
10 Best Cartoon Video Makers (Online and Desktop Solution) for 2024
10 Best Cartoon Video Makers (Online and Desktop Solution)
Abundant Video Effects - Wondershare Filmora
Provide abundant video effects - A creative video editor
Powerful color correction and grading
Detailed tutorials are provided by the official channel
Introduction
There are some issues common to the video production process. However, animated or cartoon videos have helped to combat such issues. You do not need to scout for locations, go through a seemingly endless casting process, or rent the pricey equipment. A cartoon is simply a type of animation or an illustration that usually appears in a semi-realistic or an unreal style. In addition, it uses simple, satirical, and humorous drawing language to tell the story.
Although there are restrictions, there are a lot of possibilities cartoon video makers still offer to their users. Therefore, this article will share the top 10 best cartoon video makers online and on PC that you can use before diving into an animated video world.
So, here is what we shall learn about cartoon makers today:
In this article
01 Best 5 Online Cartoon Makers
02 Cartoon Video Maker for Desktop (Win and Mac)
03 How Can I Create My Own Cartoon Using Wondershare Anireel
Part 1: Best 5 Online Cartoon Makers
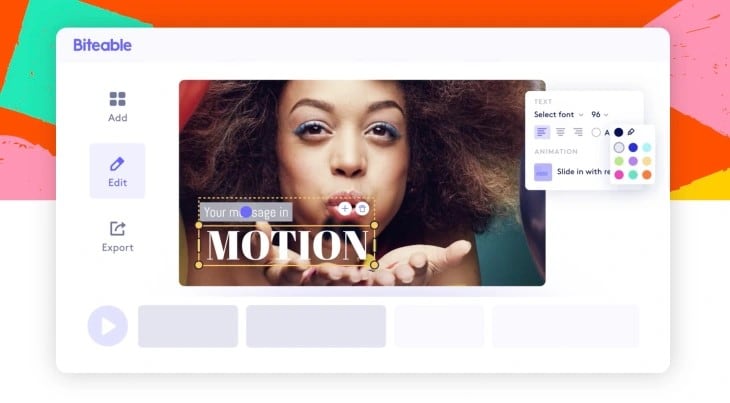
1. Biteable
Biteable provides a seemingly endless list of template categories to cater to your online media marketing needs. Aside from offering entertaining cartoon-making templates, the platform also allows users to create motion graphics or content, and Facebook covers for their social media channels.
Price: Free, $23 per month, billed annually.
Features:
- Offering library with lots of templates to choose from
- Free to use, except you are looking for additional features
- Five simple steps to an incredible cartoon video
- It has an easily customizable template
Pros
- It is a perfect option for social media managers
- Quickly create entertaining cartoons
- Used by biggies like Amazon, Microsoft, Google, Disney, BBC, Shopify, Samsung, and salesforce.
- Over 9 million users
Cons
- There is a mandatory registration
- There are no audio editing options
- The file-sharing capabilities are limited to YouTube and Facebook
- The download option is disabled in the free version
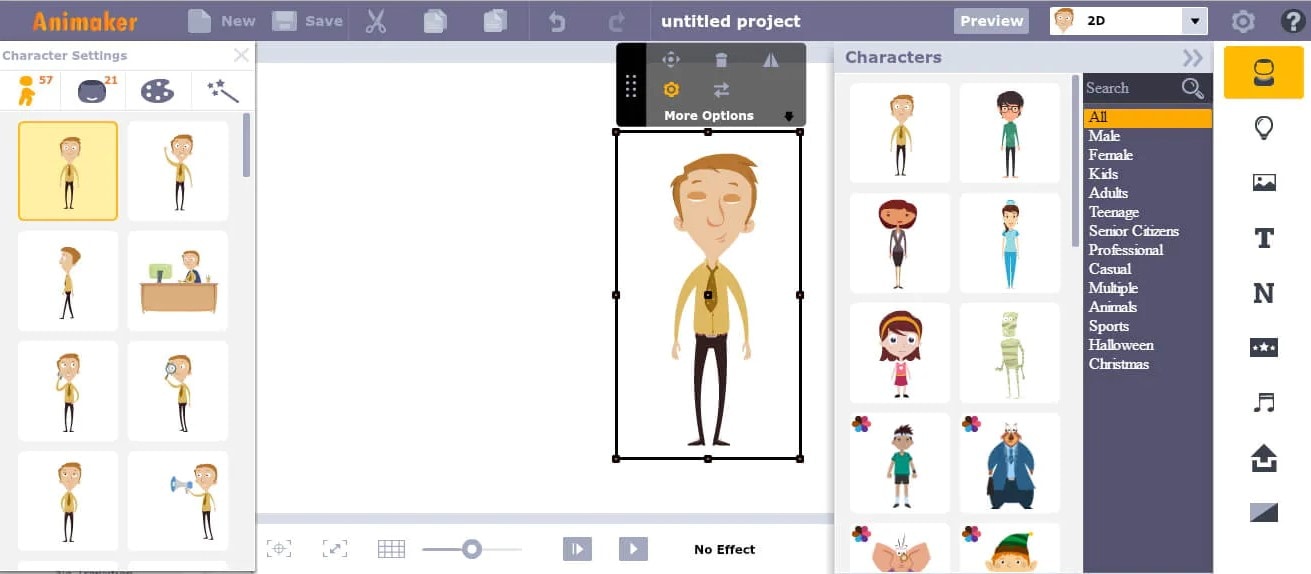
2. Animaker
With this animated maker, you get access to hundreds of animated characters, maps, and backgrounds. There are six (6) video styles available in this cartoon maker: Typography, Infographic, or 2D for different types of projects.
Price: Free version available. Subscription plans start at $12 per month/billed annually.
Features
- Different video styles, marketing, explainer, or 2D animation.
- Posts itself as the number 1 cartoon maker
- No need for a credit card to start.
- Four-step process; select template, customize it, add music, and download or share.
- 200+ voices, 25+ languages, and loads of customizable options.
- It offers auto-lip sync with advanced animation effects.
- There is a rich selection of 1000+ templates
Pros:
- Superb audio editing options
- Excellent and quick animation tools.
- Over 10 million users so far and still counting.
- Currently used by Amazon, Bosch, HP, Nokia, and Philips.
Cons:
- The monthly fee is pricey
- Account creation is mandatory for a free version
- The free version contains a watermark
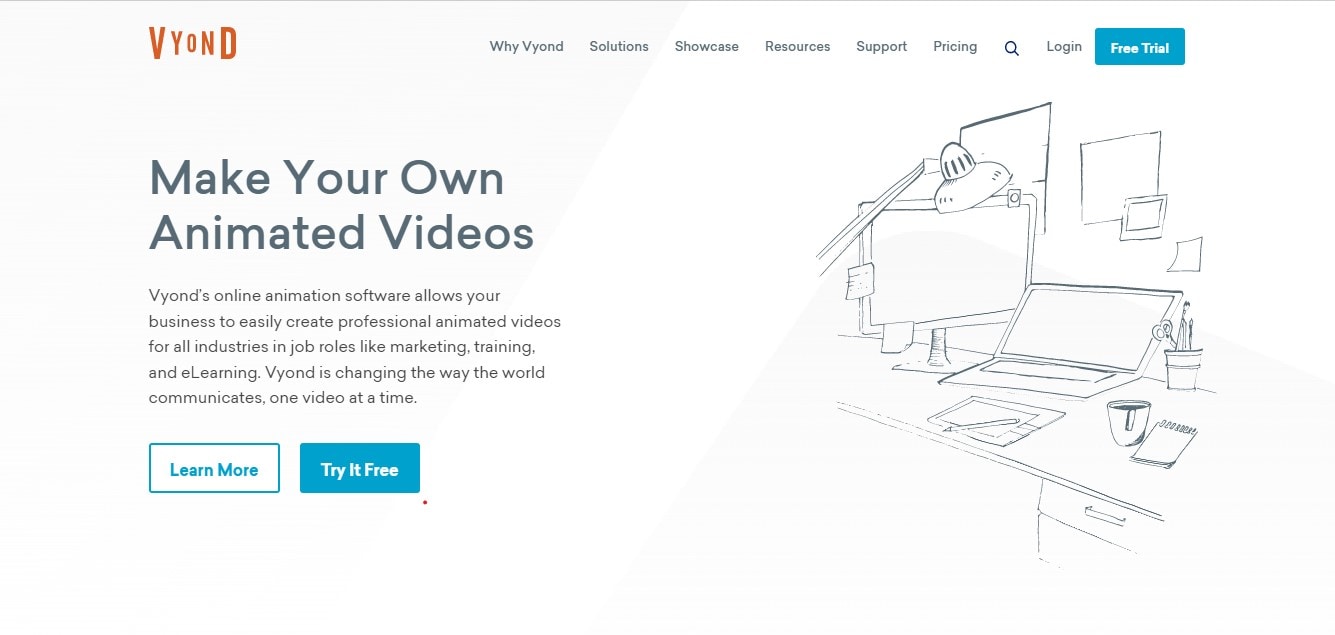
3. Vyond
Vyond, the cartoon creator launched in 2007, is probably one of the oldest online cartoon video makers. Additionally, it is still one of the most popular online destinations meant for anyone who wants to create an animated video quickly.
Price: Subscription plans start from $39 per month, billed annually.
Features:
- Perfect for animated video creation
- There is automatic character lip-syncing
- Try it for free before purchasing
- Make videos for training, e-learning, marketing, human resources, etc.
- The maximum duration of the video is 120 minutes
Pros:
- It has a fully customizable template
- There are high-end object and character animated features
- Certified by GDPR, TrustArc, BSI, and CCPA
- A wholesome cartoon makerfor enterprise and individual
- Data security and privacy assurance by BSI, CCPA, and GPDR.
Cons:
- It is quite expensive
- Vyond is not the best option for inexperienced animators
- The features depend on the subscription model
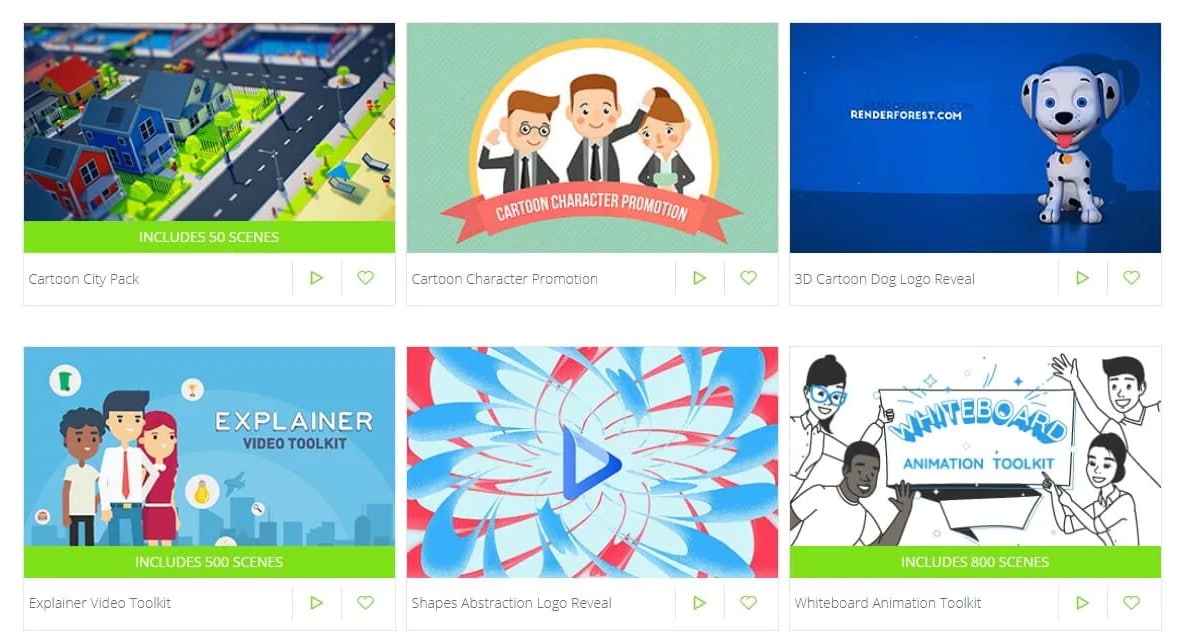
4. Renderforest
This is a famous online cartoon video maker for many purposes. Among the numerous options, the platform offers to its user. They include; 3D explainer videos, logo animations, or professional presentations.
Price: Free version available. Subscription plans start at $16 per month, billed annually.
Features:
- There is an extensive library of templates with numerous options
- Has a large online storage
- Was among the top 100 software companies in 2019.
- Top ranked solution holder for 2020
- Up to 250GB of online storage space
- Use the in-built template to make a story, customize the video, and then export it to share with your friends.
- Amadeus, Bose, BBC, Vodafone, Sony Music, and many others use Renderforest.
Pros:
- Produce videos like a pro
- Comes with an ultimate animation pack.
- Trusted by millions and one of the oldest cartoon makers.
Cons:
- A limited amount of commercial music tracks
- There are modest export options
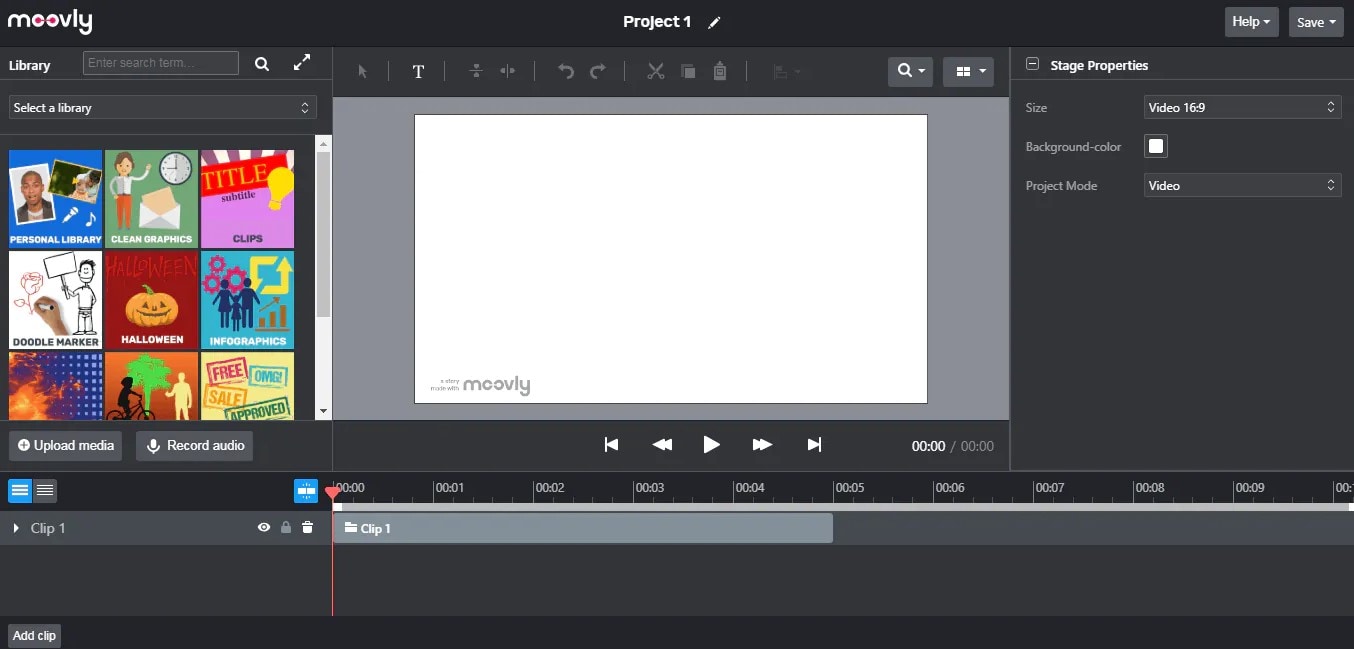
5. Moovly
With this cartoon maker, users must first log in. However, there is no need to create a new account as you can use your LinkedIn or Google account to sign in quickly.
Price: Free 30-day trial, $24.92 per month billed annually.
Features:
- Moovly is the perfect cartoon video maker for sales&marketing, human resources, internal communication, learning&development, agencies, and education.
- Apply expert features in one click with Moovly.
- Create videos and edit with browser-based or drag and drop features without installing software.
- Moovly has over 1.3 million free media, like images, sounds, music, and royalty-free stock videos at no extra charge.
- Besides, it offers 100 million extra media you can try and then purchase.
- You can add your images, music, and videos to create unique clips in style.
- Add text, remove color, add subtitles or generate them, auto-translate your text and subtitles, import PPT files, structure your content, record yourself or your computer screen, edit, mix, etc.
Pros:
- Even if users need to log in, they don’t need to create an account
- Allows users to import content from online sources like Storyblock, Shutterstock, etc.
- It is the number 1 customizable and straightforward solution to making cartoons.
- Use by Colgate-Palmolive, NHS, Teradata, Amadeus, Cisco, Continental, and Logitech.
- The interface is intuitive and user-friendly.
Cons:
- Watermarked videos during the free trial
- To export videos in HD 1080p quality, one needs to purchase one of the available plans.
Renderforest is the best cartoon maker online of the listed five in this article due to the vast library template and large online bandwidth.
Part 2: Cartoon Video Maker for Desktop (Win and Mac)
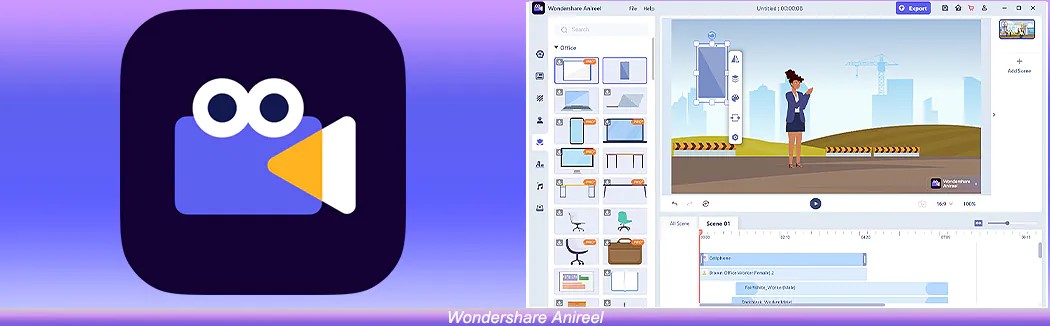
1. Wondershare Anireel
Anireel is one of the top animation software on the internet that allows users to bring their imaginations to life with a huge range of customizable elements and features.
Price: $9.99 per month billed annually and $19.99 monthly
Features:
- 40+ customizable templates
- Top animation software
- Compatible with Windows 11/10/8.1 (64 bit OS)
- Only three steps to an excellent animated video.
- Import images, videos, and sound in almost all formats.
- Create unique avatar, logo images, and more specific to your brand.
- The Deep Learning tech offers quick text-to-speech conversion.
- Animate camera movements, entry and exit effects, motion path, etc.
- Use the one-click option and change scripts to clips.
- Anireel cartoon video makercan lip-sync your characters with perfection.
- Quick and easy drag and drop editing.
Pros:
- It is convenient and simple to use
- Anireel has an intuitive interface
- The cartoon makeroffers a practical and seamless animated video editing
- It comes at an affordable and competitive price
Cons:
- It has a limited amount of assets
- Not suitable for too professional people to use.
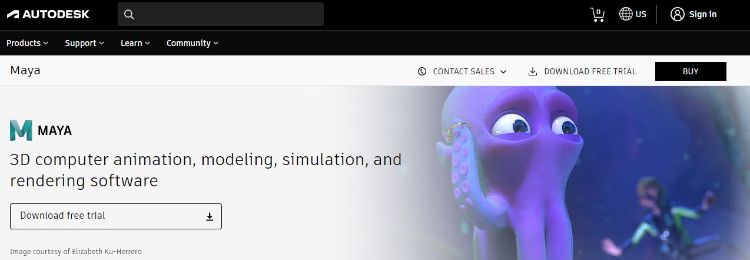
2. Autodesk Maya
Autodesk Maya is one of the best animation tools used to create animation pictures, video games, and add 3D effects in motion pictures. Plus, this cartoon maker is the best if you require a high-quality visual impact.
Price: Free trial, $225 billed monthly.
Features:
- It offers AutoDesk financing for new buyers.
- Maya is the go-to shop for architects, engineers, designers, media, and entertainment.
- Shape 3D objects and add realistic effects with Maya cartoon maker’s NURBS modeling.
- The Integrated Arnold rendering technology lets you view scene changes in real-time.
- Maya has been part of the top movie makers, including the MCU.
- This cartoon video maker offers geometry-based polygon modeling and helps create accurate simulations for visual programming.
- Maya can load and change vast data sets at a faster pace.
Pros:
- It makes complex hand-made animation tasks extremely easy
- Efficient color management
- Allows the creation of realistic effects like cloth simulations and explosions
- 30-day free trial and 30-day money-back guarantee
- Meet deadlines, add fine details to develop even the most complex shots or characters.
- Excellent tool for professionals
Cons:
- The pro is quite expensive
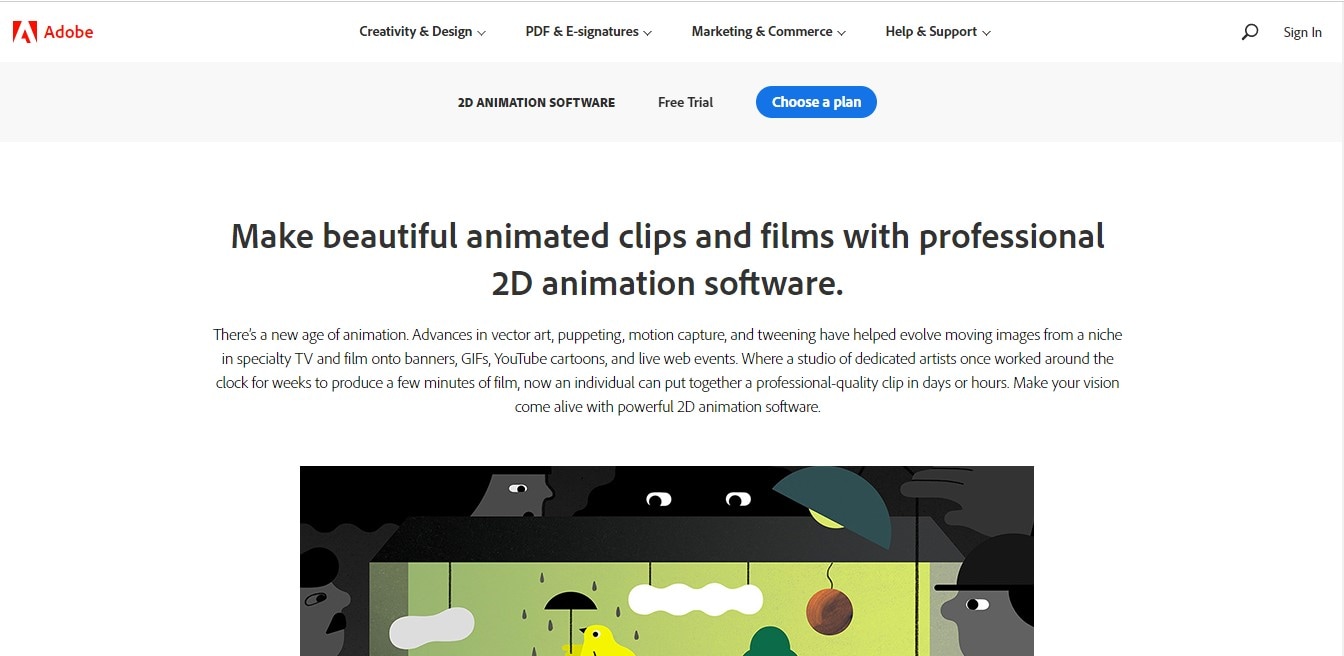
3. Adobe Animate
This is one of the most powerful animation software products on the internet that has been available for decades. It can animate images used for games, film, or online and produce HTML 5, WebGL, or Flash content.
Price: This cartoon creator offers three pricing plans starting at US$24.14/month
Features:
- Excellent for complex animation
- The capability of freehand drawing
- Animate, illustrate, and make 3D typography.
- Import and add vector drawings for further editing.
- Export your work as HTML5 Canvas, WebGL, Flash/Adobe AIR, GIF, or QuickTime movie.
- With the Bone tool, make your cartoon characters fluid and natural.
- Synchronize sounds and music for your project.
- Choose parts of the clip to be animated.
Pros:
- It has Puppeting features
- It is an excellent choice for complex animations
- It includes freehand drawing capability
Cons:
- It is not suitable for beginners
- Other Adobe software may be required while working on a project
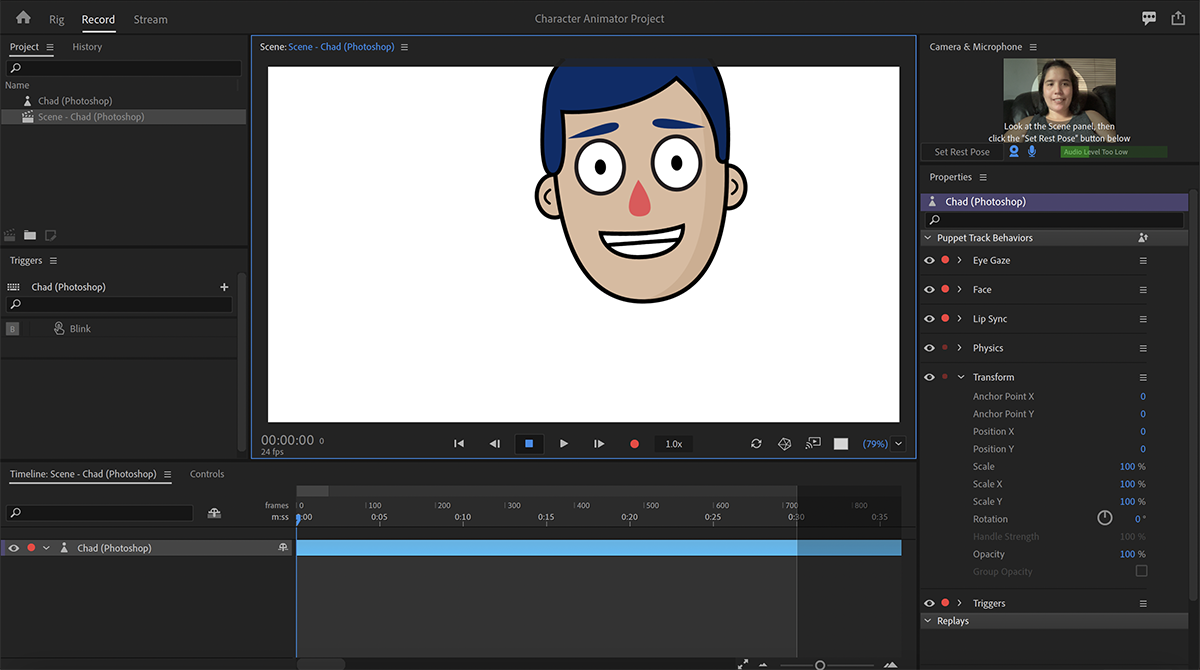
4. Adobe Character Animator
Adobe Character Animator is another type of Adobe’s animation software stack that allows users to use motion to capture and create live animations of their 2D characters.
Price: Adobe Character Animator has two pricing plans starting at US$34,49/month for the first year
Features:
- This product requires other Adobe products to function
- Lots of options to export and import.
- Make your real-life cartoon using the Motion Capture feature in five steps.
- The Avatar will walk, talk, and copy your expressions in real-time.
- Integrate and add assets from other Adobe Creative Cloud apps.
- Auto lip-syncing and real-time facial movement capture.
- Works on iOS and Android.
Pros:
- Easy to replicate real-life movements and expressions with facial tracking.
- There are various import and export options.
Cons:
- It is not a standalone product.
- Users need to have a webcam and microphone to use the motion capture feature.
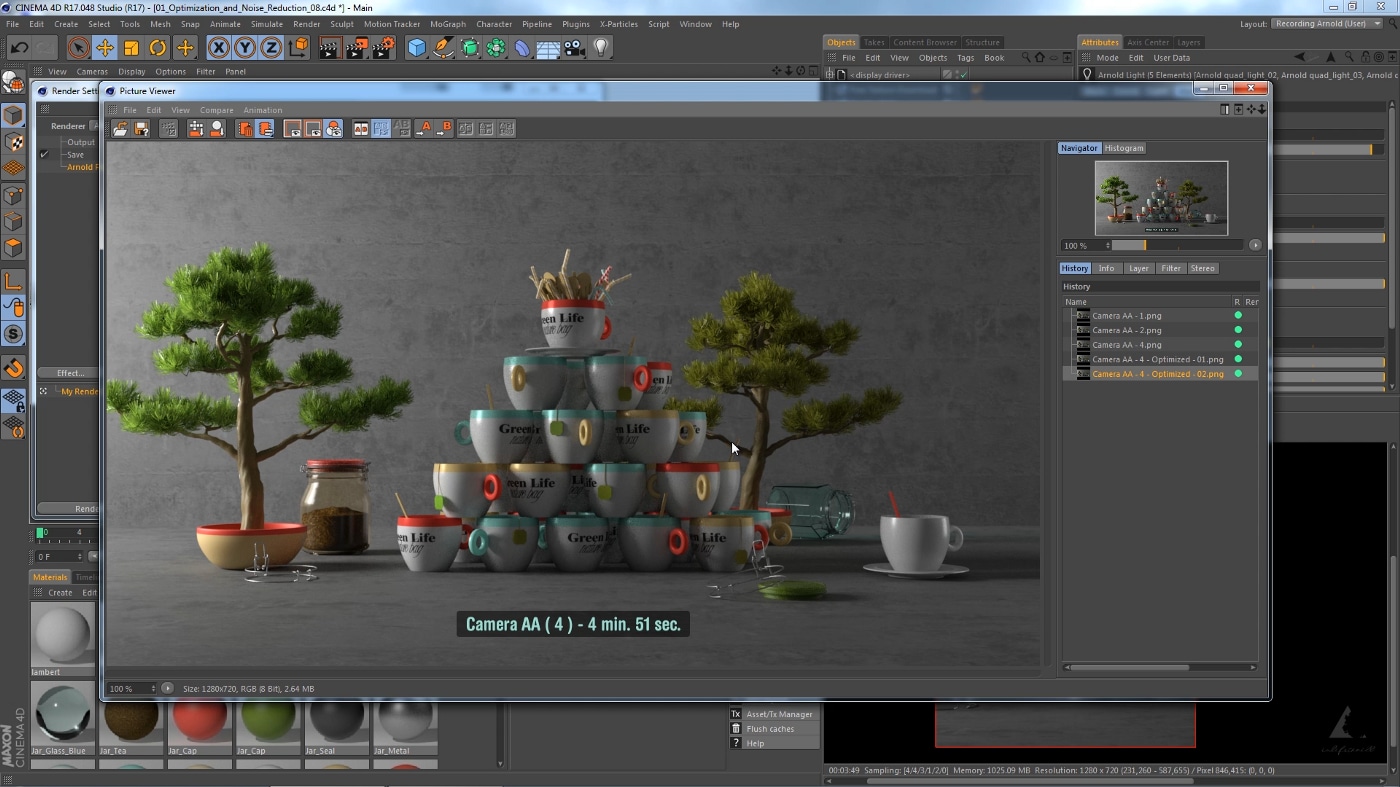
5. Cinema 4D
This cartoon maker has a 3D application interface that offers a keyframe animation, life-like characters, simulation building, object tracking, flexible rig building, cartoon styling, and animation basics.
Price: 4 pricing plans, starting at $99.91/month and $1199.00 billed annually.
Features:
- Keyframing animation effect
- It has a 3d interface
- The ZRemesher for retopology and new tools for modeling add to the new features.
- The Cloth Simulation features help make your cartoon more real.
- It supports CPU rendering with Redshift, which helps you preview, import, and export in high quality.
Pros:
- It is pretty easy to use.
- Lots of exciting design templates are available
- Many editing features are available
Cons
- It is pretty expensive compared to other software
- Not good for beginners
Wondershare Anireel is the best cartoon maker of the five listed in this article. It has lots of advanced features and templates to choose from.
Part 3: How Can I Create My Own Cartoon Using Wondershare Anireel
As stated, Wondershare Anireel has become our top cartoon creator pick due to its affordable pricing, secure server, and ease of use.
So, let us view the simple steps to create your cartoon using the Anireel software.
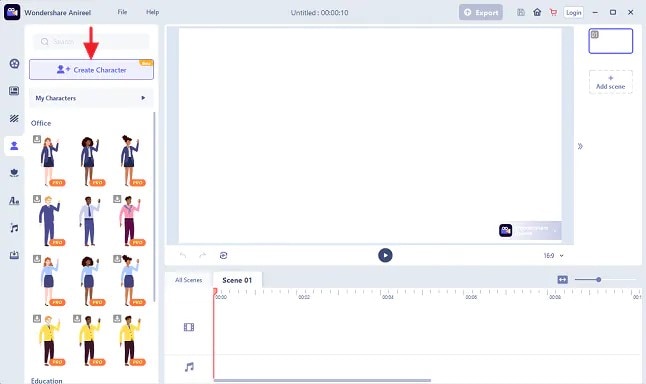
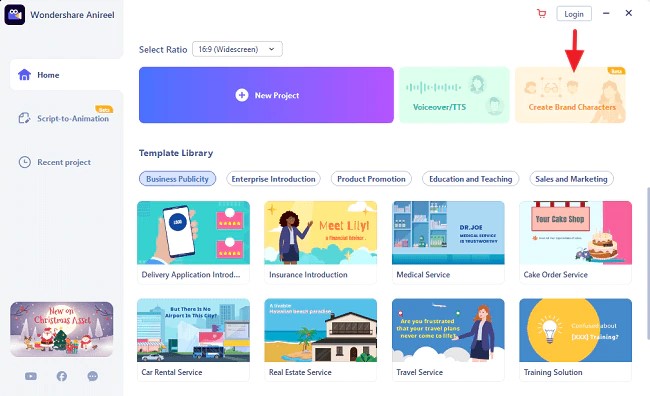
Step 1: Download, install and Create Character
Run Anireel on your device, visit Characters Tab and then click on Create a Character option, or you may click on the Create Brand Characters tab on the home screen.
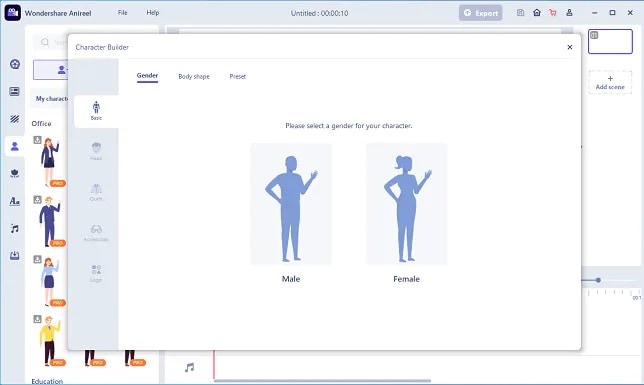
Step 2: Start Creating your Cartoon Character
Choose your gender and body shape, and apply some preset suits.
Now, you can start building facial features using the Head tab to customize the shape of the face, eyes, hairstyle, nose, mouth, ears, and eyebrows.
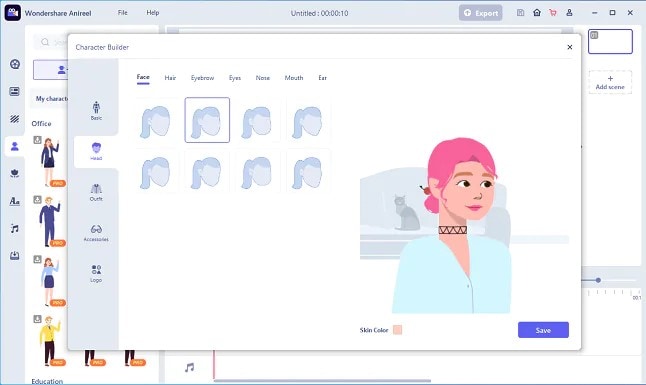
You can also choose to change the skin tone to match yours.
Step 3: Add an Outfit and Accessories
Choose the Outfit tab in Character Builder to select the base layer, outfit, bottom wear, and footwear. Pick what you want to use on your cartoon and keep adding.
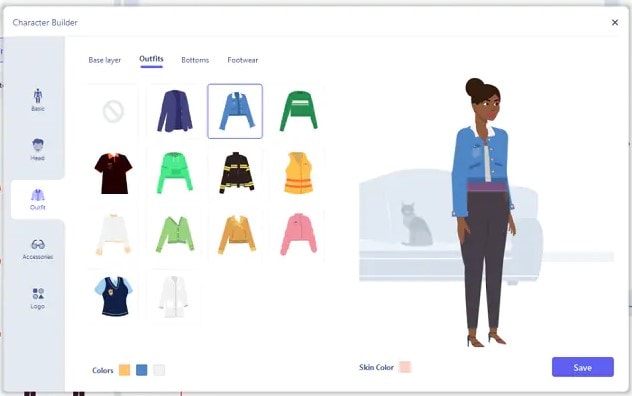
Next, reach the Accessories tab to add glasses, necklaces, and more to your cartoon character.
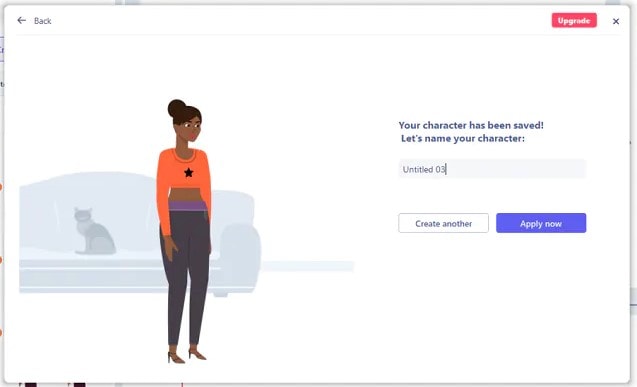
Step 4: Name your Cartoon and Apply
Click on Save and add a name to your cartoon when all done. Finally, click Apply Now to add your cartoon character to your Anireel cartoon maker canvas or My Characters tab.
Part 4: People Also Want to Know
Below are some answers to a few queries about cartoon creators. Let us look at them one by one.
1. What is the best free cartoon maker?
Wondershare Anireel is the best cartoon maker for Android as it is free to use with lots of advanced features and templates to choose from.
2. What is the best app to make a cartoon?
Wondershare Anireel’s Microsoft app is also one of the best cartoon applications that are very flexible and easy to use on the go.
Conclusion
In this article, we explained the best cartoon creators in the industry. Also, we gave the best cartoon video maker from the list. Thus, as you saw, in this report, we have summarized a few essential points regarding cartoon video makers. You learned:
- The cartoon video maker for free that you should know of.
- The ten best cartoon video makers.
- Why are Wondershare Anireel and Renderforest excellent online cartoon video makers?
- How does Anireel, cartoon creator, work?
- Finally, a few FAQs for users to better understand the cartoon maker
Introduction
There are some issues common to the video production process. However, animated or cartoon videos have helped to combat such issues. You do not need to scout for locations, go through a seemingly endless casting process, or rent the pricey equipment. A cartoon is simply a type of animation or an illustration that usually appears in a semi-realistic or an unreal style. In addition, it uses simple, satirical, and humorous drawing language to tell the story.
Although there are restrictions, there are a lot of possibilities cartoon video makers still offer to their users. Therefore, this article will share the top 10 best cartoon video makers online and on PC that you can use before diving into an animated video world.
So, here is what we shall learn about cartoon makers today:
In this article
01 Best 5 Online Cartoon Makers
02 Cartoon Video Maker for Desktop (Win and Mac)
03 How Can I Create My Own Cartoon Using Wondershare Anireel
Part 1: Best 5 Online Cartoon Makers
1. Biteable
Biteable provides a seemingly endless list of template categories to cater to your online media marketing needs. Aside from offering entertaining cartoon-making templates, the platform also allows users to create motion graphics or content, and Facebook covers for their social media channels.
Price: Free, $23 per month, billed annually.
Features:
- Offering library with lots of templates to choose from
- Free to use, except you are looking for additional features
- Five simple steps to an incredible cartoon video
- It has an easily customizable template
Pros
- It is a perfect option for social media managers
- Quickly create entertaining cartoons
- Used by biggies like Amazon, Microsoft, Google, Disney, BBC, Shopify, Samsung, and salesforce.
- Over 9 million users
Cons
- There is a mandatory registration
- There are no audio editing options
- The file-sharing capabilities are limited to YouTube and Facebook
- The download option is disabled in the free version
2. Animaker
With this animated maker, you get access to hundreds of animated characters, maps, and backgrounds. There are six (6) video styles available in this cartoon maker: Typography, Infographic, or 2D for different types of projects.
Price: Free version available. Subscription plans start at $12 per month/billed annually.
Features
- Different video styles, marketing, explainer, or 2D animation.
- Posts itself as the number 1 cartoon maker
- No need for a credit card to start.
- Four-step process; select template, customize it, add music, and download or share.
- 200+ voices, 25+ languages, and loads of customizable options.
- It offers auto-lip sync with advanced animation effects.
- There is a rich selection of 1000+ templates
Pros:
- Superb audio editing options
- Excellent and quick animation tools.
- Over 10 million users so far and still counting.
- Currently used by Amazon, Bosch, HP, Nokia, and Philips.
Cons:
- The monthly fee is pricey
- Account creation is mandatory for a free version
- The free version contains a watermark
3. Vyond
Vyond, the cartoon creator launched in 2007, is probably one of the oldest online cartoon video makers. Additionally, it is still one of the most popular online destinations meant for anyone who wants to create an animated video quickly.
Price: Subscription plans start from $39 per month, billed annually.
Features:
- Perfect for animated video creation
- There is automatic character lip-syncing
- Try it for free before purchasing
- Make videos for training, e-learning, marketing, human resources, etc.
- The maximum duration of the video is 120 minutes
Pros:
- It has a fully customizable template
- There are high-end object and character animated features
- Certified by GDPR, TrustArc, BSI, and CCPA
- A wholesome cartoon makerfor enterprise and individual
- Data security and privacy assurance by BSI, CCPA, and GPDR.
Cons:
- It is quite expensive
- Vyond is not the best option for inexperienced animators
- The features depend on the subscription model
4. Renderforest
This is a famous online cartoon video maker for many purposes. Among the numerous options, the platform offers to its user. They include; 3D explainer videos, logo animations, or professional presentations.
Price: Free version available. Subscription plans start at $16 per month, billed annually.
Features:
- There is an extensive library of templates with numerous options
- Has a large online storage
- Was among the top 100 software companies in 2019.
- Top ranked solution holder for 2020
- Up to 250GB of online storage space
- Use the in-built template to make a story, customize the video, and then export it to share with your friends.
- Amadeus, Bose, BBC, Vodafone, Sony Music, and many others use Renderforest.
Pros:
- Produce videos like a pro
- Comes with an ultimate animation pack.
- Trusted by millions and one of the oldest cartoon makers.
Cons:
- A limited amount of commercial music tracks
- There are modest export options
5. Moovly
With this cartoon maker, users must first log in. However, there is no need to create a new account as you can use your LinkedIn or Google account to sign in quickly.
Price: Free 30-day trial, $24.92 per month billed annually.
Features:
- Moovly is the perfect cartoon video maker for sales&marketing, human resources, internal communication, learning&development, agencies, and education.
- Apply expert features in one click with Moovly.
- Create videos and edit with browser-based or drag and drop features without installing software.
- Moovly has over 1.3 million free media, like images, sounds, music, and royalty-free stock videos at no extra charge.
- Besides, it offers 100 million extra media you can try and then purchase.
- You can add your images, music, and videos to create unique clips in style.
- Add text, remove color, add subtitles or generate them, auto-translate your text and subtitles, import PPT files, structure your content, record yourself or your computer screen, edit, mix, etc.
Pros:
- Even if users need to log in, they don’t need to create an account
- Allows users to import content from online sources like Storyblock, Shutterstock, etc.
- It is the number 1 customizable and straightforward solution to making cartoons.
- Use by Colgate-Palmolive, NHS, Teradata, Amadeus, Cisco, Continental, and Logitech.
- The interface is intuitive and user-friendly.
Cons:
- Watermarked videos during the free trial
- To export videos in HD 1080p quality, one needs to purchase one of the available plans.
Renderforest is the best cartoon maker online of the listed five in this article due to the vast library template and large online bandwidth.
Part 2: Cartoon Video Maker for Desktop (Win and Mac)
1. Wondershare Anireel
Anireel is one of the top animation software on the internet that allows users to bring their imaginations to life with a huge range of customizable elements and features.
Price: $9.99 per month billed annually and $19.99 monthly
Features:
- 40+ customizable templates
- Top animation software
- Compatible with Windows 11/10/8.1 (64 bit OS)
- Only three steps to an excellent animated video.
- Import images, videos, and sound in almost all formats.
- Create unique avatar, logo images, and more specific to your brand.
- The Deep Learning tech offers quick text-to-speech conversion.
- Animate camera movements, entry and exit effects, motion path, etc.
- Use the one-click option and change scripts to clips.
- Anireel cartoon video makercan lip-sync your characters with perfection.
- Quick and easy drag and drop editing.
Pros:
- It is convenient and simple to use
- Anireel has an intuitive interface
- The cartoon makeroffers a practical and seamless animated video editing
- It comes at an affordable and competitive price
Cons:
- It has a limited amount of assets
- Not suitable for too professional people to use.
2. Autodesk Maya
Autodesk Maya is one of the best animation tools used to create animation pictures, video games, and add 3D effects in motion pictures. Plus, this cartoon maker is the best if you require a high-quality visual impact.
Price: Free trial, $225 billed monthly.
Features:
- It offers AutoDesk financing for new buyers.
- Maya is the go-to shop for architects, engineers, designers, media, and entertainment.
- Shape 3D objects and add realistic effects with Maya cartoon maker’s NURBS modeling.
- The Integrated Arnold rendering technology lets you view scene changes in real-time.
- Maya has been part of the top movie makers, including the MCU.
- This cartoon video maker offers geometry-based polygon modeling and helps create accurate simulations for visual programming.
- Maya can load and change vast data sets at a faster pace.
Pros:
- It makes complex hand-made animation tasks extremely easy
- Efficient color management
- Allows the creation of realistic effects like cloth simulations and explosions
- 30-day free trial and 30-day money-back guarantee
- Meet deadlines, add fine details to develop even the most complex shots or characters.
- Excellent tool for professionals
Cons:
- The pro is quite expensive
3. Adobe Animate
This is one of the most powerful animation software products on the internet that has been available for decades. It can animate images used for games, film, or online and produce HTML 5, WebGL, or Flash content.
Price: This cartoon creator offers three pricing plans starting at US$24.14/month
Features:
- Excellent for complex animation
- The capability of freehand drawing
- Animate, illustrate, and make 3D typography.
- Import and add vector drawings for further editing.
- Export your work as HTML5 Canvas, WebGL, Flash/Adobe AIR, GIF, or QuickTime movie.
- With the Bone tool, make your cartoon characters fluid and natural.
- Synchronize sounds and music for your project.
- Choose parts of the clip to be animated.
Pros:
- It has Puppeting features
- It is an excellent choice for complex animations
- It includes freehand drawing capability
Cons:
- It is not suitable for beginners
- Other Adobe software may be required while working on a project
4. Adobe Character Animator
Adobe Character Animator is another type of Adobe’s animation software stack that allows users to use motion to capture and create live animations of their 2D characters.
Price: Adobe Character Animator has two pricing plans starting at US$34,49/month for the first year
Features:
- This product requires other Adobe products to function
- Lots of options to export and import.
- Make your real-life cartoon using the Motion Capture feature in five steps.
- The Avatar will walk, talk, and copy your expressions in real-time.
- Integrate and add assets from other Adobe Creative Cloud apps.
- Auto lip-syncing and real-time facial movement capture.
- Works on iOS and Android.
Pros:
- Easy to replicate real-life movements and expressions with facial tracking.
- There are various import and export options.
Cons:
- It is not a standalone product.
- Users need to have a webcam and microphone to use the motion capture feature.
5. Cinema 4D
This cartoon maker has a 3D application interface that offers a keyframe animation, life-like characters, simulation building, object tracking, flexible rig building, cartoon styling, and animation basics.
Price: 4 pricing plans, starting at $99.91/month and $1199.00 billed annually.
Features:
- Keyframing animation effect
- It has a 3d interface
- The ZRemesher for retopology and new tools for modeling add to the new features.
- The Cloth Simulation features help make your cartoon more real.
- It supports CPU rendering with Redshift, which helps you preview, import, and export in high quality.
Pros:
- It is pretty easy to use.
- Lots of exciting design templates are available
- Many editing features are available
Cons
- It is pretty expensive compared to other software
- Not good for beginners
Wondershare Anireel is the best cartoon maker of the five listed in this article. It has lots of advanced features and templates to choose from.
Part 3: How Can I Create My Own Cartoon Using Wondershare Anireel
As stated, Wondershare Anireel has become our top cartoon creator pick due to its affordable pricing, secure server, and ease of use.
So, let us view the simple steps to create your cartoon using the Anireel software.
Step 1: Download, install and Create Character
Run Anireel on your device, visit Characters Tab and then click on Create a Character option, or you may click on the Create Brand Characters tab on the home screen.
Step 2: Start Creating your Cartoon Character
Choose your gender and body shape, and apply some preset suits.
Now, you can start building facial features using the Head tab to customize the shape of the face, eyes, hairstyle, nose, mouth, ears, and eyebrows.
You can also choose to change the skin tone to match yours.
Step 3: Add an Outfit and Accessories
Choose the Outfit tab in Character Builder to select the base layer, outfit, bottom wear, and footwear. Pick what you want to use on your cartoon and keep adding.
Next, reach the Accessories tab to add glasses, necklaces, and more to your cartoon character.
Step 4: Name your Cartoon and Apply
Click on Save and add a name to your cartoon when all done. Finally, click Apply Now to add your cartoon character to your Anireel cartoon maker canvas or My Characters tab.
Part 4: People Also Want to Know
Below are some answers to a few queries about cartoon creators. Let us look at them one by one.
1. What is the best free cartoon maker?
Wondershare Anireel is the best cartoon maker for Android as it is free to use with lots of advanced features and templates to choose from.
2. What is the best app to make a cartoon?
Wondershare Anireel’s Microsoft app is also one of the best cartoon applications that are very flexible and easy to use on the go.
Conclusion
In this article, we explained the best cartoon creators in the industry. Also, we gave the best cartoon video maker from the list. Thus, as you saw, in this report, we have summarized a few essential points regarding cartoon video makers. You learned:
- The cartoon video maker for free that you should know of.
- The ten best cartoon video makers.
- Why are Wondershare Anireel and Renderforest excellent online cartoon video makers?
- How does Anireel, cartoon creator, work?
- Finally, a few FAQs for users to better understand the cartoon maker
End This Problem! Make Transparent Background Video Today
End This Problem! Make Transparent Background Video Today
An easy yet powerful editor
Numerous effects to choose from
Detailed tutorials provided by the official channel
How to export transparent video premiere? Making video transparent background online. Steps to remove white background from video.

Have you ever wondered why most shooting of videos are done in white or transparent background? The reasons are that they are simple and easy to shoot. There are various options to add some effects to the videos by removing the white background. New and attractive background can be added with some effects at less cost and time. So, there are various applications which facilitate making video background transparent as well as video without background. So, let’s see some of them along with the steps.
In this article
01 [How to Export Transparent Background Videos in After Effects?](#Part 1)
02 [How to Export Transparent Background Videos in Premiere Pro?](#Part 2)
03 [How to Export Transparent Background Videos in Vsdc](#Part 3)
04 [Best 5 Tool to Make Video Transparent Background Online](#Part 4)
Part 1 How to Export Transparent Background Videos in After Effects?

Working with transparent background is easy and the reason is the flexibility of using a white background and exporting it to other videos. So, let’s learn how to export transparent background videos in After Effects step by step:
● Before exporting the video with transparent background, chose composition. It can be timeline or project panel.
● After this selection, go to application window. Click at composition menu and elect Add to Render Queue.
● You can see that Render Queue window will open with composition in the queue.
● Go to settings and select as required
● Take the cursor on the left side of window and go to the drop down menu. You will find the Output Module settings window.
● Go to format and select QuickTime, the industry standard.
● Staying at Output Module settings window, under Video Output, click Channels
● Select RGB + Alpha
● Click OK
This way you can also export transparent background after effects in After effects. You can easily export your video after effects file with variable alpha layers. With layering you can add variations in the videos through various layering effects. It can used to design a project with better results.
Part 2 How to Export Transparent Background Videos in Premiere Pro?
Sometimes a Transparent Background Video needs some cool effects for some projects. This can be done by exporting a video file in Premiere Pro. The steps to be followed for exporting a transparent background video are as follows:
● Load your video in Premiere Pro with transparent background. Do all the necessary editing so that the overlay is obtained for production.
● When the video is ready, move to the setting part. Here go to file menu and open export setting. Click on media.
● After this, there is need to configure the export setting particularly for transparent background. Just few setting more are required to ensure that the transparent background video or projects are exported well.
● In order to ensure that a video format supports transparency, do the required settings. Go to export format at the right of the window. Set it to Quick time. It is always good to export by using Quick time. However if you don’t need to export using Quick time and need MOV format, you can still do that. You can use the software Adobe Premiere Pro to import the other type of files also.
● Get alpha channel enabled. When the video format is all done, get to same column and you will find ‘Effects’, Video and audio tab. You can get some unique setting through this to export the videos of Premiere Pro.
● Go to “Video Codec” settings and elect the “None” options. This gives the best result outcome for transparent backgrounds. Particularly for transparent video overlay free and animations. For example YouTube subscribe button video animation.
● To enable alpha channel, go to the “Basic Video Settings” options. Get to the “depth” option. Here you can enable the alpha channel in the export settings. After doing that the alpha channel will permit to export transparent video backgrounds.
● Clicking on the button with the” + alpha” option inside the “Depth” setting. This will enable the alpha setting.
● Also check “Render at Maximum Depth”. This will help in obtaining a max depth which will give transparent video smoother and better results. They are good for higher quality videos.
● When all configurations is done, Proceed to export the video. The file from Adobe Premiere Pro gave you can be used. The process can be followed to export the other files also.
Part 3 How to Export Transparent Background Videos in Vsdc
No background video is very difficult to handle as people face trouble to export them due to their formats. Some formats do not support transparency. MOV and Gifs formats are good for transparent background. Vsdc can be used to make video background transparent as well as remove white background video. Following steps should be followed to export transparent background video in Vsdc:
● Open VSDC and go to start screen and click the Import content button. Select the green screen video from PC.
● Go to Project’s settings window and search for Opacity and kept it zero and click Finish.
● Then go to Video effects menu. Move to Transparency and then Background remover. Click Ok.
● The green light borders can be changed through Properties window
● When all things are ready open the Export project tab. From “Media devices” select PC.
● From “Output video formats”, choose MOV.
● Go to preview window and look for “Edit profile” button. Click and change the codec of the video.
● Go to Video settings menu, opt for Video codec >> PNG lossless.
● Lastly click on Apply profile
This way you can have a video after effects export with transparent background. This is just simple to export a video with a transparent background. It can be further used in various applications to create great effects.
Part 4 Best 5 Tool to Make Video Transparent Background Online
Various software offer number of fantastic tools for making video background transparent online. It can export a video by making series of pictures or videos more attractive and memorable.
Some of the tools or the makers to make Transparent Background Video are as under:
01Canva
The online version of canva can be used to edit images and videos. This is one of the widest tools chosen by the users in making and editing videos and images. The best thing is that it can be easily installed at PC and phones. It just needs Javascript in your browser. Transparent background option can be chosen to change the background of the image and make it visually attractive. It has convenient controls that change the background into transparent one easily.
02Online PNG Tools
If you are looking for a tool that can make your video background transparent in just few clicks, then Online PNG tools is the best option. You can upload many files and it allows you to turn them into transparent backgrounds. It is good when a user desire to turn a background easily and the level of perfection required is not much high. It is fast, free and easy to use which makes it an affordable tool.
03LunaPic
It is a free online picture and video editing tool that can effortlessly help in importing, adding effects and customization. Its edit option allows the users to upload the picture and perform the task to turn a background of picture or video transparent. In just few simple steps the required changes can be made. The best thing with this tool is that the output result does not affect the quality. One can also personalize the pictures which has high standards.
04Microsoft Paint
This is from Microsoft and the most widely used tool for pictures and video creation, editing and adding effects. Its drawing and editing tools make it first preference for every beginner and a professional. One can easily turn a picture background transparent through following few steps through ‘Select’ option. Go to ‘Transparent Selection’ from the list and turn an image background transparent. It can also go smooth with other applications to have transparent video format.
05Photoshop
When you are looking for a tool that can work with Windows, Android and iOS for adding transparent background online, then Photoshop shall be a good option. It can add some great effects in flawless manner in very less time. It works excellently on various elements such as brightness, transparent background and customization of pictures. This is a good platform to add visualization to images. One can add transparent background by going to background option.
These are some of the tools that can be used to make transparent background. If you need something like Pro, then you can try Filmora from Wondershare.
Filmora can be defined in number of ways. It is software, an application and a platform that provides an opportunity to a person to expand his creativity with some good picture and video editing tools. The green screen feature makes any background transparent. Variety of sound, text, video effects and animations help the users to make their projects better and presentable.
Wondershare Filmora Video Editor is a free tool that works on Artificial Intelligence. It detects the background and does editing on the same. It can remove the backgrounds from different kinds of images, videos, and presentations. This tool is great for those who need to bring some fantastic changes on the background of the images with no more hassle. It has advantage over the other tools as it works precisely on backgrounds and make sure that no details are disturbed from the original subject.
For Win 7 or later (64-bit)
For macOS 10.12 or later
● Ending Thoughts →
● The background on any image or video plays an important role in creating a visual impact. A background should be such that it may not be difficult to a creator to utilize the original picture, video or subject for its other projects. Hence in order to use them in other themes, exporting of transparent background should be easy. This can be done through various software or applications.
● Various platforms can be used to know the steps of exporting transparent background of images or videos. The selection shall be based on the degree of perfection, affordability, ease of use and volume of work. The various applications that offer exporting transparent background videos are After Effects; Premiere Pro, Vsdc and many more.
● The various tools for making transparent backgrounds are Online PNG Tools, Canva, Photoshop, MS paint, LunaPic and Filmora. Filmora is one of the most popular platforms that have different image and video editing tools. One can easily create, edit and export transparent backgrounds of images and videos through Filmora.
How to export transparent video premiere? Making video transparent background online. Steps to remove white background from video.
Have you ever wondered why most shooting of videos are done in white or transparent background? The reasons are that they are simple and easy to shoot. There are various options to add some effects to the videos by removing the white background. New and attractive background can be added with some effects at less cost and time. So, there are various applications which facilitate making video background transparent as well as video without background. So, let’s see some of them along with the steps.
In this article
01 [How to Export Transparent Background Videos in After Effects?](#Part 1)
02 [How to Export Transparent Background Videos in Premiere Pro?](#Part 2)
03 [How to Export Transparent Background Videos in Vsdc](#Part 3)
04 [Best 5 Tool to Make Video Transparent Background Online](#Part 4)
Part 1 How to Export Transparent Background Videos in After Effects?
Working with transparent background is easy and the reason is the flexibility of using a white background and exporting it to other videos. So, let’s learn how to export transparent background videos in After Effects step by step:
● Before exporting the video with transparent background, chose composition. It can be timeline or project panel.
● After this selection, go to application window. Click at composition menu and elect Add to Render Queue.
● You can see that Render Queue window will open with composition in the queue.
● Go to settings and select as required
● Take the cursor on the left side of window and go to the drop down menu. You will find the Output Module settings window.
● Go to format and select QuickTime, the industry standard.
● Staying at Output Module settings window, under Video Output, click Channels
● Select RGB + Alpha
● Click OK
This way you can also export transparent background after effects in After effects. You can easily export your video after effects file with variable alpha layers. With layering you can add variations in the videos through various layering effects. It can used to design a project with better results.
Part 2 How to Export Transparent Background Videos in Premiere Pro?
Sometimes a Transparent Background Video needs some cool effects for some projects. This can be done by exporting a video file in Premiere Pro. The steps to be followed for exporting a transparent background video are as follows:
● Load your video in Premiere Pro with transparent background. Do all the necessary editing so that the overlay is obtained for production.
● When the video is ready, move to the setting part. Here go to file menu and open export setting. Click on media.
● After this, there is need to configure the export setting particularly for transparent background. Just few setting more are required to ensure that the transparent background video or projects are exported well.
● In order to ensure that a video format supports transparency, do the required settings. Go to export format at the right of the window. Set it to Quick time. It is always good to export by using Quick time. However if you don’t need to export using Quick time and need MOV format, you can still do that. You can use the software Adobe Premiere Pro to import the other type of files also.
● Get alpha channel enabled. When the video format is all done, get to same column and you will find ‘Effects’, Video and audio tab. You can get some unique setting through this to export the videos of Premiere Pro.
● Go to “Video Codec” settings and elect the “None” options. This gives the best result outcome for transparent backgrounds. Particularly for transparent video overlay free and animations. For example YouTube subscribe button video animation.
● To enable alpha channel, go to the “Basic Video Settings” options. Get to the “depth” option. Here you can enable the alpha channel in the export settings. After doing that the alpha channel will permit to export transparent video backgrounds.
● Clicking on the button with the” + alpha” option inside the “Depth” setting. This will enable the alpha setting.
● Also check “Render at Maximum Depth”. This will help in obtaining a max depth which will give transparent video smoother and better results. They are good for higher quality videos.
● When all configurations is done, Proceed to export the video. The file from Adobe Premiere Pro gave you can be used. The process can be followed to export the other files also.
Part 3 How to Export Transparent Background Videos in Vsdc
No background video is very difficult to handle as people face trouble to export them due to their formats. Some formats do not support transparency. MOV and Gifs formats are good for transparent background. Vsdc can be used to make video background transparent as well as remove white background video. Following steps should be followed to export transparent background video in Vsdc:
● Open VSDC and go to start screen and click the Import content button. Select the green screen video from PC.
● Go to Project’s settings window and search for Opacity and kept it zero and click Finish.
● Then go to Video effects menu. Move to Transparency and then Background remover. Click Ok.
● The green light borders can be changed through Properties window
● When all things are ready open the Export project tab. From “Media devices” select PC.
● From “Output video formats”, choose MOV.
● Go to preview window and look for “Edit profile” button. Click and change the codec of the video.
● Go to Video settings menu, opt for Video codec >> PNG lossless.
● Lastly click on Apply profile
This way you can have a video after effects export with transparent background. This is just simple to export a video with a transparent background. It can be further used in various applications to create great effects.
Part 4 Best 5 Tool to Make Video Transparent Background Online
Various software offer number of fantastic tools for making video background transparent online. It can export a video by making series of pictures or videos more attractive and memorable.
Some of the tools or the makers to make Transparent Background Video are as under:
01Canva
The online version of canva can be used to edit images and videos. This is one of the widest tools chosen by the users in making and editing videos and images. The best thing is that it can be easily installed at PC and phones. It just needs Javascript in your browser. Transparent background option can be chosen to change the background of the image and make it visually attractive. It has convenient controls that change the background into transparent one easily.
02Online PNG Tools
If you are looking for a tool that can make your video background transparent in just few clicks, then Online PNG tools is the best option. You can upload many files and it allows you to turn them into transparent backgrounds. It is good when a user desire to turn a background easily and the level of perfection required is not much high. It is fast, free and easy to use which makes it an affordable tool.
03LunaPic
It is a free online picture and video editing tool that can effortlessly help in importing, adding effects and customization. Its edit option allows the users to upload the picture and perform the task to turn a background of picture or video transparent. In just few simple steps the required changes can be made. The best thing with this tool is that the output result does not affect the quality. One can also personalize the pictures which has high standards.
04Microsoft Paint
This is from Microsoft and the most widely used tool for pictures and video creation, editing and adding effects. Its drawing and editing tools make it first preference for every beginner and a professional. One can easily turn a picture background transparent through following few steps through ‘Select’ option. Go to ‘Transparent Selection’ from the list and turn an image background transparent. It can also go smooth with other applications to have transparent video format.
05Photoshop
When you are looking for a tool that can work with Windows, Android and iOS for adding transparent background online, then Photoshop shall be a good option. It can add some great effects in flawless manner in very less time. It works excellently on various elements such as brightness, transparent background and customization of pictures. This is a good platform to add visualization to images. One can add transparent background by going to background option.
These are some of the tools that can be used to make transparent background. If you need something like Pro, then you can try Filmora from Wondershare.
Filmora can be defined in number of ways. It is software, an application and a platform that provides an opportunity to a person to expand his creativity with some good picture and video editing tools. The green screen feature makes any background transparent. Variety of sound, text, video effects and animations help the users to make their projects better and presentable.
Wondershare Filmora Video Editor is a free tool that works on Artificial Intelligence. It detects the background and does editing on the same. It can remove the backgrounds from different kinds of images, videos, and presentations. This tool is great for those who need to bring some fantastic changes on the background of the images with no more hassle. It has advantage over the other tools as it works precisely on backgrounds and make sure that no details are disturbed from the original subject.
For Win 7 or later (64-bit)
For macOS 10.12 or later
● Ending Thoughts →
● The background on any image or video plays an important role in creating a visual impact. A background should be such that it may not be difficult to a creator to utilize the original picture, video or subject for its other projects. Hence in order to use them in other themes, exporting of transparent background should be easy. This can be done through various software or applications.
● Various platforms can be used to know the steps of exporting transparent background of images or videos. The selection shall be based on the degree of perfection, affordability, ease of use and volume of work. The various applications that offer exporting transparent background videos are After Effects; Premiere Pro, Vsdc and many more.
● The various tools for making transparent backgrounds are Online PNG Tools, Canva, Photoshop, MS paint, LunaPic and Filmora. Filmora is one of the most popular platforms that have different image and video editing tools. One can easily create, edit and export transparent backgrounds of images and videos through Filmora.
4 Methods for Rotating Your GoPro Videos Professionally
Video editing has secured a prominent position among other post-production works with innovation in cameras. Now, you do not need to hold the reins of your imagination tight.
With its advanced technology, Go-Pro has grabbed the attention of technology lovers. It offers video stabilization, making it the best gadget for capturing sports activities and other outdoor events.
If you have recorded your video in an odd direction? Also, you don’t want to lose that precious memory? There is no need to worry.
Rotating your video horizontally or vertically can change the entire perspective of your project.
The process of changing the orientation of the video is convenient. There are different tools for rotating your Go-Pro videos simply and easily.
In this article, you’ll find four solutions for rotating your Go-Pro Videos. The following tools will be used for this purpose.
- Wondershare Filmora
- GoPro Quik
- VLC Media Player
- Online Converter (Ezgif)
Filmora Wondershare-A companion to rotate your GoPro Videos
If you want to experience new dimensions of video editing by changing the orientation of your videos, then Filmora Video Editor is there for you. If you have made a video with your Go-pro at the wrong angle, video rotation can solve your problem.
Filmora is there to keep you out of trouble. It comes with the option of changing the direction of your videos. Apart from that, you can crop the unwanted parts or even zoom in on videos.
For Win 7 or later (64-bit)
For macOS 10.14 or later
Here is the step-by-step guide for rotating your go-pro video.
Step 1: Drag and Drop
The interface of Filmora is user-friendly and convenient. The video rotation process starts with importing the video file and then adding the drag and drop feature to the timeline.


Step 2: Video Rotation
- In the timeline, double-click on the video clip.
- The video tab will appear with several options like transformation and lens correction.

Step 3: Exploring the Transform Tab
- Expand the Transform tab.
- You will see the options like rotation, flip, scale, and position.
- You can now rotate your Go-pro video by either rotating the slider or entering a specific value for the degree of rotation.

- You can also use the scale slider to adjust the image size.

Step 4:Exporting the rotated Go-pro Video
- After changing the orientation of your video, now is the time to export your project.
- Click on the Export tab.

The Export tab shows a list of options whether you want to export the rotated video directly to your computer or share it with your friends via social media.

Exploring the Rotation of Video through GoPro Quik
GoPro Quik provides an alternative for changing the direction of videos. It comes with built-in tools specifically meant to deal with GoPro videos. Irrespective of the quality of your videos or format, it can rotate GoPro videos with ease.
You can rotate GoPro Video with GoPro Quik by following these steps
- Download and install the software and launch it afterward.
- You can connect your GoPro device to your computer or choose a folder to add media.

- Upload the media folder into the GoPro Quik program.

- Go to the video you want to rotate and double click on it.

- A new window will open. Select the circle-shaped icon.

- The video is rotated at 90 degrees with each click.

- Apart from that, on the far right side is a three-dotted button. Click on it to enter Create Mode.

- Afterward, select Open.
- Click on the Save button to save all the editing.
Pros:
- User-friendly and convenient
- It connects to the GoPro camera easily.
- Background tracks can be imported to audio libraries.
- Supports importing of background tracks to music libraries.
Cons:
- It is slow when dealing with 4K and files.
Changing the orientation of a Go-pro video using a VLC player
The majority consider VLC as only a media player. But, it also performs the functions of a video editor. The software is user-friendly and supports every existing operating system, including Windows and Linux. The cherry on top is that it supports all audio and video formats. Unlike other tools, there is no need to download add-ons.
- After downloading the VLC media player, launch the software.

- Now, you need to import the video file you want to rotate. This is done by dragging the media file to the timeline or selecting a media source from the left.

- In the VLC menu, go to Tools and then select Effects and Filters.

Tip: You can use the shortcut CTRL+E for the same purpose.
- The effects and filter tab will open a dialogue box with different options. Select the Video Effects tab.

- The video effect tab has many sub-tabs. You need to select the Geometry tab.

- Select the Transform option. A drop-down menu will appear with different options for rotating your video at different angles.

- Tick the checkbox that says Rotate to flip your video at a certain angle. Then, move the angle dialer. This will rotate your video to the angle you have specified.

- Click on the save option to complete the rotation process.

Note: The rotation settings are saved. Thus, you need to uncheck the option if you don’t want to rotate your next video.
Permanent Rotation of Video
The above steps rotated the video for only playing once. If you want to make the orientation of the video permanently to be flipped, then follow these instructions after the above steps.
Go to Media and select Convert/Save on the menu bar or use the shortcut CTRL+R.

A pop-up window will appear. Click on the Add button. Your video will be added.
Afterward, select the option Convert/Save.

A pop-up window will appear in which you have to select the settings logo, located next to Profile

- A pop-up window will appear; click on the Video codec tab.
- Select the Filters tab and click on the Video transformation filter

In the Audio Codec tab, under the encoding parameters, select MP3 in the codec option.
Select the save option.

Note: Make sure to add the destination file in the convert dialogue box.

Click on the start button to begin the transformation.
Using the Online Converter
The Online Converter is a tool that assists you in rotating the direction of your GoPro. It is an online resource and does not require downloading and installing the cumbersome trouble. It is user-friendly and compatible with different video formats like MP4, MKV,3GP, and more.
Pros:
It is free for users. Therefore, there is no need for installation.
Cons:
- If it takes longer to upload a file, you may have to re-submit it. Hence, it can be time-consuming.
- It does not support encrypted files.
Fixing the Orientation of Go-pro video by Ezgif
If you have no time to download different tools for rotating your Go-Pro videos, then the Internet has got a solution to your problem. There are various resources available on the web that facilitate the online rotation of your videos.
The Ezgif online video rotation is a handy tool. With it, you can flip your Go-pro video both horizontally and vertically. Not only that, but it also gives you the option of rotating your video at different angles. It supports various video formats like MP4, MOV, and many others.
You need to follow these simple steps to fix the orientation of your Go-Pro video.
- Upload your desired video file.
- You can also paste an URL.

- Select the rotation options and then click the Rotate video button.

Viola! Your new rotated video is there in no time.
- You will also see several options ranging from cropping the video to changing the speed of the video.

Pros:
- There would be no watermarks in the rotated version.
- The output of the created file is mostly similar to the pre-rotated video.
Cons:
- If you have poor internet connectivity, the conversion process may take a little longer than usual.
Conclusion
With the rising trend in the development of video editing tools, Go-pro Quik is not the only app for editing its videos. Whether you are a beginner or an intermediate, editing multimedia files has added spark to the creativity of the artists. You can add the desired rotation effects to yours.
Changing the rotation of your Go-Pro videos has been made easier due to the availability of user-friendly tools. These are available for all types of operating systems. Their interface is not complicated. Hence, it makes it easy for beginners to polish their video-editing skills.
By changing the orientation of your video, you can turn an ordinary video into a mesmerizing and cherishable lifelong memory. So be it an indoor or outdoor activity, enhance your video editing skills by playing with different orientations of your videos.
For macOS 10.14 or later
Here is the step-by-step guide for rotating your go-pro video.
Step 1: Drag and Drop
The interface of Filmora is user-friendly and convenient. The video rotation process starts with importing the video file and then adding the drag and drop feature to the timeline.
Step 2: Video Rotation
- In the timeline, double-click on the video clip.
- The video tab will appear with several options like transformation and lens correction.
Step 3: Exploring the Transform Tab
- Expand the Transform tab.
- You will see the options like rotation, flip, scale, and position.
- You can now rotate your Go-pro video by either rotating the slider or entering a specific value for the degree of rotation.
- You can also use the scale slider to adjust the image size.
Step 4:Exporting the rotated Go-pro Video
- After changing the orientation of your video, now is the time to export your project.
- Click on the Export tab.
The Export tab shows a list of options whether you want to export the rotated video directly to your computer or share it with your friends via social media.
Exploring the Rotation of Video through GoPro Quik
GoPro Quik provides an alternative for changing the direction of videos. It comes with built-in tools specifically meant to deal with GoPro videos. Irrespective of the quality of your videos or format, it can rotate GoPro videos with ease.
You can rotate GoPro Video with GoPro Quik by following these steps
- Download and install the software and launch it afterward.
- You can connect your GoPro device to your computer or choose a folder to add media.
- Upload the media folder into the GoPro Quik program.
- Go to the video you want to rotate and double click on it.
- A new window will open. Select the circle-shaped icon.
- The video is rotated at 90 degrees with each click.
- Apart from that, on the far right side is a three-dotted button. Click on it to enter Create Mode.
- Afterward, select Open.
- Click on the Save button to save all the editing.
Pros:
- User-friendly and convenient
- It connects to the GoPro camera easily.
- Background tracks can be imported to audio libraries.
- Supports importing of background tracks to music libraries.
Cons:
- It is slow when dealing with 4K and files.
Changing the orientation of a Go-pro video using a VLC player
The majority consider VLC as only a media player. But, it also performs the functions of a video editor. The software is user-friendly and supports every existing operating system, including Windows and Linux. The cherry on top is that it supports all audio and video formats. Unlike other tools, there is no need to download add-ons.
- After downloading the VLC media player, launch the software.
- Now, you need to import the video file you want to rotate. This is done by dragging the media file to the timeline or selecting a media source from the left.
- In the VLC menu, go to Tools and then select Effects and Filters.
Tip: You can use the shortcut CTRL+E for the same purpose.
- The effects and filter tab will open a dialogue box with different options. Select the Video Effects tab.
- The video effect tab has many sub-tabs. You need to select the Geometry tab.
- Select the Transform option. A drop-down menu will appear with different options for rotating your video at different angles.
- Tick the checkbox that says Rotate to flip your video at a certain angle. Then, move the angle dialer. This will rotate your video to the angle you have specified.
- Click on the save option to complete the rotation process.
Note: The rotation settings are saved. Thus, you need to uncheck the option if you don’t want to rotate your next video.
Permanent Rotation of Video
The above steps rotated the video for only playing once. If you want to make the orientation of the video permanently to be flipped, then follow these instructions after the above steps.
Go to Media and select Convert/Save on the menu bar or use the shortcut CTRL+R.
A pop-up window will appear. Click on the Add button. Your video will be added.
Afterward, select the option Convert/Save.
A pop-up window will appear in which you have to select the settings logo, located next to Profile
- A pop-up window will appear; click on the Video codec tab.
- Select the Filters tab and click on the Video transformation filter
In the Audio Codec tab, under the encoding parameters, select MP3 in the codec option.
Select the save option.
Note: Make sure to add the destination file in the convert dialogue box.
Click on the start button to begin the transformation.
Using the Online Converter
The Online Converter is a tool that assists you in rotating the direction of your GoPro. It is an online resource and does not require downloading and installing the cumbersome trouble. It is user-friendly and compatible with different video formats like MP4, MKV,3GP, and more.
Pros:
It is free for users. Therefore, there is no need for installation.
Cons:
- If it takes longer to upload a file, you may have to re-submit it. Hence, it can be time-consuming.
- It does not support encrypted files.
Fixing the Orientation of Go-pro video by Ezgif
If you have no time to download different tools for rotating your Go-Pro videos, then the Internet has got a solution to your problem. There are various resources available on the web that facilitate the online rotation of your videos.
The Ezgif online video rotation is a handy tool. With it, you can flip your Go-pro video both horizontally and vertically. Not only that, but it also gives you the option of rotating your video at different angles. It supports various video formats like MP4, MOV, and many others.
You need to follow these simple steps to fix the orientation of your Go-Pro video.
- Upload your desired video file.
- You can also paste an URL.
- Select the rotation options and then click the Rotate video button.
Viola! Your new rotated video is there in no time.
- You will also see several options ranging from cropping the video to changing the speed of the video.
Pros:
- There would be no watermarks in the rotated version.
- The output of the created file is mostly similar to the pre-rotated video.
Cons:
- If you have poor internet connectivity, the conversion process may take a little longer than usual.
Conclusion
With the rising trend in the development of video editing tools, Go-pro Quik is not the only app for editing its videos. Whether you are a beginner or an intermediate, editing multimedia files has added spark to the creativity of the artists. You can add the desired rotation effects to yours.
Changing the rotation of your Go-Pro videos has been made easier due to the availability of user-friendly tools. These are available for all types of operating systems. Their interface is not complicated. Hence, it makes it easy for beginners to polish their video-editing skills.
By changing the orientation of your video, you can turn an ordinary video into a mesmerizing and cherishable lifelong memory. So be it an indoor or outdoor activity, enhance your video editing skills by playing with different orientations of your videos.
How to Loop YouTube Videos on iPhone
YouTube videos are a great way to get information fast. But there are times when you want to watch a video over and over again without having to go back to the YouTube app. Here is how you can loop YouTube videos on your iPhone. There are 2 ways to loop YouTube videos on iPhone. One is through the YouTube app and using third-party apps.
There are many reasons why you might want to loop a video on your iPhone. Maybe you’re trying to learn a dance routine, or you want to listen to a song on repeat. You’ve probably seen those cool looping videos on Instagram and Facebook and wondered how people make them. YouTube is a great place to find videos on any topic.
The YouTube app on the iPhone is a great way to watch videos, but it doesn’t have a repeat or loop feature. This means that if you are watching a long video, you will have to keep your phone on and continue watching the video. YouTube is the world’s most popular video-sharing platform with approx. 1.9 billion monthly active users.
Part 1: How to loop YouTube videos on iPhone
Step 1: Open the YouTube app on your iPhone
Install YouTube on your iPhone after that open it. Search your desired video on the YouTube search bar.

Step 2: Tap the video you want to repeat
Click on the three dots or click on the save button to create a new playlist for your video. If you want to listen to or see the existing videos you can also add your videos to your old playlist.

Step 3: Create a playlist and start playing it
Click on New Playlist then give any name to your playlist. Give any name to your playlist and select whether you want to make it private or public.

Step 4: Click on the library
After creating a playlist click on the library which is placed at the bottom. After clicking on it you can see your all playlists.

Step 5: Play the playlist on the loop
Click on your desired playlist which you want to play after that you’ll see two options on the screen Play and Shuffle. Select the Play option, your playlist will start.

Step 6: Play your favorite video first and put the playlist on the loop
When you start playing your playlist, you can start it with your favorite video or you can also put your playlist on a loop. So that you can watch your videos on a loop.
Benefits of looping YouTube videos on iPhone
If you are a YouTube addict, then you might be pleased to know that your iPhone has a built-in feature that allows for the video to loop back to the beginning. This feature is an excellent way of saving time and maximizing your viewing pleasure. Looping videos on iPhone is a great way of saving time and maximizing your viewing pleasure.
Looping videos on your phone can be a great way to kill time. Watching the same video over and over again can be tiring, but if you do it on your phone, you don’t have to worry about that. You can change the video at any point in time, so if you find that you are getting bored with it, then just find another one.
Over a billion hours of video are watched every day. The app is available for both iOS and Android devices, which means that you can watch YouTube videos on your phone no matter where you are. This can be useful if you want to listen to music or watch a tutorial while doing something else on your phone, like checking Facebook or browsing the web.
Part 2: How to Edit Time-lapse Video on Computer
Time-lapse videos are becoming more and more popular nowadays. They are a great way to show the passage of time, but editing them on a computer is not an easy task. Editing time-lapse videos on a computer is not an easy task because it requires you to have the right software and know how to use it.
It can be quite time-consuming and tedious work, which is why we need a proper editing program that can help us through this process. It’s just about learning the basics of editing and then adding a few effects to make your video more interesting. Here are some tips on how you can edit time-lapse videos on your computer:
- The first thing you need to do is download and install a video editor for your computer.
- Import the timelapse footage into the video editing program that you have downloaded and installed, such as Adobe Premiere Pro or Sony Vegas Pro, etc.
- Now you need to trim out any unwanted footage at the beginning or end of the clip so that what remains is just what you want to show in your final video.
- The next step is to add transitions between scenes, such as fades, wipes, dissolves, or cuts between shots - this will help transition between scenes smoothly and seamlessly without any abrupt jumps in time or space between them while also adding an extra level of polish.
Time-lapse videos can help you produce stunning results, no matter what your creative goals may be. If you want to create a time-lapse video, there are many things you need to consider. Time-lapse videos are not just a series of photos strung together. And the most important thing you need to consider is the format of the video you’ll need to take.
Choosing the right editing software is also important if you’re using a camera that shoots time-lapse videos. And if you’re using a DSLR camera, there is a chance that your time-lapse videos are in MOV format. If that’s the case, then you’re in luck. Filmora can help you edit your time-lapse video with ease.
Edit Time-lapse video on Filmora software
Filmora is a video editor that lets you easily create and edit time-lapse videos. With Filmora, you can add music, filters, and effects to your videos to give them a unique look and feel. You can also trim and cut your videos, and merge them to create longer videos. Filmora is perfect for creating professional-looking time-lapse videos.
Filmora has an easy-to-use timeline that makes it easy to sequence your videos and create smooth transitions. This makes it easy to create high-quality time-lapse videos that look like they were filmed in a single take. Filmora has a built-in editor that lets you easily add music and sound effects to your videos. This means that you can create videos that look and sound like professional movies.
How to edit a video in Filmora:
Filmora’s time-lapse feature is free, which is a great start. However, you do need to do a few things to make it work. First, you need to make sure that your phone is compatible with Filmora. You’ll also need a connection to the Internet and a working camera on your phone. There are a few things that you’ll need to know to start editing videos on Filmora.
Step 1: Download Filmora and create a new project
Download Filmora on your desktop and click on the “New Project” button. This will open up a new window where you can name your project and choose a video file to start working with.

Free Download For Win 7 or later(64-bit)
Free Download For macOS 10.14 or later
Step 2: Select media and place it on the timeline
Click on the “Media” tab and select your video file. You’ll now see the video timeline on the left side of the window. Use the video timeline to drag and drop video clips into the timeline. You can also use the buttons on the timeline to change the speed, direction, and audio volume of the video clips.

Step 3: Select the speed you want the video to play at and click on the “OK” button.
You set the duration and speed of your video according to your requirements. You can edit the speed of your video individually. If you put your first video on high speed then you can slow down your second video.

Step 4: Click on the “Effects” button and select the “Special Effects” tab
You have undoubtedly seen those videos, full of special effects and transitions. These effects are the result of good video editing software, like Filmora. This software is designed to be used by anyone, from beginners to expert editors. You can add effects to your time-lapse video. Click on the Effects on the top bar of Filmora. You can also add various transitions in your time-lapse video.

Step 5: Export your time-lapse video
As a user of Filmora, you can export a time-lapse video onto your computer. This feature is one of the best features Filmora has to offer. You can export your edited time-lapse video on Filmora. When you are done with your time-lapse editing export the video on your desktop, drive, or anywhere you want

The Bottom Line
Since most people own an iPhone, it’s very useful to know some tricks to be more productive. As you have seen, the utility of looping a video is not something to be scoffed at. If you need to keep watching a video over and over again, on iPhone looping a video is one of the best ways to do so.
We hope the content above has been useful to you, and that you can see how looping YouTube videos on your iPhone could improve your iPhone experience. On the other hand, you can use Filmora software for your video or photo editing. Filmora is user-friendly software and you can easily install it from a browser. You just need a piece of basic knowledge to use Filmora.
Free Download For macOS 10.14 or later
Step 2: Select media and place it on the timeline
Click on the “Media” tab and select your video file. You’ll now see the video timeline on the left side of the window. Use the video timeline to drag and drop video clips into the timeline. You can also use the buttons on the timeline to change the speed, direction, and audio volume of the video clips.
Step 3: Select the speed you want the video to play at and click on the “OK” button.
You set the duration and speed of your video according to your requirements. You can edit the speed of your video individually. If you put your first video on high speed then you can slow down your second video.
Step 4: Click on the “Effects” button and select the “Special Effects” tab
You have undoubtedly seen those videos, full of special effects and transitions. These effects are the result of good video editing software, like Filmora. This software is designed to be used by anyone, from beginners to expert editors. You can add effects to your time-lapse video. Click on the Effects on the top bar of Filmora. You can also add various transitions in your time-lapse video.
Step 5: Export your time-lapse video
As a user of Filmora, you can export a time-lapse video onto your computer. This feature is one of the best features Filmora has to offer. You can export your edited time-lapse video on Filmora. When you are done with your time-lapse editing export the video on your desktop, drive, or anywhere you want
The Bottom Line
Since most people own an iPhone, it’s very useful to know some tricks to be more productive. As you have seen, the utility of looping a video is not something to be scoffed at. If you need to keep watching a video over and over again, on iPhone looping a video is one of the best ways to do so.
We hope the content above has been useful to you, and that you can see how looping YouTube videos on your iPhone could improve your iPhone experience. On the other hand, you can use Filmora software for your video or photo editing. Filmora is user-friendly software and you can easily install it from a browser. You just need a piece of basic knowledge to use Filmora.
Also read:
- New LumaFusion – One of the Best Video Editors for iOS for 2024
- 2024 Approved Discover the Best Video Filter Software . Elevate Your Video Editing with Top Contenders Like Filmora, DaVinci Resolve, HitFilm Express, and More
- New In 2024, 2 Actionable Ways to Extract Subtitles From MKV Videos without Quality Loss
- New 2024 Approved Top List of Best VHS Video Effect Makers
- Updated Are You Searching for the Best Canon LUT Download? This Article Provides the Best Recommendations for Creating the Best Professional Videos
- How to Add VHS Green Screen to Your Video for 2024
- New In 2024, Do You Wish to Convert GIF to Animated PNG? Then, You Need to Know About Using a GIF to APNG Converter to Help You Carry This Process Out in No Time. Read On
- In 2024, 3 Methods to Combine 2 or 3 Videos Into 1
- In 2024, How to Make Simple Slideshow Word
- In 2024, Tips That Show Anybody How To Make Youtube Slideshow – Guaranteed
- Updated How to Create a Glitch Text Effect, In 2024
- In 2024, Track Mattes The Ultimate Guide For After Effects
- New In 2024, Easy Guide to Apply Slow Zoom Effects to Videos
- New Are You a Teacher? Are You Looking for Educational Background Music? This Article Has Everything You Will Need to Know for Creating Outstanding Educational Teaching Videos
- New Wondershare Filmora Tutorial | Using The AI Auto Reframe Feature
- Updated 8 Apps to Custom GIF Stickers for 2024
- New Step by Step to Rotate Video in Google Photos for 2024
- New Which 10 Best Video Editing Online Makers Is Worth Your Attention, In 2024
- Updated Land Into the Thrill of Creating Stunning GIFs with Ezgif
- New 2 Effective Ways to Add Text Behind Objects for 2024
- New In 2024, 8 Free Photo Collage with Music Video Maker
- In 2024, Step by Step to Crop a Video with CyberLink PowerDirector
- 2024 Approved How to Make My Photo 3D Cartoon Online
- In 2024, 8 Best Apps for Screen Mirroring Honor X50i+ PC | Dr.fone
- Recover your music after Tecno has been deleted
- 3 Facts You Need to Know about Screen Mirroring Honor Magic 6 Pro | Dr.fone
- Ultimate Guide to Free PPTP VPN For Beginners On Poco C55 | Dr.fone
- Top 4 Ways to Trace HTC U23 Pro Location | Dr.fone
- 3 Methods to Mirror Vivo V29 to Roku | Dr.fone
- In 2024, A Guide Nokia 150 (2023) Wireless and Wired Screen Mirroring | Dr.fone
- How to Exit Android Factory Mode On Nubia Red Magic 8S Pro+? | Dr.fone
- In 2024, Top 10 Fingerprint Lock Apps to Lock Your Infinix Smart 7 HD Phone
- Top 10 Fixes for Phone Keep Disconnecting from Wi-Fi On Samsung Galaxy A15 5G | Dr.fone
- 3 Solutions to Find Your Vivo Y27 5G Current Location of a Mobile Number | Dr.fone
- Recover Apple iPhone 12 Data From iCloud | Dr.fone
- Can Life360 Track Or See Text Messages? What Can You Do with Life360 On Nokia C210? | Dr.fone
- In 2024, Hassle-Free Ways to Remove FRP Lock from Vivo X Flip Phones with/without a PC
- In 2024, How to Unlock Itel A60 Phone without Any Data Loss
- How to Change Location on TikTok to See More Content On your Vivo T2 5G | Dr.fone
- In 2024, How to Unlock SIM Card on Oppo Find X6 Pro online without jailbreak
- Title: 10 Best Cartoon Video Makers (Online and Desktop Solution) for 2024
- Author: Morgan
- Created at : 2024-06-24 01:30:11
- Updated at : 2024-06-25 01:30:11
- Link: https://ai-video-editing.techidaily.com/10-best-cartoon-video-makers-online-and-desktop-solution-for-2024/
- License: This work is licensed under CC BY-NC-SA 4.0.
