:max_bytes(150000):strip_icc():format(webp)/GettyImages-545995058-58ed21243df78cadab023f3c.jpg)
10 Best Movie Trailer Voice Generators Windows, Mac, Android, iPhone & Online

10 Best Movie Trailer Voice Generators [Windows, Mac, Android, iPhone & Online]
Many computer voice generators have become available on the market due to the advancement of advanced AI and voice synthesis technology. These rapid developments have also rendered the usage of large amounts of speech samples or high-end equipment obsolete.
You can replicate every voice style possible in today’s AI environment, and it’s a straightforward procedure. There are various commercial uses for AI voice generators, and any size firm may start leveraging the technology with these ten best AI voice generators.
1. Narrator’s Voice
Supported System: Android/iOS
Introduction:
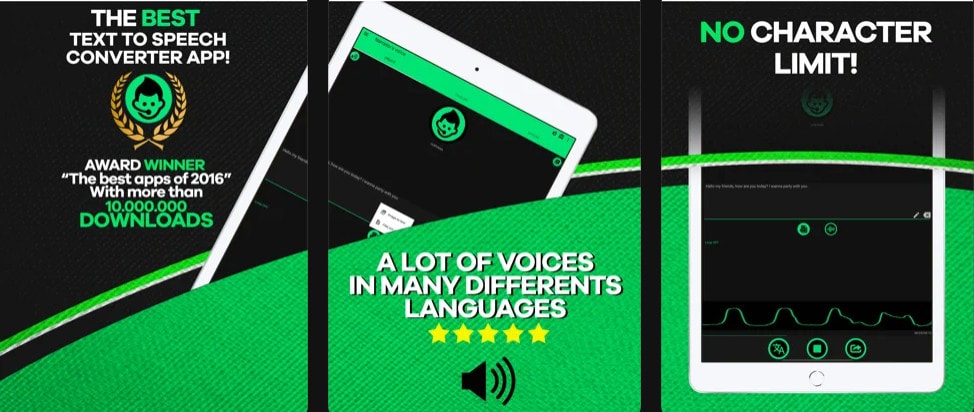
The Narrator’s Voice app allows you to write and send hilarious messages using the voice of your choice for the narrator. With a diverse selection of languages and consistent, pleasant voices. Speak or type a message, then select the app’s language, voice, and special effects. The end product is a personalized narration of your original message that you may share however you want.
Videos are one of Narrator’s Voice’s most popular projects because they allow the narrator to explain or remark on whatever is happening on the screen. Many users have been utilizing the Narrator’s Voice app to add audio to their YouTube and TikTok videos, giving them a distinct voice that adds to the overall atmosphere of the video.
Features:
- Convert text to an MP3 or MP4 audio or video file and publish on social media.
- Open or create a text file, read it aloud, or export/share the text as an audio or video file.
- What you input will be spoken on your phone.
- With several voices and effects in multiple languages.
- Provides expressive and realistic voices.
Price: Free to use, but in-app purchases for Android range from $0.99-299.99, and iPhone range from $4.99-189.99.
Cons:
- Too many ads.
- Lagging in typing or loading the app
2. LiSTNR

Supported System: Android/iOS
Introduction:
Listnr, an AI text-to-speech voice generator application that converts text-to-speech in many formats, such as genre selection, pauses, accent selection, and more, is at the top of our list of best AI voice generators. One of the best advantages of Listnr is that it allows you to create your own customized audio player embed, which you can use to add an audio version to your blog.
Listnr is tailored to the habits and preferences of each listener. It’s also helpful in producing, maintaining, and distributing podcasts. Listnr can help you monetize your material through advertising, whether you’re a commercial or freelance podcaster. You can use the AI voice generation tool to distribute and convert audio with commercial broadcasting rights on the world’s top platforms, including Spotify, Apple, and Google Podcasts. Listnr supports more than 17 languages for podcasts, and AI technology can transform scripts into various languages and dialects.
Listnr also assists you in increasing conversion rates by allowing users to read-listen and watch-listen.
Features:
- Incorporate a programmable audio player
- Tailored to each listener
- Increases conversions
- Artificial intelligence (AI) voiceovers for YouTube, blog posts, and audiobooks
- Analysis of audio
Price: Free
Cons:
- Some conversions are complex to function.
- Limited options.
3. Speechelo
Supported System: Windows/Android
Introduction:
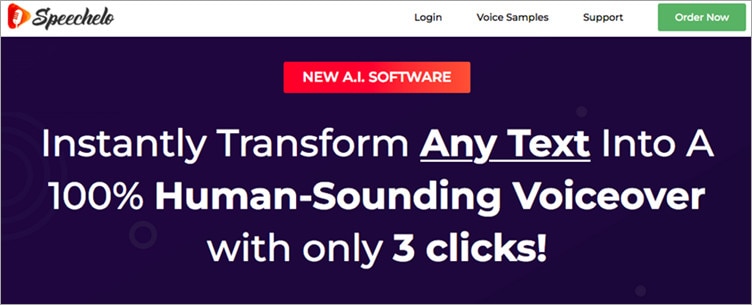
Speechelo can create a human-sounding voiceover from any text. It has both male and female voices. Its text-to-speech technology can give voice inflections. It is compatible with all video editing software. It speaks English as well as 23 other languages. You can choose the tone for reading the text with Speechelo.
Features:
- Speechelo has over 30 voices that sound human.
- It provides three different ways to read the text: standard, joyous, and profound.
- It includes characteristics like breathing noises and lengthier pauses between phrases.
- The text is checked, and the online text editor adds punctuation marks as needed.
- It allows you to adjust the pitch and tempo.
Price: For $47, you can get Speechelo. There will be no monthly installments. A 60-day money-back guarantee is included.
Cons:
- It does not offer a refund.
4. Murf.AI

Supported System: Windows/Mac
Introduction:
Murf.AI is a flexible text-to-speech voice generator that provides studio-quality voiceovers for many professional applications. The tool has an extensive voice library with over 115 distinct voices in 15 languages. Its AI can produce your speech in the appropriate tone, picking up every punctuation and exclamation mark you feed it.
It also has a grammatical assistant, so you can create proofread scripts that will only improve your voiceover work. You can also use the program to add your video, audio, and graphics synced with your produced voice. With its enterprise plan, the tool also has a powerful collaboration capability.
Features:
Price: The Basic Plan costs $13/month, the Pro plan costs $26/month, and the Enterprise plan is $83/month.
Cons:
- Few AI voices in the Murf’s library.
- Fewer languages compared to competitors.
5. Synthesys.io

Supported System: Windows/Online/Android
Introduction:
Synthesys can turn any text into incredible natural-sounding speech that may be used for commercial and personal applications. Synthesys can create AI talks in various tones, accents, and languages, from voiceovers to polite greetings.
There is no limit on how much Synthesys can be used. It can generate a limitless amount of texts at any time.
Features:
- A cloud-based application that may be accessed from any computer or mobile device.
- There are over 35 female voices and 30 male voices.
- Change the reading speed and length of the pauses.
- Before recording, listen to all demo voices.
Price: Monthly fees for Audio Synthesys are $29, Human Studio Synthesys is $39, and Audio and Human Studio Synthesys are $59 per month.
Cons:
- Less diversity in editing tools
- Speed might slow down.
6. Play. ht

Supported System: Online/Android
Introduction:
Play. ht is a web-based voice generator that allows you to generate high-quality text-to-speech. Because of its primary user interface, the platform is straightforward to use. It has a text box on the homepage where you may input your text, choose the language, gender, and voice style, and choose the conversion speed.
The platform has 570 distinct AI voices, supports more than 60 languages, and may be used for business and personal reasons. It is available in both free and paid editions. The free version is adequate, but the number of voice styles available is limited. You can also download your created speech in MP3 or WAV files from the platform.
Features:
- Use voice inflections to fine-tune the tone of your speech.
- Make Speech Pronunciations Your Own.
- Listen to all of the voice styles before applying.
- Experiment with various speaking styles.
Price: There is a free version available. Personal: $19 per month, Professional: $39 per month, Growth: $99 per month, and Business: $199 per month.
Cons:
- Voices generated in languages except European and English are low in quality.
- It does not offer a video editor to add voiceovers.
7. Lovo.ai
Supported System: Online
Introduction:
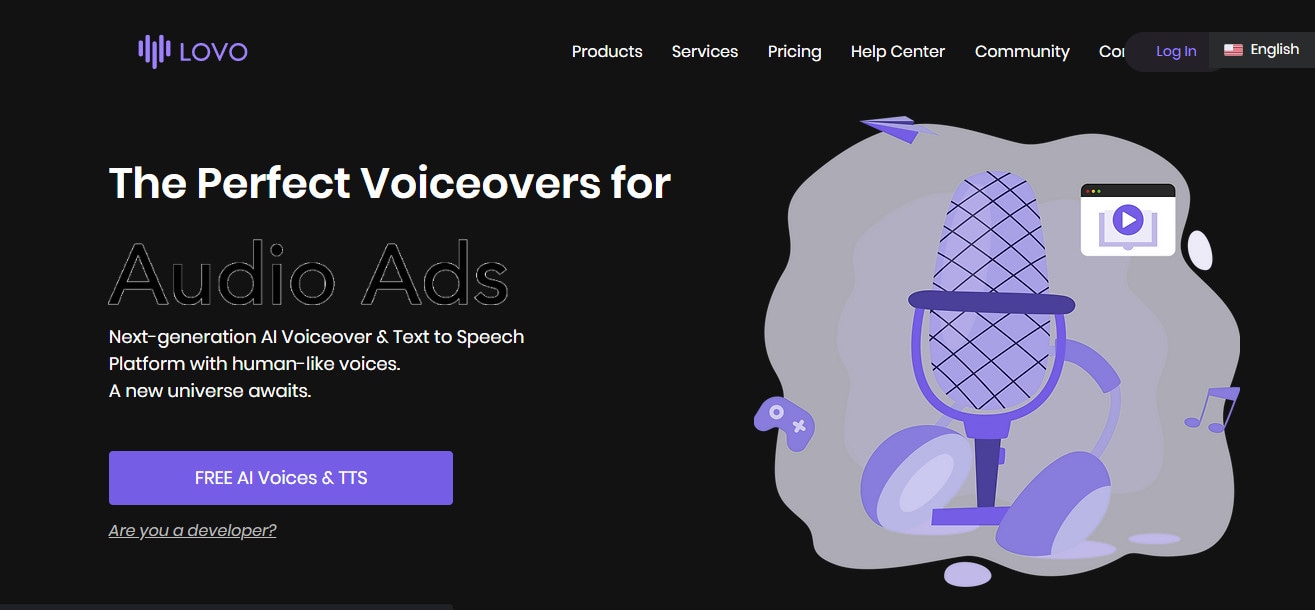
Lovo.ai’s user-friendly platform enables casual users and developers to produce speech from text and create human-sounding voiceovers. Over 180 voice styles in 33 languages are available on the platform. The site is also regularly updated with new voices every day, giving consumers a wide range of options.
In just 15 minutes, the tool can generate personalized voices. On this platform, converting text to speech requires only three simple steps. Users can also use the API to produce entirely natural voices and can be fine-tuned to express human emotions.
Features:
- Listening, conversion and sharing are all unlimited.
- Use of a significant voice collection
- Quickly convert up to 15000 characters.
- Do-it-yourself voice cloning
Price: There is a free version available. The personal Plan is $17.99, while the Freelancer costs $49.99.
Cons:
- Some voice skin does not provide complete customization options.
- No built-in video editing tools.
8. Sonantic

Supported System: Online
Introduction:
The Sonantic AI voice generator is used for films and games to create human-like voiceovers. The application uses artificial intelligence to convert scripts into audio, and it’s great for customers who want to cut down on production time.
Sonantic analyzes an uploaded script using machine learning before producing natural voiceovers and dictations that may be downloaded as MP3 and WAV files. Amazon Studios, Embark, and Obsidian are among the companies that use the AI voice generator to create human-like audio.
Features:
- Complete command over voice parameters
- Incorporates feelings into stories
- Improves user engagement with high-quality speech content
- Shortens production times
Price: Free Basic Plan, $9/month for Creator, $19/month for business, and $39/month for Business Ultimate.
Cons:
- Hard to learn
- Slightly overpriced.
9. Clipchamp

Supported System: Windows/Android
Introduction:
Clipchamp is a sophisticated text-to-speech generator that uses AI to turn words into voiceovers for professional videos and advertising. In a couple of seconds, the tool can convert an imported script into speech.
Because of its simplicity, Clipchamp is another excellent choice for beginners. Simply select your voice, language, and speed before uploading a script to generate a preview. The AI technology in the tool examines the script to identify sections that need to be updated.
Features:
- There are almost 170 distinct voices.
- Emotional communication styles
- Use emphasis and pitch in your vocal tone.
- Easy to use
Price: Custom Pricing Plan
Cons:
- Slow export rendering
- Access to more stocks requires a subscription.
10. Replica

Supported System: Windows/macOS
Introduction:
The Replica has an extensive library of AI voices recorded by industry professionals. This platform has many demo voices that you can try for free before paying for the premium service.
The Replica will turn your given text into a natural-sounding voice on-demand, with all the essential range and emotions intact, based on your chosen voice style.
You may adjust the pitch and volume and fine-tune the voice to sound sad, pleased, shocked, and so on once you’ve entered your content. The synthesized voice is available in 22 kHz MP3, WAC, OGG, or FLAC formats. The site offers 30 minutes of free voice credit, giving you plenty of time to try out all different voice types.
Features:
- Listen to samples from Replica’s vast voice library.
- Change the tempo, pitch, tone, and loudness of your speech.
- Include sound effects.
- Writing the script
- Prototyping of voice lines
Price: Try 30 minutes for free, 4 hours for $24, 100 hours for $300, and a custom enterprise plan is also available.
Cons:
- It does not offer an add-in voice line tool.
Supported System: Android/iOS
Introduction:
The Narrator’s Voice app allows you to write and send hilarious messages using the voice of your choice for the narrator. With a diverse selection of languages and consistent, pleasant voices. Speak or type a message, then select the app’s language, voice, and special effects. The end product is a personalized narration of your original message that you may share however you want.
Videos are one of Narrator’s Voice’s most popular projects because they allow the narrator to explain or remark on whatever is happening on the screen. Many users have been utilizing the Narrator’s Voice app to add audio to their YouTube and TikTok videos, giving them a distinct voice that adds to the overall atmosphere of the video.
Features:
- Convert text to an MP3 or MP4 audio or video file and publish on social media.
- Open or create a text file, read it aloud, or export/share the text as an audio or video file.
- What you input will be spoken on your phone.
- With several voices and effects in multiple languages.
- Provides expressive and realistic voices.
Price: Free to use, but in-app purchases for Android range from $0.99-299.99, and iPhone range from $4.99-189.99.
Cons:
- Too many ads.
- Lagging in typing or loading the app
2. LiSTNR

Supported System: Android/iOS
Introduction:
Listnr, an AI text-to-speech voice generator application that converts text-to-speech in many formats, such as genre selection, pauses, accent selection, and more, is at the top of our list of best AI voice generators. One of the best advantages of Listnr is that it allows you to create your own customized audio player embed, which you can use to add an audio version to your blog.
Listnr is tailored to the habits and preferences of each listener. It’s also helpful in producing, maintaining, and distributing podcasts. Listnr can help you monetize your material through advertising, whether you’re a commercial or freelance podcaster. You can use the AI voice generation tool to distribute and convert audio with commercial broadcasting rights on the world’s top platforms, including Spotify, Apple, and Google Podcasts. Listnr supports more than 17 languages for podcasts, and AI technology can transform scripts into various languages and dialects.
Listnr also assists you in increasing conversion rates by allowing users to read-listen and watch-listen.
Features:
- Incorporate a programmable audio player
- Tailored to each listener
- Increases conversions
- Artificial intelligence (AI) voiceovers for YouTube, blog posts, and audiobooks
- Analysis of audio
Price: Free
Cons:
- Some conversions are complex to function.
- Limited options.
3. Speechelo

Supported System: Windows/Android
Introduction:
Speechelo can create a human-sounding voiceover from any text. It has both male and female voices. Its text-to-speech technology can give voice inflections. It is compatible with all video editing software. It speaks English as well as 23 other languages. You can choose the tone for reading the text with Speechelo.
Features:
- Speechelo has over 30 voices that sound human.
- It provides three different ways to read the text: standard, joyous, and profound.
- It includes characteristics like breathing noises and lengthier pauses between phrases.
- The text is checked, and the online text editor adds punctuation marks as needed.
- It allows you to adjust the pitch and tempo.
Price: For $47, you can get Speechelo. There will be no monthly installments. A 60-day money-back guarantee is included.
Cons:
- It does not offer a refund.
4. Murf.AI

Supported System: Windows/Mac
Introduction:
Murf.AI is a flexible text-to-speech voice generator that provides studio-quality voiceovers for many professional applications. The tool has an extensive voice library with over 115 distinct voices in 15 languages. Its AI can produce your speech in the appropriate tone, picking up every punctuation and exclamation mark you feed it.
It also has a grammatical assistant, so you can create proofread scripts that will only improve your voiceover work. You can also use the program to add your video, audio, and graphics synced with your produced voice. With its enterprise plan, the tool also has a powerful collaboration capability.
Features:
Price: The Basic Plan costs $13/month, the Pro plan costs $26/month, and the Enterprise plan is $83/month.
Cons:
- Few AI voices in the Murf’s library.
- Fewer languages compared to competitors.
5. Synthesys.io

Supported System: Windows/Online/Android
Introduction:
Synthesys can turn any text into incredible natural-sounding speech that may be used for commercial and personal applications. Synthesys can create AI talks in various tones, accents, and languages, from voiceovers to polite greetings.
There is no limit on how much Synthesys can be used. It can generate a limitless amount of texts at any time.
Features:
- A cloud-based application that may be accessed from any computer or mobile device.
- There are over 35 female voices and 30 male voices.
- Change the reading speed and length of the pauses.
- Before recording, listen to all demo voices.
Price: Monthly fees for Audio Synthesys are $29, Human Studio Synthesys is $39, and Audio and Human Studio Synthesys are $59 per month.
Cons:
- Less diversity in editing tools
- Speed might slow down.
6. Play. ht

Supported System: Online/Android
Introduction:
Play. ht is a web-based voice generator that allows you to generate high-quality text-to-speech. Because of its primary user interface, the platform is straightforward to use. It has a text box on the homepage where you may input your text, choose the language, gender, and voice style, and choose the conversion speed.
The platform has 570 distinct AI voices, supports more than 60 languages, and may be used for business and personal reasons. It is available in both free and paid editions. The free version is adequate, but the number of voice styles available is limited. You can also download your created speech in MP3 or WAV files from the platform.
Features:
- Use voice inflections to fine-tune the tone of your speech.
- Make Speech Pronunciations Your Own.
- Listen to all of the voice styles before applying.
- Experiment with various speaking styles.
Price: There is a free version available. Personal: $19 per month, Professional: $39 per month, Growth: $99 per month, and Business: $199 per month.
Cons:
- Voices generated in languages except European and English are low in quality.
- It does not offer a video editor to add voiceovers.
7. Lovo.ai

Supported System: Online
Introduction:
Lovo.ai’s user-friendly platform enables casual users and developers to produce speech from text and create human-sounding voiceovers. Over 180 voice styles in 33 languages are available on the platform. The site is also regularly updated with new voices every day, giving consumers a wide range of options.
In just 15 minutes, the tool can generate personalized voices. On this platform, converting text to speech requires only three simple steps. Users can also use the API to produce entirely natural voices and can be fine-tuned to express human emotions.
Features:
- Listening, conversion and sharing are all unlimited.
- Use of a significant voice collection
- Quickly convert up to 15000 characters.
- Do-it-yourself voice cloning
Price: There is a free version available. The personal Plan is $17.99, while the Freelancer costs $49.99.
Cons:
- Some voice skin does not provide complete customization options.
- No built-in video editing tools.
8. Sonantic

Supported System: Online
Introduction:
The Sonantic AI voice generator is used for films and games to create human-like voiceovers. The application uses artificial intelligence to convert scripts into audio, and it’s great for customers who want to cut down on production time.
Sonantic analyzes an uploaded script using machine learning before producing natural voiceovers and dictations that may be downloaded as MP3 and WAV files. Amazon Studios, Embark, and Obsidian are among the companies that use the AI voice generator to create human-like audio.
Features:
- Complete command over voice parameters
- Incorporates feelings into stories
- Improves user engagement with high-quality speech content
- Shortens production times
Price: Free Basic Plan, $9/month for Creator, $19/month for business, and $39/month for Business Ultimate.
Cons:
- Hard to learn
- Slightly overpriced.
9. Clipchamp

Supported System: Windows/Android
Introduction:
Clipchamp is a sophisticated text-to-speech generator that uses AI to turn words into voiceovers for professional videos and advertising. In a couple of seconds, the tool can convert an imported script into speech.
Because of its simplicity, Clipchamp is another excellent choice for beginners. Simply select your voice, language, and speed before uploading a script to generate a preview. The AI technology in the tool examines the script to identify sections that need to be updated.
Features:
- There are almost 170 distinct voices.
- Emotional communication styles
- Use emphasis and pitch in your vocal tone.
- Easy to use
Price: Custom Pricing Plan
Cons:
- Slow export rendering
- Access to more stocks requires a subscription.
10. Replica

Supported System: Windows/macOS
Introduction:
The Replica has an extensive library of AI voices recorded by industry professionals. This platform has many demo voices that you can try for free before paying for the premium service.
The Replica will turn your given text into a natural-sounding voice on-demand, with all the essential range and emotions intact, based on your chosen voice style.
You may adjust the pitch and volume and fine-tune the voice to sound sad, pleased, shocked, and so on once you’ve entered your content. The synthesized voice is available in 22 kHz MP3, WAC, OGG, or FLAC formats. The site offers 30 minutes of free voice credit, giving you plenty of time to try out all different voice types.
Features:
- Listen to samples from Replica’s vast voice library.
- Change the tempo, pitch, tone, and loudness of your speech.
- Include sound effects.
- Writing the script
- Prototyping of voice lines
Price: Try 30 minutes for free, 4 hours for $24, 100 hours for $300, and a custom enterprise plan is also available.
Cons:
- It does not offer an add-in voice line tool.
Supported System: Android/iOS
Introduction:
The Narrator’s Voice app allows you to write and send hilarious messages using the voice of your choice for the narrator. With a diverse selection of languages and consistent, pleasant voices. Speak or type a message, then select the app’s language, voice, and special effects. The end product is a personalized narration of your original message that you may share however you want.
Videos are one of Narrator’s Voice’s most popular projects because they allow the narrator to explain or remark on whatever is happening on the screen. Many users have been utilizing the Narrator’s Voice app to add audio to their YouTube and TikTok videos, giving them a distinct voice that adds to the overall atmosphere of the video.
Features:
- Convert text to an MP3 or MP4 audio or video file and publish on social media.
- Open or create a text file, read it aloud, or export/share the text as an audio or video file.
- What you input will be spoken on your phone.
- With several voices and effects in multiple languages.
- Provides expressive and realistic voices.
Price: Free to use, but in-app purchases for Android range from $0.99-299.99, and iPhone range from $4.99-189.99.
Cons:
- Too many ads.
- Lagging in typing or loading the app
2. LiSTNR

Supported System: Android/iOS
Introduction:
Listnr, an AI text-to-speech voice generator application that converts text-to-speech in many formats, such as genre selection, pauses, accent selection, and more, is at the top of our list of best AI voice generators. One of the best advantages of Listnr is that it allows you to create your own customized audio player embed, which you can use to add an audio version to your blog.
Listnr is tailored to the habits and preferences of each listener. It’s also helpful in producing, maintaining, and distributing podcasts. Listnr can help you monetize your material through advertising, whether you’re a commercial or freelance podcaster. You can use the AI voice generation tool to distribute and convert audio with commercial broadcasting rights on the world’s top platforms, including Spotify, Apple, and Google Podcasts. Listnr supports more than 17 languages for podcasts, and AI technology can transform scripts into various languages and dialects.
Listnr also assists you in increasing conversion rates by allowing users to read-listen and watch-listen.
Features:
- Incorporate a programmable audio player
- Tailored to each listener
- Increases conversions
- Artificial intelligence (AI) voiceovers for YouTube, blog posts, and audiobooks
- Analysis of audio
Price: Free
Cons:
- Some conversions are complex to function.
- Limited options.
3. Speechelo

Supported System: Windows/Android
Introduction:
Speechelo can create a human-sounding voiceover from any text. It has both male and female voices. Its text-to-speech technology can give voice inflections. It is compatible with all video editing software. It speaks English as well as 23 other languages. You can choose the tone for reading the text with Speechelo.
Features:
- Speechelo has over 30 voices that sound human.
- It provides three different ways to read the text: standard, joyous, and profound.
- It includes characteristics like breathing noises and lengthier pauses between phrases.
- The text is checked, and the online text editor adds punctuation marks as needed.
- It allows you to adjust the pitch and tempo.
Price: For $47, you can get Speechelo. There will be no monthly installments. A 60-day money-back guarantee is included.
Cons:
- It does not offer a refund.
4. Murf.AI

Supported System: Windows/Mac
Introduction:
Murf.AI is a flexible text-to-speech voice generator that provides studio-quality voiceovers for many professional applications. The tool has an extensive voice library with over 115 distinct voices in 15 languages. Its AI can produce your speech in the appropriate tone, picking up every punctuation and exclamation mark you feed it.
It also has a grammatical assistant, so you can create proofread scripts that will only improve your voiceover work. You can also use the program to add your video, audio, and graphics synced with your produced voice. With its enterprise plan, the tool also has a powerful collaboration capability.
Features:
Price: The Basic Plan costs $13/month, the Pro plan costs $26/month, and the Enterprise plan is $83/month.
Cons:
- Few AI voices in the Murf’s library.
- Fewer languages compared to competitors.
5. Synthesys.io

Supported System: Windows/Online/Android
Introduction:
Synthesys can turn any text into incredible natural-sounding speech that may be used for commercial and personal applications. Synthesys can create AI talks in various tones, accents, and languages, from voiceovers to polite greetings.
There is no limit on how much Synthesys can be used. It can generate a limitless amount of texts at any time.
Features:
- A cloud-based application that may be accessed from any computer or mobile device.
- There are over 35 female voices and 30 male voices.
- Change the reading speed and length of the pauses.
- Before recording, listen to all demo voices.
Price: Monthly fees for Audio Synthesys are $29, Human Studio Synthesys is $39, and Audio and Human Studio Synthesys are $59 per month.
Cons:
- Less diversity in editing tools
- Speed might slow down.
6. Play. ht

Supported System: Online/Android
Introduction:
Play. ht is a web-based voice generator that allows you to generate high-quality text-to-speech. Because of its primary user interface, the platform is straightforward to use. It has a text box on the homepage where you may input your text, choose the language, gender, and voice style, and choose the conversion speed.
The platform has 570 distinct AI voices, supports more than 60 languages, and may be used for business and personal reasons. It is available in both free and paid editions. The free version is adequate, but the number of voice styles available is limited. You can also download your created speech in MP3 or WAV files from the platform.
Features:
- Use voice inflections to fine-tune the tone of your speech.
- Make Speech Pronunciations Your Own.
- Listen to all of the voice styles before applying.
- Experiment with various speaking styles.
Price: There is a free version available. Personal: $19 per month, Professional: $39 per month, Growth: $99 per month, and Business: $199 per month.
Cons:
- Voices generated in languages except European and English are low in quality.
- It does not offer a video editor to add voiceovers.
7. Lovo.ai

Supported System: Online
Introduction:
Lovo.ai’s user-friendly platform enables casual users and developers to produce speech from text and create human-sounding voiceovers. Over 180 voice styles in 33 languages are available on the platform. The site is also regularly updated with new voices every day, giving consumers a wide range of options.
In just 15 minutes, the tool can generate personalized voices. On this platform, converting text to speech requires only three simple steps. Users can also use the API to produce entirely natural voices and can be fine-tuned to express human emotions.
Features:
- Listening, conversion and sharing are all unlimited.
- Use of a significant voice collection
- Quickly convert up to 15000 characters.
- Do-it-yourself voice cloning
Price: There is a free version available. The personal Plan is $17.99, while the Freelancer costs $49.99.
Cons:
- Some voice skin does not provide complete customization options.
- No built-in video editing tools.
8. Sonantic

Supported System: Online
Introduction:
The Sonantic AI voice generator is used for films and games to create human-like voiceovers. The application uses artificial intelligence to convert scripts into audio, and it’s great for customers who want to cut down on production time.
Sonantic analyzes an uploaded script using machine learning before producing natural voiceovers and dictations that may be downloaded as MP3 and WAV files. Amazon Studios, Embark, and Obsidian are among the companies that use the AI voice generator to create human-like audio.
Features:
- Complete command over voice parameters
- Incorporates feelings into stories
- Improves user engagement with high-quality speech content
- Shortens production times
Price: Free Basic Plan, $9/month for Creator, $19/month for business, and $39/month for Business Ultimate.
Cons:
- Hard to learn
- Slightly overpriced.
9. Clipchamp

Supported System: Windows/Android
Introduction:
Clipchamp is a sophisticated text-to-speech generator that uses AI to turn words into voiceovers for professional videos and advertising. In a couple of seconds, the tool can convert an imported script into speech.
Because of its simplicity, Clipchamp is another excellent choice for beginners. Simply select your voice, language, and speed before uploading a script to generate a preview. The AI technology in the tool examines the script to identify sections that need to be updated.
Features:
- There are almost 170 distinct voices.
- Emotional communication styles
- Use emphasis and pitch in your vocal tone.
- Easy to use
Price: Custom Pricing Plan
Cons:
- Slow export rendering
- Access to more stocks requires a subscription.
10. Replica

Supported System: Windows/macOS
Introduction:
The Replica has an extensive library of AI voices recorded by industry professionals. This platform has many demo voices that you can try for free before paying for the premium service.
The Replica will turn your given text into a natural-sounding voice on-demand, with all the essential range and emotions intact, based on your chosen voice style.
You may adjust the pitch and volume and fine-tune the voice to sound sad, pleased, shocked, and so on once you’ve entered your content. The synthesized voice is available in 22 kHz MP3, WAC, OGG, or FLAC formats. The site offers 30 minutes of free voice credit, giving you plenty of time to try out all different voice types.
Features:
- Listen to samples from Replica’s vast voice library.
- Change the tempo, pitch, tone, and loudness of your speech.
- Include sound effects.
- Writing the script
- Prototyping of voice lines
Price: Try 30 minutes for free, 4 hours for $24, 100 hours for $300, and a custom enterprise plan is also available.
Cons:
- It does not offer an add-in voice line tool.
Supported System: Android/iOS
Introduction:
The Narrator’s Voice app allows you to write and send hilarious messages using the voice of your choice for the narrator. With a diverse selection of languages and consistent, pleasant voices. Speak or type a message, then select the app’s language, voice, and special effects. The end product is a personalized narration of your original message that you may share however you want.
Videos are one of Narrator’s Voice’s most popular projects because they allow the narrator to explain or remark on whatever is happening on the screen. Many users have been utilizing the Narrator’s Voice app to add audio to their YouTube and TikTok videos, giving them a distinct voice that adds to the overall atmosphere of the video.
Features:
- Convert text to an MP3 or MP4 audio or video file and publish on social media.
- Open or create a text file, read it aloud, or export/share the text as an audio or video file.
- What you input will be spoken on your phone.
- With several voices and effects in multiple languages.
- Provides expressive and realistic voices.
Price: Free to use, but in-app purchases for Android range from $0.99-299.99, and iPhone range from $4.99-189.99.
Cons:
- Too many ads.
- Lagging in typing or loading the app
2. LiSTNR

Supported System: Android/iOS
Introduction:
Listnr, an AI text-to-speech voice generator application that converts text-to-speech in many formats, such as genre selection, pauses, accent selection, and more, is at the top of our list of best AI voice generators. One of the best advantages of Listnr is that it allows you to create your own customized audio player embed, which you can use to add an audio version to your blog.
Listnr is tailored to the habits and preferences of each listener. It’s also helpful in producing, maintaining, and distributing podcasts. Listnr can help you monetize your material through advertising, whether you’re a commercial or freelance podcaster. You can use the AI voice generation tool to distribute and convert audio with commercial broadcasting rights on the world’s top platforms, including Spotify, Apple, and Google Podcasts. Listnr supports more than 17 languages for podcasts, and AI technology can transform scripts into various languages and dialects.
Listnr also assists you in increasing conversion rates by allowing users to read-listen and watch-listen.
Features:
- Incorporate a programmable audio player
- Tailored to each listener
- Increases conversions
- Artificial intelligence (AI) voiceovers for YouTube, blog posts, and audiobooks
- Analysis of audio
Price: Free
Cons:
- Some conversions are complex to function.
- Limited options.
3. Speechelo

Supported System: Windows/Android
Introduction:
Speechelo can create a human-sounding voiceover from any text. It has both male and female voices. Its text-to-speech technology can give voice inflections. It is compatible with all video editing software. It speaks English as well as 23 other languages. You can choose the tone for reading the text with Speechelo.
Features:
- Speechelo has over 30 voices that sound human.
- It provides three different ways to read the text: standard, joyous, and profound.
- It includes characteristics like breathing noises and lengthier pauses between phrases.
- The text is checked, and the online text editor adds punctuation marks as needed.
- It allows you to adjust the pitch and tempo.
Price: For $47, you can get Speechelo. There will be no monthly installments. A 60-day money-back guarantee is included.
Cons:
- It does not offer a refund.
4. Murf.AI

Supported System: Windows/Mac
Introduction:
Murf.AI is a flexible text-to-speech voice generator that provides studio-quality voiceovers for many professional applications. The tool has an extensive voice library with over 115 distinct voices in 15 languages. Its AI can produce your speech in the appropriate tone, picking up every punctuation and exclamation mark you feed it.
It also has a grammatical assistant, so you can create proofread scripts that will only improve your voiceover work. You can also use the program to add your video, audio, and graphics synced with your produced voice. With its enterprise plan, the tool also has a powerful collaboration capability.
Features:
Price: The Basic Plan costs $13/month, the Pro plan costs $26/month, and the Enterprise plan is $83/month.
Cons:
- Few AI voices in the Murf’s library.
- Fewer languages compared to competitors.
5. Synthesys.io

Supported System: Windows/Online/Android
Introduction:
Synthesys can turn any text into incredible natural-sounding speech that may be used for commercial and personal applications. Synthesys can create AI talks in various tones, accents, and languages, from voiceovers to polite greetings.
There is no limit on how much Synthesys can be used. It can generate a limitless amount of texts at any time.
Features:
- A cloud-based application that may be accessed from any computer or mobile device.
- There are over 35 female voices and 30 male voices.
- Change the reading speed and length of the pauses.
- Before recording, listen to all demo voices.
Price: Monthly fees for Audio Synthesys are $29, Human Studio Synthesys is $39, and Audio and Human Studio Synthesys are $59 per month.
Cons:
- Less diversity in editing tools
- Speed might slow down.
6. Play. ht

Supported System: Online/Android
Introduction:
Play. ht is a web-based voice generator that allows you to generate high-quality text-to-speech. Because of its primary user interface, the platform is straightforward to use. It has a text box on the homepage where you may input your text, choose the language, gender, and voice style, and choose the conversion speed.
The platform has 570 distinct AI voices, supports more than 60 languages, and may be used for business and personal reasons. It is available in both free and paid editions. The free version is adequate, but the number of voice styles available is limited. You can also download your created speech in MP3 or WAV files from the platform.
Features:
- Use voice inflections to fine-tune the tone of your speech.
- Make Speech Pronunciations Your Own.
- Listen to all of the voice styles before applying.
- Experiment with various speaking styles.
Price: There is a free version available. Personal: $19 per month, Professional: $39 per month, Growth: $99 per month, and Business: $199 per month.
Cons:
- Voices generated in languages except European and English are low in quality.
- It does not offer a video editor to add voiceovers.
7. Lovo.ai

Supported System: Online
Introduction:
Lovo.ai’s user-friendly platform enables casual users and developers to produce speech from text and create human-sounding voiceovers. Over 180 voice styles in 33 languages are available on the platform. The site is also regularly updated with new voices every day, giving consumers a wide range of options.
In just 15 minutes, the tool can generate personalized voices. On this platform, converting text to speech requires only three simple steps. Users can also use the API to produce entirely natural voices and can be fine-tuned to express human emotions.
Features:
- Listening, conversion and sharing are all unlimited.
- Use of a significant voice collection
- Quickly convert up to 15000 characters.
- Do-it-yourself voice cloning
Price: There is a free version available. The personal Plan is $17.99, while the Freelancer costs $49.99.
Cons:
- Some voice skin does not provide complete customization options.
- No built-in video editing tools.
8. Sonantic

Supported System: Online
Introduction:
The Sonantic AI voice generator is used for films and games to create human-like voiceovers. The application uses artificial intelligence to convert scripts into audio, and it’s great for customers who want to cut down on production time.
Sonantic analyzes an uploaded script using machine learning before producing natural voiceovers and dictations that may be downloaded as MP3 and WAV files. Amazon Studios, Embark, and Obsidian are among the companies that use the AI voice generator to create human-like audio.
Features:
- Complete command over voice parameters
- Incorporates feelings into stories
- Improves user engagement with high-quality speech content
- Shortens production times
Price: Free Basic Plan, $9/month for Creator, $19/month for business, and $39/month for Business Ultimate.
Cons:
- Hard to learn
- Slightly overpriced.
9. Clipchamp

Supported System: Windows/Android
Introduction:
Clipchamp is a sophisticated text-to-speech generator that uses AI to turn words into voiceovers for professional videos and advertising. In a couple of seconds, the tool can convert an imported script into speech.
Because of its simplicity, Clipchamp is another excellent choice for beginners. Simply select your voice, language, and speed before uploading a script to generate a preview. The AI technology in the tool examines the script to identify sections that need to be updated.
Features:
- There are almost 170 distinct voices.
- Emotional communication styles
- Use emphasis and pitch in your vocal tone.
- Easy to use
Price: Custom Pricing Plan
Cons:
- Slow export rendering
- Access to more stocks requires a subscription.
10. Replica

Supported System: Windows/macOS
Introduction:
The Replica has an extensive library of AI voices recorded by industry professionals. This platform has many demo voices that you can try for free before paying for the premium service.
The Replica will turn your given text into a natural-sounding voice on-demand, with all the essential range and emotions intact, based on your chosen voice style.
You may adjust the pitch and volume and fine-tune the voice to sound sad, pleased, shocked, and so on once you’ve entered your content. The synthesized voice is available in 22 kHz MP3, WAC, OGG, or FLAC formats. The site offers 30 minutes of free voice credit, giving you plenty of time to try out all different voice types.
Features:
- Listen to samples from Replica’s vast voice library.
- Change the tempo, pitch, tone, and loudness of your speech.
- Include sound effects.
- Writing the script
- Prototyping of voice lines
Price: Try 30 minutes for free, 4 hours for $24, 100 hours for $300, and a custom enterprise plan is also available.
Cons:
- It does not offer an add-in voice line tool.
Guide To Creating the Best Video Collages
By the combination of multiple videos together, you can create a studio-friendly video collage. Several types of collage videos are on the web, such as overlays, grids, split-screen, sequential, and more. If you are a startup business, you need to be aware of the effectiveness of video collages. It helps in showing more information in a limited time.
By the end of this discussion, you will know how to make a video collage with music without investing extra time and effort. Besides this, we will also guide you in making captivating video collages with Filmstock.
Part 1: What Is The Purpose of Using Video Collages?
Video collages serve various purposes according to the user’s needs. It helps create multiple creative video clips or images into a single composition. Some of the objectives of video collages are mentioned below that can be very helpful to you:
Visual Storytelling
If you want to convey your story or a message to the world, you can use video collages to present your story sequentially through video clips and images. Visual storytelling can be found in various mediums, including films, television, etc. The video collage technique helps you to create a showcase of your different moments. It includes event highlights or memories with friends or families.
Online Platforms
Video collages are one of the most popular formats of content creation on social media. It is because it allows you to share multiple moments, highlights, and scenes to engage your audience from different angles. This format is very popular with students because they can create and share their multiple moments in a single video.
Complementary Content
You can create contrasting content that conveys your message or theme using video collages. You can create a perfect comparison by using different images and videos side-by-side. Moreover, using this method, you can create amazing video content and stand out if you are a video editor.
Increasing Screen Coverage
Video collages allow you to present your content in a way that can use the maximum screen. It gets great when you have limited space and time to showcase your multiple visuals. You can optimize the available space and provide a comprehensive content view. Get this done by selecting and arranging the visual content carefully.
Video Collage Editor A powerful video editor helping you make a video collage without investing extra time and effort!
Free Download Free Download Learn More

Part 2: Filmstock: A Great Resource For Getting Video Collage Template
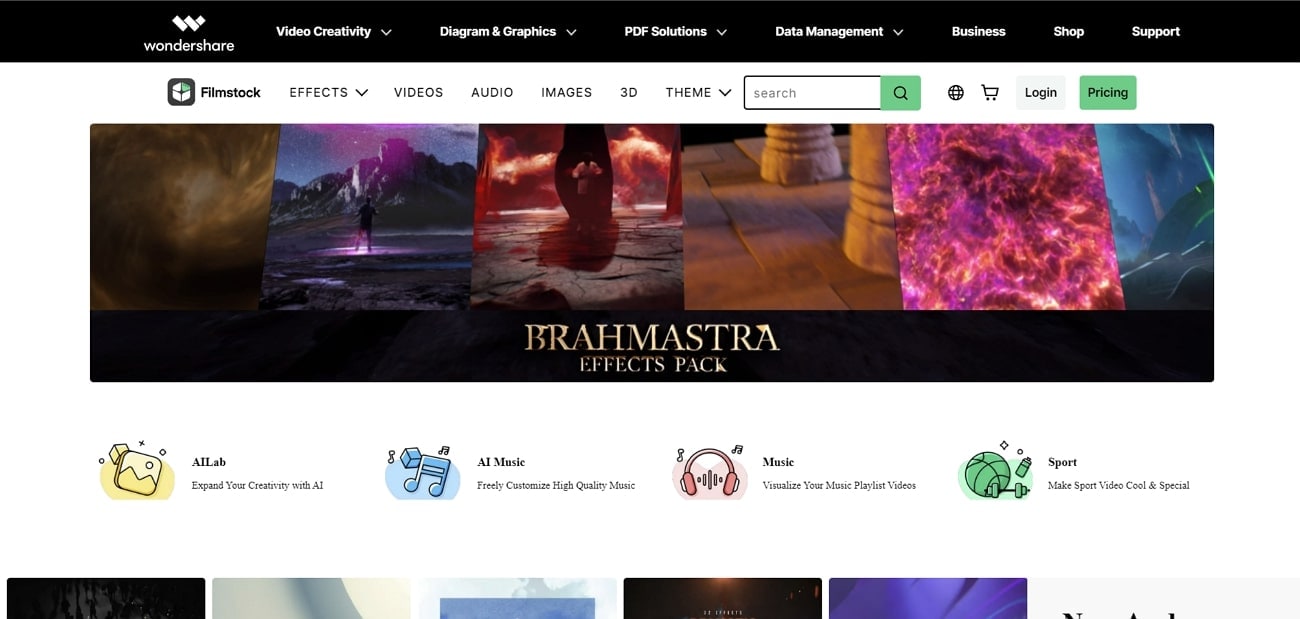
Have you understood the purpose of using video collages for managing memories? You will require a resource for creating the best video collages. Having a template makes things extremely easy to cover in video editing. Wondershare provides the option of using Filmstock , a dedicated resource for getting video collage templates. You can find everything in Filmstock to make a video collage, from effects to videos and audio.
The entire collection provided in Filmstock is highly sophisticated and coherent. It truly makes procession easy and convenient for users who are interested in video editing. While finding the best effects for Filmora, you can also observe great resource packs for Adobe After Effects. The entire resource is categorized into different sections, making it easy for you to navigate content.
Working with Filmstock is easy and effective when combined with Filmora. You can also immerse yourself in 3D content within this resource website. When it comes to creating collage videos, you can get help from the templates available at Filmstock.
Part 3: Wondershare Filmora: Create The Finest Video Collages Through Filmstock
By consulting Filmstock, you are now aware of how to get the best video collage templates from the platform. After finding one for your work, you can go to Wondershare Filmora to create and edit the video collage. It features a unique video editing platform for its users, giving a diversity of options to work with.
Free Download For Win 7 or later(64-bit)
Free Download For macOS 10.14 or later
From editing the video to managing its audio, you can perform all tasks on Filmora with ease. Unlike other video editors, Wondershare Filmora does not make it difficult for you to edit videos. Its structure is designed to make operations easy for all kinds of users who are in video editing. To know more about how Filmora makes things easy in creating the finest video collages, learn more about its features below:
1. Motion Tracking
If your video collage has a specific element that needs to be tracked, you can utilize the services of motion tracking . With a single click, you can track the motion of an object and make it the center of the video.
2. Adjustment Layer
Users working on specific video content require dedicated presets for their work. They can create adjustment layers for color grading, presets, and perform other operations.
3. AI Copywriting
Those who are creating specific social media content can utilize the services of AI copywriting powered by ChatGPT. All you must do is provide a prompt, after which they can create the perfect content for their video collage.
4. Speech-To-Text
If your video collage needs to be induced with subtitles, the service of Speech-to-Text works perfectly on Filmora. Users can get the best subtitles in a single click, with an accuracy of more than 95%, making it a great tool.

Part 4: Step-by-Step Guide: Creating Video Collages Through Filmstock
Filmstock is a resource library where you can access diversified templates for several things. It also helps you access the attractive video collage template. With that template, you can make optimistically impressive video collages. You can access the collages on versatile ranges and utilize them as needed.
You must be thinking that it is not easy to make video collages with Filmstock. However, it is not true, and you can see it for yourself from the below-given instructions:
Filmora Tutorial - Create a Photo Sliding Birthday Intro | Filmora Creator Academy
Free Download For Win 7 or later(64-bit)
Free Download For macOS 10.14 or later
Step 1Open Filmstock and Select Video Collage
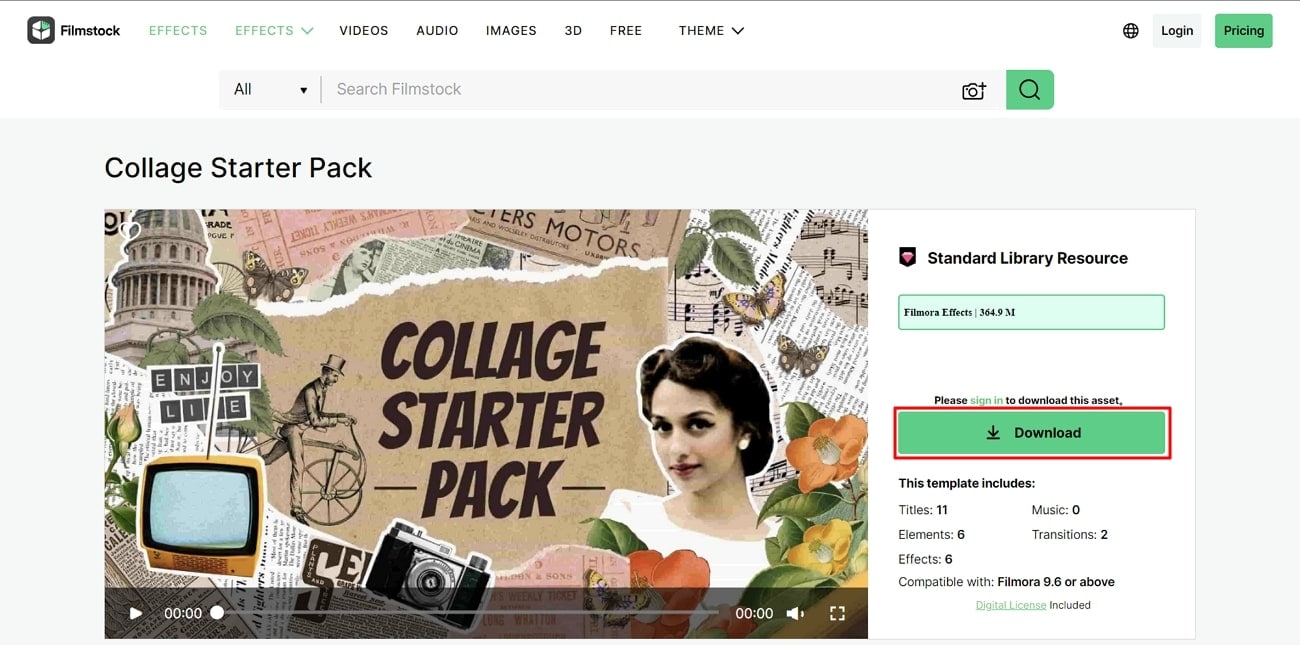
Access Filmstock on your device and go to “Search Bar.” From here, search for Video Collages, continue to select one template, and click the “Download” button. Once the template is downloaded, launch Filmora and import your video clips.
Step 2Make a Video Collage
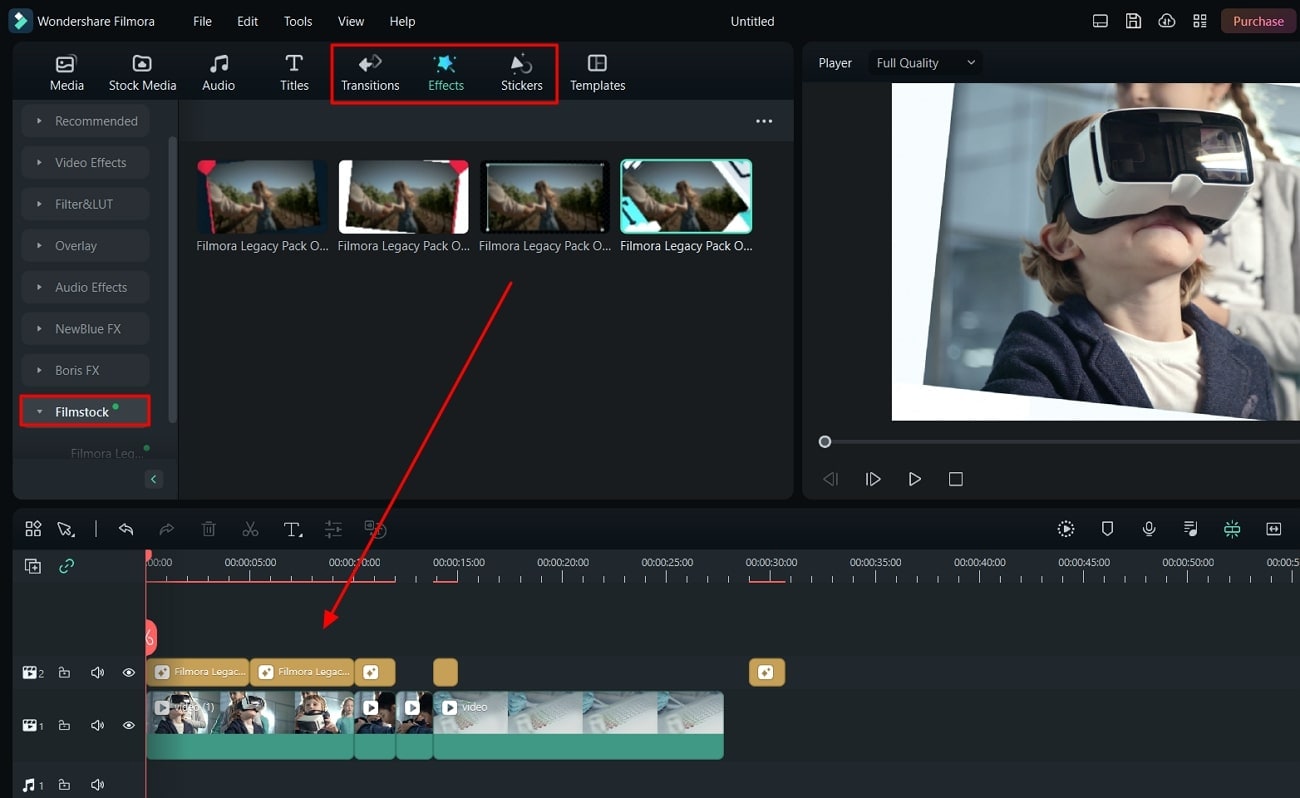
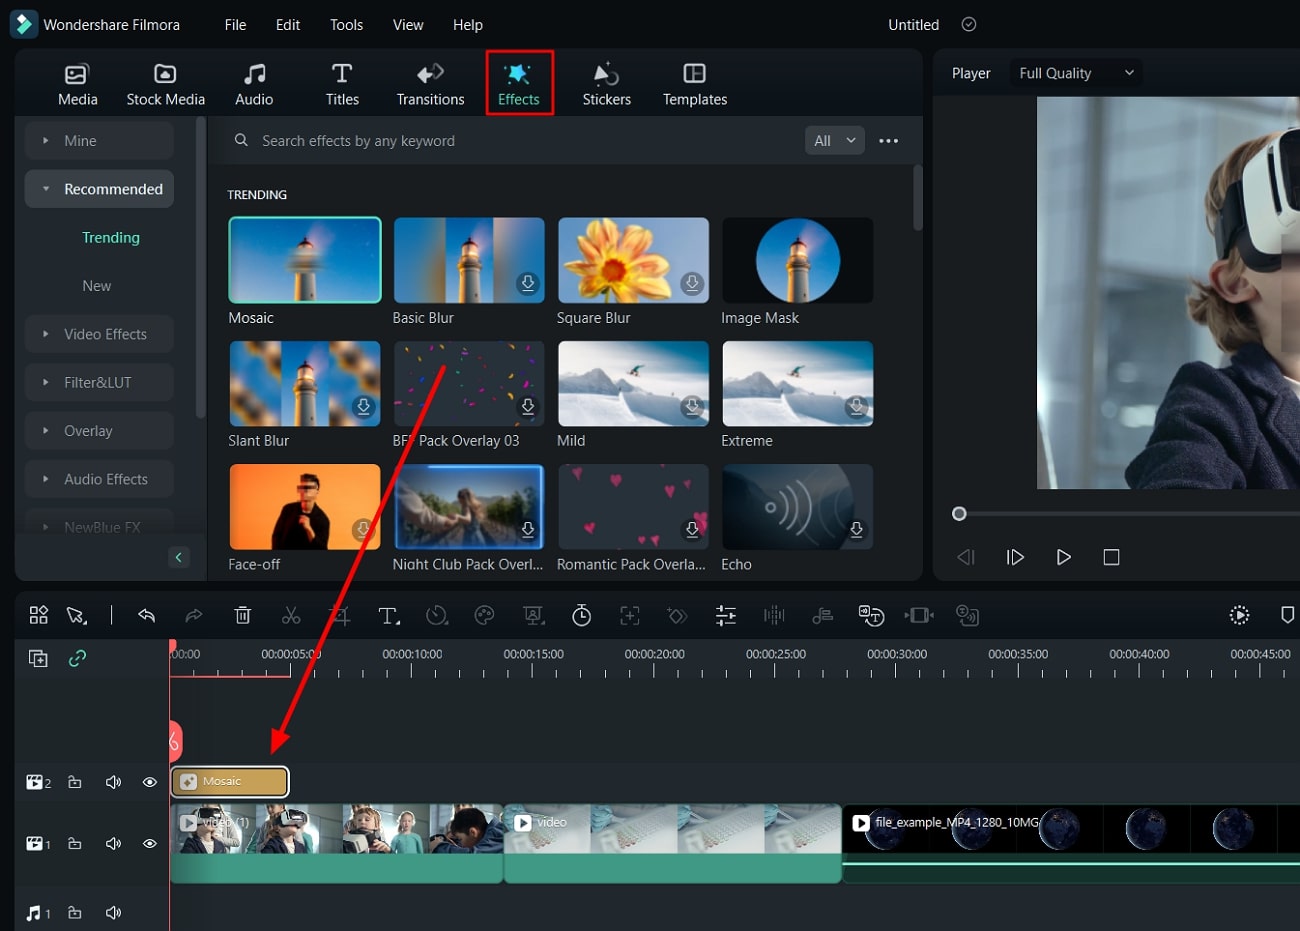
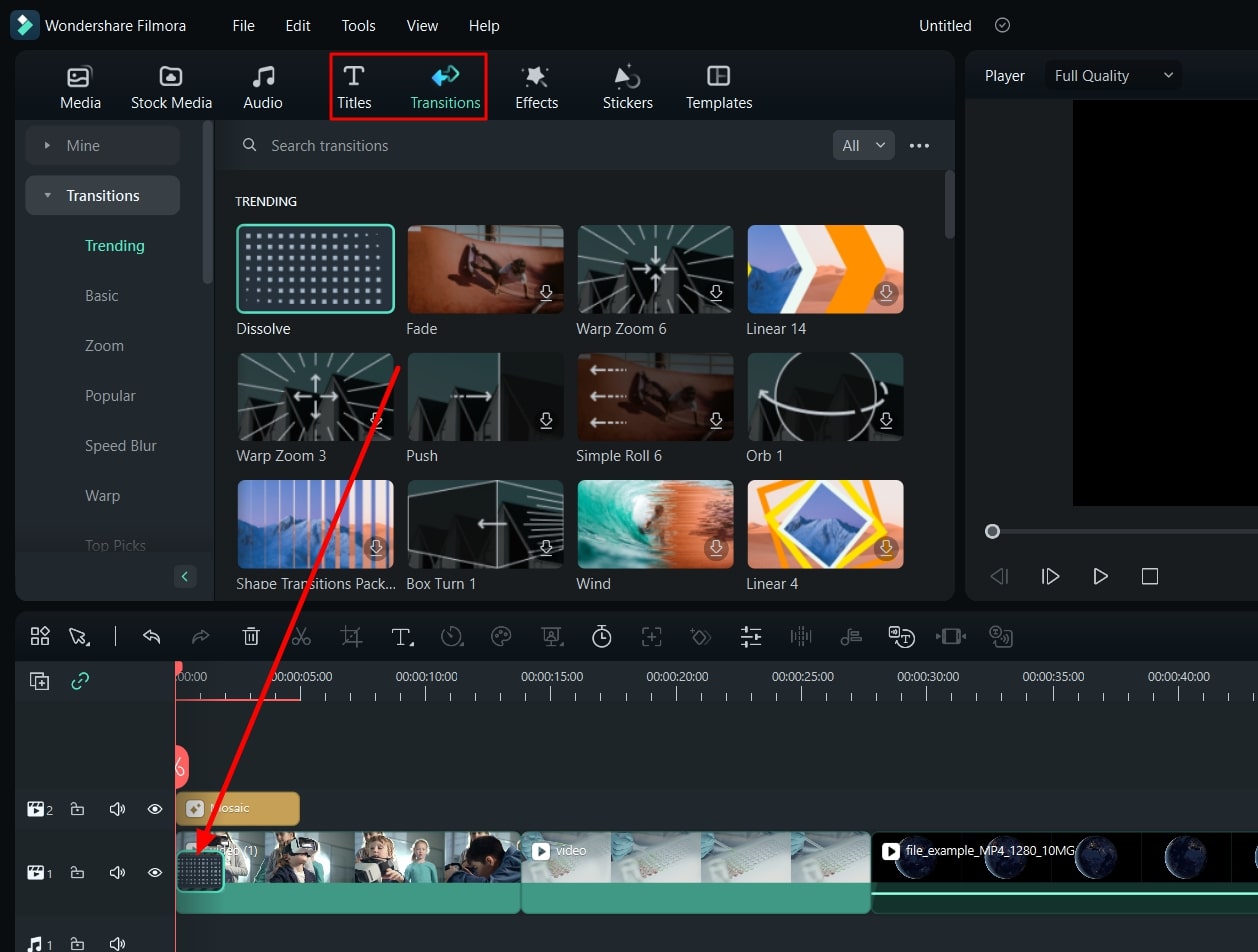
Next, drag the clips to the timeline and go to “Effects.” Locate the desired effect and drag it on the video in “Timeline.” Once done, select the “Transitions” icon and drag the transition in videos in “Timeline.” You can also customize the additional parameters from the adjustment section.
Step 3Preview and Export Video Collages
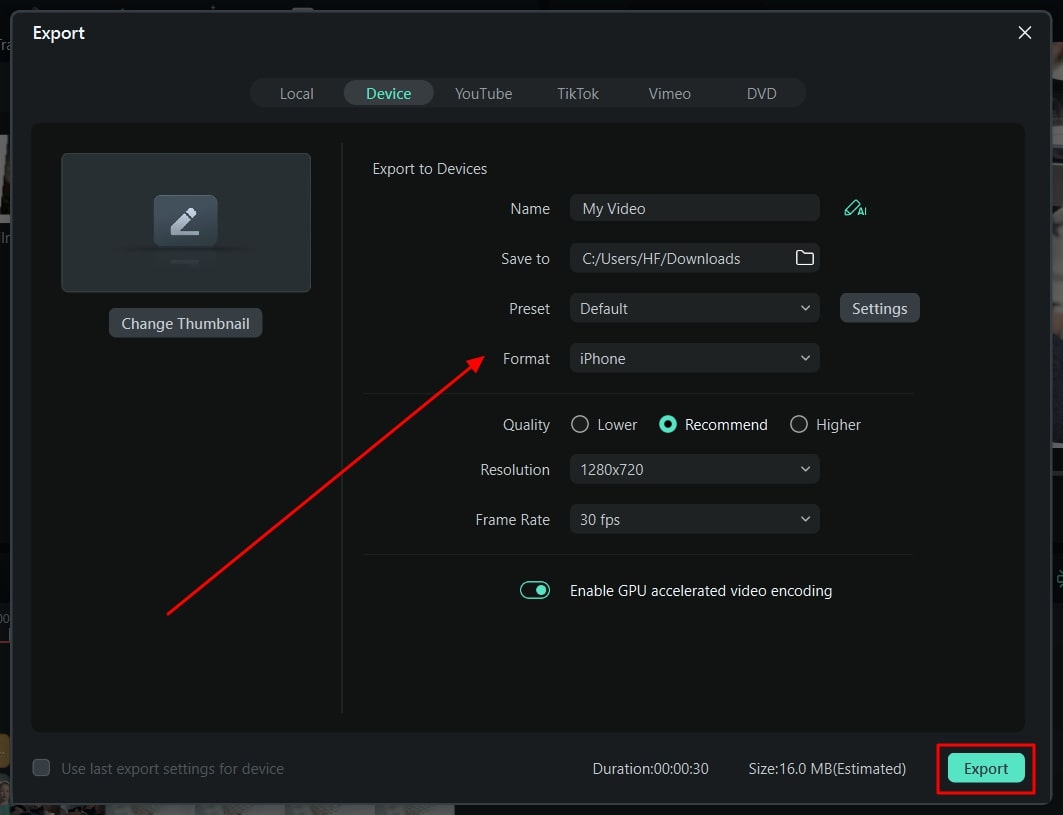
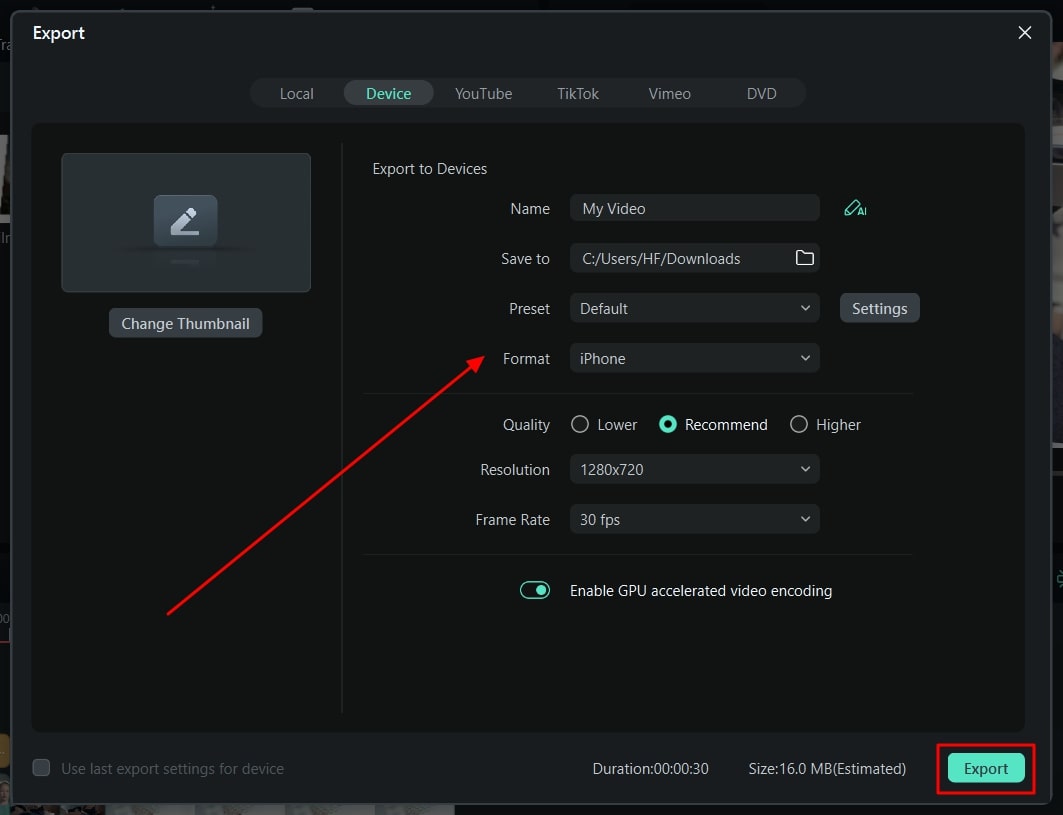
Make sure to click the “Play” icon to preview the results. When satisfied with the results, hit the “Export” button. Manage the export settings in the next window, and again select “Export.”
Bonus Part: Creating Slideshows Using Wondershare Filmora
Do you know that Wondershare Filmora can also be used to create slideshows? In this part, we will be discussing the details of how to create slideshows using Filmora. Look through the steps below to understand things that need to be investigated while creating slideshows:
Filmora Tutorial - Edit a Fast Slideshow Intro
Free Download For Win 7 or later(64-bit)
Free Download For macOS 10.14 or later
Step 1Launch Wondershare Filmora
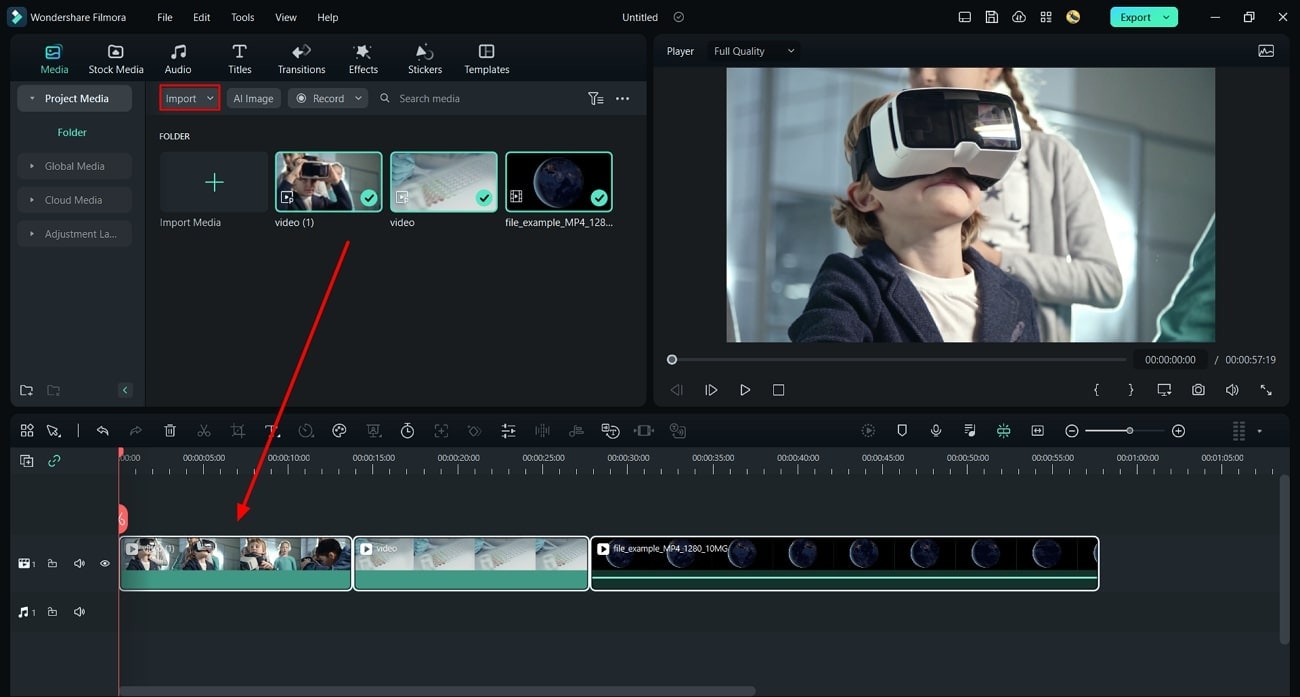
On opening Wondershare Filmora on your computer, continue to select the “New Project” button. This opens a new screen where you can import the content for the slideshow on Filmora. Select the “Import” option to add the media content for the slideshow. After importing the media content, drag and drop it on the timeline.
Step 2Add Effects to Slideshow
Once the media content is imported for the slideshow, continue to add effects to your video editing canvas. You can proceed to the “Effects” tab and add your appropriate choice.
Step 3Add Transitions and Titles
Following this, you can also look to add “Transitions” to your work. This can be done by accessing the options from the top of the screen. You can add “Titles” to your slideshow to create the best content.
Step 4Export Final Slideshow from Filmora
Once you are done with this, lead to the “Export” option to save the created slideshow on Filmora. Set the parameters for the video and click “Export” on the window to execute the process.
Conclusion
This article has provided viewers with an idea of how to create the best video collages with the right platforms. Filmstock, which offers resources for video collage templates, has been discussed. Along with that, Wondershare Filmora has been displayed as the best option for making video collages of the finest quality. If you wish to create perfect video collages, work on the details to get the best results.
Free Download Free Download Learn More

Part 2: Filmstock: A Great Resource For Getting Video Collage Template
Have you understood the purpose of using video collages for managing memories? You will require a resource for creating the best video collages. Having a template makes things extremely easy to cover in video editing. Wondershare provides the option of using Filmstock , a dedicated resource for getting video collage templates. You can find everything in Filmstock to make a video collage, from effects to videos and audio.
The entire collection provided in Filmstock is highly sophisticated and coherent. It truly makes procession easy and convenient for users who are interested in video editing. While finding the best effects for Filmora, you can also observe great resource packs for Adobe After Effects. The entire resource is categorized into different sections, making it easy for you to navigate content.
Working with Filmstock is easy and effective when combined with Filmora. You can also immerse yourself in 3D content within this resource website. When it comes to creating collage videos, you can get help from the templates available at Filmstock.

Part 3: Wondershare Filmora: Create The Finest Video Collages Through Filmstock
By consulting Filmstock, you are now aware of how to get the best video collage templates from the platform. After finding one for your work, you can go to Wondershare Filmora to create and edit the video collage. It features a unique video editing platform for its users, giving a diversity of options to work with.
Free Download For Win 7 or later(64-bit)
Free Download For macOS 10.14 or later
From editing the video to managing its audio, you can perform all tasks on Filmora with ease. Unlike other video editors, Wondershare Filmora does not make it difficult for you to edit videos. Its structure is designed to make operations easy for all kinds of users who are in video editing. To know more about how Filmora makes things easy in creating the finest video collages, learn more about its features below:
1. Motion Tracking
If your video collage has a specific element that needs to be tracked, you can utilize the services of motion tracking . With a single click, you can track the motion of an object and make it the center of the video.
2. Adjustment Layer
Users working on specific video content require dedicated presets for their work. They can create adjustment layers for color grading, presets, and perform other operations.
3. AI Copywriting
Those who are creating specific social media content can utilize the services of AI copywriting powered by ChatGPT. All you must do is provide a prompt, after which they can create the perfect content for their video collage.
4. Speech-To-Text
If your video collage needs to be induced with subtitles, the service of Speech-to-Text works perfectly on Filmora. Users can get the best subtitles in a single click, with an accuracy of more than 95%, making it a great tool.

Part 4: Step-by-Step Guide: Creating Video Collages Through Filmstock
Filmstock is a resource library where you can access diversified templates for several things. It also helps you access the attractive video collage template. With that template, you can make optimistically impressive video collages. You can access the collages on versatile ranges and utilize them as needed.
You must be thinking that it is not easy to make video collages with Filmstock. However, it is not true, and you can see it for yourself from the below-given instructions:
Filmora Tutorial - Create a Photo Sliding Birthday Intro | Filmora Creator Academy
Free Download For Win 7 or later(64-bit)
Free Download For macOS 10.14 or later
Step 1Open Filmstock and Select Video Collage
Access Filmstock on your device and go to “Search Bar.” From here, search for Video Collages, continue to select one template, and click the “Download” button. Once the template is downloaded, launch Filmora and import your video clips.

Step 2Make a Video Collage
Next, drag the clips to the timeline and go to “Effects.” Locate the desired effect and drag it on the video in “Timeline.” Once done, select the “Transitions” icon and drag the transition in videos in “Timeline.” You can also customize the additional parameters from the adjustment section.

Step 3Preview and Export Video Collages
Make sure to click the “Play” icon to preview the results. When satisfied with the results, hit the “Export” button. Manage the export settings in the next window, and again select “Export.”

Bonus Part: Creating Slideshows Using Wondershare Filmora
Do you know that Wondershare Filmora can also be used to create slideshows? In this part, we will be discussing the details of how to create slideshows using Filmora. Look through the steps below to understand things that need to be investigated while creating slideshows:
Filmora Tutorial - Edit a Fast Slideshow Intro
Free Download For Win 7 or later(64-bit)
Free Download For macOS 10.14 or later
Step 1Launch Wondershare Filmora
On opening Wondershare Filmora on your computer, continue to select the “New Project” button. This opens a new screen where you can import the content for the slideshow on Filmora. Select the “Import” option to add the media content for the slideshow. After importing the media content, drag and drop it on the timeline.

Step 2Add Effects to Slideshow
Once the media content is imported for the slideshow, continue to add effects to your video editing canvas. You can proceed to the “Effects” tab and add your appropriate choice.

Step 3Add Transitions and Titles
Following this, you can also look to add “Transitions” to your work. This can be done by accessing the options from the top of the screen. You can add “Titles” to your slideshow to create the best content.

Step 4Export Final Slideshow from Filmora
Once you are done with this, lead to the “Export” option to save the created slideshow on Filmora. Set the parameters for the video and click “Export” on the window to execute the process.

Conclusion
This article has provided viewers with an idea of how to create the best video collages with the right platforms. Filmstock, which offers resources for video collage templates, has been discussed. Along with that, Wondershare Filmora has been displayed as the best option for making video collages of the finest quality. If you wish to create perfect video collages, work on the details to get the best results.
Best 8 Online GIF to APNG Converters
Great Video Converter - Wondershare Filmora
Provide abundant video effects - A creative video editor
Powerful color correction and grading
Detailed tutorials provided by the official channel
The GIF image format is a bitmap image format that supports up to 8 bits per pixel. APNG (Animated Portable Network Graphics) is a format for animated images that supports 24 bits per pixel and 8 bits of transparency, which is not available in GIFs. Backward compatibility with non-animated PNG files is also maintained.
Because the initial frame of an APNG file saves as a regular PNG stream, it can display by most conventional PNG decoders. Extra chunks can hold frame speed data and different animation frames (as provided by the original PNG specification).
Is APNG superior to GIF? APNG files are smaller and have more outstanding quality than GIF files. However, GIF is more compatible than APNG. Firefox, Safari, Google Chrome, and Opera support APNG, while practically all online browsers support GIF.
Let’s look at the top 8 best GIFs to APNG converters now.
In this article
Part 1: Best 8 GIF to APNG Converters
Part 2: How to Convert a GIF to APNG
Part 3: FAQs
Part 1. Best 8 GIF to APNG Converters
Here are the top 8 GIFs to APNG converters to look out for
1. EZgif
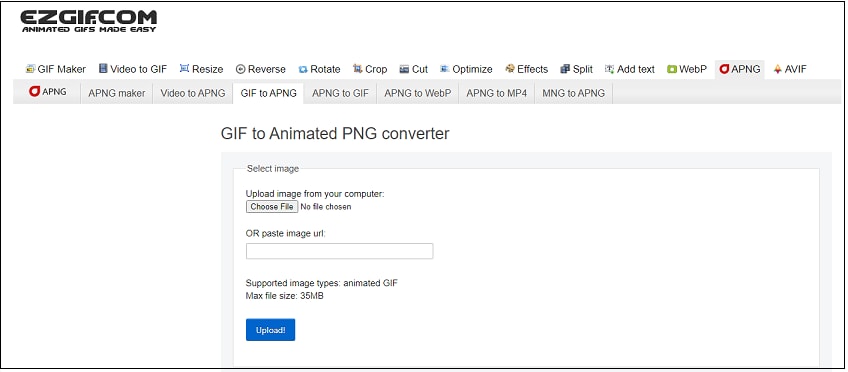
Ezgif.com is a free, easy-to-use toolset for making and modifying animated GIFs. Besides some basic video editing, we also offer editing and conversions for various other picture formats, like animated WebP, PNG, MNG, and FLIF. GIF maker, video to GIF converter, and photo resizer are three of our most popular online utilities.
In addition, EZgif lets you edit GIFs before converting them to APNG.
Features:
- ImageMagick - conducts most picture editing tasks such as resizing, optimization, cropping, etc.
- Making, optimizing, trimming, and resizing animated GIFs with gifsicle and lossygif.
- For video conversions and editing, use FFmpeg (the genuine one).
- This video to GIF converter online has a low conversion rate.
- This free online GIF banner maker can assist you in creating GIF banners.
- This online GIF creator has an extremely user-friendly UI.
- This web program’s impressive capabilities are completely free to use.
- This GIF converter online maintains high-quality GIF conversion.
- You can make GIFs from videos in seconds.
Pros
The program at ezgif.com is entirely secure to use.
Users do not have to install any other programs for the software to work.
The application is simple and allows users to create GIFs online without exerting any effort.
Cons
Because there is a problem in the program, the result of this online GIF maker from photographs degrades. Hence it is not advised for high professional use.
2. FreeConvert
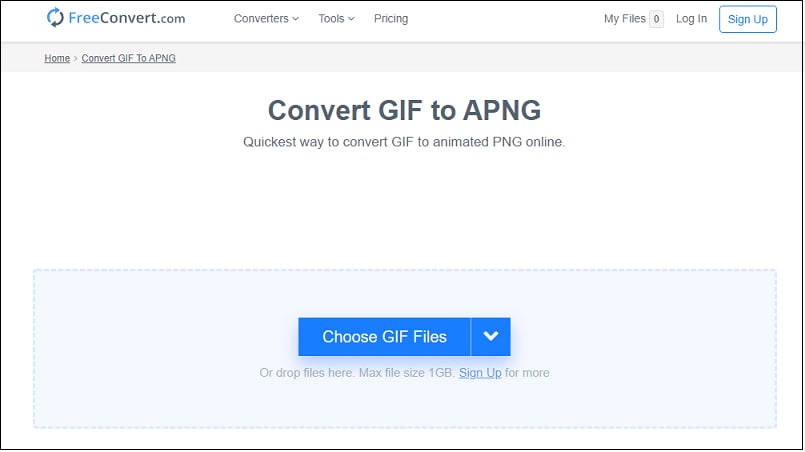
FreeConvert is a GIF to APNG converter that can convert photos, videos, audio files, documents, eBooks, and units, among other formats. It can upload GIFs from your device, Google Drive, Dropbox, or a URL, and it can batch convert many GIFs to animated PNG files without sacrificing quality. FreeConvert is a safe program because it automatically deletes converted files after two hours.
Features:
- You can convert numerous files at once without sacrificing quality.
- It provides a variety of output file types.
- You can choose from your device (computer, smartphone, etc.) or a Dropbox or Google Drive account to select your files.
Pros
It’s as simple as uploading your GIF files and clicking convert.
Convert a GIF to APNG(animated PNG) while keeping the original GIF’s animation quality.
It is entirely free and works with any web browser.
All files are encrypted using 256-bit SSL and erased after two hours.
Cons
Limited services for free users
3. Aconvert
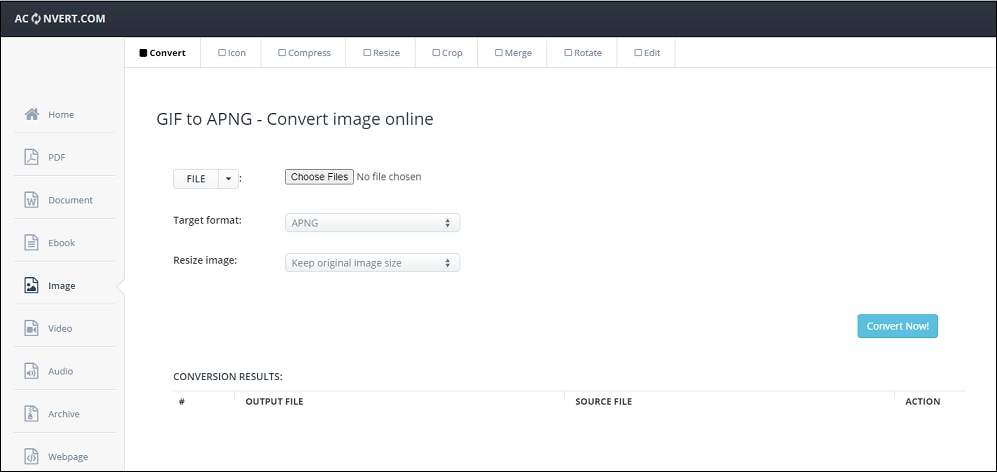
Aconvert is another free online GIF to APNG converter. It not only converts GIFs to APNG but also compresses, resizes, merges, crops, and rotates GIFs. GIFs can be stored on your device or online storage services after being uploaded from local, online storage services or a URL.
The uploaded image file can be up to 200 MB in size.
My favorite software is AVS Image Converter, which can convert GIF to APNG and APNG to GIF. Furthermore, its ability to support a wide range of image formats and editing capabilities such as Watermarks, Filters, Image Corrections, and others is fantastic.
Features:
- It supports large file conversion of up to 200MB
- It can also resize and rotate GIF file
- It supports a wide range of image formats
- Edits watermark
Pros
Simple user interface
File compression settings get support across platforms
Multiplatform
Free and can be used on a web browser
Cons
Limited services for free users.
4. AVS Image Converter

AVS Image Converter for Windows is a free GIF to APNG converter. You can use it to convert animated GIF files into animated PNG files. This software can convert GIFs to APNGs and APNGs to animated GIFs. Aside from APNG and GIF, this shareware accepts various additional image and project formats as input, including BMP, JPEG, TIFF, TGA, PCX, PSD, PDD, and more. Unlike input types, only JPEG, PDF, GIF, PNG (APNG), TIFF, BMP, TGA, and RAS are the output formats. You can convert several photos from one format to another using our GIF to APNG converter’s batch conversion.
Features:
- It supports a variety of formats.
- It converts in batches.
- Convert animated GIFs into animated PNG files
Pros
Processes large groups of images
It’s possible to utilize it from the command line.
Presets for various dimensions
Multiple input formats are supported.
Allows you to convert photos to PDF.
Multiple effects are applied.
Cons
There are no individual presets.
Displays advertisements
5. Real World Paint
RealWorld Paint - portable image editor (rw-designer.com)
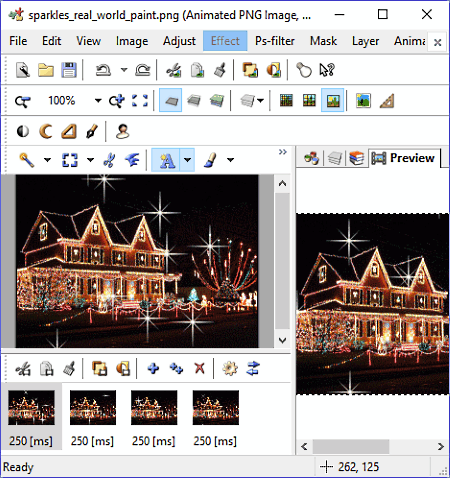
Another free GIF to APNG converter for Windows is RealWorld Paint. It can also convert an APNG file back to a GIF. Additionally, format conversions between PNG, JPEG, GIF, WEBP, animated WEBP, and other formats are possible. The prime benefit of this software is that it can work with projects created by various famous photo editors, including Photoshop, Paint.Net, GIMP, and others.
You can also add, edit, and improve frames in GIF files and simple conversion. When you open a GIF file in it, an editor area appears, right below which you can see all of the GIF file’s frames.
Features:
- Supports a wide range of file types
- Easy to use interface
- Doesn’t consume a lot of hardware resources
- Can convert in a few minutes
Pros
Transformation of a particular area
Multi-platform
Folder selection is simple.
Set the conversion quality quickly.
Cons
For novices, it’s a bit difficult.
Only the premium version is available.
6. Convertio
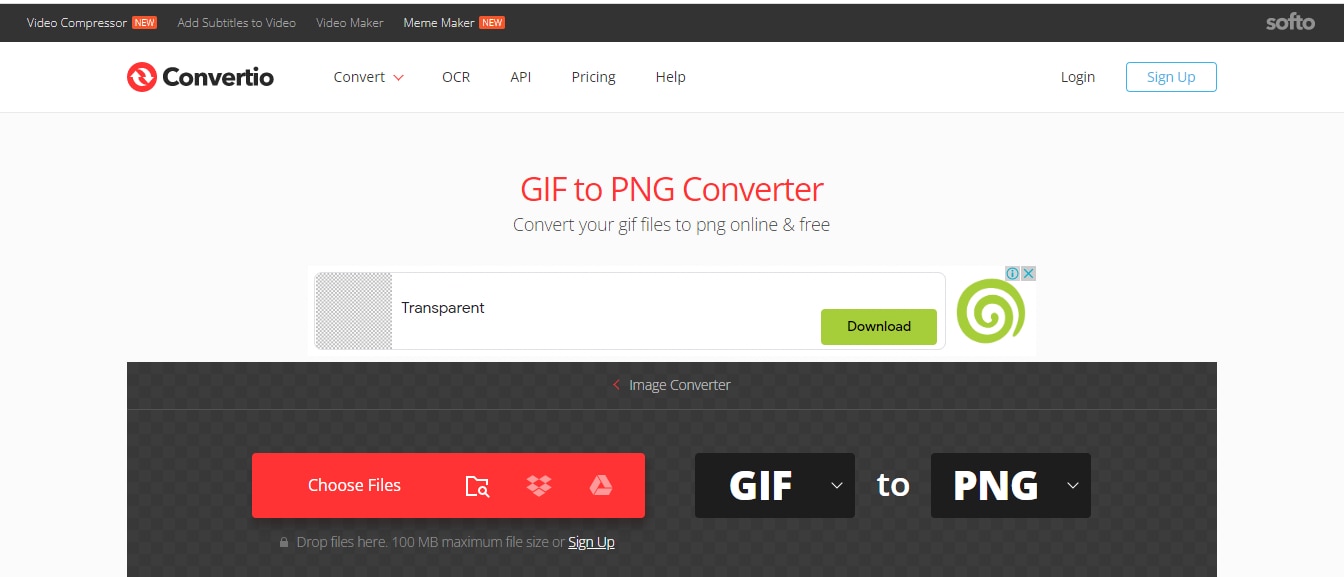
Convertio is a competitor to Browserling in terms of simplicity. Convertio, on the other hand, outnumbers the former in terms of picture formats supported. Convertio can also convert GIFs to TGA, PSD, JPG, TIFF, ICO, etc. Unfortunately, it lacks image editing capabilities.
Features:
- The file size is unrestricted.
- There is no restriction to how many conversions you can do at once.
- Priority number one.
- Every day, you have an unlimited number of conversion minutes.
- The maximum conversion time per file is unlimited.
- Pages with no advertisements.
Pros
Allows you to convert files by dragging and dropping them.
The ETA is less than 2 minutes, and the conversion is quick.
There are 3 membership options.
Cons
After 24 hours/manually, files saved on the server/cloud gets removed.
7. Onlineconvertfree
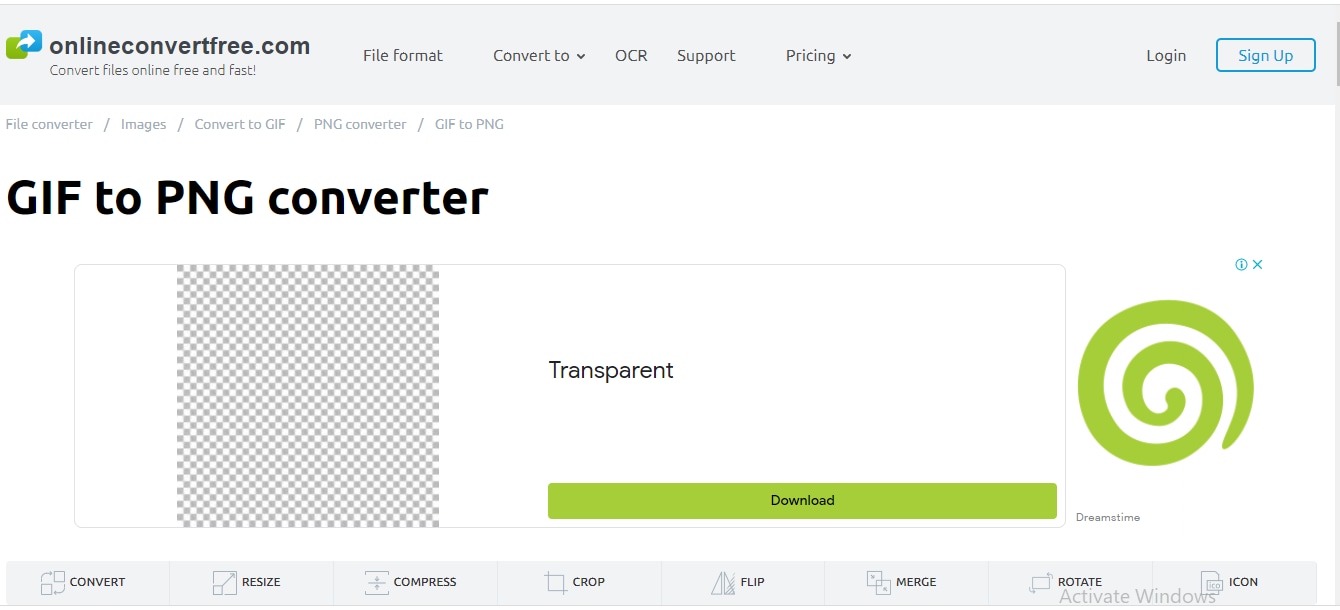
Onlineconvertfree is a lovely PNG converter that works with all standard image formats. You can create a PNG file from various formats, including GIF, JPG, HTML, TIFF, RAW, and more. Users may crop, clip, rotate, flip, and perform many other editing actions on their files.
Features:
- It has offline access for quick connectivity and document access.
- Even when an internet connection is unavailable, this helps speed up the entire document management process.
- The software comes with a free version that includes all of the basic capabilities
- Individuals and small enterprises will find it very affordable due to this.
- It supports a Variety of Formats
Pros
Converted files are simple to upload and download.
You can convert almost any file to your preferred format.
There is no need to give personal information such as an email address.
It offers three subscription tiers, all of which are ad-free.
Cons
This is a free service with a limit of two files per conversion.
8. Zamzar
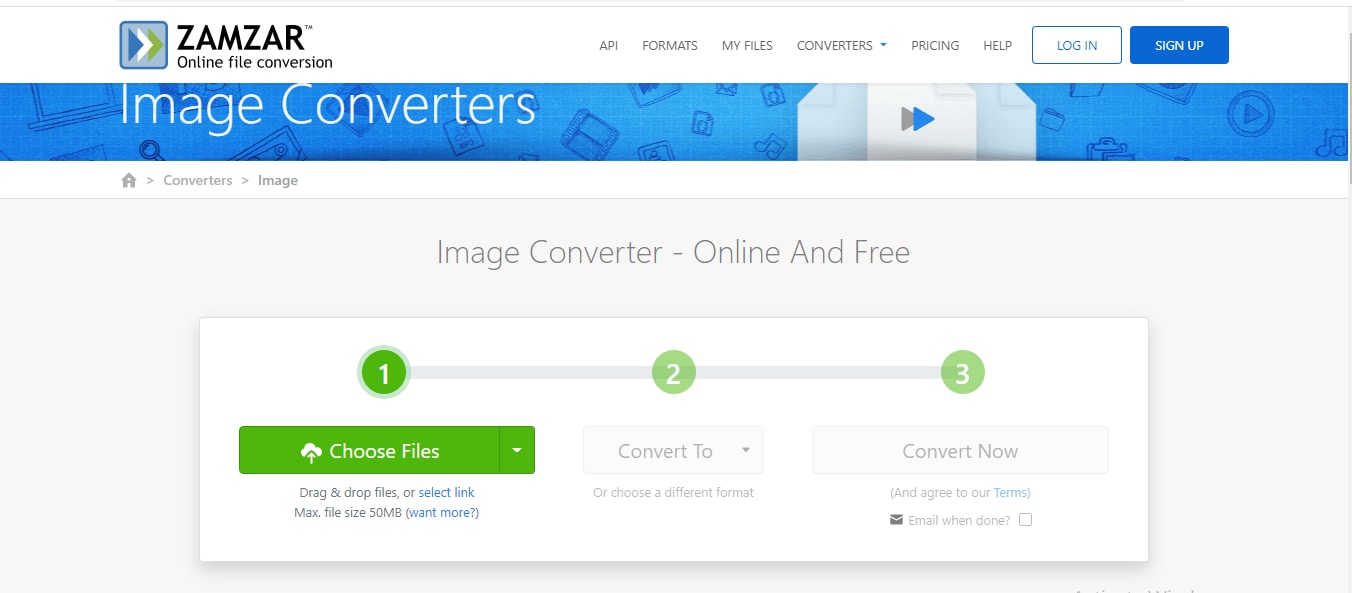
Zamzar is the easiest online GIF to APNG converter on this list. It has numbered steps that make it extremely simple to use. You may convert GIF to PNG, TIFF, TGA, JPG, BMP, and other image formats on Zamzar.
Features:
- Uploading files by dragging and dropping them and speedier file conversions.
- All Zamzar subscribers get high-speed downloads.
- Email files to be converted.
- You can stream the converted videos and audio to your iPhone, iPad, and iPod.
Pros
Allows you to convert files from URLs. Batch conversion is supported.
Presets a three-step method that is quite easy to follow.
Over 1200 file formats are supported.
Multiplatform
File compression settings are now supported.
Developers will appreciate the API.
Cons
File size restricted to 50 MB on free accounts for uploads.
Like other online tools, it lacks OCR.
Part 2. How to Convert a GIF to APNG
Follow the 3 simple steps to convert GIF to animated PNG
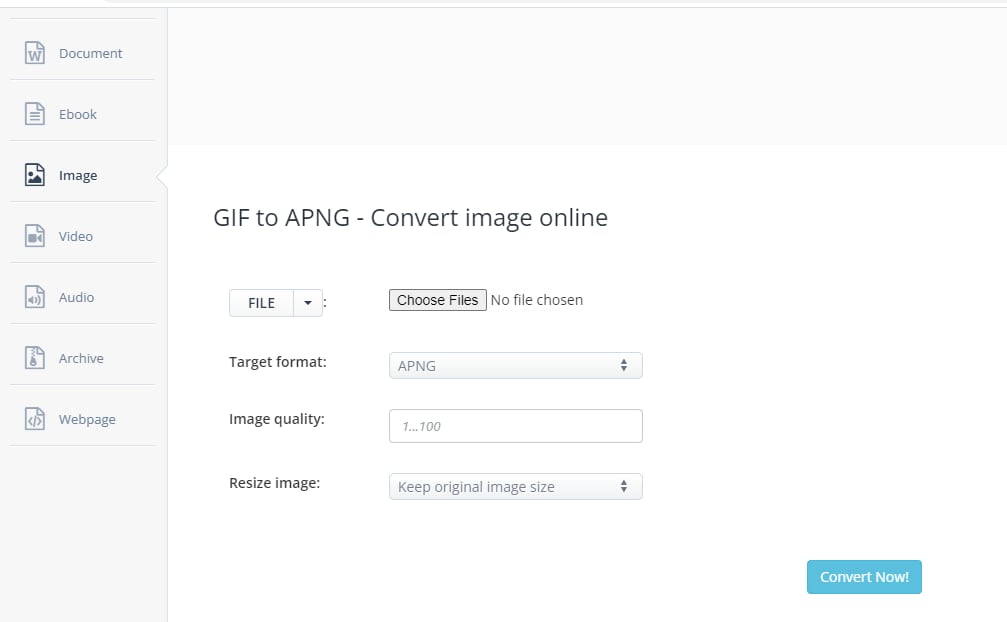
Step 1: Choose Files
Select several files on your computer using the “Choose Files” button or the dropdown menu to select an online file from a URL, Google Drive, or Dropbox. The file size of an image can be up to 200 megabytes. You can use a file analyzer to gain detailed information about a source image, including its size, resolution, quality, and transparent color.
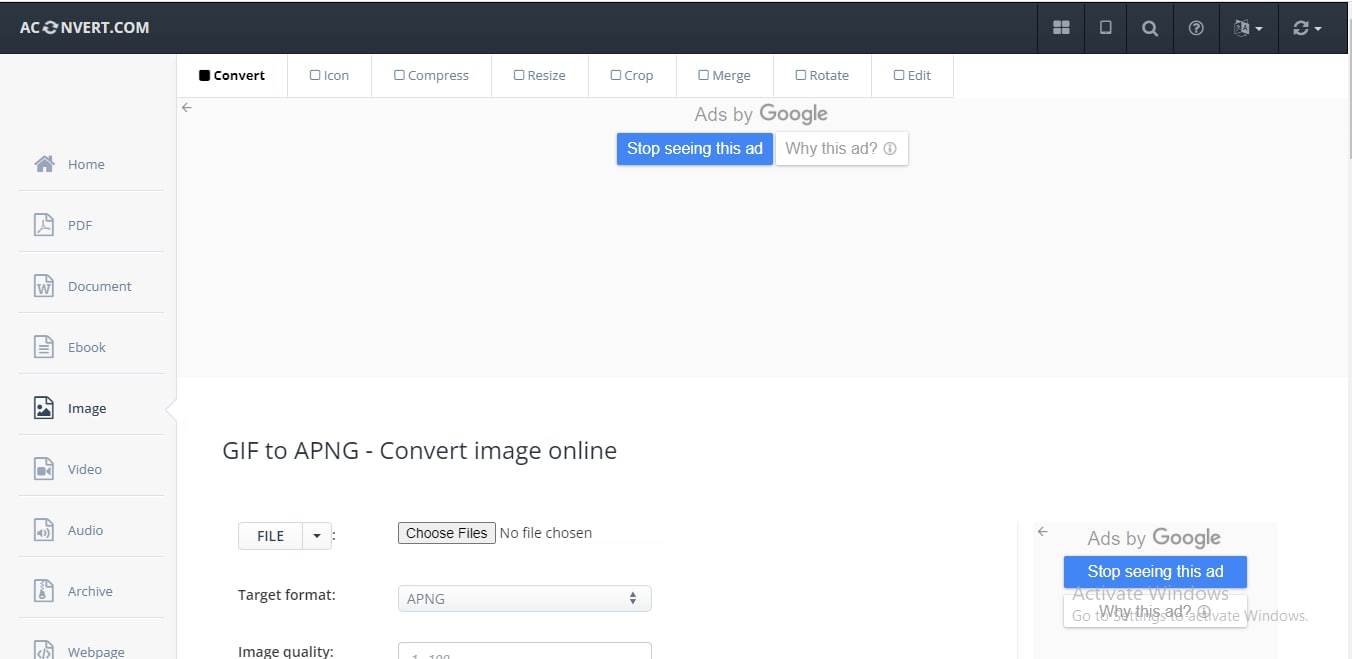
Step 2: Choose Image Format
Determine the image format, quality, and size you want to use. You choose to use the original image size or select “Change width and height” and enter a custom image size. 1920x1080 is an example of a [width]x[height] format. Only a few image formats support the picture quality choice, such as JPG, WEBP, or AVIF. The value ranges from 1 (lowest picture quality and highest compression) to 100 (highest image quality and lowest compression) (best quality but least effective compression). If this field is left blank, the converter will use the estimated quality of your input image if found; otherwise, 92 by default. JPG, PNG, TIFF, GIF, HEIC, BMP, PS, PSD, WEBP, TGA, DDS, EXR, J2K, PNM, or SVG are examples of target image formats.
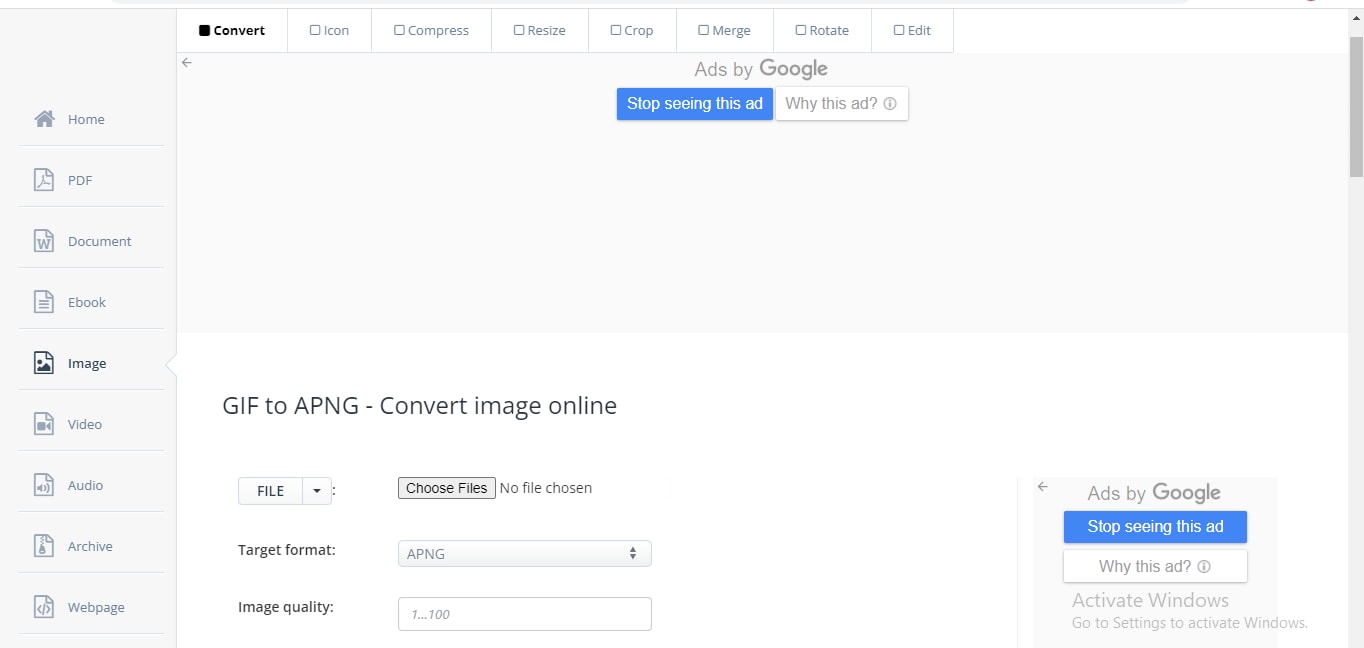
Step 3: Click on Convert Now
Click the “Convert Now” option to begin the batch conversion. If one server fails, it will automatically attempt another; please be patient while converting. The resultant files will be in the “Conversion Results” section. Click the icon to display the QR code for the file or save it to an online storage like Google Drive or Dropbox.
Part 3. FAQ
1. What Is APNG (Animated Portable Network Graphics )
The .apng (Animated Portable Network Graphics) extension is an unofficial extension to the Portable Network Graphics format (PNG ). It is a series of frames (a PNG image) that represent an animation sequence, producing a visual effect comparable to a GIF. APNG files support 24-bit pictures with 8-bit transparency. You can convert non-animated GIF files to APNG format. APNG files have the same.png extension as PNG files and can be opened by software like Mozilla Firefox, Chrome with APNG compatibility, and iOS 10’s iMessage apps.
2. How to Create APNG File?
Step 1: Select Image
Click File > Open to bring up the photo you wish to convert to PNG.

Step 2: Click Open
Click “Open” when you’ve navigated to your picture.

Step 3: Go to Save As
After you’ve opened the file, go to File > Save As.

Step 4: Save
Make sure PNG is selected from the drop-down list of formats in the following box, then click “Save.”

Step 5: Compress
The compression rate is set to “Best” by default, but the Save Options box contains a few extras to check if you want a bit more control over the compression of your file. The file size will be determined by changing the compression rate; the higher the value, the less compression will be utilized when saving your image.

3. How Do I Save Something as APNG?
Here are the steps to take when saving an image as APNG
Step 1: Open Paint
Open an image-editing program on your computer, such as Paint for Windows or Paintbrush for Mac. Simply double-click the software’s icon on your desktop, or choose it from your applications list.
Step 2: Go to saved Images
Open the image you already saved. Navigate to the window where you saved the image. Click-hold it, drag it, and drop it onto the editor to display the image.
Step 3: Resize Image
Make changes to the image. You can resize or rescale the image before saving it as a PNG file, and you can even add text using your software’s Text tool. This is, however, wholly optional.
Step 4: Choose Save as
PNG is the top format for saving images. Choose “Save as” from the “File” menu in the editor’s upper left corner.
In the File Name window, provide the name you want for the file.
Under the File Name field, click the “Save as type” drop-down option to see all of the image’s possible formats.
Click “Save” after selecting “PNG.” The file will be saved as a PNG file in the same directory as the original.
Conclusion
After getting to know the eight best GIF to APNG converters, you can utilize them efficiently when converting files. Also, we provided answers to frequently asked questions to help increase your knowledge of what an APNG is and how to save and create an APNG file.
Now explore these and convert GIF to animated PNG.
The GIF image format is a bitmap image format that supports up to 8 bits per pixel. APNG (Animated Portable Network Graphics) is a format for animated images that supports 24 bits per pixel and 8 bits of transparency, which is not available in GIFs. Backward compatibility with non-animated PNG files is also maintained.
Because the initial frame of an APNG file saves as a regular PNG stream, it can display by most conventional PNG decoders. Extra chunks can hold frame speed data and different animation frames (as provided by the original PNG specification).
Is APNG superior to GIF? APNG files are smaller and have more outstanding quality than GIF files. However, GIF is more compatible than APNG. Firefox, Safari, Google Chrome, and Opera support APNG, while practically all online browsers support GIF.
Let’s look at the top 8 best GIFs to APNG converters now.
In this article
Part 1: Best 8 GIF to APNG Converters
Part 2: How to Convert a GIF to APNG
Part 3: FAQs
Part 1. Best 8 GIF to APNG Converters
Here are the top 8 GIFs to APNG converters to look out for
1. EZgif

Ezgif.com is a free, easy-to-use toolset for making and modifying animated GIFs. Besides some basic video editing, we also offer editing and conversions for various other picture formats, like animated WebP, PNG, MNG, and FLIF. GIF maker, video to GIF converter, and photo resizer are three of our most popular online utilities.
In addition, EZgif lets you edit GIFs before converting them to APNG.
Features:
- ImageMagick - conducts most picture editing tasks such as resizing, optimization, cropping, etc.
- Making, optimizing, trimming, and resizing animated GIFs with gifsicle and lossygif.
- For video conversions and editing, use FFmpeg (the genuine one).
- This video to GIF converter online has a low conversion rate.
- This free online GIF banner maker can assist you in creating GIF banners.
- This online GIF creator has an extremely user-friendly UI.
- This web program’s impressive capabilities are completely free to use.
- This GIF converter online maintains high-quality GIF conversion.
- You can make GIFs from videos in seconds.
Pros
The program at ezgif.com is entirely secure to use.
Users do not have to install any other programs for the software to work.
The application is simple and allows users to create GIFs online without exerting any effort.
Cons
Because there is a problem in the program, the result of this online GIF maker from photographs degrades. Hence it is not advised for high professional use.
2. FreeConvert

FreeConvert is a GIF to APNG converter that can convert photos, videos, audio files, documents, eBooks, and units, among other formats. It can upload GIFs from your device, Google Drive, Dropbox, or a URL, and it can batch convert many GIFs to animated PNG files without sacrificing quality. FreeConvert is a safe program because it automatically deletes converted files after two hours.
Features:
- You can convert numerous files at once without sacrificing quality.
- It provides a variety of output file types.
- You can choose from your device (computer, smartphone, etc.) or a Dropbox or Google Drive account to select your files.
Pros
It’s as simple as uploading your GIF files and clicking convert.
Convert a GIF to APNG(animated PNG) while keeping the original GIF’s animation quality.
It is entirely free and works with any web browser.
All files are encrypted using 256-bit SSL and erased after two hours.
Cons
Limited services for free users
3. Aconvert

Aconvert is another free online GIF to APNG converter. It not only converts GIFs to APNG but also compresses, resizes, merges, crops, and rotates GIFs. GIFs can be stored on your device or online storage services after being uploaded from local, online storage services or a URL.
The uploaded image file can be up to 200 MB in size.
My favorite software is AVS Image Converter, which can convert GIF to APNG and APNG to GIF. Furthermore, its ability to support a wide range of image formats and editing capabilities such as Watermarks, Filters, Image Corrections, and others is fantastic.
Features:
- It supports large file conversion of up to 200MB
- It can also resize and rotate GIF file
- It supports a wide range of image formats
- Edits watermark
Pros
Simple user interface
File compression settings get support across platforms
Multiplatform
Free and can be used on a web browser
Cons
Limited services for free users.
4. AVS Image Converter

AVS Image Converter for Windows is a free GIF to APNG converter. You can use it to convert animated GIF files into animated PNG files. This software can convert GIFs to APNGs and APNGs to animated GIFs. Aside from APNG and GIF, this shareware accepts various additional image and project formats as input, including BMP, JPEG, TIFF, TGA, PCX, PSD, PDD, and more. Unlike input types, only JPEG, PDF, GIF, PNG (APNG), TIFF, BMP, TGA, and RAS are the output formats. You can convert several photos from one format to another using our GIF to APNG converter’s batch conversion.
Features:
- It supports a variety of formats.
- It converts in batches.
- Convert animated GIFs into animated PNG files
Pros
Processes large groups of images
It’s possible to utilize it from the command line.
Presets for various dimensions
Multiple input formats are supported.
Allows you to convert photos to PDF.
Multiple effects are applied.
Cons
There are no individual presets.
Displays advertisements
5. Real World Paint
RealWorld Paint - portable image editor (rw-designer.com)

Another free GIF to APNG converter for Windows is RealWorld Paint. It can also convert an APNG file back to a GIF. Additionally, format conversions between PNG, JPEG, GIF, WEBP, animated WEBP, and other formats are possible. The prime benefit of this software is that it can work with projects created by various famous photo editors, including Photoshop, Paint.Net, GIMP, and others.
You can also add, edit, and improve frames in GIF files and simple conversion. When you open a GIF file in it, an editor area appears, right below which you can see all of the GIF file’s frames.
Features:
- Supports a wide range of file types
- Easy to use interface
- Doesn’t consume a lot of hardware resources
- Can convert in a few minutes
Pros
Transformation of a particular area
Multi-platform
Folder selection is simple.
Set the conversion quality quickly.
Cons
For novices, it’s a bit difficult.
Only the premium version is available.
6. Convertio

Convertio is a competitor to Browserling in terms of simplicity. Convertio, on the other hand, outnumbers the former in terms of picture formats supported. Convertio can also convert GIFs to TGA, PSD, JPG, TIFF, ICO, etc. Unfortunately, it lacks image editing capabilities.
Features:
- The file size is unrestricted.
- There is no restriction to how many conversions you can do at once.
- Priority number one.
- Every day, you have an unlimited number of conversion minutes.
- The maximum conversion time per file is unlimited.
- Pages with no advertisements.
Pros
Allows you to convert files by dragging and dropping them.
The ETA is less than 2 minutes, and the conversion is quick.
There are 3 membership options.
Cons
After 24 hours/manually, files saved on the server/cloud gets removed.
7. Onlineconvertfree

Onlineconvertfree is a lovely PNG converter that works with all standard image formats. You can create a PNG file from various formats, including GIF, JPG, HTML, TIFF, RAW, and more. Users may crop, clip, rotate, flip, and perform many other editing actions on their files.
Features:
- It has offline access for quick connectivity and document access.
- Even when an internet connection is unavailable, this helps speed up the entire document management process.
- The software comes with a free version that includes all of the basic capabilities
- Individuals and small enterprises will find it very affordable due to this.
- It supports a Variety of Formats
Pros
Converted files are simple to upload and download.
You can convert almost any file to your preferred format.
There is no need to give personal information such as an email address.
It offers three subscription tiers, all of which are ad-free.
Cons
This is a free service with a limit of two files per conversion.
8. Zamzar

Zamzar is the easiest online GIF to APNG converter on this list. It has numbered steps that make it extremely simple to use. You may convert GIF to PNG, TIFF, TGA, JPG, BMP, and other image formats on Zamzar.
Features:
- Uploading files by dragging and dropping them and speedier file conversions.
- All Zamzar subscribers get high-speed downloads.
- Email files to be converted.
- You can stream the converted videos and audio to your iPhone, iPad, and iPod.
Pros
Allows you to convert files from URLs. Batch conversion is supported.
Presets a three-step method that is quite easy to follow.
Over 1200 file formats are supported.
Multiplatform
File compression settings are now supported.
Developers will appreciate the API.
Cons
File size restricted to 50 MB on free accounts for uploads.
Like other online tools, it lacks OCR.
Part 2. How to Convert a GIF to APNG
Follow the 3 simple steps to convert GIF to animated PNG
Step 1: Choose Files
Select several files on your computer using the “Choose Files” button or the dropdown menu to select an online file from a URL, Google Drive, or Dropbox. The file size of an image can be up to 200 megabytes. You can use a file analyzer to gain detailed information about a source image, including its size, resolution, quality, and transparent color.

Step 2: Choose Image Format
Determine the image format, quality, and size you want to use. You choose to use the original image size or select “Change width and height” and enter a custom image size. 1920x1080 is an example of a [width]x[height] format. Only a few image formats support the picture quality choice, such as JPG, WEBP, or AVIF. The value ranges from 1 (lowest picture quality and highest compression) to 100 (highest image quality and lowest compression) (best quality but least effective compression). If this field is left blank, the converter will use the estimated quality of your input image if found; otherwise, 92 by default. JPG, PNG, TIFF, GIF, HEIC, BMP, PS, PSD, WEBP, TGA, DDS, EXR, J2K, PNM, or SVG are examples of target image formats.

Step 3: Click on Convert Now
Click the “Convert Now” option to begin the batch conversion. If one server fails, it will automatically attempt another; please be patient while converting. The resultant files will be in the “Conversion Results” section. Click the icon to display the QR code for the file or save it to an online storage like Google Drive or Dropbox.

Part 3. FAQ
1. What Is APNG (Animated Portable Network Graphics )
The .apng (Animated Portable Network Graphics) extension is an unofficial extension to the Portable Network Graphics format (PNG ). It is a series of frames (a PNG image) that represent an animation sequence, producing a visual effect comparable to a GIF. APNG files support 24-bit pictures with 8-bit transparency. You can convert non-animated GIF files to APNG format. APNG files have the same.png extension as PNG files and can be opened by software like Mozilla Firefox, Chrome with APNG compatibility, and iOS 10’s iMessage apps.
2. How to Create APNG File?
Step 1: Select Image
Click File > Open to bring up the photo you wish to convert to PNG.

Step 2: Click Open
Click “Open” when you’ve navigated to your picture.

Step 3: Go to Save As
After you’ve opened the file, go to File > Save As.

Step 4: Save
Make sure PNG is selected from the drop-down list of formats in the following box, then click “Save.”

Step 5: Compress
The compression rate is set to “Best” by default, but the Save Options box contains a few extras to check if you want a bit more control over the compression of your file. The file size will be determined by changing the compression rate; the higher the value, the less compression will be utilized when saving your image.

3. How Do I Save Something as APNG?
Here are the steps to take when saving an image as APNG
Step 1: Open Paint
Open an image-editing program on your computer, such as Paint for Windows or Paintbrush for Mac. Simply double-click the software’s icon on your desktop, or choose it from your applications list.
Step 2: Go to saved Images
Open the image you already saved. Navigate to the window where you saved the image. Click-hold it, drag it, and drop it onto the editor to display the image.
Step 3: Resize Image
Make changes to the image. You can resize or rescale the image before saving it as a PNG file, and you can even add text using your software’s Text tool. This is, however, wholly optional.
Step 4: Choose Save as
PNG is the top format for saving images. Choose “Save as” from the “File” menu in the editor’s upper left corner.
In the File Name window, provide the name you want for the file.
Under the File Name field, click the “Save as type” drop-down option to see all of the image’s possible formats.
Click “Save” after selecting “PNG.” The file will be saved as a PNG file in the same directory as the original.
Conclusion
After getting to know the eight best GIF to APNG converters, you can utilize them efficiently when converting files. Also, we provided answers to frequently asked questions to help increase your knowledge of what an APNG is and how to save and create an APNG file.
Now explore these and convert GIF to animated PNG.
The GIF image format is a bitmap image format that supports up to 8 bits per pixel. APNG (Animated Portable Network Graphics) is a format for animated images that supports 24 bits per pixel and 8 bits of transparency, which is not available in GIFs. Backward compatibility with non-animated PNG files is also maintained.
Because the initial frame of an APNG file saves as a regular PNG stream, it can display by most conventional PNG decoders. Extra chunks can hold frame speed data and different animation frames (as provided by the original PNG specification).
Is APNG superior to GIF? APNG files are smaller and have more outstanding quality than GIF files. However, GIF is more compatible than APNG. Firefox, Safari, Google Chrome, and Opera support APNG, while practically all online browsers support GIF.
Let’s look at the top 8 best GIFs to APNG converters now.
In this article
Part 1: Best 8 GIF to APNG Converters
Part 2: How to Convert a GIF to APNG
Part 3: FAQs
Part 1. Best 8 GIF to APNG Converters
Here are the top 8 GIFs to APNG converters to look out for
1. EZgif

Ezgif.com is a free, easy-to-use toolset for making and modifying animated GIFs. Besides some basic video editing, we also offer editing and conversions for various other picture formats, like animated WebP, PNG, MNG, and FLIF. GIF maker, video to GIF converter, and photo resizer are three of our most popular online utilities.
In addition, EZgif lets you edit GIFs before converting them to APNG.
Features:
- ImageMagick - conducts most picture editing tasks such as resizing, optimization, cropping, etc.
- Making, optimizing, trimming, and resizing animated GIFs with gifsicle and lossygif.
- For video conversions and editing, use FFmpeg (the genuine one).
- This video to GIF converter online has a low conversion rate.
- This free online GIF banner maker can assist you in creating GIF banners.
- This online GIF creator has an extremely user-friendly UI.
- This web program’s impressive capabilities are completely free to use.
- This GIF converter online maintains high-quality GIF conversion.
- You can make GIFs from videos in seconds.
Pros
The program at ezgif.com is entirely secure to use.
Users do not have to install any other programs for the software to work.
The application is simple and allows users to create GIFs online without exerting any effort.
Cons
Because there is a problem in the program, the result of this online GIF maker from photographs degrades. Hence it is not advised for high professional use.
2. FreeConvert

FreeConvert is a GIF to APNG converter that can convert photos, videos, audio files, documents, eBooks, and units, among other formats. It can upload GIFs from your device, Google Drive, Dropbox, or a URL, and it can batch convert many GIFs to animated PNG files without sacrificing quality. FreeConvert is a safe program because it automatically deletes converted files after two hours.
Features:
- You can convert numerous files at once without sacrificing quality.
- It provides a variety of output file types.
- You can choose from your device (computer, smartphone, etc.) or a Dropbox or Google Drive account to select your files.
Pros
It’s as simple as uploading your GIF files and clicking convert.
Convert a GIF to APNG(animated PNG) while keeping the original GIF’s animation quality.
It is entirely free and works with any web browser.
All files are encrypted using 256-bit SSL and erased after two hours.
Cons
Limited services for free users
3. Aconvert

Aconvert is another free online GIF to APNG converter. It not only converts GIFs to APNG but also compresses, resizes, merges, crops, and rotates GIFs. GIFs can be stored on your device or online storage services after being uploaded from local, online storage services or a URL.
The uploaded image file can be up to 200 MB in size.
My favorite software is AVS Image Converter, which can convert GIF to APNG and APNG to GIF. Furthermore, its ability to support a wide range of image formats and editing capabilities such as Watermarks, Filters, Image Corrections, and others is fantastic.
Features:
- It supports large file conversion of up to 200MB
- It can also resize and rotate GIF file
- It supports a wide range of image formats
- Edits watermark
Pros
Simple user interface
File compression settings get support across platforms
Multiplatform
Free and can be used on a web browser
Cons
Limited services for free users.
4. AVS Image Converter

AVS Image Converter for Windows is a free GIF to APNG converter. You can use it to convert animated GIF files into animated PNG files. This software can convert GIFs to APNGs and APNGs to animated GIFs. Aside from APNG and GIF, this shareware accepts various additional image and project formats as input, including BMP, JPEG, TIFF, TGA, PCX, PSD, PDD, and more. Unlike input types, only JPEG, PDF, GIF, PNG (APNG), TIFF, BMP, TGA, and RAS are the output formats. You can convert several photos from one format to another using our GIF to APNG converter’s batch conversion.
Features:
- It supports a variety of formats.
- It converts in batches.
- Convert animated GIFs into animated PNG files
Pros
Processes large groups of images
It’s possible to utilize it from the command line.
Presets for various dimensions
Multiple input formats are supported.
Allows you to convert photos to PDF.
Multiple effects are applied.
Cons
There are no individual presets.
Displays advertisements
5. Real World Paint
RealWorld Paint - portable image editor (rw-designer.com)

Another free GIF to APNG converter for Windows is RealWorld Paint. It can also convert an APNG file back to a GIF. Additionally, format conversions between PNG, JPEG, GIF, WEBP, animated WEBP, and other formats are possible. The prime benefit of this software is that it can work with projects created by various famous photo editors, including Photoshop, Paint.Net, GIMP, and others.
You can also add, edit, and improve frames in GIF files and simple conversion. When you open a GIF file in it, an editor area appears, right below which you can see all of the GIF file’s frames.
Features:
- Supports a wide range of file types
- Easy to use interface
- Doesn’t consume a lot of hardware resources
- Can convert in a few minutes
Pros
Transformation of a particular area
Multi-platform
Folder selection is simple.
Set the conversion quality quickly.
Cons
For novices, it’s a bit difficult.
Only the premium version is available.
6. Convertio

Convertio is a competitor to Browserling in terms of simplicity. Convertio, on the other hand, outnumbers the former in terms of picture formats supported. Convertio can also convert GIFs to TGA, PSD, JPG, TIFF, ICO, etc. Unfortunately, it lacks image editing capabilities.
Features:
- The file size is unrestricted.
- There is no restriction to how many conversions you can do at once.
- Priority number one.
- Every day, you have an unlimited number of conversion minutes.
- The maximum conversion time per file is unlimited.
- Pages with no advertisements.
Pros
Allows you to convert files by dragging and dropping them.
The ETA is less than 2 minutes, and the conversion is quick.
There are 3 membership options.
Cons
After 24 hours/manually, files saved on the server/cloud gets removed.
7. Onlineconvertfree

Onlineconvertfree is a lovely PNG converter that works with all standard image formats. You can create a PNG file from various formats, including GIF, JPG, HTML, TIFF, RAW, and more. Users may crop, clip, rotate, flip, and perform many other editing actions on their files.
Features:
- It has offline access for quick connectivity and document access.
- Even when an internet connection is unavailable, this helps speed up the entire document management process.
- The software comes with a free version that includes all of the basic capabilities
- Individuals and small enterprises will find it very affordable due to this.
- It supports a Variety of Formats
Pros
Converted files are simple to upload and download.
You can convert almost any file to your preferred format.
There is no need to give personal information such as an email address.
It offers three subscription tiers, all of which are ad-free.
Cons
This is a free service with a limit of two files per conversion.
8. Zamzar

Zamzar is the easiest online GIF to APNG converter on this list. It has numbered steps that make it extremely simple to use. You may convert GIF to PNG, TIFF, TGA, JPG, BMP, and other image formats on Zamzar.
Features:
- Uploading files by dragging and dropping them and speedier file conversions.
- All Zamzar subscribers get high-speed downloads.
- Email files to be converted.
- You can stream the converted videos and audio to your iPhone, iPad, and iPod.
Pros
Allows you to convert files from URLs. Batch conversion is supported.
Presets a three-step method that is quite easy to follow.
Over 1200 file formats are supported.
Multiplatform
File compression settings are now supported.
Developers will appreciate the API.
Cons
File size restricted to 50 MB on free accounts for uploads.
Like other online tools, it lacks OCR.
Part 2. How to Convert a GIF to APNG
Follow the 3 simple steps to convert GIF to animated PNG
Step 1: Choose Files
Select several files on your computer using the “Choose Files” button or the dropdown menu to select an online file from a URL, Google Drive, or Dropbox. The file size of an image can be up to 200 megabytes. You can use a file analyzer to gain detailed information about a source image, including its size, resolution, quality, and transparent color.

Step 2: Choose Image Format
Determine the image format, quality, and size you want to use. You choose to use the original image size or select “Change width and height” and enter a custom image size. 1920x1080 is an example of a [width]x[height] format. Only a few image formats support the picture quality choice, such as JPG, WEBP, or AVIF. The value ranges from 1 (lowest picture quality and highest compression) to 100 (highest image quality and lowest compression) (best quality but least effective compression). If this field is left blank, the converter will use the estimated quality of your input image if found; otherwise, 92 by default. JPG, PNG, TIFF, GIF, HEIC, BMP, PS, PSD, WEBP, TGA, DDS, EXR, J2K, PNM, or SVG are examples of target image formats.

Step 3: Click on Convert Now
Click the “Convert Now” option to begin the batch conversion. If one server fails, it will automatically attempt another; please be patient while converting. The resultant files will be in the “Conversion Results” section. Click the icon to display the QR code for the file or save it to an online storage like Google Drive or Dropbox.

Part 3. FAQ
1. What Is APNG (Animated Portable Network Graphics )
The .apng (Animated Portable Network Graphics) extension is an unofficial extension to the Portable Network Graphics format (PNG ). It is a series of frames (a PNG image) that represent an animation sequence, producing a visual effect comparable to a GIF. APNG files support 24-bit pictures with 8-bit transparency. You can convert non-animated GIF files to APNG format. APNG files have the same.png extension as PNG files and can be opened by software like Mozilla Firefox, Chrome with APNG compatibility, and iOS 10’s iMessage apps.
2. How to Create APNG File?
Step 1: Select Image
Click File > Open to bring up the photo you wish to convert to PNG.

Step 2: Click Open
Click “Open” when you’ve navigated to your picture.

Step 3: Go to Save As
After you’ve opened the file, go to File > Save As.

Step 4: Save
Make sure PNG is selected from the drop-down list of formats in the following box, then click “Save.”

Step 5: Compress
The compression rate is set to “Best” by default, but the Save Options box contains a few extras to check if you want a bit more control over the compression of your file. The file size will be determined by changing the compression rate; the higher the value, the less compression will be utilized when saving your image.

3. How Do I Save Something as APNG?
Here are the steps to take when saving an image as APNG
Step 1: Open Paint
Open an image-editing program on your computer, such as Paint for Windows or Paintbrush for Mac. Simply double-click the software’s icon on your desktop, or choose it from your applications list.
Step 2: Go to saved Images
Open the image you already saved. Navigate to the window where you saved the image. Click-hold it, drag it, and drop it onto the editor to display the image.
Step 3: Resize Image
Make changes to the image. You can resize or rescale the image before saving it as a PNG file, and you can even add text using your software’s Text tool. This is, however, wholly optional.
Step 4: Choose Save as
PNG is the top format for saving images. Choose “Save as” from the “File” menu in the editor’s upper left corner.
In the File Name window, provide the name you want for the file.
Under the File Name field, click the “Save as type” drop-down option to see all of the image’s possible formats.
Click “Save” after selecting “PNG.” The file will be saved as a PNG file in the same directory as the original.
Conclusion
After getting to know the eight best GIF to APNG converters, you can utilize them efficiently when converting files. Also, we provided answers to frequently asked questions to help increase your knowledge of what an APNG is and how to save and create an APNG file.
Now explore these and convert GIF to animated PNG.
The GIF image format is a bitmap image format that supports up to 8 bits per pixel. APNG (Animated Portable Network Graphics) is a format for animated images that supports 24 bits per pixel and 8 bits of transparency, which is not available in GIFs. Backward compatibility with non-animated PNG files is also maintained.
Because the initial frame of an APNG file saves as a regular PNG stream, it can display by most conventional PNG decoders. Extra chunks can hold frame speed data and different animation frames (as provided by the original PNG specification).
Is APNG superior to GIF? APNG files are smaller and have more outstanding quality than GIF files. However, GIF is more compatible than APNG. Firefox, Safari, Google Chrome, and Opera support APNG, while practically all online browsers support GIF.
Let’s look at the top 8 best GIFs to APNG converters now.
In this article
Part 1: Best 8 GIF to APNG Converters
Part 2: How to Convert a GIF to APNG
Part 3: FAQs
Part 1. Best 8 GIF to APNG Converters
Here are the top 8 GIFs to APNG converters to look out for
1. EZgif

Ezgif.com is a free, easy-to-use toolset for making and modifying animated GIFs. Besides some basic video editing, we also offer editing and conversions for various other picture formats, like animated WebP, PNG, MNG, and FLIF. GIF maker, video to GIF converter, and photo resizer are three of our most popular online utilities.
In addition, EZgif lets you edit GIFs before converting them to APNG.
Features:
- ImageMagick - conducts most picture editing tasks such as resizing, optimization, cropping, etc.
- Making, optimizing, trimming, and resizing animated GIFs with gifsicle and lossygif.
- For video conversions and editing, use FFmpeg (the genuine one).
- This video to GIF converter online has a low conversion rate.
- This free online GIF banner maker can assist you in creating GIF banners.
- This online GIF creator has an extremely user-friendly UI.
- This web program’s impressive capabilities are completely free to use.
- This GIF converter online maintains high-quality GIF conversion.
- You can make GIFs from videos in seconds.
Pros
The program at ezgif.com is entirely secure to use.
Users do not have to install any other programs for the software to work.
The application is simple and allows users to create GIFs online without exerting any effort.
Cons
Because there is a problem in the program, the result of this online GIF maker from photographs degrades. Hence it is not advised for high professional use.
2. FreeConvert

FreeConvert is a GIF to APNG converter that can convert photos, videos, audio files, documents, eBooks, and units, among other formats. It can upload GIFs from your device, Google Drive, Dropbox, or a URL, and it can batch convert many GIFs to animated PNG files without sacrificing quality. FreeConvert is a safe program because it automatically deletes converted files after two hours.
Features:
- You can convert numerous files at once without sacrificing quality.
- It provides a variety of output file types.
- You can choose from your device (computer, smartphone, etc.) or a Dropbox or Google Drive account to select your files.
Pros
It’s as simple as uploading your GIF files and clicking convert.
Convert a GIF to APNG(animated PNG) while keeping the original GIF’s animation quality.
It is entirely free and works with any web browser.
All files are encrypted using 256-bit SSL and erased after two hours.
Cons
Limited services for free users
3. Aconvert

Aconvert is another free online GIF to APNG converter. It not only converts GIFs to APNG but also compresses, resizes, merges, crops, and rotates GIFs. GIFs can be stored on your device or online storage services after being uploaded from local, online storage services or a URL.
The uploaded image file can be up to 200 MB in size.
My favorite software is AVS Image Converter, which can convert GIF to APNG and APNG to GIF. Furthermore, its ability to support a wide range of image formats and editing capabilities such as Watermarks, Filters, Image Corrections, and others is fantastic.
Features:
- It supports large file conversion of up to 200MB
- It can also resize and rotate GIF file
- It supports a wide range of image formats
- Edits watermark
Pros
Simple user interface
File compression settings get support across platforms
Multiplatform
Free and can be used on a web browser
Cons
Limited services for free users.
4. AVS Image Converter

AVS Image Converter for Windows is a free GIF to APNG converter. You can use it to convert animated GIF files into animated PNG files. This software can convert GIFs to APNGs and APNGs to animated GIFs. Aside from APNG and GIF, this shareware accepts various additional image and project formats as input, including BMP, JPEG, TIFF, TGA, PCX, PSD, PDD, and more. Unlike input types, only JPEG, PDF, GIF, PNG (APNG), TIFF, BMP, TGA, and RAS are the output formats. You can convert several photos from one format to another using our GIF to APNG converter’s batch conversion.
Features:
- It supports a variety of formats.
- It converts in batches.
- Convert animated GIFs into animated PNG files
Pros
Processes large groups of images
It’s possible to utilize it from the command line.
Presets for various dimensions
Multiple input formats are supported.
Allows you to convert photos to PDF.
Multiple effects are applied.
Cons
There are no individual presets.
Displays advertisements
5. Real World Paint
RealWorld Paint - portable image editor (rw-designer.com)

Another free GIF to APNG converter for Windows is RealWorld Paint. It can also convert an APNG file back to a GIF. Additionally, format conversions between PNG, JPEG, GIF, WEBP, animated WEBP, and other formats are possible. The prime benefit of this software is that it can work with projects created by various famous photo editors, including Photoshop, Paint.Net, GIMP, and others.
You can also add, edit, and improve frames in GIF files and simple conversion. When you open a GIF file in it, an editor area appears, right below which you can see all of the GIF file’s frames.
Features:
- Supports a wide range of file types
- Easy to use interface
- Doesn’t consume a lot of hardware resources
- Can convert in a few minutes
Pros
Transformation of a particular area
Multi-platform
Folder selection is simple.
Set the conversion quality quickly.
Cons
For novices, it’s a bit difficult.
Only the premium version is available.
6. Convertio

Convertio is a competitor to Browserling in terms of simplicity. Convertio, on the other hand, outnumbers the former in terms of picture formats supported. Convertio can also convert GIFs to TGA, PSD, JPG, TIFF, ICO, etc. Unfortunately, it lacks image editing capabilities.
Features:
- The file size is unrestricted.
- There is no restriction to how many conversions you can do at once.
- Priority number one.
- Every day, you have an unlimited number of conversion minutes.
- The maximum conversion time per file is unlimited.
- Pages with no advertisements.
Pros
Allows you to convert files by dragging and dropping them.
The ETA is less than 2 minutes, and the conversion is quick.
There are 3 membership options.
Cons
After 24 hours/manually, files saved on the server/cloud gets removed.
7. Onlineconvertfree

Onlineconvertfree is a lovely PNG converter that works with all standard image formats. You can create a PNG file from various formats, including GIF, JPG, HTML, TIFF, RAW, and more. Users may crop, clip, rotate, flip, and perform many other editing actions on their files.
Features:
- It has offline access for quick connectivity and document access.
- Even when an internet connection is unavailable, this helps speed up the entire document management process.
- The software comes with a free version that includes all of the basic capabilities
- Individuals and small enterprises will find it very affordable due to this.
- It supports a Variety of Formats
Pros
Converted files are simple to upload and download.
You can convert almost any file to your preferred format.
There is no need to give personal information such as an email address.
It offers three subscription tiers, all of which are ad-free.
Cons
This is a free service with a limit of two files per conversion.
8. Zamzar

Zamzar is the easiest online GIF to APNG converter on this list. It has numbered steps that make it extremely simple to use. You may convert GIF to PNG, TIFF, TGA, JPG, BMP, and other image formats on Zamzar.
Features:
- Uploading files by dragging and dropping them and speedier file conversions.
- All Zamzar subscribers get high-speed downloads.
- Email files to be converted.
- You can stream the converted videos and audio to your iPhone, iPad, and iPod.
Pros
Allows you to convert files from URLs. Batch conversion is supported.
Presets a three-step method that is quite easy to follow.
Over 1200 file formats are supported.
Multiplatform
File compression settings are now supported.
Developers will appreciate the API.
Cons
File size restricted to 50 MB on free accounts for uploads.
Like other online tools, it lacks OCR.
Part 2. How to Convert a GIF to APNG
Follow the 3 simple steps to convert GIF to animated PNG
Step 1: Choose Files
Select several files on your computer using the “Choose Files” button or the dropdown menu to select an online file from a URL, Google Drive, or Dropbox. The file size of an image can be up to 200 megabytes. You can use a file analyzer to gain detailed information about a source image, including its size, resolution, quality, and transparent color.

Step 2: Choose Image Format
Determine the image format, quality, and size you want to use. You choose to use the original image size or select “Change width and height” and enter a custom image size. 1920x1080 is an example of a [width]x[height] format. Only a few image formats support the picture quality choice, such as JPG, WEBP, or AVIF. The value ranges from 1 (lowest picture quality and highest compression) to 100 (highest image quality and lowest compression) (best quality but least effective compression). If this field is left blank, the converter will use the estimated quality of your input image if found; otherwise, 92 by default. JPG, PNG, TIFF, GIF, HEIC, BMP, PS, PSD, WEBP, TGA, DDS, EXR, J2K, PNM, or SVG are examples of target image formats.

Step 3: Click on Convert Now
Click the “Convert Now” option to begin the batch conversion. If one server fails, it will automatically attempt another; please be patient while converting. The resultant files will be in the “Conversion Results” section. Click the icon to display the QR code for the file or save it to an online storage like Google Drive or Dropbox.

Part 3. FAQ
1. What Is APNG (Animated Portable Network Graphics )
The .apng (Animated Portable Network Graphics) extension is an unofficial extension to the Portable Network Graphics format (PNG ). It is a series of frames (a PNG image) that represent an animation sequence, producing a visual effect comparable to a GIF. APNG files support 24-bit pictures with 8-bit transparency. You can convert non-animated GIF files to APNG format. APNG files have the same.png extension as PNG files and can be opened by software like Mozilla Firefox, Chrome with APNG compatibility, and iOS 10’s iMessage apps.
2. How to Create APNG File?
Step 1: Select Image
Click File > Open to bring up the photo you wish to convert to PNG.

Step 2: Click Open
Click “Open” when you’ve navigated to your picture.

Step 3: Go to Save As
After you’ve opened the file, go to File > Save As.

Step 4: Save
Make sure PNG is selected from the drop-down list of formats in the following box, then click “Save.”

Step 5: Compress
The compression rate is set to “Best” by default, but the Save Options box contains a few extras to check if you want a bit more control over the compression of your file. The file size will be determined by changing the compression rate; the higher the value, the less compression will be utilized when saving your image.

3. How Do I Save Something as APNG?
Here are the steps to take when saving an image as APNG
Step 1: Open Paint
Open an image-editing program on your computer, such as Paint for Windows or Paintbrush for Mac. Simply double-click the software’s icon on your desktop, or choose it from your applications list.
Step 2: Go to saved Images
Open the image you already saved. Navigate to the window where you saved the image. Click-hold it, drag it, and drop it onto the editor to display the image.
Step 3: Resize Image
Make changes to the image. You can resize or rescale the image before saving it as a PNG file, and you can even add text using your software’s Text tool. This is, however, wholly optional.
Step 4: Choose Save as
PNG is the top format for saving images. Choose “Save as” from the “File” menu in the editor’s upper left corner.
In the File Name window, provide the name you want for the file.
Under the File Name field, click the “Save as type” drop-down option to see all of the image’s possible formats.
Click “Save” after selecting “PNG.” The file will be saved as a PNG file in the same directory as the original.
Conclusion
After getting to know the eight best GIF to APNG converters, you can utilize them efficiently when converting files. Also, we provided answers to frequently asked questions to help increase your knowledge of what an APNG is and how to save and create an APNG file.
Now explore these and convert GIF to animated PNG.
5 Methods to Make a Fake Facetime Call Video
Creating fake video call clips for entertainment has been a new norm on social media platforms. If you are looking for a software to create a fake Facetime call video, then let’s get started:
5 ways to make a fake facetime call video
1. Filmora
Compatibility: Windows/Mac
Wondershare Filmora is the greatest video editor on the market, without a doubt, and it deserves to be at the top of our list.
You’ll discover some professional tools to help you improve video quality and over 300 creative filters and effects to give your movie a new, fresh look without putting in a lot of effort with the Filmora video editor. This tool is one of the most dependable, aside from the features that allow you to modify video rotation easily.
Steps
Step 1: Import the photo or video files
Import all your media files, including video, photos, and music. You have two options for importing your videos: drag and drop directly into our software or click import to select the media files you wish to upload.
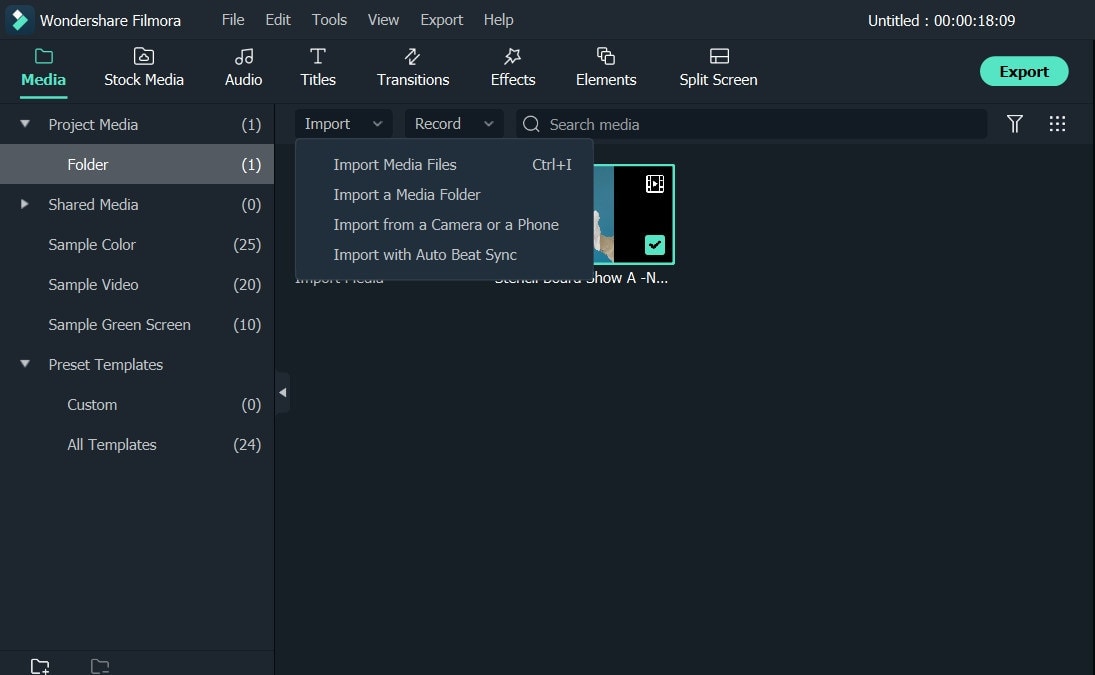
Step 2: Edit the video
Wondershare Filmora’s video templates can be added. You can apply music, text, filters and overlays, and motion effects by right-clicking on them and selecting apply. After adding video resources such as text and elements, you may customize the texts by changing the size, placement, etc.
Also, you can add overlay video clips using templates of a video call to make it look like a real call.
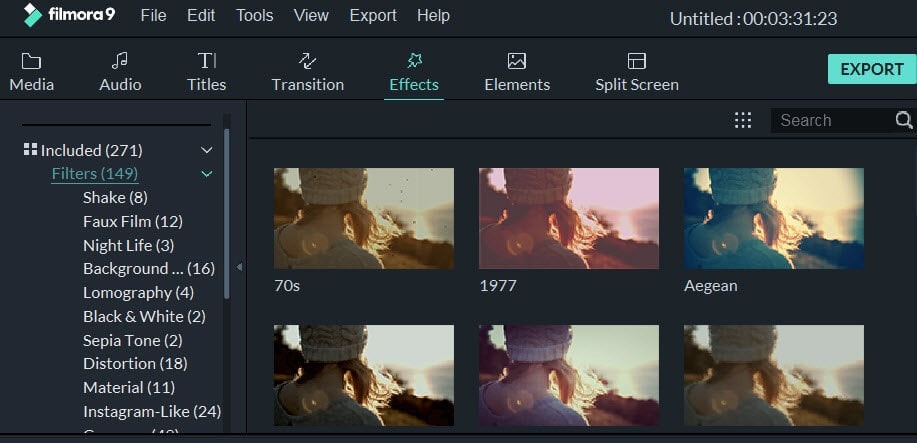
Step 3: Export and Save
Quickly export your project to a new video. After you’ve applied the video resources to your videos and clicked Export, you’ll have a whole new video that you can share at birthday parties, weddings, or for marketing purposes, just like any other video you’ve created.
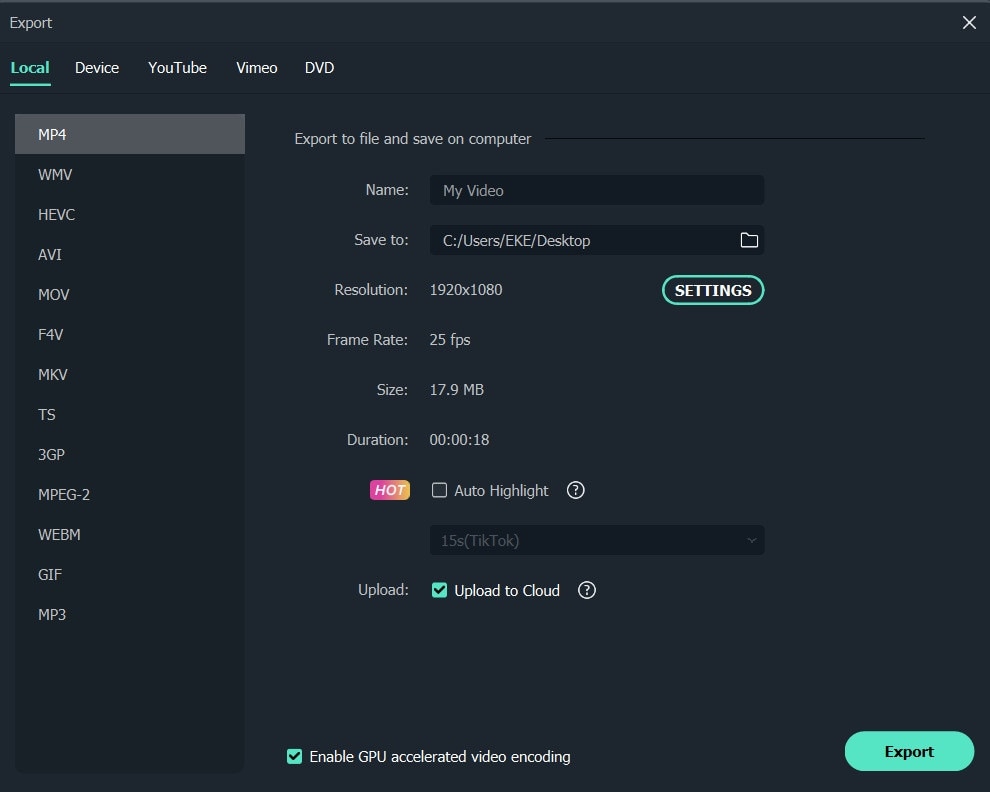
2. Kapwing
Compatibility: Online
Kapwing is a powerful online video editor with a non-linear editing methodology. Upload photos, audio, and video files, then edit them all in one spot.
Creators may view and alter their content from any device or location because Kapwing is entirely online. Work is automatically saved in the cloud, eliminating the need to transfer data locally. When you’re ready to export, sit back and relax because everything is handled in the cloud.
This template allows you to blend two videos into one like an iPhone Facetime call. First, put two videos in a photo and arrange them in a picture arrangement. Then, as a video overlay in the upper corner, layer one on top of the other.
Steps
Step 1: Open Kapwing Fake Video Call Template
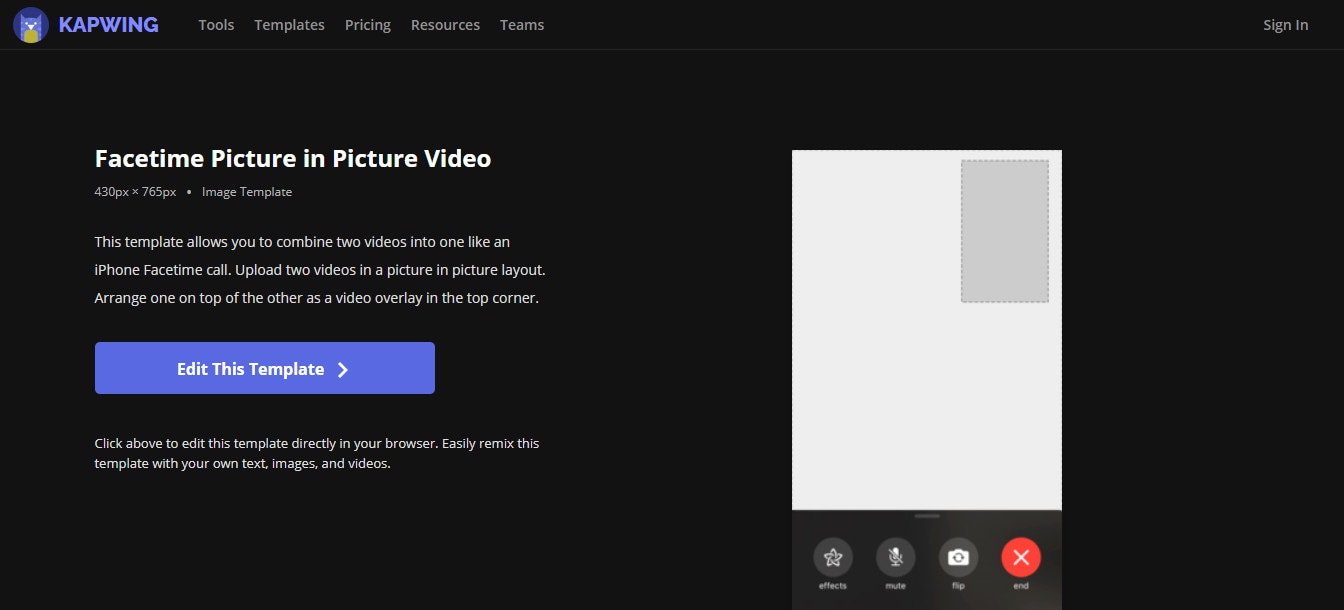
Step 2: Import video files
Click on ‘Add Media’ to add video clips.

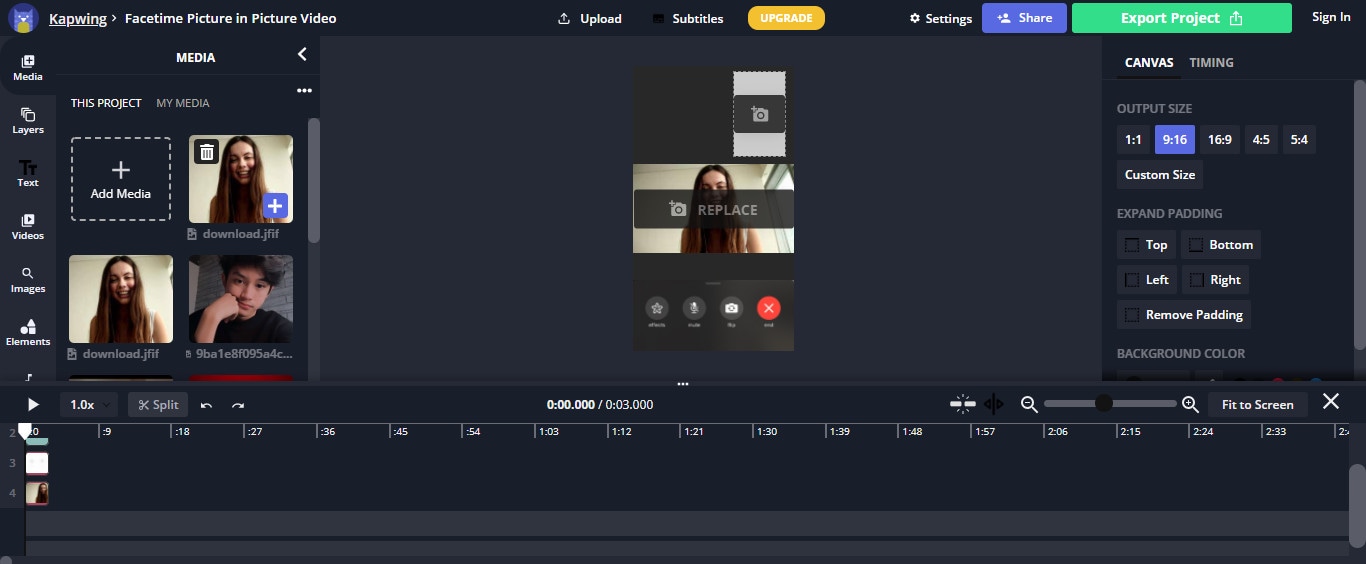
Step 3: Save and Export Video
Once you are done editing the template with the images you want, click on ‘Export Project’ to Export and save the video.
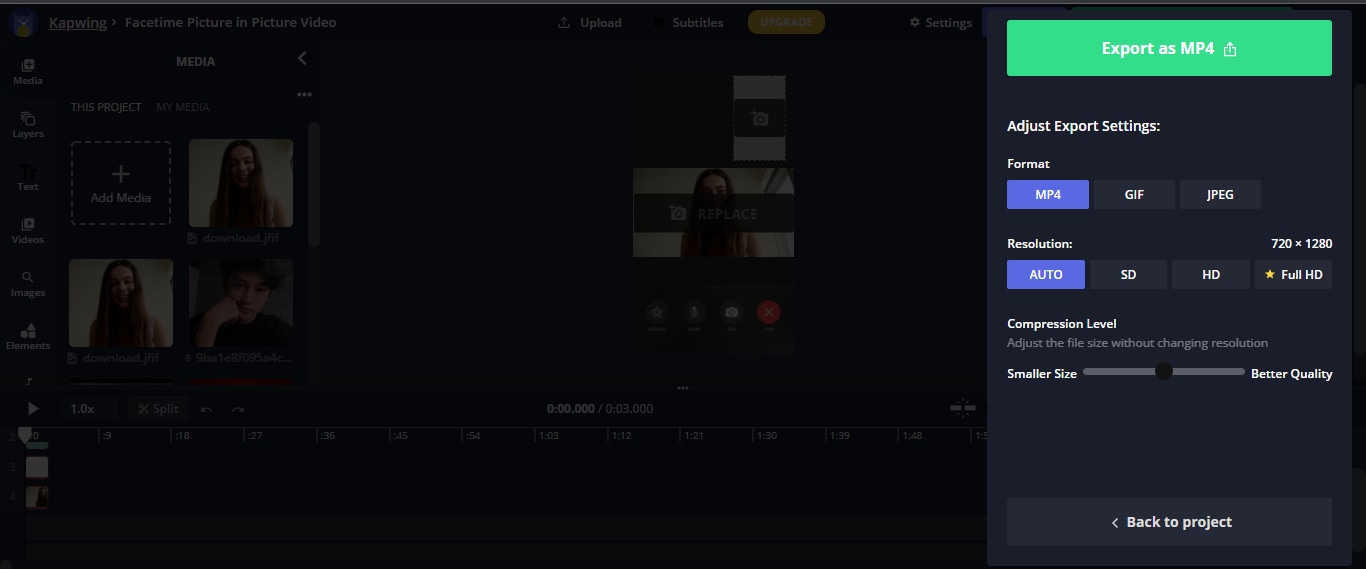
3. VITA App
Compatibility: Android/Mac

VITA is a program that allows you to make visually appealing videos by combining several filters and other features. The program comes with a large template library, so making films will be a breeze. The best part is that no prior experience is required.
All of VITA’s templates are divided into categories is one of its most noticeable features. This makes it simple to locate the desired impact. It’s critical to stress that you must have all the audiovisual materials you intend to use in your smartphone’s gallery. VITA also allows you to include text in your designs, making them fascinating.
Steps
Step 1: Import the file
Download the application from Google Play Store or Apple Store. Then, launch the application and import the video files.

Step 2: Edit the video
Download PNG images that will help you add all the call elements. Choose a picture-in-picture template. Add Subtitles.
Step 3: Export the video
Once you are done with editing, you can export the file by selecting the ‘Export’ option on the top right corner of the screen.

4. Clipchamp
Compatibility: Windows/Mac
Clipchamp is a free online video editor that makes movie creation simple for anyone, even if they have no prior editing knowledge. It lets you blend films, photos, and audio files and add text and effects before saving the finished product to your computer.
Steps
Step 1: To get started, log into your Clipchamp account or create a free account.
Step 2: Click the ‘Create a video’ button on the left sidebar. There are five different forms from which to pick. First, choose the video aspect ratio that works best for your project. For example, if you wish to upload to YouTube, we recommend shooting in widescreen 16:9.
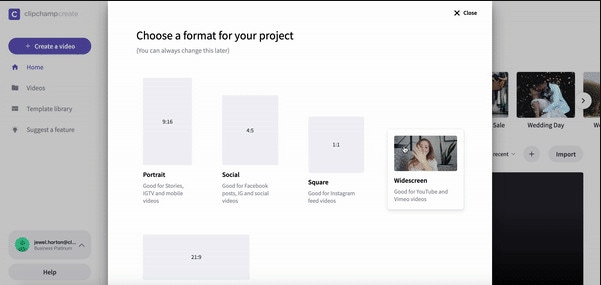
Step 3: Click ‘Add media’ and drag and drop your films, audio, and photographs into the media box if you already have filmed footage you’d like to utilize in your project. You may also add media by clicking ‘Browse my files.’ If you wish to use free stock footage, go to ‘Stock’ and upload your films to the project by clicking the ‘+’ button. All your films will be saved in your library.
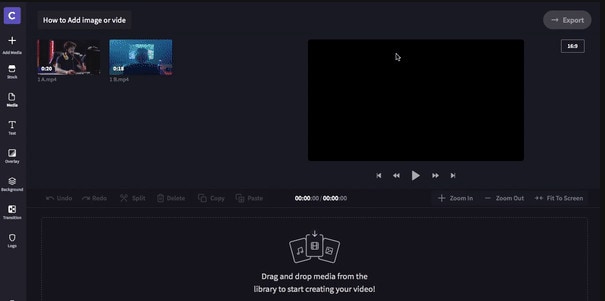
Step 4: You can now find your videos in your media library. Drag and drop the picture-in-picture videos you want to alter to the editing timeline. As shown in the sample below, arrange the two videos one over the other. Make sure both clips are precisely underneath one another.
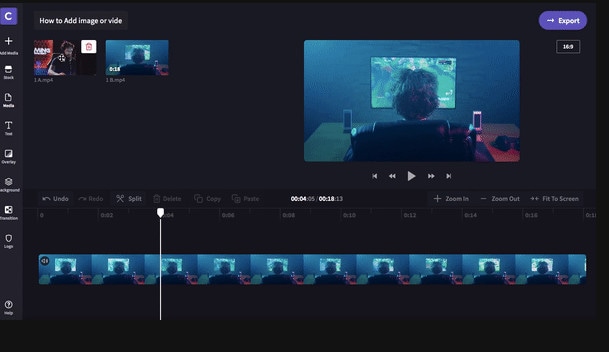
Step 5: Now that your movies are aligned, select the one you want to shrink. The video you’re reducing must be at the top of the screen. To move it from the bottom to the top, drag and drop it. A small box will appear on the timeline in the bottom left corner of the clip. The clip will shrink when you click the box once. When you click the box once again, modifying choices will appear. You can move the smaller video around and increase or decrease its size.
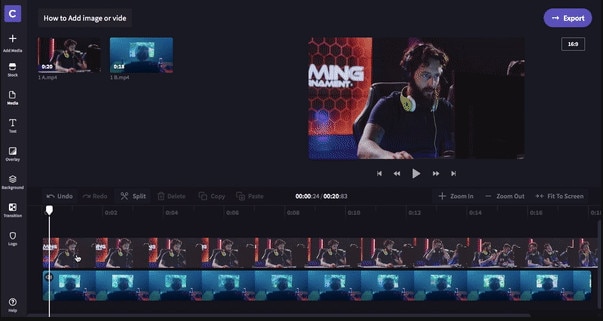
Step 6: Export your project once you’ve completed editing your video. Save to your preferred place or folder. You can share the video straight on social media or embed it in a document.

5. Movavi
Compatibility: Windows/Mac
Movavi Video Editor is a video editing tool for Windows that is powerful and simple to use. Apply stunning video effects and filters, add music and titles, and more! Yet, despite its enormous features, Movavi’s video editing program is quite simple to use: add a sprinkle of fantasy and some spare time, and you’ll have a Hollywood-style video with far less effort.
Steps
Step 1: Download the software.
Download the installation file and run it. Follow the on-screen directions. Following the setup, the PiP editor will launch.
Step 2: Import files
Select two files: the one you want to use as a background and the one you want to display over it by clicking Add Files.
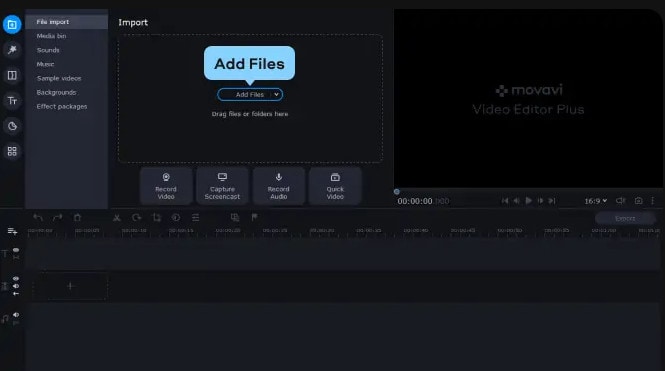
Step 3: Create a video track
Make an extra video track before you begin video editing. To do so, go to the Plus menu and select Add Video Track. Then, drag one of the videos to the secondary track and the other to the primary track.
From the menu, select the Picture in Picture option. To change the size of the video, drag the boundaries. Then, drag it to the desired location on the background video by clicking and holding.
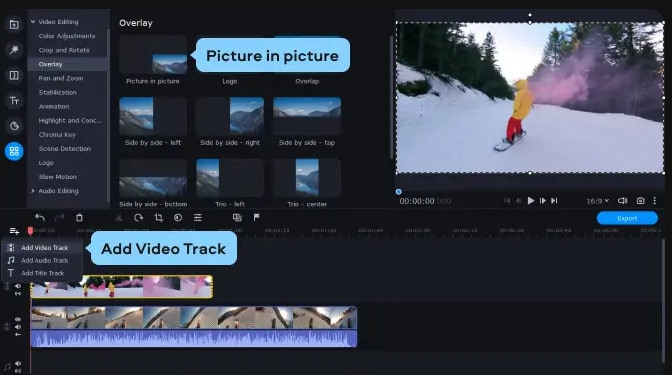
Step 4: Export and Save
Save your PiP video once you’ve finished editing it. First, select the video format, quality, and folder where the file will be saved by clicking Export and adjusting the parameters in the display popup. Then press the Start button. The picture-in-picture video editor will open the folder holding the file after the Export is complete.
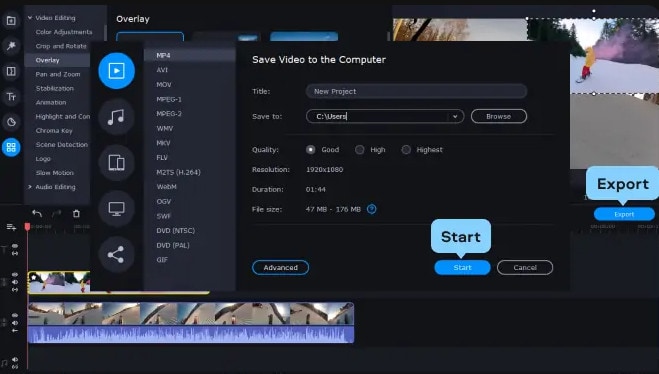
FAQs
1. How do you make a facetime video call?
Tap New FaceTime towards the top of the screen in FaceTime.
Tap to make a video call or an audio call after typing the name or number you wish to call in the top field (not available in all countries or regions). You can also tap instead.
2. How do you add a virtual background on Facetime?
To change the background, use a filter: s
- Tap your tile, then tap during a FaceTime video call (supported models).
- Open the filters by tapping.
- Select your look by tapping a filter at the bottom of the screen (swipe left or right to preview them).
4. Does Facetime have virtual backgrounds?
No. Facetime does have virtual backgrounds, but it allows the users to blur the background.
5. Can you get fake facetime calls?
There is less probability of getting fake facetime calls, but you might spam FaceTime calls from random numbers.
6. Can you Facetime a random number?
FaceTime isn’t any different. A caller could try their luck by FaceTime a random phone number or email address, and if they belong to an iPhone user or an Apple ID, the FaceTime call will be accepted.
7. Can you Facetime from an unknown number?
Switching to your email address for FaceTime audio and video chats is the way to go if you always want to keep your phone number private. You may even go a step further and only receive FaceTime calls via email, with your phone number serving as your FaceTime caller ID.
8. How do I call someone on Facetime?
Launch FaceTime. In the search field, type the names, phone numbers, or email addresses of the persons you wish to contact. Then, click the video or audio icon, depending on the type of call you wish to make. To begin the call, press the video or audio button in the screen’s bottom-left corner.
9. Can you create a background on Facetime?
No. However, FaceTime allows you to apply camera effects on video calls.
Step 2: Edit the video
Wondershare Filmora’s video templates can be added. You can apply music, text, filters and overlays, and motion effects by right-clicking on them and selecting apply. After adding video resources such as text and elements, you may customize the texts by changing the size, placement, etc.
Also, you can add overlay video clips using templates of a video call to make it look like a real call.

Step 3: Export and Save
Quickly export your project to a new video. After you’ve applied the video resources to your videos and clicked Export, you’ll have a whole new video that you can share at birthday parties, weddings, or for marketing purposes, just like any other video you’ve created.

2. Kapwing
Compatibility: Online
Kapwing is a powerful online video editor with a non-linear editing methodology. Upload photos, audio, and video files, then edit them all in one spot.
Creators may view and alter their content from any device or location because Kapwing is entirely online. Work is automatically saved in the cloud, eliminating the need to transfer data locally. When you’re ready to export, sit back and relax because everything is handled in the cloud.
This template allows you to blend two videos into one like an iPhone Facetime call. First, put two videos in a photo and arrange them in a picture arrangement. Then, as a video overlay in the upper corner, layer one on top of the other.
Steps
Step 1: Open Kapwing Fake Video Call Template

Step 2: Import video files
Click on ‘Add Media’ to add video clips.


Step 3: Save and Export Video
Once you are done editing the template with the images you want, click on ‘Export Project’ to Export and save the video.

3. VITA App
Compatibility: Android/Mac

VITA is a program that allows you to make visually appealing videos by combining several filters and other features. The program comes with a large template library, so making films will be a breeze. The best part is that no prior experience is required.
All of VITA’s templates are divided into categories is one of its most noticeable features. This makes it simple to locate the desired impact. It’s critical to stress that you must have all the audiovisual materials you intend to use in your smartphone’s gallery. VITA also allows you to include text in your designs, making them fascinating.
Steps
Step 1: Import the file
Download the application from Google Play Store or Apple Store. Then, launch the application and import the video files.

Step 2: Edit the video
Download PNG images that will help you add all the call elements. Choose a picture-in-picture template. Add Subtitles.

Step 3: Export the video
Once you are done with editing, you can export the file by selecting the ‘Export’ option on the top right corner of the screen.

4. Clipchamp
Compatibility: Windows/Mac
Clipchamp is a free online video editor that makes movie creation simple for anyone, even if they have no prior editing knowledge. It lets you blend films, photos, and audio files and add text and effects before saving the finished product to your computer.
Steps
Step 1: To get started, log into your Clipchamp account or create a free account.

Step 2: Click the ‘Create a video’ button on the left sidebar. There are five different forms from which to pick. First, choose the video aspect ratio that works best for your project. For example, if you wish to upload to YouTube, we recommend shooting in widescreen 16:9.

Step 3: Click ‘Add media’ and drag and drop your films, audio, and photographs into the media box if you already have filmed footage you’d like to utilize in your project. You may also add media by clicking ‘Browse my files.’ If you wish to use free stock footage, go to ‘Stock’ and upload your films to the project by clicking the ‘+’ button. All your films will be saved in your library.

Step 4: You can now find your videos in your media library. Drag and drop the picture-in-picture videos you want to alter to the editing timeline. As shown in the sample below, arrange the two videos one over the other. Make sure both clips are precisely underneath one another.

Step 5: Now that your movies are aligned, select the one you want to shrink. The video you’re reducing must be at the top of the screen. To move it from the bottom to the top, drag and drop it. A small box will appear on the timeline in the bottom left corner of the clip. The clip will shrink when you click the box once. When you click the box once again, modifying choices will appear. You can move the smaller video around and increase or decrease its size.

Step 6: Export your project once you’ve completed editing your video. Save to your preferred place or folder. You can share the video straight on social media or embed it in a document.

5. Movavi
Compatibility: Windows/Mac
Movavi Video Editor is a video editing tool for Windows that is powerful and simple to use. Apply stunning video effects and filters, add music and titles, and more! Yet, despite its enormous features, Movavi’s video editing program is quite simple to use: add a sprinkle of fantasy and some spare time, and you’ll have a Hollywood-style video with far less effort.
Steps
Step 1: Download the software.
Download the installation file and run it. Follow the on-screen directions. Following the setup, the PiP editor will launch.
Step 2: Import files
Select two files: the one you want to use as a background and the one you want to display over it by clicking Add Files.

Step 3: Create a video track
Make an extra video track before you begin video editing. To do so, go to the Plus menu and select Add Video Track. Then, drag one of the videos to the secondary track and the other to the primary track.
From the menu, select the Picture in Picture option. To change the size of the video, drag the boundaries. Then, drag it to the desired location on the background video by clicking and holding.

Step 4: Export and Save
Save your PiP video once you’ve finished editing it. First, select the video format, quality, and folder where the file will be saved by clicking Export and adjusting the parameters in the display popup. Then press the Start button. The picture-in-picture video editor will open the folder holding the file after the Export is complete.

FAQs
1. How do you make a facetime video call?
Tap New FaceTime towards the top of the screen in FaceTime.
Tap to make a video call or an audio call after typing the name or number you wish to call in the top field (not available in all countries or regions). You can also tap instead.
2. How do you add a virtual background on Facetime?
To change the background, use a filter: s
- Tap your tile, then tap during a FaceTime video call (supported models).
- Open the filters by tapping.
- Select your look by tapping a filter at the bottom of the screen (swipe left or right to preview them).
4. Does Facetime have virtual backgrounds?
No. Facetime does have virtual backgrounds, but it allows the users to blur the background.
5. Can you get fake facetime calls?
There is less probability of getting fake facetime calls, but you might spam FaceTime calls from random numbers.
6. Can you Facetime a random number?
FaceTime isn’t any different. A caller could try their luck by FaceTime a random phone number or email address, and if they belong to an iPhone user or an Apple ID, the FaceTime call will be accepted.
7. Can you Facetime from an unknown number?
Switching to your email address for FaceTime audio and video chats is the way to go if you always want to keep your phone number private. You may even go a step further and only receive FaceTime calls via email, with your phone number serving as your FaceTime caller ID.
8. How do I call someone on Facetime?
Launch FaceTime. In the search field, type the names, phone numbers, or email addresses of the persons you wish to contact. Then, click the video or audio icon, depending on the type of call you wish to make. To begin the call, press the video or audio button in the screen’s bottom-left corner.
9. Can you create a background on Facetime?
No. However, FaceTime allows you to apply camera effects on video calls.
Step 2: Edit the video
Wondershare Filmora’s video templates can be added. You can apply music, text, filters and overlays, and motion effects by right-clicking on them and selecting apply. After adding video resources such as text and elements, you may customize the texts by changing the size, placement, etc.
Also, you can add overlay video clips using templates of a video call to make it look like a real call.

Step 3: Export and Save
Quickly export your project to a new video. After you’ve applied the video resources to your videos and clicked Export, you’ll have a whole new video that you can share at birthday parties, weddings, or for marketing purposes, just like any other video you’ve created.

2. Kapwing
Compatibility: Online
Kapwing is a powerful online video editor with a non-linear editing methodology. Upload photos, audio, and video files, then edit them all in one spot.
Creators may view and alter their content from any device or location because Kapwing is entirely online. Work is automatically saved in the cloud, eliminating the need to transfer data locally. When you’re ready to export, sit back and relax because everything is handled in the cloud.
This template allows you to blend two videos into one like an iPhone Facetime call. First, put two videos in a photo and arrange them in a picture arrangement. Then, as a video overlay in the upper corner, layer one on top of the other.
Steps
Step 1: Open Kapwing Fake Video Call Template

Step 2: Import video files
Click on ‘Add Media’ to add video clips.


Step 3: Save and Export Video
Once you are done editing the template with the images you want, click on ‘Export Project’ to Export and save the video.

3. VITA App
Compatibility: Android/Mac

VITA is a program that allows you to make visually appealing videos by combining several filters and other features. The program comes with a large template library, so making films will be a breeze. The best part is that no prior experience is required.
All of VITA’s templates are divided into categories is one of its most noticeable features. This makes it simple to locate the desired impact. It’s critical to stress that you must have all the audiovisual materials you intend to use in your smartphone’s gallery. VITA also allows you to include text in your designs, making them fascinating.
Steps
Step 1: Import the file
Download the application from Google Play Store or Apple Store. Then, launch the application and import the video files.

Step 2: Edit the video
Download PNG images that will help you add all the call elements. Choose a picture-in-picture template. Add Subtitles.

Step 3: Export the video
Once you are done with editing, you can export the file by selecting the ‘Export’ option on the top right corner of the screen.

4. Clipchamp
Compatibility: Windows/Mac
Clipchamp is a free online video editor that makes movie creation simple for anyone, even if they have no prior editing knowledge. It lets you blend films, photos, and audio files and add text and effects before saving the finished product to your computer.
Steps
Step 1: To get started, log into your Clipchamp account or create a free account.

Step 2: Click the ‘Create a video’ button on the left sidebar. There are five different forms from which to pick. First, choose the video aspect ratio that works best for your project. For example, if you wish to upload to YouTube, we recommend shooting in widescreen 16:9.

Step 3: Click ‘Add media’ and drag and drop your films, audio, and photographs into the media box if you already have filmed footage you’d like to utilize in your project. You may also add media by clicking ‘Browse my files.’ If you wish to use free stock footage, go to ‘Stock’ and upload your films to the project by clicking the ‘+’ button. All your films will be saved in your library.

Step 4: You can now find your videos in your media library. Drag and drop the picture-in-picture videos you want to alter to the editing timeline. As shown in the sample below, arrange the two videos one over the other. Make sure both clips are precisely underneath one another.

Step 5: Now that your movies are aligned, select the one you want to shrink. The video you’re reducing must be at the top of the screen. To move it from the bottom to the top, drag and drop it. A small box will appear on the timeline in the bottom left corner of the clip. The clip will shrink when you click the box once. When you click the box once again, modifying choices will appear. You can move the smaller video around and increase or decrease its size.

Step 6: Export your project once you’ve completed editing your video. Save to your preferred place or folder. You can share the video straight on social media or embed it in a document.

5. Movavi
Compatibility: Windows/Mac
Movavi Video Editor is a video editing tool for Windows that is powerful and simple to use. Apply stunning video effects and filters, add music and titles, and more! Yet, despite its enormous features, Movavi’s video editing program is quite simple to use: add a sprinkle of fantasy and some spare time, and you’ll have a Hollywood-style video with far less effort.
Steps
Step 1: Download the software.
Download the installation file and run it. Follow the on-screen directions. Following the setup, the PiP editor will launch.
Step 2: Import files
Select two files: the one you want to use as a background and the one you want to display over it by clicking Add Files.

Step 3: Create a video track
Make an extra video track before you begin video editing. To do so, go to the Plus menu and select Add Video Track. Then, drag one of the videos to the secondary track and the other to the primary track.
From the menu, select the Picture in Picture option. To change the size of the video, drag the boundaries. Then, drag it to the desired location on the background video by clicking and holding.

Step 4: Export and Save
Save your PiP video once you’ve finished editing it. First, select the video format, quality, and folder where the file will be saved by clicking Export and adjusting the parameters in the display popup. Then press the Start button. The picture-in-picture video editor will open the folder holding the file after the Export is complete.

FAQs
1. How do you make a facetime video call?
Tap New FaceTime towards the top of the screen in FaceTime.
Tap to make a video call or an audio call after typing the name or number you wish to call in the top field (not available in all countries or regions). You can also tap instead.
2. How do you add a virtual background on Facetime?
To change the background, use a filter: s
- Tap your tile, then tap during a FaceTime video call (supported models).
- Open the filters by tapping.
- Select your look by tapping a filter at the bottom of the screen (swipe left or right to preview them).
4. Does Facetime have virtual backgrounds?
No. Facetime does have virtual backgrounds, but it allows the users to blur the background.
5. Can you get fake facetime calls?
There is less probability of getting fake facetime calls, but you might spam FaceTime calls from random numbers.
6. Can you Facetime a random number?
FaceTime isn’t any different. A caller could try their luck by FaceTime a random phone number or email address, and if they belong to an iPhone user or an Apple ID, the FaceTime call will be accepted.
7. Can you Facetime from an unknown number?
Switching to your email address for FaceTime audio and video chats is the way to go if you always want to keep your phone number private. You may even go a step further and only receive FaceTime calls via email, with your phone number serving as your FaceTime caller ID.
8. How do I call someone on Facetime?
Launch FaceTime. In the search field, type the names, phone numbers, or email addresses of the persons you wish to contact. Then, click the video or audio icon, depending on the type of call you wish to make. To begin the call, press the video or audio button in the screen’s bottom-left corner.
9. Can you create a background on Facetime?
No. However, FaceTime allows you to apply camera effects on video calls.
Step 2: Edit the video
Wondershare Filmora’s video templates can be added. You can apply music, text, filters and overlays, and motion effects by right-clicking on them and selecting apply. After adding video resources such as text and elements, you may customize the texts by changing the size, placement, etc.
Also, you can add overlay video clips using templates of a video call to make it look like a real call.

Step 3: Export and Save
Quickly export your project to a new video. After you’ve applied the video resources to your videos and clicked Export, you’ll have a whole new video that you can share at birthday parties, weddings, or for marketing purposes, just like any other video you’ve created.

2. Kapwing
Compatibility: Online
Kapwing is a powerful online video editor with a non-linear editing methodology. Upload photos, audio, and video files, then edit them all in one spot.
Creators may view and alter their content from any device or location because Kapwing is entirely online. Work is automatically saved in the cloud, eliminating the need to transfer data locally. When you’re ready to export, sit back and relax because everything is handled in the cloud.
This template allows you to blend two videos into one like an iPhone Facetime call. First, put two videos in a photo and arrange them in a picture arrangement. Then, as a video overlay in the upper corner, layer one on top of the other.
Steps
Step 1: Open Kapwing Fake Video Call Template

Step 2: Import video files
Click on ‘Add Media’ to add video clips.


Step 3: Save and Export Video
Once you are done editing the template with the images you want, click on ‘Export Project’ to Export and save the video.

3. VITA App
Compatibility: Android/Mac

VITA is a program that allows you to make visually appealing videos by combining several filters and other features. The program comes with a large template library, so making films will be a breeze. The best part is that no prior experience is required.
All of VITA’s templates are divided into categories is one of its most noticeable features. This makes it simple to locate the desired impact. It’s critical to stress that you must have all the audiovisual materials you intend to use in your smartphone’s gallery. VITA also allows you to include text in your designs, making them fascinating.
Steps
Step 1: Import the file
Download the application from Google Play Store or Apple Store. Then, launch the application and import the video files.

Step 2: Edit the video
Download PNG images that will help you add all the call elements. Choose a picture-in-picture template. Add Subtitles.

Step 3: Export the video
Once you are done with editing, you can export the file by selecting the ‘Export’ option on the top right corner of the screen.

4. Clipchamp
Compatibility: Windows/Mac
Clipchamp is a free online video editor that makes movie creation simple for anyone, even if they have no prior editing knowledge. It lets you blend films, photos, and audio files and add text and effects before saving the finished product to your computer.
Steps
Step 1: To get started, log into your Clipchamp account or create a free account.

Step 2: Click the ‘Create a video’ button on the left sidebar. There are five different forms from which to pick. First, choose the video aspect ratio that works best for your project. For example, if you wish to upload to YouTube, we recommend shooting in widescreen 16:9.

Step 3: Click ‘Add media’ and drag and drop your films, audio, and photographs into the media box if you already have filmed footage you’d like to utilize in your project. You may also add media by clicking ‘Browse my files.’ If you wish to use free stock footage, go to ‘Stock’ and upload your films to the project by clicking the ‘+’ button. All your films will be saved in your library.

Step 4: You can now find your videos in your media library. Drag and drop the picture-in-picture videos you want to alter to the editing timeline. As shown in the sample below, arrange the two videos one over the other. Make sure both clips are precisely underneath one another.

Step 5: Now that your movies are aligned, select the one you want to shrink. The video you’re reducing must be at the top of the screen. To move it from the bottom to the top, drag and drop it. A small box will appear on the timeline in the bottom left corner of the clip. The clip will shrink when you click the box once. When you click the box once again, modifying choices will appear. You can move the smaller video around and increase or decrease its size.

Step 6: Export your project once you’ve completed editing your video. Save to your preferred place or folder. You can share the video straight on social media or embed it in a document.

5. Movavi
Compatibility: Windows/Mac
Movavi Video Editor is a video editing tool for Windows that is powerful and simple to use. Apply stunning video effects and filters, add music and titles, and more! Yet, despite its enormous features, Movavi’s video editing program is quite simple to use: add a sprinkle of fantasy and some spare time, and you’ll have a Hollywood-style video with far less effort.
Steps
Step 1: Download the software.
Download the installation file and run it. Follow the on-screen directions. Following the setup, the PiP editor will launch.
Step 2: Import files
Select two files: the one you want to use as a background and the one you want to display over it by clicking Add Files.

Step 3: Create a video track
Make an extra video track before you begin video editing. To do so, go to the Plus menu and select Add Video Track. Then, drag one of the videos to the secondary track and the other to the primary track.
From the menu, select the Picture in Picture option. To change the size of the video, drag the boundaries. Then, drag it to the desired location on the background video by clicking and holding.

Step 4: Export and Save
Save your PiP video once you’ve finished editing it. First, select the video format, quality, and folder where the file will be saved by clicking Export and adjusting the parameters in the display popup. Then press the Start button. The picture-in-picture video editor will open the folder holding the file after the Export is complete.

FAQs
1. How do you make a facetime video call?
Tap New FaceTime towards the top of the screen in FaceTime.
Tap to make a video call or an audio call after typing the name or number you wish to call in the top field (not available in all countries or regions). You can also tap instead.
2. How do you add a virtual background on Facetime?
To change the background, use a filter: s
- Tap your tile, then tap during a FaceTime video call (supported models).
- Open the filters by tapping.
- Select your look by tapping a filter at the bottom of the screen (swipe left or right to preview them).
4. Does Facetime have virtual backgrounds?
No. Facetime does have virtual backgrounds, but it allows the users to blur the background.
5. Can you get fake facetime calls?
There is less probability of getting fake facetime calls, but you might spam FaceTime calls from random numbers.
6. Can you Facetime a random number?
FaceTime isn’t any different. A caller could try their luck by FaceTime a random phone number or email address, and if they belong to an iPhone user or an Apple ID, the FaceTime call will be accepted.
7. Can you Facetime from an unknown number?
Switching to your email address for FaceTime audio and video chats is the way to go if you always want to keep your phone number private. You may even go a step further and only receive FaceTime calls via email, with your phone number serving as your FaceTime caller ID.
8. How do I call someone on Facetime?
Launch FaceTime. In the search field, type the names, phone numbers, or email addresses of the persons you wish to contact. Then, click the video or audio icon, depending on the type of call you wish to make. To begin the call, press the video or audio button in the screen’s bottom-left corner.
9. Can you create a background on Facetime?
No. However, FaceTime allows you to apply camera effects on video calls.
Also read:
- 2024 Approved Split a Video in the Lightworks Step by Step
- New In 2024, Record Slow Motion Videos With Phantom Slow-Mo Camera
- New How Can You Import and Adjust the Video Clips on Wondershare Filmora for 2024
- 2024 Approved AR Is a Trend These Days. Here, You Can Browse the List of Top 10 Picks for AR Video Editing Apps
- Updated An Ultimate Guide To Edit a Music Video Aspect Ratio and First Cut for 2024
- How to Make Sony Vegas Freeze Frame
- Updated 2 Solutions to Crop a Video Using After Effects for 2024
- In 2024, How to Speed Up Video on Instagram Reels?
- How to Export iMovie, In 2024
- New How to Add Green Screen in OBS
- Updated The Best Way To Color Grading & Color Correction in Filmora
- New In 2024, Are You Looking for an Ideal Halloween Countdown Video Clip for Your Video? This Article Will Walk You Through the Best Ones You Can Use to Get the Job Done Perfectly
- New How to Use LUTs in VN Editor – Complete Guide and Best LUTs Download for 2024
- It Is Easy to Separate the Audio From the Video in DaVinci Resolve. But, to Avail of This Feature, You Need to Follow Proper Steps, and This Article Is All About It for 2024
- Updated Learn How to Use and Download KineMaster Templates Like a Pro. Discover Alternative Video Templates to Elevate Your Video Creation
- Updated Add Background to Video With/Without a Green Screen for 2024
- New 2024 Approved In This Article, We Will Cover the Stages of Film Production You Need to Keep in Mind.Without Further Ado, Lets Get Started
- Updated How To Edit Youtube Videos In Easy Steps for 2024
- New 2024 Approved How to Make Split Screen Videos in Filmora
- New Best Movie Title Maker
- New 2024 Approved Video Editors Use Transitions to Tie Their Shots and Clips Together Into a Cohesive, Polished Program. Learn the Best Method to Create a Smooth Cut Transition Effect
- The After-Effects Match Colour Feature Bestows Numerous Benefits. Thus, in the Following Discussion, We Will Discuss This Feature and an Equally Proficient Efficient Alternative Tool for Colour Matching
- How to restore wiped videos on Tecno Pova 5 Pro
- In 2024, Unlocking Made Easy The Best 10 Apps for Unlocking Your Vivo Y02T Device
- 5 Quick Methods to Bypass Itel P55+ FRP
- How To Transfer Data From Apple iPhone 12 To Other iPhone 11 Pro Max devices? | Dr.fone
- 10 Best Fake GPS Location Spoofers for Tecno Pova 5 Pro | Dr.fone
- In 2024, How to Mirror Your Lava Yuva 3 Screen to PC with Chromecast | Dr.fone
- How to Spy on Text Messages from Computer & OnePlus 12 | Dr.fone
- How To Transfer WhatsApp From iPhone 13 Pro to other iPhone 11 devices? | Dr.fone
- Bypassing Google Account With vnROM Bypass For Itel P40
- In 2024, The Ultimate Guide to Unlocking Your iPhone 14 Plus on MetroPCS
- Unlocking Made Easy The Best 10 Apps for Unlocking Your ZTE Device
- Ultimate guide to get the meltan box pokemon go For Honor Magic 6 | Dr.fone
- Google Play Services Wont Update? 12 Fixes are Here on Xiaomi Redmi Note 12 Pro 4G | Dr.fone
- How to Unlock Disabled iPhone XS/iPad Without Computer
- Title: 10 Best Movie Trailer Voice Generators Windows, Mac, Android, iPhone & Online
- Author: Morgan
- Created at : 2024-04-24 01:12:16
- Updated at : 2024-04-25 01:12:16
- Link: https://ai-video-editing.techidaily.com/10-best-movie-trailer-voice-generators-windows-mac-android-iphone-and-online/
- License: This work is licensed under CC BY-NC-SA 4.0.

