:max_bytes(150000):strip_icc():format(webp)/are-you-really-getting-dolby-atmos-sound-135ec4330d004250883e2acab9423191.jpg)
10 Best Mp3 Visualizers Windows, Mac, Android, iPhone & Online

10 Best Mp3 Visualizers [Windows, Mac, Android, iPhone & Online]
Best Audio Visualizer and Video Editor
Make your music video come alive with Filmora Audio Visualizer. The effect will intelligently match the sound in your video while also adding dynamic effects.
Free Download Free Download Free Download Learn More >

A music visualizer application produces animated graphics based on beats, volume, rhythm, and frequency spectrum. These apps show various animations for various photographs and even provide templates for creating a particular animation. Music visualizers turn music into numbers highlighted in lines, circles, and other visuals using a mathematical formulae-based algorithm.
The 10 best mp3 visualizers for Windows, Mac, Android, iPhone and Online are listed below:
1. Offeo
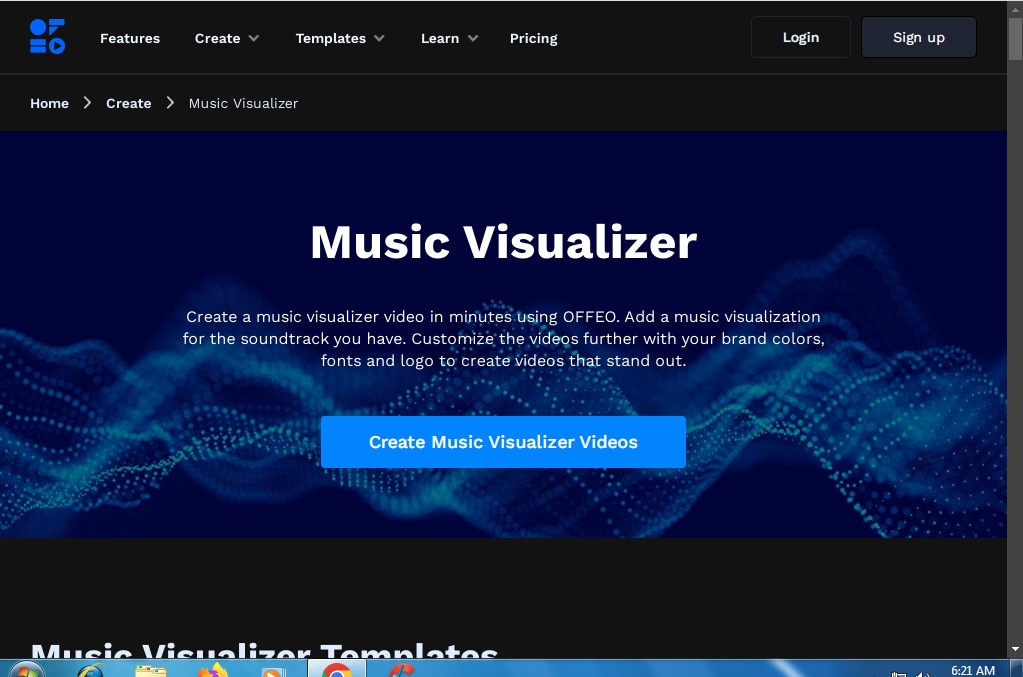
Supported system: Online
Introduction:
OFFEO is a music visualizer that allows you to generate visuals. In addition, beats and audio tracks can be synced with this application.
Features:
- Assists you in improving your music track.
- Professional design templates are available.
- It has a simple drag-and-drop interface.
- It does not require the installation of any software.
- Each video frame has customizable choices.
Price: Offeo offers a 30-day free trial, and a premium account costs around $19/month.
Cons:
- Most of the templates are for short videos (5-7 seconds).
2. Magic Music Visuals
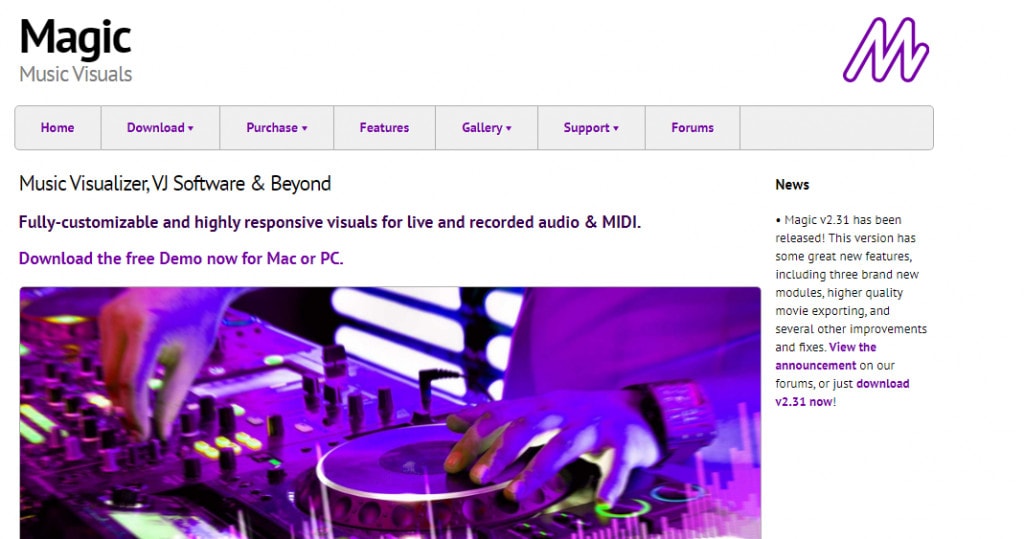
Supported system: Windows
Introduction:
Magic Music Visuals is a powerful audio visualizer for Windows that allows users to create whatever they want. The program is entirely customizable and includes MIDI and live audio capability. In addition, the program generates a variety of designs that spin in different directions depending on the volume and frequency of sound.
Features:
- It shows rotating pictures and 3D models that move to the beat of the music.
- A basic UI makes it simple to use.
- Users can upload cover art.
- Allows for live camera modification in real-time.
Price: A free trial version with nearly full functionality is available, and a $44.95 premium version for one PC.
Cons:
- It requires the ideal software configuration of the system.
3. Musicvid
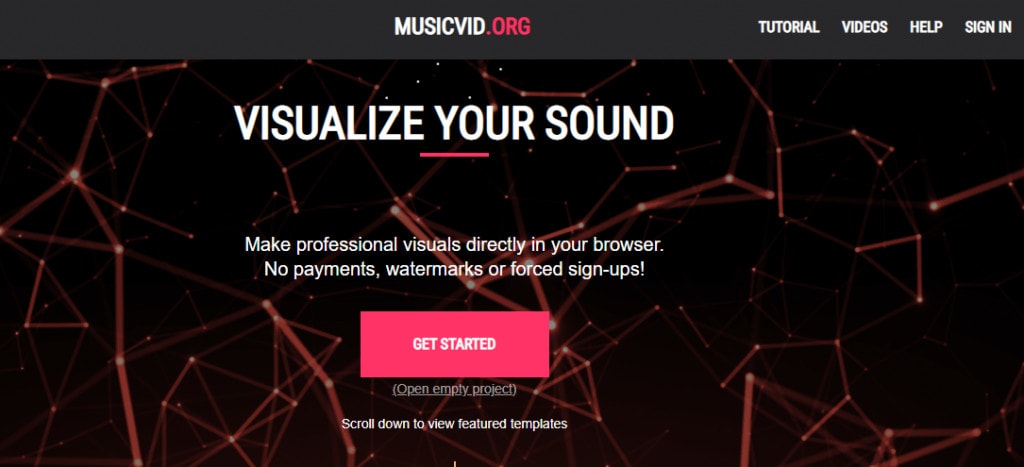
Supported system: Windows/Mac
Introduction:
A web-based application called Musicvid is another music visualizer for Windows and Mac. It has a long history and is extremely popular all around the world. It enables users to create professional-looking graphics that include sound and animation. Because it is a web-based application, users do not need to install it on their computer; however, they will require a decent internet connection. There are a variety of templates available to aid in the creation process.
Features:
- Chrome and Firefox are supported.
- It includes comprehensive instruction.
- Users can export the final visualization directly from the browser.
Price: $0
Cons:
- Requires fast internet speed to function.
4. Kapwing
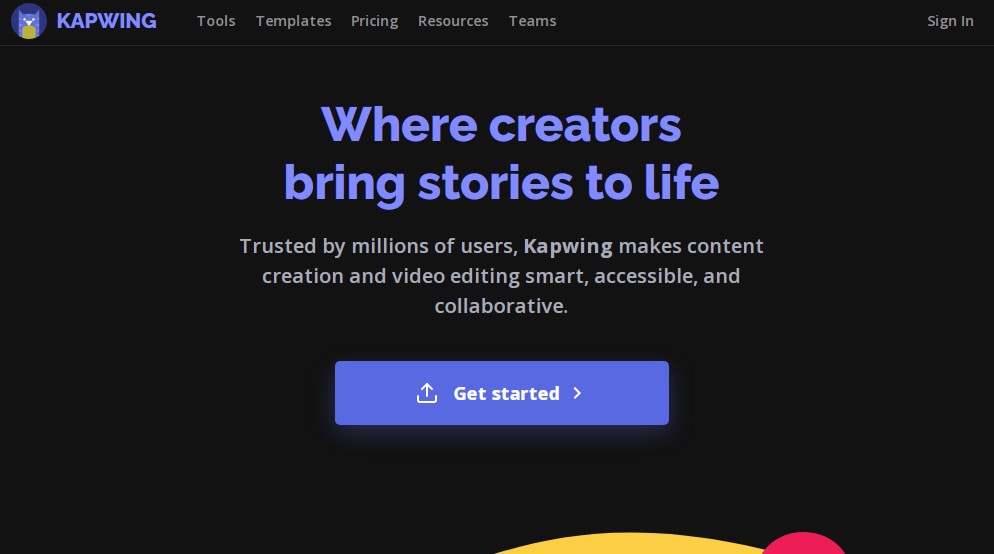
Supported system: Windows/Mac
Introduction:
Kapwing is a video editing application that adds a professional-looking waveform to any video. It assists you in changing the color, speed, and position of your waves.
Features:
- Your videos can be shared on any social media platform.
- There are no advertisements in this application.
- The video does not contain any watermarks.
- You can use any browser to see your clips.
- Allows you to include a logo in your video.
- Shapes can be used in your video clips.
Price: Free to use but can be upgraded to PRO at $16/month (Limited time offer).
Cons:
- Although the application can upload 4K UHD videos, it cannot export files simultaneously.
5. AudioVision Music Player
Supported system: Android
Introduction:
This program is a music player that helps you filter music by genres, playlists, or artists and be a great music visualization tool. The music visualizer from AudioVision comes with six different visual skins that are entirely customizable and provide nearly limitless visualization options. For example, you can adjust the Sensitivity, Bar and Border Width, and Color settings to match the music genre you’re now listening to. In addition, the software is only 1.6MB in size, so even if you don’t have a lot of storage space on your phone, you can visualize music and make unique screensavers.
Features:
- It offers a vast collection of customizable options
- User-friendly application with easy to use interface
- Customize sound wave appearance
Price: $0
Cons:
- Difficult to refresh songs
- Poor functionality
6. Alien Worlds - Music Visualizer

Supported system: Android, iOS
Introduction:
If you opt to install this music visualizer on your mobile device, you will undoubtedly be stunning. Choose from 47 radio channels in the Alien Worlds app, which play a variety of music genres such as rock, techno, trance, and ambient. As a result, its musical representations are always one-of-a-kind. Your results will be different each time you use the program. Furthermore, there are over a hundred different settings to personalize and adjust visuals in almost any way you like. To unlock all of the app’s features, you’ll need to upgrade to the $1.99 Premium version.
Features:
- Digital Impulse has 47 radio channels with music styles such as a house, trance, disco, ambient, rock, and techno.
- Use the up and down arrow buttons to adjust the speed of the visual effects.
- The visual effects are generated at random, which means that the effects shown will differ each time the program is used.
Price: The software is free; however, in-app purchases are available.
Cons:
- Lacks variations in tools and limited product quality.
7. Staella
Supported system: iOS
Introduction:
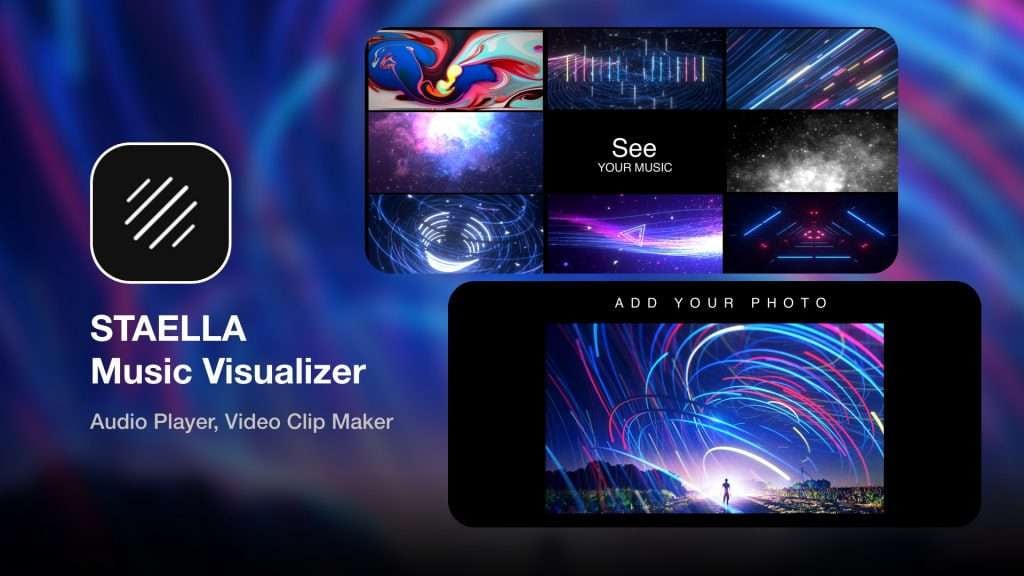
Controlling the noir, hue, and contrast of the colors are just a few of the settings available in the STAELLA app. There are various graphic packages, but you can only get them if you pay for them in-app. STAELLA is incredibly simple to use; all you have to do is choose a song and enjoy the software’s images. The app’s real-time audio-reactive engine generates visuals from sounds exceptionally instantly. If you upgrade to the Pro edition, you’ll record all of your music visualizations and save them as GIF or MOV files.
Features:
- Generate instant sound visuals
- Music Video Maker and Visual Music Player without Editing
- Music and photos can be imported. Visuals that can be changed.
- Audio Reactive System in Real-Time
- Boost your musical experience
Price: The software is free; however, in-app purchases are available.
Cons:
- Derails the music quality
8. Veed
Supported system: Online
Introduction:
Veed, which is an effective way to turn your music into videos with waveform, is next on the list of music visualizer software. The entire procedure is completed online, with the finished product saved in MP4 format. It was created to promote music on social media by adding waveforms, audio spectrums, and audiograms to make it look and sound more engaging.
Features:
- Choose your waveforms and animated audiograms.
- In the final video, add your photos or sketches.
- A cloud-based online application.
- Share your material on social media sites like Twitter, Instagram, and Facebook.
Price: Limited version is free, basic is $12, and Pro is $24 per month.
Cons:
- Limited options are available in the free plan.
9. Renderforest Music Visualizer
Supported system: Windows/Mac
Introduction:
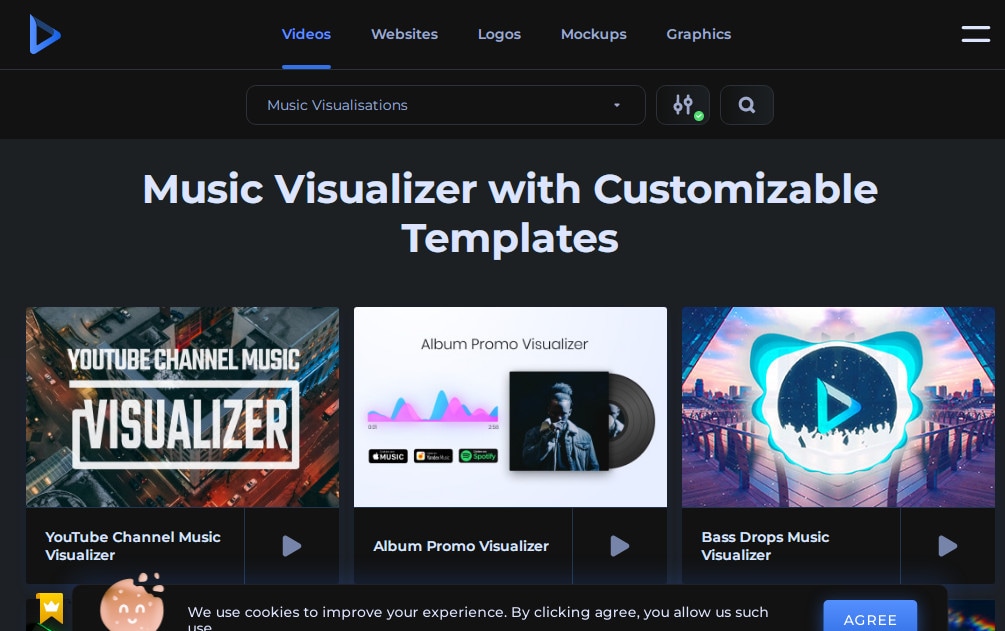
Renderforest is a free music visualizer that makes it simple to produce visually appealing material. It’s a web-based application that works with a variety of browsers. YouTubers use it to create professional-looking intros and outros. There are numerous visualization templates from which to pick.
Features:
- It has a large selection of visualization templates.
- This online music visualizer application sends you your final video through email.
- Create professional YouTube channel intros and outros.
- Animations and presentations that explain things.
- Business video editing tools that save you time.
- Use commercial videos or upload your video files.
Price: With limited possibilities, it’s free. Individualized plans are offered for a fee.
Cons:
- Limited styles when creating audio visualizations.
10. Project M - Music Visualizer
Supported system: Android/iOs
Introduction:
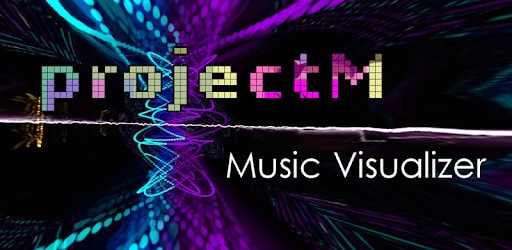
One notable difference exists between the iOS and Android versions of the ProjectM app. The iOS version of the app has a media player; however, the Android version does not. Regardless, both program versions have excellent audio visualization features that let you generate images from a wide range of music types. As a result, ProjectM is one of the most excellent music visualization apps for Android and iOS.
Features:
- It has hundreds of visual effects, multi-touch interactive visualizations, and Chromecast compatibility.
- Various additional modes available, like the Immersive Option for KitKat smartphones
- Live Wallpaper mode, which generates animated wallpapers for your Smartphone.
- Visual Effect Browser & Search
- Auto-detects sound from Microphone and Music Players
Price: On the Google Play Store, it’s free, but there are adverts; on the App Store, it’s $2.99.
Cons:
- There are no presets included with the projectM library.

A music visualizer application produces animated graphics based on beats, volume, rhythm, and frequency spectrum. These apps show various animations for various photographs and even provide templates for creating a particular animation. Music visualizers turn music into numbers highlighted in lines, circles, and other visuals using a mathematical formulae-based algorithm.
The 10 best mp3 visualizers for Windows, Mac, Android, iPhone and Online are listed below:
1. Offeo

Supported system: Online
Introduction:
OFFEO is a music visualizer that allows you to generate visuals. In addition, beats and audio tracks can be synced with this application.
Features:
- Assists you in improving your music track.
- Professional design templates are available.
- It has a simple drag-and-drop interface.
- It does not require the installation of any software.
- Each video frame has customizable choices.
Price: Offeo offers a 30-day free trial, and a premium account costs around $19/month.
Cons:
- Most of the templates are for short videos (5-7 seconds).
2. Magic Music Visuals

Supported system: Windows
Introduction:
Magic Music Visuals is a powerful audio visualizer for Windows that allows users to create whatever they want. The program is entirely customizable and includes MIDI and live audio capability. In addition, the program generates a variety of designs that spin in different directions depending on the volume and frequency of sound.
Features:
- It shows rotating pictures and 3D models that move to the beat of the music.
- A basic UI makes it simple to use.
- Users can upload cover art.
- Allows for live camera modification in real-time.
Price: A free trial version with nearly full functionality is available, and a $44.95 premium version for one PC.
Cons:
- It requires the ideal software configuration of the system.
3. Musicvid

Supported system: Windows/Mac
Introduction:
A web-based application called Musicvid is another music visualizer for Windows and Mac. It has a long history and is extremely popular all around the world. It enables users to create professional-looking graphics that include sound and animation. Because it is a web-based application, users do not need to install it on their computer; however, they will require a decent internet connection. There are a variety of templates available to aid in the creation process.
Features:
- Chrome and Firefox are supported.
- It includes comprehensive instruction.
- Users can export the final visualization directly from the browser.
Price: $0
Cons:
- Requires fast internet speed to function.
4. Kapwing

Supported system: Windows/Mac
Introduction:
Kapwing is a video editing application that adds a professional-looking waveform to any video. It assists you in changing the color, speed, and position of your waves.
Features:
- Your videos can be shared on any social media platform.
- There are no advertisements in this application.
- The video does not contain any watermarks.
- You can use any browser to see your clips.
- Allows you to include a logo in your video.
- Shapes can be used in your video clips.
Price: Free to use but can be upgraded to PRO at $16/month (Limited time offer).
Cons:
- Although the application can upload 4K UHD videos, it cannot export files simultaneously.
5. AudioVision Music Player
Supported system: Android
Introduction:
This program is a music player that helps you filter music by genres, playlists, or artists and be a great music visualization tool. The music visualizer from AudioVision comes with six different visual skins that are entirely customizable and provide nearly limitless visualization options. For example, you can adjust the Sensitivity, Bar and Border Width, and Color settings to match the music genre you’re now listening to. In addition, the software is only 1.6MB in size, so even if you don’t have a lot of storage space on your phone, you can visualize music and make unique screensavers.
Features:
- It offers a vast collection of customizable options
- User-friendly application with easy to use interface
- Customize sound wave appearance
Price: $0
Cons:
- Difficult to refresh songs
- Poor functionality
6. Alien Worlds - Music Visualizer

Supported system: Android, iOS
Introduction:
If you opt to install this music visualizer on your mobile device, you will undoubtedly be stunning. Choose from 47 radio channels in the Alien Worlds app, which play a variety of music genres such as rock, techno, trance, and ambient. As a result, its musical representations are always one-of-a-kind. Your results will be different each time you use the program. Furthermore, there are over a hundred different settings to personalize and adjust visuals in almost any way you like. To unlock all of the app’s features, you’ll need to upgrade to the $1.99 Premium version.
Features:
- Digital Impulse has 47 radio channels with music styles such as a house, trance, disco, ambient, rock, and techno.
- Use the up and down arrow buttons to adjust the speed of the visual effects.
- The visual effects are generated at random, which means that the effects shown will differ each time the program is used.
Price: The software is free; however, in-app purchases are available.
Cons:
- Lacks variations in tools and limited product quality.
7. Staella

Supported system: iOS
Introduction:
Controlling the noir, hue, and contrast of the colors are just a few of the settings available in the STAELLA app. There are various graphic packages, but you can only get them if you pay for them in-app. STAELLA is incredibly simple to use; all you have to do is choose a song and enjoy the software’s images. The app’s real-time audio-reactive engine generates visuals from sounds exceptionally instantly. If you upgrade to the Pro edition, you’ll record all of your music visualizations and save them as GIF or MOV files.
Features:
- Generate instant sound visuals
- Music Video Maker and Visual Music Player without Editing
- Music and photos can be imported. Visuals that can be changed.
- Audio Reactive System in Real-Time
- Boost your musical experience
Price: The software is free; however, in-app purchases are available.
Cons:
- Derails the music quality
8. Veed

Supported system: Online
Introduction:
Veed, which is an effective way to turn your music into videos with waveform, is next on the list of music visualizer software. The entire procedure is completed online, with the finished product saved in MP4 format. It was created to promote music on social media by adding waveforms, audio spectrums, and audiograms to make it look and sound more engaging.
Features:
- Choose your waveforms and animated audiograms.
- In the final video, add your photos or sketches.
- A cloud-based online application.
- Share your material on social media sites like Twitter, Instagram, and Facebook.
Price: Limited version is free, basic is $12, and Pro is $24 per month.
Cons:
- Limited options are available in the free plan.
9. Renderforest Music Visualizer

Supported system: Windows/Mac
Introduction:
Renderforest is a free music visualizer that makes it simple to produce visually appealing material. It’s a web-based application that works with a variety of browsers. YouTubers use it to create professional-looking intros and outros. There are numerous visualization templates from which to pick.
Features:
- It has a large selection of visualization templates.
- This online music visualizer application sends you your final video through email.
- Create professional YouTube channel intros and outros.
- Animations and presentations that explain things.
- Business video editing tools that save you time.
- Use commercial videos or upload your video files.
Price: With limited possibilities, it’s free. Individualized plans are offered for a fee.
Cons:
- Limited styles when creating audio visualizations.
10. Project M - Music Visualizer

Supported system: Android/iOs
Introduction:
One notable difference exists between the iOS and Android versions of the ProjectM app. The iOS version of the app has a media player; however, the Android version does not. Regardless, both program versions have excellent audio visualization features that let you generate images from a wide range of music types. As a result, ProjectM is one of the most excellent music visualization apps for Android and iOS.
Features:
- It has hundreds of visual effects, multi-touch interactive visualizations, and Chromecast compatibility.
- Various additional modes available, like the Immersive Option for KitKat smartphones
- Live Wallpaper mode, which generates animated wallpapers for your Smartphone.
- Visual Effect Browser & Search
- Auto-detects sound from Microphone and Music Players
Price: On the Google Play Store, it’s free, but there are adverts; on the App Store, it’s $2.99.
Cons:
- There are no presets included with the projectM library.

A music visualizer application produces animated graphics based on beats, volume, rhythm, and frequency spectrum. These apps show various animations for various photographs and even provide templates for creating a particular animation. Music visualizers turn music into numbers highlighted in lines, circles, and other visuals using a mathematical formulae-based algorithm.
The 10 best mp3 visualizers for Windows, Mac, Android, iPhone and Online are listed below:
1. Offeo

Supported system: Online
Introduction:
OFFEO is a music visualizer that allows you to generate visuals. In addition, beats and audio tracks can be synced with this application.
Features:
- Assists you in improving your music track.
- Professional design templates are available.
- It has a simple drag-and-drop interface.
- It does not require the installation of any software.
- Each video frame has customizable choices.
Price: Offeo offers a 30-day free trial, and a premium account costs around $19/month.
Cons:
- Most of the templates are for short videos (5-7 seconds).
2. Magic Music Visuals

Supported system: Windows
Introduction:
Magic Music Visuals is a powerful audio visualizer for Windows that allows users to create whatever they want. The program is entirely customizable and includes MIDI and live audio capability. In addition, the program generates a variety of designs that spin in different directions depending on the volume and frequency of sound.
Features:
- It shows rotating pictures and 3D models that move to the beat of the music.
- A basic UI makes it simple to use.
- Users can upload cover art.
- Allows for live camera modification in real-time.
Price: A free trial version with nearly full functionality is available, and a $44.95 premium version for one PC.
Cons:
- It requires the ideal software configuration of the system.
3. Musicvid

Supported system: Windows/Mac
Introduction:
A web-based application called Musicvid is another music visualizer for Windows and Mac. It has a long history and is extremely popular all around the world. It enables users to create professional-looking graphics that include sound and animation. Because it is a web-based application, users do not need to install it on their computer; however, they will require a decent internet connection. There are a variety of templates available to aid in the creation process.
Features:
- Chrome and Firefox are supported.
- It includes comprehensive instruction.
- Users can export the final visualization directly from the browser.
Price: $0
Cons:
- Requires fast internet speed to function.
4. Kapwing

Supported system: Windows/Mac
Introduction:
Kapwing is a video editing application that adds a professional-looking waveform to any video. It assists you in changing the color, speed, and position of your waves.
Features:
- Your videos can be shared on any social media platform.
- There are no advertisements in this application.
- The video does not contain any watermarks.
- You can use any browser to see your clips.
- Allows you to include a logo in your video.
- Shapes can be used in your video clips.
Price: Free to use but can be upgraded to PRO at $16/month (Limited time offer).
Cons:
- Although the application can upload 4K UHD videos, it cannot export files simultaneously.
5. AudioVision Music Player
Supported system: Android
Introduction:
This program is a music player that helps you filter music by genres, playlists, or artists and be a great music visualization tool. The music visualizer from AudioVision comes with six different visual skins that are entirely customizable and provide nearly limitless visualization options. For example, you can adjust the Sensitivity, Bar and Border Width, and Color settings to match the music genre you’re now listening to. In addition, the software is only 1.6MB in size, so even if you don’t have a lot of storage space on your phone, you can visualize music and make unique screensavers.
Features:
- It offers a vast collection of customizable options
- User-friendly application with easy to use interface
- Customize sound wave appearance
Price: $0
Cons:
- Difficult to refresh songs
- Poor functionality
6. Alien Worlds - Music Visualizer

Supported system: Android, iOS
Introduction:
If you opt to install this music visualizer on your mobile device, you will undoubtedly be stunning. Choose from 47 radio channels in the Alien Worlds app, which play a variety of music genres such as rock, techno, trance, and ambient. As a result, its musical representations are always one-of-a-kind. Your results will be different each time you use the program. Furthermore, there are over a hundred different settings to personalize and adjust visuals in almost any way you like. To unlock all of the app’s features, you’ll need to upgrade to the $1.99 Premium version.
Features:
- Digital Impulse has 47 radio channels with music styles such as a house, trance, disco, ambient, rock, and techno.
- Use the up and down arrow buttons to adjust the speed of the visual effects.
- The visual effects are generated at random, which means that the effects shown will differ each time the program is used.
Price: The software is free; however, in-app purchases are available.
Cons:
- Lacks variations in tools and limited product quality.
7. Staella

Supported system: iOS
Introduction:
Controlling the noir, hue, and contrast of the colors are just a few of the settings available in the STAELLA app. There are various graphic packages, but you can only get them if you pay for them in-app. STAELLA is incredibly simple to use; all you have to do is choose a song and enjoy the software’s images. The app’s real-time audio-reactive engine generates visuals from sounds exceptionally instantly. If you upgrade to the Pro edition, you’ll record all of your music visualizations and save them as GIF or MOV files.
Features:
- Generate instant sound visuals
- Music Video Maker and Visual Music Player without Editing
- Music and photos can be imported. Visuals that can be changed.
- Audio Reactive System in Real-Time
- Boost your musical experience
Price: The software is free; however, in-app purchases are available.
Cons:
- Derails the music quality
8. Veed

Supported system: Online
Introduction:
Veed, which is an effective way to turn your music into videos with waveform, is next on the list of music visualizer software. The entire procedure is completed online, with the finished product saved in MP4 format. It was created to promote music on social media by adding waveforms, audio spectrums, and audiograms to make it look and sound more engaging.
Features:
- Choose your waveforms and animated audiograms.
- In the final video, add your photos or sketches.
- A cloud-based online application.
- Share your material on social media sites like Twitter, Instagram, and Facebook.
Price: Limited version is free, basic is $12, and Pro is $24 per month.
Cons:
- Limited options are available in the free plan.
9. Renderforest Music Visualizer

Supported system: Windows/Mac
Introduction:
Renderforest is a free music visualizer that makes it simple to produce visually appealing material. It’s a web-based application that works with a variety of browsers. YouTubers use it to create professional-looking intros and outros. There are numerous visualization templates from which to pick.
Features:
- It has a large selection of visualization templates.
- This online music visualizer application sends you your final video through email.
- Create professional YouTube channel intros and outros.
- Animations and presentations that explain things.
- Business video editing tools that save you time.
- Use commercial videos or upload your video files.
Price: With limited possibilities, it’s free. Individualized plans are offered for a fee.
Cons:
- Limited styles when creating audio visualizations.
10. Project M - Music Visualizer

Supported system: Android/iOs
Introduction:
One notable difference exists between the iOS and Android versions of the ProjectM app. The iOS version of the app has a media player; however, the Android version does not. Regardless, both program versions have excellent audio visualization features that let you generate images from a wide range of music types. As a result, ProjectM is one of the most excellent music visualization apps for Android and iOS.
Features:
- It has hundreds of visual effects, multi-touch interactive visualizations, and Chromecast compatibility.
- Various additional modes available, like the Immersive Option for KitKat smartphones
- Live Wallpaper mode, which generates animated wallpapers for your Smartphone.
- Visual Effect Browser & Search
- Auto-detects sound from Microphone and Music Players
Price: On the Google Play Store, it’s free, but there are adverts; on the App Store, it’s $2.99.
Cons:
- There are no presets included with the projectM library.

A music visualizer application produces animated graphics based on beats, volume, rhythm, and frequency spectrum. These apps show various animations for various photographs and even provide templates for creating a particular animation. Music visualizers turn music into numbers highlighted in lines, circles, and other visuals using a mathematical formulae-based algorithm.
The 10 best mp3 visualizers for Windows, Mac, Android, iPhone and Online are listed below:
1. Offeo

Supported system: Online
Introduction:
OFFEO is a music visualizer that allows you to generate visuals. In addition, beats and audio tracks can be synced with this application.
Features:
- Assists you in improving your music track.
- Professional design templates are available.
- It has a simple drag-and-drop interface.
- It does not require the installation of any software.
- Each video frame has customizable choices.
Price: Offeo offers a 30-day free trial, and a premium account costs around $19/month.
Cons:
- Most of the templates are for short videos (5-7 seconds).
2. Magic Music Visuals

Supported system: Windows
Introduction:
Magic Music Visuals is a powerful audio visualizer for Windows that allows users to create whatever they want. The program is entirely customizable and includes MIDI and live audio capability. In addition, the program generates a variety of designs that spin in different directions depending on the volume and frequency of sound.
Features:
- It shows rotating pictures and 3D models that move to the beat of the music.
- A basic UI makes it simple to use.
- Users can upload cover art.
- Allows for live camera modification in real-time.
Price: A free trial version with nearly full functionality is available, and a $44.95 premium version for one PC.
Cons:
- It requires the ideal software configuration of the system.
3. Musicvid

Supported system: Windows/Mac
Introduction:
A web-based application called Musicvid is another music visualizer for Windows and Mac. It has a long history and is extremely popular all around the world. It enables users to create professional-looking graphics that include sound and animation. Because it is a web-based application, users do not need to install it on their computer; however, they will require a decent internet connection. There are a variety of templates available to aid in the creation process.
Features:
- Chrome and Firefox are supported.
- It includes comprehensive instruction.
- Users can export the final visualization directly from the browser.
Price: $0
Cons:
- Requires fast internet speed to function.
4. Kapwing

Supported system: Windows/Mac
Introduction:
Kapwing is a video editing application that adds a professional-looking waveform to any video. It assists you in changing the color, speed, and position of your waves.
Features:
- Your videos can be shared on any social media platform.
- There are no advertisements in this application.
- The video does not contain any watermarks.
- You can use any browser to see your clips.
- Allows you to include a logo in your video.
- Shapes can be used in your video clips.
Price: Free to use but can be upgraded to PRO at $16/month (Limited time offer).
Cons:
- Although the application can upload 4K UHD videos, it cannot export files simultaneously.
5. AudioVision Music Player
Supported system: Android
Introduction:
This program is a music player that helps you filter music by genres, playlists, or artists and be a great music visualization tool. The music visualizer from AudioVision comes with six different visual skins that are entirely customizable and provide nearly limitless visualization options. For example, you can adjust the Sensitivity, Bar and Border Width, and Color settings to match the music genre you’re now listening to. In addition, the software is only 1.6MB in size, so even if you don’t have a lot of storage space on your phone, you can visualize music and make unique screensavers.
Features:
- It offers a vast collection of customizable options
- User-friendly application with easy to use interface
- Customize sound wave appearance
Price: $0
Cons:
- Difficult to refresh songs
- Poor functionality
6. Alien Worlds - Music Visualizer

Supported system: Android, iOS
Introduction:
If you opt to install this music visualizer on your mobile device, you will undoubtedly be stunning. Choose from 47 radio channels in the Alien Worlds app, which play a variety of music genres such as rock, techno, trance, and ambient. As a result, its musical representations are always one-of-a-kind. Your results will be different each time you use the program. Furthermore, there are over a hundred different settings to personalize and adjust visuals in almost any way you like. To unlock all of the app’s features, you’ll need to upgrade to the $1.99 Premium version.
Features:
- Digital Impulse has 47 radio channels with music styles such as a house, trance, disco, ambient, rock, and techno.
- Use the up and down arrow buttons to adjust the speed of the visual effects.
- The visual effects are generated at random, which means that the effects shown will differ each time the program is used.
Price: The software is free; however, in-app purchases are available.
Cons:
- Lacks variations in tools and limited product quality.
7. Staella

Supported system: iOS
Introduction:
Controlling the noir, hue, and contrast of the colors are just a few of the settings available in the STAELLA app. There are various graphic packages, but you can only get them if you pay for them in-app. STAELLA is incredibly simple to use; all you have to do is choose a song and enjoy the software’s images. The app’s real-time audio-reactive engine generates visuals from sounds exceptionally instantly. If you upgrade to the Pro edition, you’ll record all of your music visualizations and save them as GIF or MOV files.
Features:
- Generate instant sound visuals
- Music Video Maker and Visual Music Player without Editing
- Music and photos can be imported. Visuals that can be changed.
- Audio Reactive System in Real-Time
- Boost your musical experience
Price: The software is free; however, in-app purchases are available.
Cons:
- Derails the music quality
8. Veed

Supported system: Online
Introduction:
Veed, which is an effective way to turn your music into videos with waveform, is next on the list of music visualizer software. The entire procedure is completed online, with the finished product saved in MP4 format. It was created to promote music on social media by adding waveforms, audio spectrums, and audiograms to make it look and sound more engaging.
Features:
- Choose your waveforms and animated audiograms.
- In the final video, add your photos or sketches.
- A cloud-based online application.
- Share your material on social media sites like Twitter, Instagram, and Facebook.
Price: Limited version is free, basic is $12, and Pro is $24 per month.
Cons:
- Limited options are available in the free plan.
9. Renderforest Music Visualizer

Supported system: Windows/Mac
Introduction:
Renderforest is a free music visualizer that makes it simple to produce visually appealing material. It’s a web-based application that works with a variety of browsers. YouTubers use it to create professional-looking intros and outros. There are numerous visualization templates from which to pick.
Features:
- It has a large selection of visualization templates.
- This online music visualizer application sends you your final video through email.
- Create professional YouTube channel intros and outros.
- Animations and presentations that explain things.
- Business video editing tools that save you time.
- Use commercial videos or upload your video files.
Price: With limited possibilities, it’s free. Individualized plans are offered for a fee.
Cons:
- Limited styles when creating audio visualizations.
10. Project M - Music Visualizer

Supported system: Android/iOs
Introduction:
One notable difference exists between the iOS and Android versions of the ProjectM app. The iOS version of the app has a media player; however, the Android version does not. Regardless, both program versions have excellent audio visualization features that let you generate images from a wide range of music types. As a result, ProjectM is one of the most excellent music visualization apps for Android and iOS.
Features:
- It has hundreds of visual effects, multi-touch interactive visualizations, and Chromecast compatibility.
- Various additional modes available, like the Immersive Option for KitKat smartphones
- Live Wallpaper mode, which generates animated wallpapers for your Smartphone.
- Visual Effect Browser & Search
- Auto-detects sound from Microphone and Music Players
Price: On the Google Play Store, it’s free, but there are adverts; on the App Store, it’s $2.99.
Cons:
- There are no presets included with the projectM library.
How to Create a Special Animated Transition in Filmora in Just 2 Minutes. This Simple Step-by-Step Guide Will Show You the Easy Way
Preparation
What you need to prepare:
- A computer (Windows or macOS)
- Your video materials.
- Filmora video editor
Step 1
First off, download the Filmora video editor . After it downloads, click install and follow the provided steps.
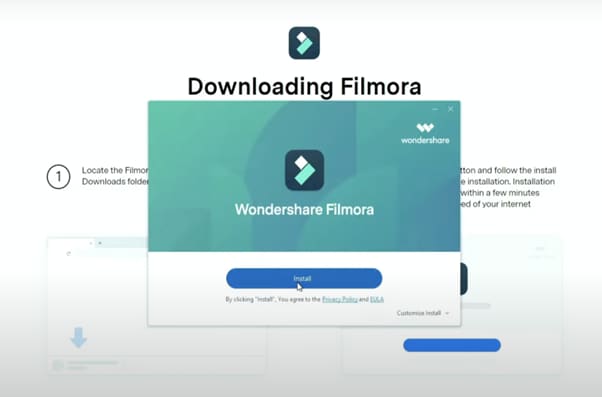
Step 2
After installing, the editor will start automatically. When it does, click on the “New Project” button to finally open the editor.

Step 3
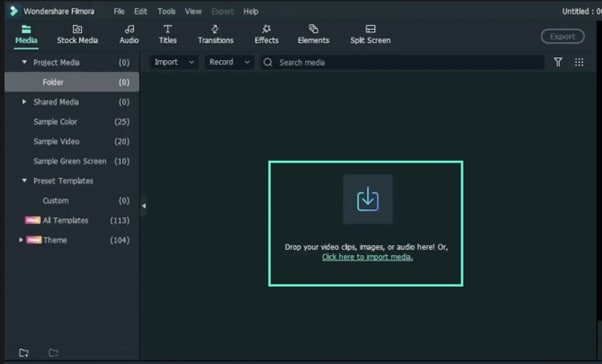
From the upper-left side of the screen, click the highlighted text to import media. This is where you insert your video files into the editor. Once the folder opens, select the videos you want to import and click “Open”.
Step 4
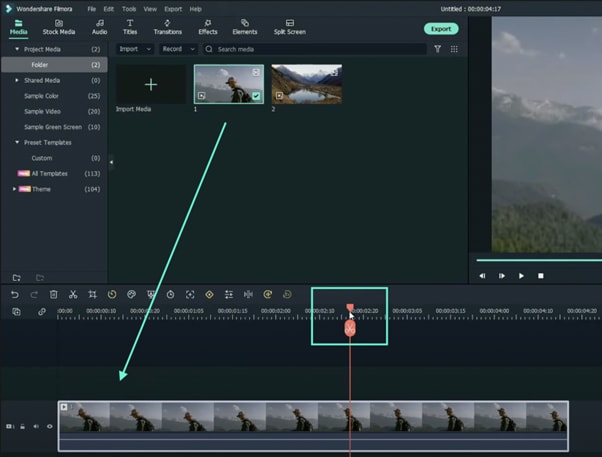
Drag your first clip to the timeline. Then, move the Playhead to where you want to start your transition.
Step 5
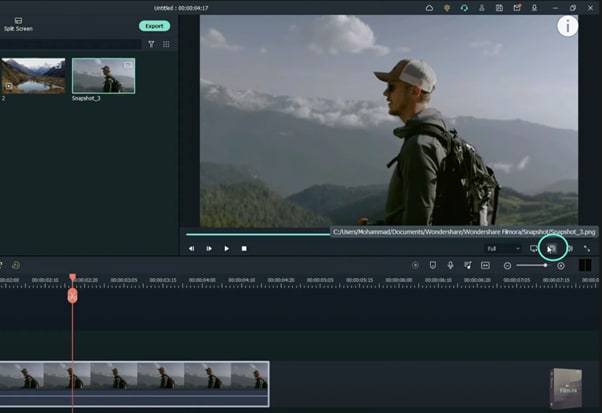
Take a snapshot of this frame.
Step 6
Split the footage and delete the part on the right side of the Playhead.
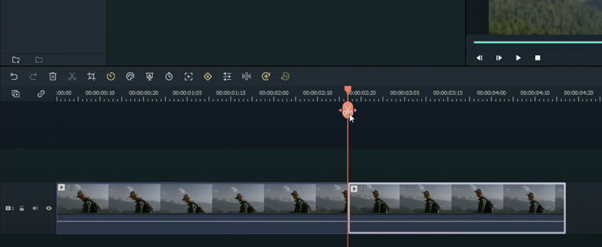
Step 7
Without moving the Playhead, simply drag the snapshot you took earlier. Right-click on the snapshot in the timeline and click on “Duration”. Then, set the duration to 1 second. Finally, click “OK”.
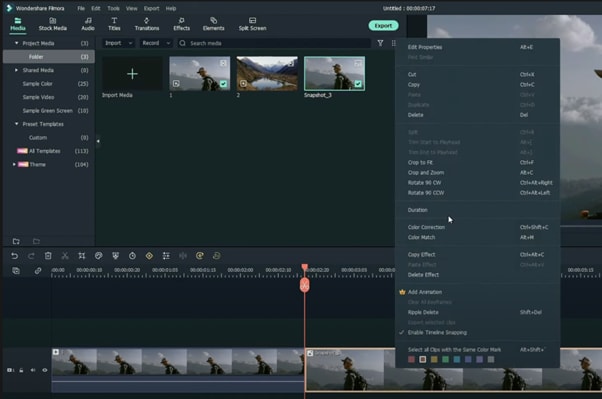
Step 8
Open your browser and go to the Picsart photo effects editor . Upload the same snapshot we made in Filmora and apply the “Comic” preset on it. Then, download the photo and import it back into Filmora.
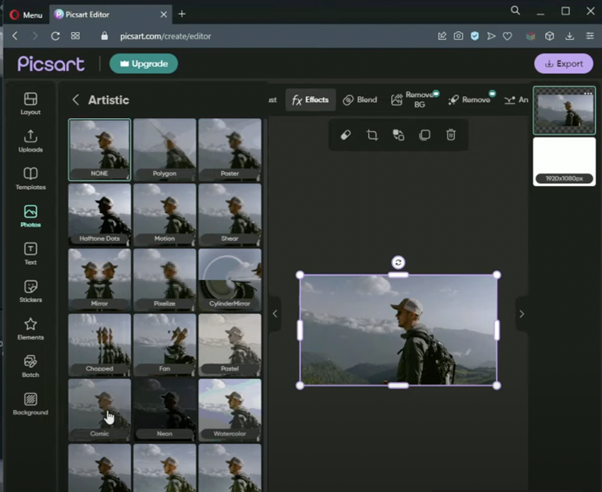
Step 9
Drag the snapshot with the Comic preset to the Timeline and set its duration to 1 second as well.
Step 10
Repeat the same process with the second clip. Take a snapshot, add the Comic effect, and import it back into Filmora. But this time, align the clips as follows: Add the snapshot with the comic preset first, then the snapshot without any effects, and then the video. It should look like this.

Step 11
Go to the Transitions tab and drag the “Color Distance” transition between the first and second snapshot on your Timeline. Then, right-click on the transition box in the timeline and select “Edit Properties”. From there, change the duration of the transition to 1 second and click “OK”.
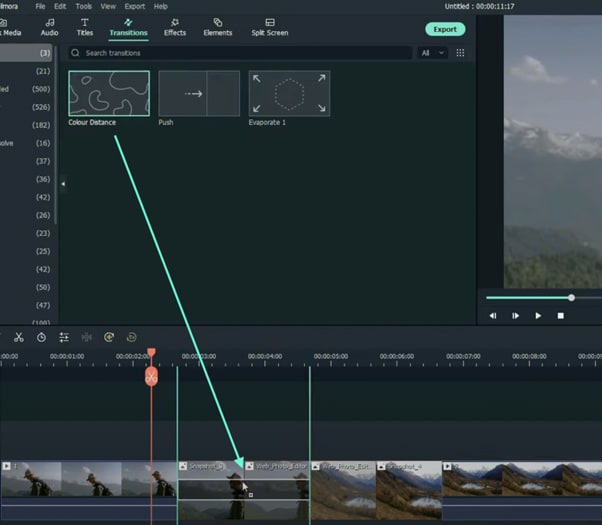
Step 12
Drag the “Push” transition between the next two snapshots. Set its duration to 1 second as well by right clicking the transition and going to “Edit Properties”.
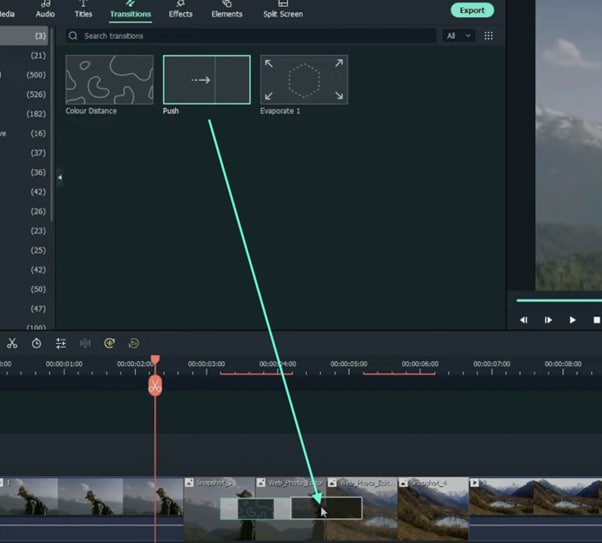
Step 13
Place the last transition between the last two snapshots in your timeline. This time, we’re going to use the “Evaporate” transition. Set its duration to 1 second as well.
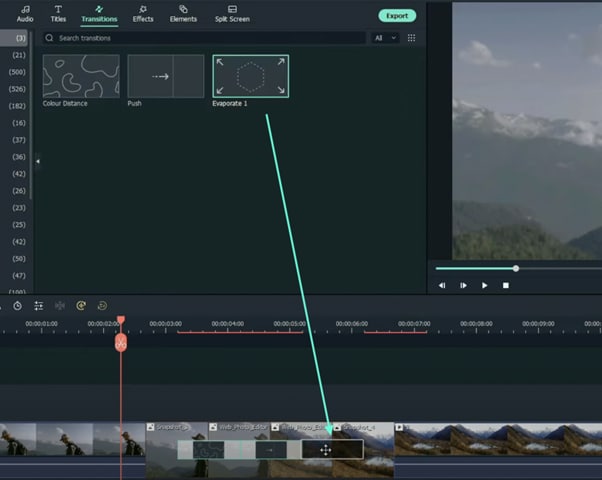
Step 14
The final step is to render the video. Click this button and you will finally be done.
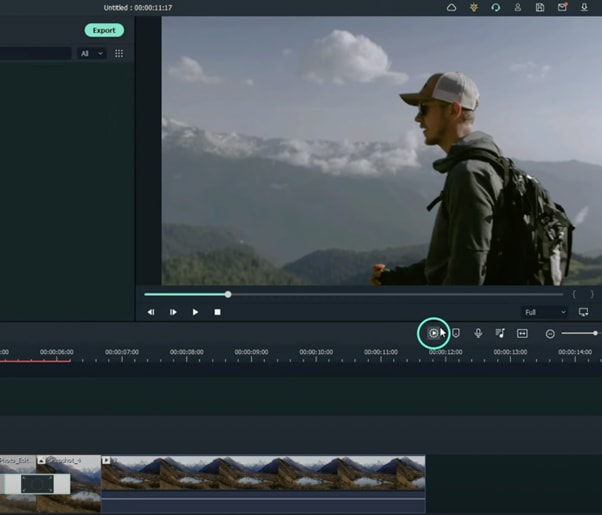
Summary
What you’ve learned:
- How to add any type of transition to video clips and images in Filmora
- How to take quick snapshots of any frame in Filmora
- A quick way to Render videos and watch the final preview
- Add custom effects to images
What you need to prepare:
- A computer (Windows or macOS)
- Your video materials.
- Filmora video editor
Step 1
First off, download the Filmora video editor . After it downloads, click install and follow the provided steps.

Step 2
After installing, the editor will start automatically. When it does, click on the “New Project” button to finally open the editor.

Step 3
From the upper-left side of the screen, click the highlighted text to import media. This is where you insert your video files into the editor. Once the folder opens, select the videos you want to import and click “Open”.

Step 4
Drag your first clip to the timeline. Then, move the Playhead to where you want to start your transition.

Step 5
Take a snapshot of this frame.

Step 6
Split the footage and delete the part on the right side of the Playhead.

Step 7
Without moving the Playhead, simply drag the snapshot you took earlier. Right-click on the snapshot in the timeline and click on “Duration”. Then, set the duration to 1 second. Finally, click “OK”.

Step 8
Open your browser and go to the Picsart photo effects editor . Upload the same snapshot we made in Filmora and apply the “Comic” preset on it. Then, download the photo and import it back into Filmora.

Step 9
Drag the snapshot with the Comic preset to the Timeline and set its duration to 1 second as well.
Step 10
Repeat the same process with the second clip. Take a snapshot, add the Comic effect, and import it back into Filmora. But this time, align the clips as follows: Add the snapshot with the comic preset first, then the snapshot without any effects, and then the video. It should look like this.

Step 11
Go to the Transitions tab and drag the “Color Distance” transition between the first and second snapshot on your Timeline. Then, right-click on the transition box in the timeline and select “Edit Properties”. From there, change the duration of the transition to 1 second and click “OK”.

Step 12
Drag the “Push” transition between the next two snapshots. Set its duration to 1 second as well by right clicking the transition and going to “Edit Properties”.

Step 13
Place the last transition between the last two snapshots in your timeline. This time, we’re going to use the “Evaporate” transition. Set its duration to 1 second as well.

Step 14
The final step is to render the video. Click this button and you will finally be done.

Summary
What you’ve learned:
- How to add any type of transition to video clips and images in Filmora
- How to take quick snapshots of any frame in Filmora
- A quick way to Render videos and watch the final preview
- Add custom effects to images
What you need to prepare:
- A computer (Windows or macOS)
- Your video materials.
- Filmora video editor
Step 1
First off, download the Filmora video editor . After it downloads, click install and follow the provided steps.

Step 2
After installing, the editor will start automatically. When it does, click on the “New Project” button to finally open the editor.

Step 3
From the upper-left side of the screen, click the highlighted text to import media. This is where you insert your video files into the editor. Once the folder opens, select the videos you want to import and click “Open”.

Step 4
Drag your first clip to the timeline. Then, move the Playhead to where you want to start your transition.

Step 5
Take a snapshot of this frame.

Step 6
Split the footage and delete the part on the right side of the Playhead.

Step 7
Without moving the Playhead, simply drag the snapshot you took earlier. Right-click on the snapshot in the timeline and click on “Duration”. Then, set the duration to 1 second. Finally, click “OK”.

Step 8
Open your browser and go to the Picsart photo effects editor . Upload the same snapshot we made in Filmora and apply the “Comic” preset on it. Then, download the photo and import it back into Filmora.

Step 9
Drag the snapshot with the Comic preset to the Timeline and set its duration to 1 second as well.
Step 10
Repeat the same process with the second clip. Take a snapshot, add the Comic effect, and import it back into Filmora. But this time, align the clips as follows: Add the snapshot with the comic preset first, then the snapshot without any effects, and then the video. It should look like this.

Step 11
Go to the Transitions tab and drag the “Color Distance” transition between the first and second snapshot on your Timeline. Then, right-click on the transition box in the timeline and select “Edit Properties”. From there, change the duration of the transition to 1 second and click “OK”.

Step 12
Drag the “Push” transition between the next two snapshots. Set its duration to 1 second as well by right clicking the transition and going to “Edit Properties”.

Step 13
Place the last transition between the last two snapshots in your timeline. This time, we’re going to use the “Evaporate” transition. Set its duration to 1 second as well.

Step 14
The final step is to render the video. Click this button and you will finally be done.

Summary
What you’ve learned:
- How to add any type of transition to video clips and images in Filmora
- How to take quick snapshots of any frame in Filmora
- A quick way to Render videos and watch the final preview
- Add custom effects to images
What you need to prepare:
- A computer (Windows or macOS)
- Your video materials.
- Filmora video editor
Step 1
First off, download the Filmora video editor . After it downloads, click install and follow the provided steps.

Step 2
After installing, the editor will start automatically. When it does, click on the “New Project” button to finally open the editor.

Step 3
From the upper-left side of the screen, click the highlighted text to import media. This is where you insert your video files into the editor. Once the folder opens, select the videos you want to import and click “Open”.

Step 4
Drag your first clip to the timeline. Then, move the Playhead to where you want to start your transition.

Step 5
Take a snapshot of this frame.

Step 6
Split the footage and delete the part on the right side of the Playhead.

Step 7
Without moving the Playhead, simply drag the snapshot you took earlier. Right-click on the snapshot in the timeline and click on “Duration”. Then, set the duration to 1 second. Finally, click “OK”.

Step 8
Open your browser and go to the Picsart photo effects editor . Upload the same snapshot we made in Filmora and apply the “Comic” preset on it. Then, download the photo and import it back into Filmora.

Step 9
Drag the snapshot with the Comic preset to the Timeline and set its duration to 1 second as well.
Step 10
Repeat the same process with the second clip. Take a snapshot, add the Comic effect, and import it back into Filmora. But this time, align the clips as follows: Add the snapshot with the comic preset first, then the snapshot without any effects, and then the video. It should look like this.

Step 11
Go to the Transitions tab and drag the “Color Distance” transition between the first and second snapshot on your Timeline. Then, right-click on the transition box in the timeline and select “Edit Properties”. From there, change the duration of the transition to 1 second and click “OK”.

Step 12
Drag the “Push” transition between the next two snapshots. Set its duration to 1 second as well by right clicking the transition and going to “Edit Properties”.

Step 13
Place the last transition between the last two snapshots in your timeline. This time, we’re going to use the “Evaporate” transition. Set its duration to 1 second as well.

Step 14
The final step is to render the video. Click this button and you will finally be done.

Summary
What you’ve learned:
- How to add any type of transition to video clips and images in Filmora
- How to take quick snapshots of any frame in Filmora
- A quick way to Render videos and watch the final preview
- Add custom effects to images
A Vlog Has Many Elements to Answer. While Setting up Ideas for It, There Are Several Things Into Which You Should Look. This Article Presents a Picture of How a Vlog Video Is Made Perfectly
Are you new to vlogging? Have you gone through the basics of starting a vlog? If not, don’t worry, as we have the best guide for you to start vlogging. Initially, you will get to know about what is a vlog, along with several tips that should be kept in mind while making a vlog video.
In this article
01 How to Start Vlogging for Beginners?
02 Inspirations and Tips for Vlog Video Ideas
Part 1: How to Start Vlogging for Beginners?
A proper guide can be considered while starting your vlog video channel. Although there are hundreds and thousands of vloggers across the social media platform, there is still room for more. As you think of an intuitive idea for vlogging, there are some steps you need to reconsider before going into this system.
1. Finding the Niche and Audience of Choice
Looking into the variety of niches that can be tried for vlog videos, the selection can never be easy. You need to be sure which genre you are looking forward to picking, which then develops a target audience that you would be addressing. Your content heavily depends on the type of target audience you pick for yourselves. Be very appropriate and original while you add yourselves in the vlog video.
Finding the appropriate niche and working across it while understanding the answer to what is a vlog is quite essential. This guides the complete future of your channel across this section.
2. Look And Inspire From Competition
The second most important thing to be done before starting vlogs on your channel is an overview of the competitive market. Understanding the current video creator market dynamics is the next direction that you need to consider for starting vlogging. Competition lets you understand the loopholes that exist in the current system. This is a highly effective way of discovering innovation within any market.
Get inspired from the competition that exists within the current vlogging market. Find what they do best and consider the strong points within yourself.
3. Creating a Brand
The next step to starting your personal vlogs is setting up a brand that would become a highlight of yours across the platforms. People need something unifying to follow a certain party or personality; the same is true with vlogging. As many vloggers describe their community as a family, they set up a complete brand across this narrative and present a great idea of inclusivity.
While you prepare for your vlog video, you need to specify the name logo and create art that would set up the complete vlog channel. These should be extremely attractive and alluring for the community to watch and learn.
4. Familiarize and Invest
You should be sure about what you need to do across the platform. While you design the video for your vlog channel, it is important to understand what needs to be done to become a professional in this sector. Familiarizing yourselves about the platform is one crucial thing that helps you understand the requirements to fulfill for a video.
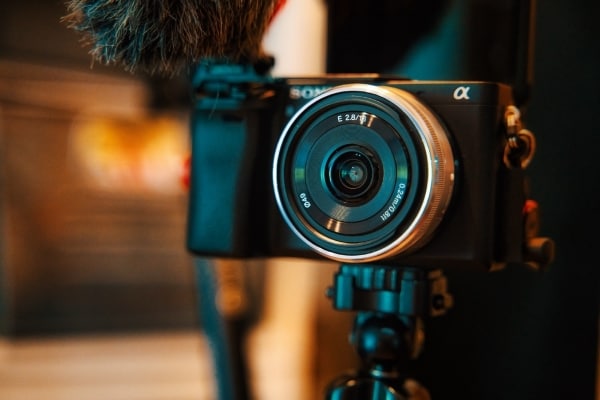
Make sure that you work with good gear and equipment. Video quality is one significant point that is considered by viewers in this community. To make yourselves heard out, you need to invest across the gear appropriately.
Part 2: Inspirations and Tips for Vlog Video Ideas
While you dissect the answer to the question of “what is vlogging,” this part indicates all the essential points and tips that need to be considered for vlog video ideas. These tips shall help you set up a platform for yourself to inspire and direct people to your content.

1. Be Innovative in Your First Vlog
The first vlog is essential for many reasons. Where you let people know about yourselves, this can be a great start to your impressive journey in vlogging. The only thing that you need to do is innovate users into setting up their first vlog. This can be done through a good idea or targeting your introduction under a particular niche. Innovate your method of interacting with people, and this would attract every person you may have thought of.
2. Make Yourselves Personal
To interact in a better way, it is always considered best to be personal with your viewers. Share things that you find especially important for the viewers to know. Where you think you’ll inspire people with your idea, you need to highlight it properly. This can include your personal goals, gains, routine, and other details that highlight your personal life in and out of work. Providing facts about your personality can be the perfect choice for a vlog about to make a start.
3. Include a Comedy Touch
People love comedy! They die for looking content that can make them laugh and make their day good. Your vlog video should be a distributed combination of different niches and types that can be targeted across different points as per the requirement of the audience. You will always understand the point where you wish to add a particular style of interaction. Adding a comedy touch will make your viewers laugh, which is a win-win for your vlog channel.
4. Add in Information
The community does not always like content that does not teach something well to the viewers. If you keep yourselves stagnant to a single point, it will never bring you a breakthrough in your vlogging history. Informative videos are realized as interactive, which many viewers usually promote at times. The topic or concept that has been presented needs to be addressed perfectly in vlogs to cater to the requirements.
5. Provide Utility Services
Vlogs that are a combination of fun, information, and utility are considered the best. Showing viewers a clear picture of your lifestyle can be used to inspire most of them. This can be one of the best tips that would be put into practice for inspiring people. Your vlog journey should be expressive and offer priority, which can be done by showcasing the world through traveling or providing fitness goals.
Closing Words
Wish to start your vlog channel? After hearing every important information and criteria, are you ready to make your first vlog? This article has provided a distinctive understanding of making the first vlog video with effective tips and tricks. Along with that, whenever it comes to editing these vlogs, you can consider using Wondershare Filmora for this purpose.
Wondershare Filmora provides a complete editorial collection of tools that can be used ideally for enhancing the quality of the video. Filmora allows you to change the videos and audios under essential tools to design the best video. You can also employ effective techniques such as using effects and transitions.
Such elements can provoke the user to perform systematically while presenting a cognitive solution to video editing. Multiple things can be done across the platform while designing the first vlog. Look into the provided tips and tricks to avoid all kinds of errors.
Wondershare Filmora
Get started easily with Filmora’s powerful performance, intuitive interface, and countless effects!
Try It Free Try It Free Try It Free Learn More >

02 Inspirations and Tips for Vlog Video Ideas
Part 1: How to Start Vlogging for Beginners?
A proper guide can be considered while starting your vlog video channel. Although there are hundreds and thousands of vloggers across the social media platform, there is still room for more. As you think of an intuitive idea for vlogging, there are some steps you need to reconsider before going into this system.

1. Finding the Niche and Audience of Choice
Looking into the variety of niches that can be tried for vlog videos, the selection can never be easy. You need to be sure which genre you are looking forward to picking, which then develops a target audience that you would be addressing. Your content heavily depends on the type of target audience you pick for yourselves. Be very appropriate and original while you add yourselves in the vlog video.
Finding the appropriate niche and working across it while understanding the answer to what is a vlog is quite essential. This guides the complete future of your channel across this section.
2. Look And Inspire From Competition
The second most important thing to be done before starting vlogs on your channel is an overview of the competitive market. Understanding the current video creator market dynamics is the next direction that you need to consider for starting vlogging. Competition lets you understand the loopholes that exist in the current system. This is a highly effective way of discovering innovation within any market.
Get inspired from the competition that exists within the current vlogging market. Find what they do best and consider the strong points within yourself.
3. Creating a Brand
The next step to starting your personal vlogs is setting up a brand that would become a highlight of yours across the platforms. People need something unifying to follow a certain party or personality; the same is true with vlogging. As many vloggers describe their community as a family, they set up a complete brand across this narrative and present a great idea of inclusivity.
While you prepare for your vlog video, you need to specify the name logo and create art that would set up the complete vlog channel. These should be extremely attractive and alluring for the community to watch and learn.
4. Familiarize and Invest
You should be sure about what you need to do across the platform. While you design the video for your vlog channel, it is important to understand what needs to be done to become a professional in this sector. Familiarizing yourselves about the platform is one crucial thing that helps you understand the requirements to fulfill for a video.
Make sure that you work with good gear and equipment. Video quality is one significant point that is considered by viewers in this community. To make yourselves heard out, you need to invest across the gear appropriately.
Part 2: Inspirations and Tips for Vlog Video Ideas
While you dissect the answer to the question of “what is vlogging,” this part indicates all the essential points and tips that need to be considered for vlog video ideas. These tips shall help you set up a platform for yourself to inspire and direct people to your content.

1. Be Innovative in Your First Vlog
The first vlog is essential for many reasons. Where you let people know about yourselves, this can be a great start to your impressive journey in vlogging. The only thing that you need to do is innovate users into setting up their first vlog. This can be done through a good idea or targeting your introduction under a particular niche. Innovate your method of interacting with people, and this would attract every person you may have thought of.
2. Make Yourselves Personal
To interact in a better way, it is always considered best to be personal with your viewers. Share things that you find especially important for the viewers to know. Where you think you’ll inspire people with your idea, you need to highlight it properly. This can include your personal goals, gains, routine, and other details that highlight your personal life in and out of work. Providing facts about your personality can be the perfect choice for a vlog about to make a start.
3. Include a Comedy Touch
People love comedy! They die for looking content that can make them laugh and make their day good. Your vlog video should be a distributed combination of different niches and types that can be targeted across different points as per the requirement of the audience. You will always understand the point where you wish to add a particular style of interaction. Adding a comedy touch will make your viewers laugh, which is a win-win for your vlog channel.
4. Add in Information
The community does not always like content that does not teach something well to the viewers. If you keep yourselves stagnant to a single point, it will never bring you a breakthrough in your vlogging history. Informative videos are realized as interactive, which many viewers usually promote at times. The topic or concept that has been presented needs to be addressed perfectly in vlogs to cater to the requirements.
5. Provide Utility Services
Vlogs that are a combination of fun, information, and utility are considered the best. Showing viewers a clear picture of your lifestyle can be used to inspire most of them. This can be one of the best tips that would be put into practice for inspiring people. Your vlog journey should be expressive and offer priority, which can be done by showcasing the world through traveling or providing fitness goals.
Closing Words
Wish to start your vlog channel? After hearing every important information and criteria, are you ready to make your first vlog? This article has provided a distinctive understanding of making the first vlog video with effective tips and tricks. Along with that, whenever it comes to editing these vlogs, you can consider using Wondershare Filmora for this purpose.
Wondershare Filmora provides a complete editorial collection of tools that can be used ideally for enhancing the quality of the video. Filmora allows you to change the videos and audios under essential tools to design the best video. You can also employ effective techniques such as using effects and transitions.
Such elements can provoke the user to perform systematically while presenting a cognitive solution to video editing. Multiple things can be done across the platform while designing the first vlog. Look into the provided tips and tricks to avoid all kinds of errors.
Wondershare Filmora
Get started easily with Filmora’s powerful performance, intuitive interface, and countless effects!
Try It Free Try It Free Try It Free Learn More >

02 Inspirations and Tips for Vlog Video Ideas
Part 1: How to Start Vlogging for Beginners?
A proper guide can be considered while starting your vlog video channel. Although there are hundreds and thousands of vloggers across the social media platform, there is still room for more. As you think of an intuitive idea for vlogging, there are some steps you need to reconsider before going into this system.

1. Finding the Niche and Audience of Choice
Looking into the variety of niches that can be tried for vlog videos, the selection can never be easy. You need to be sure which genre you are looking forward to picking, which then develops a target audience that you would be addressing. Your content heavily depends on the type of target audience you pick for yourselves. Be very appropriate and original while you add yourselves in the vlog video.
Finding the appropriate niche and working across it while understanding the answer to what is a vlog is quite essential. This guides the complete future of your channel across this section.
2. Look And Inspire From Competition
The second most important thing to be done before starting vlogs on your channel is an overview of the competitive market. Understanding the current video creator market dynamics is the next direction that you need to consider for starting vlogging. Competition lets you understand the loopholes that exist in the current system. This is a highly effective way of discovering innovation within any market.
Get inspired from the competition that exists within the current vlogging market. Find what they do best and consider the strong points within yourself.
3. Creating a Brand
The next step to starting your personal vlogs is setting up a brand that would become a highlight of yours across the platforms. People need something unifying to follow a certain party or personality; the same is true with vlogging. As many vloggers describe their community as a family, they set up a complete brand across this narrative and present a great idea of inclusivity.
While you prepare for your vlog video, you need to specify the name logo and create art that would set up the complete vlog channel. These should be extremely attractive and alluring for the community to watch and learn.
4. Familiarize and Invest
You should be sure about what you need to do across the platform. While you design the video for your vlog channel, it is important to understand what needs to be done to become a professional in this sector. Familiarizing yourselves about the platform is one crucial thing that helps you understand the requirements to fulfill for a video.
Make sure that you work with good gear and equipment. Video quality is one significant point that is considered by viewers in this community. To make yourselves heard out, you need to invest across the gear appropriately.
Part 2: Inspirations and Tips for Vlog Video Ideas
While you dissect the answer to the question of “what is vlogging,” this part indicates all the essential points and tips that need to be considered for vlog video ideas. These tips shall help you set up a platform for yourself to inspire and direct people to your content.

1. Be Innovative in Your First Vlog
The first vlog is essential for many reasons. Where you let people know about yourselves, this can be a great start to your impressive journey in vlogging. The only thing that you need to do is innovate users into setting up their first vlog. This can be done through a good idea or targeting your introduction under a particular niche. Innovate your method of interacting with people, and this would attract every person you may have thought of.
2. Make Yourselves Personal
To interact in a better way, it is always considered best to be personal with your viewers. Share things that you find especially important for the viewers to know. Where you think you’ll inspire people with your idea, you need to highlight it properly. This can include your personal goals, gains, routine, and other details that highlight your personal life in and out of work. Providing facts about your personality can be the perfect choice for a vlog about to make a start.
3. Include a Comedy Touch
People love comedy! They die for looking content that can make them laugh and make their day good. Your vlog video should be a distributed combination of different niches and types that can be targeted across different points as per the requirement of the audience. You will always understand the point where you wish to add a particular style of interaction. Adding a comedy touch will make your viewers laugh, which is a win-win for your vlog channel.
4. Add in Information
The community does not always like content that does not teach something well to the viewers. If you keep yourselves stagnant to a single point, it will never bring you a breakthrough in your vlogging history. Informative videos are realized as interactive, which many viewers usually promote at times. The topic or concept that has been presented needs to be addressed perfectly in vlogs to cater to the requirements.
5. Provide Utility Services
Vlogs that are a combination of fun, information, and utility are considered the best. Showing viewers a clear picture of your lifestyle can be used to inspire most of them. This can be one of the best tips that would be put into practice for inspiring people. Your vlog journey should be expressive and offer priority, which can be done by showcasing the world through traveling or providing fitness goals.
Closing Words
Wish to start your vlog channel? After hearing every important information and criteria, are you ready to make your first vlog? This article has provided a distinctive understanding of making the first vlog video with effective tips and tricks. Along with that, whenever it comes to editing these vlogs, you can consider using Wondershare Filmora for this purpose.
Wondershare Filmora provides a complete editorial collection of tools that can be used ideally for enhancing the quality of the video. Filmora allows you to change the videos and audios under essential tools to design the best video. You can also employ effective techniques such as using effects and transitions.
Such elements can provoke the user to perform systematically while presenting a cognitive solution to video editing. Multiple things can be done across the platform while designing the first vlog. Look into the provided tips and tricks to avoid all kinds of errors.
Wondershare Filmora
Get started easily with Filmora’s powerful performance, intuitive interface, and countless effects!
Try It Free Try It Free Try It Free Learn More >

02 Inspirations and Tips for Vlog Video Ideas
Part 1: How to Start Vlogging for Beginners?
A proper guide can be considered while starting your vlog video channel. Although there are hundreds and thousands of vloggers across the social media platform, there is still room for more. As you think of an intuitive idea for vlogging, there are some steps you need to reconsider before going into this system.

1. Finding the Niche and Audience of Choice
Looking into the variety of niches that can be tried for vlog videos, the selection can never be easy. You need to be sure which genre you are looking forward to picking, which then develops a target audience that you would be addressing. Your content heavily depends on the type of target audience you pick for yourselves. Be very appropriate and original while you add yourselves in the vlog video.
Finding the appropriate niche and working across it while understanding the answer to what is a vlog is quite essential. This guides the complete future of your channel across this section.
2. Look And Inspire From Competition
The second most important thing to be done before starting vlogs on your channel is an overview of the competitive market. Understanding the current video creator market dynamics is the next direction that you need to consider for starting vlogging. Competition lets you understand the loopholes that exist in the current system. This is a highly effective way of discovering innovation within any market.
Get inspired from the competition that exists within the current vlogging market. Find what they do best and consider the strong points within yourself.
3. Creating a Brand
The next step to starting your personal vlogs is setting up a brand that would become a highlight of yours across the platforms. People need something unifying to follow a certain party or personality; the same is true with vlogging. As many vloggers describe their community as a family, they set up a complete brand across this narrative and present a great idea of inclusivity.
While you prepare for your vlog video, you need to specify the name logo and create art that would set up the complete vlog channel. These should be extremely attractive and alluring for the community to watch and learn.
4. Familiarize and Invest
You should be sure about what you need to do across the platform. While you design the video for your vlog channel, it is important to understand what needs to be done to become a professional in this sector. Familiarizing yourselves about the platform is one crucial thing that helps you understand the requirements to fulfill for a video.
Make sure that you work with good gear and equipment. Video quality is one significant point that is considered by viewers in this community. To make yourselves heard out, you need to invest across the gear appropriately.
Part 2: Inspirations and Tips for Vlog Video Ideas
While you dissect the answer to the question of “what is vlogging,” this part indicates all the essential points and tips that need to be considered for vlog video ideas. These tips shall help you set up a platform for yourself to inspire and direct people to your content.

1. Be Innovative in Your First Vlog
The first vlog is essential for many reasons. Where you let people know about yourselves, this can be a great start to your impressive journey in vlogging. The only thing that you need to do is innovate users into setting up their first vlog. This can be done through a good idea or targeting your introduction under a particular niche. Innovate your method of interacting with people, and this would attract every person you may have thought of.
2. Make Yourselves Personal
To interact in a better way, it is always considered best to be personal with your viewers. Share things that you find especially important for the viewers to know. Where you think you’ll inspire people with your idea, you need to highlight it properly. This can include your personal goals, gains, routine, and other details that highlight your personal life in and out of work. Providing facts about your personality can be the perfect choice for a vlog about to make a start.
3. Include a Comedy Touch
People love comedy! They die for looking content that can make them laugh and make their day good. Your vlog video should be a distributed combination of different niches and types that can be targeted across different points as per the requirement of the audience. You will always understand the point where you wish to add a particular style of interaction. Adding a comedy touch will make your viewers laugh, which is a win-win for your vlog channel.
4. Add in Information
The community does not always like content that does not teach something well to the viewers. If you keep yourselves stagnant to a single point, it will never bring you a breakthrough in your vlogging history. Informative videos are realized as interactive, which many viewers usually promote at times. The topic or concept that has been presented needs to be addressed perfectly in vlogs to cater to the requirements.
5. Provide Utility Services
Vlogs that are a combination of fun, information, and utility are considered the best. Showing viewers a clear picture of your lifestyle can be used to inspire most of them. This can be one of the best tips that would be put into practice for inspiring people. Your vlog journey should be expressive and offer priority, which can be done by showcasing the world through traveling or providing fitness goals.
Closing Words
Wish to start your vlog channel? After hearing every important information and criteria, are you ready to make your first vlog? This article has provided a distinctive understanding of making the first vlog video with effective tips and tricks. Along with that, whenever it comes to editing these vlogs, you can consider using Wondershare Filmora for this purpose.
Wondershare Filmora provides a complete editorial collection of tools that can be used ideally for enhancing the quality of the video. Filmora allows you to change the videos and audios under essential tools to design the best video. You can also employ effective techniques such as using effects and transitions.
Such elements can provoke the user to perform systematically while presenting a cognitive solution to video editing. Multiple things can be done across the platform while designing the first vlog. Look into the provided tips and tricks to avoid all kinds of errors.
Wondershare Filmora
Get started easily with Filmora’s powerful performance, intuitive interface, and countless effects!
Try It Free Try It Free Try It Free Learn More >

Best LUTs for Vlog: A 2024 Overview
Color grading and color correction are essential tools in post-production videos and photos. Many tools can be used for this purpose, such as LUTs. LUTs, or Look Up Tables, are among the most popular color grading and correction tools. It can help to apply a specific color grade or look at your videos and photos.
However, you can choose from different LUT styles if you are a vlogger or a traveler. There are many LUTs vlog options available to choose from, each with a unique look and feel. This article will provide you with different vlog LUTs options that you can try.
- Best LUTs for Vlog to Use in 2024 Editing
- How Has Wondershare Filmora Changed the Dynamics of LUTs in Video Editing?
Part 1: How Can LUTs Help in Vlogging?
If you want to make your vlogs look more professional, try using LUTs. These tables can help you correct the color of your footage easily and quickly while you’re on the go. You can use LUTs for vlogs to fix issues like your clips’ white balance and exposure. Furthermore, many other uses of LUTs for vlogging are discussed below.
Consistency
Consistency is the key when it comes to vlogging. You want your vlog to have a consistent look and feel thorough. With LUTs, you can ensure that the color grading of all your clips is the same. It gives your vlog a cohesive look and makes it stand out from others in the same genre.
Creative Look
Vlog LUTs also allow you to add a unique and creative look to your vlogs. You can set the mood of your vlog by adjusting the colors and tones to match the overall tone of your content. It helps you create a recognizable brand and establish your unique style.
Time-Saving
If you’re short on time, LUTs can help you vlog more efficiently. They save time, allowing you to focus on the storytelling aspect of your vlog. LUTs can also help you to edit your videos and publish them online quickly. It lets you stay on top of trends and maintain an active presence on social media.
Lighting Correction
Sometimes, capturing footage under mixed lighting conditions can be challenging. LUTs can help you to correct this and create a cohesive look for your vlog. You can even use LUTs on mobile editing apps to quickly edit your vlogs to publish them on the go.
Part 2: Best LUTs for Vlog to Use in 2024 Editing
Besides benefits and uses, the real part is to choose the best LUTs for vlogging. With so many LUTs vlog options, choosing a good one takes time and effort. Here are some of the best LUTs that you can use for vlogs.
1. Artist Found LUTs Collection
Are you a vlogger looking for a LUT that can help enhance the colors and brightness of your videos? The Artist Found LUTs Collection is a great option. This LUT is perfect for giving your vlogs a professional look that will capture the attention of your viewers. Furthermore, you can make your videos brighter and more vibrant with this LUTs pack.

2. B&W
B&W is the best LUT for vlog that can be a great addition to your vlogging toolkit. This LUT allows you to transform your videos into black and white. It gives your vlogs and videos a more serious and dramatic look. You can add a touch of nostalgia and a vintage feel to your videos, giving them an artistic feel. With B&W, you can create a timeless and classic look for your vlogs, making them more memorable and impactful.

3. Travel Video LUTs by Matteo Martignago
If you’re looking for a LUT to use in your travel vlogs, consider the Travel Video LUTs by Matteo Martignago. In this LUT pack, you’ll find five different LUTs, each with its unique look and feel. Moreover, this pack has warm and cold LUTs, giving you multiple options. The warm LUTs give your videos a cozy feel, while the cold LUTs can create a sense of adventure and excitement.

4. BRIGHT INSTA LUTS
Bright Insta LUTs is the suitable LUT vlog pack for you if you’re a makeup or fashion vlogger. This LUT pack gives your makeup or fashion vlogs a bright and vibrant look. With 20 different LUTs, for instance, you can experiment with various color palettes and find the perfect look for your videos. These LUTs can help you achieve a bright, vibrant, and exposed feel for better fashion and makeup vlogs.

5. Kurt Von Studios Retro Film LUTs
Kurt Von Studios Retro Film LUTs is a great tool for outdoor vloggers who want to add a vintage feel to their videos. It creates a cinematic look with earthy tones and rusty textures that give your content an authentic vintage feel. With this LUT, you can achieve a retro-style feel, adding character to your vlogs and making them more visually appealing.

6. Limit Color
Give your indoor vlogs and podcasts more feel by using Limit Color. This vlog LUT adds an artistic touch to your footage by limiting the color and light in your videos. It creates darker shadows and underexposed colors by focusing on the subject. Similarly, it helps to create a dramatic look that adds emotion to your vlogs and podcasts.

Part 3: How Has Wondershare Filmora Changed the Dynamics of LUTs in Video Editing?
Wondershare Filmora is an excellent video editing software option if you’re a vlogger. The most important element in vlogging is its lighting and color composition. With its latest update, you can use different LUTs to enhance your vlogs. Filmora provides over 200+ LUTs, including many free vlog LUTs, to help you achieve your videos’ desired look and feel.
Apart from LUTs, you can also make color adjustments and corrections to your vlogs. Moreover, you can adjust brightness, contrast, saturation, and hue to create a perfect vlog. If you’re a travel vlogger, you can make certain adjustments to give your vlogs an earthy and warm feel. You can also use different in-built filters and effects to create the perfect ambiance for your travel vlogs.

Key Features
- With this powerful AI video editing tool, you can use its motion tracking feature. This feature tracks the subject in motion so that you can add creative effects to your videos.
- Wondershare Filmora has over 1000 video templates available. You can choose any desired template that suits the style and mood of your vlog.
- This tool provides you with more control with its speed ramping feature. Using this feature, you can increase or decrease the speed of your videos at any point.
Empower your videos with a new mood using different LUTs. Filmora now offers 100+ top-quality 3D LUTs cover a broad range of scenarios. Transform your videos with Filmora’s powerful 3D LUTs.
Apply LUT on Videos Apply LUT on Videos Learn More

Conclusion
To sum up, LUTs are not an option but more of becoming a necessity, especially for vloggers. LUTs not only color-grade your videos but also add depth and perspective to your videos. Your content looks more engaging and interactive with the correct colors and lighting. However, you can use the best LUTs for vlogs even in the Wondershare Filmora tool. This tool lets you create and edit creative vlogs in no time.
Part 1: How Can LUTs Help in Vlogging?
If you want to make your vlogs look more professional, try using LUTs. These tables can help you correct the color of your footage easily and quickly while you’re on the go. You can use LUTs for vlogs to fix issues like your clips’ white balance and exposure. Furthermore, many other uses of LUTs for vlogging are discussed below.
Consistency
Consistency is the key when it comes to vlogging. You want your vlog to have a consistent look and feel thorough. With LUTs, you can ensure that the color grading of all your clips is the same. It gives your vlog a cohesive look and makes it stand out from others in the same genre.
Creative Look
Vlog LUTs also allow you to add a unique and creative look to your vlogs. You can set the mood of your vlog by adjusting the colors and tones to match the overall tone of your content. It helps you create a recognizable brand and establish your unique style.
Time-Saving
If you’re short on time, LUTs can help you vlog more efficiently. They save time, allowing you to focus on the storytelling aspect of your vlog. LUTs can also help you to edit your videos and publish them online quickly. It lets you stay on top of trends and maintain an active presence on social media.
Lighting Correction
Sometimes, capturing footage under mixed lighting conditions can be challenging. LUTs can help you to correct this and create a cohesive look for your vlog. You can even use LUTs on mobile editing apps to quickly edit your vlogs to publish them on the go.
Part 2: Best LUTs for Vlog to Use in 2024 Editing
Besides benefits and uses, the real part is to choose the best LUTs for vlogging. With so many LUTs vlog options, choosing a good one takes time and effort. Here are some of the best LUTs that you can use for vlogs.
1. Artist Found LUTs Collection
Are you a vlogger looking for a LUT that can help enhance the colors and brightness of your videos? The Artist Found LUTs Collection is a great option. This LUT is perfect for giving your vlogs a professional look that will capture the attention of your viewers. Furthermore, you can make your videos brighter and more vibrant with this LUTs pack.

2. B&W
B&W is the best LUT for vlog that can be a great addition to your vlogging toolkit. This LUT allows you to transform your videos into black and white. It gives your vlogs and videos a more serious and dramatic look. You can add a touch of nostalgia and a vintage feel to your videos, giving them an artistic feel. With B&W, you can create a timeless and classic look for your vlogs, making them more memorable and impactful.

3. Travel Video LUTs by Matteo Martignago
If you’re looking for a LUT to use in your travel vlogs, consider the Travel Video LUTs by Matteo Martignago. In this LUT pack, you’ll find five different LUTs, each with its unique look and feel. Moreover, this pack has warm and cold LUTs, giving you multiple options. The warm LUTs give your videos a cozy feel, while the cold LUTs can create a sense of adventure and excitement.

4. BRIGHT INSTA LUTS
Bright Insta LUTs is the suitable LUT vlog pack for you if you’re a makeup or fashion vlogger. This LUT pack gives your makeup or fashion vlogs a bright and vibrant look. With 20 different LUTs, for instance, you can experiment with various color palettes and find the perfect look for your videos. These LUTs can help you achieve a bright, vibrant, and exposed feel for better fashion and makeup vlogs.

5. Kurt Von Studios Retro Film LUTs
Kurt Von Studios Retro Film LUTs is a great tool for outdoor vloggers who want to add a vintage feel to their videos. It creates a cinematic look with earthy tones and rusty textures that give your content an authentic vintage feel. With this LUT, you can achieve a retro-style feel, adding character to your vlogs and making them more visually appealing.

6. Limit Color
Give your indoor vlogs and podcasts more feel by using Limit Color. This vlog LUT adds an artistic touch to your footage by limiting the color and light in your videos. It creates darker shadows and underexposed colors by focusing on the subject. Similarly, it helps to create a dramatic look that adds emotion to your vlogs and podcasts.

Part 3: How Has Wondershare Filmora Changed the Dynamics of LUTs in Video Editing?
Wondershare Filmora is an excellent video editing software option if you’re a vlogger. The most important element in vlogging is its lighting and color composition. With its latest update, you can use different LUTs to enhance your vlogs. Filmora provides over 200+ LUTs, including many free vlog LUTs, to help you achieve your videos’ desired look and feel.
Apart from LUTs, you can also make color adjustments and corrections to your vlogs. Moreover, you can adjust brightness, contrast, saturation, and hue to create a perfect vlog. If you’re a travel vlogger, you can make certain adjustments to give your vlogs an earthy and warm feel. You can also use different in-built filters and effects to create the perfect ambiance for your travel vlogs.

Key Features
- With this powerful AI video editing tool, you can use its motion tracking feature. This feature tracks the subject in motion so that you can add creative effects to your videos.
- Wondershare Filmora has over 1000 video templates available. You can choose any desired template that suits the style and mood of your vlog.
- This tool provides you with more control with its speed ramping feature. Using this feature, you can increase or decrease the speed of your videos at any point.
Empower your videos with a new mood using different LUTs. Filmora now offers 100+ top-quality 3D LUTs cover a broad range of scenarios. Transform your videos with Filmora’s powerful 3D LUTs.
Apply LUT on Videos Apply LUT on Videos Learn More

Conclusion
To sum up, LUTs are not an option but more of becoming a necessity, especially for vloggers. LUTs not only color-grade your videos but also add depth and perspective to your videos. Your content looks more engaging and interactive with the correct colors and lighting. However, you can use the best LUTs for vlogs even in the Wondershare Filmora tool. This tool lets you create and edit creative vlogs in no time.
Also read:
- New Best CapCut Templates for Slow Motion Video Trend for 2024
- Updated In 2024, Learn How to Make Modern TikTok Velocity Dance Videos in Filmora Just Like the Ones You See on TikTok and Instagram Reels
- In 2024, Discover the Various Techniques of Video Framing, Which Involve Capturing the Essence of a Subject While Eliminating Distractions in the Background, Andlearn How to Apply Them Skillfully to Achieve Desired Results
- New 2024 Approved This Article Presents the Guide to Using Magic Effects for Creating Competent Films with Step-by-Step Instructions and Filmoras Grow and Win Program Contest
- 10 Recommended Websites to Discover Awesome Premiere Pro Video Templates for 2024
- Updated In 2024, Shotcut Video Editor Review
- Best Animated Text Generator for 2024
- Updated In 2024, How to Make a DIY Vlog or Video
- Updated Looking for the Best Way to Create Stunning Video Animations? Here, We Look at some of the Best Animated Video Maker Solutions to Use
- New How to Download and Use Windows Movie Maker 10 for 2024
- Updated Srt File Creator for 2024
- Updated 2024 Approved Steps to Rotate Videos Using Handbrake
- New 2024 Approved How to Add Slideshow in PowerPoint
- New How To Change Sky Background With Adobe Photoshop Best Ways
- New 2024 Approved Discover the Top 10 Video Editing Apps with Templates for Professional-Grade Results. Edit Like a Pro with These Tools
- 2024 Approved Multi Object Tracking The Ultimate Guide
- New Guide To Using Free Luts for OBS for 2024
- Updated Do You Want Your Videos to Look Like Danny Gevirtz? You Can Use some Inspired Presets. There Are Different Danny Gevirtz LUTs that You Can Download and Use
- 2024 Approved Best Cloud Storage Service for Videos
- In 2024, Video Inspiration for Birthday Slideshow
- New 2024 Approved Step by Step to Rotate Video in Google Photos
- New 2024 Approved A Detailed Guid to Remove Background From a Video in Premier Pro
- New Slow-Motion Edits Are Pretty Mesmerizing, and Weve All Imagined Ourselves in One of Those Visually Appealing, Slowed-Down Movies. Well Teach You How to Make a Smooth Slo-Mo Video Using Twixtor in This Article. Stay Tuned Until the End for 2024
- Guide to Mirror Your Vivo Y27 5G to Other Android devices | Dr.fone
- How and Where to Find a Shiny Stone Pokémon For Apple iPhone 12 mini? | Dr.fone
- In 2024, How to Transfer Contacts from Infinix Note 30 VIP to iPhone XS/11 | Dr.fone
- Here Are Some Reliable Ways to Get Pokemon Go Friend Codes For Realme Narzo 60 Pro 5G | Dr.fone
- Things You Should Know When Unlocking Total Wireless Of iPhone 12
- How to Recover iPhone 12 mini Data From iOS iTunes? | Dr.fone
- Guide to Mirror Your Samsung Galaxy S23 to Other Android devices | Dr.fone
- How to Rescue Lost Messages from Samsung Galaxy XCover 7
- In 2024, How to Use Pokémon Emerald Master Ball Cheat On Nokia C12 | Dr.fone
- In 2024, 8 Ways to Transfer Photos from Tecno Spark 10C to iPhone Easily | Dr.fone
- Recover Apple iPhone SE (2020) Data From iOS iTunes | Dr.fone
- In 2024, Guide to Mirror Your Xiaomi Redmi Note 12 Pro+ 5G to Other Android devices | Dr.fone
- How To Unlink Apple ID From Apple iPhone 6
- In 2024, Top 11 Free Apps to Check IMEI on Huawei Nova Y71 Phones
- Two Ways to Track My Boyfriends Vivo G2 without Him Knowing | Dr.fone
- Life360 Learn How Everything Works On Oppo Find N3 Flip | Dr.fone
- 5 Ways to Track Vivo Y27 4G without App | Dr.fone
- In 2024, 4 Things You Must Know About Apple iPhone 13 Pro Max Activation Lock
- Title: 10 Best Mp3 Visualizers Windows, Mac, Android, iPhone & Online
- Author: Morgan
- Created at : 2024-04-24 01:12:16
- Updated at : 2024-04-25 01:12:16
- Link: https://ai-video-editing.techidaily.com/10-best-mp3-visualizers-windows-mac-android-iphone-and-online/
- License: This work is licensed under CC BY-NC-SA 4.0.


