:max_bytes(150000):strip_icc():format(webp)/frenchopen-4d320297828b413f84f9940d5bd258f9.jpg)
11 Best Video Editing Apps for iPhone

11 Best Video Editing Apps for iPhone
Videography is an art, whether done professionally or just for fun. It includes many phases from pre-production to post-production and video editing is one of its important aspects. It is a gamechanger, as most of the mistakes done during production can be fixed in editing.
Video editing is done on large scale for film industries which require expensive and powerful computers but we won’t about them now. As video editing doesn’t only depend on powerful softwares and expensive computers, Skills play a vital role in video editing. A skilled artist on a mobile phone can create better content than a beginner with an expensive PC.
Therefore, here we will talk about small-scale editing which can be done on mobile phones and especially iPhones. Considering iPhones as they are one of the most common devices used by vloggers and small filmmakers. As a mobile video editor, you can edit your clips anywhere you want. Therefore editing videos on a go is quite important. So we have selected some top iPhone video editors for you which are as following:
- Filmora Go
- Free iPhone Video Editors
- Adobe Premiere Rush
- CapCut
- iMovie
- GoPro-Quik
- VN Video Editor
- Paid iPhone Video Editors
- Kinemaster
- Power Director
- LumaFusion
- InShot
- VivaCut
Filmora Go:
It is available on IOS and Android both.
Apart from having a professional video editor for PC, Wondershare has also introduced a video editor for mobile phones. Filmora Go is an amazing video editor, with many cool features such as chroma key, mask, keyframing, blending, e.t.c. It is fast and easy to use with built-in effects, transitions, and presets to speed up the editing process. It is a paid video editor but you can try it for free, free trial includes most of the features but it leaves a watermark on export.
~Features:
- Has speed curves for smooth speed ramping.
- Supports multiple images and video layers.
- Have many presets and filters for fast pace editing.
- Have cool features like chroma key, masking, keyframing, e.t.c.
- Supports “Pixabay’s” stock library.
~Cons:
- Its UI doesn’t support editing in landscape orientation.
- It doesn’t support 4k video resolution.
~Steps:
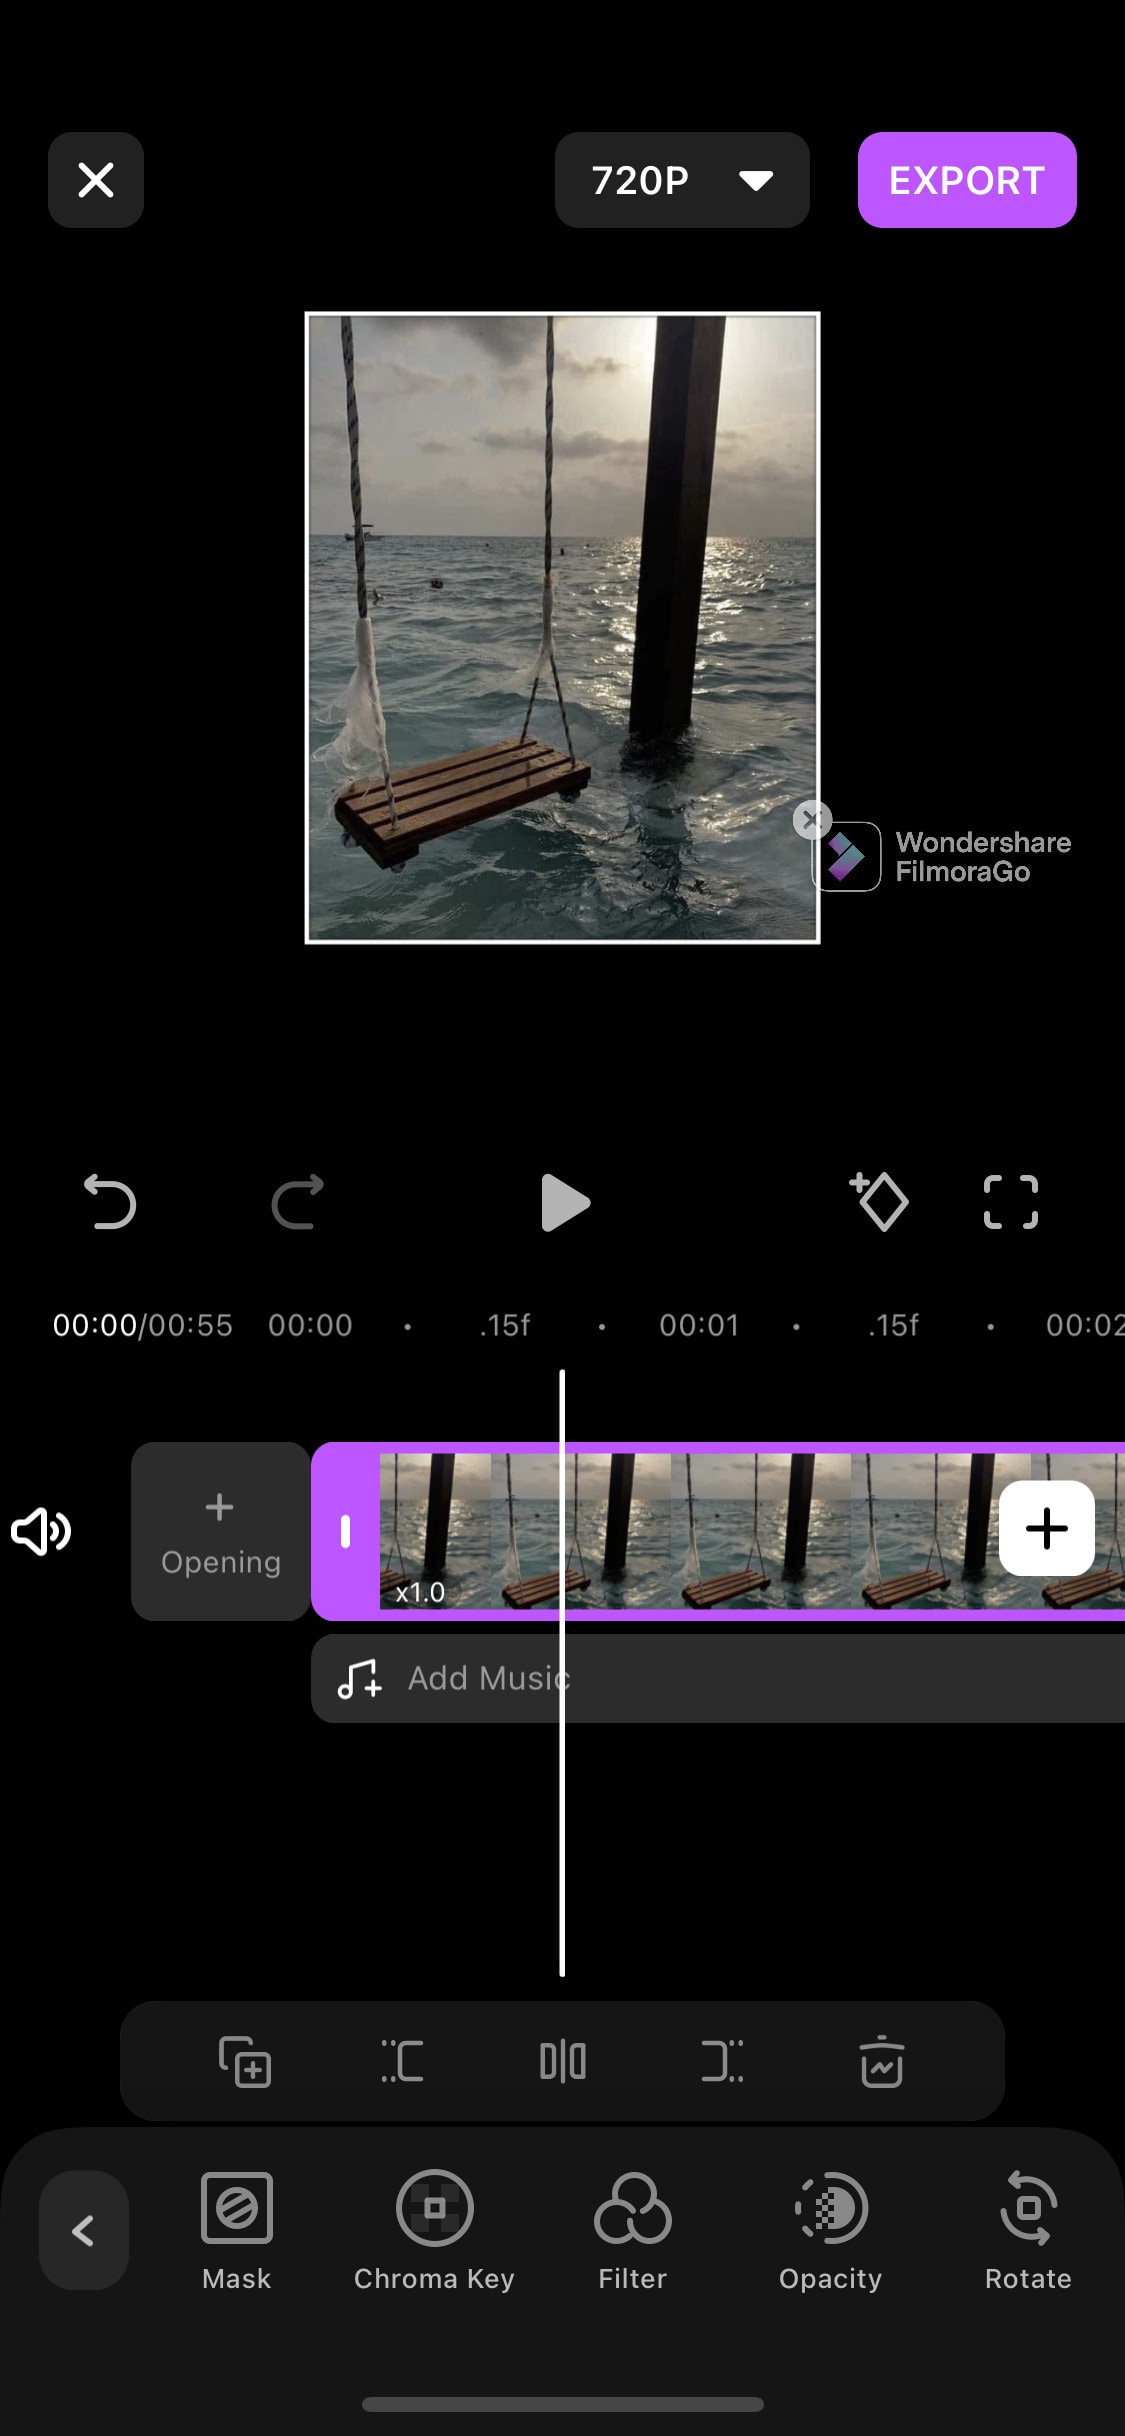
Import: Open Filmora Go, Click “New project” to start a new project, or Choose the previous one from the “Draft” portion. Select videos or images to import to your timeline. Hold and drag the clip to change its arrangement.
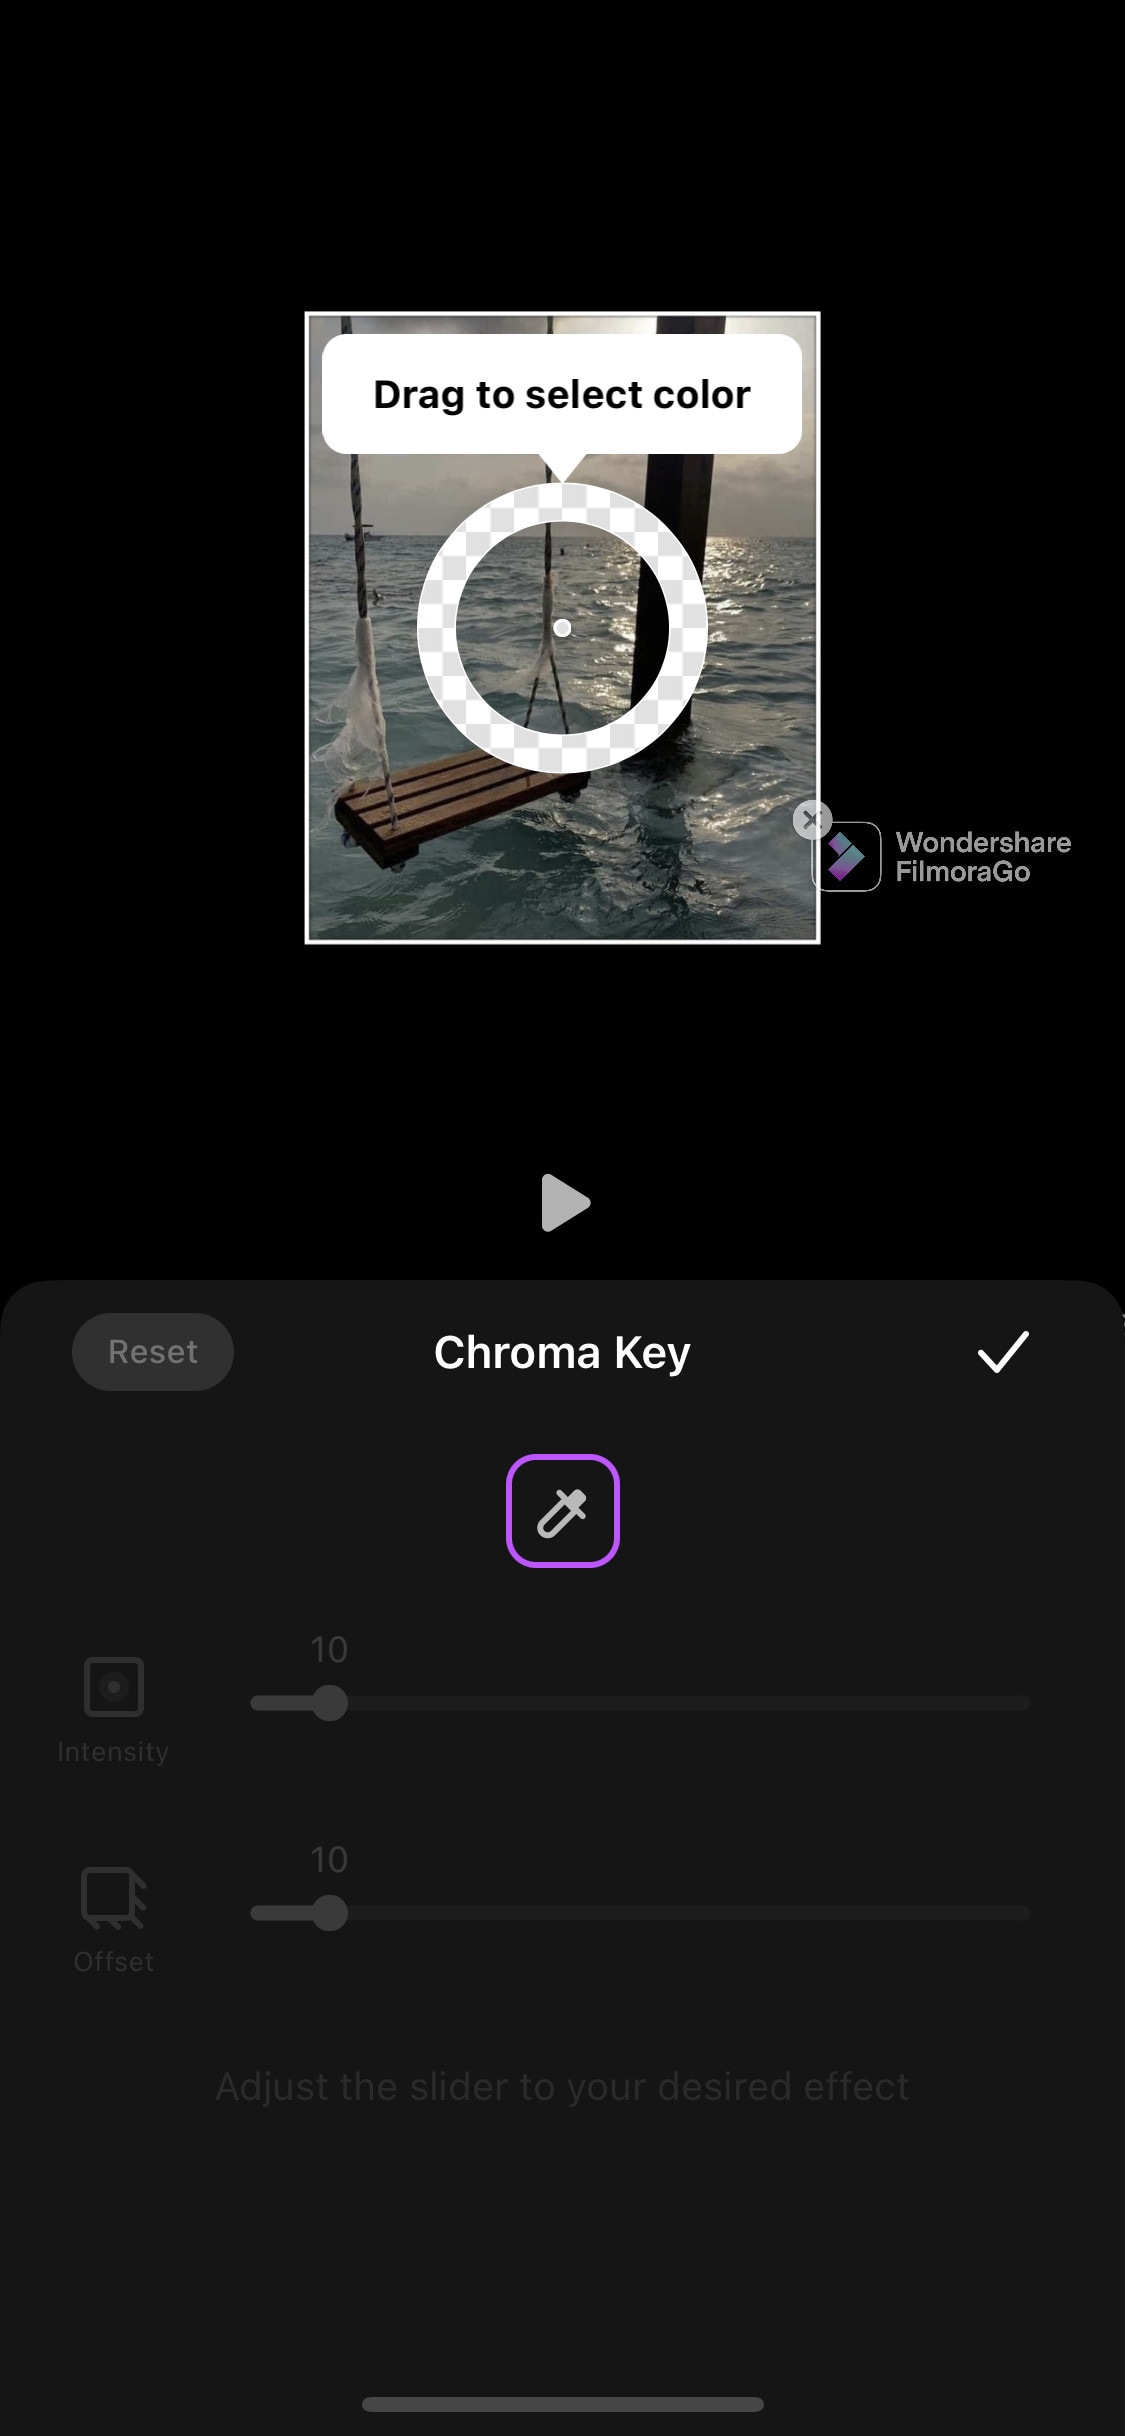
Edit: You can add text, effects, stickers, layers, e.t.c. by clicking their icon, present on the bar at the bottom.
Click the “PiP” icon to add image or video layers, you also can add multiple layers.
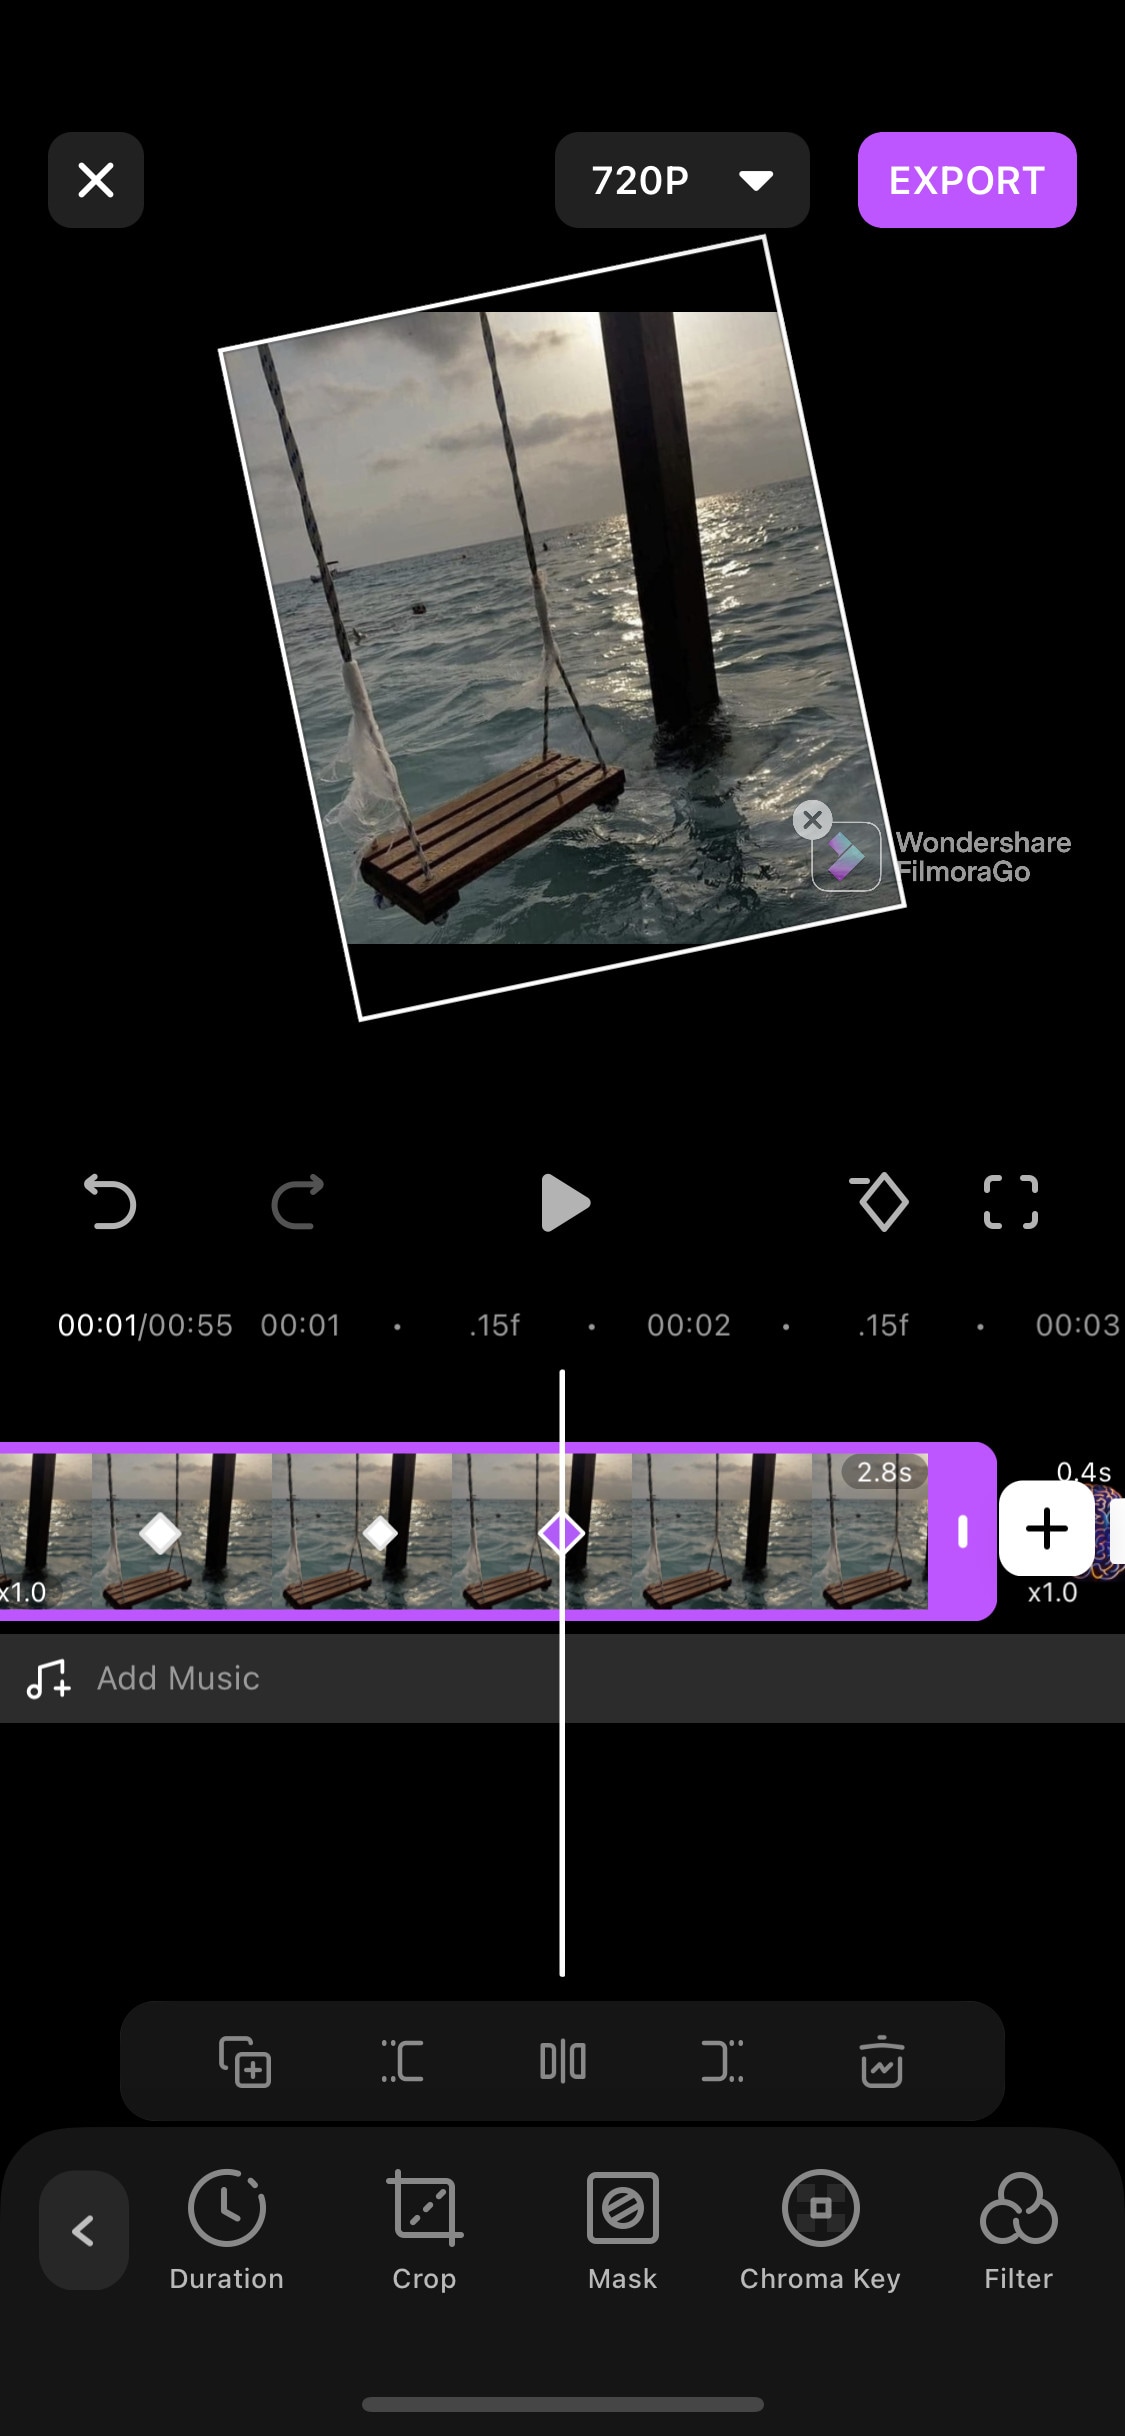
Select a clip to edit it. Different editing tools appear on the bottom bar. Here you can change its opacity, its speed, or add animations.
Effects: Click the “Effects” icon to open the effects menu. Select an effect to apply to your clip.
Click the white box between two clips to add transitions.
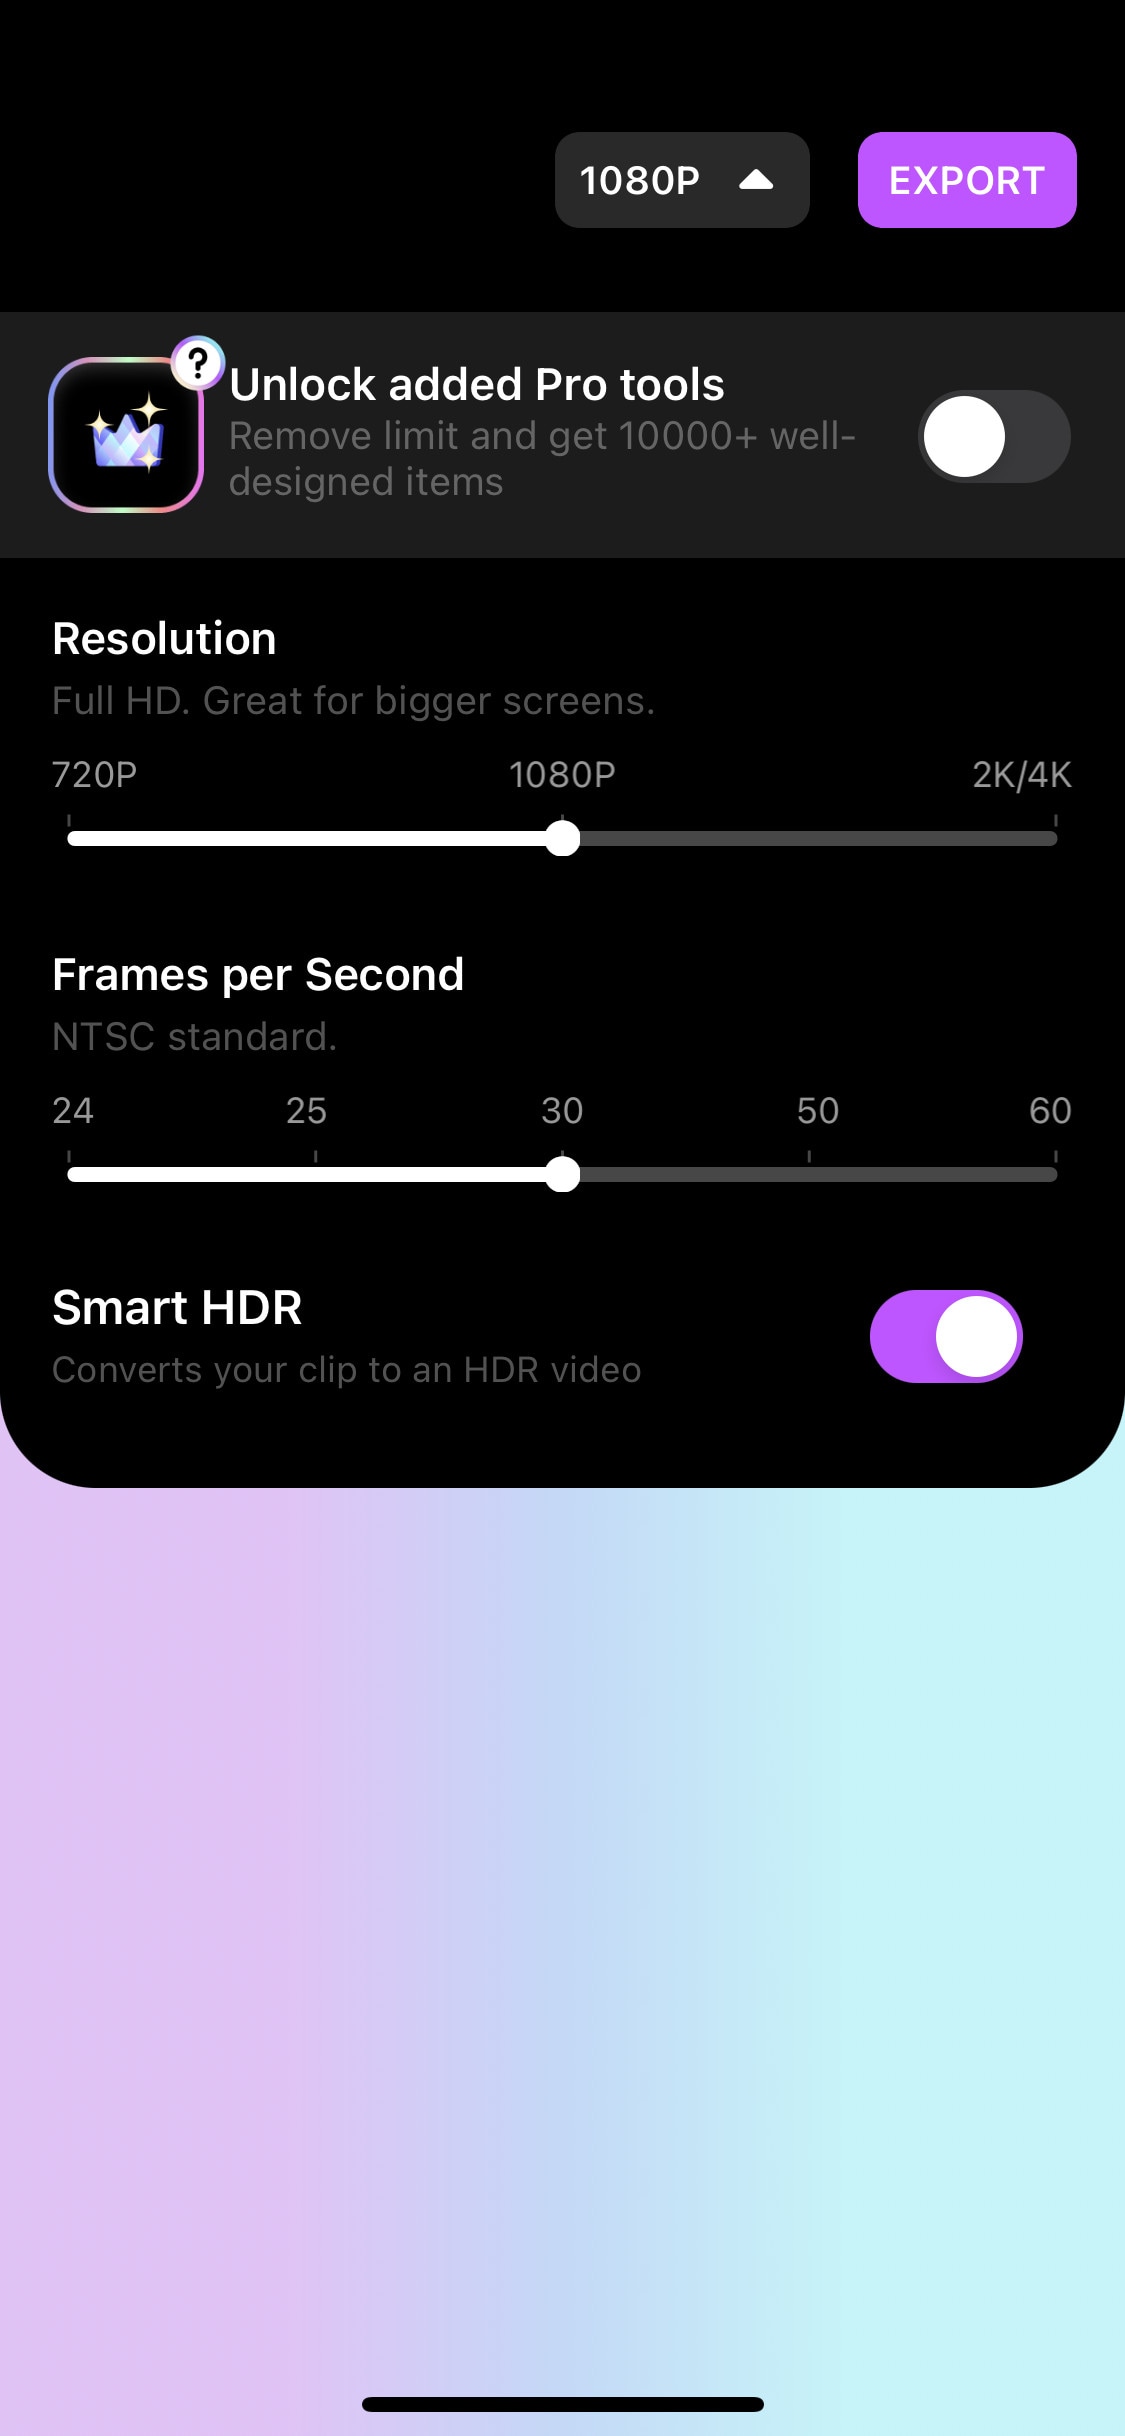
Export: Click the “Export” button to export your file. Select your desired resolution and frame rate to export your clip.
Some Free iPhone Video Editors:
If you do video editing rarely or do just basic video editing then it is useless to purchase paid video editors. Even if you are a content creator but tight on budget or new to this field, you can use free video editing softwares and save your cash for other pieces of equipment.
So, here we have mentioned some free video editors for you. Some of these are quite powerful and can do advanced editing while others are simple but easy to use.
Adobe Premiere Rush:
It is available on IOS and Android both.
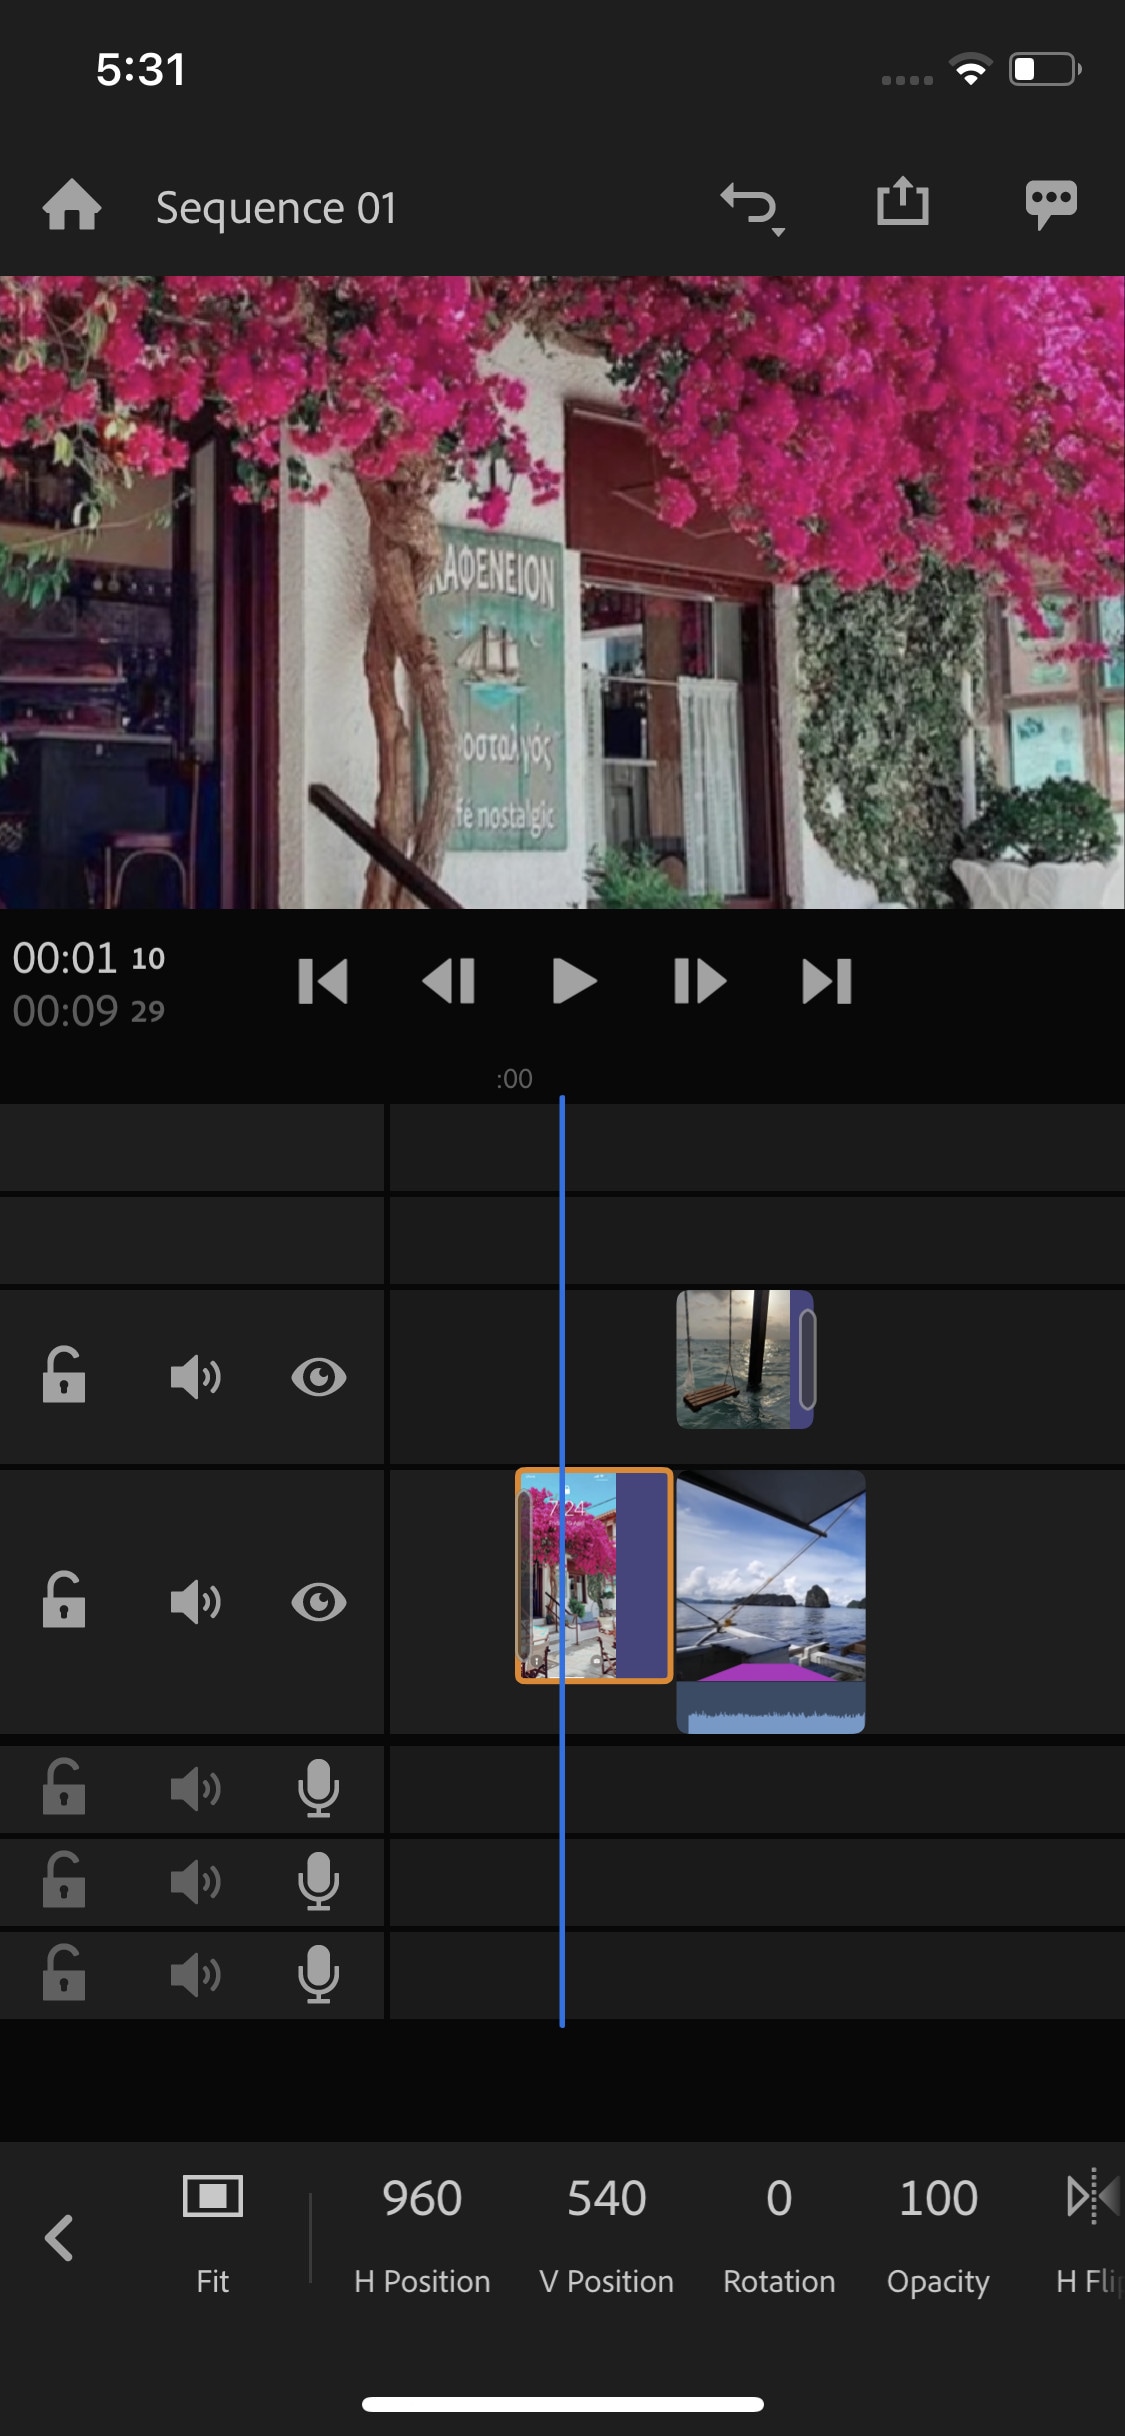
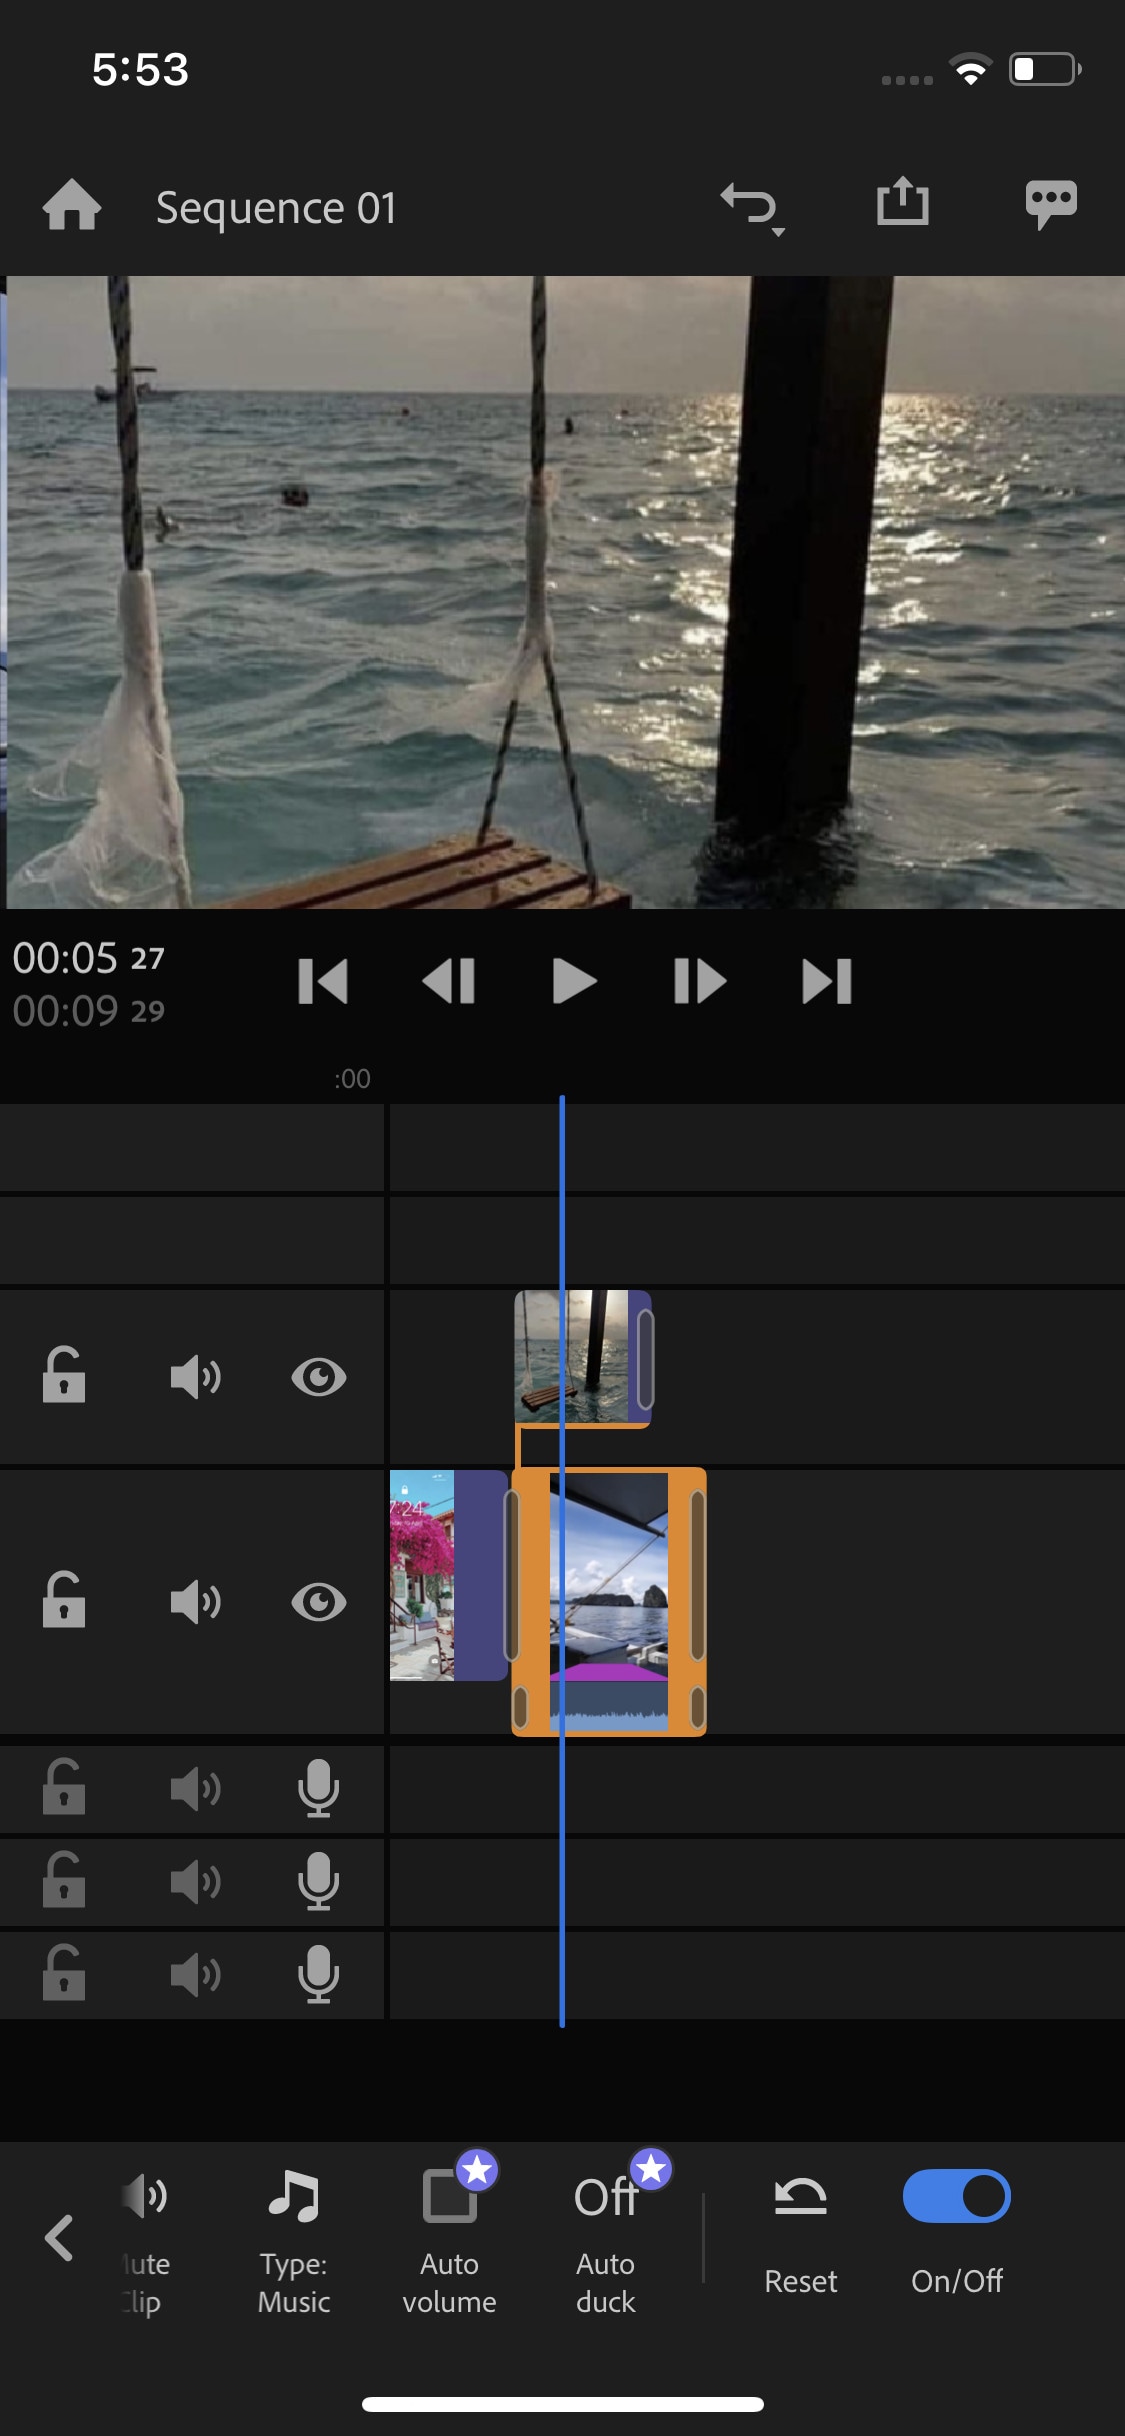
Whether you are a beginner or a content creator using mobile phones or PCs for editing, you may have heard of Adobe softwares. It is a computer software company which makes powerful softwares for different purposes. Like premiere pro, they have designed a compact version for phones named “Premiere Rush”. It is a free video editor that has all the tools needed for video editing, from video effects to color grading and audio editing. Its UI is a bit similar to PC video editors. It is a free video editor with no watermarks. Although it takes some time to understand it. But once mastered, you can do editing quickly.
~Features:
- It is a free video editor with no watermark.
- It supports up to 4K resolution at 60fps.
- You can extract audio and can do voiceover directly from the software.
- It has hundreds of filters, overlays, and title designs.
- It has basic color grading tools.
- It also has a motion tracking feature. (in Paid version)
- It supports multiple audio, video, and text layers.
~Cons:
- It only runs on high-end devices. ( It is not supported in most mid-range phones)
- Not suitable for beginners. Its UI is quite hard to understand.
- Doesn’t have common features like the chroma key, masking, e.t.c.
~Price:
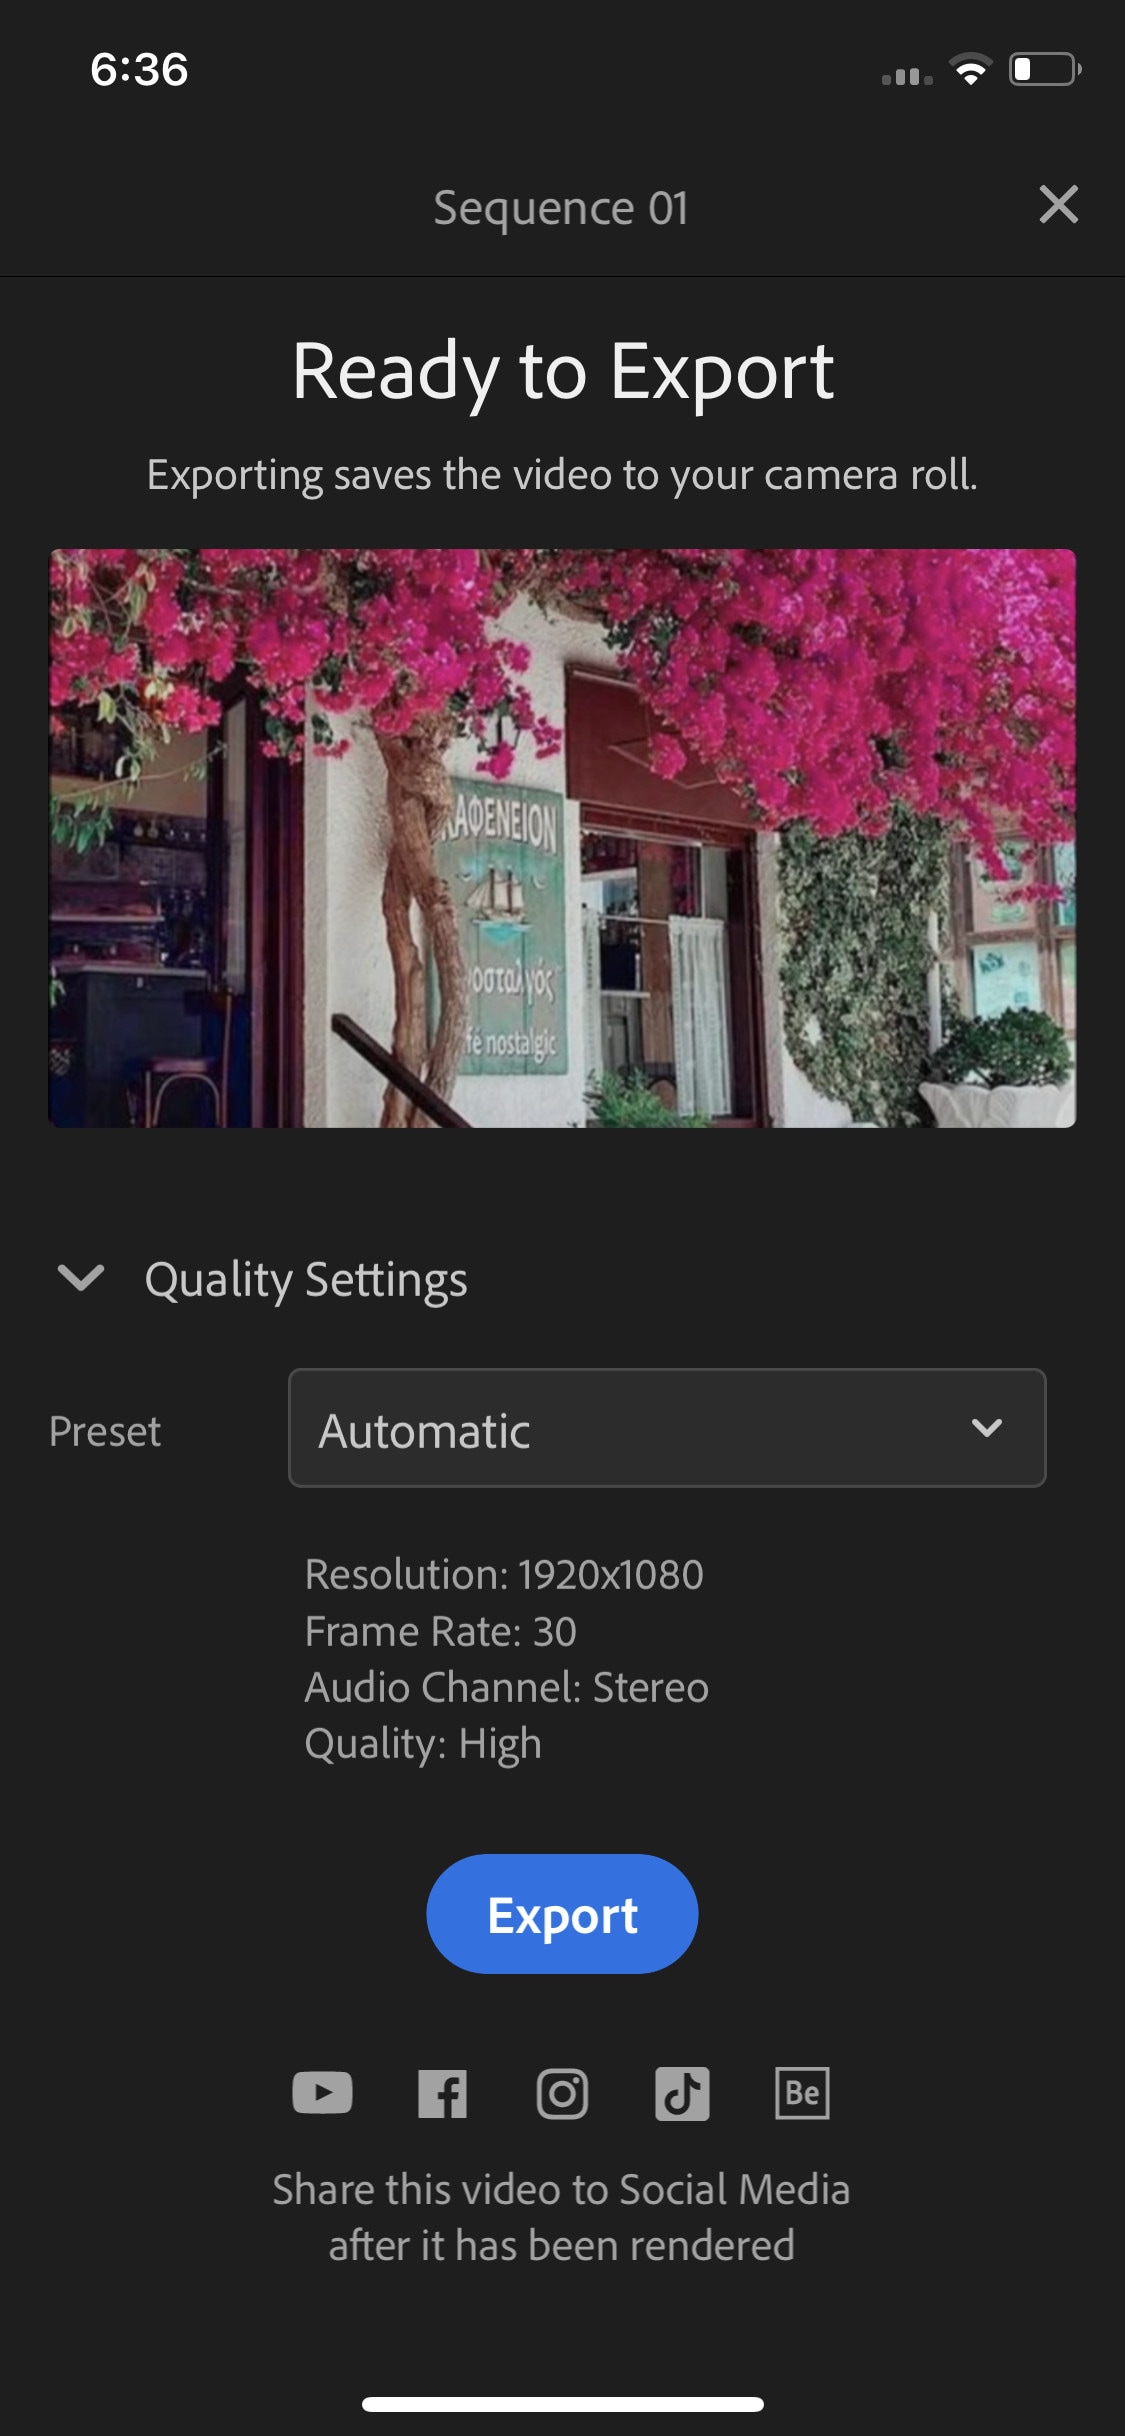
Its Premium version is available for 9.99/month. It includes some premium features. Or you can purchase the “All Apps Bundle” at $54.99/month for the annual plan.
CapCut:
It is available on IOS and Android both.
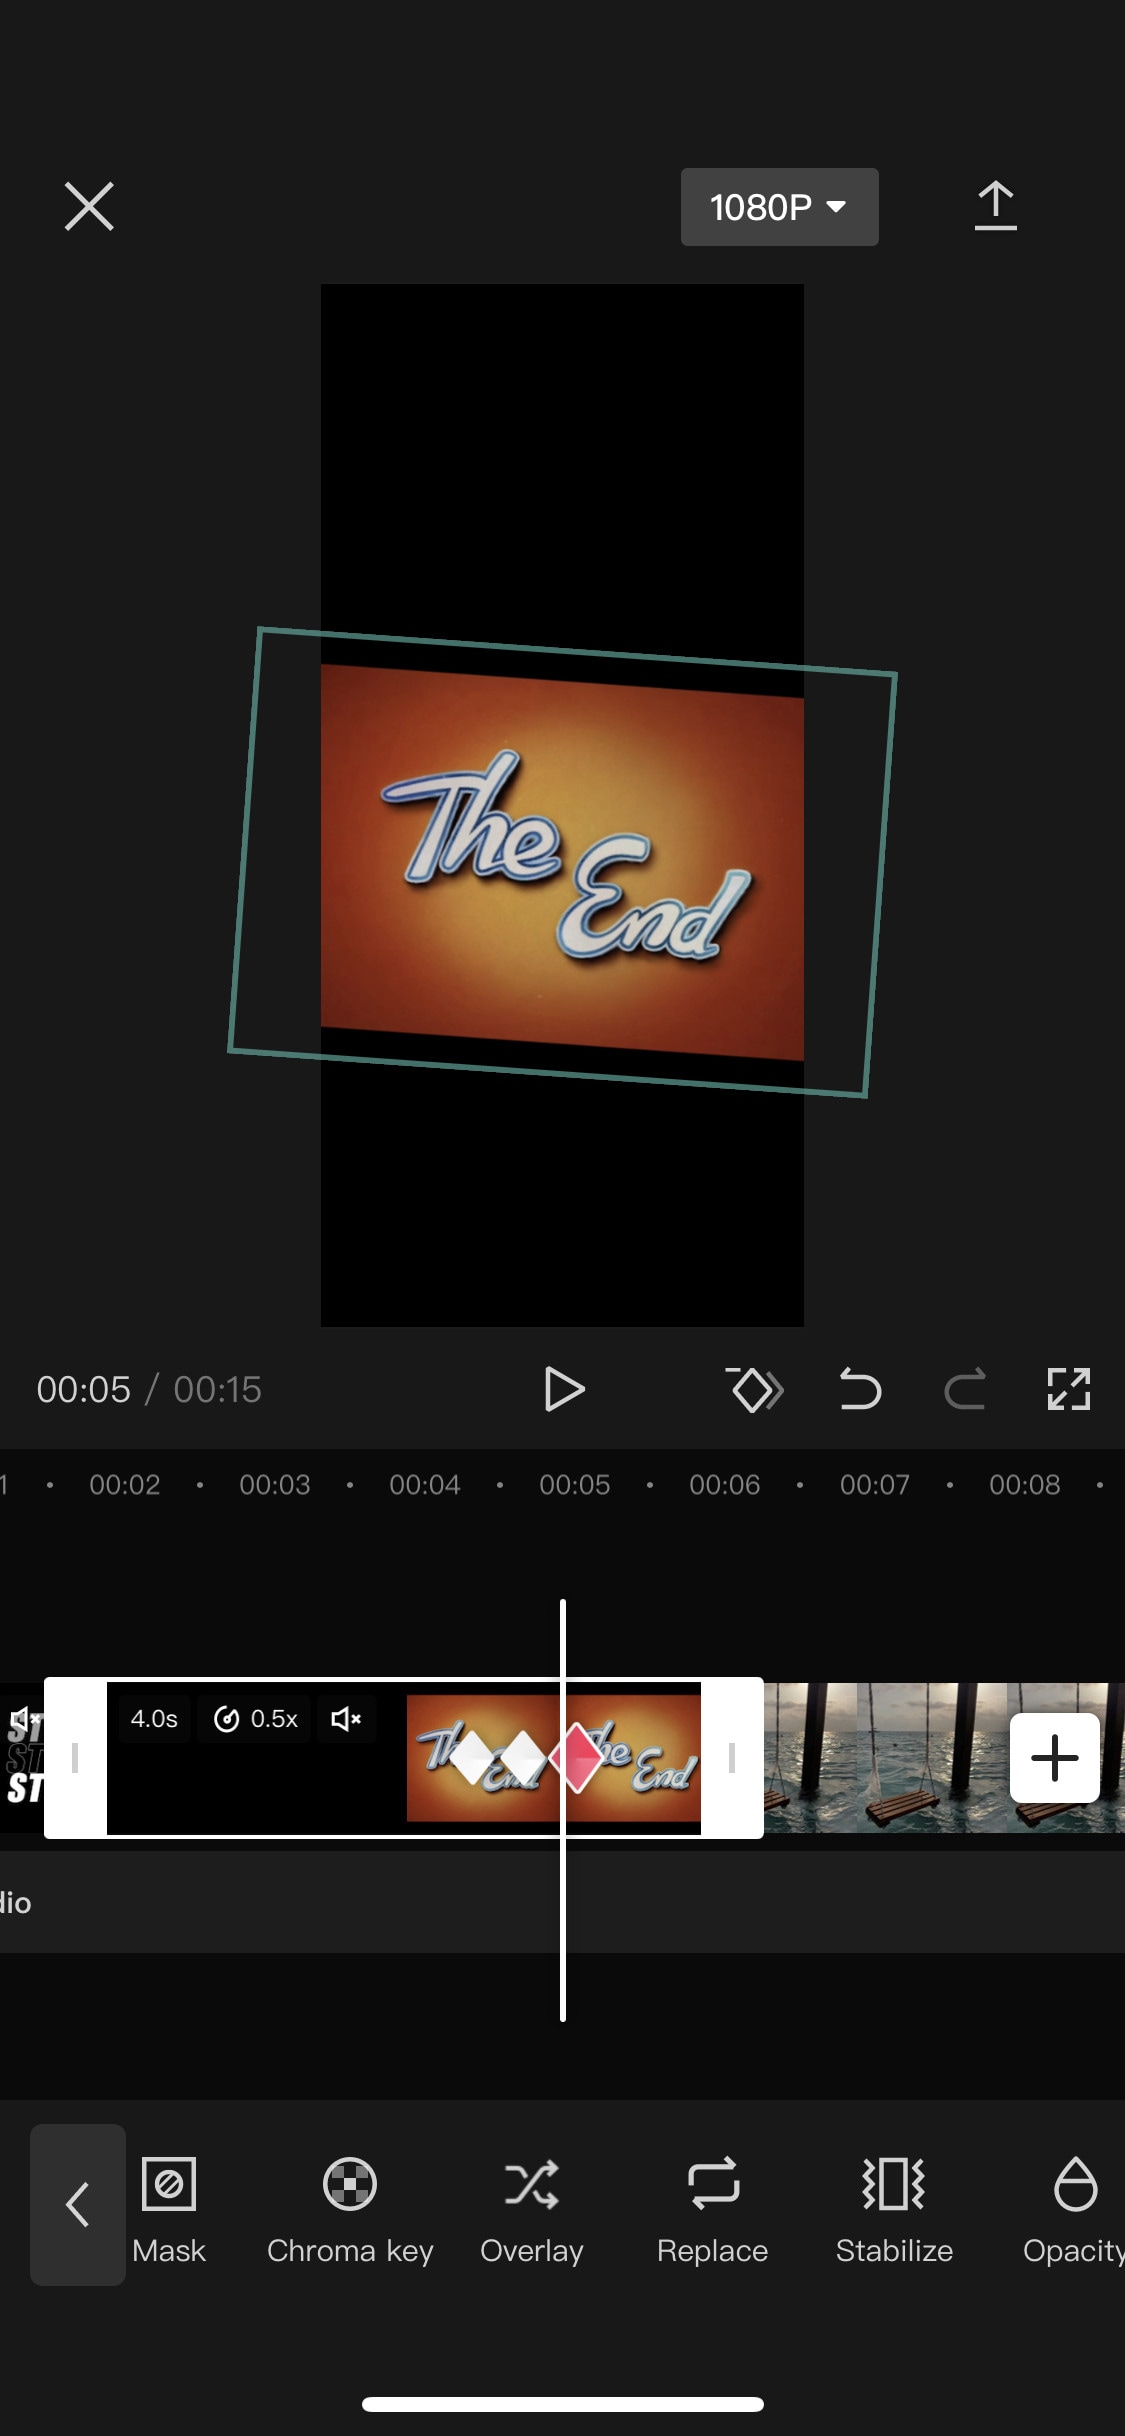
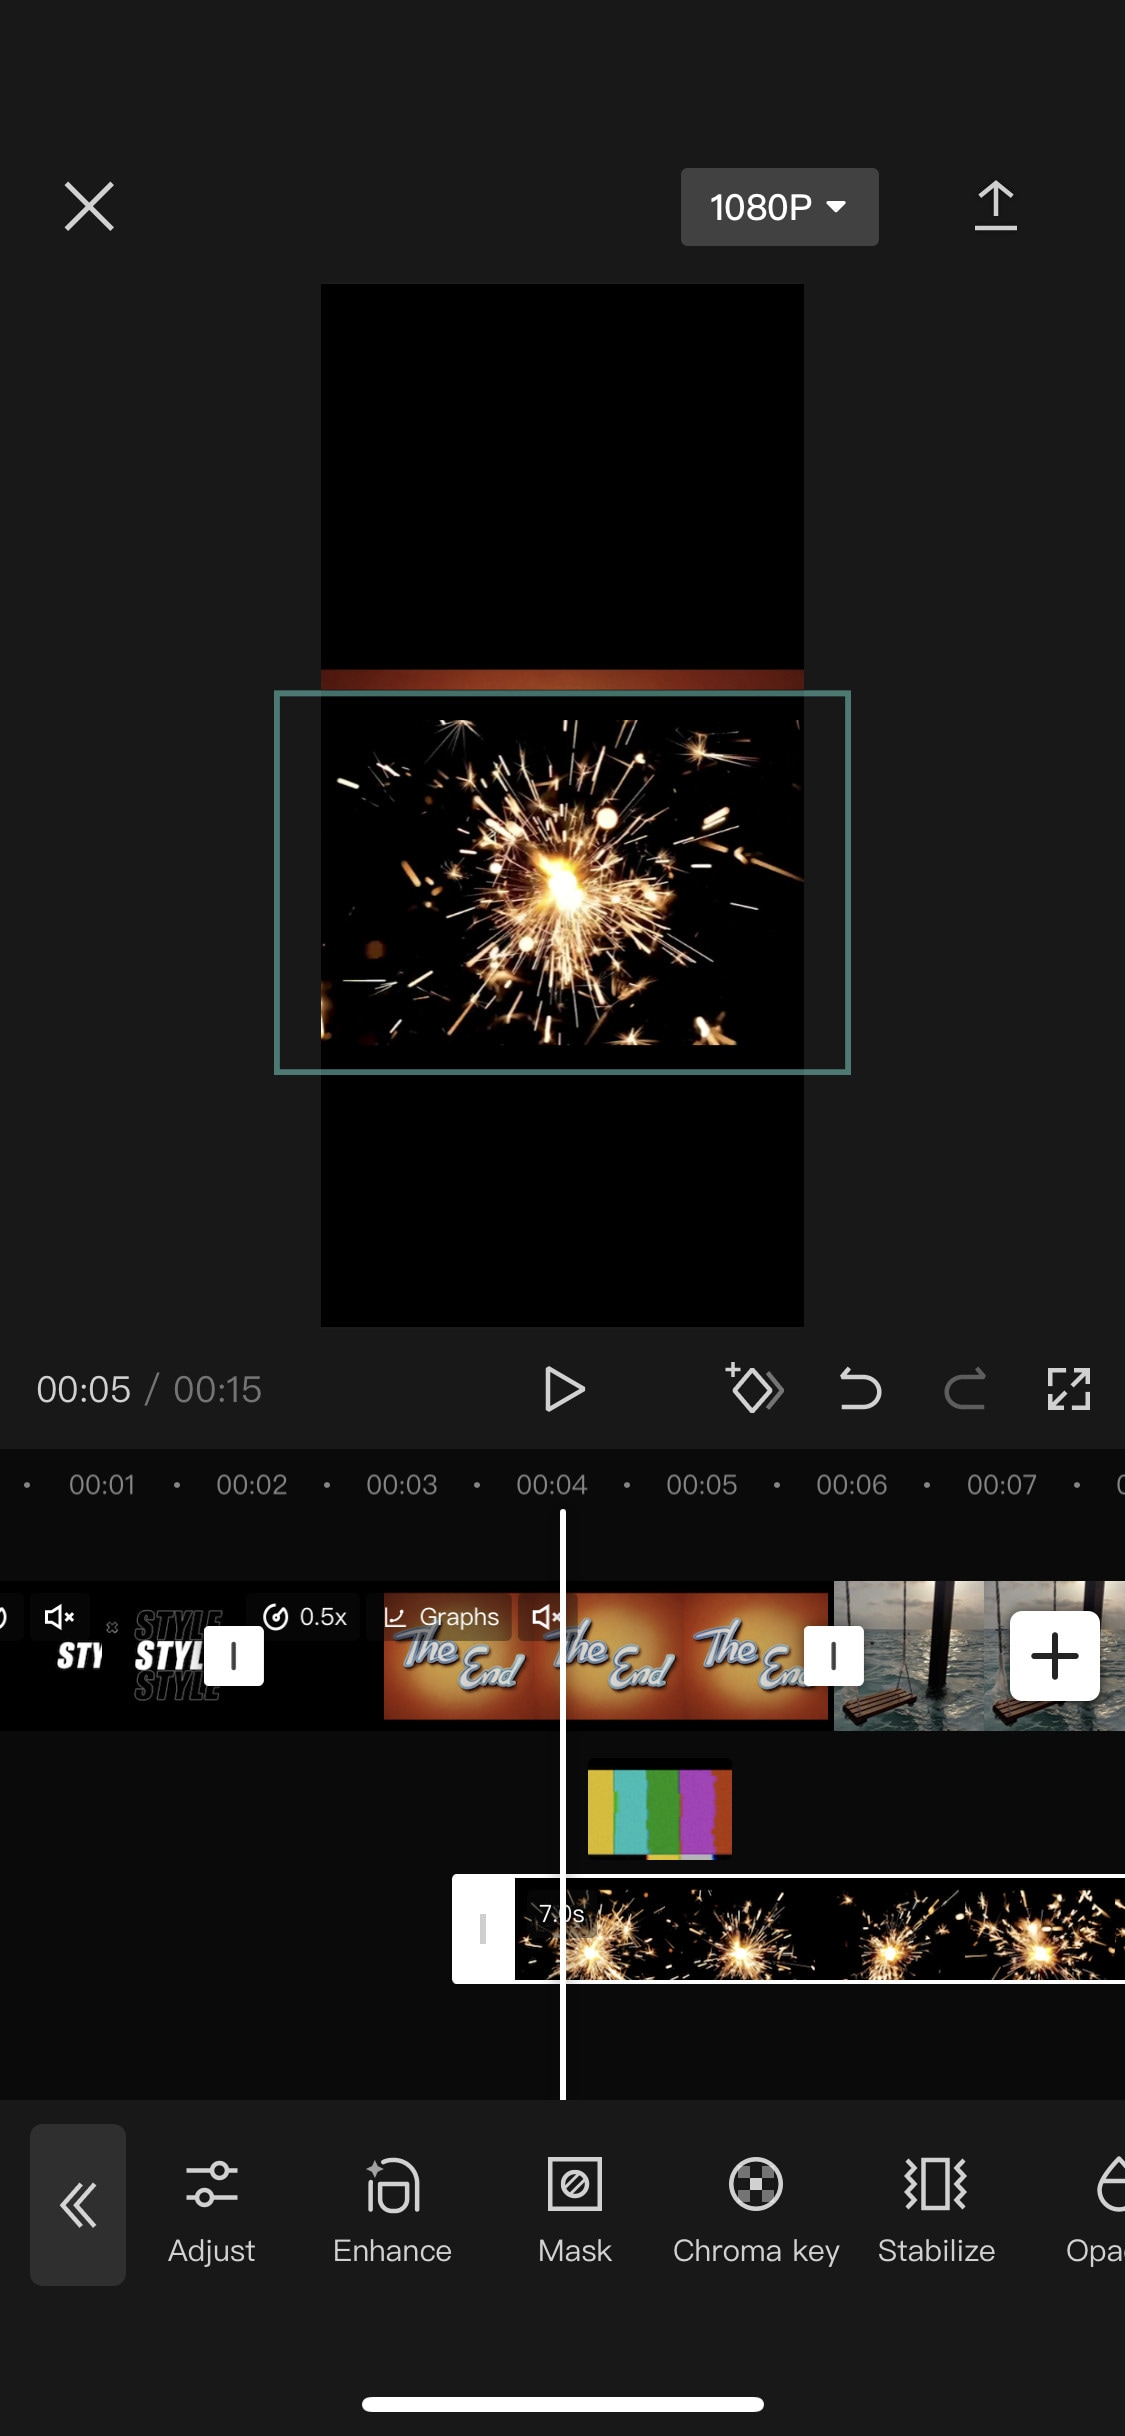
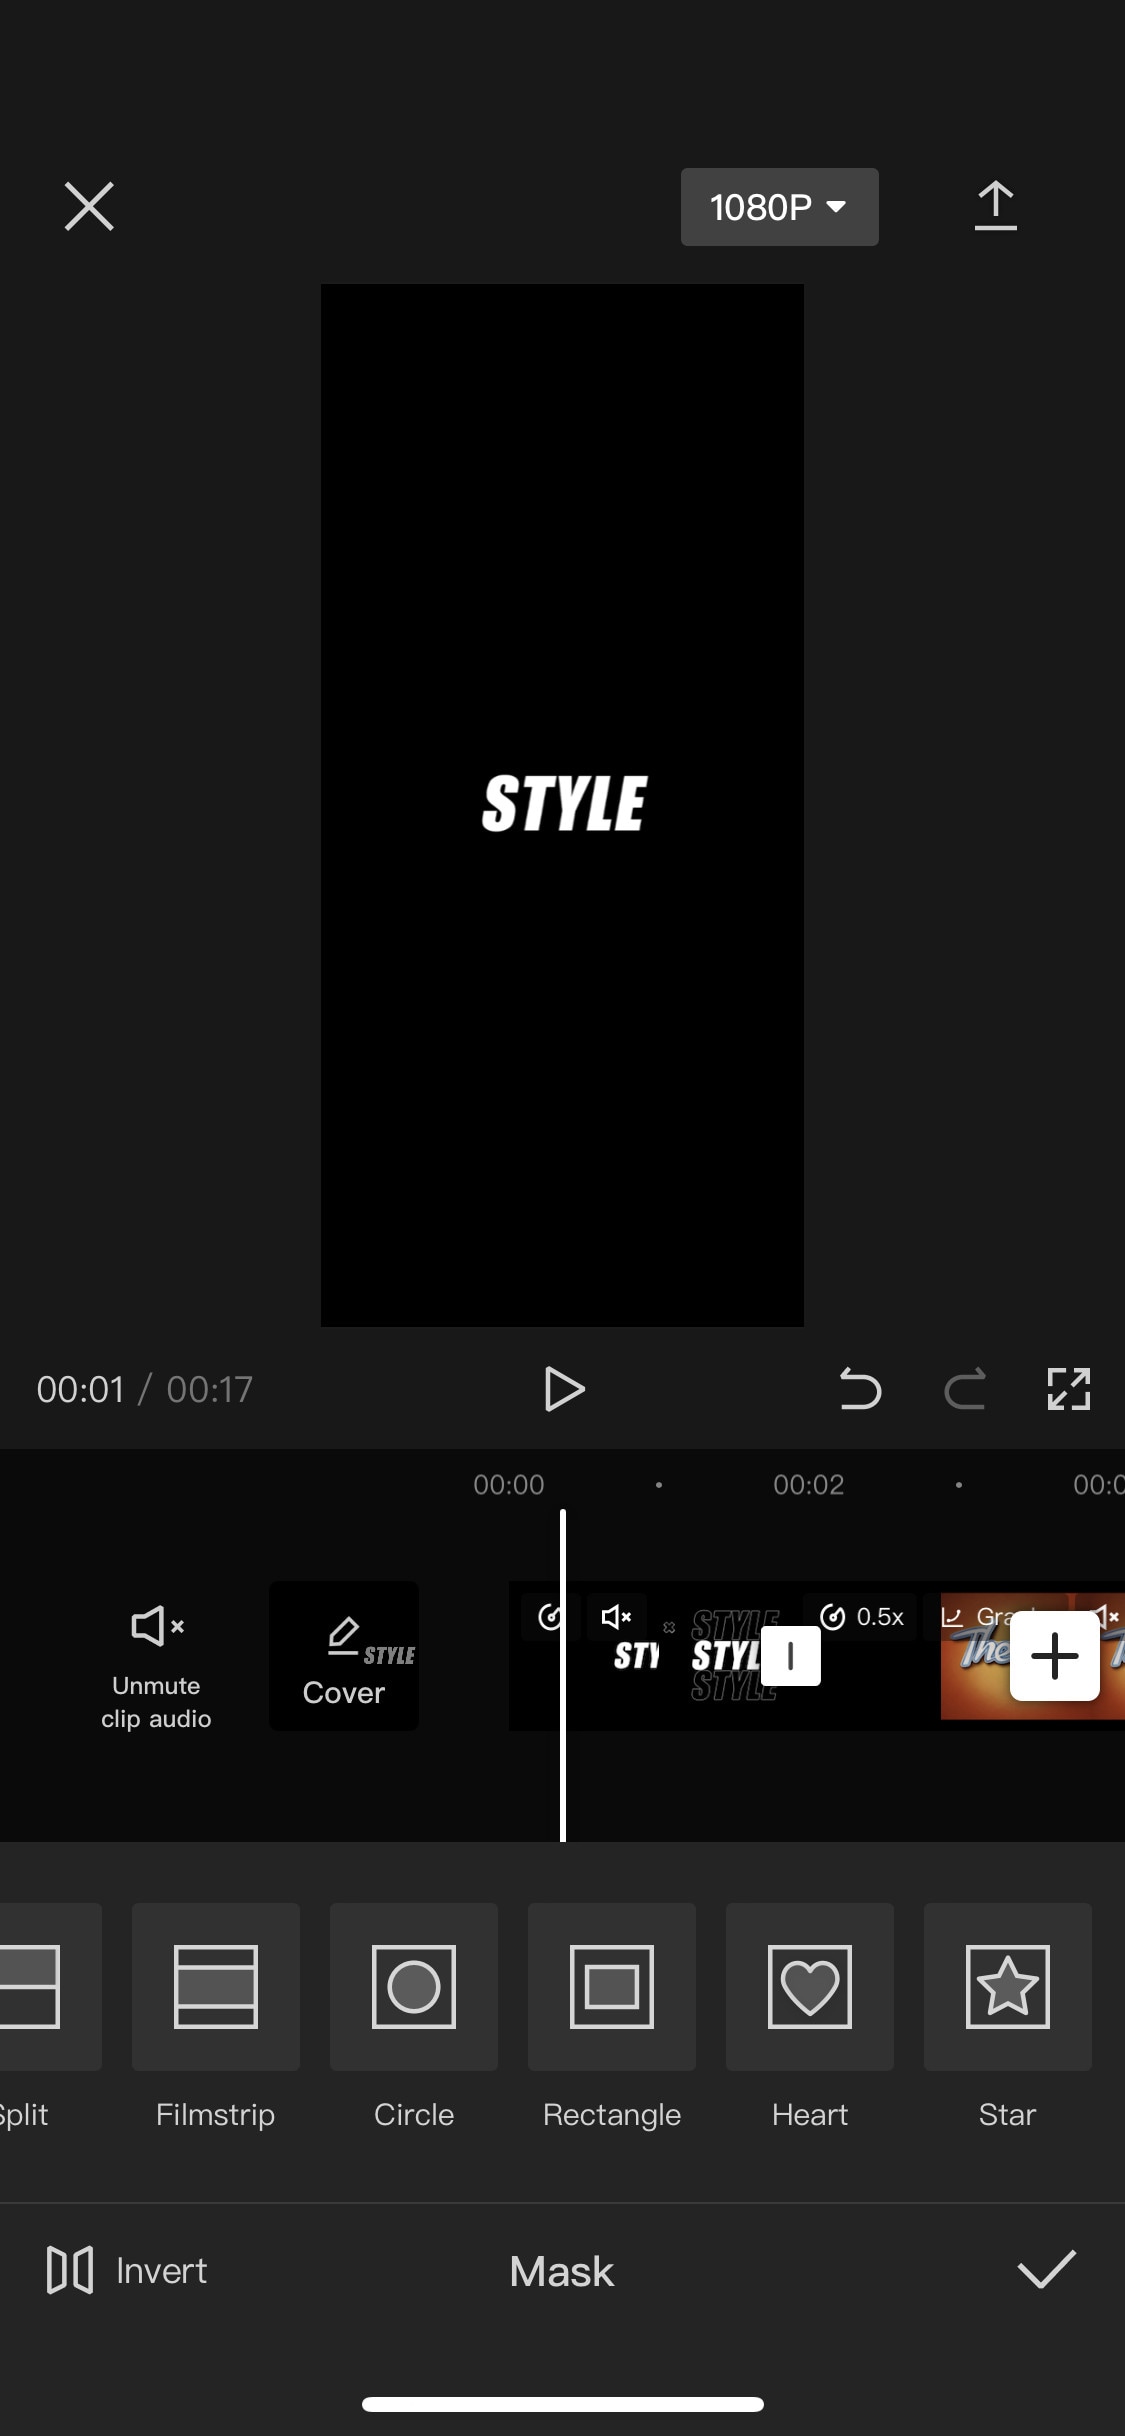
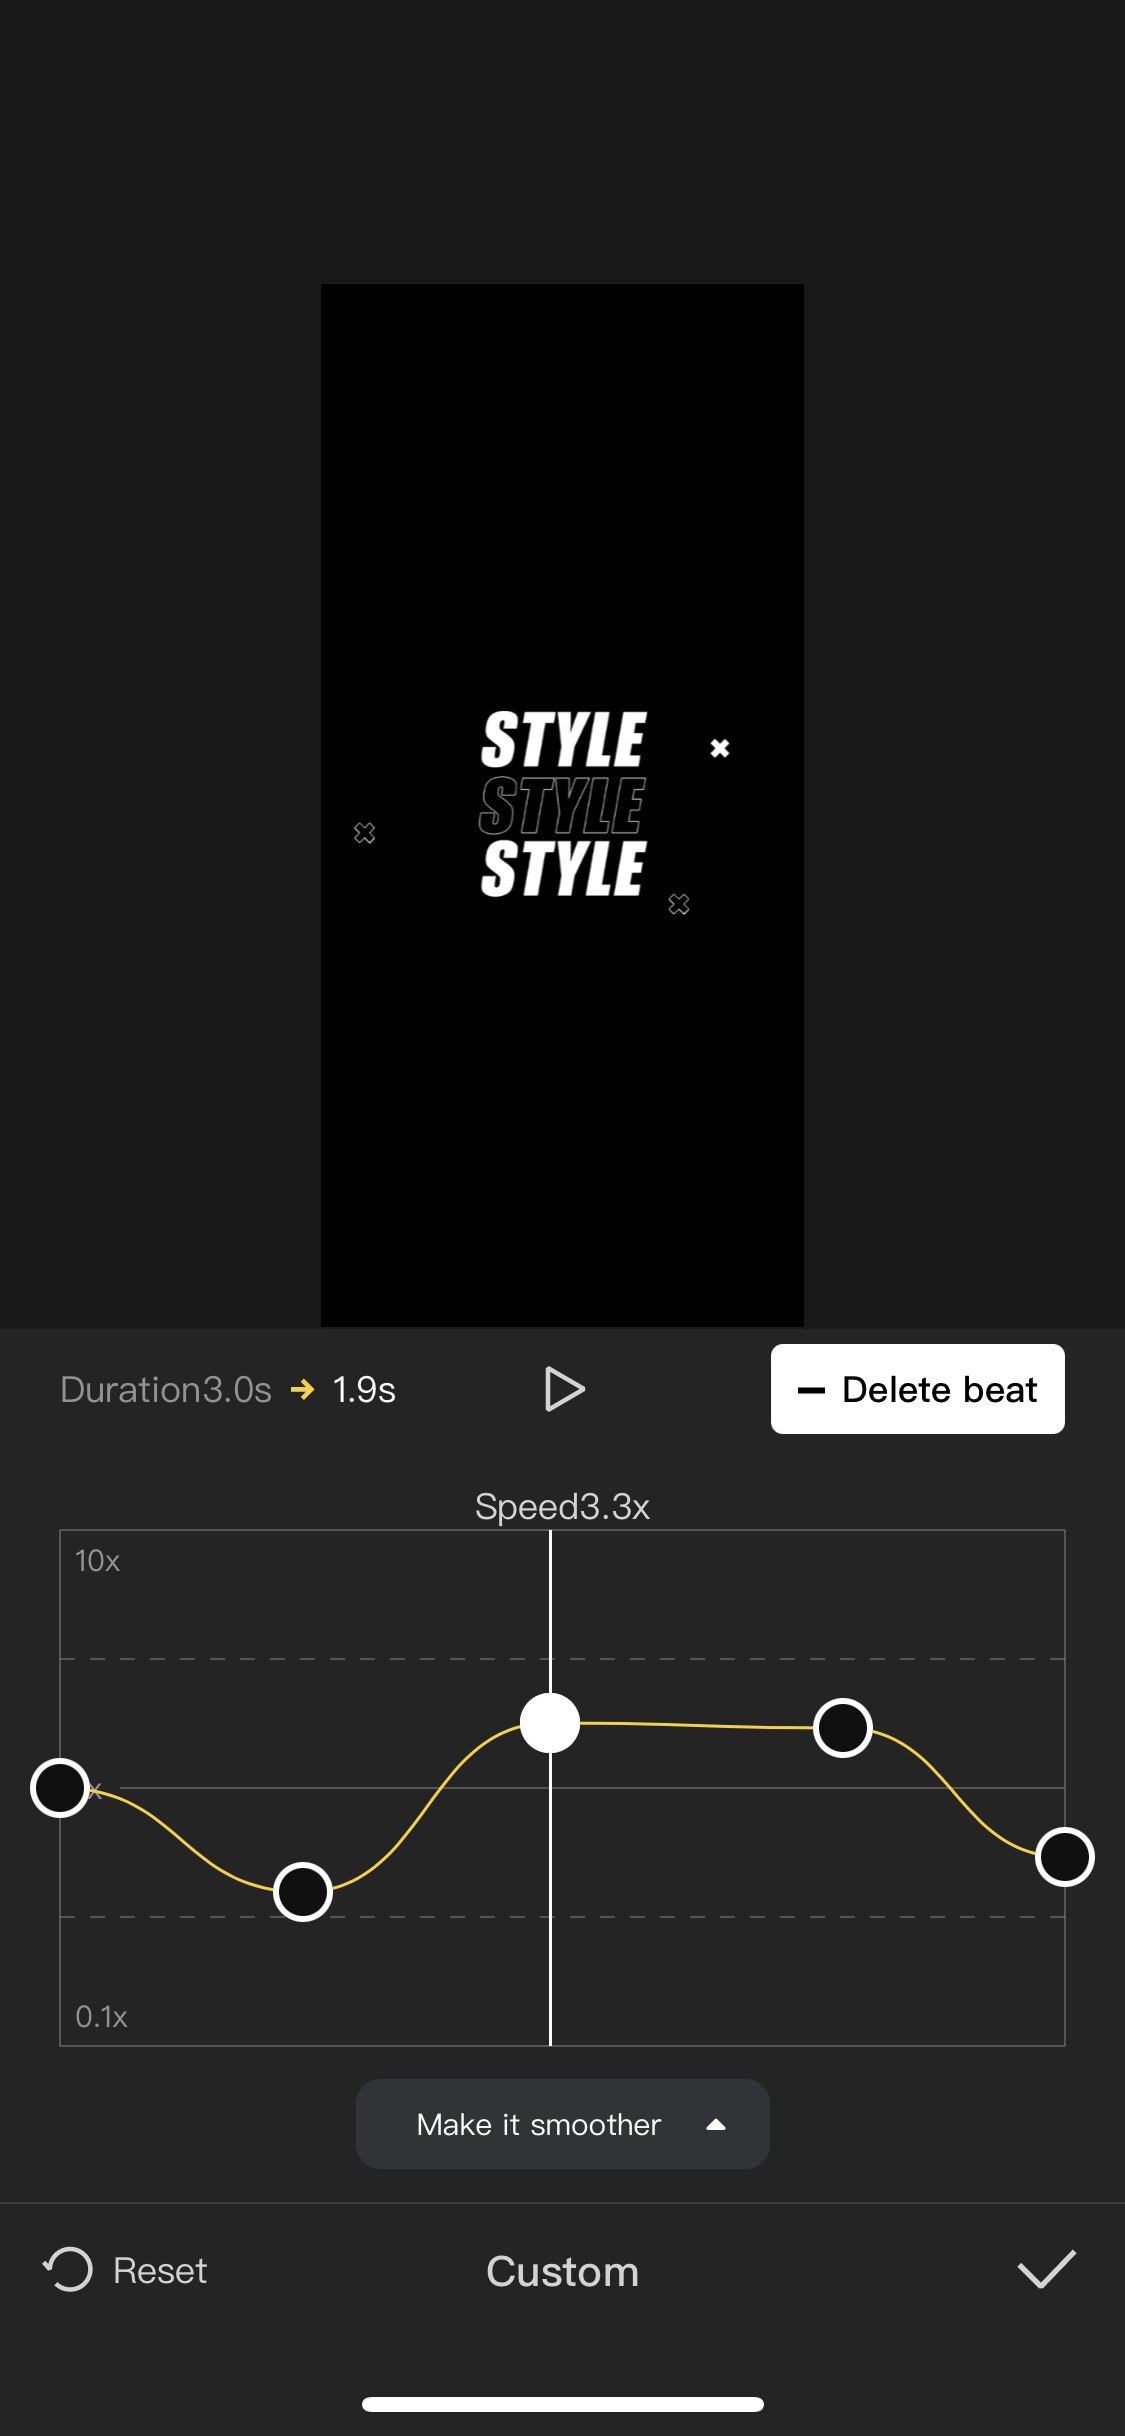
If you are looking for a free but good video editor to help you edit videos on the go, then you should get your hands on CapCut. It is a free mobile video editing software with many interesting features like keyframing, chroma-key, masking e.t.c. It also supports video and image layers. It has one of the best speed ramping features among other mobile video editors. It provides curves to smoothly speed ramp your clips. It can edit landscape, portrait, and even square video formats. It has many amazing effects and filters, it also has some stock clips.
~Features:
- It is completely free and has no watermarks.
- It supports up to 4K video resolution.
- Has curves for speed ramping.
- Has keyframes for animation.
- It has hundreds of effects, overlays, and titles.
~Cons:
- Its UI doesn’t support editing in landscape orientation.
- Lacks some common editing tools.
iMovie:
It is available on IOS and Mac.
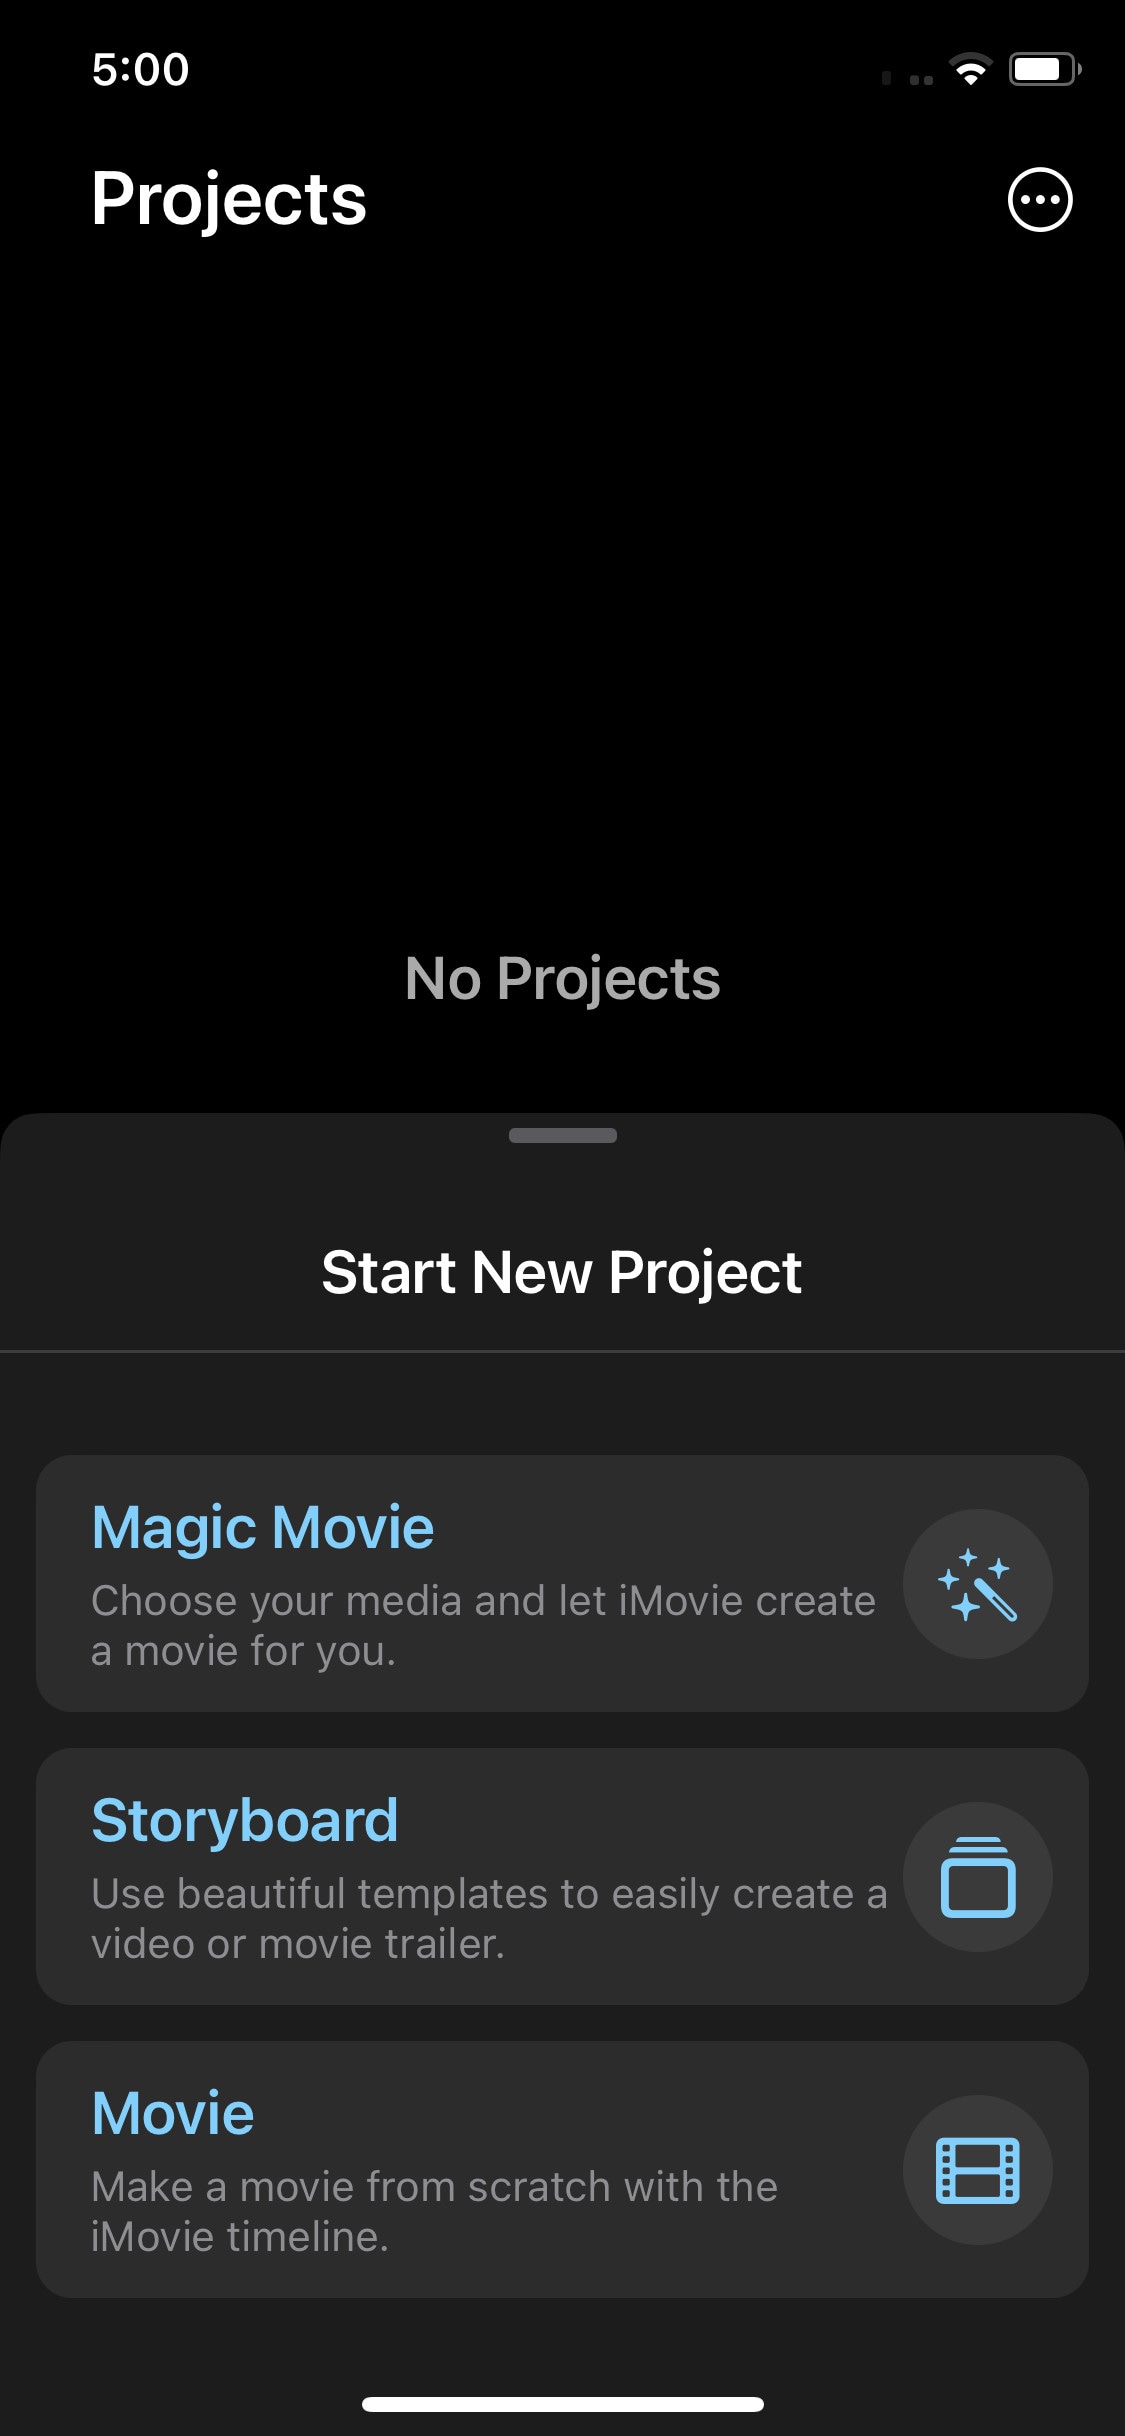
iMovie is a free video editing software designed by apple for their flagship products. It is simple and easy to use. It has all the basic editing tools to enhance your video like crop, trim, transitions, effects, e.t.c. It also has a speed ramping feature which let you change the speed at different points of a clip. It’s AI mode “Magic Movie” lets you select clips and a style and software will make the final product for you.
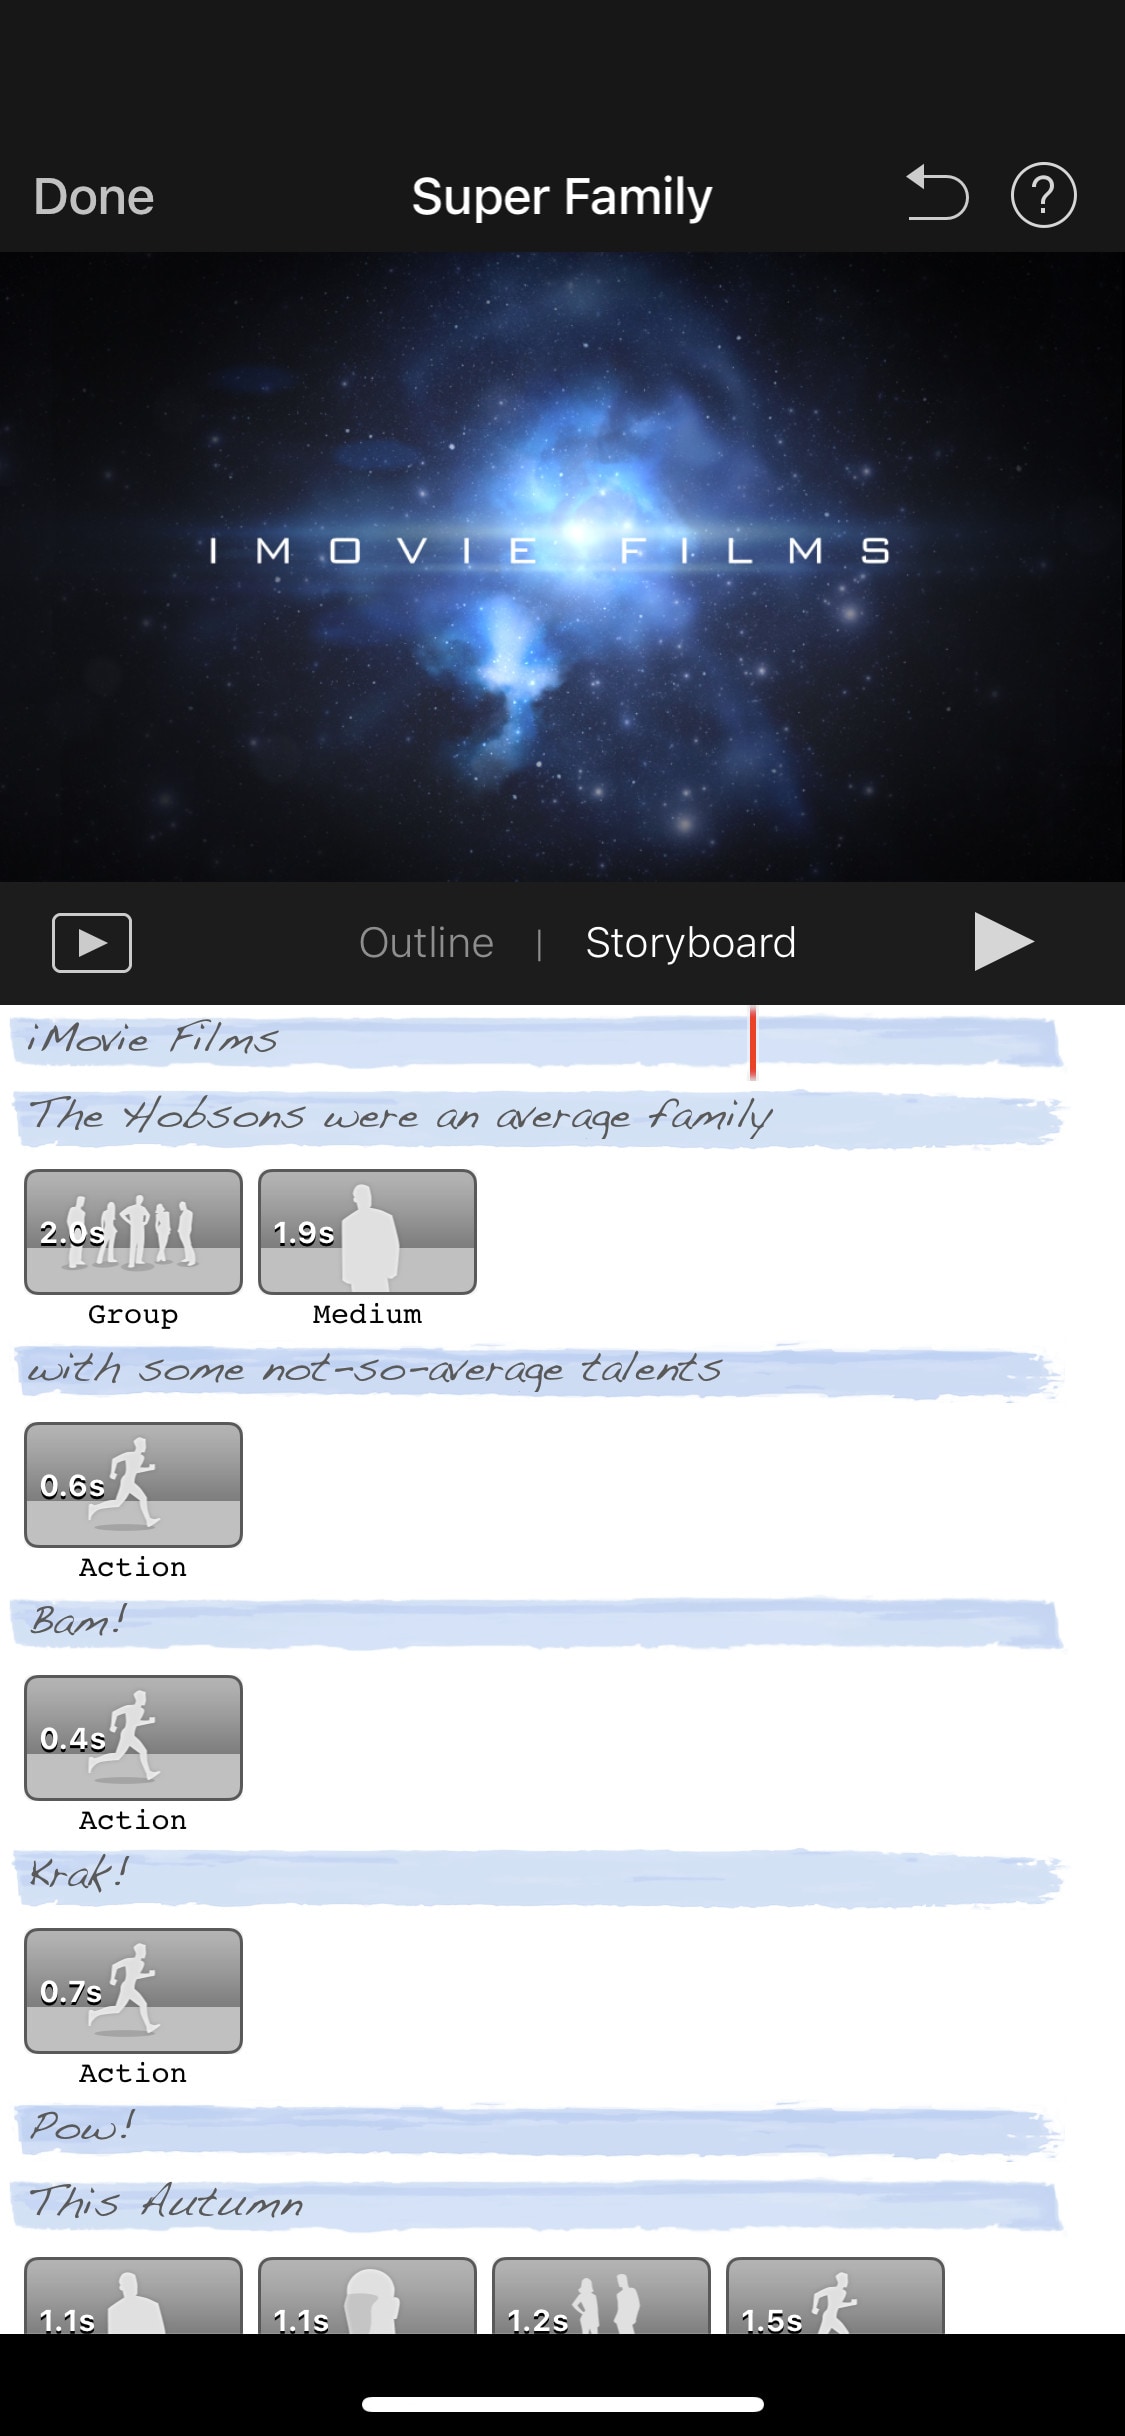
Its “Storyboards” mode is a creative way of learning production and post-production skills. It lets you choose a theme from many famous Genres available, then it will guide you through the production process like capturing footage, arranging your shots, and creating cinematic titles to enhance your story.
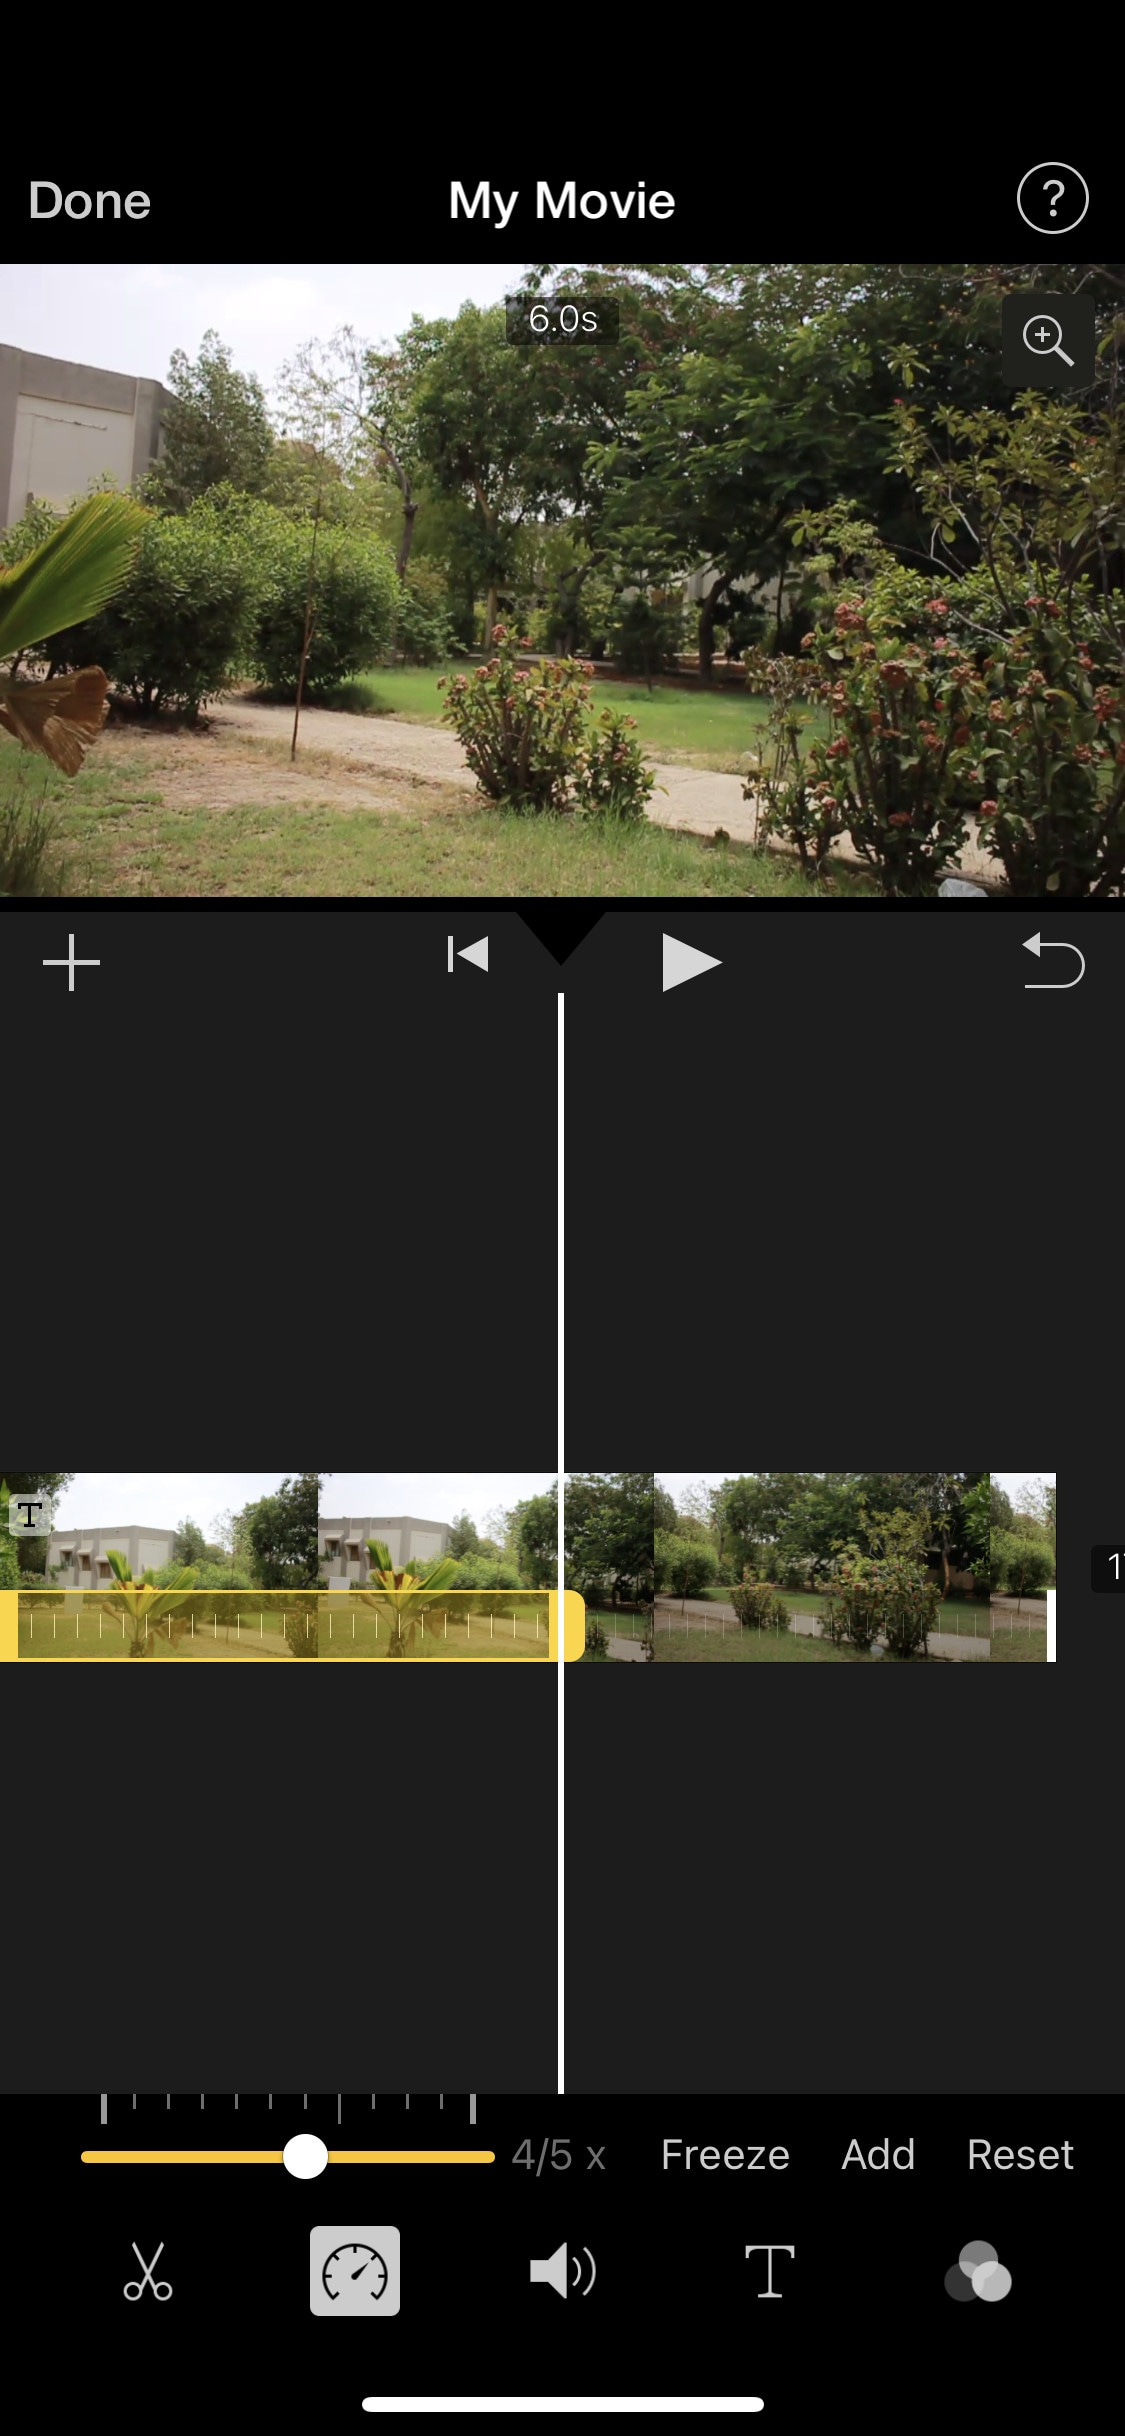
~Features:
- It is free and easy to use.
- Let you do speed ramping.
- Supports Raw files.
- It’s AI mode creates videos for you on its own.
- The “Storyboarding” feature helps you through the production process.
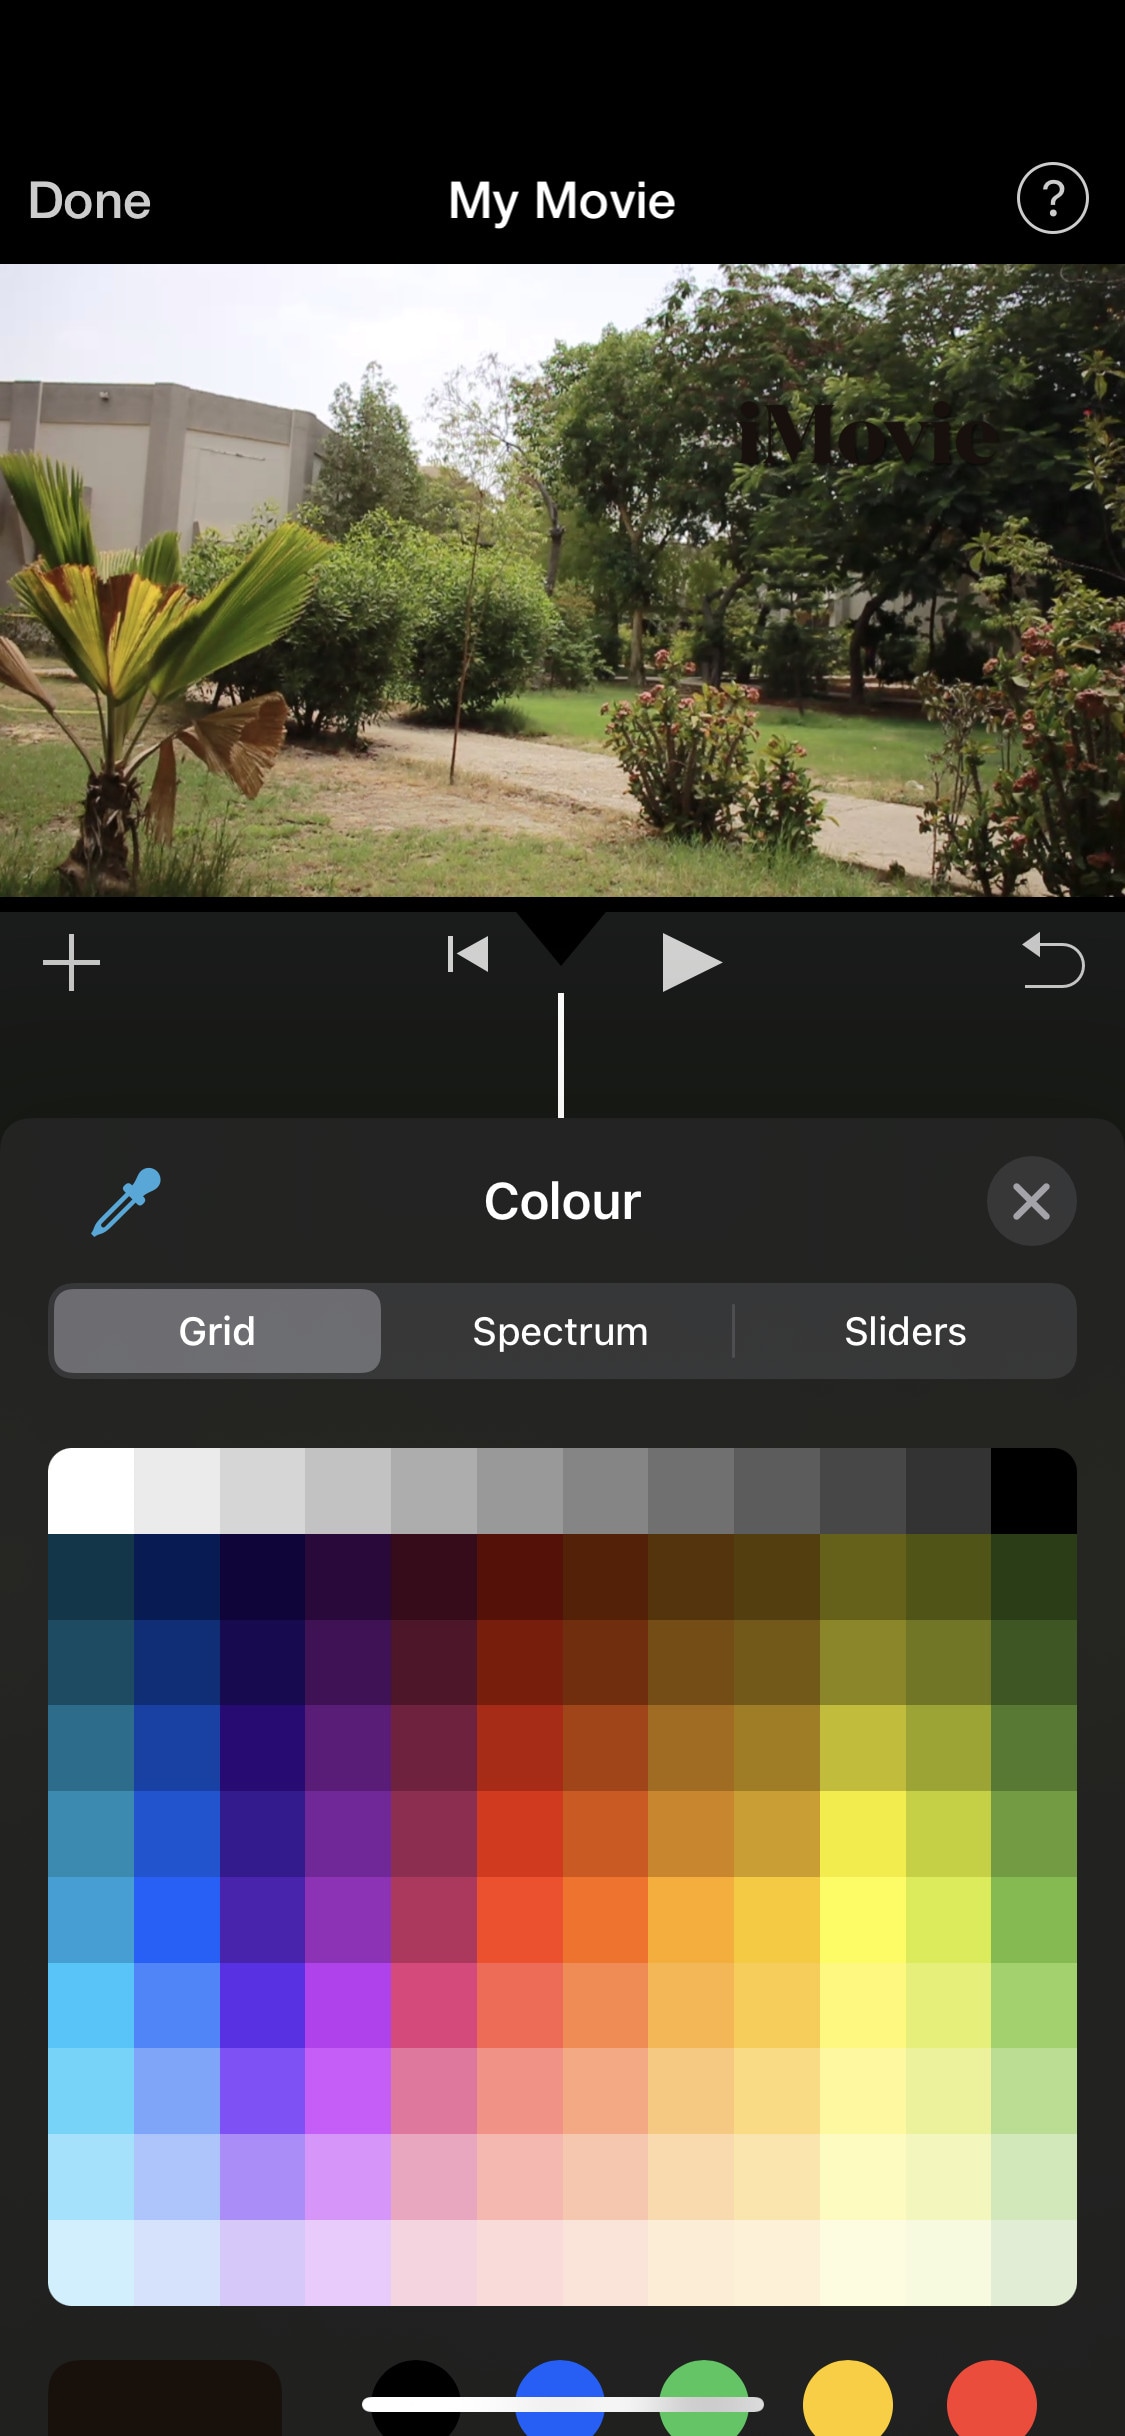
~Cons:
- It only works on ios and Mac.
- Not suitable for professional projects.
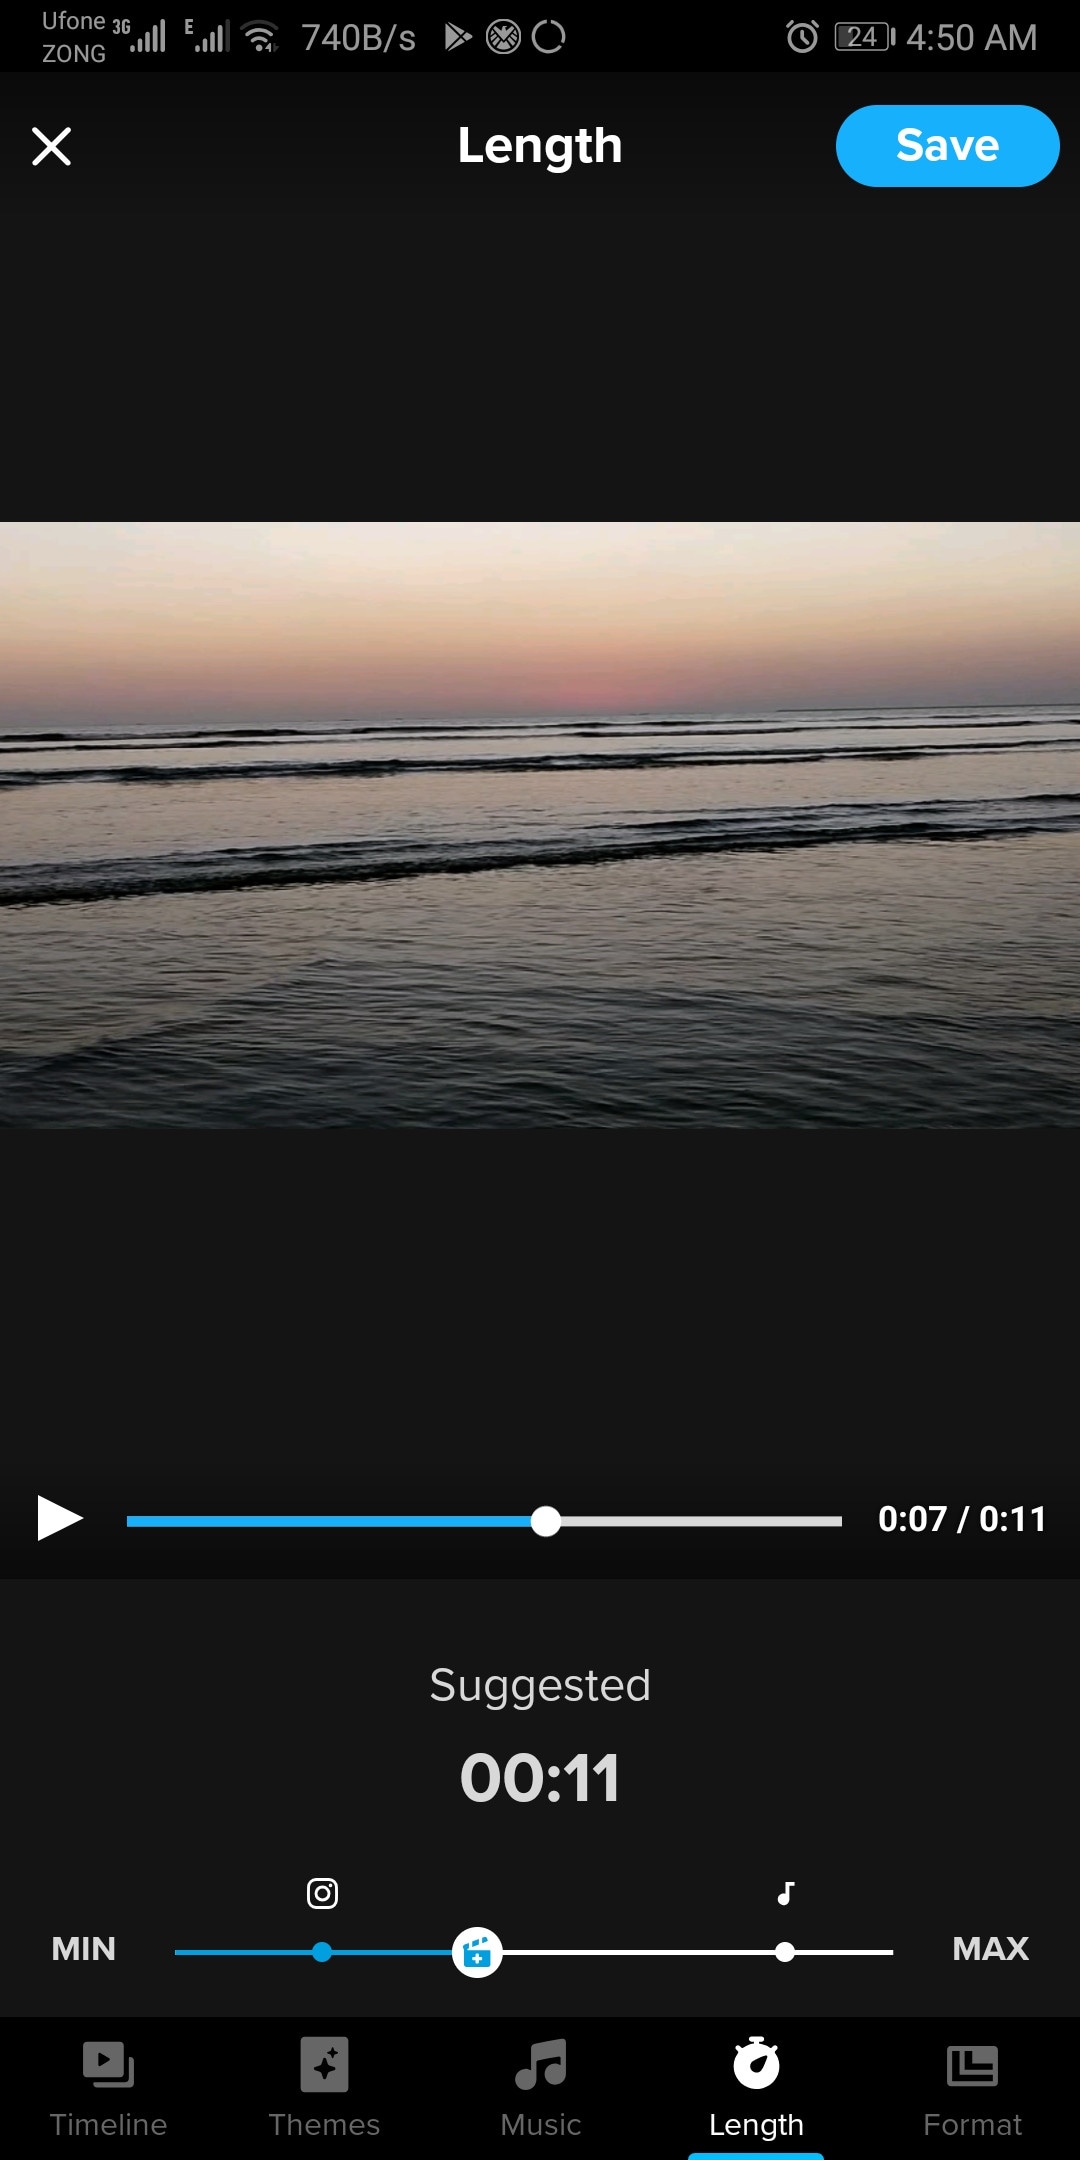
GoPro - Quik:
It is available on IOS and Android and windows also.
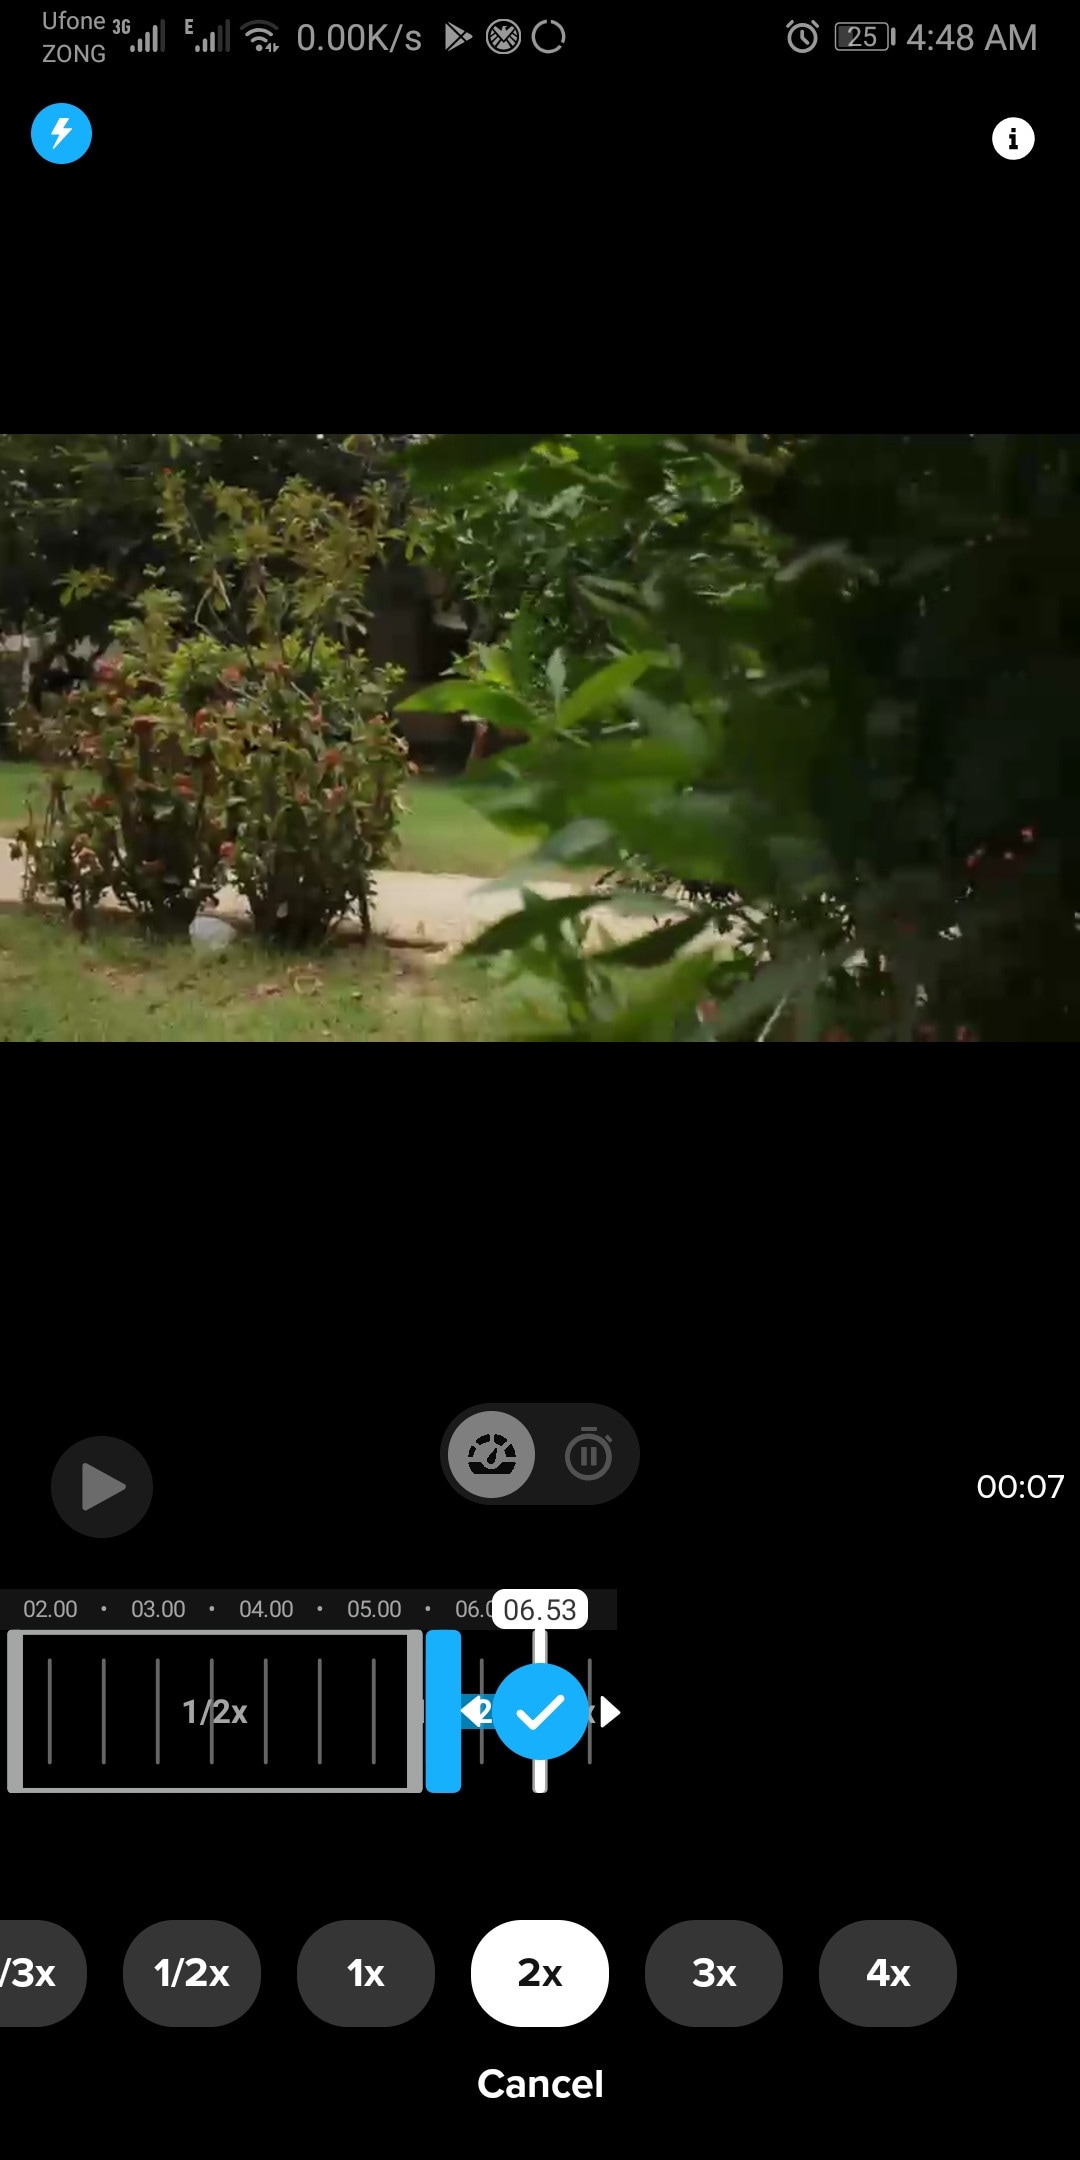
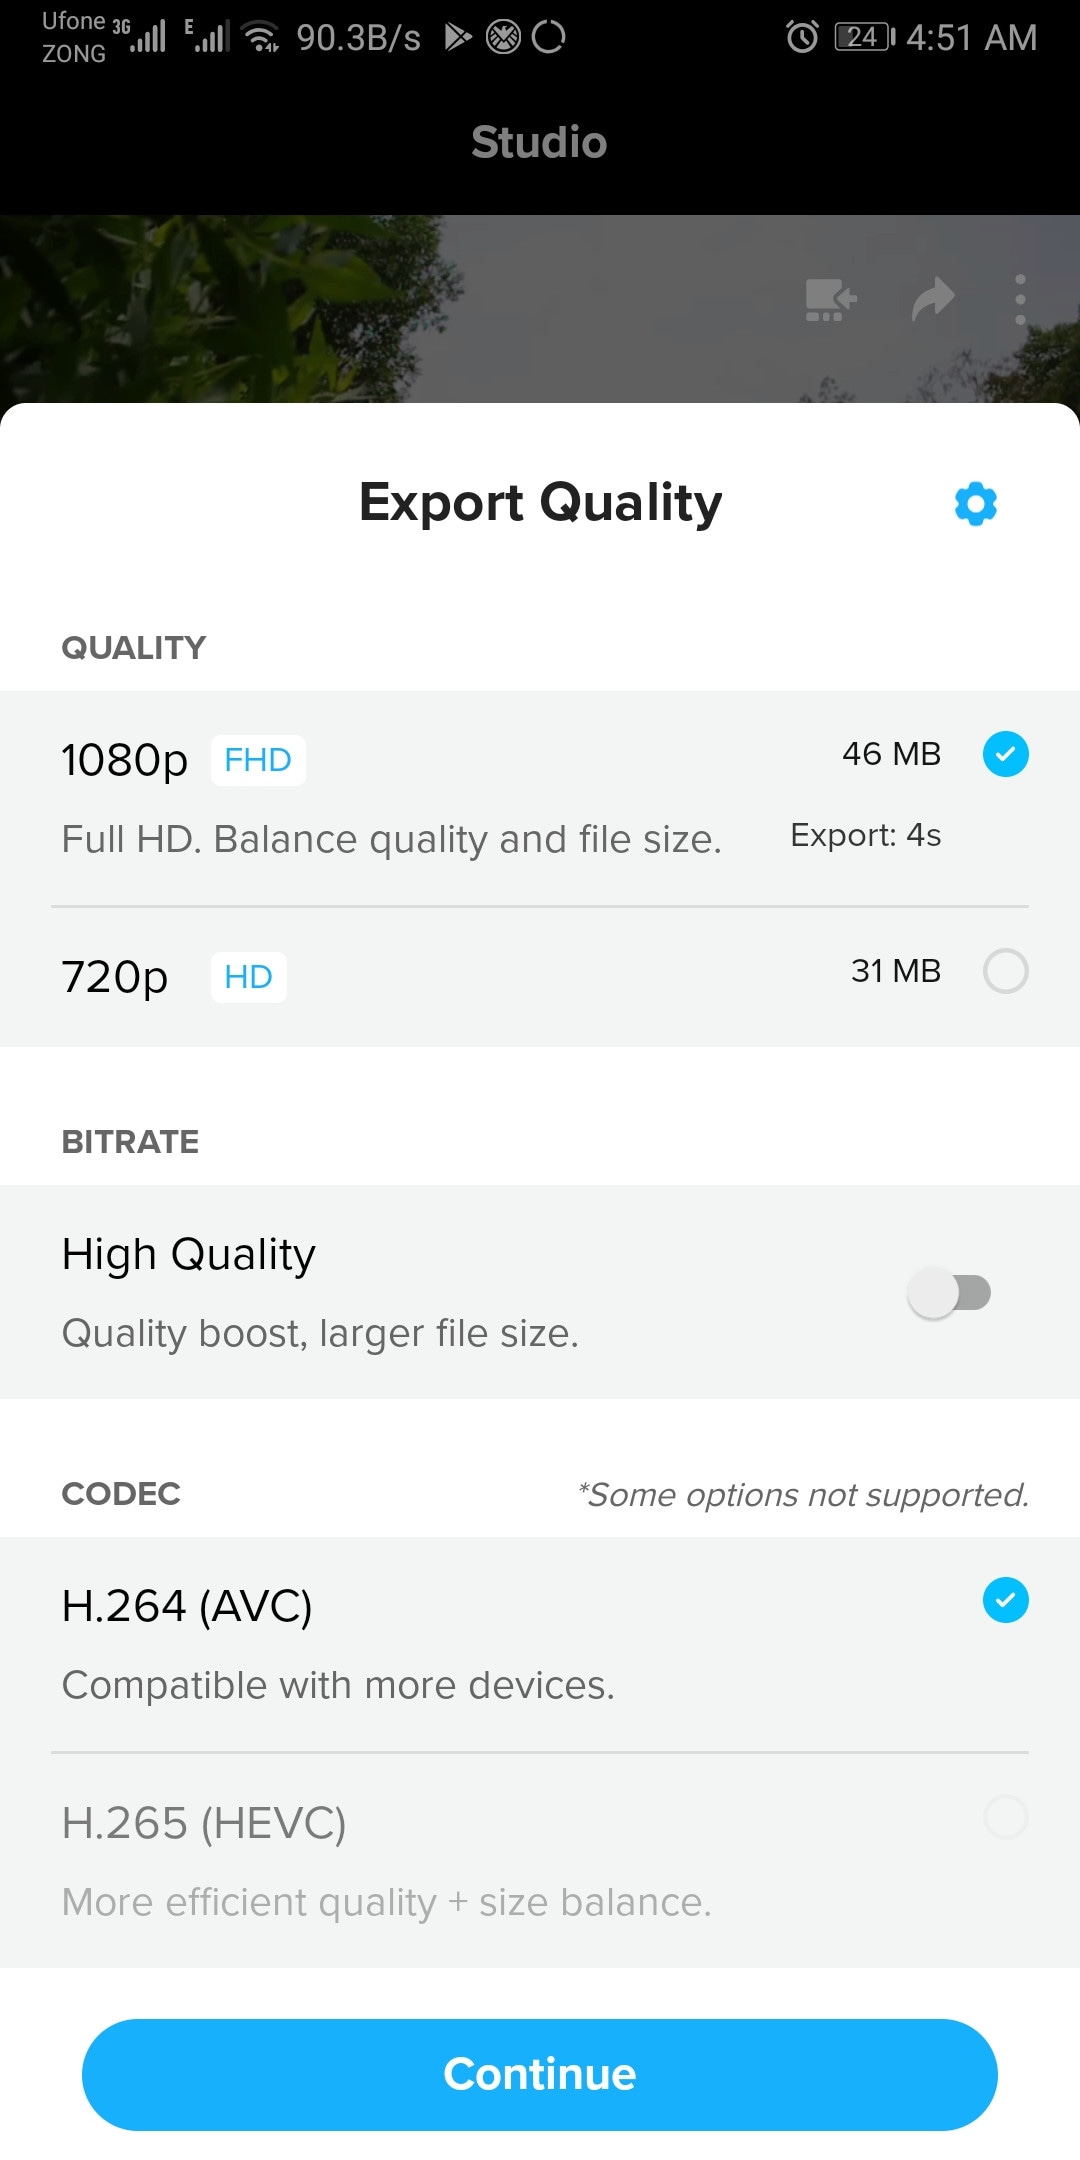
It is a free and easy-to-use software designed by GoPro. It can edit clips of your GoPro or any other device. It is a quick and easy way to enhance your clips before posting them on any social platform. It can do basic edits like trim, rotate, color correction, e.t.c. It can also make amazing speed ramps by changing the speed of different parts of the clip (available in the premium version only). It doesn’t produce any watermarks. Although its premium version unlocks more features like speed ramping, more themes, and unlimited backup space.
~Features:
- Its free version doesn’t leave a watermark.
- It is simple and easy to use.
- Can do basic color correction.
- Have pre-made themes for faster editing.
- Change the speed at different parts of the video to create smooth speed ramps. (Available in the premium version.)
- Has a free version with limited tools for basic editing.
~Cons:
- It lacks advanced tools therefore not suitable for large projects.
- Its free version has many limitations.
~Price: Its subscription is available at $1.99/month or at discount for an annual subscription having $9.99/year.
VN Video editor:
It is available on IOS and Android, Windows, and Mac.
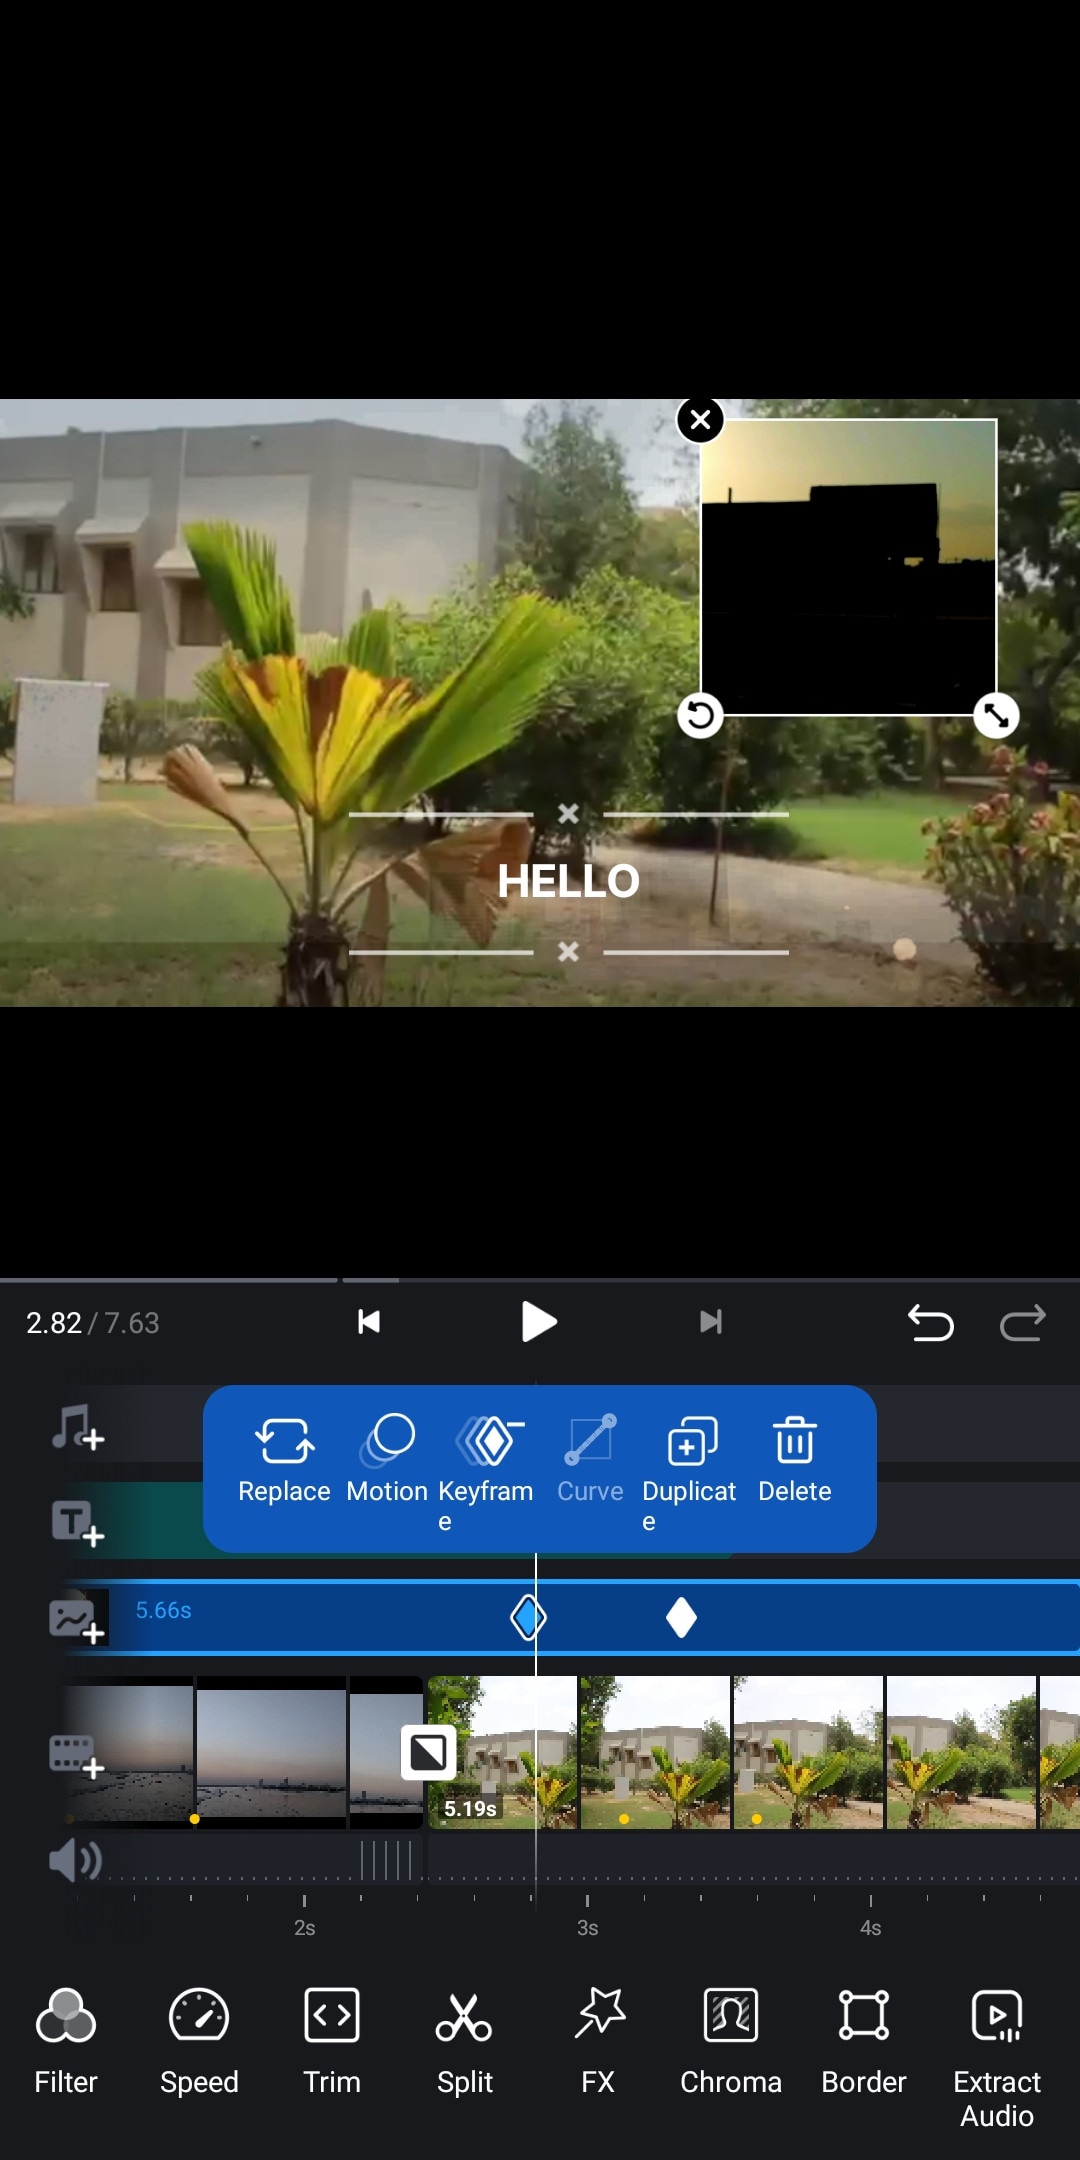
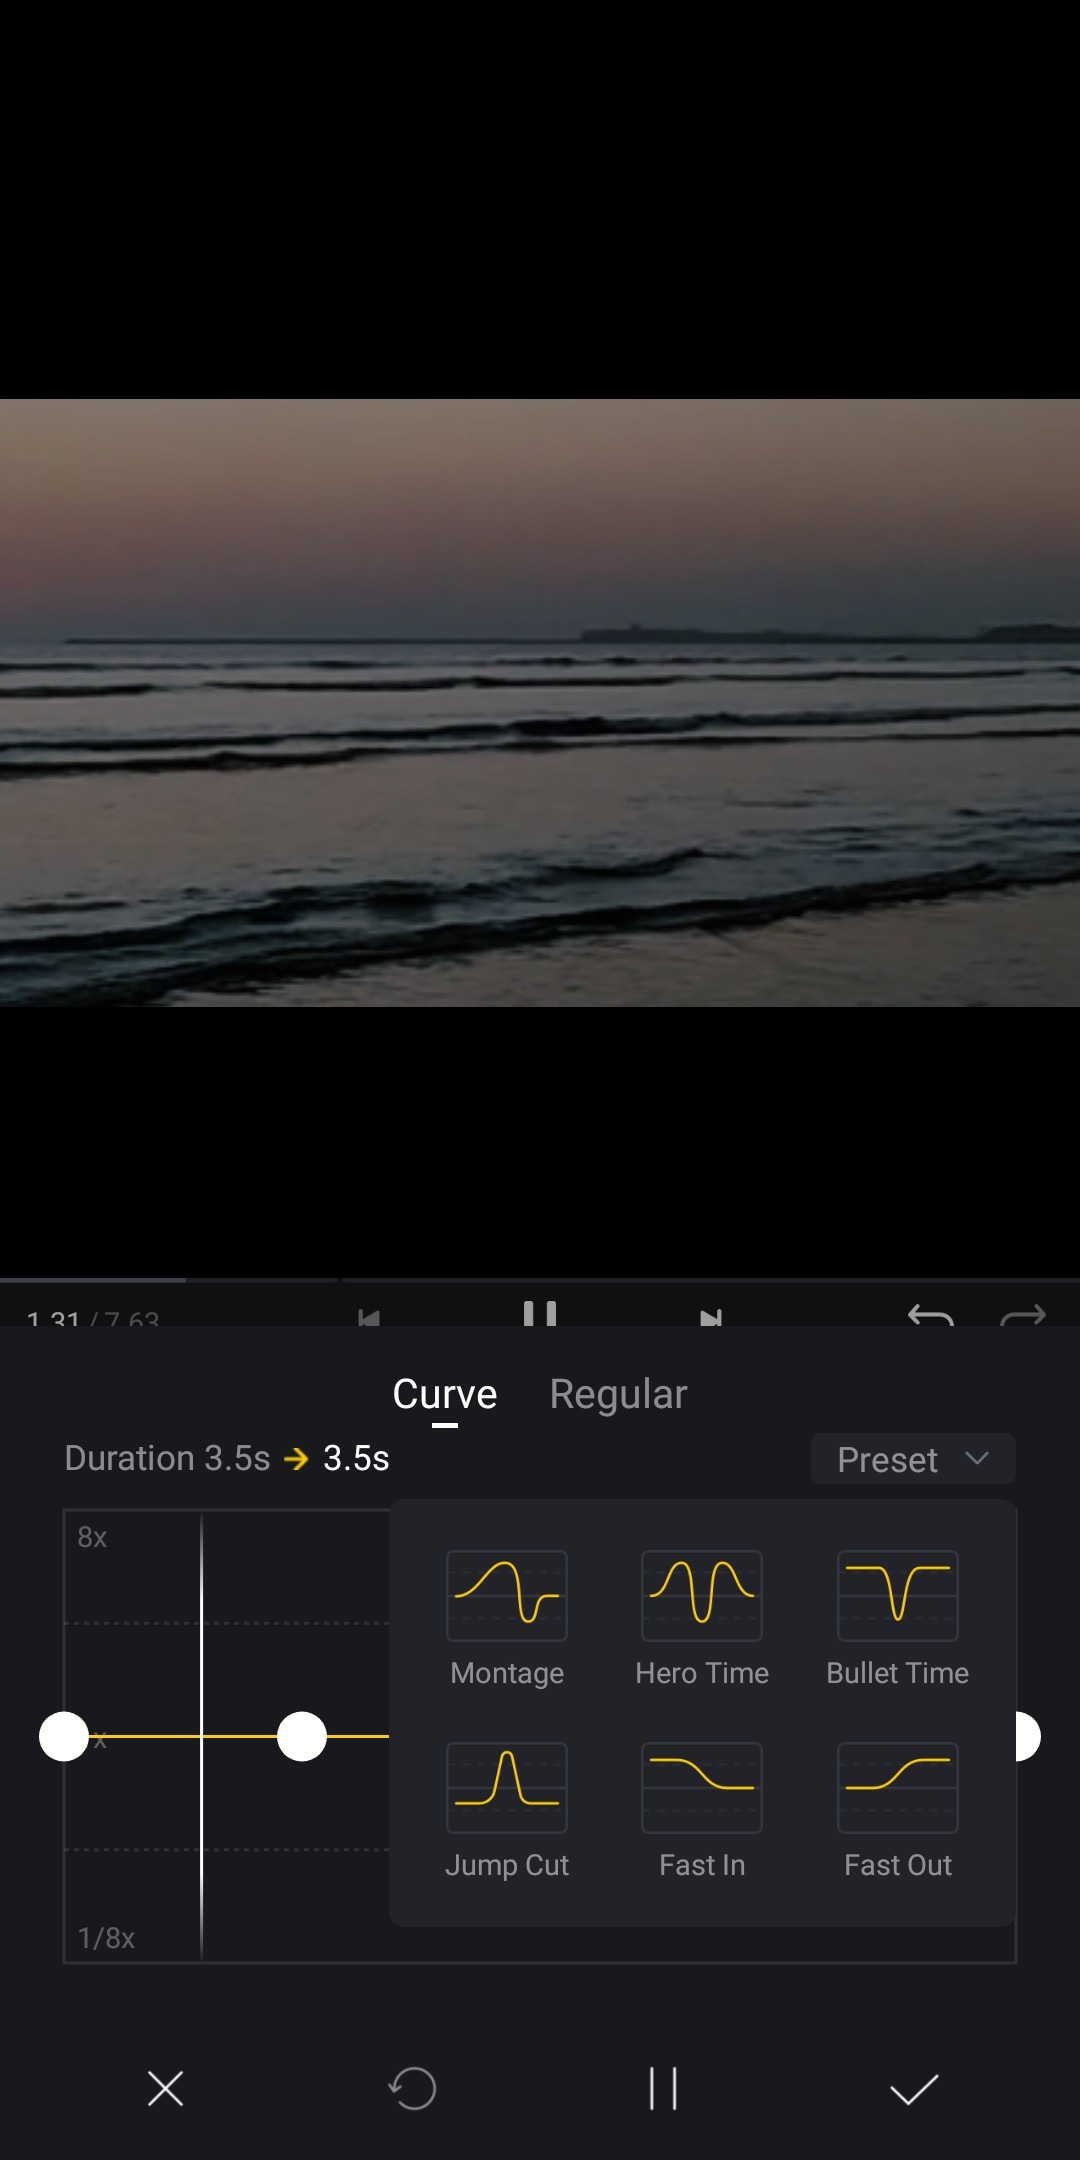
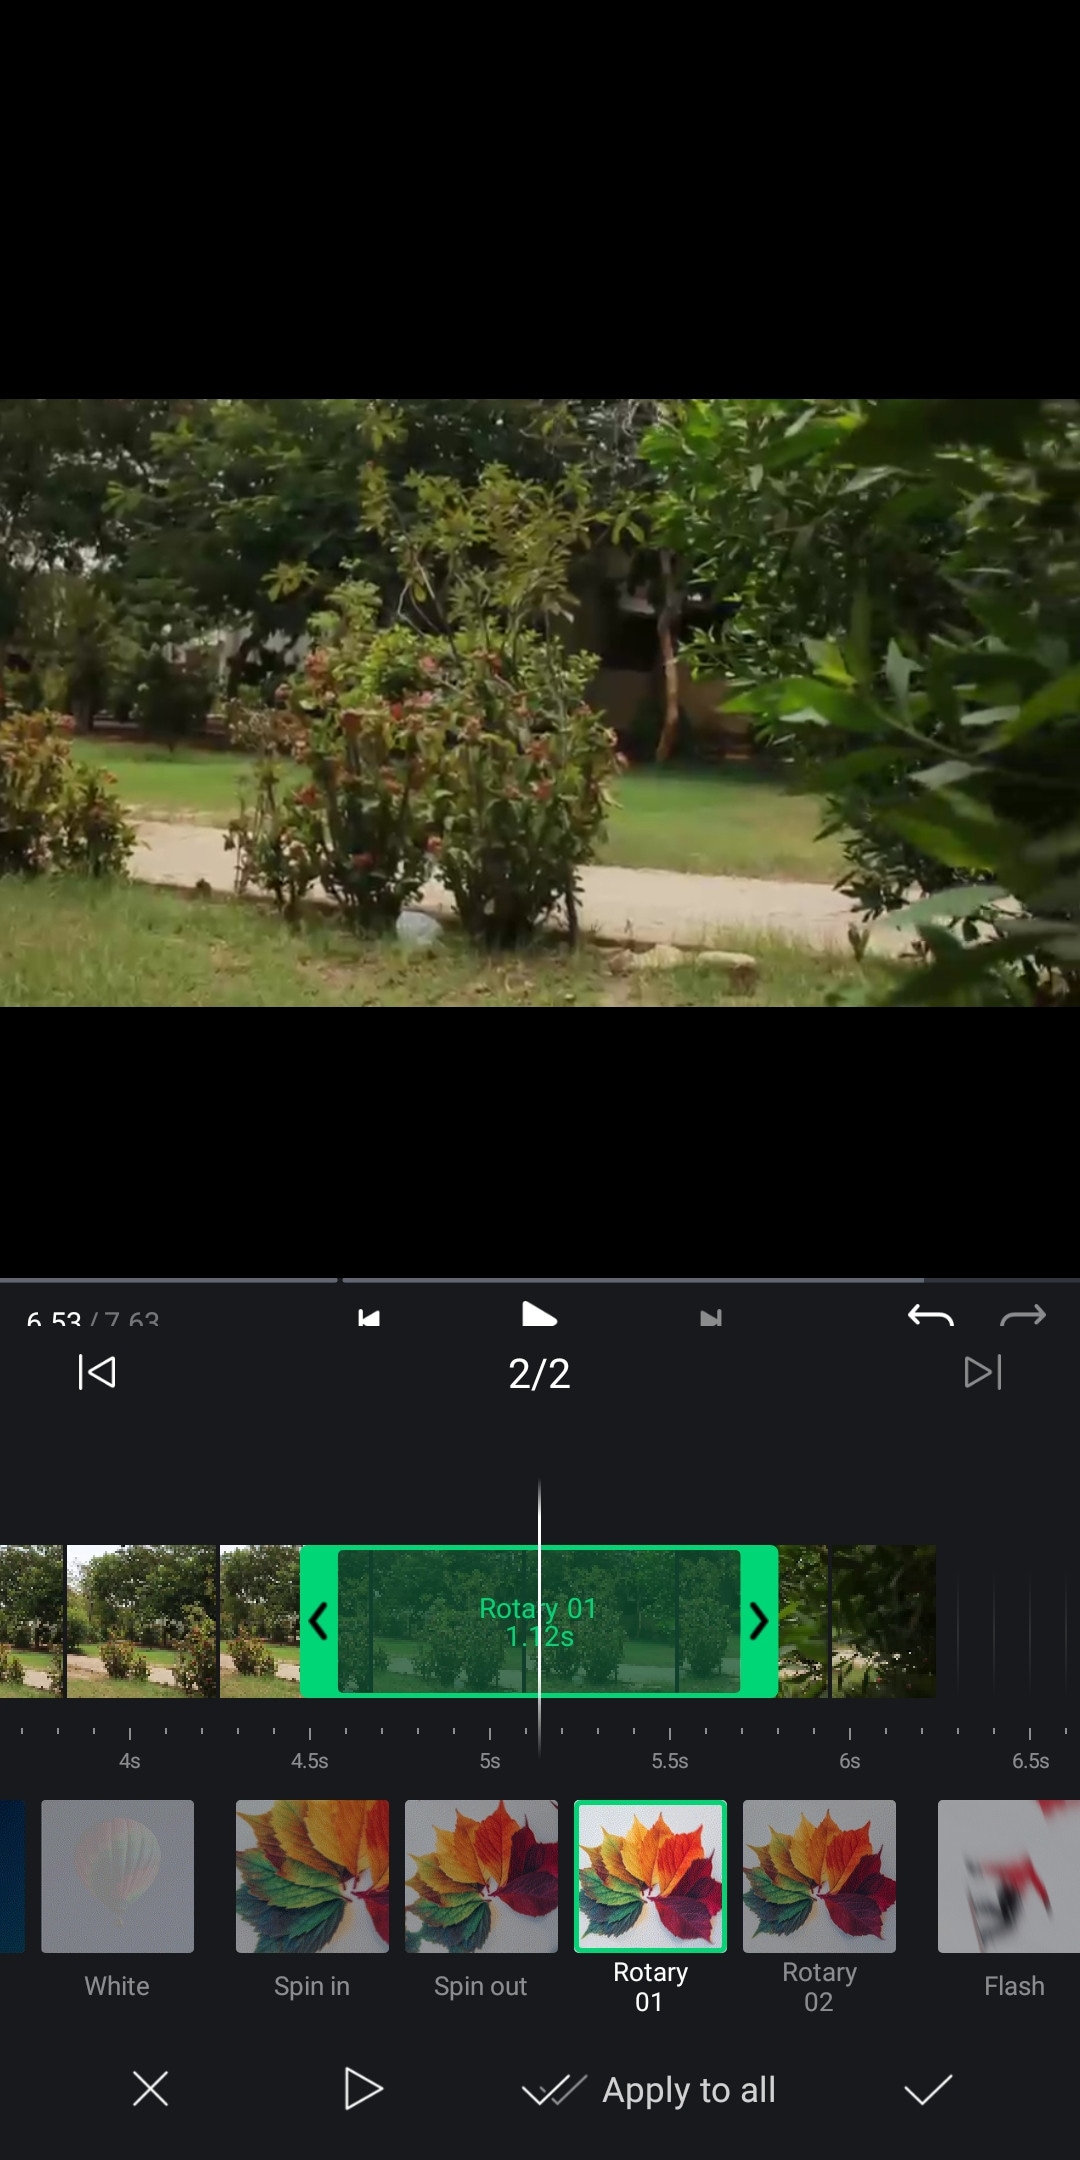
If you are looking for a video editor, which let you do fast but quality edits, then “VN video editor” is the right choice for you. It is free and easy-to-use software with many useful features like transitions, effects, speed ramps, PiP, chroma-key, keyframing, e.t.c. It supports different aspect ratios for all your social platforms.
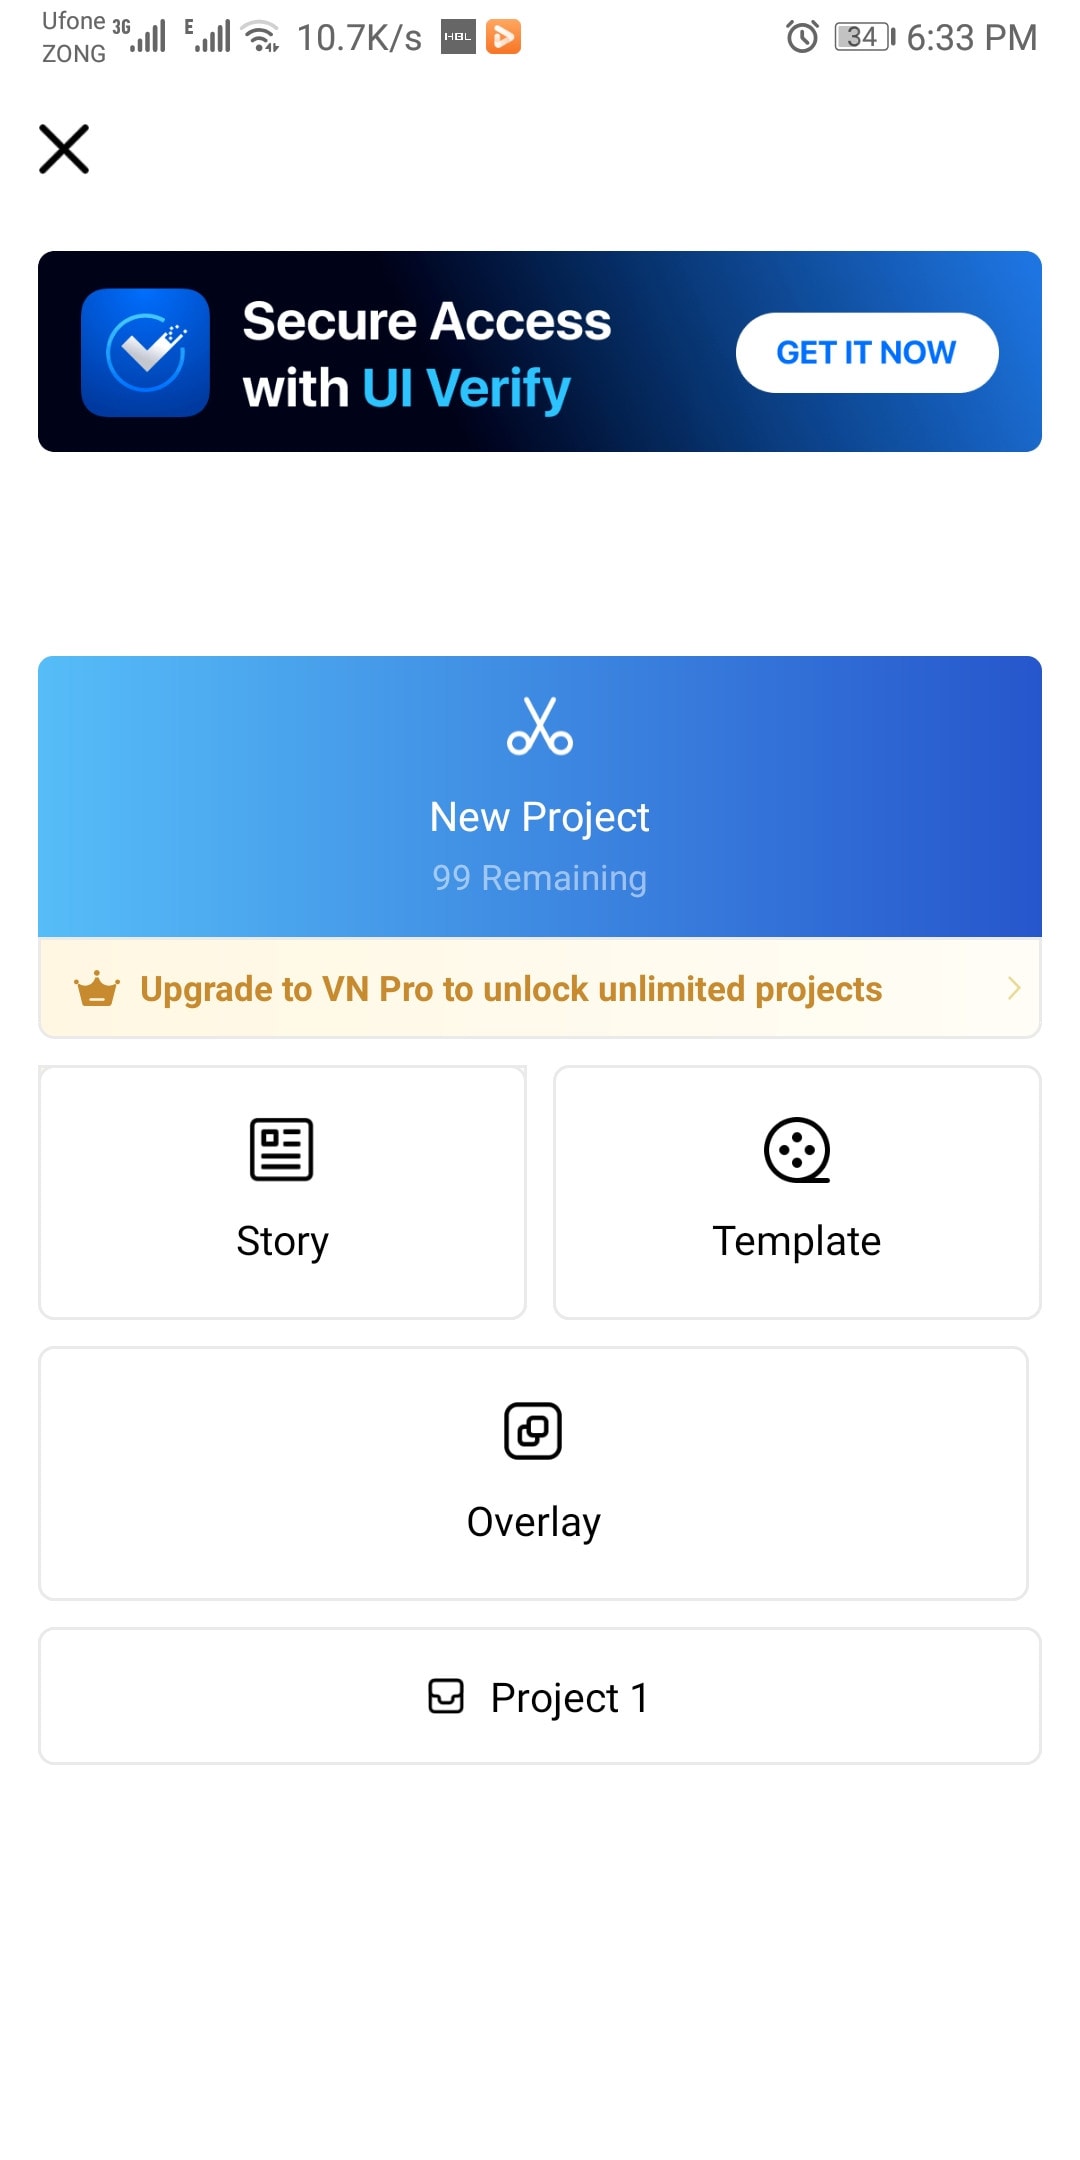
It also has pre-made templates to speed up your editing process. Its Story mode let you manage your production and post-production work easily. It also has overlay mode, which can make awesome slide shows for you.
~Features:
- It is free software with no watermark.
- It supports up to 4K resolution at 60fps.
- Supports multi-layer editing.
- Have keyframing curves to create smooth animations.
- Have speed curves for smooth speed ramping.
- Its Story mode let you manage your production work easily.
- Can extract audio from a video file.
~Cons:
- Its UI doesn’t support editing landscape orientation.
- Its free version has limitations of creating max 100 projects.
~Price:
Its Premium version is available for $3.9/month or $20.9/year.
Some Paid iPhone Video Editors:
If you want to move forward and get your hands on these paid softwares to try new features then you should buy these paid softwares. As most of these softwares are quite affordable but they pack the punch. And some of them can give you more in return than your investment. Then what are you waiting for? go and try them yourself.
Kinemaster:
It is available on IOS and Android both.
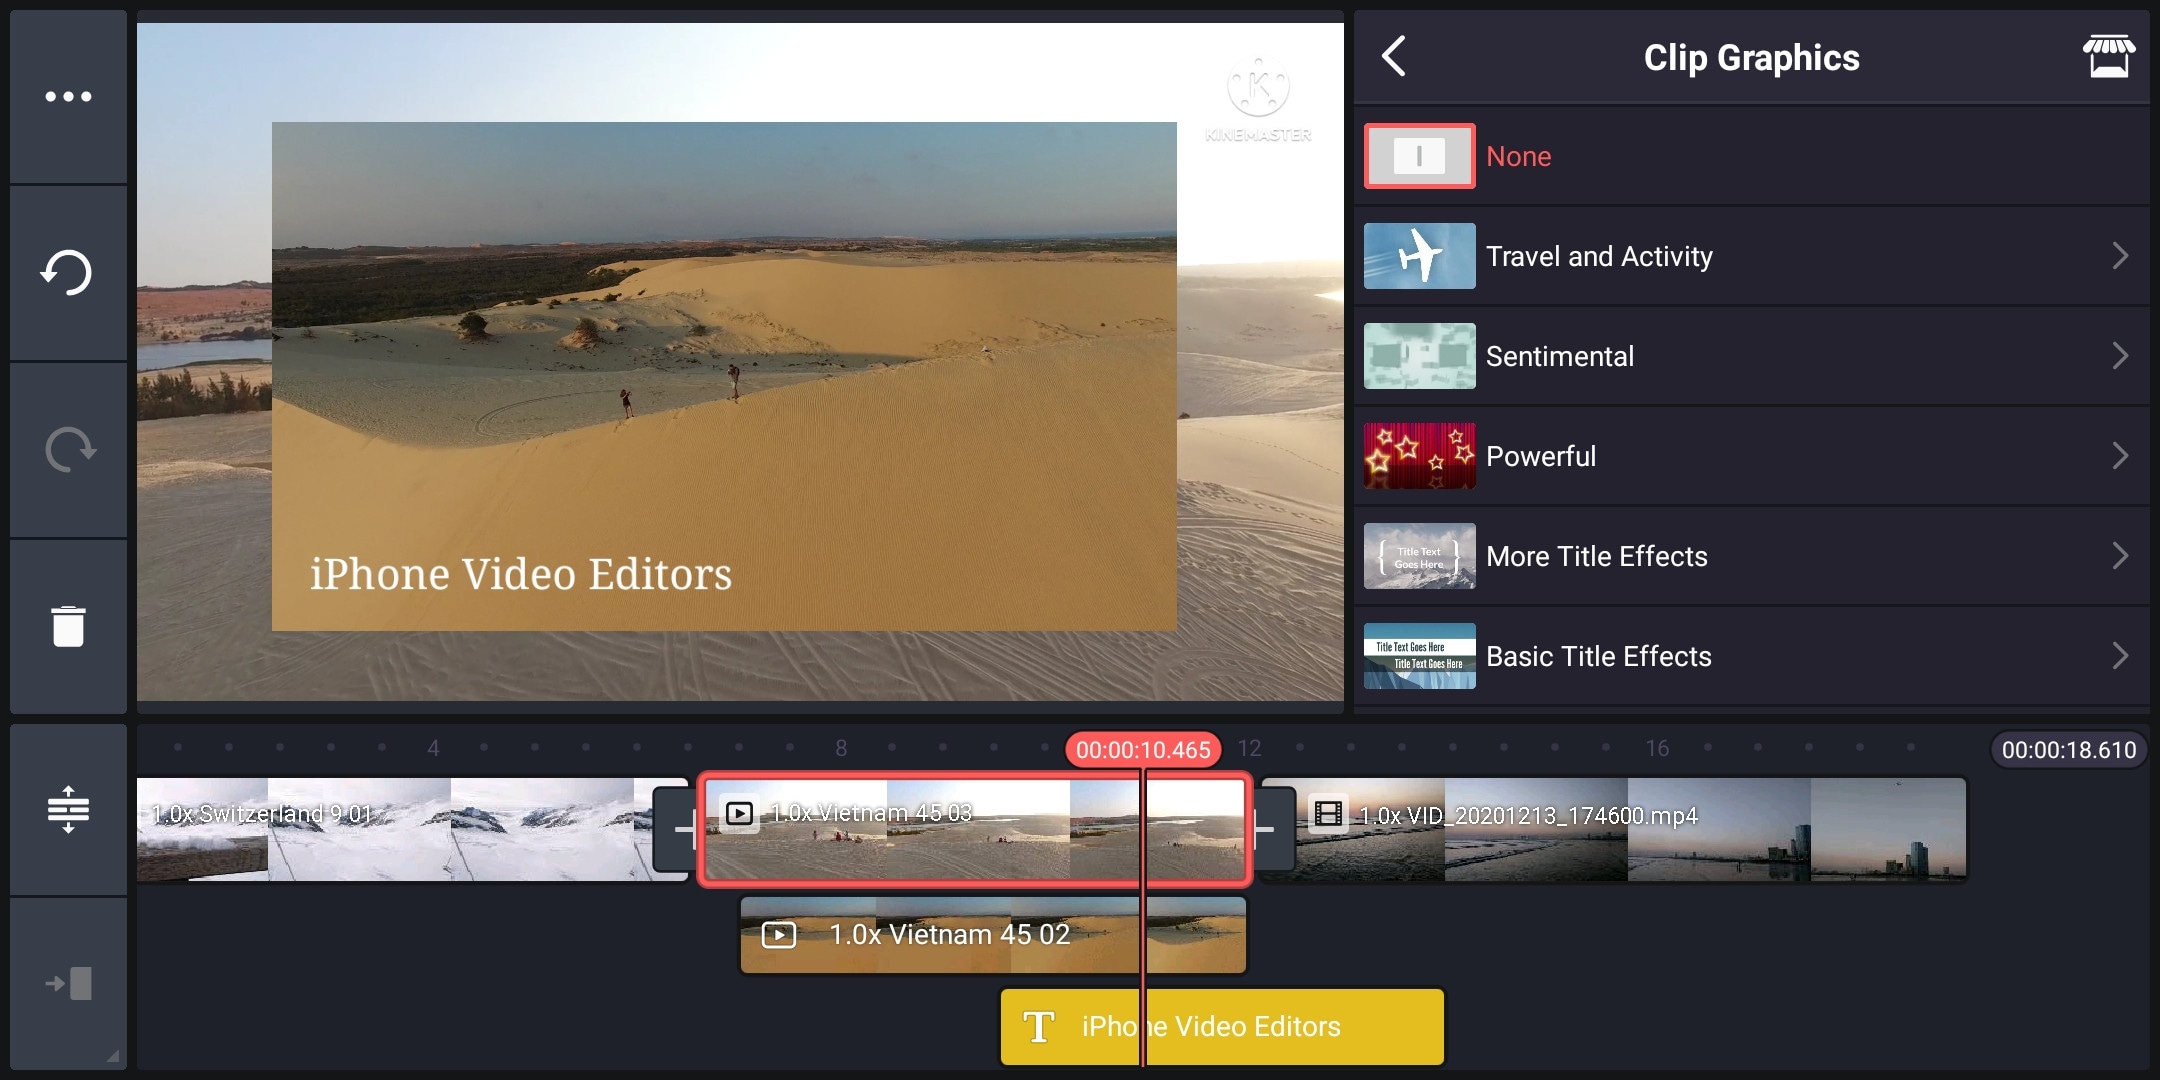
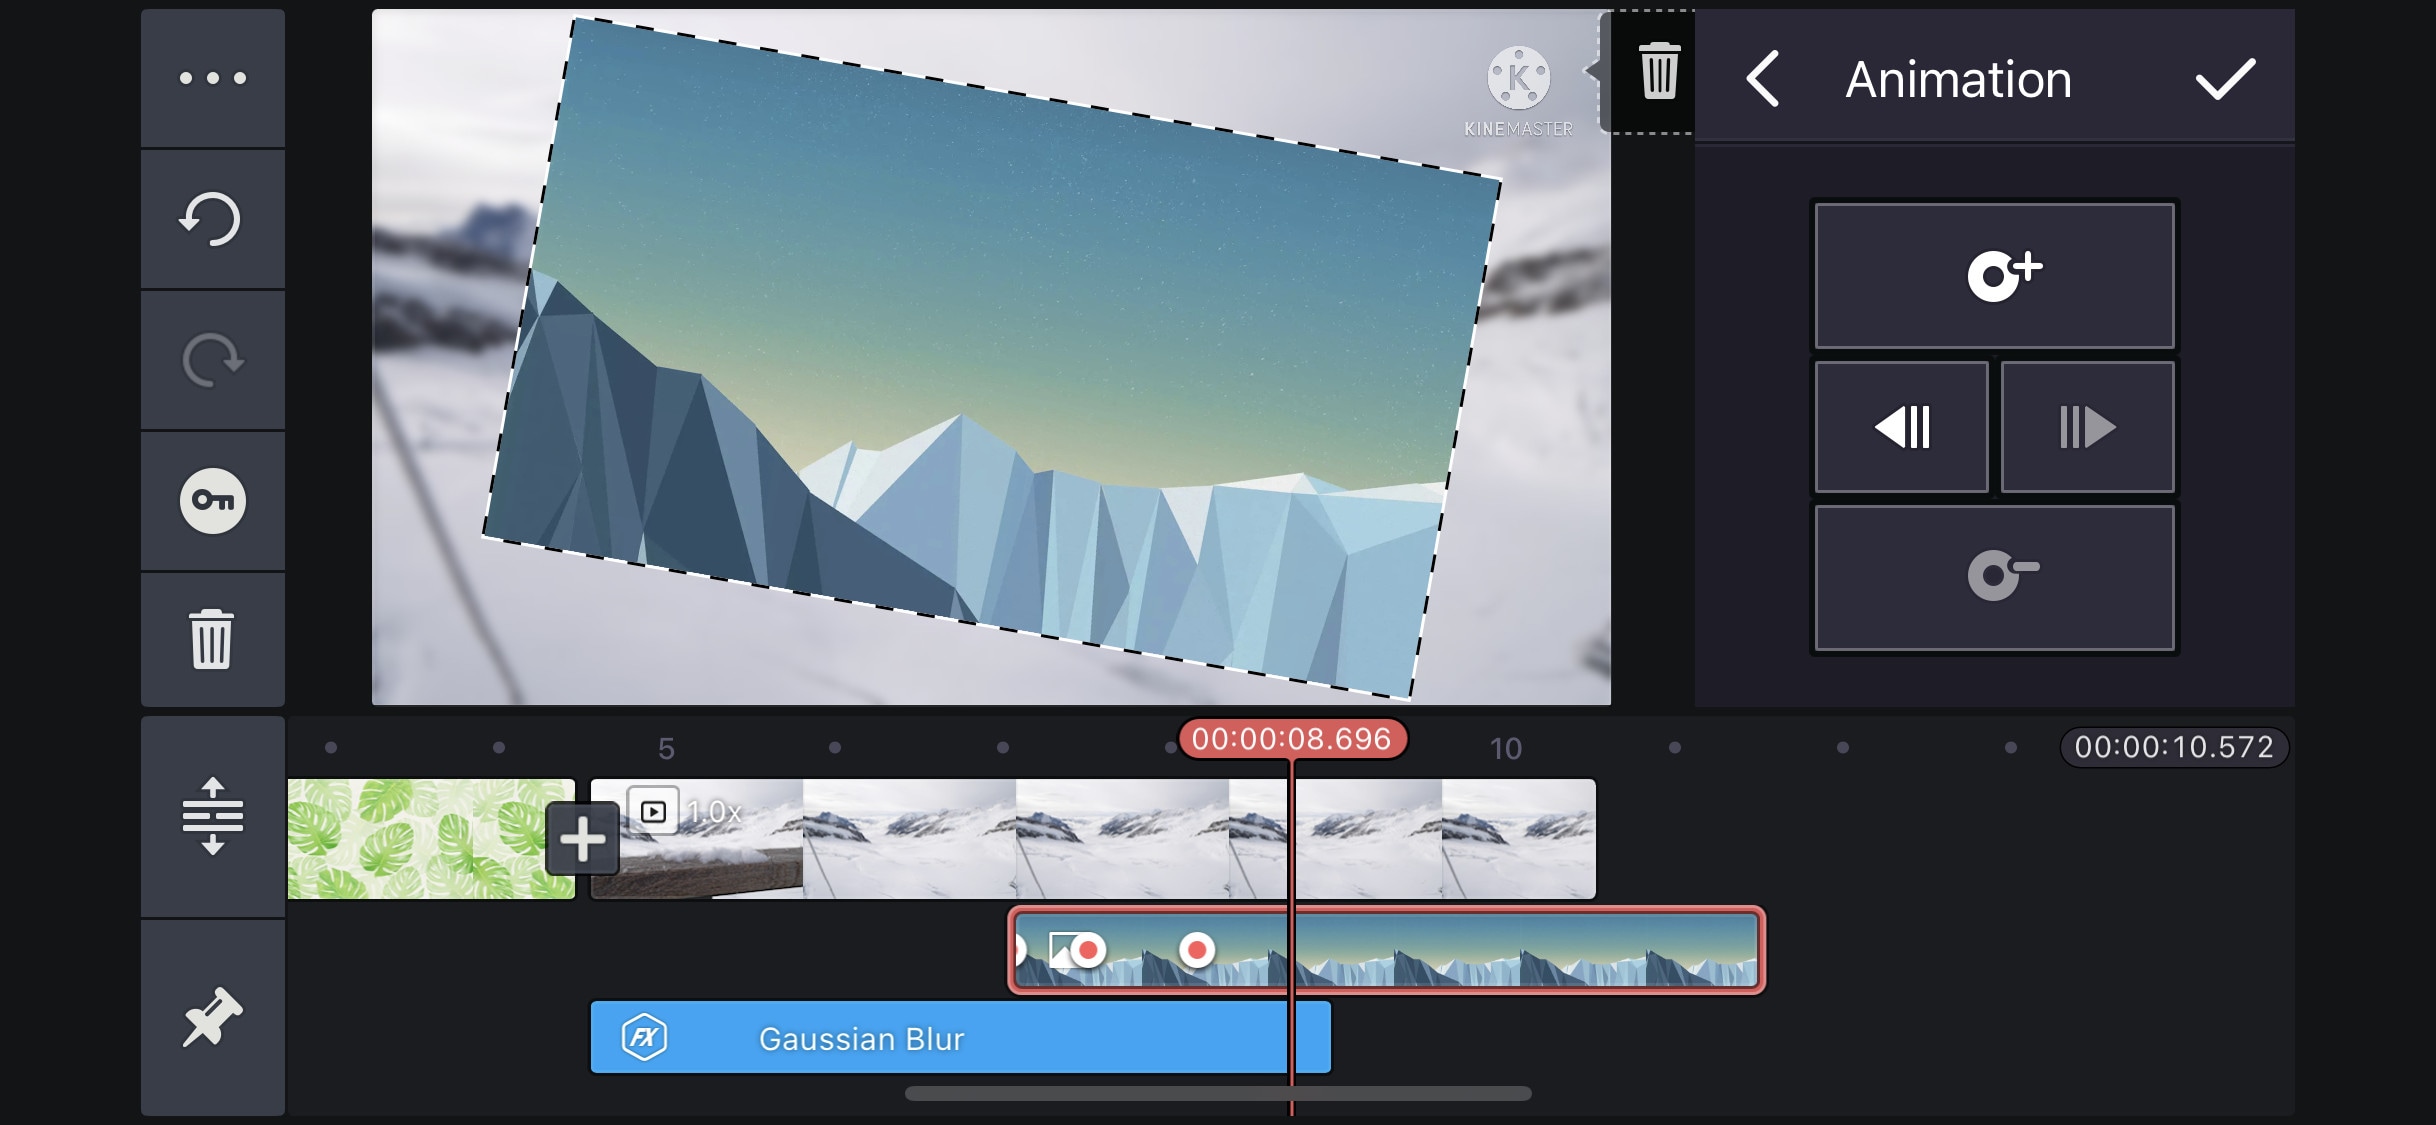
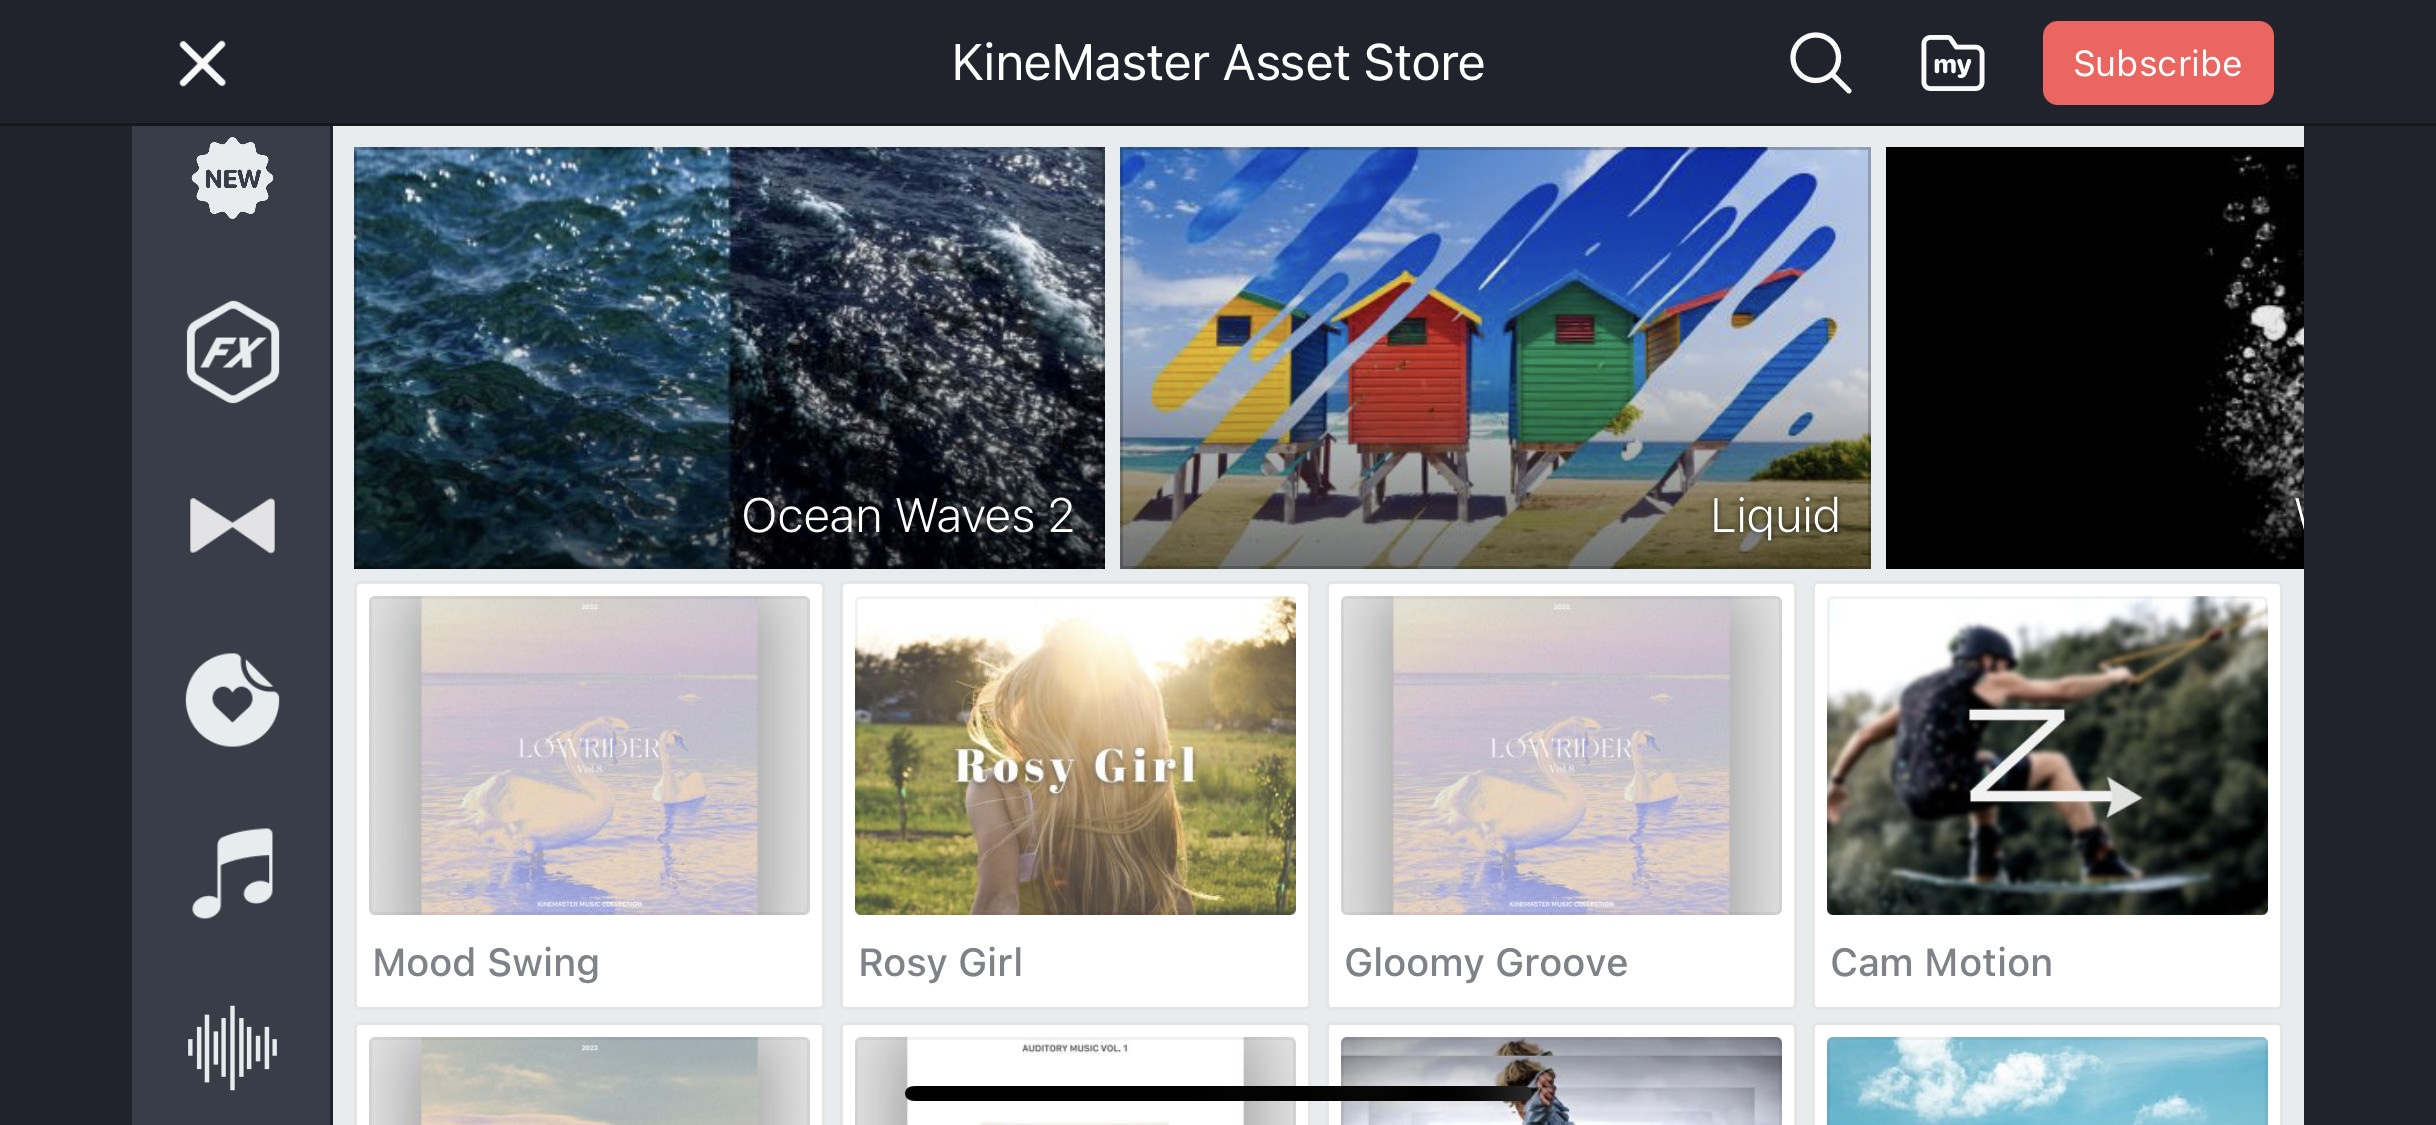
If you want to do more than just trimming and cropping to your videos then you should try Kinemaster. For editors, who want to do some advanced-level video editing on their phone, then you must have Kinemaster on your phone. It is a paid software, which is packed with many useful features. It has many video and audio effects. It also has an amazing audio editor. It also has many title designs and basic color correction tools. It has hundreds of effects and transitions + more can be downloaded from its asset store. Its UI is suitable for beginners and content creators both. It is a paid software, but all its features are completely free to use, but the free version leaves a watermark on export.
~Features:
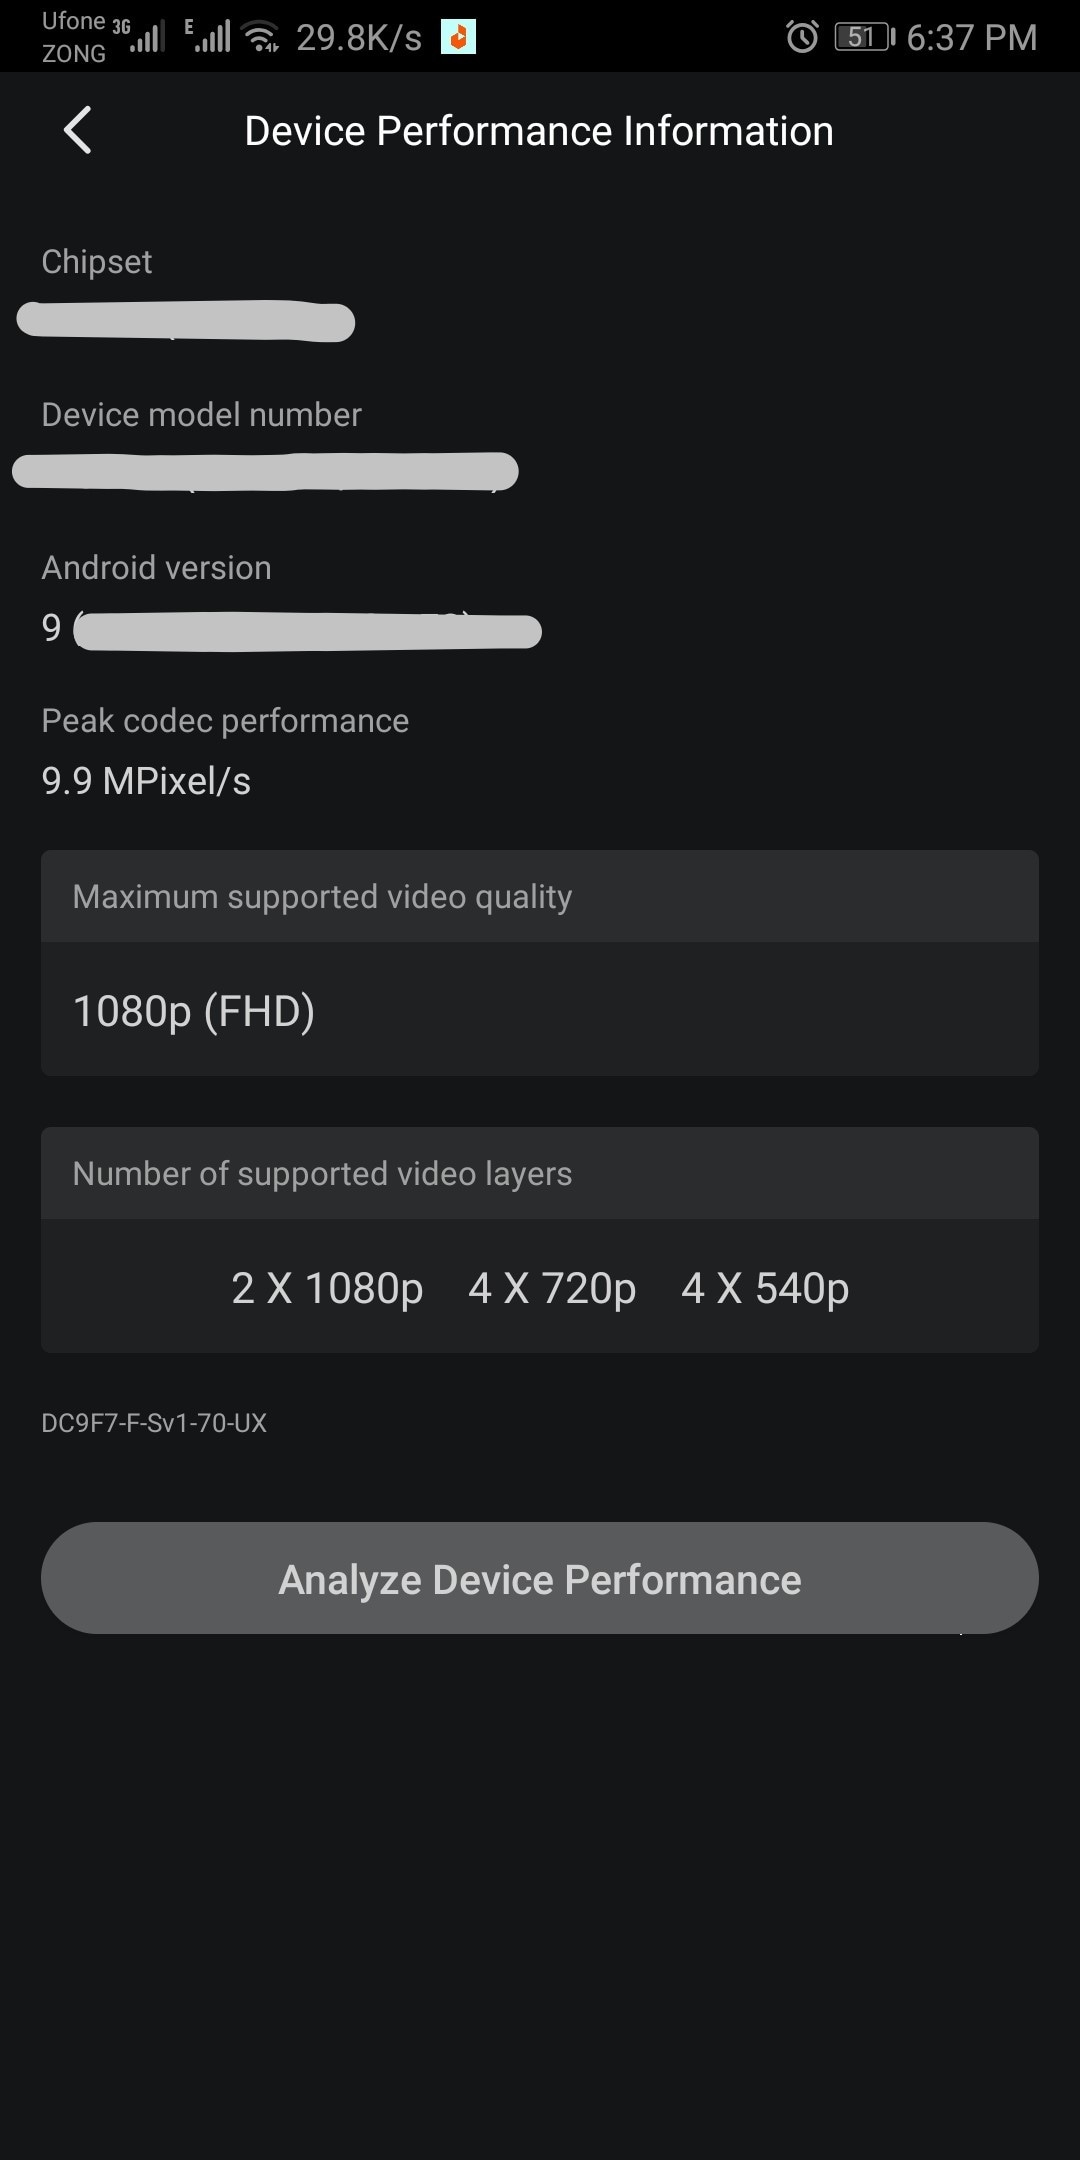
- It supports up to 4K resolution at 60fps. (depending on mobile configuration)
- Have amazing features like chroma key, keyframing, blend e.t.c
- Has built-in audio and video recorder.
- Supports multiple texts and video layers with different resolutions depending on the capability of the mobile phone.
- Has UI like a PC video editor and supports landscape orientation for editing.
- Have an asset store with 100s of free effects, transitions, and stock material.
~Cons:
- Can’t export 4K videos on most devices.
- Can’t apply keyframes and chroma key to the main video. (can be done on layers only)
~Price:
Its Premium version is available for $4.9/month or $39.9/year. It also includes all the premium assets.
Power Director:
It is available on IOS and Android both.
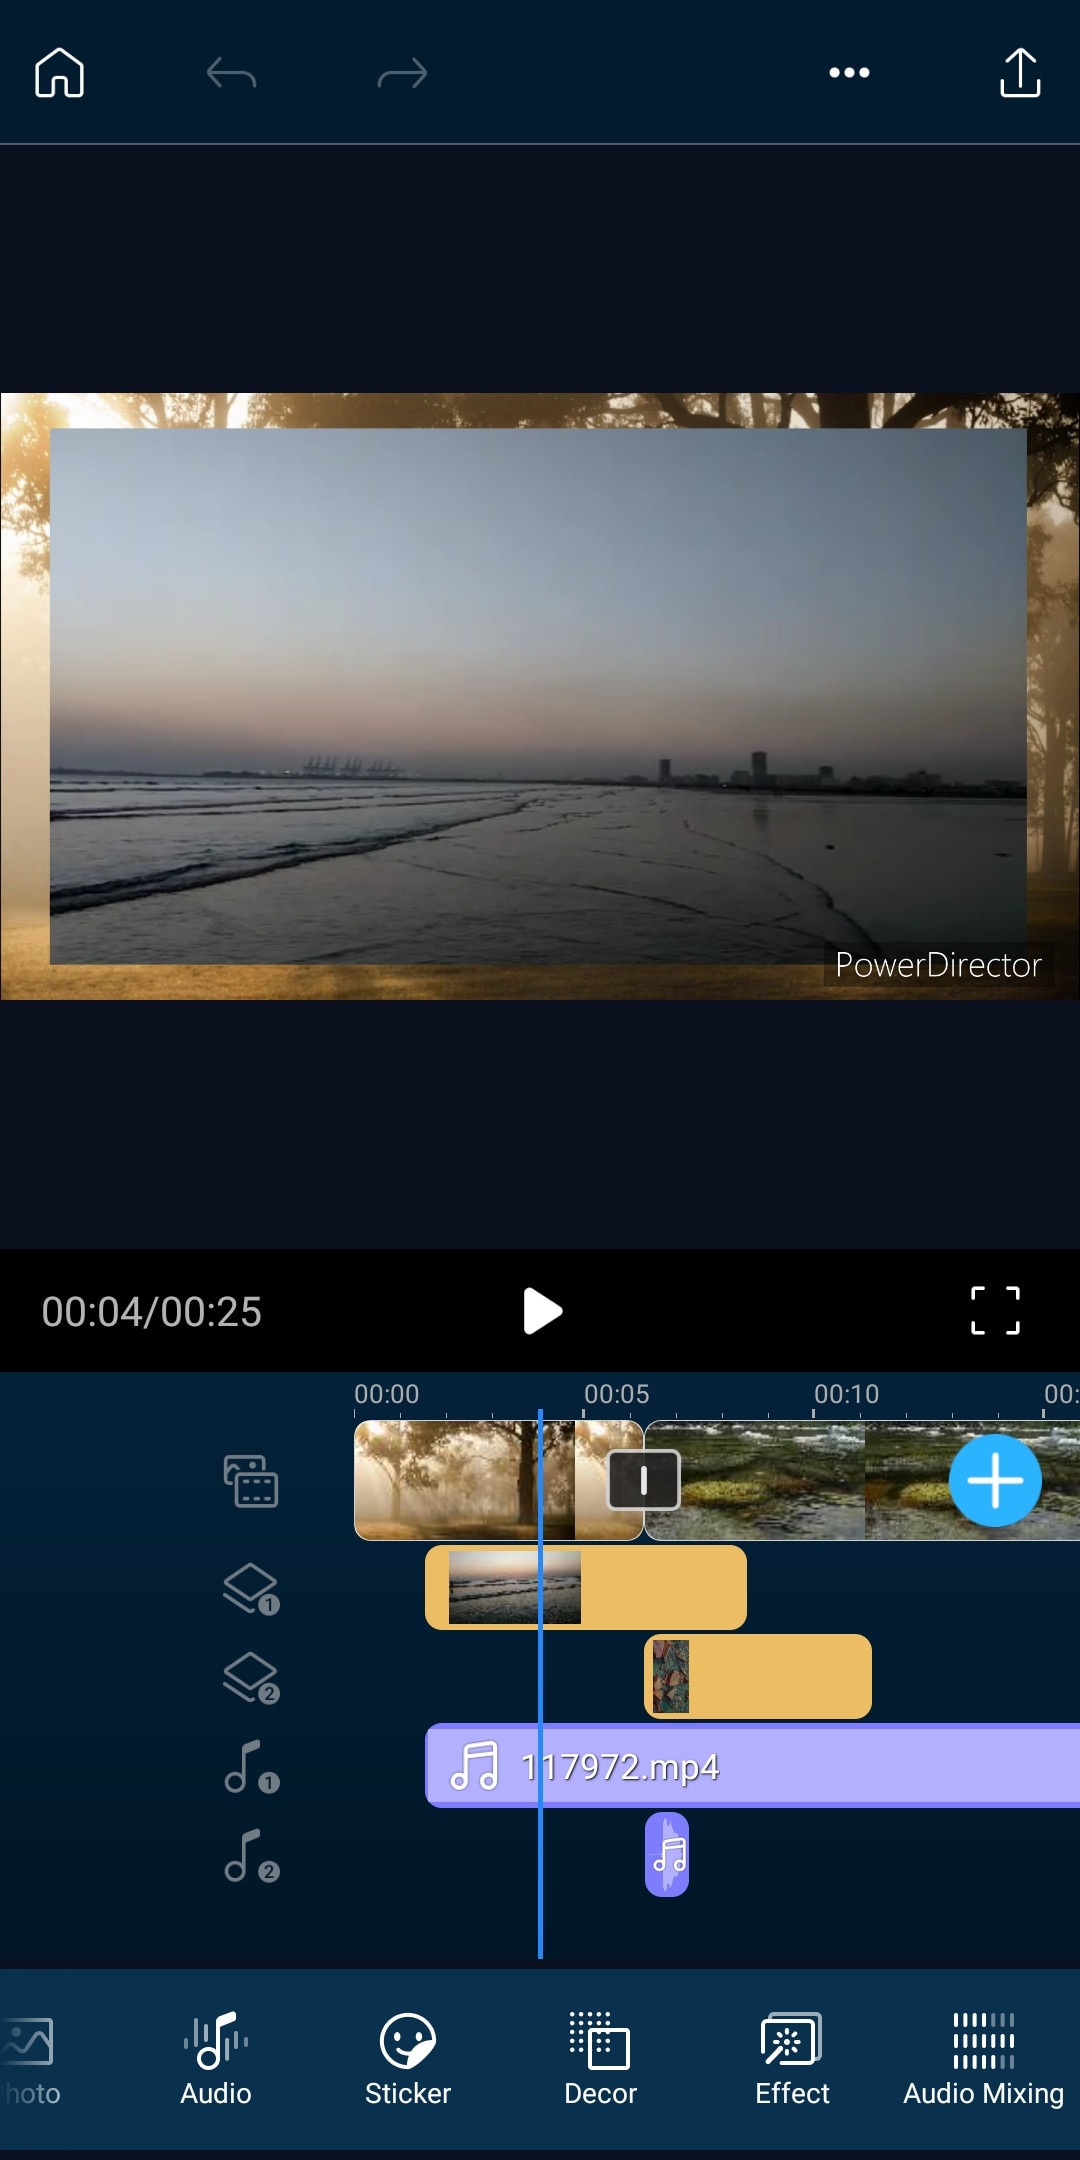
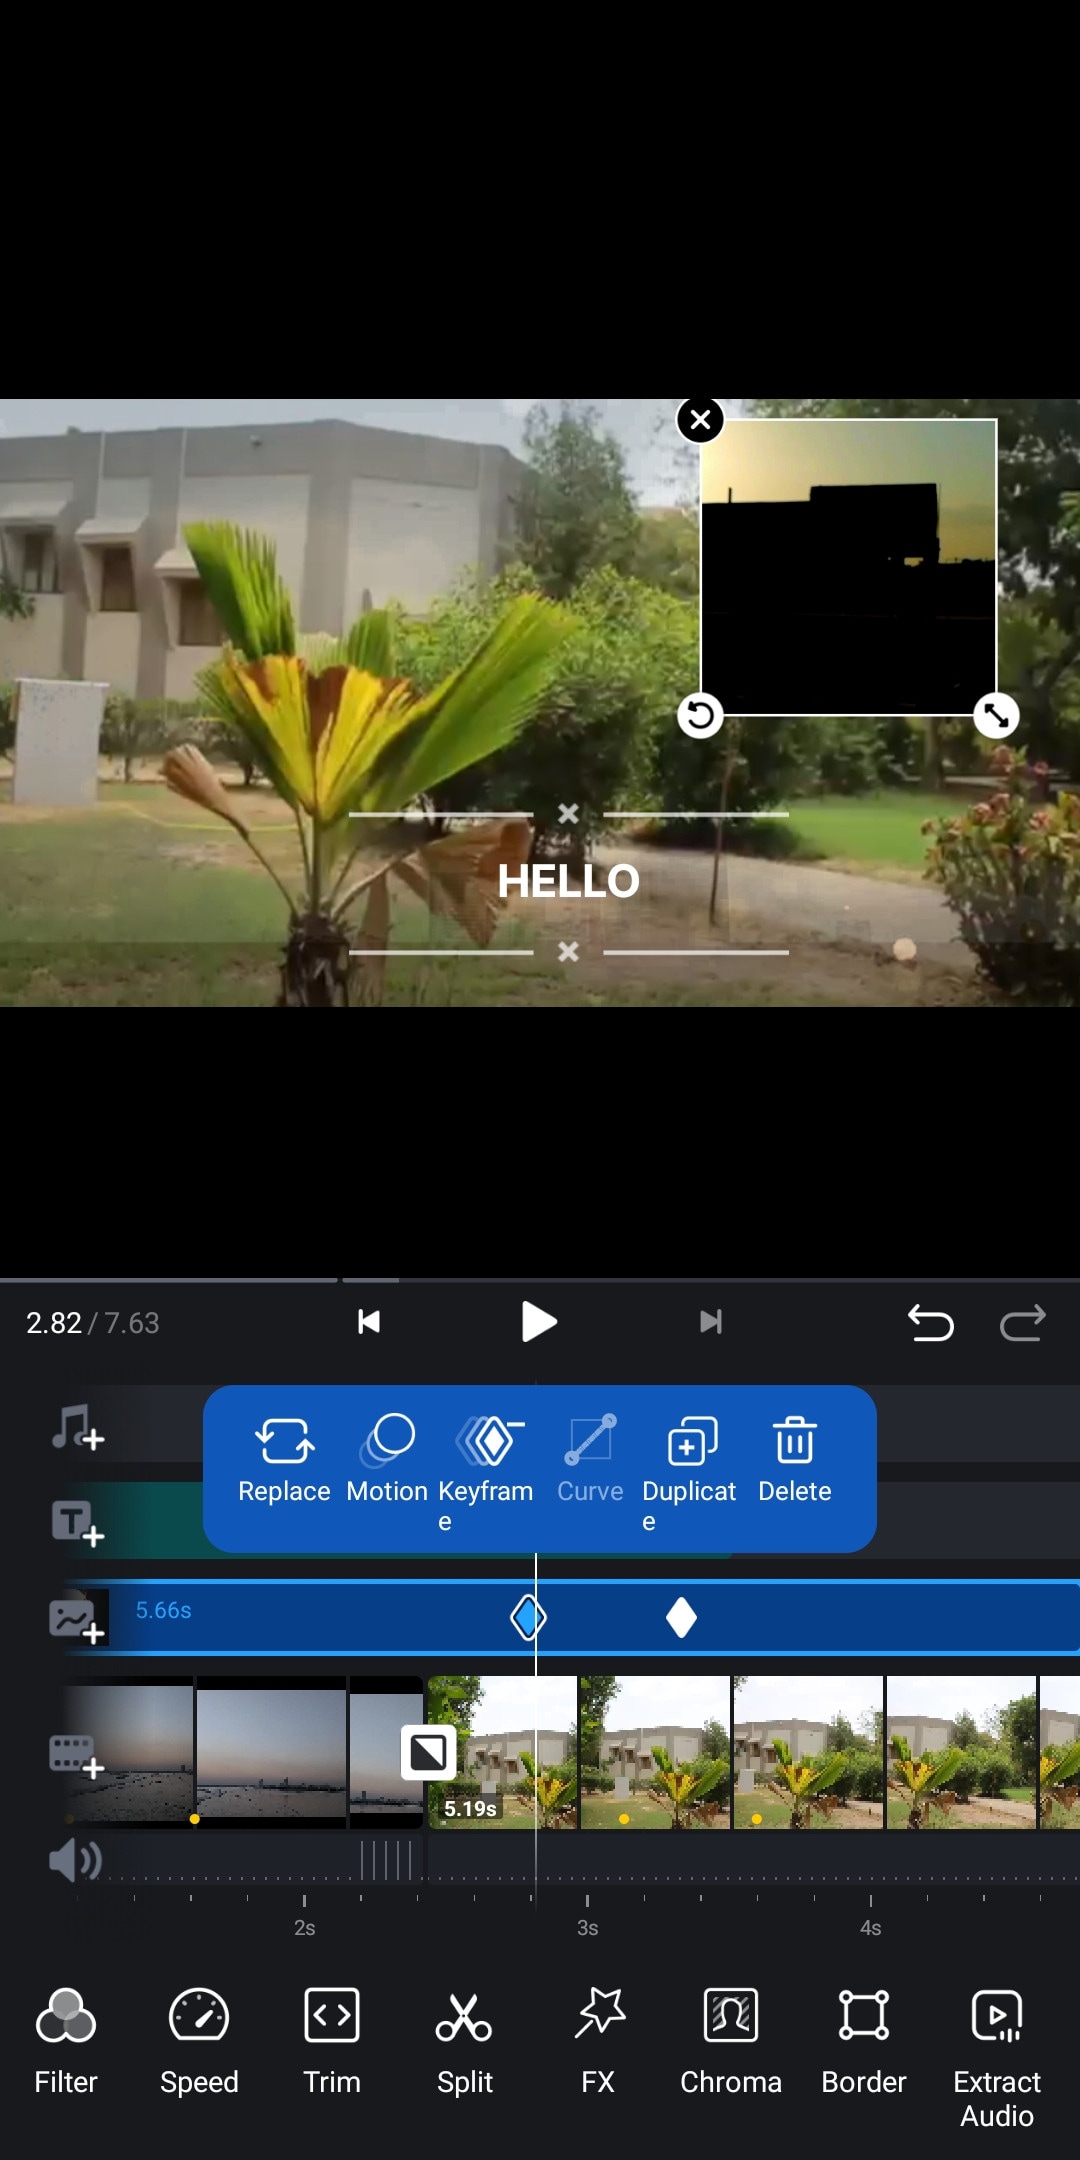
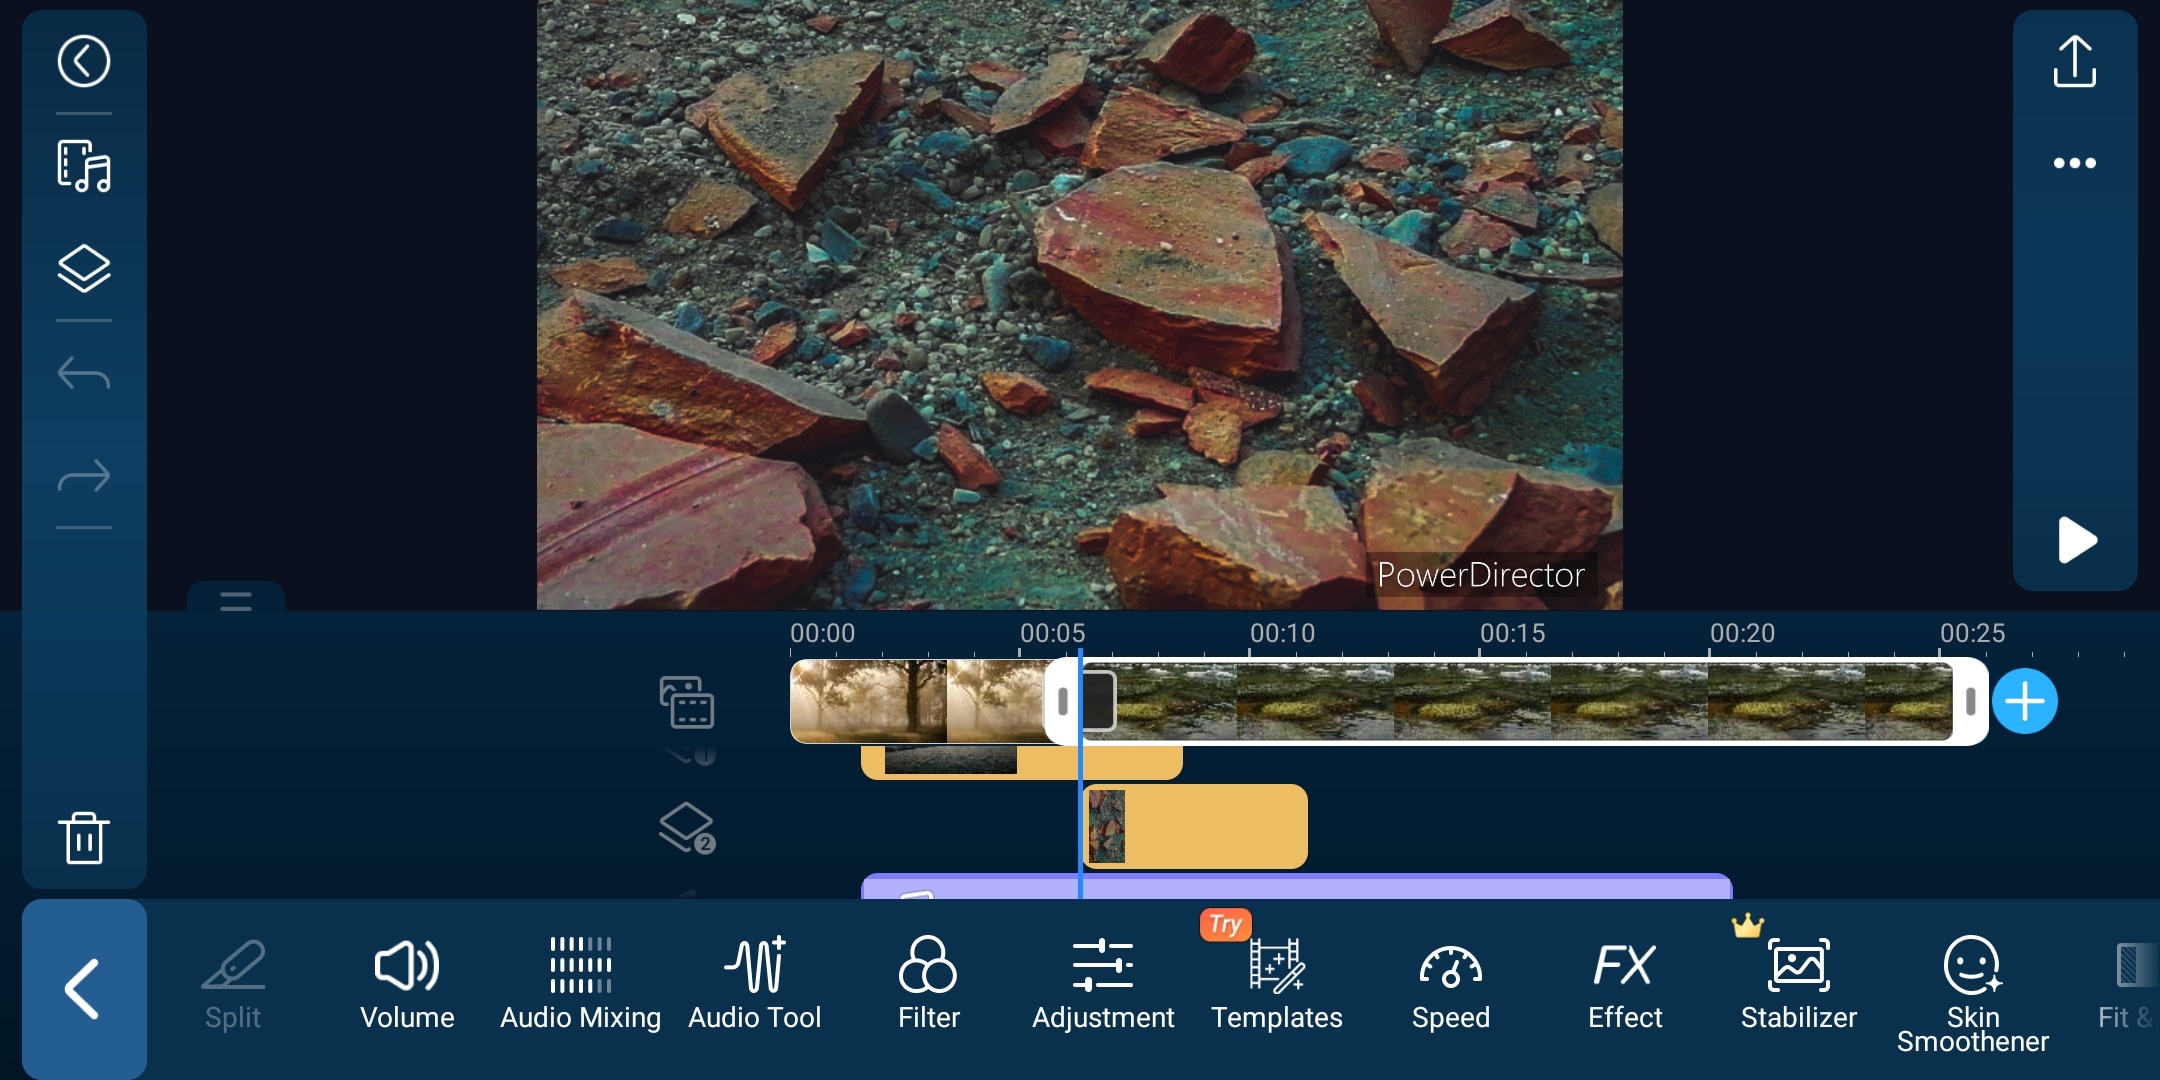
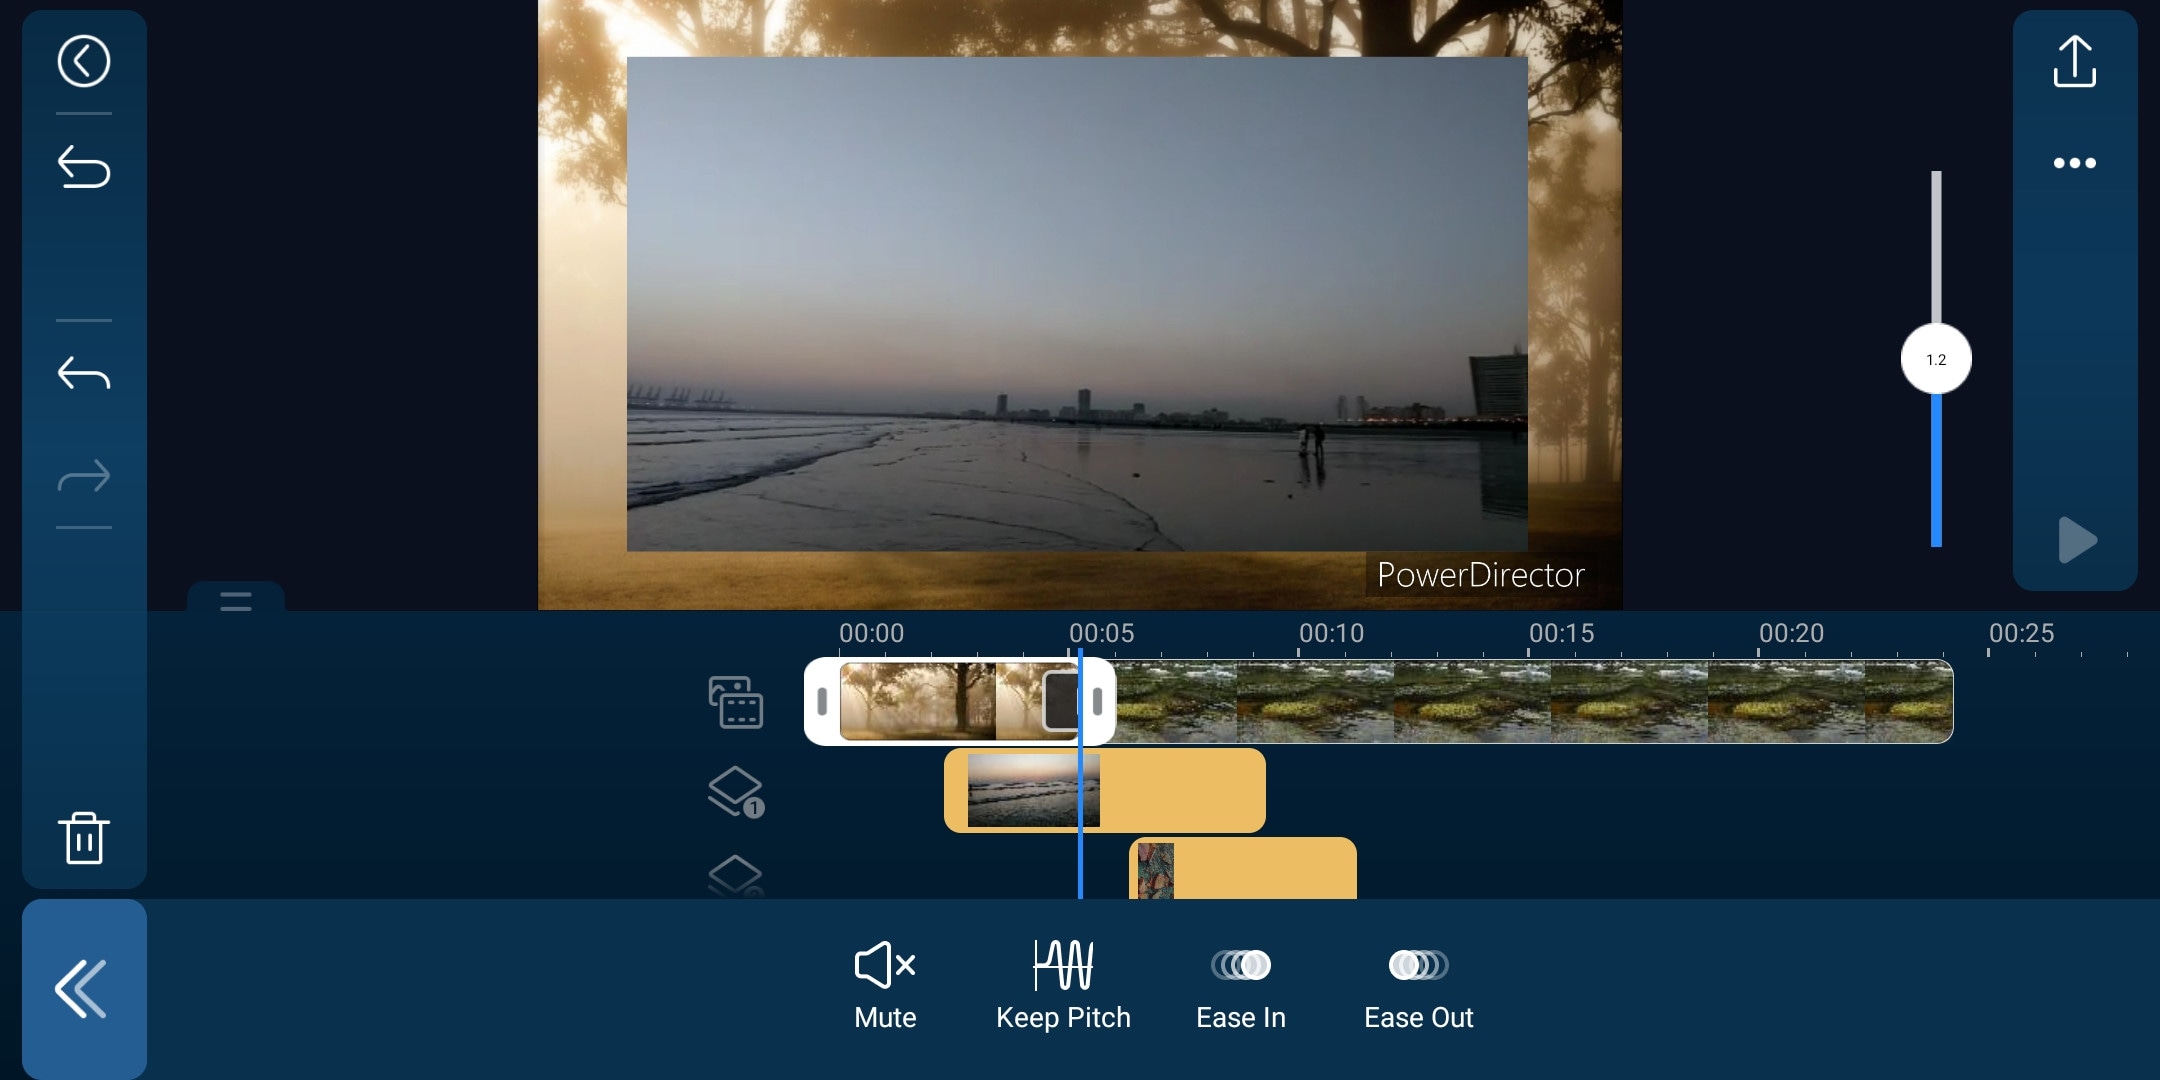
It is a paid but quite advanced video editor available for androids and IOS both. Like its PC version mobile version is also packed with many great features. It is compact and easy to use. It supports multiple video and audio layers. Have many cool filters and transitions. Can also do basic color corrections. To complete post-production work it also has audio editing tools and effects. It also has hundreds of title designs. Its UI is easy to use and supports both portrait and landscape orientation for editing. Most of its features can be used for free with a watermark on export. To remove the watermark you need to purchase the premium version.
~Features:
- It supports up to 4K resolution at 60fps. (compatible on most devices)
- Supports both Portrait and Landscape orientation for editing.
- Supports Key framing and video stabilization also.
- Supports multiple audio and video layers.
- Can edit videos in different aspect ratios.
- Have a vast stock library.
~Cons:
- Can’t export 4K videos on many devices.
- Can apply keyframing and chroma key to layers only.
- Software lags sometimes.
~Price:
Its Premium version is available for $4.9/month or $29.9/year.
LumaFusion:
It is available on IOS and Mac (with an m1 processor).
If you are a content creator and want to do professional-level video editing on your phone then you should get your hands on “LumaFusion”. It is of the most powerful and advanced video editors designed for a mobile phone. But it only works on iPhones and iPads. It is a multi-track video editor with many useful features like the Chroma key, keyframing, color grading, and color LUTs. Have powerful color grading tools and an audio editor. It also has a lock and load stabilizer. You have to purchase the software before using it. It doesn’t have any free version to try.
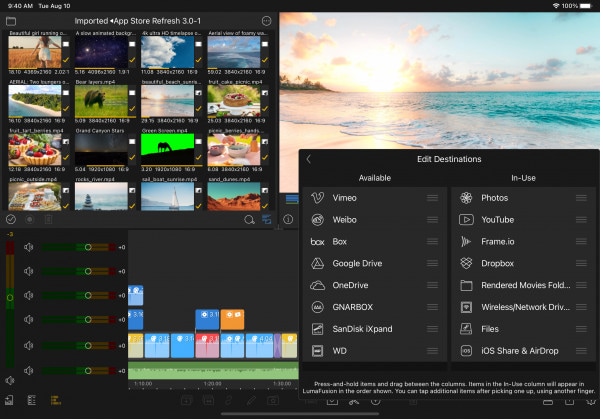
Credits: Pic by Luma touch website.
~Features:
- It supports up to 4K video resolution at a max of 240 fps.
- Can also edit and export 360 videos.
- Have powerful color correction tools. You can also import your own color LUTs.
- Supports Keyframing on almost all the editing tools within the software.
- You can add some third-party audio plugins.
- Supports up to 6 audio and video layers.
- Have “Storyblock” stock library. (Many of its contents are free to use)
- Supports external monitor for display.
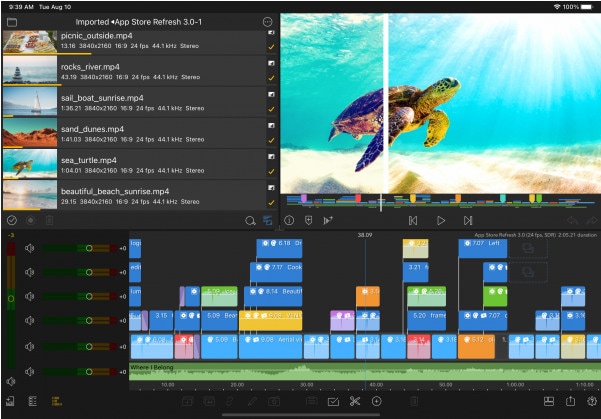
Credits: Pic by Luma touch website.
~Cons:
- Not available for Android devices.
- Being an advanced software, it doesn’t have masking and speed ramping features.
- Doesn’t have a free version to try on.
~Price:
It is available for purchase at $29.99.
InShot:
It is available on IOS and Android both.
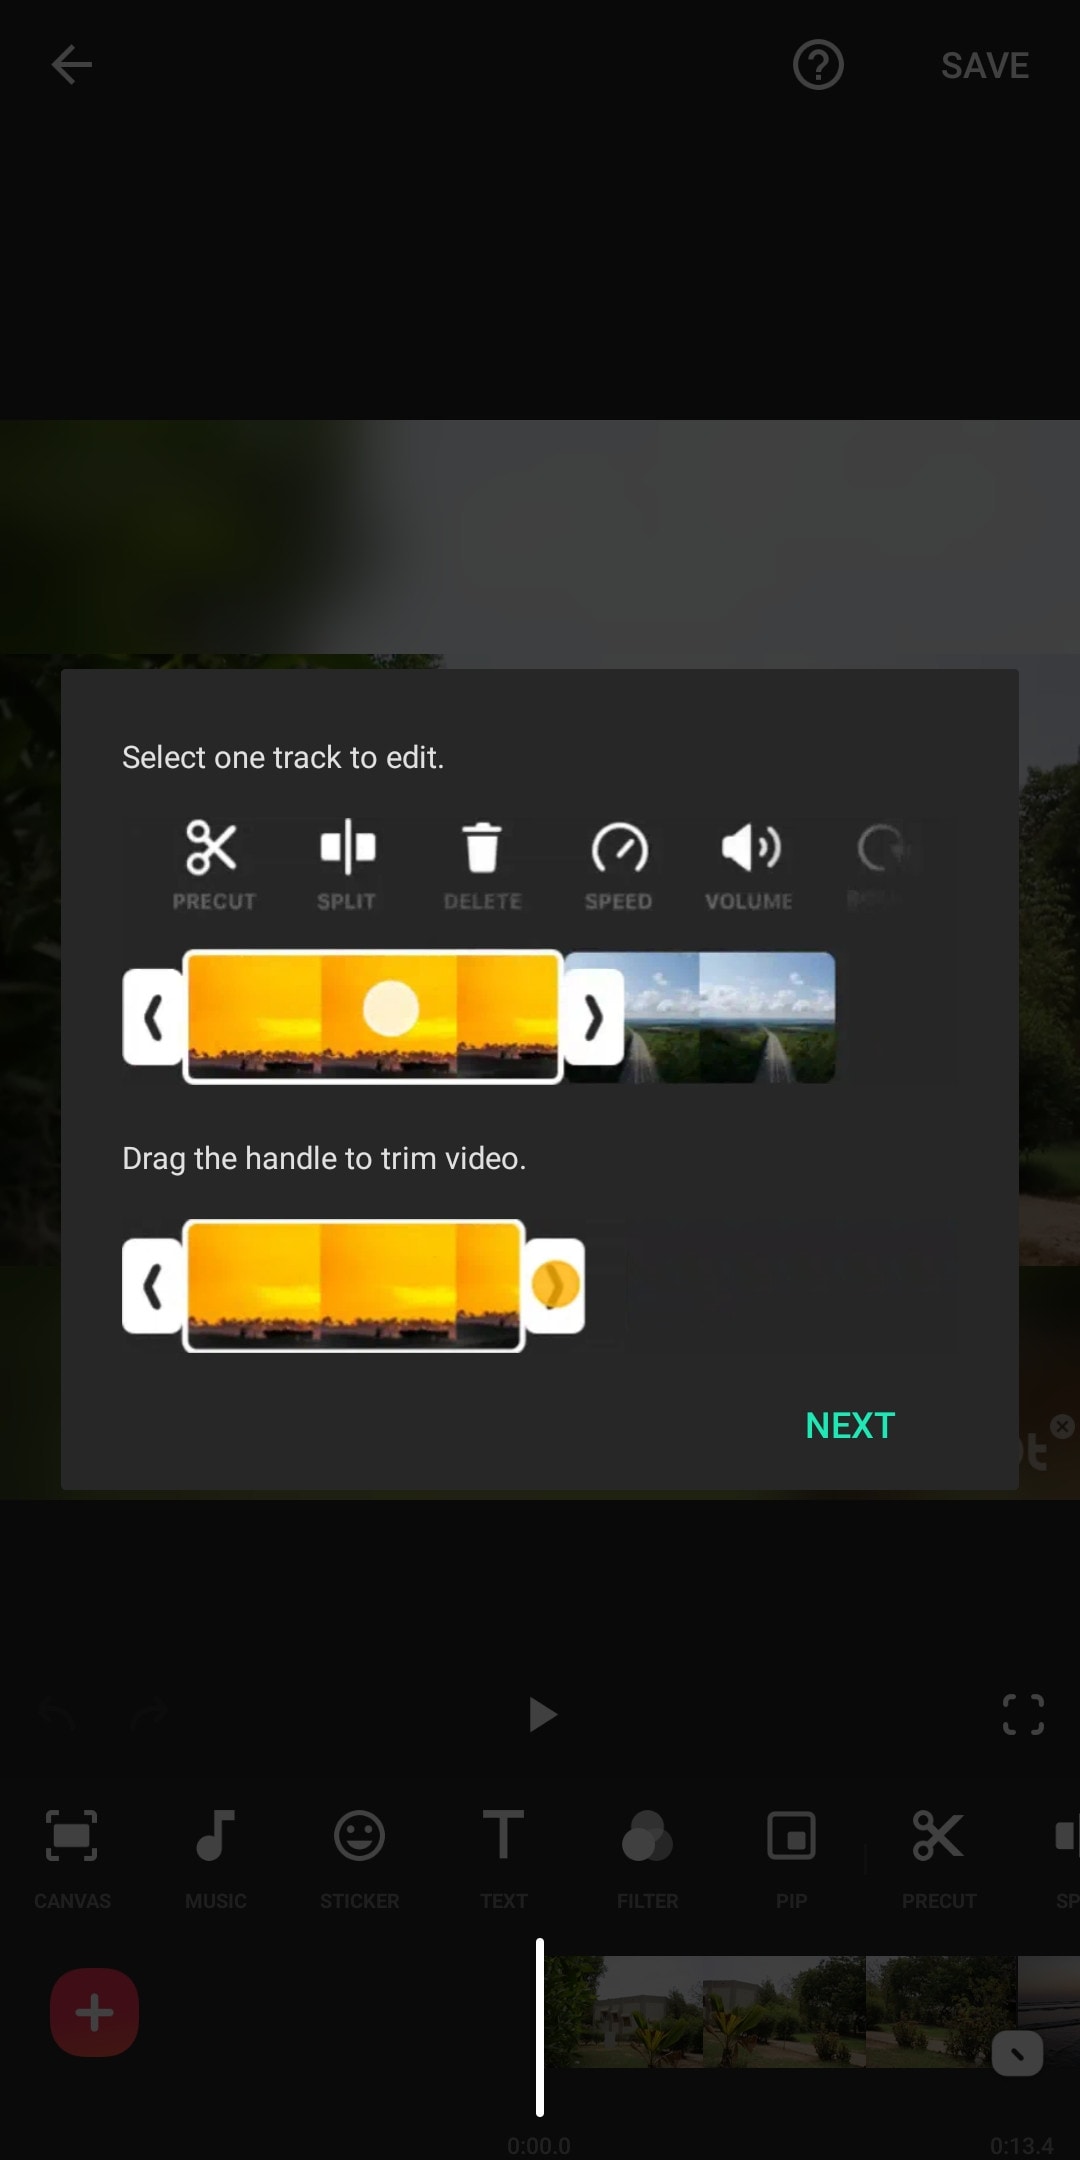
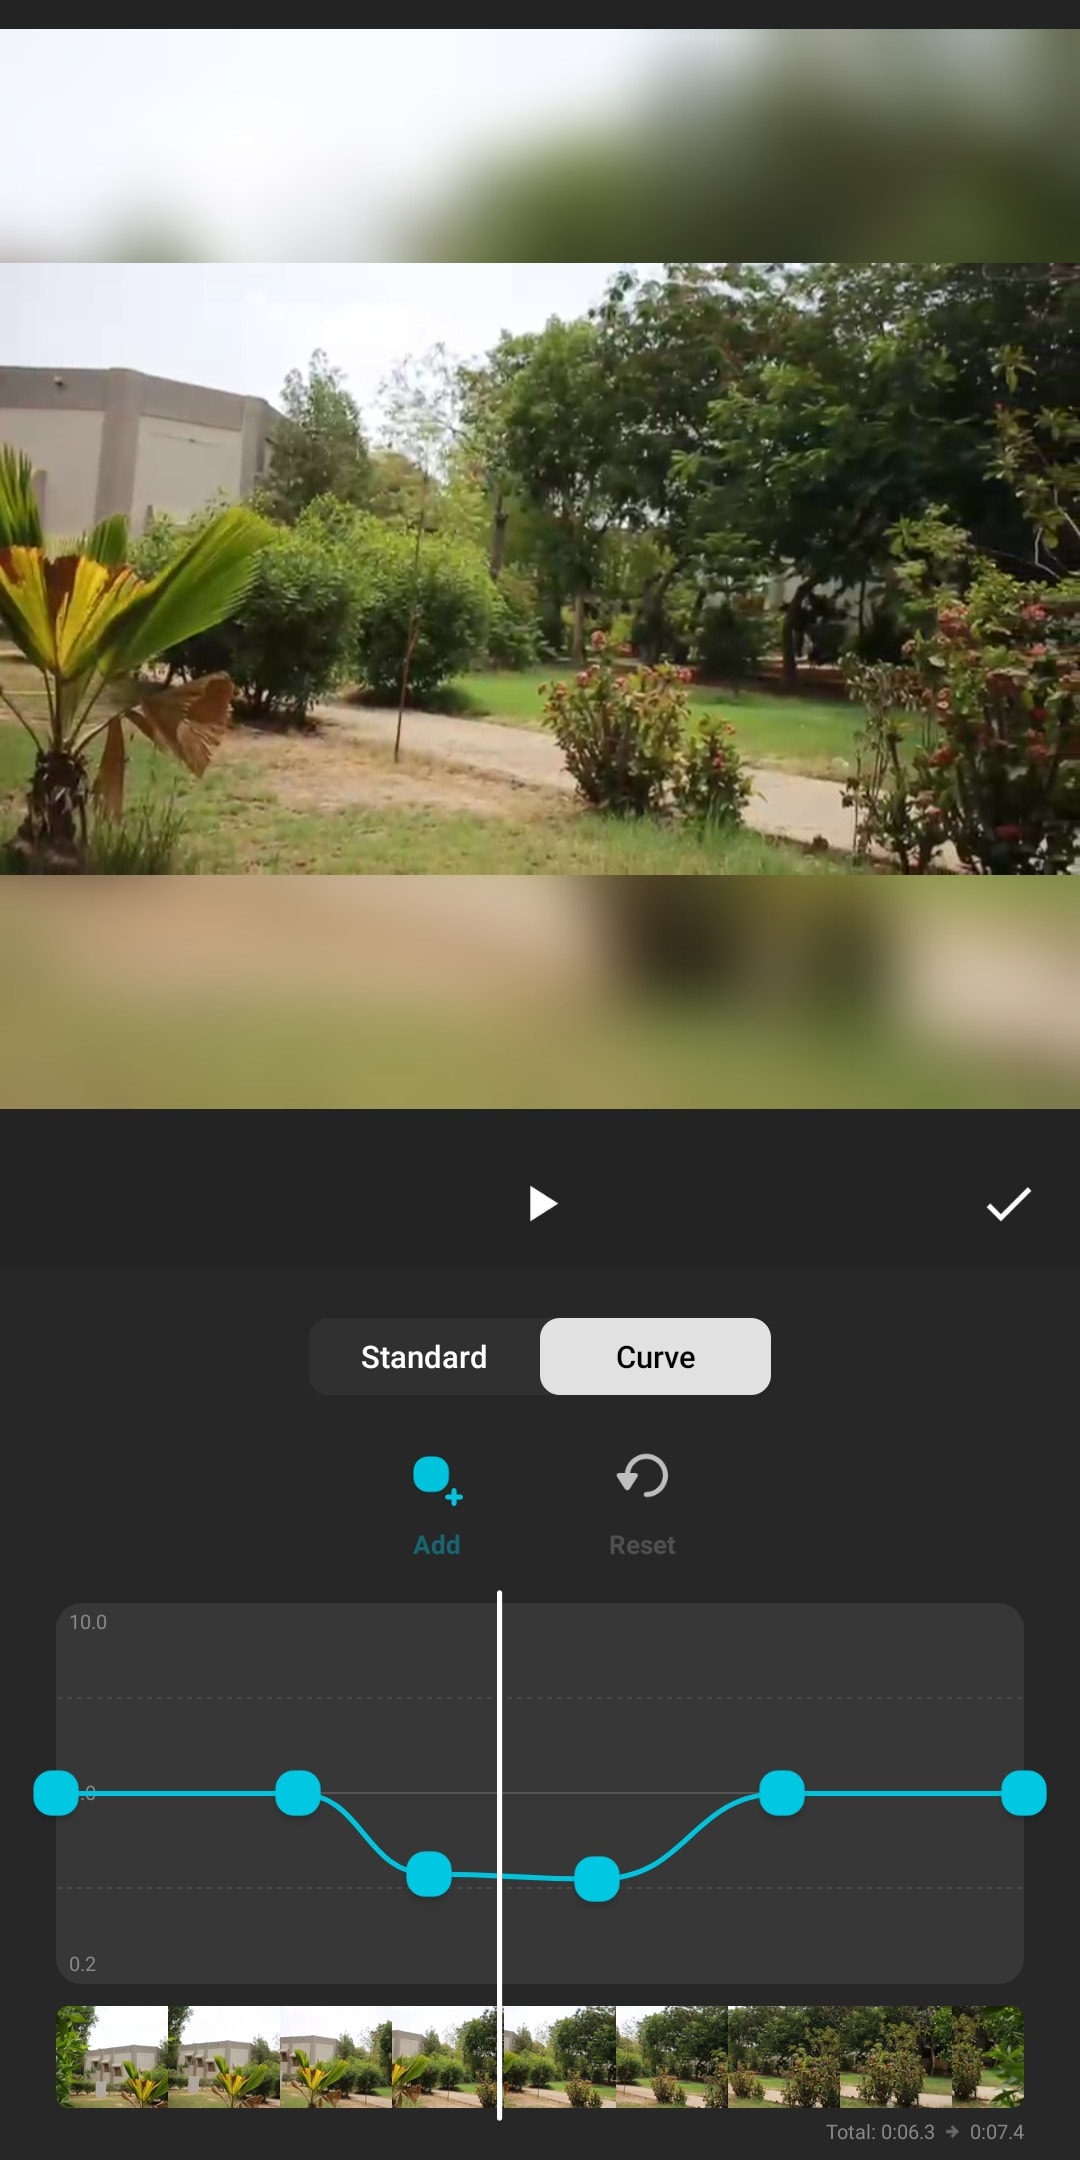
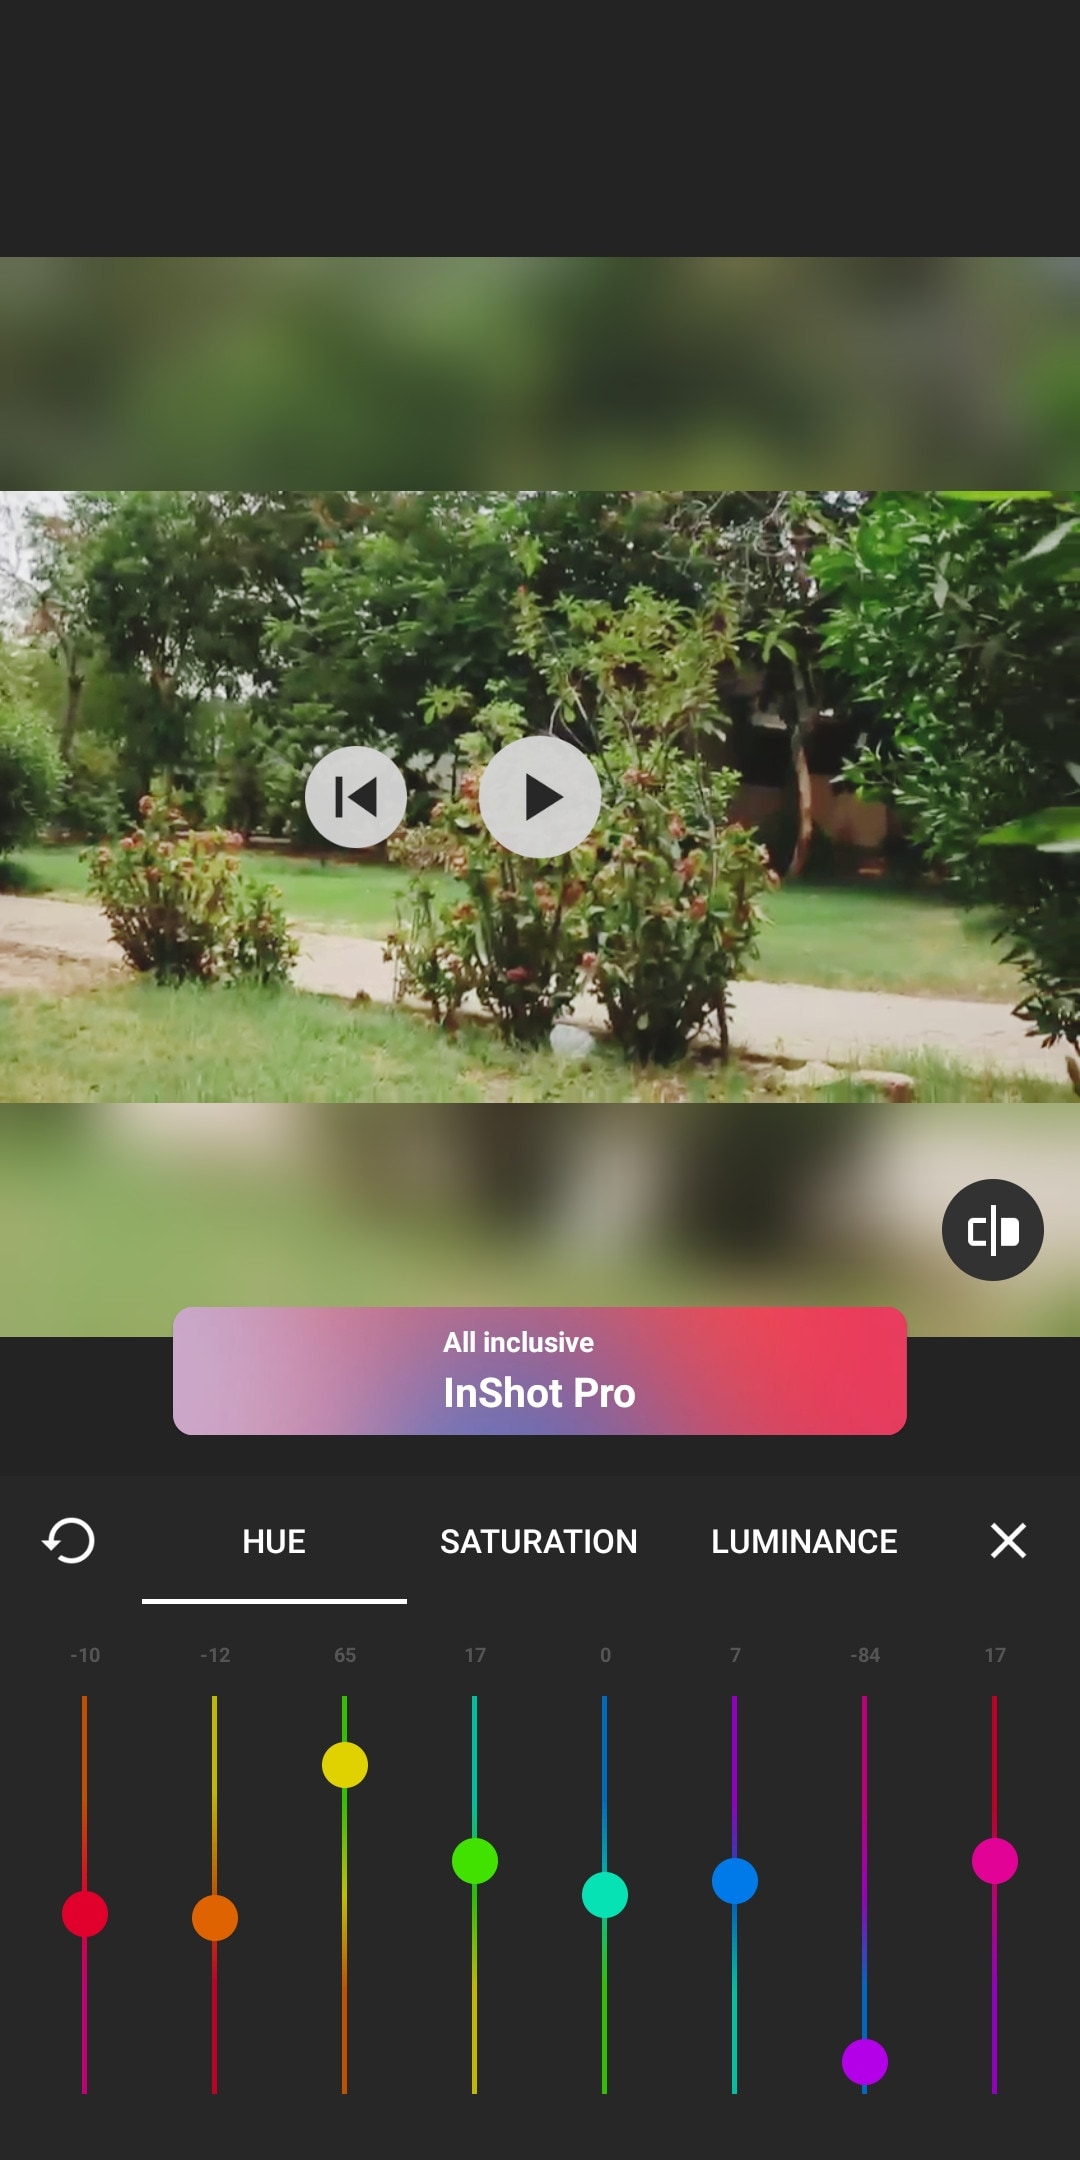
If you are new to video editing and want to do simple editing tasks then this software can be the right choice for you. It is simple and easy to use. Apart from just trimming and arranging your clips, it also has some cool features like speed ramping, chroma-key, mask e.t.c. It also has an HSL color grading tool. You can add multiple layers as PiP. It is a paid software but you can try it for free with the watermark on export.
~Features:
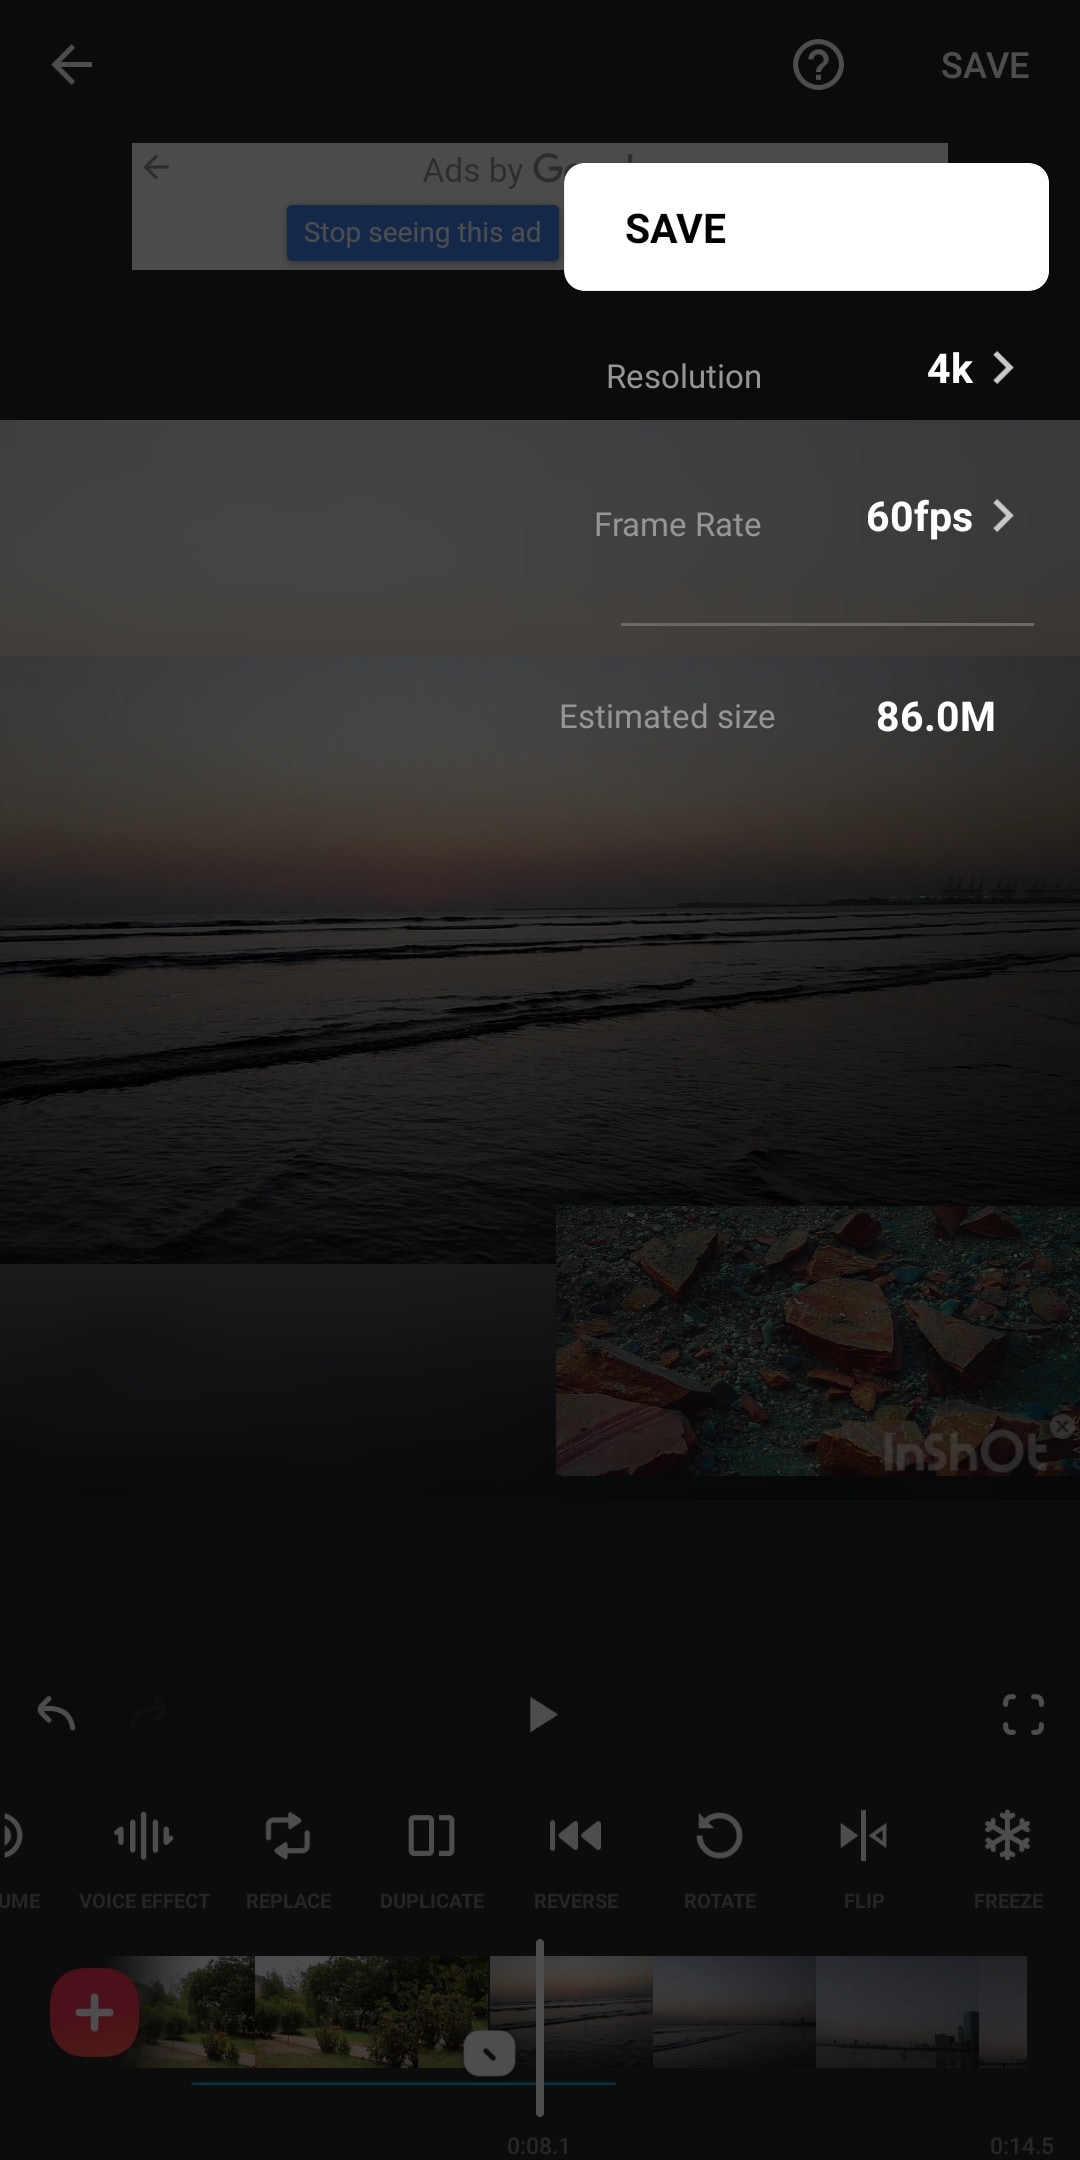
- It supports up to 4K resolution at 60fps.
- Its UI is beginner-friendly.
- Have some advanced color correction and grading tools.
- Supports multiple images and video layers as PiP.
- Have features like a mask, chroma key, and blend for layers.
- Can edit videos in different aspect ratios.
- Have speed curves for smooth speed ramping.
~Cons:
- Doesn’t have advanced tools.
- Its UI doesn’t support editing landscape orientation.
~Price:
It has 3 diff purchase plans. you can get its subscription for $3.9/month or $14.99/year. or you can purchase the software for lifetime at $34.99.
VivaCut:
It is available on IOS and Android both.
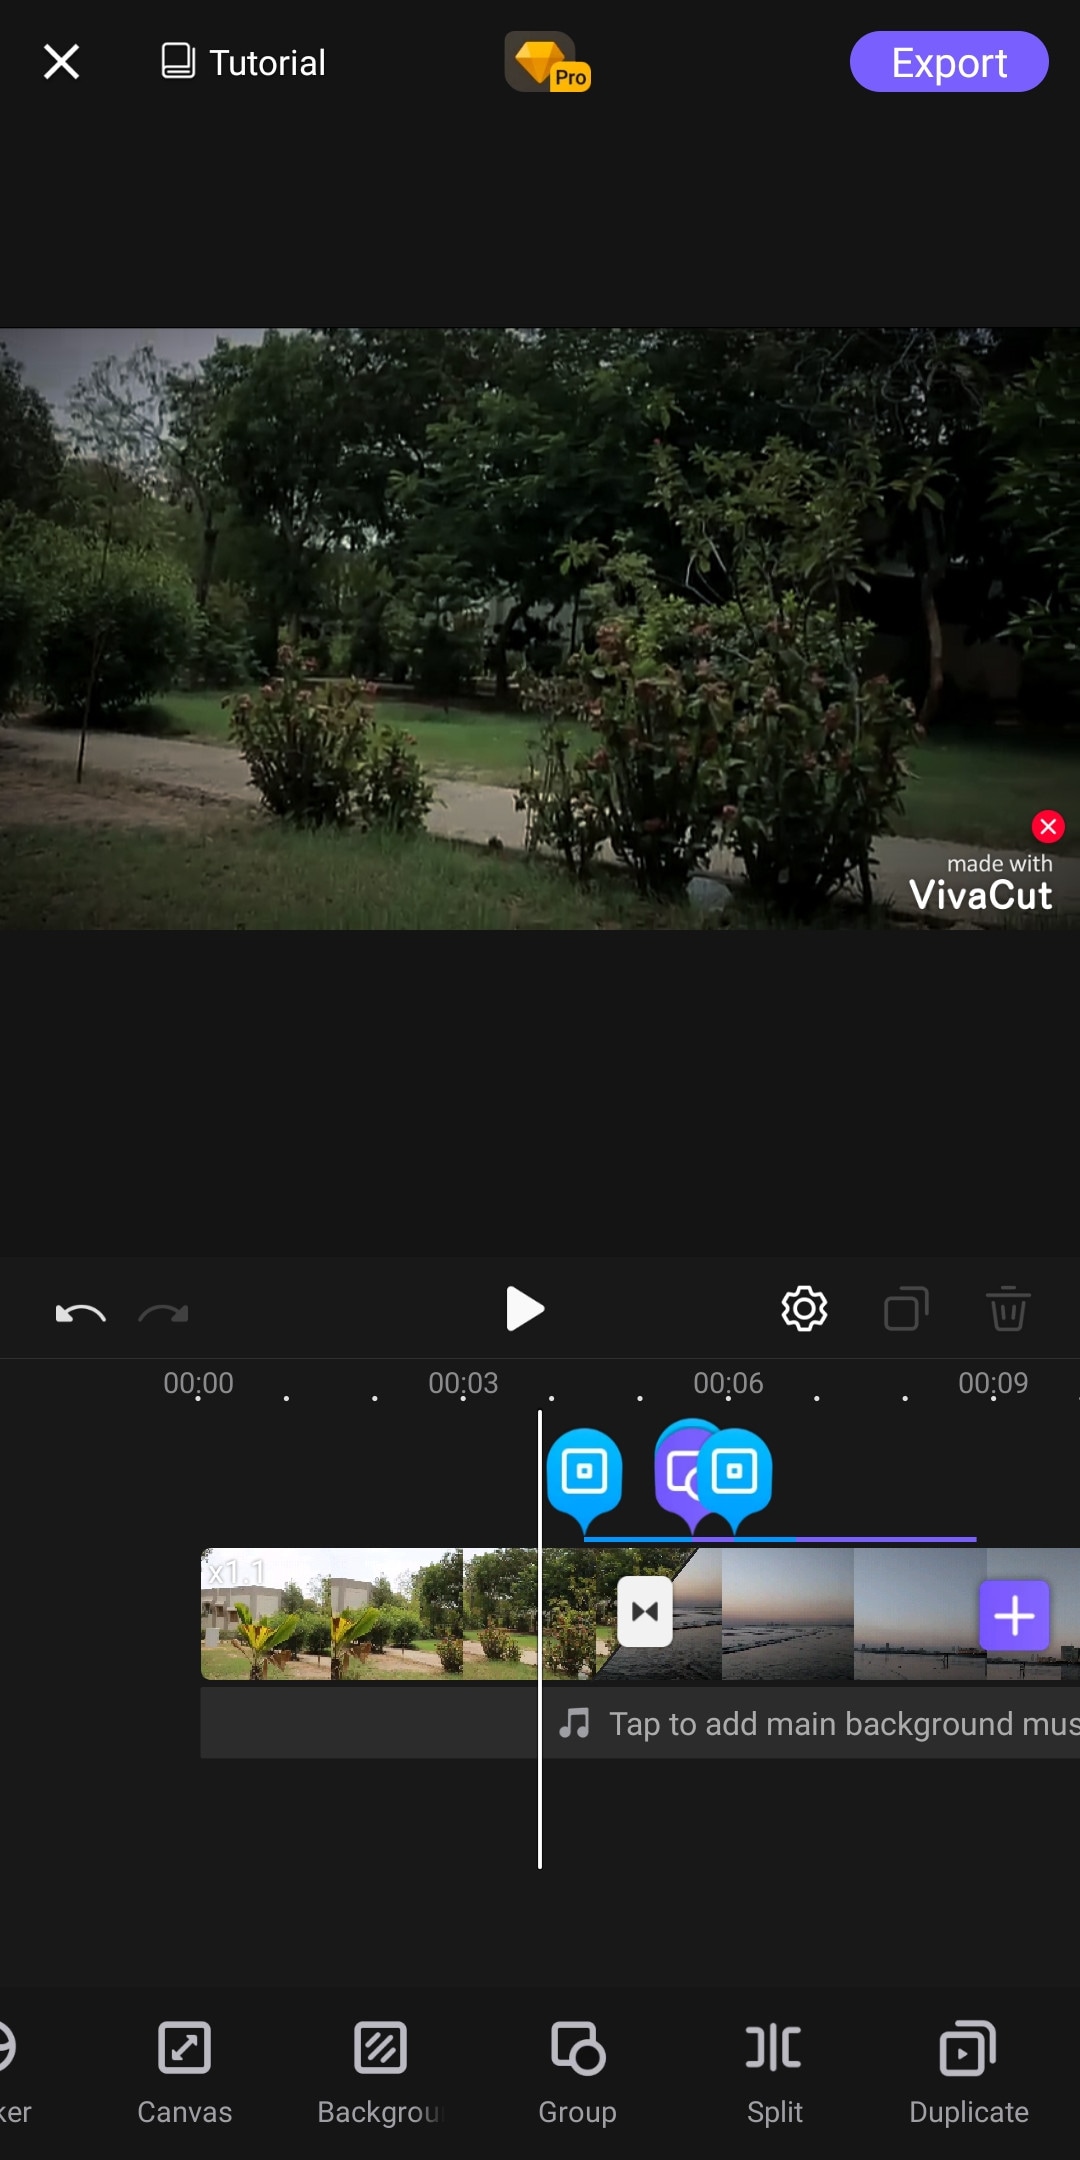
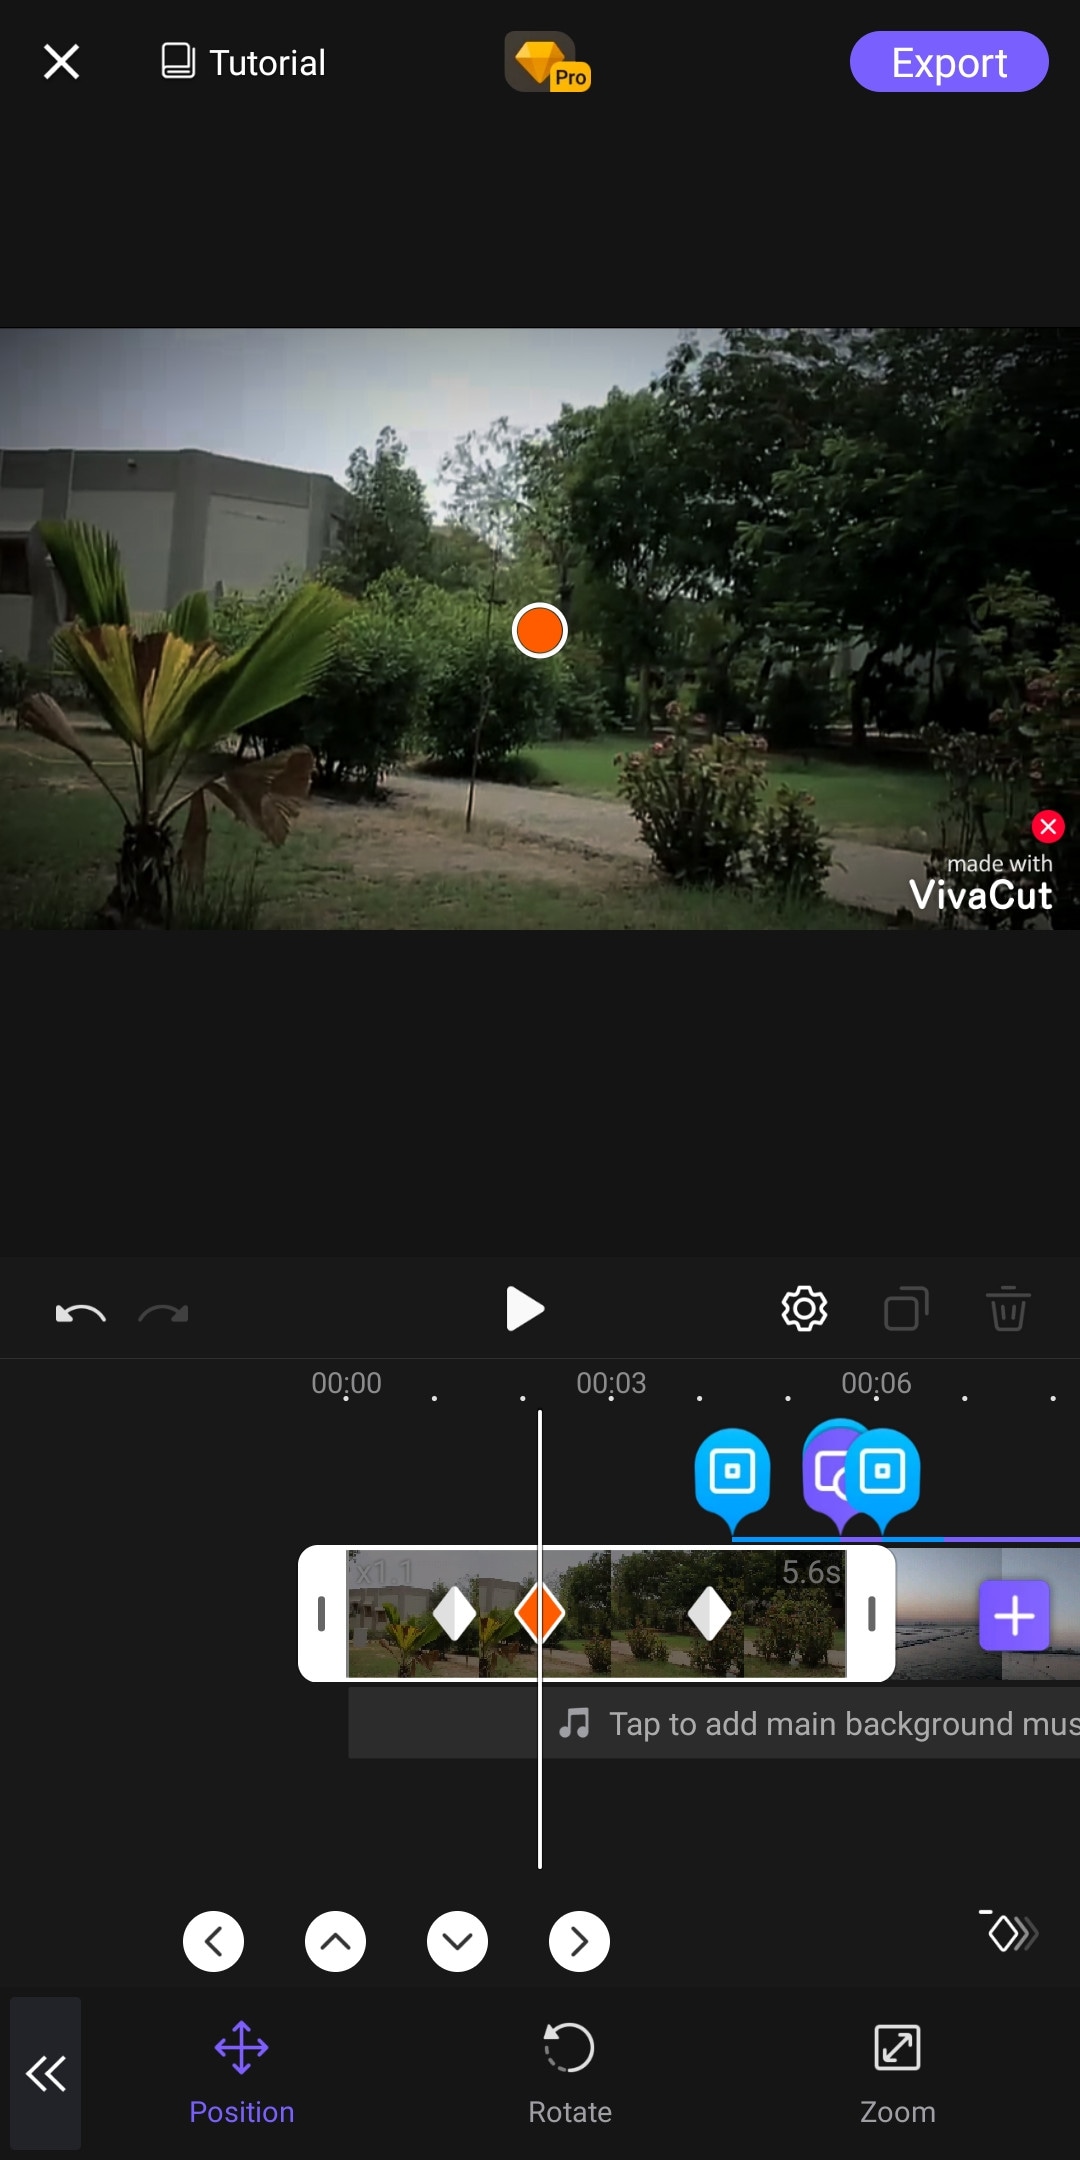
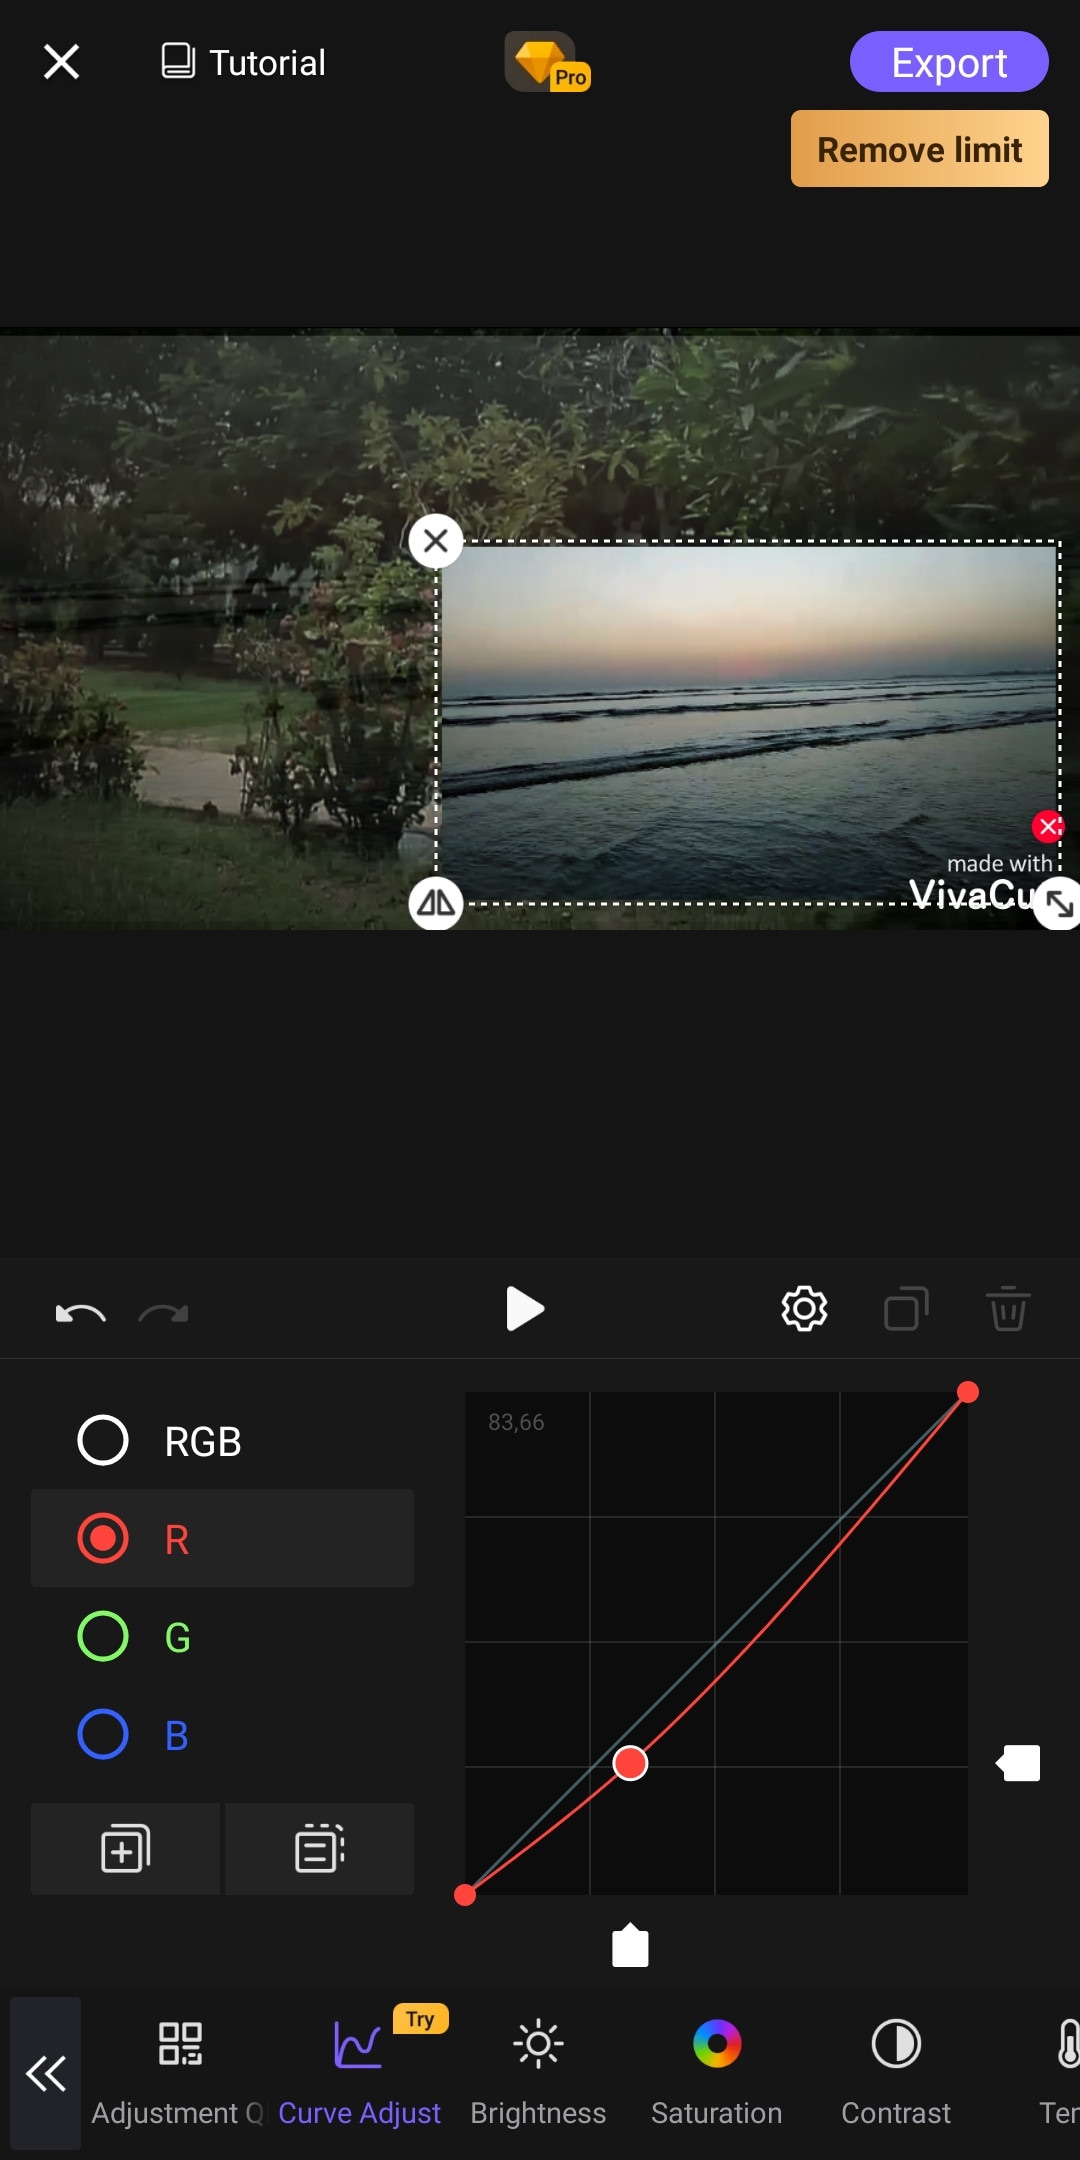
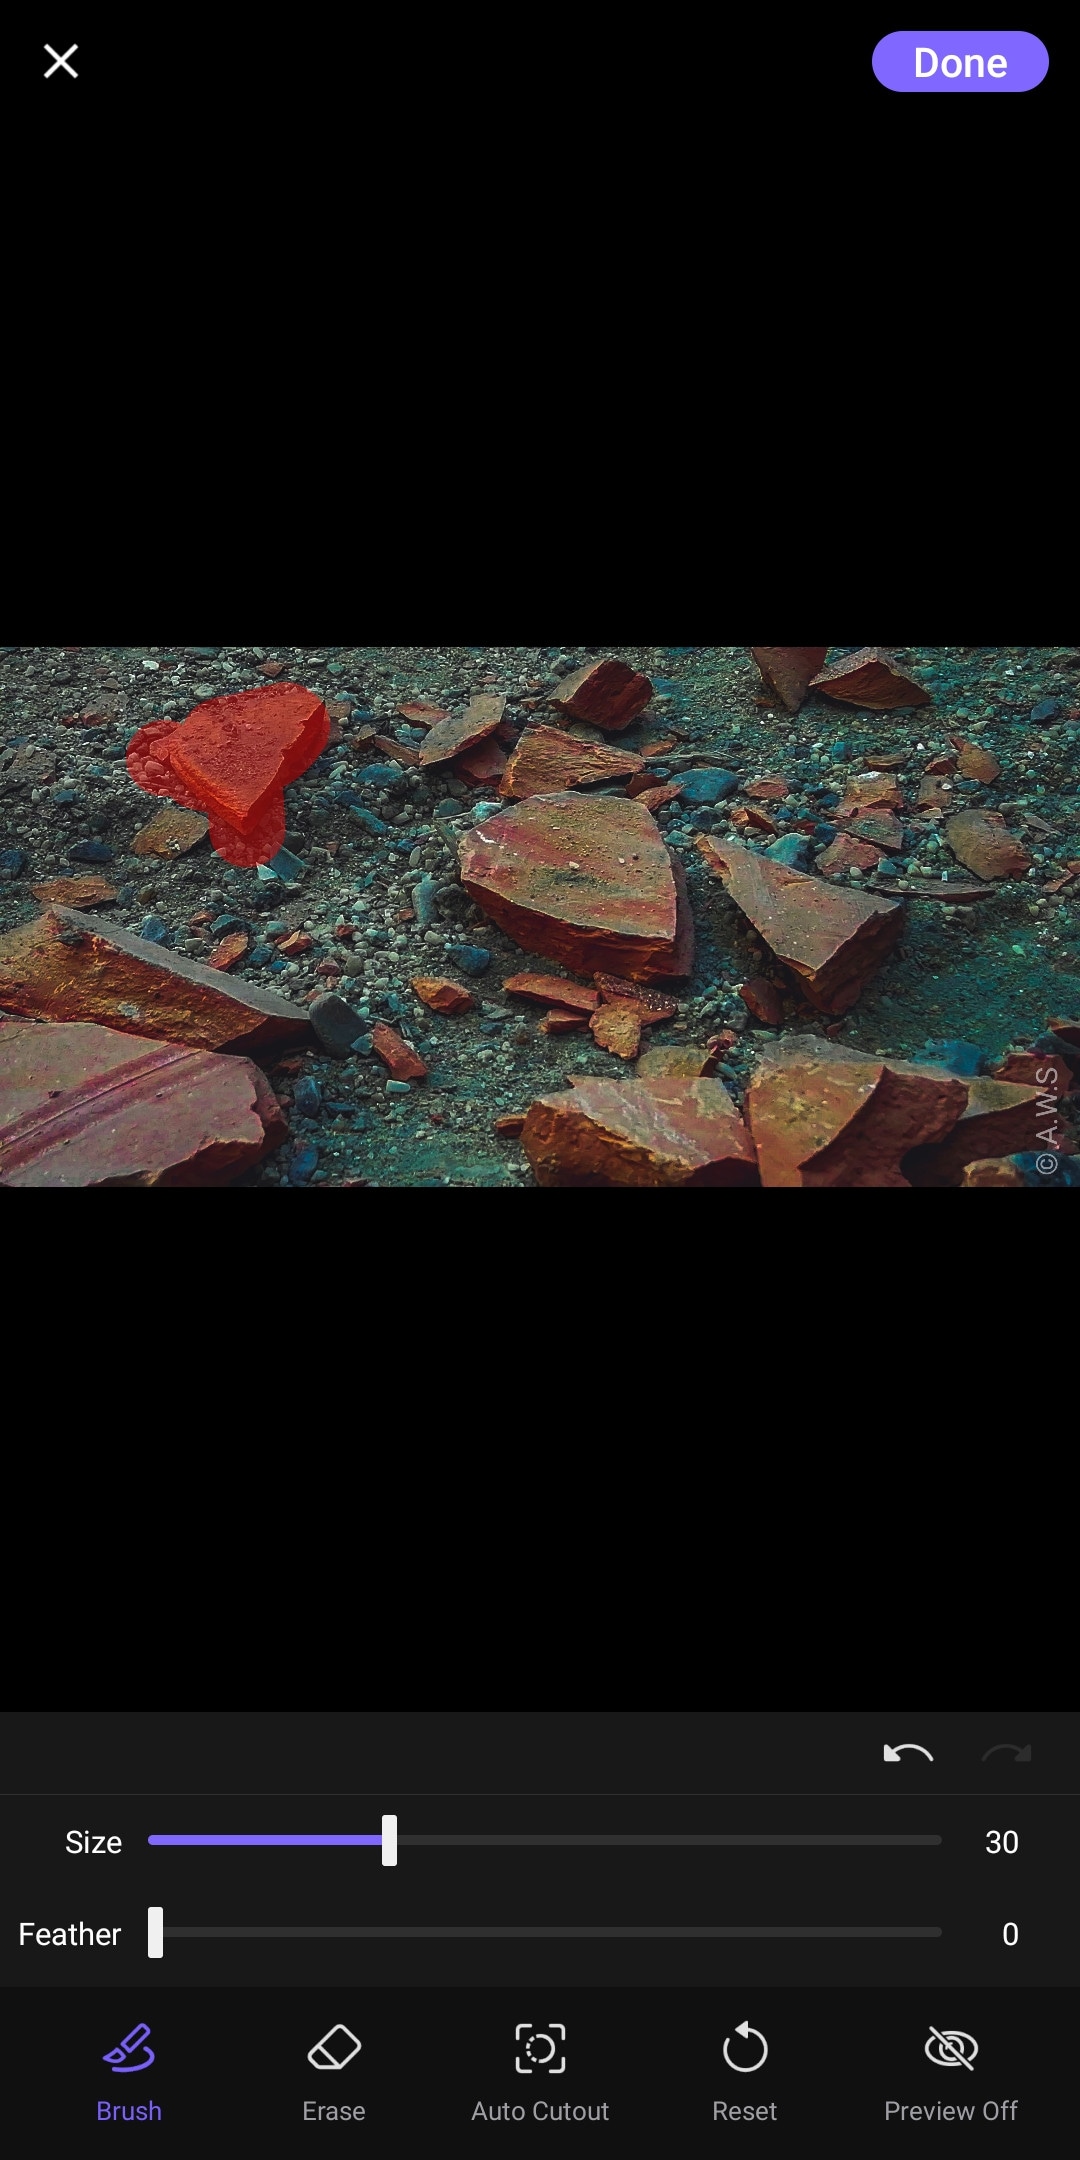
Almost every mobile video editor wished for doing PC-like video editing on their phone, but that was not possible due to software limitations and device compatibility. But now you can create PC-like videos on your phone through “VivaCut”. It is a paid software that is packed with many advanced features. Like 3D transform, overlay, Effects, Masking, e.t.c. It has one of the best color correction and grading tools among other mobile video editors. It has advanced keyframing and curve paths that can make splendid animations. It also supports multi-layer video editing. It also has a Grouping tool that let you combine several clips and texts into a single clip for easy editing. It also lets you import your presets. It is a paid software but you can try it for free with the watermark on export.
~Features:
- It supports multi-layer editing.
- Supports keyframing curves and 3D transform.
- Have advanced color correction and grading tools.
- Can Group multiple clips for easy editing.
- Let you import your presets.
- Can edit videos in different aspect ratios.
- Have an “FX plugin” library with many special effects that can be customized also.
~Cons:
- It doesn’t support 4K resolution.
- Its UI doesn’t support editing landscape orientation.
- It lags and crashes sometimes.
~Price:
Its premium version is available at $4.99/month or $19.99/year.
Which Should I Choose Free or Paid Video Editing Apps for iPhone:
If you do video editing once in a while or you don’t do more than just trimming and cropping then you shouldn’t purchase a paid video editing software. Because there are free video editors that can get your job done and even more than that. But if you are a content creator who doesn’t want to do editing on PCs or laptops, then you can get these paid video editors for your iPhone. These softwares are quite affordable and worthy of your investment. Some are cheaper than others. You can purchase the one, which meets your budget or fulfills your needs.
And if you are a beginner but want to move forward in this field then you should try free versions of these paid softwares. Select the one, which you are comfortable working on and once you are satisfied with the software then you can purchase its premium version.
- Free iPhone Video Editors
- Adobe Premiere Rush
- CapCut
- iMovie
- GoPro-Quik
- VN Video Editor
- Paid iPhone Video Editors
- Kinemaster
- Power Director
- LumaFusion
- InShot
- VivaCut
Filmora Go:
It is available on IOS and Android both.
Apart from having a professional video editor for PC, Wondershare has also introduced a video editor for mobile phones. Filmora Go is an amazing video editor, with many cool features such as chroma key, mask, keyframing, blending, e.t.c. It is fast and easy to use with built-in effects, transitions, and presets to speed up the editing process. It is a paid video editor but you can try it for free, free trial includes most of the features but it leaves a watermark on export.
~Features:
- Has speed curves for smooth speed ramping.
- Supports multiple images and video layers.
- Have many presets and filters for fast pace editing.
- Have cool features like chroma key, masking, keyframing, e.t.c.
- Supports “Pixabay’s” stock library.
~Cons:
- Its UI doesn’t support editing in landscape orientation.
- It doesn’t support 4k video resolution.


~Steps:
Import: Open Filmora Go, Click “New project” to start a new project, or Choose the previous one from the “Draft” portion. Select videos or images to import to your timeline. Hold and drag the clip to change its arrangement.
Edit: You can add text, effects, stickers, layers, e.t.c. by clicking their icon, present on the bar at the bottom.
Click the “PiP” icon to add image or video layers, you also can add multiple layers.
Select a clip to edit it. Different editing tools appear on the bottom bar. Here you can change its opacity, its speed, or add animations.
Effects: Click the “Effects” icon to open the effects menu. Select an effect to apply to your clip.
Click the white box between two clips to add transitions.
Export: Click the “Export” button to export your file. Select your desired resolution and frame rate to export your clip.


Some Free iPhone Video Editors:
If you do video editing rarely or do just basic video editing then it is useless to purchase paid video editors. Even if you are a content creator but tight on budget or new to this field, you can use free video editing softwares and save your cash for other pieces of equipment.
So, here we have mentioned some free video editors for you. Some of these are quite powerful and can do advanced editing while others are simple but easy to use.
Adobe Premiere Rush:
It is available on IOS and Android both.
Whether you are a beginner or a content creator using mobile phones or PCs for editing, you may have heard of Adobe softwares. It is a computer software company which makes powerful softwares for different purposes. Like premiere pro, they have designed a compact version for phones named “Premiere Rush”. It is a free video editor that has all the tools needed for video editing, from video effects to color grading and audio editing. Its UI is a bit similar to PC video editors. It is a free video editor with no watermarks. Although it takes some time to understand it. But once mastered, you can do editing quickly.
~Features:
- It is a free video editor with no watermark.
- It supports up to 4K resolution at 60fps.
- You can extract audio and can do voiceover directly from the software.
- It has hundreds of filters, overlays, and title designs.
- It has basic color grading tools.
- It also has a motion tracking feature. (in Paid version)
- It supports multiple audio, video, and text layers.


~Cons:
- It only runs on high-end devices. ( It is not supported in most mid-range phones)
- Not suitable for beginners. Its UI is quite hard to understand.
- Doesn’t have common features like the chroma key, masking, e.t.c.

~Price:
Its Premium version is available for 9.99/month. It includes some premium features. Or you can purchase the “All Apps Bundle” at $54.99/month for the annual plan.
CapCut:
It is available on IOS and Android both.
If you are looking for a free but good video editor to help you edit videos on the go, then you should get your hands on CapCut. It is a free mobile video editing software with many interesting features like keyframing, chroma-key, masking e.t.c. It also supports video and image layers. It has one of the best speed ramping features among other mobile video editors. It provides curves to smoothly speed ramp your clips. It can edit landscape, portrait, and even square video formats. It has many amazing effects and filters, it also has some stock clips.


~Features:
- It is completely free and has no watermarks.
- It supports up to 4K video resolution.
- Has curves for speed ramping.
- Has keyframes for animation.
- It has hundreds of effects, overlays, and titles.


~Cons:
- Its UI doesn’t support editing in landscape orientation.
- Lacks some common editing tools.
iMovie:
It is available on IOS and Mac.
iMovie is a free video editing software designed by apple for their flagship products. It is simple and easy to use. It has all the basic editing tools to enhance your video like crop, trim, transitions, effects, e.t.c. It also has a speed ramping feature which let you change the speed at different points of a clip. It’s AI mode “Magic Movie” lets you select clips and a style and software will make the final product for you.
Its “Storyboards” mode is a creative way of learning production and post-production skills. It lets you choose a theme from many famous Genres available, then it will guide you through the production process like capturing footage, arranging your shots, and creating cinematic titles to enhance your story.


~Features:
- It is free and easy to use.
- Let you do speed ramping.
- Supports Raw files.
- It’s AI mode creates videos for you on its own.
- The “Storyboarding” feature helps you through the production process.


~Cons:
- It only works on ios and Mac.
- Not suitable for professional projects.
GoPro - Quik:
It is available on IOS and Android and windows also.
It is a free and easy-to-use software designed by GoPro. It can edit clips of your GoPro or any other device. It is a quick and easy way to enhance your clips before posting them on any social platform. It can do basic edits like trim, rotate, color correction, e.t.c. It can also make amazing speed ramps by changing the speed of different parts of the clip (available in the premium version only). It doesn’t produce any watermarks. Although its premium version unlocks more features like speed ramping, more themes, and unlimited backup space.


~Features:
- Its free version doesn’t leave a watermark.
- It is simple and easy to use.
- Can do basic color correction.
- Have pre-made themes for faster editing.
- Change the speed at different parts of the video to create smooth speed ramps. (Available in the premium version.)
- Has a free version with limited tools for basic editing.

~Cons:
- It lacks advanced tools therefore not suitable for large projects.
- Its free version has many limitations.
~Price: Its subscription is available at $1.99/month or at discount for an annual subscription having $9.99/year.
VN Video editor:
It is available on IOS and Android, Windows, and Mac.
If you are looking for a video editor, which let you do fast but quality edits, then “VN video editor” is the right choice for you. It is free and easy-to-use software with many useful features like transitions, effects, speed ramps, PiP, chroma-key, keyframing, e.t.c. It supports different aspect ratios for all your social platforms.
It also has pre-made templates to speed up your editing process. Its Story mode let you manage your production and post-production work easily. It also has overlay mode, which can make awesome slide shows for you.


~Features:
- It is free software with no watermark.
- It supports up to 4K resolution at 60fps.
- Supports multi-layer editing.
- Have keyframing curves to create smooth animations.
- Have speed curves for smooth speed ramping.
- Its Story mode let you manage your production work easily.
- Can extract audio from a video file.


~Cons:
- Its UI doesn’t support editing landscape orientation.
- Its free version has limitations of creating max 100 projects.
~Price:
Its Premium version is available for $3.9/month or $20.9/year.
Some Paid iPhone Video Editors:
If you want to move forward and get your hands on these paid softwares to try new features then you should buy these paid softwares. As most of these softwares are quite affordable but they pack the punch. And some of them can give you more in return than your investment. Then what are you waiting for? go and try them yourself.
Kinemaster:
It is available on IOS and Android both.
If you want to do more than just trimming and cropping to your videos then you should try Kinemaster. For editors, who want to do some advanced-level video editing on their phone, then you must have Kinemaster on your phone. It is a paid software, which is packed with many useful features. It has many video and audio effects. It also has an amazing audio editor. It also has many title designs and basic color correction tools. It has hundreds of effects and transitions + more can be downloaded from its asset store. Its UI is suitable for beginners and content creators both. It is a paid software, but all its features are completely free to use, but the free version leaves a watermark on export.


~Features:
- It supports up to 4K resolution at 60fps. (depending on mobile configuration)
- Have amazing features like chroma key, keyframing, blend e.t.c
- Has built-in audio and video recorder.
- Supports multiple texts and video layers with different resolutions depending on the capability of the mobile phone.
- Has UI like a PC video editor and supports landscape orientation for editing.
- Have an asset store with 100s of free effects, transitions, and stock material.


~Cons:
- Can’t export 4K videos on most devices.
- Can’t apply keyframes and chroma key to the main video. (can be done on layers only)
~Price:
Its Premium version is available for $4.9/month or $39.9/year. It also includes all the premium assets.
Power Director:
It is available on IOS and Android both.
It is a paid but quite advanced video editor available for androids and IOS both. Like its PC version mobile version is also packed with many great features. It is compact and easy to use. It supports multiple video and audio layers. Have many cool filters and transitions. Can also do basic color corrections. To complete post-production work it also has audio editing tools and effects. It also has hundreds of title designs. Its UI is easy to use and supports both portrait and landscape orientation for editing. Most of its features can be used for free with a watermark on export. To remove the watermark you need to purchase the premium version.


~Features:
- It supports up to 4K resolution at 60fps. (compatible on most devices)
- Supports both Portrait and Landscape orientation for editing.
- Supports Key framing and video stabilization also.
- Supports multiple audio and video layers.
- Can edit videos in different aspect ratios.
- Have a vast stock library.


~Cons:
- Can’t export 4K videos on many devices.
- Can apply keyframing and chroma key to layers only.
- Software lags sometimes.
~Price:
Its Premium version is available for $4.9/month or $29.9/year.
LumaFusion:
It is available on IOS and Mac (with an m1 processor).
If you are a content creator and want to do professional-level video editing on your phone then you should get your hands on “LumaFusion”. It is of the most powerful and advanced video editors designed for a mobile phone. But it only works on iPhones and iPads. It is a multi-track video editor with many useful features like the Chroma key, keyframing, color grading, and color LUTs. Have powerful color grading tools and an audio editor. It also has a lock and load stabilizer. You have to purchase the software before using it. It doesn’t have any free version to try.

Credits: Pic by Luma touch website.
~Features:
- It supports up to 4K video resolution at a max of 240 fps.
- Can also edit and export 360 videos.
- Have powerful color correction tools. You can also import your own color LUTs.
- Supports Keyframing on almost all the editing tools within the software.
- You can add some third-party audio plugins.
- Supports up to 6 audio and video layers.
- Have “Storyblock” stock library. (Many of its contents are free to use)
- Supports external monitor for display.

Credits: Pic by Luma touch website.
~Cons:
- Not available for Android devices.
- Being an advanced software, it doesn’t have masking and speed ramping features.
- Doesn’t have a free version to try on.
~Price:
It is available for purchase at $29.99.
InShot:
It is available on IOS and Android both.
If you are new to video editing and want to do simple editing tasks then this software can be the right choice for you. It is simple and easy to use. Apart from just trimming and arranging your clips, it also has some cool features like speed ramping, chroma-key, mask e.t.c. It also has an HSL color grading tool. You can add multiple layers as PiP. It is a paid software but you can try it for free with the watermark on export.


~Features:
- It supports up to 4K resolution at 60fps.
- Its UI is beginner-friendly.
- Have some advanced color correction and grading tools.
- Supports multiple images and video layers as PiP.
- Have features like a mask, chroma key, and blend for layers.
- Can edit videos in different aspect ratios.
- Have speed curves for smooth speed ramping.


~Cons:
- Doesn’t have advanced tools.
- Its UI doesn’t support editing landscape orientation.
~Price:
It has 3 diff purchase plans. you can get its subscription for $3.9/month or $14.99/year. or you can purchase the software for lifetime at $34.99.
VivaCut:
It is available on IOS and Android both.
Almost every mobile video editor wished for doing PC-like video editing on their phone, but that was not possible due to software limitations and device compatibility. But now you can create PC-like videos on your phone through “VivaCut”. It is a paid software that is packed with many advanced features. Like 3D transform, overlay, Effects, Masking, e.t.c. It has one of the best color correction and grading tools among other mobile video editors. It has advanced keyframing and curve paths that can make splendid animations. It also supports multi-layer video editing. It also has a Grouping tool that let you combine several clips and texts into a single clip for easy editing. It also lets you import your presets. It is a paid software but you can try it for free with the watermark on export.


~Features:
- It supports multi-layer editing.
- Supports keyframing curves and 3D transform.
- Have advanced color correction and grading tools.
- Can Group multiple clips for easy editing.
- Let you import your presets.
- Can edit videos in different aspect ratios.
- Have an “FX plugin” library with many special effects that can be customized also.


~Cons:
- It doesn’t support 4K resolution.
- Its UI doesn’t support editing landscape orientation.
- It lags and crashes sometimes.
~Price:
Its premium version is available at $4.99/month or $19.99/year.
Which Should I Choose Free or Paid Video Editing Apps for iPhone:
If you do video editing once in a while or you don’t do more than just trimming and cropping then you shouldn’t purchase a paid video editing software. Because there are free video editors that can get your job done and even more than that. But if you are a content creator who doesn’t want to do editing on PCs or laptops, then you can get these paid video editors for your iPhone. These softwares are quite affordable and worthy of your investment. Some are cheaper than others. You can purchase the one, which meets your budget or fulfills your needs.
And if you are a beginner but want to move forward in this field then you should try free versions of these paid softwares. Select the one, which you are comfortable working on and once you are satisfied with the software then you can purchase its premium version.
- Free iPhone Video Editors
- Adobe Premiere Rush
- CapCut
- iMovie
- GoPro-Quik
- VN Video Editor
- Paid iPhone Video Editors
- Kinemaster
- Power Director
- LumaFusion
- InShot
- VivaCut
Filmora Go:
It is available on IOS and Android both.
Apart from having a professional video editor for PC, Wondershare has also introduced a video editor for mobile phones. Filmora Go is an amazing video editor, with many cool features such as chroma key, mask, keyframing, blending, e.t.c. It is fast and easy to use with built-in effects, transitions, and presets to speed up the editing process. It is a paid video editor but you can try it for free, free trial includes most of the features but it leaves a watermark on export.
~Features:
- Has speed curves for smooth speed ramping.
- Supports multiple images and video layers.
- Have many presets and filters for fast pace editing.
- Have cool features like chroma key, masking, keyframing, e.t.c.
- Supports “Pixabay’s” stock library.
~Cons:
- Its UI doesn’t support editing in landscape orientation.
- It doesn’t support 4k video resolution.


~Steps:
Import: Open Filmora Go, Click “New project” to start a new project, or Choose the previous one from the “Draft” portion. Select videos or images to import to your timeline. Hold and drag the clip to change its arrangement.
Edit: You can add text, effects, stickers, layers, e.t.c. by clicking their icon, present on the bar at the bottom.
Click the “PiP” icon to add image or video layers, you also can add multiple layers.
Select a clip to edit it. Different editing tools appear on the bottom bar. Here you can change its opacity, its speed, or add animations.
Effects: Click the “Effects” icon to open the effects menu. Select an effect to apply to your clip.
Click the white box between two clips to add transitions.
Export: Click the “Export” button to export your file. Select your desired resolution and frame rate to export your clip.


Some Free iPhone Video Editors:
If you do video editing rarely or do just basic video editing then it is useless to purchase paid video editors. Even if you are a content creator but tight on budget or new to this field, you can use free video editing softwares and save your cash for other pieces of equipment.
So, here we have mentioned some free video editors for you. Some of these are quite powerful and can do advanced editing while others are simple but easy to use.
Adobe Premiere Rush:
It is available on IOS and Android both.
Whether you are a beginner or a content creator using mobile phones or PCs for editing, you may have heard of Adobe softwares. It is a computer software company which makes powerful softwares for different purposes. Like premiere pro, they have designed a compact version for phones named “Premiere Rush”. It is a free video editor that has all the tools needed for video editing, from video effects to color grading and audio editing. Its UI is a bit similar to PC video editors. It is a free video editor with no watermarks. Although it takes some time to understand it. But once mastered, you can do editing quickly.
~Features:
- It is a free video editor with no watermark.
- It supports up to 4K resolution at 60fps.
- You can extract audio and can do voiceover directly from the software.
- It has hundreds of filters, overlays, and title designs.
- It has basic color grading tools.
- It also has a motion tracking feature. (in Paid version)
- It supports multiple audio, video, and text layers.


~Cons:
- It only runs on high-end devices. ( It is not supported in most mid-range phones)
- Not suitable for beginners. Its UI is quite hard to understand.
- Doesn’t have common features like the chroma key, masking, e.t.c.

~Price:
Its Premium version is available for 9.99/month. It includes some premium features. Or you can purchase the “All Apps Bundle” at $54.99/month for the annual plan.
CapCut:
It is available on IOS and Android both.
If you are looking for a free but good video editor to help you edit videos on the go, then you should get your hands on CapCut. It is a free mobile video editing software with many interesting features like keyframing, chroma-key, masking e.t.c. It also supports video and image layers. It has one of the best speed ramping features among other mobile video editors. It provides curves to smoothly speed ramp your clips. It can edit landscape, portrait, and even square video formats. It has many amazing effects and filters, it also has some stock clips.


~Features:
- It is completely free and has no watermarks.
- It supports up to 4K video resolution.
- Has curves for speed ramping.
- Has keyframes for animation.
- It has hundreds of effects, overlays, and titles.


~Cons:
- Its UI doesn’t support editing in landscape orientation.
- Lacks some common editing tools.
iMovie:
It is available on IOS and Mac.
iMovie is a free video editing software designed by apple for their flagship products. It is simple and easy to use. It has all the basic editing tools to enhance your video like crop, trim, transitions, effects, e.t.c. It also has a speed ramping feature which let you change the speed at different points of a clip. It’s AI mode “Magic Movie” lets you select clips and a style and software will make the final product for you.
Its “Storyboards” mode is a creative way of learning production and post-production skills. It lets you choose a theme from many famous Genres available, then it will guide you through the production process like capturing footage, arranging your shots, and creating cinematic titles to enhance your story.


~Features:
- It is free and easy to use.
- Let you do speed ramping.
- Supports Raw files.
- It’s AI mode creates videos for you on its own.
- The “Storyboarding” feature helps you through the production process.


~Cons:
- It only works on ios and Mac.
- Not suitable for professional projects.
GoPro - Quik:
It is available on IOS and Android and windows also.
It is a free and easy-to-use software designed by GoPro. It can edit clips of your GoPro or any other device. It is a quick and easy way to enhance your clips before posting them on any social platform. It can do basic edits like trim, rotate, color correction, e.t.c. It can also make amazing speed ramps by changing the speed of different parts of the clip (available in the premium version only). It doesn’t produce any watermarks. Although its premium version unlocks more features like speed ramping, more themes, and unlimited backup space.


~Features:
- Its free version doesn’t leave a watermark.
- It is simple and easy to use.
- Can do basic color correction.
- Have pre-made themes for faster editing.
- Change the speed at different parts of the video to create smooth speed ramps. (Available in the premium version.)
- Has a free version with limited tools for basic editing.

~Cons:
- It lacks advanced tools therefore not suitable for large projects.
- Its free version has many limitations.
~Price: Its subscription is available at $1.99/month or at discount for an annual subscription having $9.99/year.
VN Video editor:
It is available on IOS and Android, Windows, and Mac.
If you are looking for a video editor, which let you do fast but quality edits, then “VN video editor” is the right choice for you. It is free and easy-to-use software with many useful features like transitions, effects, speed ramps, PiP, chroma-key, keyframing, e.t.c. It supports different aspect ratios for all your social platforms.
It also has pre-made templates to speed up your editing process. Its Story mode let you manage your production and post-production work easily. It also has overlay mode, which can make awesome slide shows for you.


~Features:
- It is free software with no watermark.
- It supports up to 4K resolution at 60fps.
- Supports multi-layer editing.
- Have keyframing curves to create smooth animations.
- Have speed curves for smooth speed ramping.
- Its Story mode let you manage your production work easily.
- Can extract audio from a video file.


~Cons:
- Its UI doesn’t support editing landscape orientation.
- Its free version has limitations of creating max 100 projects.
~Price:
Its Premium version is available for $3.9/month or $20.9/year.
Some Paid iPhone Video Editors:
If you want to move forward and get your hands on these paid softwares to try new features then you should buy these paid softwares. As most of these softwares are quite affordable but they pack the punch. And some of them can give you more in return than your investment. Then what are you waiting for? go and try them yourself.
Kinemaster:
It is available on IOS and Android both.
If you want to do more than just trimming and cropping to your videos then you should try Kinemaster. For editors, who want to do some advanced-level video editing on their phone, then you must have Kinemaster on your phone. It is a paid software, which is packed with many useful features. It has many video and audio effects. It also has an amazing audio editor. It also has many title designs and basic color correction tools. It has hundreds of effects and transitions + more can be downloaded from its asset store. Its UI is suitable for beginners and content creators both. It is a paid software, but all its features are completely free to use, but the free version leaves a watermark on export.


~Features:
- It supports up to 4K resolution at 60fps. (depending on mobile configuration)
- Have amazing features like chroma key, keyframing, blend e.t.c
- Has built-in audio and video recorder.
- Supports multiple texts and video layers with different resolutions depending on the capability of the mobile phone.
- Has UI like a PC video editor and supports landscape orientation for editing.
- Have an asset store with 100s of free effects, transitions, and stock material.


~Cons:
- Can’t export 4K videos on most devices.
- Can’t apply keyframes and chroma key to the main video. (can be done on layers only)
~Price:
Its Premium version is available for $4.9/month or $39.9/year. It also includes all the premium assets.
Power Director:
It is available on IOS and Android both.
It is a paid but quite advanced video editor available for androids and IOS both. Like its PC version mobile version is also packed with many great features. It is compact and easy to use. It supports multiple video and audio layers. Have many cool filters and transitions. Can also do basic color corrections. To complete post-production work it also has audio editing tools and effects. It also has hundreds of title designs. Its UI is easy to use and supports both portrait and landscape orientation for editing. Most of its features can be used for free with a watermark on export. To remove the watermark you need to purchase the premium version.


~Features:
- It supports up to 4K resolution at 60fps. (compatible on most devices)
- Supports both Portrait and Landscape orientation for editing.
- Supports Key framing and video stabilization also.
- Supports multiple audio and video layers.
- Can edit videos in different aspect ratios.
- Have a vast stock library.


~Cons:
- Can’t export 4K videos on many devices.
- Can apply keyframing and chroma key to layers only.
- Software lags sometimes.
~Price:
Its Premium version is available for $4.9/month or $29.9/year.
LumaFusion:
It is available on IOS and Mac (with an m1 processor).
If you are a content creator and want to do professional-level video editing on your phone then you should get your hands on “LumaFusion”. It is of the most powerful and advanced video editors designed for a mobile phone. But it only works on iPhones and iPads. It is a multi-track video editor with many useful features like the Chroma key, keyframing, color grading, and color LUTs. Have powerful color grading tools and an audio editor. It also has a lock and load stabilizer. You have to purchase the software before using it. It doesn’t have any free version to try.

Credits: Pic by Luma touch website.
~Features:
- It supports up to 4K video resolution at a max of 240 fps.
- Can also edit and export 360 videos.
- Have powerful color correction tools. You can also import your own color LUTs.
- Supports Keyframing on almost all the editing tools within the software.
- You can add some third-party audio plugins.
- Supports up to 6 audio and video layers.
- Have “Storyblock” stock library. (Many of its contents are free to use)
- Supports external monitor for display.

Credits: Pic by Luma touch website.
~Cons:
- Not available for Android devices.
- Being an advanced software, it doesn’t have masking and speed ramping features.
- Doesn’t have a free version to try on.
~Price:
It is available for purchase at $29.99.
InShot:
It is available on IOS and Android both.
If you are new to video editing and want to do simple editing tasks then this software can be the right choice for you. It is simple and easy to use. Apart from just trimming and arranging your clips, it also has some cool features like speed ramping, chroma-key, mask e.t.c. It also has an HSL color grading tool. You can add multiple layers as PiP. It is a paid software but you can try it for free with the watermark on export.


~Features:
- It supports up to 4K resolution at 60fps.
- Its UI is beginner-friendly.
- Have some advanced color correction and grading tools.
- Supports multiple images and video layers as PiP.
- Have features like a mask, chroma key, and blend for layers.
- Can edit videos in different aspect ratios.
- Have speed curves for smooth speed ramping.


~Cons:
- Doesn’t have advanced tools.
- Its UI doesn’t support editing landscape orientation.
~Price:
It has 3 diff purchase plans. you can get its subscription for $3.9/month or $14.99/year. or you can purchase the software for lifetime at $34.99.
VivaCut:
It is available on IOS and Android both.
Almost every mobile video editor wished for doing PC-like video editing on their phone, but that was not possible due to software limitations and device compatibility. But now you can create PC-like videos on your phone through “VivaCut”. It is a paid software that is packed with many advanced features. Like 3D transform, overlay, Effects, Masking, e.t.c. It has one of the best color correction and grading tools among other mobile video editors. It has advanced keyframing and curve paths that can make splendid animations. It also supports multi-layer video editing. It also has a Grouping tool that let you combine several clips and texts into a single clip for easy editing. It also lets you import your presets. It is a paid software but you can try it for free with the watermark on export.


~Features:
- It supports multi-layer editing.
- Supports keyframing curves and 3D transform.
- Have advanced color correction and grading tools.
- Can Group multiple clips for easy editing.
- Let you import your presets.
- Can edit videos in different aspect ratios.
- Have an “FX plugin” library with many special effects that can be customized also.


~Cons:
- It doesn’t support 4K resolution.
- Its UI doesn’t support editing landscape orientation.
- It lags and crashes sometimes.
~Price:
Its premium version is available at $4.99/month or $19.99/year.
Which Should I Choose Free or Paid Video Editing Apps for iPhone:
If you do video editing once in a while or you don’t do more than just trimming and cropping then you shouldn’t purchase a paid video editing software. Because there are free video editors that can get your job done and even more than that. But if you are a content creator who doesn’t want to do editing on PCs or laptops, then you can get these paid video editors for your iPhone. These softwares are quite affordable and worthy of your investment. Some are cheaper than others. You can purchase the one, which meets your budget or fulfills your needs.
And if you are a beginner but want to move forward in this field then you should try free versions of these paid softwares. Select the one, which you are comfortable working on and once you are satisfied with the software then you can purchase its premium version.
- Free iPhone Video Editors
- Adobe Premiere Rush
- CapCut
- iMovie
- GoPro-Quik
- VN Video Editor
- Paid iPhone Video Editors
- Kinemaster
- Power Director
- LumaFusion
- InShot
- VivaCut
Filmora Go:
It is available on IOS and Android both.
Apart from having a professional video editor for PC, Wondershare has also introduced a video editor for mobile phones. Filmora Go is an amazing video editor, with many cool features such as chroma key, mask, keyframing, blending, e.t.c. It is fast and easy to use with built-in effects, transitions, and presets to speed up the editing process. It is a paid video editor but you can try it for free, free trial includes most of the features but it leaves a watermark on export.
~Features:
- Has speed curves for smooth speed ramping.
- Supports multiple images and video layers.
- Have many presets and filters for fast pace editing.
- Have cool features like chroma key, masking, keyframing, e.t.c.
- Supports “Pixabay’s” stock library.
~Cons:
- Its UI doesn’t support editing in landscape orientation.
- It doesn’t support 4k video resolution.


~Steps:
Import: Open Filmora Go, Click “New project” to start a new project, or Choose the previous one from the “Draft” portion. Select videos or images to import to your timeline. Hold and drag the clip to change its arrangement.
Edit: You can add text, effects, stickers, layers, e.t.c. by clicking their icon, present on the bar at the bottom.
Click the “PiP” icon to add image or video layers, you also can add multiple layers.
Select a clip to edit it. Different editing tools appear on the bottom bar. Here you can change its opacity, its speed, or add animations.
Effects: Click the “Effects” icon to open the effects menu. Select an effect to apply to your clip.
Click the white box between two clips to add transitions.
Export: Click the “Export” button to export your file. Select your desired resolution and frame rate to export your clip.


Some Free iPhone Video Editors:
If you do video editing rarely or do just basic video editing then it is useless to purchase paid video editors. Even if you are a content creator but tight on budget or new to this field, you can use free video editing softwares and save your cash for other pieces of equipment.
So, here we have mentioned some free video editors for you. Some of these are quite powerful and can do advanced editing while others are simple but easy to use.
Adobe Premiere Rush:
It is available on IOS and Android both.
Whether you are a beginner or a content creator using mobile phones or PCs for editing, you may have heard of Adobe softwares. It is a computer software company which makes powerful softwares for different purposes. Like premiere pro, they have designed a compact version for phones named “Premiere Rush”. It is a free video editor that has all the tools needed for video editing, from video effects to color grading and audio editing. Its UI is a bit similar to PC video editors. It is a free video editor with no watermarks. Although it takes some time to understand it. But once mastered, you can do editing quickly.
~Features:
- It is a free video editor with no watermark.
- It supports up to 4K resolution at 60fps.
- You can extract audio and can do voiceover directly from the software.
- It has hundreds of filters, overlays, and title designs.
- It has basic color grading tools.
- It also has a motion tracking feature. (in Paid version)
- It supports multiple audio, video, and text layers.


~Cons:
- It only runs on high-end devices. ( It is not supported in most mid-range phones)
- Not suitable for beginners. Its UI is quite hard to understand.
- Doesn’t have common features like the chroma key, masking, e.t.c.

~Price:
Its Premium version is available for 9.99/month. It includes some premium features. Or you can purchase the “All Apps Bundle” at $54.99/month for the annual plan.
CapCut:
It is available on IOS and Android both.
If you are looking for a free but good video editor to help you edit videos on the go, then you should get your hands on CapCut. It is a free mobile video editing software with many interesting features like keyframing, chroma-key, masking e.t.c. It also supports video and image layers. It has one of the best speed ramping features among other mobile video editors. It provides curves to smoothly speed ramp your clips. It can edit landscape, portrait, and even square video formats. It has many amazing effects and filters, it also has some stock clips.


~Features:
- It is completely free and has no watermarks.
- It supports up to 4K video resolution.
- Has curves for speed ramping.
- Has keyframes for animation.
- It has hundreds of effects, overlays, and titles.


~Cons:
- Its UI doesn’t support editing in landscape orientation.
- Lacks some common editing tools.
iMovie:
It is available on IOS and Mac.
iMovie is a free video editing software designed by apple for their flagship products. It is simple and easy to use. It has all the basic editing tools to enhance your video like crop, trim, transitions, effects, e.t.c. It also has a speed ramping feature which let you change the speed at different points of a clip. It’s AI mode “Magic Movie” lets you select clips and a style and software will make the final product for you.
Its “Storyboards” mode is a creative way of learning production and post-production skills. It lets you choose a theme from many famous Genres available, then it will guide you through the production process like capturing footage, arranging your shots, and creating cinematic titles to enhance your story.


~Features:
- It is free and easy to use.
- Let you do speed ramping.
- Supports Raw files.
- It’s AI mode creates videos for you on its own.
- The “Storyboarding” feature helps you through the production process.


~Cons:
- It only works on ios and Mac.
- Not suitable for professional projects.
GoPro - Quik:
It is available on IOS and Android and windows also.
It is a free and easy-to-use software designed by GoPro. It can edit clips of your GoPro or any other device. It is a quick and easy way to enhance your clips before posting them on any social platform. It can do basic edits like trim, rotate, color correction, e.t.c. It can also make amazing speed ramps by changing the speed of different parts of the clip (available in the premium version only). It doesn’t produce any watermarks. Although its premium version unlocks more features like speed ramping, more themes, and unlimited backup space.


~Features:
- Its free version doesn’t leave a watermark.
- It is simple and easy to use.
- Can do basic color correction.
- Have pre-made themes for faster editing.
- Change the speed at different parts of the video to create smooth speed ramps. (Available in the premium version.)
- Has a free version with limited tools for basic editing.

~Cons:
- It lacks advanced tools therefore not suitable for large projects.
- Its free version has many limitations.
~Price: Its subscription is available at $1.99/month or at discount for an annual subscription having $9.99/year.
VN Video editor:
It is available on IOS and Android, Windows, and Mac.
If you are looking for a video editor, which let you do fast but quality edits, then “VN video editor” is the right choice for you. It is free and easy-to-use software with many useful features like transitions, effects, speed ramps, PiP, chroma-key, keyframing, e.t.c. It supports different aspect ratios for all your social platforms.
It also has pre-made templates to speed up your editing process. Its Story mode let you manage your production and post-production work easily. It also has overlay mode, which can make awesome slide shows for you.


~Features:
- It is free software with no watermark.
- It supports up to 4K resolution at 60fps.
- Supports multi-layer editing.
- Have keyframing curves to create smooth animations.
- Have speed curves for smooth speed ramping.
- Its Story mode let you manage your production work easily.
- Can extract audio from a video file.


~Cons:
- Its UI doesn’t support editing landscape orientation.
- Its free version has limitations of creating max 100 projects.
~Price:
Its Premium version is available for $3.9/month or $20.9/year.
Some Paid iPhone Video Editors:
If you want to move forward and get your hands on these paid softwares to try new features then you should buy these paid softwares. As most of these softwares are quite affordable but they pack the punch. And some of them can give you more in return than your investment. Then what are you waiting for? go and try them yourself.
Kinemaster:
It is available on IOS and Android both.
If you want to do more than just trimming and cropping to your videos then you should try Kinemaster. For editors, who want to do some advanced-level video editing on their phone, then you must have Kinemaster on your phone. It is a paid software, which is packed with many useful features. It has many video and audio effects. It also has an amazing audio editor. It also has many title designs and basic color correction tools. It has hundreds of effects and transitions + more can be downloaded from its asset store. Its UI is suitable for beginners and content creators both. It is a paid software, but all its features are completely free to use, but the free version leaves a watermark on export.


~Features:
- It supports up to 4K resolution at 60fps. (depending on mobile configuration)
- Have amazing features like chroma key, keyframing, blend e.t.c
- Has built-in audio and video recorder.
- Supports multiple texts and video layers with different resolutions depending on the capability of the mobile phone.
- Has UI like a PC video editor and supports landscape orientation for editing.
- Have an asset store with 100s of free effects, transitions, and stock material.


~Cons:
- Can’t export 4K videos on most devices.
- Can’t apply keyframes and chroma key to the main video. (can be done on layers only)
~Price:
Its Premium version is available for $4.9/month or $39.9/year. It also includes all the premium assets.
Power Director:
It is available on IOS and Android both.
It is a paid but quite advanced video editor available for androids and IOS both. Like its PC version mobile version is also packed with many great features. It is compact and easy to use. It supports multiple video and audio layers. Have many cool filters and transitions. Can also do basic color corrections. To complete post-production work it also has audio editing tools and effects. It also has hundreds of title designs. Its UI is easy to use and supports both portrait and landscape orientation for editing. Most of its features can be used for free with a watermark on export. To remove the watermark you need to purchase the premium version.


~Features:
- It supports up to 4K resolution at 60fps. (compatible on most devices)
- Supports both Portrait and Landscape orientation for editing.
- Supports Key framing and video stabilization also.
- Supports multiple audio and video layers.
- Can edit videos in different aspect ratios.
- Have a vast stock library.


~Cons:
- Can’t export 4K videos on many devices.
- Can apply keyframing and chroma key to layers only.
- Software lags sometimes.
~Price:
Its Premium version is available for $4.9/month or $29.9/year.
LumaFusion:
It is available on IOS and Mac (with an m1 processor).
If you are a content creator and want to do professional-level video editing on your phone then you should get your hands on “LumaFusion”. It is of the most powerful and advanced video editors designed for a mobile phone. But it only works on iPhones and iPads. It is a multi-track video editor with many useful features like the Chroma key, keyframing, color grading, and color LUTs. Have powerful color grading tools and an audio editor. It also has a lock and load stabilizer. You have to purchase the software before using it. It doesn’t have any free version to try.

Credits: Pic by Luma touch website.
~Features:
- It supports up to 4K video resolution at a max of 240 fps.
- Can also edit and export 360 videos.
- Have powerful color correction tools. You can also import your own color LUTs.
- Supports Keyframing on almost all the editing tools within the software.
- You can add some third-party audio plugins.
- Supports up to 6 audio and video layers.
- Have “Storyblock” stock library. (Many of its contents are free to use)
- Supports external monitor for display.

Credits: Pic by Luma touch website.
~Cons:
- Not available for Android devices.
- Being an advanced software, it doesn’t have masking and speed ramping features.
- Doesn’t have a free version to try on.
~Price:
It is available for purchase at $29.99.
InShot:
It is available on IOS and Android both.
If you are new to video editing and want to do simple editing tasks then this software can be the right choice for you. It is simple and easy to use. Apart from just trimming and arranging your clips, it also has some cool features like speed ramping, chroma-key, mask e.t.c. It also has an HSL color grading tool. You can add multiple layers as PiP. It is a paid software but you can try it for free with the watermark on export.


~Features:
- It supports up to 4K resolution at 60fps.
- Its UI is beginner-friendly.
- Have some advanced color correction and grading tools.
- Supports multiple images and video layers as PiP.
- Have features like a mask, chroma key, and blend for layers.
- Can edit videos in different aspect ratios.
- Have speed curves for smooth speed ramping.


~Cons:
- Doesn’t have advanced tools.
- Its UI doesn’t support editing landscape orientation.
~Price:
It has 3 diff purchase plans. you can get its subscription for $3.9/month or $14.99/year. or you can purchase the software for lifetime at $34.99.
VivaCut:
It is available on IOS and Android both.
Almost every mobile video editor wished for doing PC-like video editing on their phone, but that was not possible due to software limitations and device compatibility. But now you can create PC-like videos on your phone through “VivaCut”. It is a paid software that is packed with many advanced features. Like 3D transform, overlay, Effects, Masking, e.t.c. It has one of the best color correction and grading tools among other mobile video editors. It has advanced keyframing and curve paths that can make splendid animations. It also supports multi-layer video editing. It also has a Grouping tool that let you combine several clips and texts into a single clip for easy editing. It also lets you import your presets. It is a paid software but you can try it for free with the watermark on export.


~Features:
- It supports multi-layer editing.
- Supports keyframing curves and 3D transform.
- Have advanced color correction and grading tools.
- Can Group multiple clips for easy editing.
- Let you import your presets.
- Can edit videos in different aspect ratios.
- Have an “FX plugin” library with many special effects that can be customized also.


~Cons:
- It doesn’t support 4K resolution.
- Its UI doesn’t support editing landscape orientation.
- It lags and crashes sometimes.
~Price:
Its premium version is available at $4.99/month or $19.99/year.
Which Should I Choose Free or Paid Video Editing Apps for iPhone:
If you do video editing once in a while or you don’t do more than just trimming and cropping then you shouldn’t purchase a paid video editing software. Because there are free video editors that can get your job done and even more than that. But if you are a content creator who doesn’t want to do editing on PCs or laptops, then you can get these paid video editors for your iPhone. These softwares are quite affordable and worthy of your investment. Some are cheaper than others. You can purchase the one, which meets your budget or fulfills your needs.
And if you are a beginner but want to move forward in this field then you should try free versions of these paid softwares. Select the one, which you are comfortable working on and once you are satisfied with the software then you can purchase its premium version.
Step by Step to Split Clips in VLC
The VLC media player is top-rated as it is freely available and operates on different platforms efficiently. Its framework helps play almost all the audios, videos, DVDs and various resources available on your systems. Even optimizing the videos and audio as the playback from your devices is possible. There is also a possibility of integrating a number of programs along with the streaming services.
You can even search the album covers. With the functionality of the playlist, you can play a number of films one after the other. This feature is helpful when you have downloaded the whole film in parts or watched different short films. The best part is to know it is not just a video player. It is an editor; yes, you heard it right. VLC is the correct choice for splitting or cutting your videos without facing any difficulties.
The article is a guide about the split of the videos in VLC. There is also a particular description of its alternative: Wondershare Filmora. It is suitable as well as reasonable.
How can you split the video clips in VLC?
VLC Media player has all the amazing tools for playing back the audios and videos regardless of the format. It is still on top of all the media players because of its simple interface. Below are the very easy steps to split the videos in the VLC media player.
Step 1: After completing the download, install the updated version of the VLC media player if it is not on your PC. Once it is installed, you need to double click on its icon for launching it.
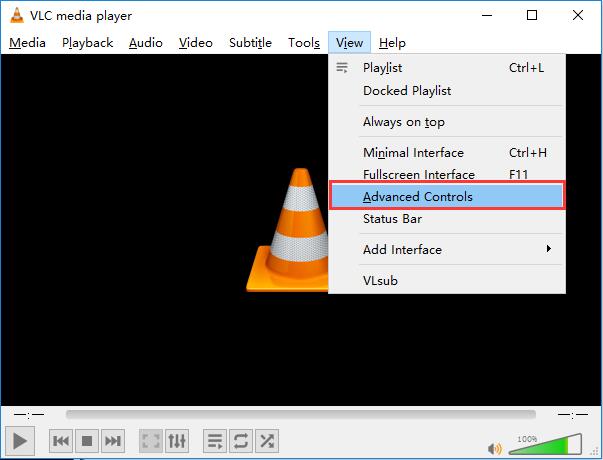
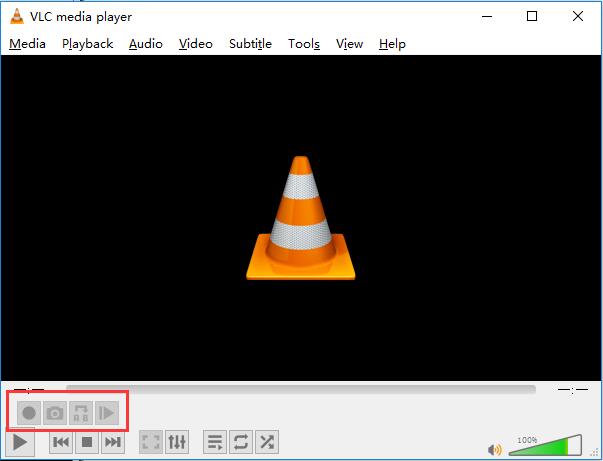
Step 2: This step is the activation of the advanced controls in the media player. Click on “View” visible on the menu bar. Click on the “Advanced Controls” and appears the menu of four additional buttons more than the button for play or pause.
Step 3: Now, you can easily play the video simply by clicking the “Open File” option present in the media menu. The drag and drop option is available inside the VLC media player.
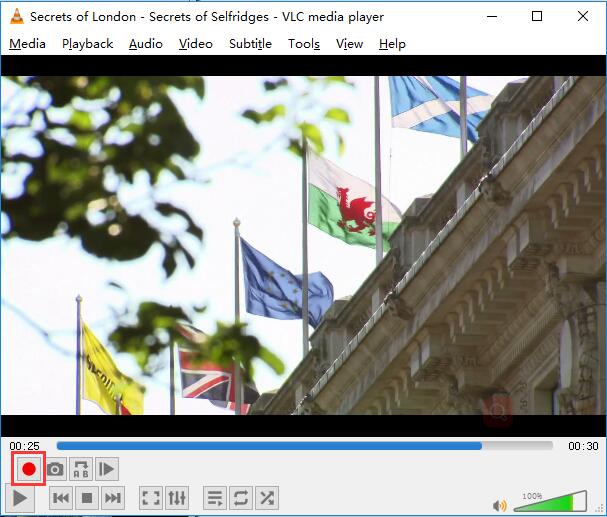
You should start playing the video now and recording the parts with the help of a decoder. Look for the position from where you want to begin the recording and press both Play and Pause buttons one after the other.
Even the Frame-by-Frame button is also available. It is the last one in the advance controls for navigating the actual frame from where you want to begin the recording.
Step 4:
Press the button “Record” again whenever you want the recording to stop. This is the final step for cutting the videos in VLC. The split video from the actual video saves automatically as the MP4 video file in the folder of Libraries or Videos if you are using Windows operating system.
Almost all, playing any video and audio format is possible in VLC media player. It includes AVI, MP4, FLV, WMV, RMVB and Quick time. You can even play the videos partially or preview them even before completing the downloads.
An easier way to split the video
The whole process of splitting the video into a VLC media player is extremely easy for managing and handling without any requirement of technical knowledge. But unfortunately, you can apply the frame-by-frame technique on the short videos. Monitoring is essential during the split and looking at the complete process whenever the recording is in VLC.
This causes the loss of quality. Here, the substitute that is also available is Filmora Video Editor . It is the recommendation of the graphic designers, web developers and videographers because it is freely available and lightweight software for the systems. You can apply its features to your images and videos. This includes the cutting, rotating and resizing of your videos along with the images.
For Win 7 or later (64-bit)
For macOS 10.14 or later
Features:
- There are 300+ special effects available
- Splitting of the screens and video clips
- Adding and tracking the motion graphics
- Unlimitedly sharing of the videos
- Addition of the transitional effects
- Dragging and dropping the video contents
- Customization of the effects
You can easily split and cut the large videos in Wondershare Filmora simply. There is no loss of video quality. Follow the steps below for splitting the video from Wondershare Filmora:
Step 1:
Import your videos to Filmora Video Cutter After installing the video cutter, launch it and select New Project to enter the video editing interface. Now, you need to import the video that needs to cut into several parts.

Step 2:
Drag and drop the videos in the timeline to start the splitting. Click the Split icon (scissor icon) on the toolbar or the Split button on the playhead to split the video

Apart from splitting the videos, you can even combine and merge different videos into one. Even the rotation of the videos is possible.
Therefore, Wondershare Filmora has received recognition due to its simple features. It is available for everyone, whether for individual, educational, or business purposes. It can help you in changing the look of your brand completely. Even adding the logos in the videos is also possible, along with adjusting the sizes. There is a huge range of features without any watermark, and all the upgrades are freely available.
Also, tech support is available for any assistance you need. Edit your images and videos on the social media platforms with ease, along with the adjusting tool. The perfect video editor is Wondershare Filmora, as it has compatibility with both Windows and Mac users. Correct and match the colour with the customization tools. Start using the Wondershare Filmora today without being concerned regarding the format of the video clips. You will definitely enjoy using it.
Step 3: Now, you can easily play the video simply by clicking the “Open File” option present in the media menu. The drag and drop option is available inside the VLC media player.
You should start playing the video now and recording the parts with the help of a decoder. Look for the position from where you want to begin the recording and press both Play and Pause buttons one after the other.
Even the Frame-by-Frame button is also available. It is the last one in the advance controls for navigating the actual frame from where you want to begin the recording.

Step 4:
Press the button “Record” again whenever you want the recording to stop. This is the final step for cutting the videos in VLC. The split video from the actual video saves automatically as the MP4 video file in the folder of Libraries or Videos if you are using Windows operating system.
Almost all, playing any video and audio format is possible in VLC media player. It includes AVI, MP4, FLV, WMV, RMVB and Quick time. You can even play the videos partially or preview them even before completing the downloads.

An easier way to split the video
The whole process of splitting the video into a VLC media player is extremely easy for managing and handling without any requirement of technical knowledge. But unfortunately, you can apply the frame-by-frame technique on the short videos. Monitoring is essential during the split and looking at the complete process whenever the recording is in VLC.
This causes the loss of quality. Here, the substitute that is also available is Filmora Video Editor . It is the recommendation of the graphic designers, web developers and videographers because it is freely available and lightweight software for the systems. You can apply its features to your images and videos. This includes the cutting, rotating and resizing of your videos along with the images.
For Win 7 or later (64-bit)
For macOS 10.14 or later
Features:
- There are 300+ special effects available
- Splitting of the screens and video clips
- Adding and tracking the motion graphics
- Unlimitedly sharing of the videos
- Addition of the transitional effects
- Dragging and dropping the video contents
- Customization of the effects
You can easily split and cut the large videos in Wondershare Filmora simply. There is no loss of video quality. Follow the steps below for splitting the video from Wondershare Filmora:
Step 1:
Import your videos to Filmora Video Cutter After installing the video cutter, launch it and select New Project to enter the video editing interface. Now, you need to import the video that needs to cut into several parts.

Step 2:
Drag and drop the videos in the timeline to start the splitting. Click the Split icon (scissor icon) on the toolbar or the Split button on the playhead to split the video

Apart from splitting the videos, you can even combine and merge different videos into one. Even the rotation of the videos is possible.
Therefore, Wondershare Filmora has received recognition due to its simple features. It is available for everyone, whether for individual, educational, or business purposes. It can help you in changing the look of your brand completely. Even adding the logos in the videos is also possible, along with adjusting the sizes. There is a huge range of features without any watermark, and all the upgrades are freely available.
Also, tech support is available for any assistance you need. Edit your images and videos on the social media platforms with ease, along with the adjusting tool. The perfect video editor is Wondershare Filmora, as it has compatibility with both Windows and Mac users. Correct and match the colour with the customization tools. Start using the Wondershare Filmora today without being concerned regarding the format of the video clips. You will definitely enjoy using it.
Step 3: Now, you can easily play the video simply by clicking the “Open File” option present in the media menu. The drag and drop option is available inside the VLC media player.
You should start playing the video now and recording the parts with the help of a decoder. Look for the position from where you want to begin the recording and press both Play and Pause buttons one after the other.
Even the Frame-by-Frame button is also available. It is the last one in the advance controls for navigating the actual frame from where you want to begin the recording.

Step 4:
Press the button “Record” again whenever you want the recording to stop. This is the final step for cutting the videos in VLC. The split video from the actual video saves automatically as the MP4 video file in the folder of Libraries or Videos if you are using Windows operating system.
Almost all, playing any video and audio format is possible in VLC media player. It includes AVI, MP4, FLV, WMV, RMVB and Quick time. You can even play the videos partially or preview them even before completing the downloads.

An easier way to split the video
The whole process of splitting the video into a VLC media player is extremely easy for managing and handling without any requirement of technical knowledge. But unfortunately, you can apply the frame-by-frame technique on the short videos. Monitoring is essential during the split and looking at the complete process whenever the recording is in VLC.
This causes the loss of quality. Here, the substitute that is also available is Filmora Video Editor . It is the recommendation of the graphic designers, web developers and videographers because it is freely available and lightweight software for the systems. You can apply its features to your images and videos. This includes the cutting, rotating and resizing of your videos along with the images.
For Win 7 or later (64-bit)
For macOS 10.14 or later
Features:
- There are 300+ special effects available
- Splitting of the screens and video clips
- Adding and tracking the motion graphics
- Unlimitedly sharing of the videos
- Addition of the transitional effects
- Dragging and dropping the video contents
- Customization of the effects
You can easily split and cut the large videos in Wondershare Filmora simply. There is no loss of video quality. Follow the steps below for splitting the video from Wondershare Filmora:
Step 1:
Import your videos to Filmora Video Cutter After installing the video cutter, launch it and select New Project to enter the video editing interface. Now, you need to import the video that needs to cut into several parts.

Step 2:
Drag and drop the videos in the timeline to start the splitting. Click the Split icon (scissor icon) on the toolbar or the Split button on the playhead to split the video

Apart from splitting the videos, you can even combine and merge different videos into one. Even the rotation of the videos is possible.
Therefore, Wondershare Filmora has received recognition due to its simple features. It is available for everyone, whether for individual, educational, or business purposes. It can help you in changing the look of your brand completely. Even adding the logos in the videos is also possible, along with adjusting the sizes. There is a huge range of features without any watermark, and all the upgrades are freely available.
Also, tech support is available for any assistance you need. Edit your images and videos on the social media platforms with ease, along with the adjusting tool. The perfect video editor is Wondershare Filmora, as it has compatibility with both Windows and Mac users. Correct and match the colour with the customization tools. Start using the Wondershare Filmora today without being concerned regarding the format of the video clips. You will definitely enjoy using it.
Step 3: Now, you can easily play the video simply by clicking the “Open File” option present in the media menu. The drag and drop option is available inside the VLC media player.
You should start playing the video now and recording the parts with the help of a decoder. Look for the position from where you want to begin the recording and press both Play and Pause buttons one after the other.
Even the Frame-by-Frame button is also available. It is the last one in the advance controls for navigating the actual frame from where you want to begin the recording.

Step 4:
Press the button “Record” again whenever you want the recording to stop. This is the final step for cutting the videos in VLC. The split video from the actual video saves automatically as the MP4 video file in the folder of Libraries or Videos if you are using Windows operating system.
Almost all, playing any video and audio format is possible in VLC media player. It includes AVI, MP4, FLV, WMV, RMVB and Quick time. You can even play the videos partially or preview them even before completing the downloads.

An easier way to split the video
The whole process of splitting the video into a VLC media player is extremely easy for managing and handling without any requirement of technical knowledge. But unfortunately, you can apply the frame-by-frame technique on the short videos. Monitoring is essential during the split and looking at the complete process whenever the recording is in VLC.
This causes the loss of quality. Here, the substitute that is also available is Filmora Video Editor . It is the recommendation of the graphic designers, web developers and videographers because it is freely available and lightweight software for the systems. You can apply its features to your images and videos. This includes the cutting, rotating and resizing of your videos along with the images.
For Win 7 or later (64-bit)
For macOS 10.14 or later
Features:
- There are 300+ special effects available
- Splitting of the screens and video clips
- Adding and tracking the motion graphics
- Unlimitedly sharing of the videos
- Addition of the transitional effects
- Dragging and dropping the video contents
- Customization of the effects
You can easily split and cut the large videos in Wondershare Filmora simply. There is no loss of video quality. Follow the steps below for splitting the video from Wondershare Filmora:
Step 1:
Import your videos to Filmora Video Cutter After installing the video cutter, launch it and select New Project to enter the video editing interface. Now, you need to import the video that needs to cut into several parts.

Step 2:
Drag and drop the videos in the timeline to start the splitting. Click the Split icon (scissor icon) on the toolbar or the Split button on the playhead to split the video

Apart from splitting the videos, you can even combine and merge different videos into one. Even the rotation of the videos is possible.
Therefore, Wondershare Filmora has received recognition due to its simple features. It is available for everyone, whether for individual, educational, or business purposes. It can help you in changing the look of your brand completely. Even adding the logos in the videos is also possible, along with adjusting the sizes. There is a huge range of features without any watermark, and all the upgrades are freely available.
Also, tech support is available for any assistance you need. Edit your images and videos on the social media platforms with ease, along with the adjusting tool. The perfect video editor is Wondershare Filmora, as it has compatibility with both Windows and Mac users. Correct and match the colour with the customization tools. Start using the Wondershare Filmora today without being concerned regarding the format of the video clips. You will definitely enjoy using it.
The Definite Guide to Craig Bot Discord
The Definite Guide to Craig Bot Discord
An easy yet powerful editor
Numerous effects to choose from
Detailed tutorials provided by the official channel
Discord is a free text and audio communication tool for gamers and other communities. The voice channel in the Discord server allows users to speak with many people. On the other hand, Discord does not have a voice recording feature. Users can use third-party solutions to capture their discord audio when speaking via voice chat. When recording someone else’s discussion, be sure you have their permission. We’ll show you how to record discord audio with the Craig Discord bot and record discord audio using Craig in this article. Craig can record discord calls also. Let’s get started!
In this article
01 [What is Craig Bot Discord?](#Part 1)
02 [Is Craig Discord Bot Safe?](#Part 2)
03 [How Do I Enable Craig in Discord?](#Part 3)
04 [How to Record Discord Audio Using Craig](#Part 4)
05 [Craig Bot Discord Q&A](#Part 5)
Part 1 What is Craig Bot Discord?
Craig is a “Discord voice channel recording bot” with multi-track/multi-channel recording capabilities. In short, that means each speaker gets their audio file when Craig records your Discord voice channel.
Craig Recorder keeps track of all your recordings. You may use Craig Bot to record your calls in high-quality audio and video as a server owner.
Craig will record continuously for up to six hours. You can download a copy of the audio to examine the status of a recording until you download the file. The Craig website has a complete set of Craig bot commands, which you may immediately access by typing: Craig, help in a Discord channel.
Part 2 Is Craig Discord Bot Safe?
All Craig web services, like most websites, log all users’ IP addresses to identify and prevent criminal activity. Craig does not keep track of anyone who does not speak in a recorded channel, use any Craig bot commands, or participate in an EnnuiCastr recording.
Part 3 How Do I Enable Craig in Discord?
All Craig web services, like most websites, log all users’ IP addresses to identify and prevent criminal activity. Anyone who does not talk in a recorded channel, use any Discord Craig commands, or engage in a recording using the Craig web app is anonymous to Craig.
Part 4 How to Record Discord Audio Using Craig
Craig will not record without a visible label indicating that it is getting recorded. It records your conversation with others, but it also records each user as a unique audio track, making it much easier to edit or remove specific speakers if necessary.
Follow these simple steps to use a Discord recording bot.
Step 1: Invite Craig
You must first invite Craig to your server to use him. Visit Craig’s website and click the “Invite Craig to Your Discord Server” option to get started.
Now, begin the joining procedure by pressing Invite Craig to your Discord Server. This action will take you to the authorization page for the Discord server. However, before using your server, you must first grant Craig permission to join it.
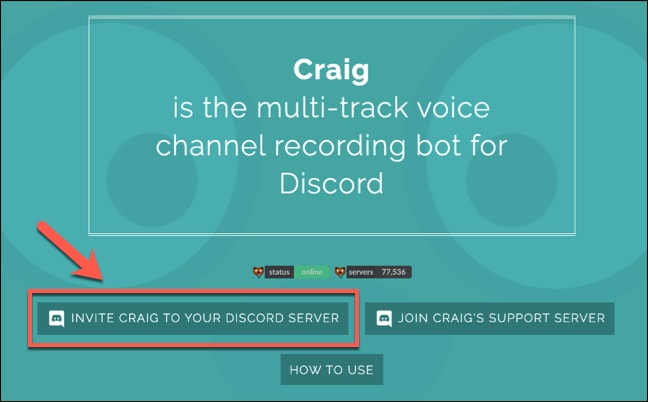
Step 2: Go to “Add Bot To”
Go to the “Add Bot To” section and select your server, then click “Authorize” to allow the bot to join. Select your Discord server, then click Authorize to enable the Craig bot to join.

Step 3: Join Craig
You should notice a join notification for “Craig” in your server if the process is successful. That’s it! You don’t have to do more; you may start recording your audio channels right away with Craig.
Enter an audio channel and type: Craig:; join to get started.

Step 4: Begin Your Recording
Craig will join the channel and start recording the audio instantly and the bot’s username will update to confirm this. Besides, you’ll also hear an voice from the bot saying, “now recording.”

Step 5: Exit to End Recording
Type: Craig, exit to end a Craig recording. It will force Craig to quit the current channel and stop recording. However, recordings in other channels will continue.

Step 6: Type “: Craig:, Stop”
If you wish to compel Craig to cease recording on all channels, type: Craig:, stop.
You can use this instead of the leave command to end a Craig recording if you’re only recording in one channel.

Step 7: Download or Delete Link
The Craig bot will send you a private message with links to download or delete your talks when you start recording.

Craig will record continuously for up to six hours. You can download a copy of the audio to examine the status of a recording until you download the file.
Part 5 Craig Bot Discord Q&A
Here are some frequently asked questions you need to go through to explore Craig discord bot:
Q: Is Craig bot capable of recording video?
A: Craig recorder keeps track of all your recordings. You may use Craig bot to record your calls in high-quality audio and video as a server owner.
Q: On Discord, how can I record my calls?
A: Select ‘Start Recording’ from the ‘Controls’ area. Discord now allows you to record calls.
Q: How do I make Craig active?
A: Enter an audio channel and type: Craig:, join to get started. Craig will join the channel and begin recording right away; update the bot’s username to reflect this. To confirm, you’ll hear an audio notice from the bot saying, “now recording.” Type: Craig:, exit to end a Craig recording.
Q: Is Craig safe?
A: Craig is in the 17th percentile for safety, which means that 83 percent of cities are safer while 17 percent are riskier. Only Craig’s appropriate borders are considered in this analysis. For a list of adjacent towns, see the table below. During a particular year, the crime rate in Craig is 48.61 per 1,000 residents.
Q: What is the best option to stop a Craig bot?
A: First, type in the audio channel and type: Craig:, join to begin. Craig will join the channel and start recording the bot immediately. You must see the updated bot’s username. After that, you’ll hear an audio note from the bot saying, “now recording.” Type: Craig:, leave to stop a Craig recording bot from all channels**.**

Wondershare Filmora Video Editor doesn’t feature multi-cam support or the latest VR technologies. However, its friendly UI and many effects can help you edit your Discord videos.
For Win 7 or later (64-bit)
For macOS 10.12 or later
PROS
● User-friendly interface
● Inexpensive
● There are numerous effects and overlays.
● Good text and title tools
● In the test, the rendering is quick.
● Regular updates with new effects for video-making and tweaking tools.
● Try it for free option before purchasing.
CONS
● The user interface is not touch-friendly.
● There is no DVD menu authoring or chapter authoring.
● Ending Thoughts →
● What Craig bot is, is it safe to use, and how you can activate it.
● Besides, you also went through the steps to use the Craig bot on Discord and some FAQs.
● Finally, we introduced Filmora, the best video editing software to get excellent results for the Discord platform.
● Thus, now with Discord Craig bot you can make recordings easily using the simple laud down steps. Ensure that you get familiar with the Craig bot commands for a seamless process. Also, get a fantastic video editor by Wondershare; this video editor helps you create amazing videos with effects giving your video that professional touch.
Discord is a free text and audio communication tool for gamers and other communities. The voice channel in the Discord server allows users to speak with many people. On the other hand, Discord does not have a voice recording feature. Users can use third-party solutions to capture their discord audio when speaking via voice chat. When recording someone else’s discussion, be sure you have their permission. We’ll show you how to record discord audio with the Craig Discord bot and record discord audio using Craig in this article. Craig can record discord calls also. Let’s get started!
In this article
01 [What is Craig Bot Discord?](#Part 1)
02 [Is Craig Discord Bot Safe?](#Part 2)
03 [How Do I Enable Craig in Discord?](#Part 3)
04 [How to Record Discord Audio Using Craig](#Part 4)
05 [Craig Bot Discord Q&A](#Part 5)
Part 1 What is Craig Bot Discord?
Craig is a “Discord voice channel recording bot” with multi-track/multi-channel recording capabilities. In short, that means each speaker gets their audio file when Craig records your Discord voice channel.
Craig Recorder keeps track of all your recordings. You may use Craig Bot to record your calls in high-quality audio and video as a server owner.
Craig will record continuously for up to six hours. You can download a copy of the audio to examine the status of a recording until you download the file. The Craig website has a complete set of Craig bot commands, which you may immediately access by typing: Craig, help in a Discord channel.
Part 2 Is Craig Discord Bot Safe?
All Craig web services, like most websites, log all users’ IP addresses to identify and prevent criminal activity. Craig does not keep track of anyone who does not speak in a recorded channel, use any Craig bot commands, or participate in an EnnuiCastr recording.
Part 3 How Do I Enable Craig in Discord?
All Craig web services, like most websites, log all users’ IP addresses to identify and prevent criminal activity. Anyone who does not talk in a recorded channel, use any Discord Craig commands, or engage in a recording using the Craig web app is anonymous to Craig.
Part 4 How to Record Discord Audio Using Craig
Craig will not record without a visible label indicating that it is getting recorded. It records your conversation with others, but it also records each user as a unique audio track, making it much easier to edit or remove specific speakers if necessary.
Follow these simple steps to use a Discord recording bot.
Step 1: Invite Craig
You must first invite Craig to your server to use him. Visit Craig’s website and click the “Invite Craig to Your Discord Server” option to get started.
Now, begin the joining procedure by pressing Invite Craig to your Discord Server. This action will take you to the authorization page for the Discord server. However, before using your server, you must first grant Craig permission to join it.

Step 2: Go to “Add Bot To”
Go to the “Add Bot To” section and select your server, then click “Authorize” to allow the bot to join. Select your Discord server, then click Authorize to enable the Craig bot to join.

Step 3: Join Craig
You should notice a join notification for “Craig” in your server if the process is successful. That’s it! You don’t have to do more; you may start recording your audio channels right away with Craig.
Enter an audio channel and type: Craig:; join to get started.

Step 4: Begin Your Recording
Craig will join the channel and start recording the audio instantly and the bot’s username will update to confirm this. Besides, you’ll also hear an voice from the bot saying, “now recording.”

Step 5: Exit to End Recording
Type: Craig, exit to end a Craig recording. It will force Craig to quit the current channel and stop recording. However, recordings in other channels will continue.

Step 6: Type “: Craig:, Stop”
If you wish to compel Craig to cease recording on all channels, type: Craig:, stop.
You can use this instead of the leave command to end a Craig recording if you’re only recording in one channel.

Step 7: Download or Delete Link
The Craig bot will send you a private message with links to download or delete your talks when you start recording.

Craig will record continuously for up to six hours. You can download a copy of the audio to examine the status of a recording until you download the file.
Part 5 Craig Bot Discord Q&A
Here are some frequently asked questions you need to go through to explore Craig discord bot:
Q: Is Craig bot capable of recording video?
A: Craig recorder keeps track of all your recordings. You may use Craig bot to record your calls in high-quality audio and video as a server owner.
Q: On Discord, how can I record my calls?
A: Select ‘Start Recording’ from the ‘Controls’ area. Discord now allows you to record calls.
Q: How do I make Craig active?
A: Enter an audio channel and type: Craig:, join to get started. Craig will join the channel and begin recording right away; update the bot’s username to reflect this. To confirm, you’ll hear an audio notice from the bot saying, “now recording.” Type: Craig:, exit to end a Craig recording.
Q: Is Craig safe?
A: Craig is in the 17th percentile for safety, which means that 83 percent of cities are safer while 17 percent are riskier. Only Craig’s appropriate borders are considered in this analysis. For a list of adjacent towns, see the table below. During a particular year, the crime rate in Craig is 48.61 per 1,000 residents.
Q: What is the best option to stop a Craig bot?
A: First, type in the audio channel and type: Craig:, join to begin. Craig will join the channel and start recording the bot immediately. You must see the updated bot’s username. After that, you’ll hear an audio note from the bot saying, “now recording.” Type: Craig:, leave to stop a Craig recording bot from all channels**.**

Wondershare Filmora Video Editor doesn’t feature multi-cam support or the latest VR technologies. However, its friendly UI and many effects can help you edit your Discord videos.
For Win 7 or later (64-bit)
For macOS 10.12 or later
PROS
● User-friendly interface
● Inexpensive
● There are numerous effects and overlays.
● Good text and title tools
● In the test, the rendering is quick.
● Regular updates with new effects for video-making and tweaking tools.
● Try it for free option before purchasing.
CONS
● The user interface is not touch-friendly.
● There is no DVD menu authoring or chapter authoring.
● Ending Thoughts →
● What Craig bot is, is it safe to use, and how you can activate it.
● Besides, you also went through the steps to use the Craig bot on Discord and some FAQs.
● Finally, we introduced Filmora, the best video editing software to get excellent results for the Discord platform.
● Thus, now with Discord Craig bot you can make recordings easily using the simple laud down steps. Ensure that you get familiar with the Craig bot commands for a seamless process. Also, get a fantastic video editor by Wondershare; this video editor helps you create amazing videos with effects giving your video that professional touch.
Discord is a free text and audio communication tool for gamers and other communities. The voice channel in the Discord server allows users to speak with many people. On the other hand, Discord does not have a voice recording feature. Users can use third-party solutions to capture their discord audio when speaking via voice chat. When recording someone else’s discussion, be sure you have their permission. We’ll show you how to record discord audio with the Craig Discord bot and record discord audio using Craig in this article. Craig can record discord calls also. Let’s get started!
In this article
01 [What is Craig Bot Discord?](#Part 1)
02 [Is Craig Discord Bot Safe?](#Part 2)
03 [How Do I Enable Craig in Discord?](#Part 3)
04 [How to Record Discord Audio Using Craig](#Part 4)
05 [Craig Bot Discord Q&A](#Part 5)
Part 1 What is Craig Bot Discord?
Craig is a “Discord voice channel recording bot” with multi-track/multi-channel recording capabilities. In short, that means each speaker gets their audio file when Craig records your Discord voice channel.
Craig Recorder keeps track of all your recordings. You may use Craig Bot to record your calls in high-quality audio and video as a server owner.
Craig will record continuously for up to six hours. You can download a copy of the audio to examine the status of a recording until you download the file. The Craig website has a complete set of Craig bot commands, which you may immediately access by typing: Craig, help in a Discord channel.
Part 2 Is Craig Discord Bot Safe?
All Craig web services, like most websites, log all users’ IP addresses to identify and prevent criminal activity. Craig does not keep track of anyone who does not speak in a recorded channel, use any Craig bot commands, or participate in an EnnuiCastr recording.
Part 3 How Do I Enable Craig in Discord?
All Craig web services, like most websites, log all users’ IP addresses to identify and prevent criminal activity. Anyone who does not talk in a recorded channel, use any Discord Craig commands, or engage in a recording using the Craig web app is anonymous to Craig.
Part 4 How to Record Discord Audio Using Craig
Craig will not record without a visible label indicating that it is getting recorded. It records your conversation with others, but it also records each user as a unique audio track, making it much easier to edit or remove specific speakers if necessary.
Follow these simple steps to use a Discord recording bot.
Step 1: Invite Craig
You must first invite Craig to your server to use him. Visit Craig’s website and click the “Invite Craig to Your Discord Server” option to get started.
Now, begin the joining procedure by pressing Invite Craig to your Discord Server. This action will take you to the authorization page for the Discord server. However, before using your server, you must first grant Craig permission to join it.

Step 2: Go to “Add Bot To”
Go to the “Add Bot To” section and select your server, then click “Authorize” to allow the bot to join. Select your Discord server, then click Authorize to enable the Craig bot to join.

Step 3: Join Craig
You should notice a join notification for “Craig” in your server if the process is successful. That’s it! You don’t have to do more; you may start recording your audio channels right away with Craig.
Enter an audio channel and type: Craig:; join to get started.

Step 4: Begin Your Recording
Craig will join the channel and start recording the audio instantly and the bot’s username will update to confirm this. Besides, you’ll also hear an voice from the bot saying, “now recording.”

Step 5: Exit to End Recording
Type: Craig, exit to end a Craig recording. It will force Craig to quit the current channel and stop recording. However, recordings in other channels will continue.

Step 6: Type “: Craig:, Stop”
If you wish to compel Craig to cease recording on all channels, type: Craig:, stop.
You can use this instead of the leave command to end a Craig recording if you’re only recording in one channel.

Step 7: Download or Delete Link
The Craig bot will send you a private message with links to download or delete your talks when you start recording.

Craig will record continuously for up to six hours. You can download a copy of the audio to examine the status of a recording until you download the file.
Part 5 Craig Bot Discord Q&A
Here are some frequently asked questions you need to go through to explore Craig discord bot:
Q: Is Craig bot capable of recording video?
A: Craig recorder keeps track of all your recordings. You may use Craig bot to record your calls in high-quality audio and video as a server owner.
Q: On Discord, how can I record my calls?
A: Select ‘Start Recording’ from the ‘Controls’ area. Discord now allows you to record calls.
Q: How do I make Craig active?
A: Enter an audio channel and type: Craig:, join to get started. Craig will join the channel and begin recording right away; update the bot’s username to reflect this. To confirm, you’ll hear an audio notice from the bot saying, “now recording.” Type: Craig:, exit to end a Craig recording.
Q: Is Craig safe?
A: Craig is in the 17th percentile for safety, which means that 83 percent of cities are safer while 17 percent are riskier. Only Craig’s appropriate borders are considered in this analysis. For a list of adjacent towns, see the table below. During a particular year, the crime rate in Craig is 48.61 per 1,000 residents.
Q: What is the best option to stop a Craig bot?
A: First, type in the audio channel and type: Craig:, join to begin. Craig will join the channel and start recording the bot immediately. You must see the updated bot’s username. After that, you’ll hear an audio note from the bot saying, “now recording.” Type: Craig:, leave to stop a Craig recording bot from all channels**.**

Wondershare Filmora Video Editor doesn’t feature multi-cam support or the latest VR technologies. However, its friendly UI and many effects can help you edit your Discord videos.
For Win 7 or later (64-bit)
For macOS 10.12 or later
PROS
● User-friendly interface
● Inexpensive
● There are numerous effects and overlays.
● Good text and title tools
● In the test, the rendering is quick.
● Regular updates with new effects for video-making and tweaking tools.
● Try it for free option before purchasing.
CONS
● The user interface is not touch-friendly.
● There is no DVD menu authoring or chapter authoring.
● Ending Thoughts →
● What Craig bot is, is it safe to use, and how you can activate it.
● Besides, you also went through the steps to use the Craig bot on Discord and some FAQs.
● Finally, we introduced Filmora, the best video editing software to get excellent results for the Discord platform.
● Thus, now with Discord Craig bot you can make recordings easily using the simple laud down steps. Ensure that you get familiar with the Craig bot commands for a seamless process. Also, get a fantastic video editor by Wondershare; this video editor helps you create amazing videos with effects giving your video that professional touch.
Discord is a free text and audio communication tool for gamers and other communities. The voice channel in the Discord server allows users to speak with many people. On the other hand, Discord does not have a voice recording feature. Users can use third-party solutions to capture their discord audio when speaking via voice chat. When recording someone else’s discussion, be sure you have their permission. We’ll show you how to record discord audio with the Craig Discord bot and record discord audio using Craig in this article. Craig can record discord calls also. Let’s get started!
In this article
01 [What is Craig Bot Discord?](#Part 1)
02 [Is Craig Discord Bot Safe?](#Part 2)
03 [How Do I Enable Craig in Discord?](#Part 3)
04 [How to Record Discord Audio Using Craig](#Part 4)
05 [Craig Bot Discord Q&A](#Part 5)
Part 1 What is Craig Bot Discord?
Craig is a “Discord voice channel recording bot” with multi-track/multi-channel recording capabilities. In short, that means each speaker gets their audio file when Craig records your Discord voice channel.
Craig Recorder keeps track of all your recordings. You may use Craig Bot to record your calls in high-quality audio and video as a server owner.
Craig will record continuously for up to six hours. You can download a copy of the audio to examine the status of a recording until you download the file. The Craig website has a complete set of Craig bot commands, which you may immediately access by typing: Craig, help in a Discord channel.
Part 2 Is Craig Discord Bot Safe?
All Craig web services, like most websites, log all users’ IP addresses to identify and prevent criminal activity. Craig does not keep track of anyone who does not speak in a recorded channel, use any Craig bot commands, or participate in an EnnuiCastr recording.
Part 3 How Do I Enable Craig in Discord?
All Craig web services, like most websites, log all users’ IP addresses to identify and prevent criminal activity. Anyone who does not talk in a recorded channel, use any Discord Craig commands, or engage in a recording using the Craig web app is anonymous to Craig.
Part 4 How to Record Discord Audio Using Craig
Craig will not record without a visible label indicating that it is getting recorded. It records your conversation with others, but it also records each user as a unique audio track, making it much easier to edit or remove specific speakers if necessary.
Follow these simple steps to use a Discord recording bot.
Step 1: Invite Craig
You must first invite Craig to your server to use him. Visit Craig’s website and click the “Invite Craig to Your Discord Server” option to get started.
Now, begin the joining procedure by pressing Invite Craig to your Discord Server. This action will take you to the authorization page for the Discord server. However, before using your server, you must first grant Craig permission to join it.

Step 2: Go to “Add Bot To”
Go to the “Add Bot To” section and select your server, then click “Authorize” to allow the bot to join. Select your Discord server, then click Authorize to enable the Craig bot to join.

Step 3: Join Craig
You should notice a join notification for “Craig” in your server if the process is successful. That’s it! You don’t have to do more; you may start recording your audio channels right away with Craig.
Enter an audio channel and type: Craig:; join to get started.

Step 4: Begin Your Recording
Craig will join the channel and start recording the audio instantly and the bot’s username will update to confirm this. Besides, you’ll also hear an voice from the bot saying, “now recording.”

Step 5: Exit to End Recording
Type: Craig, exit to end a Craig recording. It will force Craig to quit the current channel and stop recording. However, recordings in other channels will continue.

Step 6: Type “: Craig:, Stop”
If you wish to compel Craig to cease recording on all channels, type: Craig:, stop.
You can use this instead of the leave command to end a Craig recording if you’re only recording in one channel.

Step 7: Download or Delete Link
The Craig bot will send you a private message with links to download or delete your talks when you start recording.

Craig will record continuously for up to six hours. You can download a copy of the audio to examine the status of a recording until you download the file.
Part 5 Craig Bot Discord Q&A
Here are some frequently asked questions you need to go through to explore Craig discord bot:
Q: Is Craig bot capable of recording video?
A: Craig recorder keeps track of all your recordings. You may use Craig bot to record your calls in high-quality audio and video as a server owner.
Q: On Discord, how can I record my calls?
A: Select ‘Start Recording’ from the ‘Controls’ area. Discord now allows you to record calls.
Q: How do I make Craig active?
A: Enter an audio channel and type: Craig:, join to get started. Craig will join the channel and begin recording right away; update the bot’s username to reflect this. To confirm, you’ll hear an audio notice from the bot saying, “now recording.” Type: Craig:, exit to end a Craig recording.
Q: Is Craig safe?
A: Craig is in the 17th percentile for safety, which means that 83 percent of cities are safer while 17 percent are riskier. Only Craig’s appropriate borders are considered in this analysis. For a list of adjacent towns, see the table below. During a particular year, the crime rate in Craig is 48.61 per 1,000 residents.
Q: What is the best option to stop a Craig bot?
A: First, type in the audio channel and type: Craig:, join to begin. Craig will join the channel and start recording the bot immediately. You must see the updated bot’s username. After that, you’ll hear an audio note from the bot saying, “now recording.” Type: Craig:, leave to stop a Craig recording bot from all channels**.**

Wondershare Filmora Video Editor doesn’t feature multi-cam support or the latest VR technologies. However, its friendly UI and many effects can help you edit your Discord videos.
For Win 7 or later (64-bit)
For macOS 10.12 or later
PROS
● User-friendly interface
● Inexpensive
● There are numerous effects and overlays.
● Good text and title tools
● In the test, the rendering is quick.
● Regular updates with new effects for video-making and tweaking tools.
● Try it for free option before purchasing.
CONS
● The user interface is not touch-friendly.
● There is no DVD menu authoring or chapter authoring.
● Ending Thoughts →
● What Craig bot is, is it safe to use, and how you can activate it.
● Besides, you also went through the steps to use the Craig bot on Discord and some FAQs.
● Finally, we introduced Filmora, the best video editing software to get excellent results for the Discord platform.
● Thus, now with Discord Craig bot you can make recordings easily using the simple laud down steps. Ensure that you get familiar with the Craig bot commands for a seamless process. Also, get a fantastic video editor by Wondershare; this video editor helps you create amazing videos with effects giving your video that professional touch.
How to Create Discord Logo GIF
How to Make Discord Logo GIF
An easy yet powerful editor
Numerous effects to choose from
Detailed tutorials provided by the official channel
The craze to get a personalized Discord animated icon is increasing with time. As it can deliver your favorite vibe to you and your friends, it’s exciting. Moreover, there are so many options in logos to choose from.
But what if you want a Discord GIF icon for your account? Maybe you’ve seen your friends using it and it’s stunning, isn’t it? That’s why this article is containing all the latest and easiest tricks to make the desired GIF icons Discord. Get the three best ways to make your own Discord logo. And let your friends ask you for the secret.
In this article
01 [Why Discord GIF Become Popular Recently?](#Part 1)
02 [How to Make an Animated Discord Logo Icon (Free Template)](#Part 2)
03 [How to Get Animated Discord PFP](#Part 3)
04 [How to Make Your Discord PFP a GIF on Wondershare Filmora](#Part 4)
Part 1 Why Discord GIF Become Popular Recently?
Think of one online entertainment that Discord is not serving right now. It’s hard to get one in mind. From chatting with friends to watching a movie together, from listening to music to playing together, all the entertainment is under a roof. And who doesn’t want the best appearance on such an engaging platform?
On the other hand, animated icons Discord is immensely popular as they can replicate your expression and mood as you want. Normal profile pictures are back-dated now as these GIFs can make the profile more interesting. You can pick any character or Discord animated icon as per your wish. Moreover, many of these are for free. While using these GIFs on multiple online chatting platforms, users can express their exact thoughts behind a message or reaction. Similarly, by using Discord icons GIFs, people can make their profile more lively and personalized.
Not sure of using GIFs? Imagine your Discord profile with your favorite anime character or a suitable clip. On some social media platforms, we need to be formal out of the profession. But on Discord, you can chill, so your profile. So, why not give it a try?
If you’re here to know the quick guide to set your Discord logo GIF or if you’re facing any error while setting the logo, this article will help you in no time.
Part 2 How to Make an Animated Discord Logo Icon (Free Template)
If you have already decided what will be the type of GIF icon Discord you want, that’s great. Otherwise, decide whether you need something funny or relaxed or it depends on a brand. This decision would help you to pick the template. Similarly, you can make the best Discord GIF icon with the following steps.
● To make a GIF with your choice, use this tool and click on “Edit this template”. This will let you make a customized GIF from any video from your personal collection or download from the Internet.
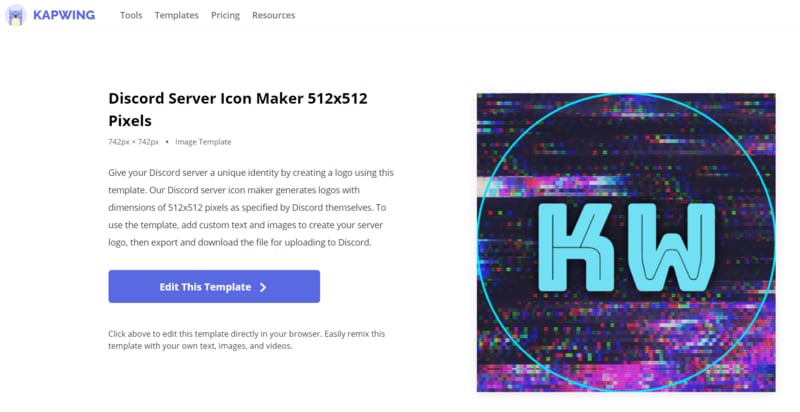
● In the next step, you have to choose the template size from the right-hand side of the window. You can keep to the custom 512x512 size as well.
● Now, on the topmost bar in the window, you can find an option named “Upload”. Click on this option to upload the video from where you want to make your Discord icon GIF.
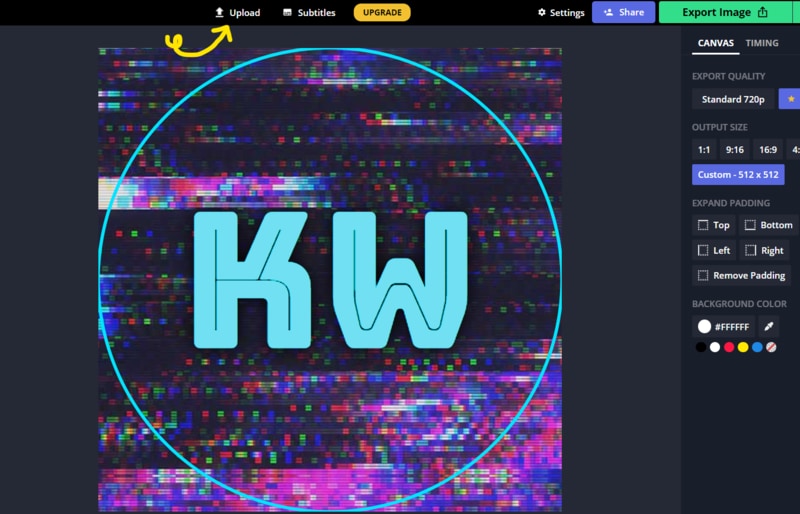
● You can upload the video from the gallery or drag-and-drop to the uploader window. You can also get videos from Google Drive.
● Now, as the video gets uploaded, you need to edit within the edit window. You can set the frame, time, and size from the tools highlighted in the image.
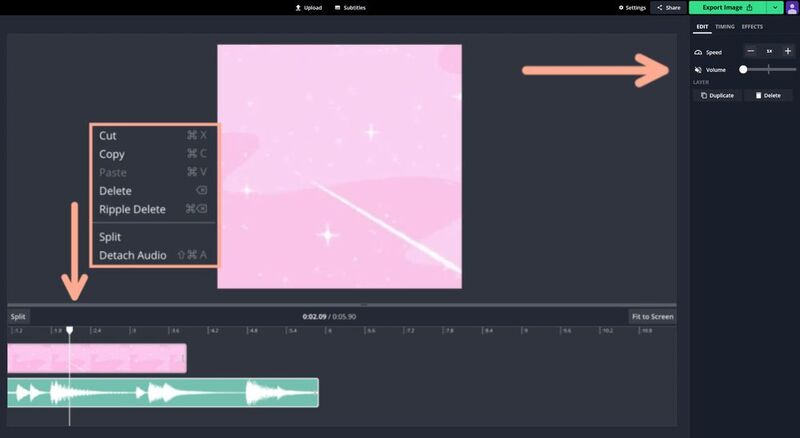
● Now, from the top-right side of the window, get the “Export Video” button. Click on the green arrow beside the button to get a drop-down list. From there click on the “Export as GIF” button to save your Discord icon GIF.
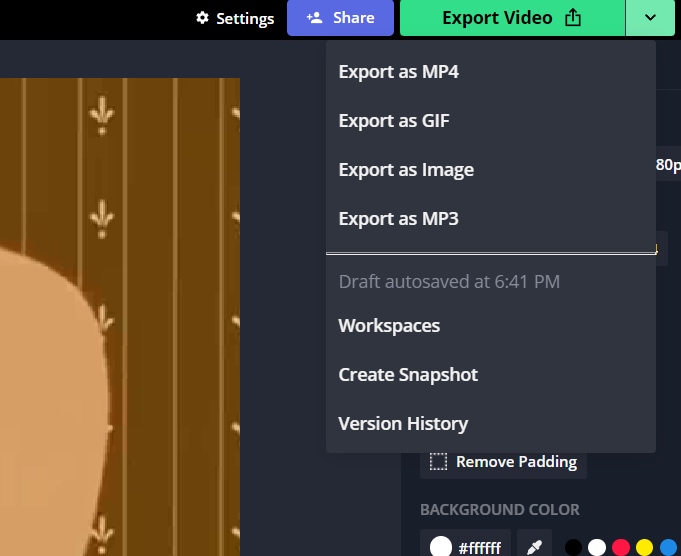
● You can check the download status from the next window.
● To save the recent GIF, click on “Download”. It will take some seconds to get saved to your system.

● Now, open Discord in your system and right-click on your “Server” icon from the left-hand side of the window. As a drop-down menu appears, select “Server Settings” followed by “Overview”.
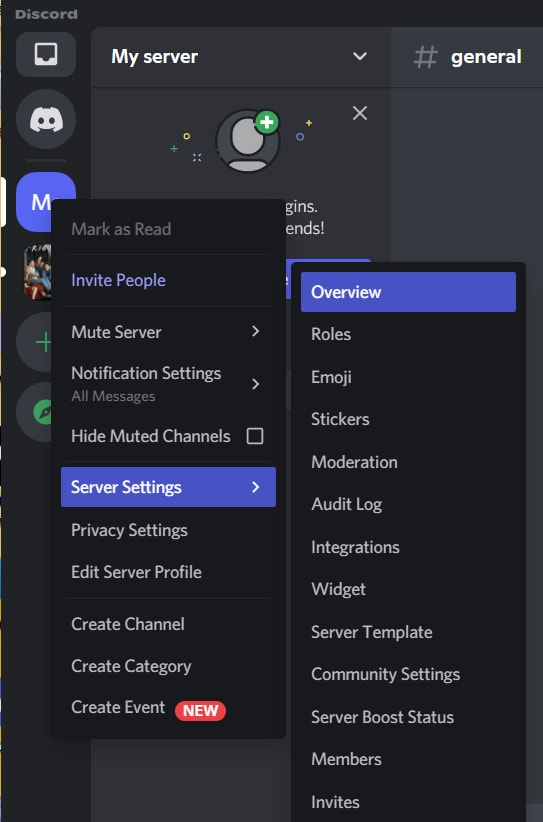
● A new window will be opened with the existing profile picture of the server. To add the GIF icon Discord, click on “Upload Image”.
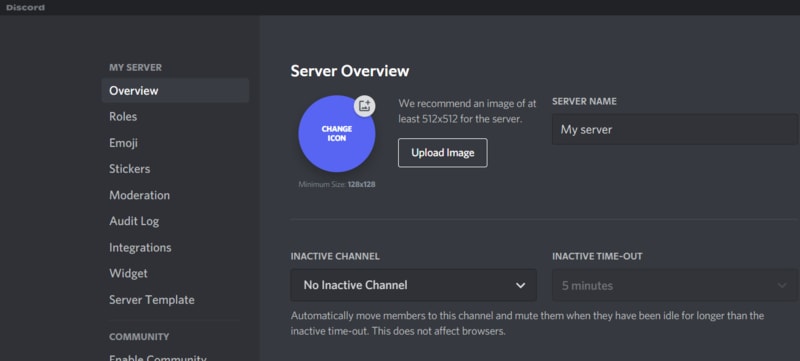
● From the location where you’ve saved the GIF, select it. Then, click on “Apply” to upload the GIF icon to the server profile.

● When uploading is completed, click on the green button named “Save Changes” to save the GIF icons Discord. Make sure that your GIF file size is less than 10.24 MB. Otherwise, you cannot save the GIF and have to resize it again.
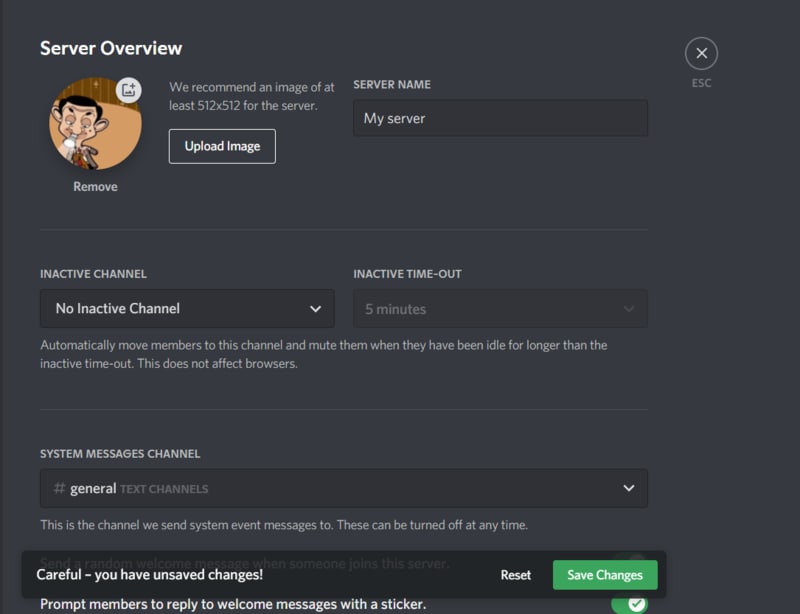
Part 3 How to Get Animated Discord PFP
To set an exciting avatar in your Discord profile, you need to go through the following quick steps. Firstly, note that you need to have Discord Nitro to set a Discord logo GIF in your user profile. Without Nitro, GIF cannot be used as a PFP. Get all the answers for how to use Discord Nitro or how to get animated Discord PFP here.
● Open Discord and from the bottom-left side panel, click on the “Gear” icon that is the “User Settings”. It will present beside your user name on the “Home” window itself.
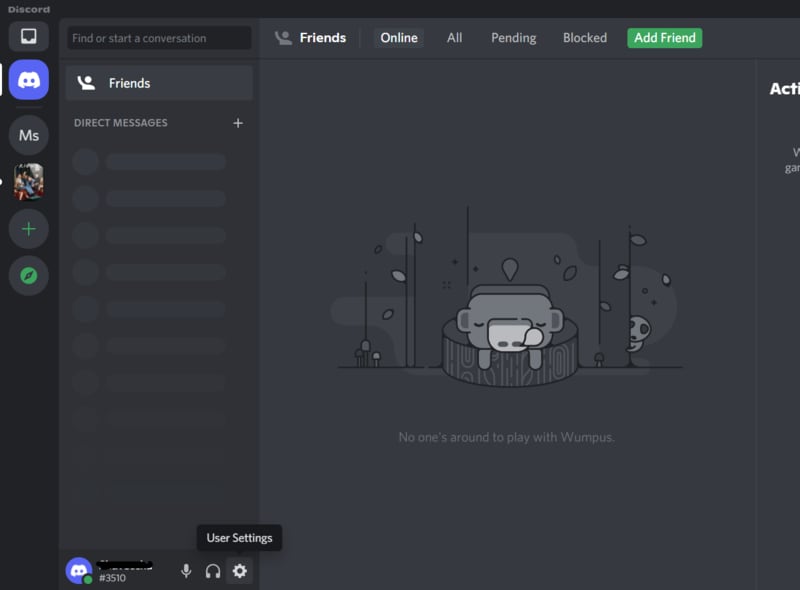
● As the new window gets opened, go to “Discord Nitro” under “Payment Settings”.
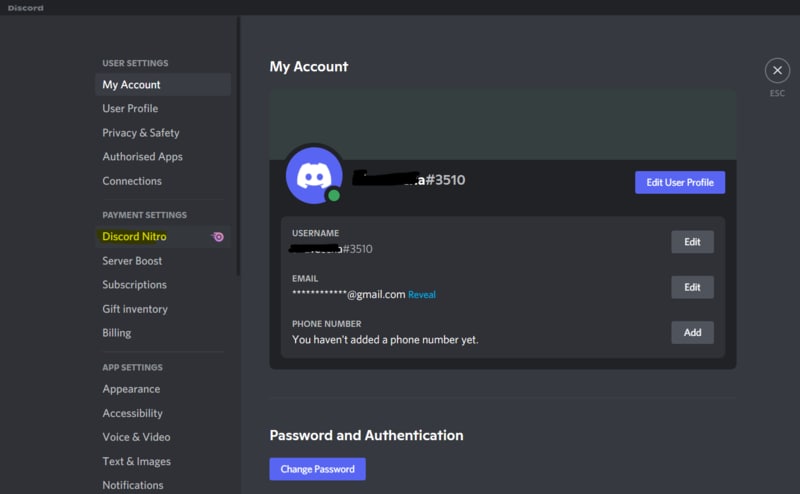
● If you don’t have activated Nitro, then click on “Subscribe” to get a suitable subscription to initiate animated icons Discord for your profile.
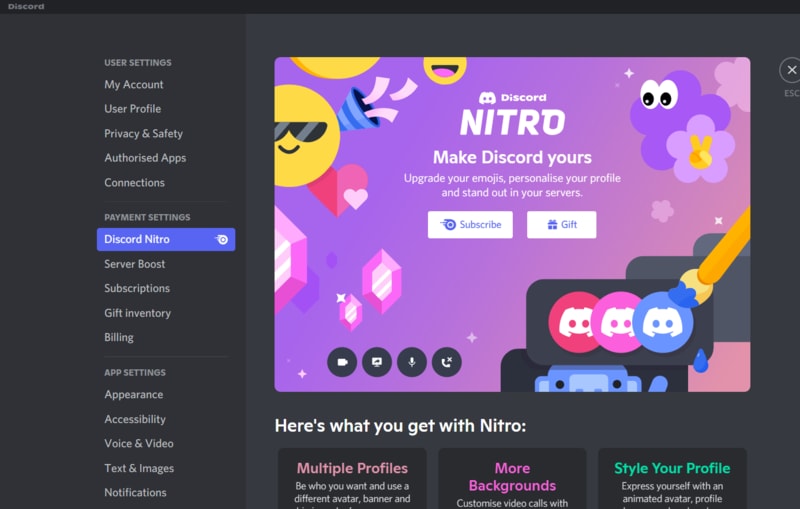
● Then, you’ll be redirected to the subscription options. Choose “Monthly” or “Yearly” subscription and to confirm it, click “Select”. If you choose the yearly plan, you’ll get an additional 16% off.
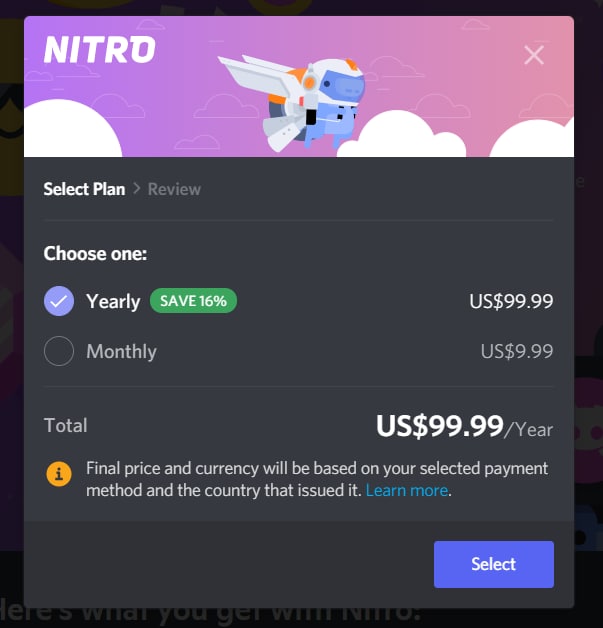
● As Discord Nitro is activated after payment and agreeing to the terms and conditions, you can see a pop-up window. Click on “Sweet” to get started.
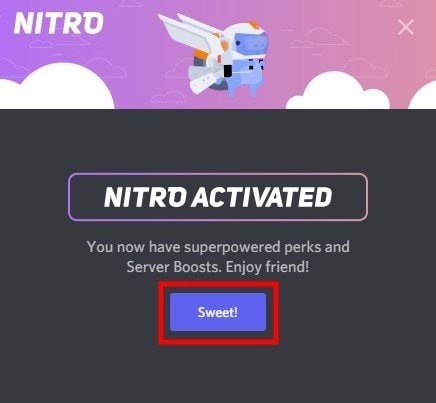
● To set your profile avatar with GIF icon Discord, you need some GIFs downloaded to your system. So, make your GIF according to the last technique we mentioned. Or you can search for GIFs on the Internet like Giphy”, “Tenor”, or “Gfycat”. Save the GIFs as images to the system.
● Go the the “Gear” icon like the 1st step and open “User Settings”. Then, Go to the second option under user settings, “User Profile”. In this window, you can find a blue button named “Change Avatar”. Click on this button to set the Discord icon GIF.
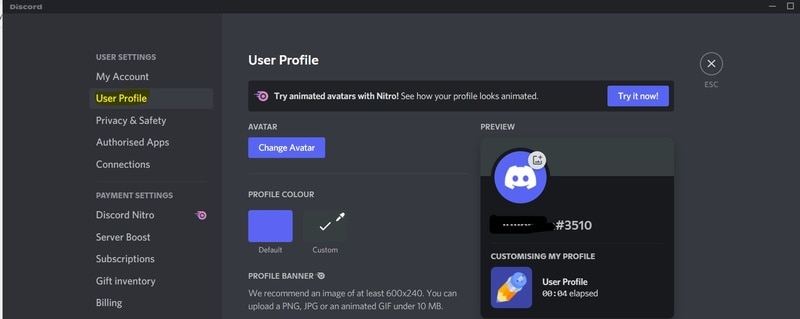
● Now, you need to find the desired GIF from the “File Explorer” opened. Go to the folder where you saved the GIF file. Then, select it and click on “Open”.
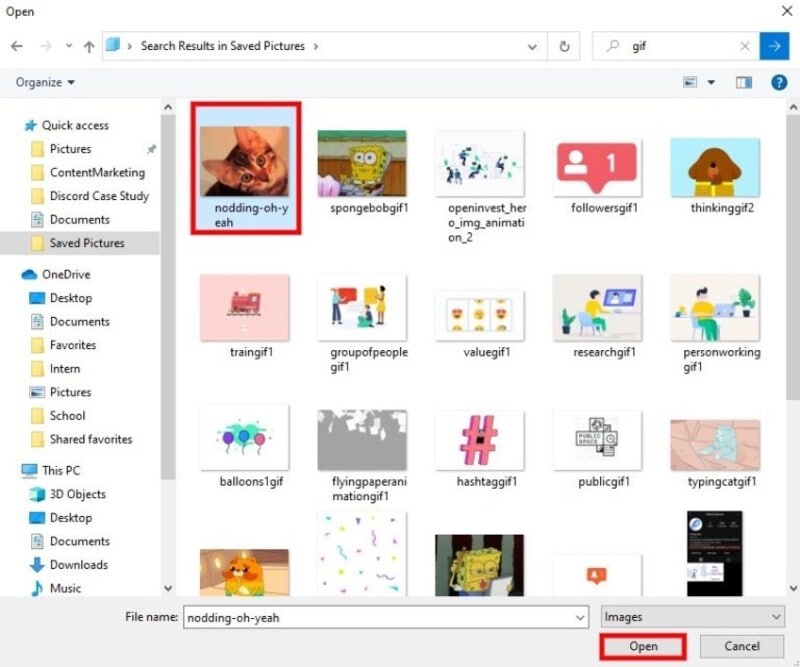
● You can edit the frame of your Discord animated icons in the “edit image’ pop-up window. Then, click on “Apply” to set it finally. If you don’t want to edit the size, click on “Skip” to save the GIF as your profile picture on Discord.
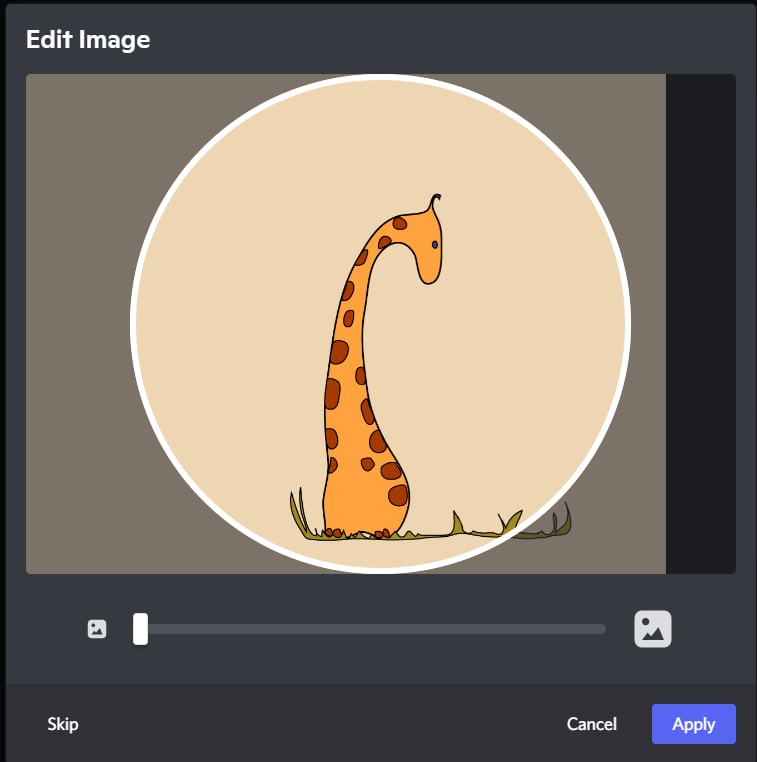
● Check your profile picture now and match it with your expectations. Then click on “Save Changes” to save the icon. If you want some changes, click on “Change Avatar” and select any GIF from the saved discord icons GIF from the file explorer.

Part 4 How to Make Your Discord PFP a GIF on Wondershare Filmora
Wondershare Filmora Video Editor is the latest software where you can create a GIF easily to set as a discord GIF icon. Instead of using the same, existing GIFs, you can make your own now. It will help you to make a unique impression and be satisfied with your personalized account. Moreover, this software is just 4 KB in storage size. So, instan5 download and installation is not a problem at all.

Wondershare Filmora - Best Video Editor for Mac/Windows
5,481,435 people have downloaded it.
Build unique custom animations without breaking a sweat.
Focus on creating epic stories and leave the details to Filmora’s auto features.
Start a creative adventure with drag & drop effects and endless possibilities.
Filmora simplifies advanced features to save you time and effort.
Filmora cuts out repetition so you can move on to your next creative breakthrough.
Let’s go through the steps to understand the procedure to make GIF icons discord on Wondershare Filmora.
● Download and Install Wondershare Filmora in your system. It won’t take more than 10 minutes for the complete installation process. This software is available for both Windows and Mac OS.
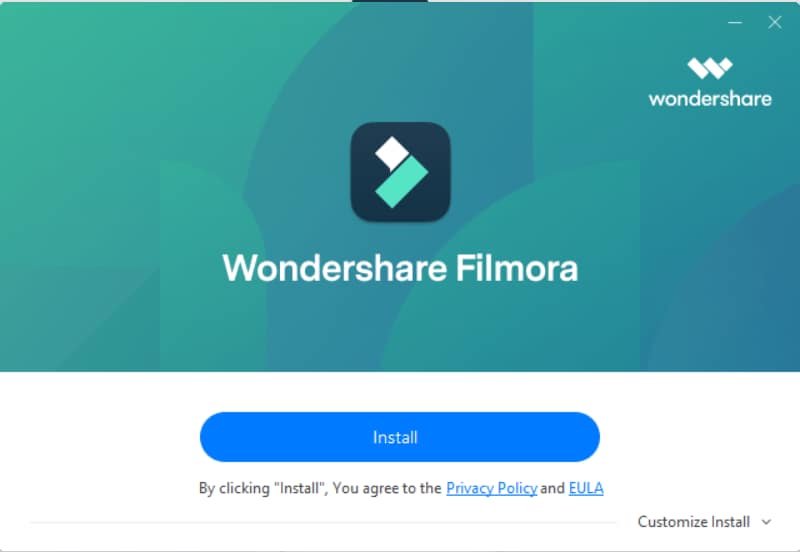
● You can observe the installation status on your screen.
● As the installation is done, click on “Start Now” to open the software on the computer. A new black window will be opened on the screen.
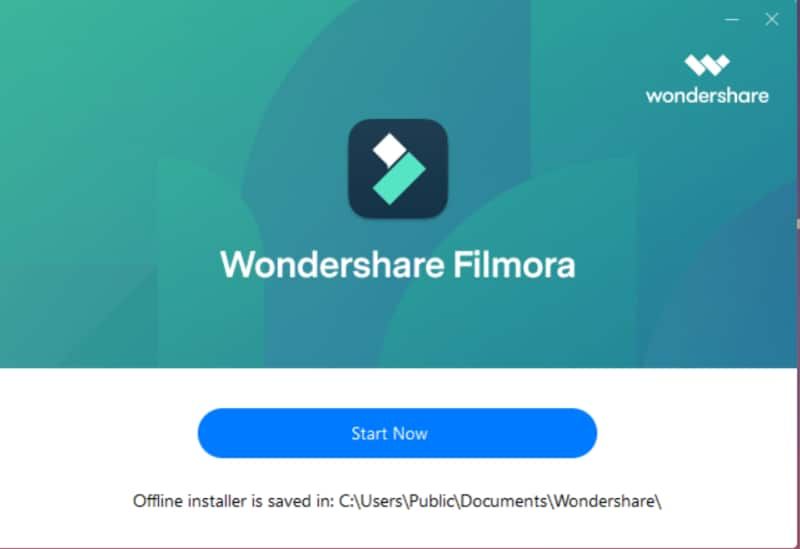
● Click on the “Import Media Files Here” section to select an editable video file or a collection of photos to make the GIF.
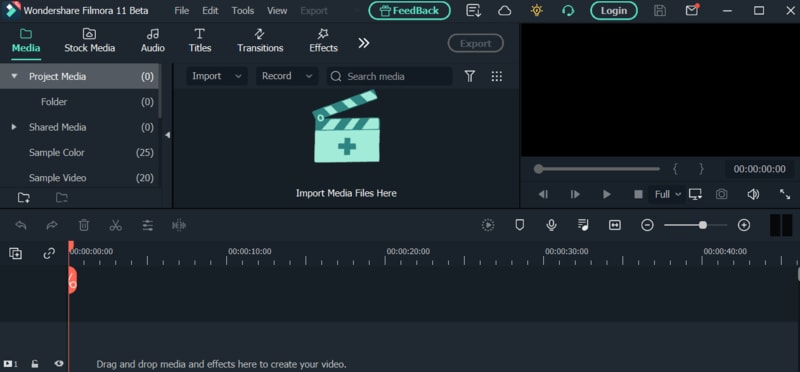
● As you select the desired video or images to make a discord animated icon from, you can find plenty of editing tools in the bottom section of the window. You can “crop”, “edit”, change the “duration” or apply “chroma-key” to the selected file. You can observe the respective changes on the right-hand side of the window.

● When you complete the editing process, move to the right-hand section to play the GIF with the triangular-shaped button. It will give you a preview of your edited GIF for discord.
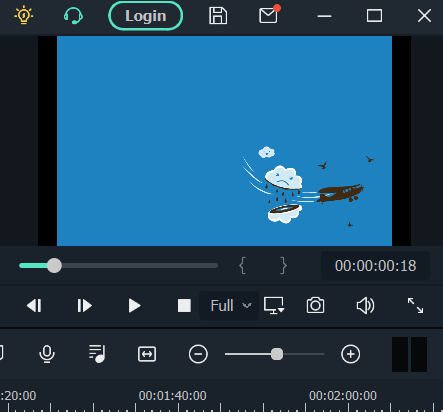
● If you want to add text to your GIF to make it more interactive, it’s possible with Wondershare Filmora. Firstly, select the “T” button or “Title” option from the menubar in the window. There’ll be multiple title templates available. Choose any one of them and click on the green “Down arrow” on the template.
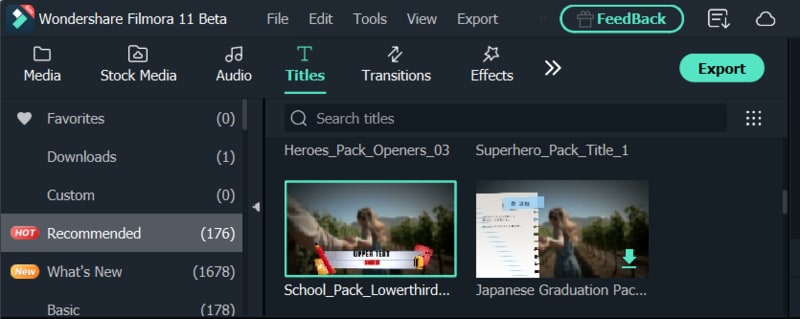
● The template will be loaded and then you can click on the small, green “+” button on the selected template to add it to your GIF. Now, click on the GIF frame to edit the text. Then click on “OK”.
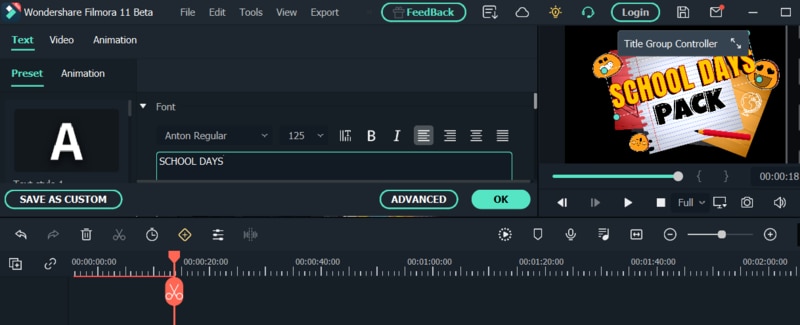
● Now, save the discord icon GIF with a proper gif extension and then upload it as your profile picture.
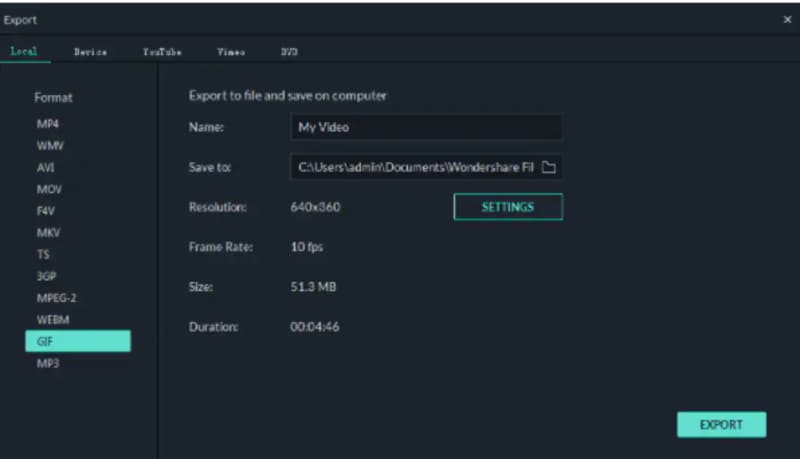
● Ending Thoughts →
● This article includes three different ways to make discord icons GIF easily to make a customized avatar.
● There’s no need to stick to the old profile picture in your discord account.
● With these quick and easy steps, creating and setting a GIF as a profile icon would be very easy.
The craze to get a personalized Discord animated icon is increasing with time. As it can deliver your favorite vibe to you and your friends, it’s exciting. Moreover, there are so many options in logos to choose from.
But what if you want a Discord GIF icon for your account? Maybe you’ve seen your friends using it and it’s stunning, isn’t it? That’s why this article is containing all the latest and easiest tricks to make the desired GIF icons Discord. Get the three best ways to make your own Discord logo. And let your friends ask you for the secret.
In this article
01 [Why Discord GIF Become Popular Recently?](#Part 1)
02 [How to Make an Animated Discord Logo Icon (Free Template)](#Part 2)
03 [How to Get Animated Discord PFP](#Part 3)
04 [How to Make Your Discord PFP a GIF on Wondershare Filmora](#Part 4)
Part 1 Why Discord GIF Become Popular Recently?
Think of one online entertainment that Discord is not serving right now. It’s hard to get one in mind. From chatting with friends to watching a movie together, from listening to music to playing together, all the entertainment is under a roof. And who doesn’t want the best appearance on such an engaging platform?
On the other hand, animated icons Discord is immensely popular as they can replicate your expression and mood as you want. Normal profile pictures are back-dated now as these GIFs can make the profile more interesting. You can pick any character or Discord animated icon as per your wish. Moreover, many of these are for free. While using these GIFs on multiple online chatting platforms, users can express their exact thoughts behind a message or reaction. Similarly, by using Discord icons GIFs, people can make their profile more lively and personalized.
Not sure of using GIFs? Imagine your Discord profile with your favorite anime character or a suitable clip. On some social media platforms, we need to be formal out of the profession. But on Discord, you can chill, so your profile. So, why not give it a try?
If you’re here to know the quick guide to set your Discord logo GIF or if you’re facing any error while setting the logo, this article will help you in no time.
Part 2 How to Make an Animated Discord Logo Icon (Free Template)
If you have already decided what will be the type of GIF icon Discord you want, that’s great. Otherwise, decide whether you need something funny or relaxed or it depends on a brand. This decision would help you to pick the template. Similarly, you can make the best Discord GIF icon with the following steps.
● To make a GIF with your choice, use this tool and click on “Edit this template”. This will let you make a customized GIF from any video from your personal collection or download from the Internet.

● In the next step, you have to choose the template size from the right-hand side of the window. You can keep to the custom 512x512 size as well.
● Now, on the topmost bar in the window, you can find an option named “Upload”. Click on this option to upload the video from where you want to make your Discord icon GIF.

● You can upload the video from the gallery or drag-and-drop to the uploader window. You can also get videos from Google Drive.
● Now, as the video gets uploaded, you need to edit within the edit window. You can set the frame, time, and size from the tools highlighted in the image.

● Now, from the top-right side of the window, get the “Export Video” button. Click on the green arrow beside the button to get a drop-down list. From there click on the “Export as GIF” button to save your Discord icon GIF.

● You can check the download status from the next window.

● To save the recent GIF, click on “Download”. It will take some seconds to get saved to your system.

● Now, open Discord in your system and right-click on your “Server” icon from the left-hand side of the window. As a drop-down menu appears, select “Server Settings” followed by “Overview”.

● A new window will be opened with the existing profile picture of the server. To add the GIF icon Discord, click on “Upload Image”.

● From the location where you’ve saved the GIF, select it. Then, click on “Apply” to upload the GIF icon to the server profile.

● When uploading is completed, click on the green button named “Save Changes” to save the GIF icons Discord. Make sure that your GIF file size is less than 10.24 MB. Otherwise, you cannot save the GIF and have to resize it again.

Part 3 How to Get Animated Discord PFP
To set an exciting avatar in your Discord profile, you need to go through the following quick steps. Firstly, note that you need to have Discord Nitro to set a Discord logo GIF in your user profile. Without Nitro, GIF cannot be used as a PFP. Get all the answers for how to use Discord Nitro or how to get animated Discord PFP here.
● Open Discord and from the bottom-left side panel, click on the “Gear” icon that is the “User Settings”. It will present beside your user name on the “Home” window itself.

● As the new window gets opened, go to “Discord Nitro” under “Payment Settings”.

● If you don’t have activated Nitro, then click on “Subscribe” to get a suitable subscription to initiate animated icons Discord for your profile.

● Then, you’ll be redirected to the subscription options. Choose “Monthly” or “Yearly” subscription and to confirm it, click “Select”. If you choose the yearly plan, you’ll get an additional 16% off.

● As Discord Nitro is activated after payment and agreeing to the terms and conditions, you can see a pop-up window. Click on “Sweet” to get started.

● To set your profile avatar with GIF icon Discord, you need some GIFs downloaded to your system. So, make your GIF according to the last technique we mentioned. Or you can search for GIFs on the Internet like Giphy”, “Tenor”, or “Gfycat”. Save the GIFs as images to the system.
● Go the the “Gear” icon like the 1st step and open “User Settings”. Then, Go to the second option under user settings, “User Profile”. In this window, you can find a blue button named “Change Avatar”. Click on this button to set the Discord icon GIF.

● Now, you need to find the desired GIF from the “File Explorer” opened. Go to the folder where you saved the GIF file. Then, select it and click on “Open”.

● You can edit the frame of your Discord animated icons in the “edit image’ pop-up window. Then, click on “Apply” to set it finally. If you don’t want to edit the size, click on “Skip” to save the GIF as your profile picture on Discord.

● Check your profile picture now and match it with your expectations. Then click on “Save Changes” to save the icon. If you want some changes, click on “Change Avatar” and select any GIF from the saved discord icons GIF from the file explorer.

Part 4 How to Make Your Discord PFP a GIF on Wondershare Filmora
Wondershare Filmora Video Editor is the latest software where you can create a GIF easily to set as a discord GIF icon. Instead of using the same, existing GIFs, you can make your own now. It will help you to make a unique impression and be satisfied with your personalized account. Moreover, this software is just 4 KB in storage size. So, instan5 download and installation is not a problem at all.

Wondershare Filmora - Best Video Editor for Mac/Windows
5,481,435 people have downloaded it.
Build unique custom animations without breaking a sweat.
Focus on creating epic stories and leave the details to Filmora’s auto features.
Start a creative adventure with drag & drop effects and endless possibilities.
Filmora simplifies advanced features to save you time and effort.
Filmora cuts out repetition so you can move on to your next creative breakthrough.
Let’s go through the steps to understand the procedure to make GIF icons discord on Wondershare Filmora.
● Download and Install Wondershare Filmora in your system. It won’t take more than 10 minutes for the complete installation process. This software is available for both Windows and Mac OS.

● You can observe the installation status on your screen.

● As the installation is done, click on “Start Now” to open the software on the computer. A new black window will be opened on the screen.

● Click on the “Import Media Files Here” section to select an editable video file or a collection of photos to make the GIF.

● As you select the desired video or images to make a discord animated icon from, you can find plenty of editing tools in the bottom section of the window. You can “crop”, “edit”, change the “duration” or apply “chroma-key” to the selected file. You can observe the respective changes on the right-hand side of the window.

● When you complete the editing process, move to the right-hand section to play the GIF with the triangular-shaped button. It will give you a preview of your edited GIF for discord.

● If you want to add text to your GIF to make it more interactive, it’s possible with Wondershare Filmora. Firstly, select the “T” button or “Title” option from the menubar in the window. There’ll be multiple title templates available. Choose any one of them and click on the green “Down arrow” on the template.

● The template will be loaded and then you can click on the small, green “+” button on the selected template to add it to your GIF. Now, click on the GIF frame to edit the text. Then click on “OK”.

● Now, save the discord icon GIF with a proper gif extension and then upload it as your profile picture.

● Ending Thoughts →
● This article includes three different ways to make discord icons GIF easily to make a customized avatar.
● There’s no need to stick to the old profile picture in your discord account.
● With these quick and easy steps, creating and setting a GIF as a profile icon would be very easy.
The craze to get a personalized Discord animated icon is increasing with time. As it can deliver your favorite vibe to you and your friends, it’s exciting. Moreover, there are so many options in logos to choose from.
But what if you want a Discord GIF icon for your account? Maybe you’ve seen your friends using it and it’s stunning, isn’t it? That’s why this article is containing all the latest and easiest tricks to make the desired GIF icons Discord. Get the three best ways to make your own Discord logo. And let your friends ask you for the secret.
In this article
01 [Why Discord GIF Become Popular Recently?](#Part 1)
02 [How to Make an Animated Discord Logo Icon (Free Template)](#Part 2)
03 [How to Get Animated Discord PFP](#Part 3)
04 [How to Make Your Discord PFP a GIF on Wondershare Filmora](#Part 4)
Part 1 Why Discord GIF Become Popular Recently?
Think of one online entertainment that Discord is not serving right now. It’s hard to get one in mind. From chatting with friends to watching a movie together, from listening to music to playing together, all the entertainment is under a roof. And who doesn’t want the best appearance on such an engaging platform?
On the other hand, animated icons Discord is immensely popular as they can replicate your expression and mood as you want. Normal profile pictures are back-dated now as these GIFs can make the profile more interesting. You can pick any character or Discord animated icon as per your wish. Moreover, many of these are for free. While using these GIFs on multiple online chatting platforms, users can express their exact thoughts behind a message or reaction. Similarly, by using Discord icons GIFs, people can make their profile more lively and personalized.
Not sure of using GIFs? Imagine your Discord profile with your favorite anime character or a suitable clip. On some social media platforms, we need to be formal out of the profession. But on Discord, you can chill, so your profile. So, why not give it a try?
If you’re here to know the quick guide to set your Discord logo GIF or if you’re facing any error while setting the logo, this article will help you in no time.
Part 2 How to Make an Animated Discord Logo Icon (Free Template)
If you have already decided what will be the type of GIF icon Discord you want, that’s great. Otherwise, decide whether you need something funny or relaxed or it depends on a brand. This decision would help you to pick the template. Similarly, you can make the best Discord GIF icon with the following steps.
● To make a GIF with your choice, use this tool and click on “Edit this template”. This will let you make a customized GIF from any video from your personal collection or download from the Internet.

● In the next step, you have to choose the template size from the right-hand side of the window. You can keep to the custom 512x512 size as well.
● Now, on the topmost bar in the window, you can find an option named “Upload”. Click on this option to upload the video from where you want to make your Discord icon GIF.

● You can upload the video from the gallery or drag-and-drop to the uploader window. You can also get videos from Google Drive.
● Now, as the video gets uploaded, you need to edit within the edit window. You can set the frame, time, and size from the tools highlighted in the image.

● Now, from the top-right side of the window, get the “Export Video” button. Click on the green arrow beside the button to get a drop-down list. From there click on the “Export as GIF” button to save your Discord icon GIF.

● You can check the download status from the next window.

● To save the recent GIF, click on “Download”. It will take some seconds to get saved to your system.

● Now, open Discord in your system and right-click on your “Server” icon from the left-hand side of the window. As a drop-down menu appears, select “Server Settings” followed by “Overview”.

● A new window will be opened with the existing profile picture of the server. To add the GIF icon Discord, click on “Upload Image”.

● From the location where you’ve saved the GIF, select it. Then, click on “Apply” to upload the GIF icon to the server profile.

● When uploading is completed, click on the green button named “Save Changes” to save the GIF icons Discord. Make sure that your GIF file size is less than 10.24 MB. Otherwise, you cannot save the GIF and have to resize it again.

Part 3 How to Get Animated Discord PFP
To set an exciting avatar in your Discord profile, you need to go through the following quick steps. Firstly, note that you need to have Discord Nitro to set a Discord logo GIF in your user profile. Without Nitro, GIF cannot be used as a PFP. Get all the answers for how to use Discord Nitro or how to get animated Discord PFP here.
● Open Discord and from the bottom-left side panel, click on the “Gear” icon that is the “User Settings”. It will present beside your user name on the “Home” window itself.

● As the new window gets opened, go to “Discord Nitro” under “Payment Settings”.

● If you don’t have activated Nitro, then click on “Subscribe” to get a suitable subscription to initiate animated icons Discord for your profile.

● Then, you’ll be redirected to the subscription options. Choose “Monthly” or “Yearly” subscription and to confirm it, click “Select”. If you choose the yearly plan, you’ll get an additional 16% off.

● As Discord Nitro is activated after payment and agreeing to the terms and conditions, you can see a pop-up window. Click on “Sweet” to get started.

● To set your profile avatar with GIF icon Discord, you need some GIFs downloaded to your system. So, make your GIF according to the last technique we mentioned. Or you can search for GIFs on the Internet like Giphy”, “Tenor”, or “Gfycat”. Save the GIFs as images to the system.
● Go the the “Gear” icon like the 1st step and open “User Settings”. Then, Go to the second option under user settings, “User Profile”. In this window, you can find a blue button named “Change Avatar”. Click on this button to set the Discord icon GIF.

● Now, you need to find the desired GIF from the “File Explorer” opened. Go to the folder where you saved the GIF file. Then, select it and click on “Open”.

● You can edit the frame of your Discord animated icons in the “edit image’ pop-up window. Then, click on “Apply” to set it finally. If you don’t want to edit the size, click on “Skip” to save the GIF as your profile picture on Discord.

● Check your profile picture now and match it with your expectations. Then click on “Save Changes” to save the icon. If you want some changes, click on “Change Avatar” and select any GIF from the saved discord icons GIF from the file explorer.

Part 4 How to Make Your Discord PFP a GIF on Wondershare Filmora
Wondershare Filmora Video Editor is the latest software where you can create a GIF easily to set as a discord GIF icon. Instead of using the same, existing GIFs, you can make your own now. It will help you to make a unique impression and be satisfied with your personalized account. Moreover, this software is just 4 KB in storage size. So, instan5 download and installation is not a problem at all.

Wondershare Filmora - Best Video Editor for Mac/Windows
5,481,435 people have downloaded it.
Build unique custom animations without breaking a sweat.
Focus on creating epic stories and leave the details to Filmora’s auto features.
Start a creative adventure with drag & drop effects and endless possibilities.
Filmora simplifies advanced features to save you time and effort.
Filmora cuts out repetition so you can move on to your next creative breakthrough.
Let’s go through the steps to understand the procedure to make GIF icons discord on Wondershare Filmora.
● Download and Install Wondershare Filmora in your system. It won’t take more than 10 minutes for the complete installation process. This software is available for both Windows and Mac OS.

● You can observe the installation status on your screen.

● As the installation is done, click on “Start Now” to open the software on the computer. A new black window will be opened on the screen.

● Click on the “Import Media Files Here” section to select an editable video file or a collection of photos to make the GIF.

● As you select the desired video or images to make a discord animated icon from, you can find plenty of editing tools in the bottom section of the window. You can “crop”, “edit”, change the “duration” or apply “chroma-key” to the selected file. You can observe the respective changes on the right-hand side of the window.

● When you complete the editing process, move to the right-hand section to play the GIF with the triangular-shaped button. It will give you a preview of your edited GIF for discord.

● If you want to add text to your GIF to make it more interactive, it’s possible with Wondershare Filmora. Firstly, select the “T” button or “Title” option from the menubar in the window. There’ll be multiple title templates available. Choose any one of them and click on the green “Down arrow” on the template.

● The template will be loaded and then you can click on the small, green “+” button on the selected template to add it to your GIF. Now, click on the GIF frame to edit the text. Then click on “OK”.

● Now, save the discord icon GIF with a proper gif extension and then upload it as your profile picture.

● Ending Thoughts →
● This article includes three different ways to make discord icons GIF easily to make a customized avatar.
● There’s no need to stick to the old profile picture in your discord account.
● With these quick and easy steps, creating and setting a GIF as a profile icon would be very easy.
The craze to get a personalized Discord animated icon is increasing with time. As it can deliver your favorite vibe to you and your friends, it’s exciting. Moreover, there are so many options in logos to choose from.
But what if you want a Discord GIF icon for your account? Maybe you’ve seen your friends using it and it’s stunning, isn’t it? That’s why this article is containing all the latest and easiest tricks to make the desired GIF icons Discord. Get the three best ways to make your own Discord logo. And let your friends ask you for the secret.
In this article
01 [Why Discord GIF Become Popular Recently?](#Part 1)
02 [How to Make an Animated Discord Logo Icon (Free Template)](#Part 2)
03 [How to Get Animated Discord PFP](#Part 3)
04 [How to Make Your Discord PFP a GIF on Wondershare Filmora](#Part 4)
Part 1 Why Discord GIF Become Popular Recently?
Think of one online entertainment that Discord is not serving right now. It’s hard to get one in mind. From chatting with friends to watching a movie together, from listening to music to playing together, all the entertainment is under a roof. And who doesn’t want the best appearance on such an engaging platform?
On the other hand, animated icons Discord is immensely popular as they can replicate your expression and mood as you want. Normal profile pictures are back-dated now as these GIFs can make the profile more interesting. You can pick any character or Discord animated icon as per your wish. Moreover, many of these are for free. While using these GIFs on multiple online chatting platforms, users can express their exact thoughts behind a message or reaction. Similarly, by using Discord icons GIFs, people can make their profile more lively and personalized.
Not sure of using GIFs? Imagine your Discord profile with your favorite anime character or a suitable clip. On some social media platforms, we need to be formal out of the profession. But on Discord, you can chill, so your profile. So, why not give it a try?
If you’re here to know the quick guide to set your Discord logo GIF or if you’re facing any error while setting the logo, this article will help you in no time.
Part 2 How to Make an Animated Discord Logo Icon (Free Template)
If you have already decided what will be the type of GIF icon Discord you want, that’s great. Otherwise, decide whether you need something funny or relaxed or it depends on a brand. This decision would help you to pick the template. Similarly, you can make the best Discord GIF icon with the following steps.
● To make a GIF with your choice, use this tool and click on “Edit this template”. This will let you make a customized GIF from any video from your personal collection or download from the Internet.

● In the next step, you have to choose the template size from the right-hand side of the window. You can keep to the custom 512x512 size as well.
● Now, on the topmost bar in the window, you can find an option named “Upload”. Click on this option to upload the video from where you want to make your Discord icon GIF.

● You can upload the video from the gallery or drag-and-drop to the uploader window. You can also get videos from Google Drive.
● Now, as the video gets uploaded, you need to edit within the edit window. You can set the frame, time, and size from the tools highlighted in the image.

● Now, from the top-right side of the window, get the “Export Video” button. Click on the green arrow beside the button to get a drop-down list. From there click on the “Export as GIF” button to save your Discord icon GIF.

● You can check the download status from the next window.

● To save the recent GIF, click on “Download”. It will take some seconds to get saved to your system.

● Now, open Discord in your system and right-click on your “Server” icon from the left-hand side of the window. As a drop-down menu appears, select “Server Settings” followed by “Overview”.

● A new window will be opened with the existing profile picture of the server. To add the GIF icon Discord, click on “Upload Image”.

● From the location where you’ve saved the GIF, select it. Then, click on “Apply” to upload the GIF icon to the server profile.

● When uploading is completed, click on the green button named “Save Changes” to save the GIF icons Discord. Make sure that your GIF file size is less than 10.24 MB. Otherwise, you cannot save the GIF and have to resize it again.

Part 3 How to Get Animated Discord PFP
To set an exciting avatar in your Discord profile, you need to go through the following quick steps. Firstly, note that you need to have Discord Nitro to set a Discord logo GIF in your user profile. Without Nitro, GIF cannot be used as a PFP. Get all the answers for how to use Discord Nitro or how to get animated Discord PFP here.
● Open Discord and from the bottom-left side panel, click on the “Gear” icon that is the “User Settings”. It will present beside your user name on the “Home” window itself.

● As the new window gets opened, go to “Discord Nitro” under “Payment Settings”.

● If you don’t have activated Nitro, then click on “Subscribe” to get a suitable subscription to initiate animated icons Discord for your profile.

● Then, you’ll be redirected to the subscription options. Choose “Monthly” or “Yearly” subscription and to confirm it, click “Select”. If you choose the yearly plan, you’ll get an additional 16% off.

● As Discord Nitro is activated after payment and agreeing to the terms and conditions, you can see a pop-up window. Click on “Sweet” to get started.

● To set your profile avatar with GIF icon Discord, you need some GIFs downloaded to your system. So, make your GIF according to the last technique we mentioned. Or you can search for GIFs on the Internet like Giphy”, “Tenor”, or “Gfycat”. Save the GIFs as images to the system.
● Go the the “Gear” icon like the 1st step and open “User Settings”. Then, Go to the second option under user settings, “User Profile”. In this window, you can find a blue button named “Change Avatar”. Click on this button to set the Discord icon GIF.

● Now, you need to find the desired GIF from the “File Explorer” opened. Go to the folder where you saved the GIF file. Then, select it and click on “Open”.

● You can edit the frame of your Discord animated icons in the “edit image’ pop-up window. Then, click on “Apply” to set it finally. If you don’t want to edit the size, click on “Skip” to save the GIF as your profile picture on Discord.

● Check your profile picture now and match it with your expectations. Then click on “Save Changes” to save the icon. If you want some changes, click on “Change Avatar” and select any GIF from the saved discord icons GIF from the file explorer.

Part 4 How to Make Your Discord PFP a GIF on Wondershare Filmora
Wondershare Filmora Video Editor is the latest software where you can create a GIF easily to set as a discord GIF icon. Instead of using the same, existing GIFs, you can make your own now. It will help you to make a unique impression and be satisfied with your personalized account. Moreover, this software is just 4 KB in storage size. So, instan5 download and installation is not a problem at all.

Wondershare Filmora - Best Video Editor for Mac/Windows
5,481,435 people have downloaded it.
Build unique custom animations without breaking a sweat.
Focus on creating epic stories and leave the details to Filmora’s auto features.
Start a creative adventure with drag & drop effects and endless possibilities.
Filmora simplifies advanced features to save you time and effort.
Filmora cuts out repetition so you can move on to your next creative breakthrough.
Let’s go through the steps to understand the procedure to make GIF icons discord on Wondershare Filmora.
● Download and Install Wondershare Filmora in your system. It won’t take more than 10 minutes for the complete installation process. This software is available for both Windows and Mac OS.

● You can observe the installation status on your screen.

● As the installation is done, click on “Start Now” to open the software on the computer. A new black window will be opened on the screen.

● Click on the “Import Media Files Here” section to select an editable video file or a collection of photos to make the GIF.

● As you select the desired video or images to make a discord animated icon from, you can find plenty of editing tools in the bottom section of the window. You can “crop”, “edit”, change the “duration” or apply “chroma-key” to the selected file. You can observe the respective changes on the right-hand side of the window.

● When you complete the editing process, move to the right-hand section to play the GIF with the triangular-shaped button. It will give you a preview of your edited GIF for discord.

● If you want to add text to your GIF to make it more interactive, it’s possible with Wondershare Filmora. Firstly, select the “T” button or “Title” option from the menubar in the window. There’ll be multiple title templates available. Choose any one of them and click on the green “Down arrow” on the template.

● The template will be loaded and then you can click on the small, green “+” button on the selected template to add it to your GIF. Now, click on the GIF frame to edit the text. Then click on “OK”.

● Now, save the discord icon GIF with a proper gif extension and then upload it as your profile picture.

● Ending Thoughts →
● This article includes three different ways to make discord icons GIF easily to make a customized avatar.
● There’s no need to stick to the old profile picture in your discord account.
● With these quick and easy steps, creating and setting a GIF as a profile icon would be very easy.
Also read:
- Doable Ways to Create Transparent Background in Procreate for 2024
- Updated In 2024, Best AR Video Apps
- Updated Discover How to Create Professional Foggy Text Reflection Effects in the Filmora Video Editor
- In 2024, So, without Wasting Time, Let Me Show You How to Mask a Video in Wondershare Filmora. Lets Get Started
- New 2024 Approved Do You Waste Time Making Transparent Background in Paint
- Updated 2024 Approved How to Use LUTS to Color Grade on Your iPhone
- New Being an After Effects Editor, You Often Find Yourself the Need to Add Motion Blur After Effects. This Guide Has Got You Covered. Follow to Find Out How to Add Motion Blur in After Effects for 2024
- In 2024, How to Create Realistic Fire Effects
- New Master Premiere Pro Custom Sequence Presets
- New In 2024, 10 Best Camera for YouTube Beginners
- Updated | Change Speed of a Video on iPhone for 2024
- Top 10 Video Editing Online Makers Is Worth Your Attention for 2024
- Updated TXT to SRT 3 Effective Ways to Convert TXT to SRT for 2024
- Updated In 2024, Find Out the Best Animated Text Video Tools and Learn How to Animate Text in a Video in Simple Steps. Discover the Best Fonts to Animate Text Along with the Text Animation Templates
- Updated How To Quickly Create A Screen Print Effect In Photoshop Detailed Guide for 2024
- Updated 10 Best Movie Trailer Voice Generators Windows, Mac, Android, iPhone & Online for 2024
- Updated 2024 Approved Best 8 Top Premiere Pro Slideshow Templates
- New 3 Best Motion Blur Plugins for Adobe After Effects for 2024
- Fun & Easy Masking Tricks Wondershare Filmora Tutorial for 2024
- In 2024, How Long Does It Take To Edit Videos
- New In 2024, The Best 10 GIF to JPGPNG Converters
- New 2024 Approved Backup and Organize Your Footage in Minutes
- 2024 Approved Want to Make an Epic CSGO Montage? You Are in the Right Place. This In-Depth Guide Will Explain How You Can Make an Attention-Grabbing Gaming Montage
- New Want to Immediately Know Something About Discord GIF?
- New 15 Best Free MP4 Video Rotators Windows,Mac, Android, iPhone & Online for 2024
- 2024 Approved Online Calculate and Change Video Aspect Ratio
- New Create a Kickass COD Warzone Thumbnail for Free
- Easily Cut Large Videos Faster on Mac 7 Solutions Included
- New In 2024, Tutorial Guides for Video Maker with Song
- Updated Do You Need to Make Your Video More Immersive? You Can Make It 60 FPS to Achieve That. And Here Are the 5 Best Tools that You Can Use
- Updated How to Stabilize Videos with Google Photos App for Free
- New 2024 Approved Splitting Video Into Frames with the FFmpeg Step by Step
- How to Use Rule of Thirds in Video
- Updated 2024 Approved To Add SRT to MP4 Is Not as Hard as You Might Think. All You Just Need Is the Right Tool to Help You Get the Job Done. Read This Article and Learn the 8 Latest Methods to Merge SRT with MP4 Effortlessly
- Practical Ways to Resize Video in Handbrake
- New How to Use OBS Chroma Key With/Without Green Screen Easy Solutions
- In 2024, Ideas That Help You Out in Converting AVI to GIF
- New Learn About Open Broadcaster Software and How to Perform Obs Color Correction. Also, Explore the Various Aspects of Color Correction Like Contrast, Brightness, Saturation, Among Others for 2024
- Do You Want to Use the Best LUTs for Your Media Content but Need Help Finding Them? Here Is the Overview of the Best Free LUTs for You to Use for 2024
- New In 2024, Easy Guide to Zoom Video in VLC
- 2024 Approved Using AI to Replace Skies Finding the Right Methods
- Updated 2024 Approved 6 Instant Ways to Create Windows 10 Slideshow
- Updated How to Add Effects on TikTok for 2024
- Updated In 2024, Google Meet Green Screen
- Updated 2024 Approved Stunning Glitch Effect and Its Creation Steps for Premiere Pro
- New Best 8 Educational Video Websites for Teachers for 2024
- New AR, or Augmented Reality, Is One of the Most Significant Technological Inventions. This Technology Is Used in Many Applications that We Use Daily, Like, Maps, Music, Video Games, Tourism, Sightseeing, Etc
- New In 2024, This Article Covers a Lot of Information About the Freeze-Frame Effect. It Includes Its Power, Its Usage in Films, and How to Create It in Your Videos Using Filmora. It Will Get You a Super Exciting Cinematic Effect
- In 2024, The Ultimate Guide How to Bypass Swipe Screen to Unlock on Vivo V29 Device
- Full Guide How To Fix Connection Is Not Private on Xiaomi 13T | Dr.fone
- 3 Ways to Unlock Your Apple iPhone 13 for Free
- 7 Fixes for Unfortunately, Phone Has Stopped on Poco X5 Pro | Dr.fone
- How to Fix My Motorola Moto G23 Location Is Wrong | Dr.fone
- In 2024, The Best Android SIM Unlock Code Generators Unlock Your Samsung Galaxy S23 Tactical Edition Phone Hassle-Free
- Will the iPogo Get You Banned and How to Solve It On Vivo Y100A | Dr.fone
- Forgot Apple iPhone 6 Backup Password? Heres What to Do
- In 2024, How to Bypass FRP from Vivo V29 Pro?
- In 2024, How To Change Your Apple ID on Apple iPhone X With or Without Password | Dr.fone
- In 2024, How to Translate Audio/Video Content from Spanish to English and vice versa?
- In 2024, Change Location on Yik Yak For your Realme 12 Pro 5G to Enjoy More Fun | Dr.fone
- In 2024, How to Change/Fake Your Poco F5 Pro 5G Location on Viber | Dr.fone
- In 2024, Top 12 Prominent Poco X5 Pro Fingerprint Not Working Solutions
- Best Text-to-Audio Converters of All Times for 2024
- Full Guide to Catch 100 IV Pokémon Using a Map On Oppo A58 4G | Dr.fone
- How to Unlock Apple iPhone X with a Mask On | Dr.fone
- How To Unlock a Oppo A2 Easily?
- What Does Jailbreaking Apple iPhone 15 Pro Max i Do? Get Answers here | Dr.fone
- 4 Solutions to Fix Unfortunately Your App Has Stopped Error on Motorola Moto G14 | Dr.fone
- In 2024, Unlock Xiaomi 14 Ultra Phone Password Without Factory Reset Full Guide Here
- How To Restore a Bricked Realme C55 Back to Operation | Dr.fone
- How to Change Location On Facebook Dating for your Samsung Galaxy A15 5G | Dr.fone
- In 2024, The Complete Guide to Vivo X100 Pro FRP Bypass Everything You Need to Know
- In 2024, Guide to Mirror Your Xiaomi Redmi A2 to Other Android devices | Dr.fone
- Android Unlock Code Sim Unlock Your Realme GT 5 Pro Phone and Remove Locked Screen
- In 2024, How to Delete iCloud Account with or without Password from your iPhone 15 Pro/Windows/Mac
- How to Delete All Photos from iPhone X Beyond Scope of Recovery? | Stellar
- How To Remove Passcode From Apple iPhone 6 Plus? Complete Guide | Dr.fone
- Complete Tutorial to Use GPS Joystick to Fake GPS Location On Honor Play 40C | Dr.fone
- Updated Adobe Animate CC Everything You Need to Know
- In 2024, Forgot Locked Apple iPhone 15 Plus Password? Learn the Best Methods To Unlock
- What to Do if Google Play Services Keeps Stopping on Samsung Galaxy XCover 6 Pro Tactical Edition | Dr.fone
- In 2024, How to Bypass FRP from Lenovo ThinkPhone?
- About Oppo FRP Bypass
- In 2024, Overview of the Best Realme 12 Pro 5G Screen Mirroring App | Dr.fone
- Updated Top 5 Udemy Subtitle Translation Tools for Seamless Auto Translations for 2024
- In 2024, Best Anti Tracker Software For Oppo Find N3 Flip | Dr.fone
- Title: 11 Best Video Editing Apps for iPhone
- Author: Morgan
- Created at : 2024-04-24 01:12:23
- Updated at : 2024-04-25 01:12:23
- Link: https://ai-video-editing.techidaily.com/11-best-video-editing-apps-for-iphone/
- License: This work is licensed under CC BY-NC-SA 4.0.


