:max_bytes(150000):strip_icc():format(webp)/istabletworthit-a75b20684e5241b8a64efc0733092fcd.jpg)
11 Ways To Radial Blur To Images (iPhone/Android/Mac/Windows) for 2024

11 Ways To Radial Blur To Images (iPhone/Android/Mac/Windows)
Radial blur is an effect you can use to create a sense of movement, emphasize parts of an image, add visual interest to a scene, or make a subject stand out. There are multiple apps and software programs available to achieve this effect.
But if you don’t know where to start, we’ll show you 11 ways to create radial blur images on your iPhone, Android device, Mac, or Windows PC. With these tools, you can quickly recreate your pictures to make them unique by adding visual interest.
How To Make A Radial Blur Effect On iPhone And Android?
Below we’ve provided a list of 5 apps that can help you make a radial blur photo effect on your iPhone or Android devices.
1. Design Blur: Radial Blur
Design Blur: Radial Blur is a free app available on the Play Store for Android devices that lets you add a sense of motion and depth to your picture by applying the radial effect with just a few taps.
Download:Android
Key features:
- Mainly devoted to creating radial blur and motion blur effects.
- Includes a camera to help you instantly take pictures and apply radial effects.
- Option to revert to your original picture if you don’t like the effects.
- Easier to remove the radial blur effect from parts of your image.
- Supports changing the intensity of the effect.
Pros
- Includes a redo and undo option
- Free to use
- User-friendly UI
- Applies the effect instantly
Cons
- Includes ads
2. DSLR Camera Blur Effects
With the DSLR Camera Blur Effects app, you can instantly apply a more natural-looking radial motion blur effect to your images to give them a more professional appearance. The app offers multiple image-blurring tools and adds a DSLR-like finish to your photos.
Download: Android
Key Features
- Import photos from your phone’s gallery or take a new one using the app’s camera option.
- Options to crop your image before uploading.
- Multiple types of blur effects to choose from, such as motion blur, gaussian blur, line blur, box blur, and pixel blur.
- Can change the focus from auto to circular, linear, freestyle, point focus, or point blur.
Pros
- Simple and fast to use
- Available for free
- Draws around the subject
- A quick social sharing option is available
Cons
- Shows multiple ads
- Adds a watermark to your final image
3. Image Radial Blur
The Image Radial Blur is another user-friendly app designed to create radial blur effects for Android users and has a range of blur strengths, types, and focus options, so you can create the exact look you want.
Download:Android
Key Features
- Two Focus Move options and two blur types to choose from.
- Adjusts the strength of the radial blur on your image.
- Instantly applies the radial blur effect.
Pros
- Free and easy to use
- Applies the effect with one tap
- Comes with a quick social sharing option
- Excellent UI
Cons
- Displays ads
4. Picsart
Picsart is a powerful photo editing app that lets you create beautiful images by removing backgrounds, adding text and radial blur or other effects, and even creating collages.

Key Features
- All-in-one photo and video editor.
- Supports creating slideshows, and collages, adding subtitles to your video, and more.
- Labeled as “Editor’s Choice” on Google Play Store.
- Blur parts of an image, its background, the subject’s face, or a complete photo.
Pros
- Available for free
- AI select auto-detect blur feature
- Perfect for quick and easy edits
- Gives a professional touch to images
Cons
- The app lags sometimes
5. Affinity Photo
Affinity Photo is an award-winning photo editor available for iPads offering desktop-grade basic and advanced editing tools, including the Radial Blur effect.
Download: iOS
Key Features
- Available for a one-time purchase of $2476.20.
- Creates the radial effect in concentric circle lines, giving your images a sense of rotation.
- Brings the focus point in your pictures to life.
Pros
- Creates unique motion blur effects
- Offers other editing options
- Desktop-grade editing
Cons
- No image organization feature is available
6 Ways To Radial Blur Your Images On Windows And Mac
Here are our top 5 recommended tools to radial blur your images on Windows and Mac:
1. Wondershare Filmora
Free Download For Win 7 or later(64-bit)
Free Download For macOS 10.14 or later
Price: Starts at $7.99 per month
Support System: Windows 11 and below & macOS 10.14 - macOS 12
Wondershare Filmora is an editing software recommended by many content creators and is available for Windows and macOS. The software comes with various features such as speed ramping, screen recording, a library of royalty-free music, radial blur, keyframing, numerous filters, effects, & preset templates, motion tracking, title editing, and more.
To create a radial blur effect on your photos using the Wondershare Filmora software, do the following steps:
Step1 Visit the Filmora website and download the file, depending on your system. Install the software and launch it. Click the “Create New Project” option and drag & drop your file.

Step2 Head to the “Effects” tab, choose the Tilt-shift Circle for the radial blur effect and drop it in the timeline.

Step3 Double-click the effect in the timeline and configure the size, X-axis, Y-axis, and intensity. That’s about it. You can now export your file by clicking the “Export” option.
2. Final Cut Pro
Price: $299.99/perpetual license
Support System: macOS 11.5.1 or later
Final Cut Pro is an editing software designed for Mac systems and has everything you need to create high-finished videos. This software program offers a wide range of features, including a timeline, proxy editing, Multicam editing, and support for 4K and HDR footage.
With Final Cut Pro, you can instantly apply the radial blur effect to your images and adjust it using various parameters in the Filters Inspector section, such as Center, Angle, Crop, and Mix.
3. Adobe Photoshop
Price: US$20.99/month
Support System: macOS and Windows
As one of the most popular and advanced photo editing software in the digital market, Adobe Photoshop is packed with high-end features and is used by many professionals as well as graphic designers to create stunning radial blur effects in their projects.
To add the radial blur effect on your images using Adobe Photoshop, start with converting your background image into a Smart Object and go to the “Filters” tab. Next, select “Blur” and click “Radial Blur.” Finally, you can set the parameter in the radial blur window to adjust the effect.
4. Paint.NET
Price: Free
Support System: Microsoft .NET 6, Windows XP, Vista, 7, & 8, and needs a 64-bit Windows processor
Paint.NET is an easy-to-use software developed on the .NET framework and is only compatible with Windows PCs. The software is free and has an innovative interface for novice users to create stunning image editing projects in no time.
Paint.NET also lets you quickly create the radial blur image effect using its blur effects. You can even configure the angle, center, and quality of the effect.
5. BCC FX Editor
Price: $175 per month
Support System: macOS Mojave 10.14
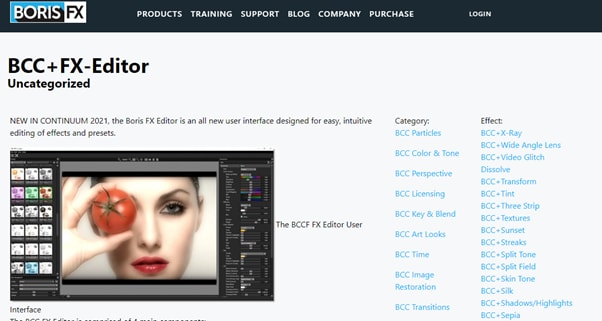
Yet another powerful software is the BCC FX Editor, designed with an intuitive interface where you can quickly apply the BCC+ Radial Blur effect around a specific point in your pictures.
The software also offers various parameters to help you adjust the effect on your image. These include GPU rendering, blur type, center, radial amount, rotation amount, falloff, smooth mode, edge mode, apply mode, and more.
6. VideoPad Video Editor
Price: Free, and the premium version starts at $23.16 quarterly
Support System: Windows 10, XP, Vista, 7, 8, and 8.1
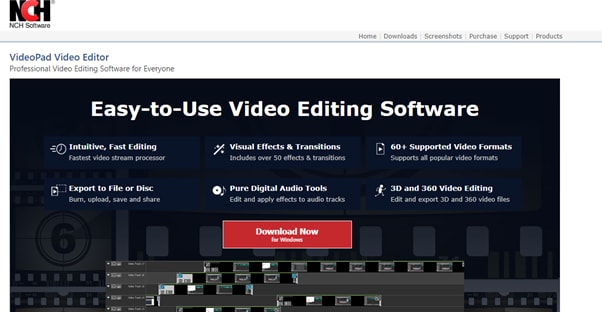
Designed for Windows systems, the VideoPad Editor is an intuitive and fast software program that can help you quickly add the radial blur effect to your file. Moreover, the software comes with numerous visual effects and transitions.
You can add custom logos, texts, & overlays and create & export your file in over 60 different video formats.
Last Words
In this article, we’ve provided a list of 5 iOS and Android apps and 6 Mac and Windows software for creating the radial blur image effect. From the above list, whichever tool you choose can help you create some stunning radial blur effects that will add depth and movement to your photos.
We’ve also provided step-by-step instructions on how you can use the Filmora 11 software to add impactful effects.
Hopefully, you’ve enjoyed reading this article and can now quickly add the radial blur effect to your images without any issues.
2. DSLR Camera Blur Effects
With the DSLR Camera Blur Effects app, you can instantly apply a more natural-looking radial motion blur effect to your images to give them a more professional appearance. The app offers multiple image-blurring tools and adds a DSLR-like finish to your photos.

Download: Android
Key Features
- Import photos from your phone’s gallery or take a new one using the app’s camera option.
- Options to crop your image before uploading.
- Multiple types of blur effects to choose from, such as motion blur, gaussian blur, line blur, box blur, and pixel blur.
- Can change the focus from auto to circular, linear, freestyle, point focus, or point blur.
Pros
- Simple and fast to use
- Available for free
- Draws around the subject
- A quick social sharing option is available
Cons
- Shows multiple ads
- Adds a watermark to your final image
3. Image Radial Blur
The Image Radial Blur is another user-friendly app designed to create radial blur effects for Android users and has a range of blur strengths, types, and focus options, so you can create the exact look you want.

Download:Android
Key Features
- Two Focus Move options and two blur types to choose from.
- Adjusts the strength of the radial blur on your image.
- Instantly applies the radial blur effect.
Pros
- Free and easy to use
- Applies the effect with one tap
- Comes with a quick social sharing option
- Excellent UI
Cons
- Displays ads
4. Picsart
Picsart is a powerful photo editing app that lets you create beautiful images by removing backgrounds, adding text and radial blur or other effects, and even creating collages.

Key Features
- All-in-one photo and video editor.
- Supports creating slideshows, and collages, adding subtitles to your video, and more.
- Labeled as “Editor’s Choice” on Google Play Store.
- Blur parts of an image, its background, the subject’s face, or a complete photo.
Pros
- Available for free
- AI select auto-detect blur feature
- Perfect for quick and easy edits
- Gives a professional touch to images
Cons
- The app lags sometimes
5. Affinity Photo
Affinity Photo is an award-winning photo editor available for iPads offering desktop-grade basic and advanced editing tools, including the Radial Blur effect.

Download: iOS
Key Features
- Available for a one-time purchase of $2476.20.
- Creates the radial effect in concentric circle lines, giving your images a sense of rotation.
- Brings the focus point in your pictures to life.
Pros
- Creates unique motion blur effects
- Offers other editing options
- Desktop-grade editing
Cons
- No image organization feature is available
6 Ways To Radial Blur Your Images On Windows And Mac
Here are our top 5 recommended tools to radial blur your images on Windows and Mac:
1. Wondershare Filmora
Free Download For Win 7 or later(64-bit)
Free Download For macOS 10.14 or later
Price: Starts at $7.99 per month
Support System: Windows 11 and below & macOS 10.14 - macOS 12
Wondershare Filmora is an editing software recommended by many content creators and is available for Windows and macOS. The software comes with various features such as speed ramping, screen recording, a library of royalty-free music, radial blur, keyframing, numerous filters, effects, & preset templates, motion tracking, title editing, and more.
To create a radial blur effect on your photos using the Wondershare Filmora software, do the following steps:
Step1 Visit the Filmora website and download the file, depending on your system. Install the software and launch it. Click the “Create New Project” option and drag & drop your file.

Step2 Head to the “Effects” tab, choose the Tilt-shift Circle for the radial blur effect and drop it in the timeline.

Step3 Double-click the effect in the timeline and configure the size, X-axis, Y-axis, and intensity. That’s about it. You can now export your file by clicking the “Export” option.
2. Final Cut Pro
Price: $299.99/perpetual license
Support System: macOS 11.5.1 or later

Final Cut Pro is an editing software designed for Mac systems and has everything you need to create high-finished videos. This software program offers a wide range of features, including a timeline, proxy editing, Multicam editing, and support for 4K and HDR footage.
With Final Cut Pro, you can instantly apply the radial blur effect to your images and adjust it using various parameters in the Filters Inspector section, such as Center, Angle, Crop, and Mix.
3. Adobe Photoshop
Price: US$20.99/month
Support System: macOS and Windows

As one of the most popular and advanced photo editing software in the digital market, Adobe Photoshop is packed with high-end features and is used by many professionals as well as graphic designers to create stunning radial blur effects in their projects.
To add the radial blur effect on your images using Adobe Photoshop, start with converting your background image into a Smart Object and go to the “Filters” tab. Next, select “Blur” and click “Radial Blur.” Finally, you can set the parameter in the radial blur window to adjust the effect.
4. Paint.NET
Price: Free
Support System: Microsoft .NET 6, Windows XP, Vista, 7, & 8, and needs a 64-bit Windows processor

Paint.NET is an easy-to-use software developed on the .NET framework and is only compatible with Windows PCs. The software is free and has an innovative interface for novice users to create stunning image editing projects in no time.
Paint.NET also lets you quickly create the radial blur image effect using its blur effects. You can even configure the angle, center, and quality of the effect.
5. BCC FX Editor
Price: $175 per month
Support System: macOS Mojave 10.14

Yet another powerful software is the BCC FX Editor, designed with an intuitive interface where you can quickly apply the BCC+ Radial Blur effect around a specific point in your pictures.
The software also offers various parameters to help you adjust the effect on your image. These include GPU rendering, blur type, center, radial amount, rotation amount, falloff, smooth mode, edge mode, apply mode, and more.
6. VideoPad Video Editor
Price: Free, and the premium version starts at $23.16 quarterly
Support System: Windows 10, XP, Vista, 7, 8, and 8.1

Designed for Windows systems, the VideoPad Editor is an intuitive and fast software program that can help you quickly add the radial blur effect to your file. Moreover, the software comes with numerous visual effects and transitions.
You can add custom logos, texts, & overlays and create & export your file in over 60 different video formats.
Last Words
In this article, we’ve provided a list of 5 iOS and Android apps and 6 Mac and Windows software for creating the radial blur image effect. From the above list, whichever tool you choose can help you create some stunning radial blur effects that will add depth and movement to your photos.
We’ve also provided step-by-step instructions on how you can use the Filmora 11 software to add impactful effects.
Hopefully, you’ve enjoyed reading this article and can now quickly add the radial blur effect to your images without any issues.
Free LUTs for OBS: How to Use Them?
LUTs are powerful tools that can significantly enhance the visual appeal of your content. You can use this tool to change the look and feel of your images and videos. Moreover, you can use LUTs to bring out the desired mood, style, and tone to your media content. Additionally, LUTs provide endless possibilities for creativity with different color adjustments and grading.
There are many software and tools available on the market to apply LUTs. These tools let you import and apply LUTs to your images and videos. Furthermore, you can apply LUTs even using streaming software like OBS. Moreover, you can improve live streams, videos, and recordings by applying LUTs using OBS. However, many paid and free LUTs for OBS are available for usage.
Part 1: Why Do We Need to Use LUTs for Editing in OBS?
There are many free OBS LUTs available that you can download and use for your content. The real question is the utility of LUTs in OBS. Here are some of the reasons to use LUTs in this tool.
Efficiency and Consistency
LUTs provide a quick and consistent way to apply color transformations. Instead of manually adjusting individual color settings, you can use LUTs. Similarly, it allows you to instantly and precisely grade and correct colors.
Time-Saving
Using LUTs saves time because they offer pre-defined color transformations. Instead of adjusting colors for each project or image, you can use LUTs. Additionally, they allow you to match your desired look or style easily.
Artistic Control and Creative Freedom
Furthermore, it gives artists, filmmakers, and photographers more control over their work. They allow for experimentation and exploration of different looks and styles. You can be more creative by experimenting with varying tones of color to the same content.
Consistent Color Reproduction
LUTs are essential for maintaining consistent color tones. The good part is it maintains consistency across different devices, software, and platforms. They ensure that colors look the same, no matter what the viewing medium, like monitors, projectors, or mobile screens.
Film Emulation and Replication
Moreover, it can replicate classic film stocks’ characteristics and aesthetics. They allow filmmakers and photographers to recreate iconic films’ color response and tonal range. In this way, everyone can experiment with color tones inspired by famous movies.
Workflow Flexibility and Collaboration
Lookup tables offer flexibility and facilitate collaboration in post-production workflows. They can be easily shared and applied to different projects or sequences. Similarly, it ensures consistent color grading across multiple editors or teams.
Calibration and Color Management
Additionally, LUTs play an important role in color calibration and management processes. It allows you to align color spaces, correct color variations, and maintain color accuracy. Furthermore, it will maintain consistent color grading throughout the project.
Real-time Color Processing
Lastly, LUTs are valuable in applications that require real-time color processing. It can be used in live broadcasts, video streaming, or video games. You can make instant adjustments and enhancements in real time.
Empower your videos with a new mood using different LUTs. Filmora now offers 100+ top-quality 3D LUTs cover a broad range of scenarios. Transform your videos with Filmora’s powerful 3D LUTs.
Apply LUT on Videos Apply LUT on Videos Learn More

Part 2: Discussing Some Top-Notch Best LUTs for OBS?
If you are searching for the best LUTs for OBS, you’re at the right place. Here is a list of some of the best LUTs you can apply using OBS. You can choose from different styles and tones according to your preference:
1. Vintage LUTs
Take a step back in time with this pack of Vintage LUTs. This pack gives your videos and images a nostalgic, retro feel. Moreover, this pack has different classic film presets, including monochrome and b&w. It enhances warm tones, adds a vignette, and introduces a gentle fade effect. Furthermore, this pack gives your media content the perfect retro feel.

2. 13 FREE Custom LUTs for Log Footage
Using these 13 cinematic LUTs, you can unleash the power of the silver screen. With these LUTs, you can bring Hollywood magic to your videos. Additionally, this pack enhances contrast and saturation to create a dramatic and cinematic look. Moreover, it enhances your media with rich colors, deep shadows, and vibrant highlights giving them a movie-like feel.
3. Vibrant Nature LUTs for Photo & Video
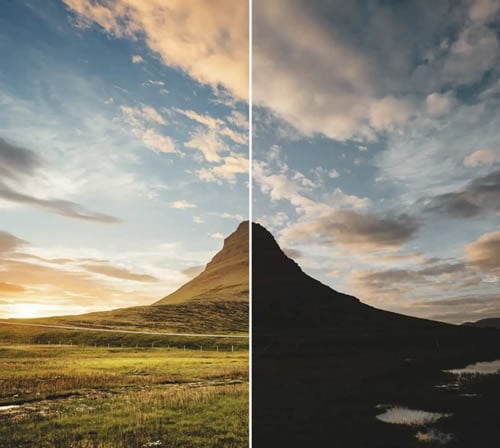
Vibrant Nature LUTs is an excellent pack that enhances the beauty of nature and the outdoors. It is a pack of five different LUTs specifically used to enhance natural landscapes and environmental shots. Furthermore, this pack highlights the earthy tones, adds depth to greens, and brings out the details of nature. Additionally, you can use this pack to improve the scenery in your pictures and videos.
4. Coastal Haze
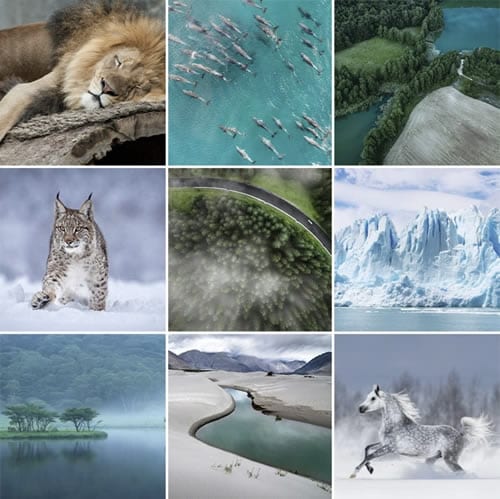
Coastal Haze is a fantastic LUT to celebrate love and romance with its color grading. It is an excellent free LUT that enhances the colors and emotions of wedding videos and romantic moments. Moreover, it adds a soft and dreamy touch by improving skin tones. Furthermore, it creates a warm and intimate atmosphere allowing you to beautify your special moments.
5. 20 Dark Moody LUTs Pack
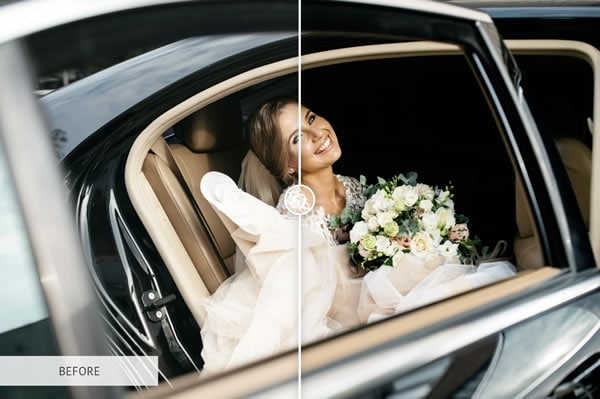
Dive into the world of moody dark colors with this 20 Dark Moody LUTs Pack. Each LUT has a different tone and feel to it. These LUTs add darkness to create a mysterious and serious ambiance. It enhances shadows, deepens blacks, and adds a subtle color grading to create an intense look. With this Moody LUT pack, you can make more professional-looking dark videos.

Part 3: How to Use LUTs in OBS Studio Properly?
If you’ve found the best free LUTs for OBS, you can apply them directly to your video feed. Here are simple steps to apply LUTs using OBS Studio. Following these steps, you can easily apply a LUT effect to your video feed or live stream in OBS.
Step 1: Open OBS and start your video feed or live stream using a webcam or capture card. Once your video stream is running, right-click the “Video Capture Device” option. After that, select “Filters” from the options that appear. In the Filters menu, locate the “Effect Filters” section and click the “+” button. Choose the “Apply LUT” option from the options that appear to add the LUT effect to your video stream.
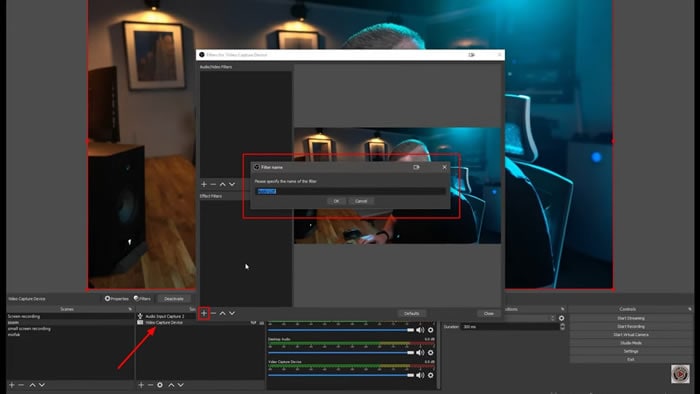
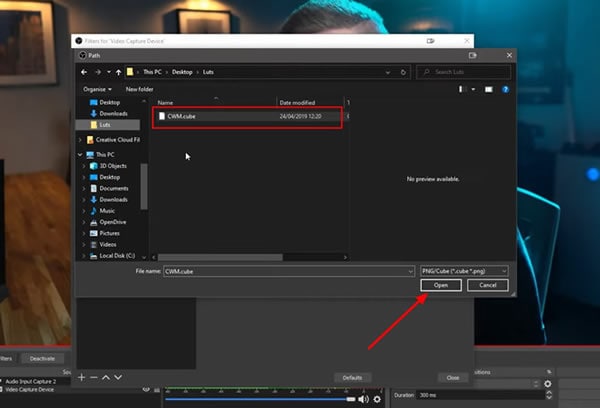
Step 2: A new window will pop up where you can specify the name of your LUT. To select your desired LUT, click the “Browse” button and navigate to its location on your device. Once you’ve found your LUT, click the “Open” button to apply it directly to your video stream. If needed, you can adjust the intensity of the LUT by making changes in the “Preview” screen.
Part 4: Wondershare Filmora: Another Efficient Platform for Adding LUTs on Videos
Wondershare Filmora is an exceptional video editing tool with the additional ability of color grading. With this powerful tool, you can color grade your videos by manually adjusting settings or applying LUTs. The latest update of Wondershare Filmora includes a library of over 200+ LUTs that you can apply to your media files. Furthermore, you can also customize the intensity of the applied LUTs.
Add LUTs on Video For Win 7 or later(64-bit)
Add LUTs on Video For macOS 10.14 or later
Besides color grading, Filmora also provides a variety of effects, filters, and overlays for your videos. These tools allow you to add artistic touches and improve the overall feel of your content. Additionally, it offers professional-grade features such as AI Cutout. This feature enables you to effortlessly select your subject in a video and change their background.

Conclusion
In conclusion, LUTs are useful tools for color-correcting live streams and video editing projects. You can apply LUTs directly to your live streams, and video feeds with OBS. Many free LUTs for OBS are available, each with a different tone and feel. Furthermore, LUTs can also be used in popular video editing tools like Wondershare Filmora. Lastly, LUTs are essential tools to make your content stand out.
Add LUTs on Video For Win 7 or later(64-bit)
Add LUTs on Video For macOS 10.14 or later
Apply LUT on Videos Apply LUT on Videos Learn More

Part 2: Discussing Some Top-Notch Best LUTs for OBS?
If you are searching for the best LUTs for OBS, you’re at the right place. Here is a list of some of the best LUTs you can apply using OBS. You can choose from different styles and tones according to your preference:
1. Vintage LUTs
Take a step back in time with this pack of Vintage LUTs. This pack gives your videos and images a nostalgic, retro feel. Moreover, this pack has different classic film presets, including monochrome and b&w. It enhances warm tones, adds a vignette, and introduces a gentle fade effect. Furthermore, this pack gives your media content the perfect retro feel.

2. 13 FREE Custom LUTs for Log Footage
Using these 13 cinematic LUTs, you can unleash the power of the silver screen. With these LUTs, you can bring Hollywood magic to your videos. Additionally, this pack enhances contrast and saturation to create a dramatic and cinematic look. Moreover, it enhances your media with rich colors, deep shadows, and vibrant highlights giving them a movie-like feel.

3. Vibrant Nature LUTs for Photo & Video
Vibrant Nature LUTs is an excellent pack that enhances the beauty of nature and the outdoors. It is a pack of five different LUTs specifically used to enhance natural landscapes and environmental shots. Furthermore, this pack highlights the earthy tones, adds depth to greens, and brings out the details of nature. Additionally, you can use this pack to improve the scenery in your pictures and videos.

4. Coastal Haze
Coastal Haze is a fantastic LUT to celebrate love and romance with its color grading. It is an excellent free LUT that enhances the colors and emotions of wedding videos and romantic moments. Moreover, it adds a soft and dreamy touch by improving skin tones. Furthermore, it creates a warm and intimate atmosphere allowing you to beautify your special moments.

5. 20 Dark Moody LUTs Pack
Dive into the world of moody dark colors with this 20 Dark Moody LUTs Pack. Each LUT has a different tone and feel to it. These LUTs add darkness to create a mysterious and serious ambiance. It enhances shadows, deepens blacks, and adds a subtle color grading to create an intense look. With this Moody LUT pack, you can make more professional-looking dark videos.

Part 3: How to Use LUTs in OBS Studio Properly?
If you’ve found the best free LUTs for OBS, you can apply them directly to your video feed. Here are simple steps to apply LUTs using OBS Studio. Following these steps, you can easily apply a LUT effect to your video feed or live stream in OBS.
Step 1: Open OBS and start your video feed or live stream using a webcam or capture card. Once your video stream is running, right-click the “Video Capture Device” option. After that, select “Filters” from the options that appear. In the Filters menu, locate the “Effect Filters” section and click the “+” button. Choose the “Apply LUT” option from the options that appear to add the LUT effect to your video stream.

Step 2: A new window will pop up where you can specify the name of your LUT. To select your desired LUT, click the “Browse” button and navigate to its location on your device. Once you’ve found your LUT, click the “Open” button to apply it directly to your video stream. If needed, you can adjust the intensity of the LUT by making changes in the “Preview” screen.

Part 4: Wondershare Filmora: Another Efficient Platform for Adding LUTs on Videos
Wondershare Filmora is an exceptional video editing tool with the additional ability of color grading. With this powerful tool, you can color grade your videos by manually adjusting settings or applying LUTs. The latest update of Wondershare Filmora includes a library of over 200+ LUTs that you can apply to your media files. Furthermore, you can also customize the intensity of the applied LUTs.
Add LUTs on Video For Win 7 or later(64-bit)
Add LUTs on Video For macOS 10.14 or later
Besides color grading, Filmora also provides a variety of effects, filters, and overlays for your videos. These tools allow you to add artistic touches and improve the overall feel of your content. Additionally, it offers professional-grade features such as AI Cutout. This feature enables you to effortlessly select your subject in a video and change their background.

Conclusion
In conclusion, LUTs are useful tools for color-correcting live streams and video editing projects. You can apply LUTs directly to your live streams, and video feeds with OBS. Many free LUTs for OBS are available, each with a different tone and feel. Furthermore, LUTs can also be used in popular video editing tools like Wondershare Filmora. Lastly, LUTs are essential tools to make your content stand out.
Add LUTs on Video For Win 7 or later(64-bit)
Add LUTs on Video For macOS 10.14 or later
The Only Guide You’ll Ever Need to Learn GIF Design
The Only Guide You’ll Ever Need to Learn GIF Design That Get Shared Like Crazy
An easy yet powerful editor
Numerous effects to choose from
Detailed tutorials provided by the official channel
The Only Guide You’ll Ever Need to Learn GIF Design That Get Shared Like Crazy
In this article
01 [8 Principles for Great GIF Design](#Part 1)
02 [6 Amazing Examples of Animated Gifs in Web Design](#Part 2)
03 [Learn How to Create and Add Gifs to Interactive Layouts in Filmora](#Part 3)
Part 1 Principles for Great GIF Design
Creating GIFs for infotainment or casual information sharing is the current talk of the trend. You might have visibly landed across a heap of tantalizing GIFs in blogs, social media posts, product promotion websites and almost every other domain you can possibly think of. Using GIFs for any type of content promotion is bound to captivate the target audience in impressive multiplicities. Ever wondered what’s the cue behind the mass appeal that GIFs create? Well, an obvious answer is the stunning GIF design.
When going for GIF creation and selection, design plays the key role in creating considerable buzz about the information being transmitted. To add impact to your creation, you need to pay considerable attention to its design implications, thus ensuring that the right things get presented in the right way. Outlined below are some amazing principles you can use to enhance your GIF design to the next level:
01Ensure Accuracy and Preciseness
The primary concern you need to be attentive about while designing a GIF is its preciseness. Ensure ban exactness of information and confine your creation to the theme and requirement of your creation, like, the message you want to deliver or the impact you want to create through the GIF. Balance your creativity within specific content parameters and avoid getting carried away or overdoing on the beautifying aspect.
As an example, it is visibly not appealing to add a wholesome mix of 15 shades and 20 different elements in a nature-based GIF. You will end up getting too harsh on the viewers’ eyes, confusing them with a hoard of speeding elements and banging colors. You can instead stick to 2 or 3 frames with an intelligent mix of 2 complementary shades.
02Maintain Visual Identity
An important aspect to keep in mind while attempting to design GIF is, it should visually relate to the underlying content. For instance, if you are intending a brand promotion through your GIF, lay stress on adding elements like, brand definition, product specifications, know-how of your work patterns, etc. ensure that your content flows naturally and has exactness.
Other alternatives are, using your product logo as the GIF background, character representation of your brand or using some explicit product oriented themes. While, you are free to pick anything that suits your preferences and needs, just make sure that using it in your GIF adds value to your brand instead of giving an out of the box feel.
Image Name: The-only-guide-you’ll-ever-need-to-learn-gif-design-that-get-shared-like-crazy-1
03Cut Down on Unnecessary Frames
Have you ever encountered a halt in the natural loop of your GIF out of nowhere? While pondering over the underlying cause, it is a common assumption to take this as an animation fallacy, but that’s evidently not the case. The actual culprits behind this glitch are those extra frames that contribute towards nothing but adding weight to an already heavy file.
To set this straight, you should switch to removing any extra frames, while saving a particular one which you may stretch to a desired duration according to the break point of your contents in the GIF. However, take caution to maintain the visual quality of your GIF while you remove those extra frames.
04Make Your GIF Accessible
You should always adhere to the concern of accessibility while creating a GIF. The reason being, your content is visibly going to get mass attention across the web and you cannot filter out visitors, make sure your GIF is easily accessible to all kind of users, particularly those with vision limitations, like, epileptic patients or the ones using screen readers.
Focus on describing your GIF content with alt text and using a limited blinking and flashing rate. In case your GIF content is primarily text based, take care to limit the effective color and image movement and adjust the frames rates to avoid constant and quick movement of image frames when adding many clips on a single page.
Pay additional heed to the auto play feature of your GIFs. It can be visibly annoying to be welcomed on a site homepage with GIFs enjoying an auto play session of their own. You can alternatively, incorporate a ‘Click to Play’ option or grant your site visitors the liberty to decide on what is to be played when.
05Use Storyboards
When aiming to create visibly appealing GIFs, you need to lay considerable stress on choosing an apt background story. Don’t get misled by the wrong assumption of using any random background, owing to the short play duration of GIFs. An impressive solution to this concern is taking the help of a storyboard to keep track of your GIF’s content flow.
Using a storyboard is quite effective means of being in line with the direction of content movement, rescuing you from the hustle of going off the track. This comes explicitly handy when you are working with a team of creators. The storyboard is there to keep everything at the exact place, thus improving member communications and boosting up the design process.
06Focus on Creating Loops
Consider creating an animated motion loop for your GIF allowing a repeated and comprehensive view of your content. Looping projects a deeper observation of the clip and its contents in a seamless transition. However, creating an infinite motion loop in GIFs is quite tricky, as you need to pay utmost concern to ensure a smooth content flow and chances of even the slightest errors are not entertained.
Any loopholes in placement of your GIF elements will get noticed within a blink and lead to an unsatisfactory user experience. Hence, you need to check each of your content frames separately to eliminate chances of possible errors. If you are a beginner, try working with geometrical animations to get the initial pickup. This will be advantageous in deciding the exact element positions at the start and end of the GIF.
07Make Use of Motion Blur
Using the concept of motion blur is pivotal in providing a natural flow and feel to your GIF, which, in an otherwise case would ordinarily appear as a mere collection of static images clubbed together. This would give a wobbling feel with unsteady frame movements to your viewers. The motion blur effect potentially ensures a smooth content flow, and your GIF looks like a short video captured from a camera.
08Stick to a Reduced File Size
Creating GIF of within a standard size range is quite difficult, owing to the fact that these are shared across a variety of media platforms, each having a different file size constraint. It is, however, recommended to stick to a file size as low as possible to escape the notch of modifying the same, ener5y time you need to work with the GIF on a different platform.
Listed below are a few ways to limit your GIF to a lower file size:
● Restrict your GIF to a frame count under 150, exceeding which, it will get difficult to export the GIF to most of the commonly visited social media and content sharing platforms.
● When your GIF is ready to export, adjust its lossy parameter between 5 and 10 to boost the file compression rate. Look for a setting that decreases the effective file size without compromising with the overall GIF design.
● Restrict to a minimum possible color usage. This will not only intensify the GIF design, but also contribute in maintaining a decreased file size. You can instead, focus on playing with animations or adjusting your image frames to longer play durations.
● Don’t experiment with multiple background gradients in your GIF. You can select from either a completely opaque, or a totally transparent background. Adding unnecessary gradients will end up giving your GIF a hazy look, along with a visibly large file that will be difficult to export non any platform.
Part 2 Amazing Examples of Animated Gifs in Web Design
GIFs are an effective means of adding appeal to brand promotions and achieving improved market buildup by delivering just the right content in the most captivating and interesting ways. You can use them as creative web design tools to add spark to your product sites, which can potentially boost the market value and reach of your product by multiplying the number of visitors to your site.
Discussed below are some stunning examples of using animated GIFs to enhance commercial web design, which you can use to create a significant buzz about your product among a target audience:
01Marie Weber
This is a shoe designer company in France, famous for its classy, handmade shoes. On visiting the company’s site, you are welcomed by a simple and subtle, animated product logo on each page. This animated logo is a masterpiece in itself, telling you the about the lavishness of the associated product.
On navigating further, you will find animated elements, like; shoe images and collection names, which appear on the screen before a zoom out. There are underlined links that pop up to animate beneath the name, indicating the link you are going to visit.
02Wonderful Weekends Festival
This is an absolute animation delight, where the welcome page of the site greets you with vibrant pieces in motion, and a pop up box informs you of the festival’s arrival time and asks you to select one from the options of ‘Play Now’ or ‘Show Me the Festival’.
As you click to make a choice, the Google brand shines with associated colors. As you continue to browse through the site, pages open up with brand color animations, along with colored active links flashing on the pages.
03Google
This is a brand name that needs no introduction. Google has launched its ‘Your Plan, Your Planet’ site to infuse awareness about environment conservation and eco friendly lifestyles, guiding visitors on ways and means of introducing related changes. The site greets you with a simple layout, with a short text moving in and getting still. Click on ‘Let’s Get Started’ and you will see 4 amazingly animated icons that open up to more vibrant animations.
Tap any one of the swinging refrigerator door, the illuminated light bulb, the running faucet or the teddy bear waving at you, to land on a schema that informs you about effective means of improving on conservation in within your selected section. This is a perfect example of using animations as a marketing strategy to captivate people’s attention on a subject that evidently turns them off.
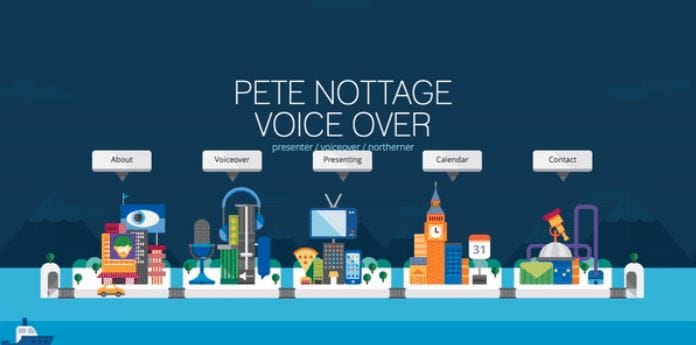
04Pete Nottage
Designed explicitly as a hiring site for voice presenter Pete Nottage, this website tells you everything about the actor and the credibility of hiring him. The site lands among the best examples of web animation usage. The welcome page of the site greets you with the brand logo. Tap on the red swipe and you will get to know that the brand infuses vibrancy to something that’s originally dull.
Next, you will find a plethora of dynamic and elegant animations in a plying plane, cityscape, flowing sea and sailing boats, moving cars and excusive motion graphics on each building. Visiting the animated site links provides you an insight of the actor’s personality. In the ‘About’ section, you can find a headshot animation, that disappears on clicking, and is followed by a more dynamic motion snippet.
05Zamzar
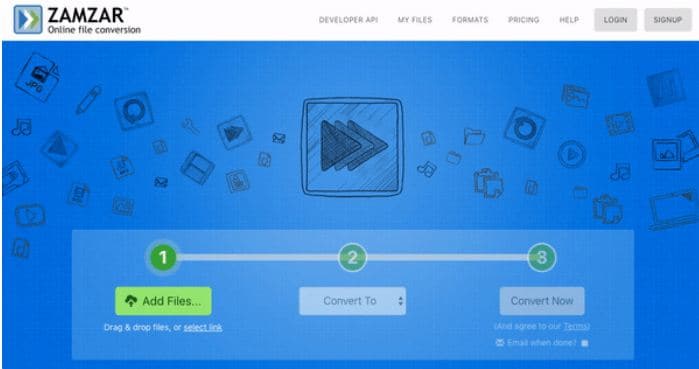
This one is an online file conversion site and lives up to its tagline ‘File Conversion Made Easy’ through a concrete animation on the welcome page. The file conversion on this site is quick, 3-step process, with a blinking animation indicating the current conversion stage.
For instance, when you are at the first step of selecting a file to convert, the animation shoes a blinking glow on number 1. This continues for the rest of the steps, till your file is finally converted into the desired file format.
06Blizzard: Warcraft III Reforged
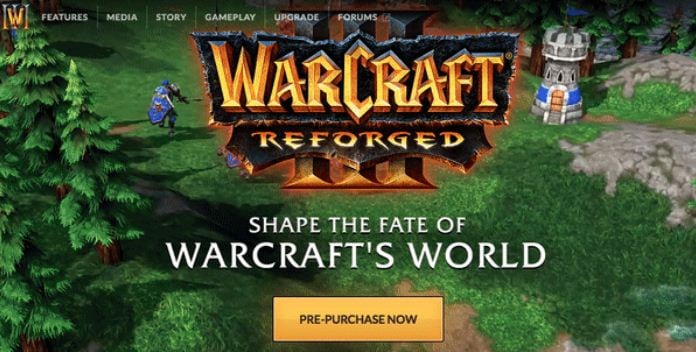
Warcraft was one complete heaven of adventure and thrill for console gamers. While the enticing cutscenes with stunning motion graphics were an absolute favorite, the game had a plenty of other exciting elements.
The relaunched game (Warcraft III Reforged) website has a mix of gaming adventures and cutscenes running in the site’s background with the game title and pitch appearing as an overlaid animation. On navigating through the site, you will find classy animated elements that take you on a nostalgic trip of the original game.
Part 3 Learn How to Create and Add Gifs to Interactive Layouts in Filmora
Now that you are quite familiar with the utility of GIFs in almost every market field, and have seen stunning examples of GIF design and usage for an impressive brand promotion, let’s take a dive into creating and using these motion clips to make interactive graphic layouts for websites, social media blogs and posts, and a variety of other applications that require some brilliant imagery for market promotion.
When looking for the perfect GIF designer software, Wondershare Filmora Video Editor is the most affordable pick. This is a free and an enhanced GIF design tool, packed with world class and premium quality features that are most suitable for giving the much appreciated professional touch to your graphic artwork. Here’s how you can work with Filmora to make alluring graphic layouts:
Step 1: Launch Filmora
The software is readily compatible to your Windows and MacOS devices and you don’t even require a signup to use the application. Just download and install the software in your preferred device and launch the same to reach the software’s welcome interface.
Filmora Free Download Link:
Step 2: Upload Media Files
Select and import the desired media files from your device to upload them to the Filmora timeline. You can either pick a video or choose a series of static images.
Step 3: Add to Timeline
Once imported, you need to add the selected files to the software’s editor timeline. You can use the ‘Drag and Drop’ method to get this done.

Wondershare Filmora - Best Video Editor for Mac/Windows
5,481,435 people have downloaded it.
Build unique custom animations without breaking a sweat.
Focus on creating epic stories and leave the details to Filmora’s auto features.
Start a creative adventure with drag & drop effects and endless possibilities.
Filmora simplifies advanced features to save you time and effort.
Filmora cuts out repetition so you can move on to your next creative breakthrough.
Step 4: Explore Your Editing Skills
As already stated, the Filmora effects library is an extensive inventory of stunning features to compliment your artwork with matchless class. You are free to choose from tons of image and video editing effects and filters suited to your GIF content to create excellent pieces of graphic art.
When starting to customize your GIF in Filmora, you can begin with cropping and trimming your images or video to the perfect part, or even cut and split them to ward off unwanted portions, or rotate and flip the images to set them in the perfect orientation.
You can further add elements like, graphic transitions, overlays, animations and texts, and etc., to customize your artwork to your heart’s content. The software’s audio-visual library facilitates you with around 300 audio-visual effects and music choices to supplement your creation with a conducive sound feel. You can also make adjustments in frame speed and play durations to get the best most snippet ever!
You are granted the liberty to choose almost any common file format to create and customize GIFs in Filmora. A more convincing feature is, the software does not leave a watermark on your artwork and you can easily share your creation across media platforms.
Step 5: Save and Export
Once your creation satisfies you, save it to your device with a .gif extension, from where it can be exported to various media sharing platforms with ease.
● Key Takeaways from This Episode →
● When planning a perfect and appealing product marketing strategy, you can consider using GIFs to enhance the feel. Complement your product site with suitable GIF design and graphic transitions can prove pivotal to target and hold your related audience.
● Looking for the best GIF creator and customization software, you can rely on Filmora to create and customize professional quality GIFs with utmost convenience.
The Only Guide You’ll Ever Need to Learn GIF Design That Get Shared Like Crazy
In this article
01 [8 Principles for Great GIF Design](#Part 1)
02 [6 Amazing Examples of Animated Gifs in Web Design](#Part 2)
03 [Learn How to Create and Add Gifs to Interactive Layouts in Filmora](#Part 3)
Part 1 Principles for Great GIF Design
Creating GIFs for infotainment or casual information sharing is the current talk of the trend. You might have visibly landed across a heap of tantalizing GIFs in blogs, social media posts, product promotion websites and almost every other domain you can possibly think of. Using GIFs for any type of content promotion is bound to captivate the target audience in impressive multiplicities. Ever wondered what’s the cue behind the mass appeal that GIFs create? Well, an obvious answer is the stunning GIF design.
When going for GIF creation and selection, design plays the key role in creating considerable buzz about the information being transmitted. To add impact to your creation, you need to pay considerable attention to its design implications, thus ensuring that the right things get presented in the right way. Outlined below are some amazing principles you can use to enhance your GIF design to the next level:
01Ensure Accuracy and Preciseness
The primary concern you need to be attentive about while designing a GIF is its preciseness. Ensure ban exactness of information and confine your creation to the theme and requirement of your creation, like, the message you want to deliver or the impact you want to create through the GIF. Balance your creativity within specific content parameters and avoid getting carried away or overdoing on the beautifying aspect.
As an example, it is visibly not appealing to add a wholesome mix of 15 shades and 20 different elements in a nature-based GIF. You will end up getting too harsh on the viewers’ eyes, confusing them with a hoard of speeding elements and banging colors. You can instead stick to 2 or 3 frames with an intelligent mix of 2 complementary shades.
02Maintain Visual Identity
An important aspect to keep in mind while attempting to design GIF is, it should visually relate to the underlying content. For instance, if you are intending a brand promotion through your GIF, lay stress on adding elements like, brand definition, product specifications, know-how of your work patterns, etc. ensure that your content flows naturally and has exactness.
Other alternatives are, using your product logo as the GIF background, character representation of your brand or using some explicit product oriented themes. While, you are free to pick anything that suits your preferences and needs, just make sure that using it in your GIF adds value to your brand instead of giving an out of the box feel.
Image Name: The-only-guide-you’ll-ever-need-to-learn-gif-design-that-get-shared-like-crazy-1
03Cut Down on Unnecessary Frames
Have you ever encountered a halt in the natural loop of your GIF out of nowhere? While pondering over the underlying cause, it is a common assumption to take this as an animation fallacy, but that’s evidently not the case. The actual culprits behind this glitch are those extra frames that contribute towards nothing but adding weight to an already heavy file.
To set this straight, you should switch to removing any extra frames, while saving a particular one which you may stretch to a desired duration according to the break point of your contents in the GIF. However, take caution to maintain the visual quality of your GIF while you remove those extra frames.
04Make Your GIF Accessible
You should always adhere to the concern of accessibility while creating a GIF. The reason being, your content is visibly going to get mass attention across the web and you cannot filter out visitors, make sure your GIF is easily accessible to all kind of users, particularly those with vision limitations, like, epileptic patients or the ones using screen readers.
Focus on describing your GIF content with alt text and using a limited blinking and flashing rate. In case your GIF content is primarily text based, take care to limit the effective color and image movement and adjust the frames rates to avoid constant and quick movement of image frames when adding many clips on a single page.
Pay additional heed to the auto play feature of your GIFs. It can be visibly annoying to be welcomed on a site homepage with GIFs enjoying an auto play session of their own. You can alternatively, incorporate a ‘Click to Play’ option or grant your site visitors the liberty to decide on what is to be played when.
05Use Storyboards
When aiming to create visibly appealing GIFs, you need to lay considerable stress on choosing an apt background story. Don’t get misled by the wrong assumption of using any random background, owing to the short play duration of GIFs. An impressive solution to this concern is taking the help of a storyboard to keep track of your GIF’s content flow.
Using a storyboard is quite effective means of being in line with the direction of content movement, rescuing you from the hustle of going off the track. This comes explicitly handy when you are working with a team of creators. The storyboard is there to keep everything at the exact place, thus improving member communications and boosting up the design process.
06Focus on Creating Loops
Consider creating an animated motion loop for your GIF allowing a repeated and comprehensive view of your content. Looping projects a deeper observation of the clip and its contents in a seamless transition. However, creating an infinite motion loop in GIFs is quite tricky, as you need to pay utmost concern to ensure a smooth content flow and chances of even the slightest errors are not entertained.
Any loopholes in placement of your GIF elements will get noticed within a blink and lead to an unsatisfactory user experience. Hence, you need to check each of your content frames separately to eliminate chances of possible errors. If you are a beginner, try working with geometrical animations to get the initial pickup. This will be advantageous in deciding the exact element positions at the start and end of the GIF.
07Make Use of Motion Blur
Using the concept of motion blur is pivotal in providing a natural flow and feel to your GIF, which, in an otherwise case would ordinarily appear as a mere collection of static images clubbed together. This would give a wobbling feel with unsteady frame movements to your viewers. The motion blur effect potentially ensures a smooth content flow, and your GIF looks like a short video captured from a camera.
08Stick to a Reduced File Size
Creating GIF of within a standard size range is quite difficult, owing to the fact that these are shared across a variety of media platforms, each having a different file size constraint. It is, however, recommended to stick to a file size as low as possible to escape the notch of modifying the same, ener5y time you need to work with the GIF on a different platform.
Listed below are a few ways to limit your GIF to a lower file size:
● Restrict your GIF to a frame count under 150, exceeding which, it will get difficult to export the GIF to most of the commonly visited social media and content sharing platforms.
● When your GIF is ready to export, adjust its lossy parameter between 5 and 10 to boost the file compression rate. Look for a setting that decreases the effective file size without compromising with the overall GIF design.
● Restrict to a minimum possible color usage. This will not only intensify the GIF design, but also contribute in maintaining a decreased file size. You can instead, focus on playing with animations or adjusting your image frames to longer play durations.
● Don’t experiment with multiple background gradients in your GIF. You can select from either a completely opaque, or a totally transparent background. Adding unnecessary gradients will end up giving your GIF a hazy look, along with a visibly large file that will be difficult to export non any platform.
Part 2 Amazing Examples of Animated Gifs in Web Design
GIFs are an effective means of adding appeal to brand promotions and achieving improved market buildup by delivering just the right content in the most captivating and interesting ways. You can use them as creative web design tools to add spark to your product sites, which can potentially boost the market value and reach of your product by multiplying the number of visitors to your site.
Discussed below are some stunning examples of using animated GIFs to enhance commercial web design, which you can use to create a significant buzz about your product among a target audience:
01Marie Weber
This is a shoe designer company in France, famous for its classy, handmade shoes. On visiting the company’s site, you are welcomed by a simple and subtle, animated product logo on each page. This animated logo is a masterpiece in itself, telling you the about the lavishness of the associated product.
On navigating further, you will find animated elements, like; shoe images and collection names, which appear on the screen before a zoom out. There are underlined links that pop up to animate beneath the name, indicating the link you are going to visit.
02Wonderful Weekends Festival
This is an absolute animation delight, where the welcome page of the site greets you with vibrant pieces in motion, and a pop up box informs you of the festival’s arrival time and asks you to select one from the options of ‘Play Now’ or ‘Show Me the Festival’.
As you click to make a choice, the Google brand shines with associated colors. As you continue to browse through the site, pages open up with brand color animations, along with colored active links flashing on the pages.
03Google
This is a brand name that needs no introduction. Google has launched its ‘Your Plan, Your Planet’ site to infuse awareness about environment conservation and eco friendly lifestyles, guiding visitors on ways and means of introducing related changes. The site greets you with a simple layout, with a short text moving in and getting still. Click on ‘Let’s Get Started’ and you will see 4 amazingly animated icons that open up to more vibrant animations.
Tap any one of the swinging refrigerator door, the illuminated light bulb, the running faucet or the teddy bear waving at you, to land on a schema that informs you about effective means of improving on conservation in within your selected section. This is a perfect example of using animations as a marketing strategy to captivate people’s attention on a subject that evidently turns them off.
04Pete Nottage
Designed explicitly as a hiring site for voice presenter Pete Nottage, this website tells you everything about the actor and the credibility of hiring him. The site lands among the best examples of web animation usage. The welcome page of the site greets you with the brand logo. Tap on the red swipe and you will get to know that the brand infuses vibrancy to something that’s originally dull.
Next, you will find a plethora of dynamic and elegant animations in a plying plane, cityscape, flowing sea and sailing boats, moving cars and excusive motion graphics on each building. Visiting the animated site links provides you an insight of the actor’s personality. In the ‘About’ section, you can find a headshot animation, that disappears on clicking, and is followed by a more dynamic motion snippet.
05Zamzar
This one is an online file conversion site and lives up to its tagline ‘File Conversion Made Easy’ through a concrete animation on the welcome page. The file conversion on this site is quick, 3-step process, with a blinking animation indicating the current conversion stage.
For instance, when you are at the first step of selecting a file to convert, the animation shoes a blinking glow on number 1. This continues for the rest of the steps, till your file is finally converted into the desired file format.
06Blizzard: Warcraft III Reforged
Warcraft was one complete heaven of adventure and thrill for console gamers. While the enticing cutscenes with stunning motion graphics were an absolute favorite, the game had a plenty of other exciting elements.
The relaunched game (Warcraft III Reforged) website has a mix of gaming adventures and cutscenes running in the site’s background with the game title and pitch appearing as an overlaid animation. On navigating through the site, you will find classy animated elements that take you on a nostalgic trip of the original game.
Part 3 Learn How to Create and Add Gifs to Interactive Layouts in Filmora
Now that you are quite familiar with the utility of GIFs in almost every market field, and have seen stunning examples of GIF design and usage for an impressive brand promotion, let’s take a dive into creating and using these motion clips to make interactive graphic layouts for websites, social media blogs and posts, and a variety of other applications that require some brilliant imagery for market promotion.
When looking for the perfect GIF designer software, Wondershare Filmora Video Editor is the most affordable pick. This is a free and an enhanced GIF design tool, packed with world class and premium quality features that are most suitable for giving the much appreciated professional touch to your graphic artwork. Here’s how you can work with Filmora to make alluring graphic layouts:
Step 1: Launch Filmora
The software is readily compatible to your Windows and MacOS devices and you don’t even require a signup to use the application. Just download and install the software in your preferred device and launch the same to reach the software’s welcome interface.
Filmora Free Download Link:
Step 2: Upload Media Files
Select and import the desired media files from your device to upload them to the Filmora timeline. You can either pick a video or choose a series of static images.
Step 3: Add to Timeline
Once imported, you need to add the selected files to the software’s editor timeline. You can use the ‘Drag and Drop’ method to get this done.

Wondershare Filmora - Best Video Editor for Mac/Windows
5,481,435 people have downloaded it.
Build unique custom animations without breaking a sweat.
Focus on creating epic stories and leave the details to Filmora’s auto features.
Start a creative adventure with drag & drop effects and endless possibilities.
Filmora simplifies advanced features to save you time and effort.
Filmora cuts out repetition so you can move on to your next creative breakthrough.
Step 4: Explore Your Editing Skills
As already stated, the Filmora effects library is an extensive inventory of stunning features to compliment your artwork with matchless class. You are free to choose from tons of image and video editing effects and filters suited to your GIF content to create excellent pieces of graphic art.
When starting to customize your GIF in Filmora, you can begin with cropping and trimming your images or video to the perfect part, or even cut and split them to ward off unwanted portions, or rotate and flip the images to set them in the perfect orientation.
You can further add elements like, graphic transitions, overlays, animations and texts, and etc., to customize your artwork to your heart’s content. The software’s audio-visual library facilitates you with around 300 audio-visual effects and music choices to supplement your creation with a conducive sound feel. You can also make adjustments in frame speed and play durations to get the best most snippet ever!
You are granted the liberty to choose almost any common file format to create and customize GIFs in Filmora. A more convincing feature is, the software does not leave a watermark on your artwork and you can easily share your creation across media platforms.
Step 5: Save and Export
Once your creation satisfies you, save it to your device with a .gif extension, from where it can be exported to various media sharing platforms with ease.
● Key Takeaways from This Episode →
● When planning a perfect and appealing product marketing strategy, you can consider using GIFs to enhance the feel. Complement your product site with suitable GIF design and graphic transitions can prove pivotal to target and hold your related audience.
● Looking for the best GIF creator and customization software, you can rely on Filmora to create and customize professional quality GIFs with utmost convenience.
The Only Guide You’ll Ever Need to Learn GIF Design That Get Shared Like Crazy
In this article
01 [8 Principles for Great GIF Design](#Part 1)
02 [6 Amazing Examples of Animated Gifs in Web Design](#Part 2)
03 [Learn How to Create and Add Gifs to Interactive Layouts in Filmora](#Part 3)
Part 1 Principles for Great GIF Design
Creating GIFs for infotainment or casual information sharing is the current talk of the trend. You might have visibly landed across a heap of tantalizing GIFs in blogs, social media posts, product promotion websites and almost every other domain you can possibly think of. Using GIFs for any type of content promotion is bound to captivate the target audience in impressive multiplicities. Ever wondered what’s the cue behind the mass appeal that GIFs create? Well, an obvious answer is the stunning GIF design.
When going for GIF creation and selection, design plays the key role in creating considerable buzz about the information being transmitted. To add impact to your creation, you need to pay considerable attention to its design implications, thus ensuring that the right things get presented in the right way. Outlined below are some amazing principles you can use to enhance your GIF design to the next level:
01Ensure Accuracy and Preciseness
The primary concern you need to be attentive about while designing a GIF is its preciseness. Ensure ban exactness of information and confine your creation to the theme and requirement of your creation, like, the message you want to deliver or the impact you want to create through the GIF. Balance your creativity within specific content parameters and avoid getting carried away or overdoing on the beautifying aspect.
As an example, it is visibly not appealing to add a wholesome mix of 15 shades and 20 different elements in a nature-based GIF. You will end up getting too harsh on the viewers’ eyes, confusing them with a hoard of speeding elements and banging colors. You can instead stick to 2 or 3 frames with an intelligent mix of 2 complementary shades.
02Maintain Visual Identity
An important aspect to keep in mind while attempting to design GIF is, it should visually relate to the underlying content. For instance, if you are intending a brand promotion through your GIF, lay stress on adding elements like, brand definition, product specifications, know-how of your work patterns, etc. ensure that your content flows naturally and has exactness.
Other alternatives are, using your product logo as the GIF background, character representation of your brand or using some explicit product oriented themes. While, you are free to pick anything that suits your preferences and needs, just make sure that using it in your GIF adds value to your brand instead of giving an out of the box feel.
Image Name: The-only-guide-you’ll-ever-need-to-learn-gif-design-that-get-shared-like-crazy-1
03Cut Down on Unnecessary Frames
Have you ever encountered a halt in the natural loop of your GIF out of nowhere? While pondering over the underlying cause, it is a common assumption to take this as an animation fallacy, but that’s evidently not the case. The actual culprits behind this glitch are those extra frames that contribute towards nothing but adding weight to an already heavy file.
To set this straight, you should switch to removing any extra frames, while saving a particular one which you may stretch to a desired duration according to the break point of your contents in the GIF. However, take caution to maintain the visual quality of your GIF while you remove those extra frames.
04Make Your GIF Accessible
You should always adhere to the concern of accessibility while creating a GIF. The reason being, your content is visibly going to get mass attention across the web and you cannot filter out visitors, make sure your GIF is easily accessible to all kind of users, particularly those with vision limitations, like, epileptic patients or the ones using screen readers.
Focus on describing your GIF content with alt text and using a limited blinking and flashing rate. In case your GIF content is primarily text based, take care to limit the effective color and image movement and adjust the frames rates to avoid constant and quick movement of image frames when adding many clips on a single page.
Pay additional heed to the auto play feature of your GIFs. It can be visibly annoying to be welcomed on a site homepage with GIFs enjoying an auto play session of their own. You can alternatively, incorporate a ‘Click to Play’ option or grant your site visitors the liberty to decide on what is to be played when.
05Use Storyboards
When aiming to create visibly appealing GIFs, you need to lay considerable stress on choosing an apt background story. Don’t get misled by the wrong assumption of using any random background, owing to the short play duration of GIFs. An impressive solution to this concern is taking the help of a storyboard to keep track of your GIF’s content flow.
Using a storyboard is quite effective means of being in line with the direction of content movement, rescuing you from the hustle of going off the track. This comes explicitly handy when you are working with a team of creators. The storyboard is there to keep everything at the exact place, thus improving member communications and boosting up the design process.
06Focus on Creating Loops
Consider creating an animated motion loop for your GIF allowing a repeated and comprehensive view of your content. Looping projects a deeper observation of the clip and its contents in a seamless transition. However, creating an infinite motion loop in GIFs is quite tricky, as you need to pay utmost concern to ensure a smooth content flow and chances of even the slightest errors are not entertained.
Any loopholes in placement of your GIF elements will get noticed within a blink and lead to an unsatisfactory user experience. Hence, you need to check each of your content frames separately to eliminate chances of possible errors. If you are a beginner, try working with geometrical animations to get the initial pickup. This will be advantageous in deciding the exact element positions at the start and end of the GIF.
07Make Use of Motion Blur
Using the concept of motion blur is pivotal in providing a natural flow and feel to your GIF, which, in an otherwise case would ordinarily appear as a mere collection of static images clubbed together. This would give a wobbling feel with unsteady frame movements to your viewers. The motion blur effect potentially ensures a smooth content flow, and your GIF looks like a short video captured from a camera.
08Stick to a Reduced File Size
Creating GIF of within a standard size range is quite difficult, owing to the fact that these are shared across a variety of media platforms, each having a different file size constraint. It is, however, recommended to stick to a file size as low as possible to escape the notch of modifying the same, ener5y time you need to work with the GIF on a different platform.
Listed below are a few ways to limit your GIF to a lower file size:
● Restrict your GIF to a frame count under 150, exceeding which, it will get difficult to export the GIF to most of the commonly visited social media and content sharing platforms.
● When your GIF is ready to export, adjust its lossy parameter between 5 and 10 to boost the file compression rate. Look for a setting that decreases the effective file size without compromising with the overall GIF design.
● Restrict to a minimum possible color usage. This will not only intensify the GIF design, but also contribute in maintaining a decreased file size. You can instead, focus on playing with animations or adjusting your image frames to longer play durations.
● Don’t experiment with multiple background gradients in your GIF. You can select from either a completely opaque, or a totally transparent background. Adding unnecessary gradients will end up giving your GIF a hazy look, along with a visibly large file that will be difficult to export non any platform.
Part 2 Amazing Examples of Animated Gifs in Web Design
GIFs are an effective means of adding appeal to brand promotions and achieving improved market buildup by delivering just the right content in the most captivating and interesting ways. You can use them as creative web design tools to add spark to your product sites, which can potentially boost the market value and reach of your product by multiplying the number of visitors to your site.
Discussed below are some stunning examples of using animated GIFs to enhance commercial web design, which you can use to create a significant buzz about your product among a target audience:
01Marie Weber
This is a shoe designer company in France, famous for its classy, handmade shoes. On visiting the company’s site, you are welcomed by a simple and subtle, animated product logo on each page. This animated logo is a masterpiece in itself, telling you the about the lavishness of the associated product.
On navigating further, you will find animated elements, like; shoe images and collection names, which appear on the screen before a zoom out. There are underlined links that pop up to animate beneath the name, indicating the link you are going to visit.
02Wonderful Weekends Festival
This is an absolute animation delight, where the welcome page of the site greets you with vibrant pieces in motion, and a pop up box informs you of the festival’s arrival time and asks you to select one from the options of ‘Play Now’ or ‘Show Me the Festival’.
As you click to make a choice, the Google brand shines with associated colors. As you continue to browse through the site, pages open up with brand color animations, along with colored active links flashing on the pages.
03Google
This is a brand name that needs no introduction. Google has launched its ‘Your Plan, Your Planet’ site to infuse awareness about environment conservation and eco friendly lifestyles, guiding visitors on ways and means of introducing related changes. The site greets you with a simple layout, with a short text moving in and getting still. Click on ‘Let’s Get Started’ and you will see 4 amazingly animated icons that open up to more vibrant animations.
Tap any one of the swinging refrigerator door, the illuminated light bulb, the running faucet or the teddy bear waving at you, to land on a schema that informs you about effective means of improving on conservation in within your selected section. This is a perfect example of using animations as a marketing strategy to captivate people’s attention on a subject that evidently turns them off.
04Pete Nottage
Designed explicitly as a hiring site for voice presenter Pete Nottage, this website tells you everything about the actor and the credibility of hiring him. The site lands among the best examples of web animation usage. The welcome page of the site greets you with the brand logo. Tap on the red swipe and you will get to know that the brand infuses vibrancy to something that’s originally dull.
Next, you will find a plethora of dynamic and elegant animations in a plying plane, cityscape, flowing sea and sailing boats, moving cars and excusive motion graphics on each building. Visiting the animated site links provides you an insight of the actor’s personality. In the ‘About’ section, you can find a headshot animation, that disappears on clicking, and is followed by a more dynamic motion snippet.
05Zamzar
This one is an online file conversion site and lives up to its tagline ‘File Conversion Made Easy’ through a concrete animation on the welcome page. The file conversion on this site is quick, 3-step process, with a blinking animation indicating the current conversion stage.
For instance, when you are at the first step of selecting a file to convert, the animation shoes a blinking glow on number 1. This continues for the rest of the steps, till your file is finally converted into the desired file format.
06Blizzard: Warcraft III Reforged
Warcraft was one complete heaven of adventure and thrill for console gamers. While the enticing cutscenes with stunning motion graphics were an absolute favorite, the game had a plenty of other exciting elements.
The relaunched game (Warcraft III Reforged) website has a mix of gaming adventures and cutscenes running in the site’s background with the game title and pitch appearing as an overlaid animation. On navigating through the site, you will find classy animated elements that take you on a nostalgic trip of the original game.
Part 3 Learn How to Create and Add Gifs to Interactive Layouts in Filmora
Now that you are quite familiar with the utility of GIFs in almost every market field, and have seen stunning examples of GIF design and usage for an impressive brand promotion, let’s take a dive into creating and using these motion clips to make interactive graphic layouts for websites, social media blogs and posts, and a variety of other applications that require some brilliant imagery for market promotion.
When looking for the perfect GIF designer software, Wondershare Filmora Video Editor is the most affordable pick. This is a free and an enhanced GIF design tool, packed with world class and premium quality features that are most suitable for giving the much appreciated professional touch to your graphic artwork. Here’s how you can work with Filmora to make alluring graphic layouts:
Step 1: Launch Filmora
The software is readily compatible to your Windows and MacOS devices and you don’t even require a signup to use the application. Just download and install the software in your preferred device and launch the same to reach the software’s welcome interface.
Filmora Free Download Link:
Step 2: Upload Media Files
Select and import the desired media files from your device to upload them to the Filmora timeline. You can either pick a video or choose a series of static images.
Step 3: Add to Timeline
Once imported, you need to add the selected files to the software’s editor timeline. You can use the ‘Drag and Drop’ method to get this done.

Wondershare Filmora - Best Video Editor for Mac/Windows
5,481,435 people have downloaded it.
Build unique custom animations without breaking a sweat.
Focus on creating epic stories and leave the details to Filmora’s auto features.
Start a creative adventure with drag & drop effects and endless possibilities.
Filmora simplifies advanced features to save you time and effort.
Filmora cuts out repetition so you can move on to your next creative breakthrough.
Step 4: Explore Your Editing Skills
As already stated, the Filmora effects library is an extensive inventory of stunning features to compliment your artwork with matchless class. You are free to choose from tons of image and video editing effects and filters suited to your GIF content to create excellent pieces of graphic art.
When starting to customize your GIF in Filmora, you can begin with cropping and trimming your images or video to the perfect part, or even cut and split them to ward off unwanted portions, or rotate and flip the images to set them in the perfect orientation.
You can further add elements like, graphic transitions, overlays, animations and texts, and etc., to customize your artwork to your heart’s content. The software’s audio-visual library facilitates you with around 300 audio-visual effects and music choices to supplement your creation with a conducive sound feel. You can also make adjustments in frame speed and play durations to get the best most snippet ever!
You are granted the liberty to choose almost any common file format to create and customize GIFs in Filmora. A more convincing feature is, the software does not leave a watermark on your artwork and you can easily share your creation across media platforms.
Step 5: Save and Export
Once your creation satisfies you, save it to your device with a .gif extension, from where it can be exported to various media sharing platforms with ease.
● Key Takeaways from This Episode →
● When planning a perfect and appealing product marketing strategy, you can consider using GIFs to enhance the feel. Complement your product site with suitable GIF design and graphic transitions can prove pivotal to target and hold your related audience.
● Looking for the best GIF creator and customization software, you can rely on Filmora to create and customize professional quality GIFs with utmost convenience.
The Only Guide You’ll Ever Need to Learn GIF Design That Get Shared Like Crazy
In this article
01 [8 Principles for Great GIF Design](#Part 1)
02 [6 Amazing Examples of Animated Gifs in Web Design](#Part 2)
03 [Learn How to Create and Add Gifs to Interactive Layouts in Filmora](#Part 3)
Part 1 Principles for Great GIF Design
Creating GIFs for infotainment or casual information sharing is the current talk of the trend. You might have visibly landed across a heap of tantalizing GIFs in blogs, social media posts, product promotion websites and almost every other domain you can possibly think of. Using GIFs for any type of content promotion is bound to captivate the target audience in impressive multiplicities. Ever wondered what’s the cue behind the mass appeal that GIFs create? Well, an obvious answer is the stunning GIF design.
When going for GIF creation and selection, design plays the key role in creating considerable buzz about the information being transmitted. To add impact to your creation, you need to pay considerable attention to its design implications, thus ensuring that the right things get presented in the right way. Outlined below are some amazing principles you can use to enhance your GIF design to the next level:
01Ensure Accuracy and Preciseness
The primary concern you need to be attentive about while designing a GIF is its preciseness. Ensure ban exactness of information and confine your creation to the theme and requirement of your creation, like, the message you want to deliver or the impact you want to create through the GIF. Balance your creativity within specific content parameters and avoid getting carried away or overdoing on the beautifying aspect.
As an example, it is visibly not appealing to add a wholesome mix of 15 shades and 20 different elements in a nature-based GIF. You will end up getting too harsh on the viewers’ eyes, confusing them with a hoard of speeding elements and banging colors. You can instead stick to 2 or 3 frames with an intelligent mix of 2 complementary shades.
02Maintain Visual Identity
An important aspect to keep in mind while attempting to design GIF is, it should visually relate to the underlying content. For instance, if you are intending a brand promotion through your GIF, lay stress on adding elements like, brand definition, product specifications, know-how of your work patterns, etc. ensure that your content flows naturally and has exactness.
Other alternatives are, using your product logo as the GIF background, character representation of your brand or using some explicit product oriented themes. While, you are free to pick anything that suits your preferences and needs, just make sure that using it in your GIF adds value to your brand instead of giving an out of the box feel.
Image Name: The-only-guide-you’ll-ever-need-to-learn-gif-design-that-get-shared-like-crazy-1
03Cut Down on Unnecessary Frames
Have you ever encountered a halt in the natural loop of your GIF out of nowhere? While pondering over the underlying cause, it is a common assumption to take this as an animation fallacy, but that’s evidently not the case. The actual culprits behind this glitch are those extra frames that contribute towards nothing but adding weight to an already heavy file.
To set this straight, you should switch to removing any extra frames, while saving a particular one which you may stretch to a desired duration according to the break point of your contents in the GIF. However, take caution to maintain the visual quality of your GIF while you remove those extra frames.
04Make Your GIF Accessible
You should always adhere to the concern of accessibility while creating a GIF. The reason being, your content is visibly going to get mass attention across the web and you cannot filter out visitors, make sure your GIF is easily accessible to all kind of users, particularly those with vision limitations, like, epileptic patients or the ones using screen readers.
Focus on describing your GIF content with alt text and using a limited blinking and flashing rate. In case your GIF content is primarily text based, take care to limit the effective color and image movement and adjust the frames rates to avoid constant and quick movement of image frames when adding many clips on a single page.
Pay additional heed to the auto play feature of your GIFs. It can be visibly annoying to be welcomed on a site homepage with GIFs enjoying an auto play session of their own. You can alternatively, incorporate a ‘Click to Play’ option or grant your site visitors the liberty to decide on what is to be played when.
05Use Storyboards
When aiming to create visibly appealing GIFs, you need to lay considerable stress on choosing an apt background story. Don’t get misled by the wrong assumption of using any random background, owing to the short play duration of GIFs. An impressive solution to this concern is taking the help of a storyboard to keep track of your GIF’s content flow.
Using a storyboard is quite effective means of being in line with the direction of content movement, rescuing you from the hustle of going off the track. This comes explicitly handy when you are working with a team of creators. The storyboard is there to keep everything at the exact place, thus improving member communications and boosting up the design process.
06Focus on Creating Loops
Consider creating an animated motion loop for your GIF allowing a repeated and comprehensive view of your content. Looping projects a deeper observation of the clip and its contents in a seamless transition. However, creating an infinite motion loop in GIFs is quite tricky, as you need to pay utmost concern to ensure a smooth content flow and chances of even the slightest errors are not entertained.
Any loopholes in placement of your GIF elements will get noticed within a blink and lead to an unsatisfactory user experience. Hence, you need to check each of your content frames separately to eliminate chances of possible errors. If you are a beginner, try working with geometrical animations to get the initial pickup. This will be advantageous in deciding the exact element positions at the start and end of the GIF.
07Make Use of Motion Blur
Using the concept of motion blur is pivotal in providing a natural flow and feel to your GIF, which, in an otherwise case would ordinarily appear as a mere collection of static images clubbed together. This would give a wobbling feel with unsteady frame movements to your viewers. The motion blur effect potentially ensures a smooth content flow, and your GIF looks like a short video captured from a camera.
08Stick to a Reduced File Size
Creating GIF of within a standard size range is quite difficult, owing to the fact that these are shared across a variety of media platforms, each having a different file size constraint. It is, however, recommended to stick to a file size as low as possible to escape the notch of modifying the same, ener5y time you need to work with the GIF on a different platform.
Listed below are a few ways to limit your GIF to a lower file size:
● Restrict your GIF to a frame count under 150, exceeding which, it will get difficult to export the GIF to most of the commonly visited social media and content sharing platforms.
● When your GIF is ready to export, adjust its lossy parameter between 5 and 10 to boost the file compression rate. Look for a setting that decreases the effective file size without compromising with the overall GIF design.
● Restrict to a minimum possible color usage. This will not only intensify the GIF design, but also contribute in maintaining a decreased file size. You can instead, focus on playing with animations or adjusting your image frames to longer play durations.
● Don’t experiment with multiple background gradients in your GIF. You can select from either a completely opaque, or a totally transparent background. Adding unnecessary gradients will end up giving your GIF a hazy look, along with a visibly large file that will be difficult to export non any platform.
Part 2 Amazing Examples of Animated Gifs in Web Design
GIFs are an effective means of adding appeal to brand promotions and achieving improved market buildup by delivering just the right content in the most captivating and interesting ways. You can use them as creative web design tools to add spark to your product sites, which can potentially boost the market value and reach of your product by multiplying the number of visitors to your site.
Discussed below are some stunning examples of using animated GIFs to enhance commercial web design, which you can use to create a significant buzz about your product among a target audience:
01Marie Weber
This is a shoe designer company in France, famous for its classy, handmade shoes. On visiting the company’s site, you are welcomed by a simple and subtle, animated product logo on each page. This animated logo is a masterpiece in itself, telling you the about the lavishness of the associated product.
On navigating further, you will find animated elements, like; shoe images and collection names, which appear on the screen before a zoom out. There are underlined links that pop up to animate beneath the name, indicating the link you are going to visit.
02Wonderful Weekends Festival
This is an absolute animation delight, where the welcome page of the site greets you with vibrant pieces in motion, and a pop up box informs you of the festival’s arrival time and asks you to select one from the options of ‘Play Now’ or ‘Show Me the Festival’.
As you click to make a choice, the Google brand shines with associated colors. As you continue to browse through the site, pages open up with brand color animations, along with colored active links flashing on the pages.
03Google
This is a brand name that needs no introduction. Google has launched its ‘Your Plan, Your Planet’ site to infuse awareness about environment conservation and eco friendly lifestyles, guiding visitors on ways and means of introducing related changes. The site greets you with a simple layout, with a short text moving in and getting still. Click on ‘Let’s Get Started’ and you will see 4 amazingly animated icons that open up to more vibrant animations.
Tap any one of the swinging refrigerator door, the illuminated light bulb, the running faucet or the teddy bear waving at you, to land on a schema that informs you about effective means of improving on conservation in within your selected section. This is a perfect example of using animations as a marketing strategy to captivate people’s attention on a subject that evidently turns them off.
04Pete Nottage
Designed explicitly as a hiring site for voice presenter Pete Nottage, this website tells you everything about the actor and the credibility of hiring him. The site lands among the best examples of web animation usage. The welcome page of the site greets you with the brand logo. Tap on the red swipe and you will get to know that the brand infuses vibrancy to something that’s originally dull.
Next, you will find a plethora of dynamic and elegant animations in a plying plane, cityscape, flowing sea and sailing boats, moving cars and excusive motion graphics on each building. Visiting the animated site links provides you an insight of the actor’s personality. In the ‘About’ section, you can find a headshot animation, that disappears on clicking, and is followed by a more dynamic motion snippet.
05Zamzar
This one is an online file conversion site and lives up to its tagline ‘File Conversion Made Easy’ through a concrete animation on the welcome page. The file conversion on this site is quick, 3-step process, with a blinking animation indicating the current conversion stage.
For instance, when you are at the first step of selecting a file to convert, the animation shoes a blinking glow on number 1. This continues for the rest of the steps, till your file is finally converted into the desired file format.
06Blizzard: Warcraft III Reforged
Warcraft was one complete heaven of adventure and thrill for console gamers. While the enticing cutscenes with stunning motion graphics were an absolute favorite, the game had a plenty of other exciting elements.
The relaunched game (Warcraft III Reforged) website has a mix of gaming adventures and cutscenes running in the site’s background with the game title and pitch appearing as an overlaid animation. On navigating through the site, you will find classy animated elements that take you on a nostalgic trip of the original game.
Part 3 Learn How to Create and Add Gifs to Interactive Layouts in Filmora
Now that you are quite familiar with the utility of GIFs in almost every market field, and have seen stunning examples of GIF design and usage for an impressive brand promotion, let’s take a dive into creating and using these motion clips to make interactive graphic layouts for websites, social media blogs and posts, and a variety of other applications that require some brilliant imagery for market promotion.
When looking for the perfect GIF designer software, Wondershare Filmora Video Editor is the most affordable pick. This is a free and an enhanced GIF design tool, packed with world class and premium quality features that are most suitable for giving the much appreciated professional touch to your graphic artwork. Here’s how you can work with Filmora to make alluring graphic layouts:
Step 1: Launch Filmora
The software is readily compatible to your Windows and MacOS devices and you don’t even require a signup to use the application. Just download and install the software in your preferred device and launch the same to reach the software’s welcome interface.
Filmora Free Download Link:
Step 2: Upload Media Files
Select and import the desired media files from your device to upload them to the Filmora timeline. You can either pick a video or choose a series of static images.
Step 3: Add to Timeline
Once imported, you need to add the selected files to the software’s editor timeline. You can use the ‘Drag and Drop’ method to get this done.

Wondershare Filmora - Best Video Editor for Mac/Windows
5,481,435 people have downloaded it.
Build unique custom animations without breaking a sweat.
Focus on creating epic stories and leave the details to Filmora’s auto features.
Start a creative adventure with drag & drop effects and endless possibilities.
Filmora simplifies advanced features to save you time and effort.
Filmora cuts out repetition so you can move on to your next creative breakthrough.
Step 4: Explore Your Editing Skills
As already stated, the Filmora effects library is an extensive inventory of stunning features to compliment your artwork with matchless class. You are free to choose from tons of image and video editing effects and filters suited to your GIF content to create excellent pieces of graphic art.
When starting to customize your GIF in Filmora, you can begin with cropping and trimming your images or video to the perfect part, or even cut and split them to ward off unwanted portions, or rotate and flip the images to set them in the perfect orientation.
You can further add elements like, graphic transitions, overlays, animations and texts, and etc., to customize your artwork to your heart’s content. The software’s audio-visual library facilitates you with around 300 audio-visual effects and music choices to supplement your creation with a conducive sound feel. You can also make adjustments in frame speed and play durations to get the best most snippet ever!
You are granted the liberty to choose almost any common file format to create and customize GIFs in Filmora. A more convincing feature is, the software does not leave a watermark on your artwork and you can easily share your creation across media platforms.
Step 5: Save and Export
Once your creation satisfies you, save it to your device with a .gif extension, from where it can be exported to various media sharing platforms with ease.
● Key Takeaways from This Episode →
● When planning a perfect and appealing product marketing strategy, you can consider using GIFs to enhance the feel. Complement your product site with suitable GIF design and graphic transitions can prove pivotal to target and hold your related audience.
● Looking for the best GIF creator and customization software, you can rely on Filmora to create and customize professional quality GIFs with utmost convenience.
[Top 9] Best Solutions To Go For When Creating an AI Thumbnail
Thumbnails are a small visual preview of the images, videos, and documents to represent the linked content. They are mostly used in web pages, video playlists, and photo galleries to offer a visual preview to the users. Furthermore, professional YouTube content creators put extra effort into making captivating thumbnails for the videos. Such thumbnails help in click-baiting and gaining maximum viewership on YouTube.
In this article, we will highlight some competent AI thumbnail makers in detail. With such AI tools, you can create desired AI thumbnails in the best visual quality. Hence, consider this guide to use AI thumbnail creator for your YouTube videos without putting in manual effort.
AI Thumbnail Creator Generate template-driven video thumbnails with the help of AI in Filmora.
Free Download Free Download Learn More

Part 1: Some Other Top-Rated Solutions For Generating AI Thumbnails (Online)
Although Filmora provides a wonderful experience creating thumbnails, you must know about other online options. In this section, we will highlight some reliable online AI thumbnail generators with their key features.
1. VEED.io
VEED.io is an efficient tool that uses AI-powered algorithms to create thumbnails. These intelligent algorithms bring authentic results within a few minutes. To use this thumbnail generator AI, describe the thumbnail through the text field. You can write multiple words by adding commas to provide a comprehensive description. Once done, click the “Generate” button to craft the AI thumbnail.
Key Features
- io can function as a video editor to alter the settings of your video. Using this tool, you can add subtitles to your video in your preferred language.
- It includes a screen recorder to capture your screen activities in high resolution. Afterward, modify the screen recording with its editing tools.
- To generate vibrant images for your work projects, try its AI image generator. With this tool, describe your imagination through words to craft convincing images.
2. Simplified
Simplified is a famous platform offering unique features to generate videos and images. By navigating to its AI thumbnail maker, you can select the size of your thumbnail. Once done, explain your video content in the given box. Moreover, you can add personalized colors, text, and images without hassle. This online thumbnail maker AI also offers different options for thumbnail templates to generate attractive results.
Key Features
- This tool offers an AI Writer through which you can create outlines and scripts for the videos. Craft compelling captions for your social media posts with this feature.
- It contains a free graphic design tool on which you can create posts and illustrations in real time. Once done, publish the created design on this online platform.
- To make excellent presentations within a few minutes, try its AI presentation maker. Describe your topic in the text field, and the tool will use AI technology to create presentations.
3. Thumbnail.AI
Thumbnail.AI is a basic tool with a beginner-friendly interface. It’s a specialized tool in which you can make both manual and AI thumbnails. For AI generation, you have to add text and additional explanations in the given boxes. Moreover, it offers three thumbnail sizes: square, rectangle, and vertical. To craft more captivating thumbnails, insert images relevant to your content. Thus, this thumbnail generator is the best option for beginners.
Key Features
- To add images to your thumbnail, this tool provides three options. You can search, link, or upload images on this thumbnail AI tool easily.
- While creating thumbnails, the tool allows you to incorporate different elements. You can add icons, shapes, people, and social media banners.
- The customization options let you change the background color of the thumbnail. It also displays multiple options for font presets.
4. Hotpot.AI
If you want a comprehensive tool to create AI YouTube thumbnails, try Hotpot. It’s a free tool containing hundreds of YouTube thumbnail templates. After choosing the template, you can edit it without any skills. On the editing window, alter the width, height, and background color of the template. Furthermore, apply unique patterns and brand logos to the thumbnail for more effective results.
Key Features
- Are you annoyed by the unwanted people in the background of your videos? If yes, use the AI background remover of this tool to eradicate unnecessary objects from the background in an effective way.
- If you have a collection of vintage or old photos, colorize them with this online tool. With its colorizer feature, you can apply natural colors and shades to old images.
- This tool also includes an option to enhance the quality of facial images. It can remove blurriness, scratches, and tears from the uploaded images.
5. Canva
Canva is an all-one tool providing a robust interface to create designs, photos, and videos. By accessing its interface, you can find thousands of templates of multiple categories. You can filter the templates by choosing a specific style and theme. There are different themes for YouTube thumbnails on Canva, such as illustration, company, and business. Furthermore, select a thumbnail designed in your favorite color.
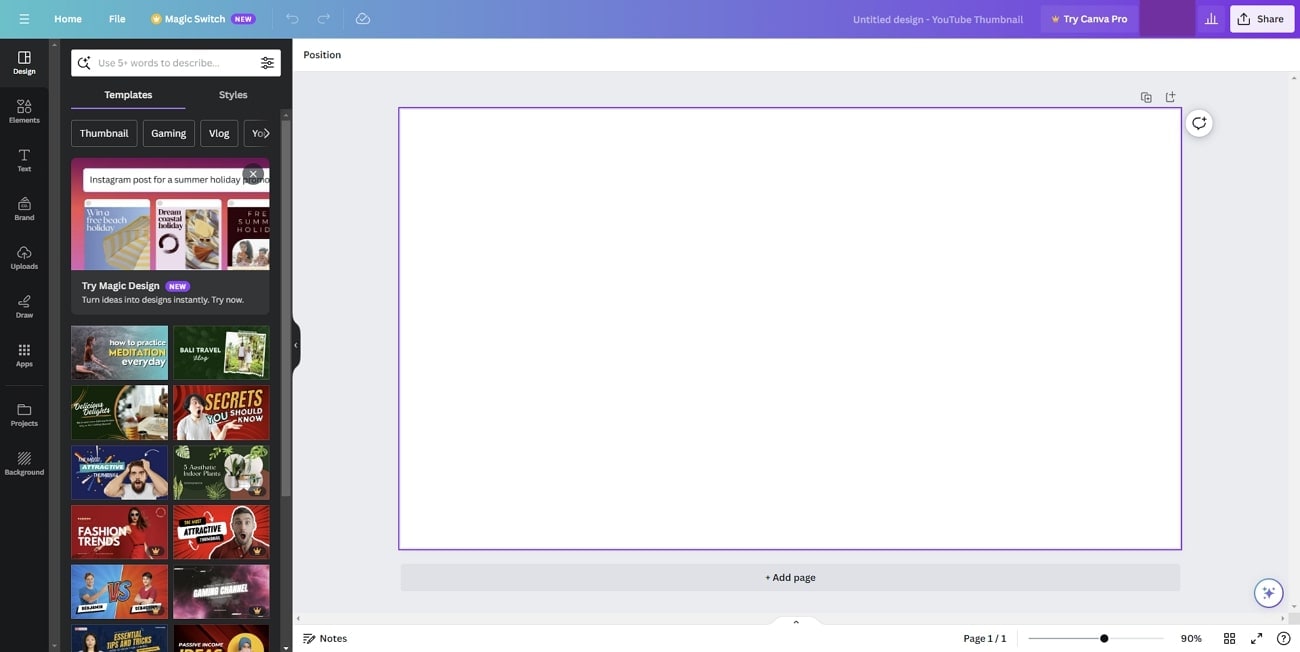
Key Features
- On this thumbnail AI generator, the thumbnail templates are 100% customizable. After editing them, you can download them quickly.
- Canva offers a PDF editor to edit and manage your PDF documents. Perform basic and advanced editing on your PDF files through this tool.
- Using this tool, make photo collages by combining desired photos. You can select attractive borders and styling boards to create collages.
6. Appy Pie
This AI thumbnail generator offers up to 47 thumbnail templates for your YouTube channel. You can preview and edit the thumbnail template within a few clicks. Furthermore, you can also design your own thumbnail by entering the text prompt. On its interface, it gives you the option to drag and drop the relevant images. By doing so, the tool will insert the relevant images on your thumbnail to generate the best results.
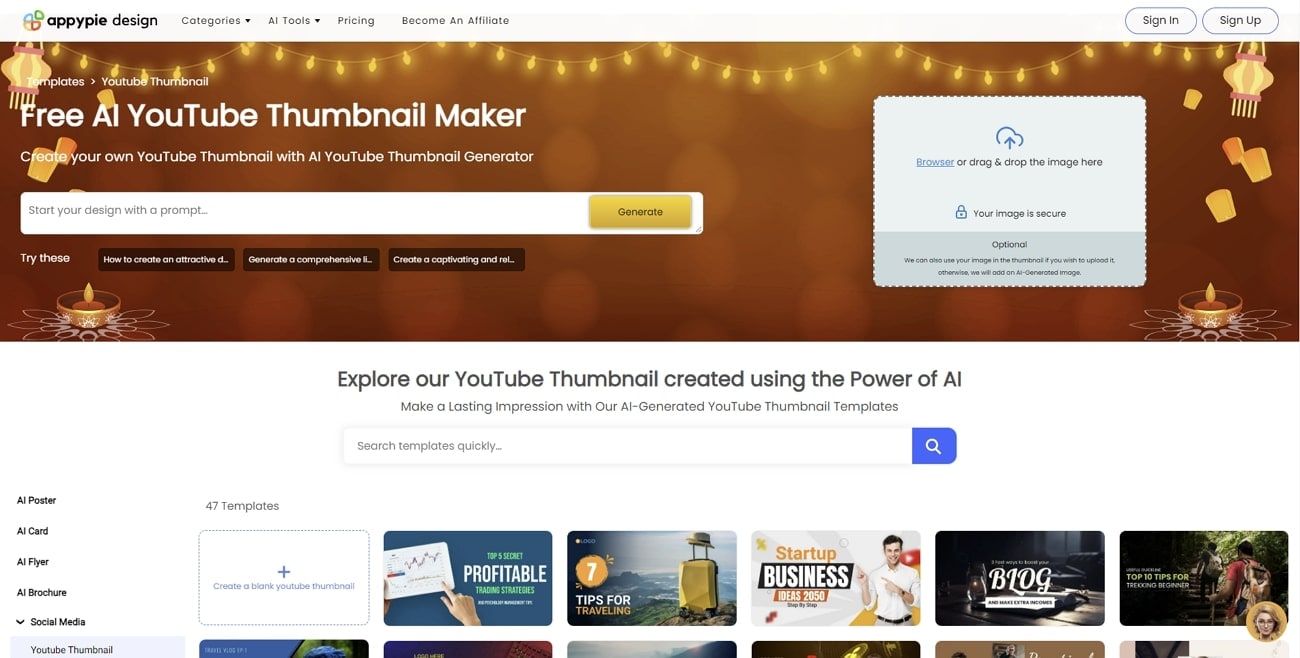
Key Features
- Do you want to create captivating avatars? You can try the AI avatar generator of this tool to create a personalized avatar by uploading your own photo.
- This tool consists of an AI text-to-video generator to craft stunning visuals. By using your textual prompt, generate a flawless video. Afterward, you can customize it from the given options.
- Using this online platform, add voiceovers to the videos with AI technology. You can write the narration in text and choose a preferred language. The tool will create a voiceover in natural voices.
7. AI YouTube Thumbnails
Do you want a professional and expert tool for creating AI thumbnails? This online tool is able to create 5 thumbnails for your video within five minutes. You can enter your video’s title or description in the text field as instructions. Afterward, the tool will email you with five attractive and relevant thumbnails for your video. Hence, it’s an easy-to-use tool to generate eye-catching thumbnails in minimal time.
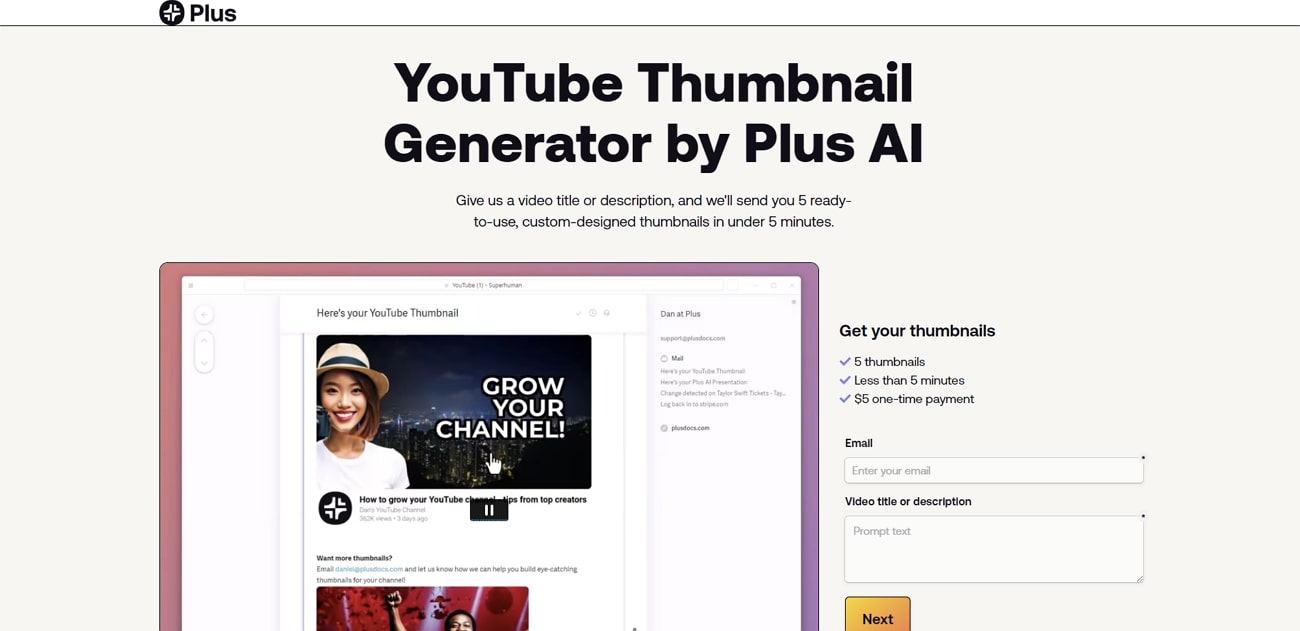
Key Features
- Using advanced algorithms, this tool can convert the text into AI slides in an efficient manner. You can copy-paste the text, and the tool will generate an AI presentation with a single click.
- It offers advanced options to edit your Google slides to generate compelling results. You can remix layouts and content to create astonishing slides.
- This tool can help you collaborate with your team by sharing custom themes and styles. This will help you to stay on board while designing for your brand or company.
8. Snappa
Snappa is widely used to craft high-resolution images in desired colors and styles. Using this AI platform, create YouTube thumbnails with many templates. You can also start from scratch to display your creativity to the world. Moreover, upload a frame from your video to add a background in the thumbnail. It also offers thousands of royalty-free images, which you can utilize in the creation of thumbnails.
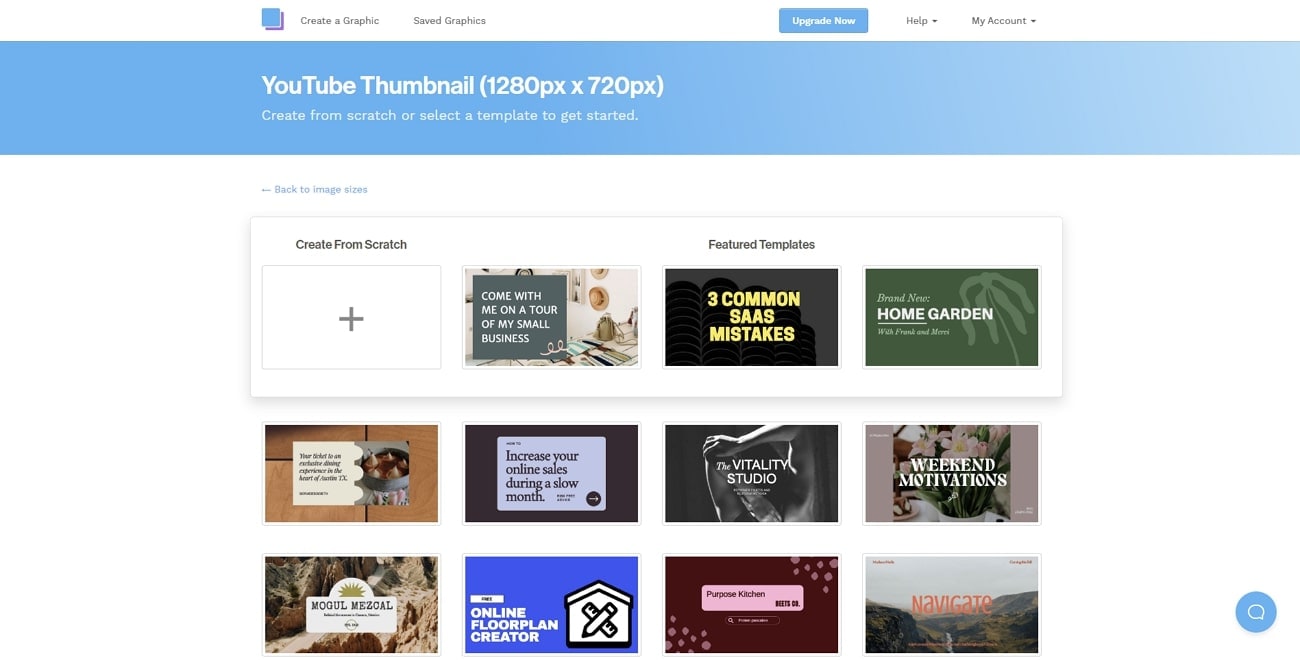
Key Features
- In this AI thumbnail creator, choose different dimensions to create images for social media posts. You can create Facebook, Instagram, LinkedIn, and other posts through this tool.
- To customize the template, add different elements from the options. You can add background, shapes, and effects to personalize the template.
- It provides multiple options to add graphics while designing a thumbnail. Add icons, vectors, photos, and uploads from your PC.
9. Picmaker
Picmaker offers the easiest way to create YouTube thumbnails in the desired manner. In this thumbnail AI maker, you can get perfectly sized YouTube thumbnails in the correct dimensions. You can use fancy colors and stylish text fonts in personalizing the thumbnail templates. Furthermore, download the thumbnail in many formats, such as SVG, PNG, PDF, and JPEG.
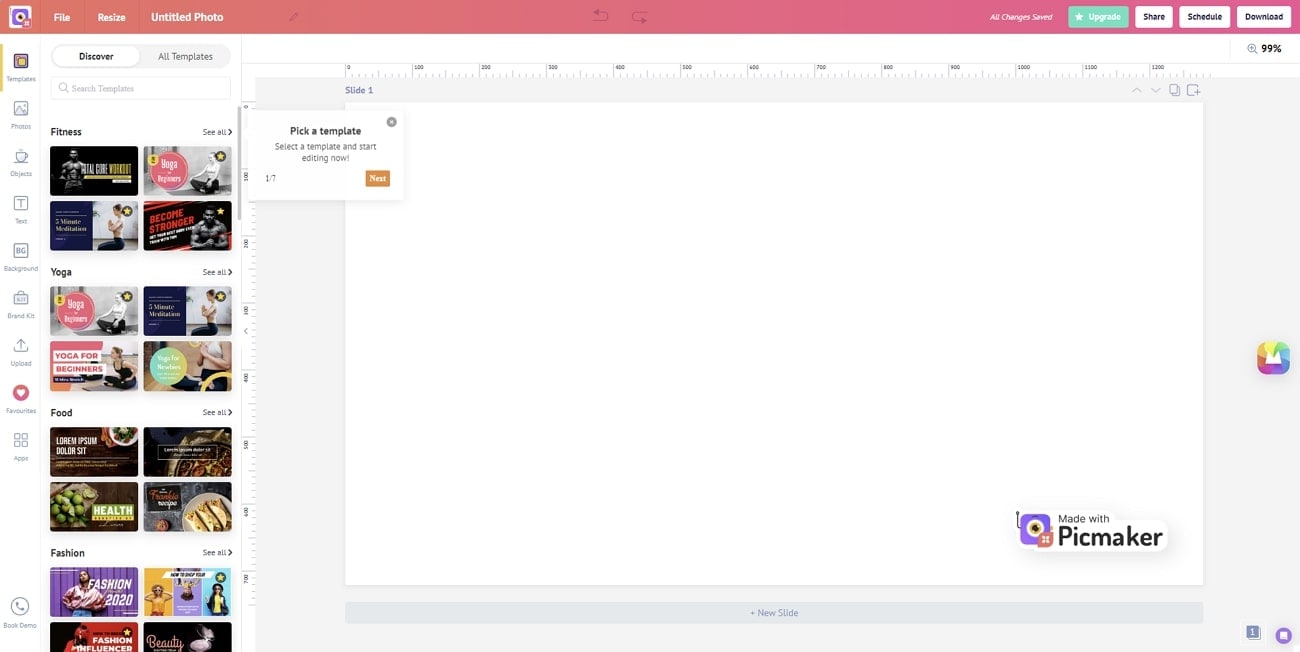
Key Features
- To create perfect online graphics, try its image resizer tool. Using this tool, you can resize the created digital designs according to the requirements of a particular platform.
- This AI thumbnail generator allows you to create customized brand kits. Create a brand kit by uploading fonts, colors, and logos effectively.
- By using its free photo editor, enhance the visual appearance of your images. You can apply captivating effects to the photos from the listed options. Also, blur the specific parts of the photo to add an aesthetic appeal.
Part 2: What Are The Benefits of Using Thumbnails in Generating Online Content?
Using thumbnails in creating online content can bring you many benefits. More specifically, if you want to generate thumbnails for YouTube videos, it can help you gain massive viewership. To know more about the benefits of thumbnail AI tools, read the below part:
1. Promotion of Brand
If you want to do your brand marketing, adding thumbnails in the videos can make an impact. You can add logos associated with your brand colors and fonts. This will help in gaining trust and credibility from your audience. Furthermore, it will display your professionalism by adding thumbnails relevant to your brand or company.
2. Enhanced Visual Representation
Thumbnails in a video help users browse and locate the content. With improved visibility of the content, users would be able to identify the content of your video. Moreover, it can increase your click-through rate (CTR), which can positively influence your viewership.
3. Offering Aesthetic Value
If you want to grow your YouTube channel or a website, YouTube thumbnail AI can help. They add an aesthetic appeal to your content, which can grasp the attention of viewers. Additionally, it will compel the viewers to explore your channel. As a result, build a strong community on your platform that can influence future progress.
4. Making Your Content Stands Out
In this competitive era, there are millions of channels and websites on online platforms. To gain a competitive edge among other channels, adding professional thumbnails is essential. Hence, make a prominent identity in the crowded online space through thumbnails.
5. Better SEO Ranking
Some online sites encourage the usage of thumbnails in the content. The reason is that thumbnails provide a preview to the users before clicking the video. In such a way, users can browse the content effortlessly. Hence, it can provide an improved SEO ranking that can highlight your content.
Part 3: Wondershare Filmora: The First-Base Solution To AI Thumbnail Making
If you want to experience a desktop-based solution for thumbnail AI creation, Wondershare Filmora is there for you. By launching this tool on Windows or macOS, you can execute professional video editing in its robust interface. Along with basic editing features like trimming and rearranging, utilize its AI tools.
It uses AI technology to provide the best performance in editing videos. It not only boosts your overall productivity but also brings perfection in editing videos. With the latest Filmora V13 launch, you can avail yourself of many game-changing features for video editing.
After this launch, you can modify your videos with the upgraded interface and intuitive controls. The new features include AI Copilot editing, AI copywriting, AI vocal remover, etc. Furthermore, it has also introduced an AI thumbnail maker to craft aesthetic thumbnails for the videos smartly.
Free Download For Win 7 or later(64-bit)
Free Download For macOS 10.14 or later
AI Thumbnail Creator Feature of Filmora
The AI Thumbnail feature of Filmora uses advanced algorithms to recognize the best shots from your video. By doing so, it can capture three thumbnails from your video that are linked to your video content. It also provides many customization options to meet your requirements for generating thumbnails. You can apply desired color schemes, fonts, and design elements.
Filmora also consists of up to 58 thumbnail templates to provide you with inspiring ideas. Moreover, it also supports advanced text and image editing to create flawless thumbnails. Thus, you must try the AI thumbnail generator of this tool for automated results.
Step-by-Step Guide To Use the AI Thumbnail Feature
Do you know how to use the AI thumbnail maker of Filmora? Here are the relevant instructions that can help you in this regard:
Step 1: Access the Thumbnail Generator
Launch Filmora on your PC and import the desired video. Once done with editing your video, hit the “Export” option. It will instantly open the Export window on your screen. From there, click the “Edit” option in the top left corner. This will open the thumbnail generator of Filmora on your screen.
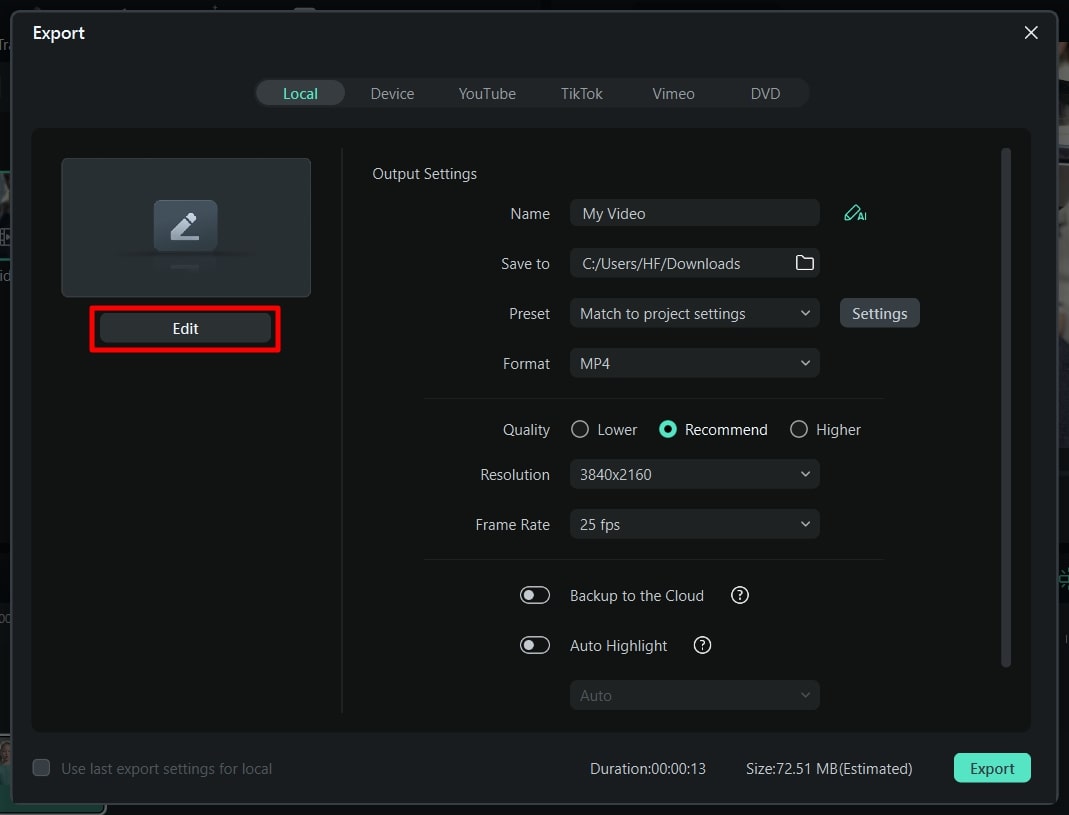
Step 2: Determine the Desired Video Frame
After accessing the thumbnail generator, you can see the best frames of your video on the left side. These frames are gathered by AI technology to bring you the best frame options. While keeping in the “From Video” section, choose your preferred frame and then tap on “Edit.”
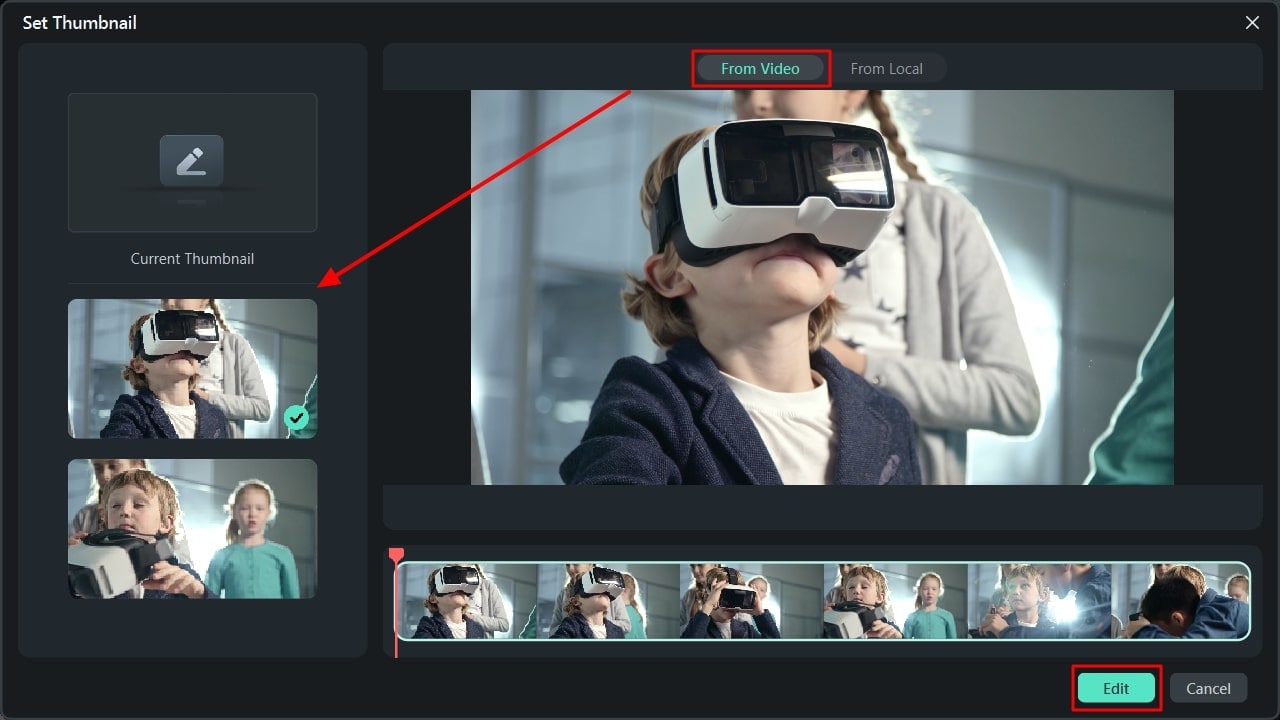
Step 3: Choose a Suitable Template
Now, the tool will display the thumbnail templates of different categories. Specify your category and then select the required thumbnail template from the listed options. Once done, tap on the “Save” button.
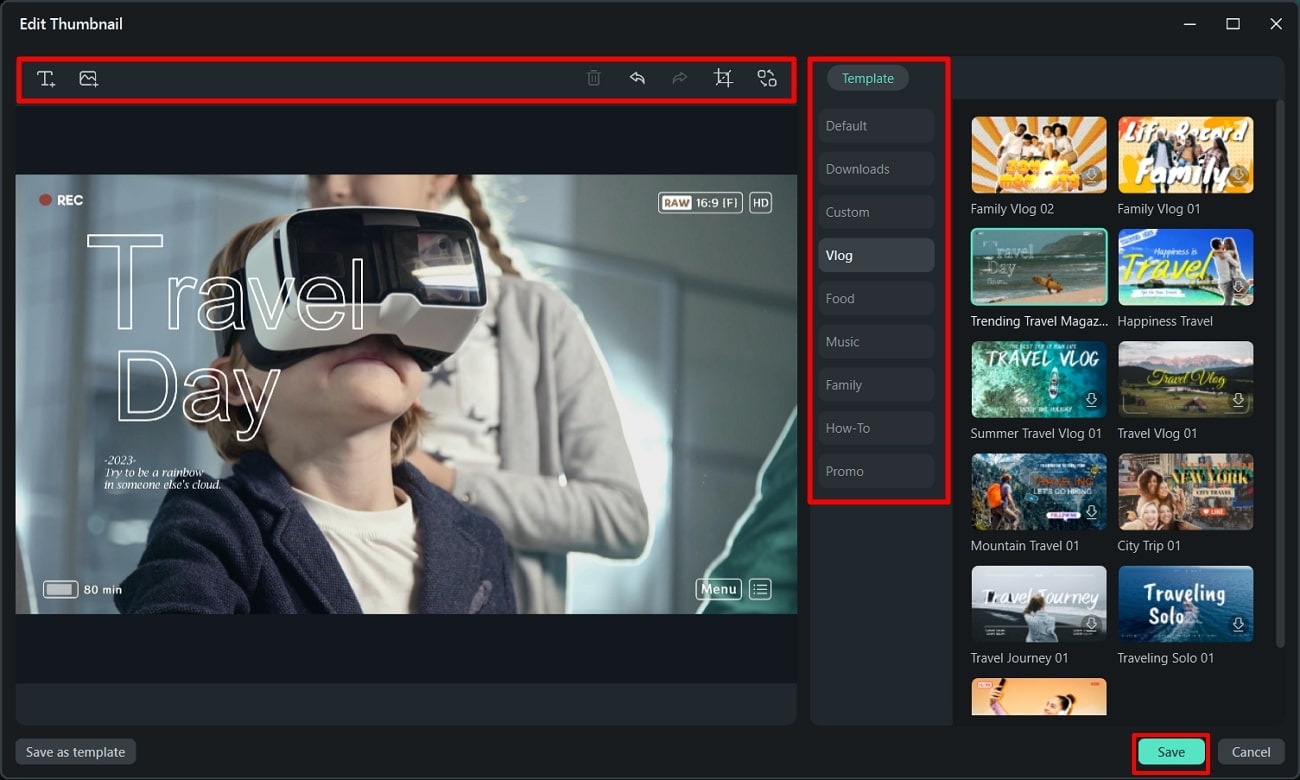
Step 4: Convert the Frame into a Thumbnail
Once you have saved the thumbnail template, the “Export” window will appear. From this window, click “Export” to convert the video frame into a thumbnail. After the conversion, check the AI-generated thumbnail by clicking the “Open Folder” option.
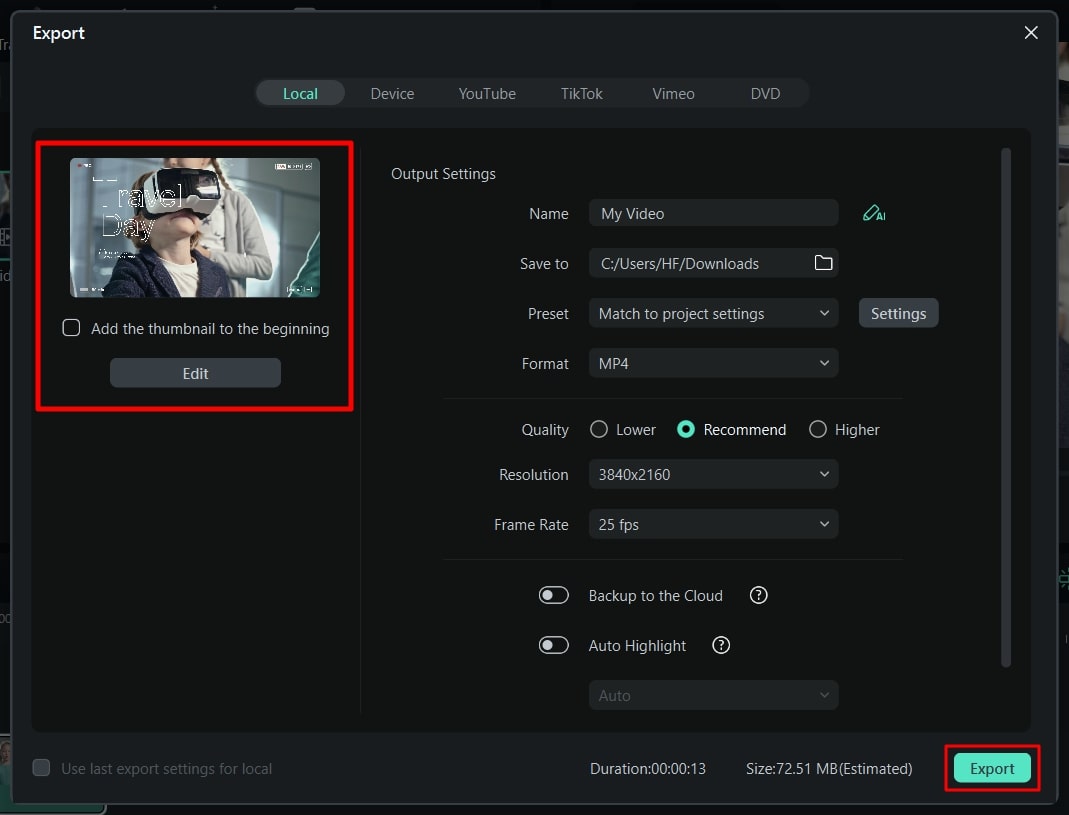
Conclusion
To make your YouTube videos look aesthetic, you should add relevant thumbnails. This will engage the viewers and help them to locate your content. Thus, being a content creator, you should know about some compelling thumbnail AI tools. By using AI-supported thumbnail creators, you can make attractive and high-quality thumbnails with little effort. Therefore, we highly recommend Filmora, which can create flawless thumbnails with up to 58 templates.
Free Download Free Download Learn More

Part 1: Some Other Top-Rated Solutions For Generating AI Thumbnails (Online)
Although Filmora provides a wonderful experience creating thumbnails, you must know about other online options. In this section, we will highlight some reliable online AI thumbnail generators with their key features.
1. VEED.io
VEED.io is an efficient tool that uses AI-powered algorithms to create thumbnails. These intelligent algorithms bring authentic results within a few minutes. To use this thumbnail generator AI, describe the thumbnail through the text field. You can write multiple words by adding commas to provide a comprehensive description. Once done, click the “Generate” button to craft the AI thumbnail.

Key Features
- io can function as a video editor to alter the settings of your video. Using this tool, you can add subtitles to your video in your preferred language.
- It includes a screen recorder to capture your screen activities in high resolution. Afterward, modify the screen recording with its editing tools.
- To generate vibrant images for your work projects, try its AI image generator. With this tool, describe your imagination through words to craft convincing images.
2. Simplified
Simplified is a famous platform offering unique features to generate videos and images. By navigating to its AI thumbnail maker, you can select the size of your thumbnail. Once done, explain your video content in the given box. Moreover, you can add personalized colors, text, and images without hassle. This online thumbnail maker AI also offers different options for thumbnail templates to generate attractive results.

Key Features
- This tool offers an AI Writer through which you can create outlines and scripts for the videos. Craft compelling captions for your social media posts with this feature.
- It contains a free graphic design tool on which you can create posts and illustrations in real time. Once done, publish the created design on this online platform.
- To make excellent presentations within a few minutes, try its AI presentation maker. Describe your topic in the text field, and the tool will use AI technology to create presentations.
3. Thumbnail.AI
Thumbnail.AI is a basic tool with a beginner-friendly interface. It’s a specialized tool in which you can make both manual and AI thumbnails. For AI generation, you have to add text and additional explanations in the given boxes. Moreover, it offers three thumbnail sizes: square, rectangle, and vertical. To craft more captivating thumbnails, insert images relevant to your content. Thus, this thumbnail generator is the best option for beginners.

Key Features
- To add images to your thumbnail, this tool provides three options. You can search, link, or upload images on this thumbnail AI tool easily.
- While creating thumbnails, the tool allows you to incorporate different elements. You can add icons, shapes, people, and social media banners.
- The customization options let you change the background color of the thumbnail. It also displays multiple options for font presets.
4. Hotpot.AI
If you want a comprehensive tool to create AI YouTube thumbnails, try Hotpot. It’s a free tool containing hundreds of YouTube thumbnail templates. After choosing the template, you can edit it without any skills. On the editing window, alter the width, height, and background color of the template. Furthermore, apply unique patterns and brand logos to the thumbnail for more effective results.

Key Features
- Are you annoyed by the unwanted people in the background of your videos? If yes, use the AI background remover of this tool to eradicate unnecessary objects from the background in an effective way.
- If you have a collection of vintage or old photos, colorize them with this online tool. With its colorizer feature, you can apply natural colors and shades to old images.
- This tool also includes an option to enhance the quality of facial images. It can remove blurriness, scratches, and tears from the uploaded images.
5. Canva
Canva is an all-one tool providing a robust interface to create designs, photos, and videos. By accessing its interface, you can find thousands of templates of multiple categories. You can filter the templates by choosing a specific style and theme. There are different themes for YouTube thumbnails on Canva, such as illustration, company, and business. Furthermore, select a thumbnail designed in your favorite color.

Key Features
- On this thumbnail AI generator, the thumbnail templates are 100% customizable. After editing them, you can download them quickly.
- Canva offers a PDF editor to edit and manage your PDF documents. Perform basic and advanced editing on your PDF files through this tool.
- Using this tool, make photo collages by combining desired photos. You can select attractive borders and styling boards to create collages.
6. Appy Pie
This AI thumbnail generator offers up to 47 thumbnail templates for your YouTube channel. You can preview and edit the thumbnail template within a few clicks. Furthermore, you can also design your own thumbnail by entering the text prompt. On its interface, it gives you the option to drag and drop the relevant images. By doing so, the tool will insert the relevant images on your thumbnail to generate the best results.

Key Features
- Do you want to create captivating avatars? You can try the AI avatar generator of this tool to create a personalized avatar by uploading your own photo.
- This tool consists of an AI text-to-video generator to craft stunning visuals. By using your textual prompt, generate a flawless video. Afterward, you can customize it from the given options.
- Using this online platform, add voiceovers to the videos with AI technology. You can write the narration in text and choose a preferred language. The tool will create a voiceover in natural voices.
7. AI YouTube Thumbnails
Do you want a professional and expert tool for creating AI thumbnails? This online tool is able to create 5 thumbnails for your video within five minutes. You can enter your video’s title or description in the text field as instructions. Afterward, the tool will email you with five attractive and relevant thumbnails for your video. Hence, it’s an easy-to-use tool to generate eye-catching thumbnails in minimal time.

Key Features
- Using advanced algorithms, this tool can convert the text into AI slides in an efficient manner. You can copy-paste the text, and the tool will generate an AI presentation with a single click.
- It offers advanced options to edit your Google slides to generate compelling results. You can remix layouts and content to create astonishing slides.
- This tool can help you collaborate with your team by sharing custom themes and styles. This will help you to stay on board while designing for your brand or company.
8. Snappa
Snappa is widely used to craft high-resolution images in desired colors and styles. Using this AI platform, create YouTube thumbnails with many templates. You can also start from scratch to display your creativity to the world. Moreover, upload a frame from your video to add a background in the thumbnail. It also offers thousands of royalty-free images, which you can utilize in the creation of thumbnails.

Key Features
- In this AI thumbnail creator, choose different dimensions to create images for social media posts. You can create Facebook, Instagram, LinkedIn, and other posts through this tool.
- To customize the template, add different elements from the options. You can add background, shapes, and effects to personalize the template.
- It provides multiple options to add graphics while designing a thumbnail. Add icons, vectors, photos, and uploads from your PC.
9. Picmaker
Picmaker offers the easiest way to create YouTube thumbnails in the desired manner. In this thumbnail AI maker, you can get perfectly sized YouTube thumbnails in the correct dimensions. You can use fancy colors and stylish text fonts in personalizing the thumbnail templates. Furthermore, download the thumbnail in many formats, such as SVG, PNG, PDF, and JPEG.

Key Features
- To create perfect online graphics, try its image resizer tool. Using this tool, you can resize the created digital designs according to the requirements of a particular platform.
- This AI thumbnail generator allows you to create customized brand kits. Create a brand kit by uploading fonts, colors, and logos effectively.
- By using its free photo editor, enhance the visual appearance of your images. You can apply captivating effects to the photos from the listed options. Also, blur the specific parts of the photo to add an aesthetic appeal.
Part 2: What Are The Benefits of Using Thumbnails in Generating Online Content?
Using thumbnails in creating online content can bring you many benefits. More specifically, if you want to generate thumbnails for YouTube videos, it can help you gain massive viewership. To know more about the benefits of thumbnail AI tools, read the below part:
1. Promotion of Brand
If you want to do your brand marketing, adding thumbnails in the videos can make an impact. You can add logos associated with your brand colors and fonts. This will help in gaining trust and credibility from your audience. Furthermore, it will display your professionalism by adding thumbnails relevant to your brand or company.
2. Enhanced Visual Representation
Thumbnails in a video help users browse and locate the content. With improved visibility of the content, users would be able to identify the content of your video. Moreover, it can increase your click-through rate (CTR), which can positively influence your viewership.
3. Offering Aesthetic Value
If you want to grow your YouTube channel or a website, YouTube thumbnail AI can help. They add an aesthetic appeal to your content, which can grasp the attention of viewers. Additionally, it will compel the viewers to explore your channel. As a result, build a strong community on your platform that can influence future progress.
4. Making Your Content Stands Out
In this competitive era, there are millions of channels and websites on online platforms. To gain a competitive edge among other channels, adding professional thumbnails is essential. Hence, make a prominent identity in the crowded online space through thumbnails.
5. Better SEO Ranking
Some online sites encourage the usage of thumbnails in the content. The reason is that thumbnails provide a preview to the users before clicking the video. In such a way, users can browse the content effortlessly. Hence, it can provide an improved SEO ranking that can highlight your content.
Part 3: Wondershare Filmora: The First-Base Solution To AI Thumbnail Making
If you want to experience a desktop-based solution for thumbnail AI creation, Wondershare Filmora is there for you. By launching this tool on Windows or macOS, you can execute professional video editing in its robust interface. Along with basic editing features like trimming and rearranging, utilize its AI tools.
It uses AI technology to provide the best performance in editing videos. It not only boosts your overall productivity but also brings perfection in editing videos. With the latest Filmora V13 launch, you can avail yourself of many game-changing features for video editing.
After this launch, you can modify your videos with the upgraded interface and intuitive controls. The new features include AI Copilot editing, AI copywriting, AI vocal remover, etc. Furthermore, it has also introduced an AI thumbnail maker to craft aesthetic thumbnails for the videos smartly.
Free Download For Win 7 or later(64-bit)
Free Download For macOS 10.14 or later
AI Thumbnail Creator Feature of Filmora
The AI Thumbnail feature of Filmora uses advanced algorithms to recognize the best shots from your video. By doing so, it can capture three thumbnails from your video that are linked to your video content. It also provides many customization options to meet your requirements for generating thumbnails. You can apply desired color schemes, fonts, and design elements.
Filmora also consists of up to 58 thumbnail templates to provide you with inspiring ideas. Moreover, it also supports advanced text and image editing to create flawless thumbnails. Thus, you must try the AI thumbnail generator of this tool for automated results.
Step-by-Step Guide To Use the AI Thumbnail Feature
Do you know how to use the AI thumbnail maker of Filmora? Here are the relevant instructions that can help you in this regard:
Step 1: Access the Thumbnail Generator
Launch Filmora on your PC and import the desired video. Once done with editing your video, hit the “Export” option. It will instantly open the Export window on your screen. From there, click the “Edit” option in the top left corner. This will open the thumbnail generator of Filmora on your screen.

Step 2: Determine the Desired Video Frame
After accessing the thumbnail generator, you can see the best frames of your video on the left side. These frames are gathered by AI technology to bring you the best frame options. While keeping in the “From Video” section, choose your preferred frame and then tap on “Edit.”

Step 3: Choose a Suitable Template
Now, the tool will display the thumbnail templates of different categories. Specify your category and then select the required thumbnail template from the listed options. Once done, tap on the “Save” button.

Step 4: Convert the Frame into a Thumbnail
Once you have saved the thumbnail template, the “Export” window will appear. From this window, click “Export” to convert the video frame into a thumbnail. After the conversion, check the AI-generated thumbnail by clicking the “Open Folder” option.

Conclusion
To make your YouTube videos look aesthetic, you should add relevant thumbnails. This will engage the viewers and help them to locate your content. Thus, being a content creator, you should know about some compelling thumbnail AI tools. By using AI-supported thumbnail creators, you can make attractive and high-quality thumbnails with little effort. Therefore, we highly recommend Filmora, which can create flawless thumbnails with up to 58 templates.
Also read:
- Updated 2024 Approved 3 Actionable Ways to Create Countdown Animation for Videos
- New In 2024, How to Turn On/Off Motion Blur in Dying Light 2?
- New In 2024, Want to Learn How to Add VHS Green Screen to Your Videos? This Guide Will Cover All the Details You Need to Know to Add This Effect to Your Videos and Make Them Stand Out
- Updated In 2024, Learn the Step-by-Step Process of Slowing Down Time-Lapse Videos on Your iPhone
- In 2024, How To Quick Guide for Creating Google Slideshows
- New 2024 Approved 2 Effective Ways to Make SRT File Translation Like a Pro
- New A Comprehensive Review of LUTs Finding LUTs Made by Danny Gevirtz for 2024
- Are You Looking to Store Your Videos Securely and Efficiently? Look No Further than Our Top Pick for the Best Cloud Storage Service for Videos
- Top iOS Solutions Finding Premium Slow Motion Apps For Video Creation
- New In 2024, Introduction to The Best Cinematic LUTs in The Market
- Updated How To Change Text Color In Premiere Pro for 2024
- In 2024, How to Blur Faces in Your Video on iPhone
- New In 2024, Within the Realm of Graphic Editing, People Also Ask How to Add Emoji to Photo. Stay Tuned to Walk Through the Best Possible Solutions in the IT Market
- Updated Discover the Ultimate LUTs for Wondershare Filmora Uncover the Answer for 2024
- Updated In 2024, Top Animated Title Makers
- How to Add Text Behind Objects in Video
- In 2024, Top 10 Secret Tips & Tricks to Use in Wondershare Filmora
- New Discover Vintage LUTs Premiere Pro Free and Paid Options Available for 2024
- New Best Movie Title Maker
- Updated 2024 Approved How to Rotate a Video in Windows 10
- New 2024 Approved Ideas to Make A Perfect Café Vlog
- Updated Templates Increase the Editing Possibilities for Beginners and Professionals. Read This Article to Learn About some Customizable Slow-Motion CapCut Templates
- New You Can Make Stylish Chroma Key Text Effects After Reading This Article. Wondershare Filmora Will Fill the Crazy Colors in Your Handwritten Note or Words for 2024
- New How to DIY VHS Overlay in After Effects?
- All About GIF Keyboard That You May Want to Know
- Updated 2024 Approved How to Rotate Video in iMovie with Alternative
- In 2024, Do You Want to Know How to Add Captivating Audio in Simple Videos? Nothing to Be Concerned About because This Article Will Help You in This Matter
- How to recover old videos from your Honor Play 40C
- In 2024, What Legendaries Are In Pokemon Platinum On Sony Xperia 1 V? | Dr.fone
- In 2024, Guide to Mirror Your Lava Yuva 3 Pro to Other Android devices | Dr.fone
- In 2024, What Does Jailbreaking iPhone 14 Pro Max i Do? Get Answers here
- How to retrieve erased call logs from Vivo Y27 4G?
- Best Android Data Recovery - Retrieve Lost Photos from Lava Yuva 2.
- In 2024, Process of Screen Sharing ZTE Nubia Flip 5G to PC- Detailed Steps | Dr.fone
- New 2024 Approved The Most Recommended Natural AI Hindi Voice Generator
- A Working Guide For Pachirisu Pokemon Go Map On Samsung Galaxy F34 5G | Dr.fone
- In 2024, Guide to Mirror Your Itel P55+ to Other Android devices | Dr.fone
- How to Change/Add Location Filters on Snapchat For your OnePlus Ace 2 Pro | Dr.fone
- Title: 11 Ways To Radial Blur To Images (iPhone/Android/Mac/Windows) for 2024
- Author: Morgan
- Created at : 2024-04-24 01:12:24
- Updated at : 2024-04-25 01:12:24
- Link: https://ai-video-editing.techidaily.com/11-ways-to-radial-blur-to-images-iphoneandroidmacwindows-for-2024/
- License: This work is licensed under CC BY-NC-SA 4.0.


