:max_bytes(150000):strip_icc():format(webp)/GettyImages-1365158534-d6952b03afff43f7a1c5f0405f31dc92.jpg)
11 Ways To Speed Up A Video On iPhone

11 Ways To Speed Up A Video On iPhone
As a content creator or a video editor, you may deal with many different aspects of editing. It may go from basic editing to VFX and so on. Speed ramping is also an important feature of editing. Creators who make cinematics or B-rolls often may have used this feature.
Changing the speed of the whole video doesn’t look good in most situations therefore speed ramping feature was created. Speed Ramping means gradually changing the speed of a clip over time. It isn’t a complex thing but doing it correctly in the right amount at the right time can change the feel of the whole video. It catches the attention of viewers through different scenes of a clip.
So, here we have mentioned some iPhone video editing softwares that can at least do basic speed changes. but most of them can also do advanced speed ramping. These are as follows:
Filmora Go:
It is available on IOS and Android both.
Want to do speed ramping? use Filmora Go. But are you a content creator and want to do more than just video editing? I would still recommend “Filmora Go”. Because it is such a versatile and easy-to-use software made by Wondershare. Like its PC software, it is also packed with many cool features such as chroma key, mask, keyframing, blending, e.t.c. It also supports multiple layers. It has built-in effects, transitions, and presets to speed up the editing process.
It is a paid video editor but you can try it for free, free trial includes most of the features but it leaves a watermark on export.
~Features:
- Has speed curves for smooth speed ramping.
- Supports multiple images and video layers.
- Have many presets and filters for fast pace editing.
- Have cool features like chroma key, masking, keyframing, e.t.c.
- Supports “Pixabay’s” stock library.
~Cons:
- Its UI doesn’t support editing in landscape orientation.
- It doesn’t support 4k video resolution.
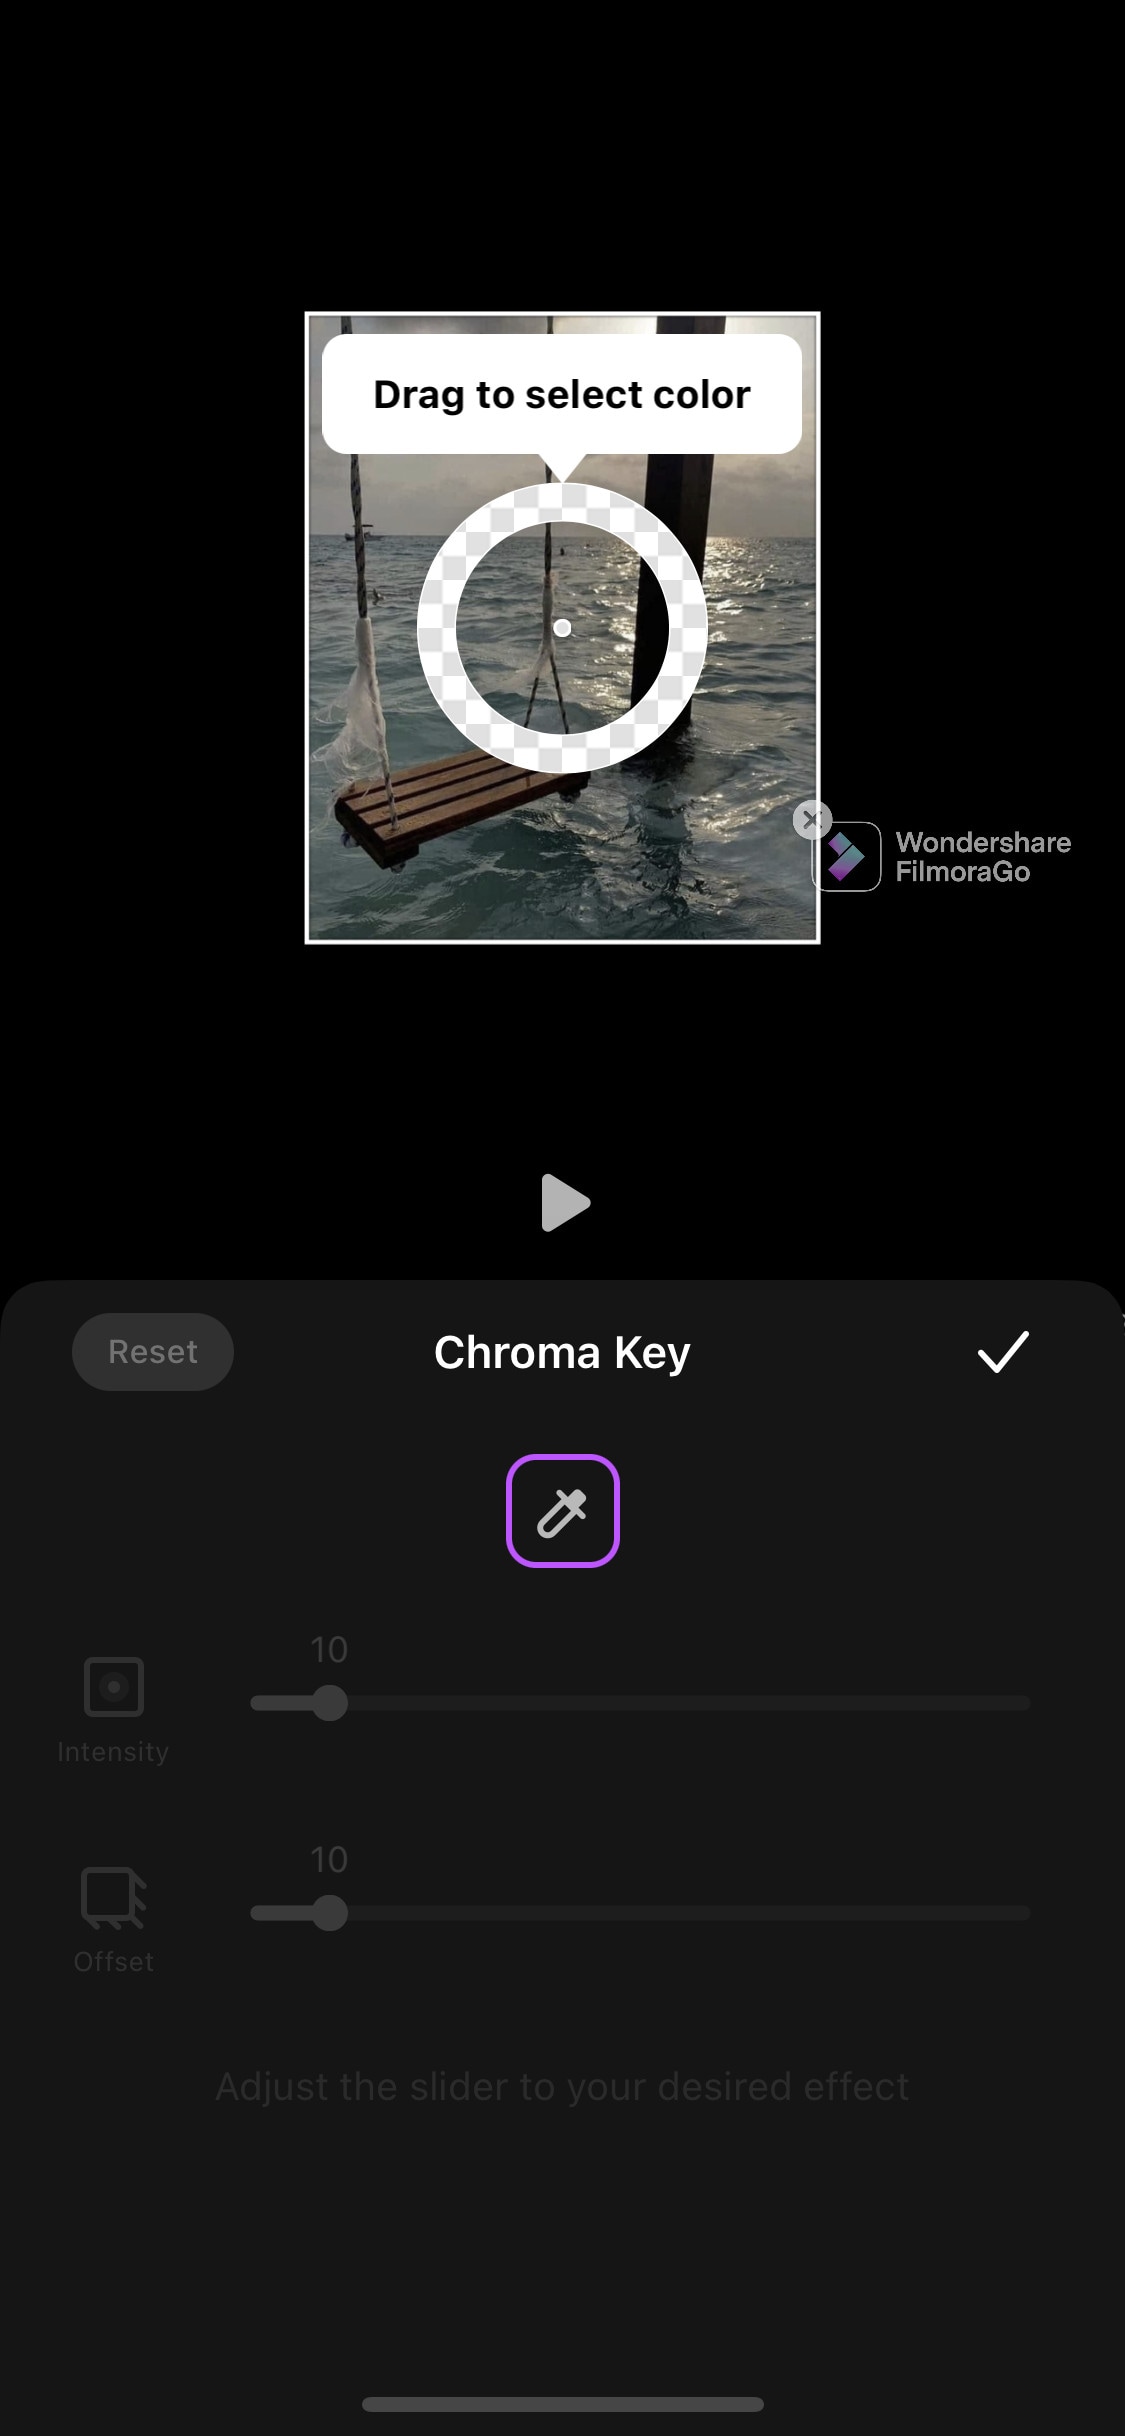
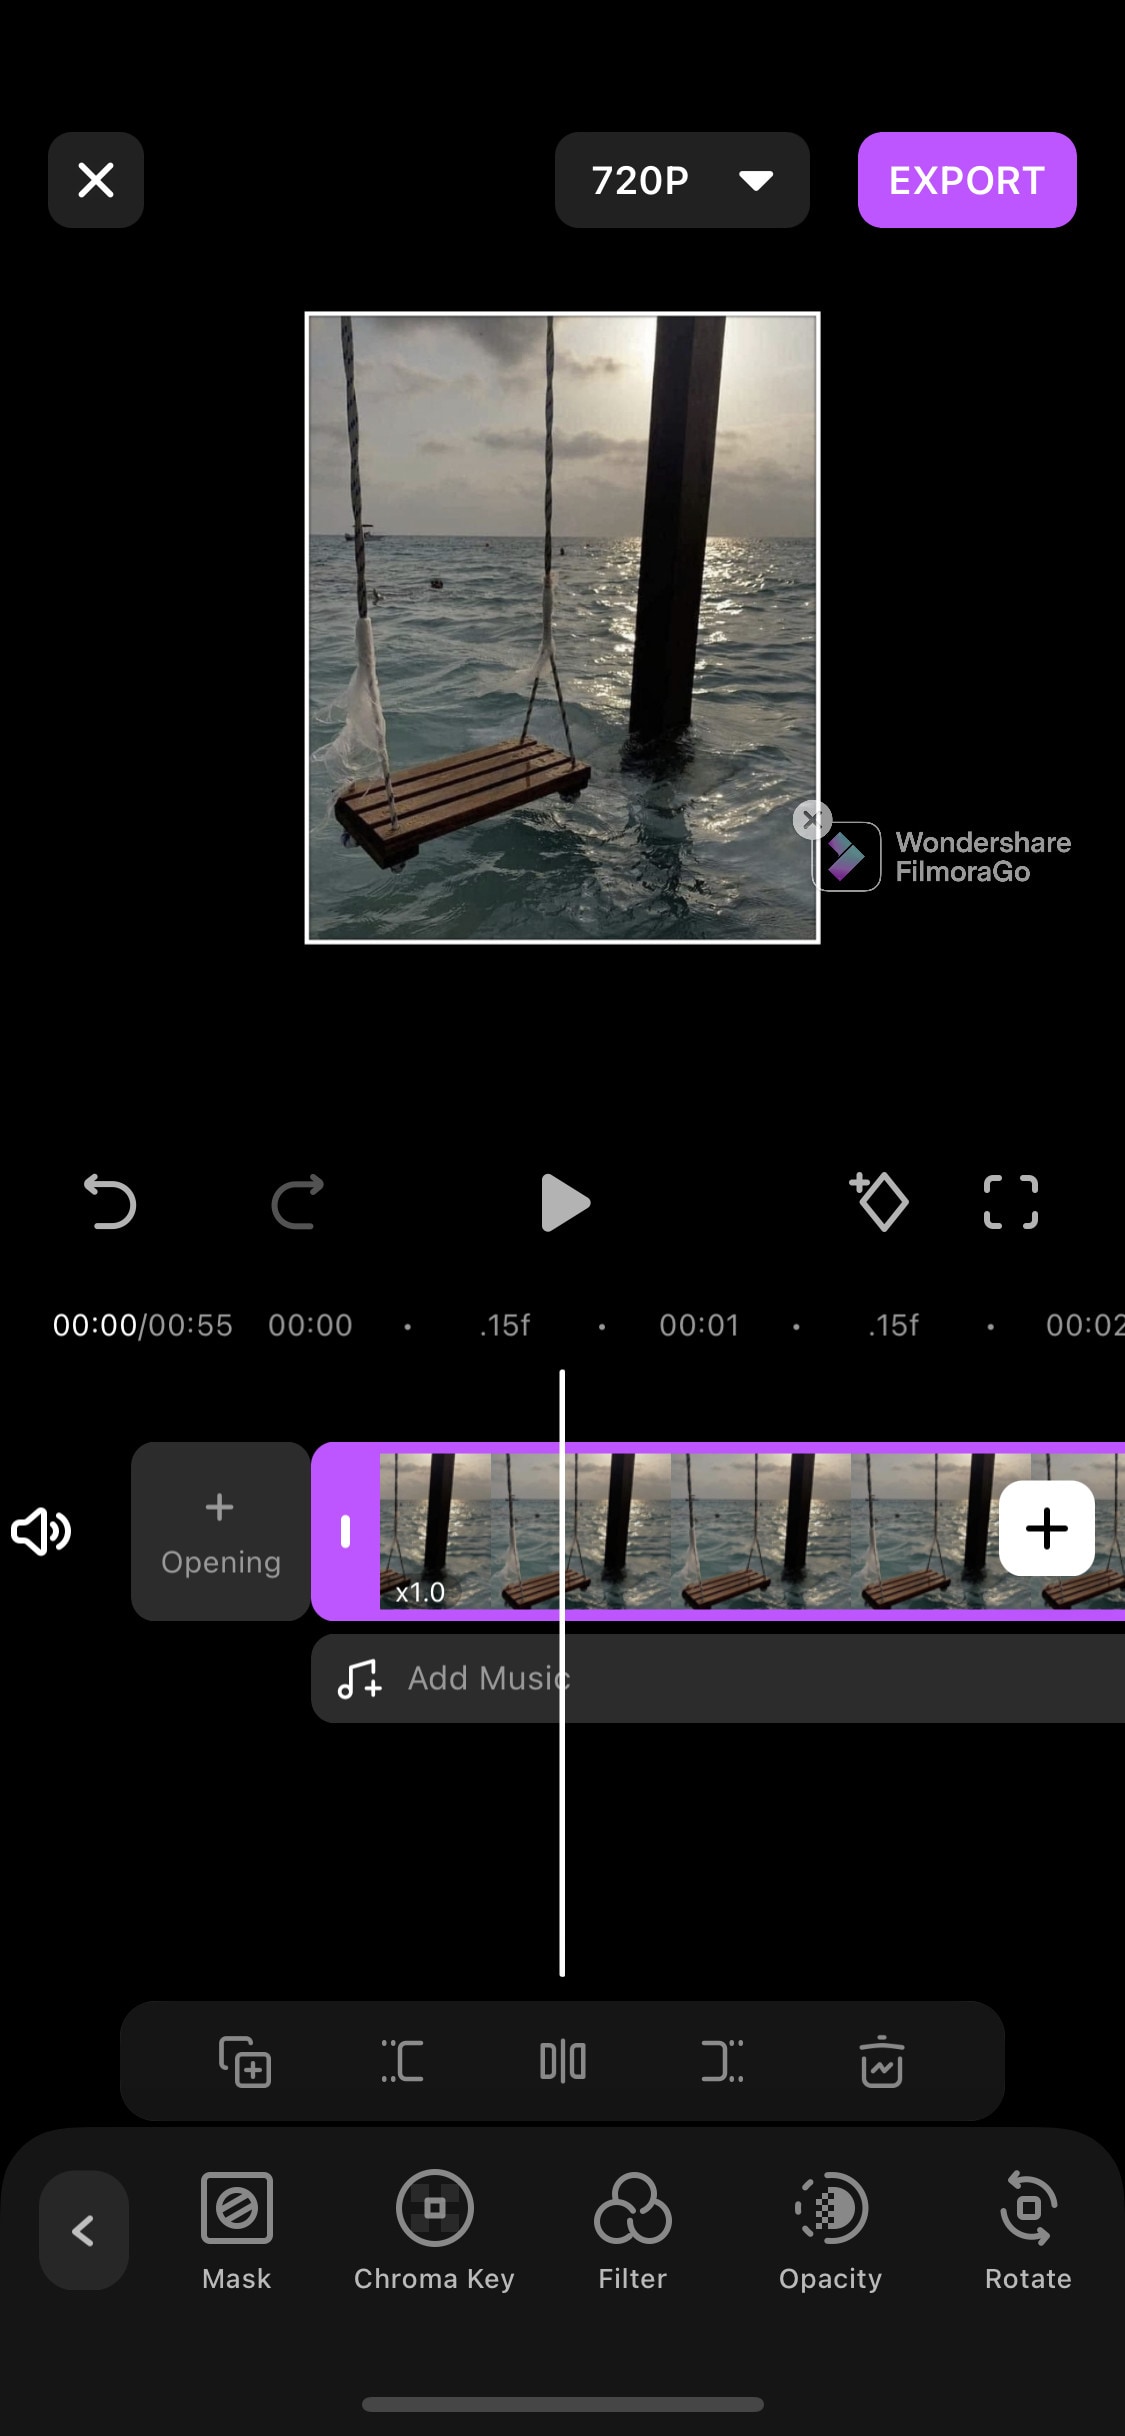
~Steps:
Import: Open Filmora Go, Click “New project” to start a new project, or Choose the previous one from the “Draft” portion. Select videos or images to import to your timeline. Hold and drag the clip to change its arrangement.
Edit: You can add text, effects, stickers, layers, e.t.c. by clicking their icon, present on the bar at the bottom.
Click and Drag a clip from the corner to trim it.
Click the “PiP” icon to add image or video layers, you also can add multiple layers.
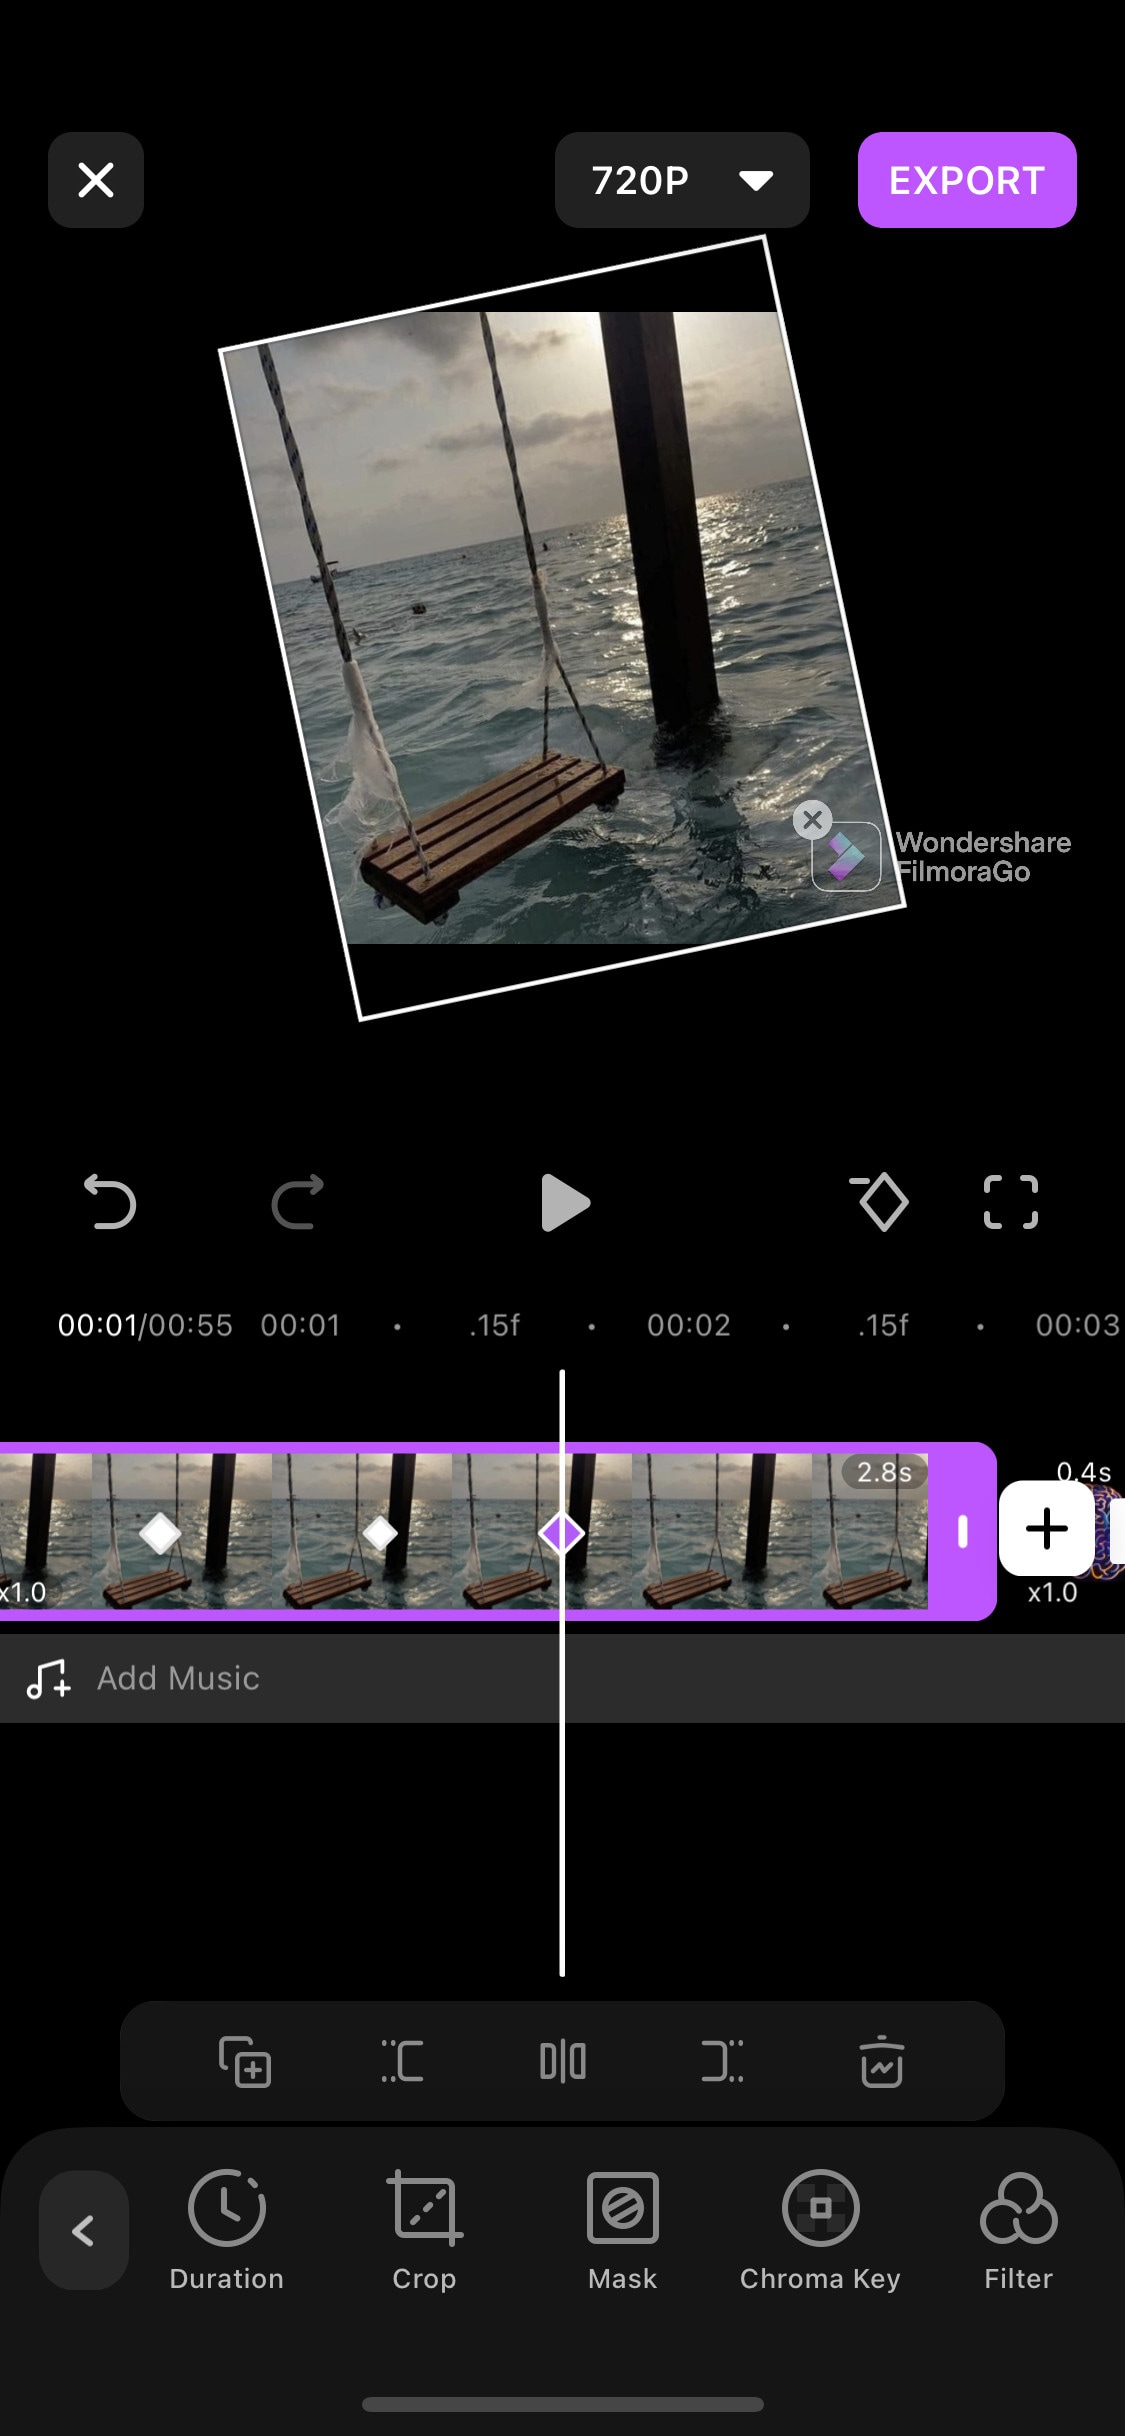
Select a clip to edit it. Different editing tools appear on the bottom bar. Here you can change its opacity, its speed, or add animations.
Click the diamond icon above the timeline to add keyframes. Zoom, move, or rotate the clip to add keyframes with the passage of time.
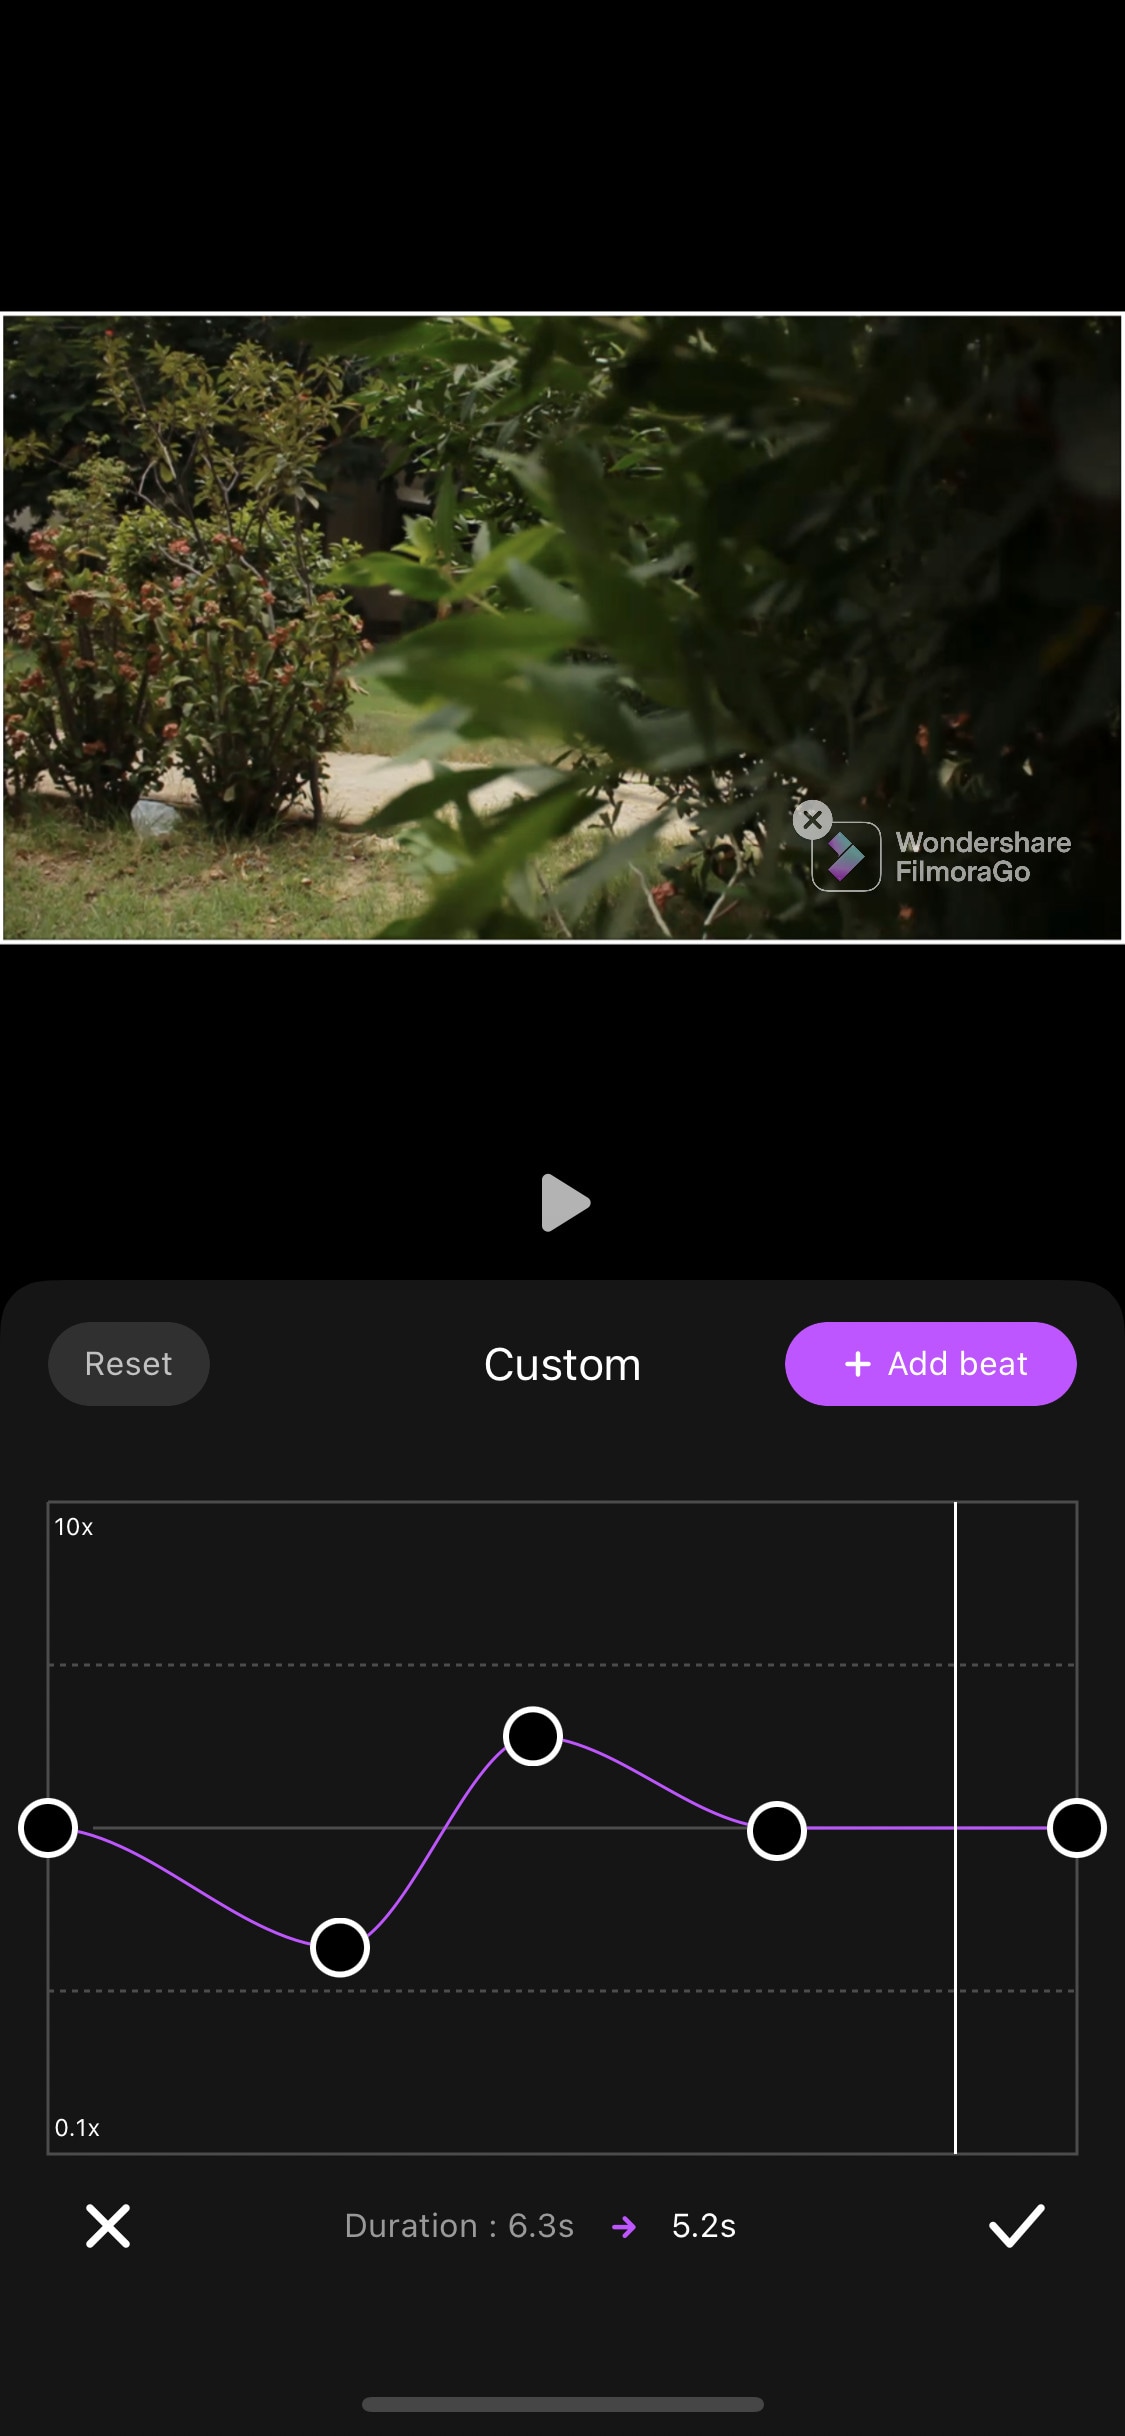
Speed Ramping: To Change the speed of a clip, select it then click the “Speed” icon on the bottom bar of the screen. Move the slider to change the speed of the whole clip. To do speed ramping, click the “curves” option to choose a preset or create your own. Click a preset to apply it, and click again to open its edit menu. drag the beats up and down to change speed or add or delete a beat if you want.
Effects: Click the “Effects” icon to open the effects menu. Select an effect to apply to your clip.
Click the white box between two clips to add transitions.
Export: Click the “Export” button to export your file. Select your desired resolution and frame rate to export your clip.
Some Free Video speeding Softwares for iPhone:
If you are short on budget or don’t want to spend much on video editing softwares then you can try these free softwares. They are free that doesn’t mean that they are useless, they are quite good for beginners or moderate users although some of them are designed for professionals also. If you don’t believe me, go and try it yourself. Apart from just changing the speed, they are good in other editing aspects also.
Adobe Premiere Rush:
It is available on IOS and Android both.
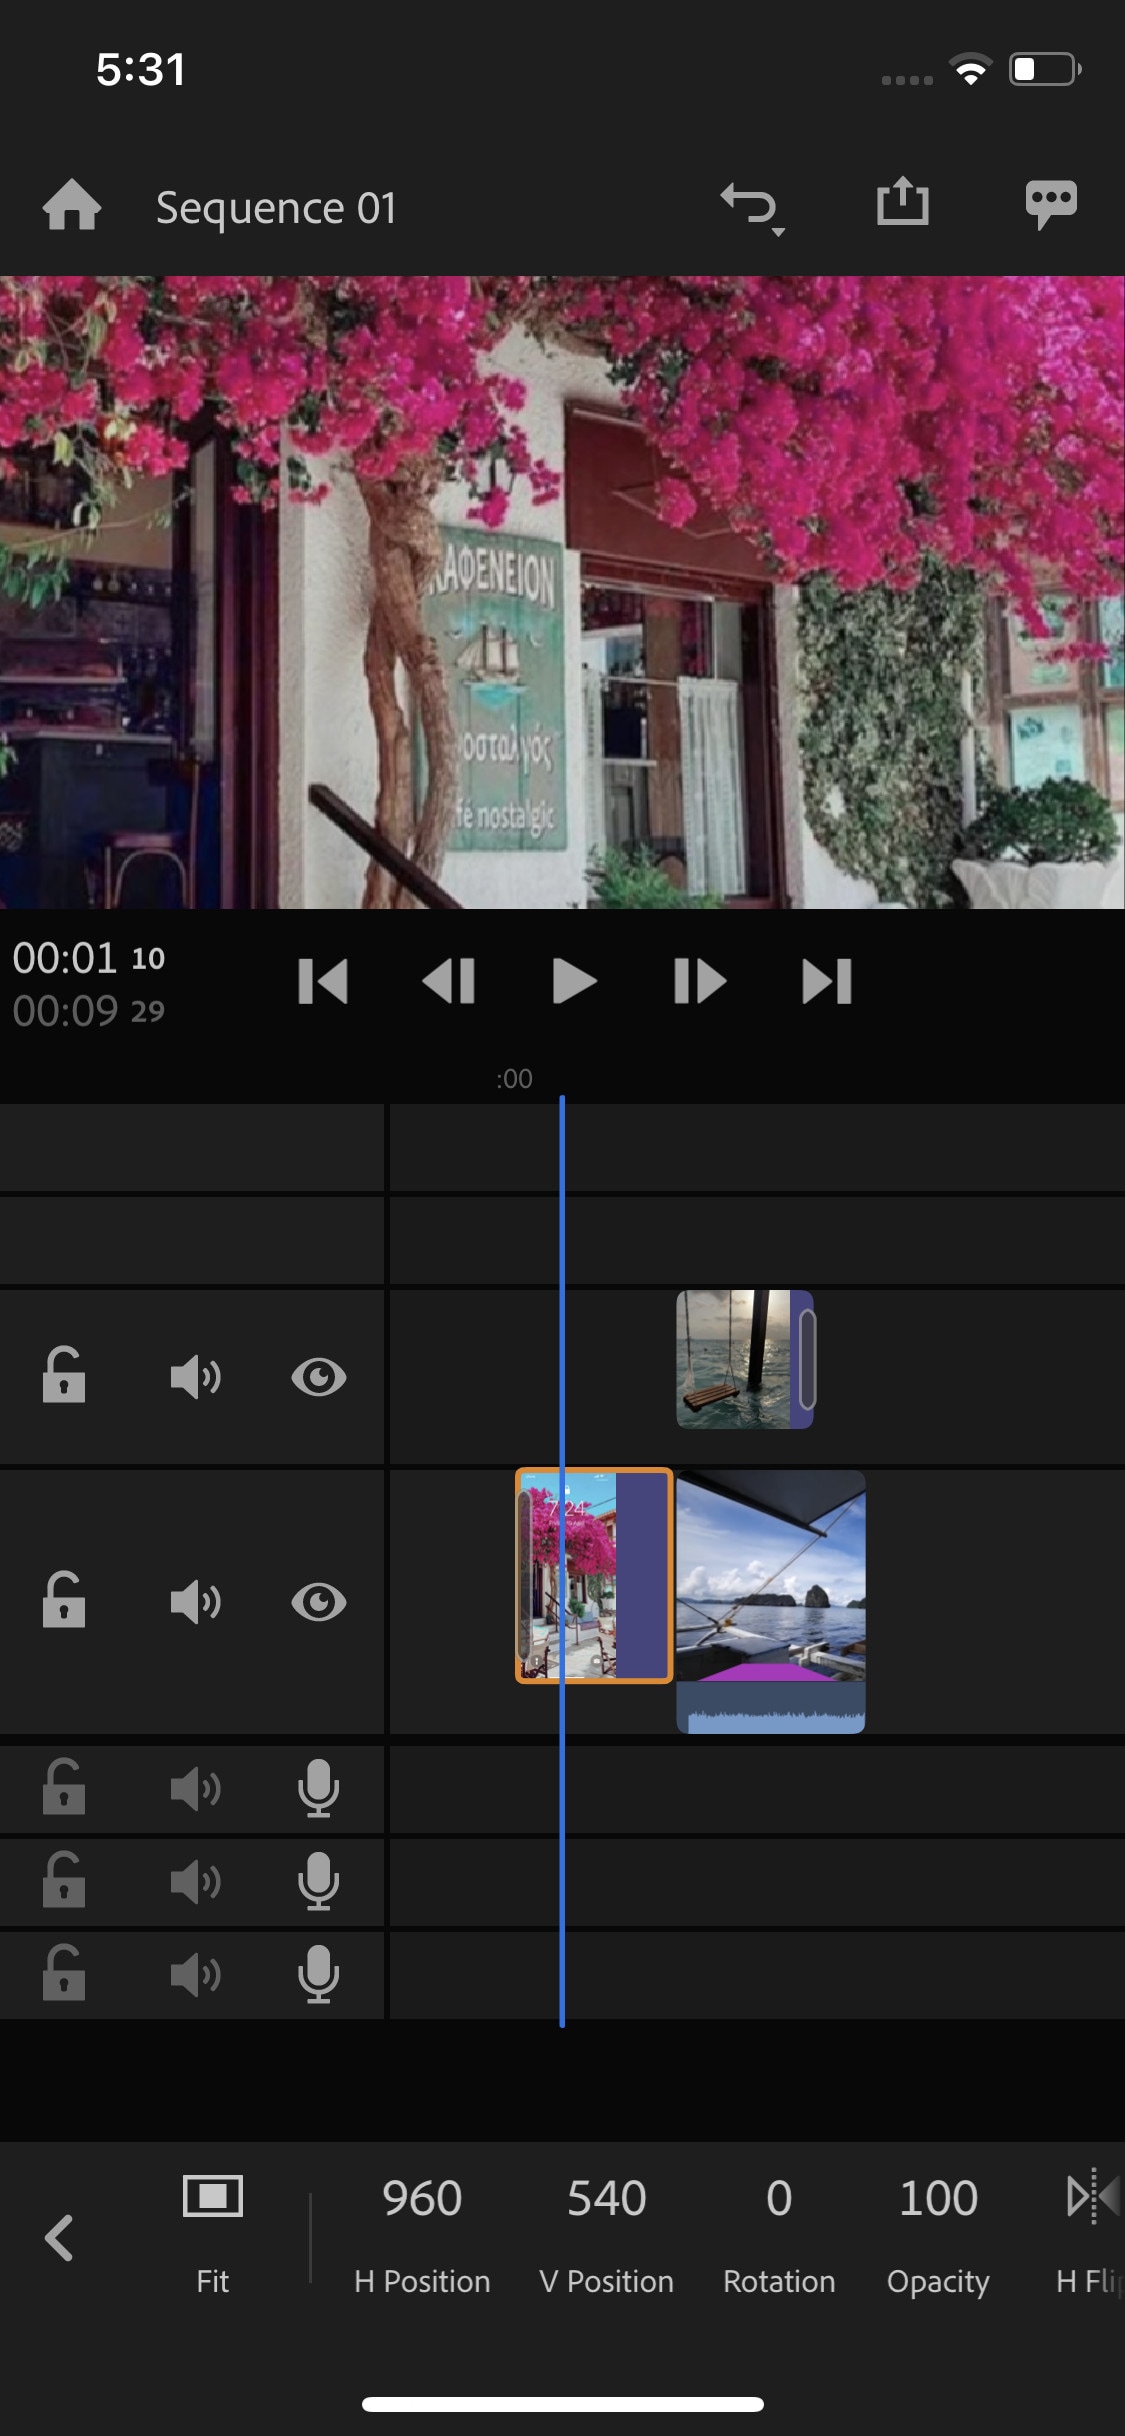
If you are looking for free but good speed ramping software then why go anywhere also when you have an amazing video editor made by a well-known software company “Adobe”. Like premiere pro, they have designed a compact version for phones named “Premiere Rush”.
It is a free video editor that has all the tools needed for video editing, from video effects to color grading and audio editing. Its UI is a bit similar to PC video editors. It is a free video editor with no watermarks. Although it takes some time to understand it. But once mastered, you can do editing quickly.
~Features:
- It is a free video editor with no watermark.
- It supports up to 4K resolution at 60fps.
- You can extract audio and can do voiceover directly from the software.
- It has hundreds of filters, overlays, and title designs.
- It has basic color grading tools.
- It also has a motion tracking feature. (in Paid version)
- It supports multiple audio, video, and text layers.
~Cons:
- It only runs on high-end devices. ( It is not supported in most mid-range phones)
- Not suitable for beginners. Its UI is quite hard to understand.
- Doesn’t have common features like the chroma key, masking, e.t.c.
~Price:
Its Premium version is available for 9.99/month. It includes some premium features. Or you can purchase the “All Apps Bundle” at $54.99/month for the annual plan.
~Steps:
Import: Open “Adobe Premiere Rush”, Click the “+” sign at the bottom to create a new project. in the media location, select the clips, then click the blue “create” button to start editing.
Click the blue “+” button at the bottom-left corner to add clips, audio, or graphics.
Hold and drag the clips upward to add them as a layer.
Edit: Scroll over a clip to select it. Clicking again shows a pop-up above the selected clip. Here you get 4 options: split, duplicate, separate audio, and delete.
A number of edit options appear on the bottom line of the screen:
Graphics: Click the “Graphics” button to add animated titles, transition graphics, and overlays as a layer. Select to customize its design.
Effects: Click the “Effects” button to add transitions or motion effect. Select a clip to apply transition at both ends. or select a corner of the clip to apply on it only. And change the duration of transition if you want.
Color: Here you can color grade your clips, Apply a preset or color grade manually by using sliders. You can also create your presets.
Transform: Here you can resize, rotate, crop, or change the position of the clip.
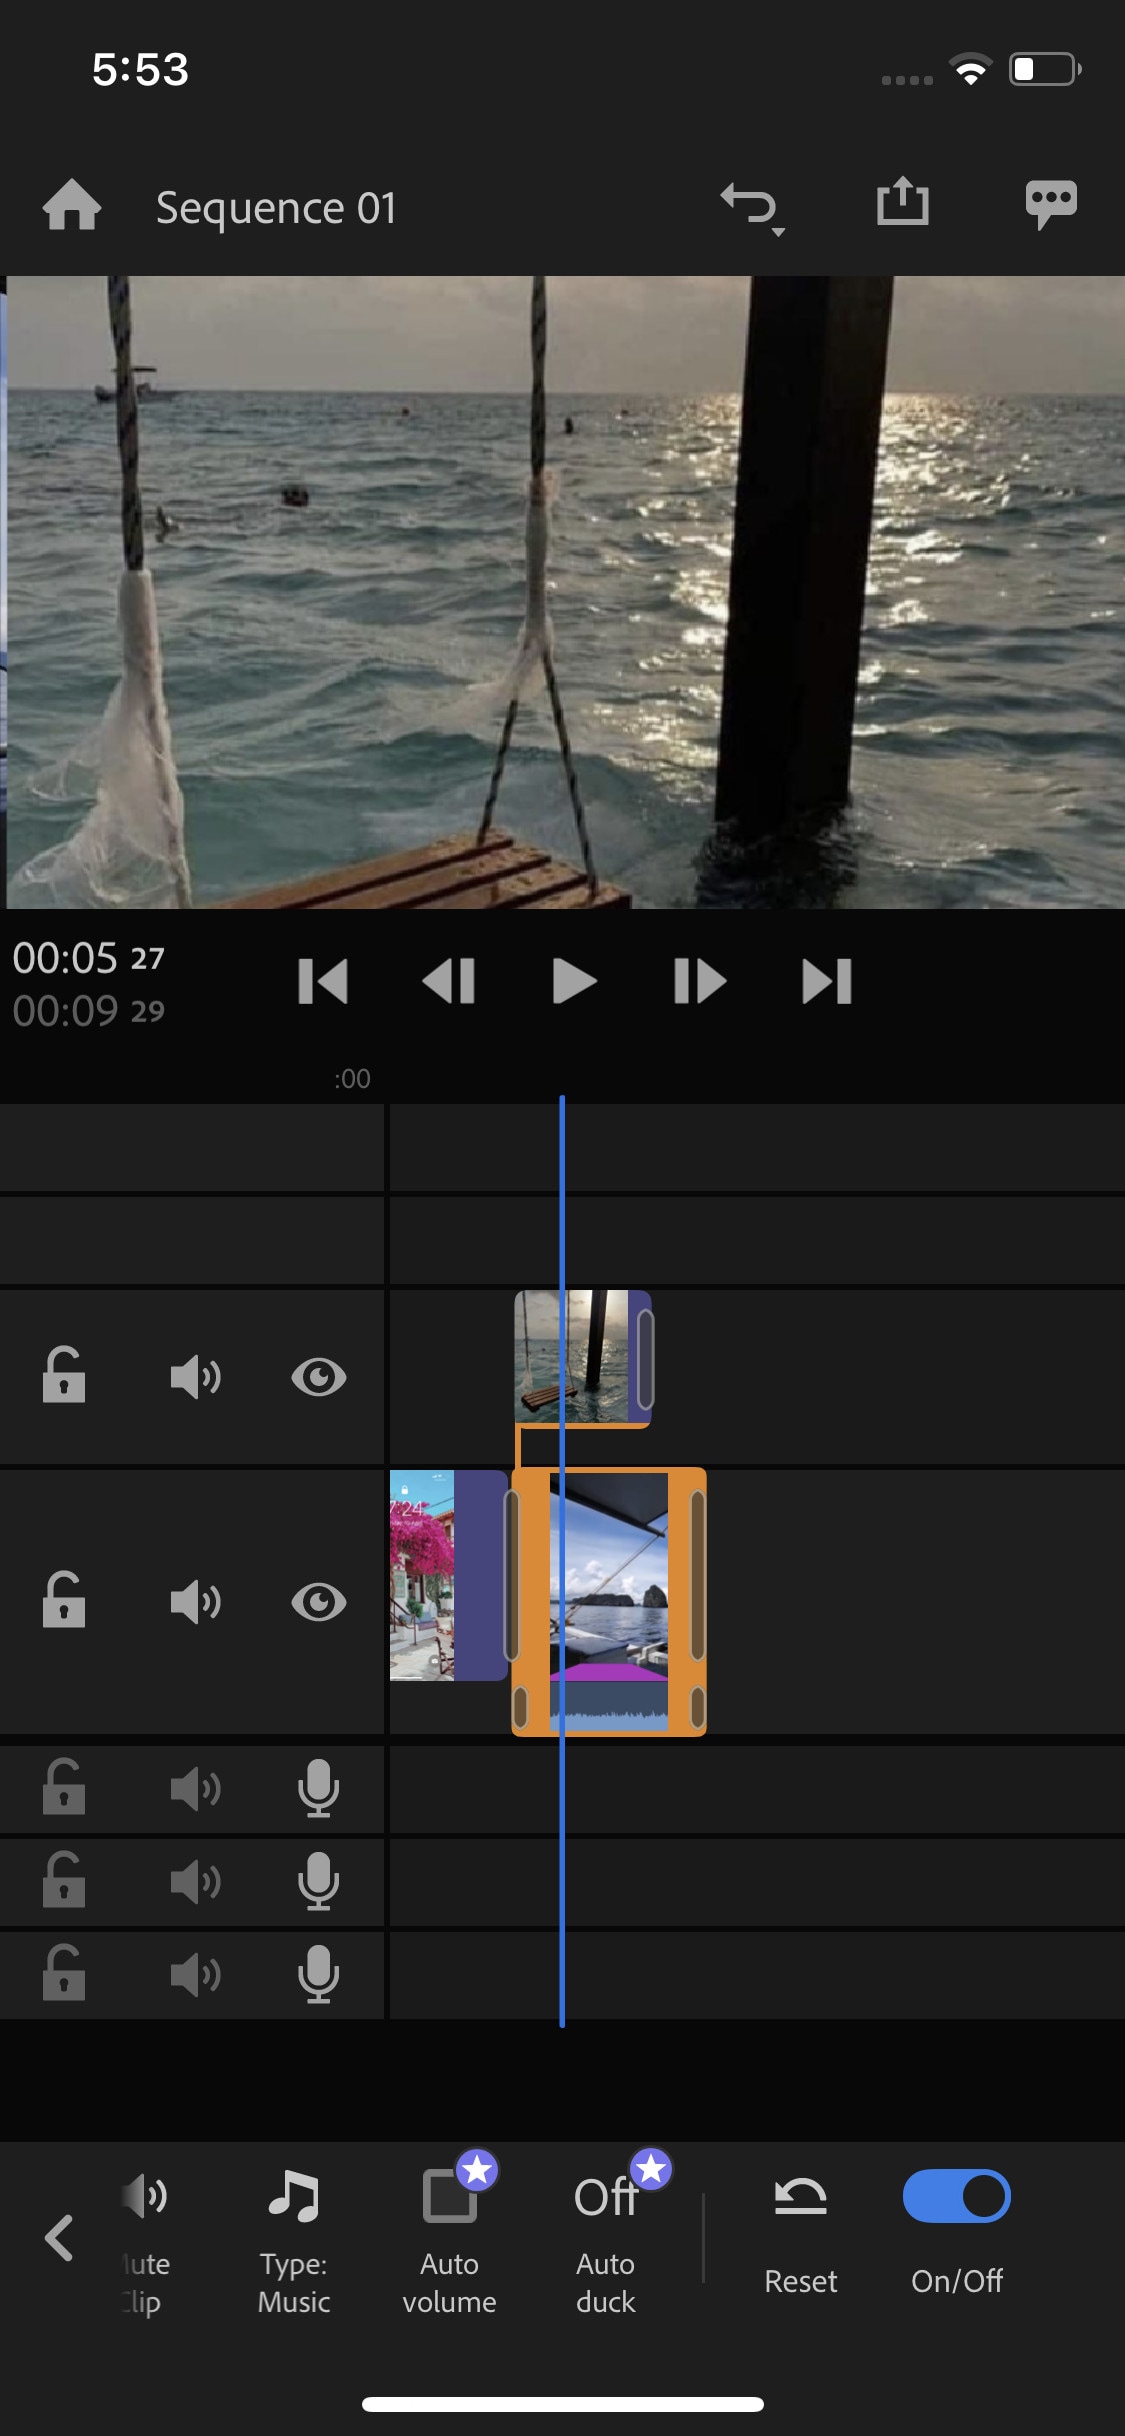
Audio: Here you can edit the audio, select a clip to edit its audio.
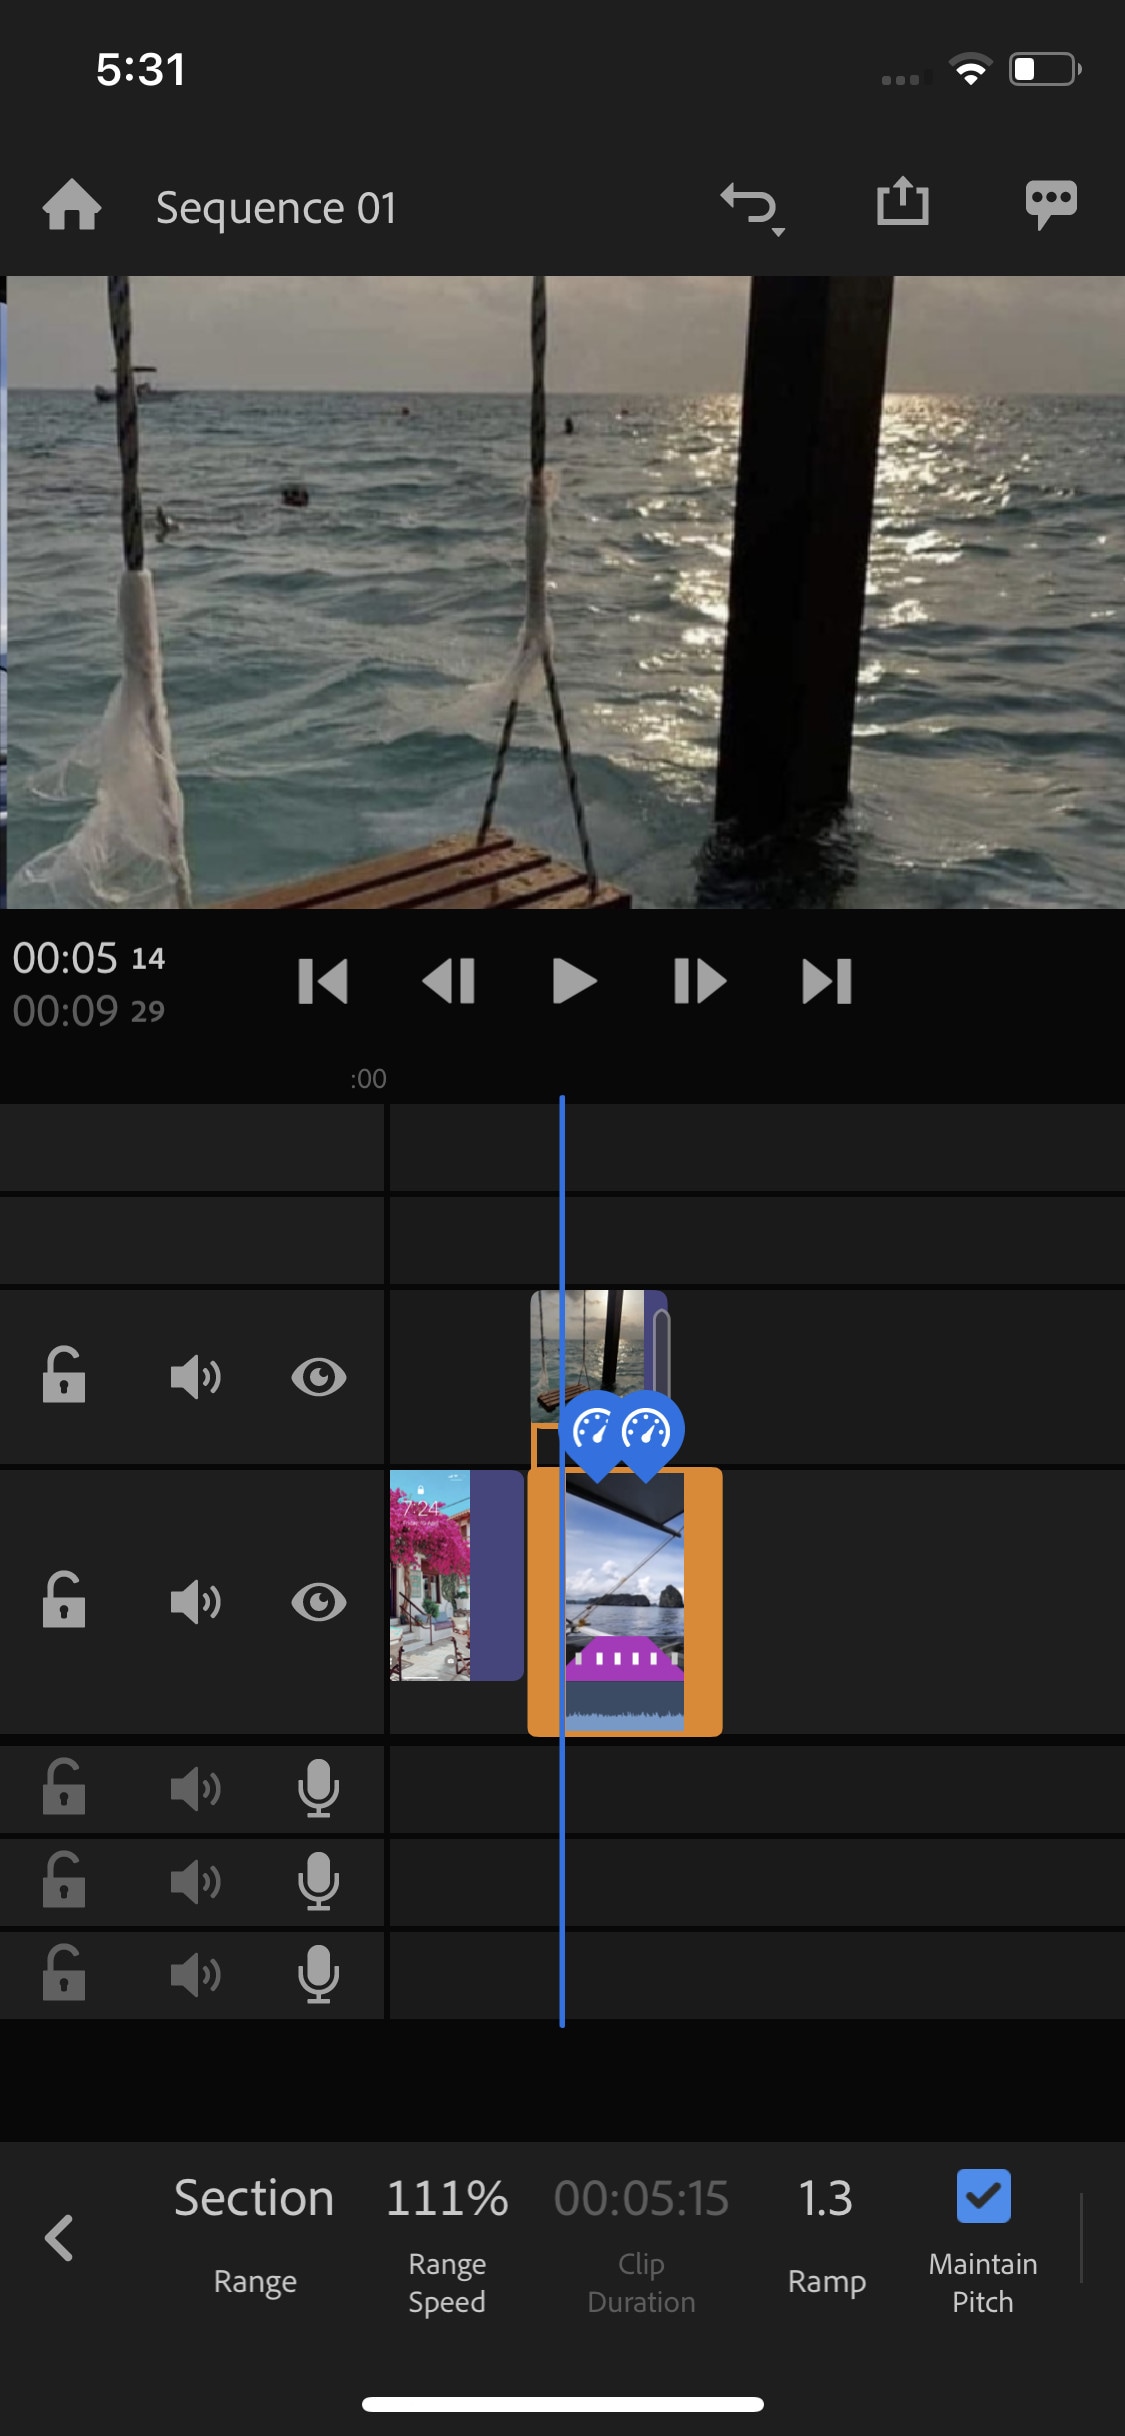
Speed Ramping: Click the “Speed” button to edit its speed. Select the range option to speed ramp a specific part of the clip. Select the ramp option to create a smooth speed curve. Or Set the clip duration to change its speed accordingly.
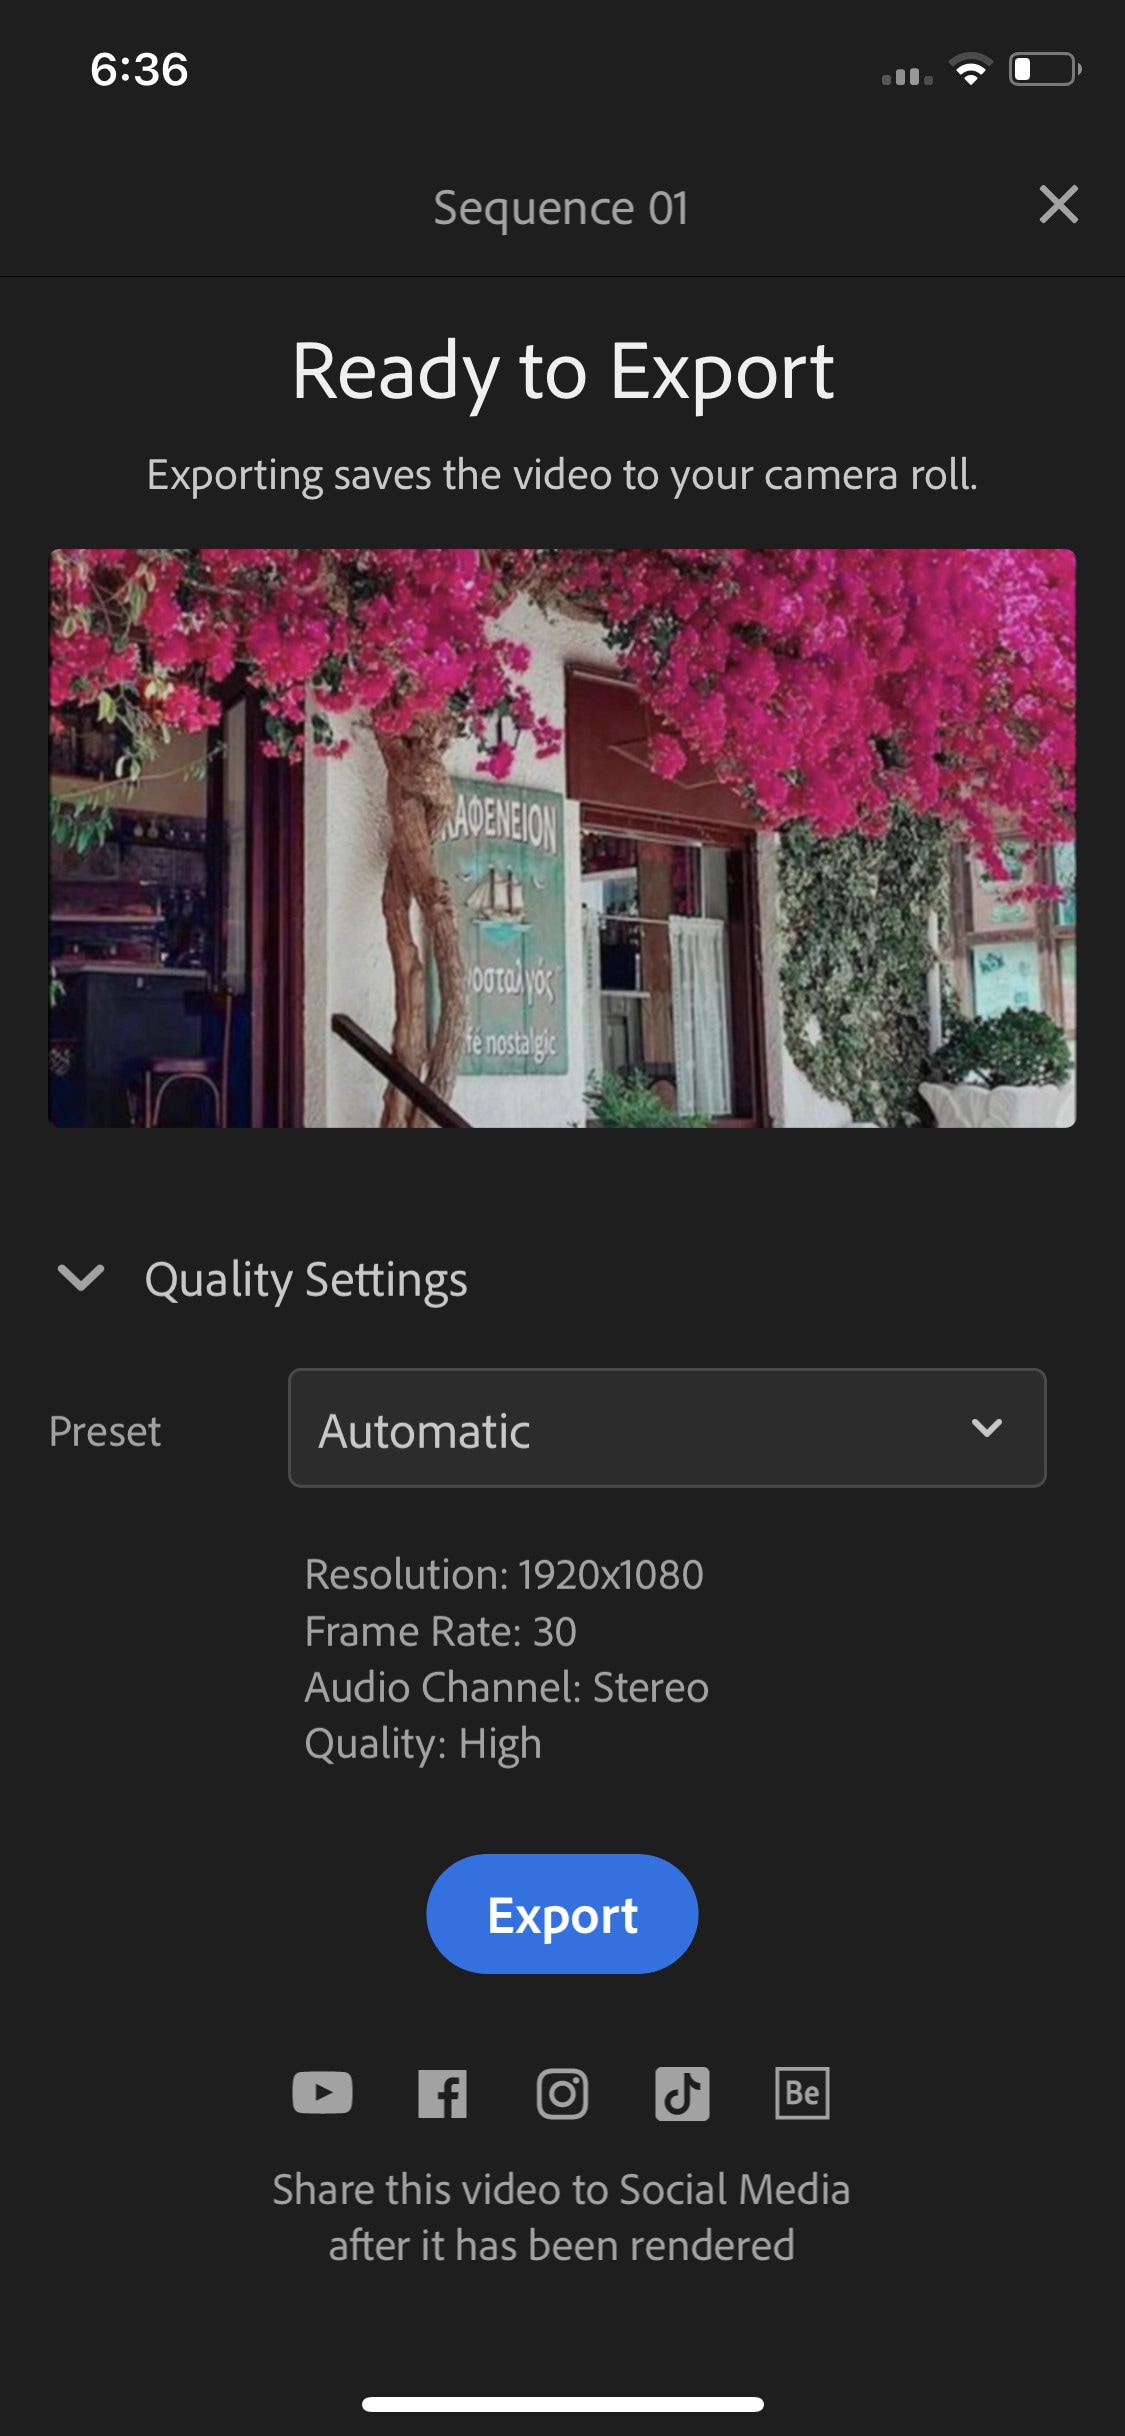
Export: To Export your clip, click the “Export” icon on top of the screen. Click “Quality Settings” to adjust export settings then click “Export” to save your file.
CapCut:
It is available on IOS and Android both.
If you are looking for a free but good speed ramping software to help you create slo-mo videos easily anywhere, anytime you want, then “CapCut” can be the right choice for you. It is a free mobile video editing software with many interesting features like keyframing, chroma-key, masking e.t.c. It also supports video and image layers. It has one of the best speed ramping features among other mobile video editors. It provides curves to smoothly speed ramp your clips. It can edit landscape, portrait, and even square video formats. It has many amazing effects and filters, it also has some stock clips.
~Features:
- It is completely free and has no watermarks.
- It supports up to 4K video resolution.
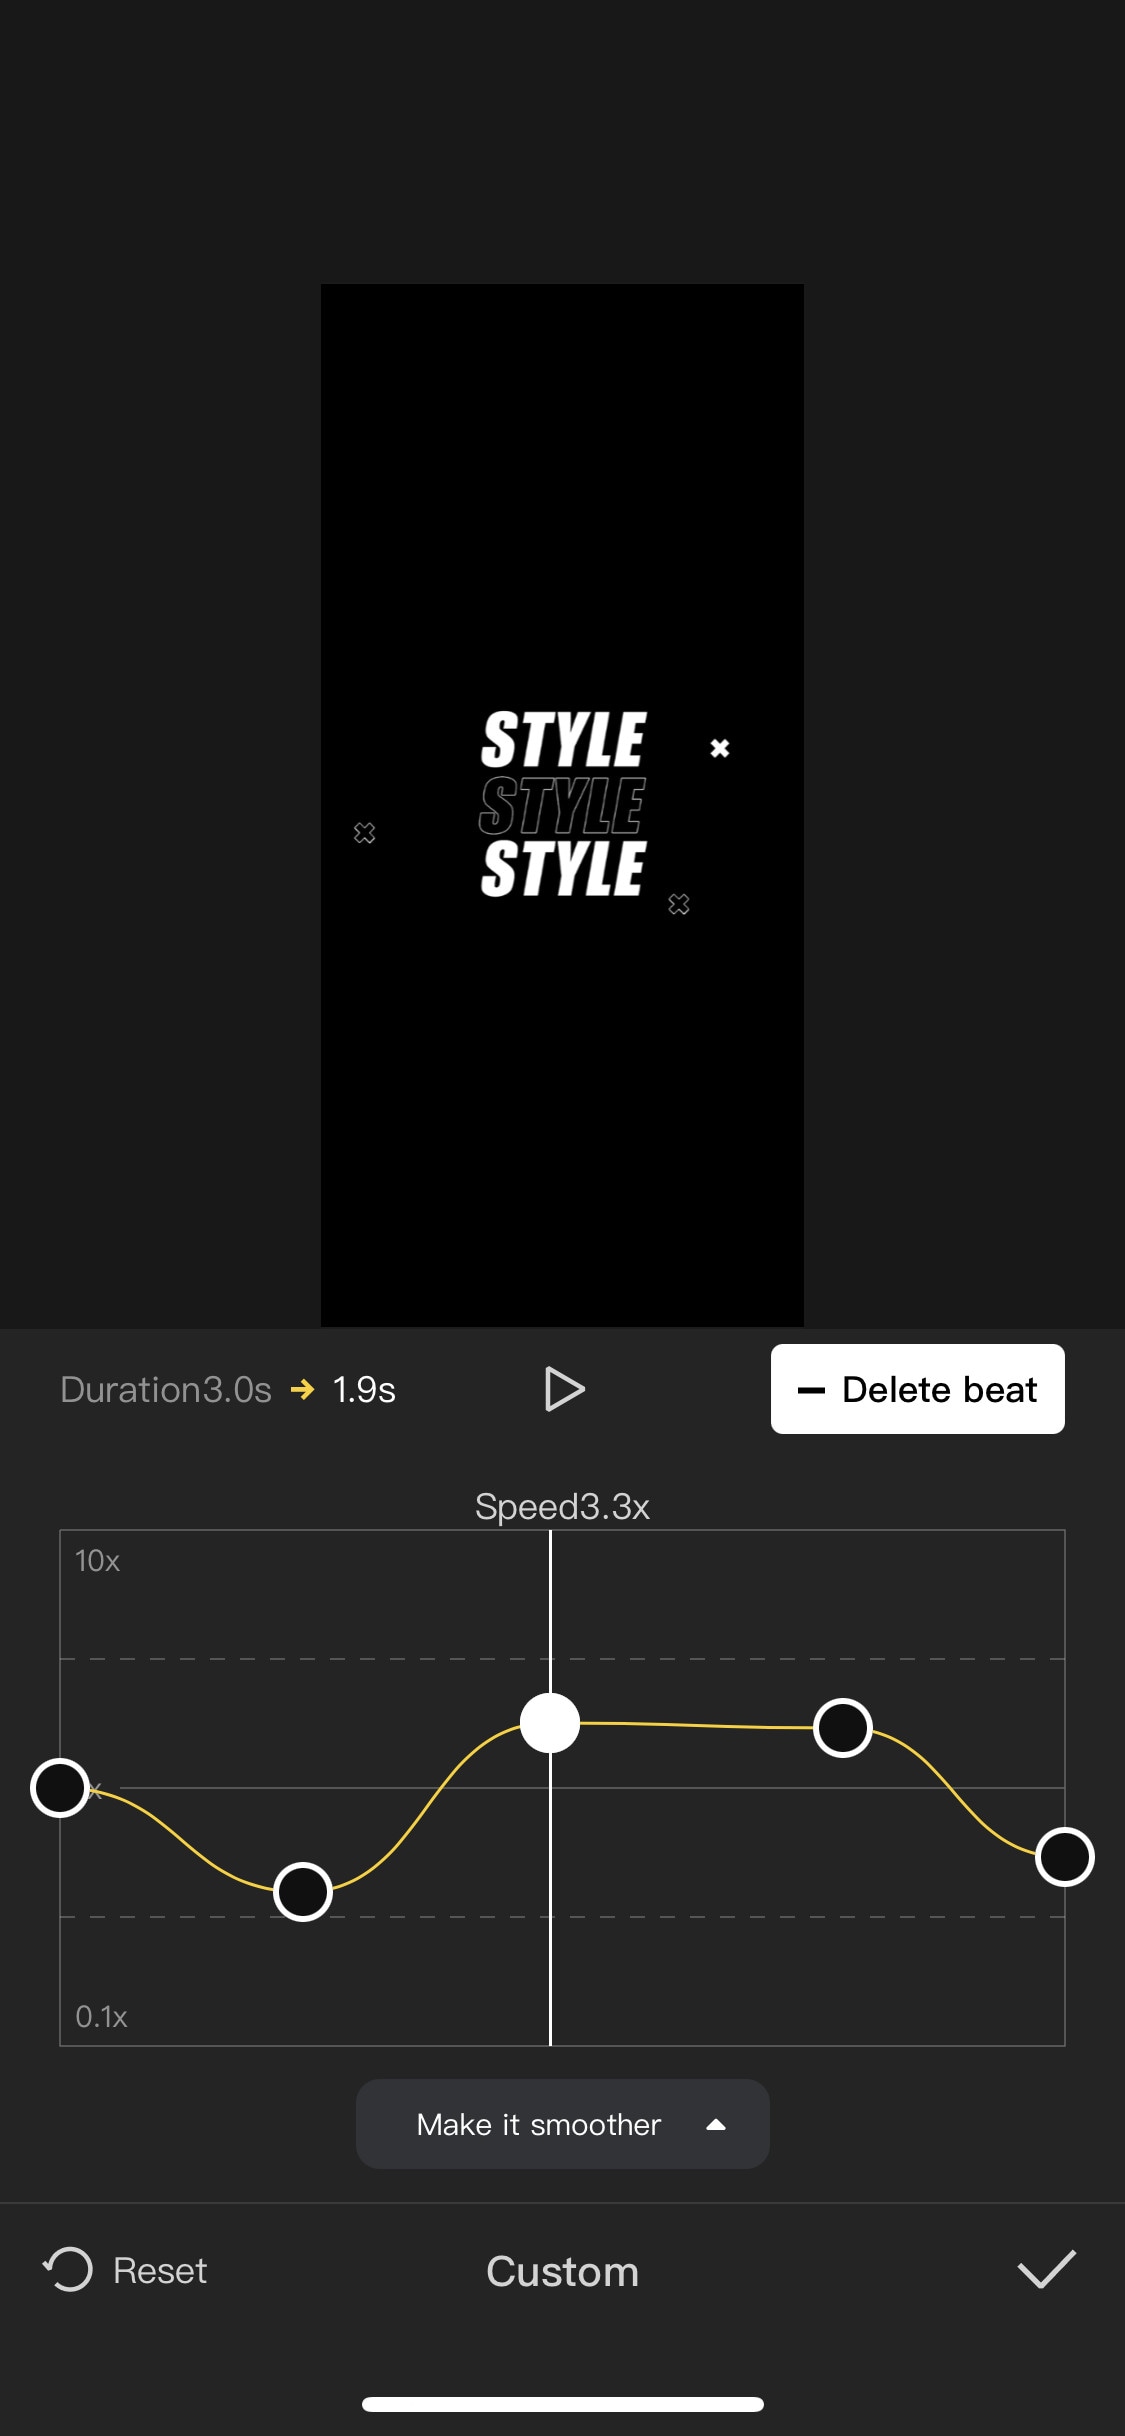
- Has curves for speed ramping.
- Has keyframes for animation.
- It has hundreds of effects, overlays, and titles.
~Cons:
- Its UI doesn’t support editing in landscape orientation.
- Lacks some common editing tools.
~Steps:
Import: Open Capcut, then click “New Project” to start a new project. Select files then click “Add” to import them. Click the white box with the “+” sign to add more clips. Hold and drag to rearrange the clips.
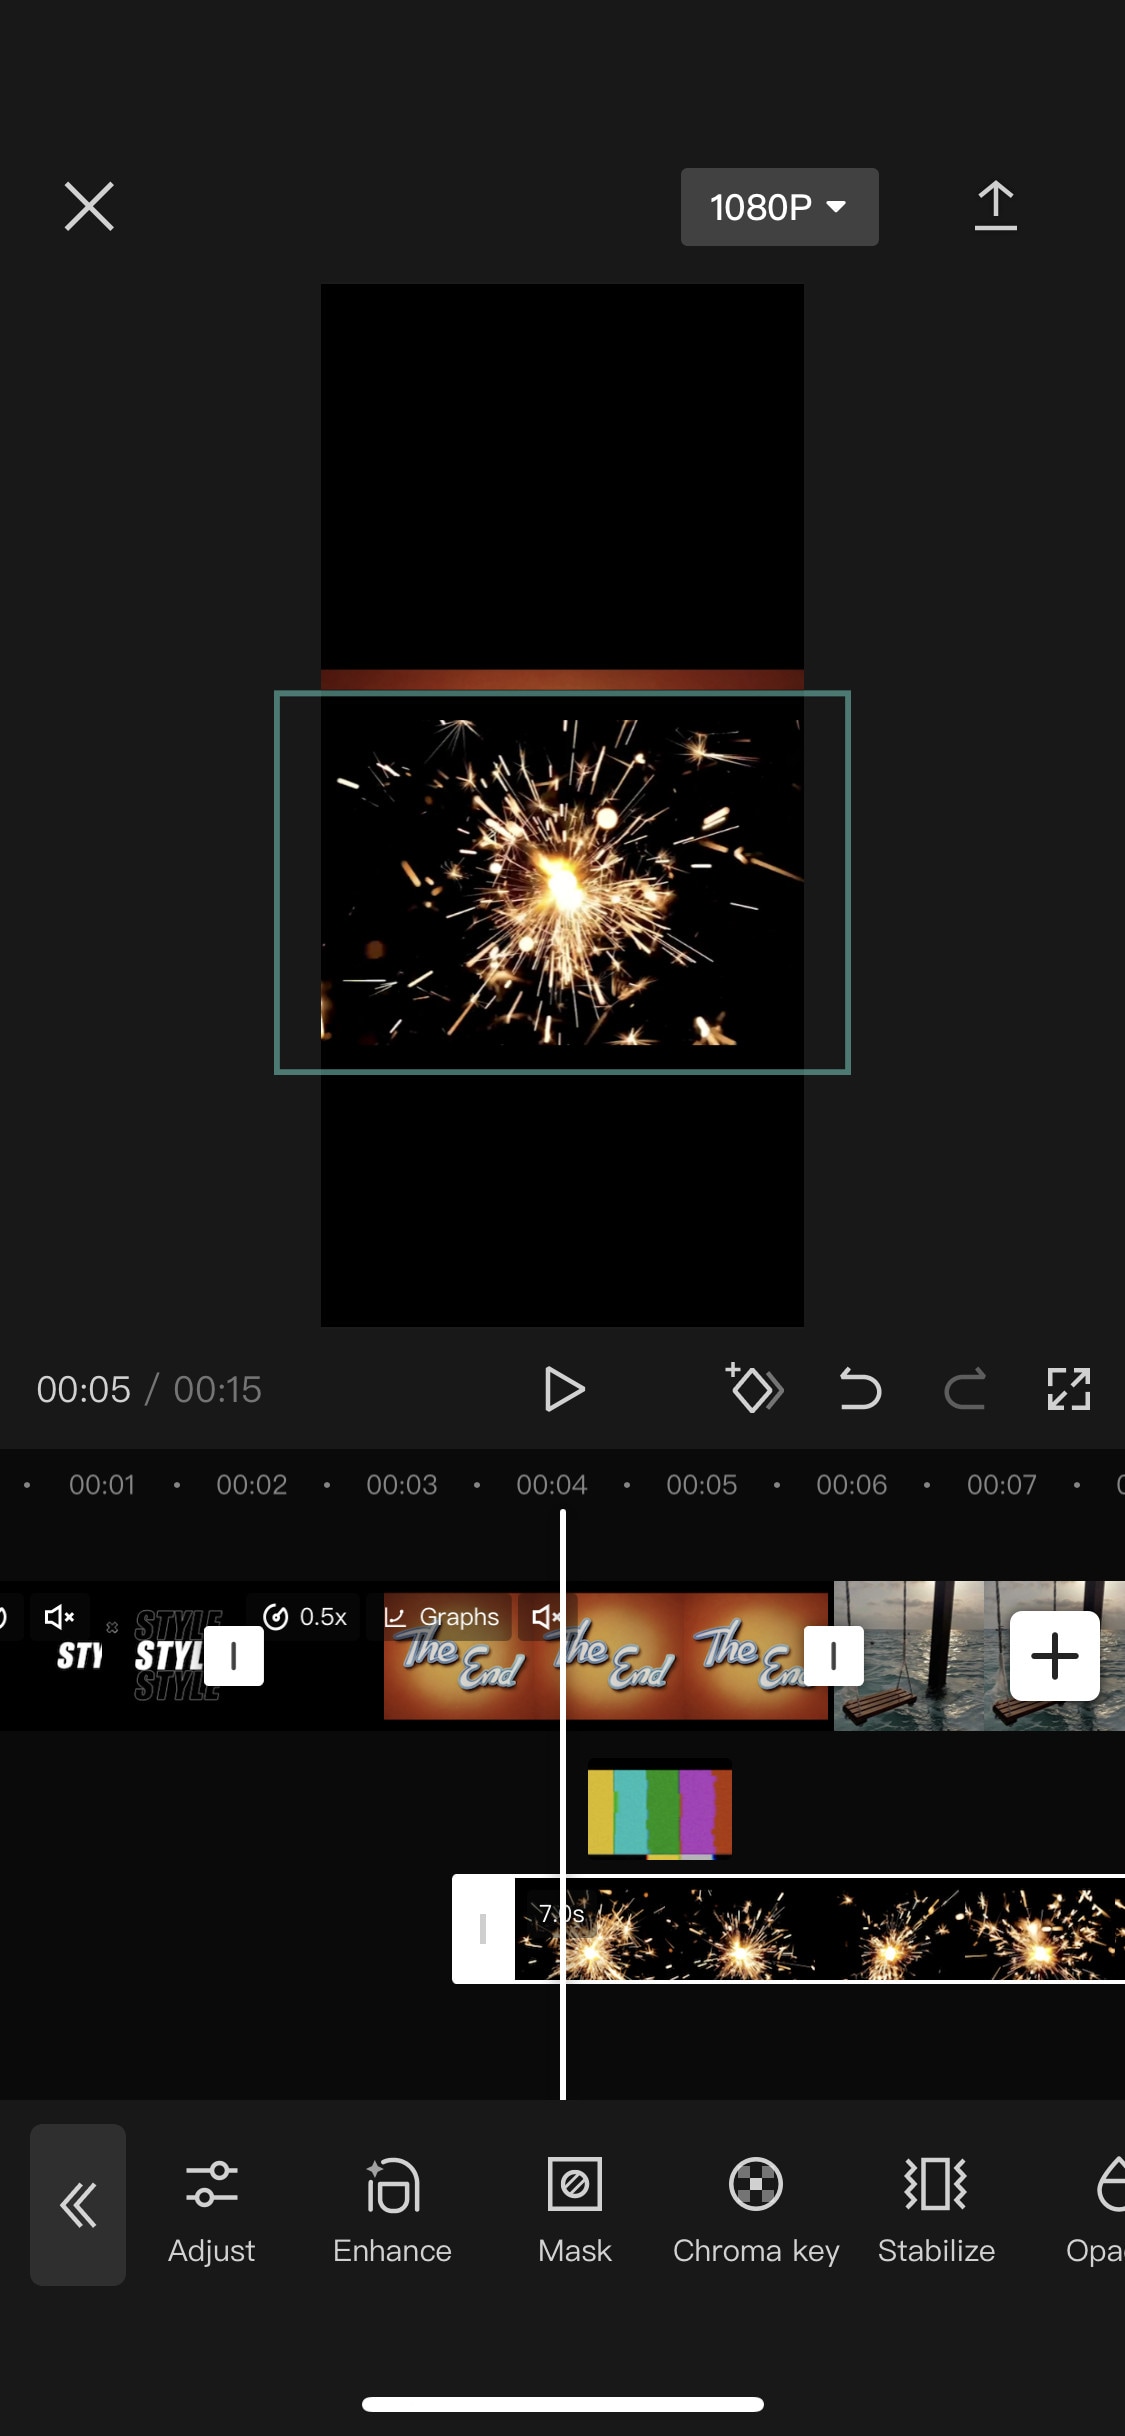
Click the “Add overlay” button to add photos or videos as layers.
Edit: On the bottom of the screen, you can find a bunch of tools for editing. From here you can add overlays, effects, filters, titles e.t.c to the timeline.
Select a clip to open the edit menu situated at the bottom of the screen. Here you can do the following tasks:
Split the clip; Change its speed, remove background, edit audio, do color correction, apply filters, stabilize the clip, e.t.c.
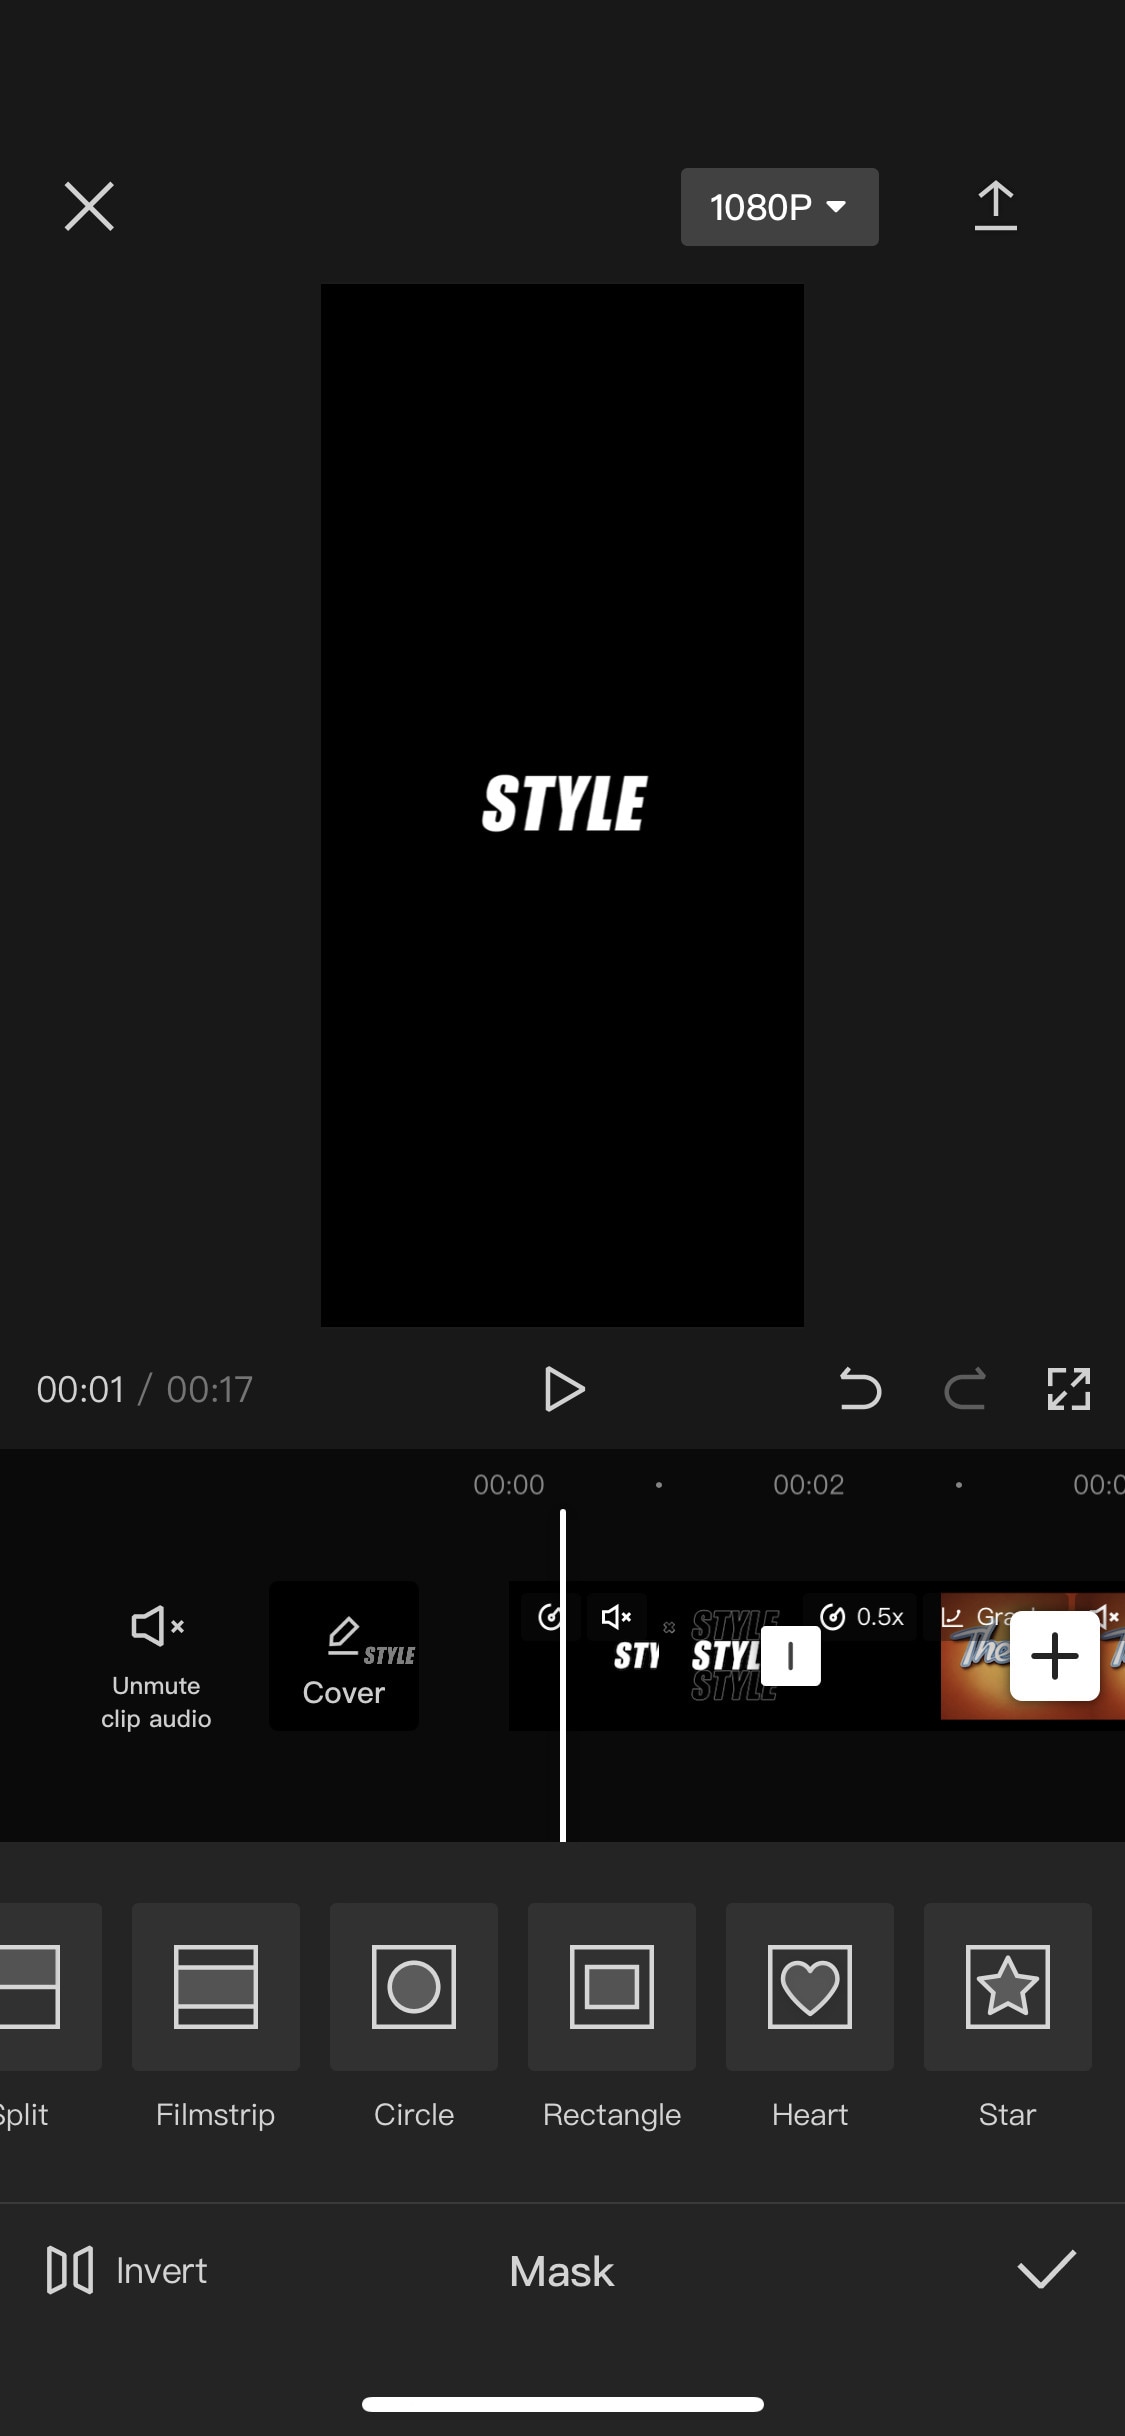
We have more edit features for the layers only which include: Spice (Blending), Animation, Masking, Chroma key, freeze frame, change opacity e.t.c.
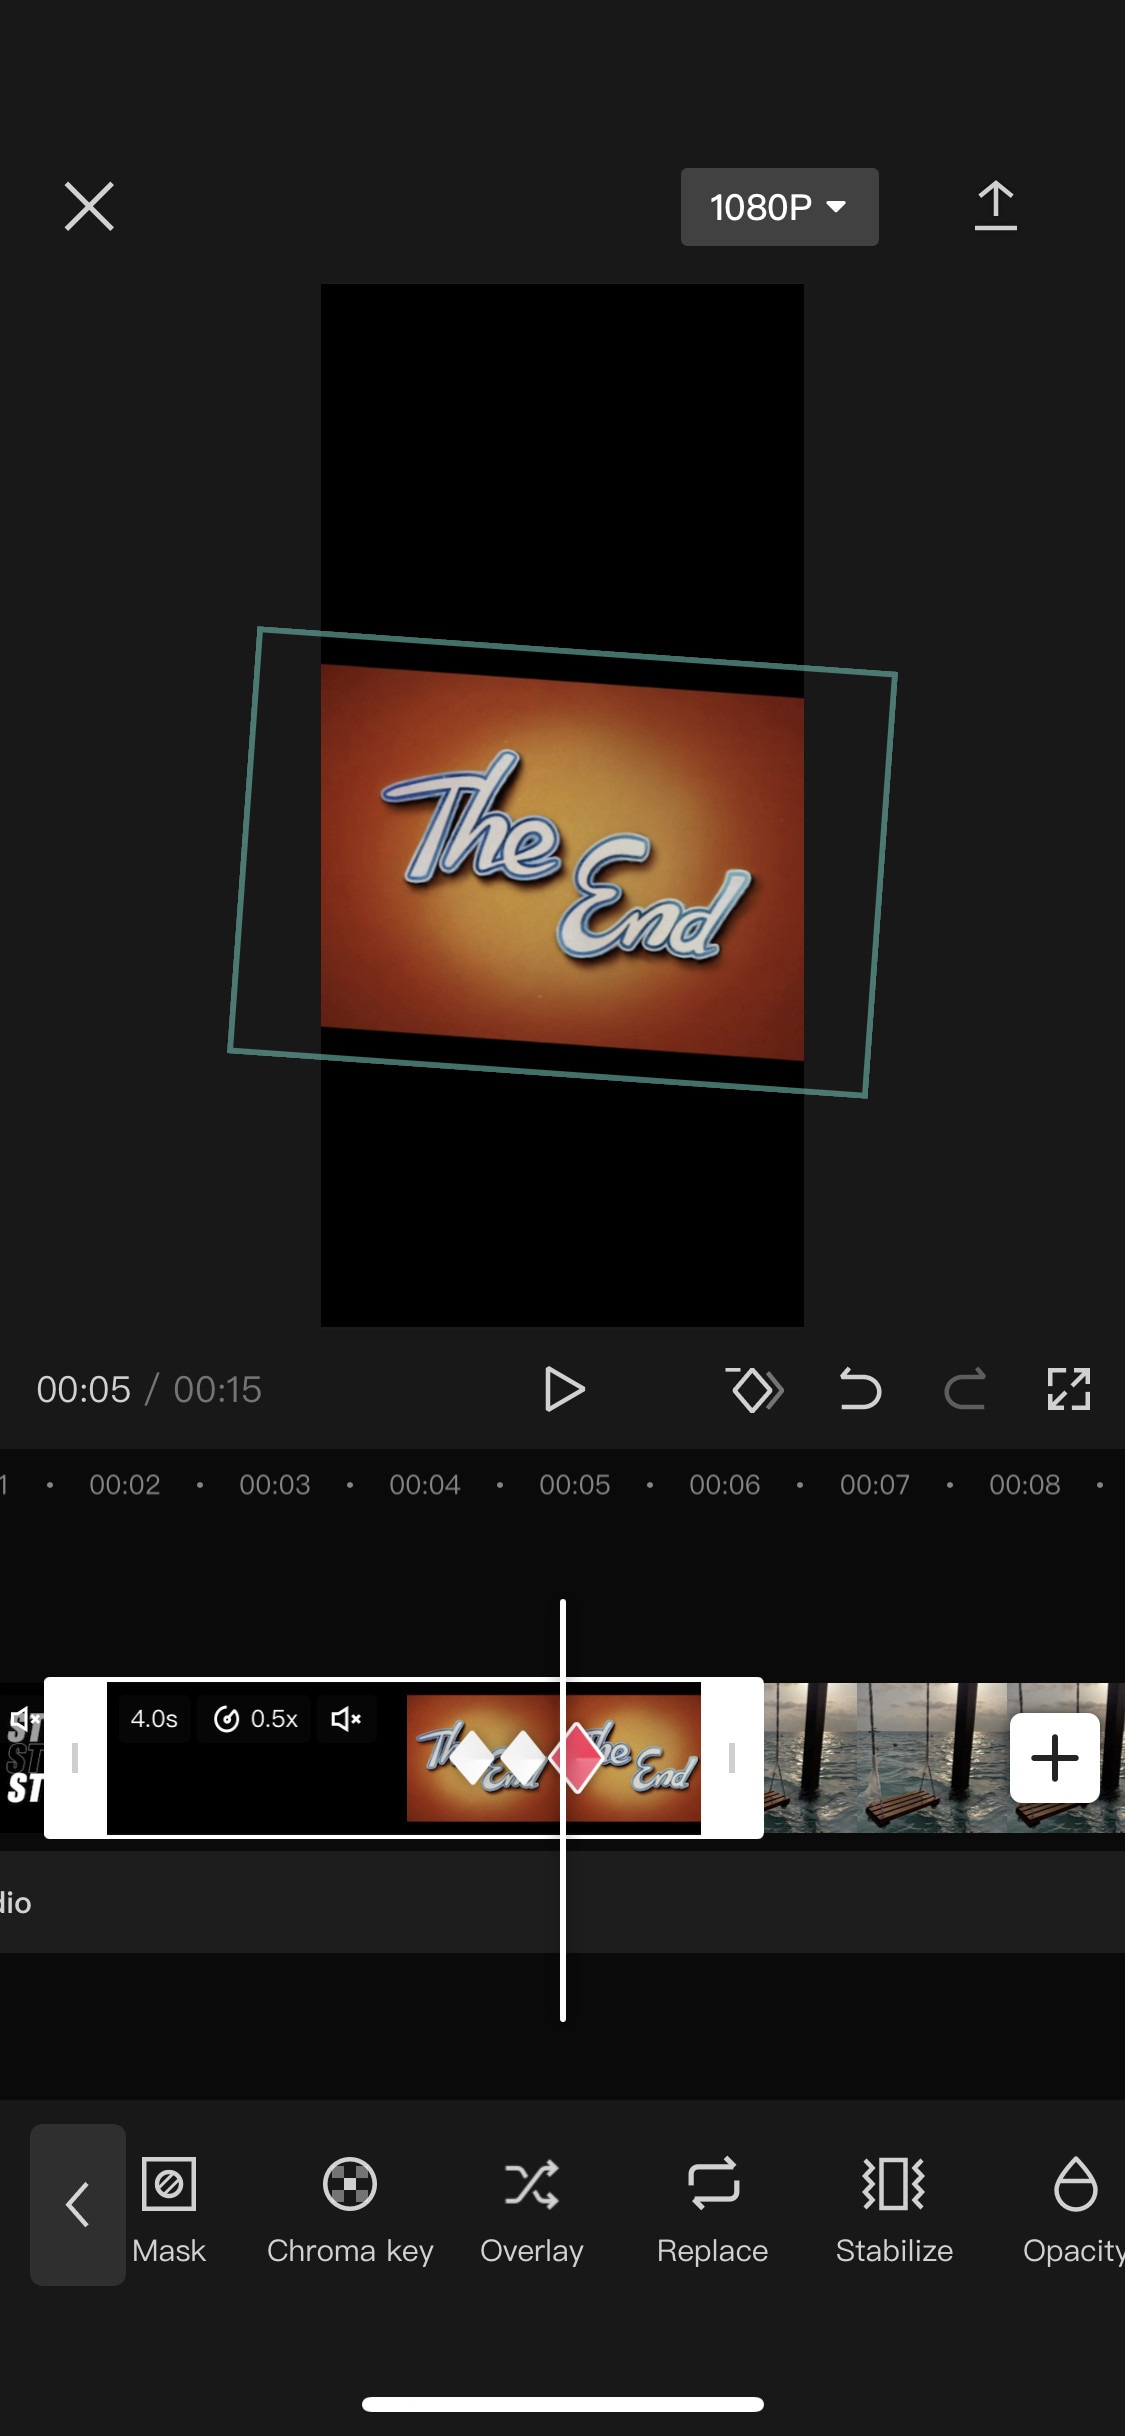
Click the “Keyframe” icon (Diamond shaped) below the playback screen to apply keyframes to the layer. Pinch and zoom or rotate to transform the clip. Use the “Graphs” button in the edit menu to customize the keyframe animation.
Speed Ramping: To Change the speed of a clip, select it then click the “Speed” icon on the bottom bar of the screen. Move the slider to change the speed of the whole clip. To do speed ramping, click the “curves” option to choose a preset or create your own. Click a preset to apply it, and click again to open its edit menu. drag the beats up and down to change speed or add or delete a beat if you want.
Effects: Click the “+” sign between the two clips to add a transition between them, and drag the slider to change its duration.
Select the effects, filters, or titles icon to add them as a layer.
Export: Click the “Export” button on the top-right side of the screen to export your clip. Or click the button, left to the “Export” button to change its resolution and frame rate.
iMovie:
It is available on IOS and Mac.
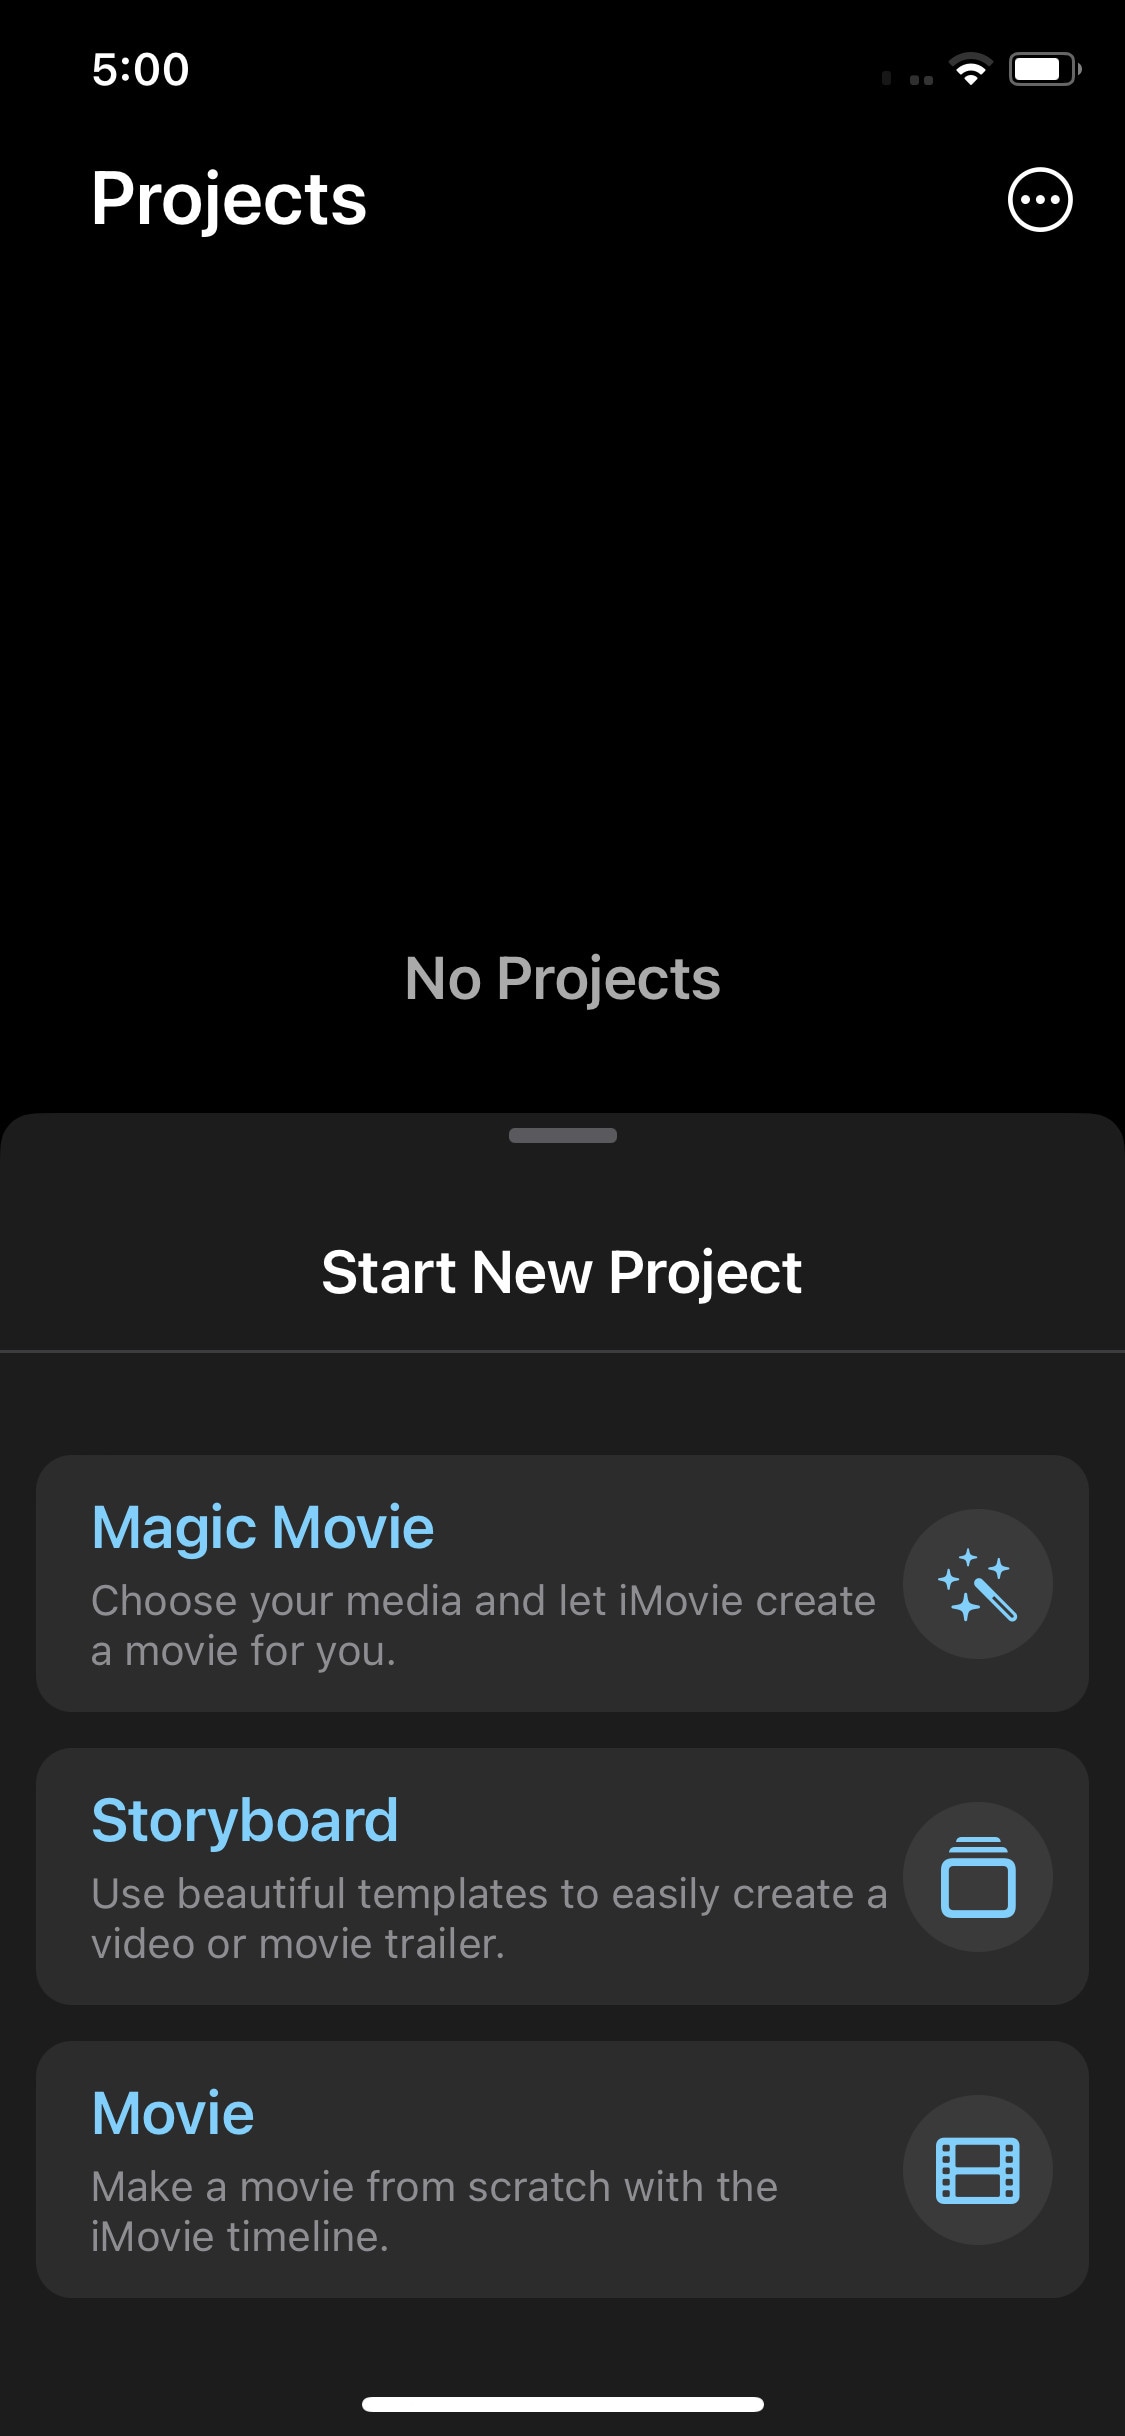
If you are an Apple fan and own everything Apple then what’s better than getting your hands on a video editor designed by Apple. It is simple and easy to use. It has all the basic editing tools to enhance your video like crop, trim, transitions, effects, e.t.c. It also has a speed ramping feature which let you change the speed at different points of a clip. It’s AI mode “Magic Movie” lets you select clips and a style and software will make the final product for you.
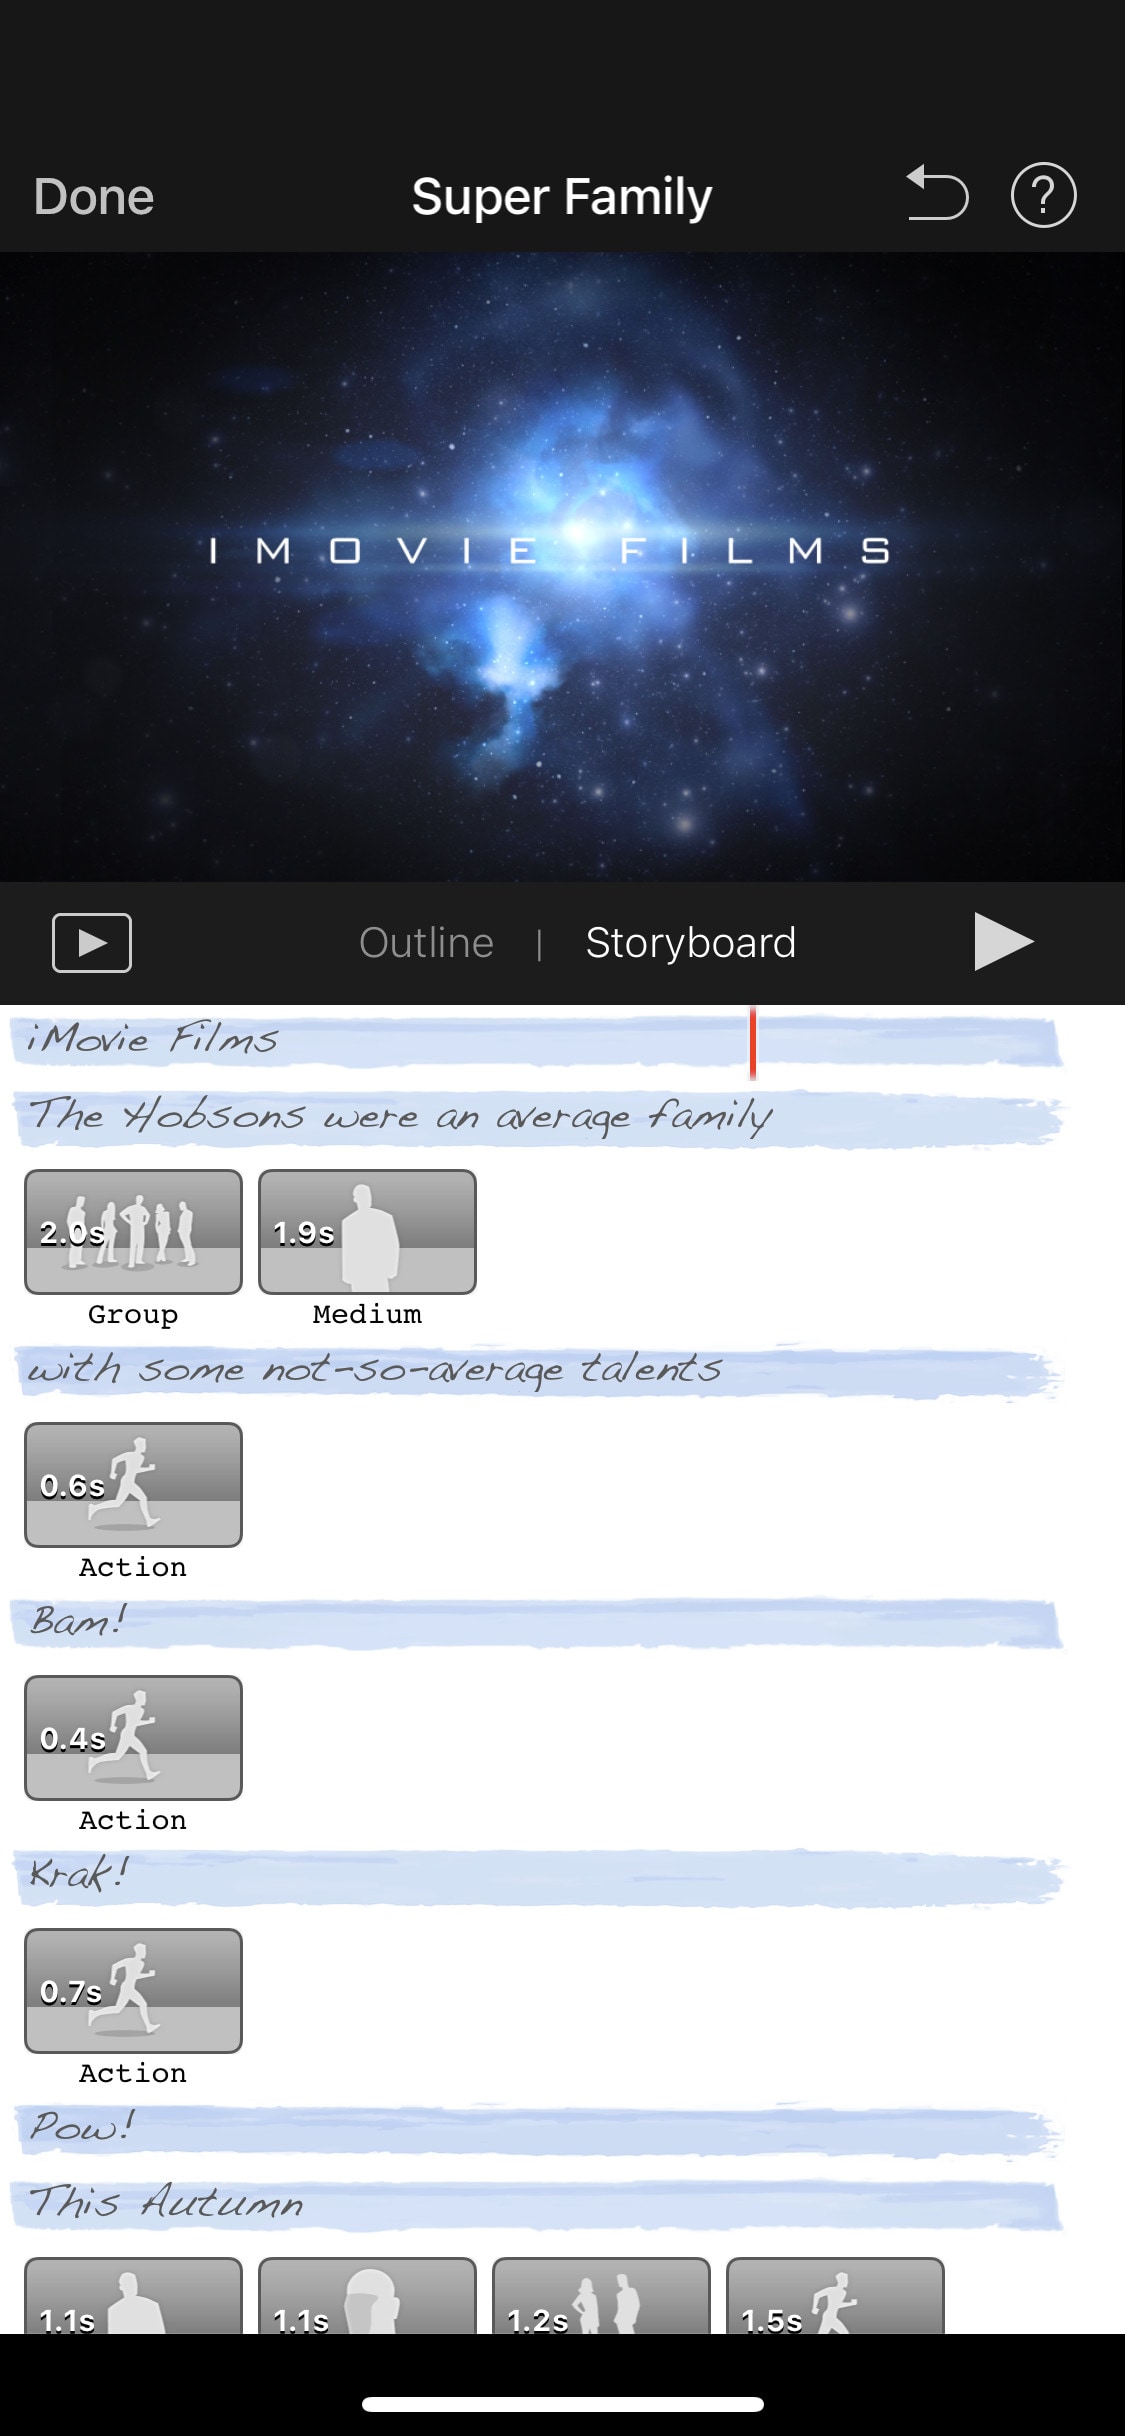
Its “Storyboards” mode is a creative way of learning production and post-production skills. It lets you choose a theme from many famous Genres available, then it will guide you through the production process like capturing footage, arranging your shots, and creating cinematic titles to enhance your story.
~Features:
- It is free and easy to use.
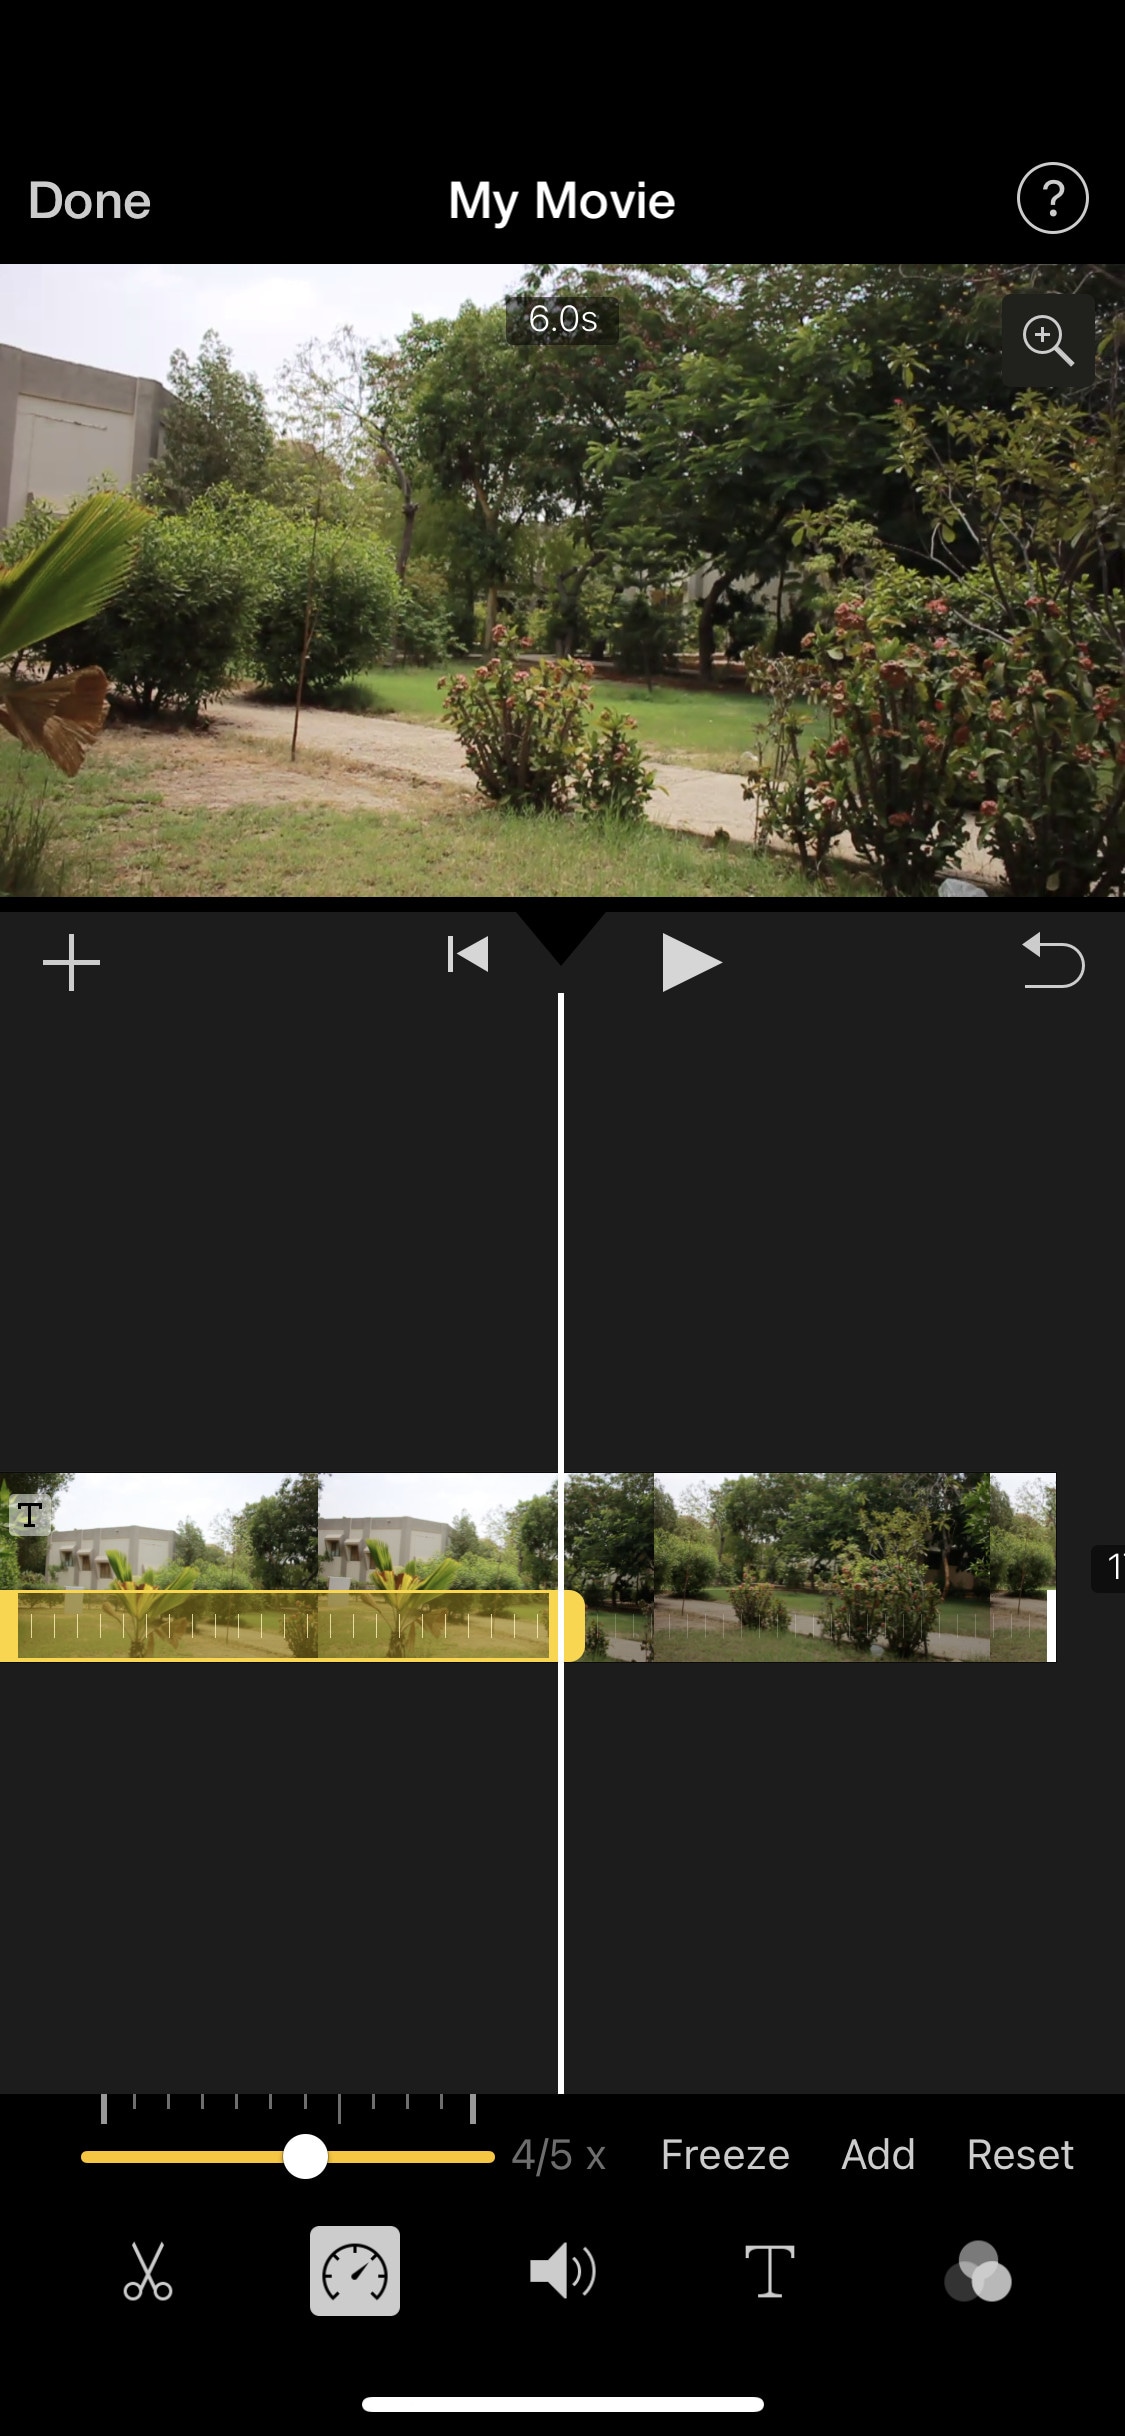
- Let you do speed ramping by changing the speed of different parts of the clip .
- Supports Raw files.
- It’s AI mode creates videos for you on its own.
- The “Storyboarding” feature helps you through the production process.
~Cons:
- It only works on IOS and Mac.
- Not suitable for professional projects.
~Steps:
Import: Open “iMovie” then click “Start New Project” and select one of the 3 following modes to start editing:
- Magic Movie: Select the clips for editing, then click “Create Magic Movie” to let iMovie create a movie for you, which you can customize according to your liking.
- Storyboard: Click “Storyboard” then select Template and a genre or a style then click “Create” to start the project. iMovie will guide you and let you add the clip or title according to the pattern.
- Movie: In “Movie” mode, select the clips from the media browser then click “Create Movie” to start editing.
Edit: Select a clip to edit it. A bunch of tools will appear at the bottom of the screen.
Click the “scissors” icon to split, duplicate, delete the clip, or to detach the audio.
Click the “volume” icon to change the volume of the clip.
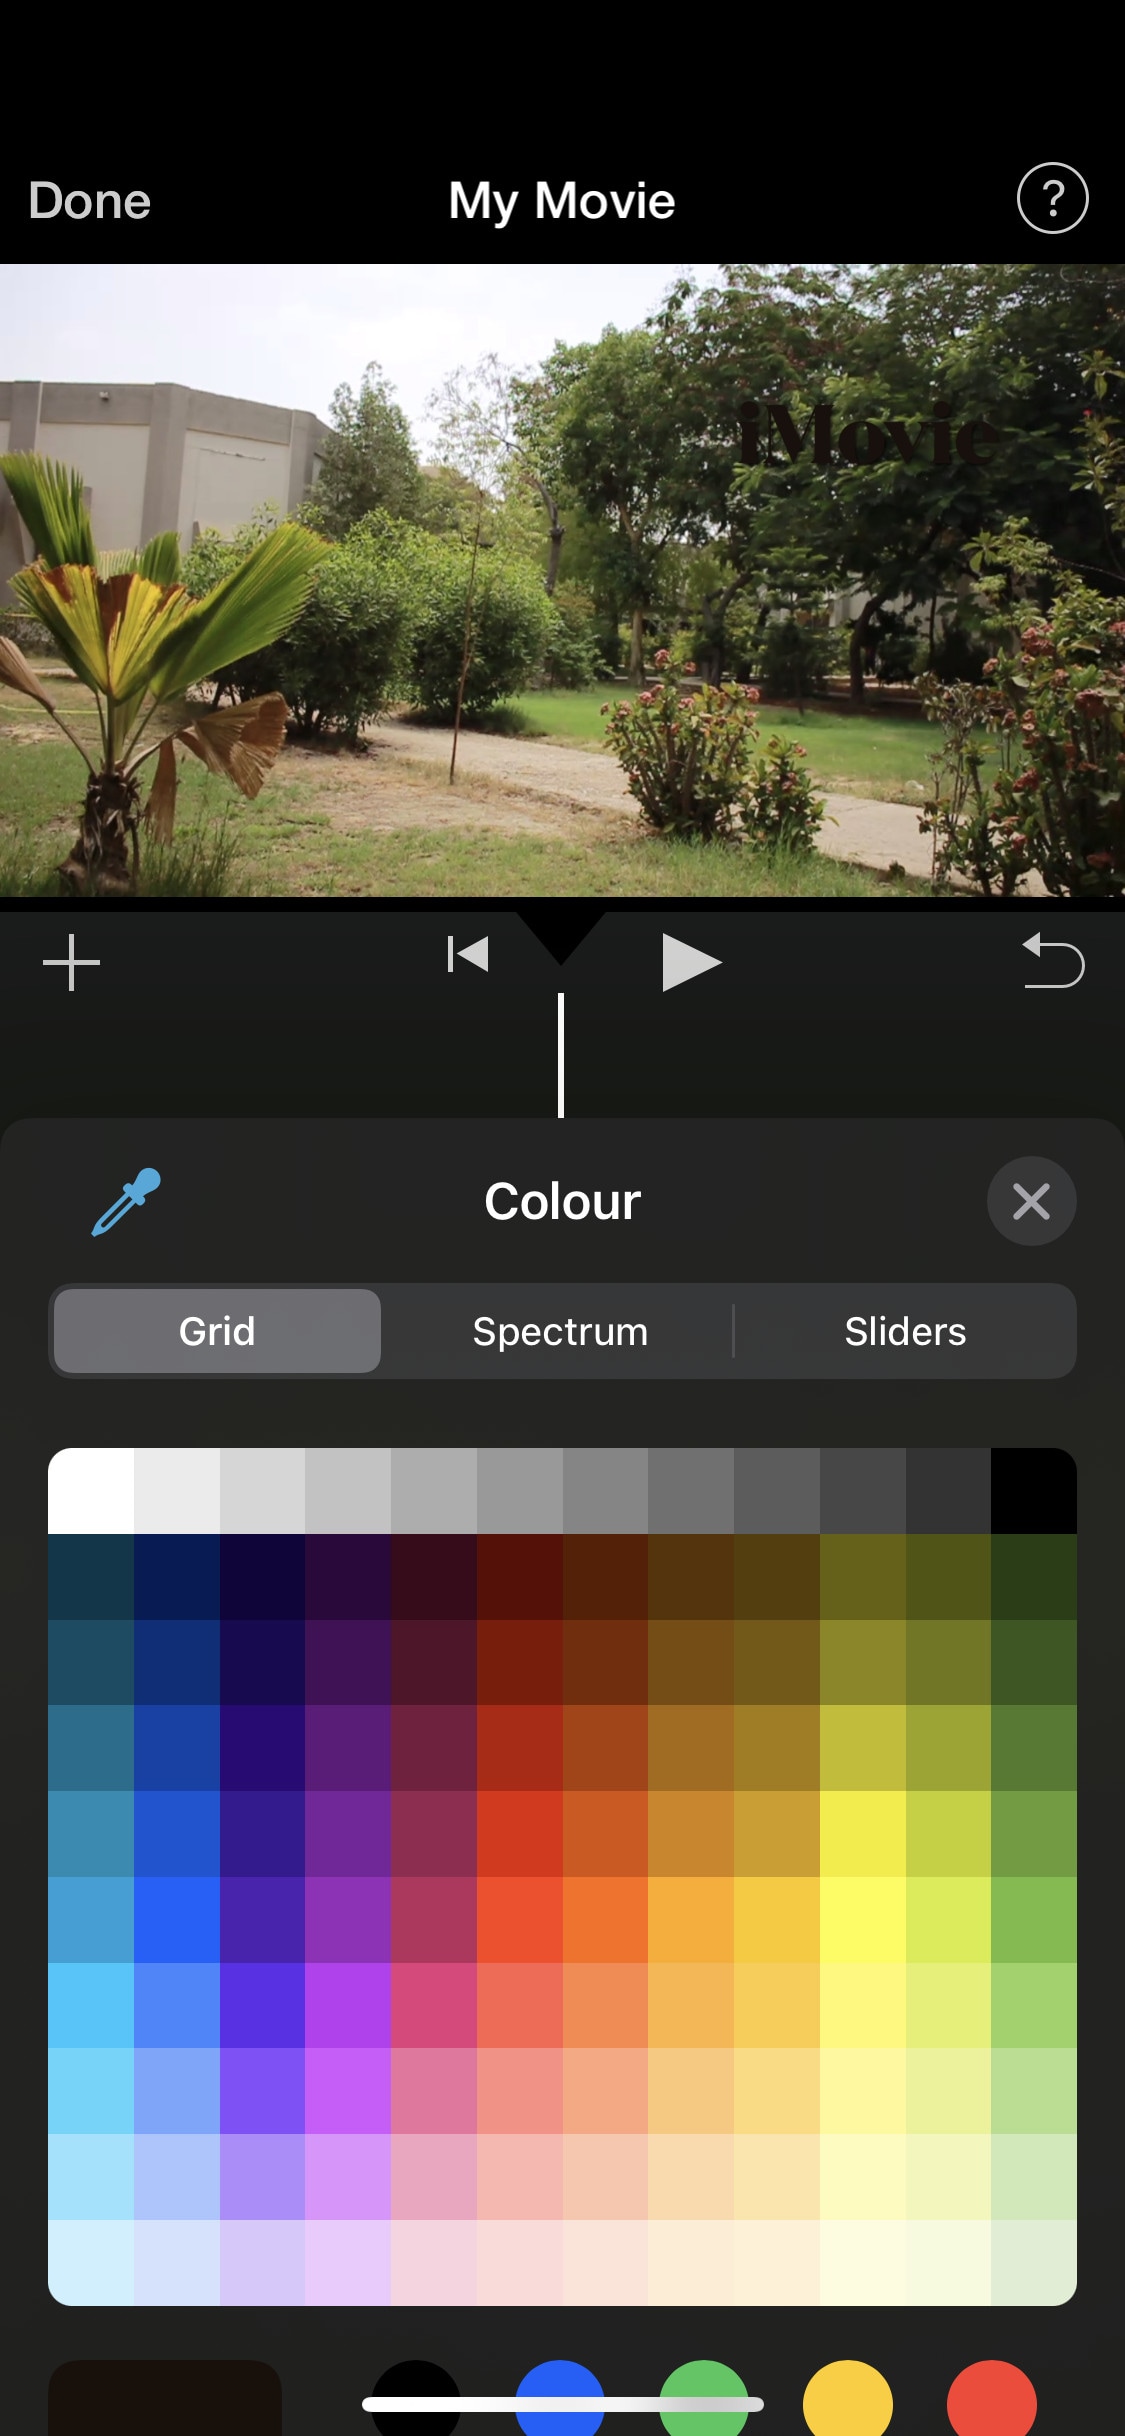
Click the “Title” icon to add a title design. Click the text (on the playback window) to edit it.
Click the “Filters” icon to apply it to the selected clip and move the slider to change its intensity.
Speed Ramping: Click the “Speed” icon to change its speed. Move the yellow slider to change the speed of the whole clip. Or click the “Add” button to add partitions (in yellow color) to the selected clip. Select a partition to change its speed only. And click the “Freeze” button to add a freeze-frame.
Effects: Select the black box between two clips to add a transition. Select a transition to apply it and change its time duration if you want.
Export: Click the “Done” button on the top-left corner of the screen to save the clip, then click the “Export” icon on the bottom of the screen to save your file.
Some Paid Video speeding Softwares for iPhone:
If you do most of your video editing from your phone and want to invest some money in it then you should check the softwares mentioned below. They are quite affordable and are worthy of investment. As they are packed with many cool features. But if you aren’t sure which software to use then don’t worry as most of these softwares have a free version to try on but they have some limited features and they provide a watermark on export. But it is a great option to get your hands on new software and once you are comfortable with it, you can purchase its premium version.
Kinemaster:
It is available on IOS and Android both.
If you want to do more than just trimming and cropping to your videos then you should try Kinemaster. For editors, who want to do some advanced-level video editing on their phone, then you must have Kinemaster on your phone. It is a paid software, which is packed with many useful features. It has many video and audio effects. It also has an amazing audio editor. It also has many title designs and basic color correction tools. It has hundreds of effects and transitions + more can be downloaded from its asset store. Its UI is suitable for beginners and content creators both. It is a paid software, but all its features are completely free to use, but the free version leaves a watermark on export.
~Features:
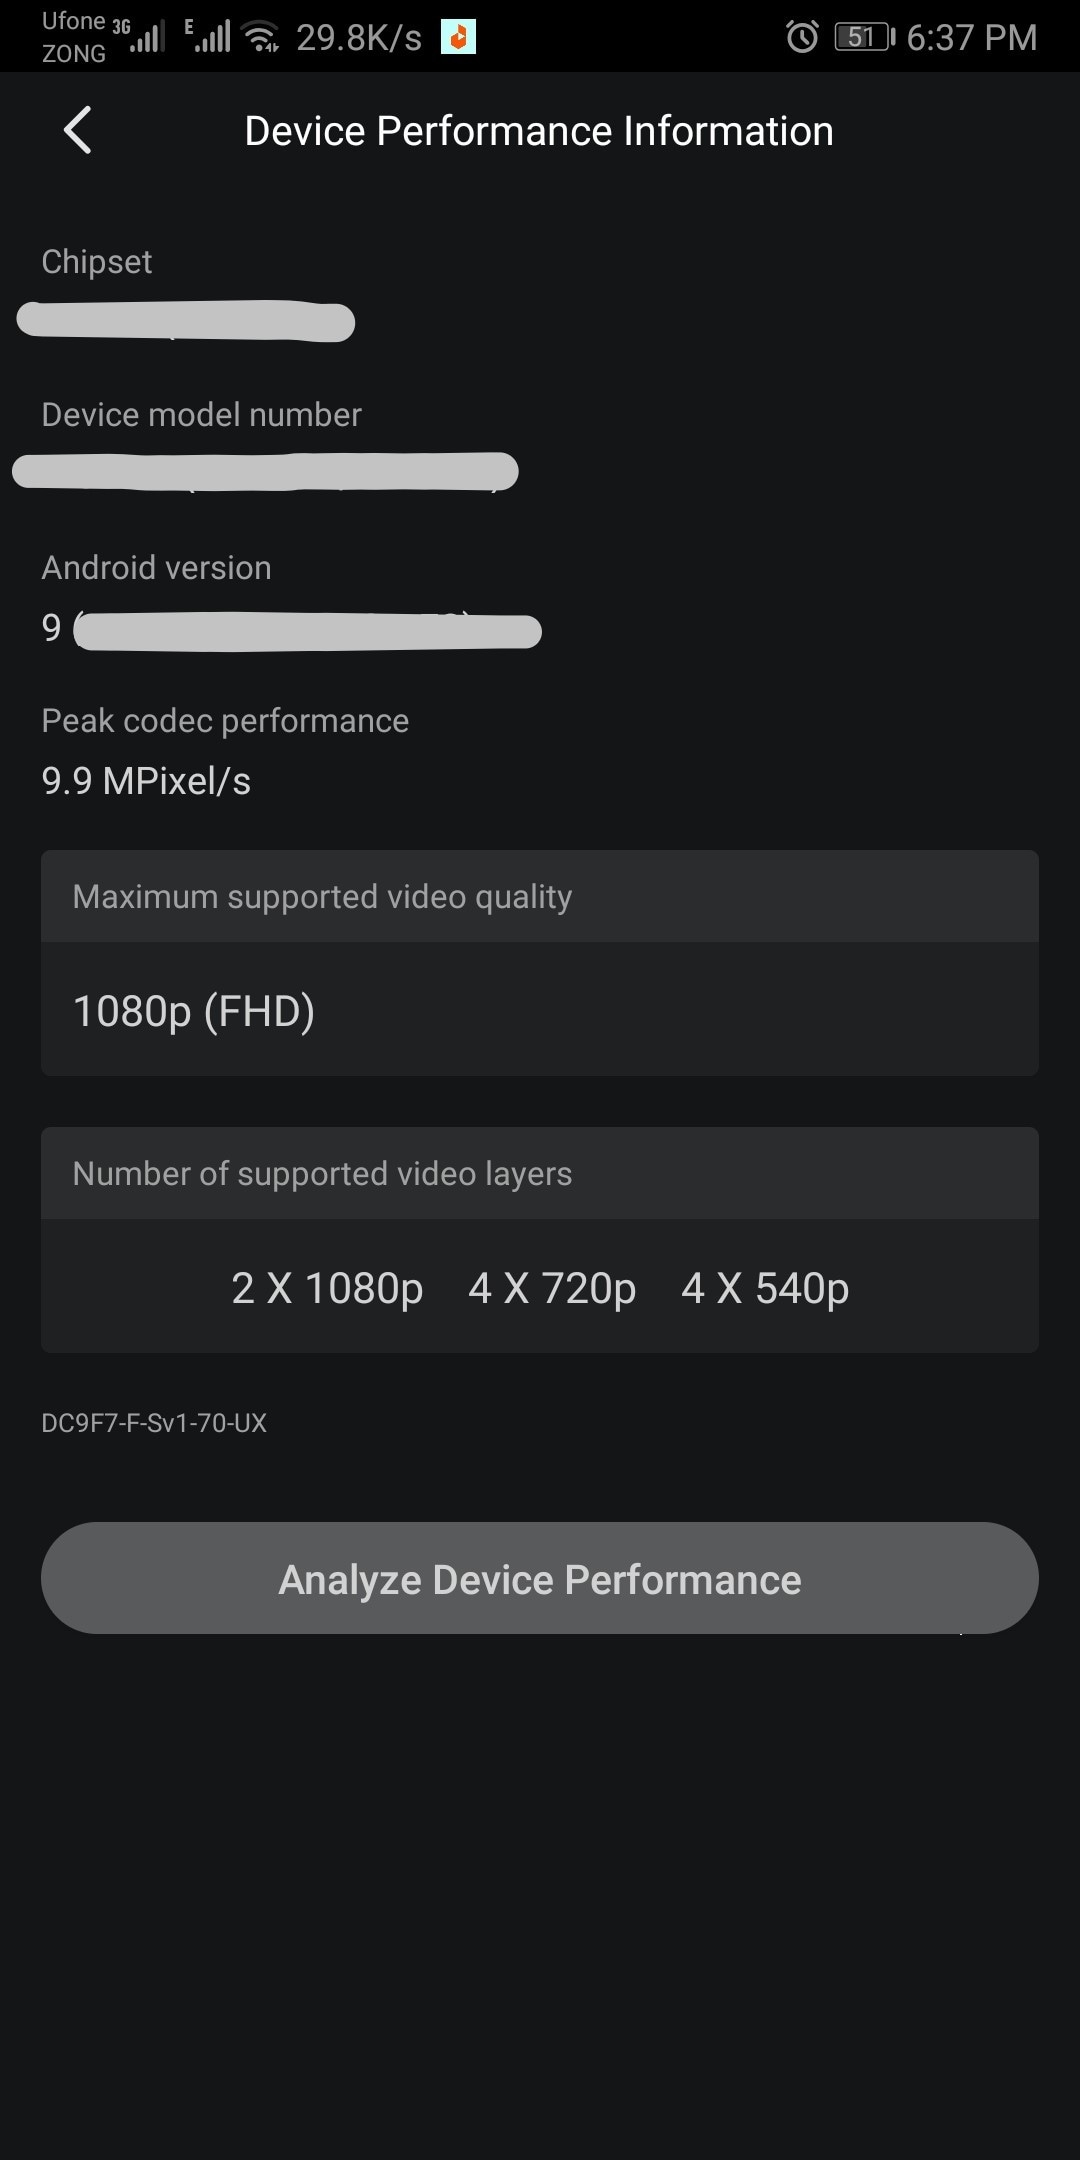
- It supports up to 4K resolution at 60fps. (depending on mobile configuration)
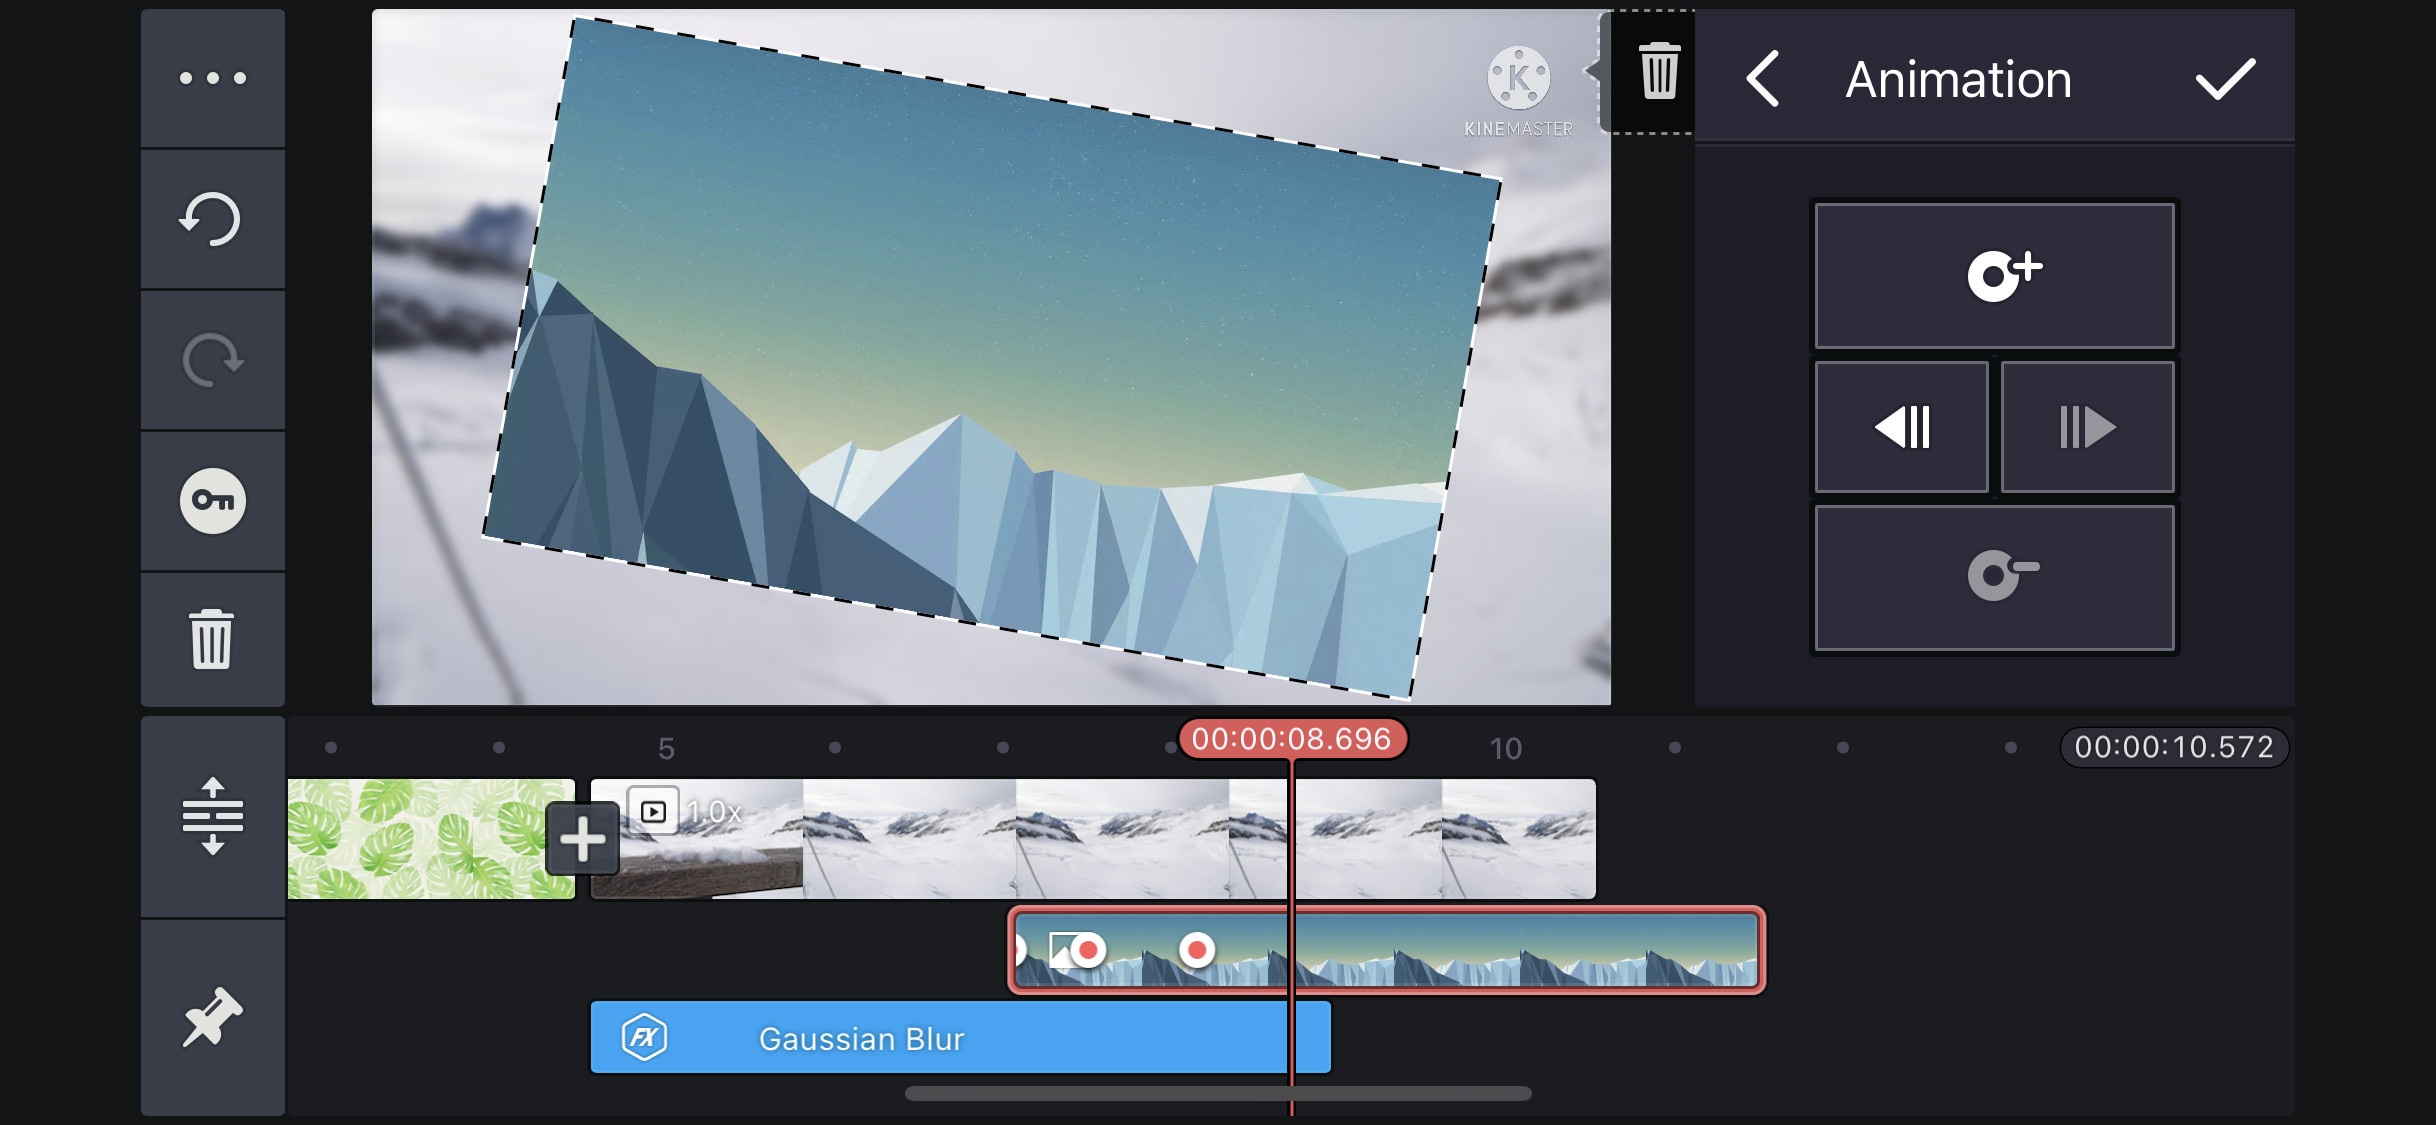
- Have amazing features like chroma key, keyframing, blend e.t.c
- Has built-in audio and video recorder.
- Supports multiple texts and video layers with different resolutions depending on the capability of the mobile phone.
- Has UI like a PC video editor and supports landscape orientation for editing.
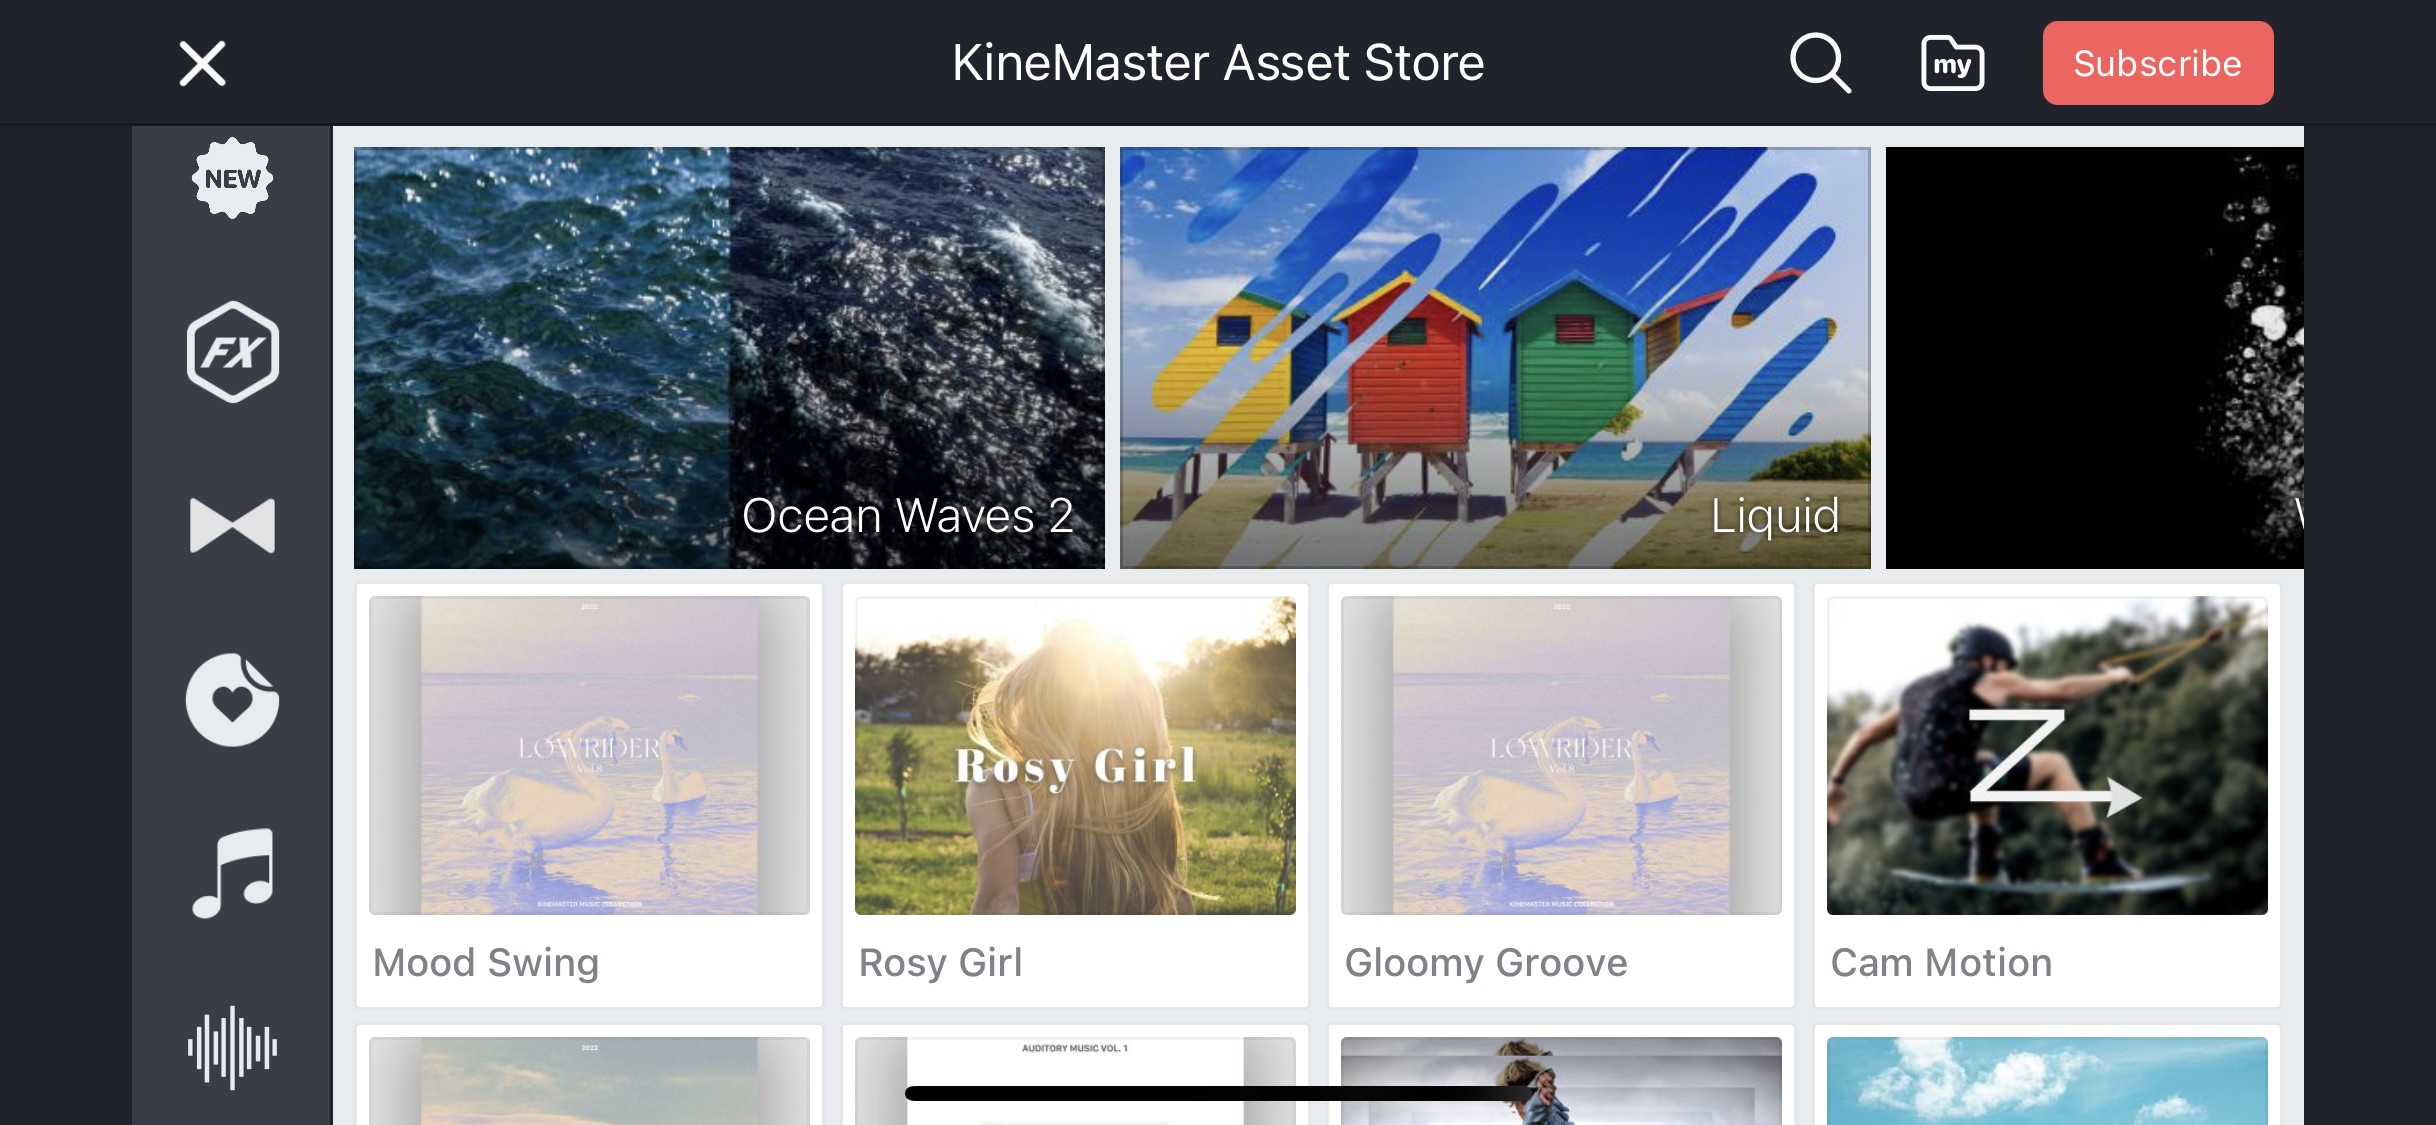
- Have an asset store with 100s of free effects, transitions, and stock material.
~Cons:
- Can’t export 4K videos on most devices.
- Can’t apply keyframes and chroma key to the main video. (can be done on layers only)
~Price:
Its Premium version is available for $4.9/month or $39.9/year. It also includes all the premium assets.
~Steps:
Import: Open Kinemaster, then click “New Project” to start a new project. Select the desired aspect ratio then click “Create” to start editing. Or click the “import” button on top to import an existing file to continue editing.
Media Browser will be opened. Select the clips to add them to the timeline. Click the “X” button on the top-right corner to close the media browser.
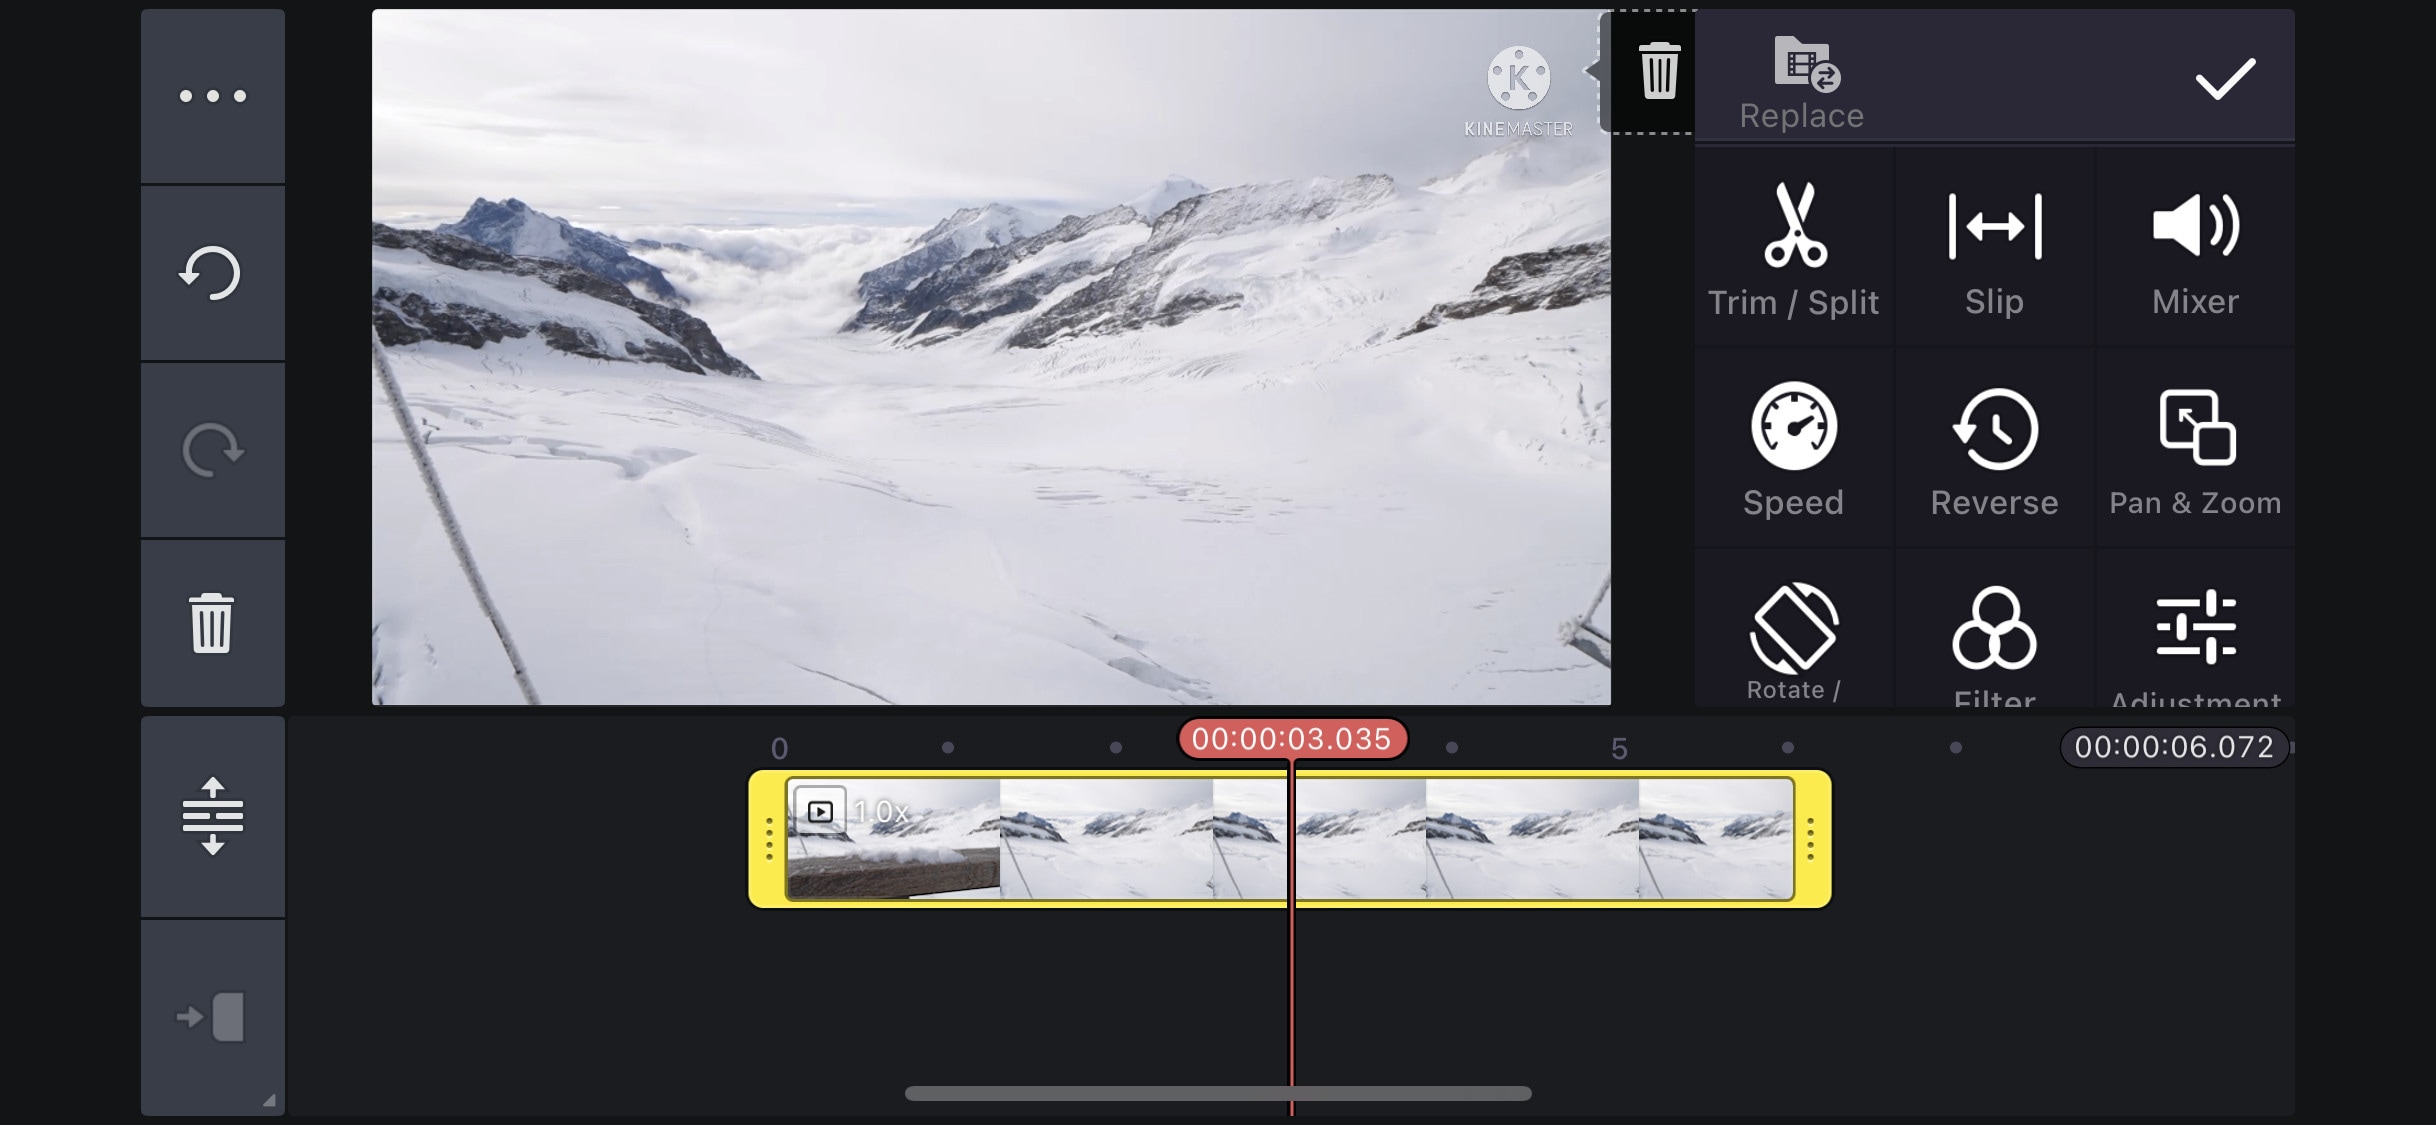
Edit: Drag the clip from the corner to trim it. Select a clip to open its editing menu. Here you can change its speed, add filters, do color correction, edit its audio, e.t.c.
On the right side, you will see a bunch of icons. Click the “Layer” button to add a media file, text, or effect as a layer. Click the “Audio” button to add an audio file. Or click the “Rec” button to do a voice-over.
Click the “+” symbol between two clips to add a transition between them, then adjust its time duration if you want.
Speed Ramping: Select the “Speed” option to change its speed. Here you can only do linear speed change. To create a speed ramp effect, split the clip into different parts and then change their speed according to your liking. Apply a crossfade transition of about 0.1 sec to smooth the jump cut between clips.
Effects: Select a clip then click “Clip Graphics” to apply the effect to your clip. Your clip will be highlighted with a yellow box, adjust it to set the time duration of the effect.
Click the “Shop” icon to visit the Asset store. Here you can find many cool Effects, clip graphics, transitions, and sound effects. Download them to use in your project.
Click the Layer clip to edit it. Here you can do chroma key, keyframing, or apply animation.
Export: Click the “Export” icon on the top-right corner of the app to open the export screen. Select the desired resolution and frame rate then click “Save as video” to export it.
Power Director:
It is available on IOS and Android both.
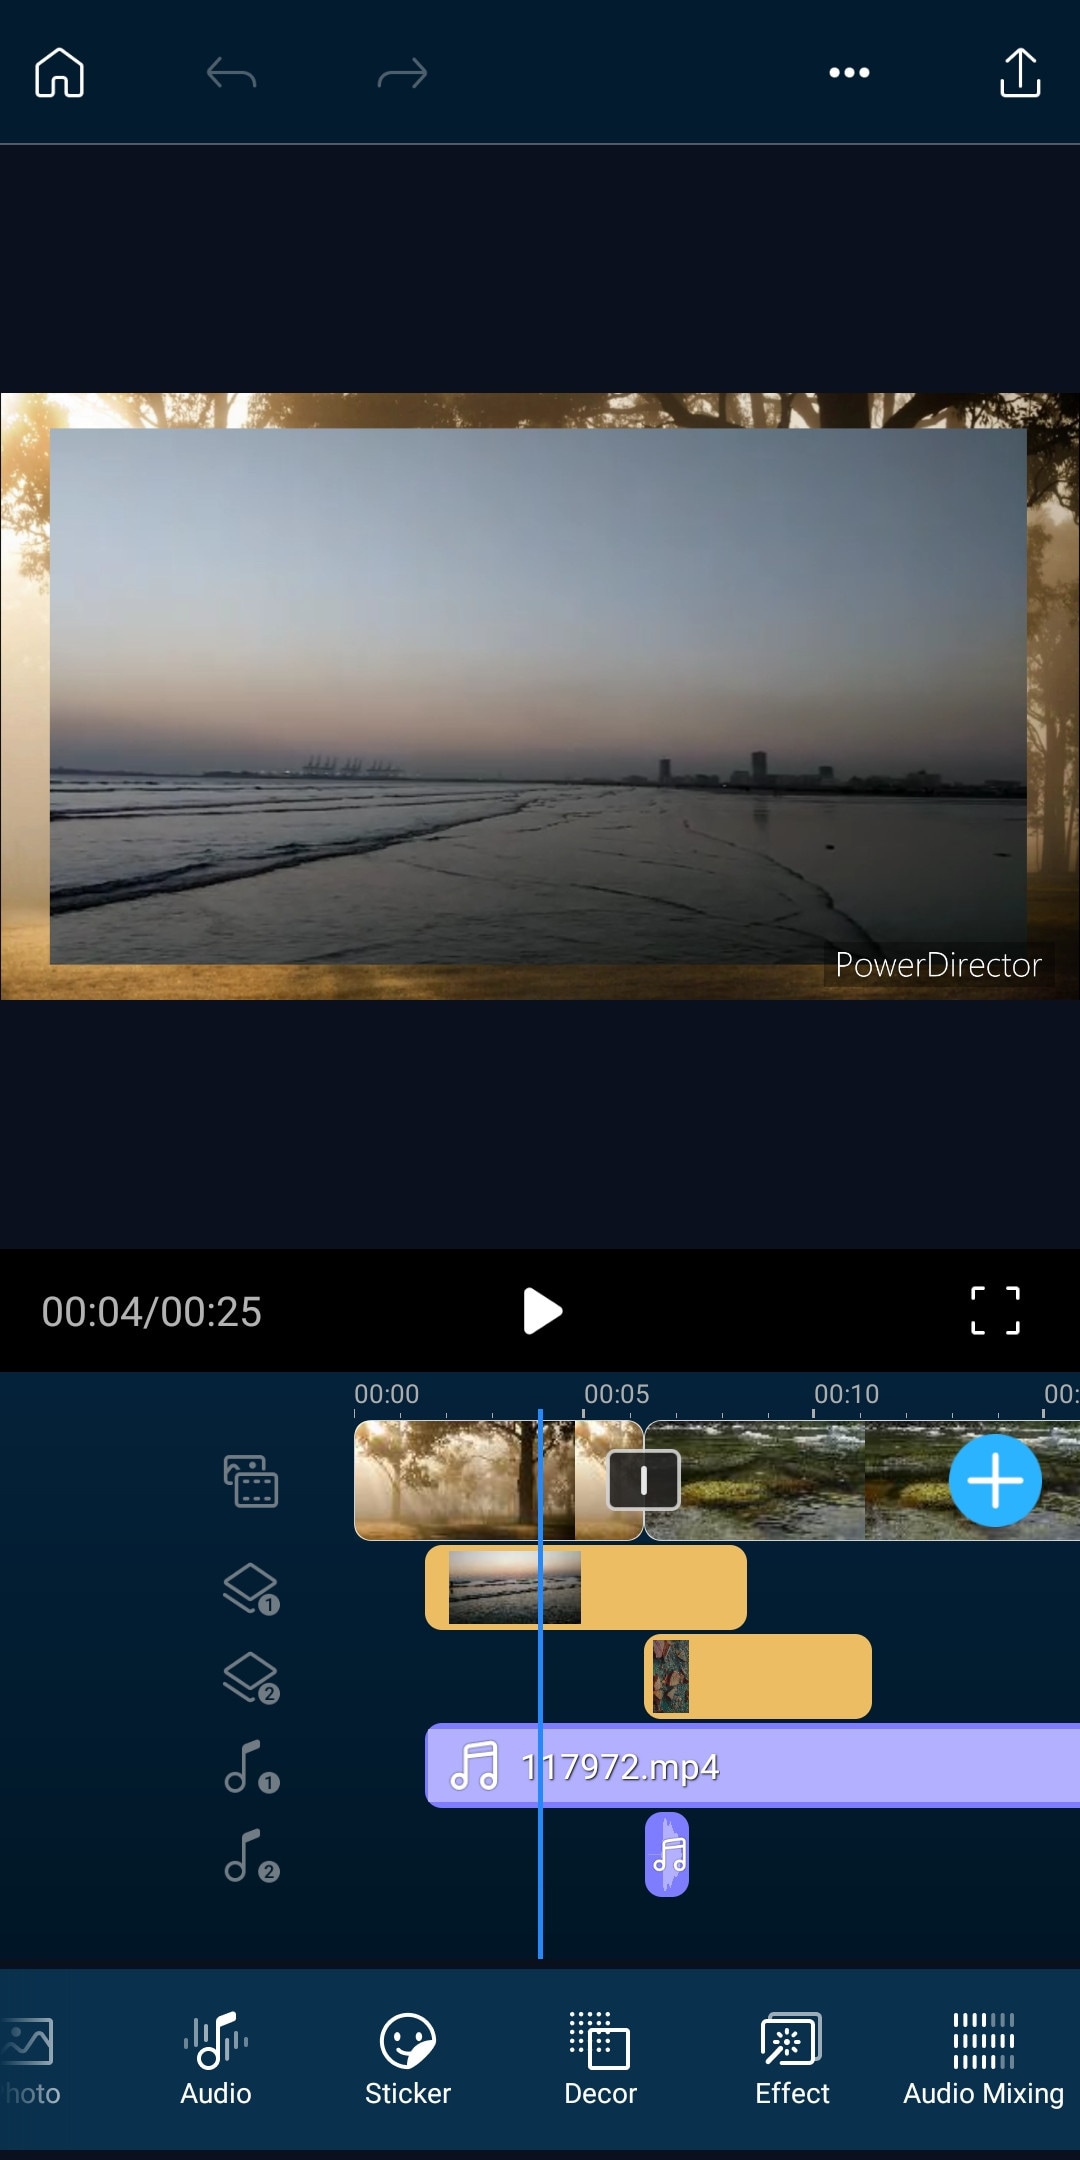
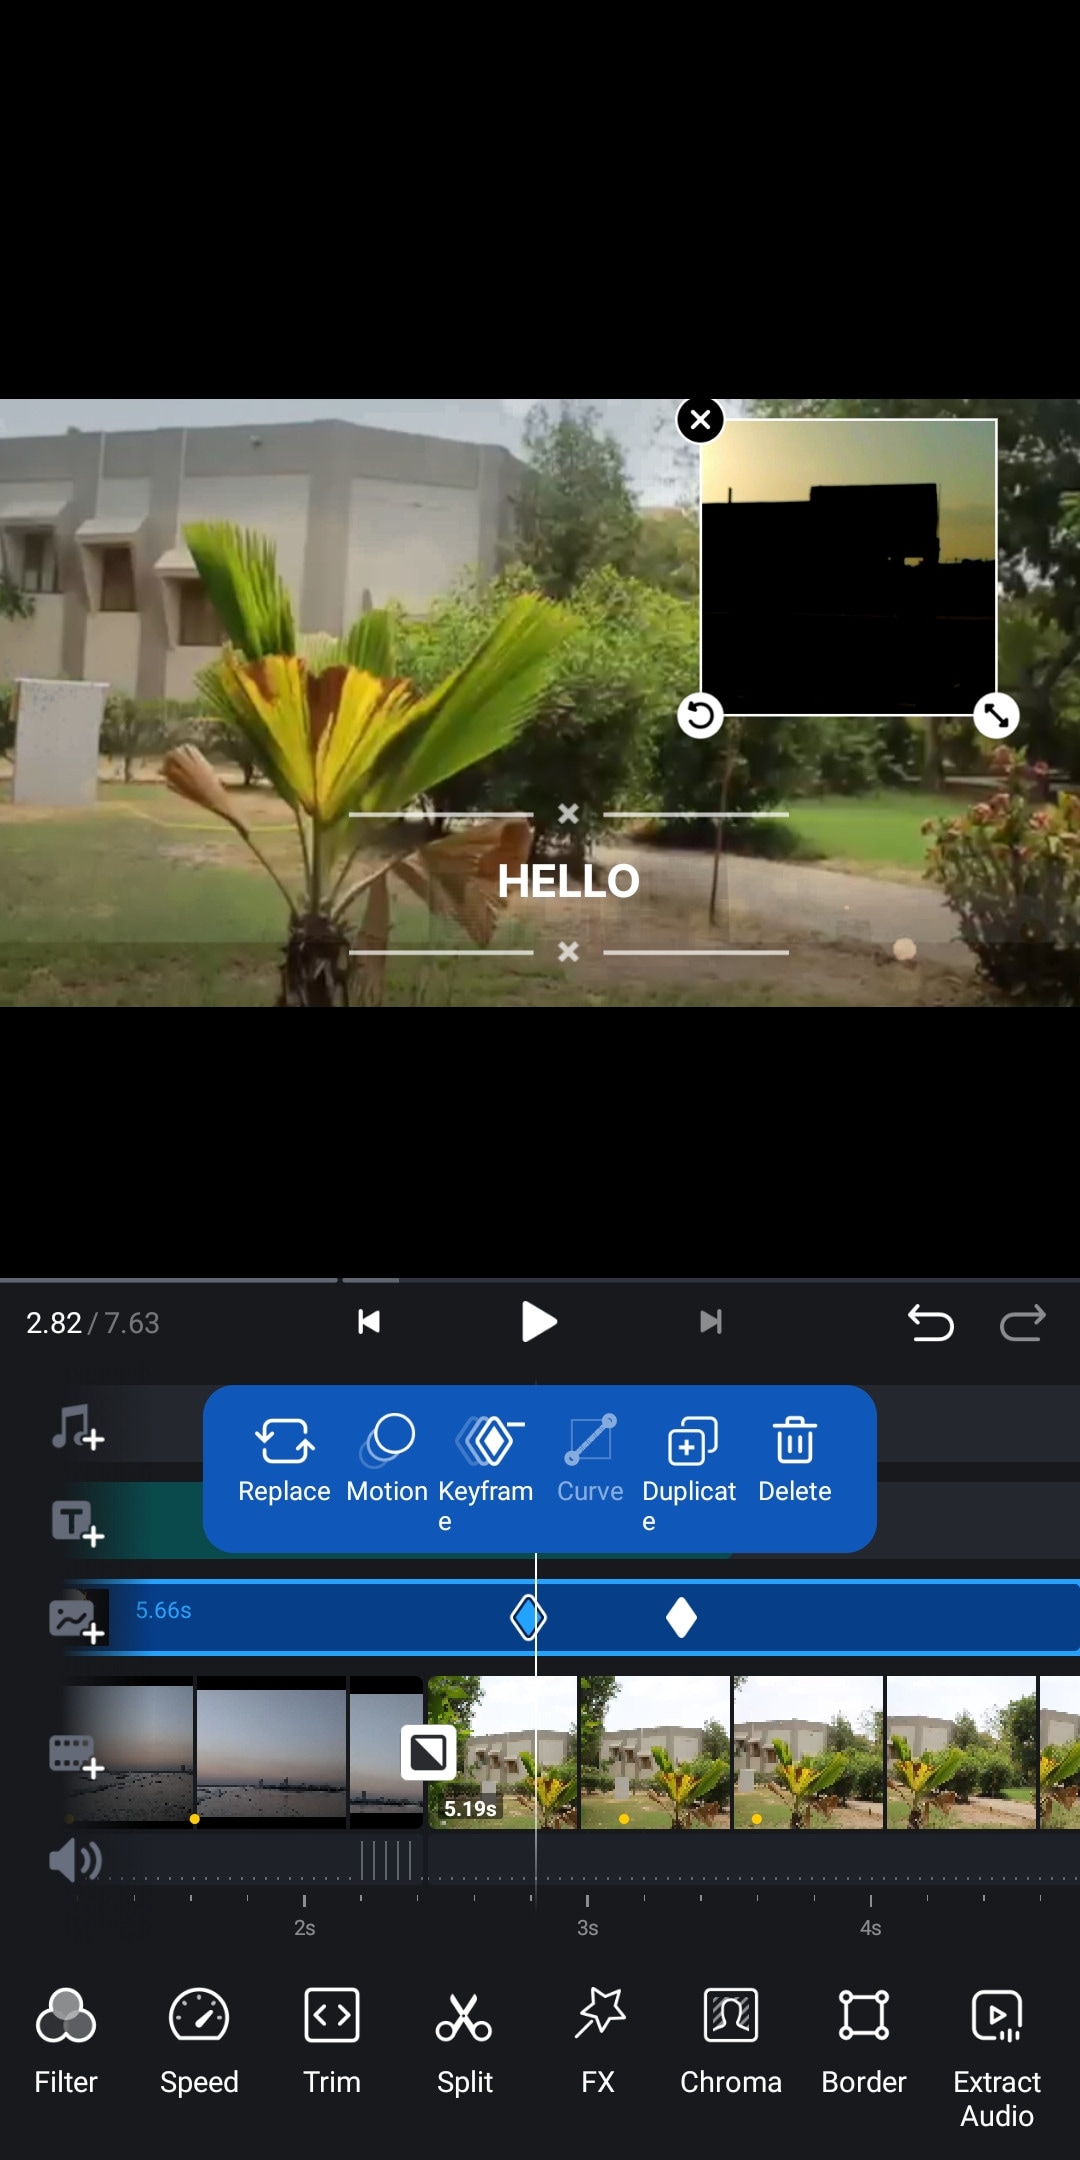
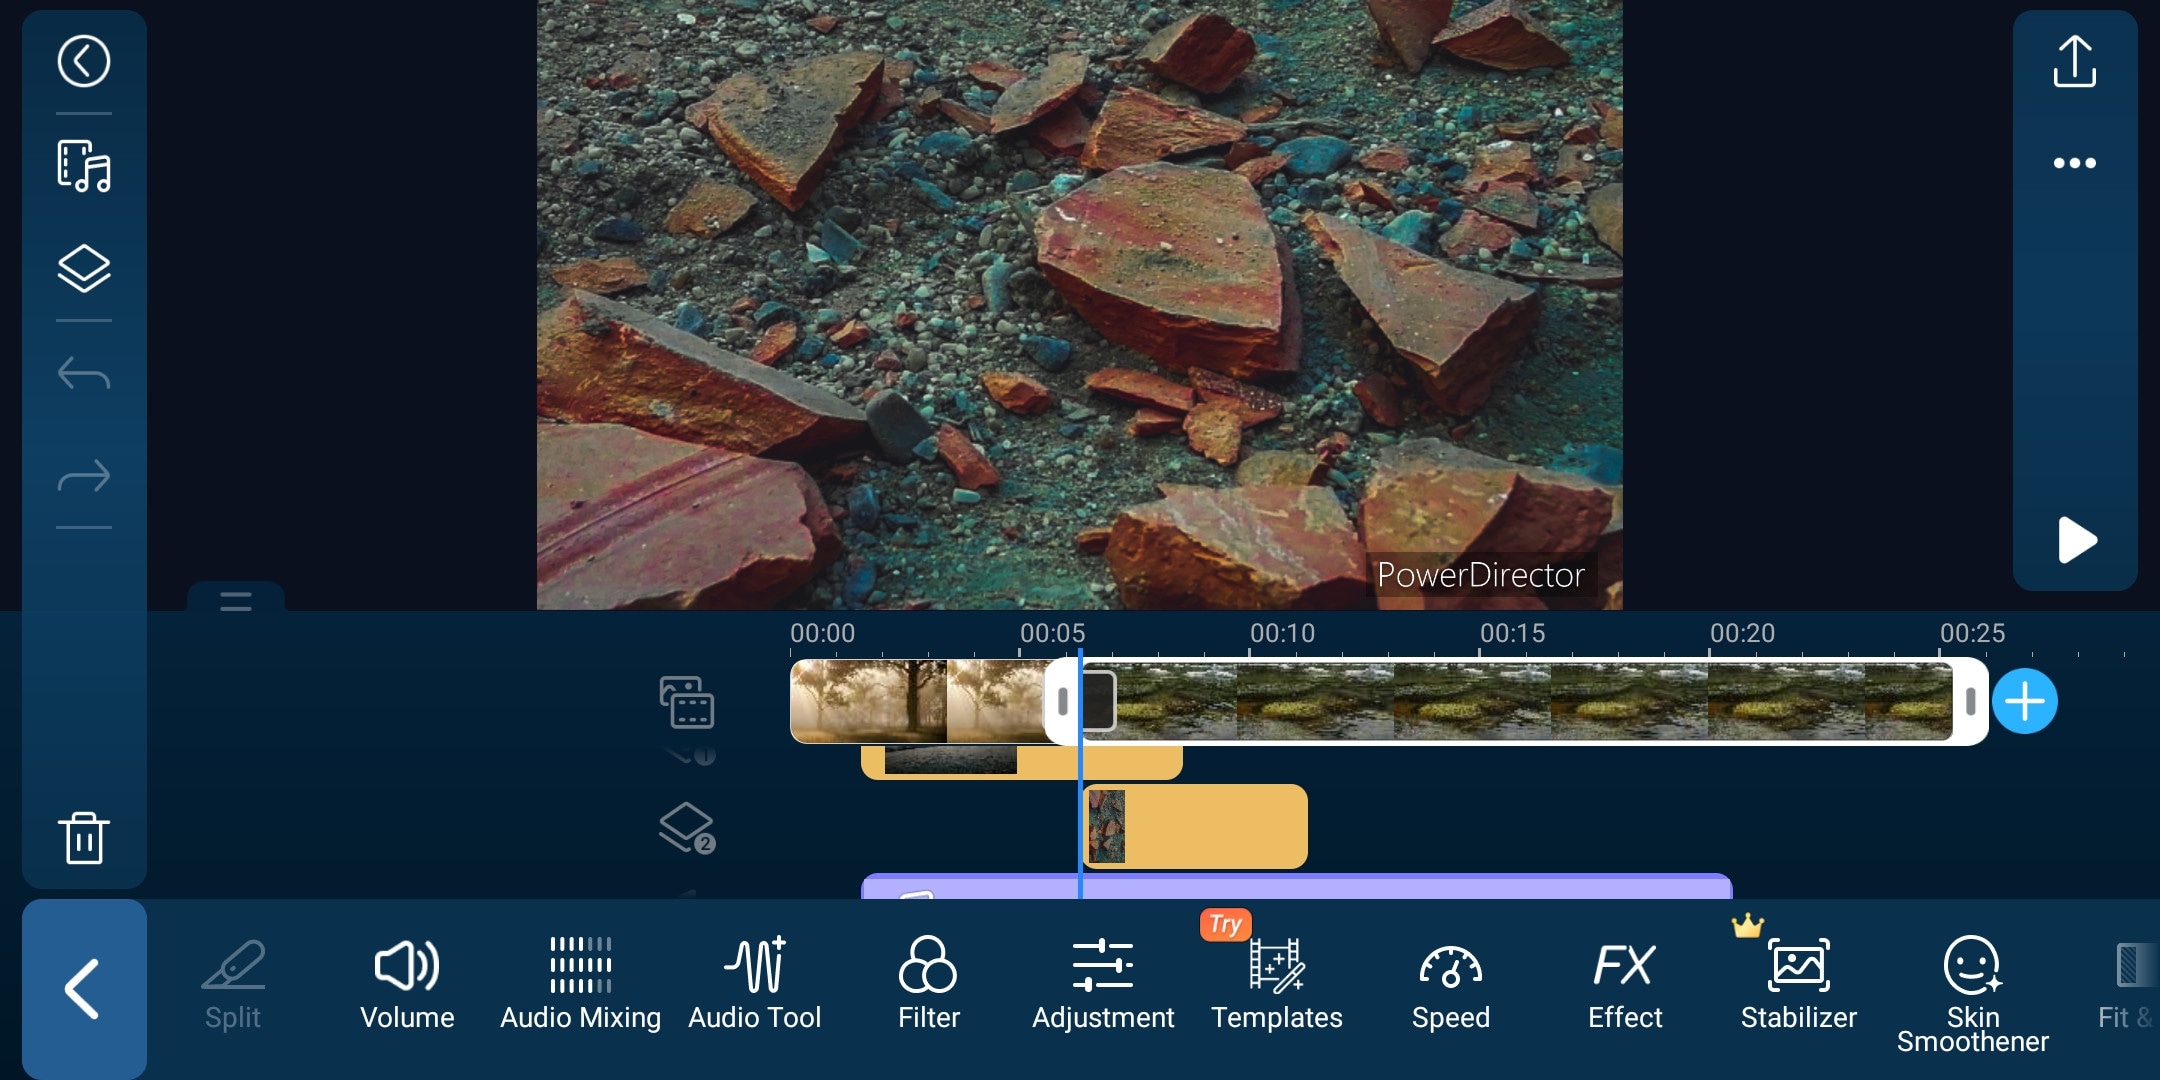
It is a paid but quite advanced video editor available for androids and IOS both. Like its PC version mobile version is also packed with many great features. It is compact and easy to use. It supports multiple video and audio layers. Have many cool filters and transitions. Can also do basic color corrections. To complete post-production work it also has audio editing tools and effects. It also has hundreds of title designs. Its UI is easy to use and supports both portrait and landscape orientation for editing. Most of its features can be used for free with a watermark on export. To remove the watermark you need to purchase the premium version.
~Features:
- It supports up to 4K resolution at 60fps. (compatible on most devices)
- Supports both Portrait and Landscape orientation for editing.
- Supports Key framing and video stabilization also.
- Supports multiple audio and video layers.
- Can edit videos in different aspect ratios.
- Have a vast stock library.
~Cons:
- Can’t export 4K videos on many devices.
- Can apply keyframing and chroma key to layers only.
- Software lags sometimes.
~Price:
Its Premium version is available for $4.9/month or $29.9/year.
~Steps:
Import: Open “Power Director”. Click “New Project” then select Aspect Ratio to start editing. Select clips from the media library Then click the “blue tick” button to add them to the timeline. Click the “+” icon to import more clips. From the bottom bar (in portrait mode), Select the video, image, audio, or effect icon to add them as a layer. In Landscape Mode bar it is situated on the left side of the screen.
Edit: Select and drag the clip from the corner to trim it. Select a clip to open edit tools. From here you can do audio editing, color correction, cropping, stabilization, and speed change.
Here you get more features to edit a layer or an overlay such as chroma key, masking, transform keyframe, e.t.c. To do keyframing, select a layer, then click the “diamond” icon located on the right side above the timeline to add keyframes then rotate, zoom or change the position of the clip with time to add more keyframes. You can also do keyframing for other features like adjustment, mask, blend, and opacity.
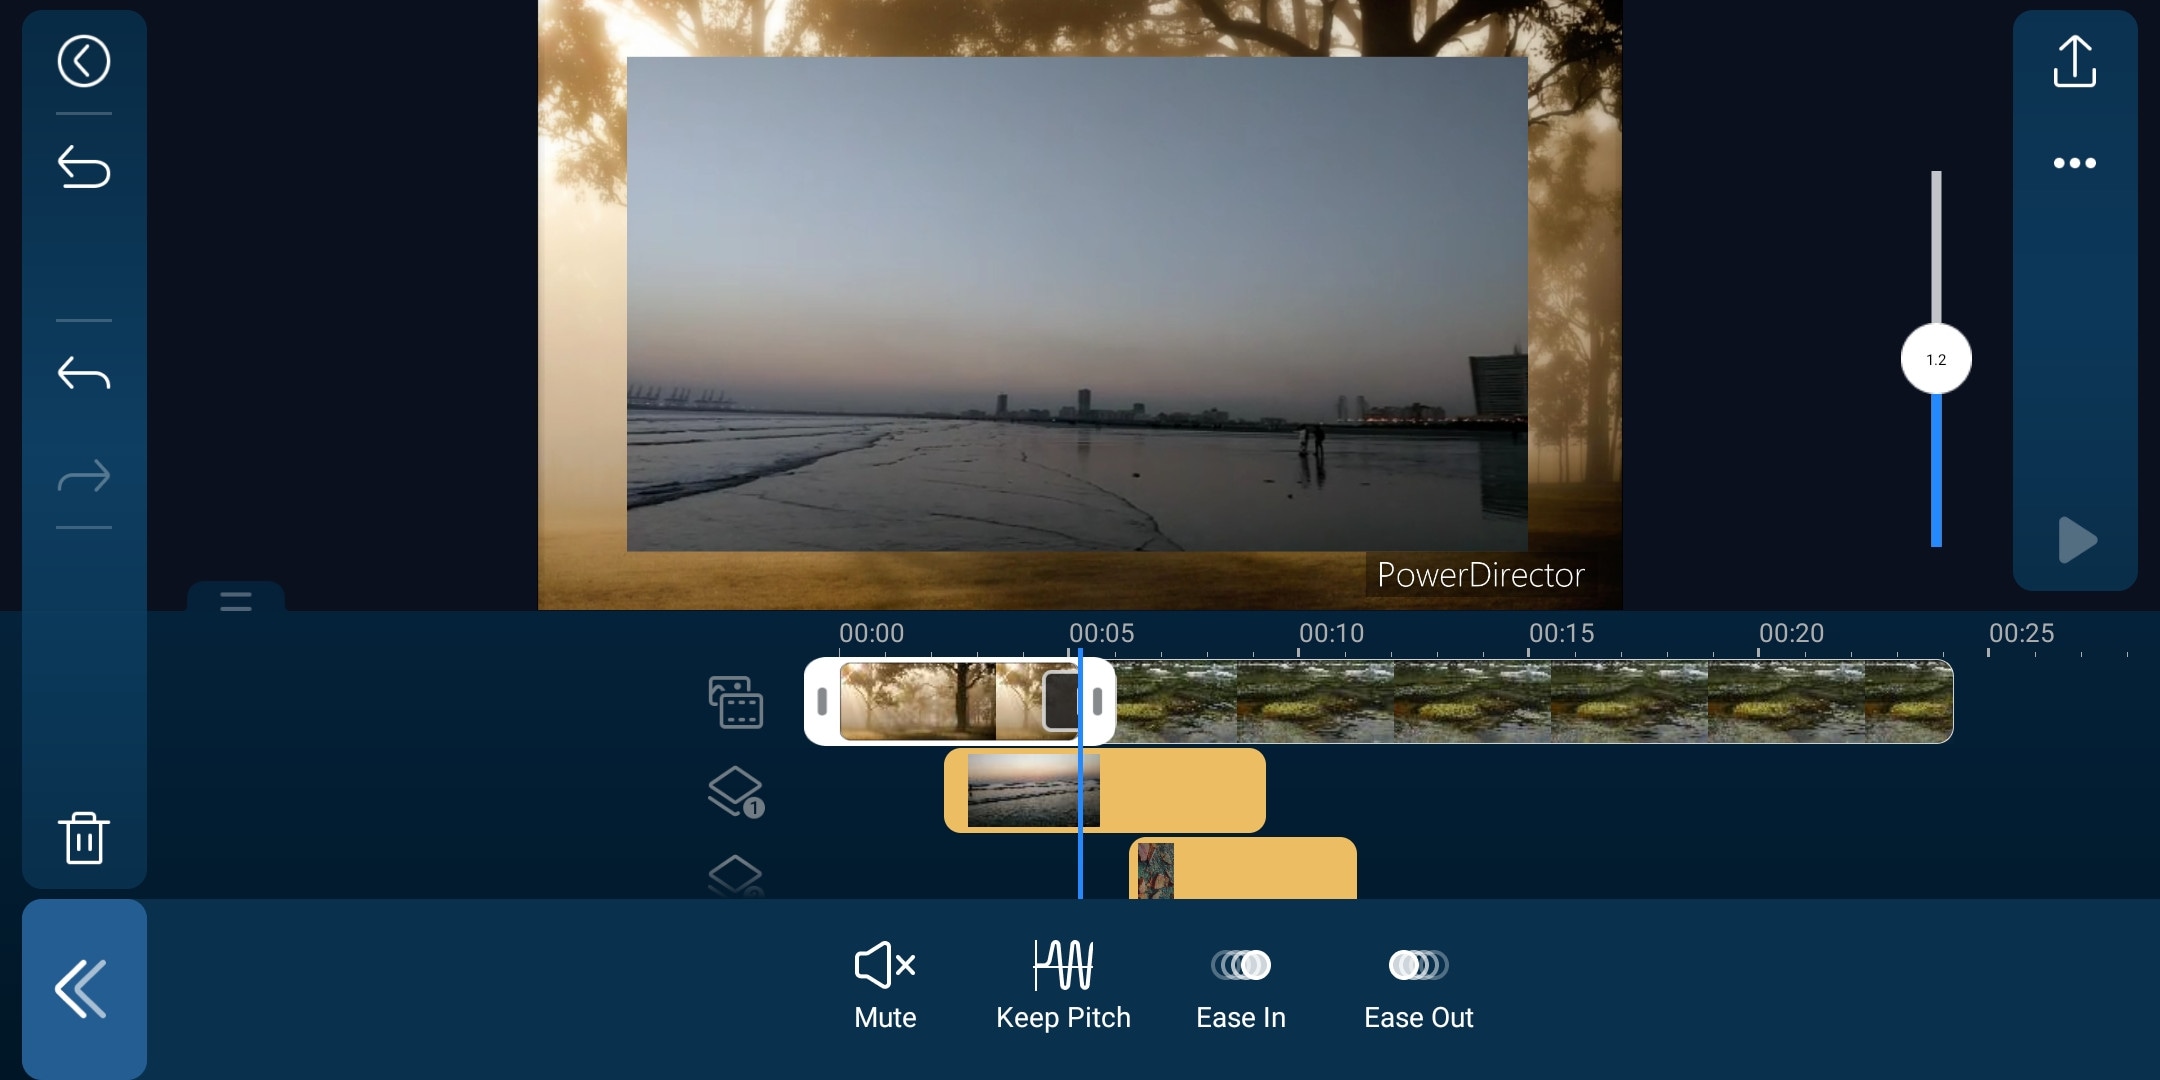
Speed Ramping: To Change speed, select a clip or a layer click the “speed” button then move the slider to change its speed. To do speed ramping split the clip into small parts and change their speed respectively. Click the “ease-in” and “ease-out” buttons to smooth the jump between the clips.
Effects: Click the grey box between the clips to add a transition and move the slider to change its duration if you want.
Select a clip, then choose a filter or an effect to apply to the selected clip.
Export: To Export the finished product, click the “export” icon on the top-right side of the screen then click “Produce and Share” to select the video resolution or click the “Settings” icon to change the storage path and frame rate. Then click “Produce”.
LumaFusion:
It is available on IOS and Mac (with an m1 processor).
As a content creator, have you ever wished for creating your own cinematic masterpiece, but the thing holding you back is that you don’t have a powerful workstation or expensive software then don’t worry. You can do professional-level editing on your iPhone with the software named “LumaFusion. It is one of the most powerful and advanced video editors available for your iPhone or iPad.
It is a multi-track video editor with many useful features like the Chroma key, keyframing, color grading, and color LUTs. Have powerful color grading tools and an audio editor. It also has a lock and load stabilizer. You have to purchase the software before using it. It doesn’t have any free version to try.
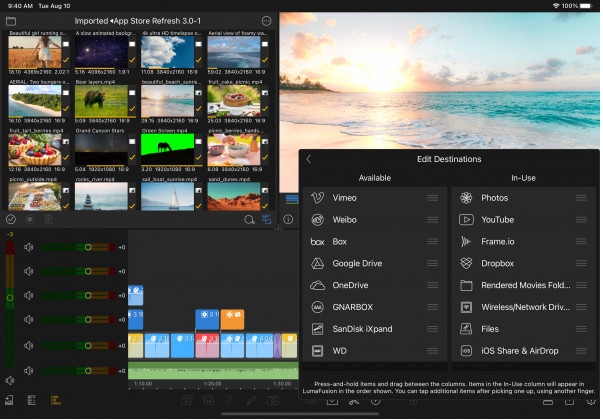
Credits: Pic by Luma touch website.
~Features:
- It supports up to 4K video resolution at a max of 240 fps.
- Can also edit and export 360 videos.
- Have powerful color correction tools. You can also import your own color LUTs.
- Supports Keyframing on almost all the editing tools within the software.
- You can add some third-party audio plugins.
- Supports up to 6 audio and video layers.
- Have “Storyblock” stock library. (Many of its contents are free to use)
- Supports external monitor for display.
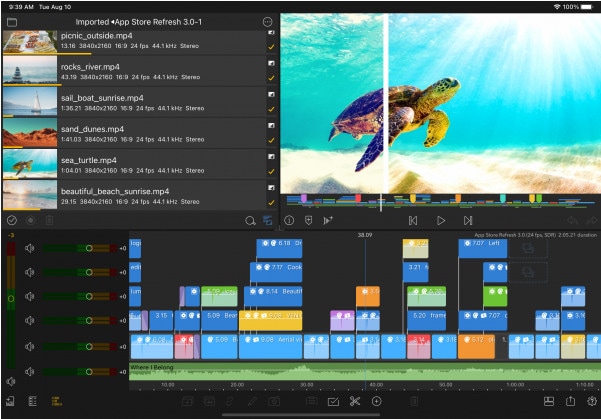
Credits: Pic by Luma touch website.
~Cons:
- Not available for Android devices.
- Being an advanced software, it doesn’t have masking and speed ramping features.
- Doesn’t have a free version to try on.
~Price:
It is available for purchase at $29.99.
~Steps:
Import: Click the “+” button on the bottom of the screen to start a new project. A small tab will appear, change the settings if you want, then click the “+” button on the top-right side of the tab to start your project.
Click the “flower icon” on the top-right side of the screen to open the source menu (Its icon changes depending on the present tab), Click “Photos” to open folders and files. Click and drag files to add them to the timeline. Click and drag the clips on the top of the primary clip to add them as a layer.
Edit: Click and drag the clips from the corner to trim them. On the bar at the bottom of the screen, you will find basic tools. Click the clip, to open editing tools on the same bar.
Click the “+” icon on the bottom bar or select “Titles” on the source menu to open the Titles menu. Drag and drop the titles to use them. Double-click the text to open the edit menu.
Double-click the clip to open the edit menu. Here you can transform the clip, change its speed, Stabilize your clips, do color grading, add an effect and perform audio editing.
Speed Ramping: In the edit mode, click the “speed and reverse” button and move the slider back or forth to change the speed of the whole video. To do speed ramping, split the video into parts and apply different speeds to create a speed ramp effect. This method is not perfect but it gets the job done.
Effects: Select the “Transitions” icon on the source menu to open the transition menu. Drag and drop a transition on a clip to use it.
Double click a clip to open the edit menu. Then in the “Color & Effects” tab select any effects and apply them to your clip.
To do keyframing, on the edit menu, click the “circle” icon on the bottom-right side below the display to start keyframing. then change the settings with time to add further keyframes.
Export: To Export your file, click the “Export” icon on the bottom-right corner of the screen to open the export menu then click the “movie” icon to select the file destination. Select the desired export settings then click the “Export” icon on the top of the menu to export your finished product.
Which One Should I Choose Free or Paid iPhone Video speeding Softwares?
It usually depends on your needs. If you just want a speed editor to make slow-mo or timelapse videos for your social media then you should go for free video editors, as they are easy to use and provide better speed ramping features than some paid video editors mentioned here.
But as a content creator if you want more features alongside speed ramping then you should go for paid softwares mentioned above. As mobile video editors are quite affordable and some of them have features like that of some PC softwares.
FAQs about Speed ramping feature and softwares:
- Q) What is Speed Ramping and where it is used?
Speed Ramping is different from just changing the speed of the whole clip. It means changing the speed of the video gradually, so the clip doesn’t feel jumpy.
It is done to give viewers a smooth experience between different parts of the clip. like the fast-forward clip is used to show the passage of time. and the slow-mo is used to emphasize something or produce tension, while a mix of both is used in ads and action scenes, e.t.c.
- Q) How to do Speed Ramping?
Speed Ramping methods vary from software to software. Either you can do it by adding keyframes and changing speed with time or you can add or adjust curves for speed change. If your software doesn’t support the speed ramping feature, you can split a clip into parts and apply speed change to them differently. For some of the best iPhone softwares, we have mentioned the speed ramping steps above.
- Q) What FPS is best for Slo-mo videos?
Shooting at 60 Fps is ideal as it gives a smooth and crisp video and you can make slow motion easily if required, you can slow it down up to 40% of its speed while maintaining the quality. It is supported in almost most devices nowadays. And if you want to create super slo-mo for your cinematics or product video then 120 or 240 fps is preferable. But higher fps often have disadvantages as it is harder to apply visual effects or masks. So choose the frame rate according to your requirements.
- Q) Does changing the speed of video affect its audio?
Yes, changing the speed of video affects the audio, It affects its pitch (tempo). Increasing its speed increases the pitch of the audio making it sound shrill while decreasing the speed of the video or making slow-mo decreases the pitch making it sound deep.
Although, some softwares provide the feature to maintain the pitch while changing the speed of the clip.
~Cons:
- Its UI doesn’t support editing in landscape orientation.
- It doesn’t support 4k video resolution.


~Steps:
Import: Open Filmora Go, Click “New project” to start a new project, or Choose the previous one from the “Draft” portion. Select videos or images to import to your timeline. Hold and drag the clip to change its arrangement.
Edit: You can add text, effects, stickers, layers, e.t.c. by clicking their icon, present on the bar at the bottom.
Click and Drag a clip from the corner to trim it.
Click the “PiP” icon to add image or video layers, you also can add multiple layers.
Select a clip to edit it. Different editing tools appear on the bottom bar. Here you can change its opacity, its speed, or add animations.
Click the diamond icon above the timeline to add keyframes. Zoom, move, or rotate the clip to add keyframes with the passage of time.
Speed Ramping: To Change the speed of a clip, select it then click the “Speed” icon on the bottom bar of the screen. Move the slider to change the speed of the whole clip. To do speed ramping, click the “curves” option to choose a preset or create your own. Click a preset to apply it, and click again to open its edit menu. drag the beats up and down to change speed or add or delete a beat if you want.
Effects: Click the “Effects” icon to open the effects menu. Select an effect to apply to your clip.
Click the white box between two clips to add transitions.
Export: Click the “Export” button to export your file. Select your desired resolution and frame rate to export your clip.


Some Free Video speeding Softwares for iPhone:
If you are short on budget or don’t want to spend much on video editing softwares then you can try these free softwares. They are free that doesn’t mean that they are useless, they are quite good for beginners or moderate users although some of them are designed for professionals also. If you don’t believe me, go and try it yourself. Apart from just changing the speed, they are good in other editing aspects also.
Adobe Premiere Rush:
It is available on IOS and Android both.
If you are looking for free but good speed ramping software then why go anywhere also when you have an amazing video editor made by a well-known software company “Adobe”. Like premiere pro, they have designed a compact version for phones named “Premiere Rush”.
It is a free video editor that has all the tools needed for video editing, from video effects to color grading and audio editing. Its UI is a bit similar to PC video editors. It is a free video editor with no watermarks. Although it takes some time to understand it. But once mastered, you can do editing quickly.
~Features:
- It is a free video editor with no watermark.
- It supports up to 4K resolution at 60fps.
- You can extract audio and can do voiceover directly from the software.
- It has hundreds of filters, overlays, and title designs.
- It has basic color grading tools.
- It also has a motion tracking feature. (in Paid version)
- It supports multiple audio, video, and text layers.


~Cons:
- It only runs on high-end devices. ( It is not supported in most mid-range phones)
- Not suitable for beginners. Its UI is quite hard to understand.
- Doesn’t have common features like the chroma key, masking, e.t.c.


~Price:
Its Premium version is available for 9.99/month. It includes some premium features. Or you can purchase the “All Apps Bundle” at $54.99/month for the annual plan.
~Steps:
Import: Open “Adobe Premiere Rush”, Click the “+” sign at the bottom to create a new project. in the media location, select the clips, then click the blue “create” button to start editing.
Click the blue “+” button at the bottom-left corner to add clips, audio, or graphics.
Hold and drag the clips upward to add them as a layer.
Edit: Scroll over a clip to select it. Clicking again shows a pop-up above the selected clip. Here you get 4 options: split, duplicate, separate audio, and delete.
A number of edit options appear on the bottom line of the screen:
Graphics: Click the “Graphics” button to add animated titles, transition graphics, and overlays as a layer. Select to customize its design.
Effects: Click the “Effects” button to add transitions or motion effect. Select a clip to apply transition at both ends. or select a corner of the clip to apply on it only. And change the duration of transition if you want.
Color: Here you can color grade your clips, Apply a preset or color grade manually by using sliders. You can also create your presets.
Transform: Here you can resize, rotate, crop, or change the position of the clip.
Audio: Here you can edit the audio, select a clip to edit its audio.
Speed Ramping: Click the “Speed” button to edit its speed. Select the range option to speed ramp a specific part of the clip. Select the ramp option to create a smooth speed curve. Or Set the clip duration to change its speed accordingly.
Export: To Export your clip, click the “Export” icon on top of the screen. Click “Quality Settings” to adjust export settings then click “Export” to save your file.
CapCut:
It is available on IOS and Android both.
If you are looking for a free but good speed ramping software to help you create slo-mo videos easily anywhere, anytime you want, then “CapCut” can be the right choice for you. It is a free mobile video editing software with many interesting features like keyframing, chroma-key, masking e.t.c. It also supports video and image layers. It has one of the best speed ramping features among other mobile video editors. It provides curves to smoothly speed ramp your clips. It can edit landscape, portrait, and even square video formats. It has many amazing effects and filters, it also has some stock clips.


~Features:
- It is completely free and has no watermarks.
- It supports up to 4K video resolution.
- Has curves for speed ramping.
- Has keyframes for animation.
- It has hundreds of effects, overlays, and titles.


~Cons:
- Its UI doesn’t support editing in landscape orientation.
- Lacks some common editing tools.
~Steps:
Import: Open Capcut, then click “New Project” to start a new project. Select files then click “Add” to import them. Click the white box with the “+” sign to add more clips. Hold and drag to rearrange the clips.
Click the “Add overlay” button to add photos or videos as layers.
Edit: On the bottom of the screen, you can find a bunch of tools for editing. From here you can add overlays, effects, filters, titles e.t.c to the timeline.
Select a clip to open the edit menu situated at the bottom of the screen. Here you can do the following tasks:
Split the clip; Change its speed, remove background, edit audio, do color correction, apply filters, stabilize the clip, e.t.c.
We have more edit features for the layers only which include: Spice (Blending), Animation, Masking, Chroma key, freeze frame, change opacity e.t.c.
Click the “Keyframe” icon (Diamond shaped) below the playback screen to apply keyframes to the layer. Pinch and zoom or rotate to transform the clip. Use the “Graphs” button in the edit menu to customize the keyframe animation.
Speed Ramping: To Change the speed of a clip, select it then click the “Speed” icon on the bottom bar of the screen. Move the slider to change the speed of the whole clip. To do speed ramping, click the “curves” option to choose a preset or create your own. Click a preset to apply it, and click again to open its edit menu. drag the beats up and down to change speed or add or delete a beat if you want.
Effects: Click the “+” sign between the two clips to add a transition between them, and drag the slider to change its duration.
Select the effects, filters, or titles icon to add them as a layer.
Export: Click the “Export” button on the top-right side of the screen to export your clip. Or click the button, left to the “Export” button to change its resolution and frame rate.
iMovie:
It is available on IOS and Mac.
If you are an Apple fan and own everything Apple then what’s better than getting your hands on a video editor designed by Apple. It is simple and easy to use. It has all the basic editing tools to enhance your video like crop, trim, transitions, effects, e.t.c. It also has a speed ramping feature which let you change the speed at different points of a clip. It’s AI mode “Magic Movie” lets you select clips and a style and software will make the final product for you.
Its “Storyboards” mode is a creative way of learning production and post-production skills. It lets you choose a theme from many famous Genres available, then it will guide you through the production process like capturing footage, arranging your shots, and creating cinematic titles to enhance your story.


~Features:
- It is free and easy to use.
- Let you do speed ramping by changing the speed of different parts of the clip .
- Supports Raw files.
- It’s AI mode creates videos for you on its own.
- The “Storyboarding” feature helps you through the production process.


~Cons:
- It only works on IOS and Mac.
- Not suitable for professional projects.
~Steps:
Import: Open “iMovie” then click “Start New Project” and select one of the 3 following modes to start editing:
- Magic Movie: Select the clips for editing, then click “Create Magic Movie” to let iMovie create a movie for you, which you can customize according to your liking.
- Storyboard: Click “Storyboard” then select Template and a genre or a style then click “Create” to start the project. iMovie will guide you and let you add the clip or title according to the pattern.
- Movie: In “Movie” mode, select the clips from the media browser then click “Create Movie” to start editing.
Edit: Select a clip to edit it. A bunch of tools will appear at the bottom of the screen.
Click the “scissors” icon to split, duplicate, delete the clip, or to detach the audio.
Click the “volume” icon to change the volume of the clip.
Click the “Title” icon to add a title design. Click the text (on the playback window) to edit it.
Click the “Filters” icon to apply it to the selected clip and move the slider to change its intensity.
Speed Ramping: Click the “Speed” icon to change its speed. Move the yellow slider to change the speed of the whole clip. Or click the “Add” button to add partitions (in yellow color) to the selected clip. Select a partition to change its speed only. And click the “Freeze” button to add a freeze-frame.
Effects: Select the black box between two clips to add a transition. Select a transition to apply it and change its time duration if you want.
Export: Click the “Done” button on the top-left corner of the screen to save the clip, then click the “Export” icon on the bottom of the screen to save your file.
Some Paid Video speeding Softwares for iPhone:
If you do most of your video editing from your phone and want to invest some money in it then you should check the softwares mentioned below. They are quite affordable and are worthy of investment. As they are packed with many cool features. But if you aren’t sure which software to use then don’t worry as most of these softwares have a free version to try on but they have some limited features and they provide a watermark on export. But it is a great option to get your hands on new software and once you are comfortable with it, you can purchase its premium version.
Kinemaster:
It is available on IOS and Android both.
If you want to do more than just trimming and cropping to your videos then you should try Kinemaster. For editors, who want to do some advanced-level video editing on their phone, then you must have Kinemaster on your phone. It is a paid software, which is packed with many useful features. It has many video and audio effects. It also has an amazing audio editor. It also has many title designs and basic color correction tools. It has hundreds of effects and transitions + more can be downloaded from its asset store. Its UI is suitable for beginners and content creators both. It is a paid software, but all its features are completely free to use, but the free version leaves a watermark on export.

~Features:
- It supports up to 4K resolution at 60fps. (depending on mobile configuration)
- Have amazing features like chroma key, keyframing, blend e.t.c
- Has built-in audio and video recorder.
- Supports multiple texts and video layers with different resolutions depending on the capability of the mobile phone.
- Has UI like a PC video editor and supports landscape orientation for editing.
- Have an asset store with 100s of free effects, transitions, and stock material.


~Cons:
- Can’t export 4K videos on most devices.
- Can’t apply keyframes and chroma key to the main video. (can be done on layers only)
~Price:
Its Premium version is available for $4.9/month or $39.9/year. It also includes all the premium assets.

~Steps:
Import: Open Kinemaster, then click “New Project” to start a new project. Select the desired aspect ratio then click “Create” to start editing. Or click the “import” button on top to import an existing file to continue editing.
Media Browser will be opened. Select the clips to add them to the timeline. Click the “X” button on the top-right corner to close the media browser.
Edit: Drag the clip from the corner to trim it. Select a clip to open its editing menu. Here you can change its speed, add filters, do color correction, edit its audio, e.t.c.
On the right side, you will see a bunch of icons. Click the “Layer” button to add a media file, text, or effect as a layer. Click the “Audio” button to add an audio file. Or click the “Rec” button to do a voice-over.
Click the “+” symbol between two clips to add a transition between them, then adjust its time duration if you want.
Speed Ramping: Select the “Speed” option to change its speed. Here you can only do linear speed change. To create a speed ramp effect, split the clip into different parts and then change their speed according to your liking. Apply a crossfade transition of about 0.1 sec to smooth the jump cut between clips.
Effects: Select a clip then click “Clip Graphics” to apply the effect to your clip. Your clip will be highlighted with a yellow box, adjust it to set the time duration of the effect.
Click the “Shop” icon to visit the Asset store. Here you can find many cool Effects, clip graphics, transitions, and sound effects. Download them to use in your project.
Click the Layer clip to edit it. Here you can do chroma key, keyframing, or apply animation.
Export: Click the “Export” icon on the top-right corner of the app to open the export screen. Select the desired resolution and frame rate then click “Save as video” to export it.
Power Director:
It is available on IOS and Android both.
It is a paid but quite advanced video editor available for androids and IOS both. Like its PC version mobile version is also packed with many great features. It is compact and easy to use. It supports multiple video and audio layers. Have many cool filters and transitions. Can also do basic color corrections. To complete post-production work it also has audio editing tools and effects. It also has hundreds of title designs. Its UI is easy to use and supports both portrait and landscape orientation for editing. Most of its features can be used for free with a watermark on export. To remove the watermark you need to purchase the premium version.


~Features:
- It supports up to 4K resolution at 60fps. (compatible on most devices)
- Supports both Portrait and Landscape orientation for editing.
- Supports Key framing and video stabilization also.
- Supports multiple audio and video layers.
- Can edit videos in different aspect ratios.
- Have a vast stock library.


~Cons:
- Can’t export 4K videos on many devices.
- Can apply keyframing and chroma key to layers only.
- Software lags sometimes.
~Price:
Its Premium version is available for $4.9/month or $29.9/year.
~Steps:
Import: Open “Power Director”. Click “New Project” then select Aspect Ratio to start editing. Select clips from the media library Then click the “blue tick” button to add them to the timeline. Click the “+” icon to import more clips. From the bottom bar (in portrait mode), Select the video, image, audio, or effect icon to add them as a layer. In Landscape Mode bar it is situated on the left side of the screen.
Edit: Select and drag the clip from the corner to trim it. Select a clip to open edit tools. From here you can do audio editing, color correction, cropping, stabilization, and speed change.
Here you get more features to edit a layer or an overlay such as chroma key, masking, transform keyframe, e.t.c. To do keyframing, select a layer, then click the “diamond” icon located on the right side above the timeline to add keyframes then rotate, zoom or change the position of the clip with time to add more keyframes. You can also do keyframing for other features like adjustment, mask, blend, and opacity.
Speed Ramping: To Change speed, select a clip or a layer click the “speed” button then move the slider to change its speed. To do speed ramping split the clip into small parts and change their speed respectively. Click the “ease-in” and “ease-out” buttons to smooth the jump between the clips.
Effects: Click the grey box between the clips to add a transition and move the slider to change its duration if you want.
Select a clip, then choose a filter or an effect to apply to the selected clip.
Export: To Export the finished product, click the “export” icon on the top-right side of the screen then click “Produce and Share” to select the video resolution or click the “Settings” icon to change the storage path and frame rate. Then click “Produce”.
LumaFusion:
It is available on IOS and Mac (with an m1 processor).
As a content creator, have you ever wished for creating your own cinematic masterpiece, but the thing holding you back is that you don’t have a powerful workstation or expensive software then don’t worry. You can do professional-level editing on your iPhone with the software named “LumaFusion. It is one of the most powerful and advanced video editors available for your iPhone or iPad.
It is a multi-track video editor with many useful features like the Chroma key, keyframing, color grading, and color LUTs. Have powerful color grading tools and an audio editor. It also has a lock and load stabilizer. You have to purchase the software before using it. It doesn’t have any free version to try.

Credits: Pic by Luma touch website.
~Features:
- It supports up to 4K video resolution at a max of 240 fps.
- Can also edit and export 360 videos.
- Have powerful color correction tools. You can also import your own color LUTs.
- Supports Keyframing on almost all the editing tools within the software.
- You can add some third-party audio plugins.
- Supports up to 6 audio and video layers.
- Have “Storyblock” stock library. (Many of its contents are free to use)
- Supports external monitor for display.

Credits: Pic by Luma touch website.
~Cons:
- Not available for Android devices.
- Being an advanced software, it doesn’t have masking and speed ramping features.
- Doesn’t have a free version to try on.
~Price:
It is available for purchase at $29.99.
~Steps:
Import: Click the “+” button on the bottom of the screen to start a new project. A small tab will appear, change the settings if you want, then click the “+” button on the top-right side of the tab to start your project.
Click the “flower icon” on the top-right side of the screen to open the source menu (Its icon changes depending on the present tab), Click “Photos” to open folders and files. Click and drag files to add them to the timeline. Click and drag the clips on the top of the primary clip to add them as a layer.
Edit: Click and drag the clips from the corner to trim them. On the bar at the bottom of the screen, you will find basic tools. Click the clip, to open editing tools on the same bar.
Click the “+” icon on the bottom bar or select “Titles” on the source menu to open the Titles menu. Drag and drop the titles to use them. Double-click the text to open the edit menu.
Double-click the clip to open the edit menu. Here you can transform the clip, change its speed, Stabilize your clips, do color grading, add an effect and perform audio editing.
Speed Ramping: In the edit mode, click the “speed and reverse” button and move the slider back or forth to change the speed of the whole video. To do speed ramping, split the video into parts and apply different speeds to create a speed ramp effect. This method is not perfect but it gets the job done.
Effects: Select the “Transitions” icon on the source menu to open the transition menu. Drag and drop a transition on a clip to use it.
Double click a clip to open the edit menu. Then in the “Color & Effects” tab select any effects and apply them to your clip.
To do keyframing, on the edit menu, click the “circle” icon on the bottom-right side below the display to start keyframing. then change the settings with time to add further keyframes.
Export: To Export your file, click the “Export” icon on the bottom-right corner of the screen to open the export menu then click the “movie” icon to select the file destination. Select the desired export settings then click the “Export” icon on the top of the menu to export your finished product.
Which One Should I Choose Free or Paid iPhone Video speeding Softwares?
It usually depends on your needs. If you just want a speed editor to make slow-mo or timelapse videos for your social media then you should go for free video editors, as they are easy to use and provide better speed ramping features than some paid video editors mentioned here.
But as a content creator if you want more features alongside speed ramping then you should go for paid softwares mentioned above. As mobile video editors are quite affordable and some of them have features like that of some PC softwares.
FAQs about Speed ramping feature and softwares:
- Q) What is Speed Ramping and where it is used?
Speed Ramping is different from just changing the speed of the whole clip. It means changing the speed of the video gradually, so the clip doesn’t feel jumpy.
It is done to give viewers a smooth experience between different parts of the clip. like the fast-forward clip is used to show the passage of time. and the slow-mo is used to emphasize something or produce tension, while a mix of both is used in ads and action scenes, e.t.c.
- Q) How to do Speed Ramping?
Speed Ramping methods vary from software to software. Either you can do it by adding keyframes and changing speed with time or you can add or adjust curves for speed change. If your software doesn’t support the speed ramping feature, you can split a clip into parts and apply speed change to them differently. For some of the best iPhone softwares, we have mentioned the speed ramping steps above.
- Q) What FPS is best for Slo-mo videos?
Shooting at 60 Fps is ideal as it gives a smooth and crisp video and you can make slow motion easily if required, you can slow it down up to 40% of its speed while maintaining the quality. It is supported in almost most devices nowadays. And if you want to create super slo-mo for your cinematics or product video then 120 or 240 fps is preferable. But higher fps often have disadvantages as it is harder to apply visual effects or masks. So choose the frame rate according to your requirements.
- Q) Does changing the speed of video affect its audio?
Yes, changing the speed of video affects the audio, It affects its pitch (tempo). Increasing its speed increases the pitch of the audio making it sound shrill while decreasing the speed of the video or making slow-mo decreases the pitch making it sound deep.
Although, some softwares provide the feature to maintain the pitch while changing the speed of the clip.
~Cons:
- Its UI doesn’t support editing in landscape orientation.
- It doesn’t support 4k video resolution.


~Steps:
Import: Open Filmora Go, Click “New project” to start a new project, or Choose the previous one from the “Draft” portion. Select videos or images to import to your timeline. Hold and drag the clip to change its arrangement.
Edit: You can add text, effects, stickers, layers, e.t.c. by clicking their icon, present on the bar at the bottom.
Click and Drag a clip from the corner to trim it.
Click the “PiP” icon to add image or video layers, you also can add multiple layers.
Select a clip to edit it. Different editing tools appear on the bottom bar. Here you can change its opacity, its speed, or add animations.
Click the diamond icon above the timeline to add keyframes. Zoom, move, or rotate the clip to add keyframes with the passage of time.
Speed Ramping: To Change the speed of a clip, select it then click the “Speed” icon on the bottom bar of the screen. Move the slider to change the speed of the whole clip. To do speed ramping, click the “curves” option to choose a preset or create your own. Click a preset to apply it, and click again to open its edit menu. drag the beats up and down to change speed or add or delete a beat if you want.
Effects: Click the “Effects” icon to open the effects menu. Select an effect to apply to your clip.
Click the white box between two clips to add transitions.
Export: Click the “Export” button to export your file. Select your desired resolution and frame rate to export your clip.


Some Free Video speeding Softwares for iPhone:
If you are short on budget or don’t want to spend much on video editing softwares then you can try these free softwares. They are free that doesn’t mean that they are useless, they are quite good for beginners or moderate users although some of them are designed for professionals also. If you don’t believe me, go and try it yourself. Apart from just changing the speed, they are good in other editing aspects also.
Adobe Premiere Rush:
It is available on IOS and Android both.
If you are looking for free but good speed ramping software then why go anywhere also when you have an amazing video editor made by a well-known software company “Adobe”. Like premiere pro, they have designed a compact version for phones named “Premiere Rush”.
It is a free video editor that has all the tools needed for video editing, from video effects to color grading and audio editing. Its UI is a bit similar to PC video editors. It is a free video editor with no watermarks. Although it takes some time to understand it. But once mastered, you can do editing quickly.
~Features:
- It is a free video editor with no watermark.
- It supports up to 4K resolution at 60fps.
- You can extract audio and can do voiceover directly from the software.
- It has hundreds of filters, overlays, and title designs.
- It has basic color grading tools.
- It also has a motion tracking feature. (in Paid version)
- It supports multiple audio, video, and text layers.


~Cons:
- It only runs on high-end devices. ( It is not supported in most mid-range phones)
- Not suitable for beginners. Its UI is quite hard to understand.
- Doesn’t have common features like the chroma key, masking, e.t.c.


~Price:
Its Premium version is available for 9.99/month. It includes some premium features. Or you can purchase the “All Apps Bundle” at $54.99/month for the annual plan.
~Steps:
Import: Open “Adobe Premiere Rush”, Click the “+” sign at the bottom to create a new project. in the media location, select the clips, then click the blue “create” button to start editing.
Click the blue “+” button at the bottom-left corner to add clips, audio, or graphics.
Hold and drag the clips upward to add them as a layer.
Edit: Scroll over a clip to select it. Clicking again shows a pop-up above the selected clip. Here you get 4 options: split, duplicate, separate audio, and delete.
A number of edit options appear on the bottom line of the screen:
Graphics: Click the “Graphics” button to add animated titles, transition graphics, and overlays as a layer. Select to customize its design.
Effects: Click the “Effects” button to add transitions or motion effect. Select a clip to apply transition at both ends. or select a corner of the clip to apply on it only. And change the duration of transition if you want.
Color: Here you can color grade your clips, Apply a preset or color grade manually by using sliders. You can also create your presets.
Transform: Here you can resize, rotate, crop, or change the position of the clip.
Audio: Here you can edit the audio, select a clip to edit its audio.
Speed Ramping: Click the “Speed” button to edit its speed. Select the range option to speed ramp a specific part of the clip. Select the ramp option to create a smooth speed curve. Or Set the clip duration to change its speed accordingly.
Export: To Export your clip, click the “Export” icon on top of the screen. Click “Quality Settings” to adjust export settings then click “Export” to save your file.
CapCut:
It is available on IOS and Android both.
If you are looking for a free but good speed ramping software to help you create slo-mo videos easily anywhere, anytime you want, then “CapCut” can be the right choice for you. It is a free mobile video editing software with many interesting features like keyframing, chroma-key, masking e.t.c. It also supports video and image layers. It has one of the best speed ramping features among other mobile video editors. It provides curves to smoothly speed ramp your clips. It can edit landscape, portrait, and even square video formats. It has many amazing effects and filters, it also has some stock clips.


~Features:
- It is completely free and has no watermarks.
- It supports up to 4K video resolution.
- Has curves for speed ramping.
- Has keyframes for animation.
- It has hundreds of effects, overlays, and titles.


~Cons:
- Its UI doesn’t support editing in landscape orientation.
- Lacks some common editing tools.
~Steps:
Import: Open Capcut, then click “New Project” to start a new project. Select files then click “Add” to import them. Click the white box with the “+” sign to add more clips. Hold and drag to rearrange the clips.
Click the “Add overlay” button to add photos or videos as layers.
Edit: On the bottom of the screen, you can find a bunch of tools for editing. From here you can add overlays, effects, filters, titles e.t.c to the timeline.
Select a clip to open the edit menu situated at the bottom of the screen. Here you can do the following tasks:
Split the clip; Change its speed, remove background, edit audio, do color correction, apply filters, stabilize the clip, e.t.c.
We have more edit features for the layers only which include: Spice (Blending), Animation, Masking, Chroma key, freeze frame, change opacity e.t.c.
Click the “Keyframe” icon (Diamond shaped) below the playback screen to apply keyframes to the layer. Pinch and zoom or rotate to transform the clip. Use the “Graphs” button in the edit menu to customize the keyframe animation.
Speed Ramping: To Change the speed of a clip, select it then click the “Speed” icon on the bottom bar of the screen. Move the slider to change the speed of the whole clip. To do speed ramping, click the “curves” option to choose a preset or create your own. Click a preset to apply it, and click again to open its edit menu. drag the beats up and down to change speed or add or delete a beat if you want.
Effects: Click the “+” sign between the two clips to add a transition between them, and drag the slider to change its duration.
Select the effects, filters, or titles icon to add them as a layer.
Export: Click the “Export” button on the top-right side of the screen to export your clip. Or click the button, left to the “Export” button to change its resolution and frame rate.
iMovie:
It is available on IOS and Mac.
If you are an Apple fan and own everything Apple then what’s better than getting your hands on a video editor designed by Apple. It is simple and easy to use. It has all the basic editing tools to enhance your video like crop, trim, transitions, effects, e.t.c. It also has a speed ramping feature which let you change the speed at different points of a clip. It’s AI mode “Magic Movie” lets you select clips and a style and software will make the final product for you.
Its “Storyboards” mode is a creative way of learning production and post-production skills. It lets you choose a theme from many famous Genres available, then it will guide you through the production process like capturing footage, arranging your shots, and creating cinematic titles to enhance your story.


~Features:
- It is free and easy to use.
- Let you do speed ramping by changing the speed of different parts of the clip .
- Supports Raw files.
- It’s AI mode creates videos for you on its own.
- The “Storyboarding” feature helps you through the production process.


~Cons:
- It only works on IOS and Mac.
- Not suitable for professional projects.
~Steps:
Import: Open “iMovie” then click “Start New Project” and select one of the 3 following modes to start editing:
- Magic Movie: Select the clips for editing, then click “Create Magic Movie” to let iMovie create a movie for you, which you can customize according to your liking.
- Storyboard: Click “Storyboard” then select Template and a genre or a style then click “Create” to start the project. iMovie will guide you and let you add the clip or title according to the pattern.
- Movie: In “Movie” mode, select the clips from the media browser then click “Create Movie” to start editing.
Edit: Select a clip to edit it. A bunch of tools will appear at the bottom of the screen.
Click the “scissors” icon to split, duplicate, delete the clip, or to detach the audio.
Click the “volume” icon to change the volume of the clip.
Click the “Title” icon to add a title design. Click the text (on the playback window) to edit it.
Click the “Filters” icon to apply it to the selected clip and move the slider to change its intensity.
Speed Ramping: Click the “Speed” icon to change its speed. Move the yellow slider to change the speed of the whole clip. Or click the “Add” button to add partitions (in yellow color) to the selected clip. Select a partition to change its speed only. And click the “Freeze” button to add a freeze-frame.
Effects: Select the black box between two clips to add a transition. Select a transition to apply it and change its time duration if you want.
Export: Click the “Done” button on the top-left corner of the screen to save the clip, then click the “Export” icon on the bottom of the screen to save your file.
Some Paid Video speeding Softwares for iPhone:
If you do most of your video editing from your phone and want to invest some money in it then you should check the softwares mentioned below. They are quite affordable and are worthy of investment. As they are packed with many cool features. But if you aren’t sure which software to use then don’t worry as most of these softwares have a free version to try on but they have some limited features and they provide a watermark on export. But it is a great option to get your hands on new software and once you are comfortable with it, you can purchase its premium version.
Kinemaster:
It is available on IOS and Android both.
If you want to do more than just trimming and cropping to your videos then you should try Kinemaster. For editors, who want to do some advanced-level video editing on their phone, then you must have Kinemaster on your phone. It is a paid software, which is packed with many useful features. It has many video and audio effects. It also has an amazing audio editor. It also has many title designs and basic color correction tools. It has hundreds of effects and transitions + more can be downloaded from its asset store. Its UI is suitable for beginners and content creators both. It is a paid software, but all its features are completely free to use, but the free version leaves a watermark on export.

~Features:
- It supports up to 4K resolution at 60fps. (depending on mobile configuration)
- Have amazing features like chroma key, keyframing, blend e.t.c
- Has built-in audio and video recorder.
- Supports multiple texts and video layers with different resolutions depending on the capability of the mobile phone.
- Has UI like a PC video editor and supports landscape orientation for editing.
- Have an asset store with 100s of free effects, transitions, and stock material.


~Cons:
- Can’t export 4K videos on most devices.
- Can’t apply keyframes and chroma key to the main video. (can be done on layers only)
~Price:
Its Premium version is available for $4.9/month or $39.9/year. It also includes all the premium assets.

~Steps:
Import: Open Kinemaster, then click “New Project” to start a new project. Select the desired aspect ratio then click “Create” to start editing. Or click the “import” button on top to import an existing file to continue editing.
Media Browser will be opened. Select the clips to add them to the timeline. Click the “X” button on the top-right corner to close the media browser.
Edit: Drag the clip from the corner to trim it. Select a clip to open its editing menu. Here you can change its speed, add filters, do color correction, edit its audio, e.t.c.
On the right side, you will see a bunch of icons. Click the “Layer” button to add a media file, text, or effect as a layer. Click the “Audio” button to add an audio file. Or click the “Rec” button to do a voice-over.
Click the “+” symbol between two clips to add a transition between them, then adjust its time duration if you want.
Speed Ramping: Select the “Speed” option to change its speed. Here you can only do linear speed change. To create a speed ramp effect, split the clip into different parts and then change their speed according to your liking. Apply a crossfade transition of about 0.1 sec to smooth the jump cut between clips.
Effects: Select a clip then click “Clip Graphics” to apply the effect to your clip. Your clip will be highlighted with a yellow box, adjust it to set the time duration of the effect.
Click the “Shop” icon to visit the Asset store. Here you can find many cool Effects, clip graphics, transitions, and sound effects. Download them to use in your project.
Click the Layer clip to edit it. Here you can do chroma key, keyframing, or apply animation.
Export: Click the “Export” icon on the top-right corner of the app to open the export screen. Select the desired resolution and frame rate then click “Save as video” to export it.
Power Director:
It is available on IOS and Android both.
It is a paid but quite advanced video editor available for androids and IOS both. Like its PC version mobile version is also packed with many great features. It is compact and easy to use. It supports multiple video and audio layers. Have many cool filters and transitions. Can also do basic color corrections. To complete post-production work it also has audio editing tools and effects. It also has hundreds of title designs. Its UI is easy to use and supports both portrait and landscape orientation for editing. Most of its features can be used for free with a watermark on export. To remove the watermark you need to purchase the premium version.


~Features:
- It supports up to 4K resolution at 60fps. (compatible on most devices)
- Supports both Portrait and Landscape orientation for editing.
- Supports Key framing and video stabilization also.
- Supports multiple audio and video layers.
- Can edit videos in different aspect ratios.
- Have a vast stock library.


~Cons:
- Can’t export 4K videos on many devices.
- Can apply keyframing and chroma key to layers only.
- Software lags sometimes.
~Price:
Its Premium version is available for $4.9/month or $29.9/year.
~Steps:
Import: Open “Power Director”. Click “New Project” then select Aspect Ratio to start editing. Select clips from the media library Then click the “blue tick” button to add them to the timeline. Click the “+” icon to import more clips. From the bottom bar (in portrait mode), Select the video, image, audio, or effect icon to add them as a layer. In Landscape Mode bar it is situated on the left side of the screen.
Edit: Select and drag the clip from the corner to trim it. Select a clip to open edit tools. From here you can do audio editing, color correction, cropping, stabilization, and speed change.
Here you get more features to edit a layer or an overlay such as chroma key, masking, transform keyframe, e.t.c. To do keyframing, select a layer, then click the “diamond” icon located on the right side above the timeline to add keyframes then rotate, zoom or change the position of the clip with time to add more keyframes. You can also do keyframing for other features like adjustment, mask, blend, and opacity.
Speed Ramping: To Change speed, select a clip or a layer click the “speed” button then move the slider to change its speed. To do speed ramping split the clip into small parts and change their speed respectively. Click the “ease-in” and “ease-out” buttons to smooth the jump between the clips.
Effects: Click the grey box between the clips to add a transition and move the slider to change its duration if you want.
Select a clip, then choose a filter or an effect to apply to the selected clip.
Export: To Export the finished product, click the “export” icon on the top-right side of the screen then click “Produce and Share” to select the video resolution or click the “Settings” icon to change the storage path and frame rate. Then click “Produce”.
LumaFusion:
It is available on IOS and Mac (with an m1 processor).
As a content creator, have you ever wished for creating your own cinematic masterpiece, but the thing holding you back is that you don’t have a powerful workstation or expensive software then don’t worry. You can do professional-level editing on your iPhone with the software named “LumaFusion. It is one of the most powerful and advanced video editors available for your iPhone or iPad.
It is a multi-track video editor with many useful features like the Chroma key, keyframing, color grading, and color LUTs. Have powerful color grading tools and an audio editor. It also has a lock and load stabilizer. You have to purchase the software before using it. It doesn’t have any free version to try.

Credits: Pic by Luma touch website.
~Features:
- It supports up to 4K video resolution at a max of 240 fps.
- Can also edit and export 360 videos.
- Have powerful color correction tools. You can also import your own color LUTs.
- Supports Keyframing on almost all the editing tools within the software.
- You can add some third-party audio plugins.
- Supports up to 6 audio and video layers.
- Have “Storyblock” stock library. (Many of its contents are free to use)
- Supports external monitor for display.

Credits: Pic by Luma touch website.
~Cons:
- Not available for Android devices.
- Being an advanced software, it doesn’t have masking and speed ramping features.
- Doesn’t have a free version to try on.
~Price:
It is available for purchase at $29.99.
~Steps:
Import: Click the “+” button on the bottom of the screen to start a new project. A small tab will appear, change the settings if you want, then click the “+” button on the top-right side of the tab to start your project.
Click the “flower icon” on the top-right side of the screen to open the source menu (Its icon changes depending on the present tab), Click “Photos” to open folders and files. Click and drag files to add them to the timeline. Click and drag the clips on the top of the primary clip to add them as a layer.
Edit: Click and drag the clips from the corner to trim them. On the bar at the bottom of the screen, you will find basic tools. Click the clip, to open editing tools on the same bar.
Click the “+” icon on the bottom bar or select “Titles” on the source menu to open the Titles menu. Drag and drop the titles to use them. Double-click the text to open the edit menu.
Double-click the clip to open the edit menu. Here you can transform the clip, change its speed, Stabilize your clips, do color grading, add an effect and perform audio editing.
Speed Ramping: In the edit mode, click the “speed and reverse” button and move the slider back or forth to change the speed of the whole video. To do speed ramping, split the video into parts and apply different speeds to create a speed ramp effect. This method is not perfect but it gets the job done.
Effects: Select the “Transitions” icon on the source menu to open the transition menu. Drag and drop a transition on a clip to use it.
Double click a clip to open the edit menu. Then in the “Color & Effects” tab select any effects and apply them to your clip.
To do keyframing, on the edit menu, click the “circle” icon on the bottom-right side below the display to start keyframing. then change the settings with time to add further keyframes.
Export: To Export your file, click the “Export” icon on the bottom-right corner of the screen to open the export menu then click the “movie” icon to select the file destination. Select the desired export settings then click the “Export” icon on the top of the menu to export your finished product.
Which One Should I Choose Free or Paid iPhone Video speeding Softwares?
It usually depends on your needs. If you just want a speed editor to make slow-mo or timelapse videos for your social media then you should go for free video editors, as they are easy to use and provide better speed ramping features than some paid video editors mentioned here.
But as a content creator if you want more features alongside speed ramping then you should go for paid softwares mentioned above. As mobile video editors are quite affordable and some of them have features like that of some PC softwares.
FAQs about Speed ramping feature and softwares:
- Q) What is Speed Ramping and where it is used?
Speed Ramping is different from just changing the speed of the whole clip. It means changing the speed of the video gradually, so the clip doesn’t feel jumpy.
It is done to give viewers a smooth experience between different parts of the clip. like the fast-forward clip is used to show the passage of time. and the slow-mo is used to emphasize something or produce tension, while a mix of both is used in ads and action scenes, e.t.c.
- Q) How to do Speed Ramping?
Speed Ramping methods vary from software to software. Either you can do it by adding keyframes and changing speed with time or you can add or adjust curves for speed change. If your software doesn’t support the speed ramping feature, you can split a clip into parts and apply speed change to them differently. For some of the best iPhone softwares, we have mentioned the speed ramping steps above.
- Q) What FPS is best for Slo-mo videos?
Shooting at 60 Fps is ideal as it gives a smooth and crisp video and you can make slow motion easily if required, you can slow it down up to 40% of its speed while maintaining the quality. It is supported in almost most devices nowadays. And if you want to create super slo-mo for your cinematics or product video then 120 or 240 fps is preferable. But higher fps often have disadvantages as it is harder to apply visual effects or masks. So choose the frame rate according to your requirements.
- Q) Does changing the speed of video affect its audio?
Yes, changing the speed of video affects the audio, It affects its pitch (tempo). Increasing its speed increases the pitch of the audio making it sound shrill while decreasing the speed of the video or making slow-mo decreases the pitch making it sound deep.
Although, some softwares provide the feature to maintain the pitch while changing the speed of the clip.
~Cons:
- Its UI doesn’t support editing in landscape orientation.
- It doesn’t support 4k video resolution.


~Steps:
Import: Open Filmora Go, Click “New project” to start a new project, or Choose the previous one from the “Draft” portion. Select videos or images to import to your timeline. Hold and drag the clip to change its arrangement.
Edit: You can add text, effects, stickers, layers, e.t.c. by clicking their icon, present on the bar at the bottom.
Click and Drag a clip from the corner to trim it.
Click the “PiP” icon to add image or video layers, you also can add multiple layers.
Select a clip to edit it. Different editing tools appear on the bottom bar. Here you can change its opacity, its speed, or add animations.
Click the diamond icon above the timeline to add keyframes. Zoom, move, or rotate the clip to add keyframes with the passage of time.
Speed Ramping: To Change the speed of a clip, select it then click the “Speed” icon on the bottom bar of the screen. Move the slider to change the speed of the whole clip. To do speed ramping, click the “curves” option to choose a preset or create your own. Click a preset to apply it, and click again to open its edit menu. drag the beats up and down to change speed or add or delete a beat if you want.
Effects: Click the “Effects” icon to open the effects menu. Select an effect to apply to your clip.
Click the white box between two clips to add transitions.
Export: Click the “Export” button to export your file. Select your desired resolution and frame rate to export your clip.


Some Free Video speeding Softwares for iPhone:
If you are short on budget or don’t want to spend much on video editing softwares then you can try these free softwares. They are free that doesn’t mean that they are useless, they are quite good for beginners or moderate users although some of them are designed for professionals also. If you don’t believe me, go and try it yourself. Apart from just changing the speed, they are good in other editing aspects also.
Adobe Premiere Rush:
It is available on IOS and Android both.
If you are looking for free but good speed ramping software then why go anywhere also when you have an amazing video editor made by a well-known software company “Adobe”. Like premiere pro, they have designed a compact version for phones named “Premiere Rush”.
It is a free video editor that has all the tools needed for video editing, from video effects to color grading and audio editing. Its UI is a bit similar to PC video editors. It is a free video editor with no watermarks. Although it takes some time to understand it. But once mastered, you can do editing quickly.
~Features:
- It is a free video editor with no watermark.
- It supports up to 4K resolution at 60fps.
- You can extract audio and can do voiceover directly from the software.
- It has hundreds of filters, overlays, and title designs.
- It has basic color grading tools.
- It also has a motion tracking feature. (in Paid version)
- It supports multiple audio, video, and text layers.


~Cons:
- It only runs on high-end devices. ( It is not supported in most mid-range phones)
- Not suitable for beginners. Its UI is quite hard to understand.
- Doesn’t have common features like the chroma key, masking, e.t.c.


~Price:
Its Premium version is available for 9.99/month. It includes some premium features. Or you can purchase the “All Apps Bundle” at $54.99/month for the annual plan.
~Steps:
Import: Open “Adobe Premiere Rush”, Click the “+” sign at the bottom to create a new project. in the media location, select the clips, then click the blue “create” button to start editing.
Click the blue “+” button at the bottom-left corner to add clips, audio, or graphics.
Hold and drag the clips upward to add them as a layer.
Edit: Scroll over a clip to select it. Clicking again shows a pop-up above the selected clip. Here you get 4 options: split, duplicate, separate audio, and delete.
A number of edit options appear on the bottom line of the screen:
Graphics: Click the “Graphics” button to add animated titles, transition graphics, and overlays as a layer. Select to customize its design.
Effects: Click the “Effects” button to add transitions or motion effect. Select a clip to apply transition at both ends. or select a corner of the clip to apply on it only. And change the duration of transition if you want.
Color: Here you can color grade your clips, Apply a preset or color grade manually by using sliders. You can also create your presets.
Transform: Here you can resize, rotate, crop, or change the position of the clip.
Audio: Here you can edit the audio, select a clip to edit its audio.
Speed Ramping: Click the “Speed” button to edit its speed. Select the range option to speed ramp a specific part of the clip. Select the ramp option to create a smooth speed curve. Or Set the clip duration to change its speed accordingly.
Export: To Export your clip, click the “Export” icon on top of the screen. Click “Quality Settings” to adjust export settings then click “Export” to save your file.
CapCut:
It is available on IOS and Android both.
If you are looking for a free but good speed ramping software to help you create slo-mo videos easily anywhere, anytime you want, then “CapCut” can be the right choice for you. It is a free mobile video editing software with many interesting features like keyframing, chroma-key, masking e.t.c. It also supports video and image layers. It has one of the best speed ramping features among other mobile video editors. It provides curves to smoothly speed ramp your clips. It can edit landscape, portrait, and even square video formats. It has many amazing effects and filters, it also has some stock clips.


~Features:
- It is completely free and has no watermarks.
- It supports up to 4K video resolution.
- Has curves for speed ramping.
- Has keyframes for animation.
- It has hundreds of effects, overlays, and titles.


~Cons:
- Its UI doesn’t support editing in landscape orientation.
- Lacks some common editing tools.
~Steps:
Import: Open Capcut, then click “New Project” to start a new project. Select files then click “Add” to import them. Click the white box with the “+” sign to add more clips. Hold and drag to rearrange the clips.
Click the “Add overlay” button to add photos or videos as layers.
Edit: On the bottom of the screen, you can find a bunch of tools for editing. From here you can add overlays, effects, filters, titles e.t.c to the timeline.
Select a clip to open the edit menu situated at the bottom of the screen. Here you can do the following tasks:
Split the clip; Change its speed, remove background, edit audio, do color correction, apply filters, stabilize the clip, e.t.c.
We have more edit features for the layers only which include: Spice (Blending), Animation, Masking, Chroma key, freeze frame, change opacity e.t.c.
Click the “Keyframe” icon (Diamond shaped) below the playback screen to apply keyframes to the layer. Pinch and zoom or rotate to transform the clip. Use the “Graphs” button in the edit menu to customize the keyframe animation.
Speed Ramping: To Change the speed of a clip, select it then click the “Speed” icon on the bottom bar of the screen. Move the slider to change the speed of the whole clip. To do speed ramping, click the “curves” option to choose a preset or create your own. Click a preset to apply it, and click again to open its edit menu. drag the beats up and down to change speed or add or delete a beat if you want.
Effects: Click the “+” sign between the two clips to add a transition between them, and drag the slider to change its duration.
Select the effects, filters, or titles icon to add them as a layer.
Export: Click the “Export” button on the top-right side of the screen to export your clip. Or click the button, left to the “Export” button to change its resolution and frame rate.
iMovie:
It is available on IOS and Mac.
If you are an Apple fan and own everything Apple then what’s better than getting your hands on a video editor designed by Apple. It is simple and easy to use. It has all the basic editing tools to enhance your video like crop, trim, transitions, effects, e.t.c. It also has a speed ramping feature which let you change the speed at different points of a clip. It’s AI mode “Magic Movie” lets you select clips and a style and software will make the final product for you.
Its “Storyboards” mode is a creative way of learning production and post-production skills. It lets you choose a theme from many famous Genres available, then it will guide you through the production process like capturing footage, arranging your shots, and creating cinematic titles to enhance your story.


~Features:
- It is free and easy to use.
- Let you do speed ramping by changing the speed of different parts of the clip .
- Supports Raw files.
- It’s AI mode creates videos for you on its own.
- The “Storyboarding” feature helps you through the production process.


~Cons:
- It only works on IOS and Mac.
- Not suitable for professional projects.
~Steps:
Import: Open “iMovie” then click “Start New Project” and select one of the 3 following modes to start editing:
- Magic Movie: Select the clips for editing, then click “Create Magic Movie” to let iMovie create a movie for you, which you can customize according to your liking.
- Storyboard: Click “Storyboard” then select Template and a genre or a style then click “Create” to start the project. iMovie will guide you and let you add the clip or title according to the pattern.
- Movie: In “Movie” mode, select the clips from the media browser then click “Create Movie” to start editing.
Edit: Select a clip to edit it. A bunch of tools will appear at the bottom of the screen.
Click the “scissors” icon to split, duplicate, delete the clip, or to detach the audio.
Click the “volume” icon to change the volume of the clip.
Click the “Title” icon to add a title design. Click the text (on the playback window) to edit it.
Click the “Filters” icon to apply it to the selected clip and move the slider to change its intensity.
Speed Ramping: Click the “Speed” icon to change its speed. Move the yellow slider to change the speed of the whole clip. Or click the “Add” button to add partitions (in yellow color) to the selected clip. Select a partition to change its speed only. And click the “Freeze” button to add a freeze-frame.
Effects: Select the black box between two clips to add a transition. Select a transition to apply it and change its time duration if you want.
Export: Click the “Done” button on the top-left corner of the screen to save the clip, then click the “Export” icon on the bottom of the screen to save your file.
Some Paid Video speeding Softwares for iPhone:
If you do most of your video editing from your phone and want to invest some money in it then you should check the softwares mentioned below. They are quite affordable and are worthy of investment. As they are packed with many cool features. But if you aren’t sure which software to use then don’t worry as most of these softwares have a free version to try on but they have some limited features and they provide a watermark on export. But it is a great option to get your hands on new software and once you are comfortable with it, you can purchase its premium version.
Kinemaster:
It is available on IOS and Android both.
If you want to do more than just trimming and cropping to your videos then you should try Kinemaster. For editors, who want to do some advanced-level video editing on their phone, then you must have Kinemaster on your phone. It is a paid software, which is packed with many useful features. It has many video and audio effects. It also has an amazing audio editor. It also has many title designs and basic color correction tools. It has hundreds of effects and transitions + more can be downloaded from its asset store. Its UI is suitable for beginners and content creators both. It is a paid software, but all its features are completely free to use, but the free version leaves a watermark on export.

~Features:
- It supports up to 4K resolution at 60fps. (depending on mobile configuration)
- Have amazing features like chroma key, keyframing, blend e.t.c
- Has built-in audio and video recorder.
- Supports multiple texts and video layers with different resolutions depending on the capability of the mobile phone.
- Has UI like a PC video editor and supports landscape orientation for editing.
- Have an asset store with 100s of free effects, transitions, and stock material.


~Cons:
- Can’t export 4K videos on most devices.
- Can’t apply keyframes and chroma key to the main video. (can be done on layers only)
~Price:
Its Premium version is available for $4.9/month or $39.9/year. It also includes all the premium assets.

~Steps:
Import: Open Kinemaster, then click “New Project” to start a new project. Select the desired aspect ratio then click “Create” to start editing. Or click the “import” button on top to import an existing file to continue editing.
Media Browser will be opened. Select the clips to add them to the timeline. Click the “X” button on the top-right corner to close the media browser.
Edit: Drag the clip from the corner to trim it. Select a clip to open its editing menu. Here you can change its speed, add filters, do color correction, edit its audio, e.t.c.
On the right side, you will see a bunch of icons. Click the “Layer” button to add a media file, text, or effect as a layer. Click the “Audio” button to add an audio file. Or click the “Rec” button to do a voice-over.
Click the “+” symbol between two clips to add a transition between them, then adjust its time duration if you want.
Speed Ramping: Select the “Speed” option to change its speed. Here you can only do linear speed change. To create a speed ramp effect, split the clip into different parts and then change their speed according to your liking. Apply a crossfade transition of about 0.1 sec to smooth the jump cut between clips.
Effects: Select a clip then click “Clip Graphics” to apply the effect to your clip. Your clip will be highlighted with a yellow box, adjust it to set the time duration of the effect.
Click the “Shop” icon to visit the Asset store. Here you can find many cool Effects, clip graphics, transitions, and sound effects. Download them to use in your project.
Click the Layer clip to edit it. Here you can do chroma key, keyframing, or apply animation.
Export: Click the “Export” icon on the top-right corner of the app to open the export screen. Select the desired resolution and frame rate then click “Save as video” to export it.
Power Director:
It is available on IOS and Android both.
It is a paid but quite advanced video editor available for androids and IOS both. Like its PC version mobile version is also packed with many great features. It is compact and easy to use. It supports multiple video and audio layers. Have many cool filters and transitions. Can also do basic color corrections. To complete post-production work it also has audio editing tools and effects. It also has hundreds of title designs. Its UI is easy to use and supports both portrait and landscape orientation for editing. Most of its features can be used for free with a watermark on export. To remove the watermark you need to purchase the premium version.


~Features:
- It supports up to 4K resolution at 60fps. (compatible on most devices)
- Supports both Portrait and Landscape orientation for editing.
- Supports Key framing and video stabilization also.
- Supports multiple audio and video layers.
- Can edit videos in different aspect ratios.
- Have a vast stock library.


~Cons:
- Can’t export 4K videos on many devices.
- Can apply keyframing and chroma key to layers only.
- Software lags sometimes.
~Price:
Its Premium version is available for $4.9/month or $29.9/year.
~Steps:
Import: Open “Power Director”. Click “New Project” then select Aspect Ratio to start editing. Select clips from the media library Then click the “blue tick” button to add them to the timeline. Click the “+” icon to import more clips. From the bottom bar (in portrait mode), Select the video, image, audio, or effect icon to add them as a layer. In Landscape Mode bar it is situated on the left side of the screen.
Edit: Select and drag the clip from the corner to trim it. Select a clip to open edit tools. From here you can do audio editing, color correction, cropping, stabilization, and speed change.
Here you get more features to edit a layer or an overlay such as chroma key, masking, transform keyframe, e.t.c. To do keyframing, select a layer, then click the “diamond” icon located on the right side above the timeline to add keyframes then rotate, zoom or change the position of the clip with time to add more keyframes. You can also do keyframing for other features like adjustment, mask, blend, and opacity.
Speed Ramping: To Change speed, select a clip or a layer click the “speed” button then move the slider to change its speed. To do speed ramping split the clip into small parts and change their speed respectively. Click the “ease-in” and “ease-out” buttons to smooth the jump between the clips.
Effects: Click the grey box between the clips to add a transition and move the slider to change its duration if you want.
Select a clip, then choose a filter or an effect to apply to the selected clip.
Export: To Export the finished product, click the “export” icon on the top-right side of the screen then click “Produce and Share” to select the video resolution or click the “Settings” icon to change the storage path and frame rate. Then click “Produce”.
LumaFusion:
It is available on IOS and Mac (with an m1 processor).
As a content creator, have you ever wished for creating your own cinematic masterpiece, but the thing holding you back is that you don’t have a powerful workstation or expensive software then don’t worry. You can do professional-level editing on your iPhone with the software named “LumaFusion. It is one of the most powerful and advanced video editors available for your iPhone or iPad.
It is a multi-track video editor with many useful features like the Chroma key, keyframing, color grading, and color LUTs. Have powerful color grading tools and an audio editor. It also has a lock and load stabilizer. You have to purchase the software before using it. It doesn’t have any free version to try.

Credits: Pic by Luma touch website.
~Features:
- It supports up to 4K video resolution at a max of 240 fps.
- Can also edit and export 360 videos.
- Have powerful color correction tools. You can also import your own color LUTs.
- Supports Keyframing on almost all the editing tools within the software.
- You can add some third-party audio plugins.
- Supports up to 6 audio and video layers.
- Have “Storyblock” stock library. (Many of its contents are free to use)
- Supports external monitor for display.

Credits: Pic by Luma touch website.
~Cons:
- Not available for Android devices.
- Being an advanced software, it doesn’t have masking and speed ramping features.
- Doesn’t have a free version to try on.
~Price:
It is available for purchase at $29.99.
~Steps:
Import: Click the “+” button on the bottom of the screen to start a new project. A small tab will appear, change the settings if you want, then click the “+” button on the top-right side of the tab to start your project.
Click the “flower icon” on the top-right side of the screen to open the source menu (Its icon changes depending on the present tab), Click “Photos” to open folders and files. Click and drag files to add them to the timeline. Click and drag the clips on the top of the primary clip to add them as a layer.
Edit: Click and drag the clips from the corner to trim them. On the bar at the bottom of the screen, you will find basic tools. Click the clip, to open editing tools on the same bar.
Click the “+” icon on the bottom bar or select “Titles” on the source menu to open the Titles menu. Drag and drop the titles to use them. Double-click the text to open the edit menu.
Double-click the clip to open the edit menu. Here you can transform the clip, change its speed, Stabilize your clips, do color grading, add an effect and perform audio editing.
Speed Ramping: In the edit mode, click the “speed and reverse” button and move the slider back or forth to change the speed of the whole video. To do speed ramping, split the video into parts and apply different speeds to create a speed ramp effect. This method is not perfect but it gets the job done.
Effects: Select the “Transitions” icon on the source menu to open the transition menu. Drag and drop a transition on a clip to use it.
Double click a clip to open the edit menu. Then in the “Color & Effects” tab select any effects and apply them to your clip.
To do keyframing, on the edit menu, click the “circle” icon on the bottom-right side below the display to start keyframing. then change the settings with time to add further keyframes.
Export: To Export your file, click the “Export” icon on the bottom-right corner of the screen to open the export menu then click the “movie” icon to select the file destination. Select the desired export settings then click the “Export” icon on the top of the menu to export your finished product.
Which One Should I Choose Free or Paid iPhone Video speeding Softwares?
It usually depends on your needs. If you just want a speed editor to make slow-mo or timelapse videos for your social media then you should go for free video editors, as they are easy to use and provide better speed ramping features than some paid video editors mentioned here.
But as a content creator if you want more features alongside speed ramping then you should go for paid softwares mentioned above. As mobile video editors are quite affordable and some of them have features like that of some PC softwares.
FAQs about Speed ramping feature and softwares:
- Q) What is Speed Ramping and where it is used?
Speed Ramping is different from just changing the speed of the whole clip. It means changing the speed of the video gradually, so the clip doesn’t feel jumpy.
It is done to give viewers a smooth experience between different parts of the clip. like the fast-forward clip is used to show the passage of time. and the slow-mo is used to emphasize something or produce tension, while a mix of both is used in ads and action scenes, e.t.c.
- Q) How to do Speed Ramping?
Speed Ramping methods vary from software to software. Either you can do it by adding keyframes and changing speed with time or you can add or adjust curves for speed change. If your software doesn’t support the speed ramping feature, you can split a clip into parts and apply speed change to them differently. For some of the best iPhone softwares, we have mentioned the speed ramping steps above.
- Q) What FPS is best for Slo-mo videos?
Shooting at 60 Fps is ideal as it gives a smooth and crisp video and you can make slow motion easily if required, you can slow it down up to 40% of its speed while maintaining the quality. It is supported in almost most devices nowadays. And if you want to create super slo-mo for your cinematics or product video then 120 or 240 fps is preferable. But higher fps often have disadvantages as it is harder to apply visual effects or masks. So choose the frame rate according to your requirements.
- Q) Does changing the speed of video affect its audio?
Yes, changing the speed of video affects the audio, It affects its pitch (tempo). Increasing its speed increases the pitch of the audio making it sound shrill while decreasing the speed of the video or making slow-mo decreases the pitch making it sound deep.
Although, some softwares provide the feature to maintain the pitch while changing the speed of the clip.
6 Best Methods to Make a Video Longer
These days when you head on to social media, you can easily find 4-5 seconds video clips on the internet. However, many social media platforms like YouTube, Instagram, and other videos sharing platforms require you to make your video longer to meet the site’s minimum length requirements. So, for example, although Instagram’s minimum length is 3 seconds, you might want to find ways to engage your audience longer.
This article will describe the best ways to make a video longer. We’ll also offer a bonus tip on how you can edit your video to make it look better and attract more audience. On that note, let’s take a look.
6 Best Methods to Make a Video Longer
There are many methods out there to make your video longer. This section will touch on the six best methods to make a video longer.
Loop the Video
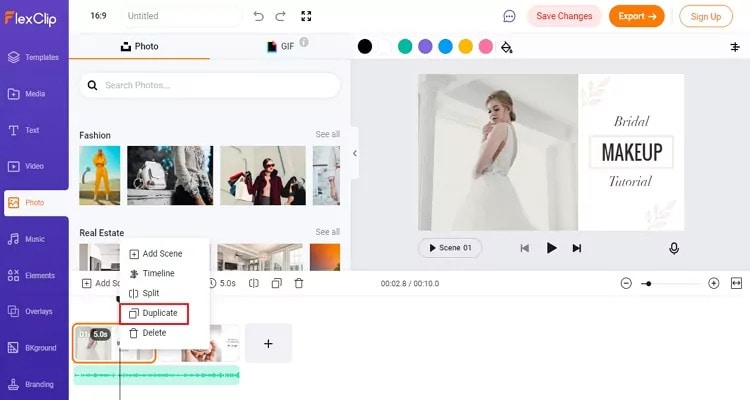
One of the best ways to make your video longer for most social media platforms is to loop the video. When you replay the video several times in a single row, it helps to multiply its length. An example is taking a 2-second video and looping it 4x. This automatically makes it into an 8-second video clip. With looping, you can simply replay the action of the clip rather than altering it in any way.
Many video editing software today allows you to loop your video for free. You have to upload the video and choose how many times you would like to loop it, and the software will get to work.
Slow Down the Video Speed

We would all agree that slow-motion makes everything seem longer automatically. You can utilize the same technique when you want to make a video longer. When you slow down a video clip, every second lasts longer. Using the slow-motion effect on a 3-second video will make the video 6 or even 9 seconds longer.
Add an Intro and Outro

Intro and outro are scenes you add before and after the video; these scenes are popular in YouTube videos. More generally, an intro is like a trailer. It shows the audience what the video is about, and the outro scene is usually used to show more information about the video maker. Adding an intro and outro to your video can add 2-4 seconds to your video clips.
It’s quite easy to add an intro and outro to any video. You can create them separately and then merge them with your video. The intro must be something relevant to the video clip; an example is adding a fast photo slideshow to the beginning of your video or a black frame. Relevant intro and outro scenes will make your video longer and maybe more engaging.
Add Images to the Video
This is another trick that most bloggers use to make their videos longer. It is an old trick in the book and makes your video significantly longer, depending on the number of videos you’re adding. A single picture can add a second or two to your video. You can simply use a video editor to merge the video clip and pictures into one seamless file.
Boomerang Your Video
If you have plans to upload your media to Instagram, then a top feature you can use to make your video longer is the boomerang feature. Instagram introduced the Boomerang feature to play short video clips forward and then repeat their reverse. So by using the Boomerang feature, you don’t only add a memory effect to your video, but you also make your video longer.
Alternatively, you can manually append your video clip to a reversed version; this option allows you to make a boomerang from an existing clip. Apart from Instagram, you can utilize many other editing tools to create a boomerang from an existing video.
Add More Content to Your Video Clip

Another step you can take is to add more materials to your video. This doesn’t necessarily mean you have to get your camera out and start shooting more scenes to add to your video. Instead, you can simply access online media libraries and get amazing materials from there that are relevant to your video clip.
Today, most professional video editors offer you access to royalty-free photos and music material. You can simply browse through their collections and pick materials relevant to your video. For example, you could add a soundtrack and videos or GIFs that make your videos engaging. Adding extra content to your video clip can make it longer by 10 seconds.
Bonus Tips: How to Edit Video Easily on a Computer
Social media platforms offer you basic video editing features that you can use to optimize your video. However, these features are limited in what they can provide you with. If you want to have more control over the editing of your video clip and make it look even more professional, you should try Wondershare Filmora. This video editing tool is powerful and provides you with more editing features to ensure you get the result you want.
Filmora offers users over 300 effects like motion elements, overlays, titles, music sounds, and many more features to make your video more engaging and attractive. Using this app is relatively easy as well, and it offers users the option of changing the file format of their video if the social media platform does not support the original format.
If you would like to edit your video to give it a more engaging and professional look, follow the simple steps below.
Step 1: Import Video to Wondershare Filmora
First, you need to download the app on your device. After that, you can download it from the official website. Luckily, Wondershare Filmora supports Windows and Mac OS. Once you download the file, install and launch the app to get started.
On the menu, click on create a new project to begin. Next, click on the import button, and from the dropdown menu, choose ‘import media file.’ Alternatively, you can simply drag the video directly to the media library of this video editor. In addition, Filmora allows you to preview your video as you add different features to optimize the video.
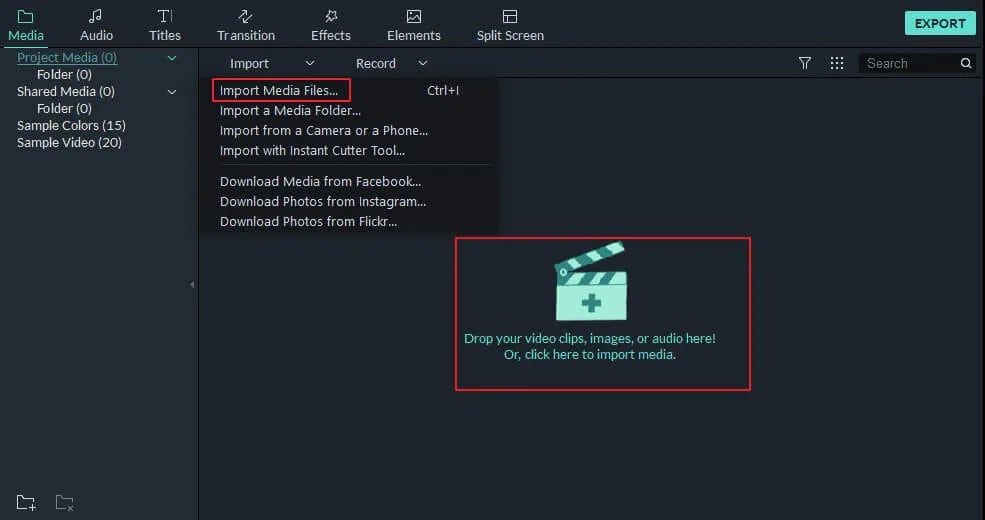
If your video is shaky, you can use the stabilization feature to make it more stable. Simply right-click on the video in the preview window and select the option. Once you are sure, the video is ok, drag and drop it into the timeline to start editing your video.
Step 2: Cut, Slip, Rotate, or Color-Tune Your Video
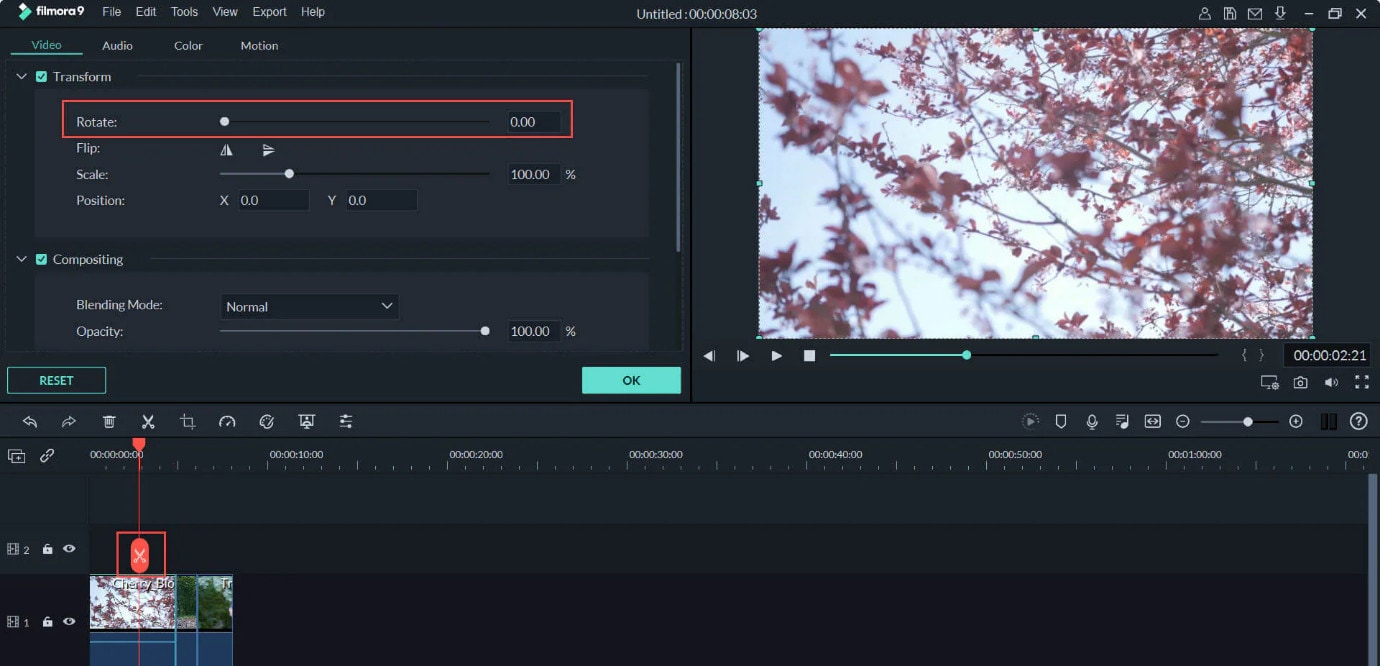
You can use many features to shape your video quickly on Wondershare Filmora. For example, you can use the scissors tool to cut or split your video. You can also use the transform tool to rotate and flip your video if you would prefer. In addition, Filmora allows you to add some advanced color tuning to your video with the color feature. This automatically makes your video even more beautiful.
Step 3: Add Filters and Effects to Your Video
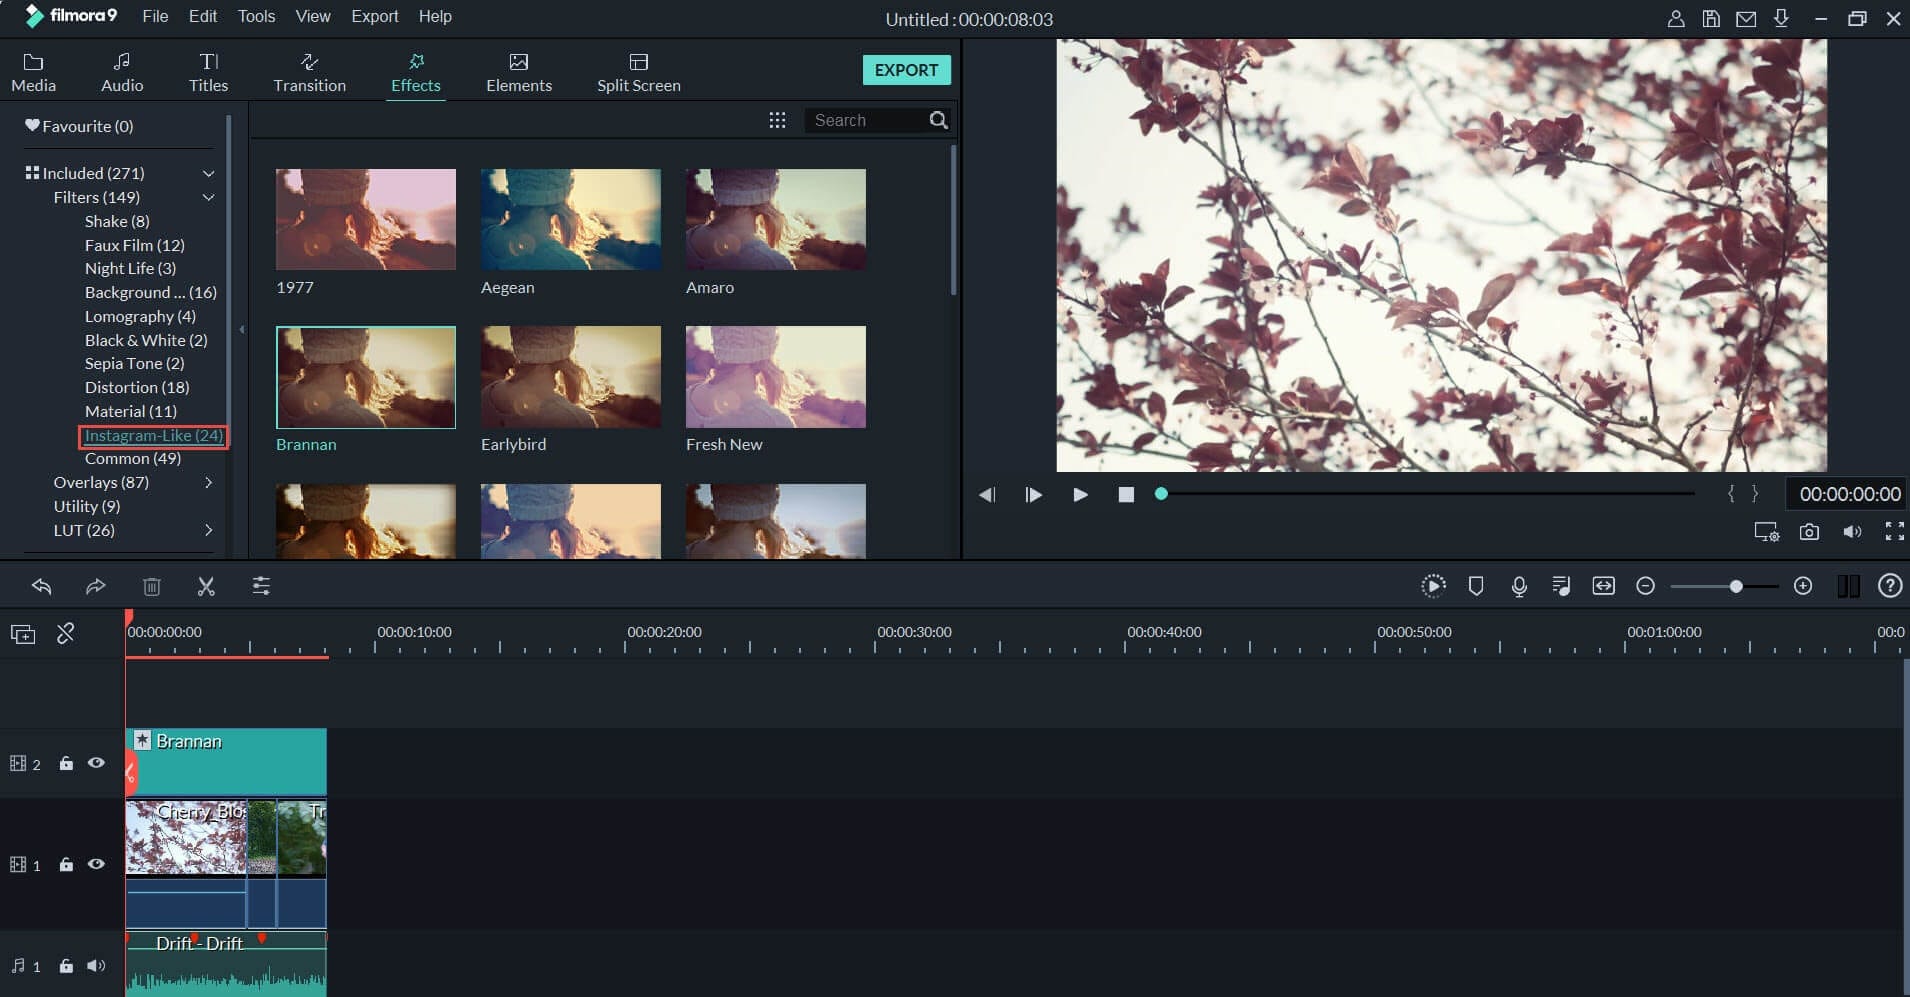
Additionally, Wondershare Filmora allows you to choose different transitions, graphics, tiles, texts, sound effects, titles, filters, overlays, and elements for your videos. With this video editing tool, you can get the exact look and sound you’re looking to achieve. In addition, there are different effect tabs above the timeline that directs you to the right feature you would like to include in your video.
You can just drag these effects and drop them on the timeline to apply to your video. Filmora has over 100 in-built filters and royalty-free music you can implement on your video. If you’re not sure which feature you’re looking for. Simply experiment and undo the effect till you find exactly what you’re looking for.
Step 4: Save and Share Edited Video
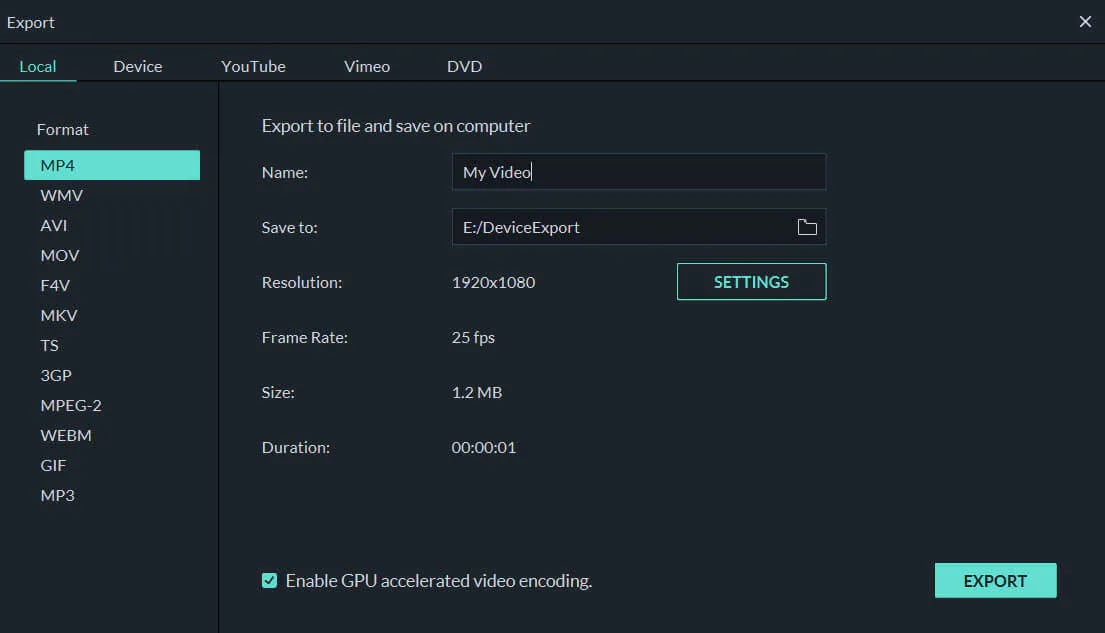
Once you’re satisfied with your video clip, you can now proceed to save it. You can choose to save the video to your local folder or a storage device you’d prefer. Wondershare Filmora allows you to save in the original format or change the format to your preferred option. Filmora also allows you to change your video’s resolution and bit rate to your preference. Alternatively, you can upload your video to video-sharing platforms like Instagram, Vimeo, YouTube, etc. You can also burn the video into a DVD collection if that’s what you’re looking for.
Final Thoughts
Social media platforms are great for gaining recognition and promoting your brand. However, there are times when you don’t meet the right video length, and you would like to make your video longer. With the six methods explained above, you can make your video as long as you want and also make your video more engaging. Additionally, you can use Wondershare Filmora to make your video more professional-looking. It offers you hundreds of effects and filters you can use to optimize your video.
Meta Description: If your video is short and you need to make it longer, this article gives you six methods to make a video longer and optimize them.
One of the best ways to make your video longer for most social media platforms is to loop the video. When you replay the video several times in a single row, it helps to multiply its length. An example is taking a 2-second video and looping it 4x. This automatically makes it into an 8-second video clip. With looping, you can simply replay the action of the clip rather than altering it in any way.
Many video editing software today allows you to loop your video for free. You have to upload the video and choose how many times you would like to loop it, and the software will get to work.
Slow Down the Video Speed

We would all agree that slow-motion makes everything seem longer automatically. You can utilize the same technique when you want to make a video longer. When you slow down a video clip, every second lasts longer. Using the slow-motion effect on a 3-second video will make the video 6 or even 9 seconds longer.
Add an Intro and Outro

Intro and outro are scenes you add before and after the video; these scenes are popular in YouTube videos. More generally, an intro is like a trailer. It shows the audience what the video is about, and the outro scene is usually used to show more information about the video maker. Adding an intro and outro to your video can add 2-4 seconds to your video clips.
It’s quite easy to add an intro and outro to any video. You can create them separately and then merge them with your video. The intro must be something relevant to the video clip; an example is adding a fast photo slideshow to the beginning of your video or a black frame. Relevant intro and outro scenes will make your video longer and maybe more engaging.
Add Images to the Video
This is another trick that most bloggers use to make their videos longer. It is an old trick in the book and makes your video significantly longer, depending on the number of videos you’re adding. A single picture can add a second or two to your video. You can simply use a video editor to merge the video clip and pictures into one seamless file.
Boomerang Your Video

If you have plans to upload your media to Instagram, then a top feature you can use to make your video longer is the boomerang feature. Instagram introduced the Boomerang feature to play short video clips forward and then repeat their reverse. So by using the Boomerang feature, you don’t only add a memory effect to your video, but you also make your video longer.
Alternatively, you can manually append your video clip to a reversed version; this option allows you to make a boomerang from an existing clip. Apart from Instagram, you can utilize many other editing tools to create a boomerang from an existing video.
Add More Content to Your Video Clip

Another step you can take is to add more materials to your video. This doesn’t necessarily mean you have to get your camera out and start shooting more scenes to add to your video. Instead, you can simply access online media libraries and get amazing materials from there that are relevant to your video clip.
Today, most professional video editors offer you access to royalty-free photos and music material. You can simply browse through their collections and pick materials relevant to your video. For example, you could add a soundtrack and videos or GIFs that make your videos engaging. Adding extra content to your video clip can make it longer by 10 seconds.
Bonus Tips: How to Edit Video Easily on a Computer
Social media platforms offer you basic video editing features that you can use to optimize your video. However, these features are limited in what they can provide you with. If you want to have more control over the editing of your video clip and make it look even more professional, you should try Wondershare Filmora. This video editing tool is powerful and provides you with more editing features to ensure you get the result you want.
Filmora offers users over 300 effects like motion elements, overlays, titles, music sounds, and many more features to make your video more engaging and attractive. Using this app is relatively easy as well, and it offers users the option of changing the file format of their video if the social media platform does not support the original format.
If you would like to edit your video to give it a more engaging and professional look, follow the simple steps below.
Step 1: Import Video to Wondershare Filmora
First, you need to download the app on your device. After that, you can download it from the official website. Luckily, Wondershare Filmora supports Windows and Mac OS. Once you download the file, install and launch the app to get started.
On the menu, click on create a new project to begin. Next, click on the import button, and from the dropdown menu, choose ‘import media file.’ Alternatively, you can simply drag the video directly to the media library of this video editor. In addition, Filmora allows you to preview your video as you add different features to optimize the video.

If your video is shaky, you can use the stabilization feature to make it more stable. Simply right-click on the video in the preview window and select the option. Once you are sure, the video is ok, drag and drop it into the timeline to start editing your video.
Step 2: Cut, Slip, Rotate, or Color-Tune Your Video

You can use many features to shape your video quickly on Wondershare Filmora. For example, you can use the scissors tool to cut or split your video. You can also use the transform tool to rotate and flip your video if you would prefer. In addition, Filmora allows you to add some advanced color tuning to your video with the color feature. This automatically makes your video even more beautiful.
Step 3: Add Filters and Effects to Your Video

Additionally, Wondershare Filmora allows you to choose different transitions, graphics, tiles, texts, sound effects, titles, filters, overlays, and elements for your videos. With this video editing tool, you can get the exact look and sound you’re looking to achieve. In addition, there are different effect tabs above the timeline that directs you to the right feature you would like to include in your video.
You can just drag these effects and drop them on the timeline to apply to your video. Filmora has over 100 in-built filters and royalty-free music you can implement on your video. If you’re not sure which feature you’re looking for. Simply experiment and undo the effect till you find exactly what you’re looking for.
Step 4: Save and Share Edited Video

Once you’re satisfied with your video clip, you can now proceed to save it. You can choose to save the video to your local folder or a storage device you’d prefer. Wondershare Filmora allows you to save in the original format or change the format to your preferred option. Filmora also allows you to change your video’s resolution and bit rate to your preference. Alternatively, you can upload your video to video-sharing platforms like Instagram, Vimeo, YouTube, etc. You can also burn the video into a DVD collection if that’s what you’re looking for.
Final Thoughts
Social media platforms are great for gaining recognition and promoting your brand. However, there are times when you don’t meet the right video length, and you would like to make your video longer. With the six methods explained above, you can make your video as long as you want and also make your video more engaging. Additionally, you can use Wondershare Filmora to make your video more professional-looking. It offers you hundreds of effects and filters you can use to optimize your video.
Meta Description: If your video is short and you need to make it longer, this article gives you six methods to make a video longer and optimize them.
One of the best ways to make your video longer for most social media platforms is to loop the video. When you replay the video several times in a single row, it helps to multiply its length. An example is taking a 2-second video and looping it 4x. This automatically makes it into an 8-second video clip. With looping, you can simply replay the action of the clip rather than altering it in any way.
Many video editing software today allows you to loop your video for free. You have to upload the video and choose how many times you would like to loop it, and the software will get to work.
Slow Down the Video Speed

We would all agree that slow-motion makes everything seem longer automatically. You can utilize the same technique when you want to make a video longer. When you slow down a video clip, every second lasts longer. Using the slow-motion effect on a 3-second video will make the video 6 or even 9 seconds longer.
Add an Intro and Outro

Intro and outro are scenes you add before and after the video; these scenes are popular in YouTube videos. More generally, an intro is like a trailer. It shows the audience what the video is about, and the outro scene is usually used to show more information about the video maker. Adding an intro and outro to your video can add 2-4 seconds to your video clips.
It’s quite easy to add an intro and outro to any video. You can create them separately and then merge them with your video. The intro must be something relevant to the video clip; an example is adding a fast photo slideshow to the beginning of your video or a black frame. Relevant intro and outro scenes will make your video longer and maybe more engaging.
Add Images to the Video
This is another trick that most bloggers use to make their videos longer. It is an old trick in the book and makes your video significantly longer, depending on the number of videos you’re adding. A single picture can add a second or two to your video. You can simply use a video editor to merge the video clip and pictures into one seamless file.
Boomerang Your Video

If you have plans to upload your media to Instagram, then a top feature you can use to make your video longer is the boomerang feature. Instagram introduced the Boomerang feature to play short video clips forward and then repeat their reverse. So by using the Boomerang feature, you don’t only add a memory effect to your video, but you also make your video longer.
Alternatively, you can manually append your video clip to a reversed version; this option allows you to make a boomerang from an existing clip. Apart from Instagram, you can utilize many other editing tools to create a boomerang from an existing video.
Add More Content to Your Video Clip

Another step you can take is to add more materials to your video. This doesn’t necessarily mean you have to get your camera out and start shooting more scenes to add to your video. Instead, you can simply access online media libraries and get amazing materials from there that are relevant to your video clip.
Today, most professional video editors offer you access to royalty-free photos and music material. You can simply browse through their collections and pick materials relevant to your video. For example, you could add a soundtrack and videos or GIFs that make your videos engaging. Adding extra content to your video clip can make it longer by 10 seconds.
Bonus Tips: How to Edit Video Easily on a Computer
Social media platforms offer you basic video editing features that you can use to optimize your video. However, these features are limited in what they can provide you with. If you want to have more control over the editing of your video clip and make it look even more professional, you should try Wondershare Filmora. This video editing tool is powerful and provides you with more editing features to ensure you get the result you want.
Filmora offers users over 300 effects like motion elements, overlays, titles, music sounds, and many more features to make your video more engaging and attractive. Using this app is relatively easy as well, and it offers users the option of changing the file format of their video if the social media platform does not support the original format.
If you would like to edit your video to give it a more engaging and professional look, follow the simple steps below.
Step 1: Import Video to Wondershare Filmora
First, you need to download the app on your device. After that, you can download it from the official website. Luckily, Wondershare Filmora supports Windows and Mac OS. Once you download the file, install and launch the app to get started.
On the menu, click on create a new project to begin. Next, click on the import button, and from the dropdown menu, choose ‘import media file.’ Alternatively, you can simply drag the video directly to the media library of this video editor. In addition, Filmora allows you to preview your video as you add different features to optimize the video.

If your video is shaky, you can use the stabilization feature to make it more stable. Simply right-click on the video in the preview window and select the option. Once you are sure, the video is ok, drag and drop it into the timeline to start editing your video.
Step 2: Cut, Slip, Rotate, or Color-Tune Your Video

You can use many features to shape your video quickly on Wondershare Filmora. For example, you can use the scissors tool to cut or split your video. You can also use the transform tool to rotate and flip your video if you would prefer. In addition, Filmora allows you to add some advanced color tuning to your video with the color feature. This automatically makes your video even more beautiful.
Step 3: Add Filters and Effects to Your Video

Additionally, Wondershare Filmora allows you to choose different transitions, graphics, tiles, texts, sound effects, titles, filters, overlays, and elements for your videos. With this video editing tool, you can get the exact look and sound you’re looking to achieve. In addition, there are different effect tabs above the timeline that directs you to the right feature you would like to include in your video.
You can just drag these effects and drop them on the timeline to apply to your video. Filmora has over 100 in-built filters and royalty-free music you can implement on your video. If you’re not sure which feature you’re looking for. Simply experiment and undo the effect till you find exactly what you’re looking for.
Step 4: Save and Share Edited Video

Once you’re satisfied with your video clip, you can now proceed to save it. You can choose to save the video to your local folder or a storage device you’d prefer. Wondershare Filmora allows you to save in the original format or change the format to your preferred option. Filmora also allows you to change your video’s resolution and bit rate to your preference. Alternatively, you can upload your video to video-sharing platforms like Instagram, Vimeo, YouTube, etc. You can also burn the video into a DVD collection if that’s what you’re looking for.
Final Thoughts
Social media platforms are great for gaining recognition and promoting your brand. However, there are times when you don’t meet the right video length, and you would like to make your video longer. With the six methods explained above, you can make your video as long as you want and also make your video more engaging. Additionally, you can use Wondershare Filmora to make your video more professional-looking. It offers you hundreds of effects and filters you can use to optimize your video.
Meta Description: If your video is short and you need to make it longer, this article gives you six methods to make a video longer and optimize them.
One of the best ways to make your video longer for most social media platforms is to loop the video. When you replay the video several times in a single row, it helps to multiply its length. An example is taking a 2-second video and looping it 4x. This automatically makes it into an 8-second video clip. With looping, you can simply replay the action of the clip rather than altering it in any way.
Many video editing software today allows you to loop your video for free. You have to upload the video and choose how many times you would like to loop it, and the software will get to work.
Slow Down the Video Speed

We would all agree that slow-motion makes everything seem longer automatically. You can utilize the same technique when you want to make a video longer. When you slow down a video clip, every second lasts longer. Using the slow-motion effect on a 3-second video will make the video 6 or even 9 seconds longer.
Add an Intro and Outro

Intro and outro are scenes you add before and after the video; these scenes are popular in YouTube videos. More generally, an intro is like a trailer. It shows the audience what the video is about, and the outro scene is usually used to show more information about the video maker. Adding an intro and outro to your video can add 2-4 seconds to your video clips.
It’s quite easy to add an intro and outro to any video. You can create them separately and then merge them with your video. The intro must be something relevant to the video clip; an example is adding a fast photo slideshow to the beginning of your video or a black frame. Relevant intro and outro scenes will make your video longer and maybe more engaging.
Add Images to the Video
This is another trick that most bloggers use to make their videos longer. It is an old trick in the book and makes your video significantly longer, depending on the number of videos you’re adding. A single picture can add a second or two to your video. You can simply use a video editor to merge the video clip and pictures into one seamless file.
Boomerang Your Video

If you have plans to upload your media to Instagram, then a top feature you can use to make your video longer is the boomerang feature. Instagram introduced the Boomerang feature to play short video clips forward and then repeat their reverse. So by using the Boomerang feature, you don’t only add a memory effect to your video, but you also make your video longer.
Alternatively, you can manually append your video clip to a reversed version; this option allows you to make a boomerang from an existing clip. Apart from Instagram, you can utilize many other editing tools to create a boomerang from an existing video.
Add More Content to Your Video Clip

Another step you can take is to add more materials to your video. This doesn’t necessarily mean you have to get your camera out and start shooting more scenes to add to your video. Instead, you can simply access online media libraries and get amazing materials from there that are relevant to your video clip.
Today, most professional video editors offer you access to royalty-free photos and music material. You can simply browse through their collections and pick materials relevant to your video. For example, you could add a soundtrack and videos or GIFs that make your videos engaging. Adding extra content to your video clip can make it longer by 10 seconds.
Bonus Tips: How to Edit Video Easily on a Computer
Social media platforms offer you basic video editing features that you can use to optimize your video. However, these features are limited in what they can provide you with. If you want to have more control over the editing of your video clip and make it look even more professional, you should try Wondershare Filmora. This video editing tool is powerful and provides you with more editing features to ensure you get the result you want.
Filmora offers users over 300 effects like motion elements, overlays, titles, music sounds, and many more features to make your video more engaging and attractive. Using this app is relatively easy as well, and it offers users the option of changing the file format of their video if the social media platform does not support the original format.
If you would like to edit your video to give it a more engaging and professional look, follow the simple steps below.
Step 1: Import Video to Wondershare Filmora
First, you need to download the app on your device. After that, you can download it from the official website. Luckily, Wondershare Filmora supports Windows and Mac OS. Once you download the file, install and launch the app to get started.
On the menu, click on create a new project to begin. Next, click on the import button, and from the dropdown menu, choose ‘import media file.’ Alternatively, you can simply drag the video directly to the media library of this video editor. In addition, Filmora allows you to preview your video as you add different features to optimize the video.

If your video is shaky, you can use the stabilization feature to make it more stable. Simply right-click on the video in the preview window and select the option. Once you are sure, the video is ok, drag and drop it into the timeline to start editing your video.
Step 2: Cut, Slip, Rotate, or Color-Tune Your Video

You can use many features to shape your video quickly on Wondershare Filmora. For example, you can use the scissors tool to cut or split your video. You can also use the transform tool to rotate and flip your video if you would prefer. In addition, Filmora allows you to add some advanced color tuning to your video with the color feature. This automatically makes your video even more beautiful.
Step 3: Add Filters and Effects to Your Video

Additionally, Wondershare Filmora allows you to choose different transitions, graphics, tiles, texts, sound effects, titles, filters, overlays, and elements for your videos. With this video editing tool, you can get the exact look and sound you’re looking to achieve. In addition, there are different effect tabs above the timeline that directs you to the right feature you would like to include in your video.
You can just drag these effects and drop them on the timeline to apply to your video. Filmora has over 100 in-built filters and royalty-free music you can implement on your video. If you’re not sure which feature you’re looking for. Simply experiment and undo the effect till you find exactly what you’re looking for.
Step 4: Save and Share Edited Video

Once you’re satisfied with your video clip, you can now proceed to save it. You can choose to save the video to your local folder or a storage device you’d prefer. Wondershare Filmora allows you to save in the original format or change the format to your preferred option. Filmora also allows you to change your video’s resolution and bit rate to your preference. Alternatively, you can upload your video to video-sharing platforms like Instagram, Vimeo, YouTube, etc. You can also burn the video into a DVD collection if that’s what you’re looking for.
Final Thoughts
Social media platforms are great for gaining recognition and promoting your brand. However, there are times when you don’t meet the right video length, and you would like to make your video longer. With the six methods explained above, you can make your video as long as you want and also make your video more engaging. Additionally, you can use Wondershare Filmora to make your video more professional-looking. It offers you hundreds of effects and filters you can use to optimize your video.
Meta Description: If your video is short and you need to make it longer, this article gives you six methods to make a video longer and optimize them.
What Slideshow Templates Teach You About Aesthetic
What Slideshow Templates Can Teach You About Aesthetic
An easy yet powerful editor
Numerous effects to choose from
Detailed tutorials provided by the official channel
The Slideshows are more capable of easily sums-up your trip or an event with some beautiful moments in an organised way to put things all-together.”Aesthetics” is not just about design style, instead it is a lifestyle and when you are making use of PowerPoint slideshow templates there should be some room for the trends, retro or a vintage style. By having aesthetically designed templates for the Google Slides & PowerPoint, you can have better opportunity to highlight the desired information in an attractive and beautiful manner.

Whether it is about representing your company or organization with beautiful contents or making a slideshow for your loved ones on their special occasion, aesthetic designed templates can overcome the complications in an organized and memorable manner.When it comes to enhancing productivity in a creative manner then coming up with the professional-looking presentations can help you to draw attention to your audience.
Part 1 Best Slideshow Video Templates
No matter what sort of topic you choose, a great looking and successful video presentation mainly depends on the key factors namely: PowerPoint’s designing tools, the attention to presentation process by the speaker or presenter, and devotion to the consistent styling.This is the reason it comes really important for you to get through with the process of making PowerPoint Slide Show right from the group but with addition of little bit of creativity. The templates can make your PowerPoint slideshow much more attractive.

Here is what you are going to get with the help of best possible slide show PowerPoint templates that you can use for business presentation or any other relevant event.
So, lets for go for it.
For Free
These 6 free slideshow templates can let you amaze each & everyone in your audience.
01Surprise Birthday Video Template
Make use of this template to amaze each & everyone in just a few clicks. The surprise birthdaySlideshow presentationtemplate can allow you to design as well as organize surprised, memorable parties with lots of fun.
02Rainbow Gradients Template
Comes with colourful backgrounds & some abstract gradients, it is perfect for making your presentation astounding in no time. In terms of giving you originality, this rainbow template is creative, artistic and much more smoothening to the eyes.
03Composition Book Template
Among the list of free slideshow templates, the composition book presentation template is capable of placing the contents in terms of ruled book pages. You can make use of this template to highlight educational importance, talk about education or write exercises for your students in a funny manner.

04Neutral Colours based Presentation Theme
Don’t want to be overcomplicated in terms of designing? Then it is the perfect template to consider for your presentation in order to stand out among the competition. Grilled with natural colours, strong images and clearer composition based slideshow designsthis will help you to convey better information in terms calm and composed manner to the desired audience.
05Vintage Moodboard Slides
All set to leave great impression on your audience with genuinely great presentation template with small details on every slide and to make it more unique you can customize it as per your needs.

06Birthday Card Presentation Template
The powerful and professionally oriented birthday designed template is fully handcrafted, for giving an organic feel. Just keep it simple by adapting any colour of your choice, layout with some customizable pages for the agendas, ideas and topics on your loved one’s birthday.
For Paid
With this collection of premium Google Slides and PowerPoint templates you can easily steal the show for both personal and commercial usages.
07Realistic Galaxy Consulting-Toolkit
Why limiting yourself to customers from planet Earth when you can be the best company in the entire Milky Way? But to aim that high, you’ll need the help

08Corporate Typography Plus
You will be amazed by how much typography one can do with this template. In terms of mixing as well as matching charts, text you can define stories on a pretty serious notes. It is a data drive template for the professionals.
09Aqua Marketing
The aqua marketing plan can clearly put some impact to your contents; you can trust this template for instantly appealing water-colour details in the best possible manner.
10Pastel Portfolio
If there is any creative portfolio which can open a lot of opportunities for your contents more than your imagination then, it is Pastel Portfolio template. You can easily showcase your skills and working style.

11Minimalist Korean Aesthetic Pitch Deck Presentation
This template is based on the minimalist style and usually comes with varieties of shades for the business presentations and clearly capable of making your audience focus on relatable contents.
12College Candy Aesthetics
The explosion of colours will welcome you, the moment you started using this template. It is a perfect blend of “aesthetics” style which is super cool & capable of shaking latest trends in the market for art. With subscription you can edit as well as add much more information apart from its free version.
Why not go for Filmora Wonderful from which you can make amazing slideshows with blend of custom audio and video?
Well Filmora is pretty awesome for Making your Presentation much more convenient and unique in all perspectives and comes with features like:-
● Entirely customizable slides
● Comes in different nodes & colors.
● Slides here are available in 16:9 as well as 4:3 format.
● You can easily change slide colours quickly.
● Get access to well-crafted templates with instant facility to download it.
● Some Pre-designed templates to help you in making it much more engaging and convenient as per the presentation.
● Best designed templatesto use in the market for special occasions
Part 2 5 Slideshow Websites to Help You Find Aesthetic Slideshow
The slideshow design for PowerPointis really time consuming &you need to create slides right from the scratch. If you are not into a mood of spending so much time in slideshow designs then with thousands of templates already present in the market you can save your time and efforts.

Here, the list of five slideshows, describe various number of slideshow templates designing resources to use so that you can download beautiful as well as professionally designed slideshow templates not just for the PowerPoint, but also for the Keynote &Google Slides.
01Power-User: Range Of Attractive Templates To Use In Offline Mode Directly
The Power-user is one of the most powerful add-onscrafted by the experts for PowerPoint and easily let you browse &insert varieties of attractive templates directly to your presentations.
With access to one million plus pictures, 250 editable maps and around 6,000 icons, charts, diagrams etc. you are getting a tool to save your time for the excel.
02Slide Model: Professionally Designed Templates &Themes
It’s aslideshow websitewith thirty thousand PowerPoint templates that are designed professionally to use for increasing the productivity and quality. You will get unlimited downloads for the 1st year with a subscription. When it comes to design a presentation with a minimal efforts, then simply download a preferred template from this website.
03Powered Template: Outstanding Powerpoint Templates
You will get access to a wide range of entirely royalty-free, attractively designed Google Slides and PowerPoint templates for the business making presentations or for the personal use. You can choose either a free plan or go with the subscription plan.
04Envato Elements: Professionally Implemented Templates By Designers
Right from the creative group of people or community, you will get access to wide range of visual elements on a monthly subscription with features of unlimited downloads& wide range of cataloguethat contains 300,000 plus stock photos & around 34,000 and more graphic assets. You can also download the whole presentation for the specified topics like investor pitch, sales presentation, Real-Estate project, etc. that can be used as a template for Slideshow PowerPoint.
05Aiippt.Com: Free Access To Powerpoint Templates, Diagrams And Designs
Thisslide show websitecan surely help for you to find a perfect match for the Aesthetic Slideshows. AIPPT is a great tool for providing value to your slide show at free of cost. Availability of delivering backgrounds, cover pages for the presentation in terms of real templates really makes it look beautiful. With some interesting elements you can adjust the template as per your needs.
Part 3 FAQ of Slideshow Templates
The ultimate goal of the PowerPoint templates is to deliver solutions to the customer’s queries with a straightforward approach. Slideshow templates are meant to give attractive features to the PowerPoint Presentation. One can easily comply with the updating as well as editing of the template following your taste. With some striking background themes & well-designed presentation templates, you can make your presentation looks even much more eye-catching to truly amaze the audience.
Here are a few FAQs about PowerPoint templates to help you in understanding Aesthetic slideshows:-
How to make an aesthetic slideshow?
You can make use of PowerPoint slideshow templates available in order to effortlessly apply attractive themes, subtle shades of highlighted pictures, and minimalistic text-based designs/fonts in your slides.
Which one is the best tool for creating an aesthetic slideshow?
If you want to have an all-rounder application for taking care of your designing needs with great tools and amazing features of its own then Filmora is the best you can have. With aesthetically pleasing templates, you can access almost 600 plus filters, innumerable templates, and effects with uncountable features in order to make your PowerPoint slides minimalistic & aesthetic.
How to use Filmora for aesthetic slideshow making?
With several varieties of Slideshow templates, Wondershare Filmora Video Editor reflects an idea of minimalistic design. You can make use of filters in order to provide a subtle pastel tone to the existing slides. Also, multiple motion control benefits & fonts available on the help can clearly make a huge difference in providing an aesthetically pleasing slideshow design.
For Win 7 or later (64-bit)
For macOS 10.12 or later
● Ending Thoughts →
● Creating a good looking PowerPoint presentation is a skill that professionals are using it to take the benefit. It is really easy for anyone to go wrong, but with custom designed templates you can have better choices to go fanatic.
●You can find varieties of attractive templates for your business and personal needs without any worries.
●It is easy to customize as well as edit the templates as per your convenient so that you can focus on your attractive ideas.
The Slideshows are more capable of easily sums-up your trip or an event with some beautiful moments in an organised way to put things all-together.”Aesthetics” is not just about design style, instead it is a lifestyle and when you are making use of PowerPoint slideshow templates there should be some room for the trends, retro or a vintage style. By having aesthetically designed templates for the Google Slides & PowerPoint, you can have better opportunity to highlight the desired information in an attractive and beautiful manner.

Whether it is about representing your company or organization with beautiful contents or making a slideshow for your loved ones on their special occasion, aesthetic designed templates can overcome the complications in an organized and memorable manner.When it comes to enhancing productivity in a creative manner then coming up with the professional-looking presentations can help you to draw attention to your audience.
Part 1 Best Slideshow Video Templates
No matter what sort of topic you choose, a great looking and successful video presentation mainly depends on the key factors namely: PowerPoint’s designing tools, the attention to presentation process by the speaker or presenter, and devotion to the consistent styling.This is the reason it comes really important for you to get through with the process of making PowerPoint Slide Show right from the group but with addition of little bit of creativity. The templates can make your PowerPoint slideshow much more attractive.

Here is what you are going to get with the help of best possible slide show PowerPoint templates that you can use for business presentation or any other relevant event.
So, lets for go for it.
For Free
These 6 free slideshow templates can let you amaze each & everyone in your audience.
01Surprise Birthday Video Template
Make use of this template to amaze each & everyone in just a few clicks. The surprise birthdaySlideshow presentationtemplate can allow you to design as well as organize surprised, memorable parties with lots of fun.
02Rainbow Gradients Template
Comes with colourful backgrounds & some abstract gradients, it is perfect for making your presentation astounding in no time. In terms of giving you originality, this rainbow template is creative, artistic and much more smoothening to the eyes.
03Composition Book Template
Among the list of free slideshow templates, the composition book presentation template is capable of placing the contents in terms of ruled book pages. You can make use of this template to highlight educational importance, talk about education or write exercises for your students in a funny manner.

04Neutral Colours based Presentation Theme
Don’t want to be overcomplicated in terms of designing? Then it is the perfect template to consider for your presentation in order to stand out among the competition. Grilled with natural colours, strong images and clearer composition based slideshow designsthis will help you to convey better information in terms calm and composed manner to the desired audience.
05Vintage Moodboard Slides
All set to leave great impression on your audience with genuinely great presentation template with small details on every slide and to make it more unique you can customize it as per your needs.

06Birthday Card Presentation Template
The powerful and professionally oriented birthday designed template is fully handcrafted, for giving an organic feel. Just keep it simple by adapting any colour of your choice, layout with some customizable pages for the agendas, ideas and topics on your loved one’s birthday.
For Paid
With this collection of premium Google Slides and PowerPoint templates you can easily steal the show for both personal and commercial usages.
07Realistic Galaxy Consulting-Toolkit
Why limiting yourself to customers from planet Earth when you can be the best company in the entire Milky Way? But to aim that high, you’ll need the help

08Corporate Typography Plus
You will be amazed by how much typography one can do with this template. In terms of mixing as well as matching charts, text you can define stories on a pretty serious notes. It is a data drive template for the professionals.
09Aqua Marketing
The aqua marketing plan can clearly put some impact to your contents; you can trust this template for instantly appealing water-colour details in the best possible manner.
10Pastel Portfolio
If there is any creative portfolio which can open a lot of opportunities for your contents more than your imagination then, it is Pastel Portfolio template. You can easily showcase your skills and working style.

11Minimalist Korean Aesthetic Pitch Deck Presentation
This template is based on the minimalist style and usually comes with varieties of shades for the business presentations and clearly capable of making your audience focus on relatable contents.
12College Candy Aesthetics
The explosion of colours will welcome you, the moment you started using this template. It is a perfect blend of “aesthetics” style which is super cool & capable of shaking latest trends in the market for art. With subscription you can edit as well as add much more information apart from its free version.
Why not go for Filmora Wonderful from which you can make amazing slideshows with blend of custom audio and video?
Well Filmora is pretty awesome for Making your Presentation much more convenient and unique in all perspectives and comes with features like:-
● Entirely customizable slides
● Comes in different nodes & colors.
● Slides here are available in 16:9 as well as 4:3 format.
● You can easily change slide colours quickly.
● Get access to well-crafted templates with instant facility to download it.
● Some Pre-designed templates to help you in making it much more engaging and convenient as per the presentation.
● Best designed templatesto use in the market for special occasions
Part 2 5 Slideshow Websites to Help You Find Aesthetic Slideshow
The slideshow design for PowerPointis really time consuming &you need to create slides right from the scratch. If you are not into a mood of spending so much time in slideshow designs then with thousands of templates already present in the market you can save your time and efforts.

Here, the list of five slideshows, describe various number of slideshow templates designing resources to use so that you can download beautiful as well as professionally designed slideshow templates not just for the PowerPoint, but also for the Keynote &Google Slides.
01Power-User: Range Of Attractive Templates To Use In Offline Mode Directly
The Power-user is one of the most powerful add-onscrafted by the experts for PowerPoint and easily let you browse &insert varieties of attractive templates directly to your presentations.
With access to one million plus pictures, 250 editable maps and around 6,000 icons, charts, diagrams etc. you are getting a tool to save your time for the excel.
02Slide Model: Professionally Designed Templates &Themes
It’s aslideshow websitewith thirty thousand PowerPoint templates that are designed professionally to use for increasing the productivity and quality. You will get unlimited downloads for the 1st year with a subscription. When it comes to design a presentation with a minimal efforts, then simply download a preferred template from this website.
03Powered Template: Outstanding Powerpoint Templates
You will get access to a wide range of entirely royalty-free, attractively designed Google Slides and PowerPoint templates for the business making presentations or for the personal use. You can choose either a free plan or go with the subscription plan.
04Envato Elements: Professionally Implemented Templates By Designers
Right from the creative group of people or community, you will get access to wide range of visual elements on a monthly subscription with features of unlimited downloads& wide range of cataloguethat contains 300,000 plus stock photos & around 34,000 and more graphic assets. You can also download the whole presentation for the specified topics like investor pitch, sales presentation, Real-Estate project, etc. that can be used as a template for Slideshow PowerPoint.
05Aiippt.Com: Free Access To Powerpoint Templates, Diagrams And Designs
Thisslide show websitecan surely help for you to find a perfect match for the Aesthetic Slideshows. AIPPT is a great tool for providing value to your slide show at free of cost. Availability of delivering backgrounds, cover pages for the presentation in terms of real templates really makes it look beautiful. With some interesting elements you can adjust the template as per your needs.
Part 3 FAQ of Slideshow Templates
The ultimate goal of the PowerPoint templates is to deliver solutions to the customer’s queries with a straightforward approach. Slideshow templates are meant to give attractive features to the PowerPoint Presentation. One can easily comply with the updating as well as editing of the template following your taste. With some striking background themes & well-designed presentation templates, you can make your presentation looks even much more eye-catching to truly amaze the audience.
Here are a few FAQs about PowerPoint templates to help you in understanding Aesthetic slideshows:-
How to make an aesthetic slideshow?
You can make use of PowerPoint slideshow templates available in order to effortlessly apply attractive themes, subtle shades of highlighted pictures, and minimalistic text-based designs/fonts in your slides.
Which one is the best tool for creating an aesthetic slideshow?
If you want to have an all-rounder application for taking care of your designing needs with great tools and amazing features of its own then Filmora is the best you can have. With aesthetically pleasing templates, you can access almost 600 plus filters, innumerable templates, and effects with uncountable features in order to make your PowerPoint slides minimalistic & aesthetic.
How to use Filmora for aesthetic slideshow making?
With several varieties of Slideshow templates, Wondershare Filmora Video Editor reflects an idea of minimalistic design. You can make use of filters in order to provide a subtle pastel tone to the existing slides. Also, multiple motion control benefits & fonts available on the help can clearly make a huge difference in providing an aesthetically pleasing slideshow design.
For Win 7 or later (64-bit)
For macOS 10.12 or later
● Ending Thoughts →
● Creating a good looking PowerPoint presentation is a skill that professionals are using it to take the benefit. It is really easy for anyone to go wrong, but with custom designed templates you can have better choices to go fanatic.
●You can find varieties of attractive templates for your business and personal needs without any worries.
●It is easy to customize as well as edit the templates as per your convenient so that you can focus on your attractive ideas.
The Slideshows are more capable of easily sums-up your trip or an event with some beautiful moments in an organised way to put things all-together.”Aesthetics” is not just about design style, instead it is a lifestyle and when you are making use of PowerPoint slideshow templates there should be some room for the trends, retro or a vintage style. By having aesthetically designed templates for the Google Slides & PowerPoint, you can have better opportunity to highlight the desired information in an attractive and beautiful manner.

Whether it is about representing your company or organization with beautiful contents or making a slideshow for your loved ones on their special occasion, aesthetic designed templates can overcome the complications in an organized and memorable manner.When it comes to enhancing productivity in a creative manner then coming up with the professional-looking presentations can help you to draw attention to your audience.
Part 1 Best Slideshow Video Templates
No matter what sort of topic you choose, a great looking and successful video presentation mainly depends on the key factors namely: PowerPoint’s designing tools, the attention to presentation process by the speaker or presenter, and devotion to the consistent styling.This is the reason it comes really important for you to get through with the process of making PowerPoint Slide Show right from the group but with addition of little bit of creativity. The templates can make your PowerPoint slideshow much more attractive.

Here is what you are going to get with the help of best possible slide show PowerPoint templates that you can use for business presentation or any other relevant event.
So, lets for go for it.
For Free
These 6 free slideshow templates can let you amaze each & everyone in your audience.
01Surprise Birthday Video Template
Make use of this template to amaze each & everyone in just a few clicks. The surprise birthdaySlideshow presentationtemplate can allow you to design as well as organize surprised, memorable parties with lots of fun.
02Rainbow Gradients Template
Comes with colourful backgrounds & some abstract gradients, it is perfect for making your presentation astounding in no time. In terms of giving you originality, this rainbow template is creative, artistic and much more smoothening to the eyes.
03Composition Book Template
Among the list of free slideshow templates, the composition book presentation template is capable of placing the contents in terms of ruled book pages. You can make use of this template to highlight educational importance, talk about education or write exercises for your students in a funny manner.

04Neutral Colours based Presentation Theme
Don’t want to be overcomplicated in terms of designing? Then it is the perfect template to consider for your presentation in order to stand out among the competition. Grilled with natural colours, strong images and clearer composition based slideshow designsthis will help you to convey better information in terms calm and composed manner to the desired audience.
05Vintage Moodboard Slides
All set to leave great impression on your audience with genuinely great presentation template with small details on every slide and to make it more unique you can customize it as per your needs.

06Birthday Card Presentation Template
The powerful and professionally oriented birthday designed template is fully handcrafted, for giving an organic feel. Just keep it simple by adapting any colour of your choice, layout with some customizable pages for the agendas, ideas and topics on your loved one’s birthday.
For Paid
With this collection of premium Google Slides and PowerPoint templates you can easily steal the show for both personal and commercial usages.
07Realistic Galaxy Consulting-Toolkit
Why limiting yourself to customers from planet Earth when you can be the best company in the entire Milky Way? But to aim that high, you’ll need the help

08Corporate Typography Plus
You will be amazed by how much typography one can do with this template. In terms of mixing as well as matching charts, text you can define stories on a pretty serious notes. It is a data drive template for the professionals.
09Aqua Marketing
The aqua marketing plan can clearly put some impact to your contents; you can trust this template for instantly appealing water-colour details in the best possible manner.
10Pastel Portfolio
If there is any creative portfolio which can open a lot of opportunities for your contents more than your imagination then, it is Pastel Portfolio template. You can easily showcase your skills and working style.

11Minimalist Korean Aesthetic Pitch Deck Presentation
This template is based on the minimalist style and usually comes with varieties of shades for the business presentations and clearly capable of making your audience focus on relatable contents.
12College Candy Aesthetics
The explosion of colours will welcome you, the moment you started using this template. It is a perfect blend of “aesthetics” style which is super cool & capable of shaking latest trends in the market for art. With subscription you can edit as well as add much more information apart from its free version.
Why not go for Filmora Wonderful from which you can make amazing slideshows with blend of custom audio and video?
Well Filmora is pretty awesome for Making your Presentation much more convenient and unique in all perspectives and comes with features like:-
● Entirely customizable slides
● Comes in different nodes & colors.
● Slides here are available in 16:9 as well as 4:3 format.
● You can easily change slide colours quickly.
● Get access to well-crafted templates with instant facility to download it.
● Some Pre-designed templates to help you in making it much more engaging and convenient as per the presentation.
● Best designed templatesto use in the market for special occasions
Part 2 5 Slideshow Websites to Help You Find Aesthetic Slideshow
The slideshow design for PowerPointis really time consuming &you need to create slides right from the scratch. If you are not into a mood of spending so much time in slideshow designs then with thousands of templates already present in the market you can save your time and efforts.

Here, the list of five slideshows, describe various number of slideshow templates designing resources to use so that you can download beautiful as well as professionally designed slideshow templates not just for the PowerPoint, but also for the Keynote &Google Slides.
01Power-User: Range Of Attractive Templates To Use In Offline Mode Directly
The Power-user is one of the most powerful add-onscrafted by the experts for PowerPoint and easily let you browse &insert varieties of attractive templates directly to your presentations.
With access to one million plus pictures, 250 editable maps and around 6,000 icons, charts, diagrams etc. you are getting a tool to save your time for the excel.
02Slide Model: Professionally Designed Templates &Themes
It’s aslideshow websitewith thirty thousand PowerPoint templates that are designed professionally to use for increasing the productivity and quality. You will get unlimited downloads for the 1st year with a subscription. When it comes to design a presentation with a minimal efforts, then simply download a preferred template from this website.
03Powered Template: Outstanding Powerpoint Templates
You will get access to a wide range of entirely royalty-free, attractively designed Google Slides and PowerPoint templates for the business making presentations or for the personal use. You can choose either a free plan or go with the subscription plan.
04Envato Elements: Professionally Implemented Templates By Designers
Right from the creative group of people or community, you will get access to wide range of visual elements on a monthly subscription with features of unlimited downloads& wide range of cataloguethat contains 300,000 plus stock photos & around 34,000 and more graphic assets. You can also download the whole presentation for the specified topics like investor pitch, sales presentation, Real-Estate project, etc. that can be used as a template for Slideshow PowerPoint.
05Aiippt.Com: Free Access To Powerpoint Templates, Diagrams And Designs
Thisslide show websitecan surely help for you to find a perfect match for the Aesthetic Slideshows. AIPPT is a great tool for providing value to your slide show at free of cost. Availability of delivering backgrounds, cover pages for the presentation in terms of real templates really makes it look beautiful. With some interesting elements you can adjust the template as per your needs.
Part 3 FAQ of Slideshow Templates
The ultimate goal of the PowerPoint templates is to deliver solutions to the customer’s queries with a straightforward approach. Slideshow templates are meant to give attractive features to the PowerPoint Presentation. One can easily comply with the updating as well as editing of the template following your taste. With some striking background themes & well-designed presentation templates, you can make your presentation looks even much more eye-catching to truly amaze the audience.
Here are a few FAQs about PowerPoint templates to help you in understanding Aesthetic slideshows:-
How to make an aesthetic slideshow?
You can make use of PowerPoint slideshow templates available in order to effortlessly apply attractive themes, subtle shades of highlighted pictures, and minimalistic text-based designs/fonts in your slides.
Which one is the best tool for creating an aesthetic slideshow?
If you want to have an all-rounder application for taking care of your designing needs with great tools and amazing features of its own then Filmora is the best you can have. With aesthetically pleasing templates, you can access almost 600 plus filters, innumerable templates, and effects with uncountable features in order to make your PowerPoint slides minimalistic & aesthetic.
How to use Filmora for aesthetic slideshow making?
With several varieties of Slideshow templates, Wondershare Filmora Video Editor reflects an idea of minimalistic design. You can make use of filters in order to provide a subtle pastel tone to the existing slides. Also, multiple motion control benefits & fonts available on the help can clearly make a huge difference in providing an aesthetically pleasing slideshow design.
For Win 7 or later (64-bit)
For macOS 10.12 or later
● Ending Thoughts →
● Creating a good looking PowerPoint presentation is a skill that professionals are using it to take the benefit. It is really easy for anyone to go wrong, but with custom designed templates you can have better choices to go fanatic.
●You can find varieties of attractive templates for your business and personal needs without any worries.
●It is easy to customize as well as edit the templates as per your convenient so that you can focus on your attractive ideas.
The Slideshows are more capable of easily sums-up your trip or an event with some beautiful moments in an organised way to put things all-together.”Aesthetics” is not just about design style, instead it is a lifestyle and when you are making use of PowerPoint slideshow templates there should be some room for the trends, retro or a vintage style. By having aesthetically designed templates for the Google Slides & PowerPoint, you can have better opportunity to highlight the desired information in an attractive and beautiful manner.

Whether it is about representing your company or organization with beautiful contents or making a slideshow for your loved ones on their special occasion, aesthetic designed templates can overcome the complications in an organized and memorable manner.When it comes to enhancing productivity in a creative manner then coming up with the professional-looking presentations can help you to draw attention to your audience.
Part 1 Best Slideshow Video Templates
No matter what sort of topic you choose, a great looking and successful video presentation mainly depends on the key factors namely: PowerPoint’s designing tools, the attention to presentation process by the speaker or presenter, and devotion to the consistent styling.This is the reason it comes really important for you to get through with the process of making PowerPoint Slide Show right from the group but with addition of little bit of creativity. The templates can make your PowerPoint slideshow much more attractive.

Here is what you are going to get with the help of best possible slide show PowerPoint templates that you can use for business presentation or any other relevant event.
So, lets for go for it.
For Free
These 6 free slideshow templates can let you amaze each & everyone in your audience.
01Surprise Birthday Video Template
Make use of this template to amaze each & everyone in just a few clicks. The surprise birthdaySlideshow presentationtemplate can allow you to design as well as organize surprised, memorable parties with lots of fun.
02Rainbow Gradients Template
Comes with colourful backgrounds & some abstract gradients, it is perfect for making your presentation astounding in no time. In terms of giving you originality, this rainbow template is creative, artistic and much more smoothening to the eyes.
03Composition Book Template
Among the list of free slideshow templates, the composition book presentation template is capable of placing the contents in terms of ruled book pages. You can make use of this template to highlight educational importance, talk about education or write exercises for your students in a funny manner.

04Neutral Colours based Presentation Theme
Don’t want to be overcomplicated in terms of designing? Then it is the perfect template to consider for your presentation in order to stand out among the competition. Grilled with natural colours, strong images and clearer composition based slideshow designsthis will help you to convey better information in terms calm and composed manner to the desired audience.
05Vintage Moodboard Slides
All set to leave great impression on your audience with genuinely great presentation template with small details on every slide and to make it more unique you can customize it as per your needs.

06Birthday Card Presentation Template
The powerful and professionally oriented birthday designed template is fully handcrafted, for giving an organic feel. Just keep it simple by adapting any colour of your choice, layout with some customizable pages for the agendas, ideas and topics on your loved one’s birthday.
For Paid
With this collection of premium Google Slides and PowerPoint templates you can easily steal the show for both personal and commercial usages.
07Realistic Galaxy Consulting-Toolkit
Why limiting yourself to customers from planet Earth when you can be the best company in the entire Milky Way? But to aim that high, you’ll need the help

08Corporate Typography Plus
You will be amazed by how much typography one can do with this template. In terms of mixing as well as matching charts, text you can define stories on a pretty serious notes. It is a data drive template for the professionals.
09Aqua Marketing
The aqua marketing plan can clearly put some impact to your contents; you can trust this template for instantly appealing water-colour details in the best possible manner.
10Pastel Portfolio
If there is any creative portfolio which can open a lot of opportunities for your contents more than your imagination then, it is Pastel Portfolio template. You can easily showcase your skills and working style.

11Minimalist Korean Aesthetic Pitch Deck Presentation
This template is based on the minimalist style and usually comes with varieties of shades for the business presentations and clearly capable of making your audience focus on relatable contents.
12College Candy Aesthetics
The explosion of colours will welcome you, the moment you started using this template. It is a perfect blend of “aesthetics” style which is super cool & capable of shaking latest trends in the market for art. With subscription you can edit as well as add much more information apart from its free version.
Why not go for Filmora Wonderful from which you can make amazing slideshows with blend of custom audio and video?
Well Filmora is pretty awesome for Making your Presentation much more convenient and unique in all perspectives and comes with features like:-
● Entirely customizable slides
● Comes in different nodes & colors.
● Slides here are available in 16:9 as well as 4:3 format.
● You can easily change slide colours quickly.
● Get access to well-crafted templates with instant facility to download it.
● Some Pre-designed templates to help you in making it much more engaging and convenient as per the presentation.
● Best designed templatesto use in the market for special occasions
Part 2 5 Slideshow Websites to Help You Find Aesthetic Slideshow
The slideshow design for PowerPointis really time consuming &you need to create slides right from the scratch. If you are not into a mood of spending so much time in slideshow designs then with thousands of templates already present in the market you can save your time and efforts.

Here, the list of five slideshows, describe various number of slideshow templates designing resources to use so that you can download beautiful as well as professionally designed slideshow templates not just for the PowerPoint, but also for the Keynote &Google Slides.
01Power-User: Range Of Attractive Templates To Use In Offline Mode Directly
The Power-user is one of the most powerful add-onscrafted by the experts for PowerPoint and easily let you browse &insert varieties of attractive templates directly to your presentations.
With access to one million plus pictures, 250 editable maps and around 6,000 icons, charts, diagrams etc. you are getting a tool to save your time for the excel.
02Slide Model: Professionally Designed Templates &Themes
It’s aslideshow websitewith thirty thousand PowerPoint templates that are designed professionally to use for increasing the productivity and quality. You will get unlimited downloads for the 1st year with a subscription. When it comes to design a presentation with a minimal efforts, then simply download a preferred template from this website.
03Powered Template: Outstanding Powerpoint Templates
You will get access to a wide range of entirely royalty-free, attractively designed Google Slides and PowerPoint templates for the business making presentations or for the personal use. You can choose either a free plan or go with the subscription plan.
04Envato Elements: Professionally Implemented Templates By Designers
Right from the creative group of people or community, you will get access to wide range of visual elements on a monthly subscription with features of unlimited downloads& wide range of cataloguethat contains 300,000 plus stock photos & around 34,000 and more graphic assets. You can also download the whole presentation for the specified topics like investor pitch, sales presentation, Real-Estate project, etc. that can be used as a template for Slideshow PowerPoint.
05Aiippt.Com: Free Access To Powerpoint Templates, Diagrams And Designs
Thisslide show websitecan surely help for you to find a perfect match for the Aesthetic Slideshows. AIPPT is a great tool for providing value to your slide show at free of cost. Availability of delivering backgrounds, cover pages for the presentation in terms of real templates really makes it look beautiful. With some interesting elements you can adjust the template as per your needs.
Part 3 FAQ of Slideshow Templates
The ultimate goal of the PowerPoint templates is to deliver solutions to the customer’s queries with a straightforward approach. Slideshow templates are meant to give attractive features to the PowerPoint Presentation. One can easily comply with the updating as well as editing of the template following your taste. With some striking background themes & well-designed presentation templates, you can make your presentation looks even much more eye-catching to truly amaze the audience.
Here are a few FAQs about PowerPoint templates to help you in understanding Aesthetic slideshows:-
How to make an aesthetic slideshow?
You can make use of PowerPoint slideshow templates available in order to effortlessly apply attractive themes, subtle shades of highlighted pictures, and minimalistic text-based designs/fonts in your slides.
Which one is the best tool for creating an aesthetic slideshow?
If you want to have an all-rounder application for taking care of your designing needs with great tools and amazing features of its own then Filmora is the best you can have. With aesthetically pleasing templates, you can access almost 600 plus filters, innumerable templates, and effects with uncountable features in order to make your PowerPoint slides minimalistic & aesthetic.
How to use Filmora for aesthetic slideshow making?
With several varieties of Slideshow templates, Wondershare Filmora Video Editor reflects an idea of minimalistic design. You can make use of filters in order to provide a subtle pastel tone to the existing slides. Also, multiple motion control benefits & fonts available on the help can clearly make a huge difference in providing an aesthetically pleasing slideshow design.
For Win 7 or later (64-bit)
For macOS 10.12 or later
● Ending Thoughts →
● Creating a good looking PowerPoint presentation is a skill that professionals are using it to take the benefit. It is really easy for anyone to go wrong, but with custom designed templates you can have better choices to go fanatic.
●You can find varieties of attractive templates for your business and personal needs without any worries.
●It is easy to customize as well as edit the templates as per your convenient so that you can focus on your attractive ideas.
Best Ai Generated Memes
Memes are the most popular elements you will come across on social media platforms. People get a laugh out of them, share them with their friends through instant messages and group messages and make them go completely viral. In fact, you will see most video creators using popular memes in their videos to entertain their viewers. However, instead of sharing the regular and already seen memes, you can create your own memes with AI meme generator and make them popular.
If you do not have the time or the skills and creativity required to come up with memes that can go viral, you can take the help of artificial intelligence to generate new memes in a few steps. Therefore, you can have the choice to check AI generator meme and reject it to move on to the next one. We will illustrate how you can create AI generated memes using the popular AI meme generators.
Part 1. Use Super Meme AI Generator
Super Meme AI Generator is one of the most popular online platforms where you can create computer generated memes instantly. The platform supports 110+ languages in which you can create memes and share on your social media accounts.
All you need to do is to select a theme based on your meme genre, select a template or upload a relatable image, and Super Meme will generate random meme for you. Here are the simple steps that you can perform from your mobile devices as well.
Step1Open your web browser and visit “www.supermeme.ai” . Click on Start for Free button.

Step2You need to sign in with your email address to proceed. Type in your email address and you will get a link in your email to get started.

Step3Once Super Meme editor opens, select a theme for your meme from the left panel.
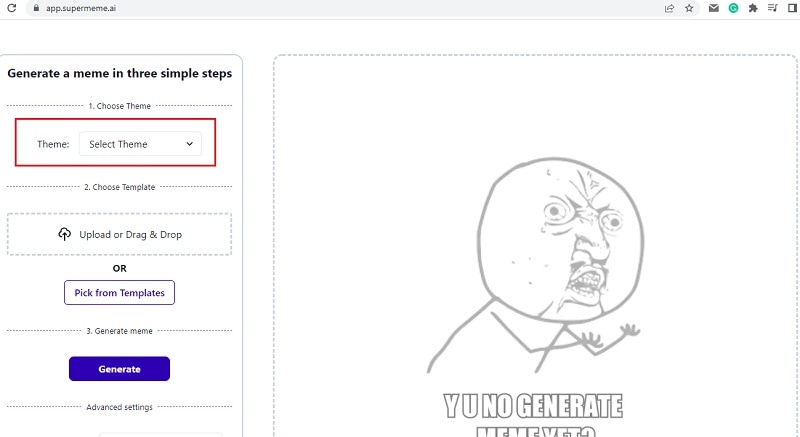
Step4Click on Pick from Templates button to select a built-in meme background.
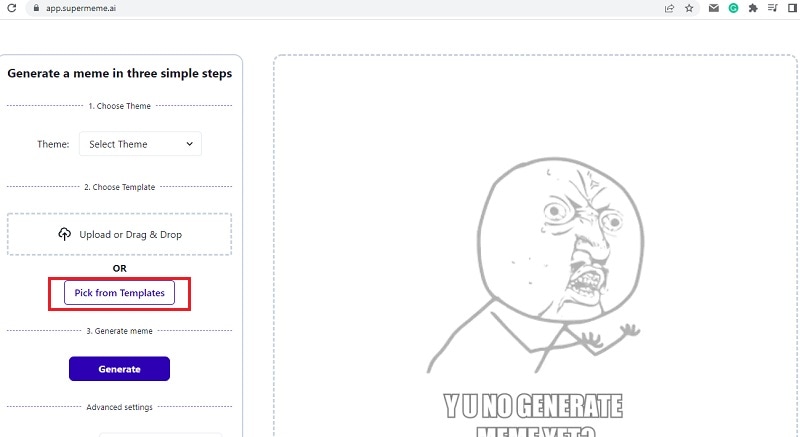
Click on Generate meme with template button. Otherwise, you can drag and drop an image from your device to set as the meme background.
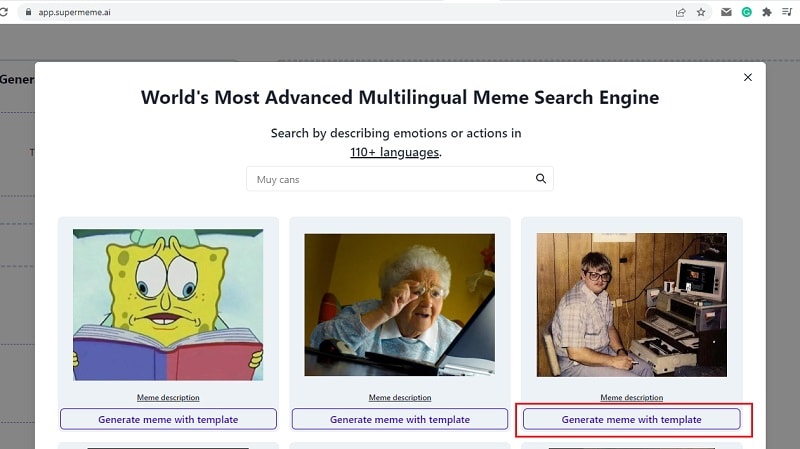
Step5Finally, click on Generate button to get the AI generated meme on your select background. You will get three memes based on the same background.

Step6Click on Download button to save them on your device. You can even edit them as well as copy them to share anywhere you want.

Part 2. Use Dalle Mini Meme Tool
You might have seen on social media platforms that people use photo memes to reply to any post or comment sarcastically. Not just on social media, you will find users using creative meme photos on instant messaging apps. If you are wondering how and where they get those out-of-the-box memes, well, most of them use meme generator AI.
Dalle Mini Meme Tool is a great platform where you can mention the type of meme you want, and it will automatically generate memes based on your mentioned keyword. You can copy and paste them anywhere you want instantly, and you will surely get traction and appreciation for using creative memes. Here are the steps to generate computer generated memes using Dalle Mini Meme Tool.
Step1Open your web browser and visit “huggingface.co/spaces/dalle-mini/dalle-mini”.
Step2Type the genre of the meme that you want to generate and click on Run button.
Step3Wait for a few seconds for the platform to generate memes based on your keyword. You can click on Run button multiple times using the same keyword to get new memes every single time.

Step4If you want to copy any meme, click on it and click on Screenshot button to copy it. You can paste it anywhere you want.

Part 3. Extra Info: Create Meme Video on Computer
So far, we have mentioned online AI meme generator where you can create meme images only. However, if you want to create meme videos on your computer for social media platforms as well as video streaming platforms, we recommend Wondershare Filmora . You can select from video templates and animated memes and add funny texts and titles to create your desired meme video. Here are the steps to create meme video on computer using Filmora.
Step1Filmora is available for both Windows and Mac and download accordingly and install Filmora on your computer.
Launch Filmora after installation and click on New Project button from the welcome screen. Otherwise, you can go to File> New Project option to start creating meme video.

Step2If you want to start from scratch, select any preferred video template from Stock Media> Pexels > Videos. You can also select from Pixabay. In fact, there are also background photos available to use as meme background.

Step3If you want to add any trending animated memes, go to Stock Media> GIPHY and drop your selected GIF into the Timeline. Copy and paste it multiple times to stretch its duration.
Step4Go to Titles> Social Media and drop any title template on the Timeline. If the title template has a background, delete it by selecting it from Viewer. You can also move around the texts to place them exactly where you want them.

Step5Double-click on the Title template located on the Timeline and edit the meme text. You can select different styles, animations, WordArt and much more.
You can also check out Elements, Effects, and Audio options located at the top to add them to your video wherever appropriate.
Step6Click on OK button and play the video. Click on Export button to save the video.
Takeaway
Generating creative and refreshing memes is no more a monopoly on professional meme creators. You can create meme images on any genre or keyword instantly with meme generator AI. We have stated how you can create static memes with artificial intelligence instantly from online platforms. If you want to create meme video on your computer, we recommend Wondershare Filmora where you can create creative meme videos instantly.
Free Download For Win 7 or later(64-bit)
Free Download For macOS 10.14 or later
Also read:
- New In 2024, Mastering Video Speed Control Slow Down, Speed Up, and Edit with Ease
- While Fiddling with Solutions to Complement the Ordinary Text Messages with Graphic Elements, People Also Ask About Ways to Add Emoji to Photo Online. Stay Here to Get the Best Answers
- New Video Course and Online Learning Are Very Popular Nowadays. Here We Are Going to Recommend some of the Best Video Websites for Teachers to Use
- Reviewing Efectum App and The Best Alternatives for Smartphone Users
- Updated Create the Stranger Things Upside Down Effect Video
- New Discover the Ultimate LUTs for Wondershare Filmora Uncover the Answer for 2024
- 2024 Approved Good Slideshow Makers Sometimes Cost High and Free Slideshow Makers Provide Slideshows with the Watermark. How to Cope with This Problem? This Article Gives Solutions
- New How to Do Masking in After Effects Alternative Provided for 2024
- Updated Blender - A Video Editor for All Professor for 2024
- New 2024 Approved Are You Searching for the Best Cinematic LUTs for Premiere Pro? You Are in the Right Place because This Article Is Dedicated to LUTs
- Updated 2024 Approved Step by Step to Rotate Videos in Davinci Resolve
- Updated How to Rotate a Video in Windows 10
- Updated Color Matching Is the Trickiest Part of Graphic Designing. Learn in Detail About Using Canva Color Match Ideally While Working on Your Pins, Social Media Posts, and Other Designs for 2024
- Updated How to Stabilize Videos for Free with Google Photos App
- 2024 Approved Reviewing Efectum App For Smartphone Users Create Slow Motion Videos
- Updated Guaranteed 10 Storyboard Creators To Make Animation Easier For You
- New In 2024, Top 31 Video Trimmers That Will Save You Time in Ediitng
- 2024 Approved Five Thoughts on Discord Create Accounts How-To Questions
- In 2024, Top 6 Drones for Videography
- A Detailed Guide on Faking Your Location in Mozilla Firefox On Samsung Galaxy A15 4G | Dr.fone
- How to Reset your Infinix Smart 8 HD Lock Screen Password
- How to Bypass Google FRP Lock on Tecno Camon 20 Pro 5G Devices
- In 2024, How to Hide/Fake Snapchat Location on Your Oppo Find X7 | Dr.fone
- Is GSM Flasher ADB Legit? Full Review To Bypass Your Oppo A79 5G Phone FRP Lock
- In 2024, Full Guide on Mirroring Your Oppo Reno 10 Pro+ 5G to Your PC/Mac | Dr.fone
- About Samsung Galaxy A05 FRP Bypass
- In 2024, Top IMEI Unlokers for Your OnePlus Nord N30 SE Phone
- 5 Ways to Track Realme C67 4G without App | Dr.fone
- Turn Off Screen Lock - Samsung Galaxy F34 5G
- How to Unlock locked iPhone 13 mini without Passcode
- In 2024, CatchEmAll Celebrate National Pokémon Day with Virtual Location On Lava Blaze 2 5G | Dr.fone
- Recommended Best Applications for Mirroring Your Infinix Note 30i Screen | Dr.fone
- In 2024, 9 Mind-Blowing Tricks to Hatch Eggs in Pokemon Go Without Walking On Google Pixel 8 | Dr.fone
- Title: 11 Ways To Speed Up A Video On iPhone
- Author: Morgan
- Created at : 2024-04-24 01:12:24
- Updated at : 2024-04-25 01:12:24
- Link: https://ai-video-editing.techidaily.com/11-ways-to-speed-up-a-video-on-iphone/
- License: This work is licensed under CC BY-NC-SA 4.0.

