
:max_bytes(150000):strip_icc():format(webp)/samsung-soundbar-dolby-atmos-569f1fdd925e46ab8b3e1f51d95e1e6c.jpg)
15 Free Cinematic LUTs for Your Film for 2024
15 Free Cinematic LUTs for Your Film
Create High-Quality Video - Wondershare Filmora
An easy and powerful YouTube video editor
Numerous video and audio effects to choose from
Detailed tutorials are provided by the official channel
A significant way of creating cinematic looks for your project is by using LUTs. And with a single click, you will transform your footage into an absolute masterpiece. By using free LUTs, not only will you save on cost but also on the hassle and bustle of having to color grade your film.
LUTs function to create a uniform color throughout a film while enhancing or preserving skin tones. You don’t have to use all the LUTs in this world to create splendid films. Besides, most professional video editors and colorists prefer to work with a handful of LUTs and create stunning films. By going through this article, you will come to learn about 15 free cinematic LUTs for your film.

In this article
01 How Cinematic LUTs Affect Your Film
02 15 Free Cinematic LUTs for Your Film
03 Edit Your Film with Filmora and its Cinematic LUTs
How Cinematic LUTs Affect Your Film
When it comes to marketing, videos often tend to play a huge role. And to market your brand effectively, you need to have top-notch videos. It doesn’t mean that you should go and study to become a colorist or a video editor. Besides, there are professional colorists and video editors who gave in their time and effort to design powerful LUTs and offer them for free.
You can use those free LUTs to create mesmerizing videos and photos for your projects. And depending on the nature of your project, you will find here a free LUT that will work best for you.
There are two types of LUTs;
- 1. Conversion LUTs
Conversion LUTs function by correcting the Log color space back to the standard color space. Professional colorists often use this LUT to obtain a high dynamic range by maintaining more details in the highlights and shadows. - 2. Creative LUTs
Creative LUTs are essentially used in bringing out the creative colors of footage. Color styles in creative LUT are of a wide range, such as moody, cinematic, vintage, and summer, among others.
Creative LUTs is the one that is often used in many cases.

Filmora 3D LUT
Empower your videos with a new mood using different LUTs
Filmora now offers 800+ top-quality LUTs cover a broad range of scenarios. Transform your videos with Filmora’s powerful 3D LUTs.
Apply LUT on Videos Apply LUT on Videos Learn More >


15 Free Cinematic LUTs for Your Film
A good LUT is one that can be applied to several setups and different lighting situations. Besides, it doesn’t mean that a single LUT should be applied to every project; instead, it should be able to produce several perfect matches to your project.
Here are some of the top-tier free cinematic LUTs that you can apply to your film.
1. 40 Free Instagram LUTs
Create amazing Instagram footage using these 40 free LUTs. Besides, you can use these free LUTs in a couple of applications, including Adobe Premiere Pro, Wondershare Filmora, Photoshop, and Da Vinci Resolve.
After applying these LUTs, you can carry out bits of basic corrections such as brightness and contrast to your footage.
2. 3 Eyes and Teeth Whitening LUTs
Eye and teeth whitening LUTs are often used in movies and quality photos. Whiten the color of your teeth and eyes using these three free LUTs.
These LUTs are very simple to use, and when you effectively incorporate them, you are assured of creating magnificent photos.

3. 70 Free Hollywood Film LUTs
Do you have a project file and want it to appear like the ones in Hollywood films? You need not to worry since here are 70 eye-catching LUTs that you can add to your project and get that ‘Hollywood” look you’ve always wanted.
4. Free Summer LUTs
Summer clips perfectly match the orange, teal look. Here, you will get summer LUTs that will work perfectly with your project.
You can use these LUTs in Adobe Premiere, Wondershare Filmora, Da Vinci Resolve, and Lightroom.
5. Free Moody Green LUTs
Footages taken in the jungle work ideally with the moody green LUTs. Here are some of the amazing LUTs you can incorporate into your project.
6. Moody Blue LUTs
When it comes to appreciating nature, moody blue LUTs tend to be the perfect resort. Create cinematic scenes for your videos using these LUTs for free.
The LUTs here are protected with a password, what you do is to watch that video to completion, and you will come across the password.
7. 3 Free Urban Dark Cinematic LUTs
Often in many movies, you will come across urban scenes that are moody, dark, and portrayed as something out-of-this-world. You can also create such scenes with these three free urban dark cinematic LUTs.
You can use these three free cinema LUTs to your Wondershare Filmora or Adobe Premiere.
8. 10 Free Winter LUTs
Footages shot in winter outdoors don’t just work with any LUTs. Besides, there are LUTs designed explicitly for winter footage, and here are the ten best winters LUTs.
Download the LUTs and apply one that you find the perfect match for your project.
9. 20 Free Travel LUTs
When traveling, you may capture several photos and videos that are not very appealing – This may hinder you from sharing them with your friends or family. Besides, you don’t have to discard those footage since you can give them a new mind-blowing look using these 20 free travel LUTs.
To access all the 20 LUTs, you only need to subscribe to their YouTube channel, and you are good to go.
10. Free Korean Tone LUT
Korean movies are enticing because of their unique, bewildering LUT mood. You can also employ this LUT to your footage and leave your followers jaw-dropping.
Here, this free LUT pack is protected, and the only catch is to watch the YouTube video and get the password.
11. 5 Free Wedding LUTs
Wedding footages often require that romantic mood. Get the best five free wedding LUTs here.
The LUT file pack here is protected by a password. So to access the password, watch the YouTube video to completion and access it. Often, it is displayed in the top-right corner of the clip.
12. Free Sunset LUTs
Sunsets footages go simultaneously with the golden light or dark violet colors. Here, you will access the free sunset LUTs that you can incorporate into your project.
After downloading the file, you will realize it is protected. What you do is only watch this YouTube video and access the password.
13. Vintage LUTs
One of the commonly used LUTs in movies is the vintage LUTs. Access over 28 free vintage LUTs here and give your footage that brilliant vintage appearance.
14. Free Warm LUT
Warm LUTs do create a sensational atmosphere in the footage. Incorporate this LUT into your footage and get jaw-dropping results.
After downloading this free LUT pack, input the password displayed in the top-right corner of this YouTube video.
15. Free Music LUTs
In music, fans are always allured by the quality of the video. Besides, you may also gain or lose fans through your video quality. Improve the quality of your music video using this free LUT pack.
To download it for free, input 0$ under the payout bar and click “Buy Now.” Complete the other forms and download your music LUT for free.

Edit Your Film with Filmora and its Cinematic LUTs
Wondershare Filmora is an award-winning video editing software that allows its users to create stunning videos through its wide array of powerful video editing tools. The platform is well aware of all your video editing needs and provides easy-to-use functionalities that include LUTs.
For Win 7 or later (64-bit)
For macOS 10.14 or later
Use LUTs in Wondershare Filmora to express your intended video ideas.
Here are the simple steps on how to edit your film with Filmora:
Step 1. Download Wondershare Filmora
First, download Wondershare Fimora to your computer and allow it to run.
Step 2. Add your Footage to the Timeline
Load your video to Filmora. Drag and drop them to your timeline.

Step 3. Access your LUT Library
To access your LUT library, open “Color Correction.” Then click on “3D LUT.”

Step 4. Add your preferred LUT to your Project video
After clicking on “3D LUT,” a drop-down list showing all the available LUTs will be displayed. Scroll and select your preferred LUT.

When you want to apply your LUTs in Filmora, click on “Load new LUT,” which is still under “3D LUTs.” You will be directed to your computer storage space to select the folder containing your LUTs.
After selecting your preferred LUT folder, hit the “OK” button to apply.
Conclusion
● Worry no more when you have a small budget and a tight deadline for your project. Depending on your project’s type, nature, and requirements, create bewildering footage using the above 15 LUTs. After applying your favorite LUT, carry out small basic adjustments such as the white balance, brightness, and contrast to your footage when necessary. By doing so, you are going to leave your clients and viewers ground rooted.
● A few of these free LUTs have a catch: watching the YouTube video and getting a password for unlocking their free LUT pack. The password is often displayed on the top-right corners of the YouTube videos.
A significant way of creating cinematic looks for your project is by using LUTs. And with a single click, you will transform your footage into an absolute masterpiece. By using free LUTs, not only will you save on cost but also on the hassle and bustle of having to color grade your film.
LUTs function to create a uniform color throughout a film while enhancing or preserving skin tones. You don’t have to use all the LUTs in this world to create splendid films. Besides, most professional video editors and colorists prefer to work with a handful of LUTs and create stunning films. By going through this article, you will come to learn about 15 free cinematic LUTs for your film.
In this article
01 How Cinematic LUTs Affect Your Film
02 15 Free Cinematic LUTs for Your Film
03 Edit Your Film with Filmora and its Cinematic LUTs
How Cinematic LUTs Affect Your Film
When it comes to marketing, videos often tend to play a huge role. And to market your brand effectively, you need to have top-notch videos. It doesn’t mean that you should go and study to become a colorist or a video editor. Besides, there are professional colorists and video editors who gave in their time and effort to design powerful LUTs and offer them for free.
You can use those free LUTs to create mesmerizing videos and photos for your projects. And depending on the nature of your project, you will find here a free LUT that will work best for you.
There are two types of LUTs;
- 1. Conversion LUTs
Conversion LUTs function by correcting the Log color space back to the standard color space. Professional colorists often use this LUT to obtain a high dynamic range by maintaining more details in the highlights and shadows. - 2. Creative LUTs
Creative LUTs are essentially used in bringing out the creative colors of footage. Color styles in creative LUT are of a wide range, such as moody, cinematic, vintage, and summer, among others.
Creative LUTs is the one that is often used in many cases.
Filmora 3D LUT
Empower your videos with a new mood using different LUTs
Filmora now offers 800+ top-quality LUTs cover a broad range of scenarios. Transform your videos with Filmora’s powerful 3D LUTs.
Apply LUT on Videos Apply LUT on Videos Learn More >
15 Free Cinematic LUTs for Your Film
A good LUT is one that can be applied to several setups and different lighting situations. Besides, it doesn’t mean that a single LUT should be applied to every project; instead, it should be able to produce several perfect matches to your project.
Here are some of the top-tier free cinematic LUTs that you can apply to your film.
1. 40 Free Instagram LUTs
Create amazing Instagram footage using these 40 free LUTs. Besides, you can use these free LUTs in a couple of applications, including Adobe Premiere Pro, Wondershare Filmora, Photoshop, and Da Vinci Resolve.
After applying these LUTs, you can carry out bits of basic corrections such as brightness and contrast to your footage.
2. 3 Eyes and Teeth Whitening LUTs
Eye and teeth whitening LUTs are often used in movies and quality photos. Whiten the color of your teeth and eyes using these three free LUTs.
These LUTs are very simple to use, and when you effectively incorporate them, you are assured of creating magnificent photos.
3. 70 Free Hollywood Film LUTs
Do you have a project file and want it to appear like the ones in Hollywood films? You need not to worry since here are 70 eye-catching LUTs that you can add to your project and get that ‘Hollywood” look you’ve always wanted.
4. Free Summer LUTs
Summer clips perfectly match the orange, teal look. Here, you will get summer LUTs that will work perfectly with your project.
You can use these LUTs in Adobe Premiere, Wondershare Filmora, Da Vinci Resolve, and Lightroom.
5. Free Moody Green LUTs
Footages taken in the jungle work ideally with the moody green LUTs. Here are some of the amazing LUTs you can incorporate into your project.
6. Moody Blue LUTs
When it comes to appreciating nature, moody blue LUTs tend to be the perfect resort. Create cinematic scenes for your videos using these LUTs for free.
The LUTs here are protected with a password, what you do is to watch that video to completion, and you will come across the password.
7. 3 Free Urban Dark Cinematic LUTs
Often in many movies, you will come across urban scenes that are moody, dark, and portrayed as something out-of-this-world. You can also create such scenes with these three free urban dark cinematic LUTs.
You can use these three free cinema LUTs to your Wondershare Filmora or Adobe Premiere.
8. 10 Free Winter LUTs
Footages shot in winter outdoors don’t just work with any LUTs. Besides, there are LUTs designed explicitly for winter footage, and here are the ten best winters LUTs.
Download the LUTs and apply one that you find the perfect match for your project.
9. 20 Free Travel LUTs
When traveling, you may capture several photos and videos that are not very appealing – This may hinder you from sharing them with your friends or family. Besides, you don’t have to discard those footage since you can give them a new mind-blowing look using these 20 free travel LUTs.
To access all the 20 LUTs, you only need to subscribe to their YouTube channel, and you are good to go.
10. Free Korean Tone LUT
Korean movies are enticing because of their unique, bewildering LUT mood. You can also employ this LUT to your footage and leave your followers jaw-dropping.
Here, this free LUT pack is protected, and the only catch is to watch the YouTube video and get the password.
11. 5 Free Wedding LUTs
Wedding footages often require that romantic mood. Get the best five free wedding LUTs here.
The LUT file pack here is protected by a password. So to access the password, watch the YouTube video to completion and access it. Often, it is displayed in the top-right corner of the clip.
12. Free Sunset LUTs
Sunsets footages go simultaneously with the golden light or dark violet colors. Here, you will access the free sunset LUTs that you can incorporate into your project.
After downloading the file, you will realize it is protected. What you do is only watch this YouTube video and access the password.
13. Vintage LUTs
One of the commonly used LUTs in movies is the vintage LUTs. Access over 28 free vintage LUTs here and give your footage that brilliant vintage appearance.
14. Free Warm LUT
Warm LUTs do create a sensational atmosphere in the footage. Incorporate this LUT into your footage and get jaw-dropping results.
After downloading this free LUT pack, input the password displayed in the top-right corner of this YouTube video.
15. Free Music LUTs
In music, fans are always allured by the quality of the video. Besides, you may also gain or lose fans through your video quality. Improve the quality of your music video using this free LUT pack.
To download it for free, input 0$ under the payout bar and click “Buy Now.” Complete the other forms and download your music LUT for free.
Edit Your Film with Filmora and its Cinematic LUTs
Wondershare Filmora is an award-winning video editing software that allows its users to create stunning videos through its wide array of powerful video editing tools. The platform is well aware of all your video editing needs and provides easy-to-use functionalities that include LUTs.
For Win 7 or later (64-bit)
For macOS 10.14 or later
Use LUTs in Wondershare Filmora to express your intended video ideas.
Here are the simple steps on how to edit your film with Filmora:
Step 1. Download Wondershare Filmora
First, download Wondershare Fimora to your computer and allow it to run.
Step 2. Add your Footage to the Timeline
Load your video to Filmora. Drag and drop them to your timeline.
Step 3. Access your LUT Library
To access your LUT library, open “Color Correction.” Then click on “3D LUT.”
Step 4. Add your preferred LUT to your Project video
After clicking on “3D LUT,” a drop-down list showing all the available LUTs will be displayed. Scroll and select your preferred LUT.
When you want to apply your LUTs in Filmora, click on “Load new LUT,” which is still under “3D LUTs.” You will be directed to your computer storage space to select the folder containing your LUTs.
After selecting your preferred LUT folder, hit the “OK” button to apply.
Conclusion
● Worry no more when you have a small budget and a tight deadline for your project. Depending on your project’s type, nature, and requirements, create bewildering footage using the above 15 LUTs. After applying your favorite LUT, carry out small basic adjustments such as the white balance, brightness, and contrast to your footage when necessary. By doing so, you are going to leave your clients and viewers ground rooted.
● A few of these free LUTs have a catch: watching the YouTube video and getting a password for unlocking their free LUT pack. The password is often displayed on the top-right corners of the YouTube videos.
Detailed Tutorial to Rotate a Video in Cyberlink PowerDirector
Video Editing is a craft that is highly dependent on various characteristics of your video. But the way one presents it or goes about filming clips also has a profound effect on the end product. And as you may know, not every aspect of a video production activity always goes without hiccups. But editing can come in clutch as it can easily solve minor problems like skewed footage that was shot at the wrong angle or is upside down (an issue that can happen while using mobile phones).
Thus, with this article, we will be looking at steps to rotate a video in Cyberlink PowerDirector to help you when required. We have also mentioned the steps you will need to follow in Wondershare Filmora.
Note: We documented the steps in this guide with PowerDirector 365 and WonderShare Filmora X.
Steps to Rotate Videos with CyberLink PowerDirector
Put yourself in a situation where you’ve just finished filming a project with your smartphone but end up realizing that the footage isn’t in the right orientation by default. While the error has an easy fix on most smartphones, you can also perform this action with video editing tools.
Also, while this form of rotating might be the most basic implementation of the feature, you can often use the feature to add a dynamic nature to your video with Keyframes.
Definition: Keyframes in Video Editing is a software feature that allows an editor to set start and endpoints (denoted by In and Out Markers), presenting the opportunity to custom clip properties between the two positions. The set changes occur gradually as the playhead continues moving through the clip. Properties that can undergo modification with this method are zoom, rotation, colors, positions, etc.
The process of rotating clips is fairly straightforward; once you have PowerDirector 365 open, follow the steps listed below.
If you do not have CyberLink PowerDirector 365, download the software by visiting Cyberlink’s official website.
Step 1: Create a new video project in Cyberlink PowerDirector 365 and choose Full Mode.

Note: Full Mode in Cyberlink PowerDirector 365 will provide users access to a full-featured video editing tool similar in function to Wondershare Filmora. The other option available is Ad Designer.
Step 2: Now, import media onto the Timeline from the Media Library.
For this guide, we used the pre-existing stock footage in Cyberlink PowerDirector.

Step 3: Now, click on the video file on the Timeline; this will activate the video in the Preview Window. And it will provide you with access to the rotation circle, allowing you to change the orientation of the source file.

EXTRA
Rotation added in the PiP Designer will function as a keyframe-based rotation action. Right-click on the video in the preview window, choose Edit and then Modify to access this menu.

Following this, you can click on the Motion Tab, go into Rotation Settings, and modify the angle with greater precision. In the Preview Window, you will now be able to see the rotating video.

An Easier Way to Crop Video with Wondershare Filmora
Though Cyberlink PowerDirector 365 is a powerful video editing tool, we felt its menus were not as simple to navigate. Accessing the rotate function while available in the forefront, the use of PiP Designer didn’t feel intuitive.
In Wondershare Filmora Video Editor , rotating footage only happens via the Edit Option, and this straightforward approach felt simple. As for those who want to use Keyframes, the integration of this feature right above the Timeline is an appreciated convenience.
This emphasis on quick accessibility is present with almost every function in Filmora, and we believe this to be a significant advantage. The use of modern and unique iconography also increases familiarity, an aspect that will always be welcoming to new and budding creators.
If you do not already have Wondershare Filmora, you can download the software by visiting the official website.
To help you learn how to use the rotate function and show you an example of the easy accessibility in Filmora, here is how you can use the feature to get the output you desire.
For Win 7 or later (64-bit)
For macOS 10.14 or later
Once you have a new project open in Filmora, follow the steps listed below.
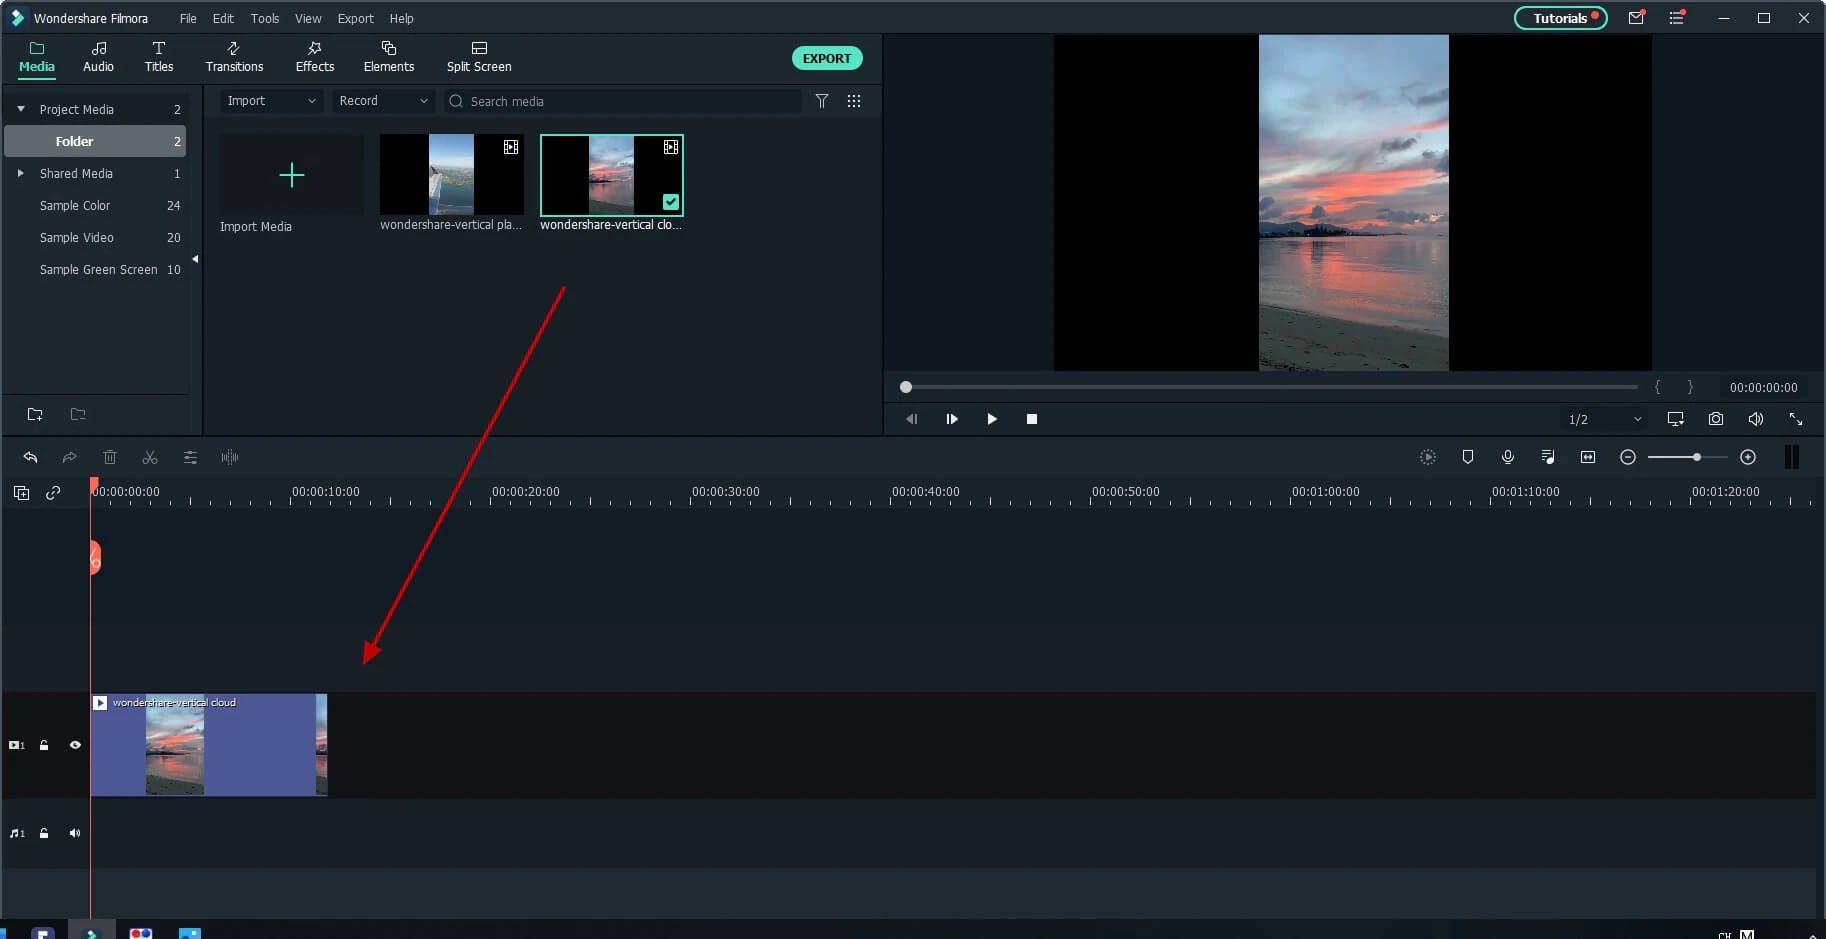
Step 1: Import a Media File to edit into your Video Project.

Step 2: Drag the video clip onto the Timeline and then select it with a mouse click to activate further interactions.

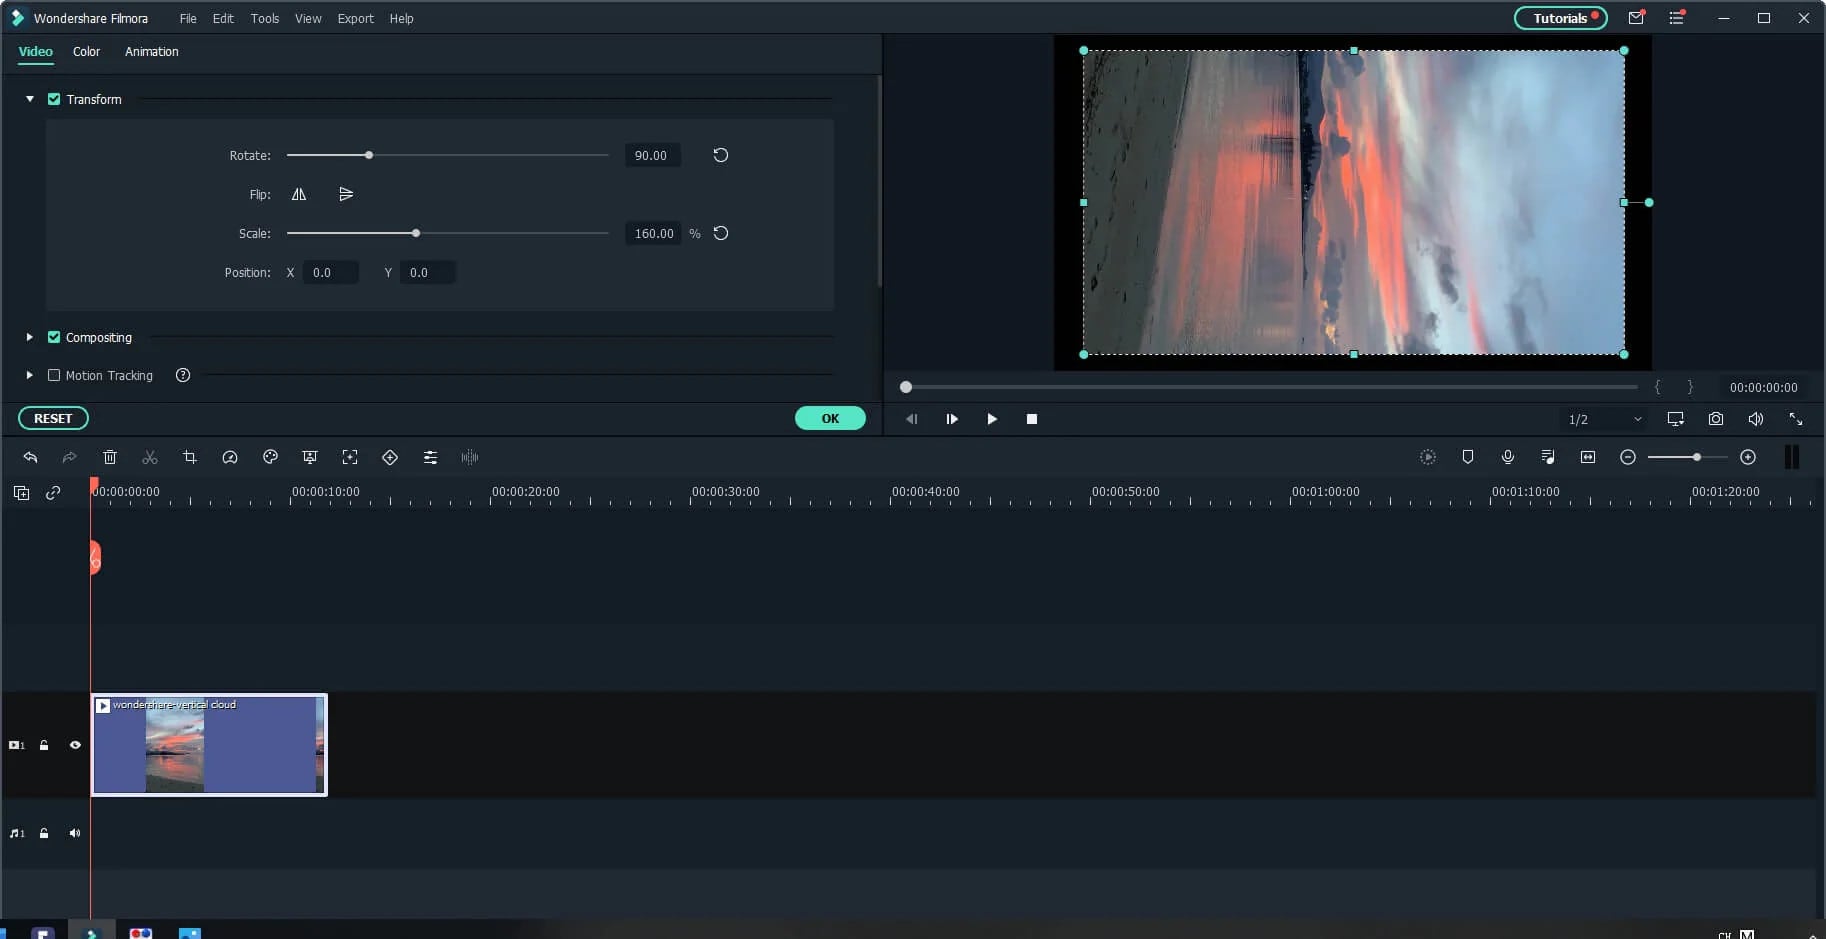
Step 3: Choose the Edit Option (marked in Red).
This will bring up the Edit Window in the left-top corner of your screen.

Step 4: Click on the Transform Menu and use the Rotation Slider to edit the orientation.

Having read this stretch of the guide, we believe you may have noticed how Filmora is more user-friendly and accessible due to its menu layout.
BONUS
Click on the Keyframe Button (marked in Green) to access the Keyframe Menu that allows you to set points between which a decided amount of rotation can happen.

The Bottom Line
This marks the end of our guide on how to rotate video in PowerDirector 365 and Wondershare Filmora X. Now, while both software are high-capable tools, we feel the keyframe-based working on rotation in Filmora is a lot more intuitive and easy to use. The ability to only have number-based rotation within the edit menu is also a positive, as rotating with a swivel like in PowerDirector isn’t always the most accurate.
And lastly, the modern iconography-based design of Wondershare Filmora is a factor to keep in mind, as this increases usability manifolds.
Note: Full Mode in Cyberlink PowerDirector 365 will provide users access to a full-featured video editing tool similar in function to Wondershare Filmora. The other option available is Ad Designer.
Step 2: Now, import media onto the Timeline from the Media Library.
For this guide, we used the pre-existing stock footage in Cyberlink PowerDirector.
Step 3: Now, click on the video file on the Timeline; this will activate the video in the Preview Window. And it will provide you with access to the rotation circle, allowing you to change the orientation of the source file.
EXTRA
Rotation added in the PiP Designer will function as a keyframe-based rotation action. Right-click on the video in the preview window, choose Edit and then Modify to access this menu.
Following this, you can click on the Motion Tab, go into Rotation Settings, and modify the angle with greater precision. In the Preview Window, you will now be able to see the rotating video.
An Easier Way to Crop Video with Wondershare Filmora
Though Cyberlink PowerDirector 365 is a powerful video editing tool, we felt its menus were not as simple to navigate. Accessing the rotate function while available in the forefront, the use of PiP Designer didn’t feel intuitive.
In Wondershare Filmora Video Editor , rotating footage only happens via the Edit Option, and this straightforward approach felt simple. As for those who want to use Keyframes, the integration of this feature right above the Timeline is an appreciated convenience.
This emphasis on quick accessibility is present with almost every function in Filmora, and we believe this to be a significant advantage. The use of modern and unique iconography also increases familiarity, an aspect that will always be welcoming to new and budding creators.
If you do not already have Wondershare Filmora, you can download the software by visiting the official website.
To help you learn how to use the rotate function and show you an example of the easy accessibility in Filmora, here is how you can use the feature to get the output you desire.
For Win 7 or later (64-bit)
For macOS 10.14 or later
Once you have a new project open in Filmora, follow the steps listed below.
Step 1: Import a Media File to edit into your Video Project.
Step 2: Drag the video clip onto the Timeline and then select it with a mouse click to activate further interactions.
Step 3: Choose the Edit Option (marked in Red).
This will bring up the Edit Window in the left-top corner of your screen.
Step 4: Click on the Transform Menu and use the Rotation Slider to edit the orientation.
Having read this stretch of the guide, we believe you may have noticed how Filmora is more user-friendly and accessible due to its menu layout.
BONUS
Click on the Keyframe Button (marked in Green) to access the Keyframe Menu that allows you to set points between which a decided amount of rotation can happen.
The Bottom Line
This marks the end of our guide on how to rotate video in PowerDirector 365 and Wondershare Filmora X. Now, while both software are high-capable tools, we feel the keyframe-based working on rotation in Filmora is a lot more intuitive and easy to use. The ability to only have number-based rotation within the edit menu is also a positive, as rotating with a swivel like in PowerDirector isn’t always the most accurate.
And lastly, the modern iconography-based design of Wondershare Filmora is a factor to keep in mind, as this increases usability manifolds.
This Article Talks in Detail About Why People Look for a Free Title Maker, and 8 Options that Will Benefit Their Work. It Includes Tools Like SEMrush Title Generator, Hubspot Title Generator, and More. Check Out
Do you know what’s more important in a blog post? Yes, you guessed it right, headline. It helps your blog grab attention and encourages people to click through. Additionally, the title is a key factor in how search engines categorize and rank posts. A great blog free title maker might be a handy tool for those who want to boost their site’s traffic.
A headline generator may assist you in creating a compelling and efficient title that will make your blog distinguish itself from others by letting you enter a few essential details. Additionally, exploring ideas might be a terrific approach if you’re feeling stuck. A title generator is unquestionably something you should consider including in the toolkit if you’re signed in marketing and blogging.
8 Best Free Title Maker You Must Try and Put to Use
1. SEMrush Title Generator

While writing and publishing something the first thing that grabs a user’s attention is the title of the post. It must be catchy and good enough for them to read the whole thing. What SEMrush ideas generator does is that it suggests you some catchy and interesting title ideas when you type in and search the same keyword.
You can opt to choose the best among the suggested ones and grab people’s attention and make them read your blog/article. Since it’s a free title generator you need not worry about spending money for title ideas and search for as many topics as you need. You may also look for topic ideas by clicking the “get more content ideas” button that is there on the right side at the bottom.
2. Contentrow Title Generator

Another excellent title intro maker online free is Content Row. It provides specific outcomes when a specific keyword is used. You only have to register with the email ID if you want to discover your keyword’s currently trending titles. You can use this free tool to analyze your headline score as well. Once you’ve chosen the blog title or headline, you can assess the topic’s strength. Additionally, it provides some ideas on which you might base your new headline.
Also, this tool displays hot subjects currently being widely or passionately debated online. A case converter or word counter is also an option. Contentrow Title Generator helps you to generate clickable and catchy blog titles to drive traffic to the articles. Discover unique video ideas that will inspire you and interest your audience. Use the clickbait or linkbait ideas for the content with their title generator to capitalize on readers’ curiosity.
3. Hubspot Title Generator

The HubSpot Title Generator has a lot going for it, not the least because it is free to use. This indicates that using the tool is not dependent upon having a HubSpot account. Here are a few additional reasons you should use it, besides being free. HubSpot Title Generator is one of the most accessible content marketing strategies. Type up to five distinct nouns into the area provided and click “Give Me Blog Ideas.”
Afterward, you can navigate through a week’s generated blog post ideas. All it takes is that. It will only take a few seconds to generate title ideas, and once you have entered the nouns into the generator field, you will be given new ideas to create new posts instantly. Users can get a unique title every week based on the nouns they put. Hubspot doesn’t share copied blog titles, producing unique and plagiarism-free titles.
4. Tweak Your Biz

Tweak your Biz Title Maker. Create catchy headlines for your blog posts and articles. A great title can boost visitor traffic, Facebook Likes, and tweets by 50% or more. An online web-only creative title generator called Tweak Your Biz title generator online free is available to experienced and inexperienced bloggers and social media influencers. It is the free headline maker that provides the two-way service, and it serves as the best headline analyzer and generator.
The target word can be searched as a verb or a noun before the output in the Tweak Your Biz headline maker. Input your subject or topic in the box provided on this innovative title generator and press the “Submit” button. It provides headlines for various topics that are grouped under several categories and gives a variety of headlines to fit the tone of your site. Use this free headline generator to create attention-grabbing headlines for your blog or social media sites. It does not require the installation of any programs, just a web browser, to function.
5. The Hoth

A well-known free online title generator and marketing provider called The HOTH offers a variety of solutions for business owners and marketers. They provide a free blog subject headline generator so you can rapidly develop headlines for your posts to help you obtain the maximum traffic to your article. The HOTH’s headline generator is a fantastic choice if you want more control over the suggestions. It still requires little time to operate and is simple, but it requires more input than many other tools.
You must add a keyword, your audience’s intended goal, a frequent key point, the name of your industry, your target audience, and other information into this tool to generate titles. After that, the program generates ten titles simultaneously, each with options specific to the abovementioned factors. The title generator on the HOTH is still a quick and straightforward approach to developing a list of intriguing title concepts. You can specify your preferred term, target market, and other details to make the headline more suited to your needs.
6. Wix Title Generator

Well, this tool called Wix title generator is no different than others as it comes with a plethora of options. All you got to do is open the website using the above link and enter around 2 main keywords to look for a relevant and catchy title for your blog/article. Put the required keywords and then opt for clicking the button that says, “Get your Title.”
You will be given around 7-8 options for the title of the blog and you can choose whatever feels best for the same. You may also load more options by clicking the button that is there at the bottom of the PC’s screen. Once chosen, you can copy the title and use it however you like being it a free tool to be used as many times as you wish.
7. Small Biz Trends

Well, the Small Biz Trends title generator is a bit different when it comes to generating title ideas for your blog than other tools mentioned here. It’s because when you open the website and type in your topic and click the submit button, you will be given a ton of blog title options. Not just that, the options here will be presented to you category-wise. Isn’t this convenient?
Yes, it is, if you feel the other tools are giving you lesser options or ideas. You can just copy whatever title appeals to you the most and use it however you need to. Also, you may use the option given above the submit button “i.e. Small business trends Thesaurus,” of you wish to opt for generating more ideas.
8. fatjoe

With the help of the well-liked headline generator from FatJoe, users may quickly come up with over 100 ideas for blog posts. Have trouble coming to a title for your most recent blog post? There are always options available here. You can enter the focus keyword or selected subject to get the best clickable and SEO-friendly titles.
In addition to providing one of the best headline creation tools for free, Fat Joe is a link-building business. One can create more than 100 titles and even the best headline ideas. You can even create new topics for generating other topics.
Conclusion
Online free title creator can create catchy headlines that increase social media engagement, drive website traffic, and accomplish various other goals. Several automated solutions will handle your labor-intensive tasks, so you don’t have to rely only on your creativity to develop article titles. With the correct tools, you can improve your SEO content and grow your business without going over budget by bringing in more customers and increasing conversions.
Free Download For Win 7 or later(64-bit)
Free Download For macOS 10.14 or later
Free Download For macOS 10.14 or later
15 Best Free MP4 Video Rotators [Windows,Mac, Android, iPhone & Online
Have you ever encountered a problem where you saved a video in the wrong orientation? So you ask yourself what’s the best tool to rotate. There are tools that help to flip videos recorded so that you don’t get frustrated while you watch them later on your pc or phone. So why don’t you take a look at the best video rotators that are available for Android, iOs, Windows, Mac, and online tools?
Best MP4 Video Rotators to Rotate MP4 Video on Windows and Mac - Filmroa Video Editor
Filmora Video Editor allows you to rotate your video to any angle. You can also zoom in and crop out the parts of the video that you don’t want to see. It also includes predefined aspect ratios such as 16:9, 9:16, 4:5, 1:1, and others to help you quickly discover the ideal aspect ratio for YouTube, Instagram, and other sites. Let’s look at how to modify the orientation of a video in Filmora.
For Win 7 or later (64-bit)
For macOS 10.14 or later
How to change the video orientation in Filmora
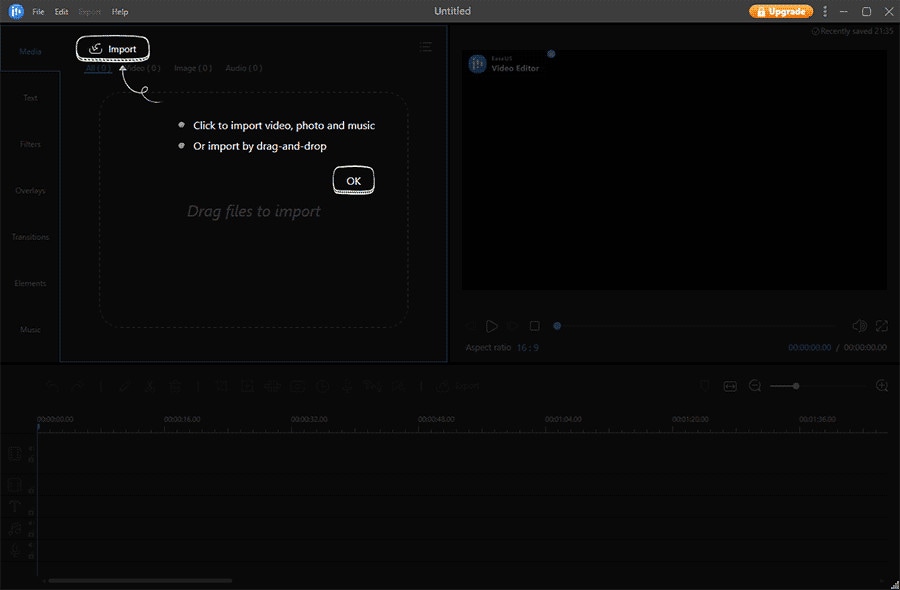
Step 1:Import the video file into Filmora, and then drag it to the timeline.
Step 2: To enter the video editing panel, double-click the video clip in the timeline. Locate the “Rotate” option under the “Transform” menu. You can drag the slider or enter a specific number to adjust the rotation value. You can rotate up to 360 degrees. When you enter “90” in the box, the video clip will be rotated 90 degrees.
By dragging the “Scale” slider, you can make the full image screen, or you can directly adjust its position, size, shape, etc., in the Viewer panel.
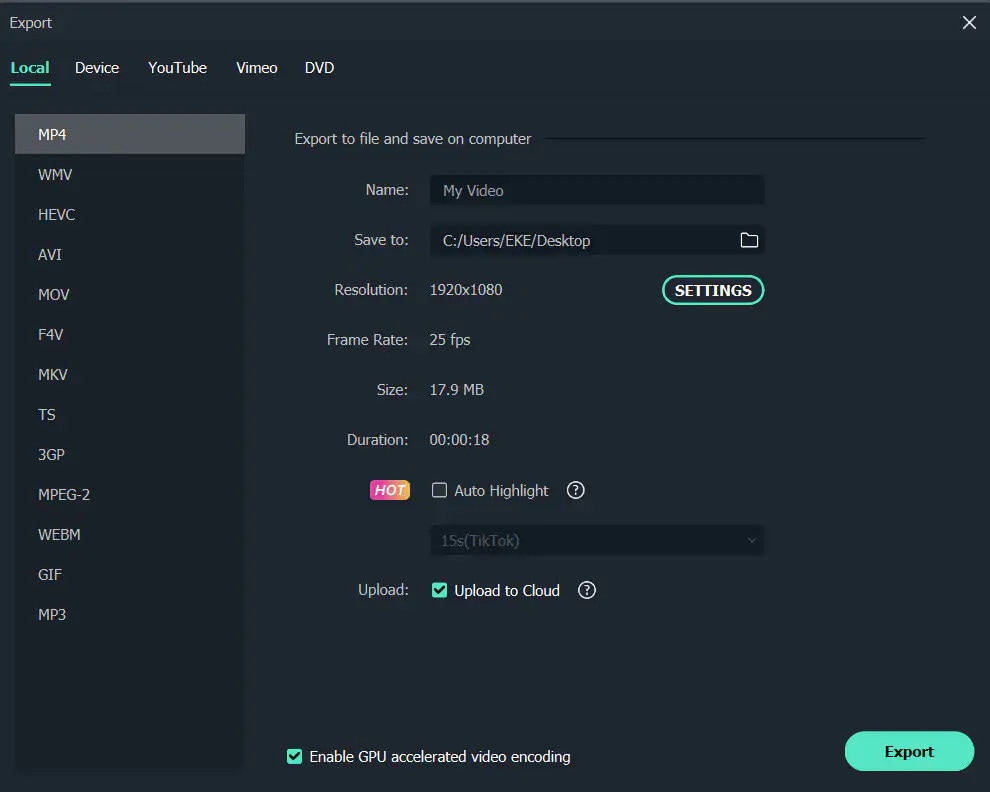
Step 3: After you are satisfied, click the export button. You can change the format here, or you can upload the file to YouTube.
Top 3 Free MP4 Video Rotators on Windows
Looking for the best free video rotator?
If you are looking for a free video rotator for windows, then this article has got you covered. A list of the top 3 free video rotators for windows has been listed.
- VSDC Free Video Editor

It is a highly functional video editing suite with easy controls. It provides anyone who is a beginner to easily access and edit the video easily.
It helps you rotate the videos in increments of 90 degrees, be it clockwise or anticlockwise )
VSDC is a free video editor with non-linear editing capabilities. Users may swiftly convert video and audio files from one format to another with VSDC. A built-in disk burning tool for DVDs is also included in the software. This free program, designed for educational purposes, can be used by businesses or individuals.
VSDC Free Video Editor features
- Built-In DVD Burning Tool
- Colour Blending And Filters
- Specific Multimedia Devices Creation
- Desktop Video Capture
- Export To Social Networking Sites
- Masking
- Non-Linear Video Editing
- Subpixel Accuracy
- Supports Popular Formats
- Video File Converter
Pros
- It’s completely free.
- There is no watermark.
- There are numerous free video editing programs available.
- Support a wide range of file formats
Cons
There isn’t a macOS version available.
Take a severe learning curve into consideration.
There are numerous premium-only features.
The timeline isn’t the same as most NLE editing software.
- Windows Movie Maker
The most well-known video rotator and editor are probably Windows Movie Maker. Most of us who grew up with Microsoft’s various operating systems have had access to it because it comes as a free download with most Microsoft products. It can handle a wide range of files and is generally simple to use. Adding features like sound, music, special effects, or even speeding up the video is simple, and you’ll love the variety of skins available.
For beginners, Windows Video Maker is ideal. It is available for free on Windows PCs and includes basic capabilities and workflow aspects found in professional video editing systems. Its user-friendly interface resembles a simplified version of a video editor timeline and is simple enough for even inexperienced editors to understand.
Features of Windows Movie Maker
- Customization Tool’s title
- Auto Movie Options
- Credit Customization Tool
- Special Effects Options
- Overlays for Transitions
Pros:
- Various video editing functions;
- A variety of output possibilities
Cons:
- Many different versions of the same product;
- No longer included in the Windows operating system.
3.EaseUS Video Editor
EaseUS Video Editor is one of the few most popular video rotators we have today. Its video editing provides tools that can change the video orientation by 90 degrees anticlockwise and clockwise, which can flip vertically and horizontally.
In terms of videos, adding great filters, sound, music, subtitles and other elements to have a great video output can be achieved using the EaseUS. Moreover, it accepts video formats and can convert files to MP4 and other great features.
Features of EaseUS Video Editor
- Can easily trim, cut, split, merge, rotate, and mix video clips.
- Ability to apply stylish video effects
- Can add or remove the watermark and reduce background or wind noise from a video.
Pros:
- User-friendly interface, perfect for beginners
- Easily trim, cut, split, merge, rotate, mix video clips
- A full range of free visual and audio effects
- Change of contrast, exposure, brightness, and other video aspects
- Use the voiceover function to add your comments to the video
Cons:
- The software has no version for macOS
Top 3 Free MP4 Video Rotators on Mac
- iMovie
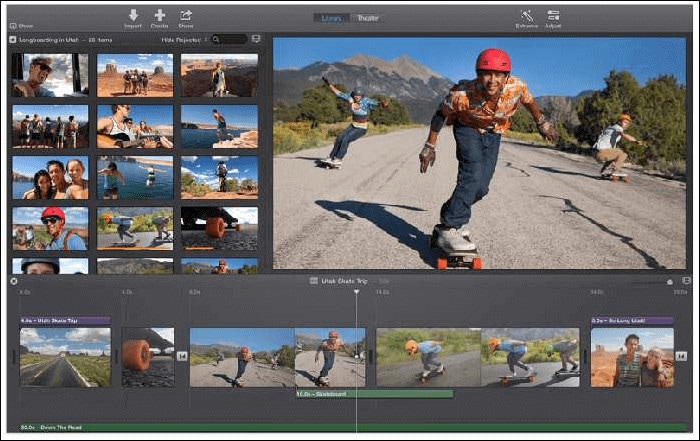
The iMovie for Mac users is an exceptional video rotator. You can turn any video or movie you may have into an amazing masterpiece with more features due to the special after-effects it has. Simple application to use and navigate easily, although when importing video takes a while at certain times.
Features of the iMovie include
- Full range of options to modify
- Ability to enhance colour settings
- Easily crop and edit video clips ease
- Ability to change the speed of clips.
Pros:
- Nice interface;
- The function is to create fun Movie Trailers.
Cons:
- Supports only a few video formats;
- Pre-processing and import trans-coding can be time-consuming.
- Movavi Video Editor
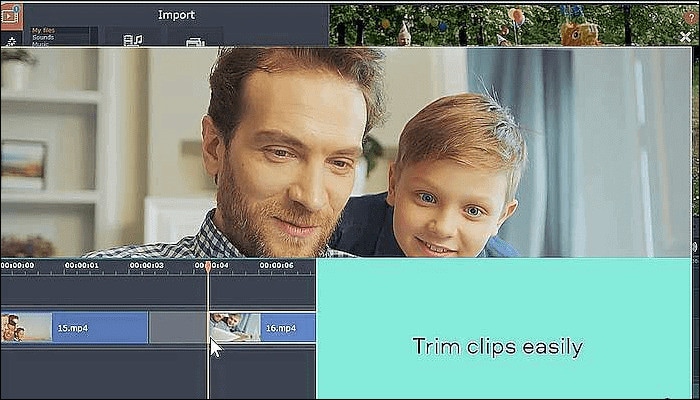
Movavi has a free version that is easy to use, especially for beginners. It allows you to add titles, filters, transitions, and special effects to your videos and photographs to make attractive movies. You can use the animation to smoothly move things around the screen in your film. On the multi-track timeline, you can add as many tracks as you wish. From the expanded built-in collection, you can get more example video clips, stickers, and audio tracks.
Features of Movavi Video Editor
- You can upload files and photographs in almost any format.
- To make videos automatically, use the Montage Wizard.
- Transition Wizard allows you to quickly put together slideshows.
- Enhance image quality by cutting, cropping, and rotating videos on the timeline.
- Apply artistic filters, and make transitions between portions as smooth as possible.
- Create animated headlines, stickers, callouts, and video overlays:
Pros:
- It’s appropriate for newcomers and casual users alike.
- A number of video formats are supported, including.mov (QuickTime)
- Chroma Key and Slow Motion are examples of special effects.
Cons
- Only the premium version supports the advanced features.
- It uses the basic colour grading tool
- QuickTime Player
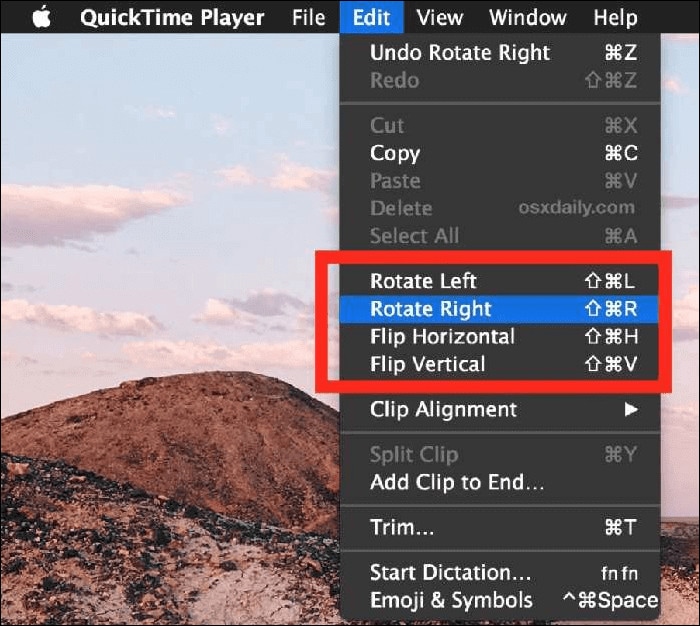
The key advantage of Apple’s QuickTime is that it comes pre-installed on your Mac’s macOS operating system. It’s powerful enough to rotate your clip, yet it’s simple enough for beginners to do. iTunes files can be played and edited with QuickTime. After rotation, it exports a new video file, leaving the old clip on the Mac. The output video will be compressed slightly, resulting in a smaller rotational video file than the original.
Features of QuickTime Player
- Anything can be recorded, including video, audio, and the screen.
- Cropping, audio detachment, combining, and rotation are all simple video editing techniques.
- From 4K to 480p video compression
- Quickly share your video: directly upload videos to YouTube
Pros:
- With macOS, it comes pre-installed.
- Work with iTunes files Streaming video player with no configuration
Cons:
- Only QuickTime Pro 7 unlocks the editing feature.
- There will be no more Windows versions.
- It isn’t compatible with standard subtitle files.
Top 3 Free MP4 Video Rotators on Android
When we use a smartphone to capture a video or download one from a website, we occasionally discover that the video has been inverted. As a result, we’ll require a video rotator app to correct the problem. On the market, there are many different sorts of tools for various platforms. However, you may have discovered that separating the wheat from the chaff can be difficult at times. To save you time, I’ve compiled a list of 3 video rotator applications for Android
- VivaVideo
VivaVideo is one of the top movie producers and free video rotators for Android devices as a media editor. This application allows you to alter the orientation of your videos. Aside from rotating videos, this software also includes cropping, combining, cutting, and other editing features. “The best video editor software is VivaVideo - Video Maker App,” an Android expert previously said. This program is a video producer as well as an editor.
Features of VivaVideo
- It allows you to add music to videos.
- Combine videos clips into one video
- Can apply video effects.
- After you’ve finished editing your videos, you may save and share them on YouTube and TikTok! To rotate video, use this program!
Pros
- It has an In-app camera with live effects previews for capturing videos.
- More than 60 effects to choose from with additional downloadable effects.
- Enhance the videos using themes.
- Ability to Merge videos and create montages with storyboarding features
- Edit frames within a video
Cons
- There is no negative review to say about this app
2.Google Photos
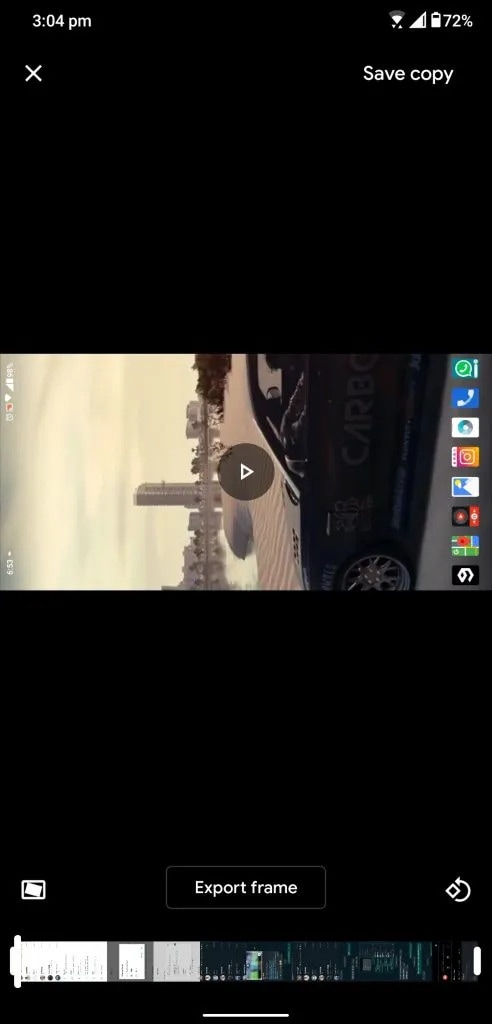
This app may already be installed on your smartphone, but you are unaware of its full potential. This program includes a built-in picture and video editor in addition to backing up your photos. This program includes three essential video editing tools that are extremely basic and easy to use.
The first is to stabilize the video; if your video is unsteady, you can use this option in Google Photos to stabilize it. You may also use the timeline below the video to cut the video. If you mistakenly captured the video in the wrong orientation, there is a tool to rotate it.
Features of Google Photos
- You can modify photographs and videos in Google Photos.
- On Google Photos, make a collage or a movie.
- Recover photos or videos that were recently erased.
- Clear off some space on Google Photos…
- Place photos in the Archive.
Pros
Google Images automatically backs up all of your device’s photos and videos.
Despite its many advantages, the reason I choose Google Photos is that it helps me save space on my smartphone.
The original quality of images stored in Google Photos is really high. Photos and videos are saved in the same resolution as when they were taken.
Over time, Google has improved the Google Photos interface, and it now incorporates AI to provide consumers with even better performance.
Cons
There aren’t many effects, and there aren’t any other editing tools.
The lack of a password-protection option in Google Photos is annoying. Some photos are private, and you may not wish to share them with others.
Users of Google Photos will no longer have limitless storage.
3Adobe Rush
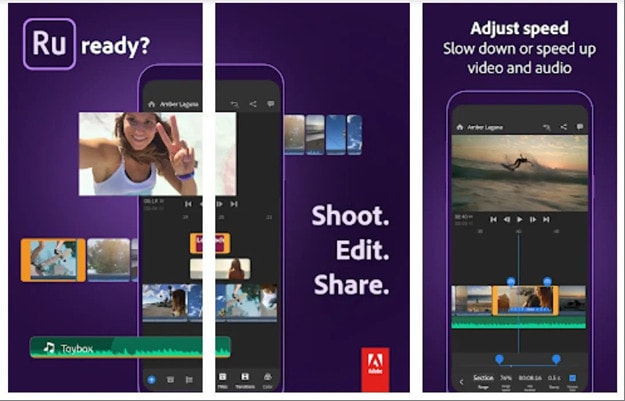
Adobe Rush is a new video editor that Adobe released via a partnership with Samsung’s latest flagship smartphone. This app is a simple yet powerful tool for editing videos on the go, on your smartphone.
This app comes with some powerful tools which you find on some high-end video editing apps. You get a timeline interface to edit your videos perfectly, and you get some music recommendations right into the app.
Features Of Adobe Rush
- In the timeline, you can make changes to your video.
- Audio can be added and refined.
- Change the colour, size, and position of the video.
- Make a title.
- Add transitions, pan and zoom effects, and reframe your clips automatically.
- Change the clip’s attributes.
- Change your video’s aspect ratio.
- Create the illusion of a picture-in-picture effect.
Pros
- It has a user-friendly UI that is responsive and snappy.
- It’s easy to use and provides helpful advice for newcomers.
- It enables Adobe users to quickly and easily produce stunning videos that are customized to their preferences.
- When compared to its competitors, exporting files is a breeze.
- Unlike most of its competitors, it comes with good colour and title tools.
- YouTube, Facebook, Vimeo, Snapchat, Instagram, and Twitter are just a few of the social media channels where the finished files can be simply shared.
- It synchronizes projects between desktop and mobile devices, making them more accessible.
Cons
- When compared to its competitors, it is a little costly.
- It renders projects slowly and only supports three transitions.
- The app does not have storyboard templates and cannot specify the exact structure for output files.
- It only comes with a few video and audio editing capabilities.
- Many standard video effects are missing.
Top 3 Free MP4 Video Rotators on iPhone
1.Splice

Trimming, cropping, effects, titles, speed adjustments, animation, transitions, and music are all available in this well-known video editor, which has a cultish following of dedicated Splicers.
Splice’s music library is one of its strongest assets. It offers a large selection of free music and sound effects to layer over your video, as well as the ability to sync your movie to the beat of your soundtrack.
Features of Splice
Clips should be cropped and trimmed to focus on the highlights.
With an Audio Library and iTunes Integration, you may add music to your videos.
To smooth transitions between clips and images, use transitions.
Enhance videos with effects.
Pros:
- Developed by GoPro, award-winning, highly regarded.
Cons:
- Only available on iOS devices.
2. Clips

It’s easy to miss pre-loaded apps like Apple’s Clips, but this video editing tool has lots of impressive features to enjoy, thanks to the weight of the tech giant’s greatest brains behind it. Take, for example, their live tiles setting. You can use this to generate animated captions and titles that appear as you speak.
To liven things up, you may add animated emojis and backgrounds, and music tracks dynamically sync to the length of your video.
Features of Clips
- Ability to generate animated captions
- Full access to Animated emojis and backgrounds
- Ability to have your music sync to your videos
Pros:
- Simple to use, unique features, and Apple’s support.
Cons:
- It’s only for iOS devices (obviously! ), and it has trouble with a big number of clips.
3. Quik

You may apply transitions and effects to up to 200 photographs and video clips from your photo library or GoPro Plus with this free software. You may not only crop, zoom, and rotate photos and video clips, but you can also customize them with 26 different themes, fonts, effects, and artwork.
You may make HD 1080p or 720p films for social sharing in cinema, square, or portrait formats, and you can store your draft creations for up to seven days.
Features of Quik
- Everything that is available for free.
- There are no limits to the number of mural events.
- Editing is unrestricted.
- There are now a total of 25 more photo and video filters.
Pros:
- Tons of features, including access to 100+ free songs,
- Flashbacks and QuikStories, which make videos based on your most recent footage,
- syncs footage to the beat of your soundtrack, and AI editing help.
Cons:
- Limited control and no trimming option; customers have claimed that it is occasionally glitchy.
Top 3 Free MP4 Video Rotators Online
1.Online Video Cutter
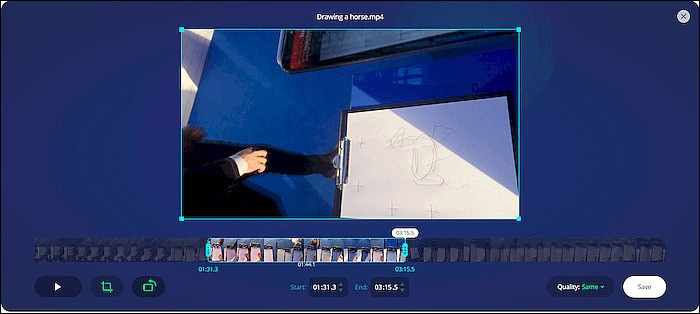
This web tool comes in helpful when you need to rapidly edit a small video file. It is not necessary to install it; you may use it right from your browser. The clip can only be rotated 90, 180, or 270 degrees. It’ll come in handy, especially if you’ve closed the video in portrait mode and want to watch it on a big screen. The service’s provider says that the files will be automatically erased from the servers a few hours after you accomplish your task, resulting in a high level of security.
Features of Online Video cutter.
- It Supports Any Video Format. …
- Completely Online for you to access
- Additional Settings to make more edits to videos
- Easy to use, User-friendly interface.
Pros:
It has a very simple user interface.
You do not need to pay for a license to utilize it.
Almost every video format is supported.
Cons:
Only suitable for little clips
Performing simply the most basic functions, such as rotating and cropping
2.EzGif
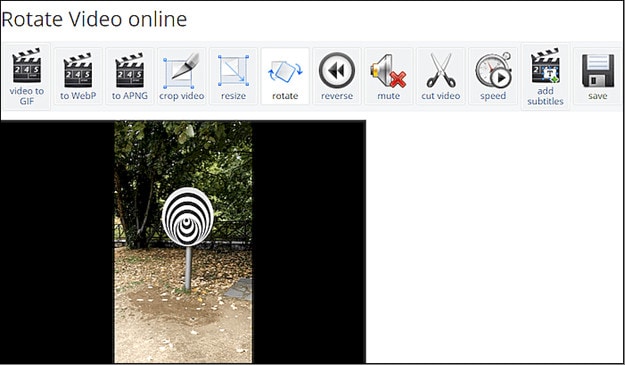
This unique internet tool not only creates animated GIFs but can also rotate video. You simply choose the clip from your local folder. However, the file’s maximum size is limited to 100MB. A basic tool for rotating the video through 90, 180, and 270 degrees. You can also vertically and horizontally flip the video before exporting it in a different format and encoding.
Features of EzGif
- A simple user interface to find your way around the website.
- Ability to do resizing and rotating of videos and images.
- Capable of video conversions and editing
Pros:
- Many video formats are supported, including MP4, WebM, AVI, MPEG, FLV, MOV, and 3GP.
- The rotation procedure is quick and simple to utilize.
- After rotating, provide a preview function.
Cons:
- The maximum file size is 100 megabytes.
- There are no filters or transitions, and only basic editing functions are available.
3.Videorotate
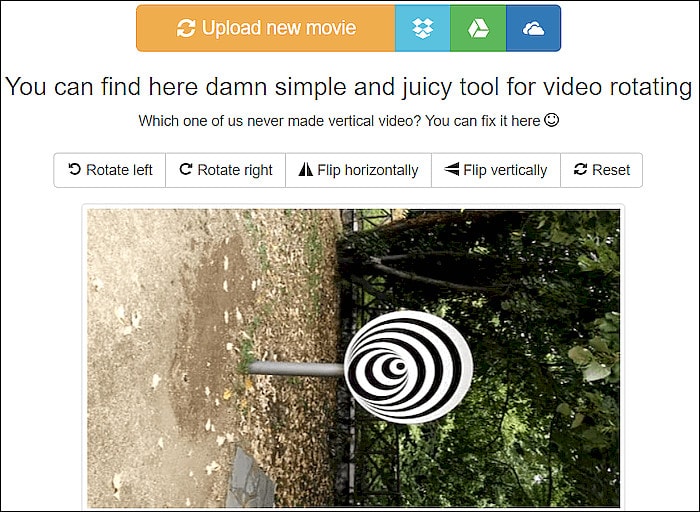
- This is a free online video rotator that is simple and quick to use. You can upload your video from a local folder or import a recorded clip from major cloud services like Dropbox, Google Drive, and One Drive, just like the other online services (there are buttons for each of them). You can flip the clip or rotate it left and right. Other video capabilities available on the site include cropping, stabilizing, and slicing.
Features of Videorotate
- Ability to crop, stabilize and slice videos.
Pros:
- Simple and straightforward to use
- Clips from your Dropbox, Google Drive, and OneDrive accounts can be uploaded.
- A specific “Reset” button is available.
Cons:
- For basic operations, a service for newcomers is available.
- Only a few video file formats are supported.
FAQs about Video Rotator
- What is the best way to rotate a video?
Use an easy-to-use video editing program. It’s easy to rotate a video, even if you’ve never edited one before. You can also use some media players.
- How do I rotate a video permanently?
In this guide, we will show you exactly how to rotate video in Windows with EaseUS Video Editor and save it permanently.
3.How can I rotate a video for free on the internet?
It’s simple to rotate a video online, and there are various services that offer free online video rotators.
- Videorotate
- Ezgif
- Video cutter on the internet
- How do I mirror a video on the internet?
The websites that support video rotation also offer the ability to “flip” the video vertically and horizontally. You’ll have “mirroring” frames in this manner as if you’re filming your pals in the mirror.
For macOS 10.14 or later
How to change the video orientation in Filmora
Step 1:Import the video file into Filmora, and then drag it to the timeline.
Step 2: To enter the video editing panel, double-click the video clip in the timeline. Locate the “Rotate” option under the “Transform” menu. You can drag the slider or enter a specific number to adjust the rotation value. You can rotate up to 360 degrees. When you enter “90” in the box, the video clip will be rotated 90 degrees.
By dragging the “Scale” slider, you can make the full image screen, or you can directly adjust its position, size, shape, etc., in the Viewer panel.
Step 3: After you are satisfied, click the export button. You can change the format here, or you can upload the file to YouTube.
Top 3 Free MP4 Video Rotators on Windows
Looking for the best free video rotator?
If you are looking for a free video rotator for windows, then this article has got you covered. A list of the top 3 free video rotators for windows has been listed.
- VSDC Free Video Editor
It is a highly functional video editing suite with easy controls. It provides anyone who is a beginner to easily access and edit the video easily.
It helps you rotate the videos in increments of 90 degrees, be it clockwise or anticlockwise )
VSDC is a free video editor with non-linear editing capabilities. Users may swiftly convert video and audio files from one format to another with VSDC. A built-in disk burning tool for DVDs is also included in the software. This free program, designed for educational purposes, can be used by businesses or individuals.
VSDC Free Video Editor features
- Built-In DVD Burning Tool
- Colour Blending And Filters
- Specific Multimedia Devices Creation
- Desktop Video Capture
- Export To Social Networking Sites
- Masking
- Non-Linear Video Editing
- Subpixel Accuracy
- Supports Popular Formats
- Video File Converter
Pros
- It’s completely free.
- There is no watermark.
- There are numerous free video editing programs available.
- Support a wide range of file formats
Cons
There isn’t a macOS version available.
Take a severe learning curve into consideration.
There are numerous premium-only features.
The timeline isn’t the same as most NLE editing software.
- Windows Movie Maker
The most well-known video rotator and editor are probably Windows Movie Maker. Most of us who grew up with Microsoft’s various operating systems have had access to it because it comes as a free download with most Microsoft products. It can handle a wide range of files and is generally simple to use. Adding features like sound, music, special effects, or even speeding up the video is simple, and you’ll love the variety of skins available.
For beginners, Windows Video Maker is ideal. It is available for free on Windows PCs and includes basic capabilities and workflow aspects found in professional video editing systems. Its user-friendly interface resembles a simplified version of a video editor timeline and is simple enough for even inexperienced editors to understand.
Features of Windows Movie Maker
- Customization Tool’s title
- Auto Movie Options
- Credit Customization Tool
- Special Effects Options
- Overlays for Transitions
Pros:
- Various video editing functions;
- A variety of output possibilities
Cons:
- Many different versions of the same product;
- No longer included in the Windows operating system.
3.EaseUS Video Editor
EaseUS Video Editor is one of the few most popular video rotators we have today. Its video editing provides tools that can change the video orientation by 90 degrees anticlockwise and clockwise, which can flip vertically and horizontally.
In terms of videos, adding great filters, sound, music, subtitles and other elements to have a great video output can be achieved using the EaseUS. Moreover, it accepts video formats and can convert files to MP4 and other great features.
Features of EaseUS Video Editor
- Can easily trim, cut, split, merge, rotate, and mix video clips.
- Ability to apply stylish video effects
- Can add or remove the watermark and reduce background or wind noise from a video.
Pros:
- User-friendly interface, perfect for beginners
- Easily trim, cut, split, merge, rotate, mix video clips
- A full range of free visual and audio effects
- Change of contrast, exposure, brightness, and other video aspects
- Use the voiceover function to add your comments to the video
Cons:
- The software has no version for macOS
Top 3 Free MP4 Video Rotators on Mac
- iMovie
The iMovie for Mac users is an exceptional video rotator. You can turn any video or movie you may have into an amazing masterpiece with more features due to the special after-effects it has. Simple application to use and navigate easily, although when importing video takes a while at certain times.
Features of the iMovie include
- Full range of options to modify
- Ability to enhance colour settings
- Easily crop and edit video clips ease
- Ability to change the speed of clips.
Pros:
- Nice interface;
- The function is to create fun Movie Trailers.
Cons:
- Supports only a few video formats;
- Pre-processing and import trans-coding can be time-consuming.
- Movavi Video Editor
Movavi has a free version that is easy to use, especially for beginners. It allows you to add titles, filters, transitions, and special effects to your videos and photographs to make attractive movies. You can use the animation to smoothly move things around the screen in your film. On the multi-track timeline, you can add as many tracks as you wish. From the expanded built-in collection, you can get more example video clips, stickers, and audio tracks.
Features of Movavi Video Editor
- You can upload files and photographs in almost any format.
- To make videos automatically, use the Montage Wizard.
- Transition Wizard allows you to quickly put together slideshows.
- Enhance image quality by cutting, cropping, and rotating videos on the timeline.
- Apply artistic filters, and make transitions between portions as smooth as possible.
- Create animated headlines, stickers, callouts, and video overlays:
Pros:
- It’s appropriate for newcomers and casual users alike.
- A number of video formats are supported, including.mov (QuickTime)
- Chroma Key and Slow Motion are examples of special effects.
Cons
- Only the premium version supports the advanced features.
- It uses the basic colour grading tool
- QuickTime Player
The key advantage of Apple’s QuickTime is that it comes pre-installed on your Mac’s macOS operating system. It’s powerful enough to rotate your clip, yet it’s simple enough for beginners to do. iTunes files can be played and edited with QuickTime. After rotation, it exports a new video file, leaving the old clip on the Mac. The output video will be compressed slightly, resulting in a smaller rotational video file than the original.
Features of QuickTime Player
- Anything can be recorded, including video, audio, and the screen.
- Cropping, audio detachment, combining, and rotation are all simple video editing techniques.
- From 4K to 480p video compression
- Quickly share your video: directly upload videos to YouTube
Pros:
- With macOS, it comes pre-installed.
- Work with iTunes files Streaming video player with no configuration
Cons:
- Only QuickTime Pro 7 unlocks the editing feature.
- There will be no more Windows versions.
- It isn’t compatible with standard subtitle files.
Top 3 Free MP4 Video Rotators on Android
When we use a smartphone to capture a video or download one from a website, we occasionally discover that the video has been inverted. As a result, we’ll require a video rotator app to correct the problem. On the market, there are many different sorts of tools for various platforms. However, you may have discovered that separating the wheat from the chaff can be difficult at times. To save you time, I’ve compiled a list of 3 video rotator applications for Android
- VivaVideo
VivaVideo is one of the top movie producers and free video rotators for Android devices as a media editor. This application allows you to alter the orientation of your videos. Aside from rotating videos, this software also includes cropping, combining, cutting, and other editing features. “The best video editor software is VivaVideo - Video Maker App,” an Android expert previously said. This program is a video producer as well as an editor.
Features of VivaVideo
- It allows you to add music to videos.
- Combine videos clips into one video
- Can apply video effects.
- After you’ve finished editing your videos, you may save and share them on YouTube and TikTok! To rotate video, use this program!
Pros
- It has an In-app camera with live effects previews for capturing videos.
- More than 60 effects to choose from with additional downloadable effects.
- Enhance the videos using themes.
- Ability to Merge videos and create montages with storyboarding features
- Edit frames within a video
Cons
- There is no negative review to say about this app
2.Google Photos
This app may already be installed on your smartphone, but you are unaware of its full potential. This program includes a built-in picture and video editor in addition to backing up your photos. This program includes three essential video editing tools that are extremely basic and easy to use.
The first is to stabilize the video; if your video is unsteady, you can use this option in Google Photos to stabilize it. You may also use the timeline below the video to cut the video. If you mistakenly captured the video in the wrong orientation, there is a tool to rotate it.
Features of Google Photos
- You can modify photographs and videos in Google Photos.
- On Google Photos, make a collage or a movie.
- Recover photos or videos that were recently erased.
- Clear off some space on Google Photos…
- Place photos in the Archive.
Pros
Google Images automatically backs up all of your device’s photos and videos.
Despite its many advantages, the reason I choose Google Photos is that it helps me save space on my smartphone.
The original quality of images stored in Google Photos is really high. Photos and videos are saved in the same resolution as when they were taken.
Over time, Google has improved the Google Photos interface, and it now incorporates AI to provide consumers with even better performance.
Cons
There aren’t many effects, and there aren’t any other editing tools.
The lack of a password-protection option in Google Photos is annoying. Some photos are private, and you may not wish to share them with others.
Users of Google Photos will no longer have limitless storage.
3Adobe Rush
Adobe Rush is a new video editor that Adobe released via a partnership with Samsung’s latest flagship smartphone. This app is a simple yet powerful tool for editing videos on the go, on your smartphone.
This app comes with some powerful tools which you find on some high-end video editing apps. You get a timeline interface to edit your videos perfectly, and you get some music recommendations right into the app.
Features Of Adobe Rush
- In the timeline, you can make changes to your video.
- Audio can be added and refined.
- Change the colour, size, and position of the video.
- Make a title.
- Add transitions, pan and zoom effects, and reframe your clips automatically.
- Change the clip’s attributes.
- Change your video’s aspect ratio.
- Create the illusion of a picture-in-picture effect.
Pros
- It has a user-friendly UI that is responsive and snappy.
- It’s easy to use and provides helpful advice for newcomers.
- It enables Adobe users to quickly and easily produce stunning videos that are customized to their preferences.
- When compared to its competitors, exporting files is a breeze.
- Unlike most of its competitors, it comes with good colour and title tools.
- YouTube, Facebook, Vimeo, Snapchat, Instagram, and Twitter are just a few of the social media channels where the finished files can be simply shared.
- It synchronizes projects between desktop and mobile devices, making them more accessible.
Cons
- When compared to its competitors, it is a little costly.
- It renders projects slowly and only supports three transitions.
- The app does not have storyboard templates and cannot specify the exact structure for output files.
- It only comes with a few video and audio editing capabilities.
- Many standard video effects are missing.
Top 3 Free MP4 Video Rotators on iPhone
1.Splice
Trimming, cropping, effects, titles, speed adjustments, animation, transitions, and music are all available in this well-known video editor, which has a cultish following of dedicated Splicers.
Splice’s music library is one of its strongest assets. It offers a large selection of free music and sound effects to layer over your video, as well as the ability to sync your movie to the beat of your soundtrack.
Features of Splice
Clips should be cropped and trimmed to focus on the highlights.
With an Audio Library and iTunes Integration, you may add music to your videos.
To smooth transitions between clips and images, use transitions.
Enhance videos with effects.
Pros:
- Developed by GoPro, award-winning, highly regarded.
Cons:
- Only available on iOS devices.
2. Clips
It’s easy to miss pre-loaded apps like Apple’s Clips, but this video editing tool has lots of impressive features to enjoy, thanks to the weight of the tech giant’s greatest brains behind it. Take, for example, their live tiles setting. You can use this to generate animated captions and titles that appear as you speak.
To liven things up, you may add animated emojis and backgrounds, and music tracks dynamically sync to the length of your video.
Features of Clips
- Ability to generate animated captions
- Full access to Animated emojis and backgrounds
- Ability to have your music sync to your videos
Pros:
- Simple to use, unique features, and Apple’s support.
Cons:
- It’s only for iOS devices (obviously! ), and it has trouble with a big number of clips.
3. Quik
You may apply transitions and effects to up to 200 photographs and video clips from your photo library or GoPro Plus with this free software. You may not only crop, zoom, and rotate photos and video clips, but you can also customize them with 26 different themes, fonts, effects, and artwork.
You may make HD 1080p or 720p films for social sharing in cinema, square, or portrait formats, and you can store your draft creations for up to seven days.
Features of Quik
- Everything that is available for free.
- There are no limits to the number of mural events.
- Editing is unrestricted.
- There are now a total of 25 more photo and video filters.
Pros:
- Tons of features, including access to 100+ free songs,
- Flashbacks and QuikStories, which make videos based on your most recent footage,
- syncs footage to the beat of your soundtrack, and AI editing help.
Cons:
- Limited control and no trimming option; customers have claimed that it is occasionally glitchy.
Top 3 Free MP4 Video Rotators Online
1.Online Video Cutter
This web tool comes in helpful when you need to rapidly edit a small video file. It is not necessary to install it; you may use it right from your browser. The clip can only be rotated 90, 180, or 270 degrees. It’ll come in handy, especially if you’ve closed the video in portrait mode and want to watch it on a big screen. The service’s provider says that the files will be automatically erased from the servers a few hours after you accomplish your task, resulting in a high level of security.
Features of Online Video cutter.
- It Supports Any Video Format. …
- Completely Online for you to access
- Additional Settings to make more edits to videos
- Easy to use, User-friendly interface.
Pros:
It has a very simple user interface.
You do not need to pay for a license to utilize it.
Almost every video format is supported.
Cons:
Only suitable for little clips
Performing simply the most basic functions, such as rotating and cropping
2.EzGif
This unique internet tool not only creates animated GIFs but can also rotate video. You simply choose the clip from your local folder. However, the file’s maximum size is limited to 100MB. A basic tool for rotating the video through 90, 180, and 270 degrees. You can also vertically and horizontally flip the video before exporting it in a different format and encoding.
Features of EzGif
- A simple user interface to find your way around the website.
- Ability to do resizing and rotating of videos and images.
- Capable of video conversions and editing
Pros:
- Many video formats are supported, including MP4, WebM, AVI, MPEG, FLV, MOV, and 3GP.
- The rotation procedure is quick and simple to utilize.
- After rotating, provide a preview function.
Cons:
- The maximum file size is 100 megabytes.
- There are no filters or transitions, and only basic editing functions are available.
3.Videorotate
- This is a free online video rotator that is simple and quick to use. You can upload your video from a local folder or import a recorded clip from major cloud services like Dropbox, Google Drive, and One Drive, just like the other online services (there are buttons for each of them). You can flip the clip or rotate it left and right. Other video capabilities available on the site include cropping, stabilizing, and slicing.
Features of Videorotate
- Ability to crop, stabilize and slice videos.
Pros:
- Simple and straightforward to use
- Clips from your Dropbox, Google Drive, and OneDrive accounts can be uploaded.
- A specific “Reset” button is available.
Cons:
- For basic operations, a service for newcomers is available.
- Only a few video file formats are supported.
FAQs about Video Rotator
- What is the best way to rotate a video?
Use an easy-to-use video editing program. It’s easy to rotate a video, even if you’ve never edited one before. You can also use some media players.
- How do I rotate a video permanently?
In this guide, we will show you exactly how to rotate video in Windows with EaseUS Video Editor and save it permanently.
3.How can I rotate a video for free on the internet?
It’s simple to rotate a video online, and there are various services that offer free online video rotators.
- Videorotate
- Ezgif
- Video cutter on the internet
- How do I mirror a video on the internet?
The websites that support video rotation also offer the ability to “flip” the video vertically and horizontally. You’ll have “mirroring” frames in this manner as if you’re filming your pals in the mirror.
Also read:
- New In 2024, Recording Video in Slow Motion Some Considerable Points
- New 2024 Approved Shotcut Video Editor Review
- Updated 2024 Approved Change Background Color in After Effects
- New What Is the Best FPS for YouTube Videos for 2024
- In 2024, How To Make Ninja Jump Effect
- Updated How to Convert SRT to DOCX
- New Top Ever Ways Make Tiktok Slideshow Solved for 2024
- New In 2024, How To Change Text Color In Premiere Pro
- New In 2024, Top 7 Easy Ways to Convert a Video to a GIF Online
- Updated In 2024, Windows Movie Maker Review
- Want to Immediately Know Something About Discord GIF, In 2024
- New 2024 Approved Step-by-Step Guide to Storyboard
- New To Determine or Change the Video Aspect Ratio Online. Use a Ratio Calculator to Calculate Pixel Dimensions and Aspect Ratios of Images or Videos
- In 2024, This Article Aim to Teach You How to Make a Night to Day Effect Video with Filmora. Follow the Steps to Figure It Out
- Updated Is Augmented Reality Conferencing the Future of Workplace Collaboration, In 2024
- Updated Do You Know What Is Motion Blur in Fortnite? Read This Article to Find Out How to Apply Motion Blur in Fortnite Efficiently and with Ease
- 2024 Approved If You Are a Free Video Editor Being a Windows User, VSDC Free Video Editor Is a Great Choice. But Is It the Best Video Editor You Should Use? Find Out From Our VSDC Free Video Editor Review
- Updated 2024 Approved Want to Speed up Your Video to Create Short-Duration Instagram Reels? Here Is How You Can Change the Speed of Pre-Recorded and Live Videos on Instagram Reels
- Repeated Text Animation Tutorial in Filmora for 2024
- Updated Effective 10 Ways to Convert YouTube to MOV at Ease PC & Online
- New Learning The Details Of How To Replace Sky in Lightroom for 2024
- Tactics to Create Transparent Image in Minimal Steps for 2024
- 20 Must-Have Graduation Songs
- In 2024, An Ultimate Guide to Flexclip Online Trimmer
- Updated How To Create 3D Text In Video
- How Did AI Video Games Act More Human Than Human?
- Color Finale Is a Color Grading Plugin for Final Cur Pro. It Allows Users to Make Cinematic Looking Video Scenes by Adjusting the Color. Here Well Share You some Basic Information About This Plugin for 2024
- New In 2024, Want to Add the Radial Blur Image Effect to Your Photos to Make Them Stand Out? Read on to Find the 11 Best Tools for Creating Stunning Image Editing Projects
- New 2024 Approved How to Create One Click Video Reverse Effect in Filmora
- Updated Are You Eager to Know How to Create an Adjustment Layer in Premiere Pro? This Article Will Highlight the Significance of Adding an Adjustment Layer in Premiere Pro
- New In 2024, Are You Seeking Free Lumetri Presets to Enhance Your Videos? Find Out All About Lumetri Color Presets and How to Use Them in Presenting Proper Color Grading
- Review Video Is a Common Type Video and the First Impression Review Is Also Included. This Article Will Show You What Is First Impression Review Video and How to Create One by Yourself for 2024
- Updated In 2024, How to Record Shots and Edit Them Using Wonderware Filmora to Create the Super Jump Effect? A Complete Guide for Beginners
- New Mix and Match The Ultimate List of 8 Video and Photo Merging Tools for 2024
- New In 2024, 4 Ways for Rotating Your GoPro Videos Professionally
- How To Make Ninja Jump Effect with Filmora
- Updated 2024 Approved 5 Simple Tools to Merge Video and Audio Online
- Updated 2024 Approved Do You Want to Add an Adjustment Layer to Your Video for Easier Editing? Read This Article to Find Out How to Efficiently Add an Adjustment Layer in After Effects
- Updated In 2024, Free Titles For Final Cut Pro
- Updated In 2024, How to Use OBS Chroma Key With/Without Green Screen
- New 2024 Approved Splice Video Editor Online - Get Your Videos Splice
- Updated 2024 Approved How to Add Font Effect
- How to Make Audio Visualizer in Filmora Easy
- Updated In 2024, Interested in Adding a Cinematic Strobe Light Effect to Your Movie or Video Title? Follow the Steps Explained in Detail Here
- Hey! Are You Looking for Video Reverse Effects in Your Videos? Then, You Are at the Right Place. This Article Will Guide You in Creating a Video Reverse Effect
- Updated How To Create The Best AI Thumbnail Using The Right Tools, In 2024
- New How to Color Grade Your Picture in LightRoom
- Little Tricks to Make Canva Slideshow No One Is Telling You for 2024
- New 2024 Approved 3 In-Camera Transitions Tricks To Make Videos Like a Pro
- How to Fix It Tecno Pova 5 Wont Turn On | Dr.fone
- How To Transfer WhatsApp From iPhone 11 to other iPhone 14 Pro devices? | Dr.fone
- Easy Ways to Manage Your Tecno Camon 20 Pro 5G Location Settings | Dr.fone
- 4 Ways to Unlock Apple iPhone 11 Pro to Use USB Accessories Without Passcode | Dr.fone
- In 2024, How to Remove the Activation Lock On your iPad and Apple iPhone 12 Pro Max without Apple Account
- In 2024, Top 10 Best Photo to Animation Converters That Give You an Advantage
- 3 Ways to Fake GPS Without Root On Vivo Y100t | Dr.fone
- 5 Quick Methods to Bypass Xiaomi Redmi Note 13 Pro+ 5G FRP
- In 2024, How to Unlock Vivo Y100A Bootloader Easily
- In 2024, iPhone 14 Asking for Passcode after iOS 17/14 Update, What to Do?
- In 2024, 9 Best Phone Monitoring Apps for Vivo S18 Pro | Dr.fone
- Detailed guide of ispoofer for pogo installation On Oppo Find N3 | Dr.fone
- Why Is My Honor 80 Pro Straight Screen Edition Offline? Troubleshooting Guide | Dr.fone
- What You Need To Know To Improve Your Tecno Phantom V Fold Hard Reset | Dr.fone
- 5 Hassle-Free Solutions to Fake Location on Find My Friends Of Itel A60s | Dr.fone
- Android Screen Stuck General Tecno Camon 20 Premier 5G Partly Screen Unresponsive | Dr.fone
- A Step-by-Step Guide on Using ADB and Fastboot to Remove FRP Lock from your Xiaomi Civi 3 Disney 100th Anniversary Edition
- 9 Mind-Blowing Tricks to Hatch Eggs in Pokemon Go Without Walking On Infinix Note 30 VIP Racing Edition | Dr.fone
- New 2024 Approved 15 Top Pics Collage Apps
- Forgotten The Voicemail Password Of Vivo Y200? Try These Fixes
- 4 Most-Known Ways to Find Someone on Tinder For Honor X50 by Name | Dr.fone
- How To Stream Anything From Xiaomi Redmi 12 to Apple TV | Dr.fone
- How to Screen Mirroring ZTE Axon 40 Lite? | Dr.fone
- In 2024, How to use iSpoofer on Poco C55? | Dr.fone
- How to Factory Reset Vivo T2 5G If I Forgot Security Code or Password? | Dr.fone
- In 2024, How to Use Life360 on Windows PC For Samsung Galaxy XCover 6 Pro Tactical Edition? | Dr.fone
- How To Fix Unresponsive Touch Screen on Tecno Spark 20 Pro+ | Dr.fone
- In 2024, 5 Ways to Transfer Music from Oppo A59 5G to Other Android Devices Easily | Dr.fone
- How To Restore Missing Photos Files from Lava Agni 2 5G.
- Title: 15 Free Cinematic LUTs for Your Film for 2024
- Author: Morgan
- Created at : 2024-04-24 01:12:28
- Updated at : 2024-04-25 01:12:28
- Link: https://ai-video-editing.techidaily.com/15-free-cinematic-luts-for-your-film-for-2024/
- License: This work is licensed under CC BY-NC-SA 4.0.
