
:max_bytes(150000):strip_icc():format(webp)/F8conferencelogo-7ec4475dc6624114aea076c2611df199.jpg)
15 Must-Use Gifs Editors
15 Must-Use Gifs Editors
15 Must-Use Gifs Editors in 2024
An easy yet powerful editor
Numerous effects to choose from
Detailed tutorials provided by the official channel
Several websites and companies use the graphics interchange format that is the GIF. It can be seen to be used by a wide number of people on the internet and its format is supported by all platforms. The common goal of all the users can be satisfied.
Are you looking to create and edit gifs online or on your laptop but cannot find a suitable way out?
Finding the best and most user friendly GIF maker is not very hard, especially considering that free gif editor software is offered by so many providers. But if you’re only starting your journey with apps to make GIFs, it can be a difficult choice.
In this article
01 [How to Make GIF Interesting?](#Part 1)
02 [Top 5 Editors for Windows](#Part 2)
03 [Top 5 Editors for iPhone/Android](#Part 3)
04 [Top 5 Editors for Animated GIF Editing](#Part 4)
Part 1 How to Make GIF Interesting?
There are several ways by which a GIF can be made interesting. You can use colorful graphics and drop duplicate frames. Using fewer colors lets you make longer and more involved gifs.
Part 2 Top 5 Editors for Windows
Below are the top 5 editors which will help you to form GIFs for Windows: -
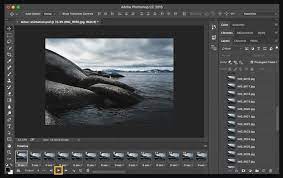
01Adobe Photoshop
Adobe Photoshop could be a useful device for making videos, image redaction, and GIF editing. This GIF code for Windows can allow you to import a GIF file so begin with the modification process.
Therefore, GIF editing is a breeze as you’ll alter the effects, modification the frame animation within the Timeline section, and do plenty a lot with this tool. You’ll simply utilize the free trial version to urge accustomed to the tool initial and then opt for the premium version to try to a lot more.
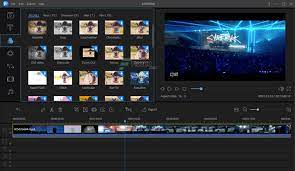
02EaseUS Video Editor
In the context of GIF makers, EaseUS Video Editor can also be said as one of the best. Free templates of texts, filters, elements, overlays, transitions, and music are available here which its users create GIF images with easily. You can also create lively and fully animated images, convert MP4 to GIFs and share it on YouTube, or other social media platforms.
The capabilities of this animated GIF maker for Windows are not restrained to this alone, as it can be used to edit all kinds of images, audio, and videos.
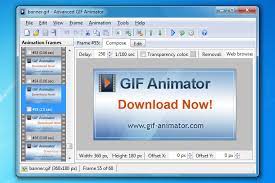
03GIF Animator
GIF animator editor is one of the first-rate GIF makers and is an awesome device for you if you desire to create GIF images, banners, buttons, and GIF videos. The device is very convenient to use and is a favorite of animators and designers.
The measurement of the photo can be modified and alongside that, it is feasible to control the frames, hastily cross texts, and enhance. Corrections to the movies can be brought and the built-in photograph editor can be used to rectify photographs and pictures, you can draw on them and you can convert movies to GIFs by the usage of the fragmented section of the video files.
04**Wondershare Filmora Video Editor **
If you are searching for nice animated GIF makers for Windows computers, then Wondershare Filmora’s animated movies and GIF editor device may want to be a brilliant choice. That’s due to the fact with this GIF maker Windows device lets you add a video, convert it to the GIF structure and then edit it later with its super features.
The interactive UI helps customers manner greater than one hundred fifty file codecs easily. With this device, you can crop, pace up a video, alter the body size, and caption it. Additionally, you add texts, add animation consequences to the images, and alter the pictures and movies in a few steps.

Wondershare Filmora - Best Video Editor for Mac/Windows
5,481,435 people have downloaded it.
Build unique custom animations without breaking a sweat.
Focus on creating epic stories and leave the details to Filmora’s auto features.
Start a creative adventure with drag & drop effects and endless possibilities.
Filmora simplifies advanced features to save you time and effort.
Filmora cuts out repetition so you can move on to your next creative breakthrough.
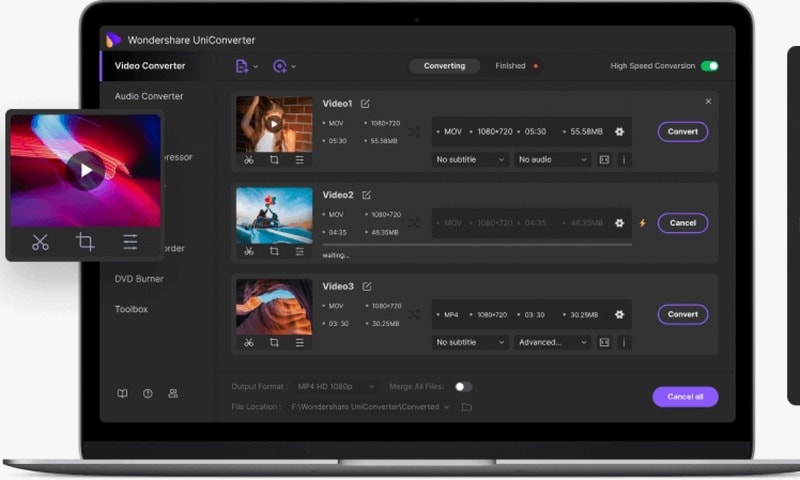
05Wondershare UniConverter
Wondershare UniConverter is one of the fine image, audio, and video editor and converter out there, and ranked the excellent GIF maker here. This GIF editor app is easy for customers and will furnish a pleasant platform for novices to operate their tasks. And when performed to create and edit GIF files, a person can export the GIF archives to both Android or iPhone barring having to use iTunes.
Part 3 Top 5 Editors for iPhone/Android
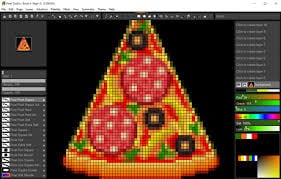
01PixelStudio
Pixel Studio is an animation app for pixel artwork fans. You can draw your little creations with pixel art. It additionally comes with a textual content tool, aid for matters like Samsung S-Pen, and it auto-saves so you don’t lose work. You can export your creations to GIF as nicely and that makes Pixel Studio one of the quality apps for customized GIFs. It’s normally an artwork app so meme lords may additionally want to put in a little greater effort than usual, however, the consequences are normally well worth it.
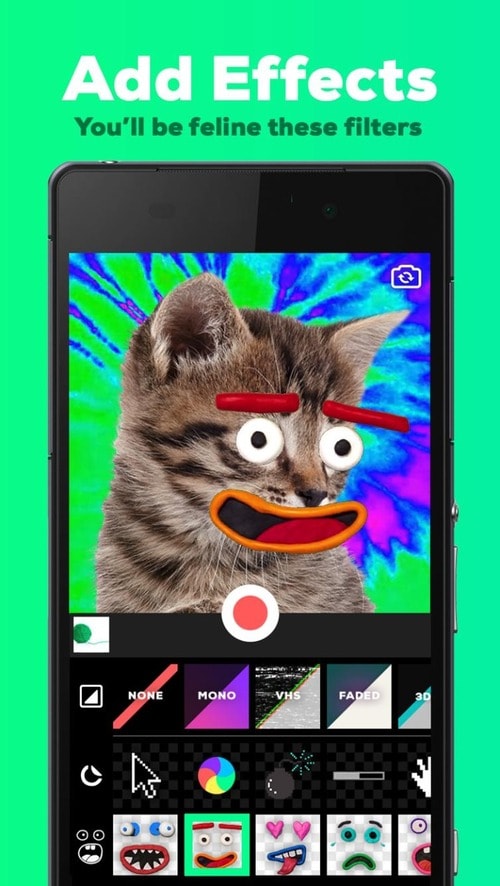
02Giphy Cam
Giphy Cam is one of the more recent gif editing apps. The digicam data is a brief phase of video. You can alter that video with lots of filters, different effects, stickers, text, and more. It additionally has a five-shot burst mode alongside its video mode. This is likely the excellent GIF/camera app hybrid. It doesn’t have any digital camera features; however, it does GIFs higher than the others by way of a large margin. It’s free with no in-app purchases.
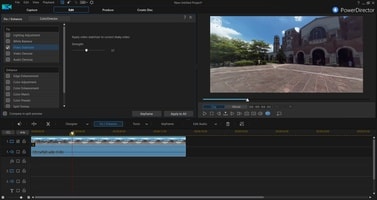
03PowerDirector
PowerDirector is one of many videos modifying apps with GIF support. This one simply takes place to be higher than most of the different ones. It’s a video editor app. Thus, it’ll have comparable features. However, two of the export codecs encompass GIF nonetheless pix and animated GIFs. This will work first-class for turning a video into a shorter GIF. The app is free to download and play with. You may additionally want to buy extra aspects by using in-app purchases.
04ImgPlay – GIF Maker
ImgPlay is a popular GIF editing app that is available for Android and iOS. You have the option of using an existing video or shooting one using your phone’s camera. In GIFs, you can apply 30 effects, crop a portion of your choice, and modify the frame rate.
05Motion Stills
Motion Stills is a Google app that allows you to record short films and turn them into looping GIFs. You can use the app to take a short 3s clip with a single tap or utilize the Fast Forward feature to condense an existing video into a short one. To make yips GIFs even better, you may add motion text and emoticons. After that, save it as a GIF and send it to your friends.
Part 4 Top 5 Editors for Animated GIF Editing
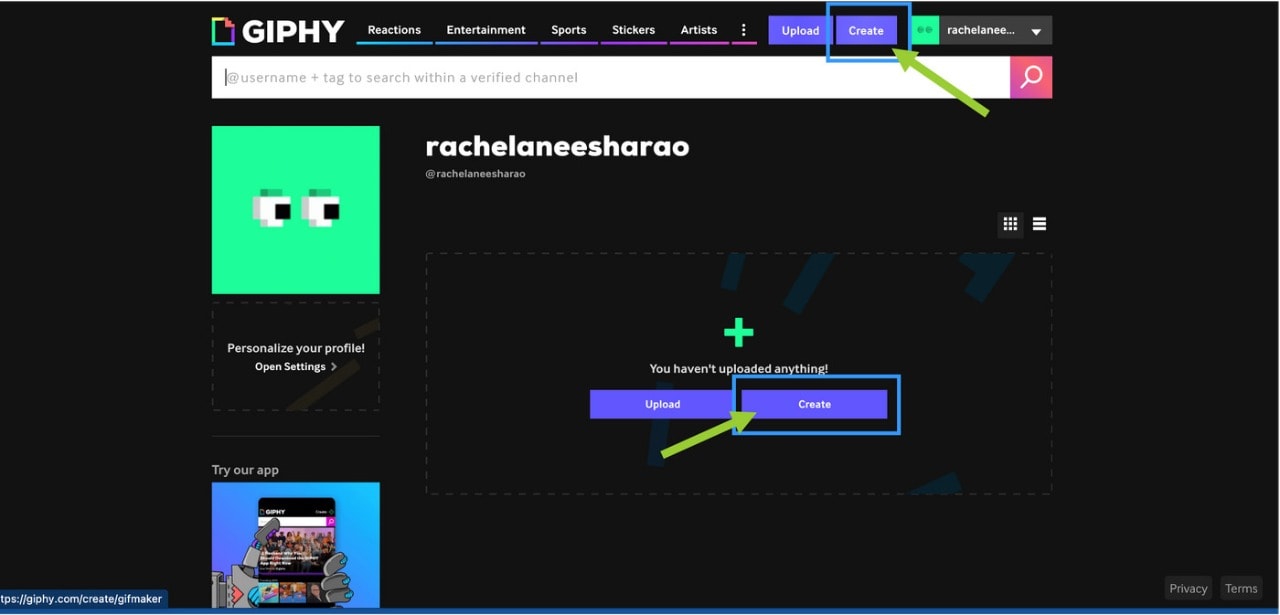
01Giphy
GIPHY is a designing tool that helps customers to create extraordinary GIFs, stickers, and backdrops. You can edit your plan with filters, captions, stickers, and different plan elements. The popular codecs for GIF uploads are JPG, PNG, GIF, MP4, or MOV, whilst the conventional file codecs to convert to stickers are JPG or PNG.
GIPHY permits you to paste URLs from specific sources such as Vimeo, YouTube, GIPHY, and others. The animated GIF maker software program makes it convenient for customers to edit and organize the uploaded archives in the favored order.
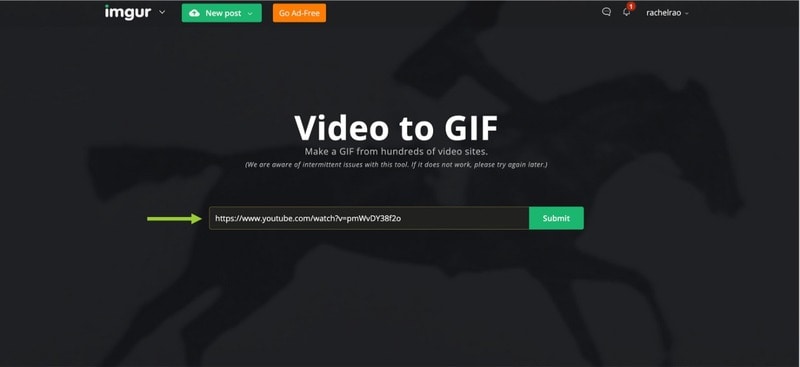
02Imgur
It’s a website that makes it simple to make GIFs. Simply paste the video URL into the web app and wait for it to process. After that, all you must do now is set the start time and duration of your GIF.
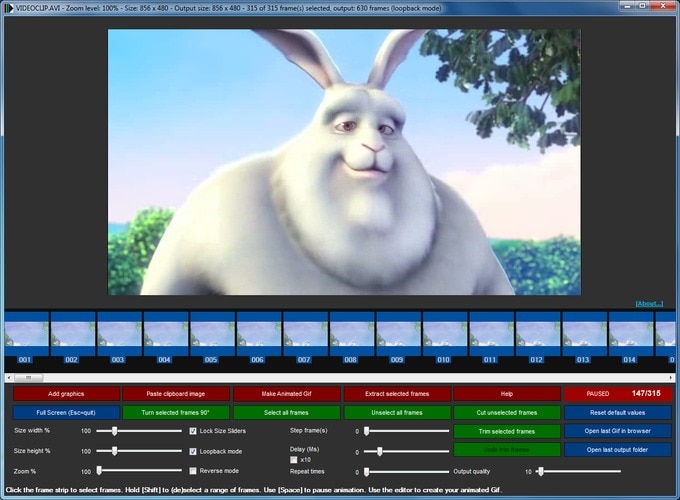
03KickMyGraphics
The utility comes with a humble person interface and it approves you to create animated GIFs from neighborhood images. In addition, you can additionally paste snapshots from your clipboard at once to the application. The utility additionally helps video files; however, you want to convert the video earlier than you can edit it. The utility affords a stay preview so you can see how your animation appears at any time. You can additionally see all handy frames and dispose of useless frames with ease.
As for editing, you can’t add your textual content or alter the brightness of your frames, however, you can trade their width, peak, and zoom level. You can additionally allow Loopback or Reverse mode and set delay, step frames, and a variety of repeats. You can additionally configure output first-class right from the application.
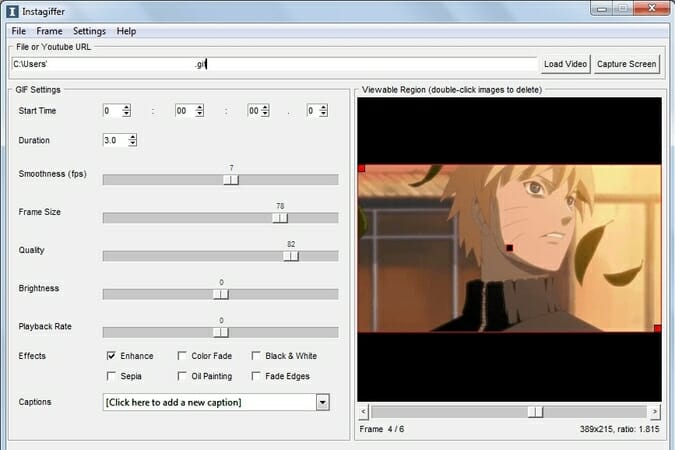
04Instagiffer
Instagiffer is some other easy software that lets you create animated GIFs on your PC. This utility affords a humble consumer interface; however, it makes up for it with an extensive variety of features. The software approves you to convert nearby movies to GIFs, however, you can additionally paste a YouTube URL and convert an online video to GIF with ease. According to the developer, the software additionally works with different video web hosting websites.
05GIMP
The software is free, so you can download and use it except for any restrictions. GIMP is best for picture designers and it comes with all preferences that an image editor needs. You can without problems edit your images, exchange their color, hue, saturation, or brightness, and add exceptional outcomes to them.
In addition, you can create special creations thanks to the built-in layer system. It’s worth citing that the software additionally helps programming algorithms so you can effortlessly edit your photos with the use of scripts.

● Key Takeaways from This Episode →
● If you are typically worried about how you can be able to come up with fascinating GIFs, you ought to hold in thought that you don’t have to create them from scratch.
● You can be capable to advance inspiring GIFs from current movies and photos eight after GIF editor software program free download.
● Hopefully, you are now capable to pick out a perfect GIF creator to use for your modifying tasks.
Several websites and companies use the graphics interchange format that is the GIF. It can be seen to be used by a wide number of people on the internet and its format is supported by all platforms. The common goal of all the users can be satisfied.
Are you looking to create and edit gifs online or on your laptop but cannot find a suitable way out?
Finding the best and most user friendly GIF maker is not very hard, especially considering that free gif editor software is offered by so many providers. But if you’re only starting your journey with apps to make GIFs, it can be a difficult choice.
In this article
01 [How to Make GIF Interesting?](#Part 1)
02 [Top 5 Editors for Windows](#Part 2)
03 [Top 5 Editors for iPhone/Android](#Part 3)
04 [Top 5 Editors for Animated GIF Editing](#Part 4)
Part 1 How to Make GIF Interesting?
There are several ways by which a GIF can be made interesting. You can use colorful graphics and drop duplicate frames. Using fewer colors lets you make longer and more involved gifs.
Part 2 Top 5 Editors for Windows
Below are the top 5 editors which will help you to form GIFs for Windows: -
01Adobe Photoshop
Adobe Photoshop could be a useful device for making videos, image redaction, and GIF editing. This GIF code for Windows can allow you to import a GIF file so begin with the modification process.
Therefore, GIF editing is a breeze as you’ll alter the effects, modification the frame animation within the Timeline section, and do plenty a lot with this tool. You’ll simply utilize the free trial version to urge accustomed to the tool initial and then opt for the premium version to try to a lot more.
02EaseUS Video Editor
In the context of GIF makers, EaseUS Video Editor can also be said as one of the best. Free templates of texts, filters, elements, overlays, transitions, and music are available here which its users create GIF images with easily. You can also create lively and fully animated images, convert MP4 to GIFs and share it on YouTube, or other social media platforms.
The capabilities of this animated GIF maker for Windows are not restrained to this alone, as it can be used to edit all kinds of images, audio, and videos.
03GIF Animator
GIF animator editor is one of the first-rate GIF makers and is an awesome device for you if you desire to create GIF images, banners, buttons, and GIF videos. The device is very convenient to use and is a favorite of animators and designers.
The measurement of the photo can be modified and alongside that, it is feasible to control the frames, hastily cross texts, and enhance. Corrections to the movies can be brought and the built-in photograph editor can be used to rectify photographs and pictures, you can draw on them and you can convert movies to GIFs by the usage of the fragmented section of the video files.
04**Wondershare Filmora Video Editor **
If you are searching for nice animated GIF makers for Windows computers, then Wondershare Filmora’s animated movies and GIF editor device may want to be a brilliant choice. That’s due to the fact with this GIF maker Windows device lets you add a video, convert it to the GIF structure and then edit it later with its super features.
The interactive UI helps customers manner greater than one hundred fifty file codecs easily. With this device, you can crop, pace up a video, alter the body size, and caption it. Additionally, you add texts, add animation consequences to the images, and alter the pictures and movies in a few steps.
Wondershare Filmora - Best Video Editor for Mac/Windows
5,481,435 people have downloaded it.
Build unique custom animations without breaking a sweat.
Focus on creating epic stories and leave the details to Filmora’s auto features.
Start a creative adventure with drag & drop effects and endless possibilities.
Filmora simplifies advanced features to save you time and effort.
Filmora cuts out repetition so you can move on to your next creative breakthrough.
05Wondershare UniConverter
Wondershare UniConverter is one of the fine image, audio, and video editor and converter out there, and ranked the excellent GIF maker here. This GIF editor app is easy for customers and will furnish a pleasant platform for novices to operate their tasks. And when performed to create and edit GIF files, a person can export the GIF archives to both Android or iPhone barring having to use iTunes.
Part 3 Top 5 Editors for iPhone/Android
01PixelStudio
Pixel Studio is an animation app for pixel artwork fans. You can draw your little creations with pixel art. It additionally comes with a textual content tool, aid for matters like Samsung S-Pen, and it auto-saves so you don’t lose work. You can export your creations to GIF as nicely and that makes Pixel Studio one of the quality apps for customized GIFs. It’s normally an artwork app so meme lords may additionally want to put in a little greater effort than usual, however, the consequences are normally well worth it.
02Giphy Cam
Giphy Cam is one of the more recent gif editing apps. The digicam data is a brief phase of video. You can alter that video with lots of filters, different effects, stickers, text, and more. It additionally has a five-shot burst mode alongside its video mode. This is likely the excellent GIF/camera app hybrid. It doesn’t have any digital camera features; however, it does GIFs higher than the others by way of a large margin. It’s free with no in-app purchases.
03PowerDirector
PowerDirector is one of many videos modifying apps with GIF support. This one simply takes place to be higher than most of the different ones. It’s a video editor app. Thus, it’ll have comparable features. However, two of the export codecs encompass GIF nonetheless pix and animated GIFs. This will work first-class for turning a video into a shorter GIF. The app is free to download and play with. You may additionally want to buy extra aspects by using in-app purchases.
04ImgPlay – GIF Maker
ImgPlay is a popular GIF editing app that is available for Android and iOS. You have the option of using an existing video or shooting one using your phone’s camera. In GIFs, you can apply 30 effects, crop a portion of your choice, and modify the frame rate.
05Motion Stills
Motion Stills is a Google app that allows you to record short films and turn them into looping GIFs. You can use the app to take a short 3s clip with a single tap or utilize the Fast Forward feature to condense an existing video into a short one. To make yips GIFs even better, you may add motion text and emoticons. After that, save it as a GIF and send it to your friends.
Part 4 Top 5 Editors for Animated GIF Editing
01Giphy
GIPHY is a designing tool that helps customers to create extraordinary GIFs, stickers, and backdrops. You can edit your plan with filters, captions, stickers, and different plan elements. The popular codecs for GIF uploads are JPG, PNG, GIF, MP4, or MOV, whilst the conventional file codecs to convert to stickers are JPG or PNG.
GIPHY permits you to paste URLs from specific sources such as Vimeo, YouTube, GIPHY, and others. The animated GIF maker software program makes it convenient for customers to edit and organize the uploaded archives in the favored order.
02Imgur
It’s a website that makes it simple to make GIFs. Simply paste the video URL into the web app and wait for it to process. After that, all you must do now is set the start time and duration of your GIF.
03KickMyGraphics
The utility comes with a humble person interface and it approves you to create animated GIFs from neighborhood images. In addition, you can additionally paste snapshots from your clipboard at once to the application. The utility additionally helps video files; however, you want to convert the video earlier than you can edit it. The utility affords a stay preview so you can see how your animation appears at any time. You can additionally see all handy frames and dispose of useless frames with ease.
As for editing, you can’t add your textual content or alter the brightness of your frames, however, you can trade their width, peak, and zoom level. You can additionally allow Loopback or Reverse mode and set delay, step frames, and a variety of repeats. You can additionally configure output first-class right from the application.
04Instagiffer
Instagiffer is some other easy software that lets you create animated GIFs on your PC. This utility affords a humble consumer interface; however, it makes up for it with an extensive variety of features. The software approves you to convert nearby movies to GIFs, however, you can additionally paste a YouTube URL and convert an online video to GIF with ease. According to the developer, the software additionally works with different video web hosting websites.
05GIMP
The software is free, so you can download and use it except for any restrictions. GIMP is best for picture designers and it comes with all preferences that an image editor needs. You can without problems edit your images, exchange their color, hue, saturation, or brightness, and add exceptional outcomes to them.
In addition, you can create special creations thanks to the built-in layer system. It’s worth citing that the software additionally helps programming algorithms so you can effortlessly edit your photos with the use of scripts.
● Key Takeaways from This Episode →
● If you are typically worried about how you can be able to come up with fascinating GIFs, you ought to hold in thought that you don’t have to create them from scratch.
● You can be capable to advance inspiring GIFs from current movies and photos eight after GIF editor software program free download.
● Hopefully, you are now capable to pick out a perfect GIF creator to use for your modifying tasks.
7 Solutions Cut Video For Instagram On Mac
More video content is being created than before. Unfortunately, some social media platforms like Instagram require your video to be short. Therefore, many people wonder how to cut a video to make it easier to share. If you’re wondering how to cut video for Instagram on Mac, you’re in luck. This article shares the best tools to use for this purpose.
What You Should Know About Instagram Video

Instagram is a social media site owned by Facebook. However, its main focus is on sharing videos and photos. It also allows users to put up stories that only last 24 hours. Stories allow you to highlight some crucial aspects of your life. These stories could be made up of photos, texts, and videos. However, each story slide can only take up to 15 seconds of video.
Most times, your video would be longer than that. If you upload a video longer than the accepted 15 seconds, Instagram automatically trims it to 15 seconds. However, the resulting video might not be the parts you want to show to your audience. Maybe there’s a particular section you would like your followers to see. That’s why video cutters enter the picture.
A good video splitter to cut video for Instagram on Mac is necessary when you’re creating video content for your Instagram page. In addition, the video editing tool you choose must maintain the quality and the safety of the file. Therefore, we’ve selected the best tools to cut videos for Instagram on Mac. Next, we’ll explore these tools, highlighting their best features, cons, and how you can use them. On that note, let’s dive in.
Best Instagram Video Cutter for Mac - Filmroa Video Editor

Supported System: Windows and Mac
Splitting your Instagram video before sharing them makes it easier to highlight your best parts. If you’re wondering what the best tool to do that is, you’re in luck. Filmora Video Editor is the best video cutter for Mac for many reasons. Apart from cutting videos, it offers several editing tools to enhance your video. It provides video processing features like cropping, splitting, rotating, trimming, speed increase, and color correction. However, it also offers features for professional editing of videos.
Filmora supports all video formats, even the high-definition video formats for your editing. In addition, Wondershare Filmora offers you an intuitive and user-friendly interface compared to other video cutters out there. This makes it a fantastic choice for experts and novices alike. The steps to split your video and use other in-built features are pretty straightforward, and if you need tutorials, Wondershare Filmora makes them available.
For Win 7 or later (64-bit)
For macOS 10.14 or later
Steps to Cut Video for Instagram on Mac
Filmora makes it relatively easy to use its extensive features. You don’t need previous editing experience to use Wondershare Filmora. If you’re wondering how to cut video for Instagram on Mac, below are the steps to follow.
Step 1: Download Wondershare Filmore
First, you have to download the Filmora app on your Mac. You can get it on the App Store or the official website. After installation, launch Filmora to get started.
Step 2: Import Video

Once you install the app, you can import the video you would like to cut for Instagram on the app. Click ‘import media files here’ to choose a video file from your PC storage. Alternatively, you can drag and drop the Instagram video on the software’s timeline.
Step 3: Cut the Video

You can cut your video from any end you prefer. First, move the cursor where you would like to cut the video until the clip changes to the ‘I’ pointer. Then, you can move the cursor within the video length to cut to your preference.
Step 4: Split Instagram Video

You can also split the video into specific portions by dragging the slider to each endpoint and picking the scissors. Additionally, you can carry out more editing like adding transitions, sound effects, and more to beautify your video.
Step 5: Save Instagram Video

Now that the video is to your liking, hit the ‘export’ button and choose the output format you would prefer. Next, click ‘export’ to confirm your choice.
More Free Instagram Video Cutter for Mac to Cut Video For Instagram
Although Wondershare Filmore is the best option when you want to cut video for Instagram on Mac, other options are available. In this section, we’ll explore the free Instagram video cutters for Mac that you can use.
Lightworks

Supported System: Windows and Mac
Lightworks is one of the best video splitting tools you can use if you’re learning how to cut video for Instagram on Mac. It is best for both novices and professionals and allows you seamlessly cut the video to your desired part. With Lightworks software, you can easily get results.
Apart from cutting Instagram videos on Mac, there are several more editing features you can utilize to take your Insta video to the next level. It also allows you to combine several cut clips. Size isn’t an issue with Lightworks as it effortlessly handles large file sizes. It offers users all the features of a high-quality video processing video editor. The best part is that it allows you directly export your cut video to Instagram or any other social media platform you would prefer.
Pros
- It supports different audio, video, and image format
- It allows users to share projects to encourage collaborative workflow
- Easy to use by beginners and professionals
- Allows exporting of video to Instagram directly
Cons
- It doesn’t support 3D video editing
- You have to register before using the application
- No video stabilization feature
Step to Cut Video for Instagram on Mac Using Lightworks
The steps to using this software are pretty easy to follow. Below, we’ve outlined the steps to make it easier to use.
- Step 1: Download the Lightworks software on your Mac from the official software. Once you do this, install the app and launch the software to begin the video-cutting process.
- Step 2: Import the video into the software. You can do this by clicking ‘import video’ or simply dragging the clip into the timeline.

- Step 3: After uploading the clip on your timeline, you can start cutting the video to your preference. Simply slide the cursor to the point you want to cut from and press the ‘c’ key on your keyboard.

- Step 4: After cutting the part you want, erase the rest by using the deleting button.

- Step 5: Click the ‘all’ option and then choose ‘export’ from the menu that appears to save your newly-cut video. You can also export directly to Instagram to save space and time.

Avidemux

Supported System: Windows and Mac
Another free video cutter that you can use when learning how to cut video for Instagram on Mac is Avidemux. This app is simple and offers simple filtering, cutting, and encoding features. As a result, it makes it relatively easy for beginners to split, cut, and trim videos. In addition, Avidemux offers users an intuitive user interface that makes it easy to know the next step to take.
Avidemux supports the most common formats like AVI, MP4, and more. It also offers different filters to spice up your Instagram videos. You can resize your video and also color correct your video. It is not an advanced tool for professionals because it doesn’t offer advanced tools. However, if you simply want to cut video for Instagram for Mac, this free software helps you achieve that.
Pros
- It supports common video formats
- It’s easy to cut videos for Instagram using keyboard shortcuts
- Offers various filters for enhancing video
- It is free to use
- Easy for beginners to use
Cons
- It crashes sometimes
- There are limited features in the editing software
Steps to Cut Video for Instagram on Mac Using Avidemux
Avidemux has a user-friendly interface that makes it easy to cut and save your Instagram video within minutes. Below are the simple steps to cut Instagram videos you should follow.
- Step 1: Download Avidemux on your Mac and install it. After installation, launch Avidemus to begin cutting your Instagram video.
- Step 2: Next, load the file you would like to work with

- Step 3: Next, navigate to the portion of the video you would like to cut and check its ‘frame type.’ At the beginning, where you would like to cut the video from, click the ‘A’ button. It automatically records it as the start of the clip.

- Start 4: Move to where you would like the clip to end and click the ‘B’ button. This will automatically cut the Instagram video to your preference.

- Step 5: Save the video by going to file and choosing ‘save’ from the available options. Next, click ‘save video’ and name the file.

You’re now ready to use your new video on Instagram or any other video-sharing platform you would prefer.
iMovie

Supported System: Mac
Apple first released this software in 1999, but it has continually updated it to offer more features to users. IMovie is available on all iOS devices, including your MacBook. Due to the frequent upgrades, this software makes editing relatively easy for beginners. The user interface is user-friendly, and it is entirely free to use. It is also an excellent choice for cutting your Instagram videos.
One of the reasons Mac users love this app is that there’s no need for installation and downloading. There are different effects available to enhance your video. You can also use ready-made templates on the software that offers popular music and stunning graphics. In addition, you can also add transitions, change speed, and many more with this software.
Pros
- It puts your content in different media libraries to help you stay organized
- It offers access to various video and audio filters
- It provides a stability feature that’s not available with many Instagram video cutting tools
- It allows you to share directly on Instagram
- It is easy for beginners to use
Cons
- It lacks some useful controls
- It doesn’t allow tagging when you share directly to Instagram
- It only supports two video tracks
Steps to Cut Video for Instagram on Mac Using IMovie
If you want to cut your video for Instagram using IMovie, below are the steps you need to follow.
- Step 1: Open iMovie on your Macbook to get started
- Step 2: Now, create a new project and name the project with a name you prefer

- Step 3: Import your video to IMovie by granting the software access to your computer’s video library.

- Step 4: Start cutting out any part you don’t want; you can also trim the video in-between if there are parts within the clip you don’t want.

- Step 5: You can add filters, transitions, or any other effect you would like to enhance your video.

- Step 6: Finally, you can save your file on your Mac or upload it directly to Instagram.
More Paid Instagram Video Cutter for Mac to Cut Video For Instagram
Now that you know the top three free video cutters for Instagram on Mac, this section explores the best paid Instagram video cutter you can use to cut videos for Instagram on Mac. Without further ado, let’s take a look.
Movavi Video Editor

Supported System: Windows and Mac
This video editor is relatively easy to use and powerful. It offers many features that go beyond cutting video for Instagram. You can also utilize this video editing software to enhance your video and make it look professional. Movavi offers transitions, filters, titles, and many more features for your videos. It is easy for both novices and professionals to use this platform.
Movavi Video Editor supports all types of video formats for easy editing. It also allows you to set your video to full HD and 4K resolution so that the images are clean and clear. You can also convert to a new format without compromising the quality of your video. In addition, Movavi offers you a trial period you can use to check out the software to ensure it is the ideal option for you. With Movavi, you can also share directly to Instagram if you’re looking to save space on Mac.
Ros
- It allows you to cut videos and export them quickly
- It offers several other features to enhance your videos
- It supports all video formats
- It enables you to convert video to the new format without compromising the quality
- It is ideal for beginners and experts
Cons
- Subscription fees are pretty high
- Some of the settings can be quite complex for beginners
Steps to Cut Video for Instagram on Mac Using Movavi Video Editor
If you would like to try Movavi video editor but don’t know how to go about it, the steps below make it relatively easy.
- Firstly, Install Movavi Video Editor on your Mac and install the app following the instructions. After installation, launch the app to begin.
- Next, choose the video file you would like to cut by clicking ‘add files’ and selecting your media library.

- It will appear on the ‘media bin,’ and you’ll have to drag it to the timeline.
- Now, you can start cutting the video for Instagram. Click on the video and move the market to the point in the video you would like to cut. Next, click the split button.

- You can easily remove the unwanted segments by clicking delete after selecting it.

- After cutting your video, you can choose the output format you prefer and then click ‘export.’ Choose the folder on your Mac you would like to save to and click ‘start’ to begin the saving process.

Final Cut Pro

Supported System: Mac
Next on our list, we have Final Cut Pro, an excellent video cutter for Mac. It is software developed by Apple for professional video editing. This app is primarily for MacOS users, and it offers several cutting-edge editing features to ensure a smooth and high-resolution video. It supports different video formats and allows you to enhance audio, add effects, trim, and carry out 360-degree video editing if you want to improve your video.
This tool doesn’t offer a monthly subscription. Instead, users can simply make a one-time payment and have lifetime access to this editing tool. It is not an excellent choice for beginners as its advanced features and interface can be pretty complicated. However, if you want to give this video cutter ago, we’ll provide the steps to cut the video for Instagram below.
Pros
- It supports 360-video editing
- Performance is relatively fast and ensures an easy video-cutting process
- It supports different video formats
- It offers various editing tools to enhance your video for Instagram
Cons
- It isn’t ideal for beginners
- One-time payment is relatively high
- The interface can be quite confusing
Steps to Cut Video for Instagram on Mac Using Final Cut Pro
If you want to cut video for Instagram in Final Cut Pro, the blade tool is the best option. However, it can be pretty confusing to use Final Cut Pro if you’ve never used the software before. Follow the steps below to cut Instagram video using Final Cut Pro.
- First, you have to download the app; you can download it on the App Store or the official website.
- Next, install the video cutter on your Mac and launch it to begin cutting Instagram videos.
- Import the video you would like to cut by visiting the ‘file’ type and choosing ‘import.’ Next, choose media and select the video from the media library. Alternatively, you can simply press Command + I on your Mac keyboard to go straight to your PC storage.

- Next, move the imported clip to the timeline to begin the cutting process.
- Select the Tools menu and choose ‘Blade’ from the dropdown menu. You can also press the B key on your keyword to select this tool.

- Now, you’re ready to start cutting the video file. Move the selected blade tool to the frame you would like to cut from the clip and click.

- Next, move to where you would like the cut to the end and click again.

- That’s all you have to do. Once you cut the clip and you’re satisfied with your result, simply save your clip by hitting the ‘export’ button and choosing the location you prefer and your preferred output format.
Adobe Premiere Rush

Supported System: Windows and Mac
Premier Rush was designed for social media videos and to help vloggers make the most of their videos. Although it started as a mobile-only app, it now has a desktop option for Mac and Windows. The idea behind Rush is an editing tool that helps you edit your video and share it to your preferred social media platform fast. This editing tool offers a simple user interface, and the workflow is seamless to ensure speedy performance.
As long as you want a video cutter created for cutting video for Instagram on Mac, this software delivers. It offers different editing features to enhance your video. You can link your Instagram account and upload directly to the platform. It also allows you to save all edited video files on Cloud to save space on your MacBook.
Pros
- It allows you to transfer videos from Adobe Premiere Pro directly for editing
- Allows you to link your social media accounts for direct uploads
- It offers transitions, filters, and more editing tools to enhance your Instagram video
- You can save directly to the Cloud to save space and ensure easy access
- It is an excellent option for beginners
Cons
- You can’t change the output format
- It doesn’t offer ample audio tools
Steps to Cut Video for Instagram on Mac Using Adobe Premiere Rush
This section will cover all the crucial steps to get the most from Adobe Premier Rush. Keep reading to learn how to cut video for Instagram on Mac using Adobe Rush.
- Firstly, download and install the app on your Mac. Launch the software after installation to start editing
- Now, create a new project on the app and import the video you would like to cut for Instagram.

- Afterward, select the video you would like to cut, click ‘create,’ and you’re ready to begin.

- When the video appears on the timeline, select the video and click the ‘scissors’ icon on the left corner. This tool helps to cut your video to your preference.
- To use the scissors tool, simply go to the beginning of the video and drag the handle to where you would like the video to start. You can also do the same to the end by dragging the handle at the end to where you would prefer.

- After cutting your video, you can also utilize other editing features to enhance your video.

- Now, you’re ready to export your video. Simply click ‘share’ located at the top of the editing software and choose from the options whether you want to share directly to Instagram or save on Mac.
Which Should I Choose, Free or Paid Instagram Video Cutter?
Now that you know the best free and paid video cutters to cut Instagram videos, you’re probably wondering what the ideal option is. With so many options, you must make the right decision for your project. You need to consider several factors before you decide if a paid or free Instagram video cutter is the best option for you.
- Budget
When deciding between a paid or free Instagram cutter, one crucial factor is how much you’re willing to pay. If your budget is really low and doesn’t fit into any paid options, you can simply go for a free option. However, if the price isn’t an issue for you, going for a paid option is best because it offers you more editing features to enhance your video.
- Ease of Use
You should also consider how easy it is to use the video cutter. Some paid options are for professionals and can be challenging to understand. However, most free options offer poor performance times. The last thing Instagram users want is to devote hours to figure out where each tool is on the software. However, there are paid options with an intuitive interface that makes it easy to cut your Instagram video.
- Customer Support
You also need to consider whether customer support will be available when you need it. Some free options have no customer support to turn to. Instead, consider a video cutter that will offer helpful and responsive customer support when picking.
- Video Format Support
Before choosing a paid or free option, you need to consider if it would support the video format you prefer. You might be using different video formats, and you want to ensure you’re not limited to select options. You also want a video cutter that offers various output formats.
FAQs about Cut Video For Instagram
- How do you post long videos on Instagram without splitting? Instagram allows users to post long videos on the app, as long as 60 seconds. Alternatively, you can use the IGTV to upload long clips on Instagram without splitting.
- What is multi-capture on Instagram: This tool allows you to create and share multiple photos on your stories.
- How do I split the video into two parts for Instagram on Mac? The paid and free video cutters shared above will help you split a video into two parts for Instagram on Mac. Simply pick the option that fits your preference.
- Why can’t I split a video on iMovie? Maybe your iMovie software is experiencing a glitch; you can simply restart the software. Alternately, move the clip to the center row if you find the option greyed out. Moving the clip should help fix the issue.
Conclusion
Various tools are available to help you cut a video for Instagram on Mac. Therefore, just refer to the paid and free tools listed above whenever you need a video cutter. These video cutters are highly recommended and ensure the quality isn’t affected while cutting the video. When deciding which is the best option for you, free or paid, the factors listed will help you decide. Suppose you’re looking specifically for a video cutter that offers you all the features you need to enhance your video while providing an intuitive user interface. In that case, Wondershare Filmora is the ideal choice.
Instagram is a social media site owned by Facebook. However, its main focus is on sharing videos and photos. It also allows users to put up stories that only last 24 hours. Stories allow you to highlight some crucial aspects of your life. These stories could be made up of photos, texts, and videos. However, each story slide can only take up to 15 seconds of video.
Most times, your video would be longer than that. If you upload a video longer than the accepted 15 seconds, Instagram automatically trims it to 15 seconds. However, the resulting video might not be the parts you want to show to your audience. Maybe there’s a particular section you would like your followers to see. That’s why video cutters enter the picture.
A good video splitter to cut video for Instagram on Mac is necessary when you’re creating video content for your Instagram page. In addition, the video editing tool you choose must maintain the quality and the safety of the file. Therefore, we’ve selected the best tools to cut videos for Instagram on Mac. Next, we’ll explore these tools, highlighting their best features, cons, and how you can use them. On that note, let’s dive in.
Best Instagram Video Cutter for Mac - Filmroa Video Editor
Supported System: Windows and Mac
Splitting your Instagram video before sharing them makes it easier to highlight your best parts. If you’re wondering what the best tool to do that is, you’re in luck. Filmora Video Editor is the best video cutter for Mac for many reasons. Apart from cutting videos, it offers several editing tools to enhance your video. It provides video processing features like cropping, splitting, rotating, trimming, speed increase, and color correction. However, it also offers features for professional editing of videos.
Filmora supports all video formats, even the high-definition video formats for your editing. In addition, Wondershare Filmora offers you an intuitive and user-friendly interface compared to other video cutters out there. This makes it a fantastic choice for experts and novices alike. The steps to split your video and use other in-built features are pretty straightforward, and if you need tutorials, Wondershare Filmora makes them available.
For Win 7 or later (64-bit)
For macOS 10.14 or later
Steps to Cut Video for Instagram on Mac
Filmora makes it relatively easy to use its extensive features. You don’t need previous editing experience to use Wondershare Filmora. If you’re wondering how to cut video for Instagram on Mac, below are the steps to follow.
Step 1: Download Wondershare Filmore
First, you have to download the Filmora app on your Mac. You can get it on the App Store or the official website. After installation, launch Filmora to get started.
Step 2: Import Video
Once you install the app, you can import the video you would like to cut for Instagram on the app. Click ‘import media files here’ to choose a video file from your PC storage. Alternatively, you can drag and drop the Instagram video on the software’s timeline.
Step 3: Cut the Video
You can cut your video from any end you prefer. First, move the cursor where you would like to cut the video until the clip changes to the ‘I’ pointer. Then, you can move the cursor within the video length to cut to your preference.
Step 4: Split Instagram Video
You can also split the video into specific portions by dragging the slider to each endpoint and picking the scissors. Additionally, you can carry out more editing like adding transitions, sound effects, and more to beautify your video.
Step 5: Save Instagram Video
Now that the video is to your liking, hit the ‘export’ button and choose the output format you would prefer. Next, click ‘export’ to confirm your choice.
More Free Instagram Video Cutter for Mac to Cut Video For Instagram
Although Wondershare Filmore is the best option when you want to cut video for Instagram on Mac, other options are available. In this section, we’ll explore the free Instagram video cutters for Mac that you can use.
Lightworks
Supported System: Windows and Mac
Lightworks is one of the best video splitting tools you can use if you’re learning how to cut video for Instagram on Mac. It is best for both novices and professionals and allows you seamlessly cut the video to your desired part. With Lightworks software, you can easily get results.
Apart from cutting Instagram videos on Mac, there are several more editing features you can utilize to take your Insta video to the next level. It also allows you to combine several cut clips. Size isn’t an issue with Lightworks as it effortlessly handles large file sizes. It offers users all the features of a high-quality video processing video editor. The best part is that it allows you directly export your cut video to Instagram or any other social media platform you would prefer.
Pros
- It supports different audio, video, and image format
- It allows users to share projects to encourage collaborative workflow
- Easy to use by beginners and professionals
- Allows exporting of video to Instagram directly
Cons
- It doesn’t support 3D video editing
- You have to register before using the application
- No video stabilization feature
Step to Cut Video for Instagram on Mac Using Lightworks
The steps to using this software are pretty easy to follow. Below, we’ve outlined the steps to make it easier to use.
- Step 1: Download the Lightworks software on your Mac from the official software. Once you do this, install the app and launch the software to begin the video-cutting process.
- Step 2: Import the video into the software. You can do this by clicking ‘import video’ or simply dragging the clip into the timeline.
- Step 3: After uploading the clip on your timeline, you can start cutting the video to your preference. Simply slide the cursor to the point you want to cut from and press the ‘c’ key on your keyboard.
- Step 4: After cutting the part you want, erase the rest by using the deleting button.
- Step 5: Click the ‘all’ option and then choose ‘export’ from the menu that appears to save your newly-cut video. You can also export directly to Instagram to save space and time.
Avidemux
Supported System: Windows and Mac
Another free video cutter that you can use when learning how to cut video for Instagram on Mac is Avidemux. This app is simple and offers simple filtering, cutting, and encoding features. As a result, it makes it relatively easy for beginners to split, cut, and trim videos. In addition, Avidemux offers users an intuitive user interface that makes it easy to know the next step to take.
Avidemux supports the most common formats like AVI, MP4, and more. It also offers different filters to spice up your Instagram videos. You can resize your video and also color correct your video. It is not an advanced tool for professionals because it doesn’t offer advanced tools. However, if you simply want to cut video for Instagram for Mac, this free software helps you achieve that.
Pros
- It supports common video formats
- It’s easy to cut videos for Instagram using keyboard shortcuts
- Offers various filters for enhancing video
- It is free to use
- Easy for beginners to use
Cons
- It crashes sometimes
- There are limited features in the editing software
Steps to Cut Video for Instagram on Mac Using Avidemux
Avidemux has a user-friendly interface that makes it easy to cut and save your Instagram video within minutes. Below are the simple steps to cut Instagram videos you should follow.
- Step 1: Download Avidemux on your Mac and install it. After installation, launch Avidemus to begin cutting your Instagram video.
- Step 2: Next, load the file you would like to work with
- Step 3: Next, navigate to the portion of the video you would like to cut and check its ‘frame type.’ At the beginning, where you would like to cut the video from, click the ‘A’ button. It automatically records it as the start of the clip.
- Start 4: Move to where you would like the clip to end and click the ‘B’ button. This will automatically cut the Instagram video to your preference.
- Step 5: Save the video by going to file and choosing ‘save’ from the available options. Next, click ‘save video’ and name the file.
You’re now ready to use your new video on Instagram or any other video-sharing platform you would prefer.
iMovie
Supported System: Mac
Apple first released this software in 1999, but it has continually updated it to offer more features to users. IMovie is available on all iOS devices, including your MacBook. Due to the frequent upgrades, this software makes editing relatively easy for beginners. The user interface is user-friendly, and it is entirely free to use. It is also an excellent choice for cutting your Instagram videos.
One of the reasons Mac users love this app is that there’s no need for installation and downloading. There are different effects available to enhance your video. You can also use ready-made templates on the software that offers popular music and stunning graphics. In addition, you can also add transitions, change speed, and many more with this software.
Pros
- It puts your content in different media libraries to help you stay organized
- It offers access to various video and audio filters
- It provides a stability feature that’s not available with many Instagram video cutting tools
- It allows you to share directly on Instagram
- It is easy for beginners to use
Cons
- It lacks some useful controls
- It doesn’t allow tagging when you share directly to Instagram
- It only supports two video tracks
Steps to Cut Video for Instagram on Mac Using IMovie
If you want to cut your video for Instagram using IMovie, below are the steps you need to follow.
- Step 1: Open iMovie on your Macbook to get started
- Step 2: Now, create a new project and name the project with a name you prefer
- Step 3: Import your video to IMovie by granting the software access to your computer’s video library.
- Step 4: Start cutting out any part you don’t want; you can also trim the video in-between if there are parts within the clip you don’t want.
- Step 5: You can add filters, transitions, or any other effect you would like to enhance your video.
- Step 6: Finally, you can save your file on your Mac or upload it directly to Instagram.
More Paid Instagram Video Cutter for Mac to Cut Video For Instagram
Now that you know the top three free video cutters for Instagram on Mac, this section explores the best paid Instagram video cutter you can use to cut videos for Instagram on Mac. Without further ado, let’s take a look.
Movavi Video Editor
Supported System: Windows and Mac
This video editor is relatively easy to use and powerful. It offers many features that go beyond cutting video for Instagram. You can also utilize this video editing software to enhance your video and make it look professional. Movavi offers transitions, filters, titles, and many more features for your videos. It is easy for both novices and professionals to use this platform.
Movavi Video Editor supports all types of video formats for easy editing. It also allows you to set your video to full HD and 4K resolution so that the images are clean and clear. You can also convert to a new format without compromising the quality of your video. In addition, Movavi offers you a trial period you can use to check out the software to ensure it is the ideal option for you. With Movavi, you can also share directly to Instagram if you’re looking to save space on Mac.
Ros
- It allows you to cut videos and export them quickly
- It offers several other features to enhance your videos
- It supports all video formats
- It enables you to convert video to the new format without compromising the quality
- It is ideal for beginners and experts
Cons
- Subscription fees are pretty high
- Some of the settings can be quite complex for beginners
Steps to Cut Video for Instagram on Mac Using Movavi Video Editor
If you would like to try Movavi video editor but don’t know how to go about it, the steps below make it relatively easy.
- Firstly, Install Movavi Video Editor on your Mac and install the app following the instructions. After installation, launch the app to begin.
- Next, choose the video file you would like to cut by clicking ‘add files’ and selecting your media library.
- It will appear on the ‘media bin,’ and you’ll have to drag it to the timeline.
- Now, you can start cutting the video for Instagram. Click on the video and move the market to the point in the video you would like to cut. Next, click the split button.
- You can easily remove the unwanted segments by clicking delete after selecting it.
- After cutting your video, you can choose the output format you prefer and then click ‘export.’ Choose the folder on your Mac you would like to save to and click ‘start’ to begin the saving process.
Final Cut Pro
Supported System: Mac
Next on our list, we have Final Cut Pro, an excellent video cutter for Mac. It is software developed by Apple for professional video editing. This app is primarily for MacOS users, and it offers several cutting-edge editing features to ensure a smooth and high-resolution video. It supports different video formats and allows you to enhance audio, add effects, trim, and carry out 360-degree video editing if you want to improve your video.
This tool doesn’t offer a monthly subscription. Instead, users can simply make a one-time payment and have lifetime access to this editing tool. It is not an excellent choice for beginners as its advanced features and interface can be pretty complicated. However, if you want to give this video cutter ago, we’ll provide the steps to cut the video for Instagram below.
Pros
- It supports 360-video editing
- Performance is relatively fast and ensures an easy video-cutting process
- It supports different video formats
- It offers various editing tools to enhance your video for Instagram
Cons
- It isn’t ideal for beginners
- One-time payment is relatively high
- The interface can be quite confusing
Steps to Cut Video for Instagram on Mac Using Final Cut Pro
If you want to cut video for Instagram in Final Cut Pro, the blade tool is the best option. However, it can be pretty confusing to use Final Cut Pro if you’ve never used the software before. Follow the steps below to cut Instagram video using Final Cut Pro.
- First, you have to download the app; you can download it on the App Store or the official website.
- Next, install the video cutter on your Mac and launch it to begin cutting Instagram videos.
- Import the video you would like to cut by visiting the ‘file’ type and choosing ‘import.’ Next, choose media and select the video from the media library. Alternatively, you can simply press Command + I on your Mac keyboard to go straight to your PC storage.
- Next, move the imported clip to the timeline to begin the cutting process.
- Select the Tools menu and choose ‘Blade’ from the dropdown menu. You can also press the B key on your keyword to select this tool.
- Now, you’re ready to start cutting the video file. Move the selected blade tool to the frame you would like to cut from the clip and click.
- Next, move to where you would like the cut to the end and click again.
- That’s all you have to do. Once you cut the clip and you’re satisfied with your result, simply save your clip by hitting the ‘export’ button and choosing the location you prefer and your preferred output format.
Adobe Premiere Rush
Supported System: Windows and Mac
Premier Rush was designed for social media videos and to help vloggers make the most of their videos. Although it started as a mobile-only app, it now has a desktop option for Mac and Windows. The idea behind Rush is an editing tool that helps you edit your video and share it to your preferred social media platform fast. This editing tool offers a simple user interface, and the workflow is seamless to ensure speedy performance.
As long as you want a video cutter created for cutting video for Instagram on Mac, this software delivers. It offers different editing features to enhance your video. You can link your Instagram account and upload directly to the platform. It also allows you to save all edited video files on Cloud to save space on your MacBook.
Pros
- It allows you to transfer videos from Adobe Premiere Pro directly for editing
- Allows you to link your social media accounts for direct uploads
- It offers transitions, filters, and more editing tools to enhance your Instagram video
- You can save directly to the Cloud to save space and ensure easy access
- It is an excellent option for beginners
Cons
- You can’t change the output format
- It doesn’t offer ample audio tools
Steps to Cut Video for Instagram on Mac Using Adobe Premiere Rush
This section will cover all the crucial steps to get the most from Adobe Premier Rush. Keep reading to learn how to cut video for Instagram on Mac using Adobe Rush.
- Firstly, download and install the app on your Mac. Launch the software after installation to start editing
- Now, create a new project on the app and import the video you would like to cut for Instagram.
- Afterward, select the video you would like to cut, click ‘create,’ and you’re ready to begin.
- When the video appears on the timeline, select the video and click the ‘scissors’ icon on the left corner. This tool helps to cut your video to your preference.
- To use the scissors tool, simply go to the beginning of the video and drag the handle to where you would like the video to start. You can also do the same to the end by dragging the handle at the end to where you would prefer.
- After cutting your video, you can also utilize other editing features to enhance your video.
- Now, you’re ready to export your video. Simply click ‘share’ located at the top of the editing software and choose from the options whether you want to share directly to Instagram or save on Mac.
Which Should I Choose, Free or Paid Instagram Video Cutter?
Now that you know the best free and paid video cutters to cut Instagram videos, you’re probably wondering what the ideal option is. With so many options, you must make the right decision for your project. You need to consider several factors before you decide if a paid or free Instagram video cutter is the best option for you.
- Budget
When deciding between a paid or free Instagram cutter, one crucial factor is how much you’re willing to pay. If your budget is really low and doesn’t fit into any paid options, you can simply go for a free option. However, if the price isn’t an issue for you, going for a paid option is best because it offers you more editing features to enhance your video.
- Ease of Use
You should also consider how easy it is to use the video cutter. Some paid options are for professionals and can be challenging to understand. However, most free options offer poor performance times. The last thing Instagram users want is to devote hours to figure out where each tool is on the software. However, there are paid options with an intuitive interface that makes it easy to cut your Instagram video.
- Customer Support
You also need to consider whether customer support will be available when you need it. Some free options have no customer support to turn to. Instead, consider a video cutter that will offer helpful and responsive customer support when picking.
- Video Format Support
Before choosing a paid or free option, you need to consider if it would support the video format you prefer. You might be using different video formats, and you want to ensure you’re not limited to select options. You also want a video cutter that offers various output formats.
FAQs about Cut Video For Instagram
- How do you post long videos on Instagram without splitting? Instagram allows users to post long videos on the app, as long as 60 seconds. Alternatively, you can use the IGTV to upload long clips on Instagram without splitting.
- What is multi-capture on Instagram: This tool allows you to create and share multiple photos on your stories.
- How do I split the video into two parts for Instagram on Mac? The paid and free video cutters shared above will help you split a video into two parts for Instagram on Mac. Simply pick the option that fits your preference.
- Why can’t I split a video on iMovie? Maybe your iMovie software is experiencing a glitch; you can simply restart the software. Alternately, move the clip to the center row if you find the option greyed out. Moving the clip should help fix the issue.
Conclusion
Various tools are available to help you cut a video for Instagram on Mac. Therefore, just refer to the paid and free tools listed above whenever you need a video cutter. These video cutters are highly recommended and ensure the quality isn’t affected while cutting the video. When deciding which is the best option for you, free or paid, the factors listed will help you decide. Suppose you’re looking specifically for a video cutter that offers you all the features you need to enhance your video while providing an intuitive user interface. In that case, Wondershare Filmora is the ideal choice.
How to Create Chroma Key Written Text Effects in Filmora
Did you know it only takes a few clicks to key out the color in Filmora? It means that you can add green screen effects to many other objects. This article will show a cool chroma key effect you can try using written text.
Part 1. What Is Chroma Key Text Effect?
Composing of the chroma key effect is widely used in the gaming and newscasting industries. In this technique, you can make layering images and videos for the text together based on color hues.

Video editors can eliminate the basis from a picture by automatically choosing a certain hue in post-production. An interactive animation results by adding different color schemes; it’s an easy way to make 3D motion videos.
To make the effects on text, we have to film the subject writing on white paper. For this, follow the below instructions:
Part 2. Filming Tips for Written Texts
To write a key text before adding the chroma effect, we have to film the writing process to understand your next project better. You can create your own by following these tips. We are just concluding a single example here.
Tip 1. A Pen and a White Paper
We need blank white paper with no boundaries and lines for writing a text. Because the chroma effect will embellish the other lines if present on paper. Make sure to choose a prominent color for writing a text.
We are using a purple color pen here for writing an essential text to make it more prominent, as shown below:

It all depends upon the contrast, and you can choose another color too but ensure that it’s more apparent during filming.
Tip 2. Different Color Paper
There are many chances that you don’t have only white paper in your studio, or your requirement is not going with a blank white sheet. Then you don’t need to worry because you can use different color papers too.
But always try to use clearer paper and a prominent pen or highlighter. See the below example of a different color paper with a different highlighter.

![]()
Note: Ensure that the colored pens have good contrast with colored paper. Don’t use dull color pens with bright color paper.
Tip 3. Camera Angles
While filming a writing process for a video, you have to take care of the alignment of the camera. First, ensure the camera is at a suitable angle so it will not block the writing letters from the left side.
Sometimes, the writer’s hand blocks the letters on the left side during writing. Take note of this tip during filming a professional video, as shown below.

After checking the alignment of the camera, it’s time to look at what size we have to use for writing!
Tip 4. Larger Size of Letters
As we already said about the prominence of written text, we have to follow one more instruction related to the structure of the letters. Use the larger size and bold words when writing from a highlighter.
It is because the effect we insert during editing will be more standing and give a professional look to the video.

![]()
Note: You can create more shots till you get the right angle for a final video. Just focus on the camera alignment and highlighted words, then it will be all set.
After filming all the clips, you must edit those shots on the Filmora to get the chroma effect. Scroll more to get the step-by-step process!
Part 3. Editing the Chroma Key Text With Filmora
We need software that will give great setting choices and stock videos for a more professional look. For this, Wondershare Filmora will work more than a robot and give high-resolution results. To do the editing process on Filmora, follow the steps below and enjoy yourself with your followers.
Free Download For Win 7 or later(64-bit)
Free Download For macOS 10.14 or later
Step1 Download and install Wondershare Filmora
Launch Wondershare Filmora on your PC or Mac after downloading.
![]()
Note: If you want to enjoy its unlimited effect, you get its premium version quickly.

Step2 Import the clips to the Filmora
First, import the best footage into the filmora which you have shot. Ensure that the clip should have the best recording angle and that every word will be prominent on the page.
For this, click on Import Media and choose from the PC library what you want to edit.

Step3 Drag the clip to the timeline
Drag and drop the clip into the timeline from the import section. If you have more clips, choose first according to your script.
Add the text-written clip into the second video track because we have to insert the background into the first video track later.

After inserting the clip into the timeline, it’s time to edit it. For this, keep following the below-mentioned steps!
Step4 Chroma key settings
To edit the chroma key, you need to open the settings. For this, follow the below instructions:
- First, double-click on the clip in the timeline of the Filmora.
- Then, the setting section of the video will pop up at the top left side.
- Mark the tick in front of the Chroma Key section, and it will show the list of different features as shown below.

Step5 Color key out
To key out the specific color for changing its background, you have to perform the following actions:
- First, find the Select color option in the settings of the clip.
- Then click on the color dropper in front of the color tab.
- After that, pick the color dropper and move it on the video to select the color from the text.
![]()
Note: Ensure to select the color from the middle of the text for better key-out accuracy.

You have to adjust the size and thickness after selecting the key-out. For this, follow the next step!
Step6 Adjust the settings
To adjust the Chroma Key’s settings, set the offset, tolerance, edge thickness, and edge feather. Increase or decrease according to your range and that suits you the best.
Then click on Alpha Channel to mark the tick in front of the option. It is due to that chroma key effects will be more clearly shown.

Now, it’s time to set the background after fixing all the settings of the chroma key effect. To perform this, scroll more to get to the next step.
Step7 Import background clips
You have to add an excellent motion background in the handwritten text video. For this, you must first import the background clip into the filmora. Then, click on Import Media and choose what you want from your PC.

Step8 Add a background clip to the timeline
After importing the background clip, now drag and drop the clip into the timeline. Finally, add the background clip to the first video track at the bottom.

Step9 Turn off the alpha channel
The last step is merging the background clip with the first clip. For this, follow the below guidelines:
- First, double-click on the handwritten text video.
- It will show the settings section at the top left corner.
- Find the chroma key section and turn Alpha Channel

Final Results
You have all done with the steps and got such a fascinating result. Following the above tricks, you can easily make your vlogs and daily videos more professional and creative. Make sure to add a great and colorful background clip.

You can also use any other motion video of scenes rather than colorful videos to give a striking look.
Conclusion
Create more attractive looks and share them with your subscribers. Mainly, vloggers can attract many viewers by making the introductory part with this effect. Then, choose hundreds of other videos from the stock media and create different looks daily.
See how you can get editing tricks on Wondershare Filmora and use them in a few clicks to get an attractive look!
Tip 3. Camera Angles
While filming a writing process for a video, you have to take care of the alignment of the camera. First, ensure the camera is at a suitable angle so it will not block the writing letters from the left side.
Sometimes, the writer’s hand blocks the letters on the left side during writing. Take note of this tip during filming a professional video, as shown below.
After checking the alignment of the camera, it’s time to look at what size we have to use for writing!
Tip 4. Larger Size of Letters
As we already said about the prominence of written text, we have to follow one more instruction related to the structure of the letters. Use the larger size and bold words when writing from a highlighter.
It is because the effect we insert during editing will be more standing and give a professional look to the video.
![]()
Note: You can create more shots till you get the right angle for a final video. Just focus on the camera alignment and highlighted words, then it will be all set.
After filming all the clips, you must edit those shots on the Filmora to get the chroma effect. Scroll more to get the step-by-step process!
Part 3. Editing the Chroma Key Text With Filmora
We need software that will give great setting choices and stock videos for a more professional look. For this, Wondershare Filmora will work more than a robot and give high-resolution results. To do the editing process on Filmora, follow the steps below and enjoy yourself with your followers.
Free Download For Win 7 or later(64-bit)
Free Download For macOS 10.14 or later
Step1 Download and install Wondershare Filmora
Launch Wondershare Filmora on your PC or Mac after downloading.
![]()
Note: If you want to enjoy its unlimited effect, you get its premium version quickly.
Step2 Import the clips to the Filmora
First, import the best footage into the filmora which you have shot. Ensure that the clip should have the best recording angle and that every word will be prominent on the page.
For this, click on Import Media and choose from the PC library what you want to edit.
Step3 Drag the clip to the timeline
Drag and drop the clip into the timeline from the import section. If you have more clips, choose first according to your script.
Add the text-written clip into the second video track because we have to insert the background into the first video track later.
After inserting the clip into the timeline, it’s time to edit it. For this, keep following the below-mentioned steps!
Step4 Chroma key settings
To edit the chroma key, you need to open the settings. For this, follow the below instructions:
- First, double-click on the clip in the timeline of the Filmora.
- Then, the setting section of the video will pop up at the top left side.
- Mark the tick in front of the Chroma Key section, and it will show the list of different features as shown below.
Step5 Color key out
To key out the specific color for changing its background, you have to perform the following actions:
- First, find the Select color option in the settings of the clip.
- Then click on the color dropper in front of the color tab.
- After that, pick the color dropper and move it on the video to select the color from the text.
![]()
Note: Ensure to select the color from the middle of the text for better key-out accuracy.
You have to adjust the size and thickness after selecting the key-out. For this, follow the next step!
Step6 Adjust the settings
To adjust the Chroma Key’s settings, set the offset, tolerance, edge thickness, and edge feather. Increase or decrease according to your range and that suits you the best.
Then click on Alpha Channel to mark the tick in front of the option. It is due to that chroma key effects will be more clearly shown.
Now, it’s time to set the background after fixing all the settings of the chroma key effect. To perform this, scroll more to get to the next step.
Step7 Import background clips
You have to add an excellent motion background in the handwritten text video. For this, you must first import the background clip into the filmora. Then, click on Import Media and choose what you want from your PC.
Step8 Add a background clip to the timeline
After importing the background clip, now drag and drop the clip into the timeline. Finally, add the background clip to the first video track at the bottom.
Step9 Turn off the alpha channel
The last step is merging the background clip with the first clip. For this, follow the below guidelines:
- First, double-click on the handwritten text video.
- It will show the settings section at the top left corner.
- Find the chroma key section and turn Alpha Channel
Final Results
You have all done with the steps and got such a fascinating result. Following the above tricks, you can easily make your vlogs and daily videos more professional and creative. Make sure to add a great and colorful background clip.
You can also use any other motion video of scenes rather than colorful videos to give a striking look.
Conclusion
Create more attractive looks and share them with your subscribers. Mainly, vloggers can attract many viewers by making the introductory part with this effect. Then, choose hundreds of other videos from the stock media and create different looks daily.
See how you can get editing tricks on Wondershare Filmora and use them in a few clicks to get an attractive look!
Find The Best Free Canon LUTs
LUTs (look-up tables) enhance color grading within photos and videos. After all, they are special editing tools for upscaling visual content. There are different types of LUTs with unique characteristics and styling. One of these categories is Canon cinematic LUTs, an exceptional 3D LUT preset. In this article, you’ll find information about Canon LUTs with the best recommendations.
- Part 2: Top-Best Free Canon LUTs To Consider in 2024
- Part 3: Using The Most Effective LUTs in Wondershare Filmora
Part 1: What are 3D LUTs?
LUTs are important editing tools for upgrading color schemas of visual content. The 3D LUTs are special LUT presets used in color correction and enhancement. 3D LUT is a mathematical table that maps input and output colors. It helps adjust the color tones, textures, and intensity in an optimized way. So, while selecting any 3D LUT filter, it’s applied in a calculated way.
The 3D LUT is equipped with three-dimensional visual art that determines brightness, hue, and saturation. It has depicted its use cases in industries like gaming and film production. Thus, they play a crucial role in matching color content from different cameras. This develops more consistency with customized looks and appealing visualization.
Part 2: Top-Best Free Canon LUTs To Consider in 2024
The Internet is overloaded with amazing download Canon LUTs. Meanwhile, choosing the right LUTs for your task can be difficult. Don’t worry; you will find the list of best Canon LUTs here:
1.Cinema Canon C-Log3
Take your video concept to the next level with cinema Canon C-Log3 LUT. In this LUT pack, you will find 25 Cinema Rec 709 and 25 Cinema C-Log3 LUTs. If you’ve videos, clips, presentations, or social videos, this LUT pack is ideal. Such LUTs are very easy to use. You only need to drag or import them into your videos.

2. City Building
Transform your city building with this free Canon LUT pack. There are exciting LUT preset filters for providing new looks into tall building structures. The combination of weather, greenery, traffic, and buildings demands upgraded looks, for which such LUTs are ideal. With special color orientation, this LUTs pack will optimize color schemes within the city.

3. Canon C-Log Blockbuster
Add special blockbusting looks to your important video clips. With the Canon C-Log Blockbuster LUTs pack, upgrade your videos with a cinematic touch. There are 20 Blockbuster C-Log LUTs that will extend the color grading of your videos. This also improves the quality of your clips, bringing more engagement. Thus, you can make your documentaries and social clips more enchanting.

4. Slight Warmth
Blend unique sunlight touch to your outdoor visual media with these free Canon LUTs. It helps you improve the standards of your images and videos with evening sunshine. Your important outdoor moments will become captured in attractive visual media with pleasing tranquility. The available LUT filter possesses a warm color gradient to initiate creativity.

5. Film Canon C-Log2
Using the film Canon C-Log2 pack, you will find amazing LUT color presets. You can use these LUT filters within your documented or personal clips and movies. Find some prominent LUTs, including the 22 Canon C-Log2 and 22 Rec 709 LUTs in the pack. All these LUTs are special and unique, with extensive color gradients. You can import the preset file or drag it into the video for magical effects.

6. Sun Flare
Are your captured images or recorded videos in a dull location? There is an option to transform quality using this sun flare Canon LUT. With its bright color presets, this LUT can correct colors within dull visual content. This way, the color schemes would be upgraded with more light and brightness. So, don’t worry, even if your picture is captured within a dull environment.

7. Vintage
You need not have any darker blueish effects on your outdoor visual media anymore. With vintage Canon LUT download, enhance color grading in an optimized way. The vintage LUT is backed with special color, tone, and style. When you apply these LUTs to your photo or video, the quality will improve. You will witness color enhancement in a quick time.

8. Blue Skies
The sky is blue as the water. Thus, if your visual content has natural landmarks, provide blue touch. After all, blueish effects will enlighten your visual content in an appealing way. With next-level color grading, you will feel special emotions and feelings vibes. The LUTs are easy to use and integrate into your images or videos.

9. Filmic Style
Blend extraordinary filmy looks into your graphical media with Filmic Style Canon LUT. This LUT is special because it leverages top-level color grading with resolution enhancements. The colors of your visual content will rise, and quality will also improve. So if you’re inspired by the cinematic display, this LUT provides optimized colors.

10. City Film
An aerial picture of your city determines its beauty. But the sandy or dusty atmosphere can ruin picture quality. Using this Canon LUT, you can upscale your city picture. There are unique color gradients that eliminate dust for clarity within the image. Meanwhile, with the correct color combination, you’ll see a clean environment overall.

11. Dusty Light
Sometimes interior images look more attractive in dusty lighting. This LUT pack comes with diverse filter presets that add brownish dusty looks. Thus, your visual content will be enhanced with optimized resolutions within dusty lighting. The Canon LUT will adjust the color schemes within your visual content. Hence, you will have a visually appealing image with outstanding dusty contrast.

12. Tinted Shades
Make your outings more attractive with stylish tints. By using this free Canon LUT, you can add faded tints to your images or videos. Meanwhile, the tinted shades will provide impressive looks within a dull atmosphere. For outdoor photography, this LUT is ideal because of its dark hues and saturated colors. The filter combines a range of color tools for the best output.

13. W&B
Black and white is a vintage color combination that is beyond levels. With this LUTs pack, you can improvise your visual content with a W&B touch. This means LUTs will replace color gradients with stylish black-and-white displays. Meanwhile, the LUT will adjust hue, saturation, contrast, and brightness. As a final result, you will receive attractive W&B content.

14. Pink Grade
Red-brownish mountains look impressive in their original colors. A pink-grade LUT filter can bring originality to your captured videos or photos. This way, the LUT will accurately apply pink color grading with consistency. The mountain which you captured will start looking great again. Pink color schemes are also more attractive when it comes to outdoor visual content.

15. Landscape
Landscapes look great in their clean yet natural colors. But if your photography or videography goes wrong, landscapes may look poor. In this scenario, using a landscape Canon LUT is a great thing to have. After all, the LUT has useful color preset filters that will provide refreshing looks. The greenery will be restored, and the blue sky will be back.

16. Landscape
The bright yet exceptional blue color of the sea is always mind-blowing. If you want to use the blueish sea filter effect, download this Canon cinematic LUTs. There are special filter effects that will enhance resoLUTions and optimize color schemas. The colors are transformed while keeping blueish sea effects in the process. The end result is always amazing, with naturally appealing graphics.

Part 3: Using The Most Effective LUTs in Wondershare Filmora
In this digital age, the use of technology is revolutionizing video editing. An example is 3D Canon LUTs for upscaling and enhancing visual colors in media. The Canon LUTs are special because of their improvised color grading and schemas. Using Wondershare Filmora , you can download Canon LUTs within a range of filter presets. There are, in total, 200+ LUT filter presets to fulfill your video editing needs within this video editor by default.
In contrast, you can use Wondershare Filmora for other video editing tasks as well. You can edit your video, add music tracks, or correct background noises. You can also add different effects, stickers, and transitions. Let’s discover more useful features of Filmora.

Top Features of Wondershare Filmora
- Stock Media: Filmora has the availability of 10 billion+ free stock media. So you if don’t have your pictures and videos, stock media can provide them. There are different categories of unique visual media.
- Extended Plug-ins: For a better editing experience, you can add countless filter plug-ins. This includes NewBlue, BorisFX, and many others. With plug-ins, you can add a more extensive color enhancement.
- Motion Tracking: The presence of motion tracking allows tracking of object movement in the video. Thus, you can pin media files, text, or graphics to that motion. Your content will look visually appealing with the use of this specific feature.
- Speed Ramping: Using Filmora, you can change the speed of your video through speed ramping. The speed could be changed uniformly or speedily. It depends on your video requirements.
Empower your videos with a new mood using different LUTs. Filmora now offers 100+ top-quality 3D LUTs cover a broad range of scenarios. Transform your videos with Filmora’s powerful 3D LUTs.
Apply LUT on Videos Apply LUT on Videos Learn More


Conclusion
Like other LUTs, Canon LUTs are also special and unique in their kind. They provide 3D cinematic looks with visually attractive color corrections. Meanwhile, in this article, you found the best Canon LUTs for editing visual media. You also learned about Wondershare Filmora, the best video editing and enhancement tool. The provided details of this video editing tool will make it easy for you to adapt to the 200+ available presets on the platform.
Part 1: What are 3D LUTs?
LUTs are important editing tools for upgrading color schemas of visual content. The 3D LUTs are special LUT presets used in color correction and enhancement. 3D LUT is a mathematical table that maps input and output colors. It helps adjust the color tones, textures, and intensity in an optimized way. So, while selecting any 3D LUT filter, it’s applied in a calculated way.
The 3D LUT is equipped with three-dimensional visual art that determines brightness, hue, and saturation. It has depicted its use cases in industries like gaming and film production. Thus, they play a crucial role in matching color content from different cameras. This develops more consistency with customized looks and appealing visualization.
Part 2: Top-Best Free Canon LUTs To Consider in 2024
The Internet is overloaded with amazing download Canon LUTs. Meanwhile, choosing the right LUTs for your task can be difficult. Don’t worry; you will find the list of best Canon LUTs here:
1.Cinema Canon C-Log3
Take your video concept to the next level with cinema Canon C-Log3 LUT. In this LUT pack, you will find 25 Cinema Rec 709 and 25 Cinema C-Log3 LUTs. If you’ve videos, clips, presentations, or social videos, this LUT pack is ideal. Such LUTs are very easy to use. You only need to drag or import them into your videos.
2. City Building
Transform your city building with this free Canon LUT pack. There are exciting LUT preset filters for providing new looks into tall building structures. The combination of weather, greenery, traffic, and buildings demands upgraded looks, for which such LUTs are ideal. With special color orientation, this LUTs pack will optimize color schemes within the city.
3. Canon C-Log Blockbuster
Add special blockbusting looks to your important video clips. With the Canon C-Log Blockbuster LUTs pack, upgrade your videos with a cinematic touch. There are 20 Blockbuster C-Log LUTs that will extend the color grading of your videos. This also improves the quality of your clips, bringing more engagement. Thus, you can make your documentaries and social clips more enchanting.
4. Slight Warmth
Blend unique sunlight touch to your outdoor visual media with these free Canon LUTs. It helps you improve the standards of your images and videos with evening sunshine. Your important outdoor moments will become captured in attractive visual media with pleasing tranquility. The available LUT filter possesses a warm color gradient to initiate creativity.
5. Film Canon C-Log2
Using the film Canon C-Log2 pack, you will find amazing LUT color presets. You can use these LUT filters within your documented or personal clips and movies. Find some prominent LUTs, including the 22 Canon C-Log2 and 22 Rec 709 LUTs in the pack. All these LUTs are special and unique, with extensive color gradients. You can import the preset file or drag it into the video for magical effects.
6. Sun Flare
Are your captured images or recorded videos in a dull location? There is an option to transform quality using this sun flare Canon LUT. With its bright color presets, this LUT can correct colors within dull visual content. This way, the color schemes would be upgraded with more light and brightness. So, don’t worry, even if your picture is captured within a dull environment.
7. Vintage
You need not have any darker blueish effects on your outdoor visual media anymore. With vintage Canon LUT download, enhance color grading in an optimized way. The vintage LUT is backed with special color, tone, and style. When you apply these LUTs to your photo or video, the quality will improve. You will witness color enhancement in a quick time.
8. Blue Skies
The sky is blue as the water. Thus, if your visual content has natural landmarks, provide blue touch. After all, blueish effects will enlighten your visual content in an appealing way. With next-level color grading, you will feel special emotions and feelings vibes. The LUTs are easy to use and integrate into your images or videos.
9. Filmic Style
Blend extraordinary filmy looks into your graphical media with Filmic Style Canon LUT. This LUT is special because it leverages top-level color grading with resolution enhancements. The colors of your visual content will rise, and quality will also improve. So if you’re inspired by the cinematic display, this LUT provides optimized colors.
10. City Film
An aerial picture of your city determines its beauty. But the sandy or dusty atmosphere can ruin picture quality. Using this Canon LUT, you can upscale your city picture. There are unique color gradients that eliminate dust for clarity within the image. Meanwhile, with the correct color combination, you’ll see a clean environment overall.
11. Dusty Light
Sometimes interior images look more attractive in dusty lighting. This LUT pack comes with diverse filter presets that add brownish dusty looks. Thus, your visual content will be enhanced with optimized resolutions within dusty lighting. The Canon LUT will adjust the color schemes within your visual content. Hence, you will have a visually appealing image with outstanding dusty contrast.
12. Tinted Shades
Make your outings more attractive with stylish tints. By using this free Canon LUT, you can add faded tints to your images or videos. Meanwhile, the tinted shades will provide impressive looks within a dull atmosphere. For outdoor photography, this LUT is ideal because of its dark hues and saturated colors. The filter combines a range of color tools for the best output.
13. W&B
Black and white is a vintage color combination that is beyond levels. With this LUTs pack, you can improvise your visual content with a W&B touch. This means LUTs will replace color gradients with stylish black-and-white displays. Meanwhile, the LUT will adjust hue, saturation, contrast, and brightness. As a final result, you will receive attractive W&B content.
14. Pink Grade
Red-brownish mountains look impressive in their original colors. A pink-grade LUT filter can bring originality to your captured videos or photos. This way, the LUT will accurately apply pink color grading with consistency. The mountain which you captured will start looking great again. Pink color schemes are also more attractive when it comes to outdoor visual content.
15. Landscape
Landscapes look great in their clean yet natural colors. But if your photography or videography goes wrong, landscapes may look poor. In this scenario, using a landscape Canon LUT is a great thing to have. After all, the LUT has useful color preset filters that will provide refreshing looks. The greenery will be restored, and the blue sky will be back.
16. Landscape
The bright yet exceptional blue color of the sea is always mind-blowing. If you want to use the blueish sea filter effect, download this Canon cinematic LUTs. There are special filter effects that will enhance resoLUTions and optimize color schemas. The colors are transformed while keeping blueish sea effects in the process. The end result is always amazing, with naturally appealing graphics.
Part 3: Using The Most Effective LUTs in Wondershare Filmora
In this digital age, the use of technology is revolutionizing video editing. An example is 3D Canon LUTs for upscaling and enhancing visual colors in media. The Canon LUTs are special because of their improvised color grading and schemas. Using Wondershare Filmora , you can download Canon LUTs within a range of filter presets. There are, in total, 200+ LUT filter presets to fulfill your video editing needs within this video editor by default.
In contrast, you can use Wondershare Filmora for other video editing tasks as well. You can edit your video, add music tracks, or correct background noises. You can also add different effects, stickers, and transitions. Let’s discover more useful features of Filmora.
Top Features of Wondershare Filmora
- Stock Media: Filmora has the availability of 10 billion+ free stock media. So you if don’t have your pictures and videos, stock media can provide them. There are different categories of unique visual media.
- Extended Plug-ins: For a better editing experience, you can add countless filter plug-ins. This includes NewBlue, BorisFX, and many others. With plug-ins, you can add a more extensive color enhancement.
- Motion Tracking: The presence of motion tracking allows tracking of object movement in the video. Thus, you can pin media files, text, or graphics to that motion. Your content will look visually appealing with the use of this specific feature.
- Speed Ramping: Using Filmora, you can change the speed of your video through speed ramping. The speed could be changed uniformly or speedily. It depends on your video requirements.
Empower your videos with a new mood using different LUTs. Filmora now offers 100+ top-quality 3D LUTs cover a broad range of scenarios. Transform your videos with Filmora’s powerful 3D LUTs.
Apply LUT on Videos Apply LUT on Videos Learn More
Conclusion
Like other LUTs, Canon LUTs are also special and unique in their kind. They provide 3D cinematic looks with visually attractive color corrections. Meanwhile, in this article, you found the best Canon LUTs for editing visual media. You also learned about Wondershare Filmora, the best video editing and enhancement tool. The provided details of this video editing tool will make it easy for you to adapt to the 200+ available presets on the platform.
Also read:
- Updated What Should Be Considered to Choose A Nice GoPro for Vlogging?
- New Easy Ways to Make Procreate GIFs for 2024
- New In 2024, Create Intro Video with Flixpress
- In 2024, In This Article, We Shall Take a Look at the Various Steps of Making a Photo Collage in Microsoft Word, and Also at Other Details of the Process, Which Might Be Relevant
- Updated 2024 Approved Looking Forward to Complement Your Weekend Evenings with a Fantasy Tour to the Anime World? Stay Here to Pick the Most Appealing Alternative From the Best and Timeless Anime Creations
- 2024 Approved How to Zoom in on PowerPoint Easy Ways
- New | Best 8 Online GIF to APNG Converters for 2024
- New 2024 Approved Having Trouble with Black Backgrounds in After Effects? Land in Here to Know How You Can Quickly Escape This Glitch in the Simplest Ever Way Possible
- How to Make a TikTok Loop Video for 2024
- New Top Free Video Editing Software Enhance Your Content with These Essential Tools
- 2024 Approved How To Add Scrolling Text Effect
- New Do You Need to Create a Video for Your Business Online but Feel You Do Not Have the Skill and Time to Do That? Try Out These AI Video Generators that Will Work for You to Carry Out Tasks Effectively
- Updated 2024 Approved Best Way to Freeze-Frame in Final Cut Pro
- Top 8 Video Grabbers for Chrome for 2024
- Updated 2024 Approved Add Flesh to Your Video Content Before Posting Them for Your Audience to See Using Meme Texts. Use the Tutorial Guide Shared in This Post
- How To Synchronize Your Audio And Videos Properly, In 2024
- 2024 Approved How to Cut Videos on Mac without Using FFmpeg?
- Updated 2024 Approved 3 Actionable Ways to Create Countdown Animation for Videos
- 2024 Approved The Complete Guide to Zoho Slides with Ease
- New 2024 Approved Adobe After Effects Review
- Updated 10 Mind-Blowing Video Collage Maker for PC for 2024
- Updated In 2024, To Determine or Change the Video Aspect Ratio Online. Use a Ratio Calculator to Calculate Pixel Dimensions and Aspect Ratios of Images or Videos
- New The Article Introduces Three Recommended Apps to Download Royalty-Free Cinematic Music and Covers an Extensive Procedure to Create a Cinematic Travel Intro for a Travel Vlog
- Updated In 2024, How to Add Motion Titles
- 2024 Approved How to Vlog? A Beginners Guide to Start Vlogging
- New Are You Looking for the Best App to Prank Your Friends? Here Is a Complete Guide on the Funcall App, How to Use It to Change Your Voice, and Its Best Alternatives for 2024
- Final Cut Pro for iPad for 2024
- Updated Efficient Ways to Manage Your Timeline for 2024
- New Are You a Newbie Across YouTube? Want to Know Who the Best Vloggers Are? This Article Provides You with the Best Vloggers on YouTube
- Updated In 2024, 3GP Video Format What Is 3GP Format And How To Play It?
- Updated Vlogs and Travel Content Are Incomplete without a Fast-Motion Effect. Learn Step-by-Step How to Make Fast Motion Video on an iPhone in This Article for 2024
- Updated How to Make Subtitle Videos for 2024
- New How to Make Fortnite Thumbnail with Motion Blur?
- How to Use Renderforest Intro Video Maker
- In 2024, VN Video Editor Templates A Game-Changer for Your Videos
- Have You a Desire to Imbibe Your PowerPoint Presentations with Custom Effects and Tools? Be There to Learn All About Creating Custom Slideshows in PowerPoint with Utmost Ease for 2024
- Are You Looking for the Best Way to Add Subtitles to Your Video? The Top SRT File Creators Can Help You Do That for 2024
- Updated In 2024, Tactics To Make Keynote Slideshow
- Updated In 2024, Lets Look at Four Different Ways of Merging Audios and Videos. The Tools Will Help You Craft High-End Videos without Involving Any Complex Steps. You Can Make Your Videos Beautiful by Using the Following Easy to Use Tools
- New 10+ Top Unlimited FCPX Slideshow Templates
- New Detailed Tutorial to Resize Your Video in VLC for 2024
- New If You Do Not Know How to QuickTime Trim Video Clips, You Are in the Right Place. We Have Provided Information that Will Help You Trim Videos with This Application and Make Them Engaging for Viewers
- 2024 Approved How Much Wedding Videographer Cost
- New In 2024, An Overview of the Best Free LUTs to Use
- 2024 Approved Adobe Photoshop Is the Best Photo Editor to Add Green Screen Effect to Your Photo While Wondershare Filmora Is the Best Video Editor to Add Green Screen Effect to Your Video
- Updated Step by Step to Crop Videos with CyberLink PowerDirector for 2024
- Updated Best 10 Tools To Make Quiz Videos for 2024
- In 2024, How to Reset a Locked Samsung Galaxy S23 Phone
- How to Transfer Videos from Xiaomi Civi 3 to iPad | Dr.fone
- How To Bypass Google FRP In 3 Different Ways
- In 2024, Best 3 Samsung Galaxy Z Flip 5 Emulator for Mac to Run Your Wanted Android Apps | Dr.fone
- Top 4 Ways to Trace Oppo F25 Pro 5G Location | Dr.fone
- In 2024, 3 Ways for Android Pokemon Go Spoofing On Samsung Galaxy A14 4G | Dr.fone
- How To Check if Your Oppo A18 Is Unlocked
- 15 Best Strongest Pokémon To Use in Pokémon GO PvP Leagues For Oppo Find N3 Flip | Dr.fone
- How to Screen Mirroring Itel S23+? | Dr.fone
- Unlocking Made Easy The Best 10 Apps for Unlocking Your ZTE Blade A73 5G Device
- In 2024, Top 15 Apps To Hack WiFi Password On Samsung Galaxy XCover 6 Pro Tactical Edition
- How to Fix iPhone 11 Pro Max Passcode not Working?
- How to Mirror PC Screen to HTC U23 Pro Phones? | Dr.fone
- How To Revive Your Bricked Realme V30 in Minutes | Dr.fone
- How To Transfer WhatsApp From Apple iPhone 14 Pro to others devices? | Dr.fone
- Title: 15 Must-Use Gifs Editors
- Author: Morgan
- Created at : 2024-04-24 01:12:29
- Updated at : 2024-04-25 01:12:29
- Link: https://ai-video-editing.techidaily.com/15-must-use-gifs-editors/
- License: This work is licensed under CC BY-NC-SA 4.0.
