

Updated | How to Share YouTube Video on Zoom?
| How to Share YouTube Video on Zoom?
Abundant Video Effects - Wondershare Filmora
Provide abundant video effects - A creative video editor
Powerful color correction and grading
Detailed tutorials are provided by the official channel
While the internet has made all of our lives significantly easier, there are still things that can prove difficult for people who are not very tech-savvy. Not everything on the web comes with a built-in tutorial, but luckily, you can find guides across the internet.
YouTube is a free online video streaming platform that is ranked as the world’s second most viewed website, just after Google. Zoom Cloud Meetings is software designed to help users set up video and audio calls for various purposes. Are you looking to combine the two platforms?
Keep reading to learn how to share a YouTube video on Zoom easily, along with a detailed step-by-step guide with a near-to-zero learning curve.
In this article
Part 1: Potential Reasons to Share YouTube Videos in Zoom
Part 2: How to Share YouTube Videos in Zoom
Part 1: Potential Reasons to Share YouTube Videos in Zoom
Everyone’s favorite app, YouTube, provides a lot of useful services for its users. The online streaming platform contains millions of videos on almost every topic from around the world, ranging from educational content to recipes and music videos.
The Zoom streaming service has also gained tremendous popularity in recent years, particularly owing to the raging pandemic that swept the world off its feet. It is quite a convenient software program that lets you organize online meetings with up to a hundred members or more in the premium version.
Certain moments may arise when you want to share a YouTube video on Zoom. Luckily, the Zoom platform offers various methods by which users can do that easily. But why would you want to share a video from YouTube on Zoom in the first place? Let’s shine some light on that.
Let’s assume you are taking an online class via Zoom. You find a YouTube video that you believe can help explain the topic to your students. During the lecture on Zoom, just like viewing a video on a projector or a screen, you can share your chosen YouTube video with the rest of the class easily.
Now let’s say you are organizing a business meeting via Zoom. You have a YouTube video showing a compilation of different forms of marketing strategies that you wish to share with your team. With just a few simple clicks, you can easily share the YouTube video with everyone present in the meeting.
You and your friends are having a group video chat on Zoom. While laughing at something your friend said, you suddenly remember seeing a reaction video meme on YouTube that would exactly fit the situation. You quickly search it up and share it with your friends, who then applaud you for your choice.
These are just some of the scenarios where you might have to share YouTube videos on Zoom. A whole set of different reasons may arise, which can cause you to share a YouTube video with your Zoom attendees. If such an instance arises, you need to learn how to do that quickly and efficiently.
Part 2: How to Share YouTube Videos in Zoom
While each of us might have different reasons for sharing YouTube videos on Zoom, the process to do so is identical on all versions of the Zoom application. Looking for a guide on how to share YouTube videos on Zoom easily?
Below, you can find two different methods using which you can seamlessly share a YouTube video of your choice on Zoom. The methods are accompanied by a step-by-step guide and relevant images, so you don’t get lost along the way.
Method 1: Sharing Video through Screen Share
The easiest and most effective method to share a YouTube video on Zoom is using Zoom’s screen sharing option. It is designed in such a way that users can share whatever is being shown on their screens with their audiences, such as PowerPoint presentations, documents, YouTube videos, and more.
The following steps indicate how you can share your video via the screen share option in the Zoom app:
Step 1: Open Your YouTube Video
To begin with, launch the browser on your computer and go to YouTube’s website. You can now search for the video you want to share with your Zoom attendees. If you have your video saved, simply access your playlists to open the video. Click on the video and ensure that the volume is turned up, but don’t hit Play yet.

Step 2: Share Screen on Zoom
Back in your Zoom meeting’s main screen, check the bottom line for options. A green “Share Screens” option will be available in the middle. When you click on it, Zoom will open a window showing all the tabs open on your device. Click the screen with the YouTube video and check the little box next to “Share Sound” at the bottom left corner of the window. Now hit “Share.”

Step 3: Play Video
You can now go back to your browser window, open your video in the full-screen mode, and hit the “Play” button to share the YouTube video with everyone. You can press the “Stop Share” button to stop sharing your screen in the meeting.

Method 2: Using Links to Share YouTube Video
If you don’t want to play the YouTube video live in the meeting, you can still share its link so people can access it privately. Zoom offers a chat box that can help you do that. Follow the steps given below to learn how to share a YouTube video’s link on Zoom meetings.
Step 1: Copy Video Link
Open YouTube on your device and navigate to the video you wish to share in Zoom. Tap the “Share” button below the video’s title and hit “Copy” to save the link on your clipboard.

Step 2: Open Chat Box
Now go to your Zoom meeting’s interface and click on the “Chat” button at the bottom. If you are using the phone app, you might have to tap the “More” option at the bottom and find “Chat” from there.
Step 3: Share Video Link on Zoom
Now simply paste the copied video link into the chat box and hit “Enter” to share it with everyone in the meeting.

Conclusion
The wonders of technology never cease to amaze. Some of the world’s top websites and software programs offer integration and support for one another. YouTube and Zoom are the prime examples of such apps which you can use collectively, leaving behind any potential hassle.
You can now share YouTube videos on Zoom without any trouble by following the simple guide mentioned above. There are multiple options to share a YouTube video via Zoom, which include screen sharing and external links. Once done, you can show the shared video to all the participants present in a Zoom meeting.
While the internet has made all of our lives significantly easier, there are still things that can prove difficult for people who are not very tech-savvy. Not everything on the web comes with a built-in tutorial, but luckily, you can find guides across the internet.
YouTube is a free online video streaming platform that is ranked as the world’s second most viewed website, just after Google. Zoom Cloud Meetings is software designed to help users set up video and audio calls for various purposes. Are you looking to combine the two platforms?
Keep reading to learn how to share a YouTube video on Zoom easily, along with a detailed step-by-step guide with a near-to-zero learning curve.
In this article
Part 1: Potential Reasons to Share YouTube Videos in Zoom
Part 2: How to Share YouTube Videos in Zoom
Part 1: Potential Reasons to Share YouTube Videos in Zoom
Everyone’s favorite app, YouTube, provides a lot of useful services for its users. The online streaming platform contains millions of videos on almost every topic from around the world, ranging from educational content to recipes and music videos.
The Zoom streaming service has also gained tremendous popularity in recent years, particularly owing to the raging pandemic that swept the world off its feet. It is quite a convenient software program that lets you organize online meetings with up to a hundred members or more in the premium version.
Certain moments may arise when you want to share a YouTube video on Zoom. Luckily, the Zoom platform offers various methods by which users can do that easily. But why would you want to share a video from YouTube on Zoom in the first place? Let’s shine some light on that.
Let’s assume you are taking an online class via Zoom. You find a YouTube video that you believe can help explain the topic to your students. During the lecture on Zoom, just like viewing a video on a projector or a screen, you can share your chosen YouTube video with the rest of the class easily.
Now let’s say you are organizing a business meeting via Zoom. You have a YouTube video showing a compilation of different forms of marketing strategies that you wish to share with your team. With just a few simple clicks, you can easily share the YouTube video with everyone present in the meeting.
You and your friends are having a group video chat on Zoom. While laughing at something your friend said, you suddenly remember seeing a reaction video meme on YouTube that would exactly fit the situation. You quickly search it up and share it with your friends, who then applaud you for your choice.
These are just some of the scenarios where you might have to share YouTube videos on Zoom. A whole set of different reasons may arise, which can cause you to share a YouTube video with your Zoom attendees. If such an instance arises, you need to learn how to do that quickly and efficiently.
Part 2: How to Share YouTube Videos in Zoom
While each of us might have different reasons for sharing YouTube videos on Zoom, the process to do so is identical on all versions of the Zoom application. Looking for a guide on how to share YouTube videos on Zoom easily?
Below, you can find two different methods using which you can seamlessly share a YouTube video of your choice on Zoom. The methods are accompanied by a step-by-step guide and relevant images, so you don’t get lost along the way.
Method 1: Sharing Video through Screen Share
The easiest and most effective method to share a YouTube video on Zoom is using Zoom’s screen sharing option. It is designed in such a way that users can share whatever is being shown on their screens with their audiences, such as PowerPoint presentations, documents, YouTube videos, and more.
The following steps indicate how you can share your video via the screen share option in the Zoom app:
Step 1: Open Your YouTube Video
To begin with, launch the browser on your computer and go to YouTube’s website. You can now search for the video you want to share with your Zoom attendees. If you have your video saved, simply access your playlists to open the video. Click on the video and ensure that the volume is turned up, but don’t hit Play yet.
Step 2: Share Screen on Zoom
Back in your Zoom meeting’s main screen, check the bottom line for options. A green “Share Screens” option will be available in the middle. When you click on it, Zoom will open a window showing all the tabs open on your device. Click the screen with the YouTube video and check the little box next to “Share Sound” at the bottom left corner of the window. Now hit “Share.”
Step 3: Play Video
You can now go back to your browser window, open your video in the full-screen mode, and hit the “Play” button to share the YouTube video with everyone. You can press the “Stop Share” button to stop sharing your screen in the meeting.
Method 2: Using Links to Share YouTube Video
If you don’t want to play the YouTube video live in the meeting, you can still share its link so people can access it privately. Zoom offers a chat box that can help you do that. Follow the steps given below to learn how to share a YouTube video’s link on Zoom meetings.
Step 1: Copy Video Link
Open YouTube on your device and navigate to the video you wish to share in Zoom. Tap the “Share” button below the video’s title and hit “Copy” to save the link on your clipboard.
Step 2: Open Chat Box
Now go to your Zoom meeting’s interface and click on the “Chat” button at the bottom. If you are using the phone app, you might have to tap the “More” option at the bottom and find “Chat” from there.
Step 3: Share Video Link on Zoom
Now simply paste the copied video link into the chat box and hit “Enter” to share it with everyone in the meeting.
Conclusion
The wonders of technology never cease to amaze. Some of the world’s top websites and software programs offer integration and support for one another. YouTube and Zoom are the prime examples of such apps which you can use collectively, leaving behind any potential hassle.
You can now share YouTube videos on Zoom without any trouble by following the simple guide mentioned above. There are multiple options to share a YouTube video via Zoom, which include screen sharing and external links. Once done, you can show the shared video to all the participants present in a Zoom meeting.
Best 10 Fun Discord Bots You Need
Top 10 Fun Discord Bots You Need in 2024
An easy yet powerful editor
Numerous effects to choose from
Detailed tutorials provided by the official channel
Consumers enjoy discord because it serves as a hub for their social groups and communities. It’s a haven where users can be themselves while socializing with others who share their interests and hobbies. There is no algorithm selecting what they should see, no continuous scrolling, and no news feed. Common interests fuel conversations and you can use some fun discord bots to pep up the conversation.

Fun bots to add discord with artificial intelligence (AI) technologies are among the most helpful tools available on the discord platform. Funny emojis for discord may be beneficial to greet new members and have funny light conversations! This aids in the creation and maintenance of a vibrant online community. You can add music, games, and fun memes to your server using these bots if you wish to.
In this article
01 [10 Fun Discord Bots You Need in 2024](#Part 1)
02 [Fun Discord Bots FAQs](#Part 2)
Part 1 Fun Discord Bots You Need in 2024
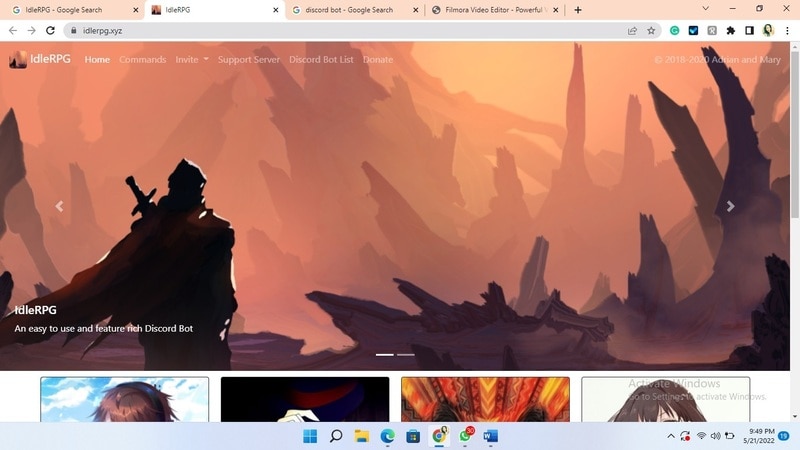
01IdleRPG
The IdleRPG is another enjoyable and engaging fun discord bot in the RPG gaming experience. It rewards server members for participating in the game while gaining XP and having fun. It offers character advancement and is comparable to other RPG games.
You may travel on a quest, trade various things, fight other players, and even find love. There’s also a scoreboard for the top ten loves, top ten PvP players, top ten wealthiest, and top ten XP players. IdleRPG also allows you to wager in various ways to help you boost your gaming money.
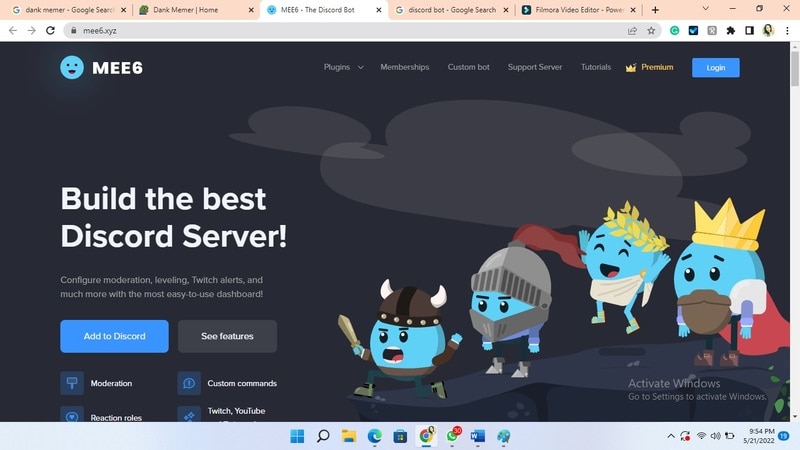
02MEE6
MEE6 is a widespread moderation and one of the greatest fun bots for discord. It takes care of many tasks that a mod team would typically do. This includes greeting new members, informing your server when you or your favorite content producers go live on Twitch or YouTube, and allowing users to assign roles depending on their reactions.
A command tool that allows you to generate custom commands and an XP leveling system that users may grind to earn access to various channels and permissions depending on activity are two of MEE6’s more complicated features. MEE6 also includes plugins for music and developing your fun discord bot.
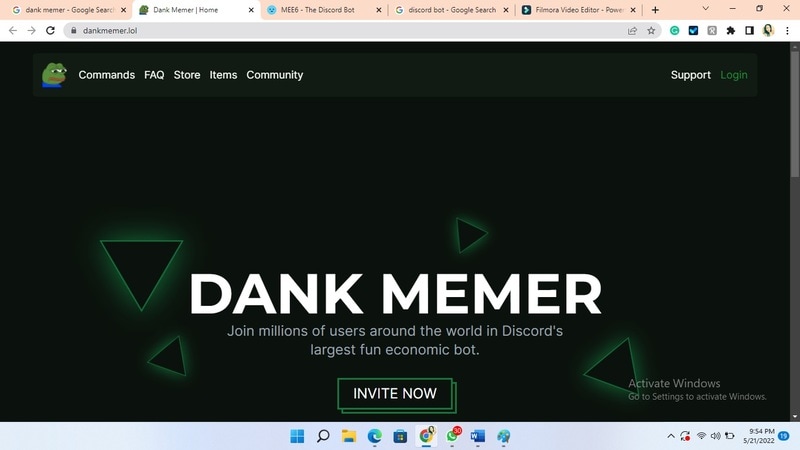
03Dank Memer
Dank Memer is another fun bot to add to discord with a lighthearted tone. It offers one of the most extensive built-in economies, allowing participants to engage in text-based thievery, bank robbery, and gambling experiences.
As its name implies, it also offers a slew of meme-related commands. You can use simple chat instructions to create memes. Other memes automatically publish.
Even more impressive is that awesome memes are collected daily from Reddit’s top meme collections.
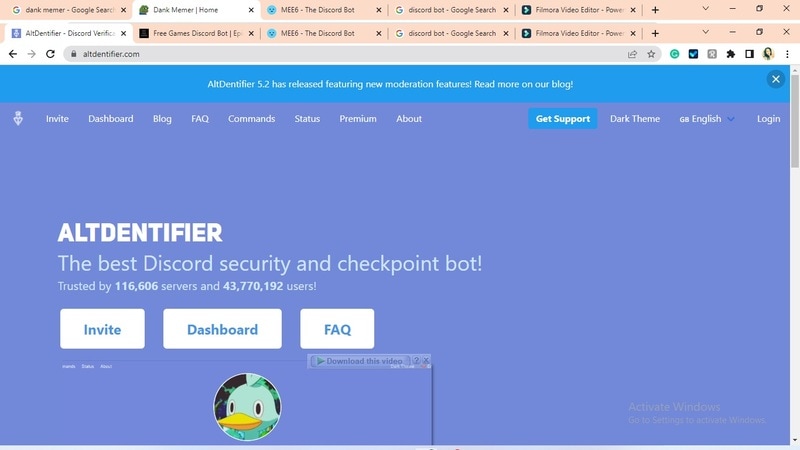
04AltDentifier
Another unique funny discord emoji bot is AltDentifier, which maintains your server clean and spam-free. It’s simple to set up and takes only a few minutes to get up and run. It now has over 35 million users spread across 100,000 servers. It also includes several more moderation commands to make administration easier.
The AltDentifier bot contains:
● An automated anti-raid system.
● A robust verification mechanism.
● Multilingual support.
● A review record.
It will also notify you if a user attempts to circumvent any limitations by utilizing a VPN.
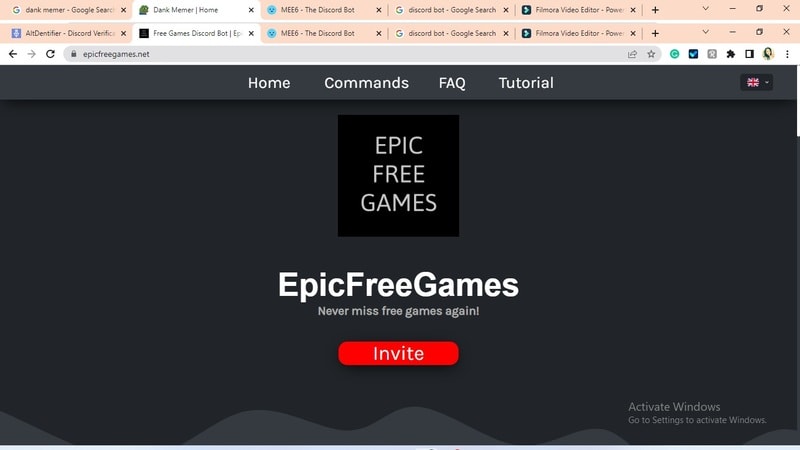
05EpicFreeGames
Over the last two years, Epic Free Games has given away thousands of free games. GTA V, Dead By Daylight, and NBA 2K21 are among the given-away titles. It even-handed away Discord Nitro lately. Have any of these free games ever escaped your notice? Fear not, for the EpicFreeGames bot has your back.
The EpicFreeGames bot delivers a message to a channel, reminding everyone of Epic’s free game(s). It only has one task, yet it can provide you with hundreds of dollars worth of games. Never miss another fantastic free Epic Games game again.
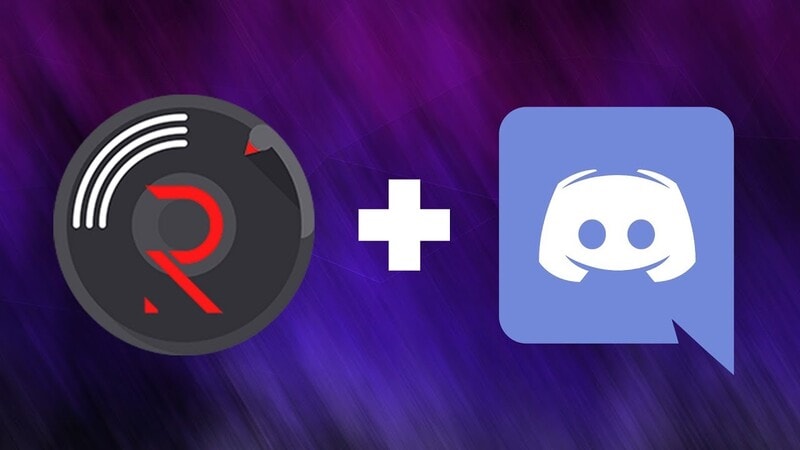
06**Rythm **
Rythm is a great fun discord bot for playing music in the voice stream of your server. This one features a beautiful user interface that includes a music player that you can interact with. This makes controlling the channel’s queue a breeze.
The options are changeable. You can designate DJ duties, prohibit the same songs from appearing in queues again, and block particular channels from playing music. Rhythm is less platform-agnostic than Groovy. Spotify, YouTube, SoundCloud, and Bandcamp are among the options. Apple Music is not currently supported.
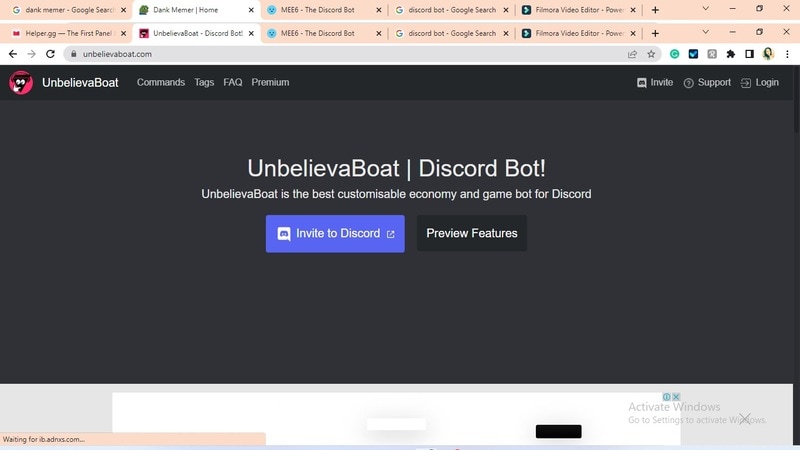
07Unbelievaboat
UnbelievaBoat is a versatile, fun bot to add to discord that uses exciting activities to keep server members engaged. These capabilities, fortunately, include a moderation mechanism that you may utilize to issue warnings and enforce bans. Your moderators may keep track of each action by assigning it a case number.
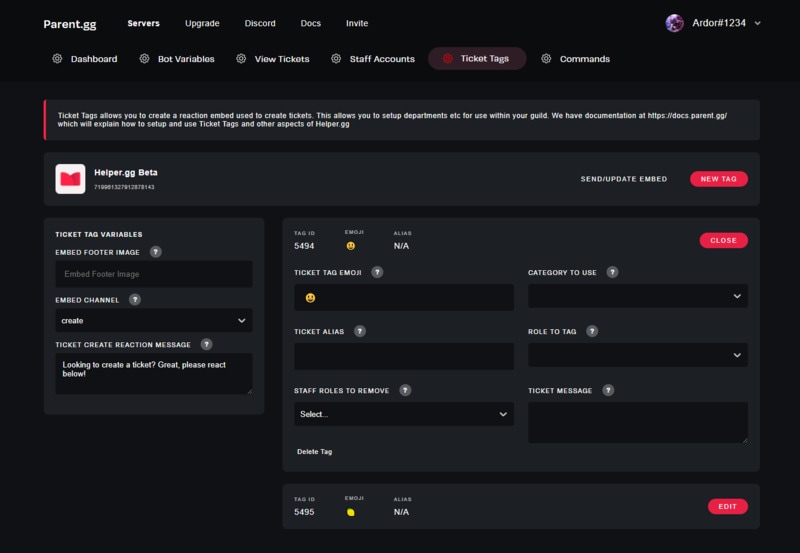
08Helper.gg
Helper.gg enables you to transform your discord server into a support ticket system. It’s a board ticket bot with a stunning UI that makes managing and responding to client tickets simple.
Create staff accounts for your company’s customer support representatives and manage their access. Ticket logging with the flexibility to rename and relocate tickets, add and delete users, and the contentment of having tickets close automatically based on the amount of time that has passed since the previous reply are all accessible.
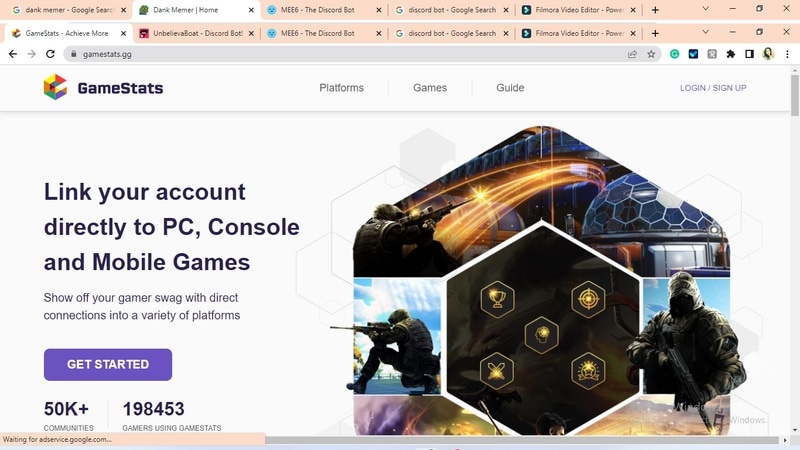
09GameStats
Next, GameStats has one-of-a-kind funny emojis for the discord bot. We all enjoy looking at our in-game statistics and comparing them. The GameStats Discord bot makes sharing and displaying your impressive numbers simple.
Connect to your game or platform, make a personalized profile card, and begin sharing your tryhard statistics.
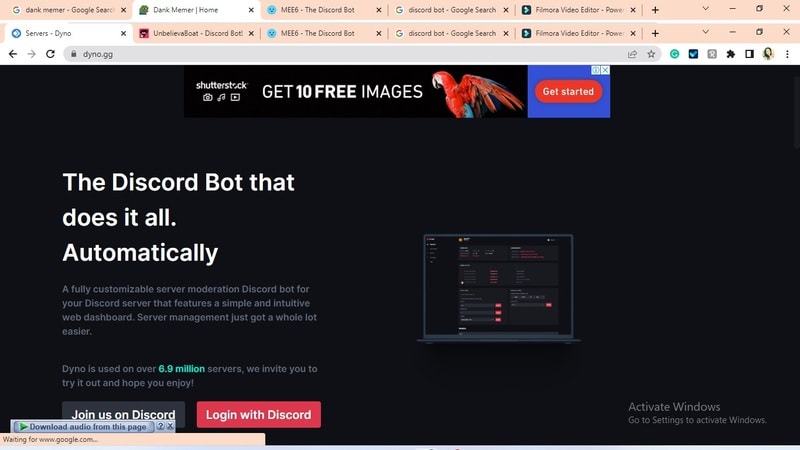
10Dyno
Dyno is another well-crafted fun discord bot. It’s an utterly customizable server moderation bot that assists with server automation. You also receive a basic online dashboard with Dyno that you can use to monitor and control your server.
It has functions such as creating positions, making announcements, banning members, and even requesting puppy or cat images. Dyno is a fun bot that allows you to automate your server management effortlessly. Premium subscriptions, which start at $4.99 per month and unlock more exclusive features, are also available.
However, if you are a creative video editor who likes sharing their experience on discord, Filmora is for you. With Filmora, you can bring your recorded experiences with funny discord emojis to life!
But Wait, What is Wondershare Filmora Video Editor ?
Filmora is a famous video editing program for those who wish to focus on editing and producing high-quality videos with the support of 4K video editing. It’s a reasonably priced software featuring tools like split, trim, add text, color, etc. When it comes to designing, adding effects, and modifying movies, it provides users with many possibilities. Users can add overlays, create animations and objects, add music, and more with Wondershare’s Filmora. It’s an excellent tool for individuals who wish to include dedications, tributes, fun emojis and anecdotes in their films. Any video can also benefit from voiceovers.
For Win 7 or later (64-bit)
For macOS 10.12 or later
Part 2 Fun Discord Bots FAQs
Q. What does MEE6 stand for?
A. MEE6 is a discord role bot that lets users assign roles to themselves via discord replies. This discord role generator will change user rights in discord automatically.
Q. Are these fun bots free?
A. Yes and no. Most fun bots for discord are free to use, although you must pay for some features.
Q. What is the top level I can reach on the MEE6 bot?
A. The maximum level accessible is 1,768,802, which would take 935 billion years if messages sent every minute.
Q. Help! My discord got hacked; how did that even happen?
A. Users may edit discord javascript files. A cybercriminal can install harmful malware to discord client files if they get user authorization. When people open the file, the code also gets executed. After then, the hacker has access to the user’s discord data.
Q. What can discord bots do?
A. On your server, the bots can conduct a variety of helpful automated chores and bot commands, like welcoming new users, monitoring content, and banning rule violators. Using fun discord bots’ instructions, you can add music, humor, games, and other emojis to your server.
● Ending Thoughts →
● In short, moderators and administrators can use funny discord emojis to administer their servers better, make them attractive, and get more users. There are many vanilla discord commands to choose from, and when you put fun bots to add to discord, the possibilities become unlimited.
● Besides, there are several funny emojis for discord to improve your discord skills and establish your discord server. Finally, Filmora can assist you in beautifying your recorded videos make funny emojis for discord.
Consumers enjoy discord because it serves as a hub for their social groups and communities. It’s a haven where users can be themselves while socializing with others who share their interests and hobbies. There is no algorithm selecting what they should see, no continuous scrolling, and no news feed. Common interests fuel conversations and you can use some fun discord bots to pep up the conversation.
Fun bots to add discord with artificial intelligence (AI) technologies are among the most helpful tools available on the discord platform. Funny emojis for discord may be beneficial to greet new members and have funny light conversations! This aids in the creation and maintenance of a vibrant online community. You can add music, games, and fun memes to your server using these bots if you wish to.
In this article
01 [10 Fun Discord Bots You Need in 2024](#Part 1)
02 [Fun Discord Bots FAQs](#Part 2)
Part 1 Fun Discord Bots You Need in 2024
01IdleRPG
The IdleRPG is another enjoyable and engaging fun discord bot in the RPG gaming experience. It rewards server members for participating in the game while gaining XP and having fun. It offers character advancement and is comparable to other RPG games.
You may travel on a quest, trade various things, fight other players, and even find love. There’s also a scoreboard for the top ten loves, top ten PvP players, top ten wealthiest, and top ten XP players. IdleRPG also allows you to wager in various ways to help you boost your gaming money.
02MEE6
MEE6 is a widespread moderation and one of the greatest fun bots for discord. It takes care of many tasks that a mod team would typically do. This includes greeting new members, informing your server when you or your favorite content producers go live on Twitch or YouTube, and allowing users to assign roles depending on their reactions.
A command tool that allows you to generate custom commands and an XP leveling system that users may grind to earn access to various channels and permissions depending on activity are two of MEE6’s more complicated features. MEE6 also includes plugins for music and developing your fun discord bot.
03Dank Memer
Dank Memer is another fun bot to add to discord with a lighthearted tone. It offers one of the most extensive built-in economies, allowing participants to engage in text-based thievery, bank robbery, and gambling experiences.
As its name implies, it also offers a slew of meme-related commands. You can use simple chat instructions to create memes. Other memes automatically publish.
Even more impressive is that awesome memes are collected daily from Reddit’s top meme collections.
04AltDentifier
Another unique funny discord emoji bot is AltDentifier, which maintains your server clean and spam-free. It’s simple to set up and takes only a few minutes to get up and run. It now has over 35 million users spread across 100,000 servers. It also includes several more moderation commands to make administration easier.
The AltDentifier bot contains:
● An automated anti-raid system.
● A robust verification mechanism.
● Multilingual support.
● A review record.
It will also notify you if a user attempts to circumvent any limitations by utilizing a VPN.
05EpicFreeGames
Over the last two years, Epic Free Games has given away thousands of free games. GTA V, Dead By Daylight, and NBA 2K21 are among the given-away titles. It even-handed away Discord Nitro lately. Have any of these free games ever escaped your notice? Fear not, for the EpicFreeGames bot has your back.
The EpicFreeGames bot delivers a message to a channel, reminding everyone of Epic’s free game(s). It only has one task, yet it can provide you with hundreds of dollars worth of games. Never miss another fantastic free Epic Games game again.
06**Rythm **
Rythm is a great fun discord bot for playing music in the voice stream of your server. This one features a beautiful user interface that includes a music player that you can interact with. This makes controlling the channel’s queue a breeze.
The options are changeable. You can designate DJ duties, prohibit the same songs from appearing in queues again, and block particular channels from playing music. Rhythm is less platform-agnostic than Groovy. Spotify, YouTube, SoundCloud, and Bandcamp are among the options. Apple Music is not currently supported.
07Unbelievaboat
UnbelievaBoat is a versatile, fun bot to add to discord that uses exciting activities to keep server members engaged. These capabilities, fortunately, include a moderation mechanism that you may utilize to issue warnings and enforce bans. Your moderators may keep track of each action by assigning it a case number.
08Helper.gg
Helper.gg enables you to transform your discord server into a support ticket system. It’s a board ticket bot with a stunning UI that makes managing and responding to client tickets simple.
Create staff accounts for your company’s customer support representatives and manage their access. Ticket logging with the flexibility to rename and relocate tickets, add and delete users, and the contentment of having tickets close automatically based on the amount of time that has passed since the previous reply are all accessible.
09GameStats
Next, GameStats has one-of-a-kind funny emojis for the discord bot. We all enjoy looking at our in-game statistics and comparing them. The GameStats Discord bot makes sharing and displaying your impressive numbers simple.
Connect to your game or platform, make a personalized profile card, and begin sharing your tryhard statistics.
10Dyno
Dyno is another well-crafted fun discord bot. It’s an utterly customizable server moderation bot that assists with server automation. You also receive a basic online dashboard with Dyno that you can use to monitor and control your server.
It has functions such as creating positions, making announcements, banning members, and even requesting puppy or cat images. Dyno is a fun bot that allows you to automate your server management effortlessly. Premium subscriptions, which start at $4.99 per month and unlock more exclusive features, are also available.
However, if you are a creative video editor who likes sharing their experience on discord, Filmora is for you. With Filmora, you can bring your recorded experiences with funny discord emojis to life!
But Wait, What is Wondershare Filmora Video Editor ?
Filmora is a famous video editing program for those who wish to focus on editing and producing high-quality videos with the support of 4K video editing. It’s a reasonably priced software featuring tools like split, trim, add text, color, etc. When it comes to designing, adding effects, and modifying movies, it provides users with many possibilities. Users can add overlays, create animations and objects, add music, and more with Wondershare’s Filmora. It’s an excellent tool for individuals who wish to include dedications, tributes, fun emojis and anecdotes in their films. Any video can also benefit from voiceovers.
For Win 7 or later (64-bit)
For macOS 10.12 or later
Part 2 Fun Discord Bots FAQs
Q. What does MEE6 stand for?
A. MEE6 is a discord role bot that lets users assign roles to themselves via discord replies. This discord role generator will change user rights in discord automatically.
Q. Are these fun bots free?
A. Yes and no. Most fun bots for discord are free to use, although you must pay for some features.
Q. What is the top level I can reach on the MEE6 bot?
A. The maximum level accessible is 1,768,802, which would take 935 billion years if messages sent every minute.
Q. Help! My discord got hacked; how did that even happen?
A. Users may edit discord javascript files. A cybercriminal can install harmful malware to discord client files if they get user authorization. When people open the file, the code also gets executed. After then, the hacker has access to the user’s discord data.
Q. What can discord bots do?
A. On your server, the bots can conduct a variety of helpful automated chores and bot commands, like welcoming new users, monitoring content, and banning rule violators. Using fun discord bots’ instructions, you can add music, humor, games, and other emojis to your server.
● Ending Thoughts →
● In short, moderators and administrators can use funny discord emojis to administer their servers better, make them attractive, and get more users. There are many vanilla discord commands to choose from, and when you put fun bots to add to discord, the possibilities become unlimited.
● Besides, there are several funny emojis for discord to improve your discord skills and establish your discord server. Finally, Filmora can assist you in beautifying your recorded videos make funny emojis for discord.
Tactics to Create Transparent Image in Minimal Steps
Tactics to Make Transparent Image in Minimal Steps
An easy yet powerful editor
Numerous effects to choose from
Detailed tutorials provided by the official channel
We always want to have the images that give us the power to do customizations as needed. Until and unless an image with appropriate adjustments is not there, we cannot think of editing them as wanted. But how can we forget sometimes the images are already occupied that we cannot make the changes. This sometimes makes us feel annoyed too. But don’t worry about it as now different tools to make pictures transparent are available. After making the image transparent, you can add on the effects as needed.
If you are having confusion how to use these tools or anything else, then keep reading till the last. In this read, we are discussing some transparent image makers that will help you to do it seamlessly. Let’s get started!
In this article
01 [Similarities and Differences Between PNG Vs. JPG Vs. GIF](#Part 1)
02 [Minimal Steps to Make Background Transparent](#Part 2)
03 [How to Insert Transparent Image in Video](#Part 3)
Part 1 Similarities and Differences Between PNG Vs. JPG Vs. GIF
As we all know, there are so many formats in which these images are available. But sometimes it happens we are not aware of the similarities and differences corresponding to them. This confusion sometimes let us chooses the wrong format. But not anymore, and in this section, we are discussing the similarities and differences between PNG Vs. JPG Vs. GIF.
● PNG
PNG is a lossless compression format which means that it can be compressed without losing any data. It also supports transparency. The compression ratio is usually higher than JPG and GIF.
● JPG
JPG is a lossy compression format which means that it can be compressed without losing any data, but the image quality will suffer because of the loss of information. It supports transparency but is not as good as PNG.
● GIF
GIF is a lossless or lossy compression format which means that it can be compressed without losing any data or quality respectively. It does not support transparency and has a limited color range compared to PNG or JPG.
Part 2 Minimal Steps to Make Background Transparent
In this section, we are discussing the steps that you need to follow with transparent image-makers. Here we discuss some of the best tools available so that you can feel a bit confident in utilizing them for editing. This list includes:-
● Canva
Canva is a graphic design tool that helps users creates professional-quality designs. It has easy to use templates and fonts that are free to use. Users can also customize their own templates and fonts, add images and videos, make collages, infographics, and other designs.
Steps to Make in Canva
Step 1: Get “Canva” available on your system and open it.

Step 2: Mode to “Edit Image” and “upload the image” in which you wish to make the background transparent.

Step 3: Choose the “Effect tab” and select the “background remover” option.


Step 4: If you wish to add on any other effect, do it.
Step 5: Click on the “Download icon” and save it for future use.
● Photoshop
Photoshop can be used to edit video footage and create special effects. You can cut video clips together and shape them into a movie sequence by adding transitions and overlays to visualize the actions between shots. You can also use it to add graphics or other visual elements, like animations or even text. But don’t forget this tool also gives you the option to make the backgrounds transparent.
Steps to Make in Photoshop
Step 1: Get Photoshop o your system and import the image you wish to edit.
Step 2: Press Ctrl+J in order to create duplicate layers. (This is important in order to keep an eye on the section you are doing for making the editing.)

Step 3: Move to “Windows” and click on “Properties”

Step 4: From the list of options, hit on “Remove Background”

Step 5: Click on the “Eye icon” to view the transparent image.

Step 6: Save the image for future use.
● Picsart
Picsart is a robust photo editing app which has features such as filters, stickers, and overlays. It also has the ability to create collages and videos. The app also has a feature called “edit & share” which allows the user to edit the photo right in the app, then share it with their friends on social media. Picsart doesn’t require any special knowledge or expertise in photography; so anyone can pick up the basics of using it in no time.
Steps to use Picsart
Step 1: Get the Picsart app in your device or visit the online portal.
Step 2: Upload the image you wish to edit.

Step 3: Click on “Start Editing” button and then choose either of the option from “Behind Person” or “Behind Object” as per your situation.


Step 4: The tool will automatically remove the background and make it transparent. Download the image now.

Part 3 How to Insert Transparent Image in Video
After creating outstanding video content, there is a possibility that you might be looking forward to integrating any transparent image into it. Well, in this case, it is important that you have access to the best tool. Until and unless the best software or tool is not here, you cannot think of getting the task done. Don’t worry because for catering to this need, Filmora is one of the best options to choose.
Wondershare Filmora Video Editor is all-in-one video editing software to help people edit their videos and make them look professional. The best thing about this software is that it doesn’t require any expertise or knowledge of video editing before using it. The user can create a video from scratch just by importing the photos and videos from their camera roll, which are automatically combined into a single video with transitions and music in just a few steps.
For Win 7 or later (64-bit)
For macOS 10.12 or later
Also, this software is both intuitive and easy to use. It also provides many features that you can customize depending on what outcome you want. In addition, this tool also includes tutorials and support services via phone, email or chat line, so all your questions are answered quickly and efficiently.
Furthermore, this allows you to make your videos better by inserting transparent images or graphics in them. You can achieve amazing effects and superimpose without having to spend hours editing your video. With Filmora, it’s simple to create professional-quality videos without using any other software and spending too much time on the editing process.
● Steps to use Filmora
Step 1: After browsing all these features, you might be curious to try out the features integrated into it. The steps you need to follow are:-
Step 2: Get Filmora available on your system. It is compatible with Windows and Mac both.
Step 3: Open Filmora and select “Import-Import Media Files”.

Step 4: Add the imported images. You can do this by doing the right-click and selecting the insert image option. Alternatively you can do it u drag and drop option too.

Step 5: The inserted images will appear in the timeline, and double click on them. The settings menu appear to select the “Chroma key” and enable it.

Step 6: The image will get transparent in no time. If you wish to add on any extra colour or effect to the image, choose it from the editing menu available. The “Color Picker” option is also there that will be helpful in adding the colors.
Step 7: Click on “Ok” to make the changes saved.

Step 7: After getting the expected transparent image, you can simply overlay it into the video.
● Ending Thoughts →
● Transparent images give you the chance to make the editing as required. This simply means there will be no need for you to occupy the image with unnecessary stuff because after making the image transparent only the required content will have a pace on it.
● Filmora is the best tool to insert transparent images in the video. This tool have innovative interface and let users have the best options to make the editing in the video they are creating. Along with making the background transparent, this tool has other editing features too.
● Making transparent images is just a matter of a few steps. One just needs to be sure of the right tools. If they are not having the right tool gett9ing the expected outcome will not be their thing.
We always want to have the images that give us the power to do customizations as needed. Until and unless an image with appropriate adjustments is not there, we cannot think of editing them as wanted. But how can we forget sometimes the images are already occupied that we cannot make the changes. This sometimes makes us feel annoyed too. But don’t worry about it as now different tools to make pictures transparent are available. After making the image transparent, you can add on the effects as needed.
If you are having confusion how to use these tools or anything else, then keep reading till the last. In this read, we are discussing some transparent image makers that will help you to do it seamlessly. Let’s get started!
In this article
01 [Similarities and Differences Between PNG Vs. JPG Vs. GIF](#Part 1)
02 [Minimal Steps to Make Background Transparent](#Part 2)
03 [How to Insert Transparent Image in Video](#Part 3)
Part 1 Similarities and Differences Between PNG Vs. JPG Vs. GIF
As we all know, there are so many formats in which these images are available. But sometimes it happens we are not aware of the similarities and differences corresponding to them. This confusion sometimes let us chooses the wrong format. But not anymore, and in this section, we are discussing the similarities and differences between PNG Vs. JPG Vs. GIF.
● PNG
PNG is a lossless compression format which means that it can be compressed without losing any data. It also supports transparency. The compression ratio is usually higher than JPG and GIF.
● JPG
JPG is a lossy compression format which means that it can be compressed without losing any data, but the image quality will suffer because of the loss of information. It supports transparency but is not as good as PNG.
● GIF
GIF is a lossless or lossy compression format which means that it can be compressed without losing any data or quality respectively. It does not support transparency and has a limited color range compared to PNG or JPG.
Part 2 Minimal Steps to Make Background Transparent
In this section, we are discussing the steps that you need to follow with transparent image-makers. Here we discuss some of the best tools available so that you can feel a bit confident in utilizing them for editing. This list includes:-
● Canva
Canva is a graphic design tool that helps users creates professional-quality designs. It has easy to use templates and fonts that are free to use. Users can also customize their own templates and fonts, add images and videos, make collages, infographics, and other designs.
Steps to Make in Canva
Step 1: Get “Canva” available on your system and open it.
Step 2: Mode to “Edit Image” and “upload the image” in which you wish to make the background transparent.
Step 3: Choose the “Effect tab” and select the “background remover” option.
Step 4: If you wish to add on any other effect, do it.
Step 5: Click on the “Download icon” and save it for future use.
● Photoshop
Photoshop can be used to edit video footage and create special effects. You can cut video clips together and shape them into a movie sequence by adding transitions and overlays to visualize the actions between shots. You can also use it to add graphics or other visual elements, like animations or even text. But don’t forget this tool also gives you the option to make the backgrounds transparent.
Steps to Make in Photoshop
Step 1: Get Photoshop o your system and import the image you wish to edit.
Step 2: Press Ctrl+J in order to create duplicate layers. (This is important in order to keep an eye on the section you are doing for making the editing.)
Step 3: Move to “Windows” and click on “Properties”
Step 4: From the list of options, hit on “Remove Background”
Step 5: Click on the “Eye icon” to view the transparent image.
Step 6: Save the image for future use.
● Picsart
Picsart is a robust photo editing app which has features such as filters, stickers, and overlays. It also has the ability to create collages and videos. The app also has a feature called “edit & share” which allows the user to edit the photo right in the app, then share it with their friends on social media. Picsart doesn’t require any special knowledge or expertise in photography; so anyone can pick up the basics of using it in no time.
Steps to use Picsart
Step 1: Get the Picsart app in your device or visit the online portal.
Step 2: Upload the image you wish to edit.
Step 3: Click on “Start Editing” button and then choose either of the option from “Behind Person” or “Behind Object” as per your situation.
Step 4: The tool will automatically remove the background and make it transparent. Download the image now.
Part 3 How to Insert Transparent Image in Video
After creating outstanding video content, there is a possibility that you might be looking forward to integrating any transparent image into it. Well, in this case, it is important that you have access to the best tool. Until and unless the best software or tool is not here, you cannot think of getting the task done. Don’t worry because for catering to this need, Filmora is one of the best options to choose.
Wondershare Filmora Video Editor is all-in-one video editing software to help people edit their videos and make them look professional. The best thing about this software is that it doesn’t require any expertise or knowledge of video editing before using it. The user can create a video from scratch just by importing the photos and videos from their camera roll, which are automatically combined into a single video with transitions and music in just a few steps.
For Win 7 or later (64-bit)
For macOS 10.12 or later
Also, this software is both intuitive and easy to use. It also provides many features that you can customize depending on what outcome you want. In addition, this tool also includes tutorials and support services via phone, email or chat line, so all your questions are answered quickly and efficiently.
Furthermore, this allows you to make your videos better by inserting transparent images or graphics in them. You can achieve amazing effects and superimpose without having to spend hours editing your video. With Filmora, it’s simple to create professional-quality videos without using any other software and spending too much time on the editing process.
● Steps to use Filmora
Step 1: After browsing all these features, you might be curious to try out the features integrated into it. The steps you need to follow are:-
Step 2: Get Filmora available on your system. It is compatible with Windows and Mac both.
Step 3: Open Filmora and select “Import-Import Media Files”.
Step 4: Add the imported images. You can do this by doing the right-click and selecting the insert image option. Alternatively you can do it u drag and drop option too.
Step 5: The inserted images will appear in the timeline, and double click on them. The settings menu appear to select the “Chroma key” and enable it.
Step 6: The image will get transparent in no time. If you wish to add on any extra colour or effect to the image, choose it from the editing menu available. The “Color Picker” option is also there that will be helpful in adding the colors.
Step 7: Click on “Ok” to make the changes saved.
Step 7: After getting the expected transparent image, you can simply overlay it into the video.
● Ending Thoughts →
● Transparent images give you the chance to make the editing as required. This simply means there will be no need for you to occupy the image with unnecessary stuff because after making the image transparent only the required content will have a pace on it.
● Filmora is the best tool to insert transparent images in the video. This tool have innovative interface and let users have the best options to make the editing in the video they are creating. Along with making the background transparent, this tool has other editing features too.
● Making transparent images is just a matter of a few steps. One just needs to be sure of the right tools. If they are not having the right tool gett9ing the expected outcome will not be their thing.
ReVisionFX ReelSmart Motion Blur Plugin For Premiere Pro
Premiere Pro is an exceptional tool for editing videos flawlessly by using various advanced features. For instance, you can use Adobe Premiere Pro to add extraordinary effects to your videos, such as motion blur. However, if you want a more smooth and flawless effect, you can use a plugin known as ReelSmart Motion Blur. By reading this article, you can learn about the ReelSmart Motion Blur Plugin Premiere Pro and its related instructions for usage.
Part 1: What is ReVisionFX ReelSmart Motion Blur?
You must be wondering why it’s essential to use the motion blur plugin for Premiere Pro. The reason is that using a plugin like ReelSmart Motion Blur can offer more advanced capabilities and options to create professional results. The ReelSmart Motion Blur plugin uses advanced algorithms to track each pixel automatically. As a result, it provides a more compelling and natural outlook to the video. Hence, you can easily apply the motion blur effect to your videos using RSMB without hard work.
Key Features
- Offers Automatic Tracking: To provide accurate and precise results, RSMB uses automatic tracking. This function allows the plugin to track every pixel automatically from one frame to another efficiently.
- Ability to Adjust Blur: You can add refinements by adjusting the amount of blur according to your preference. By doing so, you can generate the desired final output easily.
- Removing Motion Blur: Apart from adding and adjusting the motion blur effect, you can also remove the blur effect using RSMB effortlessly.
- Add Motion Blur to 360 Videos: RSMB is also capable of adding a motion blur to 360 videos properly. It can recognize the edges of sides along with the top and bottom to create a motion blur effect appropriately.
Part 2: Is It Worth Trying ReelSmart Motion Blur Pro?
As we have discussed the regular version of ReelSmart Motion Blur, now we will also shed light on its Pro version. To help you in choosing the best version, we will draw a comparison between the regular and pro versions of RSMB in this section.
Pricing Price
| Regular Version | Pro Version |
|---|---|
| $104.95 | $164.95 |
Supported Hosts
| ReelSmart Motion Blur | Regular Version | Pro Version |
|---|---|---|
| Adobe: After Effects, Premiere Pro | Adobe: After Effects, Premiere Pro | |
| Apple: Final Cut Pro, Motion | Apple: Final Cut Pro, Motion | |
| / | Avid: Media Composer | |
| OFX: Catalyst Edit, DaVinci Resolve, Final Cut Pro, HitFilm, Movie Studio, Natron, and Vegas Pro | Supports all Regular version Hosts Plus the Following:OFX: Baselight, Flame, Fusion Studio, Smoke, Nucoda, Scratch, Nuke, and Silhouette |
New Features
- Separates the Object: RSMB Pro has the additional capability to isolate the background and foreground effectively. It utilizes a specified matte that can help in object separation to create motion blur with great precision. (Not available with Movie Studio, Vegas Pro, Catalyst Edit, Smoke, Media Composer, Flame, or Nucoda)
- Blur with Motion Vectors: If you have imported a 3D animation video, the pro version can blur the motion vectors provided by you. Thus, it can work on a 3D animation system perfectly. (Not available with Vegas Pro, DaVinci Resolve, Movie Studio, Media Composer, Catalyst Edit, or Nucoda)
- RGB+A Tracking: This option is used to recognize and track dark images with mattes by using the alpha channel. You can use this option for masked or CG stuff. (Not available with Media Composer)
- Use of Tracking Points: To help the RSMB’s calculation of motion vectors, you can provide tracking points. By defining the tracking points, you can tell RSMB about the movement of one pixel from one frame to another efficiently. (Not available with Vegas Pro, Media Composer, Catalyst Edit, DaVinci Resolve, Smoke, Flame, Movie Studio, or Nucoda)
- Spline Guidance: If RSMB encounters problems related to tracking, you can draw and animate shapes to tell about the object’s movement. Thus, it can help the RSMB find the object movement easily. (Not available with Premiere Pro, Nucoda, Vegas Pro, HitFilm, Movie Studio, Smoke, Sihouette, Flame, Scratch, Nuke, Motion, Media Composer, DaVinci Resolve, Catalyst Edit, FCPX)
Rating
- 7 out of 5
Our Verdict
The new features in the pro version of RSMB are really compelling and beneficial. However, there are various restrictions when it comes to the supported hosts of the pro version. So, if you are using any common software for video editing that is not recognized by the pro version, we will recommend you use the regular version of RSMB. The regular version of RSMB is cost-effective and works proficiently.
Part 3: How to Use ReelSmart Motion Blur Plugin in Premiere Pro?
Are you eager to know how to use the Premiere Pro motion blur plugin? Read and follow the steps provided below to craft flawless results.
Step1 Import Video Clip
Open Adobe Premiere Pro in your system and start with a new project. On the newly displayed window, import the video clip by browsing through your computer. After importing the desired video file, make sure to drag and drop it into the timeline to begin editing.

Step2 Search for RSMB Effect
Once you have dropped the video into the timeline, navigate to the “Effects” tab given on the right side. On the search box, type “RSMB.” From the fetched results, select RSMB and apply it to the above layer of your video clip in the timeline.

Step3 Adjust the Plugin Settings
Now head to the settings on the left side and enable the GPU settings. Moreover, you can increase the blur amount to 1 or 1.5. By doing so, you can create a smoother look in your video. Once done with the settings, make sure to render your video to produce a smooth finish. Once done with rendering, you can preview and save the video easily.

Conclusion
Motion blur effect can drastically transform your video clip. If you are using Premiere Pro to add motion blur, we will recommend you use the plugin called ReVisionFX ReelSmart Motion Blur. If you are unaware of the motion blur plugin Premiere Pro, this article has fetched all the related details. This article has provided all the significance and instructions to use the RSMB plugin.
Supported Hosts
| ReelSmart Motion Blur | Regular Version | Pro Version |
|---|---|---|
| Adobe: After Effects, Premiere Pro | Adobe: After Effects, Premiere Pro | |
| Apple: Final Cut Pro, Motion | Apple: Final Cut Pro, Motion | |
| / | Avid: Media Composer | |
| OFX: Catalyst Edit, DaVinci Resolve, Final Cut Pro, HitFilm, Movie Studio, Natron, and Vegas Pro | Supports all Regular version Hosts Plus the Following:OFX: Baselight, Flame, Fusion Studio, Smoke, Nucoda, Scratch, Nuke, and Silhouette |
New Features
- Separates the Object: RSMB Pro has the additional capability to isolate the background and foreground effectively. It utilizes a specified matte that can help in object separation to create motion blur with great precision. (Not available with Movie Studio, Vegas Pro, Catalyst Edit, Smoke, Media Composer, Flame, or Nucoda)
- Blur with Motion Vectors: If you have imported a 3D animation video, the pro version can blur the motion vectors provided by you. Thus, it can work on a 3D animation system perfectly. (Not available with Vegas Pro, DaVinci Resolve, Movie Studio, Media Composer, Catalyst Edit, or Nucoda)
- RGB+A Tracking: This option is used to recognize and track dark images with mattes by using the alpha channel. You can use this option for masked or CG stuff. (Not available with Media Composer)
- Use of Tracking Points: To help the RSMB’s calculation of motion vectors, you can provide tracking points. By defining the tracking points, you can tell RSMB about the movement of one pixel from one frame to another efficiently. (Not available with Vegas Pro, Media Composer, Catalyst Edit, DaVinci Resolve, Smoke, Flame, Movie Studio, or Nucoda)
- Spline Guidance: If RSMB encounters problems related to tracking, you can draw and animate shapes to tell about the object’s movement. Thus, it can help the RSMB find the object movement easily. (Not available with Premiere Pro, Nucoda, Vegas Pro, HitFilm, Movie Studio, Smoke, Sihouette, Flame, Scratch, Nuke, Motion, Media Composer, DaVinci Resolve, Catalyst Edit, FCPX)
Rating
- 7 out of 5
Our Verdict
The new features in the pro version of RSMB are really compelling and beneficial. However, there are various restrictions when it comes to the supported hosts of the pro version. So, if you are using any common software for video editing that is not recognized by the pro version, we will recommend you use the regular version of RSMB. The regular version of RSMB is cost-effective and works proficiently.
Part 3: How to Use ReelSmart Motion Blur Plugin in Premiere Pro?
Are you eager to know how to use the Premiere Pro motion blur plugin? Read and follow the steps provided below to craft flawless results.
Step1 Import Video Clip
Open Adobe Premiere Pro in your system and start with a new project. On the newly displayed window, import the video clip by browsing through your computer. After importing the desired video file, make sure to drag and drop it into the timeline to begin editing.
Step2 Search for RSMB Effect
Once you have dropped the video into the timeline, navigate to the “Effects” tab given on the right side. On the search box, type “RSMB.” From the fetched results, select RSMB and apply it to the above layer of your video clip in the timeline.
Step3 Adjust the Plugin Settings
Now head to the settings on the left side and enable the GPU settings. Moreover, you can increase the blur amount to 1 or 1.5. By doing so, you can create a smoother look in your video. Once done with the settings, make sure to render your video to produce a smooth finish. Once done with rendering, you can preview and save the video easily.
Conclusion
Motion blur effect can drastically transform your video clip. If you are using Premiere Pro to add motion blur, we will recommend you use the plugin called ReVisionFX ReelSmart Motion Blur. If you are unaware of the motion blur plugin Premiere Pro, this article has fetched all the related details. This article has provided all the significance and instructions to use the RSMB plugin.
Also read:
- Updated In 2024, Do You Know How Boring a Video Can Be with Silent Moments? Some Tools with Silent Detection Features Help You Delete Those Moments
- New 2024 Approved Best Video Grabbers for Chrome
- How to Record Video Streams With FFmpeg on Windows and Mac for 2024
- New Can You Enhance Your Drone Footage with Cinematic Drone LUTs? This Article Discusses Top Drone LUTs Recommendations to Simplify Video Editing
- New Are You Ready to Learn About Something Free yet Amazing? We Are Talking About All Format Video Players for PC that You Should Know , Lets Begin
- New 2024 Approved In This Article Let Me Share with You How to Start a Vlog? Ideas and Any Tips for You to Start Your Own Vlogging Channel
- Updated How to Use Rules of Thirds
- New Top 8 Augmented Reality Video Games
- New Discover How to Download Mobile Phone Green Screen Videos and Pictures for Free. Elevate Your Content with HD Quality Green Screen Frames for 2024
- Updated In 2024, Create a Kickass COD Warzone Thumbnail for Free
- Here, the Main Discussion Is Regarding the Split of the Audio From the Video in the Sony Vegas Pro. There Are Also some Details About the Substitute, Which Is Wondershare Filmora
- New 2024 Approved Top Free Video Editing Software Enhance Your Content with These Essential Tools
- Updated Add Background to Video With/Without a Green Screen for 2024
- New Discover the Top Slow Motion Camera App to Use
- Updated 2024 Approved 10 Creative AR Teaching Examples to Tell You What Is AR in Teaching
- Updated Top 6 Text to Speech Generators for YouTube Videos Windows, Mac, And for 2024
- Updated 2024 Approved Mastering the Technique Playing Videos in Slow Motion on Your iPhone Like a Pro
- Top 5 Free Online Video Filter Editors
- New What Is TS Format and How To Play TS Files? Basic Tips
- How to Track Samsung Galaxy Z Flip 5 Location without Installing Software? | Dr.fone
- Possible solutions to restore deleted call logs from Infinix
- In 2024, 2 Ways to Transfer Text Messages from Vivo Y78t to iPhone 15/14/13/12/11/X/8/ | Dr.fone
- How to Bypass FRP on Samsung Galaxy S24 Ultra?
- In 2024, How to Use Google Assistant on Your Lock Screen Of Vivo Y100i Power 5G Phone
- How to Unlock Apple iPhone SE with a Mask On | Dr.fone
- In 2024, For People Wanting to Mock GPS on Realme GT 5 (240W) Devices | Dr.fone
- Hassle-Free Ways to Remove FRP Lock on OnePlus 12Rwith/without a PC
- Delete Gmail Account With/Without Password On Oppo Reno 10 Pro 5G
- The best electronic signature way to sign .dotx file documents online
- Samsung Galaxy S23 Ultra Stuck on Screen – Finding Solutions For Stuck on Boot | Dr.fone
- Guide to Mirror Your Itel S23 to Other Android devices | Dr.fone
- Updated 2024 Approved The Best 20 Motion Graphics Companies & Studios
- How Can I Create My Pokemon Overworld Maps On Apple iPhone 11 Pro? | Dr.fone
- In 2024, How to use Pokemon Go Joystick on Poco M6 Pro 4G? | Dr.fone
- In 2024, 5 Ways To Teach You To Transfer Files from Oppo Find X6 to Other Android Devices Easily | Dr.fone
- Can Life360 Track You When Your Vivo Y200 is off? | Dr.fone
- Title: Updated | How to Share YouTube Video on Zoom?
- Author: Morgan
- Created at : 2024-06-08 08:36:36
- Updated at : 2024-06-09 08:36:36
- Link: https://ai-video-editing.techidaily.com/1713942928695-updated-how-to-share-youtube-video-on-zoom/
- License: This work is licensed under CC BY-NC-SA 4.0.
