
:max_bytes(150000):strip_icc():format(webp)/are-you-really-getting-dolby-atmos-sound-135ec4330d004250883e2acab9423191.jpg)
Step by Step to Rotate Video in Google Photos for 2024
Step by Step to Rotate Video in Google Photos
Google photos let you store, view, edit and share your videos and photos and are automatically organized. It is a very great cloud storage service and most people use it. Google Photos has introduced an artificial intelligence technology into the app. That’s why it can automatically organize and rotate.
You have videos on google photos that are automatically rotated, others are not.
How do you rotate them manually?
It’s is so simple and will not take much of your time.
Let’s dive in…
Rotating videos in google photos
Rotating a video in google photos is pretty simple and will not take much of your time. You can easily fix the rotation and aspect ratio of your videos. But it’s a little tricky.
I’m going to show you how to flip your videos from portrait mode to landscape mode or from landscape mode to portrait mode.
You need to open up your google photos app and choose the video you want to flip, then you’re going to pick the button in the bottom middle with the levers on it and in the bottom right hand corner.

You will see a diamond with a circular arrow on it. You’re going to hit that until you find the way you want it to be.

Once you’re happy, in the top right hand corner, hit Save Copy and that’s it, the size of the file determines how long it takes to finish this process later.

An easier way to rotate videos in Google Photos
If you just need to rotate a video in portrait mode to the landscape mode or 180 degrees, Google photos will be the best choice to do that. However, what if rotate a video 32 degrees or 157 degrees, or maybe you need to do more editing operations, you can’t rely on Google Photos anymore.
But stop worrying, you can set your video at any angle with Filmora Video Editor . It is one of the best video editing software that provides you with the editing tools you need to edit and share your videos across the globe. It allows you to flip and rotate the orientation of the video. It also supports many popular formats used on different social media platforms like Linkedin, Instagram, Twitter, YouTube and so many more.
Let’s have look at this professionally designed software that everyone can master in a few minutes and can film professional videos. Since it provides all the features that you will need to make movies in a good way. Moreover, its interface is very simple to use.
For Win 7 or later (64-bit)
For macOS 10.14 or later
Here’s How to do it…
Rotate video at any angle
You can also rotate the video by using the Transform tab located at the top right corner.
- Drag your video into the timeline.
- Double click on the video to bring up the editing panel.
- Hit the basic tab under the video tab in the menu bar.
- Select the Transform
- Click the rotate
- Here you can move the rotate slider or directly enter the rotating value.

You will notice that I have changed the rotation of my video from its original position to the rotated angle.
You can rotate upside down, rotate left, rotate right or 90 degrees clockwise, 180 degrees, 270 degrees, 360 degrees rotate, and back to the original. Check the video result in the preview window. Once you get satisfied with the rotation.
- Hit the ok
- Select the save

Similarly, you can drag the video from the preview panel and adjust it as required.
Here, you can Flip function your video to change the direction. Like in this screenshot, suppose you want to change the place from right to left. You can easily change the direction by hitting on the flip tab.

Now you can see that the image has flipped without making a big effort you can also do it. I have done it for you, you are smarter.
Just go ahead and start…
Scale is also used to remove the unwanted and rubbish scenes from the selected video. Like if you don’t want to show something behind the scene, you can use the scale function to cut that scene from your video.
What’s more you can do with Filmora
Changing the Aspect ratio
After you rotate the video at an angle you like. You can change the aspect ratio of the video furthermore.
- Import the desired video and drag it into the timeline. Then click the Aspect Ratio icon at the bottom of the preview window.
- You can select the 16:9, 1:1, 4:3, or custom aspect ratio.
- Press OK

By the way, you can choose the suitable aspect ratio according to the social media platform you are using. Like, a 1:1 aspect ratio for Instagram, a 9:16 aspect ratio for portrait videos, and a 4:3 standard video.
Conclusion
Here’s how you can rotate your video using two different softwares. Now you can shoot your videos without setting the proper video orientation. Sometimes, while shooting a video, the real scene unfolds in making a lot settings. I hope, after reading this content, you will be confident enough to start shooting videos and then editing them without having trouble of learning the software.
Let’s dive in!
Go ahead…
A good destiny is waiting for you.
You will see a diamond with a circular arrow on it. You’re going to hit that until you find the way you want it to be.
Once you’re happy, in the top right hand corner, hit Save Copy and that’s it, the size of the file determines how long it takes to finish this process later.
An easier way to rotate videos in Google Photos
If you just need to rotate a video in portrait mode to the landscape mode or 180 degrees, Google photos will be the best choice to do that. However, what if rotate a video 32 degrees or 157 degrees, or maybe you need to do more editing operations, you can’t rely on Google Photos anymore.
But stop worrying, you can set your video at any angle with Filmora Video Editor . It is one of the best video editing software that provides you with the editing tools you need to edit and share your videos across the globe. It allows you to flip and rotate the orientation of the video. It also supports many popular formats used on different social media platforms like Linkedin, Instagram, Twitter, YouTube and so many more.
Let’s have look at this professionally designed software that everyone can master in a few minutes and can film professional videos. Since it provides all the features that you will need to make movies in a good way. Moreover, its interface is very simple to use.
For Win 7 or later (64-bit)
For macOS 10.14 or later
Here’s How to do it…
Rotate video at any angle
You can also rotate the video by using the Transform tab located at the top right corner.
- Drag your video into the timeline.
- Double click on the video to bring up the editing panel.
- Hit the basic tab under the video tab in the menu bar.
- Select the Transform
- Click the rotate
- Here you can move the rotate slider or directly enter the rotating value.
You will notice that I have changed the rotation of my video from its original position to the rotated angle.
You can rotate upside down, rotate left, rotate right or 90 degrees clockwise, 180 degrees, 270 degrees, 360 degrees rotate, and back to the original. Check the video result in the preview window. Once you get satisfied with the rotation.
- Hit the ok
- Select the save
Similarly, you can drag the video from the preview panel and adjust it as required.
Here, you can Flip function your video to change the direction. Like in this screenshot, suppose you want to change the place from right to left. You can easily change the direction by hitting on the flip tab.
Now you can see that the image has flipped without making a big effort you can also do it. I have done it for you, you are smarter.
Just go ahead and start…
Scale is also used to remove the unwanted and rubbish scenes from the selected video. Like if you don’t want to show something behind the scene, you can use the scale function to cut that scene from your video.
What’s more you can do with Filmora
Changing the Aspect ratio
After you rotate the video at an angle you like. You can change the aspect ratio of the video furthermore.
- Import the desired video and drag it into the timeline. Then click the Aspect Ratio icon at the bottom of the preview window.
- You can select the 16:9, 1:1, 4:3, or custom aspect ratio.
- Press OK
By the way, you can choose the suitable aspect ratio according to the social media platform you are using. Like, a 1:1 aspect ratio for Instagram, a 9:16 aspect ratio for portrait videos, and a 4:3 standard video.
Conclusion
Here’s how you can rotate your video using two different softwares. Now you can shoot your videos without setting the proper video orientation. Sometimes, while shooting a video, the real scene unfolds in making a lot settings. I hope, after reading this content, you will be confident enough to start shooting videos and then editing them without having trouble of learning the software.
Let’s dive in!
Go ahead…
A good destiny is waiting for you.
Best Video Editors to Add Text to a Video
While it can be very easy to add text to an image, the same cannot be said when it comes to adding even the simplest text to a video. You will need video editing software that is designed with the necessary features to help you add text to your video.
There are very many programs in the market that can technically be used to add text to a video. But the ones we will look at are video editors that make the process easy, but also give you a wide range of options to customize your text in numerous ways.
Filmora
Filmora by Wondershare is one of the best video editors in the market. Its user interface is so easy to use that adding text to the video is a simple 3-step process. Aside from adding text to the video, Filmora also allows you to edit other aspects of the video including adding transitions, overlays, and animations to any section of the video.

Key Features:
- You can use Filmora to add text to any section of the video
- It gives you the freedom to move the text to any section of the video
- Customizing the text, you add to the video can be done in numerous ways including changing the color, and font and adding animations to the text.
- It offers numerous templates to choose from and different font styles that you can use
- It has a simple user interface that makes the video editing process very easy
- It has numerous other video editing capabilities that allow you to create and edit videos in different ways including splitting videos, trimming videos, and even merging videos clips into one
- You can upload the videos directly to YouTube after editing.
After Effects
Adobe After Effects is a motion picture editing program that you can also use to add text and other animations to your video. While you can use it to add simple text to the video, it is an ideal solution when your goal is to add advanced text animations. It is however by no means a simple solution, especially for beginners who may find it hard to get going with After Effects.

Key Features:
- You can add simple lines of text to any section of the video
- Text is easily customizable by changing the color, font, and size of the text
- You can also choose to change the entire text layer and add advanced animations and effects
- There are a lot of text, animations, and effects templates to choose from
- You can easily copy text from other Adobe applications to use in After Effects
Movavi Editor
Movavi video editor is another great video editor that you can use to add and edit text on a video. Like most similar tools it is designed to simplify the process, allowing you to add text to any section of the document, move the text to any location on the video and even add text effects to customize the text. It has a very simple user interface that allows you to do that quickly and easily.

Key Features:
- You can add text to any section of the video
- Customizing the text by changing the font, color and size is also very easy
- The user interface is very easy to use, allowing you to add even blocks of text very quickly
- You also have additional options to edit the video including splitting and merging the video or adjusting the brightness, saturation, and color.
iMovie
This is a built-in video editor that you will find on macOS and iOS devices. Even though it is free, iMovie has a lot of features that come in handy when you want to add and edit text on a video. The fact that it can be used on iOS devices is an added advantage when you want to edit videos on the go.

Key Features:
- It allows users to add transitions and effects to the text you add to the video
- It comes with a lot of title templates to choose from
- Adding animated text is also very simple including Sideways Drift, Lens Flare, and more
- You can customize the text in very many ways including adding fonts, drop shadows, changing the color, and even resizing or repositioning the text.
Camtasia
TechSmith Camtasia is one of the most popular tools to create and edit videos. Of the numerous features that you get when you choose to use Camtasia is adding and editing text to the video. It has numerous templates that can be used to customize the text you add in various ways.

Key Features:
- It gives you numerous options to add text to the images including text boxes, templates, and effects
- It has a speech-to-text feature that is perfect for adding captions and subtitles to the video
- You can easily customize the text by adding transitions and effects or even by simply changing the font, color, and size of the text
- The text can be moved to any section of the video
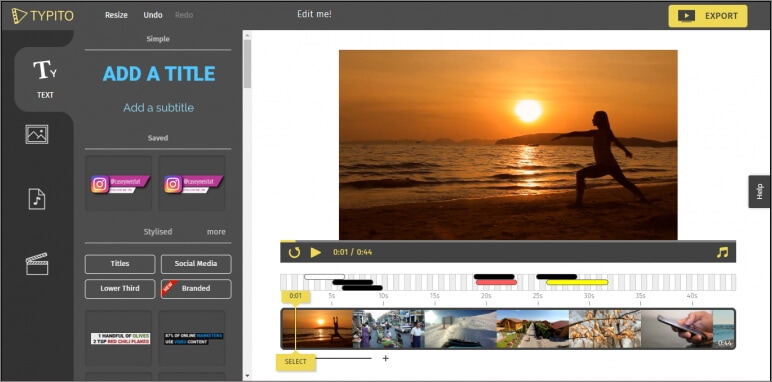
Typito
Typito is an online video editor with simple tools that can help you make changes to any video. designed to help YouTube content creators and video editors, Typito can be used to add all kinds of text and text effects to any video. It is accessible on all browsers and it is also very easy to use.
Key Features:
- It is very easy to use, allowing you to add text to any video in a few simple steps
- It has numerous templates to choose from
- Changing the font size, color, and style of the text is very easy
- You can publish videos directly to numerous video-sharing sites after editing
- It allows users to add animations, transitions, and effects to the text
Splice
Splice is an iOS app designed to help you add text to videos on iOS devices. Adding text to any video using Splice can be easily done using the overlay feature. It also has numerous other video editing features including allowing you to easily synchronize your videos and music, adding filters and transitions, and more.

Key Features:
- it has a simple user interface that makes adding text very easy
- You can customize the text in various ways including changing the font size, color and style or even adding various text effects
- Videos can be saved on the device or shared directly on social media apps like Facebook, Instagram, and YouTube
- It has numerous other video editing features including filters and animations
Clipomatic
If the text you want to add to the video is in the form of captions or subtitles, then Clipomatic is perhaps the best choice. It supports various languages including German, French, Portuguese, and even Chinese. You can also use it to add regular text to any video, reposition the text on any section of the video and customize the text in various ways.

Key Features:
- It is available for both Android and iOS
- Adding text to the video is very easy
- You can easily customize the text by changing the font color, and size and adding transitions and text effects
- It supports various languages, making it ideal for captions and subtitles
MySubtitle
MySubtitle is a simple but highly effective app that you can use to add text to your video. As the name suggests, this tool is ideal for adding subtitles and you can do that very easily by simply typing in the text and syncing the text to the video’s content.

Key Features:
- It is available for both iOS and Android devices
- You can type in your subtitles directly on the video
- Subtitles can then be paced to suit the video’s playback speed
- It is completely free to use
- You can share the videos you edit directly on various social media platforms
Free Download For Win 7 or later(64-bit)
Free Download For macOS 10.14 or later
Free Download For macOS 10.14 or later
This Article Will Focus on Understanding the Secret Tips in Wondershare Filmora that You Can Use to Edit Videos Faster and More Efficiently
Wondershare Filmora is a great video editing software with millions of users worldwide. It has many features that it provides to its users. However, there are some other features hidden up its sleeve.
This article will share some “secrets” of Wondershare Filmora features you may not know that they exist in Filmora. Scroll below to see the features that level up your editing skills.
Part 1. Shared Media Folder
You might have had the hassle of importing the same videos for a considerable time in a different project. It can become a problem for you. It may be fine if you have organized your videos from the start.
Shared Media Folder in Filmora, now called the Global Media Folder, can store video and audio that you’ve imported for future projects. So you don’t have to keep re-importing your media for future videos.

Moreover, when you have imported files into the Shared Media Folder, you can create new Sub-Folders. You can name these folders according to the types of media you are going to use.
Suppose you are a content creator and want to spice up your content with memes. You can create a meme folder to import recent memes into your videos.
Once you have imported them into the Wondershare Filmora’s Shared Media Folder, you can access them anytime. Doing so will allow you to save time and build a base for your future projects.
Free Download For Win 7 or later(64-bit)
Free Download For macOS 10.14 or later
Part 2. Customize Proxy Files
Before understanding the custom proxy settings, let us know what proxy files are.
Proxy Files
Proxy files in Wondershare Filmora allow you to render and edit 4K and other higher-resolution videos easily, regardless of your computer’s processing power.
No one wants to compromise PC performance when editing videos. But if you are importing a video with a higher resolution than your PC, you can only play it sometimes. Other than that, your PC might get stuck and slow down.
If your PC has a built-in resolution of 1080p, but the video you are going to import is 2160p, you can encounter rendering and performance problems. But in the case of Wondershare Filmora Proxy files, you can smoothly edit your videos without any trouble.
How to Customize Proxy Files in Filmora
Although Wondershare Filmora automatically creates proxy files when it encounters resolutions more significant than the PC performance. But you can also set them to your preference.
And customize your proxy files takes some simple and easy steps. But first, follow the steps mentioned below.
Step1 Find the File option on the top left corner of the Wonderhsare Filmora home interface.
Step2 Click on Files and go to Preferences.
Step3 A window will pop up, and here you can see multiple options.
Step4 Go to the performance.
Step5 In the performance tab, scroll down till your see Proxy.
Step6 Here check the box that says, “Automatically create proxies when resolution higher than:”

Step7 Below you can see multiple options. In these options, select the resolution that you want.
Step8 You can also click on the box below to automatically delete the proxies when you close your project.
Now, whenever you encounter a resolution of a higher video than the one you selected, Wondershare Filmora will do its magic.
Part 3. Delete Project Render Cache
Another hack you can use to save space on your hard drive is Deleting the Render cache. But before we do that, let us understand what Render cache is!
What is Render Cache?
Rendering can be a giant leap to give you a smooth performance experience. However, when you import your videos into the timeline, you can always render to have an uninterrupted playback experience.
Doing so will allow you to work in your zone quickly and efficiently. You can do a manual rendering before you begin the editing process. Or you can also opt to choose automatic rendering. In the automatic rendering option, you can continue your editing process. In the meantime, your timeline will be rendered.
How to Delete Render Cache in Filmora
To save up storage space on your computer, you can delete your render cache by following the steps.
Step1 Click on files in the top left corner of the Wondershare Filmora home interface.
Step2 Go to Preferences.
Step3 A window will pop up and go to Performance.
Step4 In the performance tab, scroll down below to the Preview Render.
Step5 Check the box saying, “Automatically delete render files when a project is closed.”

Step6 Click on OK to save your changes.
Now, whenever you close your project, your render cache will be deleted and would have given you extra space on your computer.
Part 4. Remove Split Button on Playhead
In some instances, when you are moving the playhead on the timelines, it can distract you from doing your editing. Or even more, you can mistakenly click on the Split button to split the clips you don’t want them to.
Well, no worries at all! Wondershare Filmora takes care of that for you. You can hide or remove the Split button on the playhead. It only takes a few simple and easy steps. Follow the steps mentioned below to remove the Split button:
Step1 You will notice the File option on the top left corner of the Wonderhsare Filmora home interface.
Step2 Click on Files and go to Preferences.
Step3 A window will pop up, and here you can see multiple options.
Step4 Go to the editing
Step5 In the editing tab, scroll down till your see the Split button.

Step6 Check the box. Then, click OK to save your changes.
Doing so would have removed the Split button from your playhead. So now you can edit your videos without any distractions.
Part 5. Copy and Paste Effects
Copy and paste are one of the oldest tricks in editing procedures. Wondershare Filmora comes with a range of commands and features that allow you to save time and be reliable.
Suppose you want to add an effect to a video clip in the timeline. Then, after adding the effect to your video, make custom changes to make it look more closely to the style you want. You can now use the copy-and-paste function to add the same effect to another clip. That helps you save a lot of time from tedious and time-consuming work.
How to Copy and Paste Effects
While editing, you will need to ensure that your editing process is as clean as possible and that you have all the time on hand.
But there is a solution! You can easily copy and paste the effects you placed on one video clip to another. Just follow the steps mentioned, and you will be good to go:
Step1 Right-click on the video to you added the effects too.
Step2 A drop-down column will pop up.
Step3 In the options below, you will notice an option called “Copy Effects.”
Step4 Click on the “Copy Effects” option.
Step5 Now move the playhead to the video clip on which you want to paste the effects.
Step6 Right-click on the video that you want to place the effect on.
Step7 In the pop-up column, select the Paste Effect
Step8 It adjusts the video clip according to the changes of the prior one.
You can save editing time by simply copying and pasting video effects.

Part 6. Timeline Snap
You might have added multiple videos in the same timeline track. If you removed the video ahead of the video clip, you have to close the gap in between.
So, arranging and moving clips in the timeline are hectic and time-consuming. However, that is the case without timeline snapping.
How to Apply Timeline Snap in Filmora
Timeline snapping will allow you to arrange video clips side by side without any breaks and cut-offs. Also, it will enable you to place it precisely above other video and audio gaps in the timeline.
In most cases, Timeline snapping is enabled from the start. But if you are encountering some problems managing your videos. Or if you want to remove the Timeline snap feature. Follow the steps mentioned below:
Step1 Right-click on the Timeline.
Step2 A pop will open up, giving you multiple options.
Step3 Click on timeline Snapping to either enable it or disable it.

Now you can easily enable and disable timeline snapping according to your choice!
Part 7. Color Code Video Clips
When editing footage from multiple cameras, you might want to organize which media is from which source in the timeline. You can do this by color coding your clips.
Steps to Color Code Your Videos
Color coding allows you to edit all the clips marked with a particular color to be selected simultaneously without selecting them manually in the timeline.
To color code a video, follow the steps as mentioned:
Step1 Select the clips you want to color code, right-click, and choose from the available colors.
Step2 Once you’ve color coded your clips, you can right-click on the clip again and choose to select all clips from the color mark option.
Step3 And all the clips marked with that color will be selected.

Part 8. Group Clips Together
Now in an editing timeline, you might encounter a situation where you want to arrange a video clip with specific audio. Again, it allows you to stay organized and save up a lot of time.
Grouping clips together can also be helpful when you want to edit multiple clips in the timeline but want to maintain a particular order. The group will remain in its place and allow you to edit your other video clips quickly.
Stepwise Guide to Grouping the Clips in Filmora
You can group video and audio clips in straightforward steps. Just follow the actions ahead, and you will be good to go:
Step1 Hold Left-click and drag across the clips that you want to select.
Step2 When you are done, Right-click on the clip to open the options tab.
Step3 Scroll down, and you will see a “” option.
Step4 Select Group, and that’s done.

Your whole group will be selected whenever you select a video clip or an audio clip.
Part 9. Pan and Zoom Shortcut
Editing shortcuts are excellent. They allow you to save up a lot of time. Some people prefer to use a mouse only to edit their videos, but professionals always use a keyboard.
But there are some other shortcuts too! In these shortcuts, you would not necessarily need a keyboard; only a mouse will work and give a good outcome.
You might have seen those videos in which a specific screen ratio moves over a picture. Or, in some cases when you have to pan and zoom to create a flow effect.
Instead of manually adjusting the ratio of your videos and photos, Pan and Zoom shortcuts will allow you to use multiple features. These features allow you to select where your video or photo will start, zoom, and end.
These shortcuts are so easy to apply. Just go through the steps below, and you will accomplish the following:
Step1 Right-click on a photo or a video clip.
Step2 Go to the crop and zoom tab above the timeline.
Step3 In the window that opens up, you will see a pan and zoom option in the top left corner. Click on it.
Step4 And on the bottom right corner of the window, you can see the pan and zoom shortcuts available.
Step5 Please select any of them you want and then click on OK.

Part 10. New Feature Request
One of the significant features of Wondershare Filmora that sets it among the best is its capability to listen to the users. When you have been using Wondershare Filmora for a long time, there will come a time when you wish for a feature. You can also do so in a few simple steps. Just follow the steps mentioned:
Step1 Multiple options are available on the top left corner of the Wondershare Filmora home interface. Click on help.
Step2 A drop-down box will open up.
Step3 In the options offered to you, select suggest a feature.

Step4 It automatically directs you to your default browser, where you can see the multiple feature requests.
Step5 You can vote for a feature you want in the next update.
Step6 Or you can also create a request for another particular feature.

Summing Up
Wondershare Filmora is the best in the business regarding editing your videos. It has such creative and easy-to-use software that even a beginner efficiently edits videos.
There are a lot of features that Wondershare Filmora provides. But now, with these secret and hidden tips, you can edit your videos more creatively.
Free Download For macOS 10.14 or later
Part 2. Customize Proxy Files
Before understanding the custom proxy settings, let us know what proxy files are.
Proxy Files
Proxy files in Wondershare Filmora allow you to render and edit 4K and other higher-resolution videos easily, regardless of your computer’s processing power.
No one wants to compromise PC performance when editing videos. But if you are importing a video with a higher resolution than your PC, you can only play it sometimes. Other than that, your PC might get stuck and slow down.
If your PC has a built-in resolution of 1080p, but the video you are going to import is 2160p, you can encounter rendering and performance problems. But in the case of Wondershare Filmora Proxy files, you can smoothly edit your videos without any trouble.
How to Customize Proxy Files in Filmora
Although Wondershare Filmora automatically creates proxy files when it encounters resolutions more significant than the PC performance. But you can also set them to your preference.
And customize your proxy files takes some simple and easy steps. But first, follow the steps mentioned below.
Step1 Find the File option on the top left corner of the Wonderhsare Filmora home interface.
Step2 Click on Files and go to Preferences.
Step3 A window will pop up, and here you can see multiple options.
Step4 Go to the performance.
Step5 In the performance tab, scroll down till your see Proxy.
Step6 Here check the box that says, “Automatically create proxies when resolution higher than:”
Step7 Below you can see multiple options. In these options, select the resolution that you want.
Step8 You can also click on the box below to automatically delete the proxies when you close your project.
Now, whenever you encounter a resolution of a higher video than the one you selected, Wondershare Filmora will do its magic.
Part 3. Delete Project Render Cache
Another hack you can use to save space on your hard drive is Deleting the Render cache. But before we do that, let us understand what Render cache is!
What is Render Cache?
Rendering can be a giant leap to give you a smooth performance experience. However, when you import your videos into the timeline, you can always render to have an uninterrupted playback experience.
Doing so will allow you to work in your zone quickly and efficiently. You can do a manual rendering before you begin the editing process. Or you can also opt to choose automatic rendering. In the automatic rendering option, you can continue your editing process. In the meantime, your timeline will be rendered.
How to Delete Render Cache in Filmora
To save up storage space on your computer, you can delete your render cache by following the steps.
Step1 Click on files in the top left corner of the Wondershare Filmora home interface.
Step2 Go to Preferences.
Step3 A window will pop up and go to Performance.
Step4 In the performance tab, scroll down below to the Preview Render.
Step5 Check the box saying, “Automatically delete render files when a project is closed.”
Step6 Click on OK to save your changes.
Now, whenever you close your project, your render cache will be deleted and would have given you extra space on your computer.
Part 4. Remove Split Button on Playhead
In some instances, when you are moving the playhead on the timelines, it can distract you from doing your editing. Or even more, you can mistakenly click on the Split button to split the clips you don’t want them to.
Well, no worries at all! Wondershare Filmora takes care of that for you. You can hide or remove the Split button on the playhead. It only takes a few simple and easy steps. Follow the steps mentioned below to remove the Split button:
Step1 You will notice the File option on the top left corner of the Wonderhsare Filmora home interface.
Step2 Click on Files and go to Preferences.
Step3 A window will pop up, and here you can see multiple options.
Step4 Go to the editing
Step5 In the editing tab, scroll down till your see the Split button.
Step6 Check the box. Then, click OK to save your changes.
Doing so would have removed the Split button from your playhead. So now you can edit your videos without any distractions.
Part 5. Copy and Paste Effects
Copy and paste are one of the oldest tricks in editing procedures. Wondershare Filmora comes with a range of commands and features that allow you to save time and be reliable.
Suppose you want to add an effect to a video clip in the timeline. Then, after adding the effect to your video, make custom changes to make it look more closely to the style you want. You can now use the copy-and-paste function to add the same effect to another clip. That helps you save a lot of time from tedious and time-consuming work.
How to Copy and Paste Effects
While editing, you will need to ensure that your editing process is as clean as possible and that you have all the time on hand.
But there is a solution! You can easily copy and paste the effects you placed on one video clip to another. Just follow the steps mentioned, and you will be good to go:
Step1 Right-click on the video to you added the effects too.
Step2 A drop-down column will pop up.
Step3 In the options below, you will notice an option called “Copy Effects.”
Step4 Click on the “Copy Effects” option.
Step5 Now move the playhead to the video clip on which you want to paste the effects.
Step6 Right-click on the video that you want to place the effect on.
Step7 In the pop-up column, select the Paste Effect
Step8 It adjusts the video clip according to the changes of the prior one.
You can save editing time by simply copying and pasting video effects.
Part 6. Timeline Snap
You might have added multiple videos in the same timeline track. If you removed the video ahead of the video clip, you have to close the gap in between.
So, arranging and moving clips in the timeline are hectic and time-consuming. However, that is the case without timeline snapping.
How to Apply Timeline Snap in Filmora
Timeline snapping will allow you to arrange video clips side by side without any breaks and cut-offs. Also, it will enable you to place it precisely above other video and audio gaps in the timeline.
In most cases, Timeline snapping is enabled from the start. But if you are encountering some problems managing your videos. Or if you want to remove the Timeline snap feature. Follow the steps mentioned below:
Step1 Right-click on the Timeline.
Step2 A pop will open up, giving you multiple options.
Step3 Click on timeline Snapping to either enable it or disable it.
Now you can easily enable and disable timeline snapping according to your choice!
Part 7. Color Code Video Clips
When editing footage from multiple cameras, you might want to organize which media is from which source in the timeline. You can do this by color coding your clips.
Steps to Color Code Your Videos
Color coding allows you to edit all the clips marked with a particular color to be selected simultaneously without selecting them manually in the timeline.
To color code a video, follow the steps as mentioned:
Step1 Select the clips you want to color code, right-click, and choose from the available colors.
Step2 Once you’ve color coded your clips, you can right-click on the clip again and choose to select all clips from the color mark option.
Step3 And all the clips marked with that color will be selected.
Part 8. Group Clips Together
Now in an editing timeline, you might encounter a situation where you want to arrange a video clip with specific audio. Again, it allows you to stay organized and save up a lot of time.
Grouping clips together can also be helpful when you want to edit multiple clips in the timeline but want to maintain a particular order. The group will remain in its place and allow you to edit your other video clips quickly.
Stepwise Guide to Grouping the Clips in Filmora
You can group video and audio clips in straightforward steps. Just follow the actions ahead, and you will be good to go:
Step1 Hold Left-click and drag across the clips that you want to select.
Step2 When you are done, Right-click on the clip to open the options tab.
Step3 Scroll down, and you will see a “” option.
Step4 Select Group, and that’s done.
Your whole group will be selected whenever you select a video clip or an audio clip.
Part 9. Pan and Zoom Shortcut
Editing shortcuts are excellent. They allow you to save up a lot of time. Some people prefer to use a mouse only to edit their videos, but professionals always use a keyboard.
But there are some other shortcuts too! In these shortcuts, you would not necessarily need a keyboard; only a mouse will work and give a good outcome.
You might have seen those videos in which a specific screen ratio moves over a picture. Or, in some cases when you have to pan and zoom to create a flow effect.
Instead of manually adjusting the ratio of your videos and photos, Pan and Zoom shortcuts will allow you to use multiple features. These features allow you to select where your video or photo will start, zoom, and end.
These shortcuts are so easy to apply. Just go through the steps below, and you will accomplish the following:
Step1 Right-click on a photo or a video clip.
Step2 Go to the crop and zoom tab above the timeline.
Step3 In the window that opens up, you will see a pan and zoom option in the top left corner. Click on it.
Step4 And on the bottom right corner of the window, you can see the pan and zoom shortcuts available.
Step5 Please select any of them you want and then click on OK.
Part 10. New Feature Request
One of the significant features of Wondershare Filmora that sets it among the best is its capability to listen to the users. When you have been using Wondershare Filmora for a long time, there will come a time when you wish for a feature. You can also do so in a few simple steps. Just follow the steps mentioned:
Step1 Multiple options are available on the top left corner of the Wondershare Filmora home interface. Click on help.
Step2 A drop-down box will open up.
Step3 In the options offered to you, select suggest a feature.
Step4 It automatically directs you to your default browser, where you can see the multiple feature requests.
Step5 You can vote for a feature you want in the next update.
Step6 Or you can also create a request for another particular feature.
Summing Up
Wondershare Filmora is the best in the business regarding editing your videos. It has such creative and easy-to-use software that even a beginner efficiently edits videos.
There are a lot of features that Wondershare Filmora provides. But now, with these secret and hidden tips, you can edit your videos more creatively.
Adding Slow Motion in DaVinci Resolve: A Comprehensive Overview
In content creation and filmmaking, slow-motion videos have achieved recognition. There are multiple scenarios that slow-motion videos can help with. They assist in emphasizing important shots in footage and bring perfection. According to creators, slow motion reveals video details that often go unnoticed. The ability of software to offer adjustable frame rates does the trick in such videos.
This article highlights slow-motion videos with reference to DaVinci Resolve’s slow motion. A comprehensive guide will be given to operate slow-motion DaVinci Resolve. The article will also commence a brief discussion on the importance of slow-mo. An AI alternative to DaVinci’s slow motion will be discussed. This software also assists in creating slow-motion videos in multiple methods.
Slow Motion Video Maker Slow your video’s speed with better control of your keyframes to create unique cinematic effects!
Make A Slow Motion Video Make A Slow Motion Video More Features

Part 1: Learning the Best Ways to Add Slow Motion in DaVinci Resolve [100% Working]
Post-production editing is what adds value and perfection to your shots. DaVinci Resolve is an all-in-one editor designed to assist in post-production tasks. You can do professional-level editing, apply effects, infuse cinematic visuals, and more. In addition, it possesses multipurpose high-grade audio editing tools for videos.
With its custom settings options, you can create slow motions in DaVinci Resolve. It has multiple options for manipulating the speed of the entire video clip. With its speed ramping option, you can slow down a specific portion of the video. The Optical Flow feature in it brings precision to your slow-motion videos. If you want to get rid of switching between software, DaVinci slow motion is an option.
Methods of Creating Slow Motion Videos in DaVinci Resolve 18
There are multiple options and techniques for producing slow-motion DaVinci Resolve. The following section contains the step-by-step guide to doing that:
Method 1. Using the Timeline Settings
Are you looking for a speedy and straightforward method to slow down a video? In this DaVinci Resolve slow motion smooth, speed is adjustable via percentage. Here is a step-by-step guide to commence this action in DaVinci:
Step 1: After importing your clip into this software, bring it to the timeline. Then, right-click on this clip in the timeline; a selection panel will appear. In this panel, locate the “Retime Controls” option and click it.

Step 2: Commencing this action will feature a speed change option on your clip. Click on the navigation icon adjacent to the speed percentage in the timeline clip. As this opens a dropdown menu, select the “Change Speed” option to continue. Further, select a slower percentage in the given panel to slow down your video.

Step 3: There is a built-in option to bring smoothness to your slow-motion video. For this, select your clip and navigate towards the top-right panel. In the “Video” tab, scroll down and access the “Retime and Scaling” section. Here, expand the “Retime Process” option and select “Optical Flow.” This will add extra smoothness to your DaVinci slow-motion video.

Method 2. Using the Clip Attribution Settings
This method is suitable if you have shot a video at a higher frame rate. This method is also plain and requires a few clicks to complete. Following is the detailed guide to creating a DaVinci Resolve slow-motion smooth:
Step 1: Once you have imported the video in the timeline, navigate towards the Media Pool. From there, find your clip, right-click on it, and click the “Clip Attributes” option.

Step 2: From the Clip Attributes window, go to the “Video” tab and expand “Video Frame Rate.” From the appearing frame rate options, select a lesser frame rate.

Step 3: To sync the audio with your clip, navigate towards the timeline panel. Select the audio track and right-click on it to access settings. From the options menu, locate and uncheck the “Link Clips” option.

Step 4: Navigate toward the bottom of the editing interface and select “Fairlight.” In here, go to the right-side panel and access the “Audio” tab. From there, find and adjust the “Speed Change” settings. Your audio is now synced with the duration of your video.

Part 2: Making Slow Motion Video Making Easy with Wondershare Filmora
Slow motion in DaVinci Resolve gives accurate and precise results. However, the editing interface of this software can appear tricky to some users. If you are new to video editing or have beginner-level skills, using it can be difficult. To liberate you from such technicalities, we introduce you to Wondershare Filmora . This is an AI-driven desktop tool offering slow-motion video functions.
Methods to Make a Slow Motion Video in Wondershare Filmora
Filmora is a reliable alternative to slow motion in DaVinci Resolve, offering two methods. We have discussed both methods in the following section below:
Free Download For Win 7 or later(64-bit)
Free Download For macOS 10.14 or later
- Method 1. Using the Manual Speed Adjustment Option
- Method 2: Using the AI Frame Interpolation Option
Method 1. Using the Manual Speed Adjustment Option
If you are someone who prefers to oversee the editing task, Filmora offers the manual option. To commence this action, follow the step-by-step guide below:
Step 1Import Media and Access Uniform Speed
After downloading Filmora on your device, launch it and create a new project. Upon accessing the media “Import” option, import files and bring them to the timeline. Right-click on the clip within the timeline and select “Uniform Speed” from the drop-down menu.

Step 2Access the Settings Panel
Navigate towards the settings panel and access the “Uniform Speed” tab. Under this tab, adjust the “Speed” slider or set the values. You can also adjust the “Duration” of the clip to do so.

Method 2. Using the AI Frame Interpolation Option
If you want better results while slowing down video frames, you can opt for this option. You can commence Optical Flow action for smooth video frames. Given below is the detailed instructional manual for this:
Step 1Access the Speed Ramping Option
After importing media and dropping it into the timeline, select the video in the timeline. Then, navigate towards the right-side panel and go to the “Speed” tab. Under this tab, select the “Speed Ramping” option and enable the “Optical Flow” option after selecting any particular speed ramping preset. You can access this option by expanding the “AI Frame Interpolation” options.

Step 2Render Preview and Export
Afterward, navigate towards the timeline panel and select the “Render Preview” option. Once the rendering is done, play your video to see the results. If the results are satisfactory, click the “Export” button to export your video.

This DaVinci slow-motion alternative has more to offer when it comes to editing. Filmora offers a wide range of video, audio, and text editing features. The majority of these features are AI-backed and speed up task completion. Along with slow motion, you can increase the speed of a video and customize it. Filmora offers a built-in Stock Media library with effects and preset options.
AI-Backed Video Editing Features of Wondershare Filmora
Wondershare Filmora is a multifunctional software designed to increase productivity. Its AI technology enhances an editor’s productivity by offering automated options. This section emphasizes some of the AI-driven video editing features of Filmora:
1. AI Copilot Editing
Have you just started using Filmora and feel confused while editing? There is no need to see videos or read articles for it. Wondershare Filmora has a built-in AI chatbot assistant to guide you. You can ask its AI copilot feature anything about accessing effects or functions. It will give you detailed directions on it along with CTA buttons for direct access.

2. AI Text-to-Video
If you have an idea for a video but not the skill to create it, Filmora has got you covered. Using this feature, you can craft a proper video from text. You just need to add a script or textual direction in the prompt section. AI will handle and insert the AI voice, text, and graphics independently.

3. AI Copywriting
Wondering what to enter as a prompt in Filmora’s Text-to-Video AI? There is no need to switch with AI copywriters as Filmora offers its own. With its ChatGPT integration, this feature generates accurate and rapid scripts. Users just need to add a description for a script, and it will generate content on it.

4. AI Smart Masking
Everyone loves those unique and high-quality transitions and effects. However, incorporating such transitions and effects can be tricky in manual editing. With its AI masking feature, you just need to activate the feature, and it will do the rest. When you enable AI masking and specify the area to mask, it will operate within seconds. You can later add transitions and effects to the unmasked area.

Conclusion
Upon conclusion, let’s rewind the complete knowledge of this article. At first, the article discussed how slow-motion videos have a significant contribution. Along with video editing, they contribute to research, training, and education. Moreover, we discussed DaVinci’s resolve in slow motion and a guide to use it. Although, we recommend you use Wondershare Filmora as it is an easy-to-use alternative.
Make A Slow Motion Video Make A Slow Motion Video More Features
Part 1: Learning the Best Ways to Add Slow Motion in DaVinci Resolve [100% Working]
Post-production editing is what adds value and perfection to your shots. DaVinci Resolve is an all-in-one editor designed to assist in post-production tasks. You can do professional-level editing, apply effects, infuse cinematic visuals, and more. In addition, it possesses multipurpose high-grade audio editing tools for videos.
With its custom settings options, you can create slow motions in DaVinci Resolve. It has multiple options for manipulating the speed of the entire video clip. With its speed ramping option, you can slow down a specific portion of the video. The Optical Flow feature in it brings precision to your slow-motion videos. If you want to get rid of switching between software, DaVinci slow motion is an option.
Methods of Creating Slow Motion Videos in DaVinci Resolve 18
There are multiple options and techniques for producing slow-motion DaVinci Resolve. The following section contains the step-by-step guide to doing that:
Method 1. Using the Timeline Settings
Are you looking for a speedy and straightforward method to slow down a video? In this DaVinci Resolve slow motion smooth, speed is adjustable via percentage. Here is a step-by-step guide to commence this action in DaVinci:
Step 1: After importing your clip into this software, bring it to the timeline. Then, right-click on this clip in the timeline; a selection panel will appear. In this panel, locate the “Retime Controls” option and click it.
Step 2: Commencing this action will feature a speed change option on your clip. Click on the navigation icon adjacent to the speed percentage in the timeline clip. As this opens a dropdown menu, select the “Change Speed” option to continue. Further, select a slower percentage in the given panel to slow down your video.
Step 3: There is a built-in option to bring smoothness to your slow-motion video. For this, select your clip and navigate towards the top-right panel. In the “Video” tab, scroll down and access the “Retime and Scaling” section. Here, expand the “Retime Process” option and select “Optical Flow.” This will add extra smoothness to your DaVinci slow-motion video.
Method 2. Using the Clip Attribution Settings
This method is suitable if you have shot a video at a higher frame rate. This method is also plain and requires a few clicks to complete. Following is the detailed guide to creating a DaVinci Resolve slow-motion smooth:
Step 1: Once you have imported the video in the timeline, navigate towards the Media Pool. From there, find your clip, right-click on it, and click the “Clip Attributes” option.
Step 2: From the Clip Attributes window, go to the “Video” tab and expand “Video Frame Rate.” From the appearing frame rate options, select a lesser frame rate.
Step 3: To sync the audio with your clip, navigate towards the timeline panel. Select the audio track and right-click on it to access settings. From the options menu, locate and uncheck the “Link Clips” option.
Step 4: Navigate toward the bottom of the editing interface and select “Fairlight.” In here, go to the right-side panel and access the “Audio” tab. From there, find and adjust the “Speed Change” settings. Your audio is now synced with the duration of your video.
Part 2: Making Slow Motion Video Making Easy with Wondershare Filmora
Slow motion in DaVinci Resolve gives accurate and precise results. However, the editing interface of this software can appear tricky to some users. If you are new to video editing or have beginner-level skills, using it can be difficult. To liberate you from such technicalities, we introduce you to Wondershare Filmora . This is an AI-driven desktop tool offering slow-motion video functions.
Methods to Make a Slow Motion Video in Wondershare Filmora
Filmora is a reliable alternative to slow motion in DaVinci Resolve, offering two methods. We have discussed both methods in the following section below:
Free Download For Win 7 or later(64-bit)
Free Download For macOS 10.14 or later
- Method 1. Using the Manual Speed Adjustment Option
- Method 2: Using the AI Frame Interpolation Option
Method 1. Using the Manual Speed Adjustment Option
If you are someone who prefers to oversee the editing task, Filmora offers the manual option. To commence this action, follow the step-by-step guide below:
Step 1Import Media and Access Uniform Speed
After downloading Filmora on your device, launch it and create a new project. Upon accessing the media “Import” option, import files and bring them to the timeline. Right-click on the clip within the timeline and select “Uniform Speed” from the drop-down menu.
Step 2Access the Settings Panel
Navigate towards the settings panel and access the “Uniform Speed” tab. Under this tab, adjust the “Speed” slider or set the values. You can also adjust the “Duration” of the clip to do so.
Method 2. Using the AI Frame Interpolation Option
If you want better results while slowing down video frames, you can opt for this option. You can commence Optical Flow action for smooth video frames. Given below is the detailed instructional manual for this:
Step 1Access the Speed Ramping Option
After importing media and dropping it into the timeline, select the video in the timeline. Then, navigate towards the right-side panel and go to the “Speed” tab. Under this tab, select the “Speed Ramping” option and enable the “Optical Flow” option after selecting any particular speed ramping preset. You can access this option by expanding the “AI Frame Interpolation” options.
Step 2Render Preview and Export
Afterward, navigate towards the timeline panel and select the “Render Preview” option. Once the rendering is done, play your video to see the results. If the results are satisfactory, click the “Export” button to export your video.
This DaVinci slow-motion alternative has more to offer when it comes to editing. Filmora offers a wide range of video, audio, and text editing features. The majority of these features are AI-backed and speed up task completion. Along with slow motion, you can increase the speed of a video and customize it. Filmora offers a built-in Stock Media library with effects and preset options.
AI-Backed Video Editing Features of Wondershare Filmora
Wondershare Filmora is a multifunctional software designed to increase productivity. Its AI technology enhances an editor’s productivity by offering automated options. This section emphasizes some of the AI-driven video editing features of Filmora:
1. AI Copilot Editing
Have you just started using Filmora and feel confused while editing? There is no need to see videos or read articles for it. Wondershare Filmora has a built-in AI chatbot assistant to guide you. You can ask its AI copilot feature anything about accessing effects or functions. It will give you detailed directions on it along with CTA buttons for direct access.
2. AI Text-to-Video
If you have an idea for a video but not the skill to create it, Filmora has got you covered. Using this feature, you can craft a proper video from text. You just need to add a script or textual direction in the prompt section. AI will handle and insert the AI voice, text, and graphics independently.
3. AI Copywriting
Wondering what to enter as a prompt in Filmora’s Text-to-Video AI? There is no need to switch with AI copywriters as Filmora offers its own. With its ChatGPT integration, this feature generates accurate and rapid scripts. Users just need to add a description for a script, and it will generate content on it.
4. AI Smart Masking
Everyone loves those unique and high-quality transitions and effects. However, incorporating such transitions and effects can be tricky in manual editing. With its AI masking feature, you just need to activate the feature, and it will do the rest. When you enable AI masking and specify the area to mask, it will operate within seconds. You can later add transitions and effects to the unmasked area.
Conclusion
Upon conclusion, let’s rewind the complete knowledge of this article. At first, the article discussed how slow-motion videos have a significant contribution. Along with video editing, they contribute to research, training, and education. Moreover, we discussed DaVinci’s resolve in slow motion and a guide to use it. Although, we recommend you use Wondershare Filmora as it is an easy-to-use alternative.
Also read:
- New How to Set Up Twitch Green Screen
- 2024 Approved How to Create Liquid Water Reveal Intro?
- Updated Exploring the Top Professional Tools to Perform Mask Tracking
- Updated 2024 Approved Best 7 Color Match Paint Apps
- 2024 Approved 8 Apps to Custom GIF Stickers
- Updated Wondershare Filmora Tutorial | Using The AI Auto Reframe Feature
- How to Make a Slow Motion Video Complete Guide
- New 2024 Approved EasyHDR Review Is This a Good Choice to Create HDR
- New 2024 Approved Ultimate Guide on Converting Word to SRT
- New In 2024, Best iOS Slow Motion Apps To Work With
- Updated Best Online GIF to Image (PNG/JPG) Converters for 2024
- In 2024, How to Do Masking in After Effects Alternative Provided
- New In 2024, Are You Trying to Make Slow-Mo Videos on Instagram? In This Article, We Will Discuss Top-Rated Ways to Produce Perfect Slow-Motion Videos for Instagram
- 2024 Approved Steps to Create Gold Text Effects After Effects
- Updated How to Use OBS Chroma Key With/Without Green Screen Easy Solutions
- 2024 Approved Wondering How to Add Custom Transitions in OBS Studio? Here Are the Steps to Add Stinger Transitions to OBS. Get a Better OBS Alternative to Add Transitions
- 2024 Approved Do You Wish to Make Changes Across Your Video? Are You Looking to Record Your Desktop Screen on Mac? Worry Not, as This Article Provides Details About QuickTime Player that Caters to All User Requirements
- Updated Creating Testimonial Videos For Health And Wellness Business Industry
- New Logo Intro Videos Are the Hottest Trend in Town and Are Gaining Popularity Quickly. Keep Reading This Article to Learn Their Importance and How to Design One for 2024
- Updated In 2024, Do You Want to Download Slow-Motion Apps that Can Edit Video Professionally? This Article Will Discuss some Slomo Makers for Both iOS and Android
- Updated Creating Motivational Videos with AI Comprehensive Guide 2024
- Updated How to Make After Effects Gifs for 2024
- Add Amazing Filters and Effects for Fun to Watch GIFs Using Adobe After Effects. Read on to Discover an Easy-to-Learn After Effects Alternative
- New Ways to Find Free Online Slideshow Maker with No Watermark
- New Mastering Video Speed Control Slow Down, Speed Up, and Edit with Ease for 2024
- This Is a Recommendation About Bandicut. If You Are Confused, Please Check It Out
- In 2024, How To Zoom In On TikTok Videos?
- 2024 Approved In This Article, You Will Learn How to Make an Engaging and Creative YouTube Intro to Give a Hook and Recap Information to the Audience by Using Wondershare Filmora
- New How to Use Filmora Slideshow Maker for Making Slideshow for 2024 What Is Slideshow Filmora? Know the Steps to Make Filmora Slideshow. What Are Steps to Make Filmora Slideshow Template?
- Updated 2024 Approved How to Denoise in Final Cut Pro – Reduce Video and Audio Noise
- How to Create a Slideshow on iPhone for 2024
- New In 2024, A Review of 3D LUT Mobile App - A Composite Application for Editing Media
- New In 2024, Looking for Free Tools to Create Radial Blur Images Online? Read Our Full Guide to Learn About the 6 Best Programs to Add This Effect to Your Pictures
- New How to Create Discord Logo GIF for 2024
- New 2024 Approved Adobe Premiere Pro Download and Use Guide
- Updated In 2024, How to Overlay Video in Premiere Pro
- 2024 Approved Easy Way to Add Effects to Art Video
- In 2024, In This Article You Will Learn How to Crop a Video Through Windows Media Player and with Filmora Wondershare. Here Are Ways to Crop Your Video Clip
- New VN Editor A Prominent Option for Adding Luts for Video Editing
- In 2024, How To Combine Videos On TikTok
- New Are You Ready to Learn About Something Free yet Amazing? We Are Talking About All Format Video Players for PC that You Should Know , Lets Begin for 2024
- Updated Wondershare Filmora Tutorial | Using The AI Auto Reframe Feature for 2024
- Updated Top 10 Picks for Flawless Slow Motion Video Generation for 2024
- 2 Methods to Crop a Video in VLC
- Updated 2024 Approved Best Video Grabbers for Chrome
- Step by Step to Rotate Videos Using Kdenlive
- Updated In 2024, In This Article, We Will Introduce You Our Top 5 Picks of Websites and Software Converter Online to Convert Powerpoint to Mp4
- How to Hide/Fake Snapchat Location on Your Honor 90 GT | Dr.fone
- Android Safe Mode - How to Turn off Safe Mode on Meizu 21 Pro? | Dr.fone
- In 2024, Best Pokemons for PVP Matches in Pokemon Go For Lava Blaze Pro 5G | Dr.fone
- In 2024, Dose Life360 Notify Me When Someone Checks My Location On Vivo Y100i Power 5G? | Dr.fone
- 3 Solutions to Find Your Itel S23 Current Location of a Mobile Number | Dr.fone
- Life360 Learn How Everything Works On Honor Play 8T | Dr.fone
- Unlock iPhone XS Without Passcode Easily
- In 2024, iSpoofer is not working On Infinix Smart 8? Fixed | Dr.fone
- 15 Best Pics Collage Apps Top Picks for 2024
- 6 Fixes to Unfortunately WhatsApp has stopped Error Popups On Infinix Smart 8 HD | Dr.fone
- How to Change Google Play Location On Nokia C110 | Dr.fone
- 3 Ways to Track Honor Play 40C without Them Knowing | Dr.fone
- How to Restore iPhone 6s from Backup when iTunes Backup is Corrupt or not compatible | Stellar
- In 2024, Does find my friends work on Oppo F25 Pro 5G | Dr.fone
- In 2024, Dose Life360 Notify Me When Someone Checks My Location On Motorola Edge 40? | Dr.fone
- 5 Ways to Send Ringtones from Apple iPhone 12 mini to iPhone Including iPhone 15 | Dr.fone
- New Best iOS and Android Apps You Can Use to Create Animoji and Memoji Videos for 2024
- Trouble with iPhone 15 Swipe-Up? Try These 11 Solutions
- In 2024, 10 Fake GPS Location Apps on Android Of your Honor Magic V2 | Dr.fone
- Nokia C300 ADB Format Tool for PC vs. Other Unlocking Tools Which One is the Best?
- How to Repair a Damaged video file of HTC U23 using Video Repair Utility on Windows?
- Xiaomi won’t play MP4 files
- In 2024, Can I Bypass a Forgotten Phone Password Of Vivo Y28 5G?
- How To Leave a Life360 Group On Poco C50 Without Anyone Knowing? | Dr.fone
- 3 Methods to Mirror Oppo A1 5G to Roku | Dr.fone
- A How-To Guide on Bypassing iPhone 11 Pro iCloud Activation Lock
- How to Reset a Samsung Galaxy A25 5G Phone that is Locked?
- Unlock Nokia C02 Phone Password Without Factory Reset Full Guide Here
- What Does Enter PUK Code Mean And Why Did The Sim Get PUK Blocked On Samsung Galaxy A05s Device
- 9 Quick Fixes to Unfortunately TouchWiz has stopped Of Motorola Moto G24 | Dr.fone
- In 2024, Latest way to get Shiny Meltan Box in Pokémon Go Mystery Box On Samsung Galaxy S23 FE | Dr.fone
- In 2024, What Legendaries Are In Pokemon Platinum On Huawei P60? | Dr.fone
- In 2024, How to Change GPS Location on Vivo V27 Pro Easily & Safely | Dr.fone
- How to Reset Apple ID and Apple Password From Apple iPhone 7
- In 2024, How Can Xiaomi Redmi K70 ProMirror Share to PC? | Dr.fone
- Best Methods for ZTE Nubia Z60 Ultra Wont Turn On | Dr.fone
- Recover your messages after Vivo S18 Pro has been deleted
- In 2024, 10 Fake GPS Location Apps on Android Of your Lava Blaze 2 Pro | Dr.fone
- In 2024, Here Are Some Reliable Ways to Get Pokemon Go Friend Codes For Oppo Reno 11 Pro 5G | Dr.fone
- 3 Ways to Fake GPS Without Root On Nokia C110 | Dr.fone
- Title: Step by Step to Rotate Video in Google Photos for 2024
- Author: Morgan
- Created at : 2024-04-24 01:12:48
- Updated at : 2024-04-25 01:12:48
- Link: https://ai-video-editing.techidaily.com/1713942943036-step-by-step-to-rotate-video-in-google-photos-for-2024/
- License: This work is licensed under CC BY-NC-SA 4.0.
