
:max_bytes(150000):strip_icc():format(webp)/removerokuchannel-c354faa0f712495384a4d5888017e30c.png)
Have You Ever Heard Bokeh Effects for Videos? Do You Know that You Can Make Your Own Bokeh Video Easily with some Software. This Article Will Introduce You How to Make a Bokeh Effect Video with Steps for 2024
Have You Ever Heard Bokeh Effects for Videos? Do You Know that You Can Make Your Own Bokeh Video Easily with some Software. This Article Will Introduce You How to Make a Bokeh Effect Video with Steps
There’s a strong chance you’ve heard about bokeh before if you frequently visit photography websites or have friends who are photographers. What exactly is this optical effect that camera aficionados frequently discuss? Bokeh, who is derived from the Japanese word for “blur,” is a term used in photography to describe how a lens presents an out-of-focus background.
Part 1. What is a Bokeh Effect?
The Japanese word boke, which meaning “blur,” “haze,” or “boke-aji,” the “blur quality,” is where the term “bokeh” originates. The pronunciation of bokeh is BOH-K or BOH-kay. You can find a lot of people discussing the beautiful bokeh that their favorite fast lenses allow on any photography website or forum.
Bokeh is characterized by the words “smooth,” “amazing,” “superb,” “good,” “beautiful,” “sweet,” “silky,” and “great.” But what is it exactly? When using a fast lens and the widest aperture possible, such as f/2.8 or wider, you can create bokeh, which is described as “the effect of a fuzzy out-of-focus background.” Bokeh is the appealing or aesthetically pleasant aspect of out-of-focus blur in a shot, to put it simply.
Part 2. What is a Bokeh effect used for?
Most often, bokeh is employed for artistic purposes. You might occasionally desire a little background blur so that the viewer’s attention is drawn to the subject. In other cases, you can want it to completely detract from the subject, as in portraiture when you want to concentrate on the individual’s eyes or mouth while blurring the rest of the image. It’s true that some people use bokeh inadvertently, like looking for photos with excellent bokeh that they may use as free images on their websites or blogs. This isn’t advised, though, as it’s against the law and usually frowned upon in the photographic community as a whole to steal someone else’s image in this manner.
Part 3. How do you create a Bokeh effect?
Bokeh’s smooth, organic texture is among its most lovely features. The major goal in producing this effect is to distinguish the subject from the backdrop by employing a shallow depth of field. You will learn how to create beautiful bokeh for your photos in this video. One of the most alluring photographic effects, particularly for portraits, is bokeh. It can impart a sense of perfection to everything in a photo, making it look lot more appealing and engaging. Bokeh helps to create a dreamy backdrop that gives the image a whole new level of depth and perspective.
Using a camera lens with a shallow depth of focus is one of the many methods for achieving bokeh in photography. You need a short depth of field so that your lens aperture can be opened up as wide as possible to achieve beautiful bokeh. You can take pictures with shallow depth of field, often known as bokeh, with a point and shoot or a DSLR. A common photography technique used to make the subject stand out from the backdrop is called bokeh.
It can be used to draw attention to the topic by blurring or losing focus on the background. Three different kinds of lenses can create beautiful bokeh: prime lenses with a wide aperture The best lenses for bokeh are often wide-aperture prime lenses. Although they are frequently more expensive and heavier than zoom lenses, they offer a wider field of view. Since there is a greater difference in depth between the foreground and background when using a wide-open aperture, wide aperture prime lenses make blurring the background easier.
Part 4. What software do you need for a Bokeh effect?
Bokeh is one of the best techniques for creating a soft out-of-focus background and emphasizing a certain spot in a shot. Utilizing a fast lens and modifying the camera’s aperture settings are the typical methods for obtaining bokeh. Still, using software for both Windows and Mac, even amateur photographers may enhance their photographs with a fantastic bokeh effect.
It might be challenging to determine which photo editing software is ideal for producing high-quality bokeh effects without trying them all out, which isn’t always an option. The top five Bokeh Effect Makers will be discussed in this post in order to improve your photographs’ visual appeal and set them apart from the competition.
# Paintshop Pro
With a comprehensive toolkit created for users of all ability levels, Paintshop Pro enables you to edit, enhance, and repair your photos. A touch-friendly photography option with a distinctive split-screen before-and-after function was recently added to the software. Paintshop Pro is a good option if you’re searching for a reasonably priced photo editor that lets you tack on extra premium capabilities as you go.
Depending on your degree of competence, the software offers three distinct workspaces for you to choose from. Essential editing tools and cutting-edge technologies like AI Upsampling and AI Style Transfer can be found in the Photography Workspace, which is intended for beginners or those making short alterations.
All of the common editing and retouching tools are present in the Essentials Workspace, but only a limited number of tools and palettes are visible. You may also change the available settings to display or hide the controls you need. Last but not least, Paintshop Pro’s Complete Workspace shows all of its tools and features.
# Blur n Bokeh
The focus of Blur & Bokeh for Mac is blurring an image’s backdrop and foreground. It has the ability to boost the saturation, brightness, and warmth of the highlighted areas, as well as masking with edge detection. The clever edge-preserving method is one of the software’s strongest components. It offers excellent outcomes for creating realistic-looking image output.
You may modify the foreground and background of your photographs using a variety of filters. Although Blur n Bokeh is excellent at producing bokeh, it’s not the ideal choice if you’re searching for software that provides a variety of additional picture editing features.
# PhotoDirector
All skill levels will benefit greatly from using PhotoDirector, a complete photo editor that is free to download and simple to use. Express Mode, who is great for making quick edits, or Full Mode, which offers preset and manual photo alteration options along with creative effects, overlays, and beauty options, are two ways the program lets you access the editor.
The best part is that there is a special bokeh tool that lets you add bokeh lights and blur a specific section of an image with just one click. PhotoDirector employs an image’s natural light sources to create the bokeh effects, in contrast to other tools. Having said that, you may select a shape from 25 options and even enable live animation.
Both beginning and experienced photographers will find PhotoDirector to be a desirable alternative. PhotoDirector is unquestionably at the top of the list if you’re seeking for reliable post-processing software with a large range of features.
# Tadaa SLR
Although there are many amazing things about your iPhone, its camera will never be able to take pictures with the same wonderfully shallow depth of field as your DSLR. That will always be the case unless Apple manages to get a much, much larger sensor into the phone.
Software, however, may mimic that lavish, shallow depth of field appearance. Tadaa SLR accomplishes this. Actually, Tadaa allows you to alter the photo’s focus point in addition to artificially adjusting the depth of field. Similar to what you can accomplish with the cutting-edge Lytro camera, it does it after you take the picture.
Tadaa is launched in camera mode, and you compose and snap your picture. Alternately, you can pick a picture from your camera roll if you wish to start with an existing image. A few widgets are as follows: Switch between a square or wide shot, show a line of thirds grid, and turn the flash on and off. Even access to the front and back cameras is provided by Tadaa.
Conclusion
Many popular photo editing programs require intermediate-level photo editing knowledge and can be a bit on the expensive side, but there are a few programs out there that cater to all skill levels and have free versions
that don’t cut corners on quality.
While each photo editor comes with various pros and cons, only one strikes a balance between offering a wide range of editing tools and being easy to navigate, and that’s PhotoDirector.
Free Download For Win 7 or later(64-bit)
Free Download For macOS 10.14 or later
Vintage Film Effect 1990S - How to Make
In the 90s, movie production technology improved a lot. This decade saw horror movies become much more fun and immersive than in the 80s and 50s because they were more psychological. In fact, we can say that the horror movies of the 90s laid the foundation for current horror movies. So, without wasting time, let’s create a 1990s horror movie similar to The Blair Witch Project.
Preparation

The preparation for this horror film production is relatively self-explanatory if you’ve watched The Blair Witch Project. Simply shoot footage inside a dark room and apply some light to your face. It’s even better if you can shoot the video inside the woods. Just add some drama and a few screaming scenes to evoke emotions.
How to create a 1990s horror film with Filmora :
Free Download For Win 7 or later(64-bit)
Free Download For macOS 10.14 or later
Step1 Add the horror video to the timeline

Open Wondershare Filmora on your computer, then load the video you want to edit. After adding the video, drag it to the editing timeline, then move it a few keyframes to the right. The idea is to apply some black screen to add drama and fear before the film starts playing.
Step2 Apply color grading

Next, double-click the horror clip and go to the Color menu. Then, click the Tone arrow before lowering the Saturation to -50%. This will give us a less saturated look popularly used in horror films.

Now click the 3D LUT option and choose a LUT that works for your film. For this horror film project, we’ll select the Dark Film option.
Step3 Add creepiness to the video

Obviously, you’ll want your horror film to look as creepy as possible. To achieve that, click the Elements tab, then search for the Smokescreen 1 effect. Move the effect to the timeline above the video track before trimming the effect clip to fit with the original horror video.

We’ll now change the size and positioning of the smokescreen effect to match the feature video. To do that, double-click the effect track. You can also reduce the opacity to around 30% to make the smoke more visible.
Step4 Add a retro filming effect

Now we’ll make the film more believable by adding a retro overlay. Click the Effects tab, then search for Retro Film Overlay 15 before dragging and dropping the effect above all the tracks in the editing timeline.

Summary
That’s it! With these tips and tricks, you can effortlessly create a retro-style 1990s horror film. Follow this tutorial and play around with the movie effects to find what works best for you. Remember, Filmstock is the ultimate resource for video and movie effects. Give it a try!
Free Download For macOS 10.14 or later
Step1 Add the horror video to the timeline
Open Wondershare Filmora on your computer, then load the video you want to edit. After adding the video, drag it to the editing timeline, then move it a few keyframes to the right. The idea is to apply some black screen to add drama and fear before the film starts playing.
Step2 Apply color grading
Next, double-click the horror clip and go to the Color menu. Then, click the Tone arrow before lowering the Saturation to -50%. This will give us a less saturated look popularly used in horror films.
Now click the 3D LUT option and choose a LUT that works for your film. For this horror film project, we’ll select the Dark Film option.
Step3 Add creepiness to the video
Obviously, you’ll want your horror film to look as creepy as possible. To achieve that, click the Elements tab, then search for the Smokescreen 1 effect. Move the effect to the timeline above the video track before trimming the effect clip to fit with the original horror video.
We’ll now change the size and positioning of the smokescreen effect to match the feature video. To do that, double-click the effect track. You can also reduce the opacity to around 30% to make the smoke more visible.
Step4 Add a retro filming effect
Now we’ll make the film more believable by adding a retro overlay. Click the Effects tab, then search for Retro Film Overlay 15 before dragging and dropping the effect above all the tracks in the editing timeline.
Summary
That’s it! With these tips and tricks, you can effortlessly create a retro-style 1990s horror film. Follow this tutorial and play around with the movie effects to find what works best for you. Remember, Filmstock is the ultimate resource for video and movie effects. Give it a try!
How To Polish Your Music Video Edits Using Filmora
A common understanding in cinematography circles is that editing makes the seventy percent of the total job. It is editing that makes a significant difference, and Filmora, a professional video editor, comes in handy when you want to edit your photos.
Filmora has multiple features that allow you to shine your videos in countless ways. This article will clarify everything you need to improve your music video. Also, it is just the tip of the iceberg. The more you try to be creative, the more options Filmora will provide you. The following points highlight how you can polish your music video editing skills.
Part 1. Duplicate your project before editing
Before you begin unleashing your inner creativity, you must make a duplicate copy of your project file. Of course, it would help if you did so to keep a backup file.
It will help you get back to the pre-edit file if you want to start from the beginning or if you want to save the file for use in the future. You can make a duplicate file of your project by following the subsequent steps.
Step1Download and install Filmora
You can download Filmora from its official website.
Free Download For Win 7 or later(64-bit)
Free Download For macOS 10.14 or later
Step2Create or import your project
- Create a project if you are using Filmora for the first time.
- Import the project from your computer directory. Then, go to file in the menu bar, and click on the open project.

- Select the project you want to open.
Step3Duplicate the project file and rename it
- When you open Filmora, a start-up window will appear.
- Right-click on the project you want to duplicate.

Step4Rename the duplicate file
- Rename the file to keep a record of new editions.

The file is renamed. It will help you remember which file is original. If your files become corrupted, you can easily access the original ones. Once you are done duplicating your project file, it is time to do our primary job: Polishing our video edits with Filmora .
Free Download For Win 7 or later(64-bit)
Free Download For macOS 10.14 or later
Part 2. Polishing Your Music Video
Just like ladies apply polish to their nails to make them more attractive, you can use editing to your music video to get the same result. Ladies can go to the beautician if they want. You can go to a professional editor if you like it.
However, these options are pretty expensive. The best way is to do it yourself. It is fun. Also, you can let loose your hidden artist for a while. Stick to the following points to understand how to begin polishing your music video.
How to put cuts on beats?
Adding beat cuts to a music video is imperative. Randomly placing beats yield an inferior-quality video. It also gives the impression that video editing is not done by a professional. The beats must be adjusted to synchronize with the storyline of the video.
Moreover, the video will lose its charm if you put cuts on every beat. People will not be able to enjoy, let alone understand, what is happening in the film.
What are the beats?
Beats are pieces of music that recur in a pattern. They are essential for music videos. It adds attraction for the viewers. Also, without beats, no music video can go viral. In the digital age, beats boost your music video.
![]()
Note: Cuts are recommended on every 2nd and 4th beat. In that way, a smooth transition of music beats takes place, making it more ear-pleasing. It also gives a professional outlook to the whole music.
Let’s learn how you can put cuts on your beats.
Step1Import the music video
- Import the Music video to which you would like to add any beat.
- You can also use the one given in Filmora.
- Drag and Drop the music video in the timeline panel.

Step2Detach its audio
- Right-click on the video.
- Select the option “Detach Audio.” It will separate the attached audio from the music. You will be able to add cuts where you deem necessary.

You can also import audio from your drive. After that, drag and drop the imported file into the timeline panel.
- Right, Click on the audio file in the audio panel.
- Select the option “Beat Detection.” It will show beats (with red markers) on the audio timeline, making adding cuts to the beat easy.

Step3Cut the beats where you find necessary
- Listen carefully to the audio file and plan where you want to add a cut to your beat.

- Adjust the beat according to your music video.
- Join the trimmed video segments to maintain continuity. The final product should look like the one given below.

Resultantly, it will readjust the beat to a different spot on the video. You can make multiple cuts in the beats. However, it is not recommended. It makes the whole experience of listening quite jarring.
Once you’ve added cuts to the beats, it is time to make them smooth. For that, keep reading the instructions given below.
Free Download For Win 7 or later(64-bit)
Free Download For macOS 10.14 or later
How to smooth out cuts
Adding cuts in the beats is one part of the job, not the whole job. After adding these cuts, you have to smoothen them. With it, the point of interest for the audience becomes clear.
To maintain the audience’s attention on our video, we have to smoothen the cuts so that our audience quickly understands the ongoing story in our video. If sudden changes occur on the screen, watching it gets disconcerting.
Indeed, you would not want your audience to have this experience. Head to the following techniques to understand how to smooth out video cuts
Technique 1: Showing multiple perspectives
The focal person in the video must occupy the same spot in the previous shot as it maintains in the current shot.
Let us understand from the example given below.
- Shot 1: The actress in the music video is occupying the left seat on the bus while looking outside.

- Shot 2: The actress occupies the same spot in the subsequent shot.

- Third Shot: The shot shows the wide angle of the bus from the inside. The actress is still sitting in the same position and the same place.

This technique keeps the audience focused on the point of interest while giving them a different perspective of the scene.
Technique 2: Using light leaks
The technique is quite helpful for the transition between two cuts. It uses different levels of colors to shine between cuts, adding smoothness and providing coherence.
What are light leaks?
Light leaks are great effects in Filmora. These effects fill the screen with light. It seems that light is leaking in a disorderly fashion. For the time being, the whole screen is filled with that effect. Thus, it explains the name of this effect as a light leak.
Filmora provides a plethora of features for adding Light Leak for transitioning cuts. With the use of Filmora, one can quickly bring a level of flow to the music video. Keep reading to understand how to use this remarkable feature of Filmora.
Free Download For Win 7 or later(64-bit)
Free Download For macOS 10.14 or later
Step1Access the light leak effects on Filmora
- Go to Effects on the Interface.
- Go to Overlay and choose the light Leak feature.
- You can also use any other light Leak stock in your capacity.

Step2Drag and drop the effects in the video editing
- Drag and drop the effect between any two cuts where you want to add this feature for a smooth transition.
- The effects should be placed above the video, in the timeline over the clip.

Step3Setting the color and blend of the light leak effect
- Right-click on the clip, and go to “Edit Properties.”

- Go to the Composing menu. Then, go to “Blend Mode” and choose “Screen.”
- It will adjust the light Leak feature to your entire screen.

Step4Fit the effect to the width of the screen
- Go to the Transform option in the clip properties.
- Click on both circles in front of the Scale option. It will adjust the effect to the entire frame width, giving it a pleasing outlook.

There you go! Your light Leak filter is ready. Give attention to how the light floods the screen and the scene transitions from one part to the next.

Now, you are done with adding some additional color and light to your cuts. Your cuts are now smooth and trouble-free. Moving onto our next tip that will further polish your music video. It is called Reframing and Zooming.
Reframe and zoom to polish your video
Another significant feature of Filmora is that it allows you to readjust the frame and zoom of the video. Any zooming option left undone in the shooting phase can be addressed in the editing phase.
For example, a director did an excellent job shooting a video. He considered every angle and yielded the best video shoot he could achieve. However, he missed a few zooming-out techniques while shooting. Now, what should one do? Use Filmora.
It is where the reframing and zooming feature of Filmora comes into play and saves the day.
Free Download For Win 7 or later(64-bit)
Free Download For macOS 10.14 or later
What are the reframing and zooming features?
This feature allows you to adjust the zoom on the point of interest in the music video. If you want to add extra focus on a certain point, the feature in Filmora can do that for you. You can run zoom in or zoom out on any particular object or actor. Follow the given steps to understand how you can do that.
Step1Plan your video
- Where you want to reframe and zoom. Trim that part of the video.

Step2Choose any two points on the clip for reframing
- Choose any two points on the clip. These points are reference points. When the clip moves from one point to the next point, the reframing takes place.
Step3Adjust the scale and position of the clip
- Go to the Transform option in Clip properties.
- Go to the clip’s end (2nd point), and turn on the Scale and Position circles.

- Go to the start of the clip
- And adjust the value of scale and position.
Atl Text: Setting new value to Scale and Position.
Step4Replay the clip
- Once the scale readings and position in the initial point are set, replay the clip to observe the reframing.

You can use it on the static shots if you want. The procedure is the same. You have to adjust the scale and position of the screen to adjust reframing. Thus, Filmora fills gaps in your music video without the need to reshoot.
Final words
Video editing requires patience, creativity, and efficient tools. Filmora provides the most effective means to run various effects on your video. You can add cuts to your, smoothen your cuts, and readjust the frame of your video. These are merely a few features to mention.
In a nutshell, Filmora assists you in polishing your music video. You will not need a professional editor. You will become one in no time.
Free Download For Win 7 or later(64-bit)
Free Download For macOS 10.14 or later
Free Download For macOS 10.14 or later
Step2Create or import your project
- Create a project if you are using Filmora for the first time.
- Import the project from your computer directory. Then, go to file in the menu bar, and click on the open project.
- Select the project you want to open.
Step3Duplicate the project file and rename it
- When you open Filmora, a start-up window will appear.
- Right-click on the project you want to duplicate.
Step4Rename the duplicate file
- Rename the file to keep a record of new editions.
The file is renamed. It will help you remember which file is original. If your files become corrupted, you can easily access the original ones. Once you are done duplicating your project file, it is time to do our primary job: Polishing our video edits with Filmora .
Free Download For Win 7 or later(64-bit)
Free Download For macOS 10.14 or later
Part 2. Polishing Your Music Video
Just like ladies apply polish to their nails to make them more attractive, you can use editing to your music video to get the same result. Ladies can go to the beautician if they want. You can go to a professional editor if you like it.
However, these options are pretty expensive. The best way is to do it yourself. It is fun. Also, you can let loose your hidden artist for a while. Stick to the following points to understand how to begin polishing your music video.
How to put cuts on beats?
Adding beat cuts to a music video is imperative. Randomly placing beats yield an inferior-quality video. It also gives the impression that video editing is not done by a professional. The beats must be adjusted to synchronize with the storyline of the video.
Moreover, the video will lose its charm if you put cuts on every beat. People will not be able to enjoy, let alone understand, what is happening in the film.
What are the beats?
Beats are pieces of music that recur in a pattern. They are essential for music videos. It adds attraction for the viewers. Also, without beats, no music video can go viral. In the digital age, beats boost your music video.
![]()
Note: Cuts are recommended on every 2nd and 4th beat. In that way, a smooth transition of music beats takes place, making it more ear-pleasing. It also gives a professional outlook to the whole music.
Let’s learn how you can put cuts on your beats.
Step1Import the music video
- Import the Music video to which you would like to add any beat.
- You can also use the one given in Filmora.
- Drag and Drop the music video in the timeline panel.
Step2Detach its audio
- Right-click on the video.
- Select the option “Detach Audio.” It will separate the attached audio from the music. You will be able to add cuts where you deem necessary.
You can also import audio from your drive. After that, drag and drop the imported file into the timeline panel.
- Right, Click on the audio file in the audio panel.
- Select the option “Beat Detection.” It will show beats (with red markers) on the audio timeline, making adding cuts to the beat easy.
Step3Cut the beats where you find necessary
- Listen carefully to the audio file and plan where you want to add a cut to your beat.
- Adjust the beat according to your music video.
- Join the trimmed video segments to maintain continuity. The final product should look like the one given below.
Resultantly, it will readjust the beat to a different spot on the video. You can make multiple cuts in the beats. However, it is not recommended. It makes the whole experience of listening quite jarring.
Once you’ve added cuts to the beats, it is time to make them smooth. For that, keep reading the instructions given below.
Free Download For Win 7 or later(64-bit)
Free Download For macOS 10.14 or later
How to smooth out cuts
Adding cuts in the beats is one part of the job, not the whole job. After adding these cuts, you have to smoothen them. With it, the point of interest for the audience becomes clear.
To maintain the audience’s attention on our video, we have to smoothen the cuts so that our audience quickly understands the ongoing story in our video. If sudden changes occur on the screen, watching it gets disconcerting.
Indeed, you would not want your audience to have this experience. Head to the following techniques to understand how to smooth out video cuts
Technique 1: Showing multiple perspectives
The focal person in the video must occupy the same spot in the previous shot as it maintains in the current shot.
Let us understand from the example given below.
- Shot 1: The actress in the music video is occupying the left seat on the bus while looking outside.
- Shot 2: The actress occupies the same spot in the subsequent shot.
- Third Shot: The shot shows the wide angle of the bus from the inside. The actress is still sitting in the same position and the same place.
This technique keeps the audience focused on the point of interest while giving them a different perspective of the scene.
Technique 2: Using light leaks
The technique is quite helpful for the transition between two cuts. It uses different levels of colors to shine between cuts, adding smoothness and providing coherence.
What are light leaks?
Light leaks are great effects in Filmora. These effects fill the screen with light. It seems that light is leaking in a disorderly fashion. For the time being, the whole screen is filled with that effect. Thus, it explains the name of this effect as a light leak.
Filmora provides a plethora of features for adding Light Leak for transitioning cuts. With the use of Filmora, one can quickly bring a level of flow to the music video. Keep reading to understand how to use this remarkable feature of Filmora.
Free Download For Win 7 or later(64-bit)
Free Download For macOS 10.14 or later
Step1Access the light leak effects on Filmora
- Go to Effects on the Interface.
- Go to Overlay and choose the light Leak feature.
- You can also use any other light Leak stock in your capacity.
Step2Drag and drop the effects in the video editing
- Drag and drop the effect between any two cuts where you want to add this feature for a smooth transition.
- The effects should be placed above the video, in the timeline over the clip.
Step3Setting the color and blend of the light leak effect
- Right-click on the clip, and go to “Edit Properties.”
- Go to the Composing menu. Then, go to “Blend Mode” and choose “Screen.”
- It will adjust the light Leak feature to your entire screen.
Step4Fit the effect to the width of the screen
- Go to the Transform option in the clip properties.
- Click on both circles in front of the Scale option. It will adjust the effect to the entire frame width, giving it a pleasing outlook.
There you go! Your light Leak filter is ready. Give attention to how the light floods the screen and the scene transitions from one part to the next.
Now, you are done with adding some additional color and light to your cuts. Your cuts are now smooth and trouble-free. Moving onto our next tip that will further polish your music video. It is called Reframing and Zooming.
Reframe and zoom to polish your video
Another significant feature of Filmora is that it allows you to readjust the frame and zoom of the video. Any zooming option left undone in the shooting phase can be addressed in the editing phase.
For example, a director did an excellent job shooting a video. He considered every angle and yielded the best video shoot he could achieve. However, he missed a few zooming-out techniques while shooting. Now, what should one do? Use Filmora.
It is where the reframing and zooming feature of Filmora comes into play and saves the day.
Free Download For Win 7 or later(64-bit)
Free Download For macOS 10.14 or later
What are the reframing and zooming features?
This feature allows you to adjust the zoom on the point of interest in the music video. If you want to add extra focus on a certain point, the feature in Filmora can do that for you. You can run zoom in or zoom out on any particular object or actor. Follow the given steps to understand how you can do that.
Step1Plan your video
- Where you want to reframe and zoom. Trim that part of the video.
Step2Choose any two points on the clip for reframing
- Choose any two points on the clip. These points are reference points. When the clip moves from one point to the next point, the reframing takes place.
Step3Adjust the scale and position of the clip
- Go to the Transform option in Clip properties.
- Go to the clip’s end (2nd point), and turn on the Scale and Position circles.
- Go to the start of the clip
- And adjust the value of scale and position.
Atl Text: Setting new value to Scale and Position.
Step4Replay the clip
- Once the scale readings and position in the initial point are set, replay the clip to observe the reframing.
You can use it on the static shots if you want. The procedure is the same. You have to adjust the scale and position of the screen to adjust reframing. Thus, Filmora fills gaps in your music video without the need to reshoot.
Final words
Video editing requires patience, creativity, and efficient tools. Filmora provides the most effective means to run various effects on your video. You can add cuts to your, smoothen your cuts, and readjust the frame of your video. These are merely a few features to mention.
In a nutshell, Filmora assists you in polishing your music video. You will not need a professional editor. You will become one in no time.
Free Download For Win 7 or later(64-bit)
Free Download For macOS 10.14 or later
15 Best Free MP4 Video Rotators [Windows,Mac, Android, iPhone & Online
Have you ever encountered a problem where you saved a video in the wrong orientation? So you ask yourself what’s the best tool to rotate. There are tools that help to flip videos recorded so that you don’t get frustrated while you watch them later on your pc or phone. So why don’t you take a look at the best video rotators that are available for Android, iOs, Windows, Mac, and online tools?
Best MP4 Video Rotators to Rotate MP4 Video on Windows and Mac - Filmroa Video Editor
Filmora Video Editor allows you to rotate your video to any angle. You can also zoom in and crop out the parts of the video that you don’t want to see. It also includes predefined aspect ratios such as 16:9, 9:16, 4:5, 1:1, and others to help you quickly discover the ideal aspect ratio for YouTube, Instagram, and other sites. Let’s look at how to modify the orientation of a video in Filmora.
For Win 7 or later (64-bit)
For macOS 10.14 or later
How to change the video orientation in Filmora
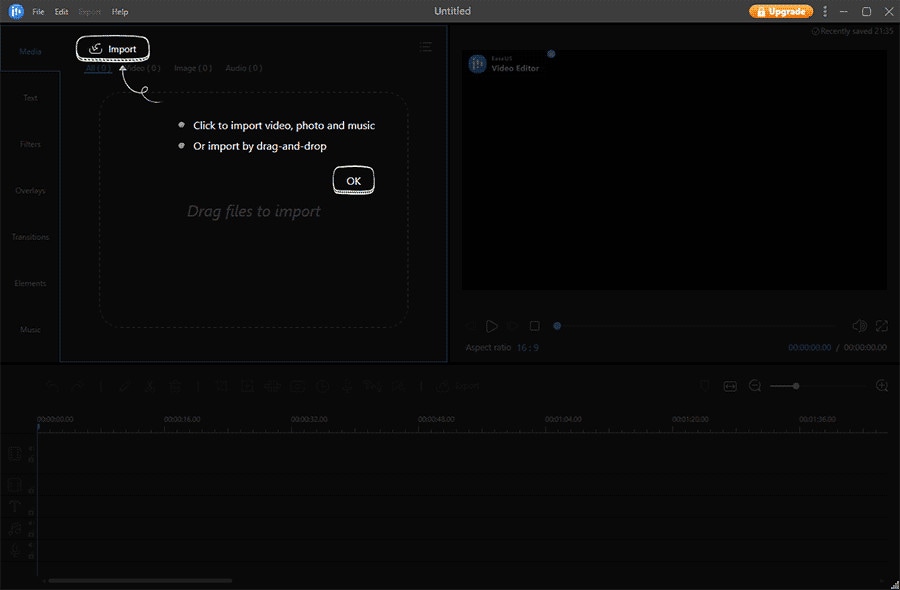
Step 1:Import the video file into Filmora, and then drag it to the timeline.
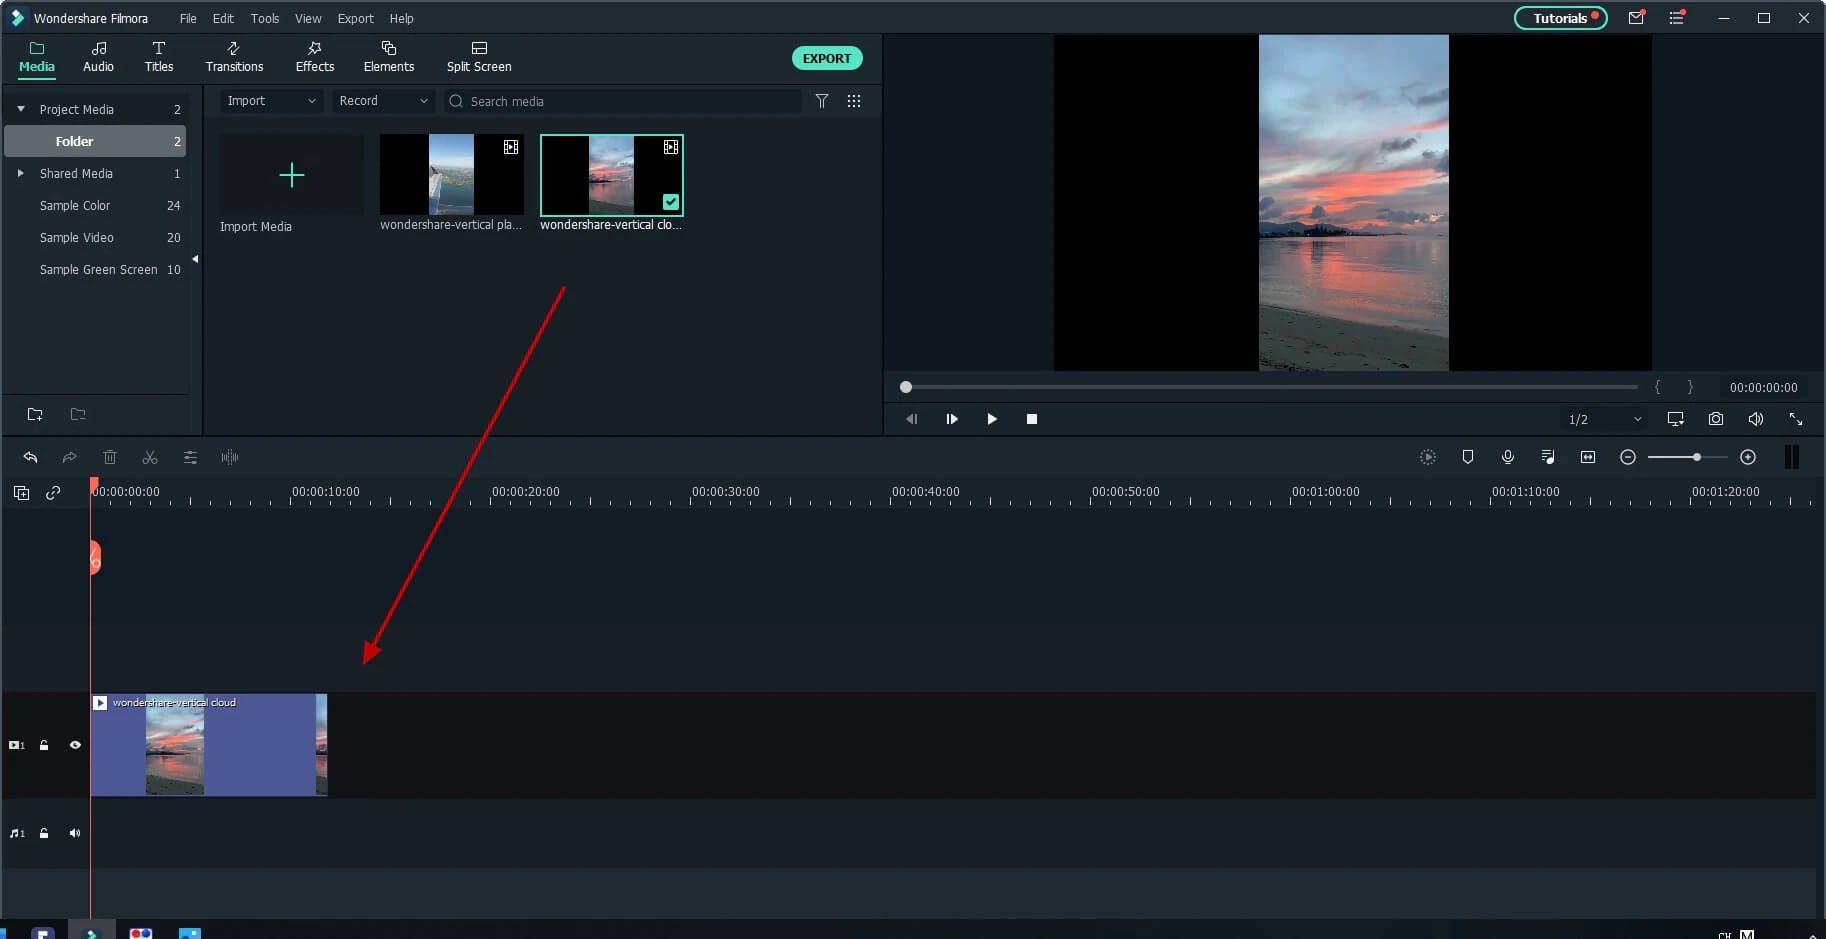
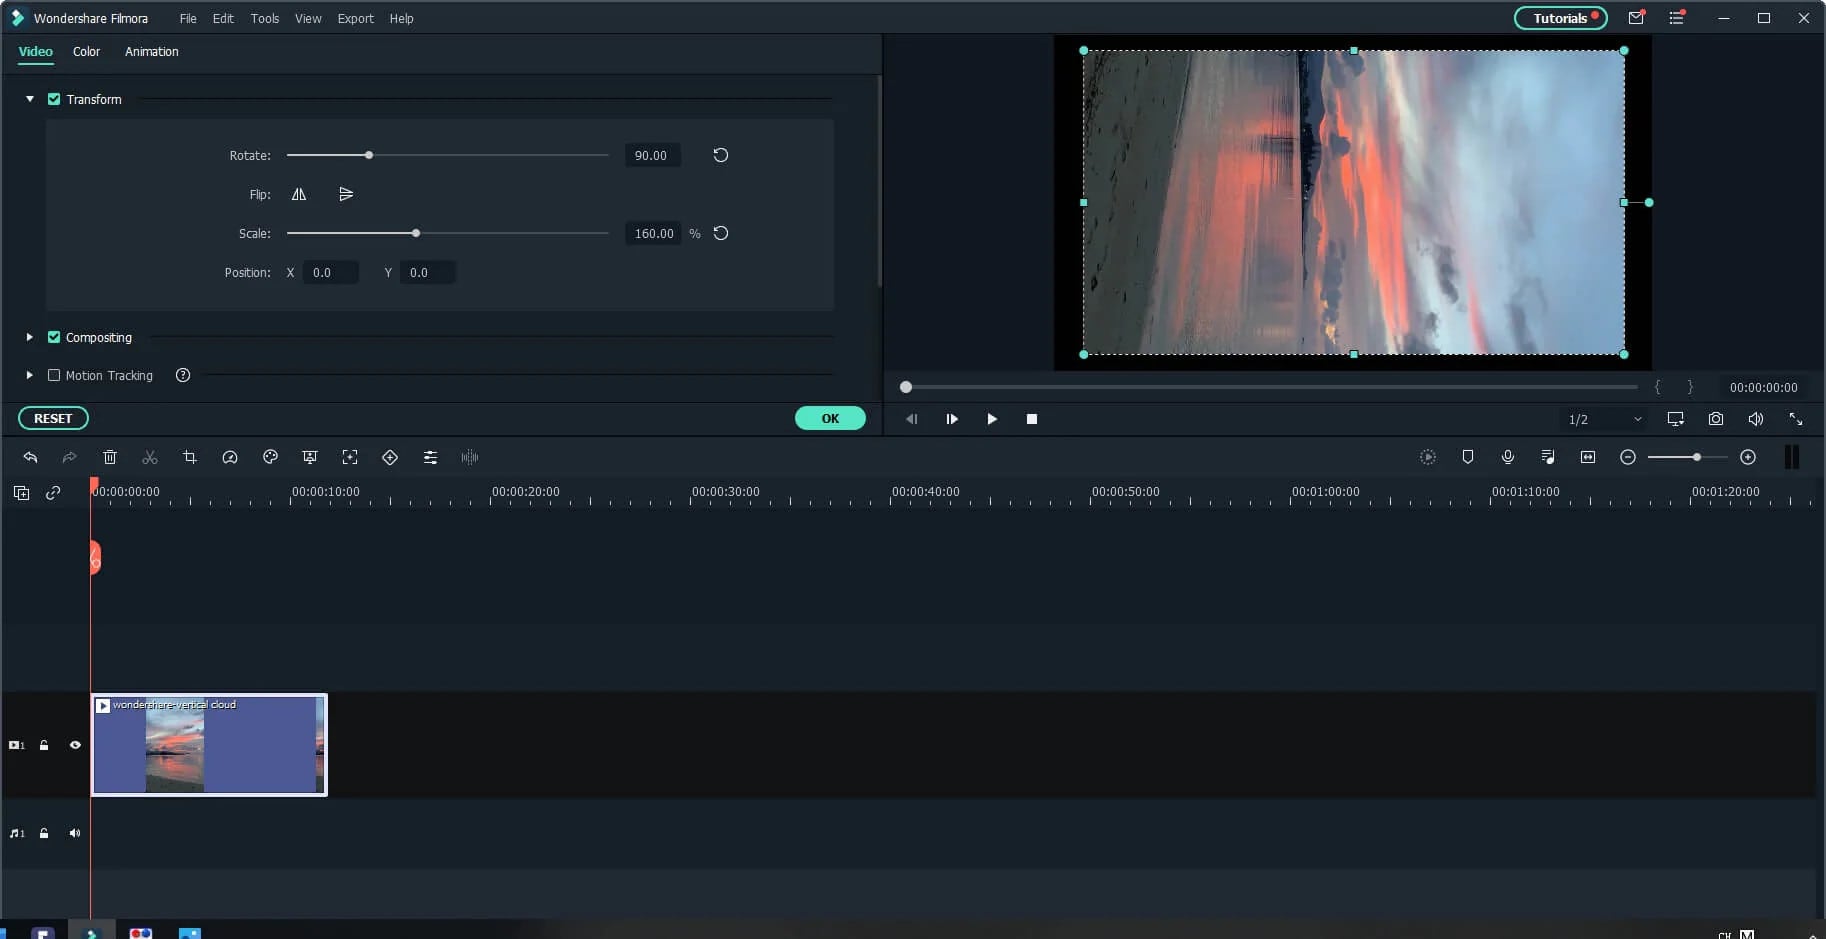
Step 2: To enter the video editing panel, double-click the video clip in the timeline. Locate the “Rotate” option under the “Transform” menu. You can drag the slider or enter a specific number to adjust the rotation value. You can rotate up to 360 degrees. When you enter “90” in the box, the video clip will be rotated 90 degrees.
By dragging the “Scale” slider, you can make the full image screen, or you can directly adjust its position, size, shape, etc., in the Viewer panel.
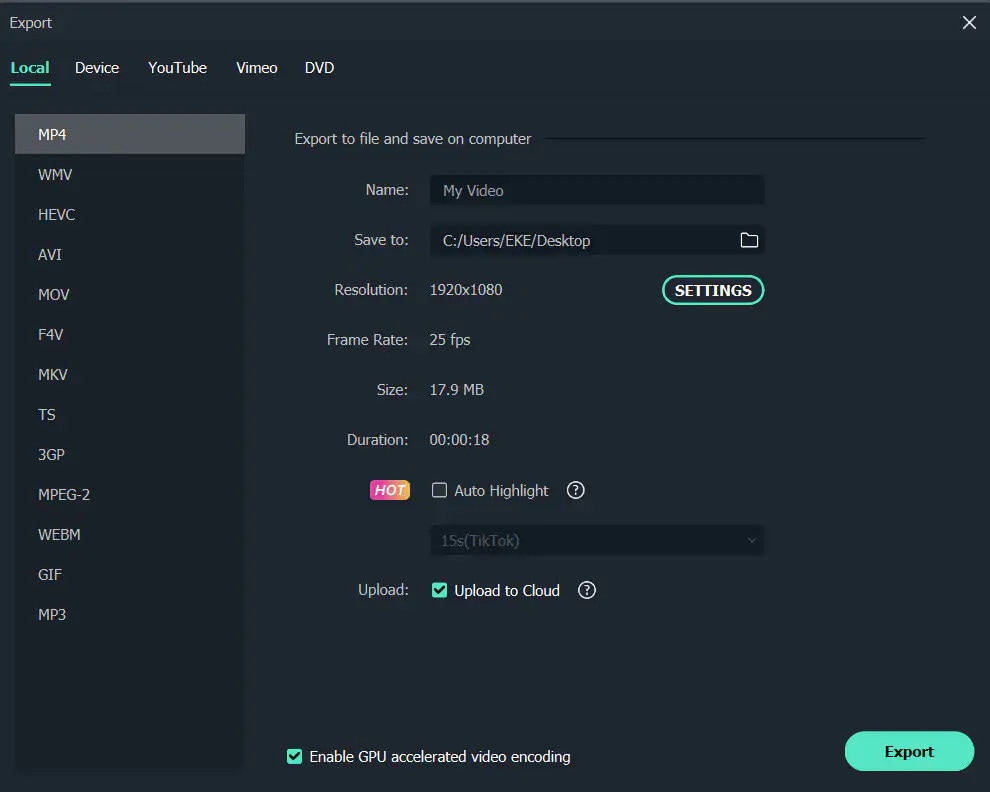
Step 3: After you are satisfied, click the export button. You can change the format here, or you can upload the file to YouTube.
Top 3 Free MP4 Video Rotators on Windows
Looking for the best free video rotator?
If you are looking for a free video rotator for windows, then this article has got you covered. A list of the top 3 free video rotators for windows has been listed.
- VSDC Free Video Editor

It is a highly functional video editing suite with easy controls. It provides anyone who is a beginner to easily access and edit the video easily.
It helps you rotate the videos in increments of 90 degrees, be it clockwise or anticlockwise )
VSDC is a free video editor with non-linear editing capabilities. Users may swiftly convert video and audio files from one format to another with VSDC. A built-in disk burning tool for DVDs is also included in the software. This free program, designed for educational purposes, can be used by businesses or individuals.
VSDC Free Video Editor features
- Built-In DVD Burning Tool
- Colour Blending And Filters
- Specific Multimedia Devices Creation
- Desktop Video Capture
- Export To Social Networking Sites
- Masking
- Non-Linear Video Editing
- Subpixel Accuracy
- Supports Popular Formats
- Video File Converter
Pros
- It’s completely free.
- There is no watermark.
- There are numerous free video editing programs available.
- Support a wide range of file formats
Cons
There isn’t a macOS version available.
Take a severe learning curve into consideration.
There are numerous premium-only features.
The timeline isn’t the same as most NLE editing software.
- Windows Movie Maker
The most well-known video rotator and editor are probably Windows Movie Maker. Most of us who grew up with Microsoft’s various operating systems have had access to it because it comes as a free download with most Microsoft products. It can handle a wide range of files and is generally simple to use. Adding features like sound, music, special effects, or even speeding up the video is simple, and you’ll love the variety of skins available.
For beginners, Windows Video Maker is ideal. It is available for free on Windows PCs and includes basic capabilities and workflow aspects found in professional video editing systems. Its user-friendly interface resembles a simplified version of a video editor timeline and is simple enough for even inexperienced editors to understand.
Features of Windows Movie Maker
- Customization Tool’s title
- Auto Movie Options
- Credit Customization Tool
- Special Effects Options
- Overlays for Transitions
Pros:
- Various video editing functions;
- A variety of output possibilities
Cons:
- Many different versions of the same product;
- No longer included in the Windows operating system.
3.EaseUS Video Editor
EaseUS Video Editor is one of the few most popular video rotators we have today. Its video editing provides tools that can change the video orientation by 90 degrees anticlockwise and clockwise, which can flip vertically and horizontally.
In terms of videos, adding great filters, sound, music, subtitles and other elements to have a great video output can be achieved using the EaseUS. Moreover, it accepts video formats and can convert files to MP4 and other great features.
Features of EaseUS Video Editor
- Can easily trim, cut, split, merge, rotate, and mix video clips.
- Ability to apply stylish video effects
- Can add or remove the watermark and reduce background or wind noise from a video.
Pros:
- User-friendly interface, perfect for beginners
- Easily trim, cut, split, merge, rotate, mix video clips
- A full range of free visual and audio effects
- Change of contrast, exposure, brightness, and other video aspects
- Use the voiceover function to add your comments to the video
Cons:
- The software has no version for macOS
Top 3 Free MP4 Video Rotators on Mac
- iMovie
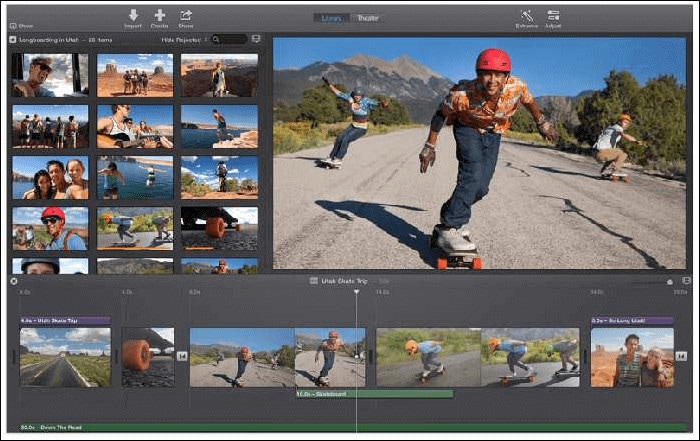
The iMovie for Mac users is an exceptional video rotator. You can turn any video or movie you may have into an amazing masterpiece with more features due to the special after-effects it has. Simple application to use and navigate easily, although when importing video takes a while at certain times.
Features of the iMovie include
- Full range of options to modify
- Ability to enhance colour settings
- Easily crop and edit video clips ease
- Ability to change the speed of clips.
Pros:
- Nice interface;
- The function is to create fun Movie Trailers.
Cons:
- Supports only a few video formats;
- Pre-processing and import trans-coding can be time-consuming.
- Movavi Video Editor
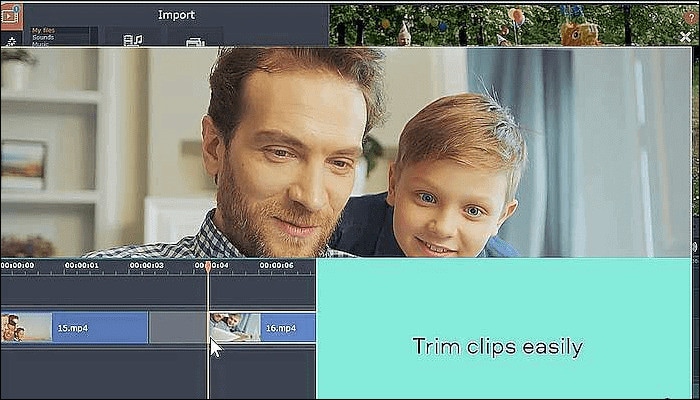
Movavi has a free version that is easy to use, especially for beginners. It allows you to add titles, filters, transitions, and special effects to your videos and photographs to make attractive movies. You can use the animation to smoothly move things around the screen in your film. On the multi-track timeline, you can add as many tracks as you wish. From the expanded built-in collection, you can get more example video clips, stickers, and audio tracks.
Features of Movavi Video Editor
- You can upload files and photographs in almost any format.
- To make videos automatically, use the Montage Wizard.
- Transition Wizard allows you to quickly put together slideshows.
- Enhance image quality by cutting, cropping, and rotating videos on the timeline.
- Apply artistic filters, and make transitions between portions as smooth as possible.
- Create animated headlines, stickers, callouts, and video overlays:
Pros:
- It’s appropriate for newcomers and casual users alike.
- A number of video formats are supported, including.mov (QuickTime)
- Chroma Key and Slow Motion are examples of special effects.
Cons
- Only the premium version supports the advanced features.
- It uses the basic colour grading tool
- QuickTime Player
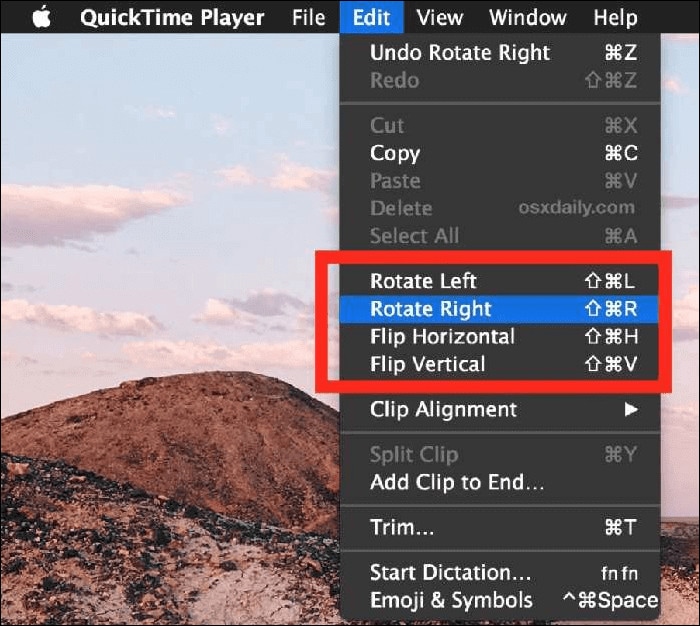
The key advantage of Apple’s QuickTime is that it comes pre-installed on your Mac’s macOS operating system. It’s powerful enough to rotate your clip, yet it’s simple enough for beginners to do. iTunes files can be played and edited with QuickTime. After rotation, it exports a new video file, leaving the old clip on the Mac. The output video will be compressed slightly, resulting in a smaller rotational video file than the original.
Features of QuickTime Player
- Anything can be recorded, including video, audio, and the screen.
- Cropping, audio detachment, combining, and rotation are all simple video editing techniques.
- From 4K to 480p video compression
- Quickly share your video: directly upload videos to YouTube
Pros:
- With macOS, it comes pre-installed.
- Work with iTunes files Streaming video player with no configuration
Cons:
- Only QuickTime Pro 7 unlocks the editing feature.
- There will be no more Windows versions.
- It isn’t compatible with standard subtitle files.
Top 3 Free MP4 Video Rotators on Android
When we use a smartphone to capture a video or download one from a website, we occasionally discover that the video has been inverted. As a result, we’ll require a video rotator app to correct the problem. On the market, there are many different sorts of tools for various platforms. However, you may have discovered that separating the wheat from the chaff can be difficult at times. To save you time, I’ve compiled a list of 3 video rotator applications for Android
- VivaVideo
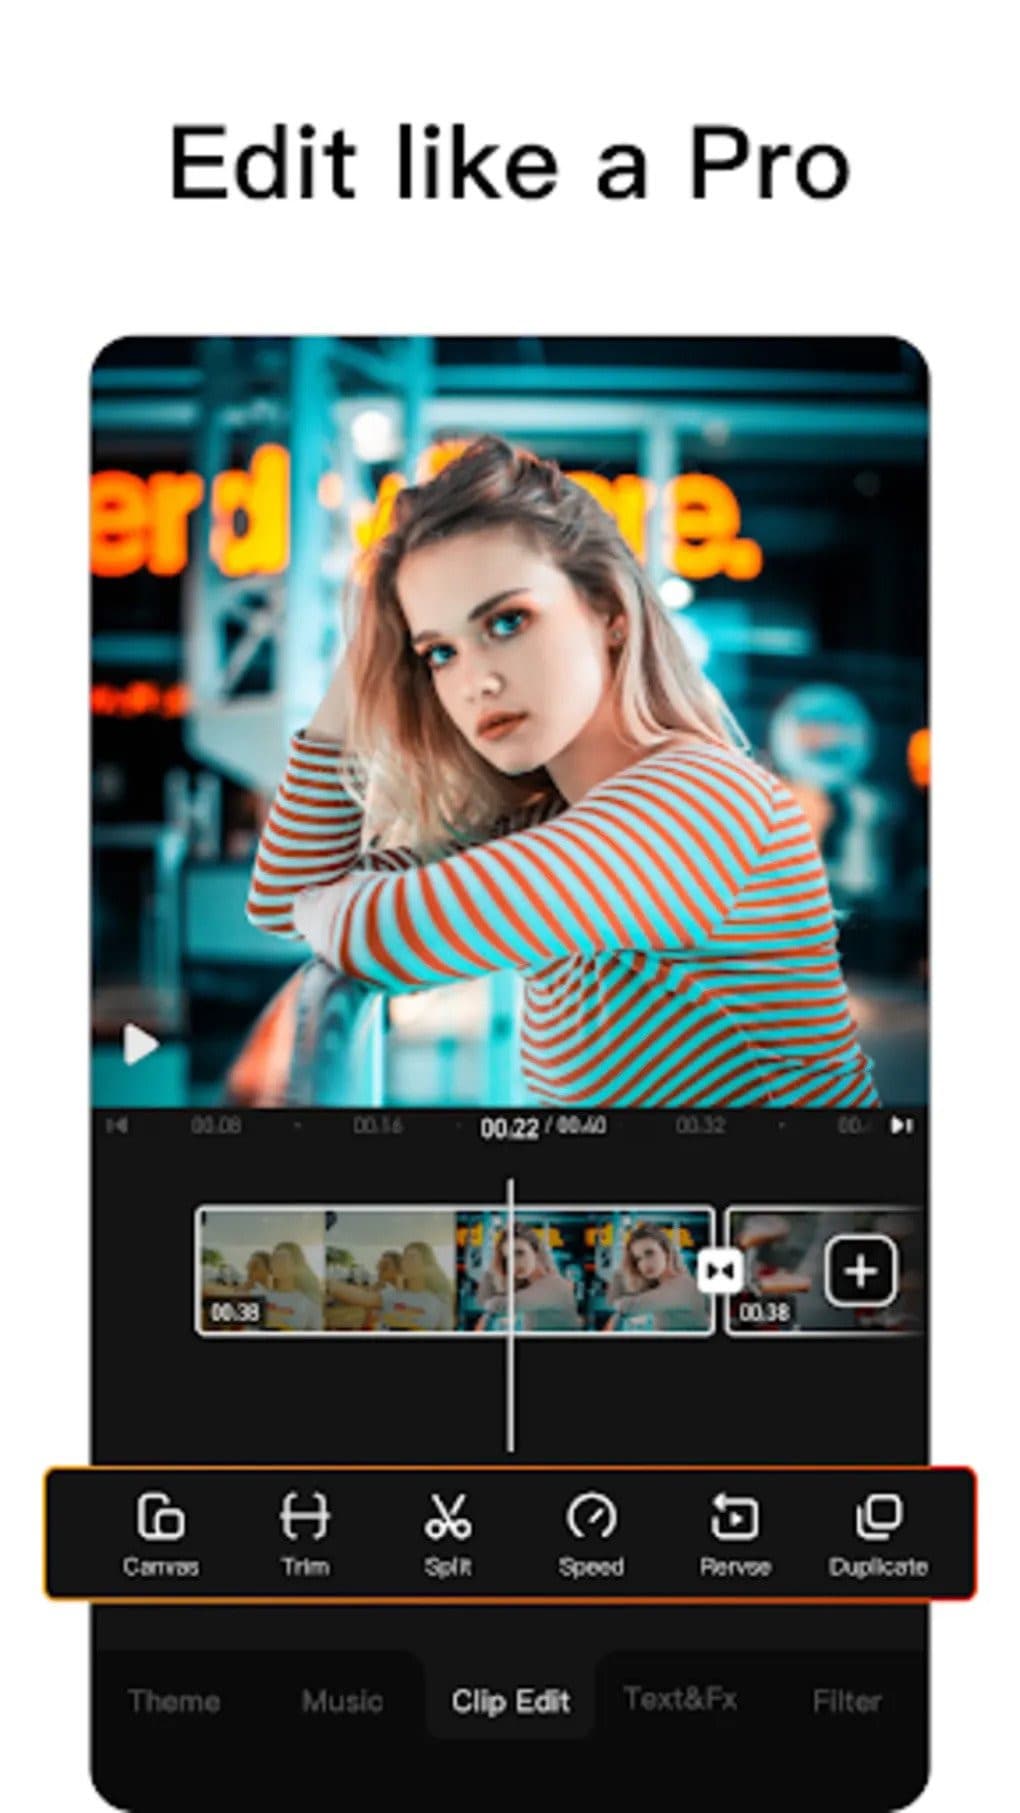
VivaVideo is one of the top movie producers and free video rotators for Android devices as a media editor. This application allows you to alter the orientation of your videos. Aside from rotating videos, this software also includes cropping, combining, cutting, and other editing features. “The best video editor software is VivaVideo - Video Maker App,” an Android expert previously said. This program is a video producer as well as an editor.
Features of VivaVideo
- It allows you to add music to videos.
- Combine videos clips into one video
- Can apply video effects.
- After you’ve finished editing your videos, you may save and share them on YouTube and TikTok! To rotate video, use this program!
Pros
- It has an In-app camera with live effects previews for capturing videos.
- More than 60 effects to choose from with additional downloadable effects.
- Enhance the videos using themes.
- Ability to Merge videos and create montages with storyboarding features
- Edit frames within a video
Cons
- There is no negative review to say about this app
2.Google Photos
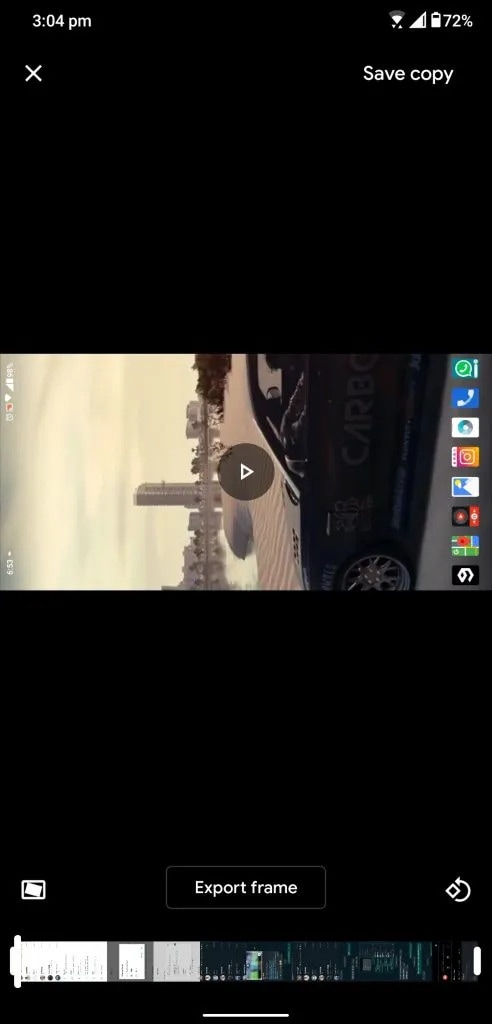
This app may already be installed on your smartphone, but you are unaware of its full potential. This program includes a built-in picture and video editor in addition to backing up your photos. This program includes three essential video editing tools that are extremely basic and easy to use.
The first is to stabilize the video; if your video is unsteady, you can use this option in Google Photos to stabilize it. You may also use the timeline below the video to cut the video. If you mistakenly captured the video in the wrong orientation, there is a tool to rotate it.
Features of Google Photos
- You can modify photographs and videos in Google Photos.
- On Google Photos, make a collage or a movie.
- Recover photos or videos that were recently erased.
- Clear off some space on Google Photos…
- Place photos in the Archive.
Pros
Google Images automatically backs up all of your device’s photos and videos.
Despite its many advantages, the reason I choose Google Photos is that it helps me save space on my smartphone.
The original quality of images stored in Google Photos is really high. Photos and videos are saved in the same resolution as when they were taken.
Over time, Google has improved the Google Photos interface, and it now incorporates AI to provide consumers with even better performance.
Cons
There aren’t many effects, and there aren’t any other editing tools.
The lack of a password-protection option in Google Photos is annoying. Some photos are private, and you may not wish to share them with others.
Users of Google Photos will no longer have limitless storage.
3Adobe Rush
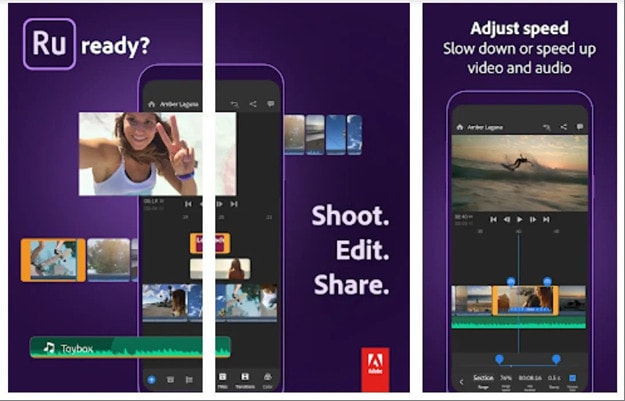
Adobe Rush is a new video editor that Adobe released via a partnership with Samsung’s latest flagship smartphone. This app is a simple yet powerful tool for editing videos on the go, on your smartphone.
This app comes with some powerful tools which you find on some high-end video editing apps. You get a timeline interface to edit your videos perfectly, and you get some music recommendations right into the app.
Features Of Adobe Rush
- In the timeline, you can make changes to your video.
- Audio can be added and refined.
- Change the colour, size, and position of the video.
- Make a title.
- Add transitions, pan and zoom effects, and reframe your clips automatically.
- Change the clip’s attributes.
- Change your video’s aspect ratio.
- Create the illusion of a picture-in-picture effect.
Pros
- It has a user-friendly UI that is responsive and snappy.
- It’s easy to use and provides helpful advice for newcomers.
- It enables Adobe users to quickly and easily produce stunning videos that are customized to their preferences.
- When compared to its competitors, exporting files is a breeze.
- Unlike most of its competitors, it comes with good colour and title tools.
- YouTube, Facebook, Vimeo, Snapchat, Instagram, and Twitter are just a few of the social media channels where the finished files can be simply shared.
- It synchronizes projects between desktop and mobile devices, making them more accessible.
Cons
- When compared to its competitors, it is a little costly.
- It renders projects slowly and only supports three transitions.
- The app does not have storyboard templates and cannot specify the exact structure for output files.
- It only comes with a few video and audio editing capabilities.
- Many standard video effects are missing.
Top 3 Free MP4 Video Rotators on iPhone
1.Splice

Trimming, cropping, effects, titles, speed adjustments, animation, transitions, and music are all available in this well-known video editor, which has a cultish following of dedicated Splicers.
Splice’s music library is one of its strongest assets. It offers a large selection of free music and sound effects to layer over your video, as well as the ability to sync your movie to the beat of your soundtrack.
Features of Splice
Clips should be cropped and trimmed to focus on the highlights.
With an Audio Library and iTunes Integration, you may add music to your videos.
To smooth transitions between clips and images, use transitions.
Enhance videos with effects.
Pros:
- Developed by GoPro, award-winning, highly regarded.
Cons:
- Only available on iOS devices.
2. Clips

It’s easy to miss pre-loaded apps like Apple’s Clips, but this video editing tool has lots of impressive features to enjoy, thanks to the weight of the tech giant’s greatest brains behind it. Take, for example, their live tiles setting. You can use this to generate animated captions and titles that appear as you speak.
To liven things up, you may add animated emojis and backgrounds, and music tracks dynamically sync to the length of your video.
Features of Clips
- Ability to generate animated captions
- Full access to Animated emojis and backgrounds
- Ability to have your music sync to your videos
Pros:
- Simple to use, unique features, and Apple’s support.
Cons:
- It’s only for iOS devices (obviously! ), and it has trouble with a big number of clips.
3. Quik

You may apply transitions and effects to up to 200 photographs and video clips from your photo library or GoPro Plus with this free software. You may not only crop, zoom, and rotate photos and video clips, but you can also customize them with 26 different themes, fonts, effects, and artwork.
You may make HD 1080p or 720p films for social sharing in cinema, square, or portrait formats, and you can store your draft creations for up to seven days.
Features of Quik
- Everything that is available for free.
- There are no limits to the number of mural events.
- Editing is unrestricted.
- There are now a total of 25 more photo and video filters.
Pros:
- Tons of features, including access to 100+ free songs,
- Flashbacks and QuikStories, which make videos based on your most recent footage,
- syncs footage to the beat of your soundtrack, and AI editing help.
Cons:
- Limited control and no trimming option; customers have claimed that it is occasionally glitchy.
Top 3 Free MP4 Video Rotators Online
1.Online Video Cutter
This web tool comes in helpful when you need to rapidly edit a small video file. It is not necessary to install it; you may use it right from your browser. The clip can only be rotated 90, 180, or 270 degrees. It’ll come in handy, especially if you’ve closed the video in portrait mode and want to watch it on a big screen. The service’s provider says that the files will be automatically erased from the servers a few hours after you accomplish your task, resulting in a high level of security.
Features of Online Video cutter.
- It Supports Any Video Format. …
- Completely Online for you to access
- Additional Settings to make more edits to videos
- Easy to use, User-friendly interface.
Pros:
It has a very simple user interface.
You do not need to pay for a license to utilize it.
Almost every video format is supported.
Cons:
Only suitable for little clips
Performing simply the most basic functions, such as rotating and cropping
2.EzGif
This unique internet tool not only creates animated GIFs but can also rotate video. You simply choose the clip from your local folder. However, the file’s maximum size is limited to 100MB. A basic tool for rotating the video through 90, 180, and 270 degrees. You can also vertically and horizontally flip the video before exporting it in a different format and encoding.
Features of EzGif
- A simple user interface to find your way around the website.
- Ability to do resizing and rotating of videos and images.
- Capable of video conversions and editing
Pros:
- Many video formats are supported, including MP4, WebM, AVI, MPEG, FLV, MOV, and 3GP.
- The rotation procedure is quick and simple to utilize.
- After rotating, provide a preview function.
Cons:
- The maximum file size is 100 megabytes.
- There are no filters or transitions, and only basic editing functions are available.
3.Videorotate
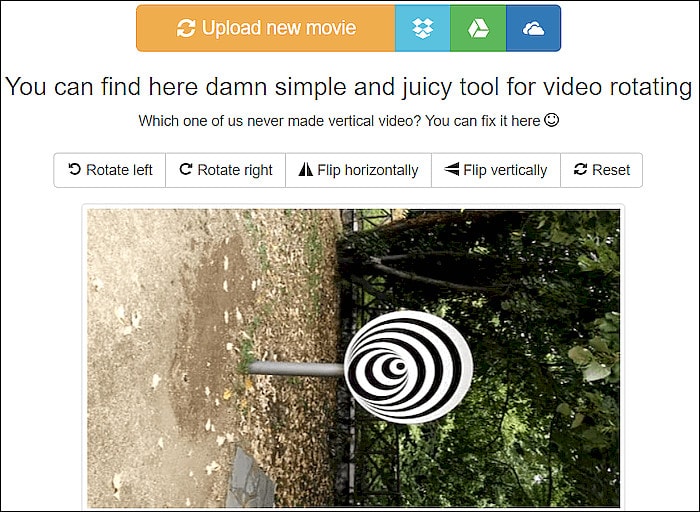
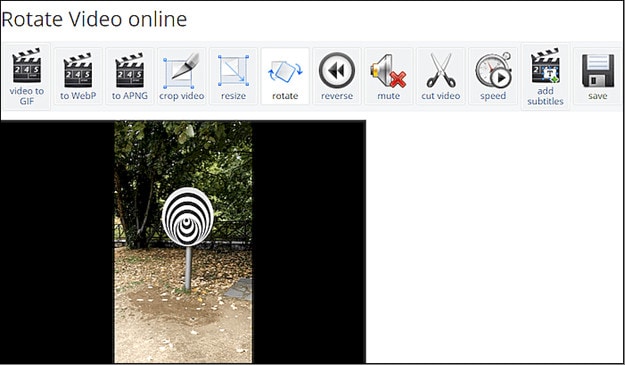
- This is a free online video rotator that is simple and quick to use. You can upload your video from a local folder or import a recorded clip from major cloud services like Dropbox, Google Drive, and One Drive, just like the other online services (there are buttons for each of them). You can flip the clip or rotate it left and right. Other video capabilities available on the site include cropping, stabilizing, and slicing.
Features of Videorotate
- Ability to crop, stabilize and slice videos.
Pros:
- Simple and straightforward to use
- Clips from your Dropbox, Google Drive, and OneDrive accounts can be uploaded.
- A specific “Reset” button is available.
Cons:
- For basic operations, a service for newcomers is available.
- Only a few video file formats are supported.
FAQs about Video Rotator
- What is the best way to rotate a video?
Use an easy-to-use video editing program. It’s easy to rotate a video, even if you’ve never edited one before. You can also use some media players.
- How do I rotate a video permanently?
In this guide, we will show you exactly how to rotate video in Windows with EaseUS Video Editor and save it permanently.
3.How can I rotate a video for free on the internet?
It’s simple to rotate a video online, and there are various services that offer free online video rotators.
- Videorotate
- Ezgif
- Video cutter on the internet
- How do I mirror a video on the internet?
The websites that support video rotation also offer the ability to “flip” the video vertically and horizontally. You’ll have “mirroring” frames in this manner as if you’re filming your pals in the mirror.
For macOS 10.14 or later
How to change the video orientation in Filmora
Step 1:Import the video file into Filmora, and then drag it to the timeline.
Step 2: To enter the video editing panel, double-click the video clip in the timeline. Locate the “Rotate” option under the “Transform” menu. You can drag the slider or enter a specific number to adjust the rotation value. You can rotate up to 360 degrees. When you enter “90” in the box, the video clip will be rotated 90 degrees.
By dragging the “Scale” slider, you can make the full image screen, or you can directly adjust its position, size, shape, etc., in the Viewer panel.
Step 3: After you are satisfied, click the export button. You can change the format here, or you can upload the file to YouTube.
Top 3 Free MP4 Video Rotators on Windows
Looking for the best free video rotator?
If you are looking for a free video rotator for windows, then this article has got you covered. A list of the top 3 free video rotators for windows has been listed.
- VSDC Free Video Editor
It is a highly functional video editing suite with easy controls. It provides anyone who is a beginner to easily access and edit the video easily.
It helps you rotate the videos in increments of 90 degrees, be it clockwise or anticlockwise )
VSDC is a free video editor with non-linear editing capabilities. Users may swiftly convert video and audio files from one format to another with VSDC. A built-in disk burning tool for DVDs is also included in the software. This free program, designed for educational purposes, can be used by businesses or individuals.
VSDC Free Video Editor features
- Built-In DVD Burning Tool
- Colour Blending And Filters
- Specific Multimedia Devices Creation
- Desktop Video Capture
- Export To Social Networking Sites
- Masking
- Non-Linear Video Editing
- Subpixel Accuracy
- Supports Popular Formats
- Video File Converter
Pros
- It’s completely free.
- There is no watermark.
- There are numerous free video editing programs available.
- Support a wide range of file formats
Cons
There isn’t a macOS version available.
Take a severe learning curve into consideration.
There are numerous premium-only features.
The timeline isn’t the same as most NLE editing software.
- Windows Movie Maker
The most well-known video rotator and editor are probably Windows Movie Maker. Most of us who grew up with Microsoft’s various operating systems have had access to it because it comes as a free download with most Microsoft products. It can handle a wide range of files and is generally simple to use. Adding features like sound, music, special effects, or even speeding up the video is simple, and you’ll love the variety of skins available.
For beginners, Windows Video Maker is ideal. It is available for free on Windows PCs and includes basic capabilities and workflow aspects found in professional video editing systems. Its user-friendly interface resembles a simplified version of a video editor timeline and is simple enough for even inexperienced editors to understand.
Features of Windows Movie Maker
- Customization Tool’s title
- Auto Movie Options
- Credit Customization Tool
- Special Effects Options
- Overlays for Transitions
Pros:
- Various video editing functions;
- A variety of output possibilities
Cons:
- Many different versions of the same product;
- No longer included in the Windows operating system.
3.EaseUS Video Editor
EaseUS Video Editor is one of the few most popular video rotators we have today. Its video editing provides tools that can change the video orientation by 90 degrees anticlockwise and clockwise, which can flip vertically and horizontally.
In terms of videos, adding great filters, sound, music, subtitles and other elements to have a great video output can be achieved using the EaseUS. Moreover, it accepts video formats and can convert files to MP4 and other great features.
Features of EaseUS Video Editor
- Can easily trim, cut, split, merge, rotate, and mix video clips.
- Ability to apply stylish video effects
- Can add or remove the watermark and reduce background or wind noise from a video.
Pros:
- User-friendly interface, perfect for beginners
- Easily trim, cut, split, merge, rotate, mix video clips
- A full range of free visual and audio effects
- Change of contrast, exposure, brightness, and other video aspects
- Use the voiceover function to add your comments to the video
Cons:
- The software has no version for macOS
Top 3 Free MP4 Video Rotators on Mac
- iMovie
The iMovie for Mac users is an exceptional video rotator. You can turn any video or movie you may have into an amazing masterpiece with more features due to the special after-effects it has. Simple application to use and navigate easily, although when importing video takes a while at certain times.
Features of the iMovie include
- Full range of options to modify
- Ability to enhance colour settings
- Easily crop and edit video clips ease
- Ability to change the speed of clips.
Pros:
- Nice interface;
- The function is to create fun Movie Trailers.
Cons:
- Supports only a few video formats;
- Pre-processing and import trans-coding can be time-consuming.
- Movavi Video Editor
Movavi has a free version that is easy to use, especially for beginners. It allows you to add titles, filters, transitions, and special effects to your videos and photographs to make attractive movies. You can use the animation to smoothly move things around the screen in your film. On the multi-track timeline, you can add as many tracks as you wish. From the expanded built-in collection, you can get more example video clips, stickers, and audio tracks.
Features of Movavi Video Editor
- You can upload files and photographs in almost any format.
- To make videos automatically, use the Montage Wizard.
- Transition Wizard allows you to quickly put together slideshows.
- Enhance image quality by cutting, cropping, and rotating videos on the timeline.
- Apply artistic filters, and make transitions between portions as smooth as possible.
- Create animated headlines, stickers, callouts, and video overlays:
Pros:
- It’s appropriate for newcomers and casual users alike.
- A number of video formats are supported, including.mov (QuickTime)
- Chroma Key and Slow Motion are examples of special effects.
Cons
- Only the premium version supports the advanced features.
- It uses the basic colour grading tool
- QuickTime Player
The key advantage of Apple’s QuickTime is that it comes pre-installed on your Mac’s macOS operating system. It’s powerful enough to rotate your clip, yet it’s simple enough for beginners to do. iTunes files can be played and edited with QuickTime. After rotation, it exports a new video file, leaving the old clip on the Mac. The output video will be compressed slightly, resulting in a smaller rotational video file than the original.
Features of QuickTime Player
- Anything can be recorded, including video, audio, and the screen.
- Cropping, audio detachment, combining, and rotation are all simple video editing techniques.
- From 4K to 480p video compression
- Quickly share your video: directly upload videos to YouTube
Pros:
- With macOS, it comes pre-installed.
- Work with iTunes files Streaming video player with no configuration
Cons:
- Only QuickTime Pro 7 unlocks the editing feature.
- There will be no more Windows versions.
- It isn’t compatible with standard subtitle files.
Top 3 Free MP4 Video Rotators on Android
When we use a smartphone to capture a video or download one from a website, we occasionally discover that the video has been inverted. As a result, we’ll require a video rotator app to correct the problem. On the market, there are many different sorts of tools for various platforms. However, you may have discovered that separating the wheat from the chaff can be difficult at times. To save you time, I’ve compiled a list of 3 video rotator applications for Android
- VivaVideo
VivaVideo is one of the top movie producers and free video rotators for Android devices as a media editor. This application allows you to alter the orientation of your videos. Aside from rotating videos, this software also includes cropping, combining, cutting, and other editing features. “The best video editor software is VivaVideo - Video Maker App,” an Android expert previously said. This program is a video producer as well as an editor.
Features of VivaVideo
- It allows you to add music to videos.
- Combine videos clips into one video
- Can apply video effects.
- After you’ve finished editing your videos, you may save and share them on YouTube and TikTok! To rotate video, use this program!
Pros
- It has an In-app camera with live effects previews for capturing videos.
- More than 60 effects to choose from with additional downloadable effects.
- Enhance the videos using themes.
- Ability to Merge videos and create montages with storyboarding features
- Edit frames within a video
Cons
- There is no negative review to say about this app
2.Google Photos
This app may already be installed on your smartphone, but you are unaware of its full potential. This program includes a built-in picture and video editor in addition to backing up your photos. This program includes three essential video editing tools that are extremely basic and easy to use.
The first is to stabilize the video; if your video is unsteady, you can use this option in Google Photos to stabilize it. You may also use the timeline below the video to cut the video. If you mistakenly captured the video in the wrong orientation, there is a tool to rotate it.
Features of Google Photos
- You can modify photographs and videos in Google Photos.
- On Google Photos, make a collage or a movie.
- Recover photos or videos that were recently erased.
- Clear off some space on Google Photos…
- Place photos in the Archive.
Pros
Google Images automatically backs up all of your device’s photos and videos.
Despite its many advantages, the reason I choose Google Photos is that it helps me save space on my smartphone.
The original quality of images stored in Google Photos is really high. Photos and videos are saved in the same resolution as when they were taken.
Over time, Google has improved the Google Photos interface, and it now incorporates AI to provide consumers with even better performance.
Cons
There aren’t many effects, and there aren’t any other editing tools.
The lack of a password-protection option in Google Photos is annoying. Some photos are private, and you may not wish to share them with others.
Users of Google Photos will no longer have limitless storage.
3Adobe Rush
Adobe Rush is a new video editor that Adobe released via a partnership with Samsung’s latest flagship smartphone. This app is a simple yet powerful tool for editing videos on the go, on your smartphone.
This app comes with some powerful tools which you find on some high-end video editing apps. You get a timeline interface to edit your videos perfectly, and you get some music recommendations right into the app.
Features Of Adobe Rush
- In the timeline, you can make changes to your video.
- Audio can be added and refined.
- Change the colour, size, and position of the video.
- Make a title.
- Add transitions, pan and zoom effects, and reframe your clips automatically.
- Change the clip’s attributes.
- Change your video’s aspect ratio.
- Create the illusion of a picture-in-picture effect.
Pros
- It has a user-friendly UI that is responsive and snappy.
- It’s easy to use and provides helpful advice for newcomers.
- It enables Adobe users to quickly and easily produce stunning videos that are customized to their preferences.
- When compared to its competitors, exporting files is a breeze.
- Unlike most of its competitors, it comes with good colour and title tools.
- YouTube, Facebook, Vimeo, Snapchat, Instagram, and Twitter are just a few of the social media channels where the finished files can be simply shared.
- It synchronizes projects between desktop and mobile devices, making them more accessible.
Cons
- When compared to its competitors, it is a little costly.
- It renders projects slowly and only supports three transitions.
- The app does not have storyboard templates and cannot specify the exact structure for output files.
- It only comes with a few video and audio editing capabilities.
- Many standard video effects are missing.
Top 3 Free MP4 Video Rotators on iPhone
1.Splice
Trimming, cropping, effects, titles, speed adjustments, animation, transitions, and music are all available in this well-known video editor, which has a cultish following of dedicated Splicers.
Splice’s music library is one of its strongest assets. It offers a large selection of free music and sound effects to layer over your video, as well as the ability to sync your movie to the beat of your soundtrack.
Features of Splice
Clips should be cropped and trimmed to focus on the highlights.
With an Audio Library and iTunes Integration, you may add music to your videos.
To smooth transitions between clips and images, use transitions.
Enhance videos with effects.
Pros:
- Developed by GoPro, award-winning, highly regarded.
Cons:
- Only available on iOS devices.
2. Clips
It’s easy to miss pre-loaded apps like Apple’s Clips, but this video editing tool has lots of impressive features to enjoy, thanks to the weight of the tech giant’s greatest brains behind it. Take, for example, their live tiles setting. You can use this to generate animated captions and titles that appear as you speak.
To liven things up, you may add animated emojis and backgrounds, and music tracks dynamically sync to the length of your video.
Features of Clips
- Ability to generate animated captions
- Full access to Animated emojis and backgrounds
- Ability to have your music sync to your videos
Pros:
- Simple to use, unique features, and Apple’s support.
Cons:
- It’s only for iOS devices (obviously! ), and it has trouble with a big number of clips.
3. Quik
You may apply transitions and effects to up to 200 photographs and video clips from your photo library or GoPro Plus with this free software. You may not only crop, zoom, and rotate photos and video clips, but you can also customize them with 26 different themes, fonts, effects, and artwork.
You may make HD 1080p or 720p films for social sharing in cinema, square, or portrait formats, and you can store your draft creations for up to seven days.
Features of Quik
- Everything that is available for free.
- There are no limits to the number of mural events.
- Editing is unrestricted.
- There are now a total of 25 more photo and video filters.
Pros:
- Tons of features, including access to 100+ free songs,
- Flashbacks and QuikStories, which make videos based on your most recent footage,
- syncs footage to the beat of your soundtrack, and AI editing help.
Cons:
- Limited control and no trimming option; customers have claimed that it is occasionally glitchy.
Top 3 Free MP4 Video Rotators Online
1.Online Video Cutter
This web tool comes in helpful when you need to rapidly edit a small video file. It is not necessary to install it; you may use it right from your browser. The clip can only be rotated 90, 180, or 270 degrees. It’ll come in handy, especially if you’ve closed the video in portrait mode and want to watch it on a big screen. The service’s provider says that the files will be automatically erased from the servers a few hours after you accomplish your task, resulting in a high level of security.
Features of Online Video cutter.
- It Supports Any Video Format. …
- Completely Online for you to access
- Additional Settings to make more edits to videos
- Easy to use, User-friendly interface.
Pros:
It has a very simple user interface.
You do not need to pay for a license to utilize it.
Almost every video format is supported.
Cons:
Only suitable for little clips
Performing simply the most basic functions, such as rotating and cropping
2.EzGif
This unique internet tool not only creates animated GIFs but can also rotate video. You simply choose the clip from your local folder. However, the file’s maximum size is limited to 100MB. A basic tool for rotating the video through 90, 180, and 270 degrees. You can also vertically and horizontally flip the video before exporting it in a different format and encoding.
Features of EzGif
- A simple user interface to find your way around the website.
- Ability to do resizing and rotating of videos and images.
- Capable of video conversions and editing
Pros:
- Many video formats are supported, including MP4, WebM, AVI, MPEG, FLV, MOV, and 3GP.
- The rotation procedure is quick and simple to utilize.
- After rotating, provide a preview function.
Cons:
- The maximum file size is 100 megabytes.
- There are no filters or transitions, and only basic editing functions are available.
3.Videorotate
- This is a free online video rotator that is simple and quick to use. You can upload your video from a local folder or import a recorded clip from major cloud services like Dropbox, Google Drive, and One Drive, just like the other online services (there are buttons for each of them). You can flip the clip or rotate it left and right. Other video capabilities available on the site include cropping, stabilizing, and slicing.
Features of Videorotate
- Ability to crop, stabilize and slice videos.
Pros:
- Simple and straightforward to use
- Clips from your Dropbox, Google Drive, and OneDrive accounts can be uploaded.
- A specific “Reset” button is available.
Cons:
- For basic operations, a service for newcomers is available.
- Only a few video file formats are supported.
FAQs about Video Rotator
- What is the best way to rotate a video?
Use an easy-to-use video editing program. It’s easy to rotate a video, even if you’ve never edited one before. You can also use some media players.
- How do I rotate a video permanently?
In this guide, we will show you exactly how to rotate video in Windows with EaseUS Video Editor and save it permanently.
3.How can I rotate a video for free on the internet?
It’s simple to rotate a video online, and there are various services that offer free online video rotators.
- Videorotate
- Ezgif
- Video cutter on the internet
- How do I mirror a video on the internet?
The websites that support video rotation also offer the ability to “flip” the video vertically and horizontally. You’ll have “mirroring” frames in this manner as if you’re filming your pals in the mirror.
Also read:
- New How to Comment on YouTube Live Chat for 2024
- Easy Ways to Edit Recorded Video
- New Tutorial | How to Make a Smooth Speed Ramping in Premiere Pro?
- Updated Ways to Find Free Online Slideshow Maker with No Watermark
- 7 Solutions to Edit GoPro Video on Mac for 2024
- Updated In 2024, Ultimate Guide on How to Plan and Storyboard a Music Video
- Updated Want to Make Use of a Lovely Background for Your Image by Removing the Background or Making It Transparent? Here Is Something You Need to Cover for 2024
- New Add some Sci-Fi Touch to Your Next Video Content Using Wondershare Filmora Editing Tools to Create an Alternate Reality Effect for 2024
- Updated 2024 Approved Learn How to Perform Velocity Edits on Your PC
- Updated 2024 Approved You May Want to Create Your Video Tutorial and Share Your Knowledge with Others. Fortunately, You Can Easily Create a Professionally Edited Tutorial Video with Filmora. Keep Reading This Article Since We Will Show You How to Do It
- In 2024, Finding the Best GIF Websites Was Never Easier
- Are You Looking to Enhance Your Video or Photo Colors Using Premiere LUTs? Get to Know About the Best Free LUT Effects to Get Started for 2024
- Updated 2024 Approved Best 5 Apps To Add Song To Video
- New In 2024, Confused About Which GoPro Should You Use? This Article Introduces and Provides a Detailed Overview of the Best GoPro for YouTubers You Can Find in the Market for Vlogging
- New 2024 Approved Kinetic Typography Text Effect 【EASY&FAST】
- Updated Top 20 Best Text To Speech Software Windows, Mac, Android, iPhone & Online
- New Why Your Transparent GIF Is Hard to Remove for 2024
- Top 10 Transparent Image Online Tools That Help You A Lot for 2024
- Updated 2024 Approved Top 10 Sound Extractors to Extract Sound From Video 2023
- Learn How to Merge Audio and Video Like a Pro with This Step-by-Step Guide to Using FFmpeg. Create Seamless Videos and Improve Your Video Production Skills for 2024
- Updated 2024 Approved How to Convert Images Into Video - Kapwing Tutorial
- Fix Cant Take Screenshot Due to Security Policy on Infinix Smart 8 | Dr.fone
- The Best Android Unlock Software For OnePlus Ace 2 Device Top 5 Picks to Remove Android Locks
- Top Apps and Online Tools To Track Xiaomi Redmi Note 12 Pro+ 5G Phone With/Without IMEI Number
- In 2024, Edit and Send Fake Location on Telegram For your Nokia 130 Music in 3 Ways | Dr.fone
- How to Lock Apps on Samsung Galaxy A54 5G to Protect Your Individual Information
- In 2024, 5 Techniques to Transfer Data from Nokia C32 to iPhone 15/14/13/12 | Dr.fone
- In 2024, How to Bypass Apple iPhone 13 Pro Max Passcode Easily Video Inside | Dr.fone
- Recommended Best Applications for Mirroring Your Oppo Reno 11 5G Screen | Dr.fone
- In 2024, Is Your iPhone 8 in Security Lockout? Proper Ways To Unlock
- In 2024, How to Watch Hulu Outside US On Nokia C300 | Dr.fone
- Troubleshooting Guide How to Fix an Unresponsive Honor Magic 6 Pro Screen | Dr.fone
- MP4 Video Repair Tool - Repair corrupt, damaged, unplayable video files of Poco C65
- How To Transfer Data From iPhone X To Others ios devices? | Dr.fone
- Fix Nokia 130 Music Android System Webview Crash 2024 Issue | Dr.fone
- Title: Have You Ever Heard Bokeh Effects for Videos? Do You Know that You Can Make Your Own Bokeh Video Easily with some Software. This Article Will Introduce You How to Make a Bokeh Effect Video with Steps for 2024
- Author: Morgan
- Created at : 2024-05-19 05:12:36
- Updated at : 2024-05-20 05:12:36
- Link: https://ai-video-editing.techidaily.com/1713949947459-have-you-ever-heard-bokeh-effects-for-videos-do-you-know-that-you-can-make-your-own-bokeh-video-easily-with-some-software-this-article-will-introduce-you-ho/
- License: This work is licensed under CC BY-NC-SA 4.0.
