
:max_bytes(150000):strip_icc():format(webp)/003_the-best-lgbt-movies-on-netflix-right-now-june-2022-5069913-8dbc370e568349c8a347c650353f17b1.jpg)
In This Article, We Are Going to Learn the Simplest Procedure on How to Cut And/Or Trim Videos Using VLC Media Player. Each Step Is Carefully Explained, with Screenshots Attached for 2024
In This Article, We Are Going to Learn the Simplest Procedure on How to Cut And/Or Trim Videos Using VLC Media Player. Each Step Is Carefully Explained, with Screenshots Attached
Other than playing videos and music, VLC Media Player can also be used as a video editing tool. While advanced video editing requires unconventional and powerful video editing software, VLC offers a simpler and easy-to-learn process of cutting and/or trimming videos.
You can cut a section of your video and make shorter video clips. This means that you can now get rid of parts of a video that you do not need and preserve those that you like. VLC automatically saves the video clips made, so you do not have to save them again.
In this article, we are going to learn the simplest procedure on how to cut and/or trim videos using VLC Media Player. Each step is carefully explained, with screenshots attached.
To Cut Video Using VLC Media Player
- Download VLC Media Player
You need to have the app before using it. To download it, visit Google Play Store or any other suitable app, search and download. There are a variety of versions that is, 32-bit, 64-bit and Windows ARM. You may as well narrow down your search to the version of your gadget, be it Android, iOS, Linux or Windows.
- Install and Open VLC Media Player
The installation process is simple. You click on the icon indicating ‘install’ then open. On opening, you will come across a page that looks like the one attached below.

This is the dashboard of the VLC Media Player.
- Select the file you would like to cut
On the top of the screen is the menu with ‘Media’ being the first on the far left. On clicking the ‘Media’ button, a drop-down menu will appear. Select the first option, ‘Open File’ to access your files. From the dialogue box that appears, locate your video (the one you would like to cut), select it then click to open. The video will start playing.

- Click on Advanced Controls (View > Advanced Controls)
Some videos will play automatically while others will wait for an action. In case your video plays automatically, it is advisable that you pause it.
On the menu is a tab labelled ‘View’. Choose the tab, click open it and on the drop-down menu, select ‘Advanced Options’.

On selecting ‘Advanced Options’, a red button will appear at the bottom-left corner of the VLC. This is the record button.

Its purpose is to indicate the recording of the section of the video that you would like to cut.
- Click to Cut or Trim
If you had paused your video, you can play it at this stage. If you do not want to cut/trim your video from the start, scroll to the point from which you would like to cut it. Click on the red button for the recording to start. If the video does not play automatically, click to play.
After the video has played till the point where you would like to end, click on the red button again to stop the recording. The cut section will be automatically saved on the videos’ folder on C:\Users\Username\Videos.
An easier way to cut videos with Wondershare Filmora
Wondershare Filmora Video Editor is an alternative video editor. Unlike VLC Media Player, Filmora gives you more options. It allows you to split, trim, edit, combine, and crop a video, among others. It also gives you room to add footnotes, a variety of transitions, lower thirds, among other features. You can as well resize your video and enhance its quality.
For Win 7 or later (64-bit)
For macOS 10.14 or later
To Cut/Trim Videos with Wondershare Filmora:
- Drag and Drop the Video
Assuming that you have already downloaded and installed Wondershare Filmora app, click to open. There are two ways through which you can locate your video.
One, you can opt to drag and drop the video from its location to the app’s timeline. Secondly, you can right click on the space at the top left then select the video to be edited from the dialogue box that will appear.

- Trimming the video
After dropping the video on the timeline, it is likely to take up a lot of space, especially if it is long.
To trim the video from the beginning, place your cursor at the starting point and wait for the pointer to appear. Then move the point forward. To trim from the end, place the cursor at that point, hold and move the pointer forward till the required point.


Trimming the video does not mean that you lose the parts. It is more like shortening it to fit in place.
- Cutting the video
Unlike trimming, cutting involves getting rid of a section of the video completely. To do so, you need to first of all isolate that section.
With the video on the timeline, move and point your cursor at the starting point of the video and click on the scissors icon at the top. Then move it to the end of the video section and click on the scissors icon again. By so doing, you will have selected that section.
Once the section has been selected, right click on the video, select and click to delete. You can then drag the remaining parts to make them one.

After cutting or trimming, you can choose to add several effects to the video. Transitions, watermarks, cropping, resizing, ripple effects among others are some of the changes you could make. All these appear on the menu at the top.
- Save and/or Import your video
The final step is saving or importing your file to prevent its loss. By clicking on the ‘Import’ button, you save the file to the Media Library. By selecting ‘save as’, you select the location where you want to store your file.

Conclusion
There are so many video editors, each with different features. Some are simple to use while others will require advanced software to operate. Whether you use VLC Media Player or Wondershare Filmora, the results will be the same. The difference comes in where you have the knowledge and skills to use one app better than the other one.
The above steps on how to use both VLC Media Player and Wondershare Filmora will guide you through the whole process. It is said that, ‘practice makes perfect’. So yes, keep practicing and putting these skills into use. Sooner or later you will be an expert!
This is the dashboard of the VLC Media Player.
- Select the file you would like to cut
On the top of the screen is the menu with ‘Media’ being the first on the far left. On clicking the ‘Media’ button, a drop-down menu will appear. Select the first option, ‘Open File’ to access your files. From the dialogue box that appears, locate your video (the one you would like to cut), select it then click to open. The video will start playing.
- Click on Advanced Controls (View > Advanced Controls)
Some videos will play automatically while others will wait for an action. In case your video plays automatically, it is advisable that you pause it.
On the menu is a tab labelled ‘View’. Choose the tab, click open it and on the drop-down menu, select ‘Advanced Options’.
On selecting ‘Advanced Options’, a red button will appear at the bottom-left corner of the VLC. This is the record button.
Its purpose is to indicate the recording of the section of the video that you would like to cut.
- Click to Cut or Trim
If you had paused your video, you can play it at this stage. If you do not want to cut/trim your video from the start, scroll to the point from which you would like to cut it. Click on the red button for the recording to start. If the video does not play automatically, click to play.
After the video has played till the point where you would like to end, click on the red button again to stop the recording. The cut section will be automatically saved on the videos’ folder on C:\Users\Username\Videos.
An easier way to cut videos with Wondershare Filmora
Wondershare Filmora Video Editor is an alternative video editor. Unlike VLC Media Player, Filmora gives you more options. It allows you to split, trim, edit, combine, and crop a video, among others. It also gives you room to add footnotes, a variety of transitions, lower thirds, among other features. You can as well resize your video and enhance its quality.
For Win 7 or later (64-bit)
For macOS 10.14 or later
To Cut/Trim Videos with Wondershare Filmora:
- Drag and Drop the Video
Assuming that you have already downloaded and installed Wondershare Filmora app, click to open. There are two ways through which you can locate your video.
One, you can opt to drag and drop the video from its location to the app’s timeline. Secondly, you can right click on the space at the top left then select the video to be edited from the dialogue box that will appear.
- Trimming the video
After dropping the video on the timeline, it is likely to take up a lot of space, especially if it is long.
To trim the video from the beginning, place your cursor at the starting point and wait for the pointer to appear. Then move the point forward. To trim from the end, place the cursor at that point, hold and move the pointer forward till the required point.
Trimming the video does not mean that you lose the parts. It is more like shortening it to fit in place.
- Cutting the video
Unlike trimming, cutting involves getting rid of a section of the video completely. To do so, you need to first of all isolate that section.
With the video on the timeline, move and point your cursor at the starting point of the video and click on the scissors icon at the top. Then move it to the end of the video section and click on the scissors icon again. By so doing, you will have selected that section.
Once the section has been selected, right click on the video, select and click to delete. You can then drag the remaining parts to make them one.
After cutting or trimming, you can choose to add several effects to the video. Transitions, watermarks, cropping, resizing, ripple effects among others are some of the changes you could make. All these appear on the menu at the top.
- Save and/or Import your video
The final step is saving or importing your file to prevent its loss. By clicking on the ‘Import’ button, you save the file to the Media Library. By selecting ‘save as’, you select the location where you want to store your file.
Conclusion
There are so many video editors, each with different features. Some are simple to use while others will require advanced software to operate. Whether you use VLC Media Player or Wondershare Filmora, the results will be the same. The difference comes in where you have the knowledge and skills to use one app better than the other one.
The above steps on how to use both VLC Media Player and Wondershare Filmora will guide you through the whole process. It is said that, ‘practice makes perfect’. So yes, keep practicing and putting these skills into use. Sooner or later you will be an expert!
10+ Royalty-Free 5 Second Countdown Footage HD & 4K Clips Included
Countdown footage, lately, has become one of the core elements that content creators use in their videos. While some use it to promote special live streams others use it to grab their viewer’s attention. Plus, some also use it as a means of updating their own when a live stream will start.
Perhaps you’re looking for a five-second countdown timer for your video or live stream, chances are you’ll find a lot online. But, sadly, not all of them online is copyrighted free. So, to help you out, we’ve compiled a list of different five seconds countdown footage ranging from HD to 4k that is worth trying.
- Blue Round 5-Second Countdown Timer HD
- Yellow Loading Bar HD
- Red Round 5-second countdown timer HD
- Multi-color Round 5-second Countdown Timer HD
- White Number 5-seconds countdown timer 4K
- Solid Yellow 5-second Countdown Timer HD
- Yellow Round 5-second Countdown Timer HD
- Round Loading 5-second Countdown timer HD
- Minute-Second-Countdown Timer 4K
- 3D 5-second Countdown Timer 4K
- Battery Percentage Countdown Timer HD
- White Loading Bar HD
- How to Find and Apply those 5-second countdown clips to videos?
- Hot FAQs on the 5-second countdown timer
Part 1: 12 Animated 5-second timer Clips for Your Project
After taking our time to search for 5-second timer clips available online, here is a list of the 12 gorgeous animated 5-second countdown timer clips that can be used in any project. All thanks to the Wondershare Filmora video editing software for giving us access to such unique designs of countdown clips. Don’t hesitate to check them out in Filmora because they all look amazing.
1. Blue Round 5-Second Countdown Timer HD
The first 5 seconds countdown video effect on our list is this adorable all-black background HD quality countdown timer that counts in an ascending manner.

2. Yellow Loading Bar HD
This 5-second countdown footage is a loading bar. Yes, a loading bar just like you’re trying install a tool on your PC.

3. Red Round 5-second countdown timer HD
This a simple but gorgeous red round 5-second countdown timer effect with a black background. Honestly, no matter the project you use this for, the viewer will surely fancy this countdown effect.

4. Multi-color Round 5-second Countdown Timer HD
The round circle of this countdown timer displays different colors when it’s played to begin a countdown. Its lemon background color makes it look really attractive for videos.

5. White Number 5-seconds countdown timer 4K
This is another all-black background 5-second countdown timer on this list. It’s great for anyone looking for a very simple 5-second countdown footage for a video.

6. Solid Yellow 5-second Countdown Timer HD
The color of this countdown timer is what makes it very adorable. Honestly, it’s worth mentioning on this list. You should try it for your colorful video,

7. Yellow Round 5-second Countdown Timer HD
A lot of folks fancy black background countdown timers, and we can’t get tired of mentioning any special one we find. This black background timer looks cool.

8. Round Loading 5-second Countdown timer HD
This 5-seconds countdown footage is like a round loading bar. Its background color and all just have the perfect blend.

9. Minute-Second-Countdown Timer 4K
Up next is a minute-second-based countdown timer, and it’s also in 4K resolution.

10. 3D 5-second Countdown Timer 4K
This countdown timer with a hi-tech sense. It can be used for a good transition to spice up your explainer videos.

11. Battery Percentage Countdown Timer HD
If you’re looking for a countdown timer like a battery percentage, this one is for you, and it looks really great.

12. White Loading Bar HD
Our final 5-second background timer is a loading bar. But, this time, a white one, and it’s similar to the previously mentioned one.

![]()
Note: Some of the clips introduced above are not typically 5-second countdown footage. Some are up to 10 seconds or even longer. However, the good thing is you can make the clip shorter when embedding it in your video by cutting it according to your requirement.
We would teach you how to make the above 5-seconds shorter if you keep reading.
Part 2: How to Find and Apply those 5-second countdown clips to videos?
I bet you fancy the 5-seconds countdown videos discussed above. But the big question is where can you find them and how do you apply the ones you need to your videos? Well, here is where the help of video editing software like Wondershare Filmora comes into the game.
Wondershare Filmora is a top-leading software that offers users at all levels the best tools needed to execute different types of video editing operations ranging from transitions, resizing, background removal, auto-reframe, and lots more without hassles.
Besides, the boasts lots of modern tools that facilitate not just video editing but also audio editing and screen recording operation. You don’t even need technical knowledge to utilize both the advanced and basic features of the tool.
Let’s proceed to learn the step-by-step process to find all the 5-seconds countdown videos introduced on this page;
Step1 Download the latest version of Filmora software from the official website and install it.
Step2 Launch the tool and use the Import button to upload the video to that you want to add the countdown clip. Alternatively, you can just drag-n-drop the video.

Step3 Drag-n-drop the video to the timeline.

Step4 Navigate to the top-left corner of the screen and click ‘Stock Media’. Then, select ‘Pexels’ or ‘Pixbay’ from the left side of the screen and type ‘Countdown’ in the search bar. After that, find a preferred Countdown effect and move it to the timeline where your video is.

Step5 If the countdown effect you added is more than five seconds, adjust it to five seconds from the timeline. Then, move it to the section of your video where you want it to be displayed.

Play your video to preview the countdown effect you added.
Step6 Once you’re satisfied with the editing, navigate to the top of the screen and click Export, then, select ‘Burn DVD’.

Step7 Enter a preferred name for your video in the pop-up that appears on your screen, then in the Folder Path, choose the location where you want the file to be saved. After that, click the ‘Export’ button to complete the operation.

Hot FAQs on the 5-second countdown timer
There are more FAQs on 5-second countdown timer that you should know about.
1. What is a dynamic countdown?
A dynamic countdown is a countdown used to display the total time left for visitors to claim an offer available on a website.
2. How do you make a countdown video?
To make a countdown video, you need the help of advanced video editing software like Filmora. Filmora offers sophisticated video editing tools that make it easy for folks to make high-quality countdown videos. You can refer to the steps explained on this page to make a countdown video.
3. What are the benefits of adding a 5 seconds countdown for videos?
- It’s a great way to push your audience to make fast decisions that will be in your favor.
- It’s efficient for promoting Livestream.
- It helps to grab viewers’ attention in videos.
Final Words
If you’re looking for beautiful 5-seconds countdown footage for your video, live stream, or whatsoever, the ones introduced on this page are really great. All thanks to the Wondershare tech experts for integrating these special countdown effects into the Filmora video editing tool. The tool is also ideal for applying 5-second countdown footage in your videos or live streams.
Free Download For Win 7 or later(64-bit)
Free Download For macOS 10.14 or later
Part 1: 12 Animated 5-second timer Clips for Your Project
After taking our time to search for 5-second timer clips available online, here is a list of the 12 gorgeous animated 5-second countdown timer clips that can be used in any project. All thanks to the Wondershare Filmora video editing software for giving us access to such unique designs of countdown clips. Don’t hesitate to check them out in Filmora because they all look amazing.
1. Blue Round 5-Second Countdown Timer HD
The first 5 seconds countdown video effect on our list is this adorable all-black background HD quality countdown timer that counts in an ascending manner.
2. Yellow Loading Bar HD
This 5-second countdown footage is a loading bar. Yes, a loading bar just like you’re trying install a tool on your PC.
3. Red Round 5-second countdown timer HD
This a simple but gorgeous red round 5-second countdown timer effect with a black background. Honestly, no matter the project you use this for, the viewer will surely fancy this countdown effect.
4. Multi-color Round 5-second Countdown Timer HD
The round circle of this countdown timer displays different colors when it’s played to begin a countdown. Its lemon background color makes it look really attractive for videos.
5. White Number 5-seconds countdown timer 4K
This is another all-black background 5-second countdown timer on this list. It’s great for anyone looking for a very simple 5-second countdown footage for a video.
6. Solid Yellow 5-second Countdown Timer HD
The color of this countdown timer is what makes it very adorable. Honestly, it’s worth mentioning on this list. You should try it for your colorful video,
7. Yellow Round 5-second Countdown Timer HD
A lot of folks fancy black background countdown timers, and we can’t get tired of mentioning any special one we find. This black background timer looks cool.
8. Round Loading 5-second Countdown timer HD
This 5-seconds countdown footage is like a round loading bar. Its background color and all just have the perfect blend.
9. Minute-Second-Countdown Timer 4K
Up next is a minute-second-based countdown timer, and it’s also in 4K resolution.
10. 3D 5-second Countdown Timer 4K
This countdown timer with a hi-tech sense. It can be used for a good transition to spice up your explainer videos.
11. Battery Percentage Countdown Timer HD
If you’re looking for a countdown timer like a battery percentage, this one is for you, and it looks really great.
12. White Loading Bar HD
Our final 5-second background timer is a loading bar. But, this time, a white one, and it’s similar to the previously mentioned one.
![]()
Note: Some of the clips introduced above are not typically 5-second countdown footage. Some are up to 10 seconds or even longer. However, the good thing is you can make the clip shorter when embedding it in your video by cutting it according to your requirement.
We would teach you how to make the above 5-seconds shorter if you keep reading.
Part 2: How to Find and Apply those 5-second countdown clips to videos?
I bet you fancy the 5-seconds countdown videos discussed above. But the big question is where can you find them and how do you apply the ones you need to your videos? Well, here is where the help of video editing software like Wondershare Filmora comes into the game.
Wondershare Filmora is a top-leading software that offers users at all levels the best tools needed to execute different types of video editing operations ranging from transitions, resizing, background removal, auto-reframe, and lots more without hassles.
Besides, the boasts lots of modern tools that facilitate not just video editing but also audio editing and screen recording operation. You don’t even need technical knowledge to utilize both the advanced and basic features of the tool.
Let’s proceed to learn the step-by-step process to find all the 5-seconds countdown videos introduced on this page;
Step1 Download the latest version of Filmora software from the official website and install it.
Step2 Launch the tool and use the Import button to upload the video to that you want to add the countdown clip. Alternatively, you can just drag-n-drop the video.
Step3 Drag-n-drop the video to the timeline.
Step4 Navigate to the top-left corner of the screen and click ‘Stock Media’. Then, select ‘Pexels’ or ‘Pixbay’ from the left side of the screen and type ‘Countdown’ in the search bar. After that, find a preferred Countdown effect and move it to the timeline where your video is.
Step5 If the countdown effect you added is more than five seconds, adjust it to five seconds from the timeline. Then, move it to the section of your video where you want it to be displayed.
Play your video to preview the countdown effect you added.
Step6 Once you’re satisfied with the editing, navigate to the top of the screen and click Export, then, select ‘Burn DVD’.
Step7 Enter a preferred name for your video in the pop-up that appears on your screen, then in the Folder Path, choose the location where you want the file to be saved. After that, click the ‘Export’ button to complete the operation.
Hot FAQs on the 5-second countdown timer
There are more FAQs on 5-second countdown timer that you should know about.
1. What is a dynamic countdown?
A dynamic countdown is a countdown used to display the total time left for visitors to claim an offer available on a website.
2. How do you make a countdown video?
To make a countdown video, you need the help of advanced video editing software like Filmora. Filmora offers sophisticated video editing tools that make it easy for folks to make high-quality countdown videos. You can refer to the steps explained on this page to make a countdown video.
3. What are the benefits of adding a 5 seconds countdown for videos?
- It’s a great way to push your audience to make fast decisions that will be in your favor.
- It’s efficient for promoting Livestream.
- It helps to grab viewers’ attention in videos.
Final Words
If you’re looking for beautiful 5-seconds countdown footage for your video, live stream, or whatsoever, the ones introduced on this page are really great. All thanks to the Wondershare tech experts for integrating these special countdown effects into the Filmora video editing tool. The tool is also ideal for applying 5-second countdown footage in your videos or live streams.
Free Download For Win 7 or later(64-bit)
Free Download For macOS 10.14 or later
How To Make a Video by Mouse in Filmora?
Have you ever wondered, what if somehow your keyboard just broken or disappeared? And you’re stuck in the middle of your project with just a mouse. Don’t know how to proceed remaining project with a mouse? Then no worries! We got you.
This article will guide you how to use stock videos and stock audio to create a music video. The catch, you say? We will be doing that only with a use of a mouse.
Things To Know Before Editing
Let us be honest, most shortcuts are not available without the keyboard. To counter that, our approach will need to be more general. General here means you need to know all the necessary controls and panels.

Take the challenge and find a solution together
To counter these difficulties, even if you have a keyboard, you can imagine yourself in a situation. A situation in which we have a keyboard but will not be using it.
Therefore, presenting us with a challenge, so if you someday come across a situation like this, you will be prepared. All in all, you would be learning more things by returning to the roots of your practice, which in most cases, can prove helpful.
Get Ready With the Professional Editing Tool
Before getting into the editing process handicapped from resources, you need to be familiar with the software that we will use. We will use Wondershare Filmora You can click the link below and catch it up.

Create a Music Video Without a Keyboard
Let us get started! Whether you have a real mouseless experience or want to take it as a challenge, let’s get the things clear first.
- We need to create a 20 seconds music video.
- We will only be using the footage from the stock library.
- We will be using music from the Wondershare Filmora library.
- We will have 5 minutes to review the footage and the music available.
- And most importantly, we don’t have a keyboard.
Step 1. Review your footage
Our first and most crucial step will be to use our imagination and creativity. So get those neurons firing, and let us go!

- Head to the stock media folder on the bar mentioned above, the Wondershare Filmora.
- Or you can simply look towards the left window, where you will find the sample videos tab.
- Click on the sample videos tab, and a new window will appear on the library screen.
- Here you will find almost more than 20 videos.
- So apart from using the actual recorded footage, we will work our way with what we have from default.
- For the music, we would be scrolling in the stock audio library.
- Click on the audio tab above and start scrolling.
- You will also find some categories in the left window.
- Choose the category of your choice and listen to the audio.
Do whatever suit you best. Keep in mind you only have 5 minutes.
Step 2. Pick music for your clips
Suppose you have found audio that speaks your vibe. The next step would be to find a video that tallies that audio. Let us suppose we have audio that is of the hip-hop genre. Let that creativity shine now!

If you like to add a more classical vibe, pick a classical song or audio from the audio library.
- After picking the song, move on to the sample videos tab and search for videos that match a classic vibe.
- Now random close-up shots of a piano, cinematic footage of a big orchestra, or simple landscapes with minimalistic movement while focusing on a single object, consider the example below.

Now that a scenario is constructed, our next step is to arrange these clips in the Wondershare Filmora timeline.
Step 3. Download the clips and audio
You have 15 minutes to create the music video. Start the timer! Once you have selected a sample video and audio that matches your scenario, you can download them from the bottom right icon on the thumbnail. Only if you still need to download them.
Step 4. Insert the audio into the timeline
- The first step is to drag the audio to the timeline.
- Now play the audio from the start. If you can work with the audio as a whole, then it’s perfect.
If you want your audio to start at a certain point. You have to follow the below-mentioned steps. It is as simple as that!

- Add your audio to the timeline.
- Then move the timer or the slider where you want your audio to start.
- Right-click on the audio file. Select split.
- Your audio file will split into two parts.
- Delete the prior file and drag the file ahead to the start of the timeline.
The next step is to add the videos to the timeline.
Step 5. Add the video to the timeline
When you have your audio in the timeline, your next step is adding the video. After you have trimmed or split your audio to your wish, follow the below steps.

- Click and drag to drop the video clips where you want the video to start.
- Play the audio first is a good feature for where you want your video to insert.
- Then adjust the timeline slider on that point.
- Simply drag your video and drop it into the timeline.
![]()
Note: now, remember you have multiple videos to match the audio length as we create a music video. The more, the more optimistic. Now, remember you have multiple videos to match the audio length as we create a music video. The more, the more optimistic.
Download the remaining videos that you would wish to be added to the music and follow the steps mentioned above to add the clips where you desire.
Step 6. Finishing touches
You can add some transitions to give your music video a fine touch**.** To add transitions, you can follow the below steps:

- First, click on the transition icon on the bar above. Then, browse as far as your imagination takes you.
- If the effect you want still needs to be downloaded, click on the download icon in the bottom right corner and download the effect.
- Click on the effect and drag it to drop it on your video. It will create a smooth transition while shifting from one video to the other.
Keep going you are almost there!
- Do this for all the videos in the timeline above the audio file.
If you have time, you can also add a few of the effects in the Wondershare Filmora.
- To do so, click on the effect icon on the top bar.
- A window will open to your left, indicating different available effects categories. Select any tab you want that fits your music video scenario.
- Download the effect mentioned above by clicking on the download icon in the bottom right corner of the effect thumbnail.
- Click to drag and drop it on top of your video.
![]()
Note: you can do so as many times as you want for the remaining video clips in the timeline.
It seems our 15 minutes are running out! Play the music video from the beginning and review the edits you made. Then, finalize your edits and Voila. You have successfully created a music video using a mouse on Wondershare Filmora.
So in a rare scenario when you don’t have a keyboard, you can just use your mouse to browse the Wondershare Filmora and put those creative ideas to work.
Conclusion
With just a mouse, you have created a music video! How easy is that? Try different music, audio, and video, and then enjoy the rest! Creativity has no limits if you know how to make the most of it by using the tools at your hand. Tell out more about your creative ideas! We love to hear from your side!
Free Download For Win 7 or later(64-bit)
Free Download For macOS 10.14 or later
Download the remaining videos that you would wish to be added to the music and follow the steps mentioned above to add the clips where you desire.
Step 6. Finishing touches
You can add some transitions to give your music video a fine touch**.** To add transitions, you can follow the below steps:
- First, click on the transition icon on the bar above. Then, browse as far as your imagination takes you.
- If the effect you want still needs to be downloaded, click on the download icon in the bottom right corner and download the effect.
- Click on the effect and drag it to drop it on your video. It will create a smooth transition while shifting from one video to the other.
Keep going you are almost there!
- Do this for all the videos in the timeline above the audio file.
If you have time, you can also add a few of the effects in the Wondershare Filmora.
- To do so, click on the effect icon on the top bar.
- A window will open to your left, indicating different available effects categories. Select any tab you want that fits your music video scenario.
- Download the effect mentioned above by clicking on the download icon in the bottom right corner of the effect thumbnail.
- Click to drag and drop it on top of your video.
![]()
Note: you can do so as many times as you want for the remaining video clips in the timeline.
It seems our 15 minutes are running out! Play the music video from the beginning and review the edits you made. Then, finalize your edits and Voila. You have successfully created a music video using a mouse on Wondershare Filmora.
So in a rare scenario when you don’t have a keyboard, you can just use your mouse to browse the Wondershare Filmora and put those creative ideas to work.
Conclusion
With just a mouse, you have created a music video! How easy is that? Try different music, audio, and video, and then enjoy the rest! Creativity has no limits if you know how to make the most of it by using the tools at your hand. Tell out more about your creative ideas! We love to hear from your side!
Free Download For Win 7 or later(64-bit)
Free Download For macOS 10.14 or later
How D AI Video Games Act More Human Than Human?
How Did AI Video Games Act More Human Than Human?
An easy yet powerful editor
Numerous effects to choose from
Detailed tutorials provided by the official channel
The gaming world is ever-changing, with developers looking to create innovative ways to immerse players into their digital worlds. One such technology that has begun to sweep is AI in the game industry.
AI is a powerful tool in many ways to improve the gaming experience. It can make artificial intelligence in computer games more believable and add replayability and immersion to games, and we can expect to see even more impressive applications in the future.
In this article
01 [What Is AI in Gaming?](#Part 1)
02 [Why Does AI in Gaming Matter?](#Part 2)
03 [How AI Will Completely Change Video Games](#Part 3)
04 [8 Games with Incredible Artificial Intelligence](#Part 4)
05 [What AI Video Games Assets Do Filmora Have?](#Part 5)
Part 1 What Is AI in Gaming?
In simple terms, AI is a set of algorithms that allow a computer to learn and improve from experience. Although you can apply it in many ways, artificial intelligence in video games is usually helpful to create more intelligent and more believable non-player characters (NPCs).
For example, an AI system might be helpful to determine how an NPC reacts to the player’s actions. If the player tries to steal from an NPC, the AI might make the NPC angry and more likely to attack the player. Alternatively, if the player is friendly to an NPC, the AI game playing might make the NPC more likely to help the player in future interactions.
Part 2 Why Does AI in Gaming Matter?
One of the most vital aspects of AI in video games is that it can make games more believable and immersive for players. When games can convincingly simulate human-like behavior, it can be a much more enjoyable experience for gamers. AI can make NPCs seem more lifelike and make the game world feel more believable.
AI is also becoming increasingly important for creating procedural content. This is where the game generates content on its own, rather than relying on pre-made assets. For example, a game might use procedural generation to create random dungeons or quests that the player can explore. This can add a lot of replayability to a game, as the player never knows what they will encounter next.
Part 3 How AI Will Completely Change Video Games
It is not a secret that AI is changing the world as we know it. With its ability to enable computers to learn and improve from experience, AI is paving the way for a future where machines can handle more complex tasks. And nowhere is this more apparent than in the world of video gaming.
In the past, developers brought in AI primarily for simple things like making certain NPCs (non-player characters) move and act realistically. But now, artificial intelligence in video games is being used for much more complex tasks like generating procedural content and creating believable human-like behavior. This results in a new generation of AI game playing that are more immersive and playable.
Part 4 Games with Incredible Artificial Intelligence
Now, we will look into eight video games that signify why we need the best ai in video games.
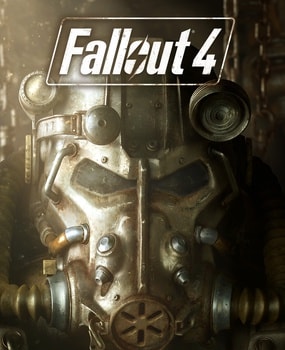
01Fallout 4
One of the most attractive examples of AI in video gaming is Fallout 4. This post-apocalyptic RPG features some of the most believable NPCs ever seen in a game. Each character is fully voiced, and they all have their unique personalities and backstories. The AI generates procedural content, meaning that the game world is always different each time you play.
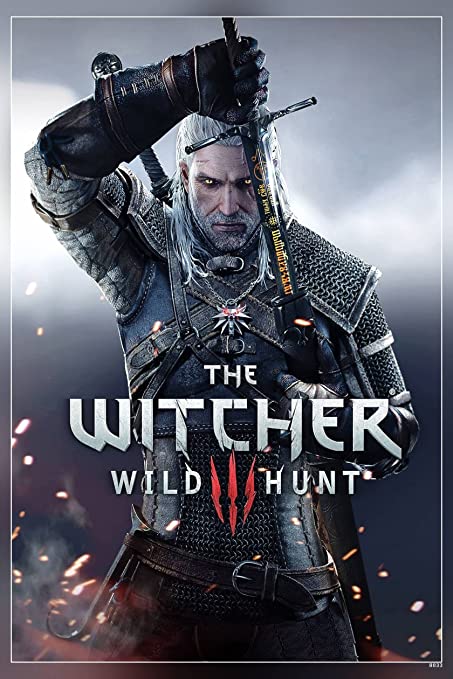
02The Witcher 3: Wild Hunt
The Witcher 3: Wild Hunt is one more great example of an AI video game. This open-world RPG features a vast array of believable NPCs, each with unique personality traits and motivations. The AI is also used to generate procedural content, resulting in a different game world every time you play.
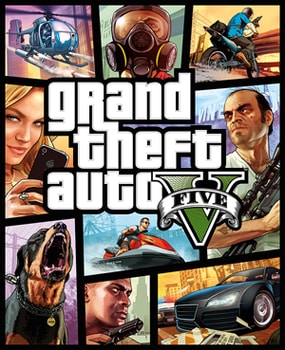
03Grand Theft Auto V
Grand Theft Auto V is yet another example of AI being used to create believable human-like behavior. The NPCs in this play are some of the most lifelike and realistic ever seen. They react to the player’s actions in believable ways, and the AI is used to generate procedural content, resulting in a game world that is always different.
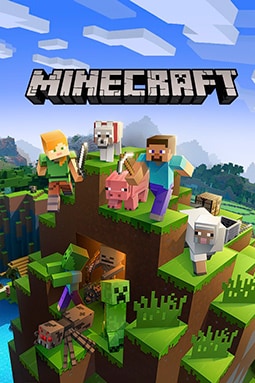
04Minecraft
Minecraft is a game that heavily uses procedural generation to create its content. The terrain and structures in the game are all generated on the fly by the AI, resulting in a different game world every time you play. What’s more, AI is also used to generate the behaviors of mobs (hostile creatures), making them more believable and lifelike.
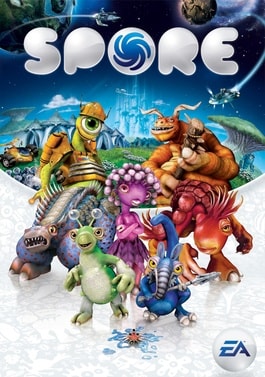
05Spore
Spore is an AI game play that is all about procedural generation. Every creature in the game is generated by AI, meaning that there are many possible creature designs. What’s more, AI is used to create creatures’ behaviors, making them more believable and lifelike.
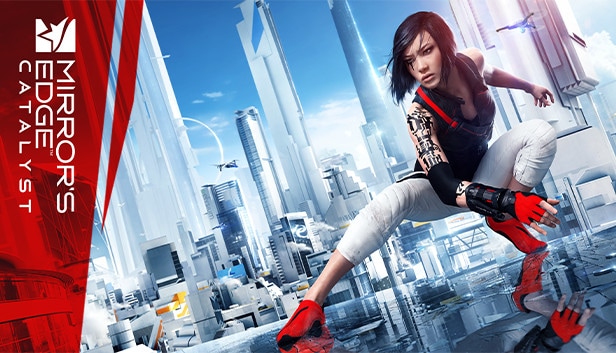
06Mirror’s Edge Catalyst
Mirror’s Edge Catalyst is a game that heavily uses AI to create its content. The levels in the game are all procedurally generated, meaning that they are different every time you play. This is made possible by the game’s AI, which produces the level layouts and obstacles on the fly.
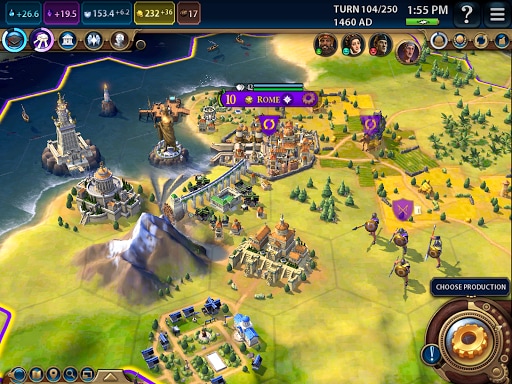
07Civilization VI
One of the most incredible examples of AI in video gaming is Civilization VI. This turn-based strategy game features some of the most believable NPCs ever seen in a game. Each character has its voice fully, and they all have unique personalities and backstories.
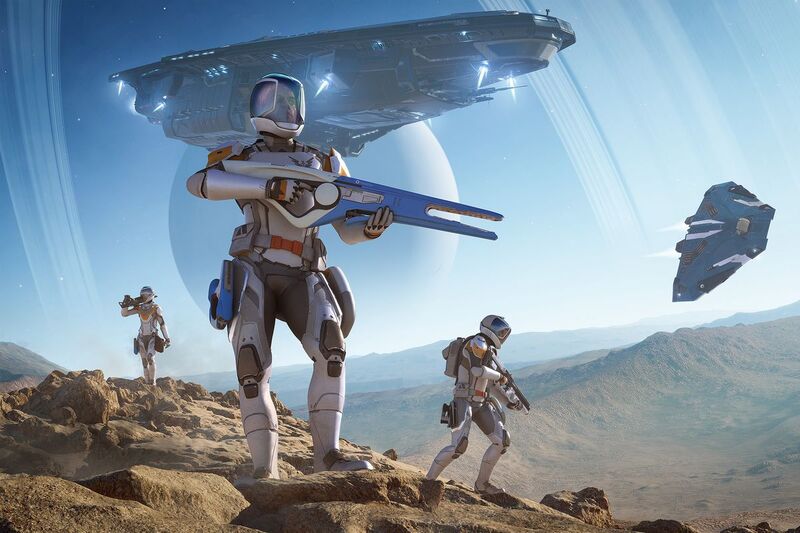
08Elite Dangerous
Elite Dangerous is a space simulation game that uses advanced AI to create believable and realistic human-like behavior. The NPCs in the game are some of the most lifelike and realistic ever seen. They react to the player’s actions in believable ways, and the AI is used to generate procedural content, resulting in a game world that is always different.
Part 5 What AI Video Games Assets Do Wondershare Filmora Video Editor Have?
With the increased use of AI in video games, most gamers have found gaming more enjoyable. However, an outstanding video editor has some assets that can significantly make AI video games better and more human. This video editor is one of the most sorted for and is called Filmora. Filmora is a great video editing software for creating stunning videos. It’s effortless to use and has various features to create professional-looking videos. It’s perfect for making videos for social media, YouTube, and other online platforms.
Its many features have a touch of artificial intelligence, making this program stand out from the other video editors and valuable for editing during ai video games creation.
Screen Recording
The Filmora screen recorder allows the user to concurrently record the screen and camera and the system and microphone audio. You can quickly record games, tutorials, YouTube videos, and other videos and then export them to YouTube, Vimeo, and other devices.
AI Portrait
The AI portrait function in Filmora video editor allows you to locate the human in your movie effortlessly and erase the background with a simple drag and click. There are also several portrait effects and AR stickers to add to your video editing enjoyment.
For Win 7 or later (64-bit)
For macOS 10.12 or later
Video Effects
Filmora customers can choose from various effects to utilize in their video editing software. It’s simple to create whatever effect you want with over 900 free effects, including drag-and-drop transitions, titles, filters, and motion components.
Do visit Wondershare Filmora exclusive website to know more about its latest upgrade and new features launch.
● Ending Thoughts →
● Thus, that was about what an ai video game is and why the characters act more like humans.
● So, as a video game lover, you can now explore the best of ai playing video games to have a personal experience of this new video gaming trend. Also, do try the Filmora software to see how you can change the looks and feel of your video game creation.
The gaming world is ever-changing, with developers looking to create innovative ways to immerse players into their digital worlds. One such technology that has begun to sweep is AI in the game industry.
AI is a powerful tool in many ways to improve the gaming experience. It can make artificial intelligence in computer games more believable and add replayability and immersion to games, and we can expect to see even more impressive applications in the future.
In this article
01 [What Is AI in Gaming?](#Part 1)
02 [Why Does AI in Gaming Matter?](#Part 2)
03 [How AI Will Completely Change Video Games](#Part 3)
04 [8 Games with Incredible Artificial Intelligence](#Part 4)
05 [What AI Video Games Assets Do Filmora Have?](#Part 5)
Part 1 What Is AI in Gaming?
In simple terms, AI is a set of algorithms that allow a computer to learn and improve from experience. Although you can apply it in many ways, artificial intelligence in video games is usually helpful to create more intelligent and more believable non-player characters (NPCs).
For example, an AI system might be helpful to determine how an NPC reacts to the player’s actions. If the player tries to steal from an NPC, the AI might make the NPC angry and more likely to attack the player. Alternatively, if the player is friendly to an NPC, the AI game playing might make the NPC more likely to help the player in future interactions.
Part 2 Why Does AI in Gaming Matter?
One of the most vital aspects of AI in video games is that it can make games more believable and immersive for players. When games can convincingly simulate human-like behavior, it can be a much more enjoyable experience for gamers. AI can make NPCs seem more lifelike and make the game world feel more believable.
AI is also becoming increasingly important for creating procedural content. This is where the game generates content on its own, rather than relying on pre-made assets. For example, a game might use procedural generation to create random dungeons or quests that the player can explore. This can add a lot of replayability to a game, as the player never knows what they will encounter next.
Part 3 How AI Will Completely Change Video Games
It is not a secret that AI is changing the world as we know it. With its ability to enable computers to learn and improve from experience, AI is paving the way for a future where machines can handle more complex tasks. And nowhere is this more apparent than in the world of video gaming.
In the past, developers brought in AI primarily for simple things like making certain NPCs (non-player characters) move and act realistically. But now, artificial intelligence in video games is being used for much more complex tasks like generating procedural content and creating believable human-like behavior. This results in a new generation of AI game playing that are more immersive and playable.
Part 4 Games with Incredible Artificial Intelligence
Now, we will look into eight video games that signify why we need the best ai in video games.
01Fallout 4
One of the most attractive examples of AI in video gaming is Fallout 4. This post-apocalyptic RPG features some of the most believable NPCs ever seen in a game. Each character is fully voiced, and they all have their unique personalities and backstories. The AI generates procedural content, meaning that the game world is always different each time you play.
02The Witcher 3: Wild Hunt
The Witcher 3: Wild Hunt is one more great example of an AI video game. This open-world RPG features a vast array of believable NPCs, each with unique personality traits and motivations. The AI is also used to generate procedural content, resulting in a different game world every time you play.
03Grand Theft Auto V
Grand Theft Auto V is yet another example of AI being used to create believable human-like behavior. The NPCs in this play are some of the most lifelike and realistic ever seen. They react to the player’s actions in believable ways, and the AI is used to generate procedural content, resulting in a game world that is always different.
04Minecraft
Minecraft is a game that heavily uses procedural generation to create its content. The terrain and structures in the game are all generated on the fly by the AI, resulting in a different game world every time you play. What’s more, AI is also used to generate the behaviors of mobs (hostile creatures), making them more believable and lifelike.
05Spore
Spore is an AI game play that is all about procedural generation. Every creature in the game is generated by AI, meaning that there are many possible creature designs. What’s more, AI is used to create creatures’ behaviors, making them more believable and lifelike.
06Mirror’s Edge Catalyst
Mirror’s Edge Catalyst is a game that heavily uses AI to create its content. The levels in the game are all procedurally generated, meaning that they are different every time you play. This is made possible by the game’s AI, which produces the level layouts and obstacles on the fly.
07Civilization VI
One of the most incredible examples of AI in video gaming is Civilization VI. This turn-based strategy game features some of the most believable NPCs ever seen in a game. Each character has its voice fully, and they all have unique personalities and backstories.
08Elite Dangerous
Elite Dangerous is a space simulation game that uses advanced AI to create believable and realistic human-like behavior. The NPCs in the game are some of the most lifelike and realistic ever seen. They react to the player’s actions in believable ways, and the AI is used to generate procedural content, resulting in a game world that is always different.
Part 5 What AI Video Games Assets Do Wondershare Filmora Video Editor Have?
With the increased use of AI in video games, most gamers have found gaming more enjoyable. However, an outstanding video editor has some assets that can significantly make AI video games better and more human. This video editor is one of the most sorted for and is called Filmora. Filmora is a great video editing software for creating stunning videos. It’s effortless to use and has various features to create professional-looking videos. It’s perfect for making videos for social media, YouTube, and other online platforms.
Its many features have a touch of artificial intelligence, making this program stand out from the other video editors and valuable for editing during ai video games creation.
Screen Recording
The Filmora screen recorder allows the user to concurrently record the screen and camera and the system and microphone audio. You can quickly record games, tutorials, YouTube videos, and other videos and then export them to YouTube, Vimeo, and other devices.
AI Portrait
The AI portrait function in Filmora video editor allows you to locate the human in your movie effortlessly and erase the background with a simple drag and click. There are also several portrait effects and AR stickers to add to your video editing enjoyment.
For Win 7 or later (64-bit)
For macOS 10.12 or later
Video Effects
Filmora customers can choose from various effects to utilize in their video editing software. It’s simple to create whatever effect you want with over 900 free effects, including drag-and-drop transitions, titles, filters, and motion components.
Do visit Wondershare Filmora exclusive website to know more about its latest upgrade and new features launch.
● Ending Thoughts →
● Thus, that was about what an ai video game is and why the characters act more like humans.
● So, as a video game lover, you can now explore the best of ai playing video games to have a personal experience of this new video gaming trend. Also, do try the Filmora software to see how you can change the looks and feel of your video game creation.
Also read:
- 2024 Approved Best Dark Moody LUTs During Editing
- In 2024, Want to Have Slow Zoom Effect in Your Video? We Will Illustrate How to Apply Slow Zoom Effect to Your Video on Your Smartphone, Computer, and TikTok
- Updated How to Add the Popular Video Text Effects to Your Video, In 2024
- Updated In 2024, In This Guidepost, Youll Learn What an HDRI Photo Is and How to Use the Best Free HDRI Program to Edit Photos. Youll Also Know the Difference Between HDR and HDRI
- Updated 2024 Approved Best Things People Know About Wedding Slideshow
- New You Can Easily Cut or Crop a Part of Your Video by Using Its Editing Tools Such as Crop (To Remove Unwanted Black Borders), Trim (To Remove the Unwanted Front and End Parts of Your Video Clip)
- Updated 2024 Approved 4 Solutions to Crop a Video on Android Easily
- In 2024, How to Get Motion Blur in Valorant?
- New Top Free Video Editing Software Enhance Your Content with These Essential Tools
- Updated In 2024, 15 Free Cinematic LUTs for Your Film
- Updated Learn How to Add Dynamic Shake Effects to Your Videos Using Alight Motion. Our Step-by-Step Guide Makes It Easy to Create Cinematic Footage
- New In 2024, 12 Best Picks of Video Enhancer Software
- New 2024 Approved Learn How to Feather Shapes in After Effects and Add a Professional Touch to Your Designs. This Comprehensive Guide Covers Everything From the Basics to Advanced Techniques. Perfect for Beginners and Experts Alike
- Some Facts That Few People Know on How to Make Transparent Background in Canva
- Best 10 Video Quiz Makers 2024 Add Quiz To Videos Easily
- Updated Best Video Grabbers for Chrome for 2024
- Updated Let Us Help You with Something that You Might Not Know. Have You Ever Worked with MOV File Format Before? Or Do You Know What that Is? Lets Talk About It
- Updated Learn How to Make Your CSGO Montage Impressive for 2024
- Updated How to Combine Multiple Videos Into One on Instagram for 2024
- New In 2024, How To Make a Video by Mouse in Filmora?
- Do You Want to Know All About Video Frame Rates and Speed? Wondershare Filmora Will Help You to Get More Information on This Matter for 2024
- Updated The Ultimate Wedding Videography Checklist for 2024
- 2024 Approved How to Create An Eye-Catching Intro Videos with InVideo
- How to Make Video Fade to Black in Movie Maker Easily
- New In 2024, How to Merge Videos in HandBrake? Expectation Vs. Reality
- Updated AVI Video Format Is Known and Famous for Its Features. Many of You Must Have Heard About It but Do You Know some Details About AVI? Lets Increase Your Knowledge and Talk About It
- Updated In 2024, How to Create A Freeze Frame Sequence in Video
- New How to Correct Lens Distortion With Filmora for 2024
- New In 2024, Tutorial to Add Effects with Movavi Slideshow Maker
- Updated Want to Convert MP4 Video To 60 FPS GIF? Read This
- In 2024, Want to Convert MP4 Video To 60 FPS GIF? Read This
- 2024 Approved How To Make Transparent Background On Picsart
- Updated If You Want to Keep Your Memories in Form of Video or Slideshow Then Keynote Is Great App for You. It Has Amazing and Powerful Tools Which Give Your Slideshow a Great and Beautiful Look
- Updated In 2024, Vintage Film Effect 1990S - How to Make
- New 2024 Approved Learn How to Use 3D Camera Tracking in Adobe After Effects and Take Your Skills to the Next Level
- Updated A Comprehensive Guide to Slow Motion YouTube Videos and How to Manage Them
- Updated How To Achieve LumaFusion Color Grading Through LUTs
- Updated Learn to Use Montage with These Movies
- 2024 Approved How to Stabilize Videos for Free with Google Photos App
- Explore Your Skills in Dimensional Graphic Editing and Animation with Blender. The Software Lands Among the Best Platforms for Art Enthusiasts with Its Stunning Transparent Backgrounds for 2024
- How to Get the Most Out of KineMaster Video Templates
- Updated And when It Comes to Voice Changers for Discord, None Is as Easy to Operate as the Voicemod. Here Is a Detailed Guide About How to Use Voicemod on Discord on Mobile and Desktop Devices for 2024
- How to Add Freeze Frame to Your Video From Any Device, In 2024
- New VSCO Slow Motion
- Updated 4 Solutions to Add White Borders on Mobile and Desktop for 2024
- Updated 2024 Approved How to Become a Youtuber
- Updated 2024 Approved The Complete Guide to GIF for Discord Profile
- In 2024, Top 4 SIM Location Trackers To Easily Find Your Lost Vivo Y200e 5G Device
- How To Bypass the Required Apple Store Verification For iPhone SE (2022)
- In 2024, What Is an AI Presentation Maker?
- How to Itel P40 Get Deleted photos Back with Ease and Safety?
- 10 Fake GPS Location Apps on Android Of your Tecno Spark 10C | Dr.fone
- Ultimate Guide to Free PPTP VPN For Beginners On Honor 90 GT | Dr.fone
- Does Life360 Notify When You Log Out On Vivo Y78+? | Dr.fone
- A Detailed Guide on Faking Your Location in Mozilla Firefox On Xiaomi 13T | Dr.fone
- In 2024, How to Unlock Realme 12+ 5G Phone without Google Account?
- Read This Guide to Find a Reliable Alternative to Fake GPS On Poco C51 | Dr.fone
- In 2024, Here are Some of the Best Pokemon Discord Servers to Join On Honor X9a | Dr.fone
- In 2024, How to Remove Find My iPhone without Apple ID On your Apple iPhone 8?
- How to Mirror Your Tecno Spark 20 Pro+ Screen to PC with Chromecast | Dr.fone
- In 2024, Apple ID Locked for Security Reasons On Apple iPhone 12 Pro? Find the Best Solution Here
- 5 Ways to Transfer Music from Apple iPhone 13 Pro to Android | Dr.fone
- Forgot Pattern Lock? Heres How You Can Unlock Nubia Red Magic 8S Pro Pattern Lock Screen
- How To Change Xiaomi Civi 3 Disney 100th Anniversary Edition Lock Screen Password?
- How Do You Get Sun Stone Evolutions in Pokémon For Motorola Razr 40? | Dr.fone
- In 2024, 3 Ways for Android Pokemon Go Spoofing On Tecno Pova 5 | Dr.fone
- 3 Best Tools to Hard Reset Honor X50 GT | Dr.fone
- Can Life360 Track You When Your Asus ROG Phone 8 is off? | Dr.fone
- Updated Descript AI Voice Enhancing Your Content Through Voice Replication for 2024
- In 2024, How to Transfer Contacts from Motorola G24 Power to Other Android Devices Devices? | Dr.fone
- How to recover old messages from your Nokia
- 5 Easy Ways to Change Location on YouTube TV On Lava Yuva 3 | Dr.fone
- In 2024, Top 10 AI Avatar Generators
- Recover Lost Photos during Transfer from iPhone 14 Pro to PC or Mac | Stellar
- The way to recover deleted pictures on Vivo T2 Pro 5G without backup.
- How To Recover Lost Data of Apple iPhone 7? | Dr.fone
- Title: In This Article, We Are Going to Learn the Simplest Procedure on How to Cut And/Or Trim Videos Using VLC Media Player. Each Step Is Carefully Explained, with Screenshots Attached for 2024
- Author: Morgan
- Created at : 2024-04-24 01:13:12
- Updated at : 2024-04-25 01:13:12
- Link: https://ai-video-editing.techidaily.com/1713950413245-in-this-article-we-are-going-to-learn-the-simplest-procedure-on-how-to-cut-andor-trim-videos-using-vlc-media-player-each-step-is-carefully-explained-with-sc/
- License: This work is licensed under CC BY-NC-SA 4.0.
