
:max_bytes(150000):strip_icc():format(webp)/windows11contextmenu-f4d6ebb14db4444d851b4338aa553e21.png)
Learn How to Easily Concatenate Videos Using FFmpeg in This Step-by-Step Guide. From Installation to Execution, We Cover It All to Streamline Your Video Editing Process for 2024
Learn How to Easily Concatenate Videos Using FFmpeg in This Step-by-Step Guide. From Installation to Execution, We Cover It All to Streamline Your Video Editing Process
Video editing is a crucial aspect of creating content for many people. Whether you’re a YouTuber, a marketer, or just someone who wants to share videos with friends and family, being able to edit and manipulate your videos is key. One of the most basic video editing tasks is concatenating videos, which combines multiple files to create one cohesive video.
FFmpeg is a powerful tool that allows you to do just that, and in this guide, we’ll walk you through the process of FFmpeg concatenate videos. Whether a beginner or an experienced video editor, this guide will provide you with all the information you need to seamlessly merge your videos. From installation to execution, we’ll cover it all so you can streamline your video editing process.

Overview and Installation of FFmpeg
FFmpeg is free, open-source project that allows you to record, convert, and stream digital audio and video. It is a command-line tool widely used in video editing and transcoding. FFmpeg can be used to concatenate videos and other tasks, such as adding subtitles, changing video resolution, and more. It is available for Windows, Mac, and Linux, making it a versatile and accessible tool for anyone to use.
Here’s how to install FFmpeg:
Step1 Log in to your Ubuntu server via SSH and update the package index.
$ sudo apt update
Step2 Install FFmpeg and all the required dependencies
$ sudo apt install ffmpeg
Step3 Verify the version of FFmpeg that you’ve installed.
$ ffmpeg -version
Prerequisite
Before we merge videos using FFmpeg, we must understand the various methods available to us. FFmpeg offers three ways to concatenate videos: a demuxer, a filter, or a protocol. However, each method has its own set of considerations, and the best method for you will depend on the properties of the videos you’re working with.
It’s crucial to ensure that all encoding-related properties align with your chosen method. This includes the timebase, height and width, codecs, and pixel format. Some methods require the videos you’re merging to have the same encoding, while others allow for different encodings. It’s essential to keep this in mind to ensure that the final video is seamless without any breaks. Remember that these prerequisites will help you have a smooth process.
Concatenate Videos With Same Codecs Using FFmpeg
If the videos you want to concatenate have the same codec, you can use the FFmpeg “concat” demuxer or protocol to join them together. This simple and efficient method doesn’t require re-encoding the videos, saving time and preserving the original quality. This section will review the steps to concatenate videos using the “concat” demuxer and “concat” protocols in FFmpeg.
Merge Videos With the “Concat” Demuxer
The concat demuxer in FFmpeg allows you to join together multiple video files with the same codecs by reading a list of file paths from a text file and demuxing them in sequence. Each video starts where the previous one finishes without needing to re-encode the videos. Here’s how to do it:
Step1 Create a .txt file and list the paths of the video files you want to merge.
Join_video.txt
file /Users/Video/input1.mp4
file /Users/Video/input2.mp4
![]()
Note: You can add more than two video files.
Step2 Run the FFmpeg command:
ffmpeg -f concat -safe 0 -i join_video.txt -c copy output_demuxer.mp4
![]()
Note: -safe 0 is added to accept any file name.
-c copy will copy all the streams.
As this method allows you to “stream copy” the files instead of re-encoding them, the concatenation is very fast. This can be a good option if you have videos with the same codecs and want to join them quickly without losing quality.
Join Videos With the “Concat” Protocol
The concat protocol in FFmpeg allows you to join together multiple video files in a specific format that supports file-level concatenation, such as MPEG-2 TS. However, it cannot be used for other video formats like MP4 and WEBM.
Here’s how to use the “concat protocol:
Step1 Run the FFmpeg command:
ffmpeg -i “concat:input1.ts|input2.ts” -c copy output_protocol.ts
![]()
Note: The concat protocol allows you to “stream copy” the files by adding the option -c copy.
Step2 Input the file name of the video using this code:
ffmpeg -i “concat:input1.mp4|input2.mp4” -c copy output_protocol.mp4
![]()
Note: If you try to use this method on video formats that are not supported, only the first input video will be saved in the output video. And the video ends after the first video.
Although this method is limited in terms of supported video formats, it’s very easy to use if you merge videos in the supported formats. It’s a single command in the terminal without needing a text file. Additionally, using the -c copy option makes it efficient as it doesn’t require re-encoding, saving time.
Concatenate MP4 Video Files of Different Codecs & Resolutions Using FFmpeg
If the videos you want to concatenate have different codecs or resolutions, you can still use FFmpeg to join them together. However, this method requires re-encoding the videos, which can take longer and may result in a loss of quality. This section will cover the steps to concatenate videos with different codecs or resolutions using FFmpeg.
Here’s how to do it:
Step1 Provide the names of the input files to FFmpeg.
ffmpeg -i file1.mp4 -i file2.mp4 -i file3.mp4 \
Step2 Use the filter_complex filtergraph parameter to instruct FFmpeg from where to take the audio and video.
-filter_complex “[0:v] [0:a] [1:v] [1:a] [2:v] [2:a]
![]()
Note: [0:v][0:a] means FFmpeg needs to take the video and audio from the 0th video (file1.mp4).
Step3 Tell FFmpeg to concatenate three files (n=3).
concat=n=3:v=1:a=1 [vv] [aa]“ \
![]()
Note: The v=1:a=1 implies one stream for the audio and one stream for the video.
Step4 Map these audio and video outputs to the final video container. This is done as follows:
-map “[vv]“ -map “[aa]“ mergedVideo.mp4
It is important to note that this method requires re-encoding the videos, which can take more time and may result in a loss of quality. However, it offers the flexibility of filtering the videos before concatenating them. The filter_complex method in FFmpeg allows you to concatenate videos of different codecs and resolutions. The final step is to map the audio and video outputs to the final video container. This can be done using the -map command.
Concatenate Videos With Multiple Audio Streams Using FFmpeg
Concatenating videos with multiple audio streams can be more complex than concatenating videos with a single audio stream. This section will cover the steps to concatenate videos with multiple audio streams using FFmpeg. We’ll be using the filter_complex method in FFmpeg, which allows you to manipulate and concatenate multiple audio and video streams in a single command. This method is more advanced but allows you to join videos with different audio streams and create a final video with multiple audio tracks.
Step1 Specify the input files and opening.mkv, episode.mkv, and ending.mkv:
$ ffmpeg -i opening.mkv -i episode.mkv -i ending.mkv -filter_complex
Step2 Use the filter_complex parameter in FFmpeg to specify the input streams for the video and audio.
[0:0] [0:1] [0:2] [1:0] [1:1] [1:2] [2:0] [2:1] [2:2]
![]()
Note: Single video stream ([0:0], [1:0], [2:0])
Dual audio streams ([0:1][0:2], [1:1][1:2], [2:1][2:2])
Step3 Use the concat filter to specify that you want to concatenate 3 files (n=3) with 1 video stream (v=1) and 2 audio streams (a=2). Specify the output streams as [v], [a1], [a2]:
concat=n=3:v=1:a=2 [v] [a1] [a2]
Step4 Use the -map option to map the output streams to the final video container:
-map ‘[v]‘ -map ‘[a1]‘ -map ‘[a2]‘ output.mkv
[Bonus] Join Videos Together With Filmora
While FFmpeg offers a wide range of options for joining videos together, it can have a steep learning curve for some users. An alternative method for joining videos is using Filmora. Wondershare Filmora is a user-friendly video editing software that allows you to easily join multiple videos. It’s a great option for users new to video editing or needing experience with command-line tools like FFmpeg.
Free Download For Win 7 or later(64-bit)
Free Download For macOS 10.14 or later
Filmora has a simple drag-and-drop interface, making adding, arranging, and editing videos and audio tracks easy. Additionally, it offers various features like split, trim, crop, merge, and more. It also has various effects, transitions, and animations to enhance the overall look of your video. With Filmora, you can create professional-looking videos with minimal effort.
How-to Steps
Here’s how to merge videos using Filmora:
Step1 Open Filmora and click “New Project.”

Step2 Go to “File“ > “Import Media“ > “Import Media Files“ to add your video files to the media library.

Step3 Drag and drop the files you want to merge from the media library to the timeline, and then you’ll get the merged video seamlessly.

Step4 Edit your video.

Step5 After editing, click the “Export“ tab to save your videos.

Conclusion
FFmpeg is a powerful tool that allows you to concatenate videos in various ways. Whether you’re working with videos of the same codecs and resolutions or videos with multiple audio streams, FFmpeg can handle it. However, for users new to video editing or needing experience with command-line tools, using Filmora can be a more user-friendly option. It offers a simple drag-and-drop interface and a variety of features and effects to enhance the overall look of your video.
Step2 Run the FFmpeg command:
ffmpeg -f concat -safe 0 -i join_video.txt -c copy output_demuxer.mp4
![]()
Note: -safe 0 is added to accept any file name.
-c copy will copy all the streams.
As this method allows you to “stream copy” the files instead of re-encoding them, the concatenation is very fast. This can be a good option if you have videos with the same codecs and want to join them quickly without losing quality.
Join Videos With the “Concat” Protocol
The concat protocol in FFmpeg allows you to join together multiple video files in a specific format that supports file-level concatenation, such as MPEG-2 TS. However, it cannot be used for other video formats like MP4 and WEBM.
Here’s how to use the “concat protocol:
Step1 Run the FFmpeg command:
ffmpeg -i “concat:input1.ts|input2.ts” -c copy output_protocol.ts
![]()
Note: The concat protocol allows you to “stream copy” the files by adding the option -c copy.
Step2 Input the file name of the video using this code:
ffmpeg -i “concat:input1.mp4|input2.mp4” -c copy output_protocol.mp4
![]()
Note: If you try to use this method on video formats that are not supported, only the first input video will be saved in the output video. And the video ends after the first video.
Although this method is limited in terms of supported video formats, it’s very easy to use if you merge videos in the supported formats. It’s a single command in the terminal without needing a text file. Additionally, using the -c copy option makes it efficient as it doesn’t require re-encoding, saving time.
Concatenate MP4 Video Files of Different Codecs & Resolutions Using FFmpeg
If the videos you want to concatenate have different codecs or resolutions, you can still use FFmpeg to join them together. However, this method requires re-encoding the videos, which can take longer and may result in a loss of quality. This section will cover the steps to concatenate videos with different codecs or resolutions using FFmpeg.
Here’s how to do it:
Step1 Provide the names of the input files to FFmpeg.
ffmpeg -i file1.mp4 -i file2.mp4 -i file3.mp4 \
Step2 Use the filter_complex filtergraph parameter to instruct FFmpeg from where to take the audio and video.
-filter_complex “[0:v] [0:a] [1:v] [1:a] [2:v] [2:a]
![]()
Note: [0:v][0:a] means FFmpeg needs to take the video and audio from the 0th video (file1.mp4).
Step3 Tell FFmpeg to concatenate three files (n=3).
concat=n=3:v=1:a=1 [vv] [aa]“ \
![]()
Note: The v=1:a=1 implies one stream for the audio and one stream for the video.
Step4 Map these audio and video outputs to the final video container. This is done as follows:
-map “[vv]“ -map “[aa]“ mergedVideo.mp4
It is important to note that this method requires re-encoding the videos, which can take more time and may result in a loss of quality. However, it offers the flexibility of filtering the videos before concatenating them. The filter_complex method in FFmpeg allows you to concatenate videos of different codecs and resolutions. The final step is to map the audio and video outputs to the final video container. This can be done using the -map command.
Concatenate Videos With Multiple Audio Streams Using FFmpeg
Concatenating videos with multiple audio streams can be more complex than concatenating videos with a single audio stream. This section will cover the steps to concatenate videos with multiple audio streams using FFmpeg. We’ll be using the filter_complex method in FFmpeg, which allows you to manipulate and concatenate multiple audio and video streams in a single command. This method is more advanced but allows you to join videos with different audio streams and create a final video with multiple audio tracks.
Step1 Specify the input files and opening.mkv, episode.mkv, and ending.mkv:
$ ffmpeg -i opening.mkv -i episode.mkv -i ending.mkv -filter_complex
Step2 Use the filter_complex parameter in FFmpeg to specify the input streams for the video and audio.
[0:0] [0:1] [0:2] [1:0] [1:1] [1:2] [2:0] [2:1] [2:2]
![]()
Note: Single video stream ([0:0], [1:0], [2:0])
Dual audio streams ([0:1][0:2], [1:1][1:2], [2:1][2:2])
Step3 Use the concat filter to specify that you want to concatenate 3 files (n=3) with 1 video stream (v=1) and 2 audio streams (a=2). Specify the output streams as [v], [a1], [a2]:
concat=n=3:v=1:a=2 [v] [a1] [a2]
Step4 Use the -map option to map the output streams to the final video container:
-map ‘[v]‘ -map ‘[a1]‘ -map ‘[a2]‘ output.mkv
[Bonus] Join Videos Together With Filmora
While FFmpeg offers a wide range of options for joining videos together, it can have a steep learning curve for some users. An alternative method for joining videos is using Filmora. Wondershare Filmora is a user-friendly video editing software that allows you to easily join multiple videos. It’s a great option for users new to video editing or needing experience with command-line tools like FFmpeg.
Free Download For Win 7 or later(64-bit)
Free Download For macOS 10.14 or later
Filmora has a simple drag-and-drop interface, making adding, arranging, and editing videos and audio tracks easy. Additionally, it offers various features like split, trim, crop, merge, and more. It also has various effects, transitions, and animations to enhance the overall look of your video. With Filmora, you can create professional-looking videos with minimal effort.
How-to Steps
Here’s how to merge videos using Filmora:
Step1 Open Filmora and click “New Project.”
Step2 Go to “File“ > “Import Media“ > “Import Media Files“ to add your video files to the media library.
Step3 Drag and drop the files you want to merge from the media library to the timeline, and then you’ll get the merged video seamlessly.
Step4 Edit your video.
Step5 After editing, click the “Export“ tab to save your videos.
Conclusion
FFmpeg is a powerful tool that allows you to concatenate videos in various ways. Whether you’re working with videos of the same codecs and resolutions or videos with multiple audio streams, FFmpeg can handle it. However, for users new to video editing or needing experience with command-line tools, using Filmora can be a more user-friendly option. It offers a simple drag-and-drop interface and a variety of features and effects to enhance the overall look of your video.
Five Thoughts on Discord Create Account’s How-To Questions
Five Thoughts on Discord Create Account
An easy yet powerful editor
Numerous effects to choose from
Detailed tutorials provided by the official channel
Discord was a great alternative to voice chat systems such as TeamSpeak, Mumble, and Ventrilo for online gamers. Gamers make discord accounts for these services to play together rather than the voice communication facilities integrated into games, which are frequently of poor quality and lack functionality.
Founded in 2015, discord allowed individuals to talk while playing PC games seamlessly. Users may utilize the service to establish servers that can include many text and audio channels. A typical discord account server may feature chat rooms dedicated to specific themes (such as “gaming” and “anime x manga”), as well as voice channels devoted to specific games or activities. The service’s high-quality, low-latency audio chat is a popular tool for Twitch broadcasters and podcasters. It has also expanded to accommodate massive video conversations to compete with Zoom.
In this article
01 [How Does Discord Work and What is it Used for?](#Part 1)
02 [How to Make a Discord Signup in the Browser?](#Part 2)
03 [How to Make a Discord Signup with Desktop?](#Part 3)
04 [How to Make a Signup Discord with App?](#Part 4)
05 [Discord Create Account FAQs](#Part 5)
Part 1 How Does Discord Work and What is it Used for?
Discord account allows friends to communicate with one another one-on-one or in groups via a server. You may use it to send direct messages to pals, as well as video calls, audio chat, and screen sharing. Once on a server, you can join a voice chat channel to communicate with other gamers who are playing certain games.
You can share many things on discord, including media files like images, gifs, audio, and videos. Speaking of videos, video editing doesn’t get any better than Filmora. Wondershare Filmora Video Editor is a sophisticated editing application for Windows and Mac users. It was initially known as Wondershare Video Editor, but following its fifth release, it got renamed Filmora. The video editor’s primary features include animation, overlays, audio control, on-screen recording, and multi-editing modes. The video editor is well-known for its feature-rich but the simple interface, making it suited for both novice and experienced users.
For Win 7 or later (64-bit)
For macOS 10.12 or later
Filmora’s standout features
● Editing Audio Equalizer 4K Resolution Support
● Support for GIFs
● Screen Dividers
● Controls For Video And Audio
● Multiple Video Clips Can Be Layered
● Stabilization of Video
● Presets for Color Grading
● Text Editing Expertise
● Tilt-Shift
● The mosaic (Blurring)
● Noise Elimination
● Importance in Social Life
● Preview of Each Frame
● Controlling the Speed
● Audio-Mixer
● Backgrounds in Chroma Key
● Screen Capture
● Separation of audio
● Scene Recognition
You can make your discord account and use it on almost any platform, including discord desktop software for Windows and Mac and iOS and Android apps for talking and calling on the move. If you prefer not to download anything, it also works in a web browser. You can link your discord account app to various popular services, such as Twitch and Spotify, so your friends can see your actions. While there is no discord Xbox app, you may link your discord and Xbox accounts so that others can see what you’re up to on your Xbox Series X or Xbox Series S.
Part 2 How to Make a Discord Signup in the Browser
Don’t have the discord account?
You can quickly sign up using your preferred web browser, i.e., Chrome, Microsoft Edge, Firefox, or Safari.
Follow the steps below to make a discord account using your web browser:
Step 1: Go to <www.discord.com> and click the “Login” button in the upper right corner.
Step 2: To establish a new discord account, click “Register” underneath the login page.
Step 3:
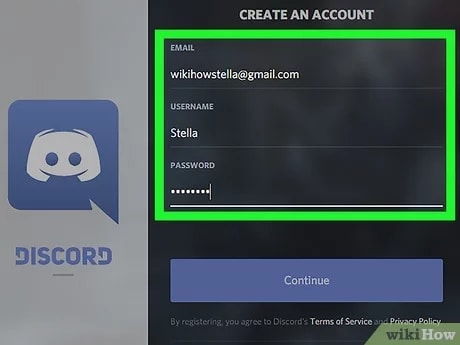
● Enter your email, a username, and a strong password.
● Date of birth.
● Accept the terms of service.
After entering the above, click the “Continue” button.
Step 4: Check the box besides “I am human” to enable the captcha.
Step 5: You will receive an email asking you to confirm your information. Select the “Verify email” option.
Once you’ve signed up for discord, you may access it via the Discord website or the mobile app. The program is free to download for Windows, Linux, Mac, Android, and iOS.
Follow the steps above to sign up on discord account successfully. Easy right? Let’s proceed!
Part 3 How to Make a Discord Signup with Desktop?
The discord creating account on your desktop is pretty much the same as using your browser.
Follow the steps below to make a discord account using your desktop.
Step 1: Click “Login” on the Discord website (top right).
Step 2: Underneath the sign-in box, click “Register.”
Step 3: Enter the email address, username, password, and birth date.
Step 4: Agree to the terms of service and then click “Continue.”
Step 5: Use the captcha to prove that you are not a robot.
Step 6: You will get an email to confirm your data; click on the link in the email to confirm.
See that? No big deal, right?
Part 4 How to Make a Signup Discord with App
Signing up for a discord account through the app is relatively easy, like the procedures above, you will not break a sweat.
Follow the easy steps below for discord create account on your smartphone device:
Step 1: Install and launch the Discord app on your smartphone
Step 2: Select the Register option.
Step 3: Choose whether to register by cellphone number or email address and input either one.
Step 4: You will get a message with a confirmation code or an email with a link.
Step 5: Enter the code or navigate to the URL.
Step 6: Enter your username and password here.
Step 7: Enter your birth date.
Step 8: Accept the terms of the agreement.
Step 9: Click “Next” to finish the Discord registration.
What Happens When You Disable your Discord Account?
When you deactivate your account, it goes to suspension mode. You may reactivate it by signing in and following the on-screen instructions. Keep in mind that discord accounts dormant for two years are removed, so if you want to keep yours, you must reactivate it (but you can disable it after this if you like).
After you deactivate an account, users will no longer get discord alerts. Users may, however, still receive friend requests, and any friend requests users get while their account is blocked will be ready for when they reactivate it. However, when a user decides to delete their account, the said account will get permanently deleted.
Tip: If you want to stay away from your discord account for a while with a plan to return to it later, it is advisable to log out or deactivate rather than delete it.
Part 5 Discord Create Account FAQs
Q. Is discord free, or do I have to pay?
A. Yes and no. The premium edition of discord is not free. If you don’t want to utilize the premium features, you may still download and make a discord account for free.
Q. Is there anything I cannot do on discord?
A. Do not organize, promote, or participate in any unlawful or possibly dangerous activities, such as sexual solicitation, human trafficking, or selling or enabling the sale of forbidden or potentially harmful products (firearms, ammunition, drugs, and controlled substances).
Q. Do messages disappear on discord?
A. Your messages are only destroyed: 1. if they are deleted individually (by you or a user with proper rights), 2. if you get banned, and the person banning you decides to delete all of your messages at once.
Q. Does discord account keep a record of interactions?
A. Yes, discord will track every discussion you have on discord acount, record everything you say on discord, and examine all photographs you transmit over discord.
Q. How will I know when someone blocks me on discord?
A. When you block someone, their online status on discord account changes to “offline” until unblocked and vice versa. They will also show offline in mutual servers or your chat history.
Q. How do I permanently delete my discord account?
A. To delete your discord created account for good, head to user settings, then tap on ‘my account.’ From there, tap on ‘Account Removal’ then tap on ‘Delete Account.’
If you are a server owner, you will have to delete the server or pass ownership of the server.
Q. How do I find servers to join on discord?
A. If you have a buddy who has a discord server you’d want to join, request an invite. If you’re a member of a discord community, ask for an invite or check on the community website.
By tapping the magnifying glass in the left window of the discord account app, you may also search for public servers that anybody can join.
● Ending Thoughts →
● Discord is a web program that works in most browsers. A desktop version is available for Windows, macOS, Linux, iOS, and Android. Discord’s desktop and browser versions are functionally and visually identical in practically every regard if you want to make a discord account. So, re-read the article and the FAQs on discord create account, and start your journey.
● Finally, for the creatives, boost your discord create account and usage experience by using Filmora to edit videos and make cool animations.
Discord was a great alternative to voice chat systems such as TeamSpeak, Mumble, and Ventrilo for online gamers. Gamers make discord accounts for these services to play together rather than the voice communication facilities integrated into games, which are frequently of poor quality and lack functionality.
Founded in 2015, discord allowed individuals to talk while playing PC games seamlessly. Users may utilize the service to establish servers that can include many text and audio channels. A typical discord account server may feature chat rooms dedicated to specific themes (such as “gaming” and “anime x manga”), as well as voice channels devoted to specific games or activities. The service’s high-quality, low-latency audio chat is a popular tool for Twitch broadcasters and podcasters. It has also expanded to accommodate massive video conversations to compete with Zoom.
In this article
01 [How Does Discord Work and What is it Used for?](#Part 1)
02 [How to Make a Discord Signup in the Browser?](#Part 2)
03 [How to Make a Discord Signup with Desktop?](#Part 3)
04 [How to Make a Signup Discord with App?](#Part 4)
05 [Discord Create Account FAQs](#Part 5)
Part 1 How Does Discord Work and What is it Used for?
Discord account allows friends to communicate with one another one-on-one or in groups via a server. You may use it to send direct messages to pals, as well as video calls, audio chat, and screen sharing. Once on a server, you can join a voice chat channel to communicate with other gamers who are playing certain games.
You can share many things on discord, including media files like images, gifs, audio, and videos. Speaking of videos, video editing doesn’t get any better than Filmora. Wondershare Filmora Video Editor is a sophisticated editing application for Windows and Mac users. It was initially known as Wondershare Video Editor, but following its fifth release, it got renamed Filmora. The video editor’s primary features include animation, overlays, audio control, on-screen recording, and multi-editing modes. The video editor is well-known for its feature-rich but the simple interface, making it suited for both novice and experienced users.
For Win 7 or later (64-bit)
For macOS 10.12 or later
Filmora’s standout features
● Editing Audio Equalizer 4K Resolution Support
● Support for GIFs
● Screen Dividers
● Controls For Video And Audio
● Multiple Video Clips Can Be Layered
● Stabilization of Video
● Presets for Color Grading
● Text Editing Expertise
● Tilt-Shift
● The mosaic (Blurring)
● Noise Elimination
● Importance in Social Life
● Preview of Each Frame
● Controlling the Speed
● Audio-Mixer
● Backgrounds in Chroma Key
● Screen Capture
● Separation of audio
● Scene Recognition
You can make your discord account and use it on almost any platform, including discord desktop software for Windows and Mac and iOS and Android apps for talking and calling on the move. If you prefer not to download anything, it also works in a web browser. You can link your discord account app to various popular services, such as Twitch and Spotify, so your friends can see your actions. While there is no discord Xbox app, you may link your discord and Xbox accounts so that others can see what you’re up to on your Xbox Series X or Xbox Series S.
Part 2 How to Make a Discord Signup in the Browser
Don’t have the discord account?
You can quickly sign up using your preferred web browser, i.e., Chrome, Microsoft Edge, Firefox, or Safari.
Follow the steps below to make a discord account using your web browser:
Step 1: Go to <www.discord.com> and click the “Login” button in the upper right corner.
Step 2: To establish a new discord account, click “Register” underneath the login page.
Step 3:
● Enter your email, a username, and a strong password.
● Date of birth.
● Accept the terms of service.
After entering the above, click the “Continue” button.
Step 4: Check the box besides “I am human” to enable the captcha.
Step 5: You will receive an email asking you to confirm your information. Select the “Verify email” option.
Once you’ve signed up for discord, you may access it via the Discord website or the mobile app. The program is free to download for Windows, Linux, Mac, Android, and iOS.
Follow the steps above to sign up on discord account successfully. Easy right? Let’s proceed!
Part 3 How to Make a Discord Signup with Desktop?
The discord creating account on your desktop is pretty much the same as using your browser.
Follow the steps below to make a discord account using your desktop.
Step 1: Click “Login” on the Discord website (top right).
Step 2: Underneath the sign-in box, click “Register.”
Step 3: Enter the email address, username, password, and birth date.
Step 4: Agree to the terms of service and then click “Continue.”
Step 5: Use the captcha to prove that you are not a robot.
Step 6: You will get an email to confirm your data; click on the link in the email to confirm.
See that? No big deal, right?
Part 4 How to Make a Signup Discord with App
Signing up for a discord account through the app is relatively easy, like the procedures above, you will not break a sweat.
Follow the easy steps below for discord create account on your smartphone device:
Step 1: Install and launch the Discord app on your smartphone
Step 2: Select the Register option.
Step 3: Choose whether to register by cellphone number or email address and input either one.
Step 4: You will get a message with a confirmation code or an email with a link.
Step 5: Enter the code or navigate to the URL.
Step 6: Enter your username and password here.
Step 7: Enter your birth date.
Step 8: Accept the terms of the agreement.
Step 9: Click “Next” to finish the Discord registration.
What Happens When You Disable your Discord Account?
When you deactivate your account, it goes to suspension mode. You may reactivate it by signing in and following the on-screen instructions. Keep in mind that discord accounts dormant for two years are removed, so if you want to keep yours, you must reactivate it (but you can disable it after this if you like).
After you deactivate an account, users will no longer get discord alerts. Users may, however, still receive friend requests, and any friend requests users get while their account is blocked will be ready for when they reactivate it. However, when a user decides to delete their account, the said account will get permanently deleted.
Tip: If you want to stay away from your discord account for a while with a plan to return to it later, it is advisable to log out or deactivate rather than delete it.
Part 5 Discord Create Account FAQs
Q. Is discord free, or do I have to pay?
A. Yes and no. The premium edition of discord is not free. If you don’t want to utilize the premium features, you may still download and make a discord account for free.
Q. Is there anything I cannot do on discord?
A. Do not organize, promote, or participate in any unlawful or possibly dangerous activities, such as sexual solicitation, human trafficking, or selling or enabling the sale of forbidden or potentially harmful products (firearms, ammunition, drugs, and controlled substances).
Q. Do messages disappear on discord?
A. Your messages are only destroyed: 1. if they are deleted individually (by you or a user with proper rights), 2. if you get banned, and the person banning you decides to delete all of your messages at once.
Q. Does discord account keep a record of interactions?
A. Yes, discord will track every discussion you have on discord acount, record everything you say on discord, and examine all photographs you transmit over discord.
Q. How will I know when someone blocks me on discord?
A. When you block someone, their online status on discord account changes to “offline” until unblocked and vice versa. They will also show offline in mutual servers or your chat history.
Q. How do I permanently delete my discord account?
A. To delete your discord created account for good, head to user settings, then tap on ‘my account.’ From there, tap on ‘Account Removal’ then tap on ‘Delete Account.’
If you are a server owner, you will have to delete the server or pass ownership of the server.
Q. How do I find servers to join on discord?
A. If you have a buddy who has a discord server you’d want to join, request an invite. If you’re a member of a discord community, ask for an invite or check on the community website.
By tapping the magnifying glass in the left window of the discord account app, you may also search for public servers that anybody can join.
● Ending Thoughts →
● Discord is a web program that works in most browsers. A desktop version is available for Windows, macOS, Linux, iOS, and Android. Discord’s desktop and browser versions are functionally and visually identical in practically every regard if you want to make a discord account. So, re-read the article and the FAQs on discord create account, and start your journey.
● Finally, for the creatives, boost your discord create account and usage experience by using Filmora to edit videos and make cool animations.
Best Free Slow Motion Apps For Android and iPhone
Slow-motion videos are the recent and most popular trend of social media. Influencers are trying their best to make appealing slow-motion videos for unique content. Not everyone can afford traditional cameras to record videos in slow-mo. That’s why transforming normal video into slow-motion with free slow-motion apps is accessible to all.
For this purpose, countless apps have been developed to provide editing tools right in your palm. Regardless of the smartphone device you are using, there are solutions for everyone. Thoroughly read this article if you want to explore some free slow-mo apps for Android and iOS users.
Slow Motion Video Maker Slow your video’s speed with better control of your keyframes to create unique cinematic effects!
Make A Slow Motion Video Make A Slow Motion Video More Features

Part 1: Progressive Android Application For Creating Free Slow-Mos
Starting with Android applications, there are some great free slow-motion apps you can come across. An overview of such apps will help you find out the best option to go with in Android:
- Velomingo - Velocity Edit Maker
- Slow Motion Video Maker
- Slow Motion Video Camera
- Splice - Video Editor & Maker
- Video Speed Changer: SlowMo F
1. Velomingo - Velocity Edit Maker
Find and transform your videos by applying multiple velocity templates using this free slow-motion app. For someone who isn’t very skilled at creating slow motions, this application can be helpful. It provides hundreds of pre-developed speed change templates for creating slow motions. After creating slo-mos, you can share them on your social handles like TikTok, Instagram, and Facebook.

Pros
- Offers high-quality export options to retain video quality while saving it.
- Offers a watermark removal option that helps in self-promotion.
Cons
- The application does not offer custom options for speed change, which limits creativity.
2. Slow Motion Video Maker
Open the doors of creativity with this free slo-mo app that is designed to modify video speed. The application slows down a video to one-fourth of its standard speed. Along with slowing down normal videos, you can bring back hyper-lapse video to normal speed. The tool offers a timeline editing panel for scene-specific editing.

Pros
- You can also increase the video speed using this application.
- Create and edit videos without worrying about their quality, as the app ensures high quality.
Cons
- Audience demand for more video playback options for fast and slow motion.
3. Slow Motion Video Camera
Do you want to create seamless slow motions and SloPros using a free slow-motion app? This application transforms your video into slo-mos using its playback speed options. There are five options for creating a slow motion that ranges from 1x to 5x. The application is compatible with Android version 4.3 and higher versions.

Pros
- Seamless supports all video formats to create a SloPro video.
- Offers visual and audio assets to enhance your video post-production.
Cons
- Shows a lot of Ads that annoy editors the most, especially during editing.
4. Splice - Video Editor & Maker
This free slow-motion app changes the speed of your video using a speed slider and timeline. The audio tracks are displayed separately on the timeline, which means you can maintain audio pitch and quality. Create slow motion for specific scenes or the whole video while providing adjustment options. There are 400+ music tracks in its audio assets library.

Pros
- A powerful interface that is an all-in-one video editor for creating compelling videos.
- Timeline editing interface to adjust text, visual, and speed effects.
Cons
- Doesn’t offer some important features like project file backup options that are on paid plans.
5. Video Speed Changer: SlowMo F
Use this free slo-mo app to create slow-motion videos in the best quality possible. The application offers distinct speed options, the slowest being 0.5x. With its timeline editing interface and trim options, you can apply an effect to specific video segments. The editor streamlines videos in any format and allows you to share them on social platforms.

Pros
- An intuitive user interface with high-quality video processing for optimized results.
- Provides regular updates in your system notifications to edit better.
Cons
- The editor comes with multiple ad displays, and there is no paid plan to avoid them.
Part 2: Directed iOS Apps For Functioning Slow Motion Video Editing
Being an iOS user, you might seek a different list of free slow-mo apps for your device. When creating a slow-motion video , it is preferred that you go by this provided list of applications. This will help you manage a good-quality of slow motion video in no time:
- SloMo Slow Motion Video Editor
- Video Editor & Maker – Vidma
- Slow Motion Video Editor
- Velomingo: Velocity Edit Maker
- InShot – Video Editor
1. SloMo Slow Motion Video Editor
Are you in search of a free slow-motion app for iPhone with an intuitive user interface? This video editor specializes in slow-motion content and assists in other speed modification tasks. Its interface reflects simplicity as it initiates editing immediately after import. Tailored to create slo-mo, the application boosts video frame rates up to 120fps and 240fps.

Pros
- Offers a smooth, slow motion with a still frame option to highlight a part.
- Offers 40+ visual features to enhance the graphical element in your videos.
Cons
- The application needs to fix some bugs related to its subscription plans.
2. Video Editor & Maker – Vidma
Are you in pursuit of a free slo-mo app that seamlessly produces trending slow-motion videos? Its Velocity Edit Maker tool is tailored to meet your needs. With seamless controls over playback speed and positioning on the velocity graph, you can create amazing slo-mos. The application features a beginner’s level speed change interface with a voice edit option.

Pros
- AI-backed algorithms that allow automated art generation via prompts for graphics.
- Offers keyframing that helps you to transform boring video via animations throughout.
Cons
- The free version lacks flexibility in some features, and you’ll have to avail the paid versions.
3. Slow Motion Video Editor
If you want to attain a professional-grade slow-motion effect on your iPhone, employ this free slow-motion app. The editor comes with a wide array of customizable speed settings to achieve the speed change goals. It leverages a sophisticated interface featuring a timeline bar and velocity graph. To control speed, you can employ a downward slide gesture on different timelines.

Pros
- Built-in music assets that fit both slo-mo and time-lapse videos.
- Creates slow-motion or even high-speed videos without declining their resolutions.
Cons
- It is only specified for speed change and lacks editing features; hence, users need to switch a lot.
4. Velomingo: Velocity Edit Maker
Embarking on the journey of crafting slow-motion sequences with precision using this free slow-motion app. Users are free to use the pre-installed velocity presets on their videos. These will result in captivating slow-motion and high-speed effects. While you cannot customize these presets, the application ensures slow-motion quality along with audio and visual quality maintenance.

Pros
- Upon export, you can improve the video quality and remove the watermark.
- Avoid any quality loss upon export by directly publishing content to social applications.
Cons
- Lacks a custom preset option because if you have to add the same effect, you will need to do the editing all over again,
5. InShot – Video Editor
The free slow-motion app assists in the creation of effective slow motions with other features. It introduces an uncomplicated technique for decreasing video speed through a slider. With its timeline editing and selective time frame options, you can apply slow motion to specific video parts. It not only offers slow motion but also fast motion effects with an extensive interface.

Pros
- The free version allows users to remove watermarks without any hassle.
- The Chroma key function cuts out the object and removes the background efficiently.
Cons
- Restriction of creative assets in the free version, and you’ll have to avail yourself of a subscription.
Part 3: Make Slow Motion Video Making Easy With Wondershare Filmora
There is a lot of competition for free slow-motion apps in the digital market. The platform, with an intuitive interface and more advanced options, stands at the top. Among such winning platforms include Wondershare Filmora, which is a video editor. It offers the latest features with AI integrations that keep users amazed. You can embrace creativity in your projects while saving hours of effort.
This platform can assist beginners and professionals by easing their tasks. If we come to the point, Filmora allows you to slow down your videos with customization. Besides, you can use its AI feature to get desired music and assistance through copilot editors.
Free Download For Win 7 or later(64-bit)
Free Download For macOS 10.14 or later
Integral Features of Filmora to Discover
Filmora is not just limited to cutting or merging tools; you can alter imaginations into reality. If you want to know how to read the main functionalities given.
AI Thumbnail Creator
As a content creator, you must know that thumbnail grab viewer’s attention to watch the video. That’s why creating an attractive thumbnail remains integral to video editing. Filmora offers an AI feature to ease this process with creativity. It provides thumbnail templates that you can edit and align with your videos. Besides, it can automatically detect the best shots in the video and bring it out as a thumbnail.
Speed Ramping
The literal meaning of speed ramping is a smooth change in video speed. You will not find speed ramping in the above-discussed free slow-motion apps. Filmora allows you to adjust the extent you want to slow down or speed up the video simultaneously. Besides a smooth transition in speed, it ensures the high quality of your slow-motion videos.
AI Image
If you are tired of internet surfing for copyright-free images, head to Filmora. Using the AI Image generator of Filmora, you will own the legal rights of the created image. To get the desired image, you have to describe some points that you want in the image. Optionally, you can pick one of the available image styles to get accurate results.
AI Smart Masking
Discover the endless possibilities on Filmora and use advanced skills to create transitions. It provides smart masking that recognizes objects in videos and automatically generates a mask. With AI masking, you can perform color correction on your media. Also, it can freeze frames to craft stunning still images. Users can mask objects and change video backgrounds with a single brush stroke.
AI Audio Stretch
Imagine finding a perfect song for a Vlog that is shorter in length for your video. This situation confuses you about switching to another song or cutting the video duration. Not more with Filmora, because it offers AI audio stretch that understands vocals in music. Thus, you will get re-timed audio instantly. Plus, it can remix different audio clips to produce a dynamic suite of soundtracks.
Conclusion
In short, creating slow-motion videos is necessary to maintain your social persona. Anyone can turn their videos into slow motion without putting effort into editing. This article has also shown some of the best choices in free slow-motion apps for Android and iOS. However, if you want more options than just slowing down videos, you should try Wondershare Filmora.
Make A Slow Motion Video Make A Slow Motion Video More Features
Part 1: Progressive Android Application For Creating Free Slow-Mos
Starting with Android applications, there are some great free slow-motion apps you can come across. An overview of such apps will help you find out the best option to go with in Android:
- Velomingo - Velocity Edit Maker
- Slow Motion Video Maker
- Slow Motion Video Camera
- Splice - Video Editor & Maker
- Video Speed Changer: SlowMo F
1. Velomingo - Velocity Edit Maker
Find and transform your videos by applying multiple velocity templates using this free slow-motion app. For someone who isn’t very skilled at creating slow motions, this application can be helpful. It provides hundreds of pre-developed speed change templates for creating slow motions. After creating slo-mos, you can share them on your social handles like TikTok, Instagram, and Facebook.
Pros
- Offers high-quality export options to retain video quality while saving it.
- Offers a watermark removal option that helps in self-promotion.
Cons
- The application does not offer custom options for speed change, which limits creativity.
2. Slow Motion Video Maker
Open the doors of creativity with this free slo-mo app that is designed to modify video speed. The application slows down a video to one-fourth of its standard speed. Along with slowing down normal videos, you can bring back hyper-lapse video to normal speed. The tool offers a timeline editing panel for scene-specific editing.
Pros
- You can also increase the video speed using this application.
- Create and edit videos without worrying about their quality, as the app ensures high quality.
Cons
- Audience demand for more video playback options for fast and slow motion.
3. Slow Motion Video Camera
Do you want to create seamless slow motions and SloPros using a free slow-motion app? This application transforms your video into slo-mos using its playback speed options. There are five options for creating a slow motion that ranges from 1x to 5x. The application is compatible with Android version 4.3 and higher versions.
Pros
- Seamless supports all video formats to create a SloPro video.
- Offers visual and audio assets to enhance your video post-production.
Cons
- Shows a lot of Ads that annoy editors the most, especially during editing.
4. Splice - Video Editor & Maker
This free slow-motion app changes the speed of your video using a speed slider and timeline. The audio tracks are displayed separately on the timeline, which means you can maintain audio pitch and quality. Create slow motion for specific scenes or the whole video while providing adjustment options. There are 400+ music tracks in its audio assets library.
Pros
- A powerful interface that is an all-in-one video editor for creating compelling videos.
- Timeline editing interface to adjust text, visual, and speed effects.
Cons
- Doesn’t offer some important features like project file backup options that are on paid plans.
5. Video Speed Changer: SlowMo F
Use this free slo-mo app to create slow-motion videos in the best quality possible. The application offers distinct speed options, the slowest being 0.5x. With its timeline editing interface and trim options, you can apply an effect to specific video segments. The editor streamlines videos in any format and allows you to share them on social platforms.
Pros
- An intuitive user interface with high-quality video processing for optimized results.
- Provides regular updates in your system notifications to edit better.
Cons
- The editor comes with multiple ad displays, and there is no paid plan to avoid them.
Part 2: Directed iOS Apps For Functioning Slow Motion Video Editing
Being an iOS user, you might seek a different list of free slow-mo apps for your device. When creating a slow-motion video , it is preferred that you go by this provided list of applications. This will help you manage a good-quality of slow motion video in no time:
- SloMo Slow Motion Video Editor
- Video Editor & Maker – Vidma
- Slow Motion Video Editor
- Velomingo: Velocity Edit Maker
- InShot – Video Editor
1. SloMo Slow Motion Video Editor
Are you in search of a free slow-motion app for iPhone with an intuitive user interface? This video editor specializes in slow-motion content and assists in other speed modification tasks. Its interface reflects simplicity as it initiates editing immediately after import. Tailored to create slo-mo, the application boosts video frame rates up to 120fps and 240fps.
Pros
- Offers a smooth, slow motion with a still frame option to highlight a part.
- Offers 40+ visual features to enhance the graphical element in your videos.
Cons
- The application needs to fix some bugs related to its subscription plans.
2. Video Editor & Maker – Vidma
Are you in pursuit of a free slo-mo app that seamlessly produces trending slow-motion videos? Its Velocity Edit Maker tool is tailored to meet your needs. With seamless controls over playback speed and positioning on the velocity graph, you can create amazing slo-mos. The application features a beginner’s level speed change interface with a voice edit option.
Pros
- AI-backed algorithms that allow automated art generation via prompts for graphics.
- Offers keyframing that helps you to transform boring video via animations throughout.
Cons
- The free version lacks flexibility in some features, and you’ll have to avail the paid versions.
3. Slow Motion Video Editor
If you want to attain a professional-grade slow-motion effect on your iPhone, employ this free slow-motion app. The editor comes with a wide array of customizable speed settings to achieve the speed change goals. It leverages a sophisticated interface featuring a timeline bar and velocity graph. To control speed, you can employ a downward slide gesture on different timelines.
Pros
- Built-in music assets that fit both slo-mo and time-lapse videos.
- Creates slow-motion or even high-speed videos without declining their resolutions.
Cons
- It is only specified for speed change and lacks editing features; hence, users need to switch a lot.
4. Velomingo: Velocity Edit Maker
Embarking on the journey of crafting slow-motion sequences with precision using this free slow-motion app. Users are free to use the pre-installed velocity presets on their videos. These will result in captivating slow-motion and high-speed effects. While you cannot customize these presets, the application ensures slow-motion quality along with audio and visual quality maintenance.
Pros
- Upon export, you can improve the video quality and remove the watermark.
- Avoid any quality loss upon export by directly publishing content to social applications.
Cons
- Lacks a custom preset option because if you have to add the same effect, you will need to do the editing all over again,
5. InShot – Video Editor
The free slow-motion app assists in the creation of effective slow motions with other features. It introduces an uncomplicated technique for decreasing video speed through a slider. With its timeline editing and selective time frame options, you can apply slow motion to specific video parts. It not only offers slow motion but also fast motion effects with an extensive interface.
Pros
- The free version allows users to remove watermarks without any hassle.
- The Chroma key function cuts out the object and removes the background efficiently.
Cons
- Restriction of creative assets in the free version, and you’ll have to avail yourself of a subscription.
Part 3: Make Slow Motion Video Making Easy With Wondershare Filmora
There is a lot of competition for free slow-motion apps in the digital market. The platform, with an intuitive interface and more advanced options, stands at the top. Among such winning platforms include Wondershare Filmora, which is a video editor. It offers the latest features with AI integrations that keep users amazed. You can embrace creativity in your projects while saving hours of effort.
This platform can assist beginners and professionals by easing their tasks. If we come to the point, Filmora allows you to slow down your videos with customization. Besides, you can use its AI feature to get desired music and assistance through copilot editors.
Free Download For Win 7 or later(64-bit)
Free Download For macOS 10.14 or later
Integral Features of Filmora to Discover
Filmora is not just limited to cutting or merging tools; you can alter imaginations into reality. If you want to know how to read the main functionalities given.
AI Thumbnail Creator
As a content creator, you must know that thumbnail grab viewer’s attention to watch the video. That’s why creating an attractive thumbnail remains integral to video editing. Filmora offers an AI feature to ease this process with creativity. It provides thumbnail templates that you can edit and align with your videos. Besides, it can automatically detect the best shots in the video and bring it out as a thumbnail.
Speed Ramping
The literal meaning of speed ramping is a smooth change in video speed. You will not find speed ramping in the above-discussed free slow-motion apps. Filmora allows you to adjust the extent you want to slow down or speed up the video simultaneously. Besides a smooth transition in speed, it ensures the high quality of your slow-motion videos.
AI Image
If you are tired of internet surfing for copyright-free images, head to Filmora. Using the AI Image generator of Filmora, you will own the legal rights of the created image. To get the desired image, you have to describe some points that you want in the image. Optionally, you can pick one of the available image styles to get accurate results.
AI Smart Masking
Discover the endless possibilities on Filmora and use advanced skills to create transitions. It provides smart masking that recognizes objects in videos and automatically generates a mask. With AI masking, you can perform color correction on your media. Also, it can freeze frames to craft stunning still images. Users can mask objects and change video backgrounds with a single brush stroke.
AI Audio Stretch
Imagine finding a perfect song for a Vlog that is shorter in length for your video. This situation confuses you about switching to another song or cutting the video duration. Not more with Filmora, because it offers AI audio stretch that understands vocals in music. Thus, you will get re-timed audio instantly. Plus, it can remix different audio clips to produce a dynamic suite of soundtracks.
Conclusion
In short, creating slow-motion videos is necessary to maintain your social persona. Anyone can turn their videos into slow motion without putting effort into editing. This article has also shown some of the best choices in free slow-motion apps for Android and iOS. However, if you want more options than just slowing down videos, you should try Wondershare Filmora.
A Vacation Slideshow Is a Great Way to Relive the Vacation Memories and Also Share Them with Your Loved Ones. If You Are Looking for Ways to Create a Slideshow in Just a Few Minutes, We Will Help You with the Best Tool
How to Make a Vocation Slideshow in Minutes
An easy yet powerful editor
Numerous effects to choose from
Detailed tutorials provided by the official channel
Who does not love vacations, but the saddest part of it is getting over? So, to relive your vacation memories and also share them with your dear ones is by creating a slideshow. With an interesting slideshow, you can present all your special vacation moments in an interesting and creative manner.

To create a vacation slideshow quickly and easily there are several factors that can be considered. Keep reading below to learn about these.
In this article
01 Tips for Creating a Vacation Slideshow in 5 Minutes
02 [Best Software for Creating a Vacation Slideshow in 5 Minutes- Wondershare Filmora](#Part 2)
Part 1 Tips For Creating A Vacation Slideshow In 5 Minutes
There are several useful tips that can help you create a vacation slideshow in just a few minutes. Check them below.

01Choose A Theme And Select Relevant Pictures
First of all, select a story or a theme for your holiday slideshow, and then choose the most relevant images and videos that can be included in the slideshow. With hundreds of images and videos for any particular trip selecting a few is the most cumbersome task and once you have a story in mind, picking up a few images becomes easy.
01Use Templates
Use a template for creating a slideshow as the readymade design will already help you get half the task done. Once you have the desired template, you simply need to add the pictures and other elements. There are several sites and tools where you can get travel, vacation, and holiday templates in different styles.
01Use A Professional Software For Editing And Creating A Software
To create a traveling sideshow that is eye-catchy, interesting, and also can be created in no time, a professional tool works as the best option. These programs have built-in features for image and video editing and in just a few simple clicks, you can create a professional-looking slideshow of your choice.
Part 2 Best Software For Creating A Vacation Slideshow In 5 Minutes- Wondershare Filmora
Creating a slideshow may sound like a simple task of adding a few pictures and videos, but in actual when you sit and start with the process it becomes quite hassled and time-consuming. As discussed above, the use of professional software will make the task simpler and quicker. One such software that we recommend here for creating a slideshow, editing videos, and other similar tasks is Wondershare Filmora Video Editor .
This Windows and Mac-based software can edit your videos like a pro and can help you create a slideshow with interesting elements like overlays, effects, templates, and more. The interface is user-friendly, which makes the software apt for all users.
You can add interesting transitions, and effects, edit images and videos and also share your created slideshow on YouTube and other sites.
For Win 7 or later (64-bit)
For macOS 10.12 or later
Steps for creating a vacation slideshow using Wondershare Filmora
Step 1. Download, install and launch the software on your system. Choose the New Project option from the main interface of the software.
Step 2. The images and the videos that have to be added to the slideshow have to be imported and added to the software Media Library. These files can be edited using the features like rotate, crop, and others. If needed you can even change the order of the files.
Step 3. Next, move the images and videos to the timeline by simply dragging them.
Step 4. Now add the transitions from the available designs, effects, filters, and also the music. You can add a local audio file or can also use it from the built-in library at the site.
Step 5. Finally, export and save the created slideshow to the local system or a DVD. There is also an option to share the slideshow directly to Vimeo or YouTube.
● Ending Thoughts →
● A vacation slideshow is a great way to bring together memorable pictures of your trip in a creative manner.
● To create an impressive slideshow quickly use a template, pick up a story, and make use of professional software.
● Wondershare Filmora is an excellent tool for creating a slideshow in just 5 minutes and in a hassle-free manner.
Who does not love vacations, but the saddest part of it is getting over? So, to relive your vacation memories and also share them with your dear ones is by creating a slideshow. With an interesting slideshow, you can present all your special vacation moments in an interesting and creative manner.
To create a vacation slideshow quickly and easily there are several factors that can be considered. Keep reading below to learn about these.
In this article
01 Tips for Creating a Vacation Slideshow in 5 Minutes
02 [Best Software for Creating a Vacation Slideshow in 5 Minutes- Wondershare Filmora](#Part 2)
Part 1 Tips For Creating A Vacation Slideshow In 5 Minutes
There are several useful tips that can help you create a vacation slideshow in just a few minutes. Check them below.
01Choose A Theme And Select Relevant Pictures
First of all, select a story or a theme for your holiday slideshow, and then choose the most relevant images and videos that can be included in the slideshow. With hundreds of images and videos for any particular trip selecting a few is the most cumbersome task and once you have a story in mind, picking up a few images becomes easy.
01Use Templates
Use a template for creating a slideshow as the readymade design will already help you get half the task done. Once you have the desired template, you simply need to add the pictures and other elements. There are several sites and tools where you can get travel, vacation, and holiday templates in different styles.
01Use A Professional Software For Editing And Creating A Software
To create a traveling sideshow that is eye-catchy, interesting, and also can be created in no time, a professional tool works as the best option. These programs have built-in features for image and video editing and in just a few simple clicks, you can create a professional-looking slideshow of your choice.
Part 2 Best Software For Creating A Vacation Slideshow In 5 Minutes- Wondershare Filmora
Creating a slideshow may sound like a simple task of adding a few pictures and videos, but in actual when you sit and start with the process it becomes quite hassled and time-consuming. As discussed above, the use of professional software will make the task simpler and quicker. One such software that we recommend here for creating a slideshow, editing videos, and other similar tasks is Wondershare Filmora Video Editor .
This Windows and Mac-based software can edit your videos like a pro and can help you create a slideshow with interesting elements like overlays, effects, templates, and more. The interface is user-friendly, which makes the software apt for all users.
You can add interesting transitions, and effects, edit images and videos and also share your created slideshow on YouTube and other sites.
For Win 7 or later (64-bit)
For macOS 10.12 or later
Steps for creating a vacation slideshow using Wondershare Filmora
Step 1. Download, install and launch the software on your system. Choose the New Project option from the main interface of the software.
Step 2. The images and the videos that have to be added to the slideshow have to be imported and added to the software Media Library. These files can be edited using the features like rotate, crop, and others. If needed you can even change the order of the files.
Step 3. Next, move the images and videos to the timeline by simply dragging them.
Step 4. Now add the transitions from the available designs, effects, filters, and also the music. You can add a local audio file or can also use it from the built-in library at the site.
Step 5. Finally, export and save the created slideshow to the local system or a DVD. There is also an option to share the slideshow directly to Vimeo or YouTube.
● Ending Thoughts →
● A vacation slideshow is a great way to bring together memorable pictures of your trip in a creative manner.
● To create an impressive slideshow quickly use a template, pick up a story, and make use of professional software.
● Wondershare Filmora is an excellent tool for creating a slideshow in just 5 minutes and in a hassle-free manner.
Also read:
- New 2024 Approved Having Issues Trying to View SRT Files when You Add Subtitle Files for VLC? Learn the Right Ways to Do so and the Best Alternative Solution
- New 2024 Approved 8 Tips to Apply Cinematic Color Grading to Your Video
- Updated The Background in Your Footage Might Be Bland or Unpleasant. This Article Will Discuss Video Background Templates You Can Use to Spice Things up and Make Your Videos Go Viral for 2024
- New In 2024, In This Guidepost, Youll Learn What an HDRI Photo Is and How to Use the Best Free HDRI Program to Edit Photos. Youll Also Know the Difference Between HDR and HDRI
- Updated In 2024, Tiktok Aspect Ratio Is a Crucial Element to Succeeding in the Tiktok Algorithm. Here Are some Suggestions to Improve Video Quality and Land on the for You Page
- Updated In 2024, Learn How to Effectively Use Masking in After Effects with This Comprehensive Guide. Includes Step-by-Step Instructions and an Alternative Masking Technique
- Learn How to Blur a Still or Moving Part of Video
- How to Make Video Fade to Black in Movie Maker Easily for 2024
- New Do You Have Any Idea About Changing the Video Speed Using the Editors? Had You Worked with the VLC Playback Speed? This Article Enlightens You with the Best Video Edits Using the Perfect Tool in the Digital Space
- New 2024 Approved Do You Want to Professionally Blur the Background in Your Video? Read This Article to Find Out the Easiest Way to Blur the Background in Videos Using Adobe After Effects
- Updated In 2024, How to Add Effects in Premiere Pro
- Updated In 2024, Turn Your Text Into a Podcast Made Possible
- How to Add Freeze Frame to Your Video From Any Device, In 2024
- 10 Top Innovative AR Video Effects to Check Out for 2024
- New How to Create Discord Logo GIF for 2024
- New Getting To Know More About the Video Editing Interface of Wondershare Filmora for 2024
- 2024 Approved We All Know Very Well that a 1-Second-Video Has Several Images in a Single Row. Even with iMovie Time-Lapse, You Can Create This! So, without Any Further Ado, Lets Learn How to Make a Timelapse in iMovie
- New 2024 Approved Looking Forward to Try Hands at Using the Icecream Slideshow Maker Program to Create High End Slideshow Presentations? Stay Here for a Complete Insight Into the Process
- Updated How to Create a Glitch Text Effect, In 2024
- Updated 2024 Approved Getting To Know More About the Video Editing Interface of Wondershare Filmora
- Updated 2024 Approved Enhance Social Media Posts with Transparent GIFs that Leave Your Peers in Awe
- Updated Do You Want to Replace the Sky in Your Media? Read the Article to Learn How to Change the Sky App on Your Mobile Phone
- Updated Want to Make Your Slideshows More Fun and Exciting? Follow the Given Discussion to Know How to Make a Slideshow Gif, Thereby Making Your Slideshow More Enjoyable than Ever for 2024
- 2024 Approved Finding The Best LUTs for Wondershare Filmora
- A Roster of 8 Top Color Match Generators
- Updated 2024 Approved Find Out The Best Dark Moody LUTs During Editing
- New In 2024, How to Change Video Thumbnail on Google Drive
- Updated 2024 Approved How to Combine Multiple Videos Into One on Instagram
- The Ultimate Guide to Countdown Animation in Videos
- New Best Photo Video Maker Apps with Song PC, Mobile, Online
- Updated List of Supported Whatsapp Video Format You May Want to Know
- New How to Brighten Video in Premiere Pro
- Updated Using This Article as a Reference, the Users Would Create a Café Meal Intro and YouTube End Screen While Knowing Multiple Ways to Download Cooking Background Music
- Easy Guide to Apply Slow Zoom Effects to Videos for 2024
- Updated In 2024, Step by Step to Crop a Video with CyberLink PowerDirector
- New Detailed Tutorial to Crop Video in KineMaster for 2024
- In 2024, How to Create a Slideshow GIF?
- Updated In 2024, How to Fade to Black Premiere Pro
- New Best Image (JPG/PNG) to GIF Converters
- Updated What Is Lumetri Color and How Do You Use It in Adobe After Effects? Find Out the Numerous Functions of Lumetri Panel and Ways to Apply Them to Your Video
- 2024 Approved Achieving GoPro Slow Motion with Quality An In-Depth Overview
- Updated In 2024, Best iPhone LUTs App to Use
- Are You Looking to Make a Thumbnail for Your Fortnite Video? This Article Features a Guide Explaining Creating a Fortnite Motion Blur Thumbnail for 2024
- New 2024 Approved Online Video Makers to Use
- Updated 2024 Approved What Is First Impression Review Video
- In 2024, Movavi Video Editor Plus Review
- Updated 2024 Approved Learn How to Make Modern TikTok Velocity Dance Videos in Filmora Just Like the Ones You See on TikTok and Instagram Reels
- Video Editing Tips to Know Before Editing First Draft
- 9 Best Phone Monitoring Apps for Infinix Hot 40i | Dr.fone
- 5 Ways to Reset Motorola Moto G84 5G Without Volume Buttons | Dr.fone
- Updated 2024 Approved How to Enable the Text to Speech Function on iPhone
- How Can Samsung Galaxy S23 FEMirror Share to PC? | Dr.fone
- How to Unlock Samsung Galaxy A05 Phone Pattern Lock without Factory Reset
- The way to convert MTS for Edge 2023
- In 2024, What Legendaries Are In Pokemon Platinum On Apple iPhone 6 Plus? | Dr.fone
- Repair damaged, unplayable video files of Nubia Red Magic 8S Pro on Mac
- 3 Easy Solutions to Hard Reset Vivo G2 | Dr.fone
- Is your Honor X7b working too slow? Heres how you can hard reset it | Dr.fone
- In 2024, How to Fix Pokemon Go Route Not Working On Motorola Moto G73 5G? | Dr.fone
- 4 Ways to extract data from corrupt Excel 2013 file | Stellar
- In 2024, How Can We Bypass Itel P55 FRP?
- 2 Ways to Transfer Text Messages from Lava Yuva 3 Pro to iPhone 15/14/13/12/11/X/8/ | Dr.fone
- In 2024, Tips and Tricks for Setting Up your Xiaomi Redmi K70 Phone Pattern Lock
- In 2024, A Quick Guide to Lava Blaze 2 Pro FRP Bypass Instantly
- How to Spy on Text Messages from Computer & Huawei P60 | Dr.fone
- Delete Gmail Account With/Without Password On Vivo Y27 5G
- New Multiple Ways How To Remove iCloud Activation Lock From your Apple iPhone 6s Plus
- 2024 Approved Guide on How to Create GIF in WhatsApp iPhone
- In 2024, Bypass Activation Lock On iPhone X - 4 Easy Ways
- The Ultimate Guide to Oppo A38 Pattern Lock Screen Everything You Need to Know
- What is Fake GPS Location Pro and Is It Good On Infinix Hot 40 Pro? | Dr.fone
- iPhone 6s Backup Password Never Set But Still Asking? Heres the Fix
- In 2024, How to Bypass Google FRP Lock from OnePlus Ace 3 Devices
- 15 Best Sites to Watch Cartoons Online Free And So Can You for 2024
- Simple ways to get lost videos back from Smart 8
- Full Tutorial to Bypass Your Infinix Zero 30 5G Face Lock?
- Updated In 2024, How To Access and Watch Nonstop NBA Live Stream Free Online
- In 2024, Preparation to Beat Giovani in Pokemon Go For Meizu 21 | Dr.fone
- In 2024, Full Tutorial to Bypass Your Samsung Galaxy A34 5G Face Lock?
- 5 Ways to Reset Poco M6 Pro 5G Without Volume Buttons | Dr.fone
- Full Guide to Unlock Your Infinix Note 30 VIP
- Remove the lock of Nokia G22
- Top 12 Illusion Gifs Top Picks for 2024
- Methods to Change GPS Location On Realme C55 | Dr.fone
- In 2024, Can You Unlock iPhone 14 Plus After Forgetting the Passcode?
- In 2024, How To Create Animated Clipart in PowerPoint
- 3 Easy Solutions to Hard Reset Vivo Y55s 5G (2023) | Dr.fone
- How to retrieve erased messages from Vivo S17t
- In 2024, Top 10 Nokia C110 Android SIM Unlock APK
- In 2024, How to Reset a Locked Xiaomi Redmi Note 12 Pro+ 5G Phone
- New What Is ChatGPT for 2024
- In 2024, How to Delete iCloud Account with or without Password from your iPhone 15/Windows/Mac
- Is GSM Flasher ADB Legit? Full Review To Bypass Your Honor 90FRP Lock
- Title: Learn How to Easily Concatenate Videos Using FFmpeg in This Step-by-Step Guide. From Installation to Execution, We Cover It All to Streamline Your Video Editing Process for 2024
- Author: Morgan
- Created at : 2024-04-24 01:13:15
- Updated at : 2024-04-25 01:13:15
- Link: https://ai-video-editing.techidaily.com/1713950658646-learn-how-to-easily-concatenate-videos-using-ffmpeg-in-this-step-by-step-guide-from-installation-to-execution-we-cover-it-all-to-streamline-your-video-editi/
- License: This work is licensed under CC BY-NC-SA 4.0.
