
:max_bytes(150000):strip_icc():format(webp)/the-10-best-password-managers-of-2022-6543213-7650bf3ab2eb41a08dbee8713ce811e3.jpg)
LumaFusion Offers Various Look Up Table Presets, or LUTs, Such as FiLMiC deLog and FiLMiC DeFlat, and Several Stylistic LUTs for Use with Neutral Use Video. You Can Also Manually Add the LUTs for 2024
LumaFusion Offers Various Look Up Table Presets, or LUTs, Such as FiLMiC deLog and FiLMiC DeFlat, and Several Stylistic LUTs for Use with Neutral Use Video. You Can Also Manually Add the LUTs
LumaFusion is one of the most complex iPad and iPhone video editing apps. Many of its customers adore it, and it has some incredible capabilities that you’d find incompetent editing software. They’ve effectively opened up the realm of LUTs to iPhone and iPad users.
LumaFusion LUTs are individual files that act as containers in LumaFusion. This container file includes standard LUT data as well as LumaFusion-specific color preset data. A LumaFusion LUT Preset file is similar to a Super LUT. LumaFusion can only employ one standard LUT at a time; however, LumaFusion LUT presets enable simultaneous Color Grading and Color Corrections.
How will LUTs help with color correction in Lumafusion
Colors in today’s cameras are vibrant, but they may continuously be improved. Color correction corrects the color that’s already there, whether it’s boosting the exposure to brighten a darker photo or increasing the saturation to make the colors pop. Color correction in other NLEs can be difficult, but not in LumaFusion.
The Color Presets tab in the Color & Effects section is where you begin color correcting footage. There are various presets from which to pick. I wouldn’t use these settings on my videos because they’re too stylized, but they’re there. You may alter any of the presets to your taste, so some of the more dramatic ones can be toned down. By picking the original setting, purists can color-fix their raw footage without using LumaFusion. Moving the sliders till the color seems perfect is all that’s required from there.
Exposure, contrast, highlights, shadows, mid-tones, and saturation and hue are all controlled by sliders. The color sliders can be used for a more forceful approach. But proceed with caution. The sliders are delicate, and it’s easy to overdo them. Play around with the sliders until you get the look you want. If you don’t like it, toss it in the trashcan and start over.
Color grading and color correction are not interchangeable terms. Color correction is a technical requirement, but color grading is primarily creative. You’ll have no command over the color grading process if you’re working with film material where primary colors aren’t even visible. Before diving into the creative LUTs, make sure you complete adequate color correcting.
Color grading, unlike color correction, adjusts the shot’s color to modify the atmosphere or feel. The only way to do that in LumaFusion is to play around with the color sliders under the Color Presets tab, but that’s not ideal. As previously stated, the three sliders are sensitive and limited. LumaFusion isn’t designed for color grading, which is OK. Thankfully, LumaFusion allows you to use LUTs.
Always color correct your footage before utilizing any LUTS, which entails changing the White-balance, Highlights, Contrast, and Shadows. Do not apply the LUTS to your footage directly.
How to use LUTs in Lumafusion?
Videographers, colorists, and editors use LUTs because they are efficient. Rather than starting from zero every time you work on a video editing project, you may speed up the color grading process using a LUT with predefined color profiles. It’s elementary to import LUTs. Simply import the preset files into LumaFusion and add the preset to your footage like an Instagram filter.
The Import button in the Color & Effects editor is the easiest way to load LUTs.
- Double click on any video/photo clip on the timeline to access the Clip Editors.
- At the bottom of the Clip Editor UI, select the Color & Effects tab.
- The import button is located directly below the effect preset library.

How to use LUTs in Lumafuison
LUTs must be loaded via the LumaFX clip editor at the moment. Follow the steps below to accomplish this:
- To access the LumaFX UI, double-tap any video/photo clip in the timeline.
- At the bottom of the LumaFX UI, select the ‘Color & Effects’ tool.
- In the upper right panel, press the cube icon.
- The import button is located directly below the effect preset library.

Load LumaFX LUTs
- Once hit, it will display your transfer site options; select your desired transfer site and navigate to the folder where your LUTs are stored.
- Select and import all of the LUTs in the folder.

Import LUTs
Free LUTs Resource for Lumafusion
Choosing the appropriate LUT pack will boost your photography and videography immediately. With our quick guide to the top free LUTs available, you can find the appropriate one for you.
1. Jaun Melara free LUTs
LUTs aren’t simply for stylizing video. They’re frequently employed as a color correction tool to ensure that your colors are shown correctly in various formats. Juan Melara has provided a free LUT set to assist you in color correcting your footage for printing on film stock. These free LUTs will provide modest stylization to your footage if you don’t want to send it to print.
Melara developed this video to demonstrate his free LUTs in action. The colors are more subdued than in the other LUTs on this list. This free LUT pack is ideal if you’re looking to produce a modern-style cinematic color grade. Melara also has a great article about using LUTs to create a lovely color grade. DaVinci PowerGrades are available for several of these LUTs. They color correct your film in the same way as LUTs do, but you’ll have more flexibility over individual PowerGrade components.

Jaun Melara free LUTs
2. Small Hd free LUTs
SmallHD, a company that makes small, full HD on-camera monitors, is giving away a free set of color grades that reproduce the appearance of seven classic movies. The company is also releasing a series of video lessons that show how to get the most out of these effects throughout production and post-production. Everything is completely free. The color grades are provided as a.zip file and are in the form of 3D LUT files created in DaVinci Resolve. If you’re unfamiliar with SmallHD, the company offers free LUTs for on-set monitoring in real-time. This free set of Movie Look LUTs is inspired by seven recent films, including Apocalypse Now’s warmth and The Matrix’s green overtones. Take use of SmallHD’s free LUT set if you want to give your footage a dramatic and cinematic vibe.

Small Hd free LUTs
3. Color Grading Central free LUTs
Color Grading Central is essential knowledge for any aspiring colorist or video editor who takes color seriously. CGC is a company that specializes in color grading. Their website has a wide range of outstanding color-related products, from grain to LUTs. They also provide their email members with a wealth of free color grading information. Free trials of some LUTs are also available, so you may try them out before you buy. They’re giving away an array of color presets, grains, and burns exclusively to their email list and the seven free color LUTs. We strongly recommend them if you want to give your footage a shot-on-film look.

Color Grading Central free LUTs
4. PremiumBeat Free LUTs
PremiumBeat has freely given countless LUT packs as well as other assets to any video editor or filmmaker over the years. Todd Blankenship has designed a fresh new set of FREE LUTs for Shutterstock, which is their latest addition. Todd chose distinct looks from films and pictures that inspire his daily work to create this bundle with attention and love. There are many options, and these looks will offer you a great place to start when it comes to grading your footage. They recently published an in-depth evaluation of Photon.io, a new color grading tool. Todd Blankenship, who ended up utilizing the tool to create these LUTs, wrote the initial review. The pack has been fine-tuned to replicate some clean, cinematic looks that you may use as a jumping-off point for your video.

PremiumBeat Free LUTs
5. Frank Glencairn free LUT
Despite having access to the most advanced filming gear, there’s something about a vintage film aesthetic that looks fantastic. Frank Glencairn has made a nice K-Tone LUT that is meant to look like vintage Kodachrome film. This film grade, which was formerly popular among photographers and filmmakers, has fallen out of favor due to the rise of digital cameras. With this free LUT, you can get the appearance of retro-looking reds, blues, and yellows.

Frank Glencairn free LUT
6. Reverse Tree Media free LUTs
Reverse Tree Media is releasing a new LUTS bundle that is absolutely free. In addition to LUTS, this LUTS collection includes utility LUTS, film grains, and a Black-Bar layer. For the color-grading procedure, this is critical. This bundle contains 56 free LUTS for various scenarios like weddings, television commercials, travel films, landscapes, Rec.709, and so on. It also has several useful LUTS and film grain overlays for 8mm, 16mm, and 35mm video, as well as a cinematic black bar PNG file with a ratio of 2.35:1 to assist you in achieving a more cinematic appearance quickly and save time. Check out the link to learn more about LUTS and to obtain their previous cinematic LUTS bundle, which is also free.

Reverse Tree
Wondershare Filmora11 Express Better
Achieve More
Grow Together
Free Download Free Download Learn More

![]()
Closing Thoughts:
LUTs are most typically used to build and store color profiles that can be utilized in other film projects. By using contrast and design, you can bring logs and flat materials to life. Everything you need to know is right here. You can now rush to your desk and fix your video.
Free Download Free Download Learn More
![]()
Closing Thoughts:
LUTs are most typically used to build and store color profiles that can be utilized in other film projects. By using contrast and design, you can bring logs and flat materials to life. Everything you need to know is right here. You can now rush to your desk and fix your video.
Looking for Simple Steps to Customize the Speed of Your Video in DaVinci Resolve? Find Out How You Can Do that and Discover an Easier Alternative to DaVinci Resolve
Slow-motion videos are in trend on social media platforms. You can shoot the footage in slow-motion mode or slow it down while editing the video. Similarly, if you are making a funny video, there are surely going to be parts where the video speeds up. Sped-up video clips have always been part of comic relief and entertainment for the audience. You will need a feature-rich video editor to customize the speed of your video.
DaVinci Resolve has established itself as a complete video editor. You can edit your video, correct the color, add visual effects and edit audio parts. You can undoubtedly change video speed in DaVinci Resolve. However, DaVinci Resolve’s user interface is slightly complex for beginners. We will instruct on how you can speed up a video using DaVinci Resolve. We will also suggest you an easier alternative if you are not in favor of DaVinci Resolve.
Part I. What are the Scenarios When You Need to Speed Up Video?
There are several scenarios when speeding up a video becomes a necessity. Here are the most probable ones that you can relate to.
Boring But Necessary Parts - There could be some sections in a long video that are necessary but boring to watch. You can’t bore your viewers and let them leave your video midway. Hence, you can speed up those sections to pass them away quickly.
Funny Videos - The subject’s actions in the video look very funny when you speed them up. Therefore, if you make funny videos to entertain your viewers, speeding up certain sections of your video with funny audio in the background should be a regular thing.
Short Videos - Short-duration videos are extremely popular on social media platforms.
People upload them as Stories and Statuses to entertain their followers regularly. Therefore, a sped-up video can shorten the duration, accommodate the necessary content, and fit the video duration requirements of the respective social media platforms.
Timelapse - Timelapse videos are a treat to watch. You can shoot the video in timelapse mode or speed up the video while editing. That is how you can fit hours of a video into a few minutes or seconds of video duration.
Part II. Speed Up Video using DaVinci Resolve
DaVinci Resolve is a professional video editor where you can change your video’s speed in several ways. You can instantly change your video clip’s speed by mentioning the speed in terms of percentage.
You can also use the advanced Speed Ramp option to customize the video speed unevenly. Besides, there are retime curves to adjust the video speed at your convenience. Let us go through the detailed guide on how to speed up the video in DaVinci Resolve 17.
Method 1. Change Clip Speed Option
The simplest way is through the Change Clip Speed option. You can explicitly mention the speed percentage as needed. To speed it up, mention speed percentage above 100. If you want to slow it down, the speed percentage will be below 100. Here are the steps you need to execute.
Step1 After you have placed the video clip onto the timeline, select the clip and right-click on it.

Step2 Tap “Change Clip Speed…” option.

Step3 Once the Change Clip Speed dialog box opens, modify the speed from 100% to something higher if you want to speed it up.

Step4 Click on the Change button when you are happy with the result.
Method 2. Speed Ramping Option
Speed ramping is a process where you can vary the speed of your video unevenly. It means you can speed up some portions while slowing down others. This is achieved through retime controls that let you edit the video clips in sections using speed points. Here are the steps to illustrate the process.
Step1 Right-click the video clip on your timeline. From the menu, select the Retime Controls option.

Step2 Move the play head where you want to change the speed. Click the arrow next to 100% and select the Add Speed Point option. Similarly, move the play head to another point and add a new speed point.

Step3 Click on the arrow next to 100% to change the speed between two-speed points. Go to the Change Speed option and select from the preset. Based on your preset speed selection, the video’s speed within the speed points will change.

Part III. Pros and Cons
Every video editor has its advantages as well as drawbacks. So if you think about changing video speed through DaVinci Resolve, check its pros and cons.
Pros
- Change the speed of the entire video clip instantly.
- Change the speed of certain sections of the video through speed ramping.
- Vary the speed of the video clip unevenly with Retime curves.
- Change video speed with Optical Flow for better motion representation.
Cons
- There are too many options to change video speed.
- The regular video speed-changing options produce jittery results.
- Some change video speed options are complicated to execute.
- There are reports of sudden crashes with too many video speed changes.
The cons are too grave to ignore. The learning curve is also steep too. Many look for an easier alternative to DaVinci Resolve speed ramp transition.
Part IV. A Simpler Alternative to DaVinci Resolve to Change Video Speed
Wondershare Filmora is perfectly suitable for you if you are looking for an easier alternative to DaVinci Resolve. Filmora comes with a simple user interface. You get almost the same features as you get in DaVinci Resolve as a video editor. Focusing on changing video speed, Filmora has similar options as DaVinci Resolve, but they are easier to operate.
Anyone can instantly change the speed of the entire or part of a video. There are uniform speed and simplified speed ramping options available for advanced users. You can customize the speed of a video clip as you need. There is not going to be any jittery motion when the speed is changed. In short, Filmora is tailor-made to fulfill all your demands for speeding up videos in easier steps.
Free Download For Win 7 or later(64-bit)
Free Download For macOS 10.14 or later
How Do You Change Video Speed in Filmora?
There are basically three ways to change video speed in Filmora. You can choose from presets for instant change. You can customize the video speed as well as use speed ramping for an advanced level of video speed change. We will now illustrate how to change video speed in Wondershare Filmora.
Watch this video to discover all the methods to change video speed in Filmora.
Method 1. Select From Speed Presets
You can instantly select from Speed Presets if you want to change your video speed in fewer steps. There are fast speed presets as well as slow speed presets available. Follow these steps to choose a speed preset.
Step1 Install Filmora on your computer (Windows or macOS). Open Filmora and select Create New Project.

Step2 Drag the video file from your computer to Filmora’s timeline. Choose video and tap Speed icon that you can find at the top of the timeline.

Step3 From the menu, go to the Fast or the Slow option and select a speed preset. Finally, you can export the file to save it to your computer.

Method 2. Alter Uniform Speed
If you want to customize the video speed as per your need, the Uniform Speed option is for you. You can select from 0.01X to 100X speed. The selected speed will be applicable to the entire video clip uniformly. Here are the steps to set uniform speed.
Step1 Once you have the video on the timeline, click on the Speed icon.
Step2 Choose the Uniform Speed option, which will open the Uniform Speed tab.

Step3 Adjust the speed slider to change the video speed as you need.

Step4 After setting the speed, click on the Ok button. Then you can export the video in any file format.
Method 3. Use Speed Ramping
Speed ramping provides you with a graph to customize the video speed. You can speed up and slow down different parts of your video as you think appropriate. As per the graph’s crests and troughs, the video’s speed varies. Here are the steps to execute.
Step1 Place the video file onto the timeline and go to the Speed icon.
Step2 Select the Speed Ramping option. This will open the Speed Ramping tab.

Step3 You can select any preset or select the Customize option. When you select the Customize option, you can edit the graph accordingly.

Step4 Click on the Ok button, followed by the Export button, to save the video.
Part V. Comparison Between DaVinci Resolve and Filmora
| Parameters | DaVinci Resolve | Filmora |
|---|---|---|
| Change Video Speed Options | Too Many | Appropriate |
| Video Speed Presets | Limited | Ample |
| Ease of Speed Change | Slightly Complicated | Very Easy |
| Export Options | Limited | Ample |
| Application Stability | Less stable | Highly stable |
| Average Rating | 3/5 | 4.5/5 |
| Pricing | High | Reasonable |
| Best For | Advanced video editors | Beginners and advanced video editors |
Conclusion
We have answered how you can use the speed ramp DaVinci Resolve 17 to speed up your video. We have also illustrated the steps to change speed settings in DaVinci Resolve. But many users look for an easier video editor to avoid DaVinci Resolve’s complicacy. Wondershare Filmora is that intuitive video editor where you can change video speed as you need. You can instantly choose from presets and customize the video speed throughout.
The cons are too grave to ignore. The learning curve is also steep too. Many look for an easier alternative to DaVinci Resolve speed ramp transition.
Part IV. A Simpler Alternative to DaVinci Resolve to Change Video Speed
Wondershare Filmora is perfectly suitable for you if you are looking for an easier alternative to DaVinci Resolve. Filmora comes with a simple user interface. You get almost the same features as you get in DaVinci Resolve as a video editor. Focusing on changing video speed, Filmora has similar options as DaVinci Resolve, but they are easier to operate.
Anyone can instantly change the speed of the entire or part of a video. There are uniform speed and simplified speed ramping options available for advanced users. You can customize the speed of a video clip as you need. There is not going to be any jittery motion when the speed is changed. In short, Filmora is tailor-made to fulfill all your demands for speeding up videos in easier steps.
Free Download For Win 7 or later(64-bit)
Free Download For macOS 10.14 or later
How Do You Change Video Speed in Filmora?
There are basically three ways to change video speed in Filmora. You can choose from presets for instant change. You can customize the video speed as well as use speed ramping for an advanced level of video speed change. We will now illustrate how to change video speed in Wondershare Filmora.
Watch this video to discover all the methods to change video speed in Filmora.
Method 1. Select From Speed Presets
You can instantly select from Speed Presets if you want to change your video speed in fewer steps. There are fast speed presets as well as slow speed presets available. Follow these steps to choose a speed preset.
Step1 Install Filmora on your computer (Windows or macOS). Open Filmora and select Create New Project.
Step2 Drag the video file from your computer to Filmora’s timeline. Choose video and tap Speed icon that you can find at the top of the timeline.
Step3 From the menu, go to the Fast or the Slow option and select a speed preset. Finally, you can export the file to save it to your computer.
Method 2. Alter Uniform Speed
If you want to customize the video speed as per your need, the Uniform Speed option is for you. You can select from 0.01X to 100X speed. The selected speed will be applicable to the entire video clip uniformly. Here are the steps to set uniform speed.
Step1 Once you have the video on the timeline, click on the Speed icon.
Step2 Choose the Uniform Speed option, which will open the Uniform Speed tab.
Step3 Adjust the speed slider to change the video speed as you need.
Step4 After setting the speed, click on the Ok button. Then you can export the video in any file format.
Method 3. Use Speed Ramping
Speed ramping provides you with a graph to customize the video speed. You can speed up and slow down different parts of your video as you think appropriate. As per the graph’s crests and troughs, the video’s speed varies. Here are the steps to execute.
Step1 Place the video file onto the timeline and go to the Speed icon.
Step2 Select the Speed Ramping option. This will open the Speed Ramping tab.
Step3 You can select any preset or select the Customize option. When you select the Customize option, you can edit the graph accordingly.
Step4 Click on the Ok button, followed by the Export button, to save the video.
Part V. Comparison Between DaVinci Resolve and Filmora
| Parameters | DaVinci Resolve | Filmora |
|---|---|---|
| Change Video Speed Options | Too Many | Appropriate |
| Video Speed Presets | Limited | Ample |
| Ease of Speed Change | Slightly Complicated | Very Easy |
| Export Options | Limited | Ample |
| Application Stability | Less stable | Highly stable |
| Average Rating | 3/5 | 4.5/5 |
| Pricing | High | Reasonable |
| Best For | Advanced video editors | Beginners and advanced video editors |
Conclusion
We have answered how you can use the speed ramp DaVinci Resolve 17 to speed up your video. We have also illustrated the steps to change speed settings in DaVinci Resolve. But many users look for an easier video editor to avoid DaVinci Resolve’s complicacy. Wondershare Filmora is that intuitive video editor where you can change video speed as you need. You can instantly choose from presets and customize the video speed throughout.
Top 10 Free WhatsApp Video Converter 2023
WhatsApp is one of the most popular apps for global users. It is a simple tool for sending messages and instant videos, and also sharing statuses. However, there is a size limit to sharing video files via WhatsApp. Plus, the app supports only certain types of video file formats.
At this point, using a high-quality WhatsApp video converter is a proper way to go. This article will let you know not only the best software but also web-based tools to convert WhatsApp video in any situation.
Which Video Formats Does WhatsApp Support?
“WhatsApp only allows me to send (a) video of maximum (of) 17 MB size, of duration 2:50 minutes. But my cousin has sent me a video of 35 MB, with (a) 5:40 minutes duration. How has this been possible?”
Indeed, WhatsApp has size and format-related restrictions, like a 16 MB size limit. However, you can access the WhatsApp Web version to share longer videos since it allows a size limit of 64 MB. Alternatively, you can reduce video size for WhatsApp with converter tools to compress, convert, and optimize video files**.**
The Best Video Formats for WhatsApp
This platform only supports specific video codec or format types that suits the pre-set compression standards.
WhatsApp-supported video formats
AVI, MP4, MOV, MKV, FLV audio codec, and 3 GP (/MPEG-4 video codec encoding).
WhatsApp allowed file size
16MB
To make sure that videos transfer safely and smoothly via WhatsApp, make the necessary size and codec conversion.
Best 5 Software to convert video for WhatsApp
Specific WhatsApp video converter types come in software versions for Mac or Windows users. You can download and launch them to use the features without network connection.
WinX HD Video Converter Deluxe
WinX HD Video Converter Deluxe is a user-friendly tool to convert video for WhatsApp, from different formats and devices. You can expect high-quality video output, reaching 4K to 8K resolution. Make necessary video codec and size changes to compress videos fit for WhatsApp-based sharing.

Converting Speed: High.
Compatible Platforms: WhatsApp, YouTube, Facebook, Instagram, Email, etc.
Supported Formats: MP4, GoPro devices, MKV, Drone devices, MOV, MTS, AVI, etc.
Rating: 3.6/5 (Top Ten Reviews)
Main Features:
- Multiple file sizes for conversion.
- Resolution up to 1080p or 4K.
- Change frame rate.
- The open-source platform is fit for Mac and Windows.
Pros
- No significant quality loss during conversions.
- Reduce GB-based sizes to MB.
- Stable compression process.
Cons
- Not for free.
- Limited advanced editor settings.
Filmora
Filmora is a high-quality WhatsApp video converter, it enables you convert any types of videos for WhatsApp, YouTube, also TikTok. Besides, Filmora is best for video editing functions, like cutting, trimming, rotating, compressing, and more. Also, get advanced editing functions like color correction, background removal, audio visualization, etc., before converting files in the WhatsApp-support format of choice.
Free Download For Win 7 or later(64-bit)
Free Download For macOS 10.14 or later

Converting Speed: High.
Compatible Platforms: YouTube, Vimeo, WhatsApp, etc.
Supported Formats: MKV, MP4, MOV, AVI, WMV, F4V, MP3, etc.
Rating: 8/10 (TrustRadius)
Main Features:
- Compress video during output as per file format type.
- Cut the size of the video to reduce the size.
- Advanced editing like background removal.
- High-quality HD resolution.
Pros
- Convert to different formats.
- Adjust the speed of the video.
- Trim file size.
Cons
- Advanced functions like watermark removal are available in premium plans.
- At least 10 GB of disk space is necessary for the device.
Wondershare Uniconverter
This software for Mac and Windows users is useful for converting different file formats into different output files. Here, you can add videos from the device library or cloud storage. Later, make conversion choices like video format type, scale size, etc.

Converting Speed: High
Compatible Platforms: WhatsApp, YouTube, etc.
Supported Formats: MP4 (Standard/4K), MKV, AVI, AVCHD, FLV, MP3, etc.
Rating: 5/5 (GetApp)
Main Features:
- Split screen video support.
- Adjust the frame rate of videos.
- Customize video filters.
- Converts HD and SD files.
Pros
- Video quality remains the same during conversion.
- Compress files to smaller sizes.
- Automated conversion.
Cons
- Advanced features like watermark removal require payment.
- Limited access to cloud storage.
HandBrake
HandBrake is a user-friendly and open-source WhatsApp video converter fit for different devices. You can convert and even edit the video files for other devices and compress the size without quality loss. See a preview before completing the changes.

Converting Speed: Medium-High.
Compatible Platforms: All browser types on Linux, Windows, and Mac devices.
Supported Formats: MKV, MP4 (mainly M4V), and WebM.
Rating: 4/5 (TechRadar)
Main Features:
- Make chapter markers on files.
- Many pre-set video filters are available.
- Live preview of the video before conversion.
- Convert Blu-ray and DVD video files.
Pros
- Open-source platform.
- Batch scanning and encoding files in queues.
- CFR and VFR-based compatibility.
Cons
- No direct conversion of the file to WhatsApp.
- Limited variety in output file format choices.
Freemake Video Converter
Freemake is a top-notch video converter tool that users can try to create and compress different file formats for free. Download the output file in any form and high-resolution quality.

Converting Speed: High.
Compatible Platforms: YouTube, Vimeo, WhatsApp, etc.
Supported Formats: AVI, MP4, WMV, MKV, 3GP, MP3, DVD, FLV, SWF, MOV, Divx, MTS, etc.
Rating: 4.5/5 (TechRadar)
Main Features:
- Supports multiple video codecs like MPEG4, and AV1.
- Batch processing is possible.
- Edit videos by rotation, trimming, etc.
- Encode the videos.
Pros
- No extra cost for conversions.
- Users can convert bigger files as well.
- Supports videos from different devices and online platforms, like Vimeo.
Cons
- Users cannot directly prepare/send WhatsApp videos.
- It is mainly allowed on Windows.
Top 5 Online Video Converter for WhatsApp
Online tools are available that allow users to convert videos to WhatsApp format. The top 5 of them are listed here.
FlexClip
FlexiClip offers an online WhatsApp video converter for free to quickly change file formats into WhatsApp-supported options. In addition, you can use this tool to make other types of conversions like audio and image files.

Converting Speed: Medium-High.
Supported Formats: MOV, MP4, AVI, etc.
Rating: 4.4/5 (TrustPilot)
Main Features:
- Create video for social media marketing.
- Pre-set templates are available.
- Multiple stock images and videos are available.
- Rich-quality overlays and transitions.
Pros
- Dynamic types of vector elements are available.
- 1000+ text-based animations/pre-set styles present.
- High-quality transitions.
Cons
- Registration is vital to export files.
- It is hard to edit pre-saved videos.
Online Converter
This is a free WhatsApp video converter web service for users to change files to suit the WhatsApp platform quickly. In addition, you can decide the resolution of the video for output and even cut files based on timestamps.

Converting Speed: Medium-High.
Supported Formats: AVI, MOV, MP4, etc.
Rating: 3.6/5 (TrustPilot)
Main Features:
- Convert any file suitable for WhatsApp.
- Support cloud-based file insertion.
- Time-based video cutting for editing.
- Enable or disable the background audio track.
Pros
- Convert multiple files at a time.
- Different resolution-based choices are available.
- Add video URL to convert.
Cons
- Limited advanced settings.
- Does not support diverse file formats.
Clideo
Clideo is a suitable WhatsApp video converter that mainly compresses the files to WhatsApp-appropriate sizes. Moreover, you can insert your video file from cloud storage and quickly convert multiple files.

Converting Speed: Medium.
Supported Formats: MP4, AVI, WMV, VOB, MOV, etc.
Rating: 4.8/5 (TrustPilot)
Main Features:
- See preview before conversion.
- Automated file size-reducing parameters.
- Support file sizes upto 500 MB.
- Add a file from any device.
Pros
- Fast processing.
- Encryption-protected files.
- Intuitive interface.
Cons
- The uploading and conversion process can take a long time.
- The watermark is visible.
Kapwing
Kapwing’s online conversion tool can change video files and make them WhatsApp-compatible quickly. Users can customize different aspects of exporting feature, like ratio, video length, and frame rate.

Converting Speed: Very High.
Supported Formats: FLV, WAV, MOV, WMV, MP4, AVI, etc.
Rating: 4.7/5 (TrustPilot)
Main Features:
- Change the file format, type, size, and frame rate.
- Convert to MP4 from different formats.
- Upload by clicking the necessary button on the screen or drag the file and drop.
- Choose aspect ratios like 16:9 or 1:1.
Pros
- AI-powered conversion.
- Online converter tool available for free.
- Convert video to image format as well.
Cons
- A limited variety of formats are supported.
- Registered members can remove watermarks.
Aconvert
This is a speedy WhatsApp video converter that users can try out on any device quickly. It supports a wide range of input and output format options for conversion/compression.

Converting Speed: Medium-High
Supported Formats: Multiple types, like AVI, MKV, MOV, MPEG, PNG, JPG, PDF, etc.
Rating: 100/100 (Scam Detector)
Main Features:
- Add at least files for converting.
- Insert files from computers, tablets, or mobile phones.
- Size and status information is visible during conversion.
- The original file size cannot extend beyond 40 MB in size.
Pros
- Multiple types of formats are supported, like images, videos, ebooks, etc.
- No installation or registration is necessary.
- Batch conversion is allowed.
Cons
- Not available in some regions.
- The speed is standard-level.
Hot FAQs on Converting Videos for WhatsApp
1. How can I send a 10-minute video on WhatsApp?
Users can directly send videos with 10-minute-length via WhatsApp if the file size is 16 MB or lower. Otherwise, you can compress the file using a video converter for WhatsApp. Alternatively, you can upload your file into your Cloud account and copy the link to send.
2. How to convert YouTube videos to WhatsApp?
You can directly copy the YouTube-based video link below the Share button on its page, paste it into the chat, and send it. Alternatively, you can use a reliable converter tool to download YouTube videos in one of the supported video formats (e.g., MP4). Then, share them via WhatsApp chat.
3. How to Send Videos on WhatsApp Without Compressing?
WhatsApp compresses the video files automatically when users insert and send them via the Gallery icon within chats. However, you can avoid reducing video quality or compressing them if you send it by clicking on the Document icon > My Media Files/whichever folder the file is in.
Final Words
Overall, multiple online and software-based tools help convert video files to suit WhatsApp-based restrictions. Among them, Filmora is all-in-one software to cut and edit videos for sharing correctly. For online-based conversion, Kapwing is a usable alternative, in our opinion. To make your choice, though, go through all options carefully.
- WinX HD Video Converter Deluxe
- Filmora
- Wondershare Uniconverter
- HandBrake
- Freemake Video Converter
- Top 5 Online Video Converter for WhatsApp
Which Video Formats Does WhatsApp Support?
“WhatsApp only allows me to send (a) video of maximum (of) 17 MB size, of duration 2:50 minutes. But my cousin has sent me a video of 35 MB, with (a) 5:40 minutes duration. How has this been possible?”
Indeed, WhatsApp has size and format-related restrictions, like a 16 MB size limit. However, you can access the WhatsApp Web version to share longer videos since it allows a size limit of 64 MB. Alternatively, you can reduce video size for WhatsApp with converter tools to compress, convert, and optimize video files**.**
The Best Video Formats for WhatsApp
This platform only supports specific video codec or format types that suits the pre-set compression standards.
WhatsApp-supported video formats
AVI, MP4, MOV, MKV, FLV audio codec, and 3 GP (/MPEG-4 video codec encoding).
WhatsApp allowed file size
16MB
To make sure that videos transfer safely and smoothly via WhatsApp, make the necessary size and codec conversion.
Best 5 Software to convert video for WhatsApp
Specific WhatsApp video converter types come in software versions for Mac or Windows users. You can download and launch them to use the features without network connection.
WinX HD Video Converter Deluxe
WinX HD Video Converter Deluxe is a user-friendly tool to convert video for WhatsApp, from different formats and devices. You can expect high-quality video output, reaching 4K to 8K resolution. Make necessary video codec and size changes to compress videos fit for WhatsApp-based sharing.
Converting Speed: High.
Compatible Platforms: WhatsApp, YouTube, Facebook, Instagram, Email, etc.
Supported Formats: MP4, GoPro devices, MKV, Drone devices, MOV, MTS, AVI, etc.
Rating: 3.6/5 (Top Ten Reviews)
Main Features:
- Multiple file sizes for conversion.
- Resolution up to 1080p or 4K.
- Change frame rate.
- The open-source platform is fit for Mac and Windows.
Pros
- No significant quality loss during conversions.
- Reduce GB-based sizes to MB.
- Stable compression process.
Cons
- Not for free.
- Limited advanced editor settings.
Filmora
Filmora is a high-quality WhatsApp video converter, it enables you convert any types of videos for WhatsApp, YouTube, also TikTok. Besides, Filmora is best for video editing functions, like cutting, trimming, rotating, compressing, and more. Also, get advanced editing functions like color correction, background removal, audio visualization, etc., before converting files in the WhatsApp-support format of choice.
Free Download For Win 7 or later(64-bit)
Free Download For macOS 10.14 or later
Converting Speed: High.
Compatible Platforms: YouTube, Vimeo, WhatsApp, etc.
Supported Formats: MKV, MP4, MOV, AVI, WMV, F4V, MP3, etc.
Rating: 8/10 (TrustRadius)
Main Features:
- Compress video during output as per file format type.
- Cut the size of the video to reduce the size.
- Advanced editing like background removal.
- High-quality HD resolution.
Pros
- Convert to different formats.
- Adjust the speed of the video.
- Trim file size.
Cons
- Advanced functions like watermark removal are available in premium plans.
- At least 10 GB of disk space is necessary for the device.
Wondershare Uniconverter
This software for Mac and Windows users is useful for converting different file formats into different output files. Here, you can add videos from the device library or cloud storage. Later, make conversion choices like video format type, scale size, etc.
Converting Speed: High
Compatible Platforms: WhatsApp, YouTube, etc.
Supported Formats: MP4 (Standard/4K), MKV, AVI, AVCHD, FLV, MP3, etc.
Rating: 5/5 (GetApp)
Main Features:
- Split screen video support.
- Adjust the frame rate of videos.
- Customize video filters.
- Converts HD and SD files.
Pros
- Video quality remains the same during conversion.
- Compress files to smaller sizes.
- Automated conversion.
Cons
- Advanced features like watermark removal require payment.
- Limited access to cloud storage.
HandBrake
HandBrake is a user-friendly and open-source WhatsApp video converter fit for different devices. You can convert and even edit the video files for other devices and compress the size without quality loss. See a preview before completing the changes.
Converting Speed: Medium-High.
Compatible Platforms: All browser types on Linux, Windows, and Mac devices.
Supported Formats: MKV, MP4 (mainly M4V), and WebM.
Rating: 4/5 (TechRadar)
Main Features:
- Make chapter markers on files.
- Many pre-set video filters are available.
- Live preview of the video before conversion.
- Convert Blu-ray and DVD video files.
Pros
- Open-source platform.
- Batch scanning and encoding files in queues.
- CFR and VFR-based compatibility.
Cons
- No direct conversion of the file to WhatsApp.
- Limited variety in output file format choices.
Freemake Video Converter
Freemake is a top-notch video converter tool that users can try to create and compress different file formats for free. Download the output file in any form and high-resolution quality.
Converting Speed: High.
Compatible Platforms: YouTube, Vimeo, WhatsApp, etc.
Supported Formats: AVI, MP4, WMV, MKV, 3GP, MP3, DVD, FLV, SWF, MOV, Divx, MTS, etc.
Rating: 4.5/5 (TechRadar)
Main Features:
- Supports multiple video codecs like MPEG4, and AV1.
- Batch processing is possible.
- Edit videos by rotation, trimming, etc.
- Encode the videos.
Pros
- No extra cost for conversions.
- Users can convert bigger files as well.
- Supports videos from different devices and online platforms, like Vimeo.
Cons
- Users cannot directly prepare/send WhatsApp videos.
- It is mainly allowed on Windows.
Top 5 Online Video Converter for WhatsApp
Online tools are available that allow users to convert videos to WhatsApp format. The top 5 of them are listed here.
FlexClip
FlexiClip offers an online WhatsApp video converter for free to quickly change file formats into WhatsApp-supported options. In addition, you can use this tool to make other types of conversions like audio and image files.
Converting Speed: Medium-High.
Supported Formats: MOV, MP4, AVI, etc.
Rating: 4.4/5 (TrustPilot)
Main Features:
- Create video for social media marketing.
- Pre-set templates are available.
- Multiple stock images and videos are available.
- Rich-quality overlays and transitions.
Pros
- Dynamic types of vector elements are available.
- 1000+ text-based animations/pre-set styles present.
- High-quality transitions.
Cons
- Registration is vital to export files.
- It is hard to edit pre-saved videos.
Online Converter
This is a free WhatsApp video converter web service for users to change files to suit the WhatsApp platform quickly. In addition, you can decide the resolution of the video for output and even cut files based on timestamps.
Converting Speed: Medium-High.
Supported Formats: AVI, MOV, MP4, etc.
Rating: 3.6/5 (TrustPilot)
Main Features:
- Convert any file suitable for WhatsApp.
- Support cloud-based file insertion.
- Time-based video cutting for editing.
- Enable or disable the background audio track.
Pros
- Convert multiple files at a time.
- Different resolution-based choices are available.
- Add video URL to convert.
Cons
- Limited advanced settings.
- Does not support diverse file formats.
Clideo
Clideo is a suitable WhatsApp video converter that mainly compresses the files to WhatsApp-appropriate sizes. Moreover, you can insert your video file from cloud storage and quickly convert multiple files.
Converting Speed: Medium.
Supported Formats: MP4, AVI, WMV, VOB, MOV, etc.
Rating: 4.8/5 (TrustPilot)
Main Features:
- See preview before conversion.
- Automated file size-reducing parameters.
- Support file sizes upto 500 MB.
- Add a file from any device.
Pros
- Fast processing.
- Encryption-protected files.
- Intuitive interface.
Cons
- The uploading and conversion process can take a long time.
- The watermark is visible.
Kapwing
Kapwing’s online conversion tool can change video files and make them WhatsApp-compatible quickly. Users can customize different aspects of exporting feature, like ratio, video length, and frame rate.
Converting Speed: Very High.
Supported Formats: FLV, WAV, MOV, WMV, MP4, AVI, etc.
Rating: 4.7/5 (TrustPilot)
Main Features:
- Change the file format, type, size, and frame rate.
- Convert to MP4 from different formats.
- Upload by clicking the necessary button on the screen or drag the file and drop.
- Choose aspect ratios like 16:9 or 1:1.
Pros
- AI-powered conversion.
- Online converter tool available for free.
- Convert video to image format as well.
Cons
- A limited variety of formats are supported.
- Registered members can remove watermarks.
Aconvert
This is a speedy WhatsApp video converter that users can try out on any device quickly. It supports a wide range of input and output format options for conversion/compression.
Converting Speed: Medium-High
Supported Formats: Multiple types, like AVI, MKV, MOV, MPEG, PNG, JPG, PDF, etc.
Rating: 100/100 (Scam Detector)
Main Features:
- Add at least files for converting.
- Insert files from computers, tablets, or mobile phones.
- Size and status information is visible during conversion.
- The original file size cannot extend beyond 40 MB in size.
Pros
- Multiple types of formats are supported, like images, videos, ebooks, etc.
- No installation or registration is necessary.
- Batch conversion is allowed.
Cons
- Not available in some regions.
- The speed is standard-level.
Hot FAQs on Converting Videos for WhatsApp
1. How can I send a 10-minute video on WhatsApp?
Users can directly send videos with 10-minute-length via WhatsApp if the file size is 16 MB or lower. Otherwise, you can compress the file using a video converter for WhatsApp. Alternatively, you can upload your file into your Cloud account and copy the link to send.
2. How to convert YouTube videos to WhatsApp?
You can directly copy the YouTube-based video link below the Share button on its page, paste it into the chat, and send it. Alternatively, you can use a reliable converter tool to download YouTube videos in one of the supported video formats (e.g., MP4). Then, share them via WhatsApp chat.
3. How to Send Videos on WhatsApp Without Compressing?
WhatsApp compresses the video files automatically when users insert and send them via the Gallery icon within chats. However, you can avoid reducing video quality or compressing them if you send it by clicking on the Document icon > My Media Files/whichever folder the file is in.
Final Words
Overall, multiple online and software-based tools help convert video files to suit WhatsApp-based restrictions. Among them, Filmora is all-in-one software to cut and edit videos for sharing correctly. For online-based conversion, Kapwing is a usable alternative, in our opinion. To make your choice, though, go through all options carefully.
How to Windows Online Movie Maker [Complete Guide]
The likelihood is that video will soon play a significant role in your content marketing approach, if it hasn’t already – and for that using windows online movie maker is inevitable. You are an emerging brand, a sole proprietor, or even a podcaster. Knowing the importance of video marketing to content producers and agencies is second nature if you’re an astute digital marketer It may be costly and challenging to utilize video editing software. Fortunately, there are free online video editors available.
Before very recently, video editing needed highly specialized skills and was done manually using different tools. Windows Movie Maker used to be a standard component of every Windows user’s toolbox and was a highly recommended video editing product for novices. With the windows movie maker online, the application was well-liked for its ease of use and entertaining special effects, but most significantly - it was free. It came pre-installed on all Windows machines. You may do that with the help of our handy list of the top three online video creators.
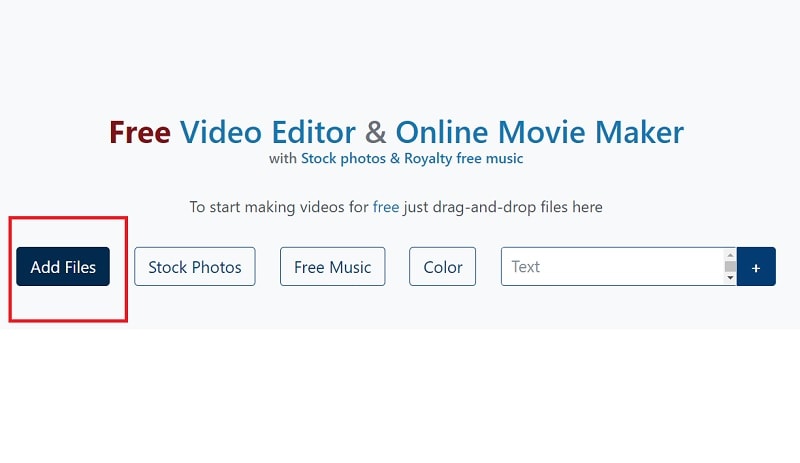
Part 1. How to Make a Video Online [Use Movie Maker Windows Online]
Using the help of Movie Maker, you may create videos online with your browser. It enables you to create professional-caliber videos without having to purchase video editing tools at professional-caliber costs. For every genre and need, this web program includes stock video, animated text, audio tracks, and on-screen effects. Your own video clips are uploaded. Then, use the simple drag-and-drop online video editor in Movie Maker to edit footage and add special effects and music to make your movie shine.
Making fantastic compilation films from your already-existing photographs and videos doesn’t need you to be a skilled editor. Even for amateur video makers, the platform’s UI is simple to use and straightforward to navigate. The customizing choices in Movie Maker are many. You have the option of uploading your own fonts and logos. You may also watermark your films and alter the text’s color. Additionally, there are a ton of very unique components like stickers, vector shapes, and masks that may enhance the visual appeal of your video productions and widen your creative boundaries.
Steps to Make Video with Movie Maker Online
Step1 Go to Movie Maker Online
Using Movie Maker Online, you can quickly and easily make incredibly interesting compilation films using your already-posted photographs and videos. You’ll immediately be sent to the editor, where you can begin organizing your films. Here’s the official link to the toolkit:
Step2 Upload Files to Web
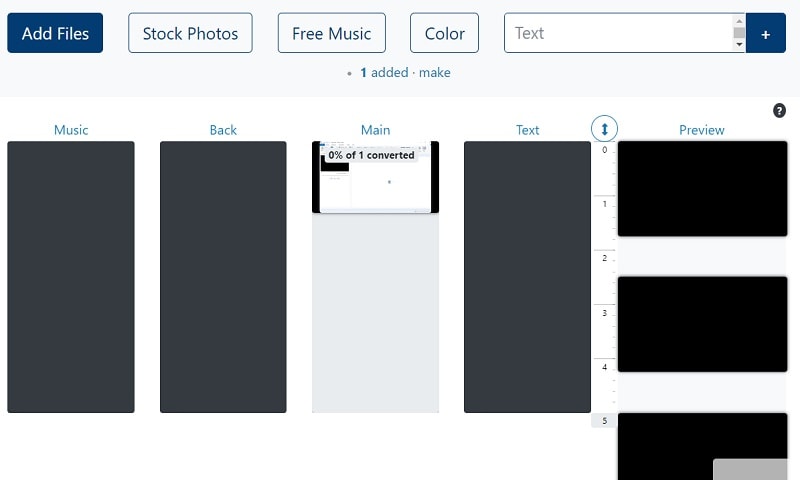
Your photographs, videos, and text may all be uploaded. If you like the default music, you may skip the step to change it; otherwise, you can choose another song from our library or upload your own MP3 file. Files from a variety of sources and devices may be added. Click the Import Media button to start importing your own media. Click Open after locating the video you wish to modify.
Step3 Create an online video
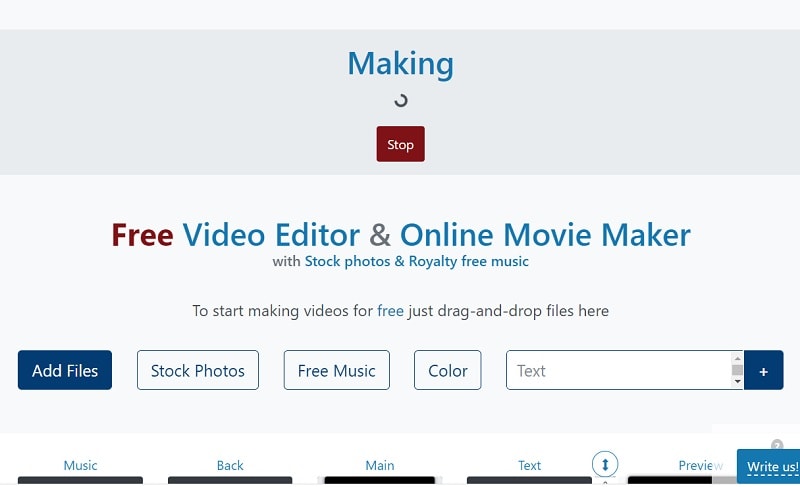
Add your music to your video compilation after all of your clips have been placed on the timeline. To accomplish that, choose a song depending on the genre or mood you want by clicking on the Music option on the left menu panel. To listen to the music track, click the little icon to the left of it. Text, colors, pictures, and video may all be customized to your heart’s delight. Add effects, drag, cut, etc. Press the Make Video button.
Step4 Save and Share with Others
Sharing your films on Facebook, Instagram, YouTube, and other platforms is made effortless. You may also send your loved ones the URLs to your videos. When you are happy with the changes, click the Save & Share option in the upper right corner, choose the quality you want to download your movie in, and then click the Export button. Download the updated video, then post it.
Part 2. Other Windows Online Movie Makers to Use [Top 3]
1. Kizoa
Link: Kizoa
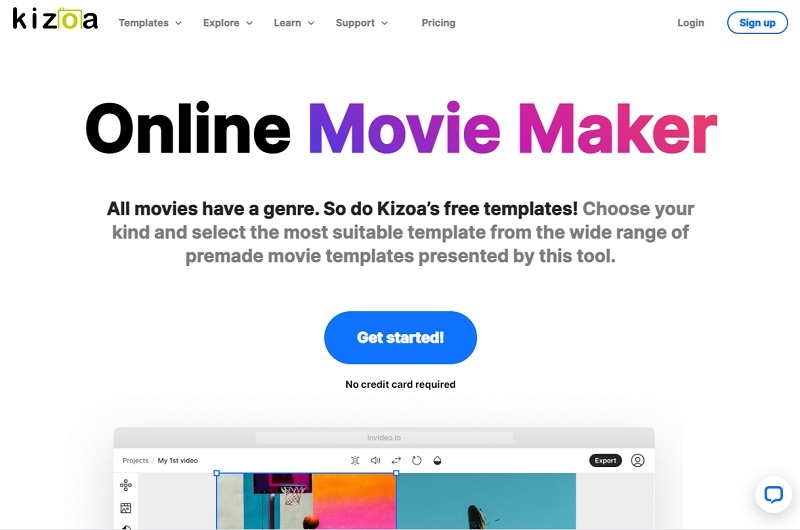
Customizing the appearance of your film is one of the finest ways to make it seem like it is your own. With the Kizoa tool, you may trim, apply a crossfade effect, choose the required resolution, and format for an output video in addition to merging files. Utilize Kizoa’s online video creator to produce eye-catching videos that will hold your audience’s attention. Create any kind of video, from personal family video slideshows to expert films to advertise your company. With the drag-and-drop movie production tool from Kizoa, you can create your very own video in a matter of minutes.
Use a video template as your starting point if you need inspiration. Key framing, animated overlays, noise reduction, transitions, and titles are just a few of the features it provides to help you produce excellent footage. For rapid video editing, there is a video production wizard. Windows Movie Maker’s auto movie themes pale in comparison to those provided by this program. Its extensive collection of stock footage and audio tracks helps you to concentrate on the crucial elements without having to drastically decrease the length of your film or the number of scenes.
2. FlexClip
Link: FlexClip
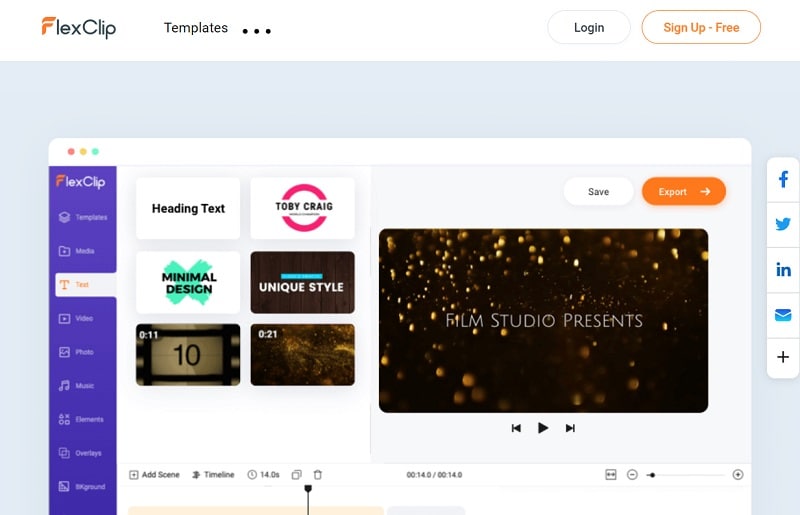
With the aid of the online video effects tool FlexClip, you may quickly and easily make entertaining short films. It has a ton of video editing features that you may use without logging in or creating an account, like merging, compressing, compiling, adding text, creating memes, etc. For those that are muted, you may use FlexClip to add animated text that blends in with the style of your film. Additionally, you may add your logo so that everyone is aware of who created the masterpiece they just saw.
An online video editor called FlexClip is mainly focused on producing high-quality marketing, advertising, and promotional films for companies. Recording a single video that will function on all social networking and video-sharing websites is almost impossible. Instagram, YouTube, and Facebook Marketing are among the partners of FlexClip that have received expert approval. It is used by marketers and enthusiasts to quickly create looping movies and stop motion animation. But as it only provides very basic functionality, it may not be the greatest choice for more intricate, demanding editing.
3. Veed.Io
Link: Veed.Io
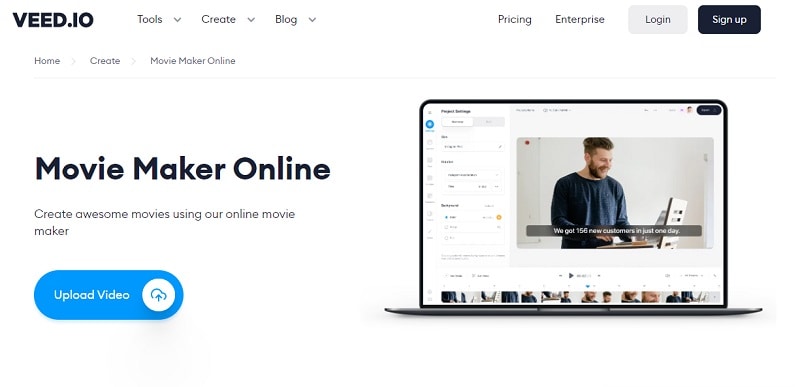
With only a few mouse clicks, users of the browser-based video editing program VEED may create professional-caliber movies. The greatest movie-making tools, including filters, effects, and stickers, are available on VEED. There are no intricate timelines, layers, or intricacy since it is a simple program that runs in your web browser. Simple drag-and-drop functionality is all you need to convey your tales. You may modify your video using its features. Using the video track below, you may combine, divide, or cut your files. Visit our website to see all of our filters, stickers, add-ons, and other tools.
Any device, whether an iPhone or Android phone, a MacBook, a Windows or Linux computer, may use VEED’s online video editor. You have access to all the resources you need to make amazing videos using VEED’s online video editor. Our user-friendly interface is very simple to use and is contemporary and intuitive. The native video sizes on each of the publishing sites, including Facebook, YouTube, and Vimeo, may all be altered using Veed. Finally, click “Export” in the editor’s upper-right corner, and your video will render quickly. Share some!
Conclusion
Use this editing list to produce more compelling video mashups for YouTube and other social media platforms in order to expand your audience, cultivate real connections with them, and eventually increase conversion rates. Because they combine the complex capabilities of the expensive, professional video suites with the user-friendliness and cost that appeal to novices, these online makers are a popular among editors of all skill levels. Make an investment in one of these video editing tools and own it.
Free Download For Win 7 or later(64-bit)
Free Download For macOS 10.14 or later
Part 1. How to Make a Video Online [Use Movie Maker Windows Online]
Using the help of Movie Maker, you may create videos online with your browser. It enables you to create professional-caliber videos without having to purchase video editing tools at professional-caliber costs. For every genre and need, this web program includes stock video, animated text, audio tracks, and on-screen effects. Your own video clips are uploaded. Then, use the simple drag-and-drop online video editor in Movie Maker to edit footage and add special effects and music to make your movie shine.
Making fantastic compilation films from your already-existing photographs and videos doesn’t need you to be a skilled editor. Even for amateur video makers, the platform’s UI is simple to use and straightforward to navigate. The customizing choices in Movie Maker are many. You have the option of uploading your own fonts and logos. You may also watermark your films and alter the text’s color. Additionally, there are a ton of very unique components like stickers, vector shapes, and masks that may enhance the visual appeal of your video productions and widen your creative boundaries.
Steps to Make Video with Movie Maker Online
Step1 Go to Movie Maker Online
Using Movie Maker Online, you can quickly and easily make incredibly interesting compilation films using your already-posted photographs and videos. You’ll immediately be sent to the editor, where you can begin organizing your films. Here’s the official link to the toolkit:
Step2 Upload Files to Web
Your photographs, videos, and text may all be uploaded. If you like the default music, you may skip the step to change it; otherwise, you can choose another song from our library or upload your own MP3 file. Files from a variety of sources and devices may be added. Click the Import Media button to start importing your own media. Click Open after locating the video you wish to modify.
Step3 Create an online video
Add your music to your video compilation after all of your clips have been placed on the timeline. To accomplish that, choose a song depending on the genre or mood you want by clicking on the Music option on the left menu panel. To listen to the music track, click the little icon to the left of it. Text, colors, pictures, and video may all be customized to your heart’s delight. Add effects, drag, cut, etc. Press the Make Video button.
Step4 Save and Share with Others
Sharing your films on Facebook, Instagram, YouTube, and other platforms is made effortless. You may also send your loved ones the URLs to your videos. When you are happy with the changes, click the Save & Share option in the upper right corner, choose the quality you want to download your movie in, and then click the Export button. Download the updated video, then post it.
Part 2. Other Windows Online Movie Makers to Use [Top 3]
1. Kizoa
Link: Kizoa
Customizing the appearance of your film is one of the finest ways to make it seem like it is your own. With the Kizoa tool, you may trim, apply a crossfade effect, choose the required resolution, and format for an output video in addition to merging files. Utilize Kizoa’s online video creator to produce eye-catching videos that will hold your audience’s attention. Create any kind of video, from personal family video slideshows to expert films to advertise your company. With the drag-and-drop movie production tool from Kizoa, you can create your very own video in a matter of minutes.
Use a video template as your starting point if you need inspiration. Key framing, animated overlays, noise reduction, transitions, and titles are just a few of the features it provides to help you produce excellent footage. For rapid video editing, there is a video production wizard. Windows Movie Maker’s auto movie themes pale in comparison to those provided by this program. Its extensive collection of stock footage and audio tracks helps you to concentrate on the crucial elements without having to drastically decrease the length of your film or the number of scenes.
2. FlexClip
Link: FlexClip
With the aid of the online video effects tool FlexClip, you may quickly and easily make entertaining short films. It has a ton of video editing features that you may use without logging in or creating an account, like merging, compressing, compiling, adding text, creating memes, etc. For those that are muted, you may use FlexClip to add animated text that blends in with the style of your film. Additionally, you may add your logo so that everyone is aware of who created the masterpiece they just saw.
An online video editor called FlexClip is mainly focused on producing high-quality marketing, advertising, and promotional films for companies. Recording a single video that will function on all social networking and video-sharing websites is almost impossible. Instagram, YouTube, and Facebook Marketing are among the partners of FlexClip that have received expert approval. It is used by marketers and enthusiasts to quickly create looping movies and stop motion animation. But as it only provides very basic functionality, it may not be the greatest choice for more intricate, demanding editing.
3. Veed.Io
Link: Veed.Io
With only a few mouse clicks, users of the browser-based video editing program VEED may create professional-caliber movies. The greatest movie-making tools, including filters, effects, and stickers, are available on VEED. There are no intricate timelines, layers, or intricacy since it is a simple program that runs in your web browser. Simple drag-and-drop functionality is all you need to convey your tales. You may modify your video using its features. Using the video track below, you may combine, divide, or cut your files. Visit our website to see all of our filters, stickers, add-ons, and other tools.
Any device, whether an iPhone or Android phone, a MacBook, a Windows or Linux computer, may use VEED’s online video editor. You have access to all the resources you need to make amazing videos using VEED’s online video editor. Our user-friendly interface is very simple to use and is contemporary and intuitive. The native video sizes on each of the publishing sites, including Facebook, YouTube, and Vimeo, may all be altered using Veed. Finally, click “Export” in the editor’s upper-right corner, and your video will render quickly. Share some!
Conclusion
Use this editing list to produce more compelling video mashups for YouTube and other social media platforms in order to expand your audience, cultivate real connections with them, and eventually increase conversion rates. Because they combine the complex capabilities of the expensive, professional video suites with the user-friendliness and cost that appeal to novices, these online makers are a popular among editors of all skill levels. Make an investment in one of these video editing tools and own it.
Free Download For Win 7 or later(64-bit)
Free Download For macOS 10.14 or later
Also read:
- New 2024 Approved Back up and Organize Your Files to Protect Any Misfortune Befalling Them. The Article Will Guide You on How to Back up and Manage Your Footage
- New Do You Want to Watch Videos in QuickTime with Subtitles in Your Desired Language? Here Are Different Ways to Add Subtitles in QuickTime Player
- Updated Have You Ever Created a Slow Motion Video on Your Phonr or Camera? This Article Will Show You some Knowledge About Slow Motion Photography
- Updated Make Videos with Pictures and Music-10 Apps
- 2024 Approved How to Create Cinematic Style Videos?
- New This Article Will Address Your Questions About the Easiest Way to Turn a Blog Into a Podcast. Lets Begin with the Reasons Why You Should Do a Podcast
- Updated 2024 Approved How To Polish Your Music Video Edits Using Filmora
- 2024 Approved How to Comment on YouTube Live Chat
- Updated In 2024, Do You Want to Experiment with Various Sky Backgrounds for Your Footage? Learn About Sky Replacement After Effects in This Article with a Step-by-Step Guide
- Looking for a Great Way to Make Your Own Anime Music Video? The Following Are the Top AMV Makers to Choose From
- New In 2024, Best Cloud Storage Service for Videos
- New In 2024, With This Article, We Will Be Looking at Steps to Rotate a Video in Cyberlink PowerDirector to Help You when Required. We Have Also Mentioned the Steps You Will Need to Follow in Wondershare Filmora
- New 2024 Approved Adobe Premiere Pro Download and Use Guide
- New DVD Slideshow Builder 2024 Review and Tutorial
- New Adobe Photoshop Is the Best Photo Editor to Add Green Screen Effect to Your Photo While Wondershare Filmora Is the Best Video Editor to Add Green Screen Effect to Your Video for 2024
- Updated Top 7 Best GoPro Video Editors for Mac for 2024
- New AI Has Influenced All Video Editors to Speed up Editing. This Article Discusses the Significance of AI Slow Motion and the Tools that Offer It
- Mastering OpenCV Object Tracking A Comprehensive Guide for Beginners and Experts
- New In 2024, How to Use OBS Chroma Key With/Without Green Screen
- New 2024 Approved Find a Video Background Change Online that Works for You. This Article Contains Tools that Can Edit Video Backgrounds Online with Little Effort
- New Videos Look Better when Edited Professionally. If Youre Looking to Edit Recorded Video with a Pro-Level Editing Then Weve Got You Covered. Learn About Editing Recorded Videos with the Best Toolkit Here
- Updated Understanding More About CapCut Lenta Template and Slow-Motion Videos for 2024
- Updated How to Make Simple Slideshow Word
- In 2024, Do You Want to Use a Professional Tool to Add Subtitles? Read This Article to Discover the Best Reliable Tool to Create Subtitles in Your Desired Manner
- Things About Transparent PNG Remove and Convert
- Lets Learn How to Convert a Normal Video Into a Film Shot in the 1920S with Wondershare Filmora
- Updated In 2024, How to Remove Motion Blur In Photoshop
- 2024 Approved Top-Rated Android Apps For Slowing Down Motion
- New Detailed Guide to the Best Convertors for Turning GIF Into PDF Files. Know Their Features, Pros, Cons, and More for 2024
- Do You Want Your Video Footage to Resemble Kodak Films? You Can Get the Old Kodak Film Look by Searching for Kodak 2383 LUT Free Download on the Internet for 2024
- 2024 Approved So, without Further Dilly-Dallying, Lets Learn How to Create a Retro 1950-Style Video with This Simple Filmora Tutorial
- Updated Troubleshoot Snapchat Camera Zoomed in Issue for 2024
- New 2024 Approved Ultimate Guidelines to Help You Use VLC Media Player Better
- New Color Match Game Top Tips for You
- Unlocking iPhone 7 Plus Passcode without a Computer | Dr.fone
- What is Geo-Blocking and How to Bypass it On Motorola Edge 40? | Dr.fone
- How to Transfer Data After Switching From Xiaomi 14 Pro to Latest Samsung | Dr.fone
- In 2024, Full Guide to Bypass Asus ROG Phone 7 FRP
- In 2024, Android Unlock Code Sim Unlock Your Vivo X Flip Phone and Remove Locked Screen
- In 2024, How to Access Your iPhone 15 Pro When You Forget the Passcode? | Dr.fone
- In 2024, Does find my friends work on Meizu 21 | Dr.fone
- Does Life360 Notify When You Log Out On Tecno Pova 6 Pro 5G? | Dr.fone
- In 2024, What Legendaries Are In Pokemon Platinum On Samsung Galaxy F14 5G? | Dr.fone
- 2024 Approved 6 Best Voice Changers
- What To Do When Motorola Moto G14 Has Black Screen of Death? | Dr.fone
- In 2024, How Can I Use a Fake GPS Without Mock Location On Realme 12 Pro+ 5G? | Dr.fone
- Fixes for Apps Keep Crashing on Realme Note 50 | Dr.fone
- In 2024, How I Transferred Messages from Realme C55 to iPhone 12/XS (Max) in Seconds | Dr.fone
- In 2024, Ways to trade pokemon go from far away On Google Pixel Fold? | Dr.fone
- In 2024, How to Remove Forgotten PIN Of Your Vivo V29 Pro
- Bypass iCloud Activation Lock with IMEI Code From Apple iPhone 15 Pro
- Mastering Lock Screen Settings How to Enable and Disable on Samsung Galaxy F14 5G
- Fake Android Location without Rooting For Your Oppo A38 | Dr.fone
- New How to Define AI Video? | Wondershare Virbo Glossary for 2024
- New In 2024, Text To Speech | Wondershare Virbo Online
- How to Mirror Motorola Moto G73 5G to Mac? | Dr.fone
- In 2024, 9 Best Phone Monitoring Apps for Nokia C12 Plus | Dr.fone
- In 2024, How To Remove Flashlight From Apple iPhone 12 Pro Lock Screen
- 2024 Approved 10 Best Memes Right Now (Include Image/ GIF/Video)
- All About Factory Reset, What Is It and What It Does to Your Vivo Y56 5G? | Dr.fone
- In 2024, How to Bypass Android Lock Screen Using Emergency Call On Samsung Galaxy S23?
- In 2024, How to use Pokemon Go Joystick on Realme 12 Pro+ 5G? | Dr.fone
- How to Stop Google Chrome from Tracking Your Location On Xiaomi Civi 3 Disney 100th Anniversary Edition? | Dr.fone
- 8 Ultimate Fixes for Google Play Your Xiaomi Redmi K70E Isnt Compatible | Dr.fone
- Your Complete Guide To Reset Nokia C110 | Dr.fone
- Title: LumaFusion Offers Various Look Up Table Presets, or LUTs, Such as FiLMiC deLog and FiLMiC DeFlat, and Several Stylistic LUTs for Use with Neutral Use Video. You Can Also Manually Add the LUTs for 2024
- Author: Morgan
- Created at : 2024-05-19 05:12:40
- Updated at : 2024-05-20 05:12:40
- Link: https://ai-video-editing.techidaily.com/1713950923551-lumafusion-offers-various-look-up-table-presets-or-luts-such-as-filmic-delog-and-filmic-deflat-and-several-stylistic-luts-for-use-with-neutral-use-video-you/
- License: This work is licensed under CC BY-NC-SA 4.0.
