
:max_bytes(150000):strip_icc():format(webp)/GettyImages-667603173-fac0b8f4b1d9453c866d332dc73821f8.jpg)
Updated Have You a Desire to Imbibe Your PowerPoint Presentations with Custom Effects and Tools? Be There to Learn All About Creating Custom Slideshows in PowerPoint with Utmost Ease for 2024
Have You a Desire to Imbibe Your PowerPoint Presentations with Custom Effects and Tools? Be There to Learn All About Creating Custom Slideshows in PowerPoint with Utmost Ease
How to Create a Custom Slide Shows in Powerpoint
An easy yet powerful editor
Numerous effects to choose from
Detailed tutorials provided by the official channel
Designing custom slideshows in PowerPoint is an absolute fun to do activity for infotainment and information sharing needs. Stay here to get an insight into creating the same, all in a wink!
In this article
01 [How to Create a Custom Slide Show in PowerPoint?](#Part 1)
02 [How to Show a Custom Show in PowerPoint?](#Part 2)
03 [How to Hide Slides in PowerPoint?](#Part 3)
Part 1 How to Create a Custom Slide Show in PowerPoint?
PowerPoint presentations are an already elusive and captivating media of information delivery and content sharing, be it a personal entertainment need or a high end professional requirement, PowerPoint presentations can do it all! Responding to the day to day IT upgrades of modern times, the aforesaid MS Office utility program has introduced its custom slideshow feature, which you can work upon to expand your creative skills in graphic design.
Custom slideshows are a convenient means of abstracting a required set of contents from a rather detailed slideshow presentation to address the needs of a specific audience, instead of distracting them with showcasing the entire content, most of which turns irrelevant to their exclusive requirements.
Talking about the knowhow to work with the feature, the following section encompasses a comprehensive understanding of the custom slide show creation process with the finest details:
User’s Guide to Create Custom Slideshows in PowerPoint
Step 1: Launch the PowerPoint Tool
Start the custom slide show PowerPoint creation process with launching the PowerPoint tool in any of your preferred devices. It would be better to work on a desktop or a PC. Proceed to open the presentation that you wish to create a custom slideshow from.
Step 2: Custom Slide Show Option
In the welcome interface of PowerPoint, navigate to the ribbon at the top and hit the ‘Slide Show’ tab, followed by clicking on the ‘Custom Slide Show’ button from the ‘Options Panel’ that appears. As you tap the aforesaid button, a dropdown menu follows next, from where you need to choose the ‘Custom Shows…’ option.

Step 3: Custom Shows Dialog Box
The completion of Step 2 brings up the ‘Custom Shows’ dialog box, with a blank area at the left, indicating the absence of any custom slide show as yet. To create one, navigate to and click on the ‘New’ button at the right side within the dialog box.

Step 4: Define Custom Show Dialog Box
As you tap the ‘New’ button, the ‘Define Custom Shows’ dialog box pops up with a display of the following fields and buttons:
● Slide Show Name Box
Use this field to assign a name to your custom slideshow. In case you don’t add a name of your choice, PowerPoint will assign the name ‘Custom Show 1’ to your custom presentation.
● Slides in Presentation
Below the ‘Slide Show Name’ box, appears a list of slides in the chosen presentation which you can use to create the custom slide show. To add slides to the same, click on the respective slide names.
● Add Button
The ‘Add’ button in the middle of the ‘Define Custom Show’ dialog box is used to include selected slides from the main list explained above to the ‘Slides in Custom Show’ list at the right. The ‘Add’ button however, remains disabled until you make a selection from the main slides list to include within the custom slides list. Take note that you can choose to repeat the slides within the custom list.
● Remove Button
You can use this button to select and delete specific slides from the ‘Slides in Custom Show’ list. The button however, remains disabled till you make a slide selection to be removed.
● Slides in Custom Show
This is a list of slides that you have selected from the main slides list to include in the custom slideshow.
● Re-Order Buttons
These are ‘Up’ and ‘Down’ arrows at the right side of the ‘Define Custom Show’ dialog box, which are active only if the ‘Slides in Custom Show’ list has more than one slide to its credit. In such a case, you can use these arrows to change the sequence of appearance of the slides within the custom presentation.

Step 5: Back to Custom Shows Dialog Box
When you have finished making all the required entries in the aforesaid fields, click on ‘OK’ to create your custom slideshow, which is visible in the ‘Custom Shows’ dialog box. You can preview the just created custom presentation by selecting the slideshow in the ‘Custom Shows’ list, followed by clicking on the ‘Show’ button at the bottom right of the dialog box.

The ‘Custom Shows’ dialog box has an additional list of buttons, which are explained as follows:
● The ‘New’ button, which you can click on to continue creating as many custom slideshows as you like.
● The ‘Edit’ button, which allows you to make changes to a specific custom slideshow.
● The ‘Remove’ button, which you can use to select and delete an existing custom presentation.
● The ‘Copy’ button, that lets you create multiple copies of a selected slideshow. This utility comes handy when you need to work on creating similar custom presentations with an affordably small number of differential elements.
When you are satisfied with your work, navigate to and hit the ‘Close’ button to finalize and save the custom presentation within your device.

Part 2 How to Show a Custom Show in PowerPoint?
When working to share any kind of information through slideshow presentations, creating a custom show is just half the job, with the significant part of a flawless content presentation remains still under the line. Having understood the process of creating a custom slide show in PowerPoint in enough detail, let us now move ahead with learning how to show the same in PowerPoint in the following section:
User’s Guide to Play a Custom Slideshow in PowerPoint
Step 1: Launch the Parent Presentation
In any suitable device of your preference, proceed with opening the presentation in which you have worked on creating the custom slideshow, followed by hitting the ‘Slide Show’ tab in the PowerPoint ribbon at the top. From the list of options that appears next, click on the ‘Custom Slide Show’ button.

Step 2: Custom Slideshow Dropdown Menu
Clicking on the ‘Custom Slide Show’ button in step 2 causes the latter’s dropdown menu to get displayed, with a list of all the created custom shows within the currently accessed parent slideshow presentation. Navigate to and click on the name of the custom presentation that you wish to play.

How to Set a Custom Show as the Default Slideshow?
If you are interested in playing the custom show as a default presentation, see through the following stepwise tutorial guide to go ahead with the process:
Step 1: Set Up Slideshow Button
After you have launched the parent presentation, navigate to and click on the ‘Slide Show’ tab within the topmost PowerPoint ribbon and tap the ‘Set Up Slide Show’ button from the list of options that follows.

Step 2: Set Up Show Dialog Box
Clicking on the aforesaid button makes the ‘Set Up Show’ dialog box to appear, where you are required to hit the ‘Custom Show’ radio button. You can now click on the dropdown arrow below the radio buttons to select your specific one from the list of custom shows that pops down. Hit ‘OK’ at the bottom right corner of the dialog box when you have made your choice.

The custom show is now your default slideshow. In your future launches of ‘Slide Show View’, only the selected custom show slides will appear to be used as a presentation.
Part 3 How to Hide Slides in PowerPoint?
In case you have worked on a detailed slideshow presentation in the PowerPoint tool, that consists of selective contents for different audience groups, all within the main presentation, it is a wise step to hide the content slides that are not useful to particular audiences, lest your viewers might get distracted with the irrelevant content.
By far, you must have developed a significant understanding of the custom slideshow PowerPoint creation and presentation procedure in much detail. Moving further into our discussion, let us now work on hiding slides within a PowerPoint presentation through the following step by step guide:
How to Hide or Unhide a Slide in PowerPoint?
Step 1: Launch the PowerPoint Presentation
Start with opening a desired PowerPoint Presentation in your preferred device.
Step 2: Make Your Selection
Visit the slide navigation pane at the left to select slide you wish to delete. Your selections will be highlighted as you tap on them. You can either delete the slides one at a time, or make multiple selections to delete them all at once.

Step 3: Hide Slide Option
When you have made the required selections, right click on the same, followed by choosing the ‘Hide Slide’ option from the dropdown menu that appears next. The selected slides will now be hidden and you can recognize them in the ‘Presenter View’ with lighter thumbnails as compared to the included slides, in the slide navigation pane.


Step 4: Unhiding the Presentation Slides
If you wish to unhide a previously hidden presentation slide, reach to the slide navigation pane in the left and right click on the hidden slide thumbnail. The dropdown menu in Step 3 pops up again, and you need to tap on the ‘Hide Slide’ option. The selected slide will now be included in the presentation.

An alternative to show a hidden slide within a running presentation, while remaining in the ‘Presenter View’, make a random right click anywhere within the currently running slide. The ‘Options Panel’ pops up, and you are required to choose the ‘See All Slides’ option.

All the slides of your presentation will now get displayed in the slide navigation pane, with the hidden ones being grayed out with a crossed slide number. Click on the thumbnail of the respective hidden slides that you want to present before the audience.
asterpieces crea

Creating PowerPoint Presentation Slides in Filmora
The Wondershare Filmora Video Editor franchise of graphic editor software is a pioneer in creating stunning masterpieces of content presentation alternatives. Talking of slideshow presentations, you can work with the software program to create and edit slideshow presentations in high end professional quality. The inbuilt library of the program is a vast trunk of features, effects and tools that allow you to explore your graphic creation abilities to your heart’s content and design top quality slideshows.
For Win 7 or later (64-bit)
For macOS 10.12 or later
Apart from creating slideshow presentations, you can use the software program to convert the same into video edits and customize them to suit your needs. As an example, you can work with removing the slideshow background, overlaying the slide contents; add tons of audio-visual effects and transitions to the slides and supplement them with pleasing background music.
Additional advantages of the application are a welcoming and user cohesive interface, high speed output response characteristics, high end, professional quality slideshow output and an extensive device compatibility. The bottom line is, the Filmora graphic editor package is an all in one solution to your most diverse and specific slideshow creation needs.
● Ending Thoughts →
● Custom slideshows are an important part of PowerPoint presentations, especially when you need to showcase selective contents of a detailed project.
● Apart from creating, you also get to play the custom slideshow, make it your default presentation and hide the latter’s slides using the PowerPoint tool.
● If you are searching for a PowerPoint alternative to create custom slideshows, picking the Wondershare Filmora slideshow creator tool is indeed a smart choice.
Designing custom slideshows in PowerPoint is an absolute fun to do activity for infotainment and information sharing needs. Stay here to get an insight into creating the same, all in a wink!
In this article
01 [How to Create a Custom Slide Show in PowerPoint?](#Part 1)
02 [How to Show a Custom Show in PowerPoint?](#Part 2)
03 [How to Hide Slides in PowerPoint?](#Part 3)
Part 1 How to Create a Custom Slide Show in PowerPoint?
PowerPoint presentations are an already elusive and captivating media of information delivery and content sharing, be it a personal entertainment need or a high end professional requirement, PowerPoint presentations can do it all! Responding to the day to day IT upgrades of modern times, the aforesaid MS Office utility program has introduced its custom slideshow feature, which you can work upon to expand your creative skills in graphic design.
Custom slideshows are a convenient means of abstracting a required set of contents from a rather detailed slideshow presentation to address the needs of a specific audience, instead of distracting them with showcasing the entire content, most of which turns irrelevant to their exclusive requirements.
Talking about the knowhow to work with the feature, the following section encompasses a comprehensive understanding of the custom slide show creation process with the finest details:
User’s Guide to Create Custom Slideshows in PowerPoint
Step 1: Launch the PowerPoint Tool
Start the custom slide show PowerPoint creation process with launching the PowerPoint tool in any of your preferred devices. It would be better to work on a desktop or a PC. Proceed to open the presentation that you wish to create a custom slideshow from.
Step 2: Custom Slide Show Option
In the welcome interface of PowerPoint, navigate to the ribbon at the top and hit the ‘Slide Show’ tab, followed by clicking on the ‘Custom Slide Show’ button from the ‘Options Panel’ that appears. As you tap the aforesaid button, a dropdown menu follows next, from where you need to choose the ‘Custom Shows…’ option.
Step 3: Custom Shows Dialog Box
The completion of Step 2 brings up the ‘Custom Shows’ dialog box, with a blank area at the left, indicating the absence of any custom slide show as yet. To create one, navigate to and click on the ‘New’ button at the right side within the dialog box.
Step 4: Define Custom Show Dialog Box
As you tap the ‘New’ button, the ‘Define Custom Shows’ dialog box pops up with a display of the following fields and buttons:
● Slide Show Name Box
Use this field to assign a name to your custom slideshow. In case you don’t add a name of your choice, PowerPoint will assign the name ‘Custom Show 1’ to your custom presentation.
● Slides in Presentation
Below the ‘Slide Show Name’ box, appears a list of slides in the chosen presentation which you can use to create the custom slide show. To add slides to the same, click on the respective slide names.
● Add Button
The ‘Add’ button in the middle of the ‘Define Custom Show’ dialog box is used to include selected slides from the main list explained above to the ‘Slides in Custom Show’ list at the right. The ‘Add’ button however, remains disabled until you make a selection from the main slides list to include within the custom slides list. Take note that you can choose to repeat the slides within the custom list.
● Remove Button
You can use this button to select and delete specific slides from the ‘Slides in Custom Show’ list. The button however, remains disabled till you make a slide selection to be removed.
● Slides in Custom Show
This is a list of slides that you have selected from the main slides list to include in the custom slideshow.
● Re-Order Buttons
These are ‘Up’ and ‘Down’ arrows at the right side of the ‘Define Custom Show’ dialog box, which are active only if the ‘Slides in Custom Show’ list has more than one slide to its credit. In such a case, you can use these arrows to change the sequence of appearance of the slides within the custom presentation.
Step 5: Back to Custom Shows Dialog Box
When you have finished making all the required entries in the aforesaid fields, click on ‘OK’ to create your custom slideshow, which is visible in the ‘Custom Shows’ dialog box. You can preview the just created custom presentation by selecting the slideshow in the ‘Custom Shows’ list, followed by clicking on the ‘Show’ button at the bottom right of the dialog box.
The ‘Custom Shows’ dialog box has an additional list of buttons, which are explained as follows:
● The ‘New’ button, which you can click on to continue creating as many custom slideshows as you like.
● The ‘Edit’ button, which allows you to make changes to a specific custom slideshow.
● The ‘Remove’ button, which you can use to select and delete an existing custom presentation.
● The ‘Copy’ button, that lets you create multiple copies of a selected slideshow. This utility comes handy when you need to work on creating similar custom presentations with an affordably small number of differential elements.
When you are satisfied with your work, navigate to and hit the ‘Close’ button to finalize and save the custom presentation within your device.
Part 2 How to Show a Custom Show in PowerPoint?
When working to share any kind of information through slideshow presentations, creating a custom show is just half the job, with the significant part of a flawless content presentation remains still under the line. Having understood the process of creating a custom slide show in PowerPoint in enough detail, let us now move ahead with learning how to show the same in PowerPoint in the following section:
User’s Guide to Play a Custom Slideshow in PowerPoint
Step 1: Launch the Parent Presentation
In any suitable device of your preference, proceed with opening the presentation in which you have worked on creating the custom slideshow, followed by hitting the ‘Slide Show’ tab in the PowerPoint ribbon at the top. From the list of options that appears next, click on the ‘Custom Slide Show’ button.
Step 2: Custom Slideshow Dropdown Menu
Clicking on the ‘Custom Slide Show’ button in step 2 causes the latter’s dropdown menu to get displayed, with a list of all the created custom shows within the currently accessed parent slideshow presentation. Navigate to and click on the name of the custom presentation that you wish to play.
How to Set a Custom Show as the Default Slideshow?
If you are interested in playing the custom show as a default presentation, see through the following stepwise tutorial guide to go ahead with the process:
Step 1: Set Up Slideshow Button
After you have launched the parent presentation, navigate to and click on the ‘Slide Show’ tab within the topmost PowerPoint ribbon and tap the ‘Set Up Slide Show’ button from the list of options that follows.
Step 2: Set Up Show Dialog Box
Clicking on the aforesaid button makes the ‘Set Up Show’ dialog box to appear, where you are required to hit the ‘Custom Show’ radio button. You can now click on the dropdown arrow below the radio buttons to select your specific one from the list of custom shows that pops down. Hit ‘OK’ at the bottom right corner of the dialog box when you have made your choice.
The custom show is now your default slideshow. In your future launches of ‘Slide Show View’, only the selected custom show slides will appear to be used as a presentation.
Part 3 How to Hide Slides in PowerPoint?
In case you have worked on a detailed slideshow presentation in the PowerPoint tool, that consists of selective contents for different audience groups, all within the main presentation, it is a wise step to hide the content slides that are not useful to particular audiences, lest your viewers might get distracted with the irrelevant content.
By far, you must have developed a significant understanding of the custom slideshow PowerPoint creation and presentation procedure in much detail. Moving further into our discussion, let us now work on hiding slides within a PowerPoint presentation through the following step by step guide:
How to Hide or Unhide a Slide in PowerPoint?
Step 1: Launch the PowerPoint Presentation
Start with opening a desired PowerPoint Presentation in your preferred device.
Step 2: Make Your Selection
Visit the slide navigation pane at the left to select slide you wish to delete. Your selections will be highlighted as you tap on them. You can either delete the slides one at a time, or make multiple selections to delete them all at once.
Step 3: Hide Slide Option
When you have made the required selections, right click on the same, followed by choosing the ‘Hide Slide’ option from the dropdown menu that appears next. The selected slides will now be hidden and you can recognize them in the ‘Presenter View’ with lighter thumbnails as compared to the included slides, in the slide navigation pane.
Step 4: Unhiding the Presentation Slides
If you wish to unhide a previously hidden presentation slide, reach to the slide navigation pane in the left and right click on the hidden slide thumbnail. The dropdown menu in Step 3 pops up again, and you need to tap on the ‘Hide Slide’ option. The selected slide will now be included in the presentation.
An alternative to show a hidden slide within a running presentation, while remaining in the ‘Presenter View’, make a random right click anywhere within the currently running slide. The ‘Options Panel’ pops up, and you are required to choose the ‘See All Slides’ option.
All the slides of your presentation will now get displayed in the slide navigation pane, with the hidden ones being grayed out with a crossed slide number. Click on the thumbnail of the respective hidden slides that you want to present before the audience.
asterpieces crea
Creating PowerPoint Presentation Slides in Filmora
The Wondershare Filmora Video Editor franchise of graphic editor software is a pioneer in creating stunning masterpieces of content presentation alternatives. Talking of slideshow presentations, you can work with the software program to create and edit slideshow presentations in high end professional quality. The inbuilt library of the program is a vast trunk of features, effects and tools that allow you to explore your graphic creation abilities to your heart’s content and design top quality slideshows.
For Win 7 or later (64-bit)
For macOS 10.12 or later
Apart from creating slideshow presentations, you can use the software program to convert the same into video edits and customize them to suit your needs. As an example, you can work with removing the slideshow background, overlaying the slide contents; add tons of audio-visual effects and transitions to the slides and supplement them with pleasing background music.
Additional advantages of the application are a welcoming and user cohesive interface, high speed output response characteristics, high end, professional quality slideshow output and an extensive device compatibility. The bottom line is, the Filmora graphic editor package is an all in one solution to your most diverse and specific slideshow creation needs.
● Ending Thoughts →
● Custom slideshows are an important part of PowerPoint presentations, especially when you need to showcase selective contents of a detailed project.
● Apart from creating, you also get to play the custom slideshow, make it your default presentation and hide the latter’s slides using the PowerPoint tool.
● If you are searching for a PowerPoint alternative to create custom slideshows, picking the Wondershare Filmora slideshow creator tool is indeed a smart choice.
Best 10 Mind-Blowing Video Collage Maker for PC
10 Mind-Blowing Video Collage Maker for PC
An easy yet powerful editor
Numerous effects to choose from
Detailed tutorials provided by the official channel
Video collages are a great way to play multiple short videos at the same time. These collages can be used for different purposes and platforms like social media platforms, online video sharing sites, brand promotion, announcing an event or a service, and similar others.

Whatever may be the situation, you would need a good and feature-packed tool for creating such a collage so that videos look perfect in a frame, background audio can be added, and other customizations can be done. Keep reading below to learn about the best video collage maker for PC.
In this article
01 [Top 10 Video Collage Makers for Pc](#Part 1)
02 [Alternatives to Video Collage Maker for Pc](#Part 2)
Part 1 Top 10 video collage makers for PC
Among the long list of tools available, below we have shortlisted the top 10 PC tools that can be used for creating a video collage.
01**Wondershare Filmora Video Editor **
This Windows and Mac-based software is the best choice when it comes to creating a simple video collage in an effortless manner.
Key features
● Create a video collage using the split-screen feature of the software.
● Excellent video editing tool supporting advanced features for creating professional-looking videos.
● Support customizable animation options along with precise editing functions.
● Support to multiple audio-related features like automatic audio sync, audio compression, audio transitions, and more.
● Offers of stock collection of images, and other media files.
● Windows and Mac support.
For Win 7 or later (64-bit)
For macOS 10.12 or later
04Movavi Video Editor Plus
Unleash your creativity and make stunning videos including video collages using this excellent software.
Key features:
● Create stunning video collages with multiple video customization options.
● Allows adding titles, transitions, stickers, and filters.
● Option to apply chroma-key for changing the background.
● Option for creating automatic video collages.
● User-friendly interface.
● Windows and Mac support.

05Aiseesoft Video Converter Ultimate
Though the name suggests the software to be a video conversion tool, it is a multi-tasking software that can perform a variety of functions including video collage making and thus can be considered as a decent video collage app for PC.
Key features
● A feature-rich program that can also be used for creating a video collage.
● Allows performing a variety of features like video conversion, editing, compression, and more.
● Option for editing the video effects and also editing ID3 info.
● Create interesting GIF animations.
● Simple and easy-to-understand layout.
● Windows and Mac support.

06Cidade Video Collage Studio
Using this intuitive tool, you can quickly create a video collage by combining all your favorite videos in one place.
Key features
● Create a video collage by combining multiple videos or creating a video grid.
● Intuitive and user-friendly interface.
● Multiple-grid options to choose from.
● Allows applying effects like Sepia, Lomo, and others.
● Background audio or music files can be added.
● Option to change the background color and also preview the video.

07Blu-ray Master Video Converter Ultimate
This is a video toolbox supporting multiple functions that also include creating a video collage.
Key feature
● Create a video collage using high-quality videos.
● Support customizing and editing videos using several built-in tools.
● Video conversion to over 500 formats supported.
● Multiple layouts and templates for video collage are available.
● Almost all video, image, and audio formats are supported.

08Adobe Premiere Elements
If you are looking for an advanced and professional tool for creating a video collage and for other video editing needs, this is the right choice.
Key features:
● Create professional-looking collages using high-quality video files.
● The interface is clean with support for advanced functions.
● Option for adding multiple video effects.
● Comes with help documents and guides to help you with the software functions.
● Windows and Mac support.

09Collage Maker
For creating a simple video collage on your Windows system this is a good tool to consider.
Key features
● Simple and basic collage-making tool.
● Comes with customizable and adjustable layout options.
● Option to add stickers ad text to the collage.
● Allows mixing videos, and images along with the music file.

1010. iMovie
For Mac users, iMovie is the default video editing tool that is pre-installed on the system. Besides editing functions, the tool can also perform other tasks like creating a video collage.
Key features:
● Allows to quickly create a video collage.
● Intuitive interface.
● Comes pre-installed with Mac systems.
● Transitions and other effects can be added.

Part 2 Alternatives to video collage maker for PC
If you do not want to download any additional software on your PC for creating a video collage, there are alternatives available in form of online tools and phone-based apps. The online tools are free and simple to use supporting all basic and needed functions. Some of the popular names in the category include FastReels, Typito, Kapwing, and more.
Apps are a great option when you want to create a collage on your mobile phone. Multiple apps for the task are available on the Google play store and Apple Store. Some of the widely used ones are PicStich, PicPlayPost Movie Video Editor, Mojo, and others.
● Ending Thoughts →
● Video collages are an interesting way to combine and play short multiple videos or play them in a grid.
● There are several PC-based video collage maker tools available like Wondershare Filmora, and others.
● As alternatives, you can use online tools or phone-based apps for creating a video collage.
Video collages are a great way to play multiple short videos at the same time. These collages can be used for different purposes and platforms like social media platforms, online video sharing sites, brand promotion, announcing an event or a service, and similar others.
Whatever may be the situation, you would need a good and feature-packed tool for creating such a collage so that videos look perfect in a frame, background audio can be added, and other customizations can be done. Keep reading below to learn about the best video collage maker for PC.
In this article
01 [Top 10 Video Collage Makers for Pc](#Part 1)
02 [Alternatives to Video Collage Maker for Pc](#Part 2)
Part 1 Top 10 video collage makers for PC
Among the long list of tools available, below we have shortlisted the top 10 PC tools that can be used for creating a video collage.
01**Wondershare Filmora Video Editor **
This Windows and Mac-based software is the best choice when it comes to creating a simple video collage in an effortless manner.
Key features
● Create a video collage using the split-screen feature of the software.
● Excellent video editing tool supporting advanced features for creating professional-looking videos.
● Support customizable animation options along with precise editing functions.
● Support to multiple audio-related features like automatic audio sync, audio compression, audio transitions, and more.
● Offers of stock collection of images, and other media files.
● Windows and Mac support.
For Win 7 or later (64-bit)
For macOS 10.12 or later
04Movavi Video Editor Plus
Unleash your creativity and make stunning videos including video collages using this excellent software.
Key features:
● Create stunning video collages with multiple video customization options.
● Allows adding titles, transitions, stickers, and filters.
● Option to apply chroma-key for changing the background.
● Option for creating automatic video collages.
● User-friendly interface.
● Windows and Mac support.
05Aiseesoft Video Converter Ultimate
Though the name suggests the software to be a video conversion tool, it is a multi-tasking software that can perform a variety of functions including video collage making and thus can be considered as a decent video collage app for PC.
Key features
● A feature-rich program that can also be used for creating a video collage.
● Allows performing a variety of features like video conversion, editing, compression, and more.
● Option for editing the video effects and also editing ID3 info.
● Create interesting GIF animations.
● Simple and easy-to-understand layout.
● Windows and Mac support.
06Cidade Video Collage Studio
Using this intuitive tool, you can quickly create a video collage by combining all your favorite videos in one place.
Key features
● Create a video collage by combining multiple videos or creating a video grid.
● Intuitive and user-friendly interface.
● Multiple-grid options to choose from.
● Allows applying effects like Sepia, Lomo, and others.
● Background audio or music files can be added.
● Option to change the background color and also preview the video.
07Blu-ray Master Video Converter Ultimate
This is a video toolbox supporting multiple functions that also include creating a video collage.
Key feature
● Create a video collage using high-quality videos.
● Support customizing and editing videos using several built-in tools.
● Video conversion to over 500 formats supported.
● Multiple layouts and templates for video collage are available.
● Almost all video, image, and audio formats are supported.
08Adobe Premiere Elements
If you are looking for an advanced and professional tool for creating a video collage and for other video editing needs, this is the right choice.
Key features:
● Create professional-looking collages using high-quality video files.
● The interface is clean with support for advanced functions.
● Option for adding multiple video effects.
● Comes with help documents and guides to help you with the software functions.
● Windows and Mac support.
09Collage Maker
For creating a simple video collage on your Windows system this is a good tool to consider.
Key features
● Simple and basic collage-making tool.
● Comes with customizable and adjustable layout options.
● Option to add stickers ad text to the collage.
● Allows mixing videos, and images along with the music file.
1010. iMovie
For Mac users, iMovie is the default video editing tool that is pre-installed on the system. Besides editing functions, the tool can also perform other tasks like creating a video collage.
Key features:
● Allows to quickly create a video collage.
● Intuitive interface.
● Comes pre-installed with Mac systems.
● Transitions and other effects can be added.
Part 2 Alternatives to video collage maker for PC
If you do not want to download any additional software on your PC for creating a video collage, there are alternatives available in form of online tools and phone-based apps. The online tools are free and simple to use supporting all basic and needed functions. Some of the popular names in the category include FastReels, Typito, Kapwing, and more.
Apps are a great option when you want to create a collage on your mobile phone. Multiple apps for the task are available on the Google play store and Apple Store. Some of the widely used ones are PicStich, PicPlayPost Movie Video Editor, Mojo, and others.
● Ending Thoughts →
● Video collages are an interesting way to combine and play short multiple videos or play them in a grid.
● There are several PC-based video collage maker tools available like Wondershare Filmora, and others.
● As alternatives, you can use online tools or phone-based apps for creating a video collage.
Creating Testimonial Videos For Health And Wellness Business Industry
It’s not easy to get a testimonial video right. You need to know how to write one, find the right people to speak in it, and make sure your audience likes what they hear. But post-production can be even more challenging than getting everything else right: editing, adding effects, and music—it’s enough to make your head spin!
Fortunately for you, we’re here with our step-by-step guide on how to edit testimonial videos using Wondershare Filmora . So, sit tight because we’re about to take you through each stage of this process from start to finish!
Import Your Media Files to Filmora Video Editor
It includes your testimonial videos and video/photo materials. You can import your media files from the following sources:
- Medial Files
- Medial Folder
- From Camera or a Phone
- With Instant Cutter Tool
- With Auto Beat Sync

To save time, it is best to prepare ahead of time all your videos materials before start editing your testimonial video. Save it in just one folder including your script guide, photos, and videos
Select Your Preferred Project Aspect Ratio
Aspect ratio is the relationship between the width and height of your video, which determines how it will look on different screens. There are several commonly used aspect ratios such as:
- Widescreen (16:9) – Recommended for Youtube and Facebook
- Instagram (1:1) – Recommended for Instagram and Facebook
- Portrait (9:16) – Recommended for Tiktok, Stories and Reels
- Standard (4:3) – Recommended for Facebook, LinkedInn and other

Being aware of the right ratio for each social media platform will help you to advertise correctly. It also affects how you edit your video. For example, if you choose a different aspect ratio than what was originally recorded by Filmora’s camera tools, then some of your content may be cut off or stretched out in undesirable ways when viewed on certain devices (e.g., smartphones).
Split Testimonial Video into Small Clips

When you’re ready, drag your video testimonials to the Show Track then begin to use the “split” button to cut out parts of the video.
To split a video into smaller sections, start by cutting it down to the appropriate length by moving the playhead to the beginning position of the part you want to cut, clicking the Split icon (the scissors icon) on the toolbar, or clicking the Split button on the playhead.
From there, repeat this procedure until you’ve completed the whole narrative. You’ll be left with numerous cut segments that you may either delete or rearrange. To remove a clip from your movie, choose Delete from the toolbar or right-click and select delete.
Add Catchy Headlines and Text (Optional)
If desired, add catchy headlines/texts like “How to Eliminate Chronic Pain Forever”. You can do this by clicking Text button from toolbar located across top portion of screen (beside Transitions button).
![]()
Adding a phrase or a short sentence is called “headline”. It would be nice to add one of them at your video, so that viewers can get an idea about what it’s about before watching it in full. The text can be customized by using different font styles like bold, italic, underline etc., as well as its size and color.
Input Subtitle
Subtitles are used to translate the spoken word into text. If you have a video that is in a language other than English, subtitles can be added so that viewers who do not speak the language can still understand what is being said. Subtitles are also useful if you want to add subtitles for educational purposes, such as teaching students how to pronounce certain words and phrases.

Apply Transitions to Your Testimonial Video
You can add fade-in transitions to clips, as well as fade-out transitions.
To add a fade-in transition: Click on the first clip and select “Effects.” Then, click “Transition.” Choose a transition from the category of “Fades” and then apply it to the first clip by clicking on its thumbnail image.
To add a fade-out transition: Click on the second clip and select “Effects.” Then, click “Transition.” Choose a transition from the category of “Fades” and then apply it to the second clip by clicking on its thumbnail image.
Feel free also to use other transitions as you want, but be careful not to use an overly extreme one.

Add Background Music to Testimonial Video
You may choose from a wide range of music in the audio library. It’s available both online and offline.
You can also easily add background music from your computer by going to the “Media” menu and then selecting the import option. Make sure to use a non-copyright music so that you don’t run into any copyright problems when you post your video. There are several no copyright tracks on Youtube; simply search for no copyright background music or get it from other sites that provide a free-royalty background music.

Add a Logo/Watermark
To add a logo or watermark to your video, follow these steps:
- Import your Business Logo to the Media Folder.
- Then drag it into the Show Track area.
- Resize it to the ideal dimensions, then position it in the correct location in your video. It’s preferable to place it at the top or button section of the video.
You may also add your company’s logo at the end of the video as a fade-out transition.
![]()
By adding a logo or watermark to your video, you can make it harder for people to illegally distribute and share your video without permission. It helps also to promote your brand or business. When viewers see your logo or watermark throughout the video, they will be more likely to remember who made the video and where they can find more information about your company or products.
Insert Thumbnail
A video thumbnail is an image that represents your video to viewers. It should be eye-catching, but not so much that it’s distracting. The right video thumbnail can help you increase views and engagement on your content.
Place the thumbnail at the beginning of the video, and make sure it’s catchy! Your viewers won’t have time to look at it in detail, but they will glance at it in passing. Make sure to include relevant text and images that can hook your audience and keep them watching!

After completing the editing process, you can export your testimonial video in a variety of formats. To do this, click on the “Export” button in the upper right-hand corner of Wondershare Filmora.
Recommended Export Quality
- Resolution: 720 or 1080
- Frame rate 30 fps
Select your preferred file format and destination for storage.
Conclusion
That’s all for today! With this tutorial, you can edit testimonial videos for the health and wellness business industry on your own and make them look more professional, engaging, and converting.
Hopefully, this post gave you an idea of how to use Filmora as an easy-to-use video editing software that can help you create awesome videos with just a few clicks. Thanks for reading!
Free Download For Win 7 or later(64-bit)
Free Download For macOS 10.14 or later
How to Windows Online Movie Maker [Complete Guide]
The likelihood is that video will soon play a significant role in your content marketing approach, if it hasn’t already – and for that using windows online movie maker is inevitable. You are an emerging brand, a sole proprietor, or even a podcaster. Knowing the importance of video marketing to content producers and agencies is second nature if you’re an astute digital marketer It may be costly and challenging to utilize video editing software. Fortunately, there are free online video editors available.
Before very recently, video editing needed highly specialized skills and was done manually using different tools. Windows Movie Maker used to be a standard component of every Windows user’s toolbox and was a highly recommended video editing product for novices. With the windows movie maker online, the application was well-liked for its ease of use and entertaining special effects, but most significantly - it was free. It came pre-installed on all Windows machines. You may do that with the help of our handy list of the top three online video creators.
Part 1. How to Make a Video Online [Use Movie Maker Windows Online]
Using the help of Movie Maker, you may create videos online with your browser. It enables you to create professional-caliber videos without having to purchase video editing tools at professional-caliber costs. For every genre and need, this web program includes stock video, animated text, audio tracks, and on-screen effects. Your own video clips are uploaded. Then, use the simple drag-and-drop online video editor in Movie Maker to edit footage and add special effects and music to make your movie shine.
Making fantastic compilation films from your already-existing photographs and videos doesn’t need you to be a skilled editor. Even for amateur video makers, the platform’s UI is simple to use and straightforward to navigate. The customizing choices in Movie Maker are many. You have the option of uploading your own fonts and logos. You may also watermark your films and alter the text’s color. Additionally, there are a ton of very unique components like stickers, vector shapes, and masks that may enhance the visual appeal of your video productions and widen your creative boundaries.
Steps to Make Video with Movie Maker Online
Step1 Go to Movie Maker Online
Using Movie Maker Online, you can quickly and easily make incredibly interesting compilation films using your already-posted photographs and videos. You’ll immediately be sent to the editor, where you can begin organizing your films. Here’s the official link to the toolkit:
Step2 Upload Files to Web
Your photographs, videos, and text may all be uploaded. If you like the default music, you may skip the step to change it; otherwise, you can choose another song from our library or upload your own MP3 file. Files from a variety of sources and devices may be added. Click the Import Media button to start importing your own media. Click Open after locating the video you wish to modify.
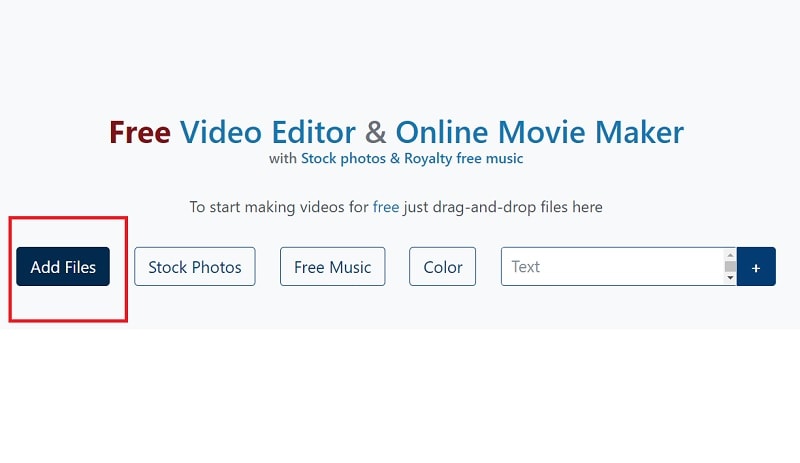
Step3 Create an online video
Add your music to your video compilation after all of your clips have been placed on the timeline. To accomplish that, choose a song depending on the genre or mood you want by clicking on the Music option on the left menu panel. To listen to the music track, click the little icon to the left of it. Text, colors, pictures, and video may all be customized to your heart’s delight. Add effects, drag, cut, etc. Press the Make Video button.
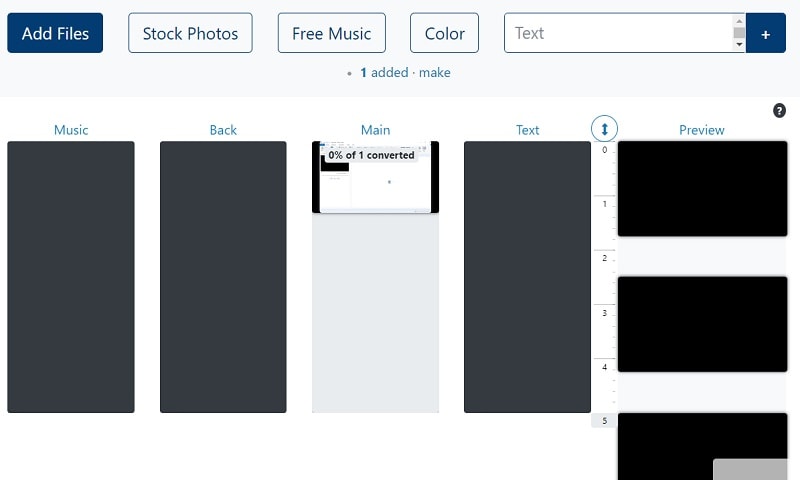
Step4 Save and Share with Others
Sharing your films on Facebook, Instagram, YouTube, and other platforms is made effortless. You may also send your loved ones the URLs to your videos. When you are happy with the changes, click the Save & Share option in the upper right corner, choose the quality you want to download your movie in, and then click the Export button. Download the updated video, then post it.
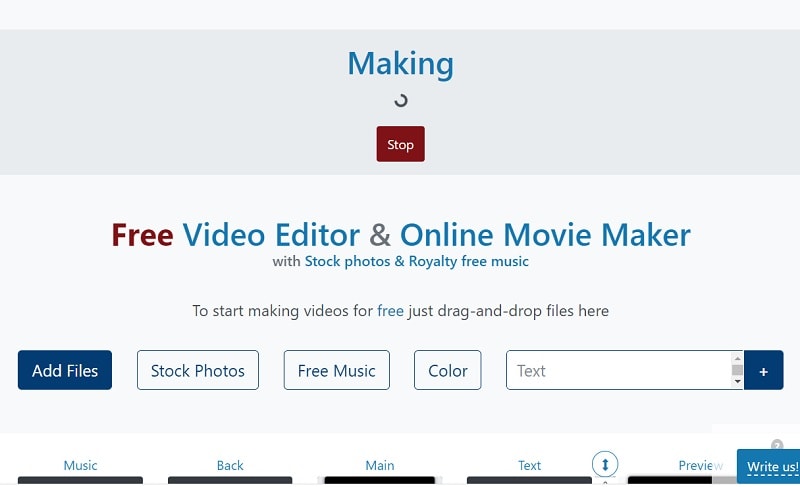
Part 2. Other Windows Online Movie Makers to Use [Top 3]
1. Kizoa
Link: Kizoa

Customizing the appearance of your film is one of the finest ways to make it seem like it is your own. With the Kizoa tool, you may trim, apply a crossfade effect, choose the required resolution, and format for an output video in addition to merging files. Utilize Kizoa’s online video creator to produce eye-catching videos that will hold your audience’s attention. Create any kind of video, from personal family video slideshows to expert films to advertise your company. With the drag-and-drop movie production tool from Kizoa, you can create your very own video in a matter of minutes.
Use a video template as your starting point if you need inspiration. Key framing, animated overlays, noise reduction, transitions, and titles are just a few of the features it provides to help you produce excellent footage. For rapid video editing, there is a video production wizard. Windows Movie Maker’s auto movie themes pale in comparison to those provided by this program. Its extensive collection of stock footage and audio tracks helps you to concentrate on the crucial elements without having to drastically decrease the length of your film or the number of scenes.
2. FlexClip
Link: FlexClip

With the aid of the online video effects tool FlexClip, you may quickly and easily make entertaining short films. It has a ton of video editing features that you may use without logging in or creating an account, like merging, compressing, compiling, adding text, creating memes, etc. For those that are muted, you may use FlexClip to add animated text that blends in with the style of your film. Additionally, you may add your logo so that everyone is aware of who created the masterpiece they just saw.
An online video editor called FlexClip is mainly focused on producing high-quality marketing, advertising, and promotional films for companies. Recording a single video that will function on all social networking and video-sharing websites is almost impossible. Instagram, YouTube, and Facebook Marketing are among the partners of FlexClip that have received expert approval. It is used by marketers and enthusiasts to quickly create looping movies and stop motion animation. But as it only provides very basic functionality, it may not be the greatest choice for more intricate, demanding editing.
3. Veed.Io
Link: Veed.Io

With only a few mouse clicks, users of the browser-based video editing program VEED may create professional-caliber movies. The greatest movie-making tools, including filters, effects, and stickers, are available on VEED. There are no intricate timelines, layers, or intricacy since it is a simple program that runs in your web browser. Simple drag-and-drop functionality is all you need to convey your tales. You may modify your video using its features. Using the video track below, you may combine, divide, or cut your files. Visit our website to see all of our filters, stickers, add-ons, and other tools.
Any device, whether an iPhone or Android phone, a MacBook, a Windows or Linux computer, may use VEED’s online video editor. You have access to all the resources you need to make amazing videos using VEED’s online video editor. Our user-friendly interface is very simple to use and is contemporary and intuitive. The native video sizes on each of the publishing sites, including Facebook, YouTube, and Vimeo, may all be altered using Veed. Finally, click “Export” in the editor’s upper-right corner, and your video will render quickly. Share some!
Conclusion
Use this editing list to produce more compelling video mashups for YouTube and other social media platforms in order to expand your audience, cultivate real connections with them, and eventually increase conversion rates. Because they combine the complex capabilities of the expensive, professional video suites with the user-friendliness and cost that appeal to novices, these online makers are a popular among editors of all skill levels. Make an investment in one of these video editing tools and own it.
Free Download For Win 7 or later(64-bit)
Free Download For macOS 10.14 or later
Part 1. How to Make a Video Online [Use Movie Maker Windows Online]
Using the help of Movie Maker, you may create videos online with your browser. It enables you to create professional-caliber videos without having to purchase video editing tools at professional-caliber costs. For every genre and need, this web program includes stock video, animated text, audio tracks, and on-screen effects. Your own video clips are uploaded. Then, use the simple drag-and-drop online video editor in Movie Maker to edit footage and add special effects and music to make your movie shine.
Making fantastic compilation films from your already-existing photographs and videos doesn’t need you to be a skilled editor. Even for amateur video makers, the platform’s UI is simple to use and straightforward to navigate. The customizing choices in Movie Maker are many. You have the option of uploading your own fonts and logos. You may also watermark your films and alter the text’s color. Additionally, there are a ton of very unique components like stickers, vector shapes, and masks that may enhance the visual appeal of your video productions and widen your creative boundaries.
Steps to Make Video with Movie Maker Online
Step1 Go to Movie Maker Online
Using Movie Maker Online, you can quickly and easily make incredibly interesting compilation films using your already-posted photographs and videos. You’ll immediately be sent to the editor, where you can begin organizing your films. Here’s the official link to the toolkit:
Step2 Upload Files to Web
Your photographs, videos, and text may all be uploaded. If you like the default music, you may skip the step to change it; otherwise, you can choose another song from our library or upload your own MP3 file. Files from a variety of sources and devices may be added. Click the Import Media button to start importing your own media. Click Open after locating the video you wish to modify.
Step3 Create an online video
Add your music to your video compilation after all of your clips have been placed on the timeline. To accomplish that, choose a song depending on the genre or mood you want by clicking on the Music option on the left menu panel. To listen to the music track, click the little icon to the left of it. Text, colors, pictures, and video may all be customized to your heart’s delight. Add effects, drag, cut, etc. Press the Make Video button.
Step4 Save and Share with Others
Sharing your films on Facebook, Instagram, YouTube, and other platforms is made effortless. You may also send your loved ones the URLs to your videos. When you are happy with the changes, click the Save & Share option in the upper right corner, choose the quality you want to download your movie in, and then click the Export button. Download the updated video, then post it.
Part 2. Other Windows Online Movie Makers to Use [Top 3]
1. Kizoa
Link: Kizoa
Customizing the appearance of your film is one of the finest ways to make it seem like it is your own. With the Kizoa tool, you may trim, apply a crossfade effect, choose the required resolution, and format for an output video in addition to merging files. Utilize Kizoa’s online video creator to produce eye-catching videos that will hold your audience’s attention. Create any kind of video, from personal family video slideshows to expert films to advertise your company. With the drag-and-drop movie production tool from Kizoa, you can create your very own video in a matter of minutes.
Use a video template as your starting point if you need inspiration. Key framing, animated overlays, noise reduction, transitions, and titles are just a few of the features it provides to help you produce excellent footage. For rapid video editing, there is a video production wizard. Windows Movie Maker’s auto movie themes pale in comparison to those provided by this program. Its extensive collection of stock footage and audio tracks helps you to concentrate on the crucial elements without having to drastically decrease the length of your film or the number of scenes.
2. FlexClip
Link: FlexClip
With the aid of the online video effects tool FlexClip, you may quickly and easily make entertaining short films. It has a ton of video editing features that you may use without logging in or creating an account, like merging, compressing, compiling, adding text, creating memes, etc. For those that are muted, you may use FlexClip to add animated text that blends in with the style of your film. Additionally, you may add your logo so that everyone is aware of who created the masterpiece they just saw.
An online video editor called FlexClip is mainly focused on producing high-quality marketing, advertising, and promotional films for companies. Recording a single video that will function on all social networking and video-sharing websites is almost impossible. Instagram, YouTube, and Facebook Marketing are among the partners of FlexClip that have received expert approval. It is used by marketers and enthusiasts to quickly create looping movies and stop motion animation. But as it only provides very basic functionality, it may not be the greatest choice for more intricate, demanding editing.
3. Veed.Io
Link: Veed.Io
With only a few mouse clicks, users of the browser-based video editing program VEED may create professional-caliber movies. The greatest movie-making tools, including filters, effects, and stickers, are available on VEED. There are no intricate timelines, layers, or intricacy since it is a simple program that runs in your web browser. Simple drag-and-drop functionality is all you need to convey your tales. You may modify your video using its features. Using the video track below, you may combine, divide, or cut your files. Visit our website to see all of our filters, stickers, add-ons, and other tools.
Any device, whether an iPhone or Android phone, a MacBook, a Windows or Linux computer, may use VEED’s online video editor. You have access to all the resources you need to make amazing videos using VEED’s online video editor. Our user-friendly interface is very simple to use and is contemporary and intuitive. The native video sizes on each of the publishing sites, including Facebook, YouTube, and Vimeo, may all be altered using Veed. Finally, click “Export” in the editor’s upper-right corner, and your video will render quickly. Share some!
Conclusion
Use this editing list to produce more compelling video mashups for YouTube and other social media platforms in order to expand your audience, cultivate real connections with them, and eventually increase conversion rates. Because they combine the complex capabilities of the expensive, professional video suites with the user-friendliness and cost that appeal to novices, these online makers are a popular among editors of all skill levels. Make an investment in one of these video editing tools and own it.
Free Download For Win 7 or later(64-bit)
Free Download For macOS 10.14 or later
Also read:
- Updated In 2024, How to Create Your Own Subscribe Channel Graphics
- Updated In 2024, Add Neon Effects to Your Dance Videos with the Help of Wondershare Filmora After Reading This Article. It Will Give a More Thrilling and Exciting Appearance
- Updated 6 Instant Mp4 to GIF Online Tools for You
- Updated In 2024, How to Create A Freeze Frame Sequence in Video
- New Using AI to Replace Skies Finding the Right Methods for 2024
- Updated 2024 Approved How to Add Font Effect
- In 2024, Learn How to Make Your CSGO Montage Impressive
- New In 2024, How to Use OBS Chroma Key With/Without Green Screen
- New Heres All About GIF Keyboard Youll Ever Want to Know
- 2024 Approved Vintage Film Effect 1980S - How to Create
- Top 8 Video Editor with Useful Masking for 2024
- Updated In 2024, Reviewing Efectum App For Smartphone Users Create Slow Motion Videos
- New Best 5 PDF to GIF Converters You Should Know
- New In 2024, Get The Perfect Drone Footage With Free Drone LUTs
- New Do You Know How Boring a Video Can Be with Silent Moments? Some Tools with Silent Detection Features Help You Delete Those Moments
- 2024 Approved 2 Methods to Crop a Video Using After Effects
- New How To Be A Successful YouTuber for 2024
- Updated 2024 Approved Best Video Grabbers for Chrome
- Confused About Deciding the Next Destination for Your Trip? This Article Features some of the Best Vloggers You Can Find for Gaining Inspiration for Traveling for 2024
- Updated How to Add Filter to Video in Premiere Pro, In 2024
- Updated In 2024, Do You Want to Print Designs Onto Your Garments or Other Fashion Accessories? Find Out How to Create a Screen Print Effect in Photoshop to Give Your Text or Graphics a Vintage or Retro Look
- Updated In 2024, You May Want to Create Your Video Tutorial and Share Your Knowledge with Others. Fortunately, You Can Easily Create a Professionally Edited Tutorial Video with Filmora. Keep Reading This Article Since We Will Show You How to Do It
- Trailer Guide for Creators and Developers
- New 2024 Approved Fast Method to Match Color in Photoshop
- New 10 Matching Color Combination That Works Together for 2024
- Updated In 2024, So, in This Short Tutorial, Well Learn How to Create a Vintage 1980-Style Video with a Retro Effect that Will Leave Your Audience Yearning for More
- Updated 2024 Approved IMovie Review – Is It The Best Video Editor for Mac Users
- Updated How to Make A Tattoo Disappear Like A Magic
- New 2024 Approved Start Making Procreate GIFs and Take Your Editing Creativity to the Next Level
- Updated Best Jump Cut Editing Tricks
- New Do You Want to Stream and Record at the Same Time but Cant Find an Easy Solution? This Guide Will Help You Get This Done Using Three Easy-to-Follow Methods for 2024
- Looking for the Simple Steps to Add a Filter to Your Video in Premiere Pro? Here Are the Complete Steps Along with the List of Free Premiere Filter Presets to Use for 2024
- Are You Convincingly Fascinated by the Whole Idea of Augmented Reality and Want to Level up Your Marketing Skills with an AR Integration? Rest Assured, Youve Found the Right Place for 2024
- Updated In 2024, Ultimate Guidelines to Help You Use VLC Media Player Better
- Updated In 2024, Do You Want to Stream and Record at the Same Time but Cant Find an Easy Solution? This Guide Will Help You Get This Done Using Three Easy-to-Follow Methods
- New In 2024, How to Merge Videos in HandBrake? Expectation Vs. Reality
- 2024 Approved Practical Ways to Resize Video in Handbrake
- New Unlocking the Power of DaVinci Resolve Scopes Enhance Your Color Grad
- New In 2024, Whatre the Best Alternatives to Pexels?
- Updated In 2024, 9 Best Sparkle Effects Photo and Video Editors You Should Know
- In 2024, If You Want to Record Video Streams on Windows or Mac Using FFmpeg, Read Our Guide and Learn How to Do This with Easy Step-by-Step Instructions
- New In 2024, Want to Play a Video on Loop on Vimeo so that It Plays Again and Again? Here Are All the Different Ways to Loop a Video on Vimeo in Simple Steps
- Updated Quick Answer Why Did Filmora AI Portrait Attract People?
- Updated Looking for the Best Way to Create Stunning Video Animations? Here, We Look at some of the Best Animated Video Maker Solutions to Use for 2024
- Best AR Video App - Top 10 Picks for 2024
- Updated Do You Want to Use a Video Editor for Your iOS Device? This Article Introduces LumaFusion, a Perfect Multi-Track Video Editor Designed to Cater to Your Needs for 2024
- Crucial Guidelines for Crafting Your Ultimate YouTube Sound Bank for 2024
- In 2024, Reset iTunes Backup Password Of iPhone 12 Prevention & Solution | Dr.fone
- New In 2024, The Ultimate Guide to Choosing an MP3 Converter for Mac
- A Step-by-Step Guide on Using ADB and Fastboot to Remove FRP Lock from your Samsung Galaxy S23 Ultra
- In 2024, PassFab iPhone 14 Plus Backup Unlocker Top 4 Alternatives
- New 2024 Approved Best 10 3D Slideshow Software Review
- Top 5 Vivo X Fold 2 Bypass FRP Tools for PC That Actually Work
- In 2024, How to Screen Mirroring Poco X5 Pro? | Dr.fone
- How to Unlock T-Mobile iPhone 14 Pro Max online without SIM Card?
- In 2024, Getting the Pokemon Go GPS Signal Not Found 11 Error in Tecno Spark 20 Pro | Dr.fone
- How to Factory Reset Oppo K11 5G in 5 Easy Ways | Dr.fone
- How to Bypass Google FRP Lock from Vivo Y27 4G Devices
- Updated 2024 Approved The Ultimate 16X9 Ratio Calculator Guide 5 Surprising Insights
- Issues playing H.265 HEVC video on HTC
- All Must-Knows to Use Fake GPS GO Location Spoofer On Nubia Red Magic 9 Pro+ | Dr.fone
- New 5 Easy Methods to Extract Audio From MP4 for 2024
- Remove FRP Lock on Infinix
- 10 Best Fake GPS Location Spoofers for Xiaomi Redmi Note 13 5G | Dr.fone
- New Best 6 Video Dubbing Software for PC - Free Download for 2024
- In 2024, How To Use Allshare Cast To Turn On Screen Mirroring On Samsung Galaxy S24+ | Dr.fone
- 3 Methods to Mirror Motorola Edge 2023 to Roku | Dr.fone
- Forgot Pattern Lock? Heres How You Can Unlock Asus ROG Phone 8 Pro Pattern Lock Screen
- In 2024, Free AVI Video Rotator Software and Apps for All Devices
- 3 Methods to Mirror Tecno Spark 20 Pro+ to Roku | Dr.fone
- Updated 2024 Approved Create Stunning 3D Videos Best Free and Paid Software
- Repair Video Tool - Repair all your damaged video files of Samsung on Mac
- Updated Give Your Videos a 3D Makeover Tips and Tricks for Windows Users
- Easy steps to recover deleted videos from Infinix Hot 30 5G
- Updated In 2024, A-List Singers Exploring Innovative Vocal Modification Tools and Resources
- In This Article, We Will Cover the Stages of Film Production You Need to Keep in Mind.Without Further Ado, Lets Get Started
- How to Bypass iCloud Lock from iPhone 8 Plus
- How To Unbrick a Dead Tecno Spark 20 Pro+ | Dr.fone
- Why Stellar Data Recovery for iPhone 13 mini takes time in scanning my iPhone? | Stellar
- Title: Updated Have You a Desire to Imbibe Your PowerPoint Presentations with Custom Effects and Tools? Be There to Learn All About Creating Custom Slideshows in PowerPoint with Utmost Ease for 2024
- Author: Morgan
- Created at : 2024-05-19 05:14:19
- Updated at : 2024-05-20 05:14:19
- Link: https://ai-video-editing.techidaily.com/1713963162244-updated-have-you-a-desire-to-imbibe-your-powerpoint-presentations-with-custom-effects-and-tools-be-there-to-learn-all-about-creating-custom-slideshows-in-po/
- License: This work is licensed under CC BY-NC-SA 4.0.
