
Updated Here We Are, Now the Main Topic of Interest of This Article - How to Put Together Several Videos so that They Become One? This Case, Unlike Other Possibilities We Discussed Above, Is More Complicated, so We Will Study This Feature Step by Step for 2024
Here We Are, Now the Main Topic of Interest of This Article - How to Put Together Several Videos so that They Become One? This Case, Unlike Other Possibilities We Discussed Above, Is More Complicated, so We Will Study This Feature Step by Step
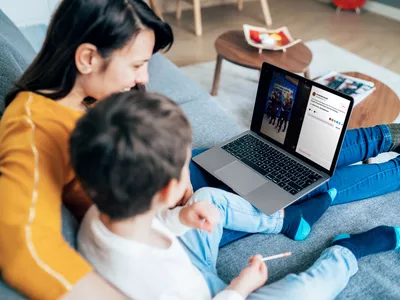
Sometimes, when working on a project, we really need to combine several videos - this way some content needs to be conveyed, there are shots that, when neatly sorted and merged together, really create visual and content value which we aspire to make; The process becomes more enjoyable if we work on the videos produced by ourselves, or if the work is to be done for our side project. People always take special care of their own work, and the same can be emphasized freely about the editing as well - about the packaging with which we have to deliver our videos to the audience. Even in the absence of an audience, maybe we want to make a kind of video collage for ourselves, our children, or in general, for the family to make delightful memories?
Of course, not everyone who has taken a camera or a mobile phone to take videos at least one time, even so, for family and friends, has the experience of editing and making various manipulations. However, the function of merging videos in various editing programs or on online platforms is so simple that it can be learned in just a few minutes, without the help of other people, and with a kind of small, though very useful result at the same time.
One of the programs where videos can be uploaded is VLC Media Player, which is a free-to-use, robust, and feature-packed software that plays a wide range of audio, image, and video files. It can play multimedia files directly from extractable devices or the PC. The program is unique, as it can stream from popular websites like Disney +, Hulu, Gaia, and Netflix. VLC Multimedia Player also accepts live video from PlayStation Live, Xbox Live, Facebook, Twitter, and YouTube. While most competing programs display advertisements, VLC Player does not, as it receives support from a non-profit organization.

Interestingly, we can, as though with the help of a magic wand, turn this particular video player into video editing software. When one computer program delivers too many functions, it might make us think of the situation where one person claims to serve ten professions at the same time - there is a mood that they will not be good in any of them. It’s not true with VLC Player, which, from experience, seems to be both a good “player” as well as a fairly user-friendly editing software with many interesting features and functions.
Before we move on to video streaming, let’s look at two features that we can use in VLC player:
In the player, right when our video clip starts to play, we may find that the footage is taken vertically instead of horizontally! This is not a nightmare just for video enthusiasts. If you don’t know how to rotate the video, then you have to rotate your head 90 degrees, and at this time you can not even get pleasure from watching, not to mention that it can even cause your neck to lock up. VLC Player took care of that - in the top panel, just click on Tools, then select Effects & Filters. In the opened window, we find Video Effects, select Geometry and check the Rotate option - so, the whole 360 degrees are at our disposal!
Sometimes it happens that we watch the video, we are crazy about one part of it, and the other part of it seems to spoil everything! Even if we are ready to publish the raw material on social media or just save it for ourselves, we just don’t want some parts of the video to be there. So, it can be said - we are not satisfied with the full version and we wish to cut our clip and/or reduce its timeframe. VLC Player solves this problem “without any problem” - we find the View in the top panel, then we demand the cursor to aim for Advanced Controls button. As a result, a sort of video editor will appear, with its red record button on which we will click and the video will play until we reach the point where we want to split the footage. The cut video will be automatically saved in My Computer’s My Video folder.
How to Merge Multiple Videos in VLC Media Player
Here we are, now the main topic of interest of this article - how to put together several videos so that they become one? This case, unlike other possibilities we discussed above, is more complicated, so we will study this feature step by step .
Technique one:
- Step one:
Open VLC media player.

Probably, you have already decided exactly which files you want to merge, so choose Open Multiple Files…

In the opened window, click on Add in the File tab.

Select the desired clips from the newly opened window (selecting order matters, because it dictates which clips will come first and which ones will be next in the finished version), then click Open.

- Step two:
The selected videos are shown in the File Selection list. At the bottom of the window, click the Arrow button next to the Play button, where you need to select Convert.

In the Profile, it is desirable to specify the following format: Video - + MP3 (MP4), and below you can choose the Destination file - the location where you want to save the merged video. Also, to find the edited video easily, check the following: Append ‘-converted’ to file name. Click on Start. Wait until it is done - then you can play the video.

Technique two:
- Create a New Folder and move the videos that you would like to merge Rename the videos (e.g. to 1, 2 etc.).

- Create a new text file. Copy and paste this line below:
vlc_location video1.mp4 video2.mp4 –sout “#gather:std{access=file,dst=final_file_name.mp4}” –sout-keep

- Type VLC in the taskbar search and right-click on the app. Choose Open File location.

Right-click on the app and choose Properties. A new window will be opened, where you need to go to Target. Select and copy the line.

Go to the text document file. Remove vlc_location and paste the copied text instead. Change the names of the video to match the names in the folder.

- Open the folder with videos. Click on the address line. Type cmd and press Enter.

sA new window will open. Cope the line from the text file and paste it into cmd window; then, click on Enter.

- VLC player will open and will play the merged video file.

An Easier Way to Merge Videos in A Few Clicks
It’s true that merging videos in VLC Media Player takes quite a few steps, so to speak. But is this the only editing program in which a similar operation can be performed? Of course not. Therefore, in our article, we decided to offer you an alternative, where you can also easily merge the videos. This is the famous Filmora Video Editor , a software that is one of the easiest and most convenient to work with, especially for those who want to edit videos without having much experience in “complicated” software before. So again, step by step guideline on how to put together our video clips in Wondershare Filmora.
For Win 7 or later (64-bit)
For macOS 10.14 or later
- Open the program.
- Choose Import Media Files Here.

- Choose your

- We can click and drag, essentially, “insert” a video in a sequence below. The Linear Timeline allows us to understand exactly when a video clip ends and when a new one starts.

- Accordingly, we can make one video “sit” next to another. If we want or need it, we will add the third video clip, fourth, and so on.

- We can view the entire video and save the video afterwards.
- Start to save video - we make sure the result is exactly what we wanted, find the Export button above the timeline and click on it.

- In the opened window, on the left side, to be precise, if we observe well, we can already choose in which format we want to save our clip. On the right we can indicate what name we want to give to our video; The location where we want to store it; Also, we see the resolution (which we can modify freely after clicking on Settings); Size; Duration.

- In Settings, we can decide how much quality the video should have, how many kbps will be the Bit Rate, how many fps the Frame Rate should be, etc., but most likely, beginners will not need to change all this.

- After selecting everything, right-click on the Export button in the lower right corner of the window and the program will start saving the material.


Filmora 9, though, works a little differently.
- In the Import dropdown menu, select Import with instant cutting tool…

This will open the Filmora Instant Cutter window with two options - Trim and Merge. Since we need Merge in this case, this is what we choose.

- Then Open File, which will allow you to select multiple clips. Select the desired video clips and to Import, click Open.

- The window will show the files we selected and the entire video, and to save it, we click on Export.

- Specify File name, Save to (location), When done - the latter is what the program should do after the material is exported, e.g. open the containing folder. The export window also shows the approximate size of the footage.

- After hitting on Ok, the project will be saved, which will happen very quickly, since the program does not decode and encode the material.


That’s it! In this article, we have tried to teach you how to use VLC Media Player as a video editor software, what features we can use and, most importantly, how to merge multiple videos in this dual program; We also learned an alternative way of how we can combine different video clips with the help of Wondershare Filmora. The choice is yours, the main thing is to know all the alternatives and find the most time and energy saving, preferable option for you personally!
Interestingly, we can, as though with the help of a magic wand, turn this particular video player into video editing software. When one computer program delivers too many functions, it might make us think of the situation where one person claims to serve ten professions at the same time - there is a mood that they will not be good in any of them. It’s not true with VLC Player, which, from experience, seems to be both a good “player” as well as a fairly user-friendly editing software with many interesting features and functions.
Before we move on to video streaming, let’s look at two features that we can use in VLC player:
In the player, right when our video clip starts to play, we may find that the footage is taken vertically instead of horizontally! This is not a nightmare just for video enthusiasts. If you don’t know how to rotate the video, then you have to rotate your head 90 degrees, and at this time you can not even get pleasure from watching, not to mention that it can even cause your neck to lock up. VLC Player took care of that - in the top panel, just click on Tools, then select Effects & Filters. In the opened window, we find Video Effects, select Geometry and check the Rotate option - so, the whole 360 degrees are at our disposal!
Sometimes it happens that we watch the video, we are crazy about one part of it, and the other part of it seems to spoil everything! Even if we are ready to publish the raw material on social media or just save it for ourselves, we just don’t want some parts of the video to be there. So, it can be said - we are not satisfied with the full version and we wish to cut our clip and/or reduce its timeframe. VLC Player solves this problem “without any problem” - we find the View in the top panel, then we demand the cursor to aim for Advanced Controls button. As a result, a sort of video editor will appear, with its red record button on which we will click and the video will play until we reach the point where we want to split the footage. The cut video will be automatically saved in My Computer’s My Video folder.
How to Merge Multiple Videos in VLC Media Player
Here we are, now the main topic of interest of this article - how to put together several videos so that they become one? This case, unlike other possibilities we discussed above, is more complicated, so we will study this feature step by step .
Technique one:
- Step one:
Open VLC media player.
Probably, you have already decided exactly which files you want to merge, so choose Open Multiple Files…
In the opened window, click on Add in the File tab.
Select the desired clips from the newly opened window (selecting order matters, because it dictates which clips will come first and which ones will be next in the finished version), then click Open.
- Step two:
The selected videos are shown in the File Selection list. At the bottom of the window, click the Arrow button next to the Play button, where you need to select Convert.
In the Profile, it is desirable to specify the following format: Video - + MP3 (MP4), and below you can choose the Destination file - the location where you want to save the merged video. Also, to find the edited video easily, check the following: Append ‘-converted’ to file name. Click on Start. Wait until it is done - then you can play the video.
Technique two:
- Create a New Folder and move the videos that you would like to merge Rename the videos (e.g. to 1, 2 etc.).
- Create a new text file. Copy and paste this line below:
vlc_location video1.mp4 video2.mp4 –sout “#gather:std{access=file,dst=final_file_name.mp4}” –sout-keep
- Type VLC in the taskbar search and right-click on the app. Choose Open File location.
Right-click on the app and choose Properties. A new window will be opened, where you need to go to Target. Select and copy the line.
Go to the text document file. Remove vlc_location and paste the copied text instead. Change the names of the video to match the names in the folder.
- Open the folder with videos. Click on the address line. Type cmd and press Enter.
sA new window will open. Cope the line from the text file and paste it into cmd window; then, click on Enter.
- VLC player will open and will play the merged video file.
An Easier Way to Merge Videos in A Few Clicks
It’s true that merging videos in VLC Media Player takes quite a few steps, so to speak. But is this the only editing program in which a similar operation can be performed? Of course not. Therefore, in our article, we decided to offer you an alternative, where you can also easily merge the videos. This is the famous Filmora Video Editor , a software that is one of the easiest and most convenient to work with, especially for those who want to edit videos without having much experience in “complicated” software before. So again, step by step guideline on how to put together our video clips in Wondershare Filmora.
For Win 7 or later (64-bit)
For macOS 10.14 or later
- Open the program.
- Choose Import Media Files Here.
- Choose your
- We can click and drag, essentially, “insert” a video in a sequence below. The Linear Timeline allows us to understand exactly when a video clip ends and when a new one starts.
- Accordingly, we can make one video “sit” next to another. If we want or need it, we will add the third video clip, fourth, and so on.
- We can view the entire video and save the video afterwards.
- Start to save video - we make sure the result is exactly what we wanted, find the Export button above the timeline and click on it.
- In the opened window, on the left side, to be precise, if we observe well, we can already choose in which format we want to save our clip. On the right we can indicate what name we want to give to our video; The location where we want to store it; Also, we see the resolution (which we can modify freely after clicking on Settings); Size; Duration.
- In Settings, we can decide how much quality the video should have, how many kbps will be the Bit Rate, how many fps the Frame Rate should be, etc., but most likely, beginners will not need to change all this.
- After selecting everything, right-click on the Export button in the lower right corner of the window and the program will start saving the material.
Filmora 9, though, works a little differently.
- In the Import dropdown menu, select Import with instant cutting tool…
This will open the Filmora Instant Cutter window with two options - Trim and Merge. Since we need Merge in this case, this is what we choose.
- Then Open File, which will allow you to select multiple clips. Select the desired video clips and to Import, click Open.
- The window will show the files we selected and the entire video, and to save it, we click on Export.
- Specify File name, Save to (location), When done - the latter is what the program should do after the material is exported, e.g. open the containing folder. The export window also shows the approximate size of the footage.
- After hitting on Ok, the project will be saved, which will happen very quickly, since the program does not decode and encode the material.
That’s it! In this article, we have tried to teach you how to use VLC Media Player as a video editor software, what features we can use and, most importantly, how to merge multiple videos in this dual program; We also learned an alternative way of how we can combine different video clips with the help of Wondershare Filmora. The choice is yours, the main thing is to know all the alternatives and find the most time and energy saving, preferable option for you personally!
Clone Yourself in Videos with Filmora
With the help of video editing programs like Filmora , you can create clones of yourself. Whether you’re looking to create a funny skit or a serious video, cloning yourself can add much production value to your project.
In this article, we’ll walk you through the process of how to clone yourself in videos using Filmora.
Part 1: How to Film Clips for Cloning Effects?
To make cloning effects, you will need to take two different shots and use a tripod to place the camera, so the frame doesn’t change.
Shooting the first clip
For the first shot, stay on one side of the frame and do the first action. For example, you can pretend to yank and take off your jacket. Then, drop the jacket to the other side of the frame.

To make it more realistic, make an interaction by reacting to the “clone” while facing the other direction.

Shooting the second clip
Then, shoot for the second clip without changing the frame. You will have to go to the place where you dropped the jacket from the first shot.

Act as if you have just appeared there and give a reaction to the other side as well.
Part 2: How to Do the Clone Effect with Filmora?
After you have shot the necessary film clips, bring the clips into Filmora 11. If you haven’t installed Filmora yet, you can go to their website and download it here:
Free Download For Win 7 or later(64-bit)
Free Download For macOS 10.14 or later
Once you have opened Filmora 11, follow the steps below:
Step1 Bring the first clip to the timeline and cut the clip where you pretend to yank and take off the jacket. Select and delete the unnecessary clip.

Step2 After you have the first part of the effect ready, let’s start working on the clone part using masking.
First, place the second clip on a different window track, and the starting point is where you react to the “clone.”

Then, double-click the second clip and go to the Filmora setting window. Tap on the Mask section > Single line.

On the preview screen, adjust the position of the mask to only show “the clone.”

Set the blur strength on the setting to make a smoother edge transition.
Step3 If the timing of the two clips doesn’t match, you can fix it using the speed ramping feature on Filmora 11. To use it, double-click the second clip and select Speed > Speed Ramping > Customize.

Move the keyframe up to increase the speed. You can adjust it according to your needs.

Step4 Once you are satisfied, adjust the clip length on the timeline and make sure that both clips finish at the same time.

Extra tip: Add one more effect to make it more magical.
Step1 Open the Effects window and search for “up down 1.”

Step2 Drag and drop the effect onto the timeline where the first cut is set. Adjust the effect length to match the action.

Then, drag and drop the effect again in the transition between the first and the second clip. Adjust it to the appropriate length, then it will give a more dramatic effect.
Step3 You can playback and see how it looks on the preview screen.
Summary
Making a clone effect on video is easy using Filmora. You can use the same trick to create a fashion lookbook video or other creative content to make them more engaging. Let us know if you want to see more tutorials.
Free Download For Win 7 or later(64-bit)
Free Download For macOS 10.14 or later
Free Download For macOS 10.14 or later
Once you have opened Filmora 11, follow the steps below:
Step1 Bring the first clip to the timeline and cut the clip where you pretend to yank and take off the jacket. Select and delete the unnecessary clip.
Step2 After you have the first part of the effect ready, let’s start working on the clone part using masking.
First, place the second clip on a different window track, and the starting point is where you react to the “clone.”
Then, double-click the second clip and go to the Filmora setting window. Tap on the Mask section > Single line.
On the preview screen, adjust the position of the mask to only show “the clone.”
Set the blur strength on the setting to make a smoother edge transition.
Step3 If the timing of the two clips doesn’t match, you can fix it using the speed ramping feature on Filmora 11. To use it, double-click the second clip and select Speed > Speed Ramping > Customize.
Move the keyframe up to increase the speed. You can adjust it according to your needs.
Step4 Once you are satisfied, adjust the clip length on the timeline and make sure that both clips finish at the same time.
Extra tip: Add one more effect to make it more magical.
Step1 Open the Effects window and search for “up down 1.”
Step2 Drag and drop the effect onto the timeline where the first cut is set. Adjust the effect length to match the action.
Then, drag and drop the effect again in the transition between the first and the second clip. Adjust it to the appropriate length, then it will give a more dramatic effect.
Step3 You can playback and see how it looks on the preview screen.
Summary
Making a clone effect on video is easy using Filmora. You can use the same trick to create a fashion lookbook video or other creative content to make them more engaging. Let us know if you want to see more tutorials.
Free Download For Win 7 or later(64-bit)
Free Download For macOS 10.14 or later
Ll About GIF Keyboard That You Want to Know
All About GIF Keyboard That You Want to Know
An easy yet powerful editor
Numerous effects to choose from
Detailed tutorials provided by the official channel
Add more thrill to the meme sharing fun with the GIF keyboard!
GIFs are absolutely stunning means of mass information sharing. Talking of exact GIF meaning, these are short, motion snippets you can use to make your messages more expressive and precise. A variety of GIF images are available across the web, allowing you to emote and convey exactly what you feel in the most unique and interesting manner.
In this article
01 [The Best 8 GIF Keyboards for Your iPhone](#Part 1)
02 [How to Text Gifs on Android](#Part 2)
03 [How to Get the Imessage GIF Keyboard](#Part 3)
Part 1 The Best 8 GIF Keyboards for Your iPhone
GIFs are already known to add spice to the immense varieties of the ‘content share’ dish. You can boost up your information credibility to the next level with exciting, relatable and impactful GIFs. Adding to the preset resourcefulness, makers have introduced the GIF keyboard, which is all set to fetch the exact GIFs with your specified keyword, making you access the content that you precisely want.
Having understood the reliability of GIF keyboards, let us browse through the best ones you can use in your iPhone:
01Fleksy Keyboard
This one is an inventive and exciting GIF keyboard that you can use for making fun-filled conversations and sharing amazing content with your social media peers and communities. You can conveniently customize the extensions of this keyboard and use its expressive stickers and emojis to emote your chats in the most perfect way.
Fleksy comes with 3 different GIF keyboards supports around 40 different languages with over 50 vibrant themes and has a quick and smart user interface.

Pros
● Fleksy is the fastest GIF keyboard currently available for iPhone.
● It has an exclusive GIF sharing feature
● Loaded with numerous GIF extension features, like, hotkey, stickers, etc.
Cons
● You can use this keyboard only on iPhones with iOS version 8.0 onwards.
● You need an internet connection to download this keyboard from the Apple App Store.
● It does not have the facility of swipe input.
Cost
This one is free application and does not cost you a penny to download and use.
02Kika Keyboard
This one falls among the most loved GIF keyboards by iPhone users. Using this keyboard you can share memes, emojis, fonts, etc., with other iPhone users. Preferred by 20 million plus users, this keyboard supports 150 languages and comes with an Autocorrect feature that never lets you make any typing mistakes. It has a huge inventory of over 3000 GIFs and emoticons.

Pros
● It has a top grade security for personal information and community chat data.
● It has a heap of impactful keyboard themes.
● Pop up GIFs and emojis are there to give you the freedom of exact expression.
Cons
● This keyboard is compatible with iOS devices having versions successive to 9.0.
● Downloading this keyboard from the Apple App Store requires an internet connection.
● Most of the keyboard styles are accessible in the paid version of the application.
Cost
This keyboard is available to you absolutely free of cost in its basic version. However, you need to pay some amount to get the paid version with premium features.
03GIF Keyboard
This is an absolute heaven for GIF lovers. You can use this keyboard on any of iOS devices to either create or share fun filled GIFs and memes to express your precise feelings and emotions with your friends. The keyboard has a user cohesive interface with a vast library of latest GIFs to explore and use.

Pros
● It assures hassle free Gif creation and sharing.
● You can create sticker and GIF packs to share with friends and family.
● You can share GIFs on a various media sharing platforms, like, SnapChat, WhatsApp, Twitter, Facebook, etc.
Cons
● You cannot use this keyboard on devices with iOS versions prior to 9.0.
● This application has a data security risk.
● You need an internet connectivity to get this one from the Apple App Store.
Cost
The app is primarily free to download and use, but cones with a few in-app purchases.
04SwiftKey Keyboard
This is also one of the top ranked GIF keyboards and undergoes continuous upgrades to increase app productivity among over 250 million loyal users across the world. You can add an extra punch to your conversations with living GIFs and emojis from its extensive content library. You can enjoy seamless typing and get the perfect themes, colors, designs and patterns to uplift your precious moments.

Pros
● This GIF keyboard supports a bilingual autocorrect feature with smart AI predictions.
● It comes with a quick access toolbar for speedy access and supports 90 different languages.
● It has a content reserve of over 1000 GIFs and emojis.
Cons
● This keyboard is compatible with iOS versions 9.3 and later.
● This keyboard lacks the ‘Save’ feature for your favorite GIFs.
● You cannot see the GIFs that you had recently sent in your conversations.
Cost
This application is free to use in its basic version, but asks you for a paid premium membership to access some advances features.
05FancyKey Keyboard
This is a smart choice to make among GIF keyboards for iPhone on account of being packed with explicitly customizable features, over 100 beautiful fonts and 50 vibrant themes. The best part is, the application is backed up with enhanced security and data privacy features. You can choose from the best auto suggest emoticons to express exactly what you feel.

Pros
● It allows you to make swipe inputs with accurate word predictions.
● Its integrated emoji art keyboard suggests exact and expressive facial expressions.
● It is compatible with almost every iOS device.
Cons
● The interface is loaded with quite a large number of access options.
● Finding your perfect content can be a bit time taking.
● You need an internet connection to download and use this keyboard.
Cost
You can get this keyboard for free on the Apple App Store.
06Gfycat
This is also quite ban efficient GIF keyboard you can use to share immense varieties of top quality GIFs, memes and stickers across your Instagram, Facebook and SnapChat accounts. Available in the most convenient user interface, this keyboard is packed with millions of GIFs and emojis to choose from.

Pros
● You can share content in various languages
● Its library is packed with GIFs and memes of HD quality.
● You can create GIFs of your own using your device’s camera.
Cons
● Keyboard features other than GIFs ate absent.
● Though high on quality, but the GIF images are quite small in size.
● You cannot save and view GIFs in the application.
Cost
You can use this keyboard absolutely free of cost on the Apple App Store.
07RainbowKey
As is evident from the name, this keyboard is packed with a range of vibrant themes to beautify the app background. Additionally, you can use still images from your device to create themes of your own. Its interactive interface shows pop up animations and emojis related to the content you type. You can find exciting GIF varieties from popular, trending and hashtag content categories.

Pros
● You can save your favorite GIFs and use them in future.
● You can create your own keyboard themes from locally saved images.
● Its smart AI feature predicts emojis and autocorrect suggestions as you type.
Cons
● It comes with a little tricky interface.
● The application may occasionally crash in between successive tan switches.
● It is supported on iOS versions later than 8.0.
Cost
The application is primarily free, but contains a few in-app purchases.
08Tenor GIF Keyboard
This is an extensive and smart GIF keyboard that allows you to make a number of GIF customizations in addition to sharing GIFs. You are granted the liberty to add captions to GIFs and save your favorite ones for later use by adding them to the exclusive GIF pack. The keyboard is launched by Tenor, which is apparently the most extensive GIF library across the web.

Pros
● You can caption your GIFs and save them locally to your device.
● You can make your explicit GIF pack to save and organize favorite GIFs for quick access.
● You can export your GIFs to almost all major media sharing platforms.
Cons
● The app has restricted keyboard functions
● The app interface may appear a bit crowded.
● You need internet connectivity to use this application
Cost
You can access and use this app for free.
Part 2 How to Text GIFs on Android
All Android devices cone with an inbuilt GIF sharing feature and it is more or less similar to sharing GIFs on iOS devices. The minor different encountered, is on account of using the Google keyboard for GIF texting via Android devices.
Now that you are accustomed to using GIFs keyboards for iPhone, let’s dive into methods of working with GIF texting on Android devices. After all, GIFs are a content credibility that is worthy of exploring beyond platform boundaries. Discussed below are some super easy steps of texting GIFs on Android devices:
● Navigate to, and open the inbuilt messaging application of your Android device.
● Tap any suitable emoticon on the keyboard.
● You will see a few file format options. Choose and tap the ‘GIF’ option.
● Look for your required GIF in the search bar or select one from the default or locally saved collections.
● Tap any suitable GIF to get its preview, followed by pressing the ‘Send’ button.
Part 1 How to Get the iMessage GIF Keyboard
Adding GIFs to iMessage is quite simple and handy, as the application opens up an extensive GIF library to save and share GIFs. While iPhone 10 and later version users are gifted with #images, the default GIF keyboard; there are alternatives too to get the iMessage GIF Keyboard for other versions.
Discussed below is a quick and convenient method to get the iMessage GIF keyboard for your iOS device:
● Reach to the ‘Messages’ application in your iPhone and open a new or an existing conversation.

● In the text field, click on the ‘Apps’ button (‘A’ symbol) at the left side and you will see the #images keyboard pops up.

● In an otherwise case, navigate to the bottom of the app screen and hit the 4-bubble icon at the left to see the #images icon appear.

● Click on the icon to explore, search and select a suitable GIF.

● Before you send the selected GIF to your friends, you can make it more impactful by adding relatable texts.

Filmora GIF Creator
DIF keyboards are one exciting trend, but creating GIFs is equally interesting. If you are thinking to try hands on making GIFs of your own, the W**Wondershare Filmora Video Editor ** is at your instant service. This one is excellent GIF creator software, to say the least, available on the web today. You can conveniently depend on this to create stunning GIFs that would leave viewers jaw dropped on your creativity.

Wondershare Filmora - Best Video Editor for Mac/Windows
5,481,435 people have downloaded it.
Build unique custom animations without breaking a sweat.
Focus on creating epic stories and leave the details to Filmora’s auto features.
Start a creative adventure with drag & drop effects and endless possibilities.
Filmora simplifies advanced features to save you time and effort.
Filmora cuts out repetition so you can move on to your next creative breakthrough.
Key Features
Filmora lands amongst the top rated GIF creator software on account of the following features:
● This one is a quick and smart GIF maker, allowing you to create catchy GIFs within minutes.
● Filmora editor library has the most extensive inventory of audio-visual effects, editing features and filters that are all set to give your creation that stunning and perfect professional look.
● The extremely user cohesive interface of this software promises you a seamless GIF creation experience.
● Key Takeaways from This Episode →
● GIF keyboards are the latest trends in adding impact to community conversations via Instant Messaging apps.
● Be it iPhones or Android devices, these keyboards are ready to intensify your chats with the most exact expressions.
● From a pool of welcoming choices, you can certainly pick the Filmora GIF creator to create interesting content in the GIF format and add that extra spunk to your normal conversations.
Add more thrill to the meme sharing fun with the GIF keyboard!
GIFs are absolutely stunning means of mass information sharing. Talking of exact GIF meaning, these are short, motion snippets you can use to make your messages more expressive and precise. A variety of GIF images are available across the web, allowing you to emote and convey exactly what you feel in the most unique and interesting manner.
In this article
01 [The Best 8 GIF Keyboards for Your iPhone](#Part 1)
02 [How to Text Gifs on Android](#Part 2)
03 [How to Get the Imessage GIF Keyboard](#Part 3)
Part 1 The Best 8 GIF Keyboards for Your iPhone
GIFs are already known to add spice to the immense varieties of the ‘content share’ dish. You can boost up your information credibility to the next level with exciting, relatable and impactful GIFs. Adding to the preset resourcefulness, makers have introduced the GIF keyboard, which is all set to fetch the exact GIFs with your specified keyword, making you access the content that you precisely want.
Having understood the reliability of GIF keyboards, let us browse through the best ones you can use in your iPhone:
01Fleksy Keyboard
This one is an inventive and exciting GIF keyboard that you can use for making fun-filled conversations and sharing amazing content with your social media peers and communities. You can conveniently customize the extensions of this keyboard and use its expressive stickers and emojis to emote your chats in the most perfect way.
Fleksy comes with 3 different GIF keyboards supports around 40 different languages with over 50 vibrant themes and has a quick and smart user interface.
Pros
● Fleksy is the fastest GIF keyboard currently available for iPhone.
● It has an exclusive GIF sharing feature
● Loaded with numerous GIF extension features, like, hotkey, stickers, etc.
Cons
● You can use this keyboard only on iPhones with iOS version 8.0 onwards.
● You need an internet connection to download this keyboard from the Apple App Store.
● It does not have the facility of swipe input.
Cost
This one is free application and does not cost you a penny to download and use.
02Kika Keyboard
This one falls among the most loved GIF keyboards by iPhone users. Using this keyboard you can share memes, emojis, fonts, etc., with other iPhone users. Preferred by 20 million plus users, this keyboard supports 150 languages and comes with an Autocorrect feature that never lets you make any typing mistakes. It has a huge inventory of over 3000 GIFs and emoticons.
Pros
● It has a top grade security for personal information and community chat data.
● It has a heap of impactful keyboard themes.
● Pop up GIFs and emojis are there to give you the freedom of exact expression.
Cons
● This keyboard is compatible with iOS devices having versions successive to 9.0.
● Downloading this keyboard from the Apple App Store requires an internet connection.
● Most of the keyboard styles are accessible in the paid version of the application.
Cost
This keyboard is available to you absolutely free of cost in its basic version. However, you need to pay some amount to get the paid version with premium features.
03GIF Keyboard
This is an absolute heaven for GIF lovers. You can use this keyboard on any of iOS devices to either create or share fun filled GIFs and memes to express your precise feelings and emotions with your friends. The keyboard has a user cohesive interface with a vast library of latest GIFs to explore and use.
Pros
● It assures hassle free Gif creation and sharing.
● You can create sticker and GIF packs to share with friends and family.
● You can share GIFs on a various media sharing platforms, like, SnapChat, WhatsApp, Twitter, Facebook, etc.
Cons
● You cannot use this keyboard on devices with iOS versions prior to 9.0.
● This application has a data security risk.
● You need an internet connectivity to get this one from the Apple App Store.
Cost
The app is primarily free to download and use, but cones with a few in-app purchases.
04SwiftKey Keyboard
This is also one of the top ranked GIF keyboards and undergoes continuous upgrades to increase app productivity among over 250 million loyal users across the world. You can add an extra punch to your conversations with living GIFs and emojis from its extensive content library. You can enjoy seamless typing and get the perfect themes, colors, designs and patterns to uplift your precious moments.
Pros
● This GIF keyboard supports a bilingual autocorrect feature with smart AI predictions.
● It comes with a quick access toolbar for speedy access and supports 90 different languages.
● It has a content reserve of over 1000 GIFs and emojis.
Cons
● This keyboard is compatible with iOS versions 9.3 and later.
● This keyboard lacks the ‘Save’ feature for your favorite GIFs.
● You cannot see the GIFs that you had recently sent in your conversations.
Cost
This application is free to use in its basic version, but asks you for a paid premium membership to access some advances features.
05FancyKey Keyboard
This is a smart choice to make among GIF keyboards for iPhone on account of being packed with explicitly customizable features, over 100 beautiful fonts and 50 vibrant themes. The best part is, the application is backed up with enhanced security and data privacy features. You can choose from the best auto suggest emoticons to express exactly what you feel.
Pros
● It allows you to make swipe inputs with accurate word predictions.
● Its integrated emoji art keyboard suggests exact and expressive facial expressions.
● It is compatible with almost every iOS device.
Cons
● The interface is loaded with quite a large number of access options.
● Finding your perfect content can be a bit time taking.
● You need an internet connection to download and use this keyboard.
Cost
You can get this keyboard for free on the Apple App Store.
06Gfycat
This is also quite ban efficient GIF keyboard you can use to share immense varieties of top quality GIFs, memes and stickers across your Instagram, Facebook and SnapChat accounts. Available in the most convenient user interface, this keyboard is packed with millions of GIFs and emojis to choose from.
Pros
● You can share content in various languages
● Its library is packed with GIFs and memes of HD quality.
● You can create GIFs of your own using your device’s camera.
Cons
● Keyboard features other than GIFs ate absent.
● Though high on quality, but the GIF images are quite small in size.
● You cannot save and view GIFs in the application.
Cost
You can use this keyboard absolutely free of cost on the Apple App Store.
07RainbowKey
As is evident from the name, this keyboard is packed with a range of vibrant themes to beautify the app background. Additionally, you can use still images from your device to create themes of your own. Its interactive interface shows pop up animations and emojis related to the content you type. You can find exciting GIF varieties from popular, trending and hashtag content categories.
Pros
● You can save your favorite GIFs and use them in future.
● You can create your own keyboard themes from locally saved images.
● Its smart AI feature predicts emojis and autocorrect suggestions as you type.
Cons
● It comes with a little tricky interface.
● The application may occasionally crash in between successive tan switches.
● It is supported on iOS versions later than 8.0.
Cost
The application is primarily free, but contains a few in-app purchases.
08Tenor GIF Keyboard
This is an extensive and smart GIF keyboard that allows you to make a number of GIF customizations in addition to sharing GIFs. You are granted the liberty to add captions to GIFs and save your favorite ones for later use by adding them to the exclusive GIF pack. The keyboard is launched by Tenor, which is apparently the most extensive GIF library across the web.
Pros
● You can caption your GIFs and save them locally to your device.
● You can make your explicit GIF pack to save and organize favorite GIFs for quick access.
● You can export your GIFs to almost all major media sharing platforms.
Cons
● The app has restricted keyboard functions
● The app interface may appear a bit crowded.
● You need internet connectivity to use this application
Cost
You can access and use this app for free.
Part 2 How to Text GIFs on Android
All Android devices cone with an inbuilt GIF sharing feature and it is more or less similar to sharing GIFs on iOS devices. The minor different encountered, is on account of using the Google keyboard for GIF texting via Android devices.
Now that you are accustomed to using GIFs keyboards for iPhone, let’s dive into methods of working with GIF texting on Android devices. After all, GIFs are a content credibility that is worthy of exploring beyond platform boundaries. Discussed below are some super easy steps of texting GIFs on Android devices:
● Navigate to, and open the inbuilt messaging application of your Android device.
● Tap any suitable emoticon on the keyboard.
● You will see a few file format options. Choose and tap the ‘GIF’ option.
● Look for your required GIF in the search bar or select one from the default or locally saved collections.
● Tap any suitable GIF to get its preview, followed by pressing the ‘Send’ button.
Part 1 How to Get the iMessage GIF Keyboard
Adding GIFs to iMessage is quite simple and handy, as the application opens up an extensive GIF library to save and share GIFs. While iPhone 10 and later version users are gifted with #images, the default GIF keyboard; there are alternatives too to get the iMessage GIF Keyboard for other versions.
Discussed below is a quick and convenient method to get the iMessage GIF keyboard for your iOS device:
● Reach to the ‘Messages’ application in your iPhone and open a new or an existing conversation.
● In the text field, click on the ‘Apps’ button (‘A’ symbol) at the left side and you will see the #images keyboard pops up.
● In an otherwise case, navigate to the bottom of the app screen and hit the 4-bubble icon at the left to see the #images icon appear.
● Click on the icon to explore, search and select a suitable GIF.
● Before you send the selected GIF to your friends, you can make it more impactful by adding relatable texts.
Filmora GIF Creator
DIF keyboards are one exciting trend, but creating GIFs is equally interesting. If you are thinking to try hands on making GIFs of your own, the W**Wondershare Filmora Video Editor ** is at your instant service. This one is excellent GIF creator software, to say the least, available on the web today. You can conveniently depend on this to create stunning GIFs that would leave viewers jaw dropped on your creativity.
Wondershare Filmora - Best Video Editor for Mac/Windows
5,481,435 people have downloaded it.
Build unique custom animations without breaking a sweat.
Focus on creating epic stories and leave the details to Filmora’s auto features.
Start a creative adventure with drag & drop effects and endless possibilities.
Filmora simplifies advanced features to save you time and effort.
Filmora cuts out repetition so you can move on to your next creative breakthrough.
Key Features
Filmora lands amongst the top rated GIF creator software on account of the following features:
● This one is a quick and smart GIF maker, allowing you to create catchy GIFs within minutes.
● Filmora editor library has the most extensive inventory of audio-visual effects, editing features and filters that are all set to give your creation that stunning and perfect professional look.
● The extremely user cohesive interface of this software promises you a seamless GIF creation experience.
● Key Takeaways from This Episode →
● GIF keyboards are the latest trends in adding impact to community conversations via Instant Messaging apps.
● Be it iPhones or Android devices, these keyboards are ready to intensify your chats with the most exact expressions.
● From a pool of welcoming choices, you can certainly pick the Filmora GIF creator to create interesting content in the GIF format and add that extra spunk to your normal conversations.
Create Your Face Zoom TikTok Now
Abundant Video Effects - Wondershare Filmora
Provide abundant video effects - A creative video editor
Powerful color correction and grading
Detailed tutorials are provided by the official channel
TikTok videos are very popular across the youth of the world. With millions of users in support of the platform, there are many content creators that gained popularity through making small videos on TikTok. These videos are, however, incomplete without the existence of a proper effect on them. To emphasize something across a video, the zoom effect is always preferred in the market.
This article discusses the face zoom effect of TikTok and provides users with the appropriate methods that can be adapted to utilize this function to perfection. With this feature, you can make your perfect videos with an emphasis on the important elements to view on the screen.
In this article
Part 1: What is TikTok Face Zoom?
Part 2: Create A Face Zoom TikTok Video in Minutes
Part 3: Bonus | Create Face Zoom Video in Wondershare Filmora
Part 1: What is TikTok Face Zoom?
The face zoom TikTok effect is referred to the zooming effect that is covered by putting the focus on the facial presence within the video. The use of the face zoom effect on TikTok has a significant utility in highlighting the importance of the person within the video and creating an illusion that would make people watch the video all along.
Many TikTokers like using this effect in scenes where they wish to highlight something new about their face, e.g., new makeup.
Part 2: Create A Face Zoom TikTok Video in Minutes
There are some direct approaches to zooming the face across a TikTok video. To understand these methods, you should go through the provided details and understand the face zoom effect on TikTok.
Method 1: Create A Face Zoom TikTok Video in Minutes
Step 1: Before coming onto adding effects across your TikTok video, you need to record it across the social platform or have it recorded before on your smartphone under the requirements of TikTok.
Step 2: For uploading a video on TikTok, you need to continue by clicking the “+” icon and locating the “Upload” button for adding a pre-recorded video across TikTok.

Step 3: Once you have added the video for editing, navigate into the “Effects” section and find yourselves in the “Visuals” section. Let the cursor of the video be at the point where the facial features are prominent, and you wish to face zoom the video from there. With the cursor across the required place, find the “Zoom” effect in the list and hold the button until you’ve successfully added the effect across the required length of the video.

Step 4: After editing the video and adding the face zoom effect successfully, you need to click on “Save” to preview the video before you click “Next” to share it across the necessary platforms. TikTok provides you with the ability to share your videos across Instagram, Facebook, or WhatsApp.

Method 2: Do Face Zoom Easily by Finding a Face Zoom Video
Step 1: To use the TikTok face zoom effect on your video, you need to launch the platform and click on “Discover” present on the bottom of the screen. In the search bar, you need to type “Face Zoom” to locate the effect across TikTok.

Step 2: Once you have found the effect, open it on another screen. Locate the “Try this effect” button to use a similar effect across your video.

Step 3: Record the video on TikTok by clicking on the red recording button. Make changes to the recorded video and save the video on your device or share it across the social media platforms as desired.

Part 3: Bonus | Create Face Zoom Video in Wondershare Filmora
TikTok produces impressive content that can be commended for many reasons. This, however, does not make the professional video that you might be looking for. What to do if you cannot create such a professional video that would help you get the right reach you are looking for? Wondershare Filmora includes an exceptional experience of using the TikTok face zoom effect across its easy-to-use platform with the right set of tools.
To understand how you can successfully execute the procedure without putting yourselves in any difficulty, go through the steps as shown below:
Step 1: Download and Install Wondershare Filmora
For starters, you need to have Wondershare Filmora installed on your computer. Proceed to launch it and click on the “New Project” button to start a new project.

Step 2: Upload Media
As a new window opens up on the front, you need to click on the arrowhead icon against the “Media” tab to import the video that is to be edited across Wondershare Filmora. On adding it, drag it across the timeline successfully.

Step 3: Track the Face using Motion Tracking
To track the facial features across the video, you need to double-click the video on the timeline and proceed to open the “Motion Tracking” menu that you can find across the pane. Enable the option if necessary and set the position of the box across the “Preview” window that would track the face. Click on “Start Tracking” to successfully motion track the face.

Step 4: Add Magnify Effect to the Face
Proceed into the “Effects” tab and write “Magnify” in the search bar. Select the effect and place it across the video in the timeline. To align the effect with the face, you need to double-click the video and move into the “Motion Tracking” section again. Select the specific magnify effect in the drop-down menu and select “Start Tracking.”

Step 5: Preview and Export the Face Zoom Video
Once you are done editing the video, preview it across the window to check if any edits are required. Once confirmed, click on the “Export” button to save the video across the computer.

Conclusion
The TikTok face zoom effect can be quite impressive if used perfectly. However, since the intent is to highlight the facial parts in the video, the appropriate use of the effect can give an exceptional result. For this, the article has discussed the best methods that can be applied to understanding how to use face zoom in TikTok with ease.
TikTok videos are very popular across the youth of the world. With millions of users in support of the platform, there are many content creators that gained popularity through making small videos on TikTok. These videos are, however, incomplete without the existence of a proper effect on them. To emphasize something across a video, the zoom effect is always preferred in the market.
This article discusses the face zoom effect of TikTok and provides users with the appropriate methods that can be adapted to utilize this function to perfection. With this feature, you can make your perfect videos with an emphasis on the important elements to view on the screen.
In this article
Part 1: What is TikTok Face Zoom?
Part 2: Create A Face Zoom TikTok Video in Minutes
Part 3: Bonus | Create Face Zoom Video in Wondershare Filmora
Part 1: What is TikTok Face Zoom?
The face zoom TikTok effect is referred to the zooming effect that is covered by putting the focus on the facial presence within the video. The use of the face zoom effect on TikTok has a significant utility in highlighting the importance of the person within the video and creating an illusion that would make people watch the video all along.
Many TikTokers like using this effect in scenes where they wish to highlight something new about their face, e.g., new makeup.
Part 2: Create A Face Zoom TikTok Video in Minutes
There are some direct approaches to zooming the face across a TikTok video. To understand these methods, you should go through the provided details and understand the face zoom effect on TikTok.
Method 1: Create A Face Zoom TikTok Video in Minutes
Step 1: Before coming onto adding effects across your TikTok video, you need to record it across the social platform or have it recorded before on your smartphone under the requirements of TikTok.
Step 2: For uploading a video on TikTok, you need to continue by clicking the “+” icon and locating the “Upload” button for adding a pre-recorded video across TikTok.
Step 3: Once you have added the video for editing, navigate into the “Effects” section and find yourselves in the “Visuals” section. Let the cursor of the video be at the point where the facial features are prominent, and you wish to face zoom the video from there. With the cursor across the required place, find the “Zoom” effect in the list and hold the button until you’ve successfully added the effect across the required length of the video.
Step 4: After editing the video and adding the face zoom effect successfully, you need to click on “Save” to preview the video before you click “Next” to share it across the necessary platforms. TikTok provides you with the ability to share your videos across Instagram, Facebook, or WhatsApp.
Method 2: Do Face Zoom Easily by Finding a Face Zoom Video
Step 1: To use the TikTok face zoom effect on your video, you need to launch the platform and click on “Discover” present on the bottom of the screen. In the search bar, you need to type “Face Zoom” to locate the effect across TikTok.
Step 2: Once you have found the effect, open it on another screen. Locate the “Try this effect” button to use a similar effect across your video.
Step 3: Record the video on TikTok by clicking on the red recording button. Make changes to the recorded video and save the video on your device or share it across the social media platforms as desired.
Part 3: Bonus | Create Face Zoom Video in Wondershare Filmora
TikTok produces impressive content that can be commended for many reasons. This, however, does not make the professional video that you might be looking for. What to do if you cannot create such a professional video that would help you get the right reach you are looking for? Wondershare Filmora includes an exceptional experience of using the TikTok face zoom effect across its easy-to-use platform with the right set of tools.
To understand how you can successfully execute the procedure without putting yourselves in any difficulty, go through the steps as shown below:
Step 1: Download and Install Wondershare Filmora
For starters, you need to have Wondershare Filmora installed on your computer. Proceed to launch it and click on the “New Project” button to start a new project.
Step 2: Upload Media
As a new window opens up on the front, you need to click on the arrowhead icon against the “Media” tab to import the video that is to be edited across Wondershare Filmora. On adding it, drag it across the timeline successfully.
Step 3: Track the Face using Motion Tracking
To track the facial features across the video, you need to double-click the video on the timeline and proceed to open the “Motion Tracking” menu that you can find across the pane. Enable the option if necessary and set the position of the box across the “Preview” window that would track the face. Click on “Start Tracking” to successfully motion track the face.
Step 4: Add Magnify Effect to the Face
Proceed into the “Effects” tab and write “Magnify” in the search bar. Select the effect and place it across the video in the timeline. To align the effect with the face, you need to double-click the video and move into the “Motion Tracking” section again. Select the specific magnify effect in the drop-down menu and select “Start Tracking.”
Step 5: Preview and Export the Face Zoom Video
Once you are done editing the video, preview it across the window to check if any edits are required. Once confirmed, click on the “Export” button to save the video across the computer.
Conclusion
The TikTok face zoom effect can be quite impressive if used perfectly. However, since the intent is to highlight the facial parts in the video, the appropriate use of the effect can give an exceptional result. For this, the article has discussed the best methods that can be applied to understanding how to use face zoom in TikTok with ease.
Also read:
- New In 2024, How to Change Video Thumbnail on Google Drive
- New Creating a Slideshow Is Necessity of the Modern Time. Whether You Plan a Business Meeting or You Are Going to Do some Family Event with Slideshow Presentation, a Good Slideshow Maker Will Help You in This Direction for 2024
- Updated In 2024, 8 Free Photo Collage with Music Video Maker
- Updated Learn How to Make Your CSGO Montage Impressive
- 2024 Approved Create A Freeze Frame Sequence In Your Videos
- You Must Be Wondering Which the Best Online Transparent Image-Maker Is! Well, There Is No Need to Get Confused as Here; You Will Get a Curated List for the Same for 2024
- 2024 Approved How to Convert Videos to Slow Motion?
- 2024 Approved How to Be a Good Podcast Host
- Updated Are You a Teacher? Are You Looking for Educational Background Music? This Article Has Everything You Will Need to Know for Creating Outstanding Educational Teaching Videos
- New In 2024, Finding The Finest Way to Add Subtitles to Videos | Filmora
- Updated 2024 Approved How to Create a Custom Slide Show in PowerPoint
- 2024 Approved Storyboards Are Amazing Way if You Want to Present Your Story in a Visual Way, Like Explaining Any Process or Giving Any Information. It Is a Graphic Layout to Tell You a Story
- New Create a Stunning Light Sweep Effect in Filmora. Use Simple and Easy Steps to Export a High-Quality Video that Will Impress Even Pro Video Editors for 2024
- Updated In 2024, How to Add Font Effects to Videos
- Learn How to Merge Audio and Video Like a Pro with This Step-by-Step Guide to Using FFmpeg. Create Seamless Videos and Improve Your Video Production Skills for 2024
- Best AR Video App - Top 10 Picks for 2024
- New In 2024, How to Speed Up Video with Canva Online Tool?
- New 2024 Approved Are You Looking to Create some Impressive Slow-Motion Video Content? Get This Done with some Impressive Android Slow Motion Video Apps
- New In 2024, The Way to Make Dynamic Video Collages?
- New In 2024, Looking for Ways to Enhance Overall Look for Your Contents Professionally? Then Coming up with These Cool PowerPoint Templates Can Help You a Lot
- In 2024, Explore the Potential of Slow-Motion Video for Different Industries. Read This Guide and Choose the Best Slow-Motion Camera App to Create Stunning Videos
- Updated 2024 Approved This Article Discusses the Splitting of the Video Clips in DaVinci Resolve Explicitly. There Is Also a Brief Description of Its Best Alternative, Wondershare Filmora. This Is Also Practically Relevant and Reasonable as Well
- Updated How to Add Filter to Video in Premiere Pro, In 2024
- 2024 Approved How to Create An Eye-Catching Intro Videos with InVideo
- New Top 10 Best Slideshow Makers with Music
- Updated How to Zoom Desktop Screen for 2024
- New 2024 Approved Learn How to Blur a Still or Moving Part of Video
- New Best GIF to Video Converters
- New The Best Jump Cut Editing Tricks Make Your Videos Snappy!
- New How to Use a Stabilization Tool in Filmora for 2024
- New 2024 Approved Can You Get Free After Effects Templates Slideshow? Yes, You Definitely Can! Follow the Given Discussion to Learn About a Simple Trick and More About Getting Free Effects Template for Slideshows
- New In 2024, Unlock Your Video Editing Potential With Filmora From Wondershare
- Updated As Video Editing Has Become a Pillar Stone in Post-Production Work, You Might Need to Upgrade Your Knowledge About It. In This Article, You Will Learn How to Rotate the Video for 2024
- New In 2024, How to Find a High-Quality Video Marketing Agency?
- New Good Slideshow Makers Sometimes Cost High and Free Slideshow Makers Provide Slideshows with the Watermark. How to Cope with This Problem? This Article Gives Solutions
- Updated Step by Step to Cut Videos in Adobe Premiere Pro
- Updated 2024 Approved The Best 10 AI Video Analytics Companies at a Glance
- Do You Want to Apply Professional-Looking Color Grading on Your iPhones Photos and Videos? You Can Use Different iPhone LUTs for Your Pictures and Videos
- 4 Solutions to Add White Borders on Mobile and Desktop for 2024
- 2024 Approved How to Make Discord GIF Avatar in Depth Guide
- Top 5 Tips to Freeze-Frame in After Effects for 2024
- Updated 2024 Approved 9 Best Sparkle Effects Photo and Video Editors You Should Know
- So, without Wasting Time, Let Me Show You How to Mask a Video in Wondershare Filmora. Lets Get Started for 2024
- New Find Out How to Add Subtitles in the VLC Media Player on Your Windows and Mac System with Quick and Simple Instructions for 2024
- An Ultimate Guide to Edit a Music Video Aspect Ratio and First Cut
- Updated In 2024, Want to Know the Simplest Way to Match the Colors of Your Photos in Photoshop? The Following Discussion Will Help Match Color in Photoshop, Almost Effortlessly
- 7 Solutions to Fix Error Code 963 on Google Play Of Lenovo ThinkPhone | Dr.fone
- In 2024, Forgotten The Voicemail Password Of Xiaomi Redmi 13C 5G? Try These Fixes
- How to Screen Mirroring Vivo Y100t to PC? | Dr.fone
- Nubia Z50 Ultra Not Connecting to Wi-Fi? 12 Quick Ways to Fix | Dr.fone
- New How You Can Turn Yourself Into Anime Character Using Anime Filter for 2024
- Three Ways to Sim Unlock HTC U23
- Your Complete Guide To Reset Motorola Moto G73 5G | Dr.fone
- 10 Best Fake GPS Location Spoofers for Samsung Galaxy F14 5G | Dr.fone
- What Pokémon Evolve with A Dawn Stone For Honor 70 Lite 5G? | Dr.fone
- Fake the Location to Get Around the MLB Blackouts on Motorola Edge 40 Neo | Dr.fone
- Updated 2024 Approved Review of LazLive Live Selling Platform With Guide
- How to Transfer Videos from Nokia C12 Pro to iPad | Dr.fone
- In 2024, iSpoofer is not working On Motorola Moto G34 5G? Fixed | Dr.fone
- In 2024, Everything You Need to Know about Lock Screen Settings on your Vivo Y56 5G
- Android Unlock Code Sim Unlock Your Sony Xperia 1 V Phone and Remove Locked Screen
- 15 Best Strongest Pokémon To Use in Pokémon GO PvP Leagues For Tecno Spark 20 Pro | Dr.fone
- Process of Screen Sharing Lava Blaze Pro 5G to PC- Detailed Steps | Dr.fone
- In 2024, 5 Quick Methods to Bypass Vivo X Fold 2 FRP
- How to Bypass iCloud Lock on Apple iPhone 15
- How To Create an Apple Developer Account On Apple iPhone 6s
- How To Restore Missing Pictures Files from OnePlus Ace 2V.
- What Is AI Voice Text to Speech for 2024
- In 2024, Process of Screen Sharing Vivo Y100 to PC- Detailed Steps | Dr.fone
- In 2024, How to Bypass iPhone 7 Plus Passcode Easily Video Inside
- How to Recover Lost Data from iPhone SE (2022) After iOS Update? | Stellar
- How To Stream Anything From Samsung Galaxy M14 4G to Apple TV | Dr.fone
- 9 Best Free Android Monitoring Apps to Monitor Phone Remotely For your Honor Magic 6 Pro | Dr.fone
- Different Methods for Resetting Xiaomi Redmi 12 Phones with Screen Locked and Not | Dr.fone
- How to Restore Deleted Reno 8T 5G Photos An Easy Method Explained.
- In 2024, How to Unlock a Network Locked Samsung Galaxy A05 Phone?
- Realme GT Neo 5 SE Bootloop Problem, How to Fix it Without Data Loss | Dr.fone
- How to Bypass FRP on Meizu 21 Pro?
- Complete Review & Guide to Techeligible FRP Bypass and More For Itel S23
- Android Call History Recovery - recover deleted call logs from Vivo T2x 5G
- How to recover deleted photos from Android Gallery after format on X50i+
- Easy Guide How To Bypass Nokia C210 FRP Android 10/11/12/13
- In 2024, Solutions to Spy on Lava Blaze 2 5G with and without jailbreak | Dr.fone
- In 2024, Forgot Pattern Lock? Heres How You Can Unlock Infinix Smart 7 Pattern Lock Screen
- How to recover deleted photos from Android Gallery without backup on Lava
- How to Resolve Poco F5 Pro 5G Screen Not Working | Dr.fone
- How To Transfer Data From iPhone 13 Pro To Other iPhone 13 Pro Max devices? | Dr.fone
- How to Fix the Unable to Record Macro Error in Excel 2023? | Stellar
- FRP Hijacker by Hagard Download and Bypass your Nokia 130 Music FRP Locks
- In 2024, Latest way to get Shiny Meltan Box in Pokémon Go Mystery Box On Honor X50i | Dr.fone
- All Things You Need to Know about Wipe Data/Factory Reset For Nokia G22 | Dr.fone
- The way to recover deleted pictures on OnePlus without backup.
- Title: Updated Here We Are, Now the Main Topic of Interest of This Article - How to Put Together Several Videos so that They Become One? This Case, Unlike Other Possibilities We Discussed Above, Is More Complicated, so We Will Study This Feature Step by Step for 2024
- Author: Morgan
- Created at : 2024-06-15 18:56:52
- Updated at : 2024-06-16 18:56:52
- Link: https://ai-video-editing.techidaily.com/1713963399609-updated-here-we-are-now-the-main-topic-of-interest-of-this-article-how-to-put-together-several-videos-so-that-they-become-one-this-case-unlike-other-possibi/
- License: This work is licensed under CC BY-NC-SA 4.0.
