
:max_bytes(150000):strip_icc():format(webp)/Instagram_Login-5c004ff2c9e77c000104174d.png)
Updated Timeline Template Is a Visual Representation Showing the Passage of Time. It Includes Text, Diagrams, Images and Icons. They Are Perfect for Telling Stories, Events Etc for 2024
Timeline Template Is a Visual Representation Showing the Passage of Time. It Includes Text, Diagrams, Images and Icons. They Are Perfect for Telling Stories, Events Etc
Best Shortcut Towards Timeline Template
An easy yet powerful editor
Numerous effects to choose from
Detailed tutorials provided by the official channel
In this article
01 [Best Tips To Become A Timeline Designer Now?](#Part 1)
02 [12 Editable Timeline Templates](#Part 2)
03 [How to Create a Timeline?](#Part 3)
04 [Time Template Q&A](#Part 4)
Part 1 Best Tips To Become A Timeline Designer Now?
If you desire to become an expert timeline designer, it is essential to hone your skills. Here are some tips that will help you in boosting your skills and become an expert.
01Keep it Simple
Keeping it simple looks beautiful, helps in communicating messages more clearly. Using required elements without making it look cluttered, will help to understand the messages more quickly. Adding space where it is necessary will make it look clean and you can fully focus on the content. Focus on the fonts as it will represent your content.
If you want to create some serious look, you can use black and white colors. This will make it look simpler. If you want to highlight specific content you can add your desired colors to it. This will make the specific content to stand out.
02Enlarge the images to wider dimension
Adding high quality images is not a big deal now. Images play an important role in design as they add context, and emotion and then you can communicate a message more easily. Try to display the images in full size so that it looks more impactful. Display the images as much as you can and take advantage from it, displaying them on full size gives a luxurious look.
If you want to make your images look more professional, add layers. Add an overlay to your images to change them in unicolor.
03Use simple shapes
Using simple shapes will enhance the look of the design. There are a lot of shapes from which you can choose like geometric, organic shapes etc. Geometric shapes include basic shapes like square, circle, rectangle and triangle. Circles are the best shapes as they don’t have any sharp corners or edges. Circles help to keep the content separate and look neat.
04Using dark color
Using dark color can be challenging to work on but it looks sophisticated. Using dark color with dark color text can be difficult to read and thus it should be avoided. Try to add a contrast color with a dark color background. Use dark color as your background and light color like grey, orange or yellow to highlight the specific content.
05Add borders
Borders are a set of designs shapes, boundaries of text boxes, lines, etc. that can make your document look more beautiful and attractive. Adding a border can enhance the look of the content and theme of the menu. You can customize the design and thickness of the page. It totally depends on you that if you want add colorful border, text border, picture border, text border and custom border then you can add them. Adding a border will make it look more clean and simple.
Part 2 Editable Timeline Templates
06Handwritten Circles Timeline PowerPoint Template
The handwritten circles timeline PowerPoint template is suitable for envisioning projects, goals, events etc. Business companies use this handwritten timeline template to represent business growth in their presentation. The companies use this timeline template for making their high level projects according to the schedule. Timeline template presentations are used in business, schools, organizations etc.
The timeline template of hand writing circles is editable. You can customize its colors in background, and can also change its hand drawn shapes. Inside the circle the text boxes can be switchable from the clipart icons.

07One Pager Vertical Timeline Slide Timeline
This vertical timeline template displays the connected curves as a path in vertical timeline. It is used for presenting the events, goals etc. in a sequence. A person from any field can use this curved timeline in vertical order. This one page vertical timeline slide can be used for teaching process or explaining historic events in which you can display year, decay or anything related to that event.
This is an editable PowerPoint vertical timeline and you can customize it as you want. The sky blue and white combination looks professional but if you don’t like it you can change its color according to the business presentation. Business can use this timeline template to represent their business strategy, goals or projects.

08Seed Germination Growth PowerPoint Template
Seed germination growth PowerPoint template is very innovative template which shows the growth metaphor of the seed and by using it you can make a beautiful presentation. Each and every object is created from the PowerPoint shapes so that the user can customize it according to him. You can present it to your audience in a very professional way.

09Creative Timeline Template for PowerPoint
The Creative Timeline Template for PowerPoint is a selection of milestone shapes arranged in a sequence to give you a professional timeline. You can track the growth and progress of any company by using this template. They are used to give you directions. In the other way, they can be represented in the form of events. These events are in running order, which means it can happen one after the other. Between the two milestones, a gap is been displayed. Milestone can involve the dates, people etc. The template can be customized using PowerPoint shapes. The user can change its color and texts as well using its editable features.

10Bubble Timeline PowerPoint Template
This timeline PowerPoint template has a bubble style and comes with a clean design. This timeline template for PowerPoint has different slides with timeline graphics. You can make changes or edit this timeline as you want. Some slides designs include a series of bars to represent the important milestones in the form of bubble.

11Clean Timeline Template for PowerPoint
Clean timeline template for PowerPoint is a beautiful template with simple design. In this PowerPoint presentation template, you will get 6 slide designs with amazing layouts which have been created from the PowerPoint shapes.

12Weekly Work Plan Template
The Weekly Work Plan Template is designed to present the progress of weekly tasks. It helps you in planning your week efficiently and also not to miss out on important tasks. The design of this template has a horizontal bar graph, with different horizontal shapes showing the progress of the particular event or task. Users can also change the colors or the objects if they wish their plan a personalized touch. It can also be used by professionals or by teachers to present their weekly goals or progress.

13Work Plan Slides PowerPoint Templates
The Work Plan Slides PowerPoint Templates come in four designs which can be used by professionals to present their work plans. Professionals can customize this Work Plan Slides PowerPoint Templates according to how they want to present their work plan. Teachers and organizations can also edit this template to design this. This There are several elements that can also be changed. Users can modify background, text font, shapes and colors as they wish.

14Annual Work Plan Template for PowerPoint
You can represent the annual strategy plan by customizing the Annual Work Plan Template. The annual work plan template represents the most important achievement predicted throughout the year. It is an organization plan for 12 months which includes the budget details, responsibilities, and progress expectations.
Any changes like color, font style, design or background changes are customizable. Use this template for preparing an annual work plan for your organization.

15 10. Product Portfolio Timeline Template
The Product Portfolio Timeline Template is a Gantt chart presentation for any product portfolio. The product portfolio timeline envisions the development strategy and processes to deliver a product. It gives you an overview of the product stages regarding its progress over time. This is an editable template with white and blue PowerPoint backgrounds. Users can customize the timeline according to their presentation theme.

16Arrows Milestone Timeline Template
The Arrow Milestone Timeline Template is a set of arrows PowerPoint diagram. These timeline templates are very helpful in highlighting the workflow. The timeline template is convenient for providing information in order to understand the growth, change, or recurring events. Ready to use timeline templates will help you save your time and energy and by simply changing its textual content. Users can also edit the timeline by changing its color, font style, and background and shape effects.

17Scheduled Day View Calendar PowerPoint Template
Scheduled Day View Calendar PowerPoint Template is available in three designs. These are the templates which help the individuals and corporate in time management. These templates make it easy for the busy individuals to manage their activities. It will keep you updated with all the events which are happening around you. A daily calendar PowerPoint template will help you ti make and present to- do- list. The template of day schedule will represent the day chores, activities and work which is happened throughout the day. The Schedule Day View Calendar PowerPoint Template is customizable making it easy for you to manage the tasks in a creative manner.

Part 3 How To Create A Timeline?
Creating a timeline can be easy of you use a software like Wondershare Filmora Video Editor . This software comes loaded with a lot of features that will allow you to design a creative timeline to manage your tasks. All you need to do is to go to the editor panel in which you can access different tools.
For Win 7 or later (64-bit)
For macOS 10.12 or later
Below listed are the tools and how you can use them for creating a timeline.
Working with the Time Ruler
You can check the duration of the project on the Time Ruler, which is located on the top side of the timeline. Play head’s present position will be changed when you will click on the time ruler. It allows you to select video clip which you want to be displayed on the Viewer Panel. On the Time Ruler, dragging a playhead to any particular location will let you traverse through your project and preview your clips before you make any other changes at that particular location.
Working with Scaling and Panning on Timeline
The Zoom bar is used to scale the timeline. You can zoom in or out depending on your comfortability and preview your project how it will look on the Timeline. There is no need to put the video clips onto the timeline before you scale it. Adding a video clip to a video track on a timeline will let you know how much you have to zoom in or out. You can pan the video and audio when you zoom in on a certain segment on the Timeline by using Hand Tool and Scroll Bars. Scaling and panning options in the Editor’s panel can help you in editing the video.
Choosing the Work Area
On the Time Ruler, you will see the light gray area which shows the selected work area. You can export only that part of the timeline, once you have selected the work area. In the viewer panel, you can also loop your selected area; it is another way to analyze your work. If you want to loop a work area, from the viewer select the loop playback icon.

Export your Video
At the upper right corner of the Editor Panel, there is an Export Button which has two options which will let you choose the portion of timeline you want to add to export line.
You have to select the work area on the timeline to make use of the Export option. You can select the area by simply pressing I button then drag the slider on the point on the timeline where you want the work area to end by pressing the O button. When you are done with this, click on the Export button and select the In-Out option. From the Export Option, it will only export the section on the Timeline which is selected by the work area.

Part 4 Time template Q&A
What are the different things that should be involved in a timeline?
A. A timeline template should include the events or activities that you want represent in your presentation along with their date and time, so that audience will get the idea of when and at what time it is going to happen.
What are the most important elements of a timeline?
A. The most important elements of a timeline are:
● The task lists should be completely mentioned with all the required details.
● Mention the date and time so that audience can get an idea of when will this task take place.
● Mention the length of each task and the person who will be responsible for this task.
What is the aim of using a timeline?
A. A time is an important tool as it represents the events and activities. We use timeline for any kind of research, study, business projects or event planning. Timelines make things easier to explain it to anyone in an orderly manner.
What are the various types of timeline?
A. There are different types of timelines:
● Gantt Chart Timeline
● Chronology Chart
● Static Timeline
● Interactive timeline
● Vertical Bar Chart Timeline
In what way a timeline will help a team to achieve its goals?
A. Team members will get an idea of the events that whether they are on track or not. Setting deadlines of a project to complete it on time. Timeline will help them in making strategies for the company project if it is required.
● Ending Thoughts →
● Timeline Templates are very helpful in telling stories, any sort of development or growth which is very helpful in understanding the previous and present things.
● There are a lot of editable Timeline Templates which you can customize it according to your needs.
● Most important things of the Timeline Templates are dates and time of the tasks, and the duration of the tasks which helps you in better time management.
In this article
01 [Best Tips To Become A Timeline Designer Now?](#Part 1)
02 [12 Editable Timeline Templates](#Part 2)
03 [How to Create a Timeline?](#Part 3)
04 [Time Template Q&A](#Part 4)
Part 1 Best Tips To Become A Timeline Designer Now?
If you desire to become an expert timeline designer, it is essential to hone your skills. Here are some tips that will help you in boosting your skills and become an expert.
01Keep it Simple
Keeping it simple looks beautiful, helps in communicating messages more clearly. Using required elements without making it look cluttered, will help to understand the messages more quickly. Adding space where it is necessary will make it look clean and you can fully focus on the content. Focus on the fonts as it will represent your content.
If you want to create some serious look, you can use black and white colors. This will make it look simpler. If you want to highlight specific content you can add your desired colors to it. This will make the specific content to stand out.
02Enlarge the images to wider dimension
Adding high quality images is not a big deal now. Images play an important role in design as they add context, and emotion and then you can communicate a message more easily. Try to display the images in full size so that it looks more impactful. Display the images as much as you can and take advantage from it, displaying them on full size gives a luxurious look.
If you want to make your images look more professional, add layers. Add an overlay to your images to change them in unicolor.
03Use simple shapes
Using simple shapes will enhance the look of the design. There are a lot of shapes from which you can choose like geometric, organic shapes etc. Geometric shapes include basic shapes like square, circle, rectangle and triangle. Circles are the best shapes as they don’t have any sharp corners or edges. Circles help to keep the content separate and look neat.
04Using dark color
Using dark color can be challenging to work on but it looks sophisticated. Using dark color with dark color text can be difficult to read and thus it should be avoided. Try to add a contrast color with a dark color background. Use dark color as your background and light color like grey, orange or yellow to highlight the specific content.
05Add borders
Borders are a set of designs shapes, boundaries of text boxes, lines, etc. that can make your document look more beautiful and attractive. Adding a border can enhance the look of the content and theme of the menu. You can customize the design and thickness of the page. It totally depends on you that if you want add colorful border, text border, picture border, text border and custom border then you can add them. Adding a border will make it look more clean and simple.
Part 2 Editable Timeline Templates
06Handwritten Circles Timeline PowerPoint Template
The handwritten circles timeline PowerPoint template is suitable for envisioning projects, goals, events etc. Business companies use this handwritten timeline template to represent business growth in their presentation. The companies use this timeline template for making their high level projects according to the schedule. Timeline template presentations are used in business, schools, organizations etc.
The timeline template of hand writing circles is editable. You can customize its colors in background, and can also change its hand drawn shapes. Inside the circle the text boxes can be switchable from the clipart icons.
07One Pager Vertical Timeline Slide Timeline
This vertical timeline template displays the connected curves as a path in vertical timeline. It is used for presenting the events, goals etc. in a sequence. A person from any field can use this curved timeline in vertical order. This one page vertical timeline slide can be used for teaching process or explaining historic events in which you can display year, decay or anything related to that event.
This is an editable PowerPoint vertical timeline and you can customize it as you want. The sky blue and white combination looks professional but if you don’t like it you can change its color according to the business presentation. Business can use this timeline template to represent their business strategy, goals or projects.
08Seed Germination Growth PowerPoint Template
Seed germination growth PowerPoint template is very innovative template which shows the growth metaphor of the seed and by using it you can make a beautiful presentation. Each and every object is created from the PowerPoint shapes so that the user can customize it according to him. You can present it to your audience in a very professional way.
09Creative Timeline Template for PowerPoint
The Creative Timeline Template for PowerPoint is a selection of milestone shapes arranged in a sequence to give you a professional timeline. You can track the growth and progress of any company by using this template. They are used to give you directions. In the other way, they can be represented in the form of events. These events are in running order, which means it can happen one after the other. Between the two milestones, a gap is been displayed. Milestone can involve the dates, people etc. The template can be customized using PowerPoint shapes. The user can change its color and texts as well using its editable features.
10Bubble Timeline PowerPoint Template
This timeline PowerPoint template has a bubble style and comes with a clean design. This timeline template for PowerPoint has different slides with timeline graphics. You can make changes or edit this timeline as you want. Some slides designs include a series of bars to represent the important milestones in the form of bubble.
11Clean Timeline Template for PowerPoint
Clean timeline template for PowerPoint is a beautiful template with simple design. In this PowerPoint presentation template, you will get 6 slide designs with amazing layouts which have been created from the PowerPoint shapes.
12Weekly Work Plan Template
The Weekly Work Plan Template is designed to present the progress of weekly tasks. It helps you in planning your week efficiently and also not to miss out on important tasks. The design of this template has a horizontal bar graph, with different horizontal shapes showing the progress of the particular event or task. Users can also change the colors or the objects if they wish their plan a personalized touch. It can also be used by professionals or by teachers to present their weekly goals or progress.
13Work Plan Slides PowerPoint Templates
The Work Plan Slides PowerPoint Templates come in four designs which can be used by professionals to present their work plans. Professionals can customize this Work Plan Slides PowerPoint Templates according to how they want to present their work plan. Teachers and organizations can also edit this template to design this. This There are several elements that can also be changed. Users can modify background, text font, shapes and colors as they wish.
14Annual Work Plan Template for PowerPoint
You can represent the annual strategy plan by customizing the Annual Work Plan Template. The annual work plan template represents the most important achievement predicted throughout the year. It is an organization plan for 12 months which includes the budget details, responsibilities, and progress expectations.
Any changes like color, font style, design or background changes are customizable. Use this template for preparing an annual work plan for your organization.
15 10. Product Portfolio Timeline Template
The Product Portfolio Timeline Template is a Gantt chart presentation for any product portfolio. The product portfolio timeline envisions the development strategy and processes to deliver a product. It gives you an overview of the product stages regarding its progress over time. This is an editable template with white and blue PowerPoint backgrounds. Users can customize the timeline according to their presentation theme.
16Arrows Milestone Timeline Template
The Arrow Milestone Timeline Template is a set of arrows PowerPoint diagram. These timeline templates are very helpful in highlighting the workflow. The timeline template is convenient for providing information in order to understand the growth, change, or recurring events. Ready to use timeline templates will help you save your time and energy and by simply changing its textual content. Users can also edit the timeline by changing its color, font style, and background and shape effects.
17Scheduled Day View Calendar PowerPoint Template
Scheduled Day View Calendar PowerPoint Template is available in three designs. These are the templates which help the individuals and corporate in time management. These templates make it easy for the busy individuals to manage their activities. It will keep you updated with all the events which are happening around you. A daily calendar PowerPoint template will help you ti make and present to- do- list. The template of day schedule will represent the day chores, activities and work which is happened throughout the day. The Schedule Day View Calendar PowerPoint Template is customizable making it easy for you to manage the tasks in a creative manner.
Part 3 How To Create A Timeline?
Creating a timeline can be easy of you use a software like Wondershare Filmora Video Editor . This software comes loaded with a lot of features that will allow you to design a creative timeline to manage your tasks. All you need to do is to go to the editor panel in which you can access different tools.
For Win 7 or later (64-bit)
For macOS 10.12 or later
Below listed are the tools and how you can use them for creating a timeline.
Working with the Time Ruler
You can check the duration of the project on the Time Ruler, which is located on the top side of the timeline. Play head’s present position will be changed when you will click on the time ruler. It allows you to select video clip which you want to be displayed on the Viewer Panel. On the Time Ruler, dragging a playhead to any particular location will let you traverse through your project and preview your clips before you make any other changes at that particular location.
Working with Scaling and Panning on Timeline
The Zoom bar is used to scale the timeline. You can zoom in or out depending on your comfortability and preview your project how it will look on the Timeline. There is no need to put the video clips onto the timeline before you scale it. Adding a video clip to a video track on a timeline will let you know how much you have to zoom in or out. You can pan the video and audio when you zoom in on a certain segment on the Timeline by using Hand Tool and Scroll Bars. Scaling and panning options in the Editor’s panel can help you in editing the video.
Choosing the Work Area
On the Time Ruler, you will see the light gray area which shows the selected work area. You can export only that part of the timeline, once you have selected the work area. In the viewer panel, you can also loop your selected area; it is another way to analyze your work. If you want to loop a work area, from the viewer select the loop playback icon.
Export your Video
At the upper right corner of the Editor Panel, there is an Export Button which has two options which will let you choose the portion of timeline you want to add to export line.
You have to select the work area on the timeline to make use of the Export option. You can select the area by simply pressing I button then drag the slider on the point on the timeline where you want the work area to end by pressing the O button. When you are done with this, click on the Export button and select the In-Out option. From the Export Option, it will only export the section on the Timeline which is selected by the work area.
Part 4 Time template Q&A
What are the different things that should be involved in a timeline?
A. A timeline template should include the events or activities that you want represent in your presentation along with their date and time, so that audience will get the idea of when and at what time it is going to happen.
What are the most important elements of a timeline?
A. The most important elements of a timeline are:
● The task lists should be completely mentioned with all the required details.
● Mention the date and time so that audience can get an idea of when will this task take place.
● Mention the length of each task and the person who will be responsible for this task.
What is the aim of using a timeline?
A. A time is an important tool as it represents the events and activities. We use timeline for any kind of research, study, business projects or event planning. Timelines make things easier to explain it to anyone in an orderly manner.
What are the various types of timeline?
A. There are different types of timelines:
● Gantt Chart Timeline
● Chronology Chart
● Static Timeline
● Interactive timeline
● Vertical Bar Chart Timeline
In what way a timeline will help a team to achieve its goals?
A. Team members will get an idea of the events that whether they are on track or not. Setting deadlines of a project to complete it on time. Timeline will help them in making strategies for the company project if it is required.
● Ending Thoughts →
● Timeline Templates are very helpful in telling stories, any sort of development or growth which is very helpful in understanding the previous and present things.
● There are a lot of editable Timeline Templates which you can customize it according to your needs.
● Most important things of the Timeline Templates are dates and time of the tasks, and the duration of the tasks which helps you in better time management.
Learning The Details Of How To Replace Sky in Lightroom
People look for sky replacements in their images to improve their appearance. Sometimes, we need to do this because of overexposed images in sunlight. Replacing the surroundings of images is a common post-processing technique in photography. For this purpose, advanced editing tools like Lightroom and Adobe Photoshop are required.
Lightroom Sky replacement requires certain editing skills to effectively edit the media. This article will help you to learn how to do sky replacement in Lightroom. Before delving into the steps, read the first part to know the reason for changing the surroundings in Lightroom to replace the sky system.
Sky Replacement A cross-platform works like magic for background removal or sky replacement photos!
Free Download Free Download Learn More

Part 1: Why Do Creators Look Forward to Changing the Environment Across Their Recorded or Captured Media?
Humans love to show creativity and express themselves from different perspectives. Creative works provide entertainment and prove therapeutic in some way. That’s why creators and artists try to change the surroundings of recorded media. Such changes make the captured media virtually stunning and creative. Let’s explore more reasons that push creators towards sky replacement in Lightroom:
- Artistic Storytelling: A creative art piece shows a story of a thousand words. Thus, artists look for visual elements to convey particular moods and messages in their media.
- Symbolism: In many art competitions, creators are asked to show symbolic media. For this purpose, they might replace Sky in Lightroom to symbolize rebirth and growth.
- World-Building: The science fiction and fantasy genre needs such changes to build another world. Creators turn the media into imaginative settings to inspire the audience.
- Entertainment: Another aim of the creator is to provide new and exciting content to the audience. It allows them to temporarily escape their world and enjoy it.
- Discovery: You might have seen virtual landscapes in video games that uncover hidden secrets. Such backgrounds are designed to facilitate adventure through media.
Part 2: A Guide to Replace Sky in Lightroom: Step-by-Step
As discussed earlier, changing the sky in Lightroom proves fruitful for many reasons. Altering media scenes can also create a powerful emotional impact. Likewise, shifting from a green meadow to a messy landscape can turn a calm mood into chaos. If you intend to replace your current media background, then let us help you. Here are the steps below to change the environment in Lightroom:
Step 1: Lightroom can enhance your surroundings by using certain effects. To replace the sky, right-click on your image and select the “Edit in Photoshop” option. Before that, ensure that you have Adobe Photoshop installed on your system.

Step 2: Now, go to the top toolbar and press the “Edit” option next to “File.” From the drop-down list, access the “Sky Replacement” option. Head to the “Sky Replacement” panel and click the downward icon next to the sky preview. Scroll to pick one sky of your choice and hit the “OK” button.

Step 3: To import more skies, press the “Settings” icon on the Sky Replacement panel. Select the first option of “Get More Skies” and click on “Import Images.” You can explore skies from the Blue Skies, Spectacular, and Sunsets folders from that panel.

Step 4: Bring this picture back to the Lightroom and go to its right-side panel. There, use the Exposure, Contrast, and Highlights sliders below the “Light” downward icon. After enhancing your image, right-click on it and look for the “Export” option to save the file.

Part 3: Make Background Changing Easy with Wondershare Filmora
Sky Replacement in Lightroom and Photoshop requires some basic editing skills. Not everyone has such skills, so they have to acquire skills from video tutorials. It wastes a lot of time and effort just to learn editing from scratch. As an easier solution, they should try Wondershare Filmora to change image surroundings.
Notably, it’s a better solution that accommodates all users from beginner professionals. You can use Filmora for video editing to effortlessly expand your creativity. This tool is available online for Desktop, macOS, mobile, and online with the latest AI features.
Free Download For Win 7 or later(64-bit)
Free Download For macOS 10.14 or later
Key Features Marking Filmora’s Importance
Instantly remove or change your videos and image backgrounds with Filmora. Reimagine your world by knowing the given key features of Filmora in changing backgrounds:
1. Chroma Key (Green Screen)
Applying green-screen in effect in video and images will generate professional content. With AI support, you can remove a certain color from overlay images and videos. It can make your chosen colors transparent in the imported media. To fine-tune the media, you can use Tolerance, Edge Thickness, and Feather sliders.

2. AI Portrait
If you want to focus on the portrait while ignoring the background, use this feature. It can remove the background with accuracy by recognizing the main object. Filmora detects humans with AI and allows manual adjustments after removing the background. You can change the Edge Thickness and Edge Feature to the required extent.

3. Basic Background
While editing any media, you might require a blur option to hide distortion in the background. Filmora offers background blur options with different types and styles in them. You can opt for a Pattern, Color, and blur option from blur types. Then, it allows you to choose from blur styles like Grainy, Direction, and Radial. Afterward, users can select the level of blur as per their choice.

4. AI Image Stylizer
Aside from changing background, you can unleash your creativity with an AI Image stylizer. It’s the latest feature of Filmora that can turn your image into a devil, clown, or zombie. If you want to follow certain social media trends of making anime, explore this feature. You can find 19 styles that also include soft image looks like Flower and Angel image styles.

Steps to Change Background with Different Ways Using Filmora
Instead of lightroom sky replacement, Filmora offers the simplest way to edit images and videos. Let’s explore the quickest ways to change backgrounds using Filmora.
- Method 1: Using Chroma Key
- Method 2: Accessing AI Portrait
- Method 3: Change the Background through Masking
Method 1: Using Chroma Key
Step 1: Get the Latest Version of Filmora in Your system
Successfully launch the latest version of Filmora in your system. Double-tap on it to enter the home screen. Click on “New Project” and access the editing screen of Filmora.

Step 2: Use the Chroma Key and Change the Background
From the media panel, use “Import” and bring your media to the Timeline section. Place the background video first and then bring the Main Clip below it. Head to the right-side panel and press the “AI Tools” option from the top. Now enable the “Chroma Key” option, and the background will be replaced. You can adjust the edges through “Edge Thickness” and “Edge Feather” sliders.

Step 3: Continue Editing or Export Media at Desired Location
When you have finished the editing, move to the “Export” option at the top right. Using the “Export” window, define parameters and export the file wherever you want.

Method 2: Accessing AI Portrait
Step 1: Set the Videos at the Correct Place in the Timeline
Import your Background video and main clips in the media panel. Drag the main video in the second track and the background video in the first track, respectively.

Step 2: Explore and Utilize AI Portrait for Changing Background
Head to the right-side panel and access the AI tools option for choosing “AI Portrait.” Toggle this option and get the background automatically changed. To further enhance, you can use “Edge Thickness” and “Edge Feather” sliders.

Method 3: Change the Background through Masking
Step 1: Get Stock Media and Place it in the Timeline
Drag your main video in the timeline. Then, tap the “Stock Media” icon from the toolbar of the media panel. Browse one background clip and bring it to the timeline at the second track.

Step 2: Draw a Mask to Replace the Background with Stock Media
Look for the “Mask” option before the “AI tools” option on the right-side panel. Pick the “Draw Mask” icon and try to draw the lines around the main figure. When you finish drawing, the background will be replaced. You can use the “Blur Strength” slider to give a natural look.

Conclusion
In short, sky replacement is a feature of Adobe Photoshop that turns clear skies into sunsets. To do so, you can follow the steps highlighted in this article. Changing sky in the Lightroom needs some editing skills in Photoshop, and not everyone has it. Thus, you should use Wondershare Filmora as the top-notch solution. It can change your media’s background with AI and other manual changing options.
Free Download Free Download Learn More
Part 1: Why Do Creators Look Forward to Changing the Environment Across Their Recorded or Captured Media?
Humans love to show creativity and express themselves from different perspectives. Creative works provide entertainment and prove therapeutic in some way. That’s why creators and artists try to change the surroundings of recorded media. Such changes make the captured media virtually stunning and creative. Let’s explore more reasons that push creators towards sky replacement in Lightroom:
- Artistic Storytelling: A creative art piece shows a story of a thousand words. Thus, artists look for visual elements to convey particular moods and messages in their media.
- Symbolism: In many art competitions, creators are asked to show symbolic media. For this purpose, they might replace Sky in Lightroom to symbolize rebirth and growth.
- World-Building: The science fiction and fantasy genre needs such changes to build another world. Creators turn the media into imaginative settings to inspire the audience.
- Entertainment: Another aim of the creator is to provide new and exciting content to the audience. It allows them to temporarily escape their world and enjoy it.
- Discovery: You might have seen virtual landscapes in video games that uncover hidden secrets. Such backgrounds are designed to facilitate adventure through media.
Part 2: A Guide to Replace Sky in Lightroom: Step-by-Step
As discussed earlier, changing the sky in Lightroom proves fruitful for many reasons. Altering media scenes can also create a powerful emotional impact. Likewise, shifting from a green meadow to a messy landscape can turn a calm mood into chaos. If you intend to replace your current media background, then let us help you. Here are the steps below to change the environment in Lightroom:
Step 1: Lightroom can enhance your surroundings by using certain effects. To replace the sky, right-click on your image and select the “Edit in Photoshop” option. Before that, ensure that you have Adobe Photoshop installed on your system.
Step 2: Now, go to the top toolbar and press the “Edit” option next to “File.” From the drop-down list, access the “Sky Replacement” option. Head to the “Sky Replacement” panel and click the downward icon next to the sky preview. Scroll to pick one sky of your choice and hit the “OK” button.
Step 3: To import more skies, press the “Settings” icon on the Sky Replacement panel. Select the first option of “Get More Skies” and click on “Import Images.” You can explore skies from the Blue Skies, Spectacular, and Sunsets folders from that panel.
Step 4: Bring this picture back to the Lightroom and go to its right-side panel. There, use the Exposure, Contrast, and Highlights sliders below the “Light” downward icon. After enhancing your image, right-click on it and look for the “Export” option to save the file.
Part 3: Make Background Changing Easy with Wondershare Filmora
Sky Replacement in Lightroom and Photoshop requires some basic editing skills. Not everyone has such skills, so they have to acquire skills from video tutorials. It wastes a lot of time and effort just to learn editing from scratch. As an easier solution, they should try Wondershare Filmora to change image surroundings.
Notably, it’s a better solution that accommodates all users from beginner professionals. You can use Filmora for video editing to effortlessly expand your creativity. This tool is available online for Desktop, macOS, mobile, and online with the latest AI features.
Free Download For Win 7 or later(64-bit)
Free Download For macOS 10.14 or later
Key Features Marking Filmora’s Importance
Instantly remove or change your videos and image backgrounds with Filmora. Reimagine your world by knowing the given key features of Filmora in changing backgrounds:
1. Chroma Key (Green Screen)
Applying green-screen in effect in video and images will generate professional content. With AI support, you can remove a certain color from overlay images and videos. It can make your chosen colors transparent in the imported media. To fine-tune the media, you can use Tolerance, Edge Thickness, and Feather sliders.
2. AI Portrait
If you want to focus on the portrait while ignoring the background, use this feature. It can remove the background with accuracy by recognizing the main object. Filmora detects humans with AI and allows manual adjustments after removing the background. You can change the Edge Thickness and Edge Feature to the required extent.
3. Basic Background
While editing any media, you might require a blur option to hide distortion in the background. Filmora offers background blur options with different types and styles in them. You can opt for a Pattern, Color, and blur option from blur types. Then, it allows you to choose from blur styles like Grainy, Direction, and Radial. Afterward, users can select the level of blur as per their choice.
4. AI Image Stylizer
Aside from changing background, you can unleash your creativity with an AI Image stylizer. It’s the latest feature of Filmora that can turn your image into a devil, clown, or zombie. If you want to follow certain social media trends of making anime, explore this feature. You can find 19 styles that also include soft image looks like Flower and Angel image styles.
Steps to Change Background with Different Ways Using Filmora
Instead of lightroom sky replacement, Filmora offers the simplest way to edit images and videos. Let’s explore the quickest ways to change backgrounds using Filmora.
- Method 1: Using Chroma Key
- Method 2: Accessing AI Portrait
- Method 3: Change the Background through Masking
Method 1: Using Chroma Key
Step 1: Get the Latest Version of Filmora in Your system
Successfully launch the latest version of Filmora in your system. Double-tap on it to enter the home screen. Click on “New Project” and access the editing screen of Filmora.
Step 2: Use the Chroma Key and Change the Background
From the media panel, use “Import” and bring your media to the Timeline section. Place the background video first and then bring the Main Clip below it. Head to the right-side panel and press the “AI Tools” option from the top. Now enable the “Chroma Key” option, and the background will be replaced. You can adjust the edges through “Edge Thickness” and “Edge Feather” sliders.
Step 3: Continue Editing or Export Media at Desired Location
When you have finished the editing, move to the “Export” option at the top right. Using the “Export” window, define parameters and export the file wherever you want.
Method 2: Accessing AI Portrait
Step 1: Set the Videos at the Correct Place in the Timeline
Import your Background video and main clips in the media panel. Drag the main video in the second track and the background video in the first track, respectively.
Step 2: Explore and Utilize AI Portrait for Changing Background
Head to the right-side panel and access the AI tools option for choosing “AI Portrait.” Toggle this option and get the background automatically changed. To further enhance, you can use “Edge Thickness” and “Edge Feather” sliders.
Method 3: Change the Background through Masking
Step 1: Get Stock Media and Place it in the Timeline
Drag your main video in the timeline. Then, tap the “Stock Media” icon from the toolbar of the media panel. Browse one background clip and bring it to the timeline at the second track.
Step 2: Draw a Mask to Replace the Background with Stock Media
Look for the “Mask” option before the “AI tools” option on the right-side panel. Pick the “Draw Mask” icon and try to draw the lines around the main figure. When you finish drawing, the background will be replaced. You can use the “Blur Strength” slider to give a natural look.
Conclusion
In short, sky replacement is a feature of Adobe Photoshop that turns clear skies into sunsets. To do so, you can follow the steps highlighted in this article. Changing sky in the Lightroom needs some editing skills in Photoshop, and not everyone has it. Thus, you should use Wondershare Filmora as the top-notch solution. It can change your media’s background with AI and other manual changing options.
How to Use Kahoot! On Zoom
In the educational game Kahoot! participants respond to multiple-choice questions based on trivia. Each participant uses their own controller to answer questions in the online game. There are several question kinds to pick from, allowing for complete customization of the test. Each player needs their own controller for Kahoot! The game questions will be shown in the Zoom/Google Meet window, but the answers must be entered using the controller. With the Kahoot!! app for Zoom, presenters may use play and friendly rivalry to increase participant engagement. Users may organize knowledge- and feedback-gathering pulse checks with staff members, encourage original thought with word clouds, and empower participants’ voices with surveys, open-ended questions, and other tools. Utilizing the brainstorm tool, organizations may crowdsource ideas and advance teamwork.
Engagement has emerged as a crucial component of successful learning, collaboration, and connection as the globe has increased the use of video communications in social and professional situations. Users may access, host, and play Kahoot!! games and educational information with other meeting participants using the Kahoot!! app for Zoom without ever leaving the Zoom Meeting or requiring a second device. Corporate executives may motivate their staff via speeches, meetings, and online activities. Meeting hosts will have immediate access to data and statistics from their Kahoot!! experience, allowing them to respond in real time to audience engagement with the material. Additionally, hosts may email the Kahoot!! games to all participants so they can practice and improve their scores, which will increase participant engagement and learning retention. Hosts can also distribute the Kahoot!! games as self-paced challenges with individuals who couldn’t attend in person.
Part 1: Key Features of Kahoot
What more is there to discuss, Kahoot!? Every pupil adores it. Many instructors and educators use it all around the world to make learning simple, enjoyable, and interesting. Everyone may use it since it is free and extremely simple to use. These are some of its attributes:
- Quizzes may be made in a matter of minutes.
- Develop games based on the abilities of the kids. Playing at home or in the Zoom is simple for them.
- Various templates are offered. You can choose one of them with confidence.
- Kahoot! has the ability to be organized into many folders according to topics or subjects.
- Additionally, multiple choice questions may be included by quiz makers.
- Teachers using Kahoot! may combine different questions into one format, such as quizzes, polls, riddles, and slides.
- Use Apple Schoolwork, Google Zooms, and Microsoft Teams to share student-centered tasks.
Part 2: How to Host a Kahoot! Session within a Zoom Meeting
With the Zoom app, Kahoot! may be viewed, hosted, and used. It’s amazing that Kahoot!!, one of the most well-known brands in quiz-based learning, still provides a free-to-use platform, making it very accessible to both instructors and students. It’s also a useful resource for a hybrid class that combines online and classroom instruction. Most devices will be able to use the cloud-based service using a web browser. This implies that students using computers, tablets, and cellphones in class or at home may access this. Participants in Zoom Meetings may play games and learn without having to leave the Zoom meeting or bring a second device.
Step1Sign up for Zoom ahead of time and get ready. On the other hand, launch the Kahoot! test in your web browser, then be ready to share your screen in Zoom.
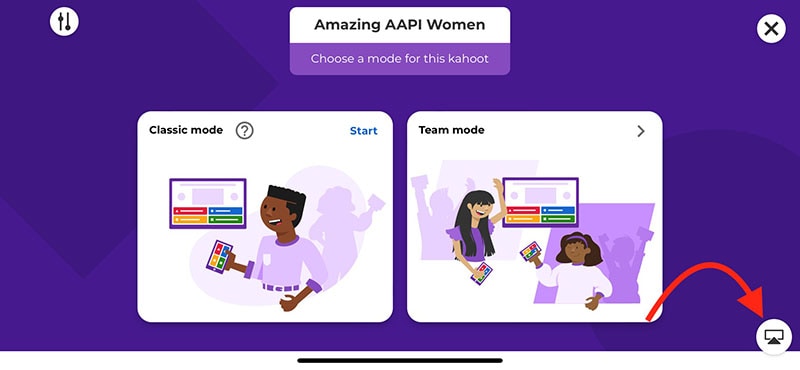
Step2As the participants come, allow them in and check to see whether you and they can both hear each other. To access the Kahoot! quiz, make sure they have a device or another browser tab open.
Step3Open the Kahoot! test and share it using Zoom’s “Share Screen” feature. While your screen is shared, continue to host the Kahoot! as normal. To view participants next to your shared screen, we advise selecting Side-by-Side Mode.
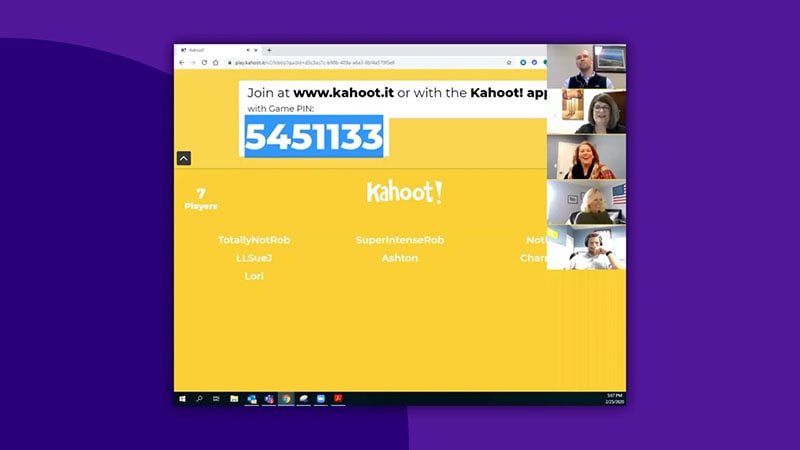
Part 3: How to Participate in Kahoot! Sessions within a Zoom Meeting
With more than 40 million ready-made games available on Kahoot!!, getting started is fast and simple. When time and resources are limited, hybrid or distant learning is ideal. After linking the Kahoot! to your Zoom account, you may utilize it. Use this app and start a meeting. Go to Apps on the toolbar and choose the program you wish to use. Select Who is Hosting to locate their host or to join a Kahoot! session being hosted by a friend or another player. Players may post a question to a shared screen on the Kahoot! platform. Kahoot!! just needs an account to be made in order to use it since it is free. Most devices may be used by students to access Kahoot!! from wherever there is an internet connection. This is how:
Step1Take the time to check that Zoom, Skype, Cisco Webex, or Google Hangout are operating and that your camera, microphone, and speaker are all operational.
Step2In the right-side panel, add the Kahoot!! app to your list of apps and click Join.
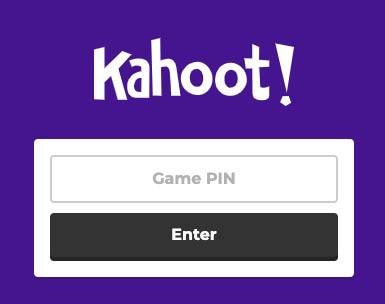
Step3The lobby will reveal your game PIN when you click the Play button, allowing the computer to show you a Kahoot! You may enter the game PIN and press Enter to join the Kahoot! session once the host shows their screen with you. To participate in a Kahoot! session, you don’t need a Kahoot! account.
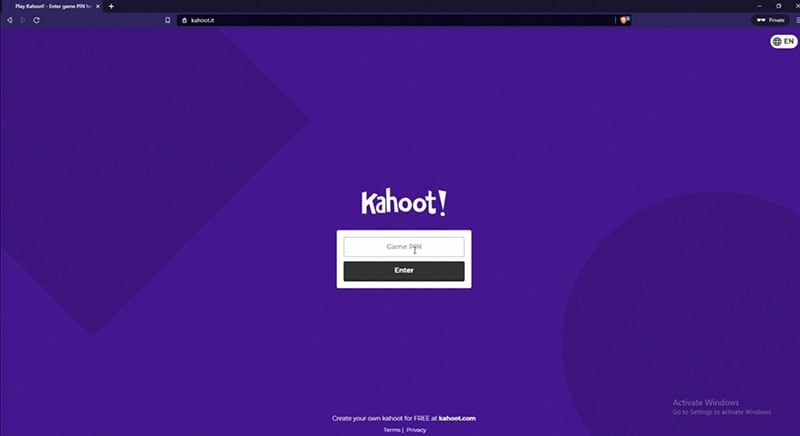
Part 4: How to Record Zoom Meetings
Zoom is a conference tool that enables real-time, high-quality, low-latency communication. Filmora is an excellent video recorder for that reason, enabling users to capture on-screen activity such Zoom audio tracks and video conversations. Wondershare One of the most versatile and portable Zoom voice recorders is the Filmora. Even novices may easily utilize it due to its user-friendly UI. All you have to do is click the record button after choosing the proper audio source in the settings. The all-in-one video editing program Filmora allows you to record your screen with audio, a facecam, and a green screen effect. You can record the entire screen or just a portion of it, and you can perform a number of quick edits on your video using tools like trimming, cropping, changing the audio track’s volume, and so on.
How to Use Filmora to Record Zoom Lectures
Having said that, Filmora is a great Zoom recorder that can capture games, audio, and video conversations. This video recorder may be used to make video clip lessons in addition to recording movies, video games, and webcam footage. In addition to Zoom, it can also capture internet streaming audio. Here is information on how to record Zoom meetings using this software:
Step1Download and Install Filmora on your PC
To use this program for a number of tasks, including screen recording and recording editing, you must first download and install it on your computer. To achieve this, download the recording program by clicking the link below. Launch the program as soon as the download is finished to start the installation process, and then adhere to the on-screen directions to install and make this software available for usage.
Step2Choose the Record’s Ideal Position in the Zoom
Use it on your PC at this point. As soon as you start the program, a window interface with two choices for screen recording, editing already recorded videos, and generating videos will display. Choose the Recording option from the menu. When you click the record button, the program will direct you to the recording interface, where you can easily adjust the settings for your camera and audio. To add the microphone or Zoom sound in that particular field, use the necessary buttons as described below:
Step3Press the Record Button
It goes without saying that you must test your recording tools to ensure they are functional and capturing the highest quality audio. But once you’re ready, click the record button, which will allow you 3-5 seconds before starting to record the personalized screen of your PC as seen below:
Step4Export and Save Your Zoom Recording
You may now save the Zoom video for sharing on social media after making and modifying it. The following file types may be used to save the document: MP4, WMV, AVI, MOV, GIF, and MP3. The finest feature of Wondershare Filmora is the direct export and sharing of Zoom video recordings to YouTube; the only need is that you must be signed in to your YouTube account inside the application:
Because the MOV format is only available for online movies, you may also export your Zoom recordings to MP4 if you want to publish them to your YouTube channel. You are free to choose the format that best suits your needs. You may choose the encoder from a drop-down menu in the export options.
Conclusion
With the aid of several interesting tools and programs made accessible in this virtual environment, learning has now become enjoyable. Of them is Kahoot! In Zoom. It is an application that acts as a learning tool by providing fun games, tests, and a variety of other chances. In only a few minutes, quizzes may be made and distributed. Games and quizzes may be planned using this platform quite easily. The Kahoot! with Zoom will make it simpler than ever for corporate leaders to engage and encourage their team members with Kahoot!! engaging game-based learning experiences at a time when many organizations are staying virtual or planning for a hybrid model. Head towards recording Kahoot with Filmora to experience a smooth Kahoot! usage on Zoom. Plus, you can also share the gameplay afterwards.
In the educational game Kahoot! participants respond to multiple-choice questions based on trivia. Each participant uses their own controller to answer questions in the online game. There are several question kinds to pick from, allowing for complete customization of the test. Each player needs their own controller for Kahoot! The game questions will be shown in the Zoom/Google Meet window, but the answers must be entered using the controller. With the Kahoot!! app for Zoom, presenters may use play and friendly rivalry to increase participant engagement. Users may organize knowledge- and feedback-gathering pulse checks with staff members, encourage original thought with word clouds, and empower participants’ voices with surveys, open-ended questions, and other tools. Utilizing the brainstorm tool, organizations may crowdsource ideas and advance teamwork.
Engagement has emerged as a crucial component of successful learning, collaboration, and connection as the globe has increased the use of video communications in social and professional situations. Users may access, host, and play Kahoot!! games and educational information with other meeting participants using the Kahoot!! app for Zoom without ever leaving the Zoom Meeting or requiring a second device. Corporate executives may motivate their staff via speeches, meetings, and online activities. Meeting hosts will have immediate access to data and statistics from their Kahoot!! experience, allowing them to respond in real time to audience engagement with the material. Additionally, hosts may email the Kahoot!! games to all participants so they can practice and improve their scores, which will increase participant engagement and learning retention. Hosts can also distribute the Kahoot!! games as self-paced challenges with individuals who couldn’t attend in person.
Part 1: Key Features of Kahoot
What more is there to discuss, Kahoot!? Every pupil adores it. Many instructors and educators use it all around the world to make learning simple, enjoyable, and interesting. Everyone may use it since it is free and extremely simple to use. These are some of its attributes:
- Quizzes may be made in a matter of minutes.
- Develop games based on the abilities of the kids. Playing at home or in the Zoom is simple for them.
- Various templates are offered. You can choose one of them with confidence.
- Kahoot! has the ability to be organized into many folders according to topics or subjects.
- Additionally, multiple choice questions may be included by quiz makers.
- Teachers using Kahoot! may combine different questions into one format, such as quizzes, polls, riddles, and slides.
- Use Apple Schoolwork, Google Zooms, and Microsoft Teams to share student-centered tasks.
Part 2: How to Host a Kahoot! Session within a Zoom Meeting
With the Zoom app, Kahoot! may be viewed, hosted, and used. It’s amazing that Kahoot!!, one of the most well-known brands in quiz-based learning, still provides a free-to-use platform, making it very accessible to both instructors and students. It’s also a useful resource for a hybrid class that combines online and classroom instruction. Most devices will be able to use the cloud-based service using a web browser. This implies that students using computers, tablets, and cellphones in class or at home may access this. Participants in Zoom Meetings may play games and learn without having to leave the Zoom meeting or bring a second device.
Step1Sign up for Zoom ahead of time and get ready. On the other hand, launch the Kahoot! test in your web browser, then be ready to share your screen in Zoom.
Step2As the participants come, allow them in and check to see whether you and they can both hear each other. To access the Kahoot! quiz, make sure they have a device or another browser tab open.
Step3Open the Kahoot! test and share it using Zoom’s “Share Screen” feature. While your screen is shared, continue to host the Kahoot! as normal. To view participants next to your shared screen, we advise selecting Side-by-Side Mode.
Part 3: How to Participate in Kahoot! Sessions within a Zoom Meeting
With more than 40 million ready-made games available on Kahoot!!, getting started is fast and simple. When time and resources are limited, hybrid or distant learning is ideal. After linking the Kahoot! to your Zoom account, you may utilize it. Use this app and start a meeting. Go to Apps on the toolbar and choose the program you wish to use. Select Who is Hosting to locate their host or to join a Kahoot! session being hosted by a friend or another player. Players may post a question to a shared screen on the Kahoot! platform. Kahoot!! just needs an account to be made in order to use it since it is free. Most devices may be used by students to access Kahoot!! from wherever there is an internet connection. This is how:
Step1Take the time to check that Zoom, Skype, Cisco Webex, or Google Hangout are operating and that your camera, microphone, and speaker are all operational.
Step2In the right-side panel, add the Kahoot!! app to your list of apps and click Join.
Step3The lobby will reveal your game PIN when you click the Play button, allowing the computer to show you a Kahoot! You may enter the game PIN and press Enter to join the Kahoot! session once the host shows their screen with you. To participate in a Kahoot! session, you don’t need a Kahoot! account.
Part 4: How to Record Zoom Meetings
Zoom is a conference tool that enables real-time, high-quality, low-latency communication. Filmora is an excellent video recorder for that reason, enabling users to capture on-screen activity such Zoom audio tracks and video conversations. Wondershare One of the most versatile and portable Zoom voice recorders is the Filmora. Even novices may easily utilize it due to its user-friendly UI. All you have to do is click the record button after choosing the proper audio source in the settings. The all-in-one video editing program Filmora allows you to record your screen with audio, a facecam, and a green screen effect. You can record the entire screen or just a portion of it, and you can perform a number of quick edits on your video using tools like trimming, cropping, changing the audio track’s volume, and so on.
How to Use Filmora to Record Zoom Lectures
Having said that, Filmora is a great Zoom recorder that can capture games, audio, and video conversations. This video recorder may be used to make video clip lessons in addition to recording movies, video games, and webcam footage. In addition to Zoom, it can also capture internet streaming audio. Here is information on how to record Zoom meetings using this software:
Step1Download and Install Filmora on your PC
To use this program for a number of tasks, including screen recording and recording editing, you must first download and install it on your computer. To achieve this, download the recording program by clicking the link below. Launch the program as soon as the download is finished to start the installation process, and then adhere to the on-screen directions to install and make this software available for usage.
Step2Choose the Record’s Ideal Position in the Zoom
Use it on your PC at this point. As soon as you start the program, a window interface with two choices for screen recording, editing already recorded videos, and generating videos will display. Choose the Recording option from the menu. When you click the record button, the program will direct you to the recording interface, where you can easily adjust the settings for your camera and audio. To add the microphone or Zoom sound in that particular field, use the necessary buttons as described below:
Step3Press the Record Button
It goes without saying that you must test your recording tools to ensure they are functional and capturing the highest quality audio. But once you’re ready, click the record button, which will allow you 3-5 seconds before starting to record the personalized screen of your PC as seen below:
Step4Export and Save Your Zoom Recording
You may now save the Zoom video for sharing on social media after making and modifying it. The following file types may be used to save the document: MP4, WMV, AVI, MOV, GIF, and MP3. The finest feature of Wondershare Filmora is the direct export and sharing of Zoom video recordings to YouTube; the only need is that you must be signed in to your YouTube account inside the application:
Because the MOV format is only available for online movies, you may also export your Zoom recordings to MP4 if you want to publish them to your YouTube channel. You are free to choose the format that best suits your needs. You may choose the encoder from a drop-down menu in the export options.
Conclusion
With the aid of several interesting tools and programs made accessible in this virtual environment, learning has now become enjoyable. Of them is Kahoot! In Zoom. It is an application that acts as a learning tool by providing fun games, tests, and a variety of other chances. In only a few minutes, quizzes may be made and distributed. Games and quizzes may be planned using this platform quite easily. The Kahoot! with Zoom will make it simpler than ever for corporate leaders to engage and encourage their team members with Kahoot!! engaging game-based learning experiences at a time when many organizations are staying virtual or planning for a hybrid model. Head towards recording Kahoot with Filmora to experience a smooth Kahoot! usage on Zoom. Plus, you can also share the gameplay afterwards.
VSDC Free Video Editor Review
If you are a Window user and you are looking for a free video editor without a watermark, VSDC free video editor is definitely a great application. There are only a handful of free video editors available where the output video will not have a watermark, and there is no limitation on the video length. VSDC video editor belongs to the non-liner video editor group where you can combine video clips, photos, objects, and blend and overlap them as per your requirements.
For a beginner, VSDC free video editor is undoubtedly one of the best video editors. It supports different types of video and audio formats as well as codes. The system requirements are very basic, and hence, it is perfect for low-end computers? But can you rely on VSDC editor when you need slightly advanced video editing? Check out our VSDC editor review and find a better alternative.
Part 1. How to Download and Install VSDC?
VSDC editor download is only available for Windows users. It is tailor-made for those who have a low-end computer with older Windows version OS. The software is compatible with Windows 2000 to Windows 11. The minimum RAM requirement is 128MB and free disk space of 200 MB. Here are the steps to download and install VSDC editor.
Step 1: Open your web browser and visit ‘www.videosoftdev.com/free-video-editor/download” .
Step 2: Click on Download Video Editor button based on 32-bit or 64-bit version of your computer. If you have Windows XP, you have to download VDSC video editor version 6.4 instead of the latest version for compatibility.
Step 3: Give some time for the installer file to get downloaded. It is merely 100 MB and it should not take long. After downloading the installer, launch it and follow the on-screen instruction to complete the installation.
Step 4: After proper installation, launch VSDC video editor. You will get the options to create a new project and capture screen, start editing an existing video and export the finished project in a proper video format.
Part 2. Key Features of VSDC
There are two versions of VSDC video editor available – Free video editor and Pro video editor. The free version has limited features while Pro version has advanced features. Here are going to discuss the key features of VSDC Free Video Editor.
Low System Requirements – One of the reasons for the wide popularity of VSDC video editor is that it does not demand high system configurations like most other video editors. If you have a low-end computer with an outdated Windows operating system, you can use VSDC video editor without any issue.
Basic Editing – Among the basic editing tools, you can cut, trim, split and join video clips. There are options for rotating and resizing videos. You can also go for color correction and put overlays on videos as applicable. Besides, you can edit 36-degree videos with zoom and chart tools.
Effects – VSDC has a wide collection of video, audio and text effects. You can also add objects to your video and apply different ready-made filters. There are also transitions to apply in between video clips and slides. You can also use green screen effect to change your background. The special split-screen effect and picture-in-picture effects are quite eye-catching.
Capture Video – VSDC video editor is equally competent in capturing videos from your webcam as well as recording your screen video. In fact, there is a dedicated option available for creating slideshow videos from photos. You can even record your voiceover if you want to.
File Formats - VSDC supports all the popular file formats for importing and exporting video and audio files. There are different export profiles available so that you can save your edited video for different devices conveniently.
Apart from these, if you opt for the Pro version, you get motion tracking, video masking, video stabilization, and much more such advanced video editing tools.
Part 3. How to Edit Videos with VSDC
If you have the recorded video and you want to edit it with VSDC video editor, the steps are quite simple. You can even record your webcam and screen video with audio if you want to start from scratch. Coming to the editing part, you can split large video files, merge video clips, add transitions in between, add objects in the video as well as crop and rotate videos. There are different effects you can apply to uplift video content. Here are the steps to edit videos with VSDC editor.
Step 1: Open VSDC Video Editor and click on Blank Project option. Name the project and change parameters, and click on Finish.

Step 2: Click on Add Object option at the top and select Video. Import the video clips saved on your hard drive. Similarly, you can go to Add Objects> Audio to import audio files.

Step 3: All the imported media files will appear on the timeline. If you have multiple video clips, you can shift the position of clips on the timeline so that one video clip ends and the other begins.
Step 4: If you want to add transitions in between the video clips, go to Video Effects> Transitions> select the effect you want to apply. Check the on-screen parameters such as duration and click on Ok button.

Step 5: If you want to add objects, go to Add Object and select shapes, texts, animations, charts, and much more. You can also add Audio Effects as well as Text Effects from the top bar.
Step 6: Once you are happy with the preview of the edited video, go to Export Project and check all the parameters. Click on Export Project option.

Part 4. Best VSDC Alternative Video Editor
Since VSDC video editor is available completely free, there is no hard in downloading the application and trying it out. But soon, you will understand that the video editor is limited as far as tools and features are concerned. If you want to get more than just basic tools, you will have to upgrade to its Pro version. However, there are better premium video editors available. We recommend Wondershare Filmora as a better alternative to VSDC video editor.
Filmora is extremely popular in the professional video editing world as it has an intuitive interface and does not demand high-end computers. There are tons of transitions, effects, filters, and objects available to add to your edit. You can perform all standard and advanced video editing to take your video to the next level. Here are all the steps to edit videos on Filmora.
For Win 7 or later (64-bit)
For macOS 10.12 or later
Step 1: Download and install Filmora and it is available for Windows and Mac. Launch Filmora and click on New Project. Import all your media files into Project Media folder by drag and drop action.

Step 2: Arrange the video clips and audio clips on the timeline by drag and drop action. You should be placing the video and audio files on different tracks. This is where you can do all the basic editing such as trimming, cutting, splitting, and merging.

Step 3: To add transitions in between the video clips, go to Transitions from the top bar and drag and drop any transition in between the clips. Check out Titles, Effects, and Elements from the top bar and insert them on the timeline as you think appropriate.

Step 4: Play the video to see if everything is perfect and click on Export button to save your video to your hard drive.

Part 5. FAQs about VSDC
1. Is VSDC video editor really free?
Yes, VSDC video editor is completely free to use. However, there is a pro version available where more features are present. But the free version does not put watermark on the output video and has all the standard tools for video editing without any limitation.
2. Is VSDC better than Adobe Premiere Pro?
No, VSDC is not better than Adobe Premiere Pro. VSDC is a free video tor while Adobe Premiere Pro is a premium one. Naturally, Adobe Premiere Pro has more features and functionalities. However, VSDC is better for beginners and those who have low-end computers if you compare it with Adobe Premiere Pro.
3. Is VSDC safe?
Yes VSDC video editor is safe and stable to use. However, there was an incident in 2019 where VSDC video editor’s official website was hacked, but the software itself is safe to use on Windows computers.
For macOS 10.12 or later
Step 1: Download and install Filmora and it is available for Windows and Mac. Launch Filmora and click on New Project. Import all your media files into Project Media folder by drag and drop action.
Step 2: Arrange the video clips and audio clips on the timeline by drag and drop action. You should be placing the video and audio files on different tracks. This is where you can do all the basic editing such as trimming, cutting, splitting, and merging.
Step 3: To add transitions in between the video clips, go to Transitions from the top bar and drag and drop any transition in between the clips. Check out Titles, Effects, and Elements from the top bar and insert them on the timeline as you think appropriate.
Step 4: Play the video to see if everything is perfect and click on Export button to save your video to your hard drive.
Part 5. FAQs about VSDC
1. Is VSDC video editor really free?
Yes, VSDC video editor is completely free to use. However, there is a pro version available where more features are present. But the free version does not put watermark on the output video and has all the standard tools for video editing without any limitation.
2. Is VSDC better than Adobe Premiere Pro?
No, VSDC is not better than Adobe Premiere Pro. VSDC is a free video tor while Adobe Premiere Pro is a premium one. Naturally, Adobe Premiere Pro has more features and functionalities. However, VSDC is better for beginners and those who have low-end computers if you compare it with Adobe Premiere Pro.
3. Is VSDC safe?
Yes VSDC video editor is safe and stable to use. However, there was an incident in 2019 where VSDC video editor’s official website was hacked, but the software itself is safe to use on Windows computers.
Also read:
- In 2024, Final Cut Pro - How to Download and Install It?
- New OBS Studio Is a Free and Open-Source App for Screen-Casting and Live Streaming for 2024
- Updated How to Convert Images Into Video - Kapwing Tutorial for 2024
- New In 2024, Ultimate Guide on Converting Word to SRT
- 2024 Approved Top Tricks for Learning Photo Slideshow
- Updated How to Perform Mask Tracking Discovering the Best Methods for 2024
- Updated Top 10 iPad Slideshow Apps to Create a Slideshow for 2024
- Updated How to Add Font Effects to Videos
- Updated 2024 Approved Discover the Best Video Frame Rate Converters for Smooth Playback, Including Online and Offline Options. Learn How to Convert Frame Rates for Free and Elevate Your Video Quality with These Top 8 Tools
- New YouTube Algorithm Hacks
- New In This Article, We Will Discuss How to Rotate Videos in the Lightworks Application. Below Is a Way to Rotate Videos in Lightworks Manually, Here, We Will Use the Z-Axis Rotation
- New Zoom In and Zoom Out on YouTube for 2024
- New 5 Methods to Denoise a Video
- In 2024, How to Add Subtitles in Canva?
- New 2024 Approved Repeated Text Animation Tutorial in Filmora
- How to Fade to Black Premiere Pro
- Updated Featuring The Use of Camera Shake in Creating the Best Videos
- Updated In 2024, Learn How to Make Modern TikTok Velocity Dance Videos in Filmora Just Like the Ones You See on TikTok and Instagram Reels
- Updated 2024 Approved Best 6 Online MP4 Croppers
- New List of Whatsapp Video Format That You May Need to Know for 2024
- Updated Guaranteed 10 Storyboard Creators To Make Animation Easier For You
- How to Polish Your Music Video Edits Using Filmora for 2024
- Updated How Much Information Do You Have About MP4 Digital File Storage? Let Us Tell You More About the MP4 File Format; Get Ready to Increase Your Knowledge for 2024
- Updated Do You Want to Know About the Photo Video Maker with Song? Are You Ready to Discover It in Detail? This Article Will Give You Valuable Insights on This Topic for 2024
- In 2024, When Struggling to Find a Suitable Game Recorder for Your PC, You Might Come Across Many Options. Explore the Best Game Recorders for Sharing Game Highlights
- Updated 2024 Approved Creating a Slideshow Is Necessity of the Modern Time. Whether You Plan a Business Meeting or You Are Going to Do some Family Event with Slideshow Presentation, a Good Slideshow Maker Will Help You in This Direction
- New 2024 Approved How to Slow-Mo YouTube Videos
- New How To Speed Up Video With Lightworks Video Editor for 2024
- 10 Best Meme Text to Speech Tools Windows, Mac, Android, iPhone
- New In 2024, How To Change Text Color In Premiere Pro
- New 2024 Approved 2 Solutions to Crop a Video Using After Effects
- Updated Several Tips Can Facilitate How You Edit Videos Faster and Easier. All You Need to Do Is to Read This Article to Find Out What They Are
- Updated Best 5 Solutions on How to Add Emojis to iPhone
- Learn Color Correction in After Effects with These Videos
- How Can You Create Outstanding Educational Teaching Videos?
- Updated Wondering How to Add Custom Transitions in OBS Studio? Here Are the Steps to Add Stinger Transitions to OBS. Get a Better OBS Alternative to Add Transitions
- Updated In 2024, Do You Want to Know How to Add a VHS Effect Premiere Look? You Can Easily Apply the VHS Effect to Your Videos Using Adobe Premiere Pro
- 10 Best Video Editing Apps With Templates for 2024
- Updated Understanding More About CapCut Lenta Template and Slow-Motion Videos for 2024
- Remove FRP Lock on Xiaomi Civi 3
- Fix Unfortunately Settings Has Stopped on Realme GT Neo 5 Quickly | Dr.fone
- In 2024, Top 4 Ways to Trace Vivo T2 5G Location | Dr.fone
- 8 Ultimate Fixes for Google Play Your Asus ROG Phone 7 Isnt Compatible | Dr.fone
- 3 Easy Ways to Factory Reset a Locked Apple iPhone 12 Pro Without iTunes
- Top 4 Ways to Trace Samsung Galaxy S23 FE Location | Dr.fone
- In 2024, How to Bypass Google FRP Lock on Xiaomi 14 Devices
- How to Access Your iPhone 7 Plus When You Forget the Passcode? | Dr.fone
- The way to get back lost music from Samsung Galaxy XCover 6 Pro Tactical Edition
- In 2024, 7 Top Ways To Resolve Apple ID Not Active Issue For Apple iPhone 6 Plus
- Updated 2024 Approved Installation and Registration | Wondershare Virbo
- How to Reset a Nubia Z50S Pro Phone that is Locked?
- In 2024, How To Unlock Stolen Apple iPhone 13 Pro In Different Conditionsin | Dr.fone
- In 2024, A Guide Motorola Moto G04 Wireless and Wired Screen Mirroring | Dr.fone
- How to rescue lost call logs from Infinix Note 30 VIP Racing Edition
- Title: Updated Timeline Template Is a Visual Representation Showing the Passage of Time. It Includes Text, Diagrams, Images and Icons. They Are Perfect for Telling Stories, Events Etc for 2024
- Author: Morgan
- Created at : 2024-04-24 01:11:33
- Updated at : 2024-04-25 01:11:33
- Link: https://ai-video-editing.techidaily.com/1713965307023-updated-timeline-template-is-a-visual-representation-showing-the-passage-of-time-it-includes-text-diagrams-images-and-icons-they-are-perfect-for-telling-sto/
- License: This work is licensed under CC BY-NC-SA 4.0.
