
:max_bytes(150000):strip_icc():format(webp)/GettyImages-678913139-58a4ece73df78c345bcd781b.jpg)
Updated Whatever the Reason You Want to Convert an Mp4 to GIF Online, There Are a Number of Ways to Do It. Use This Guide to Learn the Best Methods. Read More Here for 2024
Whatever the Reason You Want to Convert an Mp4 to GIF Online, There Are a Number of Ways to Do It. Use This Guide to Learn the Best Methods. Read More Here
6 Instant mp4 to GIF Online Tools
An easy yet powerful editor
Numerous effects to choose from
Detailed tutorials provided by the official channel
Content creation has become easier than before with the popularity of mp4 to gif online. GIFs help to create compelling and engaging content in every industry. They can also be used in all sorts of ways, from adding animation to your designs to visually communicating information.
Moreover, if you don’t want to include videos and are interested in giving a good laugh dose to your audience, GIFs are the solution.
They are being used heavily today by content creators, marketing experts, and digital marketing agencies. However, they are not easily available in the way you want. So, you may have to convert mp4 to gif online. Fortunately, a number of tools are available for MP4 to GIF conversion that we are going to share here.
In this article
01 [6 Online Tools for Converting an MP4 to a GIF](#Part 1)
02 [6 Online Tools for Converting GIFs to MP4](#Part 2)
Part 1 6 Online Tools for Converting an MP4 to a GIF
01Any GIF Animator

Any GIF Animator is a popular choice for content creators when making GIFs. Its simple interface helps in turning video files of any format into attractive GIFs. Even those who have no technical idea of video editing can use this software easily. You can even import media files from optical storage devices using this mp4 to gif online platform.
Key Features
● Best for those without a technical background
● Comes with an animation wizard and a built-in image editor
● Quickly add effects or customize your GIF the way you want
● Get access to some advanced features like text overlays, resolution effects, and more
● It is possible to make adjustments to frame rate, width, height, and more in a GIF
● Convert a Youtube video to a GIF as well
Supported Platforms: Windows
02Adobe Creative Cloud Express

Adobe Creative Cloud Express is the simplest and quickest way to convert an MP4 to GIF. The users have to drag and drop the file and wait for the magic to happen. It has been powered by adobe premiere pro. The only requirement is there to sign up and then you get access to a plethora of creative tools.
Key Features
● Drag and Drop Feature Available
● Download the Converted file in your desired size and quality
● Simple and effective
Supported Platforms: All
03Instagriffer

Instagriffer is widely used forextracting GIFs from YouTube videos, Netflix shows, and more. It assists you in capturing your favorite moments from the screen in GIF format for free. There is no need to worry about watermarks because it doesn’t add them to the output.
Key Features
● You can add text, filters, loops, and more
● A plethora of customizable text and logos
● Decide the starting and ending time of a GIF
Supported Platforms: Windows & Mac
04Cute GIF to Video Converter

It allows you to add various animation effects during GIF processing. Apart from that, the users get the privilege of sharing GIFs on other networks. You can also extract a clip from a video and create a GIF out of it with this online tool. What makes this tool so demanding is the interface, where all the app segments are shown in one frame.
Key Features
● Navigating through the interface is easier than you can imagine
● Compatible with the batch conversion
● Supports numerous file types, including audio
● Supported Platforms: Windows
05Ezgif

Ezgif offers flexible options to convert online mp4 to gif. Either you can upload a file from your computer or paste a video URL to make a GIF. But the maximum file size should not exceed 100 MB. You can preview the GIF before converting it too.
Key Features
● Can convert transparent videos into animated GIFs
● You can set the width, height, and other elements before saving your GIF.
● It lets you choose the frame rate at your convenience
Platforms Supported: All
06Zamzar

Do you want to convert an endless number of file formats? If so, go ahead to Zamzar. It is powerful enough to convert more than 1100 file formats on the go. Not only does it work as an online mp4 to gif converter, but it also lets you convert a document, image, video, or audio file.
Key Features
● Use the “drag and drop” feature to upload multiple files
● It gives a fast output of heavy media files within 10 minutes
● Simple to use
● Over 1200 file formats are supported
Supported Platforms: All Web Browsers
Part 2 6 Online Tools for Converting GIFs to MP4
01**Wondershare Filmora Video Editor ** by Wondershare

Wondershare Filmora - Best Video Editor for Mac/Windows
5,481,435 people have downloaded it.
Build unique custom animations without breaking a sweat.
Focus on creating epic stories and leave the details to Filmora’s auto features.
Start a creative adventure with drag & drop effects and endless possibilities.
Filmora simplifies advanced features to save you time and effort.
Filmora cuts out repetition so you can move on to your next creative breakthrough.
The Wondershare Filmora V11 is a one-stop platform for all of your online mp4 to GIF needs. This tool can deliver you a high-resolution GIF output from an mp4 video. It also allows you to do much more, like video trimming, editing, conversion to different file formats, etc. In addition, the advanced elements added in Filmora can help to create original GIFs.
Key Features
● There is no file size limitation during conversion
● It works with all the major video formats
● Interactive interface
● Fast in processing GIFs from HD videos
Platforms supported: Windows 8 and later, Mac 10.14 and later
02CloudConvert

CloudConvert is a robust online file conversion platform. It can convert vectors, documents, ebooks, cad, archives, and more kinds of files. It enables you to adjust timing, dimensions, quality, and more. To convert a gif to an mp4 online, you have to upload the file and click on the export option. That’s it! Your file will start converting. However, you will only get the first 25 minutes free every day, and thereafter, you will have to pay a charge to convert large files.
Key Features
● Supports 200+ formats.
● Personalized conversion service based on your requirements
● It yields a high quality output at the end.
Platforms Supported: All
03Converterlite

Converterlite supports batch conversion of audio and video file formats. It can convert GIF files into MP4 format efficiently. It supports all major video formats such as AVI, MPEG, WMV, MOV, FLV, etc. For someone involved in content creation at a broad level, this is a must-use platform.
Key Features
● Available in five different languages
● Based on the powerful FFmpeg project
● Produce high-quality output in a timely manner
● This is best for social media content creators, meme makers, and marketers
Platforms supported: Windows XP, Vista, and 7
04GIFtoMP4

As the name implies, it simplifies gif to mp4 online conversion. The maximum number of GIFs it can convert to MP4 is 20. Once the conversion process ends, you can either download the files individually or get them all in zip format. It doesn’t keep any data on the site. All the stored data is deleted after anhour.
Key Features
● Use with confidence.
● Quickly convert GIF animations to MP4 videos
● No need to download software
● More than 16 languages to choose from
Platforms Supported: All
05Thundersoft GIF to Video Converter

It may appear to be one of the most unusual tools for the online GIF to MP4 conversion. Prior to getting the MP4 file, you can add music and many other custom elements to the uploaded GIF. There are many other customization features, which you can only explore after trying out this tool.
Key Features
● A great tool for novice editors and video makers
● It permits batch conversion of GIFs at a single click
● Compatible with the majority of video formats
● Allows you to convert GIF files to image series
Platforms supported: Windows 2000, 2003, XP, Vista, 7, 8, and 10 are all supported platforms
06Aconvert

Although there are many alternatives for gif to mp4 online conversion, the simplicity of Aconvert attracts all. You have to choose the file that you can upload from your local disk, Google Drive, Dropbox, and more. After that, select the target format and whether you want to change anything or let it be as it is. You can also upload multiple files at once.
Key Features
● Converts audio, video, documents, ebooks, images, and a variety of other file types to audio, video, document, ebook, image, and a variety of other file types
● Batch conversion is supported
● Ensure final conversion without interruption by automatically trying a new server if one fails
Platforms Supported: All
● Key Takeaways from This Episode →
● Nowadays, there are so many tools for making GIFs that it’s hard to find the best one. But the six instant mp4 to gif online tools above will accelerate this process. You just have to upload the video and be patient while they work. From our findings, we can come to these conclusions:
● Converting mp4 to gif online and vice versa is easy with a tool.
● Get familiar with the tools for doing your things quickly.
● Wondershare Filmore is the best and most highly recommended one among them.
● Whatever the reason you want to convert an mp4 to GIF online, there are a number of ways to do it. Use this guide to learn the best methods. Read more here.
Content creation has become easier than before with the popularity of mp4 to gif online. GIFs help to create compelling and engaging content in every industry. They can also be used in all sorts of ways, from adding animation to your designs to visually communicating information.
Moreover, if you don’t want to include videos and are interested in giving a good laugh dose to your audience, GIFs are the solution.
They are being used heavily today by content creators, marketing experts, and digital marketing agencies. However, they are not easily available in the way you want. So, you may have to convert mp4 to gif online. Fortunately, a number of tools are available for MP4 to GIF conversion that we are going to share here.
In this article
01 [6 Online Tools for Converting an MP4 to a GIF](#Part 1)
02 [6 Online Tools for Converting GIFs to MP4](#Part 2)
Part 1 6 Online Tools for Converting an MP4 to a GIF
01Any GIF Animator
Any GIF Animator is a popular choice for content creators when making GIFs. Its simple interface helps in turning video files of any format into attractive GIFs. Even those who have no technical idea of video editing can use this software easily. You can even import media files from optical storage devices using this mp4 to gif online platform.
Key Features
● Best for those without a technical background
● Comes with an animation wizard and a built-in image editor
● Quickly add effects or customize your GIF the way you want
● Get access to some advanced features like text overlays, resolution effects, and more
● It is possible to make adjustments to frame rate, width, height, and more in a GIF
● Convert a Youtube video to a GIF as well
Supported Platforms: Windows
02Adobe Creative Cloud Express
Adobe Creative Cloud Express is the simplest and quickest way to convert an MP4 to GIF. The users have to drag and drop the file and wait for the magic to happen. It has been powered by adobe premiere pro. The only requirement is there to sign up and then you get access to a plethora of creative tools.
Key Features
● Drag and Drop Feature Available
● Download the Converted file in your desired size and quality
● Simple and effective
Supported Platforms: All
03Instagriffer
Instagriffer is widely used forextracting GIFs from YouTube videos, Netflix shows, and more. It assists you in capturing your favorite moments from the screen in GIF format for free. There is no need to worry about watermarks because it doesn’t add them to the output.
Key Features
● You can add text, filters, loops, and more
● A plethora of customizable text and logos
● Decide the starting and ending time of a GIF
Supported Platforms: Windows & Mac
04Cute GIF to Video Converter
It allows you to add various animation effects during GIF processing. Apart from that, the users get the privilege of sharing GIFs on other networks. You can also extract a clip from a video and create a GIF out of it with this online tool. What makes this tool so demanding is the interface, where all the app segments are shown in one frame.
Key Features
● Navigating through the interface is easier than you can imagine
● Compatible with the batch conversion
● Supports numerous file types, including audio
● Supported Platforms: Windows
05Ezgif
Ezgif offers flexible options to convert online mp4 to gif. Either you can upload a file from your computer or paste a video URL to make a GIF. But the maximum file size should not exceed 100 MB. You can preview the GIF before converting it too.
Key Features
● Can convert transparent videos into animated GIFs
● You can set the width, height, and other elements before saving your GIF.
● It lets you choose the frame rate at your convenience
Platforms Supported: All
06Zamzar
Do you want to convert an endless number of file formats? If so, go ahead to Zamzar. It is powerful enough to convert more than 1100 file formats on the go. Not only does it work as an online mp4 to gif converter, but it also lets you convert a document, image, video, or audio file.
Key Features
● Use the “drag and drop” feature to upload multiple files
● It gives a fast output of heavy media files within 10 minutes
● Simple to use
● Over 1200 file formats are supported
Supported Platforms: All Web Browsers
Part 2 6 Online Tools for Converting GIFs to MP4
01**Wondershare Filmora Video Editor ** by Wondershare
Wondershare Filmora - Best Video Editor for Mac/Windows
5,481,435 people have downloaded it.
Build unique custom animations without breaking a sweat.
Focus on creating epic stories and leave the details to Filmora’s auto features.
Start a creative adventure with drag & drop effects and endless possibilities.
Filmora simplifies advanced features to save you time and effort.
Filmora cuts out repetition so you can move on to your next creative breakthrough.
The Wondershare Filmora V11 is a one-stop platform for all of your online mp4 to GIF needs. This tool can deliver you a high-resolution GIF output from an mp4 video. It also allows you to do much more, like video trimming, editing, conversion to different file formats, etc. In addition, the advanced elements added in Filmora can help to create original GIFs.
Key Features
● There is no file size limitation during conversion
● It works with all the major video formats
● Interactive interface
● Fast in processing GIFs from HD videos
Platforms supported: Windows 8 and later, Mac 10.14 and later
02CloudConvert
CloudConvert is a robust online file conversion platform. It can convert vectors, documents, ebooks, cad, archives, and more kinds of files. It enables you to adjust timing, dimensions, quality, and more. To convert a gif to an mp4 online, you have to upload the file and click on the export option. That’s it! Your file will start converting. However, you will only get the first 25 minutes free every day, and thereafter, you will have to pay a charge to convert large files.
Key Features
● Supports 200+ formats.
● Personalized conversion service based on your requirements
● It yields a high quality output at the end.
Platforms Supported: All
03Converterlite
Converterlite supports batch conversion of audio and video file formats. It can convert GIF files into MP4 format efficiently. It supports all major video formats such as AVI, MPEG, WMV, MOV, FLV, etc. For someone involved in content creation at a broad level, this is a must-use platform.
Key Features
● Available in five different languages
● Based on the powerful FFmpeg project
● Produce high-quality output in a timely manner
● This is best for social media content creators, meme makers, and marketers
Platforms supported: Windows XP, Vista, and 7
04GIFtoMP4
As the name implies, it simplifies gif to mp4 online conversion. The maximum number of GIFs it can convert to MP4 is 20. Once the conversion process ends, you can either download the files individually or get them all in zip format. It doesn’t keep any data on the site. All the stored data is deleted after anhour.
Key Features
● Use with confidence.
● Quickly convert GIF animations to MP4 videos
● No need to download software
● More than 16 languages to choose from
Platforms Supported: All
05Thundersoft GIF to Video Converter
It may appear to be one of the most unusual tools for the online GIF to MP4 conversion. Prior to getting the MP4 file, you can add music and many other custom elements to the uploaded GIF. There are many other customization features, which you can only explore after trying out this tool.
Key Features
● A great tool for novice editors and video makers
● It permits batch conversion of GIFs at a single click
● Compatible with the majority of video formats
● Allows you to convert GIF files to image series
Platforms supported: Windows 2000, 2003, XP, Vista, 7, 8, and 10 are all supported platforms
06Aconvert
Although there are many alternatives for gif to mp4 online conversion, the simplicity of Aconvert attracts all. You have to choose the file that you can upload from your local disk, Google Drive, Dropbox, and more. After that, select the target format and whether you want to change anything or let it be as it is. You can also upload multiple files at once.
Key Features
● Converts audio, video, documents, ebooks, images, and a variety of other file types to audio, video, document, ebook, image, and a variety of other file types
● Batch conversion is supported
● Ensure final conversion without interruption by automatically trying a new server if one fails
Platforms Supported: All
● Key Takeaways from This Episode →
● Nowadays, there are so many tools for making GIFs that it’s hard to find the best one. But the six instant mp4 to gif online tools above will accelerate this process. You just have to upload the video and be patient while they work. From our findings, we can come to these conclusions:
● Converting mp4 to gif online and vice versa is easy with a tool.
● Get familiar with the tools for doing your things quickly.
● Wondershare Filmore is the best and most highly recommended one among them.
● Whatever the reason you want to convert an mp4 to GIF online, there are a number of ways to do it. Use this guide to learn the best methods. Read more here.
How to Use Renderforest Intro Video Maker
When individuals hear about free online items, they frequently associate them with being of poor quality, ineffective, or unreliable. Renderforest, on the other hand, is an exception. This can be precisely what you need if you’re seeking a cheap—or even free—high-quality online video editing platform. The service offers both freemium and premium solutions. The more expensive solutions provide the most flexibility.
What is Renderforest?
A free online tool for making animated videos and slideshows is Renderforest. The web platform makes it simple, quick, and affordable for organizations and individuals to produce slideshows, explainer and promotional business movies, logo animations, and much more.
The online video creation platform Renderforest enables people and companies to produce “broadcast grade” videos for personal or professional usage. Anyone may register as a user in just a few easy steps, and using it is free.
Users can produce an infinite number of high-quality videos, export them, and then share them online or on social media.
The web platform already provides various tailor-made options for blog animations, wedding and photo slideshows, instructional films, and video invites for personal use.
Additionally, the platform offers simple-to-use alternatives for company presentations, invites to events, promotional films, kinetic typography, explainer videos, testimonials, and more.
Renderforest’s Primary Attributes include:
- Videos of high quality
- A sizable collection of animation templates and storylines
- Access to more than 195,000 Royalty-free stock footage clips with an intuitive online movie editor
- One-click video publishing to YouTube channels or Facebook pages
- A music library with commercial licenses for use in making videos
Added characteristics:
- A voiceover generator for text
- Create an infinite number of color schemes
- Countless font uploads
- Obtainable 1,000,000+ premium video templates
- Including a custom watermark
- A reseller’s permit
- Working in teams
How it Works
Choose a video template from their selection by browsing. Once you register, you can utilize any of the hundreds of editable templates that they have available.
You will be presented with various categories when you choose video templates, from promotional templates to logo animation templates to slide displays and everything in between.
You may freely post high-quality photographs, audio, and voice-over, an incredibly fantastic feature. The ability to share their tales in a way that customers can relate to is given to business owners by this.
After you’ve finished editing, the video must render for a while before it’s prepared for publishing. Click the edit button if you want to make some changes to the video or are unsatisfied with it. The video can be edited as many times as you like.
Users can directly post their videos on social media platforms, including Facebook, Twitter, Google+, Pinterest, and Instagram, through the website.
Renderforest maintains all your projects on your dashboard for as long as you use the service, so you don’t have to fear that you’ll lose your work..
Pricing
Regarding costs, Renderforest provides four different kinds of subscription options. The Free, Amateur, Pro, and Business plans are among them. The Free program makes a fantastic study aid. It’s possible to take your time with it, hone your talents, and upgrade to the paid plans after becoming familiar with the platform.
Regarding the free plan, you may watch and share your films on social media but not download them. You must utilize one of the paying subscriptions to download your videos. Choose the Business package if you don’t want Renderforest’s watermark to appear on your video. If you select monthly billing, it will cost you $149.99 per month or $49.99 per year.
If you want to take your company to the next level with distinctive videos, think about selecting one of the expertly produced video production packages. The starting package, which starts at $699, is the least priced.
Tutorial on How to Create an Intro Using Renderforest
Professional video creators are likely aware that starting a video without a suitable introduction is equivalent to sneaking into someone’s house without permission. A good intro is a doorbell to let people know you’ve arrived.
A strong introduction ensures that more people will view your film. Adults have an attention span of about 12 seconds, according to studies from 2000. It is now only 8 seconds. You have 8 seconds to entice viewers to watch your video, so don’t waste it. A captivating introduction will give your content a professional touch and pique your audience’s interest. This task is worthwhile if you want to advertise your videos successfully.
These days, you don’t necessarily need to hire a pro to make a film if you need one. The majority of the available tools are free. We’ll demonstrate in this lesson how to use Renderforest to create a polished video intro. Our intro maker will let you start strong, whether for a fun birthday video or commercial use.
When you’re prepared to begin producing your videos, go to Renderforest, register for an account, or sign in if you already have one.
Check out the vast selection of templates under “Intros and logos“ in the “Create Video“ section of the navigation menu. Here, you can select the intro you like most and begin altering it, or use our advanced search filters to locate the specific content you require.

We’ll use the “Swift Glitch Logo“ template for this tutorial, enabling you to present your logo with glitch effects. This template may produce intro and outro movies for presentations, your YouTube channel, lobby backgrounds, and other uses.
Select your preferred template and click the “Create now“ button to start.
![]()
Your logo should now be uploaded with a transparent background (PNG). You can upload it in one of three ways: using an image URL directly from your device or selecting an existing file from your “Media library.” If you don’t already have one, you may make one right away using our logo maker tool, which is also accessible in the editor.

Write your company’s name, tagline, or other brief words in the text field once you’ve added your logo. To save the changes, don’t forget to click “Save and close.”
You can select the overall design of your logo and the preferred font style in the “Style” section.

Select your preferred color scheme in the “Color“ section now. You can choose between two color schemes made by our design team and manually selectable custom colors in this section.
Go to the “Music“ area to select a song for your intro. You can add one or pick from our “Music collection.” You can record a voice-over in the editor or upload one for your introduction.
Well done! Let’s check out your introduction in the “Preview“ area now. Click “Free preview“ to check your video and ensure you like the outcome. Click back and tweak the introduction if you need to make any adjustments.
Instantly create professional introduction videos in your browser! Utilize our intro maker, and let its unique touch set your videos apart from the competition.
Enjoy making videos with Renderforest, where your imagination is the only restriction.
Renderforest Pros & Cons
This section is for you if you need to learn quickly about Renderforest’s advantages and disadvantages and are short on time. We’ve studied all the relevant reviews available and created a list of advantages and disadvantages for you to consider.
To determine if this is the best product for your company’s needs, look over these Renderforest advantages and disadvantages.
Pros
- Many lovely and contemporary templates
- a 4K video export feature
- 5-in-1 solution
- use is limitless for all services
- Quick and friendly client support
Cons
- With free version, watermark
- Only paying customers have access to font modification
- Costly single-project packages
- Free high-quality video preview unavailable
- a few templates allow for limited customisation
Competition to Renderforest
Animoto and PowToon are a couple of the site’s main rivals. These are excellent online video editing tools, but Renderforest stands out because it is simple to use and enables even novice users to create, share quickly, and download “broadcast grade videos.”
Renderforest vs PowToon
One of the most popular Renderforest Video alternatives available is PowToon. It’s challenging to decide which of these two platforms is superior because they are the best on the market. What you want as a business owner ultimately determines everything.
PowToon is a similar business that focuses on corporate videos but doesn’t provide the extra things Renderforest delivers (logo maker, graphic design, mockups, website builder). Pro customers pay $89 per month ($20 if invoiced annually), which is significantly more expensive than the alternative. Fortunately, they offer a complimentary bundle so you can sample the goods.
PowToon offers many more customizing choices than Renderforest because it is a video-based platform, but it will cost you.
Renderforest is a more cost-effective option if you need a range of services for your small business. PowToon is a better option for more prominent firms seeking a professional video creation platform.
Currently, some internet video services might be pricey and time-consuming to use. Renderforest will be welcomed by many small businesses looking for an economical and user-friendly online video editing platform.
Renderforest combines the top tools under a single subscription bundle in terms of features. In the end, you can manage your website, branding, and marketing visual production for less than $25 per month.
Fortunately, you don’t have to believe us. You may experience all the main advantages of Renderforest yourself by giving it a try. Check out the pros and drawbacks list in our Renderforest review if you need more assistance.
Free Download For Win 7 or later(64-bit)
Free Download For macOS 10.14 or later
Easy Ways to Edit Recorded Video
The most critical component of post-production for a video marketer is editing. Your video will seem unfinished and repel your viewers if you cannot effortlessly weave your images together or get your cut to reach the proper frame. Learning to edit a video may soon become a never-ending task. While each project you work on will have somewhat different editing needs, the principles of video editing remain basically the same. You don’t need to spend a lot on costly equipment to have a professional appearance; if you pay attention to a few important things, you can produce excellent movies with whatever you have right now.
Content producers, entrepreneurs, and influencers can have much too much material to include into a single YouTube video. You may not be able to buy video editing software if you’re on a tight budget. So, what does a video marketer do if they don’t have editing software? To assist you with the process of video editing, we’ve put up this thorough tutorial that covers everything you’ll need to know to make stunning films, even if you’ve never done it before. We’ll also demonstrate how to utilize the super-intuitive and user-friendly editor to create a video.
Part 1. Edit Recorded Video in OBS
OBS is a video streaming and recording application. It’s open source, free, and works on Macs, Windows, and Linux. It is a strong and adaptable screencast video creation tool when paired with competent audio and video editing tools. Unfortunately, OBS doesn’t support editing feature and hence, we’re enlisting the recording steps so you can edit them by using a third-party toolkit mentioned in the guide.
Step 1. Download and Install OBS
Install OBS according to the instructions for your operating system by downloading it from the link below.
Step 2. Setup Screen Recording
The window is divided into separate parts called “docks” when you initially launch the app. Every dock has a distinct function. Scenes, Sources, Mixer, and Controls are the areas to pay attention to. OBS employs a Scenes and Sources system, which will be discussed in more depth in a later lesson. These two tools operate in tandem to help you keep track of your video, audio, and other production materials. When you first start OBS, you’ll see that a scene is already loaded, which you can locate in the bottom left corner of the interface.

You’ll also need to add a source to this scene before you can begin recording. Click the Add button at the bottom of the Sources panel, then pick Screen Capture on Linux or Display Capture on Mac and Windows with the default Scene chosen (it will be highlighted).
Step 3. Customize the Recording Source
You’ll need to create a new source before you can begin recording your desktop screen. Select “Display Capture” by clicking the “+” icon on the Sources dock. You will be prompted to name the Display source in a popup window. Click “OK”. At the bottom right of the screen, click the Settings icon. Take note of the Recording Path field under the Output tab. This is where your recorded video will be kept on your computer.

Step 4. Start/Stop Recording
You’ll be able to choose the computer screen display you wish to capture in the following window. If you just have one monitor, make that the default. OBS Studios should show you the screen in the window after a valid display has been chosen. We need to change your graphics settings if OBS is unable to successfully load the screen video. Click the Start Recording button in the bottom right corner when you’re ready to begin recording. When you’re finished, click Stop Recording, and a movie will be saved to the folder you chose in the preferences.

Part 2. Edit Recorded Video in Filmora
Wondershare Filmora is a powerful screen recording application that includes a video editing suite, screen sketching tools, AI face recognition, built-in video effect packs, customizable branding watermark, and more. It may not only make recording movies simpler, but it may also provide you more possibilities for making your films more professional, creative, and attractive. Filmora is a great tool for beginners who want to make high-quality explainer films, training videos, demo videos, and more quickly. Because of the excellent video templates, screen recording is more appealing. To highlight important information, people might utilize annotation tools like as callouts, arrows, and drawing motions.
Steps to Record and Edit with Filmora
Step 1: Install Filmora on your laptop
To begin, you must first download this software program to your system from the following links:
For Win 7 or later (64-bit)
For macOS 10.12 or later
After you’ve finished downloading it, you’ll need to install it on your computer so that you can start using it with your laptop.
Step 2: Launch the Program and Begin Customizing It
The next step is to launch the software application and start recording your screen. Simply click the New Recording button in the start-up box to start recording. You may totally alter your screen recordings using the tools included in Filmora. You may also incorporate your laptop’s Webcam or a microphone as an audio source in your recordings.

Step 3: Start/Stop Screen Recording
Now is the time to begin recording your audio, which you can accomplish by hitting the red circular recording button. Press the Square-shaped button on your laptop’s screen to end the recording.

Step 4: Edit the Recordings and Save Them
Finally, you may adjust your audio recordings with entirely configurable editing tools. To do so, use Filmora’s editor and utilize easy to complicated editing ways to edit your recorded audio files. Filmora’s Editor lets you add Animated Titles, amazing effects, Audio Enhancements, and more to your recorded video to make it more polished.

Step 5: Add Special Effects to Your Video
Wondershare Filmora was designed specifically to provide a professional touch to your videos. It includes a number of eye-catching and adaptable effects that you can use to make your video projects stand out from the crowd. We’ve gone through some of the greatest effects for giving life to your drab and amateurish videos in this section.

Step 6: Save or Share the Videos
Finally, after you’ve finished editing the recorded video, you may utilize the Filmora editor in its entirety, as described before. Click the Export option and select the platform where you wish to share your video clip to post your work of art immediately to YouTube or another well-known website. You may even alter the movie before sharing it if you desire.

Part 3. Edit Recorded Video with Zoom
Trimming and editing Zoom recordings is a necessary for digging out value-packed nuggets from captured footage. But although you already know this, you’re probably putting off doing so as you’re anticipating you’ll need to learn a ton of new tools to edit Zoom recordings.
Steps to Record Videos with Zoom
Step 1For the cloud recordings, go to zoom.us and log in to your account. Then, navigate to ‘Settings’ from the navigation menu on the left.

Step 2 Under Advanced cloud recording options, tick the option for ‘Optimize the recording for 3rd party video editor’ and click ‘Save’.

Step 3Then, navigate to ‘Recording’ from the navigation menu on the left. Check the option for ‘Optimize for 3rd party video editor.

Step 4To really edit a Zoom recording, whether it’s stored on your PC or Zoom cloud, you need to utilize third-party video editing software. But no worries, you don’t need any sophisticated equipment or software here.
Part 4. Edit Recorded Video in Teams
Teams gives the opportunity to record your online meetings. This may be especially beneficial for sharing meeting recordings with individuals unable to attend live, to preserve instructional material for future use, or to enable participants to revisit prior meeting topics. At the top of the meeting window, a message will appear stating that the recording has begun, which alerts participants that their interactions in the meeting may be recorded by the recording. You will also notice a recording sign and the duration of the recording in the top-left corner of the meeting window.
Steps to Record Videos with Teams
Step 1 Open Microsoft Teams on Windows and Mac.
Step 2 Go to appropriate Teams or Channel and click on the Video button at the top to create a video call.

Step 3Invite people and organize a meeting. Whenever you feel you need to record any significant point, click on the three-dot menu at the top.

Step 4 Click on Start recording and Microsoft Teams will start recording the video/voice call. As soon as you start recording, every participant will be told about it.
At any moment, you may stop recording from the same. Once the meeting as concluded, your recording will display in the Chat panel in the main Teams window. Please note that depending on the length of the recording it might take some time for the recording to complete and display in the meeting chat. To find the recording, pick the Chat panel, open the correct meeting from the chat list and the recording will display in the chat window once processed.

Part 5. Edit Recorded Video in Google Meet
With more individuals working from home these days, services like Google Meet are rising in popularity. You may have an online video conference, see everyone’s face, communicate, and take care of business. As with in-office meetings, notes with action items and summaries for online meetings are just as crucial. Unfortunately, it doesn’t always happen. To have formal documentation for your meeting or share it with people who couldn’t attend, try recording your Google Meet.
Steps to Record and Edit Videos by Meet
Step 1. Launch Meet
Visit Google Meet and sign in to join or start your meeting.
Step 2. Start Recording
Select the Activities symbol on the bottom right and pick Recording when you’re ready to start recording.

Step 3. Stop/Save Recording
Visit Google Drive and login in if required. Navigate to My Drive on the left and search for the Meet Recordings folder on the right. It may take several minutes for the recording to show. If you do not already have a Meet Recordings folder, Google Drive will create one. You’ll notice the recording named with the meeting identifier along with the date and hour. If Chat took occurred during the meeting, you’d view this as a distinct text file.
To get a preview of your recording or chat transcript, just double-click the file in the Meet Recordings folder on Google Drive. You may download, distribute, or acquire a link to the recording (or chat) file from the Meet Recordings folder or the File Preview. In the folder, right-click the file and pick an action from the menu. Notice you may execute further options such as Rename, Make a copy, and Open with.

Step 4. Use WeVideo to Edit Videos
WeVideo is the cloud-based video production tool that supports student creativity, narrative, engagement and multimodal learning. Video projects develop deep knowledge about a subject through creating abilities like teamwork, communication and critical thinking. Log in and click Create New. Choose what you want to make (video, recording, etc.) and a format. Upload your media or search the Stock media repository. Make any extra modifications and preview your movie one final time. All done? Click Finish to export, download and share your video!

Part 6: Related FAQs
1. How do I edit video recordings?
Most individuals have the tools they need to film and edit small videos. With a smartphone or tablet and access to a computer, you can get the job done without even checking out equipment, much less employing a key grip. A laptop isn’t the finest equipment to film a movie–that would be extremely uncomfortable. Smartphone or tablet is easy to use. This topic is for those with access to an iPhone and a PC. Android, iPad, and Mac users will have a distinct process. Smartphones and tablets often default to recording video at a very high-Quality level, which takes up a lot of memory and results in big file sizes. Most likely you will want to lessen the resolution that you photograph.
Can you edit an already uploaded video?
If you have found yourself in this circumstance, your initial instinct could be to worry and assume you must repair the issue, delete the uploaded video, and re-upload the new one. However, this procedure will make your prior video URL dead, and any embeds of your video will display the following graphic to visitors. Nevertheless, these aforementioned sites recognizes that artists occasionally make small honest errors, or someone included in the uploaded video may demand that they be removed from it. So, to permit that, makers may chop away sections from their film without resetting a video’s metrics.
How to edit recorded video on iPhone?
If you have iOS 13 or later, you can edit films in the built-in Photos app… much as you edit your images. You may cut, crop, and straighten your films. And you may make your film more attractive by altering brightness, color, or even making it black and white. Filming films on iPhone has gotten more popular as iPhone camera lenses have progressed over the years. Many iPhone filmmakers desire the capacity to edit their video directly from their phone for simple social sharing. Using a video editing software for iPhone is a terrific method to effortlessly produce and upload videos. just open the video you want to modify, then press Edit at the upper right to get it done.
Conclusion:
If you routinely use Google Meet or Zoom, it can be a good idea to record your conferences so you can still return to them at a later period. Recording these conversations and meetings may be a big assistance when it’s time for later evaluations, updates, and enabling absent team members catch up on the meeting topic. For instance, do you wish to share meeting minutes or information with people missing in this meeting? Essentially the call recording is for other co-workers to view afterwards. Instead, you may use the recommended screen recorders to capture every moment and then use a specialist video editor like Filmora to make the required edits before sharing it with others.
For macOS 10.12 or later
After you’ve finished downloading it, you’ll need to install it on your computer so that you can start using it with your laptop.
Step 2: Launch the Program and Begin Customizing It
The next step is to launch the software application and start recording your screen. Simply click the New Recording button in the start-up box to start recording. You may totally alter your screen recordings using the tools included in Filmora. You may also incorporate your laptop’s Webcam or a microphone as an audio source in your recordings.
Step 3: Start/Stop Screen Recording
Now is the time to begin recording your audio, which you can accomplish by hitting the red circular recording button. Press the Square-shaped button on your laptop’s screen to end the recording.
Step 4: Edit the Recordings and Save Them
Finally, you may adjust your audio recordings with entirely configurable editing tools. To do so, use Filmora’s editor and utilize easy to complicated editing ways to edit your recorded audio files. Filmora’s Editor lets you add Animated Titles, amazing effects, Audio Enhancements, and more to your recorded video to make it more polished.
Step 5: Add Special Effects to Your Video
Wondershare Filmora was designed specifically to provide a professional touch to your videos. It includes a number of eye-catching and adaptable effects that you can use to make your video projects stand out from the crowd. We’ve gone through some of the greatest effects for giving life to your drab and amateurish videos in this section.
Step 6: Save or Share the Videos
Finally, after you’ve finished editing the recorded video, you may utilize the Filmora editor in its entirety, as described before. Click the Export option and select the platform where you wish to share your video clip to post your work of art immediately to YouTube or another well-known website. You may even alter the movie before sharing it if you desire.
Part 3. Edit Recorded Video with Zoom
Trimming and editing Zoom recordings is a necessary for digging out value-packed nuggets from captured footage. But although you already know this, you’re probably putting off doing so as you’re anticipating you’ll need to learn a ton of new tools to edit Zoom recordings.
Steps to Record Videos with Zoom
Step 1For the cloud recordings, go to zoom.us and log in to your account. Then, navigate to ‘Settings’ from the navigation menu on the left.
Step 2 Under Advanced cloud recording options, tick the option for ‘Optimize the recording for 3rd party video editor’ and click ‘Save’.
Step 3Then, navigate to ‘Recording’ from the navigation menu on the left. Check the option for ‘Optimize for 3rd party video editor.
Step 4To really edit a Zoom recording, whether it’s stored on your PC or Zoom cloud, you need to utilize third-party video editing software. But no worries, you don’t need any sophisticated equipment or software here.
Part 4. Edit Recorded Video in Teams
Teams gives the opportunity to record your online meetings. This may be especially beneficial for sharing meeting recordings with individuals unable to attend live, to preserve instructional material for future use, or to enable participants to revisit prior meeting topics. At the top of the meeting window, a message will appear stating that the recording has begun, which alerts participants that their interactions in the meeting may be recorded by the recording. You will also notice a recording sign and the duration of the recording in the top-left corner of the meeting window.
Steps to Record Videos with Teams
Step 1 Open Microsoft Teams on Windows and Mac.
Step 2 Go to appropriate Teams or Channel and click on the Video button at the top to create a video call.
Step 3Invite people and organize a meeting. Whenever you feel you need to record any significant point, click on the three-dot menu at the top.
Step 4 Click on Start recording and Microsoft Teams will start recording the video/voice call. As soon as you start recording, every participant will be told about it.
At any moment, you may stop recording from the same. Once the meeting as concluded, your recording will display in the Chat panel in the main Teams window. Please note that depending on the length of the recording it might take some time for the recording to complete and display in the meeting chat. To find the recording, pick the Chat panel, open the correct meeting from the chat list and the recording will display in the chat window once processed.
Part 5. Edit Recorded Video in Google Meet
With more individuals working from home these days, services like Google Meet are rising in popularity. You may have an online video conference, see everyone’s face, communicate, and take care of business. As with in-office meetings, notes with action items and summaries for online meetings are just as crucial. Unfortunately, it doesn’t always happen. To have formal documentation for your meeting or share it with people who couldn’t attend, try recording your Google Meet.
Steps to Record and Edit Videos by Meet
Step 1. Launch Meet
Visit Google Meet and sign in to join or start your meeting.
Step 2. Start Recording
Select the Activities symbol on the bottom right and pick Recording when you’re ready to start recording.
Step 3. Stop/Save Recording
Visit Google Drive and login in if required. Navigate to My Drive on the left and search for the Meet Recordings folder on the right. It may take several minutes for the recording to show. If you do not already have a Meet Recordings folder, Google Drive will create one. You’ll notice the recording named with the meeting identifier along with the date and hour. If Chat took occurred during the meeting, you’d view this as a distinct text file.
To get a preview of your recording or chat transcript, just double-click the file in the Meet Recordings folder on Google Drive. You may download, distribute, or acquire a link to the recording (or chat) file from the Meet Recordings folder or the File Preview. In the folder, right-click the file and pick an action from the menu. Notice you may execute further options such as Rename, Make a copy, and Open with.
Step 4. Use WeVideo to Edit Videos
WeVideo is the cloud-based video production tool that supports student creativity, narrative, engagement and multimodal learning. Video projects develop deep knowledge about a subject through creating abilities like teamwork, communication and critical thinking. Log in and click Create New. Choose what you want to make (video, recording, etc.) and a format. Upload your media or search the Stock media repository. Make any extra modifications and preview your movie one final time. All done? Click Finish to export, download and share your video!
Part 6: Related FAQs
1. How do I edit video recordings?
Most individuals have the tools they need to film and edit small videos. With a smartphone or tablet and access to a computer, you can get the job done without even checking out equipment, much less employing a key grip. A laptop isn’t the finest equipment to film a movie–that would be extremely uncomfortable. Smartphone or tablet is easy to use. This topic is for those with access to an iPhone and a PC. Android, iPad, and Mac users will have a distinct process. Smartphones and tablets often default to recording video at a very high-Quality level, which takes up a lot of memory and results in big file sizes. Most likely you will want to lessen the resolution that you photograph.
Can you edit an already uploaded video?
If you have found yourself in this circumstance, your initial instinct could be to worry and assume you must repair the issue, delete the uploaded video, and re-upload the new one. However, this procedure will make your prior video URL dead, and any embeds of your video will display the following graphic to visitors. Nevertheless, these aforementioned sites recognizes that artists occasionally make small honest errors, or someone included in the uploaded video may demand that they be removed from it. So, to permit that, makers may chop away sections from their film without resetting a video’s metrics.
How to edit recorded video on iPhone?
If you have iOS 13 or later, you can edit films in the built-in Photos app… much as you edit your images. You may cut, crop, and straighten your films. And you may make your film more attractive by altering brightness, color, or even making it black and white. Filming films on iPhone has gotten more popular as iPhone camera lenses have progressed over the years. Many iPhone filmmakers desire the capacity to edit their video directly from their phone for simple social sharing. Using a video editing software for iPhone is a terrific method to effortlessly produce and upload videos. just open the video you want to modify, then press Edit at the upper right to get it done.
Conclusion:
If you routinely use Google Meet or Zoom, it can be a good idea to record your conferences so you can still return to them at a later period. Recording these conversations and meetings may be a big assistance when it’s time for later evaluations, updates, and enabling absent team members catch up on the meeting topic. For instance, do you wish to share meeting minutes or information with people missing in this meeting? Essentially the call recording is for other co-workers to view afterwards. Instead, you may use the recommended screen recorders to capture every moment and then use a specialist video editor like Filmora to make the required edits before sharing it with others.
Little Known Ways of Adding Emojis to Photos on iPhone & Android [2023
Little Known Ways of Adding Emojis to Photos on iPhone & Android
An easy yet powerful editor
Numerous effects to choose from
Detailed tutorials provided by the official channel
Emojis are catchy graphic elements that can add life to your photos, videos and allied artworks within a wink. Be here to know about the most exciting how-tos!
In this article
01 [Best 6 Tools to Put Emojis on Pictures on iPhone](#Part 1)
02 [Best 6 Tools to Put Emojis on Pictures on Android](#Part 2)
03 [Best 5 Tools to Put Emojis on Pictures on Computer](#Part 3)
Part 1 Best 6 Tools to Put Emojis on Pictures on iPhone
Emojis have managed to secure enough significance in our social and professional lives across social media platforms in the current time. Be it a fun-filled conversation with friends and family on a chat service program, or a high end and professionally sound business strategy, these mini caricature pieces of graphic art can add the much needed highlight to almost every aspect of your digital communication concerns.
Now that you are aware of the utility of working with emojis to make your digital contents, let us take a dive into some of the best ways and means to make your iPhone images come alive in the following section:
01Emoji Picture Editor- Add Emojis to Your Photos
If you like to imbibe the images on your iPhone media gallery with a hoard of funny and cool emojis, this one is a perfect app to address the concern. The tool’s library houses the latest collection of emoji categories to be in line with a diversity of photo styles, themes and backgrounds. You can take your pick from the huge inventory of over 1500 different emojis to level up your photos.
Talking about the app interface and usage controls, you are granted full liberty to add emojis to your emojis, while changing their positions through a finger drag, or scale and rotate them by expanding, pinching and twisting your fingers. The app additionally allows you to send bigger emoji stickers on chats and conversations.
02Insta Emoji Photo Editor
When looking for an interesting and reliable application to set straight the concern of how to put emojis on pictures, the Insta Emoji Photo Editor is an affordable pick. Loaded with an enormous and updated emoji library, the app presents before you over 3200 fascinating emoji options to select from and add to your images.
The inclusion process is intuitively simple, with you just having to upload the desired images to the app’s working interface and choose from your most favorite emoji elements to make the stills come alive with added fun and spark. The app houses an interesting ’Emoji Paint’ feature for the extensively creative ones to let them create catchy drawings with the coolest emojis.
03Emoji My Face
Moving ahead in the list comes the aforesaid app, which you can conveniently rely on to get through the photo edit emoji task in less than a few seconds. What’s unique about the utility is its feature that lets you add emoji stickers on the faces of your image elements. Working with the app, you can transform the skinned appearances of your friends and family into hilarious emoji faces.
While the app permits you to pick any number of preferences from its latest and updated emoji collection, you can additionally, save and share your emoji centered image edits across a diversity of media sharing platforms and chat service programs.
04Emoji Background Photo Maker
While there are hoards of IT alternatives to add emojis to pictures, the following utility caters to the concern in a slightly different style, ahead of just picking and pasting emojis to still captures. Working with the tool, you can experiment with changing the customary and fundamental image backgrounds into funny and appealing emoji centered themes. You are allowed to either work with a desired image from your iPhone’s media gallery, or take a fresh shot from your device’s camera, followed by uploading the same to the app’s editing interface.
Focusing on the tool’s expanse of usage features, you get tom work with a straightforward interface, and select from a wide variety of expressive and thematic emoji backgrounds. You can further, preview and save the edited images in HD quality, and share the same with friends and family across social media handles.
05Funny Photo Editor With Emoji Stickers Camera
This one is an innovative image editing tool that lets you create funny image transformations with classic emoji stickers, while addressing the query of how to add emojis to pictures. If your peer group consists of crazy creators who are selfie freaks, try hands at uplifting your live camera shots with this application by adding the funkiest emojis and sharing them across the regular communication platforms.
The app’s default camera feature lets you capture a straight forward image and convert the same into a hilarious edit with the latest range of free emoji stickers, caricature smileys and lots more. You can additionally beautify the edits with choosing from a decent range of emoji skin tones to suit the image background.
06Instamoji- Emoji Photo Editor
If you have been searching for an affordable solution to walk through the concern of , how to add emoji to photo on your iPhone, try working with the Instamoji application to highlight your customary images with classic emoji stickers and elements within the blink of an eye. The app welcomes you with a clean and intuitive interface to work upon, and is completely free to use.
Talking about the utility’s emoji centered image editing features, you are permitted to select from a decent collection of vibrant, funny and cool emojis, assorted under a diversity of categories to complement your images with, while exporting them across your digital communication accounts with utmost ease. The app promises you of the finest quality edited image output.
Part 2 Best 6 Tools to Put Emojis on Pictures on Android
Emojis are best known to spark up graphic artworks with an element of fun and entertainment. While the introduction of social media and digital communication utilities have brought emojis to the fingertips of modern day smartphone users, the IT market never lags behind at putting the latest transformations regarding emoji usage at your disposal.
Discussing along the line, let us talk about some interesting applications that address the concern of how to add an emoji to a photo using an Android device in what follows next:
01Add Emoji Stickers- Pics Editor and Photo Maker
This one is a smart photo editing tool that you can choose to customize the otherwise ordinary images on the local media gallery of your Android smartphone. The app greets you with an extensive range of updated emoji alternatives to suit your most specific editing requirements for complementing your elementary photos with the perfect feel and emotion.
The emojis work to add the missing fun to your social media posts with image edits funny enough to make your peers roll over with laughter. Not just smiley faces, the app delivers to you a categorized set of emojis that are a perfect fit to any graphic theme. Some of the most preferred ones include Nature, Travel, Food & Drinks, and many more. So why wait? Just get the free utility and begin to edit and share!
02Emoji Face Sticker
If you are creativity freak and love to experiment with your editing skills to put emoji on picture, try hands at working with this free image editor utility to add a fun element to your photos and give a laughter dose to your friends and family on social media. The app caters to transform your uploaded images faces to the cutest emoji look alike ever.
If that’s not enough, you can work with the app to change your smartphone’s regular camera into an emoji camera app that works to create the best caricature emoji montages from your snapped selfies. Navigating through the latte’s editing library, you will get to choose from among the craziest and coolest emoji stickers to create emoji photos out of normal stills. All in all, the app allows you to put forward your emotions in a relatively funnier way.
03Emoji Photo Editor
Are you bored of looking at those customary color backgrounds behind your images? Consider sparking them up with the cutest and most expressive emoji backgrounds. As you pick the app to edit your images, the latter grants you a complete access to its free emoji library that houses a decent collection of over 50 different emoji backgrounds to select from. A few of the most popular ones comprise of the flower and heart crown stickers, dog face camera among others.
Editing images within the app is seamless enough to last for a few seconds. You can use the created emoji background edits in a series of ways, like, preferring a local save or going for an image export to your favorite social media handle. Another cool way to show off your creativity can be making a device screen wallpaper of the emoji background image.
04Auto Face Stamp- Cover Face With Emoji
Looking forward to use an SNS services for media sharing purposes, but bothered about privacy concerns? While it is a common practice to share pictures via SNS and allied public platforms, most of us are often worried about keeping our faces hidden. Under normal circumstances, the face masking task is something you would ideally want to escape; the aforesaid app caters to the same in a funny and enjoyable manner.
Working with the utility, you can mask your image faces with over 100 different types of emoji stickers. The app aids you further in the task through its accurate face recognition ability that takes into consideration the smallest of faces with utmost precision. All you need to do is, select a desired emoji sticker and tap on the face you wish to mask with the same.
You can further, choose to directly export the masked images to media sharing handles right from the app’s editing workspace. The app is available to you absolutely free of cost and greets its users with a responsive working interface.

05Emoji Background Photo Editor
If the ordinary thematic backgrounds of your images do not suit you any longer, try working with this application to transmute the same into vibrant and expressive emoji alternatives. The aforesaid photo editing utility caters to make your images stand out of the crowd with beautiful emoji landscapes that render creative image edits of a matchless class, while maintaining a high-definition output image quality.
Extending the dimension of features to a longer stretch, the app grants you the liberty to adjust the position and transparency of the added emojis, set emoji frames and customize the emoji centered backgrounds with stunning effects and filters. As you finish with the editing process, the app lets you share your creations directly to a preferred social media platform, while also keeping them safe in your device’s local media gallery.
06Face Emoji Photo Effect
Reaching the end of the list, here comes the Face Emoji Photo Effect application that is all set to upgrade the level of your regular images with its classic and beautiful emoji backgrounds and stickers. The app’s editing library houses a diverse range of latest and elusive emojis to highlight your otherwise normal captures. The app additionally facilitates you with an expanded set of image editing features and effects to turn them into a graphic masterpiece.
The app welcomes you with a clean and responsive interface that makes the emoji inclusion process a quick and fun activity. All you need to do is, pick up an image from your locally saved alternatives and upload them to the app’s working interface, followed by browsing the latter’s emoji library to select a cohesive emoji background to complement the same.
You can further, download the premium emoji packs through a minimal payment to enhance the app’s library if the preset options do not match your requirements. The inbuilt emoji choices are however, free to work with.
Part 3 Best 5 Tools to Put Emojis on Pictures on Computer
All of us are familiar to and love using emojis everywhere, right from commenting on regular social media posts and chat service conversations, to creating professionally sound and strategic, business centered company presentations. While the most diverse use of these graphic utilities is reported on mobile devices, you may sometimes land across an instance that demands working with emojis on a computer.
Moving ahead with our discussion to address the aforesaid concern, let us talk about some of the prominent software and online solutions to set aside the issue of how to put emojis on photos while working on a computer in the upcoming section of this article:
01Kapwing
Entering into the domain of online image editing tools, the Kapwing website easily lands among the highly preferred choices. To address the concern of adding emojis to pictures on your PC or desktop systems, this one is an affordable tool to rely on. Talking of the underlying reasons behind the app’s high rated user preference, the latter allows you to access its huge inventory of emoji stickers, distributed across a heap of categories to choose from.
Next in the line is the tool’s spic and span editing process that lets you add and customize emojis on the uploaded images with a series of effects and filters in a matter of counted seconds. You can either pick and import images from your system, or work with the app’s in house emoji templates to edit the photos. As you are done with uploading images and adding emojis, proceed to place them at the desired position within the image.
The app allows you to add multiple emoji layers to the images by facilitating the creation of duplicate copies of your favorite emojis. Once you are done with the editing process, you are free to export your creation across media handles, or save them locally to your system.
02Editor.pho.to
If you are a newbie to the world of graphic editing and want to experiment with your creative skills to sort out the need of how to add an emoji to a picture, prefer landing on this free online website to work on your images. Considering the fact that not everyone around you is a tech savvy, the aforesaid online photo editing tool is designed to house the simplest of interfaces ever. The tool is available to you absolutely free of cost, without any unfair hidden purchases.
Ahead of the basic customization features, the tool grants you the freedom to expand your graphic skills on a wider canvas with presenting before you a plethora of emoji faces, stickers and backgrounds to complement the uploaded images with. Once you have added the emoji, the tool lets you work on the latter’s position and transparency adjustments, create emoji layers and overlays and save the edits to your system in a visibly high output quality.

03Add Emoji to Photo
When looking for dependable solutions to work towards the task of how to put an emoji on a photo, you can conveniently trust the aforementioned online tool to create classic emoji photo edits from the customary still alternatives son your computer. This one is a free to use image editor facility that allows you to decorate your otherwise unnoticed images with an extensive range of preset and custom emojis to make them expressive and speak out your emotions.
The tool caters to render a high definition edited image output within seconds through the simplest of customization processes. You just need to upload a desired image from your system to the tool’s working interface, followed by picking a suitable emoji from the tool’s editing library to add it to the image. If however, the available options don’t seem to address your specific requirements, you can proceed to create custom emojis of your own within the tool.
You can also create multiple emoji layers to add to the uploaded image and make adjustments to their transparency and position within the photo. As you finish the editing process, the tool grants you the liberty to download the customized image to your system in either of the PNG or JPG file formats.
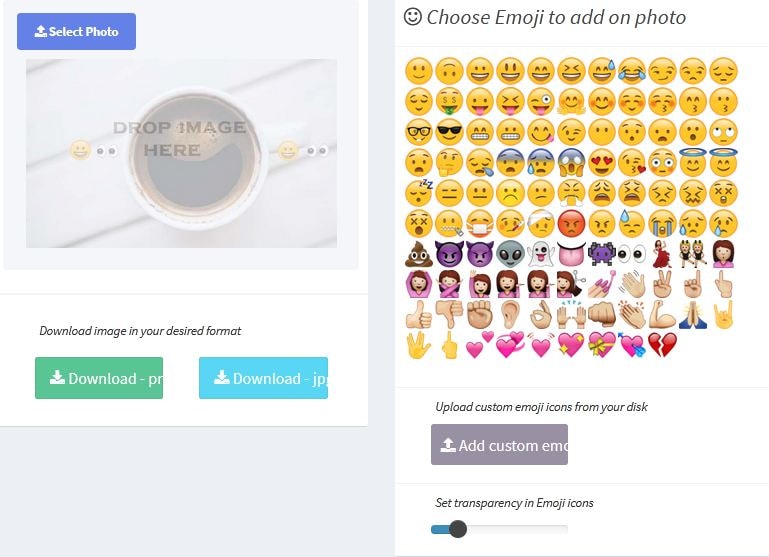
04Image Online
Another entry into the list of solutions to answer the query of how to put emojis on a photo, the Image Online tool promises you of a quality constrained image editing process to complement the basic still captures in the local media gallery of your computer with the latest collection of emoji elements. Welcoming you with a decent interface, the tool caters to sort out your emoji centered picture editing requirements within a blink’s time.
To add emoji to image with this tool, you just need to upload the selected photo to the latter’s workspace, followed by selecting a preferred emoji from the editing library, or create a custom emoji of your own, to put on the image. You can customize the emoji settings in terms of position, size and transparency, and download the edits to your device in JPG and PNG image formats.
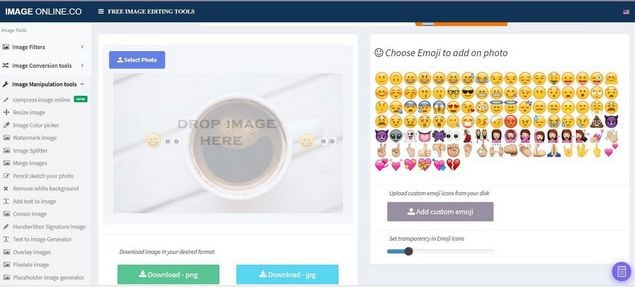
05Canva
Last in the list is the Canva graphic editing tool which you can conveniently work with to add an emoji to a picture. Having a slightly different image editing process in comparison to its online counterparts, the utility requires you to sign up to its working interface to begin editing your photos. To start with, you need to select a preset image template or pick customized dimensions to upload the desired image.
To add emojis to your picture, you will have to download the latter’s application by navigating to and tapping the ‘More’ icon, followed by choosing the ‘Emoji’ option from the drop down menu that appears next. Once the ‘Emoji’ tab shows up in the tool’s main interface, proceed to upload your image and pick a suitable emoji from the list to add to the uploaded image. You can further, add layers of emojis to the picture, while resizing and adjusting the skin tones of the same.
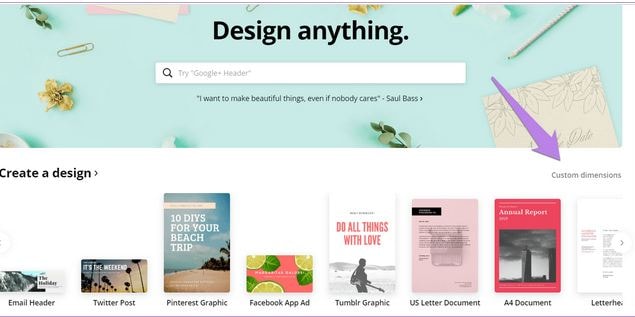
Part 4 Adding Emoji to Photo Q&A
● What is the total number of emoji characters till date?
As of September 2021, a total of 3,633 emojis are known to have been introduced so far. Talking of the latest emoji package, there comes the Emoji 14.0, adding 112 emoji variations to the existing count. The aforesaid is a cumulative figure, including the skin tone, gender and flag sequences.
● What are the different types of emoji categories?
During the current time, the emoji characterization is known to house 8 different categories, namely, Flags, Symbols, Objects, Travel, Activity, Food & Drink, Animals & Nature and Smileys & People.
● What is the difference between Emoji and Emoticons?
Emoticons are specifically, graphic interpretations of the various human emotions that come with a keyboard command combination. Emojis on the other hand, are a standard set of various characters, often having a different artwork, but a universal meaning.
● Is it possible to self-create custom emojis?
As of now, having self-created variants of emojis is not possible. If at all, you become successful in design a character that resembles an emoji, you can use it as an image at the most. In an attempt to share it as an emoji, you will end up sending text combinations.
● What is the best software alternative to add emojis to pictures?
When looking for an affordable software solution for catering to the concern of how to add emojis to a photo, you can go for picking the Wondershare Filmora Video Editor graphic editing program, whose editing library literally houses the largest and the latest collection of emoji categories and varieties for sparking up your images with the best possible customized appearance.
For Win 7 or later (64-bit)
For macOS 10.12 or later
● Ending Thoughts →
● Adding emojis to pictures has landed among the latest and most preferred graphic editing trends of current times.
● When beginning to address the concern of how do you add emojis to pictures, the IT market puts a diversity of software and online solutions before you.
● If you are confused about making the best choice, you can pick the Wondershare Filmora graphic editor program without having to think twice.
Emojis are catchy graphic elements that can add life to your photos, videos and allied artworks within a wink. Be here to know about the most exciting how-tos!
In this article
01 [Best 6 Tools to Put Emojis on Pictures on iPhone](#Part 1)
02 [Best 6 Tools to Put Emojis on Pictures on Android](#Part 2)
03 [Best 5 Tools to Put Emojis on Pictures on Computer](#Part 3)
Part 1 Best 6 Tools to Put Emojis on Pictures on iPhone
Emojis have managed to secure enough significance in our social and professional lives across social media platforms in the current time. Be it a fun-filled conversation with friends and family on a chat service program, or a high end and professionally sound business strategy, these mini caricature pieces of graphic art can add the much needed highlight to almost every aspect of your digital communication concerns.
Now that you are aware of the utility of working with emojis to make your digital contents, let us take a dive into some of the best ways and means to make your iPhone images come alive in the following section:
01Emoji Picture Editor- Add Emojis to Your Photos
If you like to imbibe the images on your iPhone media gallery with a hoard of funny and cool emojis, this one is a perfect app to address the concern. The tool’s library houses the latest collection of emoji categories to be in line with a diversity of photo styles, themes and backgrounds. You can take your pick from the huge inventory of over 1500 different emojis to level up your photos.
Talking about the app interface and usage controls, you are granted full liberty to add emojis to your emojis, while changing their positions through a finger drag, or scale and rotate them by expanding, pinching and twisting your fingers. The app additionally allows you to send bigger emoji stickers on chats and conversations.
02Insta Emoji Photo Editor
When looking for an interesting and reliable application to set straight the concern of how to put emojis on pictures, the Insta Emoji Photo Editor is an affordable pick. Loaded with an enormous and updated emoji library, the app presents before you over 3200 fascinating emoji options to select from and add to your images.
The inclusion process is intuitively simple, with you just having to upload the desired images to the app’s working interface and choose from your most favorite emoji elements to make the stills come alive with added fun and spark. The app houses an interesting ’Emoji Paint’ feature for the extensively creative ones to let them create catchy drawings with the coolest emojis.
03Emoji My Face
Moving ahead in the list comes the aforesaid app, which you can conveniently rely on to get through the photo edit emoji task in less than a few seconds. What’s unique about the utility is its feature that lets you add emoji stickers on the faces of your image elements. Working with the app, you can transform the skinned appearances of your friends and family into hilarious emoji faces.
While the app permits you to pick any number of preferences from its latest and updated emoji collection, you can additionally, save and share your emoji centered image edits across a diversity of media sharing platforms and chat service programs.
04Emoji Background Photo Maker
While there are hoards of IT alternatives to add emojis to pictures, the following utility caters to the concern in a slightly different style, ahead of just picking and pasting emojis to still captures. Working with the tool, you can experiment with changing the customary and fundamental image backgrounds into funny and appealing emoji centered themes. You are allowed to either work with a desired image from your iPhone’s media gallery, or take a fresh shot from your device’s camera, followed by uploading the same to the app’s editing interface.
Focusing on the tool’s expanse of usage features, you get tom work with a straightforward interface, and select from a wide variety of expressive and thematic emoji backgrounds. You can further, preview and save the edited images in HD quality, and share the same with friends and family across social media handles.
05Funny Photo Editor With Emoji Stickers Camera
This one is an innovative image editing tool that lets you create funny image transformations with classic emoji stickers, while addressing the query of how to add emojis to pictures. If your peer group consists of crazy creators who are selfie freaks, try hands at uplifting your live camera shots with this application by adding the funkiest emojis and sharing them across the regular communication platforms.
The app’s default camera feature lets you capture a straight forward image and convert the same into a hilarious edit with the latest range of free emoji stickers, caricature smileys and lots more. You can additionally beautify the edits with choosing from a decent range of emoji skin tones to suit the image background.
06Instamoji- Emoji Photo Editor
If you have been searching for an affordable solution to walk through the concern of , how to add emoji to photo on your iPhone, try working with the Instamoji application to highlight your customary images with classic emoji stickers and elements within the blink of an eye. The app welcomes you with a clean and intuitive interface to work upon, and is completely free to use.
Talking about the utility’s emoji centered image editing features, you are permitted to select from a decent collection of vibrant, funny and cool emojis, assorted under a diversity of categories to complement your images with, while exporting them across your digital communication accounts with utmost ease. The app promises you of the finest quality edited image output.
Part 2 Best 6 Tools to Put Emojis on Pictures on Android
Emojis are best known to spark up graphic artworks with an element of fun and entertainment. While the introduction of social media and digital communication utilities have brought emojis to the fingertips of modern day smartphone users, the IT market never lags behind at putting the latest transformations regarding emoji usage at your disposal.
Discussing along the line, let us talk about some interesting applications that address the concern of how to add an emoji to a photo using an Android device in what follows next:
01Add Emoji Stickers- Pics Editor and Photo Maker
This one is a smart photo editing tool that you can choose to customize the otherwise ordinary images on the local media gallery of your Android smartphone. The app greets you with an extensive range of updated emoji alternatives to suit your most specific editing requirements for complementing your elementary photos with the perfect feel and emotion.
The emojis work to add the missing fun to your social media posts with image edits funny enough to make your peers roll over with laughter. Not just smiley faces, the app delivers to you a categorized set of emojis that are a perfect fit to any graphic theme. Some of the most preferred ones include Nature, Travel, Food & Drinks, and many more. So why wait? Just get the free utility and begin to edit and share!
02Emoji Face Sticker
If you are creativity freak and love to experiment with your editing skills to put emoji on picture, try hands at working with this free image editor utility to add a fun element to your photos and give a laughter dose to your friends and family on social media. The app caters to transform your uploaded images faces to the cutest emoji look alike ever.
If that’s not enough, you can work with the app to change your smartphone’s regular camera into an emoji camera app that works to create the best caricature emoji montages from your snapped selfies. Navigating through the latte’s editing library, you will get to choose from among the craziest and coolest emoji stickers to create emoji photos out of normal stills. All in all, the app allows you to put forward your emotions in a relatively funnier way.
03Emoji Photo Editor
Are you bored of looking at those customary color backgrounds behind your images? Consider sparking them up with the cutest and most expressive emoji backgrounds. As you pick the app to edit your images, the latter grants you a complete access to its free emoji library that houses a decent collection of over 50 different emoji backgrounds to select from. A few of the most popular ones comprise of the flower and heart crown stickers, dog face camera among others.
Editing images within the app is seamless enough to last for a few seconds. You can use the created emoji background edits in a series of ways, like, preferring a local save or going for an image export to your favorite social media handle. Another cool way to show off your creativity can be making a device screen wallpaper of the emoji background image.
04Auto Face Stamp- Cover Face With Emoji
Looking forward to use an SNS services for media sharing purposes, but bothered about privacy concerns? While it is a common practice to share pictures via SNS and allied public platforms, most of us are often worried about keeping our faces hidden. Under normal circumstances, the face masking task is something you would ideally want to escape; the aforesaid app caters to the same in a funny and enjoyable manner.
Working with the utility, you can mask your image faces with over 100 different types of emoji stickers. The app aids you further in the task through its accurate face recognition ability that takes into consideration the smallest of faces with utmost precision. All you need to do is, select a desired emoji sticker and tap on the face you wish to mask with the same.
You can further, choose to directly export the masked images to media sharing handles right from the app’s editing workspace. The app is available to you absolutely free of cost and greets its users with a responsive working interface.
05Emoji Background Photo Editor
If the ordinary thematic backgrounds of your images do not suit you any longer, try working with this application to transmute the same into vibrant and expressive emoji alternatives. The aforesaid photo editing utility caters to make your images stand out of the crowd with beautiful emoji landscapes that render creative image edits of a matchless class, while maintaining a high-definition output image quality.
Extending the dimension of features to a longer stretch, the app grants you the liberty to adjust the position and transparency of the added emojis, set emoji frames and customize the emoji centered backgrounds with stunning effects and filters. As you finish with the editing process, the app lets you share your creations directly to a preferred social media platform, while also keeping them safe in your device’s local media gallery.
06Face Emoji Photo Effect
Reaching the end of the list, here comes the Face Emoji Photo Effect application that is all set to upgrade the level of your regular images with its classic and beautiful emoji backgrounds and stickers. The app’s editing library houses a diverse range of latest and elusive emojis to highlight your otherwise normal captures. The app additionally facilitates you with an expanded set of image editing features and effects to turn them into a graphic masterpiece.
The app welcomes you with a clean and responsive interface that makes the emoji inclusion process a quick and fun activity. All you need to do is, pick up an image from your locally saved alternatives and upload them to the app’s working interface, followed by browsing the latter’s emoji library to select a cohesive emoji background to complement the same.
You can further, download the premium emoji packs through a minimal payment to enhance the app’s library if the preset options do not match your requirements. The inbuilt emoji choices are however, free to work with.
Part 3 Best 5 Tools to Put Emojis on Pictures on Computer
All of us are familiar to and love using emojis everywhere, right from commenting on regular social media posts and chat service conversations, to creating professionally sound and strategic, business centered company presentations. While the most diverse use of these graphic utilities is reported on mobile devices, you may sometimes land across an instance that demands working with emojis on a computer.
Moving ahead with our discussion to address the aforesaid concern, let us talk about some of the prominent software and online solutions to set aside the issue of how to put emojis on photos while working on a computer in the upcoming section of this article:
01Kapwing
Entering into the domain of online image editing tools, the Kapwing website easily lands among the highly preferred choices. To address the concern of adding emojis to pictures on your PC or desktop systems, this one is an affordable tool to rely on. Talking of the underlying reasons behind the app’s high rated user preference, the latter allows you to access its huge inventory of emoji stickers, distributed across a heap of categories to choose from.
Next in the line is the tool’s spic and span editing process that lets you add and customize emojis on the uploaded images with a series of effects and filters in a matter of counted seconds. You can either pick and import images from your system, or work with the app’s in house emoji templates to edit the photos. As you are done with uploading images and adding emojis, proceed to place them at the desired position within the image.
The app allows you to add multiple emoji layers to the images by facilitating the creation of duplicate copies of your favorite emojis. Once you are done with the editing process, you are free to export your creation across media handles, or save them locally to your system.
02Editor.pho.to
If you are a newbie to the world of graphic editing and want to experiment with your creative skills to sort out the need of how to add an emoji to a picture, prefer landing on this free online website to work on your images. Considering the fact that not everyone around you is a tech savvy, the aforesaid online photo editing tool is designed to house the simplest of interfaces ever. The tool is available to you absolutely free of cost, without any unfair hidden purchases.
Ahead of the basic customization features, the tool grants you the freedom to expand your graphic skills on a wider canvas with presenting before you a plethora of emoji faces, stickers and backgrounds to complement the uploaded images with. Once you have added the emoji, the tool lets you work on the latter’s position and transparency adjustments, create emoji layers and overlays and save the edits to your system in a visibly high output quality.
03Add Emoji to Photo
When looking for dependable solutions to work towards the task of how to put an emoji on a photo, you can conveniently trust the aforementioned online tool to create classic emoji photo edits from the customary still alternatives son your computer. This one is a free to use image editor facility that allows you to decorate your otherwise unnoticed images with an extensive range of preset and custom emojis to make them expressive and speak out your emotions.
The tool caters to render a high definition edited image output within seconds through the simplest of customization processes. You just need to upload a desired image from your system to the tool’s working interface, followed by picking a suitable emoji from the tool’s editing library to add it to the image. If however, the available options don’t seem to address your specific requirements, you can proceed to create custom emojis of your own within the tool.
You can also create multiple emoji layers to add to the uploaded image and make adjustments to their transparency and position within the photo. As you finish the editing process, the tool grants you the liberty to download the customized image to your system in either of the PNG or JPG file formats.
04Image Online
Another entry into the list of solutions to answer the query of how to put emojis on a photo, the Image Online tool promises you of a quality constrained image editing process to complement the basic still captures in the local media gallery of your computer with the latest collection of emoji elements. Welcoming you with a decent interface, the tool caters to sort out your emoji centered picture editing requirements within a blink’s time.
To add emoji to image with this tool, you just need to upload the selected photo to the latter’s workspace, followed by selecting a preferred emoji from the editing library, or create a custom emoji of your own, to put on the image. You can customize the emoji settings in terms of position, size and transparency, and download the edits to your device in JPG and PNG image formats.
05Canva
Last in the list is the Canva graphic editing tool which you can conveniently work with to add an emoji to a picture. Having a slightly different image editing process in comparison to its online counterparts, the utility requires you to sign up to its working interface to begin editing your photos. To start with, you need to select a preset image template or pick customized dimensions to upload the desired image.
To add emojis to your picture, you will have to download the latter’s application by navigating to and tapping the ‘More’ icon, followed by choosing the ‘Emoji’ option from the drop down menu that appears next. Once the ‘Emoji’ tab shows up in the tool’s main interface, proceed to upload your image and pick a suitable emoji from the list to add to the uploaded image. You can further, add layers of emojis to the picture, while resizing and adjusting the skin tones of the same.
Part 4 Adding Emoji to Photo Q&A
● What is the total number of emoji characters till date?
As of September 2021, a total of 3,633 emojis are known to have been introduced so far. Talking of the latest emoji package, there comes the Emoji 14.0, adding 112 emoji variations to the existing count. The aforesaid is a cumulative figure, including the skin tone, gender and flag sequences.
● What are the different types of emoji categories?
During the current time, the emoji characterization is known to house 8 different categories, namely, Flags, Symbols, Objects, Travel, Activity, Food & Drink, Animals & Nature and Smileys & People.
● What is the difference between Emoji and Emoticons?
Emoticons are specifically, graphic interpretations of the various human emotions that come with a keyboard command combination. Emojis on the other hand, are a standard set of various characters, often having a different artwork, but a universal meaning.
● Is it possible to self-create custom emojis?
As of now, having self-created variants of emojis is not possible. If at all, you become successful in design a character that resembles an emoji, you can use it as an image at the most. In an attempt to share it as an emoji, you will end up sending text combinations.
● What is the best software alternative to add emojis to pictures?
When looking for an affordable software solution for catering to the concern of how to add emojis to a photo, you can go for picking the Wondershare Filmora Video Editor graphic editing program, whose editing library literally houses the largest and the latest collection of emoji categories and varieties for sparking up your images with the best possible customized appearance.
For Win 7 or later (64-bit)
For macOS 10.12 or later
● Ending Thoughts →
● Adding emojis to pictures has landed among the latest and most preferred graphic editing trends of current times.
● When beginning to address the concern of how do you add emojis to pictures, the IT market puts a diversity of software and online solutions before you.
● If you are confused about making the best choice, you can pick the Wondershare Filmora graphic editor program without having to think twice.
Also read:
- New 2024 Approved How to Save As MP4 File on Windows Movie Maker?
- Enhance Your Video Color Accuracy with Video Scopes for 2024
- New How to Denoise in After Effects – Audio and Video Noise Removal
- New Videos Look Better when Edited Professionally. If Youre Looking to Edit Recorded Video with a Pro-Level Editing Then Weve Got You Covered. Learn About Editing Recorded Videos with the Best Toolkit Here
- New 20 Must-Have Graduation Songs
- Updated Tips for Choosing Location & Scheduling Music Video
- New 2024 Approved ReVisionFX ReelSmart Motion Blur Plugin For Premiere Pro
- In 2024, In This Article I Will Share to You My Tips and Experiences on How to Become a YouTube Vlogger and Things You Need to Consider Being a Vlogger
- Updated In 2024, Useful Guide to Speed Up/Down Videos in VLC
- Updated Creative Ways to Add Green Screen Effects In Photoshop for 2024
- Top 7 Best GoPro Video Editors for Mac for 2024
- Updated How to Clone Yourself in Videos with Filmora for 2024
- Best Audio Plug-Ins For Video Editors
- How to Remove Audio From Video on Mac? Free and Official Solutions
- Updated 2024 Approved Denoise a Video in Adobe Premiere Pro – Audio and Video Noise Removal
- Updated Achieving GoPro Slow Motion with Quality An In-Depth Overview for 2024
- New Best Shortcut Towards Timeline Template for 2024
- Updated 2024 Approved This Article Will Address Your Questions About the Easiest Way to Turn a Blog Into a Podcast. Lets Begin with the Reasons Why You Should Do a Podcast
- Updated 5 Methods to Make a Fake Facetime Call Video for 2024
- Updated | How to Change Quicktime Player Speed on Mac for 2024
- Updated 2024 Approved Change Background Color in After Effects
- Updated Guide To Using Luts Perfectly in Final Cut Pro
- In 2024, Looking Forward to Complement Your Weekend Evenings with a Fantasy Tour to the Anime World? Stay Here to Pick the Most Appealing Alternative From the Best and Timeless Anime Creations
- New An Ultimate Guide on the Significance of Music in Videos and How to Choose the Right Music for Your Videos with Wondershare Filmora for 2024
- Updated In 2024, Looking for a Legitimate Tutorial to Create and Add Text Effects in Adobe Premiere Pro? Here Are the Simple Steps for Premiere Pro Text Effects and Find an Alternative Way
- Updated 2024 Approved Best 5 Solutions on How to Add Emojis to iPhone
- 2024 Approved How to Build A Video Editing Career
- Updated Discover the Top 10 Video Editing Apps with Templates for Professional-Grade Results. Edit Like a Pro with These Tools for 2024
- New In 2024, Unleash the Power of Video Scopes in Your Video Editing Projects. Find the Most Common Video Scopes and How to Use Them on Video Editing Software
- 2024 Approved Want to Speed up or Slow Down a Video to Make It Look Different? Here Are the Simple Steps to Change Video Speed in Lightworks Video Editor
- How To Make Transparent Background On Picsart
- In This Article, We Are Going to Learn the Simplest Procedure on How to Cut And/Or Trim Videos Using VLC Media Player. Each Step Is Carefully Explained, with Screenshots Attached
- Updated 2024 Approved Are You Looking for an Ideal Halloween Countdown Video Clip for Your Video? This Article Will Walk You Through the Best Ones You Can Use to Get the Job Done Perfectly
- If You Are a Teacher or People Who Want to Share Their Ideas via Vides, You Can Always Make It on Your Own. This Article Will Share You 7 Tips to Create an Educational Video Easily for 2024
- Guaranteed 10 Storyboard Creators To Make Animation Easier for 2024
- Updated 2024 Approved Would You Like to Know How to Change the Ratio of the Video or Which Is the Correct Aspect Ratio for Uploading to the Online Platform? Then, Go Through the Article to Get Complete Details About the Video Aspect Ratio
- Best Video Repair tool to Fix and Repair Corrupt MP4,MOV,AVI video files of 130 Music
- Can’t view HEVC H.265 content on Redmi 12 5G
- 5 Solutions For Itel P55 Unlock Without Password
- What You Need To Know To Improve Your Infinix Smart 7 Hard Reset | Dr.fone
- In 2024, 3 Ways of How to Get Someones Apple ID Off iPhone 14 Plus without Password
- In 2024, Complete Tutorial to Use VPNa to Fake GPS Location On Tecno Camon 20 | Dr.fone
- 10 Fake GPS Location Apps on Android Of your Poco X6 Pro | Dr.fone
- In 2024, How to Remove Forgotten PIN Of Your Realme GT Neo 5
- How To Pause Life360 Location Sharing For Xiaomi Civi 3 Disney 100th Anniversary Edition | Dr.fone
- Your Account Has Been Disabled in the App Store and iTunes On iPhone 13?
- Recover your messages after Tecno Camon 20 has been deleted
- How to Fix Android.Process.Media Has Stopped on Realme Narzo N55 | Dr.fone
- Will iSpoofer update On Oppo K11x | Dr.fone
- In 2024, Bypassing Google Account With vnROM Bypass For Nokia C12
- How to Change Google Play Location On Oppo Reno 11 Pro 5G | Dr.fone
- Does find my friends work on Realme C51 | Dr.fone
- In 2024, How to Unlock iCloud lock on your iPhone 14 and iPad?
- In 2024, Does find my friends work on Apple iPhone 6s Plus | Dr.fone
- In 2024, Hassle-Free Ways to Remove FRP Lock on Meizu 21with/without a PC
- How to Cast Vivo S18e to Computer for iPhone and Android? | Dr.fone
- How to Fake Snapchat Location without Jailbreak On Oppo Find N3 Flip | Dr.fone
- The Magnificent Art of Pokemon Go Streaming On Poco X6 Pro? | Dr.fone
- Title: Updated Whatever the Reason You Want to Convert an Mp4 to GIF Online, There Are a Number of Ways to Do It. Use This Guide to Learn the Best Methods. Read More Here for 2024
- Author: Morgan
- Created at : 2024-04-24 01:11:58
- Updated at : 2024-04-25 01:11:58
- Link: https://ai-video-editing.techidaily.com/1713965884011-updated-whatever-the-reason-you-want-to-convert-an-mp4-to-gif-online-there-are-a-number-of-ways-to-do-it-use-this-guide-to-learn-the-best-methods-read-more-/
- License: This work is licensed under CC BY-NC-SA 4.0.
