
:max_bytes(150000):strip_icc():format(webp)/Robothandholdinganapple-fbe6ff482ed641e188dd6650b9ac132e.jpg)
2024 Approved How to Add Freeze Frame to Your Video From Any Device?
How to Add Freeze Frame to Your Video From Any Device?
Adding effects is an essential part of video editing to make a regular video look extraordinary. There are literally unlimited video effects available in popular video editors. You need to apply a video effect as per the trend and requirements of your video. Freeze frame effect has become extremely popular among video creators in today’s world of social media. Use freeze frame effect to freeze a specific scene in your video so that you can draw the attention of your viewers to that particular moment.
For example, in a match highlight video, you freeze the frame moment before a goal to show the positioning of the players or strikers. Owing to the popularity of freeze frame effect, you will find the video effect in almost all popular video editor apps for computers and smartphones. In fact, even popular online video editors have included the effect in their video effects. We will illustrate how to add freeze frame effect to your video on any device.
Part 1. How to Add Freeze Frame Video Effect on PC
If you are a computer user and you are looking for a video editor to add freeze frame effect to your video, we recommend Wondershare Filmora. Filmora is extremely popular among video creators for its wide range of video effects as well as its intuitive user interface. Adding freeze frame effect is super easy in Filmora and here are the steps to follow.
Step1Download and install Filmora for Windows PC. Launch Filmora and click on New Project button.
Step2Import your video clip under Project Media and then drop it into Timeline.
Step3Play the video and pause it where you want to freeze frame. Click on Snapshot icon to take photo of the frame. You will find the photo you have taken just now under Media library. In the meantime, you should split the video clip where you paused it to make space for the still image to get added and stay frozen.
Drag and drop the image on Timeline and stretch it to the duration up to which you want the frame to stay frozen. This image should be on top of the video clip in Timeline. You should place the image exactly where you paused the video.
Step4Double-click on the image in Timeline and adjust parameters as required. Play the video to notice the freeze frame effect. Click on Export button to save the video.
Part 2. How to Add Freeze Frame Video Effect on Mac
If you are a Mac user, the best video editor you can use to edit your video is Final Cut Pro. FCP is widely used by professional video creators and editors to edit their videos as per requirements. There are different categories of video effects available on FCP including freeze frame effect. Make sure your video is recorded with high frame rate and resolution for better outcomes. Here are the steps on how to add freeze frame in Final Cut Pro.
Step1Launch Final Cut Pro on your Mac. Go to File> Import> Files and select your video clip from the storage device. Drag it into the Timeline.

Step2Grab and move the Playhead to the point where you want to freeze the frame. Click on the video clip in the Timeline.

Step3Go to Edit menu and click on Add Freeze Frame. This will split your video clip and add frozen frame where you have placed the Playhead.

The default duration of the frozen freeze is four seconds. You can stretch it as per your requirements.
Just for information, both Windows and Mac users can also Premiere Pro add freeze frame effect if they already have Premiere Pro installed on their computers. The freeze frame feature in Premiere Pro is referred to as Add Frame Hold effect.
Part 3. How to Add Freeze Frame Video Effects Online
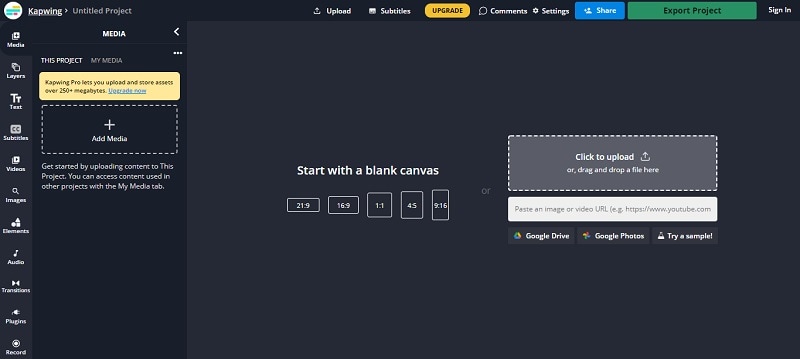
If you do not want to download and install a dedicated video editor on your computer, you can apply freeze frame effect to your video online as well. This will save your space as well as put less pressure on your CPU resource. We recommend Kapwing online video editor to use freeze frame effect on the go from any device directly from web browser. Here are the steps to add freeze frame effect to your video online.
Step1Open web browser on your device and visit “kapwing.com/tools/freeze-frame”. Click on Choose a video button.

Step2Drop your video file into Timeline and click on the video clip. Move the Playhead to the point where you want to add freeze frame effect.

Step3Go to Timing tab located in the top-right corner. Click on Freeze Frame button to add still image of the scene in the video. You can click multiple times to add more still images of the same scene. The more still images, the greater its duration will be.

Step4Play the video and you can have multiple freeze frame effects in the video clip.
This is undoubtedly the easiest way to add freeze frame effects for beginners.
Part 4. How to Add Freeze Frame Video Effects on Mobile
If you are using an Android smartphone or iPhone, you can apply freeze frame effect directly on your mobile instantly. In today’s world, people capture videos through their smartphones thanks to high-quality phone camera. You can use CapCut video editor app on both Android and iOS devices to add freeze frame effects. Here are the steps you need to follow.
Step1Install CapCut app on your phone. Launch the app and tap on New Project.

Step2Go to Albums and select the video to which you want to add the frame freeze effect.

Step3Put the Playhead to the point where you want to add the effect. Tap on Edit option.

Step4Search for Freeze option located at the bottom and tap on it to insert still image of the scene in Timeline.

Step5You can drag the duration of the frame freeze effect as per your requirement.
The Bottom Line
Adding freeze frame to your videos before and during impactful moments can enhance your video content. We have illustrated how to add a freeze frame in Final Cut Pro for Mac users. You can also add it to your video online using Kapwing video editor. You can use CapCut app to use the effect in your video on your smartphone. We recommend Filmora to add the effect quickly and conveniently on your PC.
Free Download For Win 7 or later(64-bit)
Free Download For macOS 10.14 or later
Free Download For macOS 10.14 or later
Add Text Animation to A Video Online
Do you want to make a creative video? Do you want your presentation or video to be easy to follow and entertaining? You can take the video to another level with the help of text animation. This article will discuss how to add text animation to online videos. You can use a good video editor from where you can select fresh styles and make the best video from there. One of the simplest ways to elevate your movie from good to excellent is with understandable text animation.
Text animation and short captions can broaden the audience for your content as more consumers view videos without sound these days. It matters what fonts you use in the videos, and they establish the mood and facilitate interaction with most viewers who rely on video captions. Add text, alter the font, add transitions, and use text effects to draw the user’s attention as they scroll. Please continue reading to discover how simple it is to make interactive video titles, words, and supers.
1. Use Kapwing animation text editor
(https://www.kapwing.com/animated-text-video-maker )
You can use the potent online editor Kapwing to add animated text to videos online, utilizing music, videos, GIFs, and images. There are no downloads required because everything is already present inside the browser. Kapwing is a capable tool for content production that is simple enough for everyone to use. The majority of video formats, GIF and image, including avi, png, jpg, gif, MOV, mp4, and more, are supported by Kapwing.
Step1 Upload the Video to Kapwing
You can open Kapwing with the device and tap on “Start Editing” to open up Kapwimg studio. After that, one can use the drag and drop option to upload the video in the studio. You can click on upload or use the link to upload.
If you have a more than 250 MB video, then you will require the Pro version.
Step2 Add the Text
When the video gets uploaded, now you can add your text. You must click the “Text” option on the left and type the text. After that, you can pick your favorite color, background, and color to add style.
You will always want that your text to get animated, but it doesn’t mean that you will have to use explosive fonts or funky or bright, which are very funky. The animation will make your text look attractive, and you can experiment with the colors and fonts to find the best combination.
Step3 Animate the Text
Now the fun part starts; choose the text box present on the right side and click on the “Animate” tab. It will allow the user to select animations like fade, flicker, hue rotates, and many more. Choose the speed according to your requirement, and if you want to change the background and color, you can do it too.
Use “Apply To” for applying this animation in the outro, intro, or both. It will help you to make the text fade out, fade in, or transition out and in with animation. Now the animation library has nine options:
- Drop: It appears on top of the text box
- Flicker: This one is like a candle’s flicker, and text flashes disappear and appear before staying.
- Fade: Opacity can be changed from 0% to 100%.
- Pop:- This grows the text more extensive than the text box and shrinks back to the place.
- Reveal:- Rolls from the left side to the right side
- Wipe:- Rolls from the left side to the right side with a colored background.
- Vibrate: The text box shakes in every direction.
- Hue rotates:- Colour of text cycles through the hue values..
You can use a timeline to adjust the animation’s termination when you set text animation. You can even drag that layer after the start time or use it on end/start time sliders to decrease or increase the time of your video. Text animation can get started when the cursor reaches the start time.
Step4 Export
The video with animated text is now ready to boom. You can click on “Export Video” present at the top and wait for the process. After that, you can download that video and use the links to share it on your social media platform.
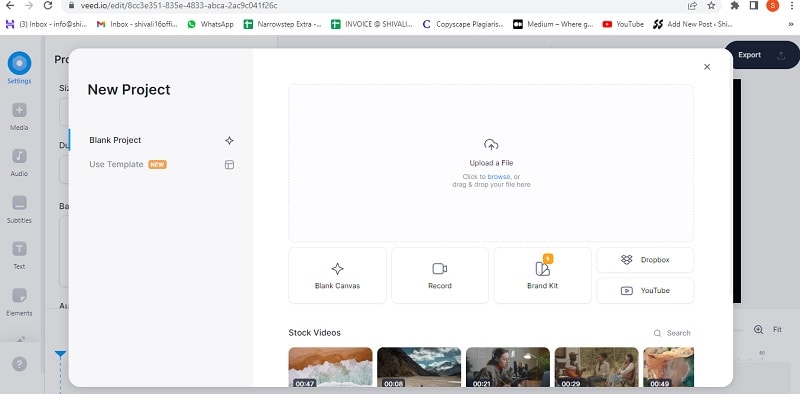
2. Use veed.io text video editor
(https://www.veed.io/create/text-video-maker )
Veed is one of the best video editor text effects online, which allows you to add text to online videos. You can easily add style, color, text, and font in a few clicks. You can upload the video and tap the text to get started. Add title and text or select handwriting font. One can select it from templates. Change transparency, alignment, and font size of the text.
This online software is perfect for creating attractive videos on social media. This is free, which omits the usage of expensive software. It is much easier to avoid many complex video editor apps. With the help of VEED, you can create an excellent video without any experience and do it with a few clicks. Let’s see how to add animated text to photos online.
Step1 Upload the video
Tap on “Choose Video” and choose the file you want to upload on VEED. One can even use the drag and drop option from the folder to the editor.
Step2 Add text
After that, you can add the text by tapping on the “Text” option on the left menu. You can select the text style and start typing.
Step3 Export
Save the video with the text you placed by tapping on “Export.” The video gets saved in an MP4 file.
3. Use Animaker text maker
(https://www.animaker.com/text-animation-maker )
The Animaker is one of the best-animated video makers. This app offers the best collection of charts, BGs, and animated characters. With the help of Animaker, you can make the text disappear or appear off-screen in the best way. After you finish your video, you can download the format in MP4.
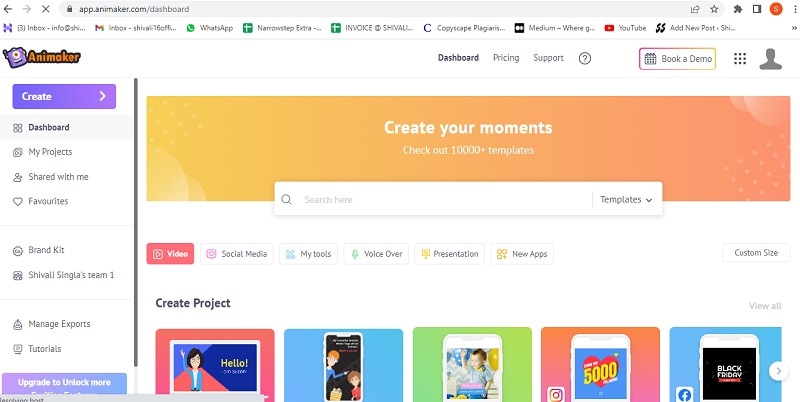
Step1 Upload the video clip
First, you can upload your video clip present on top that you wish to add text animation.
- Tap on the “Upload section” on the bottom left. You can upload your video where you wish to add the animated text.
- The video will get uploaded to “My Files.”
- Click on the uploaded video in the library to load it on the workspace.
Step2 Add text to the video
- You can add text in their text section
- In the next section, one can find two different text types. At the top, you will discover plain text options, and at the bottom, you can find pre-designed boxes seasoned at Animaker.
Let’s see how you can use pre-built text boxes.
- Tap on pre-built designs for your text animation. One can see the text appearing in the center of the workspace, and you can click it and type new text if you want to customize it.
- You can notice widespread options appearing with your text. It is known as the item menu. It will allow the user to modify their text. One can change font size, color, style, etc. Your text will come with pre-defined effects, which will help you to animate text instantly.
- You must have noticed that the purple color bar appears on the timeline, representing the duration of the text visible in the video. For example, if you want that text to get visible between 4rth to 8th seconds, then you will have to drag the edges of that purple bar to the same duration.
To see the scene, you must click on the play button on top of the timeline.
Let’s check the other ways of adding animated text to the video. In the previous one, you have seen how you can add text animation using pre-built boxes. Now you will get to know about doing it by using blank boxes.
- Start tapping the “text section”. Select the bank textbox.
- Click on them and then opt to add new text.
- Opt for clicking the cog icon that is there in the item menu.
- You will notice the settings tab that is on the screen’s right side.
- You can easily opt for the customization of the text in the way you wish. You can start by modifying the style of the font. One can change the size and color of the font as well.
- Use these options and opt for the application of enter and/or exit effects to text. Now, opt to click on the effect option to get more than 50 options. You can select the effect from there.
- Once the animation effect is applied to your timeline, you can notice the pink part in the bar i.e. purple. This completes creating text animation by using Animaker.
Step3 Download the Video
- You can visit the publish option in the right window to download the video.
- Tap on the “download video” option for downloading.
Conclusion
Now, you are aware of how to add text animation to video online and the three best video editors that will help you add animated text to your videos. At this point, you can choose the best one according to your needs and usage. These steps will help you create a unique and good video that will be easy to understand and entertaining.
Free Download For Win 7 or later(64-bit)
Free Download For macOS 10.14 or later
Free Download For macOS 10.14 or later
Top 10 Transparent Image Online Tools That Help You A Lot
[Top 10] Transparent Image Online Tools That Give You an Advantage
An easy yet powerful editor
Numerous effects to choose from
Detailed tutorials provided by the official channel
If you are a photoholic person and you love to share your images on social media then at some point in time you might have felt the need of removing the background of the image and add something cool to the background. This process of removing the background of the image is called making your image transparent. Professional photo artists make the most use of this feature to create the best of photos. Creating transparent images and changing their background could be used in many ways like designing the logo of the brands, professional photography, or simply fun purpose.
If you have not made use of transparent images yet and you want to learn to create transparent images online and edit transparent images online then this article is for you.
In this article
01 [Best 10 Transparent Image Editors You Deserve to Own](#Part 1)
02 [Can You Find Assets of Transparent Image in the Video Editor?](#Part 2)
Part 1 Best 10 Transparent Image Editors You Deserve to Own
You might be afraid that editing a picture online and making it a transparent image would need technical knowledge in photo editing. Then you are wrong. Making transparent images online and then editing them is very easy. We, here in this article, have come up with the 10 best online transparent image makers using which you can create transparent images in a very fun way, and then you can use them for whatever purpose you want. And don’t worry, we have provided the steps on how to use online transparent image makers to make your work easy.
01Removebg
If you are looking for a free online transparent image maker then Removbg should be the first one you give a try. This online tool is powered by Al technology which enables you to remove the background of your image precisely. Removebg has “Erase” and “Restore” tools which provides for manual adjustment of the details so you can give your image a realistic touch. Apart from these features, the other highlights of this online tool are solid color backgrounds, well-designed templates, and custom templates. Using this online free tool you can also upload your image in batches. Images created by you will have a professional finishing.

02FocoClipping
The next great online transparent image maker on our list is FocoClipping. While most of the image makers and editors have a free version and paid version but all the features in the FocoClipping are free. This image editor enables you to remove background from your photos and make them transparent with only a single click. FocoClipping also uses AI tech to remove the background of your image precisely. The other features of this tool include no limit of download and upload, an easy-to-use interface, casting shadows into images, and many more.

03Image online.co
Image online.co is a trusted name in the field of transparent image makers online. This amazing website is also completely free to use. This website is powered packed by a bundle of image editing tools. To make your transparent image all you need to do is to select the background using the mouse and you are done. No technical photo editing knowledge is required to use this tool. Apart from this Image online.co offers you features like resizing the image, image color picker, merging the images, pencil sketching the photo, adding text to the image, adding a logo to the photo, etc.

04AirMore
If you are the one who needs a simple and easy-to-use tool without much sophistication to make a transparent image, then AirMore could be a good choice for you. All you need is a single click on the background to remove it. This tool provides the “Keep” and “Remove” options so in case you don’t like your editing then you can reverse the whole process. The best thing about using AirMore is that you will not have to compromise with the quality of your image and you can add any cool background to your image like a pro.

05PhotoWorks
If you find photoshop software on your pc too complicated to use then try PhotoWorks. This easy-to-use tool can help you in making transparent images online in a few seconds. PhotoWorks has a very user-friendly interface packed with many manual settings which users can adjust according to their needs. The biggest highlight of this tool is once you access it online you need no further internet connection to edit your images. It is a wonderful transparent background generator with effective results.

06Publisher
This tool comes is created by Microsoft and comes in your laptops and computers with the Microsoft office package. Publisher provides features using which you can generate transparent images in a very quick and easy manner. Other features of this tool include making designs, calendars, posters, greeting cards, and many more. However, this tool is only compatible with computers only and not smartphones. The results generated by Publisher are accurate to a high level and the interface of this software is very user-friendly.

07Online PNG Tools
Another website on our list is Online PNG Tools. This website offers you all the means to create a hassle-free transparent image online in a few seconds and that too at no cost. The algorithm of this website is powered by artificial intelligence which lets you make transparent images without any trouble. All you need to do is open the site and upload your image and click on the background you want to make transparent. The most attractive feature offered by this website is that it does not ask you to download anything. You will get very quick results while using Online PNG Tools.

08Photoshop
After reading the name Photoshop on our list, many readers might be surprised. Many people find Photoshop a bit tough to use but that is not true. This is one of the best online transparent image makers which you can use to remove the background from your images. Photoshop is a one-stop solution for the entire photo editing-related works. Here you can use features like resizing the image, image color picker, merging the images, pencil sketching the photo, adding text to the image, adding a logo to the photo, etc. Photoshop is the most reliable transparent image maker.

09LunaPic
Next on our list of online transparent image makers is LunaPic. This online platform is completely free to use and you don’t even need to sign in to use it. The best feature is can upload your image from your computer, social media, the Cloud, or any other website you want. LunaPic is power-packed with numerous tools for editing the images which will make your online transparent image-making experience a good one. It provides various Borders, Filters, Effects, etc using which you can be master in image editing. Also, you can share your photos directly to social media from the LunaPic.

10Fotor
No discussion of online transparent image maker is complete without Fotor. If you consider yourself a complete beginner, in photo editing, you should try Fotor. Creating transparent images through this tool is very easy. Along with this, you can make use of various Effects, Beauty, Frames, Stickers, etc to make the image picture-perfect. This tool’s photo background remover lets you clear the background in just a few steps. Be it about beautifying life by sharing moments or the purpose is simply the business advertisement, when you have Fotor in hand, the background removal experience is incredible and the process gets easy with its easy interface.

So, now you know the best online transparent image maker. But if you are not a professional and worried about using these online tools then we are here. Here we will guide you on making a transparent picture online, and we have usedFocoClipping for explaining, but you can use any of the above-mentioned tools and the steps are almost similar for all.
Step 1: Go to the browser of your computer and type “FocoClipping” in your search box. Click on the FocoClipping link on your screen.
Step 2: Now select the image you want to make transparent and click on “Upload”. FocoClipping user interface is auto-adjusted to remove the background from your image. As soon as you open the image in FocoClipping the background of your image will be removed.

Step 3: Now if you want to experiment more with your image then you a new background, crop, or resize the transparent image. On the right corner of your screen, you will see options “Background, Crop, and Shadow” select them according to your requirements.

Step 4: If you feel like restoring any part or whole of the real image then select the “Recover” option. Drag the recover brush over the parts you want to recover. You can make use of the “Erase” tool to delete any stuff.
Step 5: After the completion of the whole editing process click on the “Download” button”. FocoClipping will download your image without any sign-in process. The tool will ask you to choose between PNG and JPG format to save your edited image, go for your preferred format. Hit the “Download” option again and your edited image will get saved to your preferred location on your pc.
Part 2 Can You Find Assets of Transparent Image in the Video Editor?
Till now we were keeping our discussion limited to online photo editors that can create transparent images, but what is a video editing platform that provides all such features? If you find all the assets of the transparent image in a video editor then your life is going to be very easy.
Here we are talking about Wondershare Filmora Video Editor . This online video editing platform enables its users to find all the assets of transparent images. All the online video content creators find this feature of Filmora very handy in making their videos awesome and cool.
For Win 7 or later (64-bit)
For macOS 10.12 or later
Apart from this Filmora is power-packed with a big list of features some of these features are mentioned below.
● Editing features like split screen, motion tracker, screen recorder, keyframing, Auto Beat Sync, etc.
● Various kinds of effects like green screen, mask and blend, AI portraits, video effects, etc.
● Audio editing features like audio ducking and silence detection.
● Color match and color combination.
Using Filmora you can create transparent images online and along with it, this platform offers a whole bunch of editing features. If you are new to photo editing then you don’t have to worry, the UI of Filmora has been designed in such a way that anyone without any technical expertise can edit their images and videos like a pro.
● Ending Thoughts →
● So dear readers, with this article we have tried to bring you the best online transparent image maker.
● All the 10 image editors mentioned in his article are top class and you can use them to create and edit all kinds of images including transparent images.
● With the tutorial provided in the article, you can learn to create transparent images. All you need to do is to follow the steps explained in the article and you will master the art of creating transparent images online.
● If you are looking for a video editing platform through which you can access all the assets of transparent images then try Filmora.
● This platform enables you to create and video including transparent images in a very quick and easy manner.
If you are a photoholic person and you love to share your images on social media then at some point in time you might have felt the need of removing the background of the image and add something cool to the background. This process of removing the background of the image is called making your image transparent. Professional photo artists make the most use of this feature to create the best of photos. Creating transparent images and changing their background could be used in many ways like designing the logo of the brands, professional photography, or simply fun purpose.
If you have not made use of transparent images yet and you want to learn to create transparent images online and edit transparent images online then this article is for you.
In this article
01 [Best 10 Transparent Image Editors You Deserve to Own](#Part 1)
02 [Can You Find Assets of Transparent Image in the Video Editor?](#Part 2)
Part 1 Best 10 Transparent Image Editors You Deserve to Own
You might be afraid that editing a picture online and making it a transparent image would need technical knowledge in photo editing. Then you are wrong. Making transparent images online and then editing them is very easy. We, here in this article, have come up with the 10 best online transparent image makers using which you can create transparent images in a very fun way, and then you can use them for whatever purpose you want. And don’t worry, we have provided the steps on how to use online transparent image makers to make your work easy.
01Removebg
If you are looking for a free online transparent image maker then Removbg should be the first one you give a try. This online tool is powered by Al technology which enables you to remove the background of your image precisely. Removebg has “Erase” and “Restore” tools which provides for manual adjustment of the details so you can give your image a realistic touch. Apart from these features, the other highlights of this online tool are solid color backgrounds, well-designed templates, and custom templates. Using this online free tool you can also upload your image in batches. Images created by you will have a professional finishing.
02FocoClipping
The next great online transparent image maker on our list is FocoClipping. While most of the image makers and editors have a free version and paid version but all the features in the FocoClipping are free. This image editor enables you to remove background from your photos and make them transparent with only a single click. FocoClipping also uses AI tech to remove the background of your image precisely. The other features of this tool include no limit of download and upload, an easy-to-use interface, casting shadows into images, and many more.
03Image online.co
Image online.co is a trusted name in the field of transparent image makers online. This amazing website is also completely free to use. This website is powered packed by a bundle of image editing tools. To make your transparent image all you need to do is to select the background using the mouse and you are done. No technical photo editing knowledge is required to use this tool. Apart from this Image online.co offers you features like resizing the image, image color picker, merging the images, pencil sketching the photo, adding text to the image, adding a logo to the photo, etc.
04AirMore
If you are the one who needs a simple and easy-to-use tool without much sophistication to make a transparent image, then AirMore could be a good choice for you. All you need is a single click on the background to remove it. This tool provides the “Keep” and “Remove” options so in case you don’t like your editing then you can reverse the whole process. The best thing about using AirMore is that you will not have to compromise with the quality of your image and you can add any cool background to your image like a pro.
05PhotoWorks
If you find photoshop software on your pc too complicated to use then try PhotoWorks. This easy-to-use tool can help you in making transparent images online in a few seconds. PhotoWorks has a very user-friendly interface packed with many manual settings which users can adjust according to their needs. The biggest highlight of this tool is once you access it online you need no further internet connection to edit your images. It is a wonderful transparent background generator with effective results.
06Publisher
This tool comes is created by Microsoft and comes in your laptops and computers with the Microsoft office package. Publisher provides features using which you can generate transparent images in a very quick and easy manner. Other features of this tool include making designs, calendars, posters, greeting cards, and many more. However, this tool is only compatible with computers only and not smartphones. The results generated by Publisher are accurate to a high level and the interface of this software is very user-friendly.
07Online PNG Tools
Another website on our list is Online PNG Tools. This website offers you all the means to create a hassle-free transparent image online in a few seconds and that too at no cost. The algorithm of this website is powered by artificial intelligence which lets you make transparent images without any trouble. All you need to do is open the site and upload your image and click on the background you want to make transparent. The most attractive feature offered by this website is that it does not ask you to download anything. You will get very quick results while using Online PNG Tools.
08Photoshop
After reading the name Photoshop on our list, many readers might be surprised. Many people find Photoshop a bit tough to use but that is not true. This is one of the best online transparent image makers which you can use to remove the background from your images. Photoshop is a one-stop solution for the entire photo editing-related works. Here you can use features like resizing the image, image color picker, merging the images, pencil sketching the photo, adding text to the image, adding a logo to the photo, etc. Photoshop is the most reliable transparent image maker.
09LunaPic
Next on our list of online transparent image makers is LunaPic. This online platform is completely free to use and you don’t even need to sign in to use it. The best feature is can upload your image from your computer, social media, the Cloud, or any other website you want. LunaPic is power-packed with numerous tools for editing the images which will make your online transparent image-making experience a good one. It provides various Borders, Filters, Effects, etc using which you can be master in image editing. Also, you can share your photos directly to social media from the LunaPic.
10Fotor
No discussion of online transparent image maker is complete without Fotor. If you consider yourself a complete beginner, in photo editing, you should try Fotor. Creating transparent images through this tool is very easy. Along with this, you can make use of various Effects, Beauty, Frames, Stickers, etc to make the image picture-perfect. This tool’s photo background remover lets you clear the background in just a few steps. Be it about beautifying life by sharing moments or the purpose is simply the business advertisement, when you have Fotor in hand, the background removal experience is incredible and the process gets easy with its easy interface.
So, now you know the best online transparent image maker. But if you are not a professional and worried about using these online tools then we are here. Here we will guide you on making a transparent picture online, and we have usedFocoClipping for explaining, but you can use any of the above-mentioned tools and the steps are almost similar for all.
Step 1: Go to the browser of your computer and type “FocoClipping” in your search box. Click on the FocoClipping link on your screen.
Step 2: Now select the image you want to make transparent and click on “Upload”. FocoClipping user interface is auto-adjusted to remove the background from your image. As soon as you open the image in FocoClipping the background of your image will be removed.
Step 3: Now if you want to experiment more with your image then you a new background, crop, or resize the transparent image. On the right corner of your screen, you will see options “Background, Crop, and Shadow” select them according to your requirements.
Step 4: If you feel like restoring any part or whole of the real image then select the “Recover” option. Drag the recover brush over the parts you want to recover. You can make use of the “Erase” tool to delete any stuff.
Step 5: After the completion of the whole editing process click on the “Download” button”. FocoClipping will download your image without any sign-in process. The tool will ask you to choose between PNG and JPG format to save your edited image, go for your preferred format. Hit the “Download” option again and your edited image will get saved to your preferred location on your pc.
Part 2 Can You Find Assets of Transparent Image in the Video Editor?
Till now we were keeping our discussion limited to online photo editors that can create transparent images, but what is a video editing platform that provides all such features? If you find all the assets of the transparent image in a video editor then your life is going to be very easy.
Here we are talking about Wondershare Filmora Video Editor . This online video editing platform enables its users to find all the assets of transparent images. All the online video content creators find this feature of Filmora very handy in making their videos awesome and cool.
For Win 7 or later (64-bit)
For macOS 10.12 or later
Apart from this Filmora is power-packed with a big list of features some of these features are mentioned below.
● Editing features like split screen, motion tracker, screen recorder, keyframing, Auto Beat Sync, etc.
● Various kinds of effects like green screen, mask and blend, AI portraits, video effects, etc.
● Audio editing features like audio ducking and silence detection.
● Color match and color combination.
Using Filmora you can create transparent images online and along with it, this platform offers a whole bunch of editing features. If you are new to photo editing then you don’t have to worry, the UI of Filmora has been designed in such a way that anyone without any technical expertise can edit their images and videos like a pro.
● Ending Thoughts →
● So dear readers, with this article we have tried to bring you the best online transparent image maker.
● All the 10 image editors mentioned in his article are top class and you can use them to create and edit all kinds of images including transparent images.
● With the tutorial provided in the article, you can learn to create transparent images. All you need to do is to follow the steps explained in the article and you will master the art of creating transparent images online.
● If you are looking for a video editing platform through which you can access all the assets of transparent images then try Filmora.
● This platform enables you to create and video including transparent images in a very quick and easy manner.
How to Resize FLV Videos Efficiently[Windows, Mac, Android, iPhone & Online]
FLV Videos are Flash Video files with a .flv file extension. FLV video files were once one of the most popular video file types and the standard video format used for embedding videos on the internet and streaming. Even though video files like mp4 and mkv have gained more popularity today, you can still come across many Flv videos on the internet.
In this article, you’ll be learning How to Resize FLV Videos Efficiently on all the platforms. But wait, what exactly does the resizing mean? When you are working with videos, resizing can mean two things: one is changing the aspect ratio or resolution of the video and another is changing the file size of the video. So let’s see how we can resize the flv videos efficiently on different platforms:
Best FLV Editor to Resize FLV Videos on Windows and Mac – Filmora Video Editor [with steps]
Among many different video editors available today, Filmora Video Editor is the one that climbs up the rank to the top. It is the best FLV editor on Windows and Mac for resizing and editing flv videos. Different social media platforms require videos of different sizes, resolutions, and aspect ratios. For eg: YouTube requires horizontal video, TikTok requires vertical, Emails have a size limit for every file, etc. That’s when the Filmora Video Editor comes into play for fast and easy resizing of any video for different platforms.
For Win 7 or later (64-bit)
For macOS 10.14 or later
Why choose Filmora Video Editor for resizing FLV videos, you say?
- Simple UI and easy interface
- Easily crop or change the aspect ratio of the video
- Not all video editors support FLV video format, but the Filmora does
- Advanced export options to compress or change the file size of video
- Suitable for beginners as well as professionals
- Regular software updates and improvements
Plus, Filmora Video Editor has a free version, so you can instantly download the program, install it, and get started on resizing FLV Videos. Below is a step-by-step guide to resize FLV Videos on Windows and Mac with Wondershare Filmora Video Editor, so you can follow along!
Steps to resize FLV videos with Filmora Video Editor:
- Launch Filmora and open a new project
Run the Wondershare Filmora application on Windows or Mac after installing it. Then you should automatically be inside a new project. If not, you can manually open a new project by going to File on the top left corner and then clicking on ‘**New Project**’.

- Import the FLV video and add it to timeline
Click on ‘**Import Media Files**’ and import the flv video into project media from your computer’s file explorer. Then add the video to the timeline by dragging it inside the timeline.

- Edit and perform desired modifications (Optional)
If you are just looking to resize the FLV video file, then you can skip this step and move to step no. 4. Otherwise, you can do various editings on the video like cropping, muting, trimming, animating, etc. before resizing the video. Filmora provides a wide range of features for editing and adding effects to the video.

- Resize the video by changing the aspect ratio
Aspect ratio defines the shape of your video like if you want the video to be horizontal, vertical, square, or custom. Generally, the term ‘resizing video’ refers to changing the aspect ratio of the video. For that, go to the File and then to the Project Settings. Then on the Aspect Ratio box, select the one that you prefer or you can try custom scaling. You can choose your preferred resolution of the project too while you’re at it.

- Resize the video by cropping
When you change the aspect ratio of the project, some parts of your flv video might not fit or it might be shrunk small to fit. So you need to resize the flv video by cropping so that you can crop and focus on the part of the video you like. To crop the video, select the flv video clip in the timeline and click on the crop icon in the timeline toolbar. Now choose the ratio you want to crop and select the part you’d like to keep. Then click OK and your flv video will be resized.

- Adjust the file size of the video through export settings
After you’ve cropped and resized the Flv video, you need to export it by clicking the Export button on the top center part. There are different settings available for exporting the video. Click on the Settings button near the resolution and you’ll be shown some detailed preferences for exporting. Every setting here like frame rate, resolution, bitrate, etc. can affect the size of the output video.

Filmora Video Editor really makes the task of editing and resizing FLV videos easier, simpler, and faster. Since you now know the steps, it’s time you try it and resize your own FLV videos with this best FLV Editor for Windows and Mac.
Alternative Way to Resize FLV Videos on Windows
In case you want to try something different than Filmora, here are two alternative software (one paid and another free) that you can use to resize your FLV Videos on Windows:
- Movavi Video Editor Plus

Movavi Video Editor Plus is one of the best easy-to-use video editors that can help you to resize FLV videos as well as edit them on Windows. Its interface and functionalities are somewhat similar to that of the Filmora Video Editor. This is a paid software available for download on both Windows and Mac but you can try it for free with their 7 days trial version.
Steps to resize FLV videos on Windows with Movavi Video Editor:
- Install Movavi Video Editor and run the software on your PC. Then you should automatically be inside a new project in it.

- Import the FLV video file you want to resize through the ‘File Import’ tab on the left and drag it to the timeline.

- To resize the aspect ratio, expand the resolution options near the preview screen above the export button and select the preferred ratio.

- To crop or resize the video, select the clip in the timeline and use the crop tool to make adjustments as you wish. Then hit Apply to save changes.

- After the video is ready, export it with the Export button on the right side of the screen. Then choose your preferred settings for output and click on Start after which your video will be rendered and saved to your PC.

- VSDC Free Video Editor

VSDC Free Video Editor is another alternative to Filmora for resizing FLV videos on Windows. It is a free video editor that packs a wide range of editing features without any restrictions. However, it does have a paid version with some advanced features and hardware acceleration.
Steps to resize FLV videos on Windows with VSDC Free Video Editor:
- Install and open VSDC video editor on your PC. Then create a new project with preferred settings through the ‘Projects’ tab on the top left corner.

- Import the video file into the project by dragging and dropping it directly into the timeline.

- To resize the aspect ratio, click on the Projects Explorer and click on your project name. Then in the Properties windows on the right, manually adjust width, height, resolution, etc. according to your preferences.

- To crop and reposition your video, select the clip in the timeline and go to the Editor tab on the top. Then use the crop tool and adjust your video accordingly.

- Finally export your design through the Export project tab at the top with preferred settings.

Alternative Way to Resize FLV Videos on Mac
Wondershare Filmora Video Editor is also available for Mac operating system which is recommended to resize FLV videos but if you want to try out some other alternatives, then below are the two ways to resize FLV videos on Mac:
- VideoProc Converter

VideoProc is a powerful video editor/ converter that helps you edit, convert, and resize any kind of video. It also supports a wide range of codecs and video formats including flv. It is a paid software but you can also try their free trial version with some limitations.
Steps to resize FLV videos on Mac with VideoProc:
- Launch VideoProc on a Mac device and go inside the Video

- Add files in VideoProc by drag and drop method or directly through the ‘Add Video’ option.

- Then click on the Options (codec) on the right side of the video and change the resolutions and aspect ratio of the video as you want. You can also manage export settings like quality, codec, fps, bitrate, etc. from this tab.

- Then go to the Crop section inside the Edit Video tab and crop the video as you like with preview and different other options.

- Finally click Done to go back and hit the Run This’ll start rendering the video and will save it to your Mac device.

- Shotcut

Shotcut is another alternative to Filmora Video Editor for resizing FLV videos on Mac. It is a free, open-source, and cross-platform video editor that has a sleek and intuitive interface with many useful editing features which really makes it suitable for both beginners as well as advanced editors.
Steps to resize FLV videos on Mac with Shotcut:
- Run the Shotcut program on your Mac after installing it and create a new project.

- Import the Flv video file to the project by drag and drop method into the timeline.

- To change the resolution and aspect ratio of the video, go to the Settings tab, then Video mode, and choose the format you want.

- To crop the video, select the clip in the timeline and go to the Filters Now click on the ‘**+**’ icon and select Size, Position & Rotate under the Favorite section. Then adjust crop settings as you like.

- Finally, go to the Export section at the top and click on Advanced. Then configure the output settings as you like and click on Export File.

2 Ways to Resize FLV Videos on Android
Wouldn’t it be great if you could resize FLV videos on your android device rather than having to open your computer for every small task? Previously, this was a major issue due to a lack of good video editors for android with flv support but that’s no longer the case. Below are two ways to resize FLV videos on android:
- AndroVid – Video Editor, Video Maker

AndroVid is an easy-to-use, full-featured video editor especially developed to edit videos for social media like YouTube, TikTok, Facebook, Instagram, etc. It is not a very popular application with just over 300k+ downloads in Google Play Store, but after testing it out, we thought it deserves to be in this article. It is available for free to download from Google Play Store.
Steps to resize FLV videos on Android with AndroVid Video Editor:
- Open AndroVid Video Editor on an android phone and go inside the Videos

- Now select the FLV video file that you want to resize.

- Inside editor, tap on the Crop tool in the toolbar at the top.

- Then select the preferred Aspect ratio from the top right, reposition the video area and tap on the tick icon to save the video.

- If you need to change the resolution too, click on the three dots at the top right after the video is saved successfully. Then choose the preferred resolution, quality, and format and click on the tick icon to export.

2 Ways to Resize FLV Videos on iPhone
Like Android, you can also resize FLV videos on your iPhone on the go without needing to use your computer. Doing such editing on mobile phones can really save your time and effort, so here are 2 ways for you to resize FLV videos on iPhone:
- Cyberlink Powerdirector

Cyberlink Powerdirector is one of the most popular as well as powerful video editors for Android and iOS. It is a full-featured mobile video editor with over 130M+ downloads on the App Store which allows you to do an advanced level of editing. It is a paid software but also has a free version available for download.
Steps to resize FLV videos on iPhone with PowerDirector:
- Launch the PowerDirector app on your iPhone and create a new project. Unlike other apps, you cannot change the aspect ratio later, so you need to set the aspect ratio you want while creating a new project.

- Now add the FLV video file into the timeline by tapping on the ‘**+**’ icon on the video. Then tap on the play button at the top right to enter the editor.

- To resize the video, select the video clip in the timeline and tap on the pencil icon at the bottom left. Then use different crop tools available to resize your video as you want.

- After you resize the video, tap on the export button on the top right to export it. Then tap on Produce and Share, and produce resized video with preferred settings.

- Splice – Video Editor & Maker

Splice – Video Editor & Maker is a simple yet powerful application that makes it easy to create fully customized and professional-looking videos on iPhone. It is another great app for resizing FLV videos on iPhone with over 70M+ downloads on App Store and it is available for free.
Steps to resize FLV videos on iPhone with Splice:
- Open the Splice app on the iPhone and tap on the ‘**+**’ icon to create a new project.

- Now select the flv video file to add and start the project.

- To resize the video, tap on the gear icon at the top right corner which opens up Project settings from where you can change the aspect ratio.

- To crop the video, select the clip in the timeline and tap on the Crop option in the toolbar. You can crop and reposition the video from there.

- Then click on the Export icon at the top right corner to export the video with preferred configurations.

2 Ways to Resize FLV Videos Online
Resizing is not that big of a task and you might just want to quickly resize your Flv video and share it. So why bother installing and running large video editing programs on your computer or even mobile phones when you can easily resize your videos in the web browser? Yes, you read that right, and below are the 2 ways for you to resize FLV videos online:
- io

Veed is a simple online video editing tool that you can access from any device with the help of a web browser. It can help you resize your Flv videos easily within just a few clicks. It has a clean and beautiful interface with a responsive design which provides you with a good editing experience while using it. It is a paid tool but you can also try it for free before purchasing it.
Steps to resize FLV videos online with Veed.io:
- Go to veed.io on your web browser and click on ‘Upload Your Video’ to get started without any account.

- Now upload the FLV video or you can directly drag and drop the video there.

- After you upload the video, you’ll be taken inside the Veed editor. To change the aspect ratio, go to the Size section inside Project Settings and choose the size you want to resize to.

- To crop the video, select the clip in the timeline and directly resize the video from the preview area. And you can also use settings like ‘Fill the canvas’ and ‘Fit the canvas’ at the left side for ease.

- Then click on the Export button at the top right corner to open Export settings. Configure the settings as you like and click on ‘Export Video’ to render and download the video.

- Clideo

When it comes to resizing or editing videos online, Clideo is one of the best tools you can rely on. Like Veed.io, it has a clean and responsive interface and supports many video formats including flv. Clideo is free to use but also comes with various subscription plans for extra functionalities.
Steps to resize FLV videos online with Clideo:
- Go to clideo.com/resize-video and upload your video through ‘Choose file’ button.

- To resize the aspect ratio, choose your desired formats in the ‘Resize for’ section. You can also manually set the aspect ratio.

- Then just below that, you’ll find various cropping options. Use them to crop or resize the video as you like.

- Finally, click on the Export button at the bottom right corner to export the video. You can download the video or can directly save to cloud storage like Drive, Dropbox, etc.

FAQs about Resizing FLV Video
Here are some of the Frequently Asked Questions (FAQs) related to resizing FLV videos that you might be interested in:
- How do I make FLV files smaller?
You can make FLV files smaller with the help of any video editor that supports Flv video format by cutting and cropping out unnecessary parts, decreasing the resolution, and bitrate, and converting flv into another lighter file format.
- Which video editors support FLV file format?
There are few video editors like Filmora, Movavi, VSDC, etc. that support the FLV file format. But when it comes to editing FLV videos, Filmora Video Editor is the best choice.
- How do I view an FLV file?
FLV is one of the oldest video formats due to which most new and modern video players don’t recognize it or can’t play it. However, there are few programs like VLC media players which can help you view an FLV file. Or you can also convert the FLV file into other supported video formats with the help of a video converter.
- Can I convert a horizontal FLV video into a vertical one?
Yes, and that’s a piece of cake when you use Filmora Video Editor or other similar video editors. You just need to change the aspect ratio of the video or the project from horizontal (generally 16:9) to vertical (generally 9:16).
- Can I resize FLV video files on my mobile?
Though video editors on mobile are not as powerful as those on PC, there are some that are still capable enough to let you easily resize FLV video files on mobile devices. Some examples are Splice, Powerdirector, etc.
For macOS 10.14 or later
Why choose Filmora Video Editor for resizing FLV videos, you say?
- Simple UI and easy interface
- Easily crop or change the aspect ratio of the video
- Not all video editors support FLV video format, but the Filmora does
- Advanced export options to compress or change the file size of video
- Suitable for beginners as well as professionals
- Regular software updates and improvements
Plus, Filmora Video Editor has a free version, so you can instantly download the program, install it, and get started on resizing FLV Videos. Below is a step-by-step guide to resize FLV Videos on Windows and Mac with Wondershare Filmora Video Editor, so you can follow along!
Steps to resize FLV videos with Filmora Video Editor:
- Launch Filmora and open a new project
Run the Wondershare Filmora application on Windows or Mac after installing it. Then you should automatically be inside a new project. If not, you can manually open a new project by going to File on the top left corner and then clicking on ‘**New Project**’.
- Import the FLV video and add it to timeline
Click on ‘**Import Media Files**’ and import the flv video into project media from your computer’s file explorer. Then add the video to the timeline by dragging it inside the timeline.
- Edit and perform desired modifications (Optional)
If you are just looking to resize the FLV video file, then you can skip this step and move to step no. 4. Otherwise, you can do various editings on the video like cropping, muting, trimming, animating, etc. before resizing the video. Filmora provides a wide range of features for editing and adding effects to the video.
- Resize the video by changing the aspect ratio
Aspect ratio defines the shape of your video like if you want the video to be horizontal, vertical, square, or custom. Generally, the term ‘resizing video’ refers to changing the aspect ratio of the video. For that, go to the File and then to the Project Settings. Then on the Aspect Ratio box, select the one that you prefer or you can try custom scaling. You can choose your preferred resolution of the project too while you’re at it.
- Resize the video by cropping
When you change the aspect ratio of the project, some parts of your flv video might not fit or it might be shrunk small to fit. So you need to resize the flv video by cropping so that you can crop and focus on the part of the video you like. To crop the video, select the flv video clip in the timeline and click on the crop icon in the timeline toolbar. Now choose the ratio you want to crop and select the part you’d like to keep. Then click OK and your flv video will be resized.
- Adjust the file size of the video through export settings
After you’ve cropped and resized the Flv video, you need to export it by clicking the Export button on the top center part. There are different settings available for exporting the video. Click on the Settings button near the resolution and you’ll be shown some detailed preferences for exporting. Every setting here like frame rate, resolution, bitrate, etc. can affect the size of the output video.
Filmora Video Editor really makes the task of editing and resizing FLV videos easier, simpler, and faster. Since you now know the steps, it’s time you try it and resize your own FLV videos with this best FLV Editor for Windows and Mac.
Alternative Way to Resize FLV Videos on Windows
In case you want to try something different than Filmora, here are two alternative software (one paid and another free) that you can use to resize your FLV Videos on Windows:
- Movavi Video Editor Plus
Movavi Video Editor Plus is one of the best easy-to-use video editors that can help you to resize FLV videos as well as edit them on Windows. Its interface and functionalities are somewhat similar to that of the Filmora Video Editor. This is a paid software available for download on both Windows and Mac but you can try it for free with their 7 days trial version.
Steps to resize FLV videos on Windows with Movavi Video Editor:
- Install Movavi Video Editor and run the software on your PC. Then you should automatically be inside a new project in it.
- Import the FLV video file you want to resize through the ‘File Import’ tab on the left and drag it to the timeline.
- To resize the aspect ratio, expand the resolution options near the preview screen above the export button and select the preferred ratio.
- To crop or resize the video, select the clip in the timeline and use the crop tool to make adjustments as you wish. Then hit Apply to save changes.
- After the video is ready, export it with the Export button on the right side of the screen. Then choose your preferred settings for output and click on Start after which your video will be rendered and saved to your PC.
- VSDC Free Video Editor
VSDC Free Video Editor is another alternative to Filmora for resizing FLV videos on Windows. It is a free video editor that packs a wide range of editing features without any restrictions. However, it does have a paid version with some advanced features and hardware acceleration.
Steps to resize FLV videos on Windows with VSDC Free Video Editor:
- Install and open VSDC video editor on your PC. Then create a new project with preferred settings through the ‘Projects’ tab on the top left corner.
- Import the video file into the project by dragging and dropping it directly into the timeline.
- To resize the aspect ratio, click on the Projects Explorer and click on your project name. Then in the Properties windows on the right, manually adjust width, height, resolution, etc. according to your preferences.
- To crop and reposition your video, select the clip in the timeline and go to the Editor tab on the top. Then use the crop tool and adjust your video accordingly.
- Finally export your design through the Export project tab at the top with preferred settings.
Alternative Way to Resize FLV Videos on Mac
Wondershare Filmora Video Editor is also available for Mac operating system which is recommended to resize FLV videos but if you want to try out some other alternatives, then below are the two ways to resize FLV videos on Mac:
- VideoProc Converter
VideoProc is a powerful video editor/ converter that helps you edit, convert, and resize any kind of video. It also supports a wide range of codecs and video formats including flv. It is a paid software but you can also try their free trial version with some limitations.
Steps to resize FLV videos on Mac with VideoProc:
- Launch VideoProc on a Mac device and go inside the Video
- Add files in VideoProc by drag and drop method or directly through the ‘Add Video’ option.
- Then click on the Options (codec) on the right side of the video and change the resolutions and aspect ratio of the video as you want. You can also manage export settings like quality, codec, fps, bitrate, etc. from this tab.
- Then go to the Crop section inside the Edit Video tab and crop the video as you like with preview and different other options.
- Finally click Done to go back and hit the Run This’ll start rendering the video and will save it to your Mac device.
- Shotcut
Shotcut is another alternative to Filmora Video Editor for resizing FLV videos on Mac. It is a free, open-source, and cross-platform video editor that has a sleek and intuitive interface with many useful editing features which really makes it suitable for both beginners as well as advanced editors.
Steps to resize FLV videos on Mac with Shotcut:
- Run the Shotcut program on your Mac after installing it and create a new project.
- Import the Flv video file to the project by drag and drop method into the timeline.
- To change the resolution and aspect ratio of the video, go to the Settings tab, then Video mode, and choose the format you want.
- To crop the video, select the clip in the timeline and go to the Filters Now click on the ‘**+**’ icon and select Size, Position & Rotate under the Favorite section. Then adjust crop settings as you like.
- Finally, go to the Export section at the top and click on Advanced. Then configure the output settings as you like and click on Export File.
2 Ways to Resize FLV Videos on Android
Wouldn’t it be great if you could resize FLV videos on your android device rather than having to open your computer for every small task? Previously, this was a major issue due to a lack of good video editors for android with flv support but that’s no longer the case. Below are two ways to resize FLV videos on android:
- AndroVid – Video Editor, Video Maker
AndroVid is an easy-to-use, full-featured video editor especially developed to edit videos for social media like YouTube, TikTok, Facebook, Instagram, etc. It is not a very popular application with just over 300k+ downloads in Google Play Store, but after testing it out, we thought it deserves to be in this article. It is available for free to download from Google Play Store.
Steps to resize FLV videos on Android with AndroVid Video Editor:
- Open AndroVid Video Editor on an android phone and go inside the Videos
- Now select the FLV video file that you want to resize.
- Inside editor, tap on the Crop tool in the toolbar at the top.
- Then select the preferred Aspect ratio from the top right, reposition the video area and tap on the tick icon to save the video.
- If you need to change the resolution too, click on the three dots at the top right after the video is saved successfully. Then choose the preferred resolution, quality, and format and click on the tick icon to export.
2 Ways to Resize FLV Videos on iPhone
Like Android, you can also resize FLV videos on your iPhone on the go without needing to use your computer. Doing such editing on mobile phones can really save your time and effort, so here are 2 ways for you to resize FLV videos on iPhone:
- Cyberlink Powerdirector
Cyberlink Powerdirector is one of the most popular as well as powerful video editors for Android and iOS. It is a full-featured mobile video editor with over 130M+ downloads on the App Store which allows you to do an advanced level of editing. It is a paid software but also has a free version available for download.
Steps to resize FLV videos on iPhone with PowerDirector:
- Launch the PowerDirector app on your iPhone and create a new project. Unlike other apps, you cannot change the aspect ratio later, so you need to set the aspect ratio you want while creating a new project.
- Now add the FLV video file into the timeline by tapping on the ‘**+**’ icon on the video. Then tap on the play button at the top right to enter the editor.
- To resize the video, select the video clip in the timeline and tap on the pencil icon at the bottom left. Then use different crop tools available to resize your video as you want.
- After you resize the video, tap on the export button on the top right to export it. Then tap on Produce and Share, and produce resized video with preferred settings.
- Splice – Video Editor & Maker
Splice – Video Editor & Maker is a simple yet powerful application that makes it easy to create fully customized and professional-looking videos on iPhone. It is another great app for resizing FLV videos on iPhone with over 70M+ downloads on App Store and it is available for free.
Steps to resize FLV videos on iPhone with Splice:
- Open the Splice app on the iPhone and tap on the ‘**+**’ icon to create a new project.
- Now select the flv video file to add and start the project.
- To resize the video, tap on the gear icon at the top right corner which opens up Project settings from where you can change the aspect ratio.
- To crop the video, select the clip in the timeline and tap on the Crop option in the toolbar. You can crop and reposition the video from there.
- Then click on the Export icon at the top right corner to export the video with preferred configurations.
2 Ways to Resize FLV Videos Online
Resizing is not that big of a task and you might just want to quickly resize your Flv video and share it. So why bother installing and running large video editing programs on your computer or even mobile phones when you can easily resize your videos in the web browser? Yes, you read that right, and below are the 2 ways for you to resize FLV videos online:
- io
Veed is a simple online video editing tool that you can access from any device with the help of a web browser. It can help you resize your Flv videos easily within just a few clicks. It has a clean and beautiful interface with a responsive design which provides you with a good editing experience while using it. It is a paid tool but you can also try it for free before purchasing it.
Steps to resize FLV videos online with Veed.io:
- Go to veed.io on your web browser and click on ‘Upload Your Video’ to get started without any account.
- Now upload the FLV video or you can directly drag and drop the video there.
- After you upload the video, you’ll be taken inside the Veed editor. To change the aspect ratio, go to the Size section inside Project Settings and choose the size you want to resize to.
- To crop the video, select the clip in the timeline and directly resize the video from the preview area. And you can also use settings like ‘Fill the canvas’ and ‘Fit the canvas’ at the left side for ease.
- Then click on the Export button at the top right corner to open Export settings. Configure the settings as you like and click on ‘Export Video’ to render and download the video.
- Clideo
When it comes to resizing or editing videos online, Clideo is one of the best tools you can rely on. Like Veed.io, it has a clean and responsive interface and supports many video formats including flv. Clideo is free to use but also comes with various subscription plans for extra functionalities.
Steps to resize FLV videos online with Clideo:
- Go to clideo.com/resize-video and upload your video through ‘Choose file’ button.
- To resize the aspect ratio, choose your desired formats in the ‘Resize for’ section. You can also manually set the aspect ratio.
- Then just below that, you’ll find various cropping options. Use them to crop or resize the video as you like.
- Finally, click on the Export button at the bottom right corner to export the video. You can download the video or can directly save to cloud storage like Drive, Dropbox, etc.
FAQs about Resizing FLV Video
Here are some of the Frequently Asked Questions (FAQs) related to resizing FLV videos that you might be interested in:
- How do I make FLV files smaller?
You can make FLV files smaller with the help of any video editor that supports Flv video format by cutting and cropping out unnecessary parts, decreasing the resolution, and bitrate, and converting flv into another lighter file format.
- Which video editors support FLV file format?
There are few video editors like Filmora, Movavi, VSDC, etc. that support the FLV file format. But when it comes to editing FLV videos, Filmora Video Editor is the best choice.
- How do I view an FLV file?
FLV is one of the oldest video formats due to which most new and modern video players don’t recognize it or can’t play it. However, there are few programs like VLC media players which can help you view an FLV file. Or you can also convert the FLV file into other supported video formats with the help of a video converter.
- Can I convert a horizontal FLV video into a vertical one?
Yes, and that’s a piece of cake when you use Filmora Video Editor or other similar video editors. You just need to change the aspect ratio of the video or the project from horizontal (generally 16:9) to vertical (generally 9:16).
- Can I resize FLV video files on my mobile?
Though video editors on mobile are not as powerful as those on PC, there are some that are still capable enough to let you easily resize FLV video files on mobile devices. Some examples are Splice, Powerdirector, etc.
Also read:
- New Replacing Sky in Your Pictures Using Online and Offline Tools
- In 2024, Looking for a Legitimate Tutorial to Create and Add Text Effects in Adobe Premiere Pro? Here Are the Simple Steps for Premiere Pro Text Effects and Find an Alternative Way
- New 2024 Approved Zoom In and Out on Discord (Desktop + App + Browser Solutions)
- New In 2024, What Is Motion Blur in the Game? Do You Really Need It?
- In 2024, Whats an AV1 Format and How Does It Impact Your Life?
- In 2024, Lets Create a New Premiere Pro Project, Import some Video, and Control Video Playback Speed. Also, Find Alternative Software (WonderShare Filmora) to Control Playback Speed in Minutes
- New Linkedin Posts Can Be Made Engaging by Using the Emojis. This Article Will Tell You Its Importance and Different Ways to Add Them
- How to Vlog? A Ultimate Guide for Beginners
- 2024 Approved Mastering DaVinci Resolve Scopes A Comprehensive Guide
- New In 2024, How to Make A Fantastic Café Vlog
- Updated How to Add Filter to Video in Premiere Pro, In 2024
- New How To Use Motion Blur On Video Star for 2024
- Updated Discover 8 Top-Rated Video and Photo Merger Tools for Desktop, Mobile, and Online Use. Elevate Your Media Game and Create Stunning Visuals with Ease
- Updated In 2024, Step by Step to Cut Videos in Lightworks
- Updated What Anime Character Are You Look Like for 2024
- 2024 Approved The Most Efficient Ways to Manage Your Timeline
- New Videos Look Better when Edited Professionally. If Youre Looking to Edit Recorded Video with a Pro-Level Editing Then Weve Got You Covered. Learn About Editing Recorded Videos with the Best Toolkit Here
- New 2024 Approved A Guide to Create Your Own LOL Montage Video
- New 2024 Approved What Anime Character Are You Look Like?
- Updated When It Comes to Video Editing, There Are Countless Software Options Available on the Market. However, Not All of Them Come with Useful Masking Tools. In This Article, We Will Be Discussing the Top 8 Video Editor with Useful Masking Tools for 2024
- In 2024, Ultimate Guide from Oppo Find X6 FRP Bypass
- Unova Stone Pokémon Go Evolution List and How Catch Them For Honor V Purse | Dr.fone
- Home Button Not Working on Realme Narzo N53? Here Are Real Fixes | Dr.fone
- 7 Fixes for Unfortunately, Phone Has Stopped on Infinix Zero 30 5G | Dr.fone
- How To Do Oppo A58 4G Screen Sharing | Dr.fone
- How To Restore Missing Call Logs from Oppo Reno 10 Pro+ 5G
- In 2024, Complete Guide on Unlocking Apple iPhone 15 Pro with a Broken Screen?
- In 2024, 10 Fake GPS Location Apps on Android Of your Vivo Y100 | Dr.fone
- 3 Effective Methods to Fake GPS location on Android For your Realme C67 4G | Dr.fone
- How to Change your Apple iPhone 6s Location on Twitter | Dr.fone
- Can’t view MKV movies content on Galaxy A25 5G
- New In 2024, Narakeet Review Text to Speech Convenient Voice Maker
- 4 Ways to Unlock Apple iPhone 15 Pro Max to Use USB Accessories Without Passcode
- Title: 2024 Approved How to Add Freeze Frame to Your Video From Any Device?
- Author: Morgan
- Created at : 2024-05-19 05:11:51
- Updated at : 2024-05-20 05:11:51
- Link: https://ai-video-editing.techidaily.com/2024-approved-how-to-add-freeze-frame-to-your-video-from-any-device/
- License: This work is licensed under CC BY-NC-SA 4.0.
