:max_bytes(150000):strip_icc():format(webp)/google-logo-dbc6703838ab40ffac436f7f360b79f7.png)
2024 Approved How to Fade in Text in Adobe Premiere Pro

How to Fade in Text in Adobe Premiere Pro
Every video is unappealing until you edit the video properly. Editing videos not only means trimming out unnecessary parts but also adding effects and animations. There are certain effects and transitions that are commonly used in most videos. Fade in effect is widely used in texts, objects, as well as clips. Fade in effect is very eye-soothing that does not distract the audience from the overall video content.
Fade in effect is available in all video editors. Among video editors, Adobe Premiere Pro is one of the best professional video editors. However, the learning curve of Premiere Pro is steep and hence, you have to know the exact steps to add fade in text Premiere Pro. We will illustrate how to apply fade in text effect Pro as well as add fade in and fade out transition effects in Premiere Pro. We will also state an alternative way to fade in texts in your videos.
Part 1. Fade in text in Premiere Pro with Opacity option
If you have added any text or any graphical object in your video on Premiere Pro, you can apply fade in effect to your text and object easily. When you add fade in effect to your text or object, they slowly appear on the screen which is very soothing to watch instead of sudden and abrupt appearance. Here are the steps on how to fade text in Premiere Pro.
Step1 You must have your video clip as well as text clip on the Timeline of Premiere Pro. Make sure that you add text from Essential Graphics panel. Select the text clip from the Timeline to proceed.

Step2 Go to Effect Controls and click on Text option to expand it. Click on Opacity option from the dropdown menu.

Step3 Put the timeline cursor at the beginning of the selected text clip. Thereafter, make the Opacity value to zero. Click on Stopwatch icon beside Opacity to add a keyframe.

Step4 Put the timeline cursor at that point in the clip where you want the text to appear completely. Now make the Opacity value to 100. Click on Stopwatch to add a keyframe here.

Step5 Play the video to watch the fade in effect on your selected text. You can move the keyframes to speed up or slow down fade in effect.
Part 2. Make fade in or out with transition effects
If you have multiple video clips or scenes, you should add fade in and fade out transition effects so that the transition from one clip to another or one scene to another is smooth. The fade in or fade out effect for video clips look similar to fade text Premiere Pro. In fact, you can use the steps of how to fade in text in Premiere Pro to get the job done. But there is an easier way available with Video Transitions option. Here are the steps on how to apply fade in or out effect on your video clips in Premiere Pro.
Step1 You should have multiple video clips added to Timeline. Select the video clip to which you want to apply Fade in effect.
Step2 Go to Effects panel and click on Video Transitions option.

Step3 Click on Dissolve and from the dropdown list, drag and drop Film Dissolve to the beginning of the selected video clip for fade in effect.

Step4 Click on the added effect on Timeline to adjust speed, duration, and alignment of the effect.

Step5 Play the video to ensure that the effect looks perfect. Therefore, go to File> Share> Export File to save the video.
You can place the transition at the end of the video for fading out effect. Instead of Film Dissolve, you can use Crossfade or Dip to Black effect for fade in and fade out effect on video clips.
Part 3. Alternative way to fade in text in videos
If you do not have Adobe Premiere Pro or you find the steps difficult to fade in text in videos using Premiere Pro, we recommend Wondershare Filmora . Filmora is a professional video editor that is available for Windows as well as Mac users. There is a wide range of video effects available in Filmora in comparison to Premiere Pro. Most importantly, Filmora is super easy and intuitive to use, and even amateur users can use it comfortably. Here are the steps to fade in text in videos using Filmora.
Free Download For Win 7 or later(64-bit)
Free Download For macOS 10.14 or later
Step1 Download and install Filmora . Launch Filmora and click on New Project option.

Step2 Import the video clip under Project Media folder. Drag and drop the video clip to Timeline.

Step3 Go to Titles located at the top and drag and drop any title style on Timeline. Double-click on the Title clip on Timeline and type in your required text in the Viewer. You can stretch the Title clip to extend its duration as per your requirement.

Step4 Double-click on Title clip again on the Timeline and go to Text> Animation tab located at the top-left corner. Scroll down to go to Fade1 option and double-click Fade1 to apply it to your text.
Step5 You can go to settings by clicking on Advanced button and adjust parameters such as speed and duration of the fade effect for better visibility.
Step6 Once you are done, play the video and thereafter, click on Export to save the video on your hard drive.
Conclusion
We have stated the steps on how to fade text in Premiere Pro. You can use the same steps to apply the effect to graphical objects. We have also illustrated how to apply fade in and fade out effects between video clips and scenes using transition effects. If you are looking for an alternative and easier way to fade in texts in your videos, we recommend Wondershare Filmora .
Free Download For macOS 10.14 or later
Step1 Download and install Filmora . Launch Filmora and click on New Project option.

Step2 Import the video clip under Project Media folder. Drag and drop the video clip to Timeline.

Step3 Go to Titles located at the top and drag and drop any title style on Timeline. Double-click on the Title clip on Timeline and type in your required text in the Viewer. You can stretch the Title clip to extend its duration as per your requirement.

Step4 Double-click on Title clip again on the Timeline and go to Text> Animation tab located at the top-left corner. Scroll down to go to Fade1 option and double-click Fade1 to apply it to your text.
Step5 You can go to settings by clicking on Advanced button and adjust parameters such as speed and duration of the fade effect for better visibility.
Step6 Once you are done, play the video and thereafter, click on Export to save the video on your hard drive.
Conclusion
We have stated the steps on how to fade text in Premiere Pro. You can use the same steps to apply the effect to graphical objects. We have also illustrated how to apply fade in and fade out effects between video clips and scenes using transition effects. If you are looking for an alternative and easier way to fade in texts in your videos, we recommend Wondershare Filmora .
Best Android Apps For Creating Slow Motion Videos
Creating slow-motion videos has been a trend followed by millions across social platforms. For designing the perfect video as a slow-motion video, people seek a good option. Android slow motion video apps are one remedy to this requirement. Google Play Store offers a diversity of applications for making video slow motion Android.
This article is all about figuring out the top Android applications that can feature the best slow motion. For that, go through the content provided to find out the most suitable slow motion video in Android.
Slow Motion Video Maker Slow your video’s speed with better control of your keyframes to create unique cinematic effects!
Make A Slow Motion Video Make A Slow Motion Video More Features

Part 1. Top 10 Android Apps For Slowing Down Motion in Video
When searching for a slow motion video app for Android, there are many options to go by. Provided next is a composite list of mobile apps that serve the purpose of slow-motion video creation:
- Slow Motion Video – Fast&Slow Mo
- Slow Motion Video Maker
- Video Editor & Maker – InShot
- Video Maker & Editor - Vidma
- VivaVideo - Video Editor&Maker
- VivaVideo - Video Editor&Maker
- VivaVideo - Video Editor&Maker
- VivaVideo - Video Editor&Maker
- VivaVideo - Video Editor&Maker
- VivaVideo - Video Editor&Maker
1. Slow Motion Video – Fast&Slow Mo
This Android slow-motion video converter offers an intuitive user interface and simple functions. Users can craft slow motion via drag and adjust the action of the slider in a downward direction. The video’s playback speed is customizable, ranging from 0.25x to 4.0x. Additionally, the software empowers users to apply slow motion to specific video segments to enhance precision.
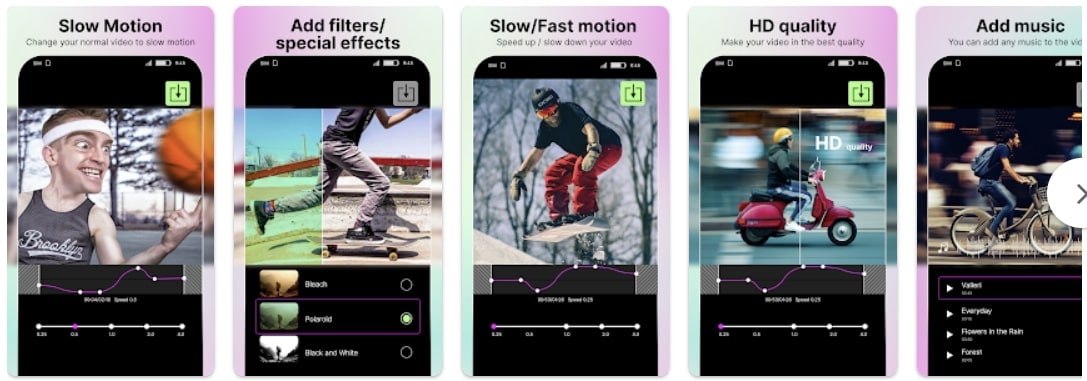
Key Features
- The application offers pre-installed filters and special effects to elevate visual aesthetics.
- It preserves video quality and transforms video resolution to high definition (HD).
- Incorporate high-quality music into your videos with its built-in music collection.
2. Slow Motion Video Maker
This slow-mo video Android editor offers advanced functionalities to craft perfect videos. With its timeline editing interface, it simplifies the application of slow-motion effects to specific scenes. The application showcases three distinct slow-motion speed options: 0.5x, 0.3x, and 0.25x, ensuring perfection.
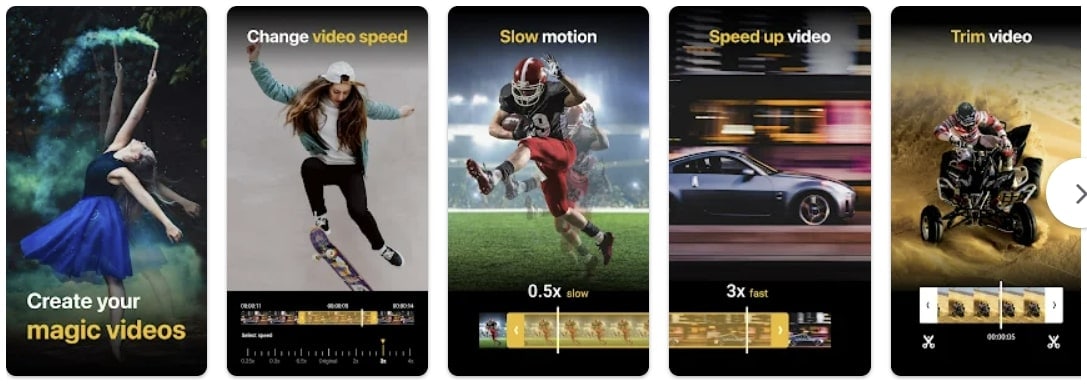
Key Features
- Accelerate your videos up to 4x with its high-speed options and get high-quality results.
- The video trimming feature and timeline editing enable accurate segmentation of a video.
- It is equipped with pre-existing music tracks to create the perfect slow-motion video on Android.
3. Video Editor & Maker - InShot
Embark upon the journey to create video slow motion Android with this multifunctional app. It extends a straightforward approach to slow video speed through slider manipulation. Timeline editing and selective playhead options empower users to adjust the speed of specific segments. This exceeds the conventional approach of a slo-mo creation, unlocking creative possibilities.
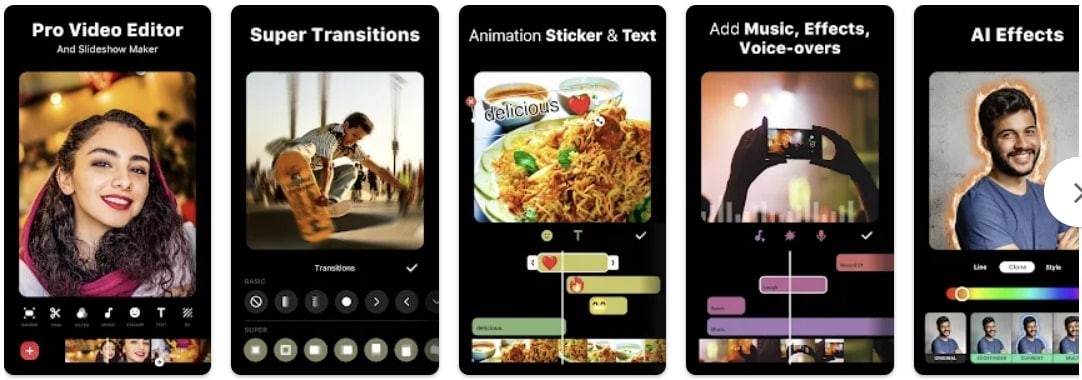
Key Features
- Elevate the artistic expression of videos by integrating a wide range of animations and text.
- Enhance your reels with a collection of transition effects like Fade in, Fade out, basics, and more.
- This editor has AI capabilities and background removal options with a heightened level of accuracy.
4. Video Maker & Editor - Vidma
This slow-mo app for Android facilitates individuals seeking a video editor capable of producing convincing results. It acts as a Velocity Edit Maker, offering diverse playback speed and positioning controls. The interface resembles a velocity graph, providing a visual representation of speed adjustments.
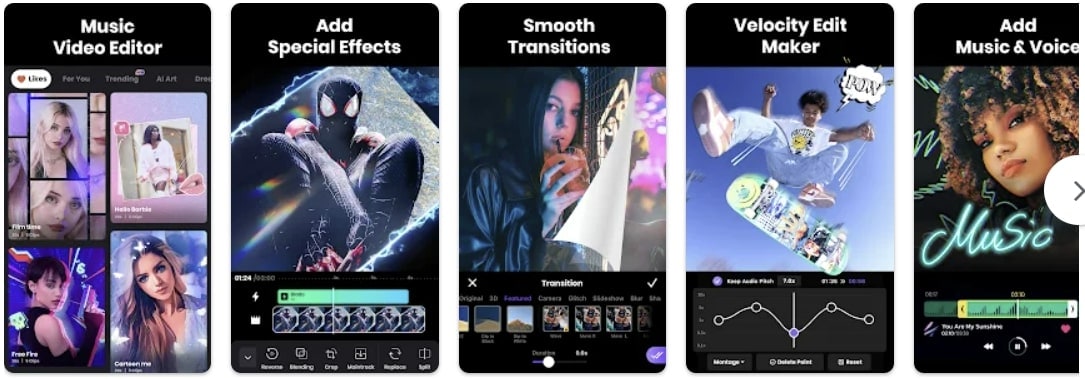
Key Features
- Introduces an automated “Keep Audio Pitch” option, ensuring high-quality audio.
- Enhance the creative factor in your images and videos with its built-in text and stickers.
- Comes with a variety of visual filters with an intensity control option.
5. VivaVideo - Video Editor&Maker
If you are seeking the best Slomo app for Android, this editor provides diverse speed-setting presets for creating slow-motion and fast-motion effects. Among presets such as Montage, Hero, Bullet, and others, it offers a Custom preset option to help you adjust everything accordingly. With its ability to apply speed settings at specific periods, your slow motions are bound to be perfect.
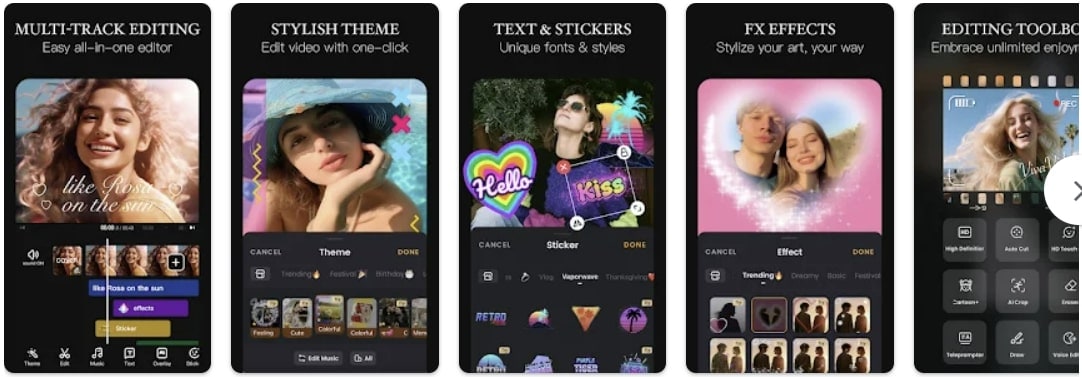
Key Features
- The non-uniform timeline editor allows you to incorporate multiple assets at once.
- A range of texts, animations, themes, effects, and music tracks are in its Stock Library.
- This video maker also incorporates a Voice Editor to uphold the audio track’s quality.
6. Smart Video Crop - Video Cut
Although this video maker is specified for resizing videos, it also offers speed change options. To make a video slow motion on Android, you can change both playback speed and framerate. Once you have edited your video, you can make changes to the export options. In addition, the application updates its mechanism and shows compatibility with Android 4.4 and higher versions.

Key Features
- The application shows multi-format video support, i.e., MP4, 3GP, and AVI.
- Proposes multiple video crop options like 1:1, 4:3, 16:9, and 3:2.
- You can select to crop the whole video or apply the crop to a specific part of it.
7. Video Editor - Video.Guru
What would be better than a slow-motion video app for Android that can change speed and enhance video? To access this functionality, users need to switch to its PRO version. The speed change options that it offers are from 0.2x to 100x, with 0.2x being the slowest. In addition, the tool doesn’t decline video quality but enhances it to 4K.
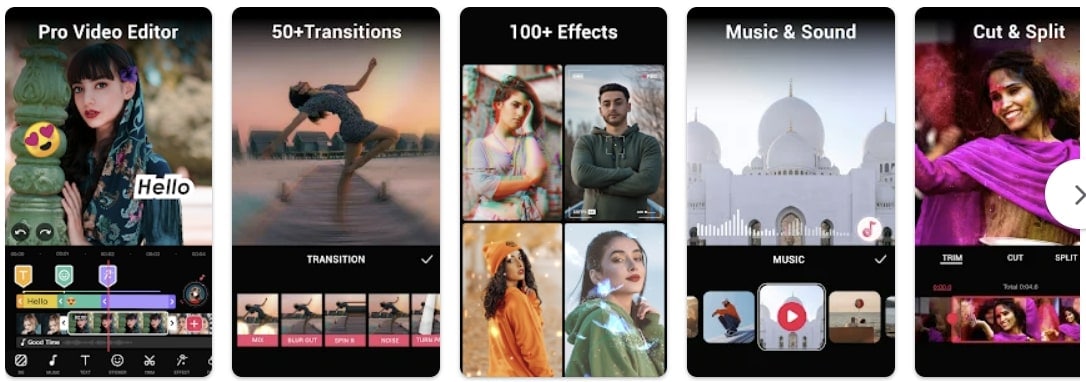
Key Features
- If you are a YouTuber, then this editor affects and filters for Vloggers and offers to remove Watermark.
- You can crop a video into available ratios while keeping its HD quality.
- Can add 30+ video transition effects and incorporate music to enhance their quality.
8. Slow Motion - Slow Mo, Fast Mo
Make video slow motion Android effortlessly with this application, which is specified for speed change. It offers 10 playback speed options for creating slow motions with precision. The playback speed ranges from 0.95x to 0.1x. Once you have created a slow motion with it, you can easily preview it to observe if any changes are needed.
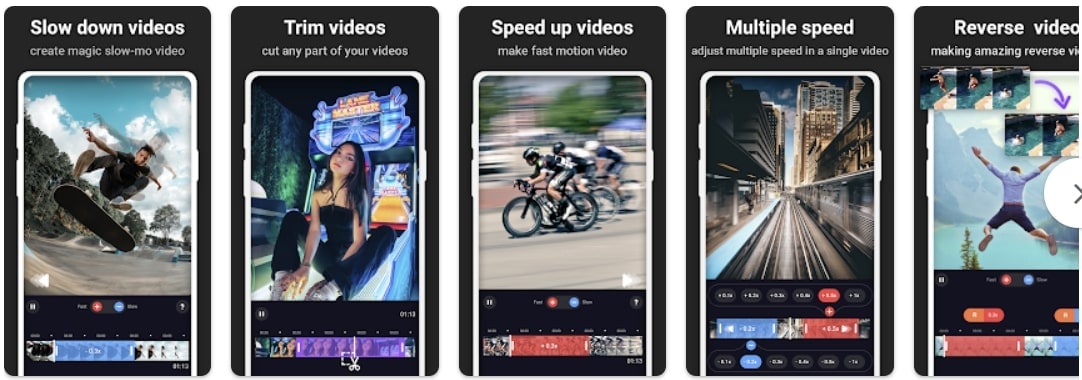
Key Features
- Along with precise slo-mo options, it also offers extensive fast motion option speed ranges.
- You can mix and match both fast and slow-motion effects in a video at once.
- It also offers a watermark removal option to avoid any visual weakening.
9. Slow Motion Video FX-camera
Not only video frame rates but also slow down your speech with this slow-motion app for Android. You can add dramatic or funny effects to your voices using the application. It offers to slow down video speed up to 0.25x. It uses the standard slider approach to manipulate the playback speed of your videos. You can apply the slow-mo effect to the overall video or to some specific parts of it.
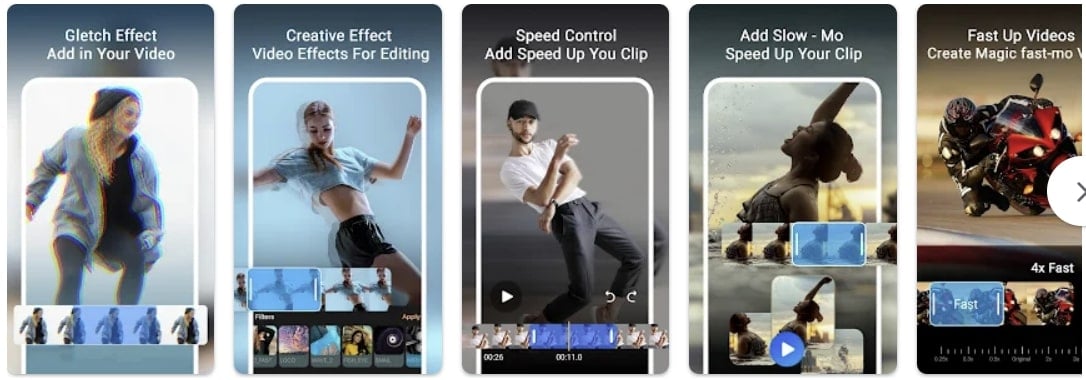
Key Features
- An intuitive user interface with a velocity graph to observe the changes in speed and duration.
- Transform your low-quality videos to HD quality with this slow-motion app for Android.
- Use the application’s built-in music library to incorporate music tracks.
10. Slow Motion
Decrease your video speed up to 1/4th of its original speed with this Android slow-motion video editor. The speed options are customizable, and you can apply them to multiple video scenes. As the name indicates, the tool is specifically fashioned for slow-motion effects; hence, it offers an accessible user interface.

Key Features
- Export your videos in landscape or portrait mode; the choice is yours.
- In any mode, the application retains video quality and exports it in full resolution.
- It is excellent to slow down YouTube videos as there is no watermark addition.
Bonus Part: Wondershare Filmora: A Perfect Desktop Solution To Slow Down Video
Making slow motion videos in Android is like keeping creativity in your hand anywhere. This facility is good for basic effects but not for professional and advanced slow-motion effects. That’s where you need to shift to a more equipped alternative, which is Wondershare Filmora . Using Filmora means turning imagination into the real picture.
It is a video editing platform with artificial intelligence integration. You can create slow-motion videos with automation in Filmora. The interactive interface of Filmora caters to all users’ needs in simple steps. Freelancers, content creators, and educationists use this platform for diverse needs.
Free Download For Win 7 or later(64-bit)
Free Download For macOS 10.14 or later
How to Make Video Slow Motion Android in Filmora
As you are familiar with Filmora, let’s make a slow-motion video. It is quite easy if compared with Android slow-motion video making. Without further delay, delve into the given step-by-step guide:
Step 1Import Your Project After Successful Launch
Unleash your creativity in Filmora after downloading it. In this regard, you must go to Wondershare Filmora’s official site. Open the main interface of Filmora and tap “New Project” to enter the editing window. To start working, import a file in the media panel and drag it into the timeline section.
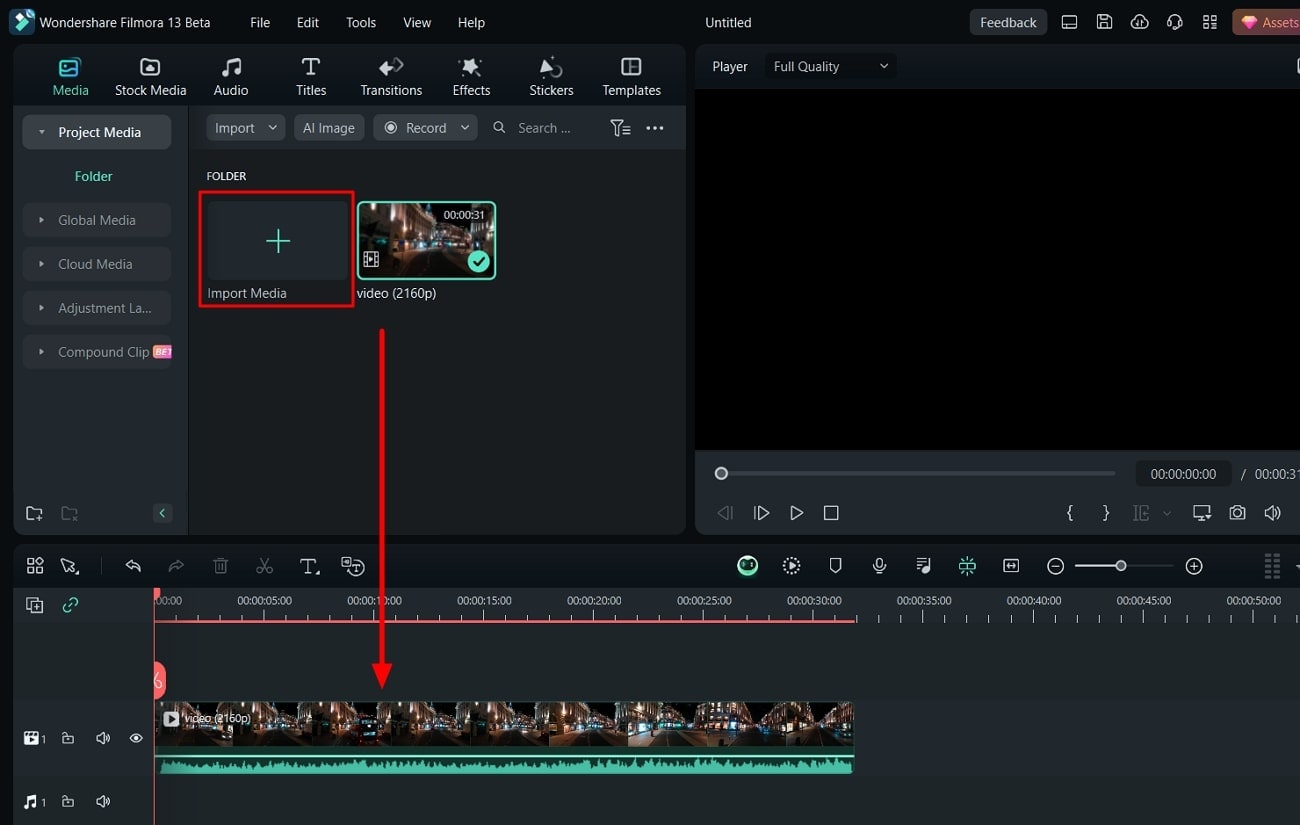
Step 2Slow Down the Video with Uniform Speed
After successful importing, right-click on your video and an extended list. Choose the “Uniform Speed” option from the list and find an editing panel towards your right. You will see the slider under the speed option. Hold on to the circle and drag it to the left if you want to slow down the videos. Move downward and toggle the “Ripple Edit” and “Maintain Pitch” for good results.
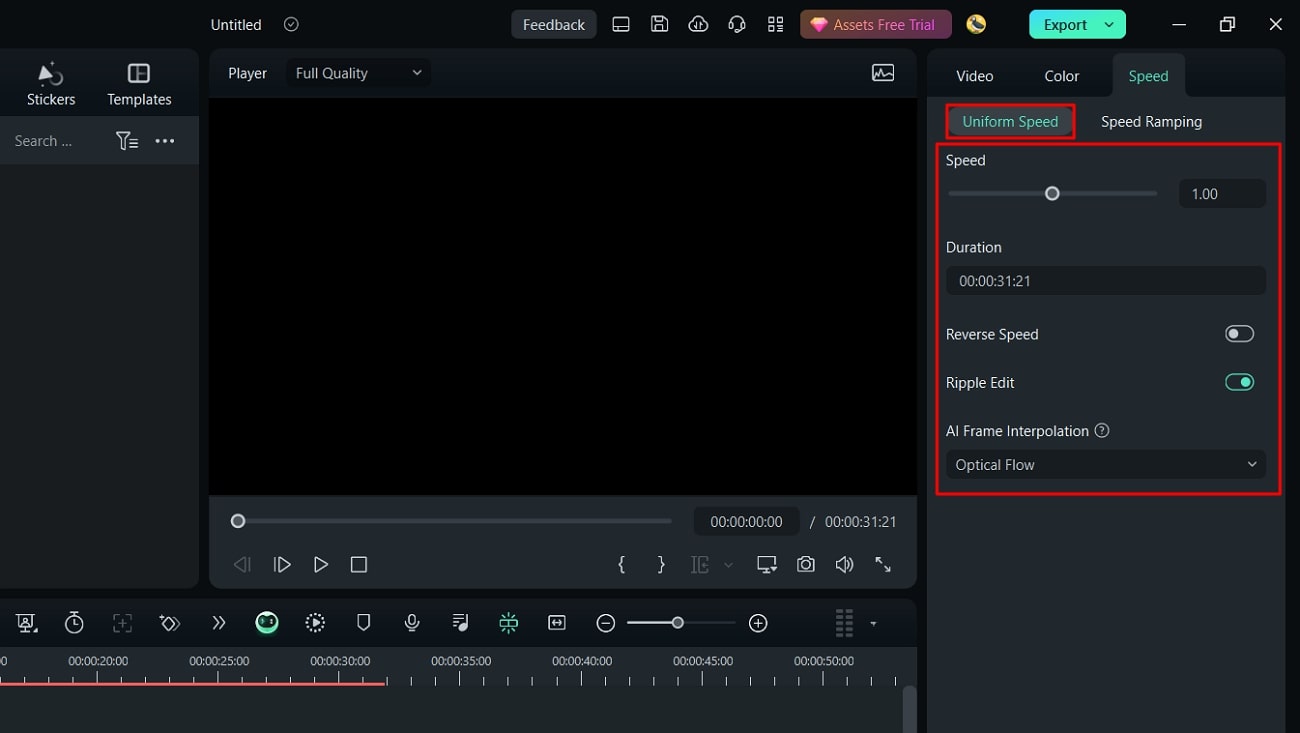
Step 3Enhance Video with Optical Flow
Towards the end, you will find the “AI Frame Interpolation.” Click on its downward symbol and select the “Optical Flow” option from the list. It will automatically boost your video quality. You can choose the “Reverse Speed” option if your video is required.
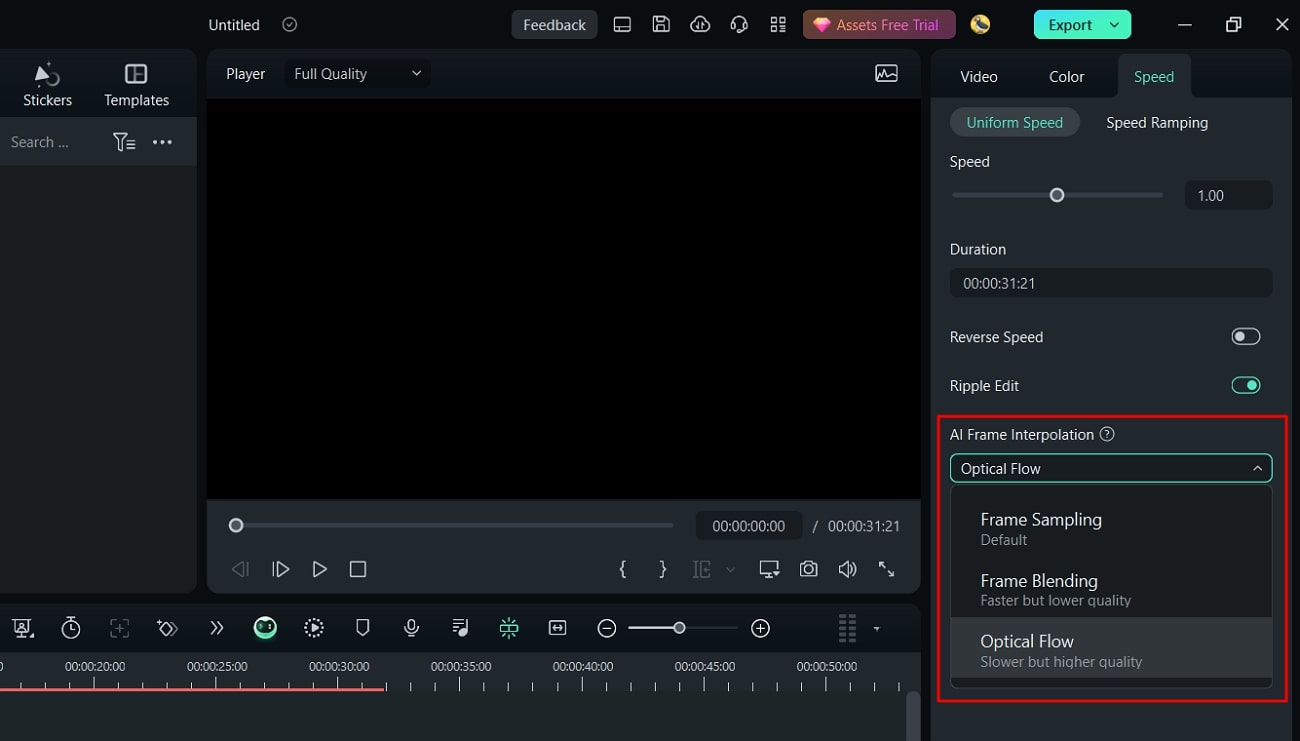
Step 4End Editing and Move to Export
Now, it’s up to you if you want to continue editing with Filmora or want to export the media. To end editing, you can hit the “Export” button from the top right.
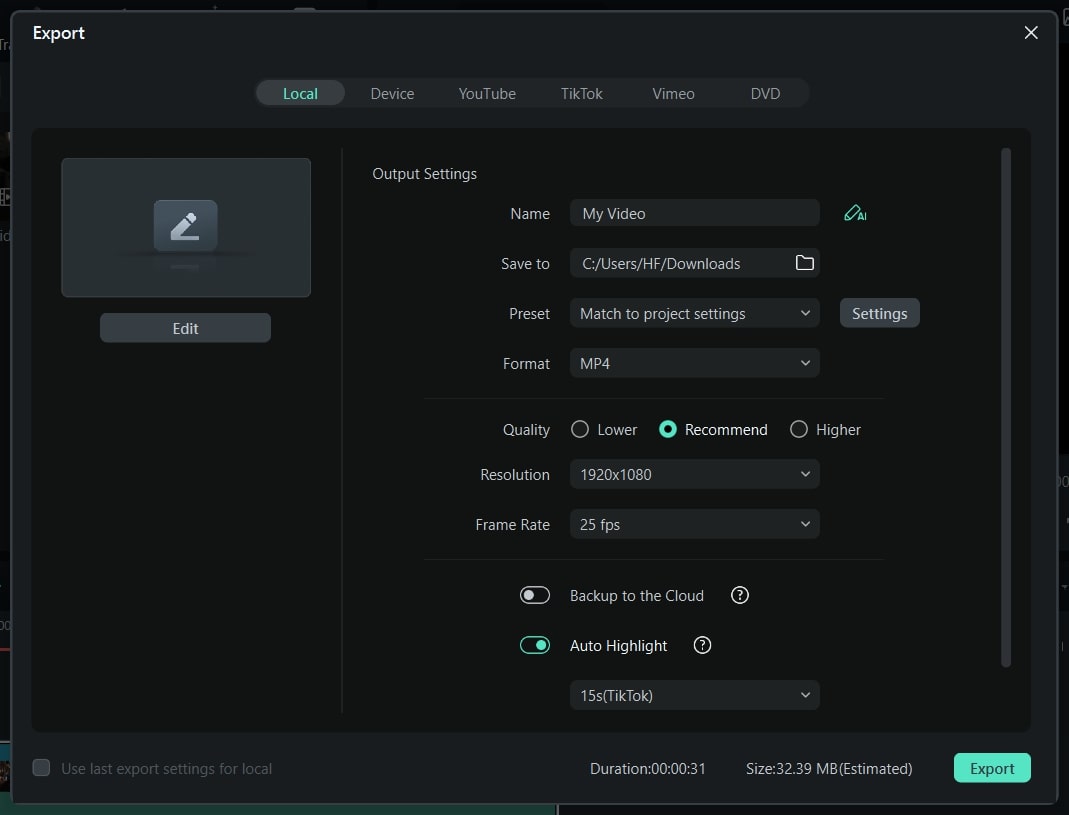
Remarkable Key Functionalities of Filmora
If you want to understand the amazing features of Filmora better, this section is for you. Keep reading and find some integral functionalities of Filmora. This platform offers more than just creating slow-motion video Android:
1. AI Smart Cutout
Artificial intelligence in Filmora can amazingly assist you in making flawless videos. Unlike other tools, Filmora allows you to remove unwanted objects, people, and icons from videos. Besides, users can refine their cutout frame by frame using its’ advanced editing options. You can preview the modified media in four ways, such as Transparency grid and Alpha Mode.
2. AI Audio Stretch
This AI-based feature is new to the market and saves hours of rippling and cutting audio. It aims to match the length of your audio with videos. From Vlog videos to blockbuster audio effects, you can use this feature almost everywhere. This option allows you to re-time your audio tracks after detecting vocals in the music.
3. Speech-to-Text
Video captions make the content accessible to international viewers. That’s where Filmora proves vital in removing language barriers. It supports over 26 languages and adds subtitles to your videos with one click. This built-in feature in Filmora recognizes speech swiftly to guarantee accuracy. You can also export your SRT file of subtitles to make any edits.
4. AI Portrait
Beautify faces in your videos to set a new trend on social media with Filmora. To do so, an AI Portrait feature can automatically detect faces to apply changes. You can choose a sticker effect from more than 70 AI portrait AR stickers. Besides, it can remove video backgrounds by retaining the human beings there.
Conclusion
With all marked details, this article concludes with a note that there are always different calibers of tools that we can work with. While discovering the best Android application in the market, you got to know many slow motion videos on Android. Along with that, we also discussed DemoCreator as a comprehensive solution to the entire use of mobile apps.
Make A Slow Motion Video Make A Slow Motion Video More Features

Part 1. Top 10 Android Apps For Slowing Down Motion in Video
When searching for a slow motion video app for Android, there are many options to go by. Provided next is a composite list of mobile apps that serve the purpose of slow-motion video creation:
- Slow Motion Video – Fast&Slow Mo
- Slow Motion Video Maker
- Video Editor & Maker – InShot
- Video Maker & Editor - Vidma
- VivaVideo - Video Editor&Maker
- VivaVideo - Video Editor&Maker
- VivaVideo - Video Editor&Maker
- VivaVideo - Video Editor&Maker
- VivaVideo - Video Editor&Maker
- VivaVideo - Video Editor&Maker
1. Slow Motion Video – Fast&Slow Mo
This Android slow-motion video converter offers an intuitive user interface and simple functions. Users can craft slow motion via drag and adjust the action of the slider in a downward direction. The video’s playback speed is customizable, ranging from 0.25x to 4.0x. Additionally, the software empowers users to apply slow motion to specific video segments to enhance precision.

Key Features
- The application offers pre-installed filters and special effects to elevate visual aesthetics.
- It preserves video quality and transforms video resolution to high definition (HD).
- Incorporate high-quality music into your videos with its built-in music collection.
2. Slow Motion Video Maker
This slow-mo video Android editor offers advanced functionalities to craft perfect videos. With its timeline editing interface, it simplifies the application of slow-motion effects to specific scenes. The application showcases three distinct slow-motion speed options: 0.5x, 0.3x, and 0.25x, ensuring perfection.

Key Features
- Accelerate your videos up to 4x with its high-speed options and get high-quality results.
- The video trimming feature and timeline editing enable accurate segmentation of a video.
- It is equipped with pre-existing music tracks to create the perfect slow-motion video on Android.
3. Video Editor & Maker - InShot
Embark upon the journey to create video slow motion Android with this multifunctional app. It extends a straightforward approach to slow video speed through slider manipulation. Timeline editing and selective playhead options empower users to adjust the speed of specific segments. This exceeds the conventional approach of a slo-mo creation, unlocking creative possibilities.

Key Features
- Elevate the artistic expression of videos by integrating a wide range of animations and text.
- Enhance your reels with a collection of transition effects like Fade in, Fade out, basics, and more.
- This editor has AI capabilities and background removal options with a heightened level of accuracy.
4. Video Maker & Editor - Vidma
This slow-mo app for Android facilitates individuals seeking a video editor capable of producing convincing results. It acts as a Velocity Edit Maker, offering diverse playback speed and positioning controls. The interface resembles a velocity graph, providing a visual representation of speed adjustments.

Key Features
- Introduces an automated “Keep Audio Pitch” option, ensuring high-quality audio.
- Enhance the creative factor in your images and videos with its built-in text and stickers.
- Comes with a variety of visual filters with an intensity control option.
5. VivaVideo - Video Editor&Maker
If you are seeking the best Slomo app for Android, this editor provides diverse speed-setting presets for creating slow-motion and fast-motion effects. Among presets such as Montage, Hero, Bullet, and others, it offers a Custom preset option to help you adjust everything accordingly. With its ability to apply speed settings at specific periods, your slow motions are bound to be perfect.

Key Features
- The non-uniform timeline editor allows you to incorporate multiple assets at once.
- A range of texts, animations, themes, effects, and music tracks are in its Stock Library.
- This video maker also incorporates a Voice Editor to uphold the audio track’s quality.
6. Smart Video Crop - Video Cut
Although this video maker is specified for resizing videos, it also offers speed change options. To make a video slow motion on Android, you can change both playback speed and framerate. Once you have edited your video, you can make changes to the export options. In addition, the application updates its mechanism and shows compatibility with Android 4.4 and higher versions.

Key Features
- The application shows multi-format video support, i.e., MP4, 3GP, and AVI.
- Proposes multiple video crop options like 1:1, 4:3, 16:9, and 3:2.
- You can select to crop the whole video or apply the crop to a specific part of it.
7. Video Editor - Video.Guru
What would be better than a slow-motion video app for Android that can change speed and enhance video? To access this functionality, users need to switch to its PRO version. The speed change options that it offers are from 0.2x to 100x, with 0.2x being the slowest. In addition, the tool doesn’t decline video quality but enhances it to 4K.

Key Features
- If you are a YouTuber, then this editor affects and filters for Vloggers and offers to remove Watermark.
- You can crop a video into available ratios while keeping its HD quality.
- Can add 30+ video transition effects and incorporate music to enhance their quality.
8. Slow Motion - Slow Mo, Fast Mo
Make video slow motion Android effortlessly with this application, which is specified for speed change. It offers 10 playback speed options for creating slow motions with precision. The playback speed ranges from 0.95x to 0.1x. Once you have created a slow motion with it, you can easily preview it to observe if any changes are needed.

Key Features
- Along with precise slo-mo options, it also offers extensive fast motion option speed ranges.
- You can mix and match both fast and slow-motion effects in a video at once.
- It also offers a watermark removal option to avoid any visual weakening.
9. Slow Motion Video FX-camera
Not only video frame rates but also slow down your speech with this slow-motion app for Android. You can add dramatic or funny effects to your voices using the application. It offers to slow down video speed up to 0.25x. It uses the standard slider approach to manipulate the playback speed of your videos. You can apply the slow-mo effect to the overall video or to some specific parts of it.

Key Features
- An intuitive user interface with a velocity graph to observe the changes in speed and duration.
- Transform your low-quality videos to HD quality with this slow-motion app for Android.
- Use the application’s built-in music library to incorporate music tracks.
10. Slow Motion
Decrease your video speed up to 1/4th of its original speed with this Android slow-motion video editor. The speed options are customizable, and you can apply them to multiple video scenes. As the name indicates, the tool is specifically fashioned for slow-motion effects; hence, it offers an accessible user interface.

Key Features
- Export your videos in landscape or portrait mode; the choice is yours.
- In any mode, the application retains video quality and exports it in full resolution.
- It is excellent to slow down YouTube videos as there is no watermark addition.
Bonus Part: Wondershare Filmora: A Perfect Desktop Solution To Slow Down Video
Making slow motion videos in Android is like keeping creativity in your hand anywhere. This facility is good for basic effects but not for professional and advanced slow-motion effects. That’s where you need to shift to a more equipped alternative, which is Wondershare Filmora . Using Filmora means turning imagination into the real picture.
It is a video editing platform with artificial intelligence integration. You can create slow-motion videos with automation in Filmora. The interactive interface of Filmora caters to all users’ needs in simple steps. Freelancers, content creators, and educationists use this platform for diverse needs.
Free Download For Win 7 or later(64-bit)
Free Download For macOS 10.14 or later
How to Make Video Slow Motion Android in Filmora
As you are familiar with Filmora, let’s make a slow-motion video. It is quite easy if compared with Android slow-motion video making. Without further delay, delve into the given step-by-step guide:
Step 1Import Your Project After Successful Launch
Unleash your creativity in Filmora after downloading it. In this regard, you must go to Wondershare Filmora’s official site. Open the main interface of Filmora and tap “New Project” to enter the editing window. To start working, import a file in the media panel and drag it into the timeline section.

Step 2Slow Down the Video with Uniform Speed
After successful importing, right-click on your video and an extended list. Choose the “Uniform Speed” option from the list and find an editing panel towards your right. You will see the slider under the speed option. Hold on to the circle and drag it to the left if you want to slow down the videos. Move downward and toggle the “Ripple Edit” and “Maintain Pitch” for good results.

Step 3Enhance Video with Optical Flow
Towards the end, you will find the “AI Frame Interpolation.” Click on its downward symbol and select the “Optical Flow” option from the list. It will automatically boost your video quality. You can choose the “Reverse Speed” option if your video is required.

Step 4End Editing and Move to Export
Now, it’s up to you if you want to continue editing with Filmora or want to export the media. To end editing, you can hit the “Export” button from the top right.

Remarkable Key Functionalities of Filmora
If you want to understand the amazing features of Filmora better, this section is for you. Keep reading and find some integral functionalities of Filmora. This platform offers more than just creating slow-motion video Android:
1. AI Smart Cutout
Artificial intelligence in Filmora can amazingly assist you in making flawless videos. Unlike other tools, Filmora allows you to remove unwanted objects, people, and icons from videos. Besides, users can refine their cutout frame by frame using its’ advanced editing options. You can preview the modified media in four ways, such as Transparency grid and Alpha Mode.
2. AI Audio Stretch
This AI-based feature is new to the market and saves hours of rippling and cutting audio. It aims to match the length of your audio with videos. From Vlog videos to blockbuster audio effects, you can use this feature almost everywhere. This option allows you to re-time your audio tracks after detecting vocals in the music.
3. Speech-to-Text
Video captions make the content accessible to international viewers. That’s where Filmora proves vital in removing language barriers. It supports over 26 languages and adds subtitles to your videos with one click. This built-in feature in Filmora recognizes speech swiftly to guarantee accuracy. You can also export your SRT file of subtitles to make any edits.
4. AI Portrait
Beautify faces in your videos to set a new trend on social media with Filmora. To do so, an AI Portrait feature can automatically detect faces to apply changes. You can choose a sticker effect from more than 70 AI portrait AR stickers. Besides, it can remove video backgrounds by retaining the human beings there.
Conclusion
With all marked details, this article concludes with a note that there are always different calibers of tools that we can work with. While discovering the best Android application in the market, you got to know many slow motion videos on Android. Along with that, we also discussed DemoCreator as a comprehensive solution to the entire use of mobile apps.
New Video Inspiration for Birthday Slideshow
Video Inspiration for Birthday Slideshow
An easy yet powerful editor
Numerous effects to choose from
Detailed tutorials provided by the official channel
Birthdays come only once a year, and at this time of the year, we want to make our loved ones feel special and loved by praying for them, wishing them well, getting them presents, throwing parties, and other stuff people do to celebrate birthdays. You can also make the best of this celebration by doing something special. A birthday slideshow showing all of the celebrant’s fondest moments sounds like a perfect gift to me. A birthday photo slideshow has all the celebrant’s favorite memories, vacation photos, favorite pets, and interests. It combines several images put together using a free or paid birthday slide photo creator. It can be displayed on a computer or Tv screen depending on the creator’s choice.
In this article
01 [What you should put in a birthday slideshow](#Part 1)
02 [Top 5 video templates for happy birthday slideshow](#Part 2)
03 [How to make a birthday slideshow](#Part 3)
Part 1 What You Should Put in A Birthday Slideshow
A birthday slideshow combines several images in a chosen software program. But it is not the only thing that makes a fantastic birthday photo slideshow. This amazing slideshow doesn’t have to be just photos, and you can also create a birthday wishes slideshow. For a lasting impression on the celebrant, consider adding these when you create a birthday slideshow. A birthday slideshow should have the following:
● Background music
Lighten up your video with some background music. A slideshow just displaying photos without music isn’t a good idea.
● Meaningful Quotes and greetings
You can spice up the birthday video by adding greetings, quotes, and well wishes to let the celebrant know you want to them feel fantastic.
● Make the video personal
Add a personal touch to the clip by adding things that matter to the celebrant, whether pictures of them taken while performing a hobby or a favorite place. You can also use photos of their achievements from the time of their last birthday to the present one.
● Keep it short and simple
You don’t want to drag your audience with too many photos. I think the video would have the most impact when it is short, to the point, and keeps the viewers longing for more.
Part 2 Top 5 Video Templates for Happy Birthday Slideshow
Sometimes starting to create a slideshow from scratch can be very hectic and confusing as you might run out of designs to work with. There are other ways to create an impressive and mind-blowing slideshow without starting from scratch. There’s no need to worry cause we have a list of birthday slideshow templates to cover you. Also, tons of mobile apps, websites, and software possess tools to help you with your design.
If you’re still confused about how to go about it, we’ve compiled the top 5 video templates for a birthday photo slideshow to make your work easier.
01birthday cake template.
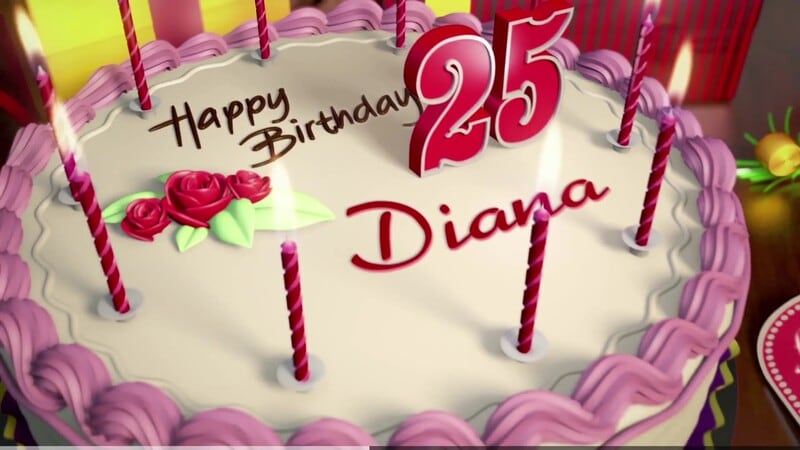
Developed for, After Effects, this 3D birthday cake is a top-notch birthday video template for free download. With easy customization, it’s among the first choice to consider! A birthday party can never be without cake, so using this template gives the slideshow a little bit of everything. There are photos, cakes, and music.
02Happy Birthday Slideshow Template
This Happy Birthday slideshow template from Renderforest has a customer rating of 4.5, which is a pretty high rating. This is why it is no two on our list. It gathers all your choice memories in the form of an album and is easy and fast to create. You cannot go wrong with this fantastic template. It is sure to impress the celebrant, friends, and relatives.

03Happy Birthday, Mom!
As its name implies, this particular video template is to celebrate your mom’s birthday. Let your mom know how much you care and value her by using this birthday video template. It is available on Canva but not on the free plan and is downloadable by Pro users of Canva. You can customize it to suit your choice by adding your mom’s favorite photos, pet photos, birthday music, and even animation.

04Kid’s Birthday Slideshow Template.
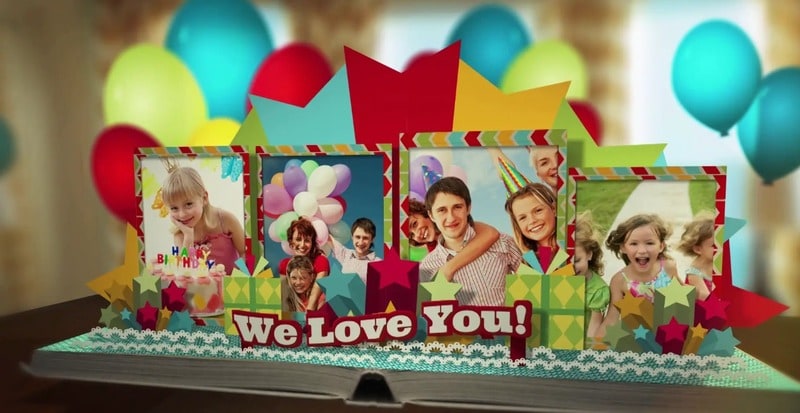
This birthday template is best suited for kids’ birthday parties. Its bold and lively background, wrapped gifts, ribbons, streams of confetti, and bordered slides makes it a perfect choice for your child’s birthdays videos slideshow. The above birthday video template is offered by filmii. Kids love colorful things, so add a little more to their birthday photo slideshow by using this template.

05Awesome Birthday Template
“You get more awesome as the year goes by.”This excellent video template provided by Vimeo is perfect for wishing the celebrant a fantastic birthday. It comes with an aspect ratio that is easily customizable, a transitioning background, and a lively background combination. Consider using this for your birthday video.
Part 3 How To Make A Birthday Slideshow
Creating a free birthday video has never been easier with various birthday video templates to choose from and numerous software and mobile apps to work it. With these tools available, we can create our birthday slideshow. I’ll show you how in these steps below.
Step1: Create Video
To get started, click the Create a Video or View Templates buttons.
Self

Step 2: Upload media files
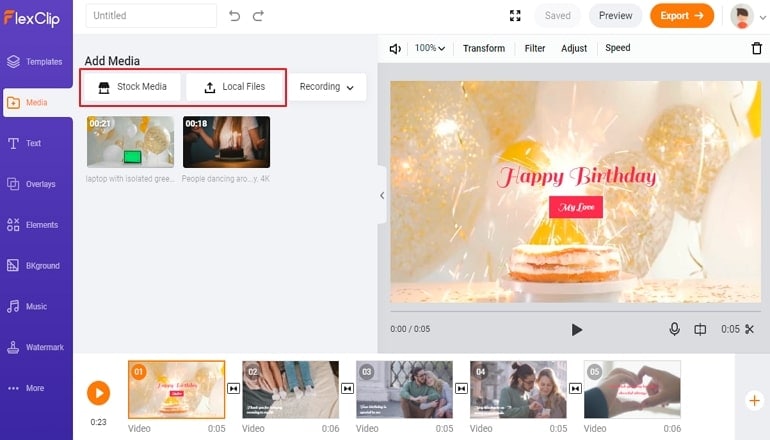
Go to the Media section and upload all of the video clips and photographs you’ll need to construct a birthday slideshow. Then apply them straight to the storyboard or use them to replace the resources in templates.
Step 3: Create Slideshow
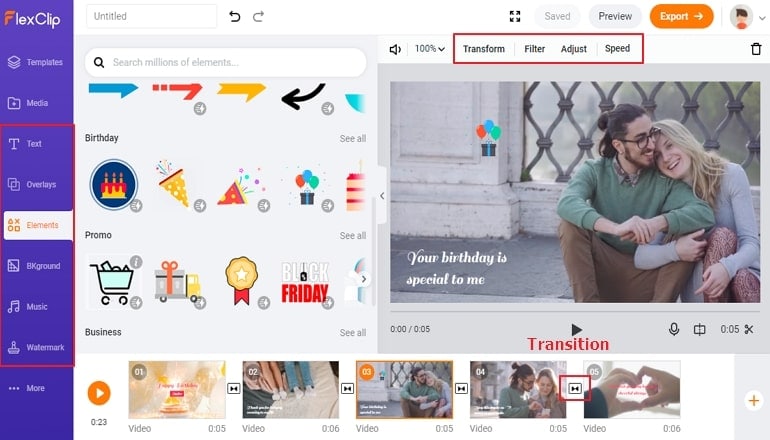
Add text, music, a filter, change the speed, tweak the settings, split the slideshow, and make your birthday slideshow more professional.
You’ve now completed a fantastic free birthday slideshow. So, save it to your PC or share it directly on YouTube.
Wondershare Filmora Video Editor template Mode is the first best birthday slideshow creator for newbies and professionals, among numerous others. It has a comprehensive and customizable set of birthday slideshow templates.
For Win 7 or later (64-bit)
For macOS 10.12 or later
Filmora’s advanced video editing tools, simple and elegant image frames, modern fonts, eye-catching color combinations, and addons make it an excellent tool for a perfect birthday video. Adding, removing, and adjusting clips using effects is made more accessible and less stressful. Next time you wish to surprise your family with a birthday wishes slideshow or a birthday photo slideshow, use the Filmora software for an effortless experience and impressive slideshow turnout.
● Ending Thoughts →
● So, we’ve looked at the best birthday video inspiration templates for the birthday slideshow. I’m sure that after reading this blog, you will be able to know what to do when next you want to create a birthday slideshow.
● Hence, pick the template of your choice, upload images, edit the video, preview, and then export. Go ahead with any of the mentioned templates and a free birthday slideshow creator like Fimora to create magic**.**
Birthdays come only once a year, and at this time of the year, we want to make our loved ones feel special and loved by praying for them, wishing them well, getting them presents, throwing parties, and other stuff people do to celebrate birthdays. You can also make the best of this celebration by doing something special. A birthday slideshow showing all of the celebrant’s fondest moments sounds like a perfect gift to me. A birthday photo slideshow has all the celebrant’s favorite memories, vacation photos, favorite pets, and interests. It combines several images put together using a free or paid birthday slide photo creator. It can be displayed on a computer or Tv screen depending on the creator’s choice.
In this article
01 [What you should put in a birthday slideshow](#Part 1)
02 [Top 5 video templates for happy birthday slideshow](#Part 2)
03 [How to make a birthday slideshow](#Part 3)
Part 1 What You Should Put in A Birthday Slideshow
A birthday slideshow combines several images in a chosen software program. But it is not the only thing that makes a fantastic birthday photo slideshow. This amazing slideshow doesn’t have to be just photos, and you can also create a birthday wishes slideshow. For a lasting impression on the celebrant, consider adding these when you create a birthday slideshow. A birthday slideshow should have the following:
● Background music
Lighten up your video with some background music. A slideshow just displaying photos without music isn’t a good idea.
● Meaningful Quotes and greetings
You can spice up the birthday video by adding greetings, quotes, and well wishes to let the celebrant know you want to them feel fantastic.
● Make the video personal
Add a personal touch to the clip by adding things that matter to the celebrant, whether pictures of them taken while performing a hobby or a favorite place. You can also use photos of their achievements from the time of their last birthday to the present one.
● Keep it short and simple
You don’t want to drag your audience with too many photos. I think the video would have the most impact when it is short, to the point, and keeps the viewers longing for more.
Part 2 Top 5 Video Templates for Happy Birthday Slideshow
Sometimes starting to create a slideshow from scratch can be very hectic and confusing as you might run out of designs to work with. There are other ways to create an impressive and mind-blowing slideshow without starting from scratch. There’s no need to worry cause we have a list of birthday slideshow templates to cover you. Also, tons of mobile apps, websites, and software possess tools to help you with your design.
If you’re still confused about how to go about it, we’ve compiled the top 5 video templates for a birthday photo slideshow to make your work easier.
01birthday cake template.
Developed for, After Effects, this 3D birthday cake is a top-notch birthday video template for free download. With easy customization, it’s among the first choice to consider! A birthday party can never be without cake, so using this template gives the slideshow a little bit of everything. There are photos, cakes, and music.

02Happy Birthday Slideshow Template
This Happy Birthday slideshow template from Renderforest has a customer rating of 4.5, which is a pretty high rating. This is why it is no two on our list. It gathers all your choice memories in the form of an album and is easy and fast to create. You cannot go wrong with this fantastic template. It is sure to impress the celebrant, friends, and relatives.

03Happy Birthday, Mom!
As its name implies, this particular video template is to celebrate your mom’s birthday. Let your mom know how much you care and value her by using this birthday video template. It is available on Canva but not on the free plan and is downloadable by Pro users of Canva. You can customize it to suit your choice by adding your mom’s favorite photos, pet photos, birthday music, and even animation.

04Kid’s Birthday Slideshow Template.
This birthday template is best suited for kids’ birthday parties. Its bold and lively background, wrapped gifts, ribbons, streams of confetti, and bordered slides makes it a perfect choice for your child’s birthdays videos slideshow. The above birthday video template is offered by filmii. Kids love colorful things, so add a little more to their birthday photo slideshow by using this template.

05Awesome Birthday Template
“You get more awesome as the year goes by.”This excellent video template provided by Vimeo is perfect for wishing the celebrant a fantastic birthday. It comes with an aspect ratio that is easily customizable, a transitioning background, and a lively background combination. Consider using this for your birthday video.

Part 3 How To Make A Birthday Slideshow
Creating a free birthday video has never been easier with various birthday video templates to choose from and numerous software and mobile apps to work it. With these tools available, we can create our birthday slideshow. I’ll show you how in these steps below.
Step1: Create Video
To get started, click the Create a Video or View Templates buttons.
Self

Step 2: Upload media files
Go to the Media section and upload all of the video clips and photographs you’ll need to construct a birthday slideshow. Then apply them straight to the storyboard or use them to replace the resources in templates.

Step 3: Create Slideshow
Add text, music, a filter, change the speed, tweak the settings, split the slideshow, and make your birthday slideshow more professional.

You’ve now completed a fantastic free birthday slideshow. So, save it to your PC or share it directly on YouTube.
Wondershare Filmora Video Editor template Mode is the first best birthday slideshow creator for newbies and professionals, among numerous others. It has a comprehensive and customizable set of birthday slideshow templates.
For Win 7 or later (64-bit)
For macOS 10.12 or later
Filmora’s advanced video editing tools, simple and elegant image frames, modern fonts, eye-catching color combinations, and addons make it an excellent tool for a perfect birthday video. Adding, removing, and adjusting clips using effects is made more accessible and less stressful. Next time you wish to surprise your family with a birthday wishes slideshow or a birthday photo slideshow, use the Filmora software for an effortless experience and impressive slideshow turnout.
● Ending Thoughts →
● So, we’ve looked at the best birthday video inspiration templates for the birthday slideshow. I’m sure that after reading this blog, you will be able to know what to do when next you want to create a birthday slideshow.
● Hence, pick the template of your choice, upload images, edit the video, preview, and then export. Go ahead with any of the mentioned templates and a free birthday slideshow creator like Fimora to create magic**.**
Birthdays come only once a year, and at this time of the year, we want to make our loved ones feel special and loved by praying for them, wishing them well, getting them presents, throwing parties, and other stuff people do to celebrate birthdays. You can also make the best of this celebration by doing something special. A birthday slideshow showing all of the celebrant’s fondest moments sounds like a perfect gift to me. A birthday photo slideshow has all the celebrant’s favorite memories, vacation photos, favorite pets, and interests. It combines several images put together using a free or paid birthday slide photo creator. It can be displayed on a computer or Tv screen depending on the creator’s choice.
In this article
01 [What you should put in a birthday slideshow](#Part 1)
02 [Top 5 video templates for happy birthday slideshow](#Part 2)
03 [How to make a birthday slideshow](#Part 3)
Part 1 What You Should Put in A Birthday Slideshow
A birthday slideshow combines several images in a chosen software program. But it is not the only thing that makes a fantastic birthday photo slideshow. This amazing slideshow doesn’t have to be just photos, and you can also create a birthday wishes slideshow. For a lasting impression on the celebrant, consider adding these when you create a birthday slideshow. A birthday slideshow should have the following:
● Background music
Lighten up your video with some background music. A slideshow just displaying photos without music isn’t a good idea.
● Meaningful Quotes and greetings
You can spice up the birthday video by adding greetings, quotes, and well wishes to let the celebrant know you want to them feel fantastic.
● Make the video personal
Add a personal touch to the clip by adding things that matter to the celebrant, whether pictures of them taken while performing a hobby or a favorite place. You can also use photos of their achievements from the time of their last birthday to the present one.
● Keep it short and simple
You don’t want to drag your audience with too many photos. I think the video would have the most impact when it is short, to the point, and keeps the viewers longing for more.
Part 2 Top 5 Video Templates for Happy Birthday Slideshow
Sometimes starting to create a slideshow from scratch can be very hectic and confusing as you might run out of designs to work with. There are other ways to create an impressive and mind-blowing slideshow without starting from scratch. There’s no need to worry cause we have a list of birthday slideshow templates to cover you. Also, tons of mobile apps, websites, and software possess tools to help you with your design.
If you’re still confused about how to go about it, we’ve compiled the top 5 video templates for a birthday photo slideshow to make your work easier.
01birthday cake template.
Developed for, After Effects, this 3D birthday cake is a top-notch birthday video template for free download. With easy customization, it’s among the first choice to consider! A birthday party can never be without cake, so using this template gives the slideshow a little bit of everything. There are photos, cakes, and music.

02Happy Birthday Slideshow Template
This Happy Birthday slideshow template from Renderforest has a customer rating of 4.5, which is a pretty high rating. This is why it is no two on our list. It gathers all your choice memories in the form of an album and is easy and fast to create. You cannot go wrong with this fantastic template. It is sure to impress the celebrant, friends, and relatives.

03Happy Birthday, Mom!
As its name implies, this particular video template is to celebrate your mom’s birthday. Let your mom know how much you care and value her by using this birthday video template. It is available on Canva but not on the free plan and is downloadable by Pro users of Canva. You can customize it to suit your choice by adding your mom’s favorite photos, pet photos, birthday music, and even animation.

04Kid’s Birthday Slideshow Template.
This birthday template is best suited for kids’ birthday parties. Its bold and lively background, wrapped gifts, ribbons, streams of confetti, and bordered slides makes it a perfect choice for your child’s birthdays videos slideshow. The above birthday video template is offered by filmii. Kids love colorful things, so add a little more to their birthday photo slideshow by using this template.

05Awesome Birthday Template
“You get more awesome as the year goes by.”This excellent video template provided by Vimeo is perfect for wishing the celebrant a fantastic birthday. It comes with an aspect ratio that is easily customizable, a transitioning background, and a lively background combination. Consider using this for your birthday video.

Part 3 How To Make A Birthday Slideshow
Creating a free birthday video has never been easier with various birthday video templates to choose from and numerous software and mobile apps to work it. With these tools available, we can create our birthday slideshow. I’ll show you how in these steps below.
Step1: Create Video
To get started, click the Create a Video or View Templates buttons.
Self

Step 2: Upload media files
Go to the Media section and upload all of the video clips and photographs you’ll need to construct a birthday slideshow. Then apply them straight to the storyboard or use them to replace the resources in templates.

Step 3: Create Slideshow
Add text, music, a filter, change the speed, tweak the settings, split the slideshow, and make your birthday slideshow more professional.

You’ve now completed a fantastic free birthday slideshow. So, save it to your PC or share it directly on YouTube.
Wondershare Filmora Video Editor template Mode is the first best birthday slideshow creator for newbies and professionals, among numerous others. It has a comprehensive and customizable set of birthday slideshow templates.
For Win 7 or later (64-bit)
For macOS 10.12 or later
Filmora’s advanced video editing tools, simple and elegant image frames, modern fonts, eye-catching color combinations, and addons make it an excellent tool for a perfect birthday video. Adding, removing, and adjusting clips using effects is made more accessible and less stressful. Next time you wish to surprise your family with a birthday wishes slideshow or a birthday photo slideshow, use the Filmora software for an effortless experience and impressive slideshow turnout.
● Ending Thoughts →
● So, we’ve looked at the best birthday video inspiration templates for the birthday slideshow. I’m sure that after reading this blog, you will be able to know what to do when next you want to create a birthday slideshow.
● Hence, pick the template of your choice, upload images, edit the video, preview, and then export. Go ahead with any of the mentioned templates and a free birthday slideshow creator like Fimora to create magic**.**
Birthdays come only once a year, and at this time of the year, we want to make our loved ones feel special and loved by praying for them, wishing them well, getting them presents, throwing parties, and other stuff people do to celebrate birthdays. You can also make the best of this celebration by doing something special. A birthday slideshow showing all of the celebrant’s fondest moments sounds like a perfect gift to me. A birthday photo slideshow has all the celebrant’s favorite memories, vacation photos, favorite pets, and interests. It combines several images put together using a free or paid birthday slide photo creator. It can be displayed on a computer or Tv screen depending on the creator’s choice.
In this article
01 [What you should put in a birthday slideshow](#Part 1)
02 [Top 5 video templates for happy birthday slideshow](#Part 2)
03 [How to make a birthday slideshow](#Part 3)
Part 1 What You Should Put in A Birthday Slideshow
A birthday slideshow combines several images in a chosen software program. But it is not the only thing that makes a fantastic birthday photo slideshow. This amazing slideshow doesn’t have to be just photos, and you can also create a birthday wishes slideshow. For a lasting impression on the celebrant, consider adding these when you create a birthday slideshow. A birthday slideshow should have the following:
● Background music
Lighten up your video with some background music. A slideshow just displaying photos without music isn’t a good idea.
● Meaningful Quotes and greetings
You can spice up the birthday video by adding greetings, quotes, and well wishes to let the celebrant know you want to them feel fantastic.
● Make the video personal
Add a personal touch to the clip by adding things that matter to the celebrant, whether pictures of them taken while performing a hobby or a favorite place. You can also use photos of their achievements from the time of their last birthday to the present one.
● Keep it short and simple
You don’t want to drag your audience with too many photos. I think the video would have the most impact when it is short, to the point, and keeps the viewers longing for more.
Part 2 Top 5 Video Templates for Happy Birthday Slideshow
Sometimes starting to create a slideshow from scratch can be very hectic and confusing as you might run out of designs to work with. There are other ways to create an impressive and mind-blowing slideshow without starting from scratch. There’s no need to worry cause we have a list of birthday slideshow templates to cover you. Also, tons of mobile apps, websites, and software possess tools to help you with your design.
If you’re still confused about how to go about it, we’ve compiled the top 5 video templates for a birthday photo slideshow to make your work easier.
01birthday cake template.
Developed for, After Effects, this 3D birthday cake is a top-notch birthday video template for free download. With easy customization, it’s among the first choice to consider! A birthday party can never be without cake, so using this template gives the slideshow a little bit of everything. There are photos, cakes, and music.

02Happy Birthday Slideshow Template
This Happy Birthday slideshow template from Renderforest has a customer rating of 4.5, which is a pretty high rating. This is why it is no two on our list. It gathers all your choice memories in the form of an album and is easy and fast to create. You cannot go wrong with this fantastic template. It is sure to impress the celebrant, friends, and relatives.

03Happy Birthday, Mom!
As its name implies, this particular video template is to celebrate your mom’s birthday. Let your mom know how much you care and value her by using this birthday video template. It is available on Canva but not on the free plan and is downloadable by Pro users of Canva. You can customize it to suit your choice by adding your mom’s favorite photos, pet photos, birthday music, and even animation.

04Kid’s Birthday Slideshow Template.
This birthday template is best suited for kids’ birthday parties. Its bold and lively background, wrapped gifts, ribbons, streams of confetti, and bordered slides makes it a perfect choice for your child’s birthdays videos slideshow. The above birthday video template is offered by filmii. Kids love colorful things, so add a little more to their birthday photo slideshow by using this template.

05Awesome Birthday Template
“You get more awesome as the year goes by.”This excellent video template provided by Vimeo is perfect for wishing the celebrant a fantastic birthday. It comes with an aspect ratio that is easily customizable, a transitioning background, and a lively background combination. Consider using this for your birthday video.

Part 3 How To Make A Birthday Slideshow
Creating a free birthday video has never been easier with various birthday video templates to choose from and numerous software and mobile apps to work it. With these tools available, we can create our birthday slideshow. I’ll show you how in these steps below.
Step1: Create Video
To get started, click the Create a Video or View Templates buttons.
Self

Step 2: Upload media files
Go to the Media section and upload all of the video clips and photographs you’ll need to construct a birthday slideshow. Then apply them straight to the storyboard or use them to replace the resources in templates.

Step 3: Create Slideshow
Add text, music, a filter, change the speed, tweak the settings, split the slideshow, and make your birthday slideshow more professional.

You’ve now completed a fantastic free birthday slideshow. So, save it to your PC or share it directly on YouTube.
Wondershare Filmora Video Editor template Mode is the first best birthday slideshow creator for newbies and professionals, among numerous others. It has a comprehensive and customizable set of birthday slideshow templates.
For Win 7 or later (64-bit)
For macOS 10.12 or later
Filmora’s advanced video editing tools, simple and elegant image frames, modern fonts, eye-catching color combinations, and addons make it an excellent tool for a perfect birthday video. Adding, removing, and adjusting clips using effects is made more accessible and less stressful. Next time you wish to surprise your family with a birthday wishes slideshow or a birthday photo slideshow, use the Filmora software for an effortless experience and impressive slideshow turnout.
● Ending Thoughts →
● So, we’ve looked at the best birthday video inspiration templates for the birthday slideshow. I’m sure that after reading this blog, you will be able to know what to do when next you want to create a birthday slideshow.
● Hence, pick the template of your choice, upload images, edit the video, preview, and then export. Go ahead with any of the mentioned templates and a free birthday slideshow creator like Fimora to create magic**.**
DaVinci Resolve Scopes Have Undergone Significant Improvements. Find Out How to Use These Scopes and Improve Your Video Editing Skills
How do you set up DaVinci scopes? The internal color scopes in Resolve are flexible and customizable but can be confusing. The built-in DaVinci Resolve scope used to be limited only a few possibilities. However, the new 9-scope view offers a wider range of choice, making them a powerful tool for video editing. In this article, we will explore how to set up DaVinci scopes to achieve better color results.
Color Correction Editor An easy-to-use video editor helps you make color correction and color grading experience for videos!
Free Download Use Vectorscope in Filmora Try Color Correction

Part 1. Unlocking Color Precision: Exploring the Improved Scopes in DaVinci Resolve
The Blackmagic Design continues to improve the Resolve to make it better with every iteration. The new features improve colorist workflow in less powerful ways. The major improvements include a major facelift to the scope, allowing professions to do more with DaVinci resolve. Let’s have a look at some of these changes:
1. CIE 1931 Color Space
The inclusion of the CIE chromaticity diagram is perhaps the biggest change to DaVinci scopes. It displays the gamut of the project as set in the Color Management preferences. This makes it a useful alternate way of looking at the trace of an image to judge when the values are out of legal range. It also functions as an educational tool for learning about the range of color spaces.
2. Low Pass Filter
The wavefront and parade scopes now have a low pass filter, which reduces noise in the trace. This visually sharpens the display of the scopes, allowing easier detection of elements in the frame.
The image above shows the major improvements. The second set of waveforms has more defined lines. These have the low-pass filter activated, which makes the scopes easier to read.
3. High, Mid, and Low Views in Vectorscope
The vectorscope has been added to the ability to toggle the mid-tones, shadows, and highlights of the image independently. You can set the ranges with greater visualization control.
As seen in the picture above, the vectorscope controls allow you to select the low, mid, or high range of the image. You can also set the low and high ranges as desired.
4. Histograms Over Curves
Another great DaVinci scope is the histogram, which now appears outside of the scope panel. The new improvements have embedded the histogram inside the Curves tab on the bottom Palette. Click on the three dots in the Custom Curves tab. The pulldown menu that appears includes the Input or Output of the histogram. With these settings, you can find the element in the frame that helps you make adjustments quickly.
5. Scope Quality
The GPU-accelerated scopes engine allows the scopes to respond quickly. Users have the option to set the quality to high, medium, or low and the scopes will respond to a range of hardware systems. Depending on whether you are working on a stationary short or looking to see how the scopes react in real-time, you will be able to toggle the modes quickly and easily.

6. YRGB View in Histogram and Parade
The histogram and parade now come with the ability to view luminance together with the red, green, and blue channels. Users also have the option for YCbCr mode in the Parade.

7. Extents
These are weak elements in the signore, which are of lesser importance compared to the stronger elements. However, Danvici now allows them to be revealed for a full illustration of the information that lies in the image. Consequently, extents can be used to determine whether the data is being clipped beyond legal limits.

Part 2. Mastering Scopes in DaVinci Resolve: A Brief Guide
DaVinci scopes help you to analyze images as a basis for color correction. When used properly, scopes help in fixing white balance issues and checking saturation. They also allow you to get the correct exposure and check details like skin tone. To use scopes in DaVinci Resolve, go to the color page in the bottom right corner. You can also click on the small graph icon to view the scope. Here is how to use them:
1. Waveform
The Waveform represents the brightness or luminance of your image. In this video scope, the brightest parts are at the top while the darkest are at the bottom. The pixels are represented from left to right.
The Waveform scope on DaVinci Resolve is helpful when you are checking for clipping. This simply means finding out whether the image is too bright or too dark. The waveform also ensures that the image is properly exposed. The colorize feature of the waveform shows the colors of the image while the extent shows the darkest or lightest parts of the image.
2. Parade (RGB)
The RGB Parade comprises 3 waveforms that represent the luminance of red, green, and blue channels. The approach for reading the parade video scope is similar to that of the waveform. However, you now look at the balance between the colors correct the white balance, and check for a color cast.
The Parade works almost in a similar manner as the waveform. It displays the red, green, and blue channels of the image as separate waveforms. This way, you can easily identify and correct color casts while ensuring the colors in the image are balanced. The video scope provides useful information to decide which parts of the image need to be corrected or tweaked further.
3. Vectorscope
Vectorscope in DaVinci Resolve shows hue and saturation on a circular graph. Hues (the colors) are indicated outside of the color wheel for easier color correction. Saturation is indicated by how far the graph extends from the center.
By displaying the hue and saturation of the image as a vector, this video scope helps check skin tones. The scope specifically checks whether skin tones are shifted toward colors such as yellow, magenta, or green. It allows you to make sure that the colors in your subject skin tones are not too saturated or desaturated.
4. Histogram
Histogram is a video scope in DaVinci Resolve that displays the brightness or luminance of an image from left to right for the RGB channel. The video scope is based on the number of pixels that the colors red, blue, and green have in an image.
Using the histogram video scope on DaVinci Resolve allows you to check for overexposure or underexposure in your image. You can also ensure that the image has a good overall brightness range. The scope provides a graphical representation of tonal distribution in each channel. This way, you can evaluate the tone in detail for more accurate brightness and contrast adjustments.
Part 3: Edit Like a Pro: Mastering Video Scopes in Filmora
When working on video projects, Wondershare Filmora is a great editing software. It comes with unique features to color-correct your videos on the go as you edit it. From AI-powered features to royalty-free music, there is so much more you can do with Filmora.
Free Download For Win 7 or later(64-bit)
Free Download For macOS 10.14 or later
How to Use Video Scopes on Filmora
Using video scopes on Filmora is easy. The software offers four video scope options, allowing you to color-correct and grade your visual images properly. They include parade RGB, waveform, vectorscope, and histogram. When editing videos on Filmora, the video scopes can be accessed by clicking on the video scopes icon. The icon is found on the top right corner of the media player.
Filmora has made it easy for users to manage video scopes, and color-correct videos quickly. Users can change the layout options of the video scopes to match the editing needs of their project. You can also expand the button to show the name of the scope. As you manage the scopes, you can start with the Parade to make the necessary adjustments. Then move on to waveform, vectorscope, and histogram.
The uses of the video scope on Filmora are as follows:
- Parade – Cahnge the color channel from RBG to YRGB or YCbCr
- Vectorscope – Identify skin tone
- Waveform – Adjust color channels in a different way
- Histogram – Display the multiple color adjustments in a graphical way
Conclusion
Scopes are indeed valuable to video editors and colorists. While viewing images on a monitor can be subjective, scopes allow you to analyze and define them objectively. This gives you the power to color grade and correct to ensure that viewers look at the image with a clear representation. When working on or editing your videos, we recommend Wondershare Filmora. The video editing software comes with a wide range of features and video scopes that allow you to do everything on the same platform.
Free Download Use Vectorscope in Filmora Try Color Correction

Part 1. Unlocking Color Precision: Exploring the Improved Scopes in DaVinci Resolve
The Blackmagic Design continues to improve the Resolve to make it better with every iteration. The new features improve colorist workflow in less powerful ways. The major improvements include a major facelift to the scope, allowing professions to do more with DaVinci resolve. Let’s have a look at some of these changes:
1. CIE 1931 Color Space
The inclusion of the CIE chromaticity diagram is perhaps the biggest change to DaVinci scopes. It displays the gamut of the project as set in the Color Management preferences. This makes it a useful alternate way of looking at the trace of an image to judge when the values are out of legal range. It also functions as an educational tool for learning about the range of color spaces.
2. Low Pass Filter
The wavefront and parade scopes now have a low pass filter, which reduces noise in the trace. This visually sharpens the display of the scopes, allowing easier detection of elements in the frame.
The image above shows the major improvements. The second set of waveforms has more defined lines. These have the low-pass filter activated, which makes the scopes easier to read.
3. High, Mid, and Low Views in Vectorscope
The vectorscope has been added to the ability to toggle the mid-tones, shadows, and highlights of the image independently. You can set the ranges with greater visualization control.
As seen in the picture above, the vectorscope controls allow you to select the low, mid, or high range of the image. You can also set the low and high ranges as desired.
4. Histograms Over Curves
Another great DaVinci scope is the histogram, which now appears outside of the scope panel. The new improvements have embedded the histogram inside the Curves tab on the bottom Palette. Click on the three dots in the Custom Curves tab. The pulldown menu that appears includes the Input or Output of the histogram. With these settings, you can find the element in the frame that helps you make adjustments quickly.
5. Scope Quality
The GPU-accelerated scopes engine allows the scopes to respond quickly. Users have the option to set the quality to high, medium, or low and the scopes will respond to a range of hardware systems. Depending on whether you are working on a stationary short or looking to see how the scopes react in real-time, you will be able to toggle the modes quickly and easily.

6. YRGB View in Histogram and Parade
The histogram and parade now come with the ability to view luminance together with the red, green, and blue channels. Users also have the option for YCbCr mode in the Parade.

7. Extents
These are weak elements in the signore, which are of lesser importance compared to the stronger elements. However, Danvici now allows them to be revealed for a full illustration of the information that lies in the image. Consequently, extents can be used to determine whether the data is being clipped beyond legal limits.

Part 2. Mastering Scopes in DaVinci Resolve: A Brief Guide
DaVinci scopes help you to analyze images as a basis for color correction. When used properly, scopes help in fixing white balance issues and checking saturation. They also allow you to get the correct exposure and check details like skin tone. To use scopes in DaVinci Resolve, go to the color page in the bottom right corner. You can also click on the small graph icon to view the scope. Here is how to use them:
1. Waveform
The Waveform represents the brightness or luminance of your image. In this video scope, the brightest parts are at the top while the darkest are at the bottom. The pixels are represented from left to right.
The Waveform scope on DaVinci Resolve is helpful when you are checking for clipping. This simply means finding out whether the image is too bright or too dark. The waveform also ensures that the image is properly exposed. The colorize feature of the waveform shows the colors of the image while the extent shows the darkest or lightest parts of the image.
2. Parade (RGB)
The RGB Parade comprises 3 waveforms that represent the luminance of red, green, and blue channels. The approach for reading the parade video scope is similar to that of the waveform. However, you now look at the balance between the colors correct the white balance, and check for a color cast.
The Parade works almost in a similar manner as the waveform. It displays the red, green, and blue channels of the image as separate waveforms. This way, you can easily identify and correct color casts while ensuring the colors in the image are balanced. The video scope provides useful information to decide which parts of the image need to be corrected or tweaked further.
3. Vectorscope
Vectorscope in DaVinci Resolve shows hue and saturation on a circular graph. Hues (the colors) are indicated outside of the color wheel for easier color correction. Saturation is indicated by how far the graph extends from the center.
By displaying the hue and saturation of the image as a vector, this video scope helps check skin tones. The scope specifically checks whether skin tones are shifted toward colors such as yellow, magenta, or green. It allows you to make sure that the colors in your subject skin tones are not too saturated or desaturated.
4. Histogram
Histogram is a video scope in DaVinci Resolve that displays the brightness or luminance of an image from left to right for the RGB channel. The video scope is based on the number of pixels that the colors red, blue, and green have in an image.
Using the histogram video scope on DaVinci Resolve allows you to check for overexposure or underexposure in your image. You can also ensure that the image has a good overall brightness range. The scope provides a graphical representation of tonal distribution in each channel. This way, you can evaluate the tone in detail for more accurate brightness and contrast adjustments.
Part 3: Edit Like a Pro: Mastering Video Scopes in Filmora
When working on video projects, Wondershare Filmora is a great editing software. It comes with unique features to color-correct your videos on the go as you edit it. From AI-powered features to royalty-free music, there is so much more you can do with Filmora.
Free Download For Win 7 or later(64-bit)
Free Download For macOS 10.14 or later
How to Use Video Scopes on Filmora
Using video scopes on Filmora is easy. The software offers four video scope options, allowing you to color-correct and grade your visual images properly. They include parade RGB, waveform, vectorscope, and histogram. When editing videos on Filmora, the video scopes can be accessed by clicking on the video scopes icon. The icon is found on the top right corner of the media player.
Filmora has made it easy for users to manage video scopes, and color-correct videos quickly. Users can change the layout options of the video scopes to match the editing needs of their project. You can also expand the button to show the name of the scope. As you manage the scopes, you can start with the Parade to make the necessary adjustments. Then move on to waveform, vectorscope, and histogram.
The uses of the video scope on Filmora are as follows:
- Parade – Cahnge the color channel from RBG to YRGB or YCbCr
- Vectorscope – Identify skin tone
- Waveform – Adjust color channels in a different way
- Histogram – Display the multiple color adjustments in a graphical way
Conclusion
Scopes are indeed valuable to video editors and colorists. While viewing images on a monitor can be subjective, scopes allow you to analyze and define them objectively. This gives you the power to color grade and correct to ensure that viewers look at the image with a clear representation. When working on or editing your videos, we recommend Wondershare Filmora. The video editing software comes with a wide range of features and video scopes that allow you to do everything on the same platform.
Also read:
- Have You Ever Played Roblox Games? Read This Article to Find Out How to Get Motion Blur in Roblox Using Simple and Efficient Ways
- Guiding Principles of Track Matte and Tracking in Adobe After Effects for 2024
- 2024 Approved Best 8 Srt File Creators
- New 2024 Approved How to Turn Text Into a Podcast
- New 2024 Approved Shotcut Video Editor Review
- New 2024 Approved Top Best Free LUTs For Premiere Pro
- Updated In 2024, Top 8 AR Apps for Android and iOS | Help You See the World of AR
- How to Add Selective Color Effect to Your Videos for 2024
- Updated In 2024, How to Add Effects in Premiere Pro
- Hitfilm Express Video Editor Review
- Updated 10 Best Meme Text to Speech Tools Windows, Mac, Android, iPhone&Online
- Top 10 Video Editing Online Makers Is Worth Your Attention for 2024
- New You Can Create a Photo Video Slideshow on YouTube. In Slideshow on YouTube You Can Add Photos and Videos, Effects and Transitions and Make a Quality Slideshow for 2024
- 2024 Approved In This Guidepost, Youll Learn What an HDRI Photo Is and How to Use the Best Free HDRI Program to Edit Photos. Youll Also Know the Difference Between HDR and HDRI
- How to Resize FLV Videos EfficientlyWindows, Mac, Android, iPhone & Online for 2024
- New How To Use Slow Zoom Effect in Your Video?
- Want to Add Freeze Frame Effect to Your Video on Your Device? Here Are the Steps to Add Freeze Frame on PC, Mac, Smartphone as Well as Online From Any Device
- New Video Inspiration for Birthday Slideshow
- In 2024, How Can I Catch the Regional Pokémon without Traveling On Poco C55 | Dr.fone
- Guide How To Unbrick a Bricked Tecno Spark Go (2023) Phone | Dr.fone
- Wondering the Best Alternative to Hola On Poco M6 5G? Here Is the Answer | Dr.fone
- In 2024, Top 5 Car Locator Apps for Meizu 21 | Dr.fone
- How to Rescue Lost Messages from Meizu
- In 2024, Disabling Apple iPhone 13 Pro Parental Restrictions With/Without Password
- Popular Tips on Learning Animate Rigging for 2024
- How to insert sign in .wpt file
- iPhone 14 Pro Max® Data Recovery Software to Recover Lost iOS® Data | Stellar
- How to Use Phone Clone to Migrate Your Nokia 105 Classic Data? | Dr.fone
- Title: 2024 Approved How to Fade in Text in Adobe Premiere Pro
- Author: Morgan
- Created at : 2024-05-19 05:12:02
- Updated at : 2024-05-20 05:12:02
- Link: https://ai-video-editing.techidaily.com/2024-approved-how-to-fade-in-text-in-adobe-premiere-pro/
- License: This work is licensed under CC BY-NC-SA 4.0.


