
:max_bytes(150000):strip_icc():format(webp)/GettyImages-Macys-59e6c3699abed500118af858.jpg)
Add Neon Effects to Your Dance Videos with the Help of Wondershare Filmora After Reading This Article. It Will Give a More Thrilling and Exciting Appearance
Add Neon Effects to Your Dance Videos with the Help of Wondershare Filmora After Reading This Article. It Will Give a More Thrilling and Exciting Appearance
Neon colors in videos are constantly attracting and compelling the scenes. So how it looks if dancing videos have this feature? For sure, it’ll be dreamier and more classy.
After moving toward, the following steps of processing neon effects, you will find different effects to make your video filmier. Wondershare Filmora provides all types of products on one platform. Then try it out and enjoy the rest. Scroll more to learn about the neon effect before editing your video!
Neon Dance Effects in Wondershare Filmora
You often watch viral dance videos or commercials in which a neon highlight of a person dances aside from them in the video. Yes! You can also make that just in a few minutes.
In this case, Wondershare Filmora is considered to be your partner. Filmora is a fantastic tool that you can have at your disposal to edit a range of videos. There are tons of neon effects in Filmora, including neon frames, neon swings, or even multiple neon overlays.
Free Download For Win 7 or later(64-bit)
Free Download For macOS 10.14 or later

Steps to Make a Neon Dance Effect With Filmora
The public is tired now of seeing old video graphics in dancing videos. It’s time to add neon colors to give a fascinating look. Follow the step-by-step guide mentioned below, and let’s get going!
Step1 Import Clips into the Timeline
Before we begin to edit our video, make sure you download Wondershare Filmora. First, you need to create a timeline to edit our dancing clips. For this, take a look at the below steps!
- Click on the Import icon in the main window when you open Wondershare Filmora.
- Then, import the video clips you want to edit.
- Now, drag the Video and drop it in the editing timeline below.

Step2 Add the Same Video again
We aim to create a black background for the original video we imported above. To do so, follow the steps mentioned below.
- Drag and drop the same video on the timeline.
- Make sure to drag and drop it above the original video.

Step3 Go into the Compositing Mode
After adding the same video, now convert BG into a black screen. For this, follow the given steps:
- Double-Click on the video we added later.
- A video editing panel will open up in the Import
- Scroll down till you see the compositing tab.
- Here will have to change the Blending mode.
- Click on the tab ahead that is labeled “Norma“
- A drop-down option will open up.
- In this drop-down option, scroll below to “Difference“.

- As soon as you click on the Difference option, you will notice a change in the main play window; it will all turn to a black screen.
Step4 Add the Pixelated Edges effect
Our target is to outline the individual in the video, so we can move on to create the Neon Highlight effect. To do so, follow these steps!
- First, go into the effects option that you can select from the tab above the import window.
- In the effects panel, search for the Pixelated edges
- You will notice a search bar in the top right corner. Type “Pixelated edges,“ and you will see some effects pop up in the import window.

- Select the Pixelated edges effect. Then, click and drag it below the video that we turned to black using the Difference
- The edges of the individual dancing in the video will be outlined.

Step5 Change the outline color
You may not like the default color with the Pixelated edges effect. But no worries, you can change that to whatever color you desire by following these steps:
- Double-Click on the video in which you added the effect.
- An editing panel will pop up.
- Click on the Effect option below the Video
- Here, you can see the color option.
- Click on the color and select whatever suits you the best.

Step6 Create Multiple Outlines
It would help if you created multiple outlines to achieve the Neon Dance effect. These multiple outlines will be produced by exporting them multiple times with the color you want. Follow the below points to get it instantly!
- When you have selected the color for your outline, export the video by clicking on the Export icon in the top right corner.

- When you have exported the video, move back to the timeline to edit again.
- As we had selected the Blue color for reference, now choose another color you wish.
- After changing the video, export it again.
![]()
Note: Export as many times as you want with the color of your choice. E.g., 5 colors = 5 exports.
Step7 Import the exported videos
- Now you have to import the videos that you exported.
- Before doing that, first, delete the video in track 2. (The video on which we applied the Difference)
- Now select all the exports from your library and import them onto the import window.
- Please select all of them and drag them on the timeline.
![]()
Note: You don’t want all the outlines to play simultaneously. Otherwise, the outlines will not appear to be separate.
- To do so, stack the videos on each other on different tracks.
Tip: The trick here will be to offset the video by a few seconds so that each video plays a little later than the other.

To efficiently blend the outlines with the green screen, you can change the blending mode of each of the exported videos to “Lighten.”
- Double-click on each video.
- In the editing panel, choose compositing.
- From there, select the “Lighten“ option.

Step8 Add the Glow effect
To make the outlines glow like Neon lights, we will need to add another effect from the effects library.
- Go to the effects tab and search for “Glow.”
- Click and drag the glow effect to each of the exported videos.

You can make it more fun by going one step further!
- Double-click on each of the glow effects that you added.
- In effect, the editing panel goes to the video effects.
- Here, you can change the radius of the Glow effect you added.
- Similarly, you can do it in all the other videos.
Step9 Apply the Green screen effect
We will change our green screen for the final part. Follow the last steps, and then enjoy!
- Move the green screen footage below them all to the top track.
- Double-click the video to enter the editing panel.
- Go to the chroma key (Green Screen) in the editing panel**.**
- Click on the arrow aside from the tab.
You will immediately see changes to your video in the main play window. Play the video from the start and notice the changes.

Congratulations! You have successfully created Neon Dance effects by using the user-friendly Wondershare Filmora.
Conclusion
Wondershare Filmora offers a variety of editing features that you can use to create very innovative videos. You can quickly create Neon effects in your dance videos next time by following the above steps! Add more creativity to attract more audience. Have fun and explore more effects to get unique results!
Free Download For macOS 10.14 or later
Steps to Make a Neon Dance Effect With Filmora
The public is tired now of seeing old video graphics in dancing videos. It’s time to add neon colors to give a fascinating look. Follow the step-by-step guide mentioned below, and let’s get going!
Step1 Import Clips into the Timeline
Before we begin to edit our video, make sure you download Wondershare Filmora. First, you need to create a timeline to edit our dancing clips. For this, take a look at the below steps!
- Click on the Import icon in the main window when you open Wondershare Filmora.
- Then, import the video clips you want to edit.
- Now, drag the Video and drop it in the editing timeline below.
Step2 Add the Same Video again
We aim to create a black background for the original video we imported above. To do so, follow the steps mentioned below.
- Drag and drop the same video on the timeline.
- Make sure to drag and drop it above the original video.
Step3 Go into the Compositing Mode
After adding the same video, now convert BG into a black screen. For this, follow the given steps:
- Double-Click on the video we added later.
- A video editing panel will open up in the Import
- Scroll down till you see the compositing tab.
- Here will have to change the Blending mode.
- Click on the tab ahead that is labeled “Norma“
- A drop-down option will open up.
- In this drop-down option, scroll below to “Difference“.
- As soon as you click on the Difference option, you will notice a change in the main play window; it will all turn to a black screen.
Step4 Add the Pixelated Edges effect
Our target is to outline the individual in the video, so we can move on to create the Neon Highlight effect. To do so, follow these steps!
- First, go into the effects option that you can select from the tab above the import window.
- In the effects panel, search for the Pixelated edges
- You will notice a search bar in the top right corner. Type “Pixelated edges,“ and you will see some effects pop up in the import window.
- Select the Pixelated edges effect. Then, click and drag it below the video that we turned to black using the Difference
- The edges of the individual dancing in the video will be outlined.
Step5 Change the outline color
You may not like the default color with the Pixelated edges effect. But no worries, you can change that to whatever color you desire by following these steps:
- Double-Click on the video in which you added the effect.
- An editing panel will pop up.
- Click on the Effect option below the Video
- Here, you can see the color option.
- Click on the color and select whatever suits you the best.
Step6 Create Multiple Outlines
It would help if you created multiple outlines to achieve the Neon Dance effect. These multiple outlines will be produced by exporting them multiple times with the color you want. Follow the below points to get it instantly!
- When you have selected the color for your outline, export the video by clicking on the Export icon in the top right corner.
- When you have exported the video, move back to the timeline to edit again.
- As we had selected the Blue color for reference, now choose another color you wish.
- After changing the video, export it again.
![]()
Note: Export as many times as you want with the color of your choice. E.g., 5 colors = 5 exports.
Step7 Import the exported videos
- Now you have to import the videos that you exported.
- Before doing that, first, delete the video in track 2. (The video on which we applied the Difference)
- Now select all the exports from your library and import them onto the import window.
- Please select all of them and drag them on the timeline.
![]()
Note: You don’t want all the outlines to play simultaneously. Otherwise, the outlines will not appear to be separate.
- To do so, stack the videos on each other on different tracks.
Tip: The trick here will be to offset the video by a few seconds so that each video plays a little later than the other.
To efficiently blend the outlines with the green screen, you can change the blending mode of each of the exported videos to “Lighten.”
- Double-click on each video.
- In the editing panel, choose compositing.
- From there, select the “Lighten“ option.
Step8 Add the Glow effect
To make the outlines glow like Neon lights, we will need to add another effect from the effects library.
- Go to the effects tab and search for “Glow.”
- Click and drag the glow effect to each of the exported videos.
You can make it more fun by going one step further!
- Double-click on each of the glow effects that you added.
- In effect, the editing panel goes to the video effects.
- Here, you can change the radius of the Glow effect you added.
- Similarly, you can do it in all the other videos.
Step9 Apply the Green screen effect
We will change our green screen for the final part. Follow the last steps, and then enjoy!
- Move the green screen footage below them all to the top track.
- Double-click the video to enter the editing panel.
- Go to the chroma key (Green Screen) in the editing panel**.**
- Click on the arrow aside from the tab.
You will immediately see changes to your video in the main play window. Play the video from the start and notice the changes.
Congratulations! You have successfully created Neon Dance effects by using the user-friendly Wondershare Filmora.
Conclusion
Wondershare Filmora offers a variety of editing features that you can use to create very innovative videos. You can quickly create Neon effects in your dance videos next time by following the above steps! Add more creativity to attract more audience. Have fun and explore more effects to get unique results!
How to Merge FLV Files [Windows, Mac,Android, iPhone & Online]
It’s typical to download numerous small FLV files of a popular movie from YouTube or other video-sharing sites instead of the entire movie. Let me tell you here that an FLV (Flash Video) is a container format used to transmit video or audio over the internet. At this point, you may want to combine multiple FLV files into one. Combining multiple FLV files to create a masterpiece, like a trailer, is of course a terrific idea. Well, to combine these FLV files, you need a professional FLV merger as your assistant.
So, let me help you here. Filmora Video Editor may be the best FLV combiner for Windows and Mac available nowadays. This clever tool is ideal for users seeking professional editing functions like video merging. The software is available for download on Windows and Mac systems and allows for the lossless merging of FLV, MP4, MOV, WebM, and many more file formats. It makes it a lot easier for you to merge or combine FLV files into a large video collection without compromising on video quality even if you lack technical expertise. And, you can use it to watch a movie or your favorite content without any annoying interruptions.
Now, I’ll show you how to quickly and effortlessly merge your favorite video clips into a new video collection.
For Win 7 or later (64-bit)
For macOS 10.14 or later
A Step-by-Step Guide to Merge FLV files on Windows/Mac using Wondershare Filmora
Step 1: Launch Wondershare Filmora and load FLV files…
When you run this FLV joiner, simply click “Import” to load all of the local FLV files that you want to merge to the User’s album of this FLV video merger. You can also just drag and drop the target files from your PC into the album.

Step 2: Merge FLV files into one…
At the bottom of this FLV file merger, there lies a Timeline. Drag FLV files from the album to the Timeline and use the slider bar to help you arrange all FLV files in the Timeline without overlapping them. That’s very important as if you put one video to another, the original video will get split. Also, make sure that all FLV files are placed in the sequence in which they are to be played. If not, you can rearrange any video clip with a simple drag-and-drop.

Step 3: Choose the target format as FLV…
When you are sure that all FLV files are in the correct required order on the Timeline, you can view the effect in real-time in the preview pane. If everything is fine, you are now ready to export this new FLV file. All you have to do is just press the “Create”
button, then go to the “Format” tab > “FLV” output format in the output window.

Step 4: Export a new FLV file…
Finally, click the “Create” button to save the settings and export the new FLV file simultaneously. When it’s done, simply navigate to the whole FLV video using the output file path.

Alternative Way to Merge/Combine FLV Files on Windows
Joyoshare Media Cutter (Paid tool to merge FLV Files)
Joyoshare Video Joiner for Windows is a comprehensive and user-friendly audio and video merging software that supports a wide range of file formats such as FLV, F4V, HD,4K, MP4, M4V, M4A, DV, MPEG, FLAV, WMA, and others. It is not only a superb video joiner for joining FLV files in batches without re-encoding, but it is also a video editor thanks to the built-in advanced editing tool. That means you can customize and enhance your FLV files as required before integrating them. The two combing modes (high-speed mode and encoding mode) it employs are also noteworthy. With high-speed mode, you can join an unlimited number of FLV files losslessly and swiftly. You can merge files in different formats without gaps and customize the codec, resolution, bit rate, frame rate, and other parameters of your FLV files while in encoding mode.
A Step-by-Step Guide
Step 1: Add FLV files…
First, go to the Joyoshare website and download the Joyoshare Video Joiner installation package. Install and configure it on your computer. Then, import FLV files into the video joiner. There are two options: click “Open File” to choose them or drag them directly into the software.

Step 2: Choose a merging mode and export format…
You must pick a format from high-speed mode and encoding mode based on your requirements by using the “Format” button. The former is only for combining files of the same format losslessly at 60 X speed. The other is for users who want to modify files while joining files in different formats. With the use of a gear icon beside the selected output format, users can change video settings such as resolution, bit rate, codes, and so on while in encoding mode.

Step 3: Remove undesirable parts…
Once finished choosing mode and format, simply press “OK” to go back to the main screen. Then double-click these FLV files one by one to preview them. You can change the timeline to remove unnecessary sections from your FLV videos. Moreover, renaming and rearranging these video files can also be realized in this step.

Step 4: Edit FLV files (optional)…
The software has an editor that allows you to easily and flexibly enhance your FLV video files by clicking “Edit” next to each file before joining.

Step 5: Merge FLV files and save…
Finally, all you have to do is press the “Convert” button to enable Joyoshare Video Joiner to begin combining these FLV files. The merged FLV file will be saved as a converted file on your computer.
Format Factory (Free tool to merge FLV Files)
Format Factory is a free Windows video joiner, recorder, converter, downloader, and editor. It supports a wide range of file types, including FLV, MKV, MP4, 3GP, WMV, SWF, AVI, MPG, VOB, WebM, and others. It is not difficult to use it to combine FLV files.
A Step-by-Step Guide
Step 1: Run Format Factory…
After installing Format Factory, go to “Video Joiner & Mux” to proceed.

Step 2: Add FLV files…
“Add Files” allows you to import FLV files in batches. When all FLV files have been loaded, click “Clip” to clip and crop FLV files as needed. Then, under “Output Settings,” choose an output format and further customize the output quality.


Step 3: Merge files…
Once done, click “OK” to get back to the first window and press “Start” to begin the merging
process.

Alternative Way to Merge/Combine FLV Files on Mac
iDealshare VideoGo (Paid tool to merge FLV Files)
You can use iDealshare VideoGo to convert media files for playback anywhere. It supports a wide range of video formats, both SD and HD. The application also features its own editor, which includes a wide range of activities. It allows you to trim the selected video, crop it, modify the brightness, contrast, and saturation, add text and image watermarks, and manage or add your own subtitles.

A Step-by-Step Guide
Step 1: Import FLV files…
To import the FLV video files that you want to merge, click the “Add File” button or just drag & drop the files.
Step 2: Choose output format…
Choose FLV as the output video format. Select FLV from the “General Video” category from the “Profile” pop-up menu.
Step 3: Merge FLV files…
Select the FLV video files that you wish to merge into one in the main window list, and then choose the “Merge Selected into One” option from the context menu. Click the “Convert” button to start combining the videos.

Faasoft FLV Joiner/Merger (Free tool to merge FLV Files)
Faasoft FLV Joiner/Merger is used to combine FLV files without any re-encoding as well as retain the output quality. Merges FLV files and converts them to more popular formats as well like; MP4, AVI, MOV, WMV, MKV, ASF, ProRes, MXF, OGV, 3GP, etc. to get played on multiple mediums. Apart from FLV files, Faasoft FLV Joiner allows you to merge various kinds of video and audio clips. In addition, this powerful tool works more than just an FLV Merger, i.e.; It is, even more, an in-built video and audio editor, with which, you can optimize any files as per requirement.
A Step-by-Step Guide
Step 1: Load FLV files…
To add FLV files to this Joiner, run FLV Merger and drag and drop the folder containing FLV files to the program’s main screen. If the FLV files you wish to merge are not in the same folder, you can drag them one by one to the software. You should put them together first to save time.
Step 2: List to merge…
Once all FLV files have loaded, pick them all and choose “Merge Selected into One” from the context menu. In the task list, the combined FLV file will have an extension name similar to “Merge 1.”

Step 3: Convert FLV clips…
Click the “Profile” drop-down button to select “FLV Flash Video Format (*.flv)” from the “Picture & Animation” category as the output format. If you want to re-encode the merged FLV file to another video format, select another output format from the list above.
Step 4: Start joining…
Simply click the round “Convert” button in the bottom right corner and let this fantastic tool do the rest.
2 Ways to Merge/Combine FLV Files on Android
Video Merger by Alyaanah (Paid tool to merge FLV Files)
Video Merger can merge any number of videos together in one video. It also accepts almost any format of videos as input. Some of the input formats for merging that are supported are mp4, mkv, 3gp, 3gpp, mov, flv, avi, mpg, mpeg, m4v, vob, wmv, webm, mts, ts, m2ts, and so on. It can also convert the combined video to a variety of formats. Merged output formats supported include mp4, mkv, mov, avi, 3gp, and others. This application allows you to combine videos with different formats, bitrates, and frame rates into a single video. It also scales multiple videos into a single scale and merges them together. It can also merge videos with different resolutions into one video. The merged videos can also be compressed together maintaining original quality to a smaller sized video than all the original video sizes combined.
Video merger allows you to merge in three different ways as follows;
Side by side:
Choose two files, and they will be merged in a side-by-side format (Horizontal stack).
Top-Bottom:
Choose two files, and they will be merged top to bottom (Vertical stack).
Sequential:
You can select unlimited files and they will be merged one after the other in a sequential format.
VideoChain by Arypex Initiative (Free tool to merge FLV Files)
Now you can combine video files from your Android device camera as well and for free. VideoChain is an easy to learn and use app (with in-built instructions) that allows you to easily combine video clips to create one video using the most advanced encoding techniques. It is an excellent tool for merging video clips from your front and rear cameras, as well as portrait and landscape video files, into a single file. It can combine MP4, MPEG, MKV, FLV, and other video clips with four different quality/compression settings available.
2 Ways to Merge/Combine FLV Files on iPhone
Magisto Video Editor (Paid tool to merge FLV Files)
It is a wonderful app to put FLV clips together on an iPhone. Using this versatile video editing app, you can merge multiple videos and create eye-catching files of up to 5 minutes. You can add text, colors, and even text slides between video frames to the video. The app’s filters can be used to further enhance the files. The app also supports a large library of audio files, which you can use to add music to your video files. And, to use all of the app’s features, you must have a paid subscription.


iMovie (Free tool to merge FLV Files)
iMovie is one of the most popular video editing apps for iOS users. You can edit and merge videos on iMovie with ease. The app is free and secure. If you are looking for a professional way to put two videos together on your iPhone, iMovie can be a good choice. FLV videos can be converted to WMV, M4V, and other popular video formats after merging. You can also modify the video output settings and delete the selected video segments as well.
A Step-by-Step Guide
Step 1: Launch the iMovie app on your iPhone. In the Projects window, press the + button.

Step 2: In the New Project window, select Movie. Browse through your video clips in the gallery and import them.

Step 3: Tap Create Movie at the iPhone screen’s bottom. The videos will automatically get merged in the iMovie timeline.
Step 4: Select the desired video file. You can include transition effects, background music, and other profiles.
Step 5: Tap Done to combine two videos into one on the iPhone using iMovie.

Step 6: To export your merged video file, tap the Share icon to save the video.
2 Ways to Merge/Combine FLV Files Online
Clideo (Paid online tool to merge FLV Files)
Now you can combine your FLV files online using Clideo’s FLV Merger. It allows you to combine several videos, images, and audio files. You will also be able to download the finished product in any format you want. And, as the tool operates online, it will not consume any of your device’s memory. Each file you add in the free edition can be up to 500 MB in size; if this is insufficient for you, you can always subscribe to Clideo Pro.
A Step-by-Step Guide
Step 1: Upload the FLV files…
Click on the “Choose files” button and select the necessary videos from your device. To add a video from Google Drive or Dropbox, use the little arrow to call a drop-down menu.
Step 2: Merge FLV and other files
To add more content, use the menu with all of the options from the previous stage. Rearrange them as you see fit. Crop the frame using one of the available aspect ratios. Upload a soundtrack, then cut it with the scissors icon and adjust the volume. When you’re done, choose a format and click “Merge.”
Step 3: Save joined FLV
Take a peek at the outcome. If you like it, save it to your device or cloud storage. Otherwise, you can return to editing without having to start over.
Veed’s Video Editor (Free online tool to merge FLV Files)
Now there’s no need to pay for expensive apps like Filmora or Wondershare Uniconvertor. You can merge your FLV files using Veed’s Video Editor. It lets you combine multiple flash videos together and export them as a single video file. You can simply do it all straight from your browser and from any device. Veed’s Video Editor is compatible with Windows XP, Windows 10, Mac, Linux, and all mobile devices. And, it is absolutely free. There’s no need for an account or to download anything.
A Step-by-Step Guide
Step 1: Upload the FLV files…
Select multiple FLV videos after clicking on ‘Choose FLV Files’. You can also drag and drop your videos into the box. They’ll be added to the editor.
Step 2: Start editing or add more videos…
You’ll be directed to the video editor, where you can split, combine, and rearrange your video clips. This is a purely optional step. More videos can be added by clicking the plus (+) sign in the editing window or by selecting “Upload” from the left menu.
Step 3: Export your new video…
You can now save your merged videos as a single MP4 file. Simply select ‘Export,’ and your download will initiate.
FAQs about Merging FLV Files
Question 1: How to combine FLV files?
Answer: To combine FLV files, hold down the Ctrl or Shift key while selecting multiple FLV files in the User’s Album, and then drag and drop to the video track on the Timeline. All FLV files will automatically merge one after the other in order.
Question 2: What browser should be used to Merge FLV?
Answer: You can use any modern browser to Merge FLV, such as Google Chrome, Firefox, Opera, or Safari.
Question 3: How long does it take to Merge FLV files?
Answer: The FLV file merger is quite quick and takes only a few seconds.
So, if you have been looking for the best options on how to merge FLV files on different mediums, the above-listed apps will serve your purpose. Now, check out the supported features, formats, and other merging functions of all the apps and choose the one that best meets your needs.
For macOS 10.14 or later
A Step-by-Step Guide to Merge FLV files on Windows/Mac using Wondershare Filmora
Step 1: Launch Wondershare Filmora and load FLV files…
When you run this FLV joiner, simply click “Import” to load all of the local FLV files that you want to merge to the User’s album of this FLV video merger. You can also just drag and drop the target files from your PC into the album.
Step 2: Merge FLV files into one…
At the bottom of this FLV file merger, there lies a Timeline. Drag FLV files from the album to the Timeline and use the slider bar to help you arrange all FLV files in the Timeline without overlapping them. That’s very important as if you put one video to another, the original video will get split. Also, make sure that all FLV files are placed in the sequence in which they are to be played. If not, you can rearrange any video clip with a simple drag-and-drop.
Step 3: Choose the target format as FLV…
When you are sure that all FLV files are in the correct required order on the Timeline, you can view the effect in real-time in the preview pane. If everything is fine, you are now ready to export this new FLV file. All you have to do is just press the “Create”
button, then go to the “Format” tab > “FLV” output format in the output window.
Step 4: Export a new FLV file…
Finally, click the “Create” button to save the settings and export the new FLV file simultaneously. When it’s done, simply navigate to the whole FLV video using the output file path.
Alternative Way to Merge/Combine FLV Files on Windows
Joyoshare Media Cutter (Paid tool to merge FLV Files)
Joyoshare Video Joiner for Windows is a comprehensive and user-friendly audio and video merging software that supports a wide range of file formats such as FLV, F4V, HD,4K, MP4, M4V, M4A, DV, MPEG, FLAV, WMA, and others. It is not only a superb video joiner for joining FLV files in batches without re-encoding, but it is also a video editor thanks to the built-in advanced editing tool. That means you can customize and enhance your FLV files as required before integrating them. The two combing modes (high-speed mode and encoding mode) it employs are also noteworthy. With high-speed mode, you can join an unlimited number of FLV files losslessly and swiftly. You can merge files in different formats without gaps and customize the codec, resolution, bit rate, frame rate, and other parameters of your FLV files while in encoding mode.
A Step-by-Step Guide
Step 1: Add FLV files…
First, go to the Joyoshare website and download the Joyoshare Video Joiner installation package. Install and configure it on your computer. Then, import FLV files into the video joiner. There are two options: click “Open File” to choose them or drag them directly into the software.
Step 2: Choose a merging mode and export format…
You must pick a format from high-speed mode and encoding mode based on your requirements by using the “Format” button. The former is only for combining files of the same format losslessly at 60 X speed. The other is for users who want to modify files while joining files in different formats. With the use of a gear icon beside the selected output format, users can change video settings such as resolution, bit rate, codes, and so on while in encoding mode.
Step 3: Remove undesirable parts…
Once finished choosing mode and format, simply press “OK” to go back to the main screen. Then double-click these FLV files one by one to preview them. You can change the timeline to remove unnecessary sections from your FLV videos. Moreover, renaming and rearranging these video files can also be realized in this step.
Step 4: Edit FLV files (optional)…
The software has an editor that allows you to easily and flexibly enhance your FLV video files by clicking “Edit” next to each file before joining.
Step 5: Merge FLV files and save…
Finally, all you have to do is press the “Convert” button to enable Joyoshare Video Joiner to begin combining these FLV files. The merged FLV file will be saved as a converted file on your computer.
Format Factory (Free tool to merge FLV Files)
Format Factory is a free Windows video joiner, recorder, converter, downloader, and editor. It supports a wide range of file types, including FLV, MKV, MP4, 3GP, WMV, SWF, AVI, MPG, VOB, WebM, and others. It is not difficult to use it to combine FLV files.
A Step-by-Step Guide
Step 1: Run Format Factory…
After installing Format Factory, go to “Video Joiner & Mux” to proceed.
Step 2: Add FLV files…
“Add Files” allows you to import FLV files in batches. When all FLV files have been loaded, click “Clip” to clip and crop FLV files as needed. Then, under “Output Settings,” choose an output format and further customize the output quality.
Step 3: Merge files…
Once done, click “OK” to get back to the first window and press “Start” to begin the merging
process.
Alternative Way to Merge/Combine FLV Files on Mac
iDealshare VideoGo (Paid tool to merge FLV Files)
You can use iDealshare VideoGo to convert media files for playback anywhere. It supports a wide range of video formats, both SD and HD. The application also features its own editor, which includes a wide range of activities. It allows you to trim the selected video, crop it, modify the brightness, contrast, and saturation, add text and image watermarks, and manage or add your own subtitles.
A Step-by-Step Guide
Step 1: Import FLV files…
To import the FLV video files that you want to merge, click the “Add File” button or just drag & drop the files.
Step 2: Choose output format…
Choose FLV as the output video format. Select FLV from the “General Video” category from the “Profile” pop-up menu.
Step 3: Merge FLV files…
Select the FLV video files that you wish to merge into one in the main window list, and then choose the “Merge Selected into One” option from the context menu. Click the “Convert” button to start combining the videos.
Faasoft FLV Joiner/Merger (Free tool to merge FLV Files)
Faasoft FLV Joiner/Merger is used to combine FLV files without any re-encoding as well as retain the output quality. Merges FLV files and converts them to more popular formats as well like; MP4, AVI, MOV, WMV, MKV, ASF, ProRes, MXF, OGV, 3GP, etc. to get played on multiple mediums. Apart from FLV files, Faasoft FLV Joiner allows you to merge various kinds of video and audio clips. In addition, this powerful tool works more than just an FLV Merger, i.e.; It is, even more, an in-built video and audio editor, with which, you can optimize any files as per requirement.
A Step-by-Step Guide
Step 1: Load FLV files…
To add FLV files to this Joiner, run FLV Merger and drag and drop the folder containing FLV files to the program’s main screen. If the FLV files you wish to merge are not in the same folder, you can drag them one by one to the software. You should put them together first to save time.
Step 2: List to merge…
Once all FLV files have loaded, pick them all and choose “Merge Selected into One” from the context menu. In the task list, the combined FLV file will have an extension name similar to “Merge 1.”
Step 3: Convert FLV clips…
Click the “Profile” drop-down button to select “FLV Flash Video Format (*.flv)” from the “Picture & Animation” category as the output format. If you want to re-encode the merged FLV file to another video format, select another output format from the list above.
Step 4: Start joining…
Simply click the round “Convert” button in the bottom right corner and let this fantastic tool do the rest.
2 Ways to Merge/Combine FLV Files on Android
Video Merger by Alyaanah (Paid tool to merge FLV Files)
Video Merger can merge any number of videos together in one video. It also accepts almost any format of videos as input. Some of the input formats for merging that are supported are mp4, mkv, 3gp, 3gpp, mov, flv, avi, mpg, mpeg, m4v, vob, wmv, webm, mts, ts, m2ts, and so on. It can also convert the combined video to a variety of formats. Merged output formats supported include mp4, mkv, mov, avi, 3gp, and others. This application allows you to combine videos with different formats, bitrates, and frame rates into a single video. It also scales multiple videos into a single scale and merges them together. It can also merge videos with different resolutions into one video. The merged videos can also be compressed together maintaining original quality to a smaller sized video than all the original video sizes combined.
Video merger allows you to merge in three different ways as follows;
Side by side:
Choose two files, and they will be merged in a side-by-side format (Horizontal stack).
Top-Bottom:
Choose two files, and they will be merged top to bottom (Vertical stack).
Sequential:
You can select unlimited files and they will be merged one after the other in a sequential format.
VideoChain by Arypex Initiative (Free tool to merge FLV Files)
Now you can combine video files from your Android device camera as well and for free. VideoChain is an easy to learn and use app (with in-built instructions) that allows you to easily combine video clips to create one video using the most advanced encoding techniques. It is an excellent tool for merging video clips from your front and rear cameras, as well as portrait and landscape video files, into a single file. It can combine MP4, MPEG, MKV, FLV, and other video clips with four different quality/compression settings available.
2 Ways to Merge/Combine FLV Files on iPhone
Magisto Video Editor (Paid tool to merge FLV Files)
It is a wonderful app to put FLV clips together on an iPhone. Using this versatile video editing app, you can merge multiple videos and create eye-catching files of up to 5 minutes. You can add text, colors, and even text slides between video frames to the video. The app’s filters can be used to further enhance the files. The app also supports a large library of audio files, which you can use to add music to your video files. And, to use all of the app’s features, you must have a paid subscription.
iMovie (Free tool to merge FLV Files)
iMovie is one of the most popular video editing apps for iOS users. You can edit and merge videos on iMovie with ease. The app is free and secure. If you are looking for a professional way to put two videos together on your iPhone, iMovie can be a good choice. FLV videos can be converted to WMV, M4V, and other popular video formats after merging. You can also modify the video output settings and delete the selected video segments as well.
A Step-by-Step Guide
Step 1: Launch the iMovie app on your iPhone. In the Projects window, press the + button.
Step 2: In the New Project window, select Movie. Browse through your video clips in the gallery and import them.
Step 3: Tap Create Movie at the iPhone screen’s bottom. The videos will automatically get merged in the iMovie timeline.
Step 4: Select the desired video file. You can include transition effects, background music, and other profiles.
Step 5: Tap Done to combine two videos into one on the iPhone using iMovie.
Step 6: To export your merged video file, tap the Share icon to save the video.
2 Ways to Merge/Combine FLV Files Online
Clideo (Paid online tool to merge FLV Files)
Now you can combine your FLV files online using Clideo’s FLV Merger. It allows you to combine several videos, images, and audio files. You will also be able to download the finished product in any format you want. And, as the tool operates online, it will not consume any of your device’s memory. Each file you add in the free edition can be up to 500 MB in size; if this is insufficient for you, you can always subscribe to Clideo Pro.
A Step-by-Step Guide
Step 1: Upload the FLV files…
Click on the “Choose files” button and select the necessary videos from your device. To add a video from Google Drive or Dropbox, use the little arrow to call a drop-down menu.
Step 2: Merge FLV and other files
To add more content, use the menu with all of the options from the previous stage. Rearrange them as you see fit. Crop the frame using one of the available aspect ratios. Upload a soundtrack, then cut it with the scissors icon and adjust the volume. When you’re done, choose a format and click “Merge.”
Step 3: Save joined FLV
Take a peek at the outcome. If you like it, save it to your device or cloud storage. Otherwise, you can return to editing without having to start over.
Veed’s Video Editor (Free online tool to merge FLV Files)
Now there’s no need to pay for expensive apps like Filmora or Wondershare Uniconvertor. You can merge your FLV files using Veed’s Video Editor. It lets you combine multiple flash videos together and export them as a single video file. You can simply do it all straight from your browser and from any device. Veed’s Video Editor is compatible with Windows XP, Windows 10, Mac, Linux, and all mobile devices. And, it is absolutely free. There’s no need for an account or to download anything.
A Step-by-Step Guide
Step 1: Upload the FLV files…
Select multiple FLV videos after clicking on ‘Choose FLV Files’. You can also drag and drop your videos into the box. They’ll be added to the editor.
Step 2: Start editing or add more videos…
You’ll be directed to the video editor, where you can split, combine, and rearrange your video clips. This is a purely optional step. More videos can be added by clicking the plus (+) sign in the editing window or by selecting “Upload” from the left menu.
Step 3: Export your new video…
You can now save your merged videos as a single MP4 file. Simply select ‘Export,’ and your download will initiate.
FAQs about Merging FLV Files
Question 1: How to combine FLV files?
Answer: To combine FLV files, hold down the Ctrl or Shift key while selecting multiple FLV files in the User’s Album, and then drag and drop to the video track on the Timeline. All FLV files will automatically merge one after the other in order.
Question 2: What browser should be used to Merge FLV?
Answer: You can use any modern browser to Merge FLV, such as Google Chrome, Firefox, Opera, or Safari.
Question 3: How long does it take to Merge FLV files?
Answer: The FLV file merger is quite quick and takes only a few seconds.
So, if you have been looking for the best options on how to merge FLV files on different mediums, the above-listed apps will serve your purpose. Now, check out the supported features, formats, and other merging functions of all the apps and choose the one that best meets your needs.
Do You Want to Use LUTs in Final Cut Pro? There Are Many Free LUTs for FCPX Available that You Can Use. Using LUTs, You Can Create Professional-Looking Content
Final Cut Pro is a powerful video editing software available for Mac OS. You can create professional-looking videos using this tool. To give your videos a more professional touch, you can use LUTs as well. It is a quick way to color grade and improve the feel of your media content. They are essentially a set of instructions that apply a particular color grading to your video.
Moreover, with so many options available, you can choose from any color grading style you want. From cinematic to retro, LUTs offer you a variety of color adjustment tones and overlays. All you have to do is to choose from free LUTs for Final Cut Pro and download your preferred one.
- Part 2: How to Apply LUTs on Final Cut Pro
- Part 3: Discussing Wondershare Filmora LUTs - The Best Video Editing Platform
Part 1: Discovering The Top Best LUTs for FCPX
You are at the right place if you’re having trouble finding the best LUTs for FCPX. This section will provide you with one of the best LUTs you can choose for your videos.
1.Free Cinematic LUTs Pack for Video Editing
This free LUT pack is a perfect choice to give your videos a cinematic look. It features a soft blue color grading with high contrast that can make your footage look like it was shot on film. This LUT is especially effective for outdoor scenes and action shots. Moreover, its color grading enhances the drama and feel of your video footage.

2.10 Free Vintage Color Presets for Final Cut Pro
10 Free Vintage Color Presets for Final Cut Pro is a great pack if you’re looking for a vintage or retro feel. It has a warm, yellowish color grading that can give your videos a nostalgic look. This pack is ideal for footage shot in the 70s, 80s, or 90s. It highlights the muddiness and brown shades in your video to add a touch of authenticity to it.

3. Perfect Green Video LUT
Perfect Green Video LUT is a pack of 3 cinematic-style LUTs. This pack is ideal for travel or nature videos as it increases the green tone in your videos. It has a lush, green color grading that can make your videos look vibrant and lively. Additionally, this pack is effective for outdoor scenes as it improves your video’s natural colors and makes it look more dynamic.

4. Cyberpunk Color Grades
Cyberpunk Color Grades is a pack of modern cyberpunk-style LUTs. It is a fantastic LUT pack if you’re working on a music video or a creative project. It has a bold, colorful grading with high saturation that can make your video stand out. This LUT pack is perfect for scenes with many neon lights or bright backgrounds. Moreover, it adds an extra pop of color and makes your videos look more energetic.

5. Pro Retouching Essentials Pack by Prince Meyson
Prince Meyson offers this skin tone enhancer LUT pack. It has a neutral, balanced color grading that can make your videos look more polished and professional. This LUT is ideal for interviews, documentaries, or corporate videos. Moreover, this pack is perfect for portraits and close-up shots. It can enhance the natural colors of your footage and make it look more refined.

Part 2: How to Apply LUTs on Final Cut Pro
Now that you’ve discovered there are many Final Cut Pro LUTs free to download. The most important thing is to learn how to use these free LUTs on your video using FCPX. Here are some methods to learn to apply LUTs using Final Cut Pro in simple steps.
Method 1 Using Custom Layer
Step1
Open Final Cut Pro and import your video. Once the video is imported, click on the clip you want to apply the LUT.

Step2
Go to the “Effect Browser” and search for the LUT option from the search menu. After selecting it, you will get a “Custom LUT” layer. Select the custom LUT layer and drag and drop it onto your video clip. Then, click on the video clip and go to the “Inspector” window.

Step3
Select the “Custom LUT” option in the inspector window and choose your desired LUT from the LUT drop-down menu. Final Cut Pro will apply your desired LUT to your video clip.

Method 2 Using Adjustment Layer
Step1
Click the plugin button once you’ve imported your video clip and choose RT Adjustment Layer. Furthermore, if you don’t have this plugin, you can download it for free.

Step2
An icon will appear once you’ve selected RT Adjustment Layer. Drag and drop this icon on top of your video clip.

Step3
Drag and drop the “Custom LUT” layer onto your RT Adjustment Layer from the Effect Browser. Click on the RT Adjustment Layer and choose your desired LUT from the “Inspector” menu.

Method 3 Change Settings To Enable LUTs
Step1
Import your video into Final Cut Pro and click on your video in the library and open the inspector window.

Step2
In the section of the “Inspector” menu, click the drop-down menu and select the “General” option. It will open up new options in the menu where you have to choose the “Camera LUT” option and select your preferred LUT. After selecting your LUT, save your video by choosing the option.

Part 3: Discussing Wondershare Filmora LUTs - The Best Video Editing Platform
If you’re looking for a great video editing tool, Wondershare Filmora might be just what you need. With many features embedded in it, it makes it easy to create professional-looking videos. Moreover, you can apply LUTs to add a cinematic touch to your footage. With over 200+ LUTs available, you can improve the color grading of your videos. Additionally, this tool allows you to adjust its intensity as well.
Furthermore, Wondershare Filmora offers options for color adjustments and enhancements. You can add transitions, templates, effects, and filters to your videos. In addition to this, it offers over 10 billion free media assets that you can use to enhance your videos. With Wondershare Filmora, you can play around with different features and options to make your content look fantastic.

Empower your videos with a new mood using different LUTs. Filmora now offers 100+ top-quality 3D LUTs cover a broad range of scenarios. Transform your videos with Filmora’s powerful 3D LUTs.
Apply LUT on Videos Apply LUT on Videos Learn More


Conclusion
In conclusion, Final Cut Pro is a powerful tool for video editing. This tool allows you to make color corrections and color adjustments to your videos. Furthermore, Final Cut Pro offers the option to use LUTs for color grading. You can find many best LUTs for FCPX available online to use in this tool. However, Wondershare Filmora is another amazing tool that you use to color-grade your videos professionally.
Part 1: Discovering The Top Best LUTs for FCPX
You are at the right place if you’re having trouble finding the best LUTs for FCPX. This section will provide you with one of the best LUTs you can choose for your videos.
1.Free Cinematic LUTs Pack for Video Editing
This free LUT pack is a perfect choice to give your videos a cinematic look. It features a soft blue color grading with high contrast that can make your footage look like it was shot on film. This LUT is especially effective for outdoor scenes and action shots. Moreover, its color grading enhances the drama and feel of your video footage.
2.10 Free Vintage Color Presets for Final Cut Pro
10 Free Vintage Color Presets for Final Cut Pro is a great pack if you’re looking for a vintage or retro feel. It has a warm, yellowish color grading that can give your videos a nostalgic look. This pack is ideal for footage shot in the 70s, 80s, or 90s. It highlights the muddiness and brown shades in your video to add a touch of authenticity to it.
3. Perfect Green Video LUT
Perfect Green Video LUT is a pack of 3 cinematic-style LUTs. This pack is ideal for travel or nature videos as it increases the green tone in your videos. It has a lush, green color grading that can make your videos look vibrant and lively. Additionally, this pack is effective for outdoor scenes as it improves your video’s natural colors and makes it look more dynamic.
4. Cyberpunk Color Grades
Cyberpunk Color Grades is a pack of modern cyberpunk-style LUTs. It is a fantastic LUT pack if you’re working on a music video or a creative project. It has a bold, colorful grading with high saturation that can make your video stand out. This LUT pack is perfect for scenes with many neon lights or bright backgrounds. Moreover, it adds an extra pop of color and makes your videos look more energetic.
5. Pro Retouching Essentials Pack by Prince Meyson
Prince Meyson offers this skin tone enhancer LUT pack. It has a neutral, balanced color grading that can make your videos look more polished and professional. This LUT is ideal for interviews, documentaries, or corporate videos. Moreover, this pack is perfect for portraits and close-up shots. It can enhance the natural colors of your footage and make it look more refined.
Part 2: How to Apply LUTs on Final Cut Pro
Now that you’ve discovered there are many Final Cut Pro LUTs free to download. The most important thing is to learn how to use these free LUTs on your video using FCPX. Here are some methods to learn to apply LUTs using Final Cut Pro in simple steps.
Method 1 Using Custom Layer
Step1
Open Final Cut Pro and import your video. Once the video is imported, click on the clip you want to apply the LUT.
Step2
Go to the “Effect Browser” and search for the LUT option from the search menu. After selecting it, you will get a “Custom LUT” layer. Select the custom LUT layer and drag and drop it onto your video clip. Then, click on the video clip and go to the “Inspector” window.
Step3
Select the “Custom LUT” option in the inspector window and choose your desired LUT from the LUT drop-down menu. Final Cut Pro will apply your desired LUT to your video clip.
Method 2 Using Adjustment Layer
Step1
Click the plugin button once you’ve imported your video clip and choose RT Adjustment Layer. Furthermore, if you don’t have this plugin, you can download it for free.
Step2
An icon will appear once you’ve selected RT Adjustment Layer. Drag and drop this icon on top of your video clip.
Step3
Drag and drop the “Custom LUT” layer onto your RT Adjustment Layer from the Effect Browser. Click on the RT Adjustment Layer and choose your desired LUT from the “Inspector” menu.
Method 3 Change Settings To Enable LUTs
Step1
Import your video into Final Cut Pro and click on your video in the library and open the inspector window.
Step2
In the section of the “Inspector” menu, click the drop-down menu and select the “General” option. It will open up new options in the menu where you have to choose the “Camera LUT” option and select your preferred LUT. After selecting your LUT, save your video by choosing the option.
Part 3: Discussing Wondershare Filmora LUTs - The Best Video Editing Platform
If you’re looking for a great video editing tool, Wondershare Filmora might be just what you need. With many features embedded in it, it makes it easy to create professional-looking videos. Moreover, you can apply LUTs to add a cinematic touch to your footage. With over 200+ LUTs available, you can improve the color grading of your videos. Additionally, this tool allows you to adjust its intensity as well.
Furthermore, Wondershare Filmora offers options for color adjustments and enhancements. You can add transitions, templates, effects, and filters to your videos. In addition to this, it offers over 10 billion free media assets that you can use to enhance your videos. With Wondershare Filmora, you can play around with different features and options to make your content look fantastic.
Empower your videos with a new mood using different LUTs. Filmora now offers 100+ top-quality 3D LUTs cover a broad range of scenarios. Transform your videos with Filmora’s powerful 3D LUTs.
Apply LUT on Videos Apply LUT on Videos Learn More
Conclusion
In conclusion, Final Cut Pro is a powerful tool for video editing. This tool allows you to make color corrections and color adjustments to your videos. Furthermore, Final Cut Pro offers the option to use LUTs for color grading. You can find many best LUTs for FCPX available online to use in this tool. However, Wondershare Filmora is another amazing tool that you use to color-grade your videos professionally.
How To Fade Audio In Kinemaster
If you have been looking for video and audio editing tools then you have probably heard of Kinemaster. It is a great video editing app that allows users to edit all aspects of the video including any audio or music that may accompany the video. It has a lot of very useful features and the user interface is fairly easy to use.
One of the things that you can do with Kinemaster is to fade out audio, a useful feature that can help the ending of any video appear more authentic. In this article, we will be looking at how you can use Kinemaster to fade audio.
Kinemaster Fade Audio Steps
The following steps show you how you can easily fade audio in Kinemaster;
Step1If you don’t have Kinemaster already, start by downloading and installing the video editor on your computer.
Step2Open Kinemaster on your computer and then click on the “New Project” icon to start. Select the aspect ratio that you would like to use. If you are not sure, we recommend choosing the “16:9” aspect ratio.
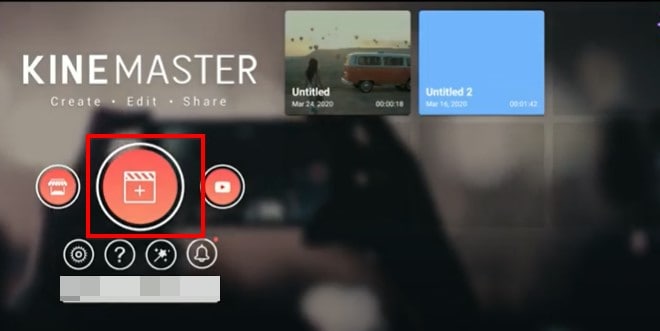
Step3In the next window, click on “Media” to select the clip you would like to add to the Kinemaster project that you have just created.
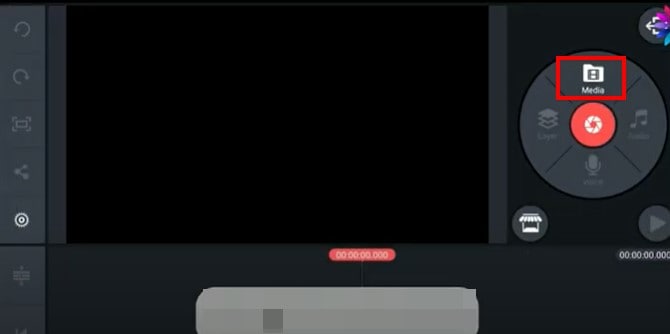
Step4To fade in and fade out the audio in the project, click on the gear icon from the options to the left of the screen.
![]()
Step5Select the “Audio” tab on the next screen and then turn on the switch next to “Audio Fade-in (Start of Project)” and “Audio Fade-out (End of Project).” This will add a fade-in and fade-out effect at the beginning of the audio and at the end of it.
Step6You can then easily set the duration of the “Audio fade-in” and “Audio fade-out” by dragging the slider below each option. We recommend setting the duration to just a few seconds.
Don’t forget to save the project when you’re done.
Kinemaster Alternative to Edit Audio
Kinemaster is a good way to edit both audio and video on your computer, but the following options are just as good;
1. VideoShop
VideoShop is a simple to use and highly effective program that you can use to create and edit videos on your computer. The interface makes it easy to import any video project that you have into the program and the wealth of very useful features can help you edit the video in various ways.
For example, you can change the speed of the video, add transitions at various points in the video, add and remove text, add and remove music and so much more. Although there is a free trial version, you will only be able to access some of the more useful features when you purchase the premium version.
The Pro version of VideoShop goes for $3.99 a month, but you can get lifetime access to the program for only $39.99. One thing that VideoShop has over Kinemaster is that it is very easy to use, even beginner users find video editing a breeze with this tool.
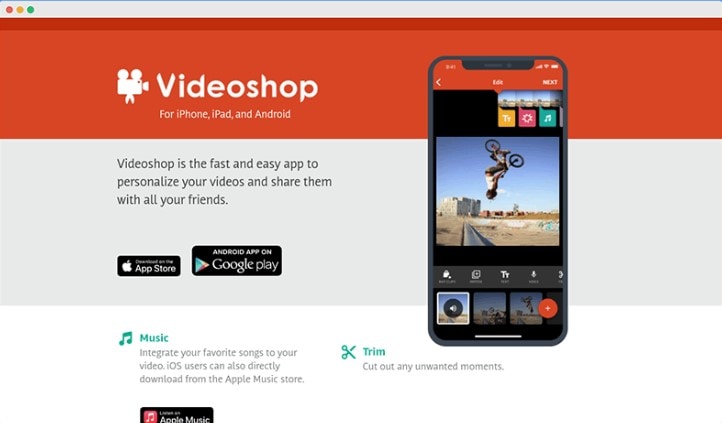
2. Filmora
If you are looking for a simple way to edit videos on Android or iOS devices, Filmora is one of the best options in the market. This mobile version of the very popular Filmora video editor is just as easy to use as its parent program. You can use it to create video projects from scratch or upload a video and make changes to it.
It offers you a lot of choices when it comes to editing features including trimming sections of the video, adding filters, adding music, adding or removing text, and even changing the canvas or the background of the video. Advanced options such as changing the speed of the video are also available.
One of the things that we love about Filmora is that you don’t even have to create an account to use it or remove the watermark added to the completed video project, watching a video ad can be enough. But this option is only available once every 24 hours, meaning that you can only remove a watermark on the free version once a day. Filmora is available for both iOS and Android and the yearly premium plan will cost you just $19.90.
3. Quik
Quik is a video editing program created by GoPro for the purpose of editing GoPro videos, but that doesn’t mean that you will not be able to use it to edit other types of videos. You can use Quik to create a new project or edit an existing video and gives users a lot of different options when it comes to video editing.
One of the main benefits of using Quik is that you can easily add music, audio, and special effects to a video as well as change the length of the video, fade audio in and out and even change when the music starts. It is also one of the best ways to use images to create collages and slideshows very easily. There are a lot of slideshow and collage templates to choose from, and you can edit them easily by adding your music and images. Quik is completely free to use and you can upload your creation to the cloud ad share the link with others.
Conclusion
Kinemaster is one of the most popular video editing tools, especially since it simplifies the video editing process to make it very easy. All the alternative tools we have outlined here in this article are selected because they can make video editing quite simple.
Free Download For Win 7 or later(64-bit)
Free Download For macOS 10.14 or later
Also read:
- YouTube Lives Are Very Popular Nowadays and People Can Interact with the Anchor at Real Time. If You Want to Comment on a YouTube Live Chat, You Can Follow the Guide Below for 2024
- Updated Looking Forward to Try Hands at Using the Icecream Slideshow Maker Program to Create High End Slideshow Presentations? Stay Here for a Complete Insight Into the Process for 2024
- Updated Looking Forward to Try Hands at Using the Icecream Slideshow Maker Program to Create High End Slideshow Presentations? Stay Here for a Complete Insight Into the Process
- Updated 2024 Approved Learn the Step-by-Step Process of Slowing Down Time-Lapse Videos on Your iPhone
- 2024 Approved Effective 10 Ways to Convert YouTube to MOV at Ease PC & Online
- Updated How to Color-Correct an S-Log Footage
- Updated This Article Will Help You Make Cinematic Shots with Simple DIY Hacks Using Stuff From Your Nearest Dollar Store. You Can Edit Your Video to Get Pro Results by Wondershare Filmora
- In 2024, How to Create Datamoshing Effect to Your Footage in After Effects?
- How to Make Sony Vegas Freeze Frame
- In 2024, Discover the Ultimate LUTs for Wondershare Filmora Uncover the Answer
- Updated Start Making Procreate GIFs and Take Your Editing Creativity to the Next Level
- New 3 Best Motion Blur Plugins for Adobe After Effects for 2024
- Updated 2024 Approved Are You a Videographer or Video Content Creator? Is Enhancing Your Videography Skills Your Priority? Do You Want to Learn the Basics of LumaFusion Color Grading? Read on to Find All the Information You Need
- New Understanding More About CapCut Lenta Template and Slow-Motion Videos
- New In 2024, Little Tricks to Create Canva Slideshow No One Is Telling You
- Best iOS Slow Motion Apps To Work With for 2024
- 2024 Approved Are You Searching the Internet for Top Wedding LUTs Premiere Pro? This Article Provides Suggestions on the Best LUT Color Presets
- Cropping Videos in VLC Step by Step
- Updated In 2024, This Article Talks in Detail About How to Export iMovie Video From iPhone, Mac, Etc. It Also Covers the Process of Using iMovie Alternative to Edit Videos on Mac. Check Out Now
- New 2024 Approved Troubleshoot Snapchat Camera Zoomed in Issue 4 Tips
- New In 2024, How to Brighten a Video in Windows 10 | Step-By-Step Guide
- In 2024, Top Online Video Background Changers Transform Your Videos with Ease
- New How to Choose A Nice GoPro for Vlogging for 2024
- New 2024 Approved The Craziest 10 AI Editors Youve Ever Seen
- Best Shortcut Towards Timeline Template
- Updated Read on to Learn About Multi Object Tracking, Its Types, and Requirements. Youll Also Learn About the Different Approaches Toward Object Tracking for 2024
- In 2024, How to Create Realistic Fire Effects
- 2024 Approved 3 Methods to Combine 2 or 3 Videos Into 1
- Complete guide for recovering photos files on Infinix .
- New 2024 Approved 10 Great MP4 to GIF Converters to Get Perfect-Made GIF
- In 2024, Best Pokemons for PVP Matches in Pokemon Go For Lava Blaze Pro 5G | Dr.fone
- In 2024, How to Share/Fake Location on WhatsApp for Nubia Red Magic 8S Pro | Dr.fone
- 8 Best Apps for Screen Mirroring Infinix Smart 8 Pro PC | Dr.fone
- Why is iPogo not working On Vivo Y56 5G? Fixed | Dr.fone
- How to Use Phone Clone to Migrate Your Vivo S18 Data? | Dr.fone
- How to Transfer Music from Meizu 21 Pro to iPod | Dr.fone
- Full Solutions to Fix Error Code 920 In Google Play on Vivo G2 | Dr.fone
- New What Is AI Advertising for 2024
- How To Unlock A Found iPhone XS Max? | Dr.fone
- How to Use Phone Clone to Migrate Your Realme GT 5 Pro Data? | Dr.fone
- In 2024, Ultimate Guide, How to Transfer Music From Apple iPhone 14 to iPhone | Dr.fone
- In 2024, The Best iSpoofer Alternative to Try On Vivo T2 5G | Dr.fone
- How To Unlock Stolen iPhone 8 In Different Conditionsin
- In 2024, What is the best Pokemon for pokemon pvp ranking On Lava Yuva 3? | Dr.fone
- 2 Ways to Transfer Text Messages from Samsung Galaxy S24 to iPhone 15/14/13/12/11/X/8/ | Dr.fone
- In 2024, 3 Things You Must Know about Fake Snapchat Location On Apple iPhone 15 Plus | Dr.fone
- In 2024, Best 3 Software to Transfer Files to/from Your Vivo Y27 4G via a USB Cable | Dr.fone
- How To Unlock The iPhone 11 SIM Lock 4 Easy Methods
- 4 Methods to Turn off Life 360 On Vivo X Fold 2 without Anyone Knowing | Dr.fone
- Stuck at Android System Recovery Of Nokia C12 Plus ? Fix It Easily | Dr.fone
- Title: Add Neon Effects to Your Dance Videos with the Help of Wondershare Filmora After Reading This Article. It Will Give a More Thrilling and Exciting Appearance
- Author: Morgan
- Created at : 2024-05-19 05:11:33
- Updated at : 2024-05-20 05:11:33
- Link: https://ai-video-editing.techidaily.com/add-neon-effects-to-your-dance-videos-with-the-help-of-wondershare-filmora-after-reading-this-article-it-will-give-a-more-thrilling-and-exciting-appearance./
- License: This work is licensed under CC BY-NC-SA 4.0.
