:max_bytes(150000):strip_icc():format(webp)/how-to-use-remote-access-on-your-samsung-smart-tv-4688935-01-29c7de5dc77e4747a8070d12f0c3d84c.jpg)
An Ultimate Guide to Flexclip Online Trimmer for 2024

An Ultimate Guide to Flexclip Online Trimmer
Flexclip video trimmer is a robust and easy-to-use online tool that lets you cut the unwanted section of any of your videos to get the desired result.
Pros
- Online trimming - no need for software.
- No ads during the editing process.
- Real-time preview of what is happening.
- Additional robust video editing features.
- Simple and intuitive UI.
Cons
- The free version lacks advanced features.
- Video export duration is limited to 1 minute in the free version.
- Signup is required for exporting videos.
Part 1. What is Flexclip Video Trimmer?
Do you want to trim your videos quickly without downloading and installing any complicated software? Well, Flexclip Trimmer might be your answer.
Flexclip is a free-to-use online video editing tool that makes it effortless for you to trim, crop, and edit your videos. The editor has an intuitive and user-friendly interface, making it easy to use even for beginners.
Besides video trimming, Flexclip has numerous other features video trimming, including support for a wide range of video formats, slideshow making, screen and voice recording, royalty-free music, pictures and video libraries, and other advanced tools.
Price: You can use the Flexclip trimmer for free. However, export duration is limited to 1 minute, and a watermark will be added to it.
Besides the free version, Flexclip comes with three pricing tiers:
- Basic: $5.99/month or $71.88/year.
- Plus: $ 9.99 /month or $119.88/ year.
- Business: $ 19.99 /month or $239.88/year.
Part 2. Key Features Of Flexclip Video Trimmer
As a powerful and easy-to-use online video trimmer, Flexclip has helped numerous users make great videos without too much hassle.
Therefore, if you’re looking for a video trimmer with all the bells and whistles, this editor must be at the top of your list. Here are some of the key features that make Flexclip Free Video Trimmer stand out from the rest:
Online Video Cutter: Flexclip Video Trimmer eliminates the need to download complex software to cut videos. Head to the website, upload your video, and let the trimmer do its magic.
Safe and Secure to Use: Flexclip editor provides guaranteed security from any malware or data breach.
Easy to Use: Flexclip trimmer is designed with simplicity in mind. Even if you’ve never edited/trimmed a video before, you’ll be able to figure out how to use this tool in no time. Upload your footage, and with a few clicks/adjustments, you will get it trimmed.
Completely Free: Flexclip offers the trimming tool completely free, and no annoying ads will be displayed during the editing process.
Real-Time Preview: Not only is the Flexclip video trimmer convenient to use, but it also provides a real-time preview of the project, so you can see exactly how your edits will look before you save them.
Multiple Video Formats Support: Flexclip Video Trimmer is a versatile and powerful tool that supports a vast range of video formats, including MOV, WEBM, M4V, and MP4.
Part 3. How To Use Flexclip Trimmer To Trim Videos?
Videos are an excellent way to share memories, tell stories, or just have some fun. But sometimes, you might want to trim a clip to make it shorter, edit out certain parts, or just give it a different look. Flexclip’s video trimmer is a splendid way to do this in just a few steps:
Step1 First, ensure you have a stable internet connection. Now, launch a browser of your choice on your PC and visit theFlexclip Video Trimmer website.
Step2 Now, drag and drop your video clip or click the “Browse Video” option to find and upload the video from your computer in the supported MP4, M4V, MOV, or WEBM video formats.
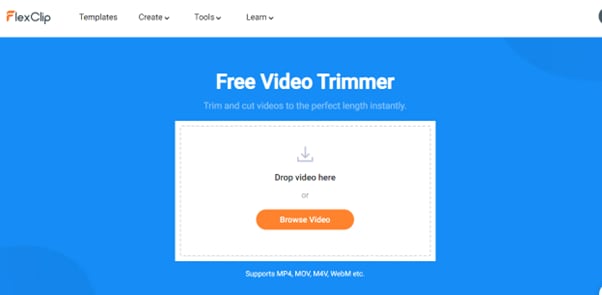
Step3 Next, wait for a few seconds to complete the video uploading process. You will be taken to the editing interface, and the trimming window will pop up. If not, click the Scissor icon below the video.
Step4 Use the handles on either side of the video timeline to select the part of the video you want to keep. Next, click the “Trim Video” button to apply your changes.
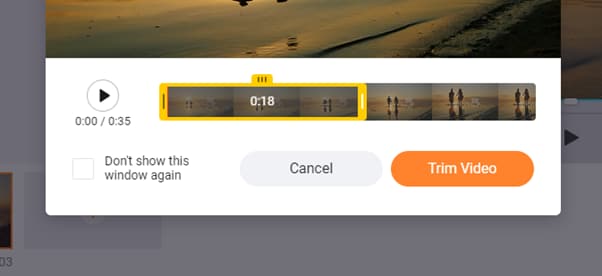
Step5 You can also use the trimming tool to split the video into multiple clips. Once you’re done, click “Export” to save your project.
You’ll be asked to sign in to export the video. Create a new account or use the existing one and click “Export” again.
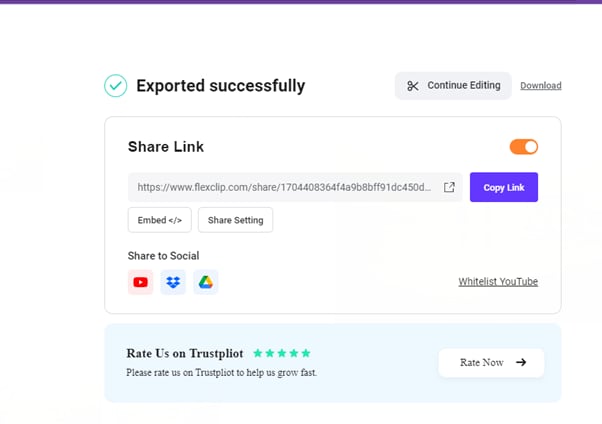
Step6 Finally, select the video resolution but bear in mind that the free version only allows 480p resolution for exporting a clip. Click the Export option and wait for the process to complete. You can also share your video to Youtube, Dropbox, or Google Drive.
Bonus Tips: Best Flexclip Video Trimmer Alternative On Desktop
A desktop video editor has a number of advantages over an online editor, such as:
- More control over the editing process.
- Can Fine tune your edits with more precision.
- Support for a wider range of video and audio formats.
- More flexibility.
- A more comprehensive set of features than online editors.
Filmora is an excellent desktop alternative to the Flexclip video trimmer and includes more advanced features with a user-friendly interface. The software also supports a bit more video formats and higher video output resolution.
Here’s how you can use Filmora to trim your video:
Step1 Download and install the Filmora software from the official website. Click the “New Project” option and select your video to upload. Next, drag and drop the clip to the timeline.
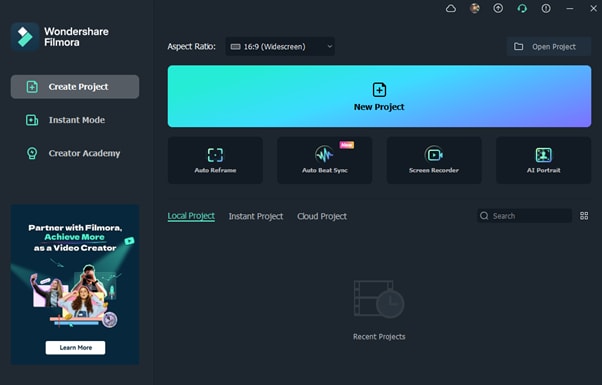
Step2 Hover your mouse near the starting or ending edges and drag the trim icon to cut your video into the desired length. You can also use the Split option to remove the unwanted part in the middle of your clip.
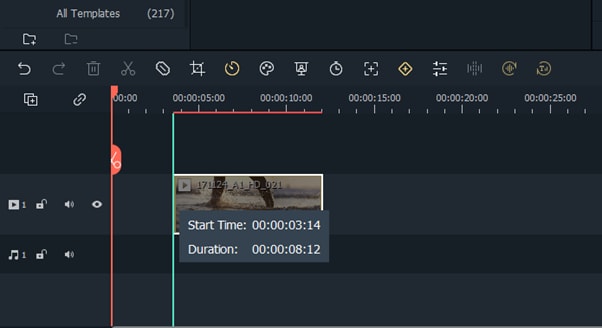
Step3 Once you are done with your video trimming, click the Export option. Select the format from the left-hand side menu and click Export again.
You can also export your videos with YouTube, Vimeo, DVD, or your device.
Conclusion
In this article, we’ve explored the Flexclip video trimmer online tool, its key features, and how to use it to trim videos with simple instructions. We also discussed the best Flexclip video trimmer alternative on desktop - Filmora and provided a step-by-step guide to help you cut an unwanted section from your clip.
Hopefully, you found this comprehensive guide useful and that you now know everything you need to know about trimming videos with Flexclip.
Free Download For Win 7 or later(64-bit)
Free Download For macOS 10.14 or later
Part 1. What is Flexclip Video Trimmer?
Do you want to trim your videos quickly without downloading and installing any complicated software? Well, Flexclip Trimmer might be your answer.
Flexclip is a free-to-use online video editing tool that makes it effortless for you to trim, crop, and edit your videos. The editor has an intuitive and user-friendly interface, making it easy to use even for beginners.
Besides video trimming, Flexclip has numerous other features video trimming, including support for a wide range of video formats, slideshow making, screen and voice recording, royalty-free music, pictures and video libraries, and other advanced tools.
Price: You can use the Flexclip trimmer for free. However, export duration is limited to 1 minute, and a watermark will be added to it.
Besides the free version, Flexclip comes with three pricing tiers:
- Basic: $5.99/month or $71.88/year.
- Plus: $ 9.99 /month or $119.88/ year.
- Business: $ 19.99 /month or $239.88/year.
Part 2. Key Features Of Flexclip Video Trimmer
As a powerful and easy-to-use online video trimmer, Flexclip has helped numerous users make great videos without too much hassle.
Therefore, if you’re looking for a video trimmer with all the bells and whistles, this editor must be at the top of your list. Here are some of the key features that make Flexclip Free Video Trimmer stand out from the rest:
Online Video Cutter: Flexclip Video Trimmer eliminates the need to download complex software to cut videos. Head to the website, upload your video, and let the trimmer do its magic.
Safe and Secure to Use: Flexclip editor provides guaranteed security from any malware or data breach.
Easy to Use: Flexclip trimmer is designed with simplicity in mind. Even if you’ve never edited/trimmed a video before, you’ll be able to figure out how to use this tool in no time. Upload your footage, and with a few clicks/adjustments, you will get it trimmed.
Completely Free: Flexclip offers the trimming tool completely free, and no annoying ads will be displayed during the editing process.
Real-Time Preview: Not only is the Flexclip video trimmer convenient to use, but it also provides a real-time preview of the project, so you can see exactly how your edits will look before you save them.
Multiple Video Formats Support: Flexclip Video Trimmer is a versatile and powerful tool that supports a vast range of video formats, including MOV, WEBM, M4V, and MP4.
Part 3. How To Use Flexclip Trimmer To Trim Videos?
Videos are an excellent way to share memories, tell stories, or just have some fun. But sometimes, you might want to trim a clip to make it shorter, edit out certain parts, or just give it a different look. Flexclip’s video trimmer is a splendid way to do this in just a few steps:
Step1 First, ensure you have a stable internet connection. Now, launch a browser of your choice on your PC and visit theFlexclip Video Trimmer website.
Step2 Now, drag and drop your video clip or click the “Browse Video” option to find and upload the video from your computer in the supported MP4, M4V, MOV, or WEBM video formats.

Step3 Next, wait for a few seconds to complete the video uploading process. You will be taken to the editing interface, and the trimming window will pop up. If not, click the Scissor icon below the video.
Step4 Use the handles on either side of the video timeline to select the part of the video you want to keep. Next, click the “Trim Video” button to apply your changes.

Step5 You can also use the trimming tool to split the video into multiple clips. Once you’re done, click “Export” to save your project.
You’ll be asked to sign in to export the video. Create a new account or use the existing one and click “Export” again.
Step6 Finally, select the video resolution but bear in mind that the free version only allows 480p resolution for exporting a clip. Click the Export option and wait for the process to complete. You can also share your video to Youtube, Dropbox, or Google Drive.

Bonus Tips: Best Flexclip Video Trimmer Alternative On Desktop
A desktop video editor has a number of advantages over an online editor, such as:
- More control over the editing process.
- Can Fine tune your edits with more precision.
- Support for a wider range of video and audio formats.
- More flexibility.
- A more comprehensive set of features than online editors.
Filmora is an excellent desktop alternative to the Flexclip video trimmer and includes more advanced features with a user-friendly interface. The software also supports a bit more video formats and higher video output resolution.
Here’s how you can use Filmora to trim your video:
Step1 Download and install the Filmora software from the official website. Click the “New Project” option and select your video to upload. Next, drag and drop the clip to the timeline.

Step2 Hover your mouse near the starting or ending edges and drag the trim icon to cut your video into the desired length. You can also use the Split option to remove the unwanted part in the middle of your clip.

Step3 Once you are done with your video trimming, click the Export option. Select the format from the left-hand side menu and click Export again.
You can also export your videos with YouTube, Vimeo, DVD, or your device.
Conclusion
In this article, we’ve explored the Flexclip video trimmer online tool, its key features, and how to use it to trim videos with simple instructions. We also discussed the best Flexclip video trimmer alternative on desktop - Filmora and provided a step-by-step guide to help you cut an unwanted section from your clip.
Hopefully, you found this comprehensive guide useful and that you now know everything you need to know about trimming videos with Flexclip.
Free Download For Win 7 or later(64-bit)
Free Download For macOS 10.14 or later
EasyHDR Review: Is This a Good Choice to Create HDR
Any professional photographer knows that “photography” is a broad niche. For example, HDR photography involves taking images in dark and bright areas. But because these images might not show much to the naked eyes, you’ll need an HDR program like EasyHDR. This software can recreate and design incredible HDR photos on Mac and Windows computers. So, this review post advises you whether Easy HDR is worth the money or not. We’ll also advise on the best way to edit and create HDR videos on PC.
Part 1: Summary Box on Easy HDR
| Description | EasyHDR is an HDR photography software for highlighting image details in HDR photos. It supports raw images and batch processing. |
|---|---|
| Pricing | $33 for a lifetime license |
| Operating System | Windows 7/8/10/11 and macOS 10.12 or newer |
| Layout | 4.5/5 |
| Easy to use | 4.8/5 |
| HDQ quality | 4.2/5 |
| Post-processing | 3.5/5 |
Before we dive deeper into this Easy HDRi review, let’s first discuss how this HDR software rates in some critical aspects:
1. Effectiveness - 4.8/5
The HDRi process on this software is very effective, although you shouldn’t have high expectations. It provides manual and automatic lens correction properties, although using the manual option might need a learning curve. Other extras include ghost removal and automatic alignment.
2. Price - 4.7/5
Easy HDR is not necessarily a free program. Although there’s a free demo version, it’s pretty limited in features. Therefore, purchase the premium plan for $33 or $55 for personal and lifetime licenses. As a seasoned HDR editor, you should know that other HDR programs like Aurora HDR cost way more than this.
3. Supported OS - 5/5
This HDR photography program is compatible with Windows and macOS systems, which is a big plus. You can install it on Windows 7 or newer and macOS 10.12 or newer. Sorry, Linux users!
4. Ease of use - 4.8
Easy HDR is one of the most beginner-friendly HDR processing tools despite the advanced management tools. It features automatic lens correction, ghost removal, and HDR merging capabilities.
5. Best for - Beginner HDRi editors
This program’s simple approach makes it perfect for HDRi photographers without prior editing skills. Also, if you’re a beginner on a tight budget, easyHDR is the best software for you.
Our Verdict
Up to this juncture, you might wonder if Easy HDR is worth the money or not. Well, that depends on what you want. If you have minimal HDR editing knowledge, then this is the best professional program for you.
The straightforward layout boasts automatic HDR editing tools to make your work effortless. In addition, it supports a wide array of image formats, including photos taken using your DSLR camera. And the $33/lifetime price should be manageable by many average Joes.
But on the flip side, Easy HDR lacks in-depth post-processing tools. Also, it lacks the all-important “undo” feature, which is vital in HDR image editing. Other than that, it’s the perfect program to make dramatic and realistic HDR photos.
Pros
- Simple layout.
- Make realistic HDR images with automatic tools.
- Easy HDRi Blender and Adobe Lightroom plugins.
- Standalone Easy HDR desktop program.
- Batch processing supported.
- Compatible with multiple image formats, including RAW.
Cons
- It doesn’t have advanced HDR post-processing tools.
- No HDR feature for editing.
Part 2. Detailed Review for Easy HDR
Before diving deeper into the detailed Easy HDR features, it’s important to note that the program has a demo version. You can use this version to practice and study the vital components of easyHDR. But be guided that the demo version exports images with a watermark. In addition, users can’t save HDRi in TIFF format. Let’s get in!
1. High-Quality Bracket Merging
A good quality HDRi software should easily merge different image exposures, making the photo look natural and spectacular. To start incorporating, drag the image brackets to easyHDR and press “Ok” on the pop-up screen. You can now try the different bracket merging effects until you find something that suits your preference.
2. Editing features
EasyHDR goes a step further to provide its users with a comprehensive list of editing features. For example, the “Clone Stamp” tool can remove unwanted objects like cables without blurring the photo. You can also use the “Tone Curve” feature to adjust the brightness of shadows and highlights.
3. Ghost removal
No, this is not the scary ghost that you know. Instead, these ghosting artefacts appear in misaligned photos due to moving objects like leaves, branches, cars, people, etc. With Easy HDR, you can eliminate the “ghosts” manually or automatically. Simply open the photo and turn on “Ghost Removal” to remove them automatically.
4. HDR batch processing
As expected, you can find it pretty tedious to import and merge each HDR bracket individually. For this reason, easyHDR comes with a “Batch Processing” feature that allows users to combine a whole folder of brackets automatically.
5. LDR enhancement
Although we’ve mainly focused on brackets and photos in this post, it’s important to note that easyHDR also works with single images. Instead of having three separate bracketed exposures, LDR (Low Dynamic Range) enhancement allows you to generate exposures from a single JPEG or RAW photo.
Bonus Tips: The Best Way to Edit HDR videos on your Desktop
Like HDR images, HDR videos offer more comprehensive displays in dark and bright surroundings. In short, these videos allow more colourful and detailed highlight representations. Unfortunately, not all HDR editing programs can merge bracketed exposures effortlessly to produce outstanding results. And those that do can cost you an arm and a leg.
With that in mind, we recommend Wondershare Filmora 11 for professional and semi-professional HDR editors. It’s a simple but detailed program that allows users to edit HDR materials quickly and easily. It houses thousands of free effects you’ll use with the Blending Mode to create nice HDR footage. Filmora 11 works with any video format, including RAW footage from your camcorder. And of course, there are many other editing features like color correction, color grading, image stabilization, chroma key/green screen, etc.
Steps to add an HDR effect to a standard video on Filmora 11:
Step1Open the video on Filmora 11
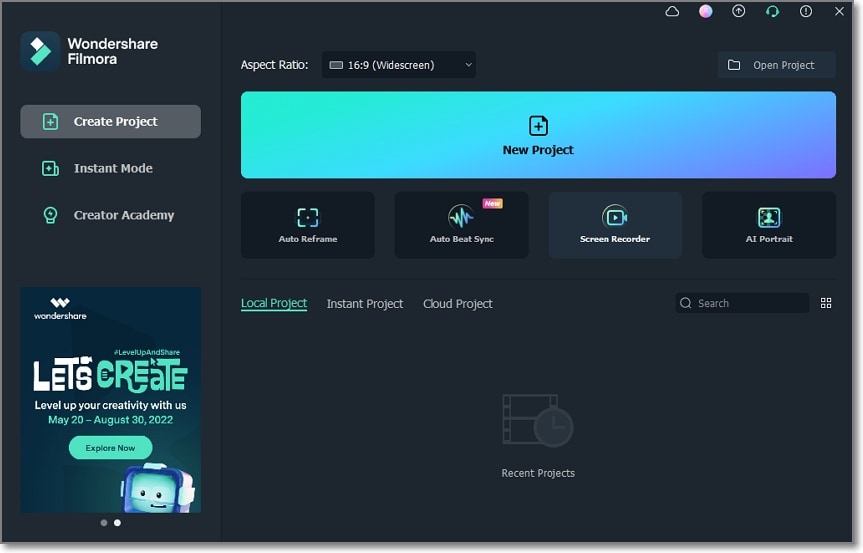
Run Wondershare Filmora 11 on your Mac/Win computer and start a new project. After creating a project, click Import Media to upload the video to edit and move it to the storyboard.
Step2Add a blending mode effect
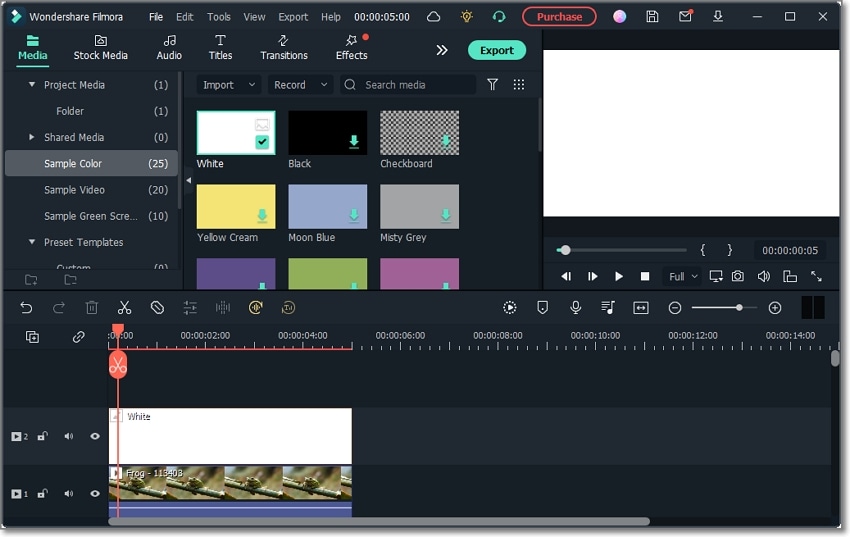
Next, select the video and choose White as the color overlay. To do that, open the Sample color options and move the While color on the top timeline.
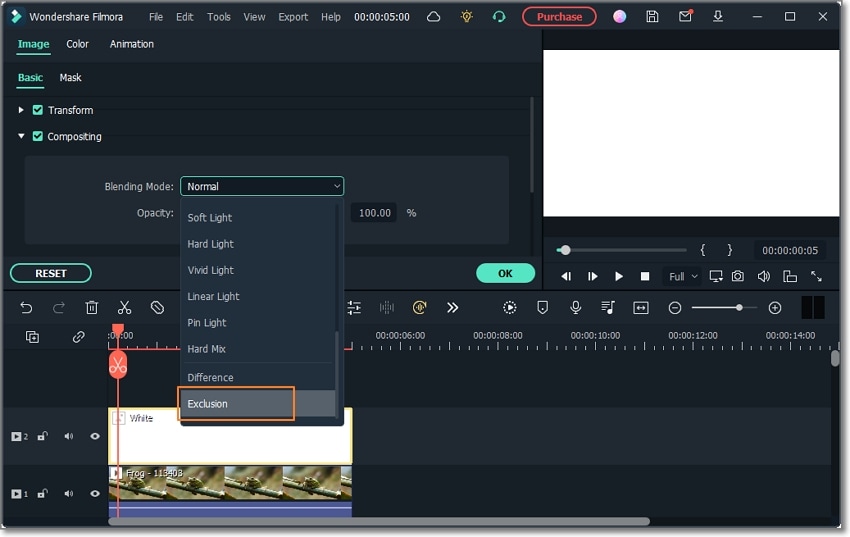
After that, it’s time to change the Blending Mode of the color overlay. To do that, right-click the color track and choose Edit Properties. Then tap Composition and then select Exclusion on the Blending Mode drop-down menu.
Step3Apply the B&W Film color effect
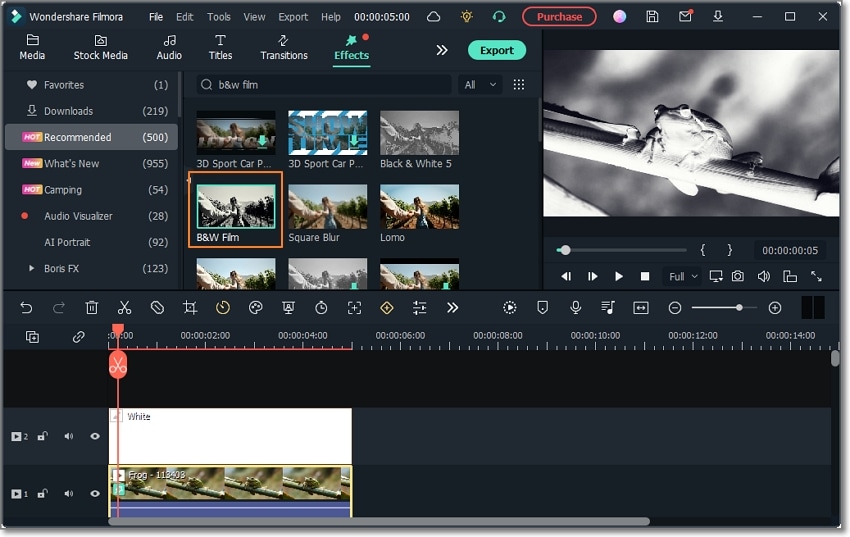
Now tap the Effect tab and search for the B&W Film effect. This film effect should be free to use whether using a paid or free account. After downloading it, add the effect overlay to the video track and export the video.
Step4Import the uploaded video
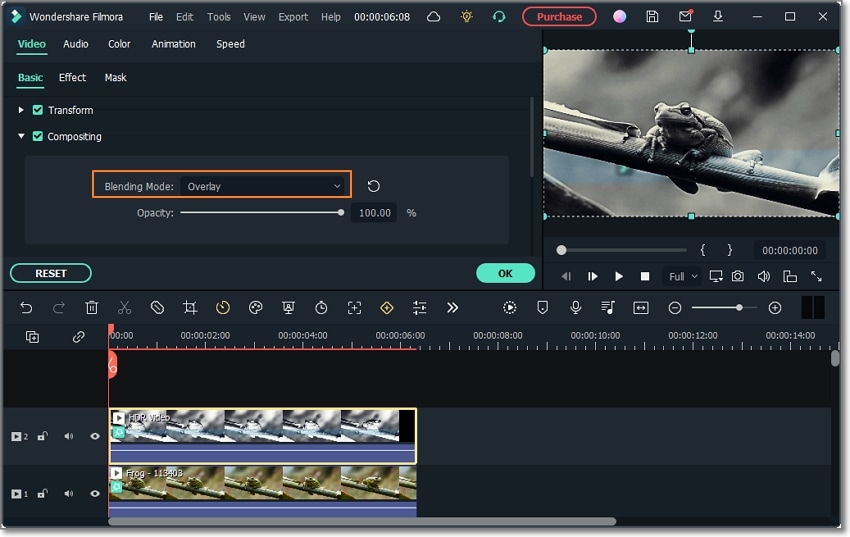
After creating the video, import it on Filmora 11 and delete the white color overlay and W&B Film effects. Now add the imported video on the first track, then search and apply a Square Blur effect. Also, change the Blending Mode of the footage to Overlay. Meanwhile, click the Effect tab and adjust the Size slider accordingly. For example, you can choose 10.
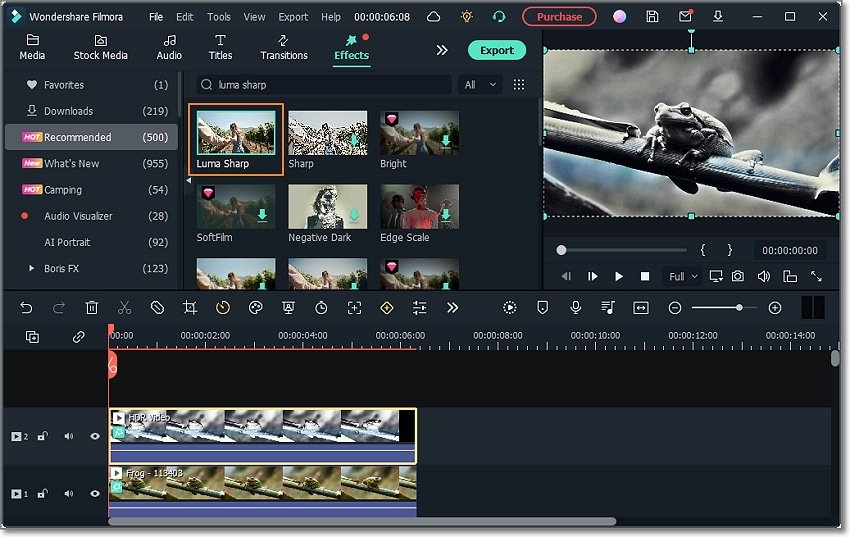
Don’t stop there. Open the Effects tab and add the Lomo effect to your video. Also, search and add the Luma Sharp effect. Remember that you can retouch these effects accordingly under the Effect tab. And lastly, export the new HDR video. That’s it!
Final Words
There you have it. Easy HDR is arguably the most-beginner friendly program to edit your photos on desktops. Although it doesn’t feature much, the available editing features should be enough to help you create incredible HDR images. And don’t forget to use Wondershare Filmora 11 to apply a cool HDR effect to your footage. Give it a try!
Free Download For Win 7 or later(64-bit)
Free Download For macOS 10.14 or later
Before we dive deeper into this Easy HDRi review, let’s first discuss how this HDR software rates in some critical aspects:
1. Effectiveness - 4.8/5
The HDRi process on this software is very effective, although you shouldn’t have high expectations. It provides manual and automatic lens correction properties, although using the manual option might need a learning curve. Other extras include ghost removal and automatic alignment.
2. Price - 4.7/5
Easy HDR is not necessarily a free program. Although there’s a free demo version, it’s pretty limited in features. Therefore, purchase the premium plan for $33 or $55 for personal and lifetime licenses. As a seasoned HDR editor, you should know that other HDR programs like Aurora HDR cost way more than this.
3. Supported OS - 5/5
This HDR photography program is compatible with Windows and macOS systems, which is a big plus. You can install it on Windows 7 or newer and macOS 10.12 or newer. Sorry, Linux users!
4. Ease of use - 4.8
Easy HDR is one of the most beginner-friendly HDR processing tools despite the advanced management tools. It features automatic lens correction, ghost removal, and HDR merging capabilities.
5. Best for - Beginner HDRi editors
This program’s simple approach makes it perfect for HDRi photographers without prior editing skills. Also, if you’re a beginner on a tight budget, easyHDR is the best software for you.
Our Verdict
Up to this juncture, you might wonder if Easy HDR is worth the money or not. Well, that depends on what you want. If you have minimal HDR editing knowledge, then this is the best professional program for you.
The straightforward layout boasts automatic HDR editing tools to make your work effortless. In addition, it supports a wide array of image formats, including photos taken using your DSLR camera. And the $33/lifetime price should be manageable by many average Joes.
But on the flip side, Easy HDR lacks in-depth post-processing tools. Also, it lacks the all-important “undo” feature, which is vital in HDR image editing. Other than that, it’s the perfect program to make dramatic and realistic HDR photos.
Pros
- Simple layout.
- Make realistic HDR images with automatic tools.
- Easy HDRi Blender and Adobe Lightroom plugins.
- Standalone Easy HDR desktop program.
- Batch processing supported.
- Compatible with multiple image formats, including RAW.
Cons
- It doesn’t have advanced HDR post-processing tools.
- No HDR feature for editing.
Part 2. Detailed Review for Easy HDR
Before diving deeper into the detailed Easy HDR features, it’s important to note that the program has a demo version. You can use this version to practice and study the vital components of easyHDR. But be guided that the demo version exports images with a watermark. In addition, users can’t save HDRi in TIFF format. Let’s get in!
1. High-Quality Bracket Merging
A good quality HDRi software should easily merge different image exposures, making the photo look natural and spectacular. To start incorporating, drag the image brackets to easyHDR and press “Ok” on the pop-up screen. You can now try the different bracket merging effects until you find something that suits your preference.
2. Editing features
EasyHDR goes a step further to provide its users with a comprehensive list of editing features. For example, the “Clone Stamp” tool can remove unwanted objects like cables without blurring the photo. You can also use the “Tone Curve” feature to adjust the brightness of shadows and highlights.
3. Ghost removal
No, this is not the scary ghost that you know. Instead, these ghosting artefacts appear in misaligned photos due to moving objects like leaves, branches, cars, people, etc. With Easy HDR, you can eliminate the “ghosts” manually or automatically. Simply open the photo and turn on “Ghost Removal” to remove them automatically.
4. HDR batch processing
As expected, you can find it pretty tedious to import and merge each HDR bracket individually. For this reason, easyHDR comes with a “Batch Processing” feature that allows users to combine a whole folder of brackets automatically.
5. LDR enhancement
Although we’ve mainly focused on brackets and photos in this post, it’s important to note that easyHDR also works with single images. Instead of having three separate bracketed exposures, LDR (Low Dynamic Range) enhancement allows you to generate exposures from a single JPEG or RAW photo.
Bonus Tips: The Best Way to Edit HDR videos on your Desktop
Like HDR images, HDR videos offer more comprehensive displays in dark and bright surroundings. In short, these videos allow more colourful and detailed highlight representations. Unfortunately, not all HDR editing programs can merge bracketed exposures effortlessly to produce outstanding results. And those that do can cost you an arm and a leg.
With that in mind, we recommend Wondershare Filmora 11 for professional and semi-professional HDR editors. It’s a simple but detailed program that allows users to edit HDR materials quickly and easily. It houses thousands of free effects you’ll use with the Blending Mode to create nice HDR footage. Filmora 11 works with any video format, including RAW footage from your camcorder. And of course, there are many other editing features like color correction, color grading, image stabilization, chroma key/green screen, etc.
Steps to add an HDR effect to a standard video on Filmora 11:
Step1Open the video on Filmora 11

Run Wondershare Filmora 11 on your Mac/Win computer and start a new project. After creating a project, click Import Media to upload the video to edit and move it to the storyboard.
Step2Add a blending mode effect

Next, select the video and choose White as the color overlay. To do that, open the Sample color options and move the While color on the top timeline.

After that, it’s time to change the Blending Mode of the color overlay. To do that, right-click the color track and choose Edit Properties. Then tap Composition and then select Exclusion on the Blending Mode drop-down menu.
Step3Apply the B&W Film color effect

Now tap the Effect tab and search for the B&W Film effect. This film effect should be free to use whether using a paid or free account. After downloading it, add the effect overlay to the video track and export the video.
Step4Import the uploaded video

After creating the video, import it on Filmora 11 and delete the white color overlay and W&B Film effects. Now add the imported video on the first track, then search and apply a Square Blur effect. Also, change the Blending Mode of the footage to Overlay. Meanwhile, click the Effect tab and adjust the Size slider accordingly. For example, you can choose 10.

Don’t stop there. Open the Effects tab and add the Lomo effect to your video. Also, search and add the Luma Sharp effect. Remember that you can retouch these effects accordingly under the Effect tab. And lastly, export the new HDR video. That’s it!
Final Words
There you have it. Easy HDR is arguably the most-beginner friendly program to edit your photos on desktops. Although it doesn’t feature much, the available editing features should be enough to help you create incredible HDR images. And don’t forget to use Wondershare Filmora 11 to apply a cool HDR effect to your footage. Give it a try!
Free Download For Win 7 or later(64-bit)
Free Download For macOS 10.14 or later
Best 12 Best Freeze Frame Video Editing Examples
Top 12 Best Freeze Frame Video Editing Examples
An easy yet powerful editor
Numerous effects to choose from
Detailed tutorials provided by the official channel
Freeze frame effect in video editing is a skill that requires more practice to master. It adds drama and impact to movies. If you want to see more energy and acting in the videos you watch, then you should see more freeze-frame examples.
Sometimes we notice that a particular action stays on longer than necessary in a movie or video. The filmmakers use this skill to emphasize some intense moments further to sustain or pique your interest.
The freeze-frame video editing feature is a valuable skill that helps filmmakers make excellent movies. We have a list of the top 12 examples of freeze-frame effects in movies for you.
In this article
01 [What is freeze-frame video editing?](#Part 1)
02 [Ways to use freeze-frame video editing](#Part 2)
03 [What are the best freeze-frame video editing examples?](#Part 3)
Part 1 What Is Freeze Frame Video Editing?
Freeze frame video editing is a video editing technique that halts movement in a video for a given period. It converts moving pictures into still photography for some time. These video editor effects help filmmakers gear attention to the video editing or filmmaking process. In other words, they are self-reflexive.
Part 2 Ways to Use Freeze Frame in Video editing
Freeze frames can be helpful in 3 significant ways in video editing;
● At the beginning of a movie/video: Freeze-frame at the beginning helps you pique the audience’s interest and give them a sneak peek of what to expect in the movie. This freeze-frame technique was used in the film ‘Good Fellas’ to pique the audience’s interests.
● At the end: Using a freeze-frame allows the audience to choose or decide how the movie ends, whether it is obvious. The ‘breakfast club’ filmmakers use a freeze-frame at the end to emphasize the young boy.
● In the middle, subtly capturing intense moments like in the movie ‘The Departed.’
Part 3 What are the Best Freeze-Frame Video Editing Examples?
It takes a great deal of skill to employ freeze frame with the best results correctly. It might bore the audience or give another impression other than the intended when not done effectively.
But several movie directors have effectively used the freeze-frame video editing technique that wowed the audience.
Here is a list of the best freeze frame examples you would love;
01The Departed
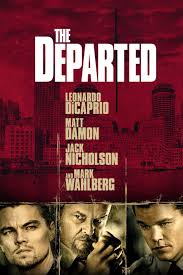
In this 2006 movie, an undercover cop and a mole try to identify each other. Scorsese shows his editing prowess once again as he uses freeze-frame more subtly.
He changes the frame speed instead of stopping on one frame for a considerably longer time. This emphasizes some memorable moments that you may overlook on a first watch.
02Rocky III
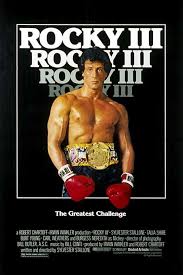
The freeze-frame came in during the final match between Apollo and Balboa in this movie.
During the first 3 Rocky movies, Apollo and Balboa had an intriguing rivalry. At the end of Rocky III, the duo decides to engage in a friendly battle to determine who was the Lord in boxing.
The movie ends in a freeze-frame with Rocky swinging a right hook after Apollo imitates the bell, saying, “Ding Dong.”
The freeze-frame allows the audience to guess who the winner will be, thus a longer time to think of the movie after watching.
03400 Blows
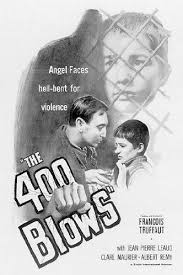
In 400 Blows, the main character Antoine, a young Parisian, was hardly out of trouble.
In an attempt to end his troubles, he arrives at the beach after running away from a soccer match.
He is faced with either jumping right in or going back. The movie ends in a freeze-frame as no one finds out. The decision was left to the audience.
04Thelma and Louise
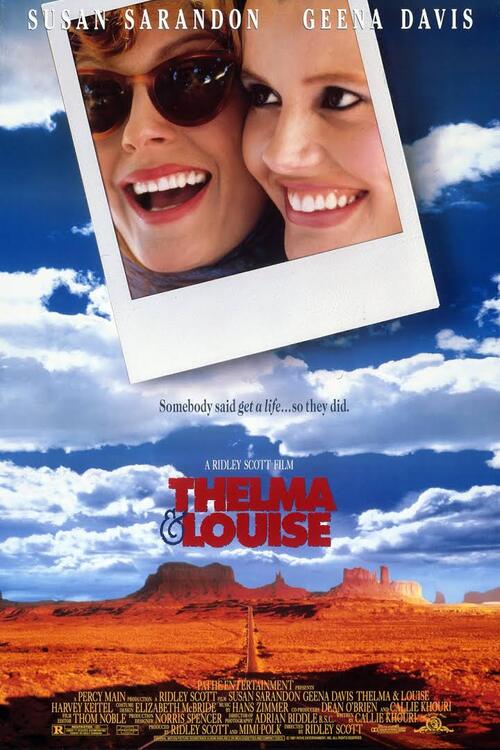
Thelma and Louise is about two (2) friends, Thelma Dickinson and Louise Sawyer. They both rise to defend themselves in a male-dominated world. In the film, Thelma and Louise are both running from the authorities. Louise killed a man who almost raped her friend, Thelma, thus the run. Things get out of control as they try to escape to Mexico, away from the authorities.
While on the run, they get ambushed by the police towards the grand canyon. The audience, at this point, is in suspense as to whether the ladies will survive or not.
Instead of surrendering, they drive right into the grand canyon, and the movie ends in a freeze-frame as they get caught hanging in the air while plunging into the canyon.
Regular movies might decide to give us all the details of the car plunging and exploding.
05The Wolf of Wall Street
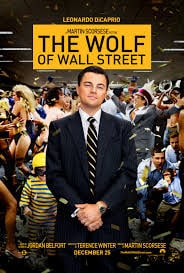
Scorsese uses freeze-frame at the beginning of this movie, just as he did in Good Fellas. The freeze-frame effect here helps introduce the character and shows us the plot of the movie hence piquing the audience’s interests immediately.
06Out of Sight
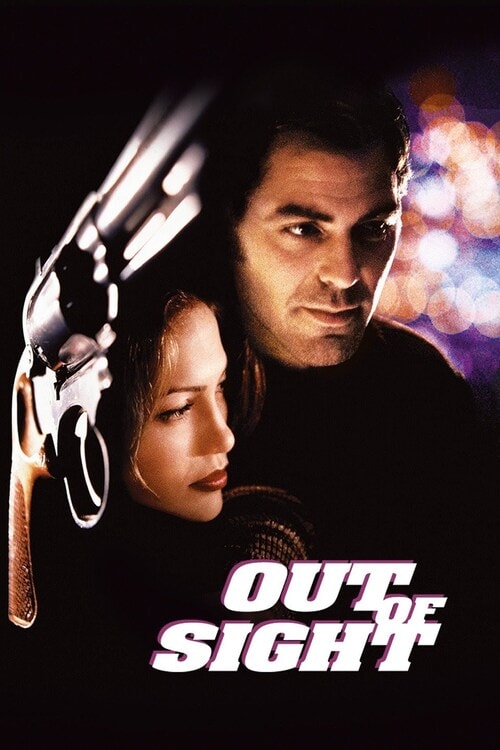
This movie is another excellent example of freeze-frame video editing. What other way to pique the audience’s interest significantly and emphasize them than capture them in a freeze-frame.
07Death Proof
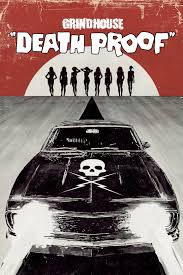
In this movie, the freeze-frame stays till the very end. It captures three women as they raise their hands-on celebration after successfully beating to death a psychopath who has been killing young women.
08Butch Cassidy and the Sundance Kid
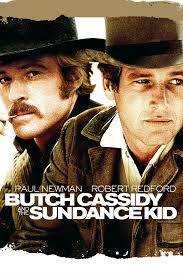
This movie follows two train robbers, Butch Cassidy and Harry Longabaugh, known as the ‘Sundance Kid.’ After conducting several robberies, they go on the run as the authorities pursue them. After a gun battle with the authorities, they take cover inside a building, but they get surrounded with no other escape route.
Thus they decide to engage in the last fight instead of surrendering, and you see them in a gun battle with the authorities. The movie ends with them caught in a freeze-frame brandishing their guns at the officers instead of actual bloodshed. Though we all know they will get killed.
09Good Fellas
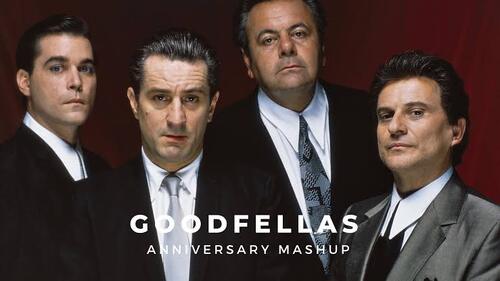
Initially, we mentioned that a freeze-frame could be of use at the beginning of a movie. Scorsese used this effectively in ‘Good Fellas’ to emphasize the movie plot.
In the opening scene, the characters Henry, Jimmy, and Tonny, played by Ray Liotta, Robert De Niro, and Joe Pesci, respectively, stop their car in the middle of the road.
They open their truck and see a man badly wounded and beaten, Tonny stabs him, and Jimmy shoots him. Henry then closes the truck and looks on in a freeze-frame before uttering the lines, “As far back as I can remember, I have always wanted to be a gangster.”
This lets us know right away what will happen in the movie. That person will get killed, and this is the mob territory.
10Harry Potter and the Prisoner of Azkaban
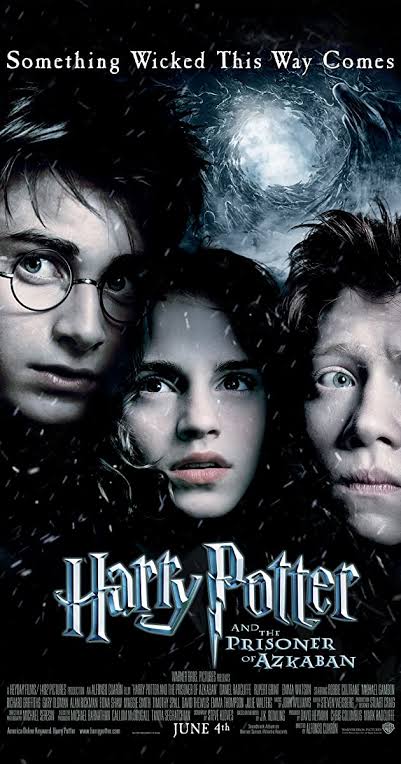
During a bad and weird year at Hogwarts, Harry potter experiences an extremely joyous moment when he goes anti-gravity on his new Firebolt broom.
He becomes overjoyed and his expression gets captured in a freeze-frame.
11The Breakfast Club
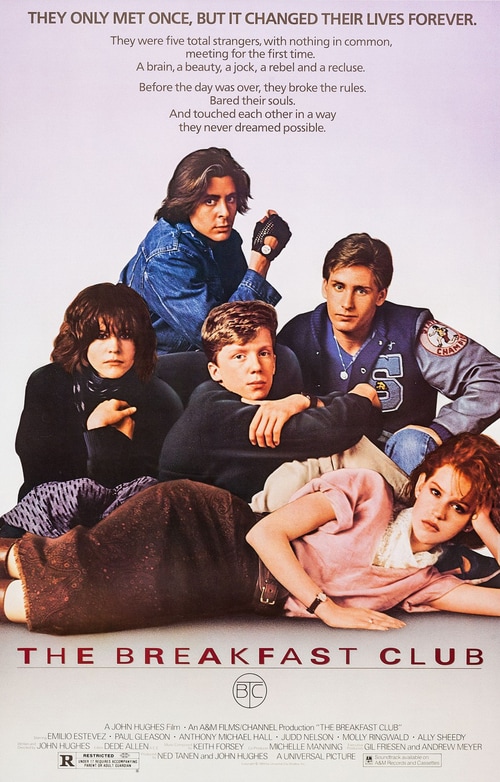
The Breakfast Club is an 80s movie showing teenagers trying to find their identity in life and overcoming the challenges of these years.
This is another freeze frame example where the filmmakers showed great expertise. The character John Bender is caught in a freeze-frame, punching the air to celebrate his victory.
He has just shared a kiss with the class sweetheart Claire. He and his classmates have also just won over the authoritative principal, Mr. Vernon.
12Pulp Fiction: Pumpkin and Honey Bunny.
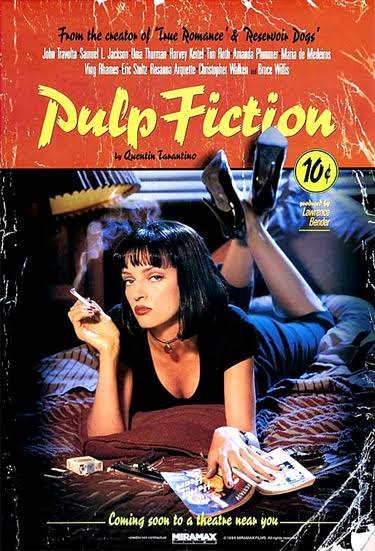
Pulp Fiction is another movie such as ‘Good Fellas’ with its freeze-frame edition done at the movie’s beginning.
Pumpkin and Honey Bunny are shown at the movie’s beginning, sitting together in a diner. They argue whether it will be safer to rub a bank or a restaurant. In the end, they settle for a diner — the same one they are sitting in.
They kiss and pull out their guns, and the images freeze before the credits roll out.
The freeze-frame gives us a sneak peek of the violence to experience in the movie, and indeed, we were not disappointed.
For Win 7 or later (64-bit)
For macOS 10.12 or later
With Wondershare Filmora Video Editor ‘s speed ramping feature, you can adjust your video speed while controlling the keyframes to create fascinating cinematic videos.
Filmora is a video editing tool developed by wondershare and has exciting features. Filmora makes video editing easy and seamless yet produces professional results.
Filmora’s freeze-frame feature helps bring dynamism and energy to your videos using its keyframe feature.
● Ending Thoughts →
● It is an inexplicable feeling that we get every time we remember a movie we watched a long time ago, the ones whereas kept debating with our friends as to what would have happened.
● That is the purpose of adding freeze-frame effects at the end of videos. So you keep thinking about them.
● Now that you know this effect, you can figure out which freeze-frame video examples you still find very interesting. Also, do not hesitate to try out the new features of Filmora. It would bring out the best of your video to the audience.
Freeze frame effect in video editing is a skill that requires more practice to master. It adds drama and impact to movies. If you want to see more energy and acting in the videos you watch, then you should see more freeze-frame examples.
Sometimes we notice that a particular action stays on longer than necessary in a movie or video. The filmmakers use this skill to emphasize some intense moments further to sustain or pique your interest.
The freeze-frame video editing feature is a valuable skill that helps filmmakers make excellent movies. We have a list of the top 12 examples of freeze-frame effects in movies for you.
In this article
01 [What is freeze-frame video editing?](#Part 1)
02 [Ways to use freeze-frame video editing](#Part 2)
03 [What are the best freeze-frame video editing examples?](#Part 3)
Part 1 What Is Freeze Frame Video Editing?
Freeze frame video editing is a video editing technique that halts movement in a video for a given period. It converts moving pictures into still photography for some time. These video editor effects help filmmakers gear attention to the video editing or filmmaking process. In other words, they are self-reflexive.
Part 2 Ways to Use Freeze Frame in Video editing
Freeze frames can be helpful in 3 significant ways in video editing;
● At the beginning of a movie/video: Freeze-frame at the beginning helps you pique the audience’s interest and give them a sneak peek of what to expect in the movie. This freeze-frame technique was used in the film ‘Good Fellas’ to pique the audience’s interests.
● At the end: Using a freeze-frame allows the audience to choose or decide how the movie ends, whether it is obvious. The ‘breakfast club’ filmmakers use a freeze-frame at the end to emphasize the young boy.
● In the middle, subtly capturing intense moments like in the movie ‘The Departed.’
Part 3 What are the Best Freeze-Frame Video Editing Examples?
It takes a great deal of skill to employ freeze frame with the best results correctly. It might bore the audience or give another impression other than the intended when not done effectively.
But several movie directors have effectively used the freeze-frame video editing technique that wowed the audience.
Here is a list of the best freeze frame examples you would love;
01The Departed

In this 2006 movie, an undercover cop and a mole try to identify each other. Scorsese shows his editing prowess once again as he uses freeze-frame more subtly.
He changes the frame speed instead of stopping on one frame for a considerably longer time. This emphasizes some memorable moments that you may overlook on a first watch.
02Rocky III

The freeze-frame came in during the final match between Apollo and Balboa in this movie.
During the first 3 Rocky movies, Apollo and Balboa had an intriguing rivalry. At the end of Rocky III, the duo decides to engage in a friendly battle to determine who was the Lord in boxing.
The movie ends in a freeze-frame with Rocky swinging a right hook after Apollo imitates the bell, saying, “Ding Dong.”
The freeze-frame allows the audience to guess who the winner will be, thus a longer time to think of the movie after watching.
03400 Blows

In 400 Blows, the main character Antoine, a young Parisian, was hardly out of trouble.
In an attempt to end his troubles, he arrives at the beach after running away from a soccer match.
He is faced with either jumping right in or going back. The movie ends in a freeze-frame as no one finds out. The decision was left to the audience.
04Thelma and Louise

Thelma and Louise is about two (2) friends, Thelma Dickinson and Louise Sawyer. They both rise to defend themselves in a male-dominated world. In the film, Thelma and Louise are both running from the authorities. Louise killed a man who almost raped her friend, Thelma, thus the run. Things get out of control as they try to escape to Mexico, away from the authorities.
While on the run, they get ambushed by the police towards the grand canyon. The audience, at this point, is in suspense as to whether the ladies will survive or not.
Instead of surrendering, they drive right into the grand canyon, and the movie ends in a freeze-frame as they get caught hanging in the air while plunging into the canyon.
Regular movies might decide to give us all the details of the car plunging and exploding.
05The Wolf of Wall Street

Scorsese uses freeze-frame at the beginning of this movie, just as he did in Good Fellas. The freeze-frame effect here helps introduce the character and shows us the plot of the movie hence piquing the audience’s interests immediately.
06Out of Sight

This movie is another excellent example of freeze-frame video editing. What other way to pique the audience’s interest significantly and emphasize them than capture them in a freeze-frame.
07Death Proof

In this movie, the freeze-frame stays till the very end. It captures three women as they raise their hands-on celebration after successfully beating to death a psychopath who has been killing young women.
08Butch Cassidy and the Sundance Kid

This movie follows two train robbers, Butch Cassidy and Harry Longabaugh, known as the ‘Sundance Kid.’ After conducting several robberies, they go on the run as the authorities pursue them. After a gun battle with the authorities, they take cover inside a building, but they get surrounded with no other escape route.
Thus they decide to engage in the last fight instead of surrendering, and you see them in a gun battle with the authorities. The movie ends with them caught in a freeze-frame brandishing their guns at the officers instead of actual bloodshed. Though we all know they will get killed.
09Good Fellas

Initially, we mentioned that a freeze-frame could be of use at the beginning of a movie. Scorsese used this effectively in ‘Good Fellas’ to emphasize the movie plot.
In the opening scene, the characters Henry, Jimmy, and Tonny, played by Ray Liotta, Robert De Niro, and Joe Pesci, respectively, stop their car in the middle of the road.
They open their truck and see a man badly wounded and beaten, Tonny stabs him, and Jimmy shoots him. Henry then closes the truck and looks on in a freeze-frame before uttering the lines, “As far back as I can remember, I have always wanted to be a gangster.”
This lets us know right away what will happen in the movie. That person will get killed, and this is the mob territory.
10Harry Potter and the Prisoner of Azkaban

During a bad and weird year at Hogwarts, Harry potter experiences an extremely joyous moment when he goes anti-gravity on his new Firebolt broom.
He becomes overjoyed and his expression gets captured in a freeze-frame.
11The Breakfast Club

The Breakfast Club is an 80s movie showing teenagers trying to find their identity in life and overcoming the challenges of these years.
This is another freeze frame example where the filmmakers showed great expertise. The character John Bender is caught in a freeze-frame, punching the air to celebrate his victory.
He has just shared a kiss with the class sweetheart Claire. He and his classmates have also just won over the authoritative principal, Mr. Vernon.
12Pulp Fiction: Pumpkin and Honey Bunny.

Pulp Fiction is another movie such as ‘Good Fellas’ with its freeze-frame edition done at the movie’s beginning.
Pumpkin and Honey Bunny are shown at the movie’s beginning, sitting together in a diner. They argue whether it will be safer to rub a bank or a restaurant. In the end, they settle for a diner — the same one they are sitting in.
They kiss and pull out their guns, and the images freeze before the credits roll out.
The freeze-frame gives us a sneak peek of the violence to experience in the movie, and indeed, we were not disappointed.
For Win 7 or later (64-bit)
For macOS 10.12 or later
With Wondershare Filmora Video Editor ‘s speed ramping feature, you can adjust your video speed while controlling the keyframes to create fascinating cinematic videos.
Filmora is a video editing tool developed by wondershare and has exciting features. Filmora makes video editing easy and seamless yet produces professional results.
Filmora’s freeze-frame feature helps bring dynamism and energy to your videos using its keyframe feature.
● Ending Thoughts →
● It is an inexplicable feeling that we get every time we remember a movie we watched a long time ago, the ones whereas kept debating with our friends as to what would have happened.
● That is the purpose of adding freeze-frame effects at the end of videos. So you keep thinking about them.
● Now that you know this effect, you can figure out which freeze-frame video examples you still find very interesting. Also, do not hesitate to try out the new features of Filmora. It would bring out the best of your video to the audience.
Freeze frame effect in video editing is a skill that requires more practice to master. It adds drama and impact to movies. If you want to see more energy and acting in the videos you watch, then you should see more freeze-frame examples.
Sometimes we notice that a particular action stays on longer than necessary in a movie or video. The filmmakers use this skill to emphasize some intense moments further to sustain or pique your interest.
The freeze-frame video editing feature is a valuable skill that helps filmmakers make excellent movies. We have a list of the top 12 examples of freeze-frame effects in movies for you.
In this article
01 [What is freeze-frame video editing?](#Part 1)
02 [Ways to use freeze-frame video editing](#Part 2)
03 [What are the best freeze-frame video editing examples?](#Part 3)
Part 1 What Is Freeze Frame Video Editing?
Freeze frame video editing is a video editing technique that halts movement in a video for a given period. It converts moving pictures into still photography for some time. These video editor effects help filmmakers gear attention to the video editing or filmmaking process. In other words, they are self-reflexive.
Part 2 Ways to Use Freeze Frame in Video editing
Freeze frames can be helpful in 3 significant ways in video editing;
● At the beginning of a movie/video: Freeze-frame at the beginning helps you pique the audience’s interest and give them a sneak peek of what to expect in the movie. This freeze-frame technique was used in the film ‘Good Fellas’ to pique the audience’s interests.
● At the end: Using a freeze-frame allows the audience to choose or decide how the movie ends, whether it is obvious. The ‘breakfast club’ filmmakers use a freeze-frame at the end to emphasize the young boy.
● In the middle, subtly capturing intense moments like in the movie ‘The Departed.’
Part 3 What are the Best Freeze-Frame Video Editing Examples?
It takes a great deal of skill to employ freeze frame with the best results correctly. It might bore the audience or give another impression other than the intended when not done effectively.
But several movie directors have effectively used the freeze-frame video editing technique that wowed the audience.
Here is a list of the best freeze frame examples you would love;
01The Departed

In this 2006 movie, an undercover cop and a mole try to identify each other. Scorsese shows his editing prowess once again as he uses freeze-frame more subtly.
He changes the frame speed instead of stopping on one frame for a considerably longer time. This emphasizes some memorable moments that you may overlook on a first watch.
02Rocky III

The freeze-frame came in during the final match between Apollo and Balboa in this movie.
During the first 3 Rocky movies, Apollo and Balboa had an intriguing rivalry. At the end of Rocky III, the duo decides to engage in a friendly battle to determine who was the Lord in boxing.
The movie ends in a freeze-frame with Rocky swinging a right hook after Apollo imitates the bell, saying, “Ding Dong.”
The freeze-frame allows the audience to guess who the winner will be, thus a longer time to think of the movie after watching.
03400 Blows

In 400 Blows, the main character Antoine, a young Parisian, was hardly out of trouble.
In an attempt to end his troubles, he arrives at the beach after running away from a soccer match.
He is faced with either jumping right in or going back. The movie ends in a freeze-frame as no one finds out. The decision was left to the audience.
04Thelma and Louise

Thelma and Louise is about two (2) friends, Thelma Dickinson and Louise Sawyer. They both rise to defend themselves in a male-dominated world. In the film, Thelma and Louise are both running from the authorities. Louise killed a man who almost raped her friend, Thelma, thus the run. Things get out of control as they try to escape to Mexico, away from the authorities.
While on the run, they get ambushed by the police towards the grand canyon. The audience, at this point, is in suspense as to whether the ladies will survive or not.
Instead of surrendering, they drive right into the grand canyon, and the movie ends in a freeze-frame as they get caught hanging in the air while plunging into the canyon.
Regular movies might decide to give us all the details of the car plunging and exploding.
05The Wolf of Wall Street

Scorsese uses freeze-frame at the beginning of this movie, just as he did in Good Fellas. The freeze-frame effect here helps introduce the character and shows us the plot of the movie hence piquing the audience’s interests immediately.
06Out of Sight

This movie is another excellent example of freeze-frame video editing. What other way to pique the audience’s interest significantly and emphasize them than capture them in a freeze-frame.
07Death Proof

In this movie, the freeze-frame stays till the very end. It captures three women as they raise their hands-on celebration after successfully beating to death a psychopath who has been killing young women.
08Butch Cassidy and the Sundance Kid

This movie follows two train robbers, Butch Cassidy and Harry Longabaugh, known as the ‘Sundance Kid.’ After conducting several robberies, they go on the run as the authorities pursue them. After a gun battle with the authorities, they take cover inside a building, but they get surrounded with no other escape route.
Thus they decide to engage in the last fight instead of surrendering, and you see them in a gun battle with the authorities. The movie ends with them caught in a freeze-frame brandishing their guns at the officers instead of actual bloodshed. Though we all know they will get killed.
09Good Fellas

Initially, we mentioned that a freeze-frame could be of use at the beginning of a movie. Scorsese used this effectively in ‘Good Fellas’ to emphasize the movie plot.
In the opening scene, the characters Henry, Jimmy, and Tonny, played by Ray Liotta, Robert De Niro, and Joe Pesci, respectively, stop their car in the middle of the road.
They open their truck and see a man badly wounded and beaten, Tonny stabs him, and Jimmy shoots him. Henry then closes the truck and looks on in a freeze-frame before uttering the lines, “As far back as I can remember, I have always wanted to be a gangster.”
This lets us know right away what will happen in the movie. That person will get killed, and this is the mob territory.
10Harry Potter and the Prisoner of Azkaban

During a bad and weird year at Hogwarts, Harry potter experiences an extremely joyous moment when he goes anti-gravity on his new Firebolt broom.
He becomes overjoyed and his expression gets captured in a freeze-frame.
11The Breakfast Club

The Breakfast Club is an 80s movie showing teenagers trying to find their identity in life and overcoming the challenges of these years.
This is another freeze frame example where the filmmakers showed great expertise. The character John Bender is caught in a freeze-frame, punching the air to celebrate his victory.
He has just shared a kiss with the class sweetheart Claire. He and his classmates have also just won over the authoritative principal, Mr. Vernon.
12Pulp Fiction: Pumpkin and Honey Bunny.

Pulp Fiction is another movie such as ‘Good Fellas’ with its freeze-frame edition done at the movie’s beginning.
Pumpkin and Honey Bunny are shown at the movie’s beginning, sitting together in a diner. They argue whether it will be safer to rub a bank or a restaurant. In the end, they settle for a diner — the same one they are sitting in.
They kiss and pull out their guns, and the images freeze before the credits roll out.
The freeze-frame gives us a sneak peek of the violence to experience in the movie, and indeed, we were not disappointed.
For Win 7 or later (64-bit)
For macOS 10.12 or later
With Wondershare Filmora Video Editor ‘s speed ramping feature, you can adjust your video speed while controlling the keyframes to create fascinating cinematic videos.
Filmora is a video editing tool developed by wondershare and has exciting features. Filmora makes video editing easy and seamless yet produces professional results.
Filmora’s freeze-frame feature helps bring dynamism and energy to your videos using its keyframe feature.
● Ending Thoughts →
● It is an inexplicable feeling that we get every time we remember a movie we watched a long time ago, the ones whereas kept debating with our friends as to what would have happened.
● That is the purpose of adding freeze-frame effects at the end of videos. So you keep thinking about them.
● Now that you know this effect, you can figure out which freeze-frame video examples you still find very interesting. Also, do not hesitate to try out the new features of Filmora. It would bring out the best of your video to the audience.
Freeze frame effect in video editing is a skill that requires more practice to master. It adds drama and impact to movies. If you want to see more energy and acting in the videos you watch, then you should see more freeze-frame examples.
Sometimes we notice that a particular action stays on longer than necessary in a movie or video. The filmmakers use this skill to emphasize some intense moments further to sustain or pique your interest.
The freeze-frame video editing feature is a valuable skill that helps filmmakers make excellent movies. We have a list of the top 12 examples of freeze-frame effects in movies for you.
In this article
01 [What is freeze-frame video editing?](#Part 1)
02 [Ways to use freeze-frame video editing](#Part 2)
03 [What are the best freeze-frame video editing examples?](#Part 3)
Part 1 What Is Freeze Frame Video Editing?
Freeze frame video editing is a video editing technique that halts movement in a video for a given period. It converts moving pictures into still photography for some time. These video editor effects help filmmakers gear attention to the video editing or filmmaking process. In other words, they are self-reflexive.
Part 2 Ways to Use Freeze Frame in Video editing
Freeze frames can be helpful in 3 significant ways in video editing;
● At the beginning of a movie/video: Freeze-frame at the beginning helps you pique the audience’s interest and give them a sneak peek of what to expect in the movie. This freeze-frame technique was used in the film ‘Good Fellas’ to pique the audience’s interests.
● At the end: Using a freeze-frame allows the audience to choose or decide how the movie ends, whether it is obvious. The ‘breakfast club’ filmmakers use a freeze-frame at the end to emphasize the young boy.
● In the middle, subtly capturing intense moments like in the movie ‘The Departed.’
Part 3 What are the Best Freeze-Frame Video Editing Examples?
It takes a great deal of skill to employ freeze frame with the best results correctly. It might bore the audience or give another impression other than the intended when not done effectively.
But several movie directors have effectively used the freeze-frame video editing technique that wowed the audience.
Here is a list of the best freeze frame examples you would love;
01The Departed

In this 2006 movie, an undercover cop and a mole try to identify each other. Scorsese shows his editing prowess once again as he uses freeze-frame more subtly.
He changes the frame speed instead of stopping on one frame for a considerably longer time. This emphasizes some memorable moments that you may overlook on a first watch.
02Rocky III

The freeze-frame came in during the final match between Apollo and Balboa in this movie.
During the first 3 Rocky movies, Apollo and Balboa had an intriguing rivalry. At the end of Rocky III, the duo decides to engage in a friendly battle to determine who was the Lord in boxing.
The movie ends in a freeze-frame with Rocky swinging a right hook after Apollo imitates the bell, saying, “Ding Dong.”
The freeze-frame allows the audience to guess who the winner will be, thus a longer time to think of the movie after watching.
03400 Blows

In 400 Blows, the main character Antoine, a young Parisian, was hardly out of trouble.
In an attempt to end his troubles, he arrives at the beach after running away from a soccer match.
He is faced with either jumping right in or going back. The movie ends in a freeze-frame as no one finds out. The decision was left to the audience.
04Thelma and Louise

Thelma and Louise is about two (2) friends, Thelma Dickinson and Louise Sawyer. They both rise to defend themselves in a male-dominated world. In the film, Thelma and Louise are both running from the authorities. Louise killed a man who almost raped her friend, Thelma, thus the run. Things get out of control as they try to escape to Mexico, away from the authorities.
While on the run, they get ambushed by the police towards the grand canyon. The audience, at this point, is in suspense as to whether the ladies will survive or not.
Instead of surrendering, they drive right into the grand canyon, and the movie ends in a freeze-frame as they get caught hanging in the air while plunging into the canyon.
Regular movies might decide to give us all the details of the car plunging and exploding.
05The Wolf of Wall Street

Scorsese uses freeze-frame at the beginning of this movie, just as he did in Good Fellas. The freeze-frame effect here helps introduce the character and shows us the plot of the movie hence piquing the audience’s interests immediately.
06Out of Sight

This movie is another excellent example of freeze-frame video editing. What other way to pique the audience’s interest significantly and emphasize them than capture them in a freeze-frame.
07Death Proof

In this movie, the freeze-frame stays till the very end. It captures three women as they raise their hands-on celebration after successfully beating to death a psychopath who has been killing young women.
08Butch Cassidy and the Sundance Kid

This movie follows two train robbers, Butch Cassidy and Harry Longabaugh, known as the ‘Sundance Kid.’ After conducting several robberies, they go on the run as the authorities pursue them. After a gun battle with the authorities, they take cover inside a building, but they get surrounded with no other escape route.
Thus they decide to engage in the last fight instead of surrendering, and you see them in a gun battle with the authorities. The movie ends with them caught in a freeze-frame brandishing their guns at the officers instead of actual bloodshed. Though we all know they will get killed.
09Good Fellas

Initially, we mentioned that a freeze-frame could be of use at the beginning of a movie. Scorsese used this effectively in ‘Good Fellas’ to emphasize the movie plot.
In the opening scene, the characters Henry, Jimmy, and Tonny, played by Ray Liotta, Robert De Niro, and Joe Pesci, respectively, stop their car in the middle of the road.
They open their truck and see a man badly wounded and beaten, Tonny stabs him, and Jimmy shoots him. Henry then closes the truck and looks on in a freeze-frame before uttering the lines, “As far back as I can remember, I have always wanted to be a gangster.”
This lets us know right away what will happen in the movie. That person will get killed, and this is the mob territory.
10Harry Potter and the Prisoner of Azkaban

During a bad and weird year at Hogwarts, Harry potter experiences an extremely joyous moment when he goes anti-gravity on his new Firebolt broom.
He becomes overjoyed and his expression gets captured in a freeze-frame.
11The Breakfast Club

The Breakfast Club is an 80s movie showing teenagers trying to find their identity in life and overcoming the challenges of these years.
This is another freeze frame example where the filmmakers showed great expertise. The character John Bender is caught in a freeze-frame, punching the air to celebrate his victory.
He has just shared a kiss with the class sweetheart Claire. He and his classmates have also just won over the authoritative principal, Mr. Vernon.
12Pulp Fiction: Pumpkin and Honey Bunny.

Pulp Fiction is another movie such as ‘Good Fellas’ with its freeze-frame edition done at the movie’s beginning.
Pumpkin and Honey Bunny are shown at the movie’s beginning, sitting together in a diner. They argue whether it will be safer to rub a bank or a restaurant. In the end, they settle for a diner — the same one they are sitting in.
They kiss and pull out their guns, and the images freeze before the credits roll out.
The freeze-frame gives us a sneak peek of the violence to experience in the movie, and indeed, we were not disappointed.
For Win 7 or later (64-bit)
For macOS 10.12 or later
With Wondershare Filmora Video Editor ‘s speed ramping feature, you can adjust your video speed while controlling the keyframes to create fascinating cinematic videos.
Filmora is a video editing tool developed by wondershare and has exciting features. Filmora makes video editing easy and seamless yet produces professional results.
Filmora’s freeze-frame feature helps bring dynamism and energy to your videos using its keyframe feature.
● Ending Thoughts →
● It is an inexplicable feeling that we get every time we remember a movie we watched a long time ago, the ones whereas kept debating with our friends as to what would have happened.
● That is the purpose of adding freeze-frame effects at the end of videos. So you keep thinking about them.
● Now that you know this effect, you can figure out which freeze-frame video examples you still find very interesting. Also, do not hesitate to try out the new features of Filmora. It would bring out the best of your video to the audience.
How to Create Loop Videos Using Filmora
A loop fashion lookbook will be familiar to you if you are a fashion YouTuber. Here we will show you how to record shots and make a creative lookbook to show off your best outfits in an excellent way with Wondershare Filmora.

Shots recording for loop masking
The first and most crucial step for creating a good loop video is to record perfect shots. Here are the steps to record video shots for loop videos.
How to create a loop video
Step1 Set your camera or phone on a tripod. Make sure it stands still and does not move.

Step2 Set it so that you have a door on one side and enough room for the subject to walk through the door and move out of the frame.

Step3 Make sure all your outfits are ready.

Step4 Start recording on your camera. Walk through the door wearing the first outfit. Change your outfits and repeat the step with all your dresses. It would help if you kept the camera rolling while recording all these clips. Turning the recording on and off with every shot will result in many small movements.
Editing footage with a professional video editor - Wondershare Filmora
After recording the shots, the next step is to edit them. Wondershare Filmora is the best software for this purpose. Creating a loop video using filmora is an easy task.
Free Download For Win 7 or later(64-bit)
Free Download For macOS 10.14 or later
Below is the step-by-step guide on using Wondershare Filmora to create a loop masking or lookbook video.
How to edit a loop lookbook video
Step1 Download and install Wondershare Filmora on your PC or Mac.
Step2 Launch Wondershare Filmora, import the video clip into Filmora and place it on the first track.

Step3 Find a frame with an empty background, i.e., without the subject, and freeze the frame.

Step4 Extend the frozen frame and cut out the rest of the video.

Step5 We are done with the first track so lock it.

Step6 Import the clip again on the second track. And find the sections of the clips where the subject is walking in the video. Cut the remaining part.

Step7 It will create several small sections on the second track.

Step8 Put the first clip at the start of the timeline and move the playhead to find the frame containing enough room for the second outfit.

Step9 Move the second outfit to that playhead area.

Step10 Double-click on the clip, go to effects, and choose a single-line mask.

Step11 Drag the mask to the point where it shows the outfit on its right side.

Step12 Blur the mask edges by increasing blur numbers.

Step13 Click on the add button to add a mask keyframe and move the play head forward until the first outfit leaves the frame.

Step14 Move the mask to the left to reveal the entire frame, and repeat the same process with all outfits.

Step15 After finishing all outfits, copy the clip from the first outfit. And paste it on top of all the tracks after the last outfit. And add a mask keyframe to this section too.

Step16 Unlock the first track and move the playhead to find the point where the subject with 4th outfit moves out of the frame. Then, cut the remaining part of the freeze frame on the right.

Step17 Now move the playhead to the first frame and find where it coincides with the last part of the final frame. Cut the previous piece.

Post it on Instagram, and it will keep playing automatically and act like a loop video. Otherwise, duplicate this edited clip several times to create a longer loop video. Background music plays a vital role in these videos, setting the tone and pace. Follow all the steps in the correct order. Then, create and post loop videos on your social media platforms.
Free Download For macOS 10.14 or later
Below is the step-by-step guide on using Wondershare Filmora to create a loop masking or lookbook video.
How to edit a loop lookbook video
Step1 Download and install Wondershare Filmora on your PC or Mac.
Step2 Launch Wondershare Filmora, import the video clip into Filmora and place it on the first track.

Step3 Find a frame with an empty background, i.e., without the subject, and freeze the frame.

Step4 Extend the frozen frame and cut out the rest of the video.

Step5 We are done with the first track so lock it.

Step6 Import the clip again on the second track. And find the sections of the clips where the subject is walking in the video. Cut the remaining part.

Step7 It will create several small sections on the second track.

Step8 Put the first clip at the start of the timeline and move the playhead to find the frame containing enough room for the second outfit.

Step9 Move the second outfit to that playhead area.

Step10 Double-click on the clip, go to effects, and choose a single-line mask.

Step11 Drag the mask to the point where it shows the outfit on its right side.

Step12 Blur the mask edges by increasing blur numbers.

Step13 Click on the add button to add a mask keyframe and move the play head forward until the first outfit leaves the frame.

Step14 Move the mask to the left to reveal the entire frame, and repeat the same process with all outfits.

Step15 After finishing all outfits, copy the clip from the first outfit. And paste it on top of all the tracks after the last outfit. And add a mask keyframe to this section too.

Step16 Unlock the first track and move the playhead to find the point where the subject with 4th outfit moves out of the frame. Then, cut the remaining part of the freeze frame on the right.

Step17 Now move the playhead to the first frame and find where it coincides with the last part of the final frame. Cut the previous piece.

Post it on Instagram, and it will keep playing automatically and act like a loop video. Otherwise, duplicate this edited clip several times to create a longer loop video. Background music plays a vital role in these videos, setting the tone and pace. Follow all the steps in the correct order. Then, create and post loop videos on your social media platforms.
Also read:
- New 3 Methods to Combine 2 or 3 Videos Into 1
- New Best Image (JPG/PNG) to GIF Converters
- New This Article Aims to Show You How to Export Videos in Filmora for 2024
- Updated 2024 Approved How to Loop a Video in Canva Editor
- TXT to SRT 3 Effective Ways to Convert TXT to SRT
- How To Create Quiz Videos Detailed Guide
- Facts About GIF Background You Didnt Know
- Updated Magic Effects Video Making How To for 2024
- 2024 Approved Updated 8 Ways to Merge SRT with MP4
- Updated The Ultimate Guide to GIF for Discord Profile
- New How to Speed Up Video on Instagram Reels, In 2024
- 2024 Approved “Create. Edit. Share. Transform Your Videos with KineMaster! Powerful Tools, Easy to Use.” – a Few Words We Read when We Come up with the Official Web-Site of KineMaster, a Mobile Video Editing Application
- New 2024 Approved How to Create Liquid Water Reveal Intro?
- New In 2024, How to Add Subtitles to MKV Videos on All Platforms
- In 2024, How to Perform Mask Tracking Discovering the Best Methods
- New To Determine or Change the Video Aspect Ratio Online. Use a Ratio Calculator to Calculate Pixel Dimensions and Aspect Ratios of Images or Videos
- New 2024 Approved Best Shortcut Towards Timeline Template
- Updated 2024 Approved Would You Like to Know How to Change the Ratio of the Video or Which Is the Correct Aspect Ratio for Uploading to the Online Platform? Then, Go Through the Article to Get Complete Details About the Video Aspect Ratio
- New Discover 8 Top-Rated Video and Photo Merger Tools for Desktop, Mobile, and Online Use. Elevate Your Media Game and Create Stunning Visuals with Ease for 2024
- Hard to Remove Black Background in After Effects?
- Updated Google Meet Green Screen
- Slow Motion Video Editors To Look Out For
- New Ultimate Guidelines to Help You Better Use VLC Media Player
- In 2024, 10 Top Innovative AR Video Effects to Check Out
- New In 2024, Best GIF to MOV Converters
- New 2024 Approved Ways to Merge Videos in HandBrake? Expectation Vs. Reality
- Updated 2024 Approved Denoise a Video in Adobe Premiere Pro – Audio and Video Noise Removal
- New TikTok Slow Zoom | Create Your Slow Zoom TikTok in Minutes for 2024
- Figuring Out Proper Ways to Play a Video in Slow Motion on iPhone for 2024
- 2024 Approved In This Article, You Will Learn How to Make an Engaging and Creative YouTube Intro to Give a Hook and Recap Information to the Audience by Using Wondershare Filmora
- 2024 Approved How To Make Transparent Background On Picsart
- New Kinetic Typography Text Effect 【EASY&FAST】 for 2024
- Updated 2024 Approved Finding the Best GIF Websites Was Never Easier
- Guide How To Unbrick a Bricked Motorola Razr 40 Ultra Phone | Dr.fone
- In 2024, 10 Fake GPS Location Apps on Android Of your Itel A60 | Dr.fone
- 2024 Approved Top 15 Male Anime Characters By Voting
- A Detailed Guide to Making Your Pictures Speak for 2024
- Unlock Your Disabled iPhone 6 Plus Without iTunes in 5 Ways
- Complete Tutorial for Samsung Galaxy F04 Hard Reset | Dr.fone
- In 2024, 5 Quick Methods to Bypass OnePlus 12 FRP
- How to Change Your Honor 90 GT Location on life360 Without Anyone Knowing? | Dr.fone
- Reliable User Guide to Fix Nubia Red Magic 8S Pro+ Running Slow and Freezing | Dr.fone
- In 2024, iSpoofer is not working On Infinix Note 30i? Fixed | Dr.fone
- Title: An Ultimate Guide to Flexclip Online Trimmer for 2024
- Author: Morgan
- Created at : 2024-05-19 05:12:11
- Updated at : 2024-05-20 05:12:11
- Link: https://ai-video-editing.techidaily.com/an-ultimate-guide-to-flexclip-online-trimmer-for-2024/
- License: This work is licensed under CC BY-NC-SA 4.0.

