
:max_bytes(150000):strip_icc():format(webp)/streamfreesportsonline-5b1994178023b900364a81e5.jpg)
Are You Looking for an Ideal Halloween Countdown Video Clip for Your Video? This Article Will Walk You Through the Best Ones You Can Use to Get the Job Done Perfectly
Are You Looking for an Ideal Halloween Countdown Video Clip for Your Video? This Article Will Walk You Through the Best Ones You Can Use to Get the Job Done Perfectly
Halloween is fast approaching, and as a content creator, you’re looking to take advantage of the season and give your viewers unique Halloween vibes in your videos, but you don’t know how to go about it. Don’t panic, we got just the right idea for you. Some might ask; What idea? Well, it’s none other than a Halloween countdown video clip.
Adding a Halloween countdown clip to your video is a great way to spice it up. However, it can be quite difficult to find a perfect clip that will suit the theme of your video. To help you out, we’ve curated a list of the best 15 Halloween countdown video clips that you can use in your videos to make them fancier.
- Fog Stones Halloween Dead
- Scary Sadako ghost
- Transferring Halloween Cupcakes From The Tray To The Table Moments
- Skeleton breaking screen
- Dark Monster Halloween Horror
- Face Portrait Halloween Clown
- A Family Wearing Handmade Halloween Mask At Home
- Halloween Buckets Stacked Together
- Carving Of Pumpkin For Halloween
- Dough Halloween Cookies Bakery Products
- Woman Decorating for Halloween [TikTok]
- Girl Blonde Portrait Halloween
- An Outdoor Table With Halloween Theme Settings
- A Kid In A Mummy Costume Holding A Halloween Bucket
- Stop Motion Of Halloween Candy
Halloween Countdown Clips Editor The best editor helps you add a Halloween countdown clip to your video.
Free Download Free Download Learn More

Part 1: Top 10 Halloween-Themed Footage for Halloween Countdown Clock Video
Here we provide footage exclusively for horizontal videos, so that you can use them for your videos for YouTube, Vimeo, Twitch, etc. If you just want some clips for TikTok, Ins story, or anything else, go ahead Halloween footage for vertical videos.
1. Fog Stones Halloween Dead
Spooky graveyard with scary tombstones is another good way to go about it when you are looking for vacation countdown clock videos. The mixture of the turbulent and serene environment is enough to set the Halloween mood and even scare some folks.
Remember the scene from the movie “The Fog” and its famous dialogues: When the fog rolls in the terror begin! If you do not, take a look at a scene and judge for yourself if scary enough or not.

2. Scary Sadako ghost
What’s better than the Sadako ghost 7-day video call threat on Halloween? Well, nothing! So, why not create a prank video for your friends and family, especially those afraid of Sadako? Plus, Sadako creates a perfect backdrop for the countdown. Look at this Philippines creator who went to great lengths to scare his friends via a Sadako video call.
But you do not have to go through all that costume and scenery setup. Instead, you can use the video footage on any premium video and apply Sadako ghost via Green Screen.

3. Transferring Halloween Cupcakes From The Tray To The Table Moments
Halloween is adored for its trick-or-treat, but what about the party? What will you serve? Cupcakes sound like a good idea. But how will you entice your guest with your Halloween cupcakes? Well, you can include the cupcakes in the invitation video. While you can find many Halloween creative and savory cupcake recipes on YouTube, you can use stock footage to have them in the video.

4. Skeleton breaking screen
The broken screen is the classic prank suitable for any event and day. But simply using apps or replacing the wallpaper on your friend’s or spouse’s mobile doesn’t cut in this age and day. With new technology coming in, you have to get creative. Plus, it’s for Halloween, meaning dead skulls are a must.

5. Dark Monster Halloween Horror
Halloween house horror is another great backdrop for scaring your friends after a vacation countdown clock. You will find tons of videos on Halloween Horror houses on the internet. Look at how Jackie from Super Enthused (YouTube channel) gets scared while touring the 10 Halloween horror houses at the theme park. That was really scary, and this Halloween countdown effect can also help you do the same to your viewers.

6. Face Portrait Halloween Clown
Scary clowns against a kid’s window have been the long norm of scaring the small ones. No doubt, such pranks can scare anyone, not just kids. If you do not believe me, look at the reaction video from Infinite featuring scaring clowns’ pranks.
But how about dropping such a scary face bomb in a vacation countdown clock video? You can easily get your hands on creepy clowns’ portraits for videos via premium stock libraries like Filmora’s Filmstock.

7. A Family Wearing Handmade Halloween Mask At Home
Another not-so-fancy, subtle, and understated appeal for the Halloween vacation countdown clock video is a family together with Halloween masks. Given everyone will be in their costumes, you can also consider distributing self-made masks for everyone. You can take ideas from any of the numerous videos about Halloween mask design ideas.

8. Halloween Buckets Stacked Together
What’s the simplest and most fitting footage for the Halloween vacation countdown clock? Well, it is the scary pumpkins. Carving out Jack-o’-lantern has long been the Halloween “tradition,” and featuring it in your countdown timer at the party is the most classic way to go about it. The vibe from simple Halloween buckets stacked together is on the next level; if you do not believe me, look at Angie Bellemare’s Halloween Bucket ideas and creativity:

9. Carving Of Pumpkin For Halloween
Another Jack-o’-lantern idea for the vacation countdown clock video is the DIY Pumpin projects in the video. It doesn’t sound like much, but it really is enough to give the best feeling about Halloween without really indulging in the scary stuff. Take a look at how Jenn designs her Pumpkin Stack Fall Planter:

10. Dough Halloween Cookies Bakery Products
If Halloween is more about spending time with friends and family, a bunch of laughter, fun, and creating memories, then it cannot get better than focusing on the sweet stuff, like the dough used to cook the Halloween cookies. When you imagine the scenario of dough mixing for the Halloween countdown timer video, it does not sound like much! But they are cool-looking and set the perfect backdrop for a countdown timer video:
You can use such clips individually or mix them with other stock video footage mentioned here to create a perfect Halloween vacation countdown clock video clip.

Halloween Footage for Vertical Videos [TikTok/Instagram Story]:
The above list discusses the panoramic footage suitable for big screens. If your screen is rather a vertical one, then you might be looking for vertical stock footage for the Halloween vacation countdown clock clip. Here are some vertical footage ideas and links to stock footage to create the perfect vertical vacation countdown clock video for Halloween:
1. Woman Decorating for Halloween [TikTok]
Another simple backdrop for the Halloween countdown timer video is the decorations process to transform your indoors or outdoors for Halloween. And while you can use your own footage of decorating the house, chances are you may have missed filming yourself while decorating the house, given not everyone films themselves decorating the house and use it for their TikTok video. Here’s a video from Spooky Bones featuring the indoor decoration process for Halloween.

2. Girl Blonde Portrait Halloween
Another simple idea for a vertical countdown timer for Halloween is a scary face. In fact, if you are looking for the users to focus on the timer instead of footage is to use a slo-mo video, like this one from Tay. Tay tells a story about a real haunted house in her neighborhood while wearing scary Halloween makeup.
Of course, you can replace the story; and instead, use a clock with a girl wearing Halloween makeup.

3. An Outdoor Table With Halloween Theme Settings
If you are looking to feature the vacation countdown clock outdoors in a vertical setup, then a table with a Halloween theme might create the perfect setting. After all, Halloween is all about setting the perfect theme, and featuring a non-relevant indoor or scary video outdoors spoils the theme. Take a look at how Stephanie Cunningham on TikTok showcases her outdoor table decoration setup for Halloween.

4. A Kid In A Mummy Costume Holding A Halloween Bucket
If you are going for the classic mummy theme on Halloween, then how can you include any other footage than an actual mummy in the vertical countdown timer video? There are many ways to go about when looking to feature a mummy in the countdown clock; one idea is to show you made the mummy costumes, like Vina’s getup video on TikTok.

5. Stop Motion Of Halloween Candy
Hosting a Halloween party for kids and in search of the perfect vertical footage for a Halloween vacation countdown clock video? It cannot get better than simply featuring a bunch of candy to lure the kids toward the countdown clock. When you look at this video and imagine using a clock for the countdown clock.

Part 2: How to Apply a Halloween Countdown Clock to Your Video?
To make a unique Halloween Countdown Clock that ticks boxes around, you need software like Wondershare Filmora to implement the right element seamlessly.
Filmora library is filled with numerous such videos that will create the perfect backdrop for Halloween vacation countdown clock clips.
Coming to using the footage in your videos and making the Halloween countdown clock; well, you can do that easily using the Filmora Video editor (the video editor includes the Filmstock plug-in for easy navigation).
- Aside from Halloween-themed video footage, Filmora’s Filmstock also includes numerous audio, image, and other such elements.
- Filmora, primarily, is a video editor. You can combine all the elements like the stock footage videos discussed above and scary soundtracks and create a clock-down timer video easily.
- From trimming to splitting, to cool effects, there are several editing tools in Filmora.
- Transitions**, filters, text animations, and other editing features** are all supported.
Here’s how to use Filmora to Create a Halloween Countdown Clock Video
Free Download For Win 7 or later(64-bit)
Free Download For macOS 10.14 or later
Step1 Download and install Filmora on your Mac or PC.
Step2 Start the installed software and click Import from the main interface to upload the Halloween countdown clip. Alternatively, you can just drag-n-drop the video.

Step3 Drag-n-drop the uploaded video to the timeline.

Step4 Next, click on Stock Media and select the countdown effect that you want to use in the Halloween video. Then, drag-n-drop it to the timeline.

Step5 double click on the countdown effect and adjust it according to your requirement. You can adjust the time length too.

After that, play the video to preview it.
Step6 If you’re satisfied with the editing, scroll to the top of the screen and click Export, then, select ‘Burn DVD’.

Step7 Enter a name for your file in the Label box of the pop-up that appears on your screen, then in the Folder Path, choose the location where you want the file to be saved. Click the ‘Export’ button to finish.

Conclusion
There you have it - the top 15 Halloween countdown videos that can be used to spice up videos. Not to mention, you can find the stock footage on this page via Filmstock’s vast library containing tons of such videos. Also, is better to use subtle and not-so-horrifying clips if you want everything to be serene in the Halloween vacation countdown clock video.
Free Download For Win 7 or later(64-bit)
Free Download For macOS 10.14 or later
Halloween Countdown Clips Editor The best editor helps you add a Halloween countdown clip to your video.
Free Download Free Download Learn More
Part 1: Top 10 Halloween-Themed Footage for Halloween Countdown Clock Video
Here we provide footage exclusively for horizontal videos, so that you can use them for your videos for YouTube, Vimeo, Twitch, etc. If you just want some clips for TikTok, Ins story, or anything else, go ahead Halloween footage for vertical videos.
1. Fog Stones Halloween Dead
Spooky graveyard with scary tombstones is another good way to go about it when you are looking for vacation countdown clock videos. The mixture of the turbulent and serene environment is enough to set the Halloween mood and even scare some folks.
Remember the scene from the movie “The Fog” and its famous dialogues: When the fog rolls in the terror begin! If you do not, take a look at a scene and judge for yourself if scary enough or not.
2. Scary Sadako ghost
What’s better than the Sadako ghost 7-day video call threat on Halloween? Well, nothing! So, why not create a prank video for your friends and family, especially those afraid of Sadako? Plus, Sadako creates a perfect backdrop for the countdown. Look at this Philippines creator who went to great lengths to scare his friends via a Sadako video call.
But you do not have to go through all that costume and scenery setup. Instead, you can use the video footage on any premium video and apply Sadako ghost via Green Screen.
3. Transferring Halloween Cupcakes From The Tray To The Table Moments
Halloween is adored for its trick-or-treat, but what about the party? What will you serve? Cupcakes sound like a good idea. But how will you entice your guest with your Halloween cupcakes? Well, you can include the cupcakes in the invitation video. While you can find many Halloween creative and savory cupcake recipes on YouTube, you can use stock footage to have them in the video.
4. Skeleton breaking screen
The broken screen is the classic prank suitable for any event and day. But simply using apps or replacing the wallpaper on your friend’s or spouse’s mobile doesn’t cut in this age and day. With new technology coming in, you have to get creative. Plus, it’s for Halloween, meaning dead skulls are a must.
5. Dark Monster Halloween Horror
Halloween house horror is another great backdrop for scaring your friends after a vacation countdown clock. You will find tons of videos on Halloween Horror houses on the internet. Look at how Jackie from Super Enthused (YouTube channel) gets scared while touring the 10 Halloween horror houses at the theme park. That was really scary, and this Halloween countdown effect can also help you do the same to your viewers.
6. Face Portrait Halloween Clown
Scary clowns against a kid’s window have been the long norm of scaring the small ones. No doubt, such pranks can scare anyone, not just kids. If you do not believe me, look at the reaction video from Infinite featuring scaring clowns’ pranks.
But how about dropping such a scary face bomb in a vacation countdown clock video? You can easily get your hands on creepy clowns’ portraits for videos via premium stock libraries like Filmora’s Filmstock.
7. A Family Wearing Handmade Halloween Mask At Home
Another not-so-fancy, subtle, and understated appeal for the Halloween vacation countdown clock video is a family together with Halloween masks. Given everyone will be in their costumes, you can also consider distributing self-made masks for everyone. You can take ideas from any of the numerous videos about Halloween mask design ideas.
8. Halloween Buckets Stacked Together
What’s the simplest and most fitting footage for the Halloween vacation countdown clock? Well, it is the scary pumpkins. Carving out Jack-o’-lantern has long been the Halloween “tradition,” and featuring it in your countdown timer at the party is the most classic way to go about it. The vibe from simple Halloween buckets stacked together is on the next level; if you do not believe me, look at Angie Bellemare’s Halloween Bucket ideas and creativity:
9. Carving Of Pumpkin For Halloween
Another Jack-o’-lantern idea for the vacation countdown clock video is the DIY Pumpin projects in the video. It doesn’t sound like much, but it really is enough to give the best feeling about Halloween without really indulging in the scary stuff. Take a look at how Jenn designs her Pumpkin Stack Fall Planter:
10. Dough Halloween Cookies Bakery Products
If Halloween is more about spending time with friends and family, a bunch of laughter, fun, and creating memories, then it cannot get better than focusing on the sweet stuff, like the dough used to cook the Halloween cookies. When you imagine the scenario of dough mixing for the Halloween countdown timer video, it does not sound like much! But they are cool-looking and set the perfect backdrop for a countdown timer video:
You can use such clips individually or mix them with other stock video footage mentioned here to create a perfect Halloween vacation countdown clock video clip.
Halloween Footage for Vertical Videos [TikTok/Instagram Story]:
The above list discusses the panoramic footage suitable for big screens. If your screen is rather a vertical one, then you might be looking for vertical stock footage for the Halloween vacation countdown clock clip. Here are some vertical footage ideas and links to stock footage to create the perfect vertical vacation countdown clock video for Halloween:
1. Woman Decorating for Halloween [TikTok]
Another simple backdrop for the Halloween countdown timer video is the decorations process to transform your indoors or outdoors for Halloween. And while you can use your own footage of decorating the house, chances are you may have missed filming yourself while decorating the house, given not everyone films themselves decorating the house and use it for their TikTok video. Here’s a video from Spooky Bones featuring the indoor decoration process for Halloween.
2. Girl Blonde Portrait Halloween
Another simple idea for a vertical countdown timer for Halloween is a scary face. In fact, if you are looking for the users to focus on the timer instead of footage is to use a slo-mo video, like this one from Tay. Tay tells a story about a real haunted house in her neighborhood while wearing scary Halloween makeup.
Of course, you can replace the story; and instead, use a clock with a girl wearing Halloween makeup.
3. An Outdoor Table With Halloween Theme Settings
If you are looking to feature the vacation countdown clock outdoors in a vertical setup, then a table with a Halloween theme might create the perfect setting. After all, Halloween is all about setting the perfect theme, and featuring a non-relevant indoor or scary video outdoors spoils the theme. Take a look at how Stephanie Cunningham on TikTok showcases her outdoor table decoration setup for Halloween.
4. A Kid In A Mummy Costume Holding A Halloween Bucket
If you are going for the classic mummy theme on Halloween, then how can you include any other footage than an actual mummy in the vertical countdown timer video? There are many ways to go about when looking to feature a mummy in the countdown clock; one idea is to show you made the mummy costumes, like Vina’s getup video on TikTok.
5. Stop Motion Of Halloween Candy
Hosting a Halloween party for kids and in search of the perfect vertical footage for a Halloween vacation countdown clock video? It cannot get better than simply featuring a bunch of candy to lure the kids toward the countdown clock. When you look at this video and imagine using a clock for the countdown clock.
Part 2: How to Apply a Halloween Countdown Clock to Your Video?
To make a unique Halloween Countdown Clock that ticks boxes around, you need software like Wondershare Filmora to implement the right element seamlessly.
Filmora library is filled with numerous such videos that will create the perfect backdrop for Halloween vacation countdown clock clips.
Coming to using the footage in your videos and making the Halloween countdown clock; well, you can do that easily using the Filmora Video editor (the video editor includes the Filmstock plug-in for easy navigation).
- Aside from Halloween-themed video footage, Filmora’s Filmstock also includes numerous audio, image, and other such elements.
- Filmora, primarily, is a video editor. You can combine all the elements like the stock footage videos discussed above and scary soundtracks and create a clock-down timer video easily.
- From trimming to splitting, to cool effects, there are several editing tools in Filmora.
- Transitions**, filters, text animations, and other editing features** are all supported.
Here’s how to use Filmora to Create a Halloween Countdown Clock Video
Free Download For Win 7 or later(64-bit)
Free Download For macOS 10.14 or later
Step1 Download and install Filmora on your Mac or PC.
Step2 Start the installed software and click Import from the main interface to upload the Halloween countdown clip. Alternatively, you can just drag-n-drop the video.
Step3 Drag-n-drop the uploaded video to the timeline.
Step4 Next, click on Stock Media and select the countdown effect that you want to use in the Halloween video. Then, drag-n-drop it to the timeline.
Step5 double click on the countdown effect and adjust it according to your requirement. You can adjust the time length too.
After that, play the video to preview it.
Step6 If you’re satisfied with the editing, scroll to the top of the screen and click Export, then, select ‘Burn DVD’.
Step7 Enter a name for your file in the Label box of the pop-up that appears on your screen, then in the Folder Path, choose the location where you want the file to be saved. Click the ‘Export’ button to finish.
Conclusion
There you have it - the top 15 Halloween countdown videos that can be used to spice up videos. Not to mention, you can find the stock footage on this page via Filmstock’s vast library containing tons of such videos. Also, is better to use subtle and not-so-horrifying clips if you want everything to be serene in the Halloween vacation countdown clock video.
Free Download For Win 7 or later(64-bit)
Free Download For macOS 10.14 or later
Finding LUTs Made by Danny Gevirtz
Danny Gevirtz is a talented video editor known for his creative skills that bring videos to life. His unique approach to video editing sets him apart. One factor that makes Danny’s content so amazing is his mastery of color grading. Through his expert use of color, he can transform ordinary videos into extraordinary ones. You can even download Danny Gevirtz LUTs for your work.
In this way, you can apply his signature style to your videos to make them look great. Moreover, you can achieve a cinematic-style look for your media content. There are so many Danny Gevirtz-influenced LUTs available, both paid and free. You can download any one of them to replicate the color grading style of your favorite video editor.
Part 1: Introducing the Basics of LUTs in Video Editing
LUTs are like magic formulas that make your videos and images look better. They tweak the colors and tones in your footage to create a new visual experience. Following are the basic details of using and applying LUTs in basic video editing operations.
Types of LUTs
- Technical LUTs: These are for technical stuff like adjusting color spaces or correcting gamma. They ensure your colors and tones stay consistent across different devices and platforms.
- Creative LUTs: This type is a fun type of LUT. Creative LUTs help you achieve specific looks or styles. They can make your videos look like they were shot on film or create different moods and visual effects.
Apply LUTs with the Correct LUT Format
You can apply LUTs using different video editing software. For instance, there is Adobe Premiere Pro, DaVinci Resolve, Final Cut Pro, and others to apply LUT. Just load the LUT and apply it to your video clips or the whole project. Moreover, you can make adjustments to the LUT according to your preference.
In addition, LUTs come in different file formats, such as .cube, .3dl, .look, or .icc. The most common one is .cube. Furthermore, different video editing tools support different formats. Moreover, choose the right format for your editing software and the colors you want.
Customizing LUTs and Non-Destructive Editing
You don’t have to stick with pre-made LUTs. Additionally, you can create your own or modify existing ones to match your needs and style. Advanced color grading software lets you tweak individual colors, contrast, saturation, and more. Save these adjustments as custom LUTs for future use.
The great thing about LUTs is that they don’t mess with your original video file. They’re like a layer that sits on top, making real-time changes during playback or rendering. Moreover, you can always return to the original footage or make further adjustments without losing data.
Empower your videos with a new mood using different LUTs. Filmora now offers 100+ top-quality 3D LUTs cover a broad range of scenarios. Transform your videos with Filmora’s powerful 3D LUTs.
Apply LUT on Videos Apply LUT on Videos Learn More


Part 2: What are the Benefits and Drawbacks of Having LUTs in Video Editing?
LUTs are an amazing tool in video editing to improve the color scheme of your videos. However, Look-up Tables also have advantages and disadvantages, which are to be discussed as follows.
Advantages of LUTs in Video Editing
1. Time Efficiency: LUTs save time by quickly applying color grading adjustments. Furthermore, it streamlines the editing process, especially for large volumes of media files.
2. Consistent Look: Using the same LUT across multiple clips ensures consistent color and tone. Moreover, even working with different cameras or lighting conditions throughout your video.
3. Creative Flexibility: LUTs offer a wide range of creative options. It allows you to achieve specific moods and styles or emulate film aesthetics. Similarly, you can enhance your storytelling with correct color grading.
4. Real-Time Preview: Moreover, LUTs provide a real-time preview of the final look. It enables you to make informed, creative decisions. Additionally, you can experiment with different looks during the editing process.
Disadvantages of LUTs in Video Editing
1. Generic Look: Pre-made LUTs may not perfectly match your creative vision. Similarly, it results in a generic or overused appearance that lacks uniqueness or creativity.
2. Limited Control: LUTs offer overall color and tone adjustments, but limitations exist. They may not provide precise control over individual color parameters. It limits the customization options for each clip.
3. Compatibility Issues: Not all LUTs are compatible with every editing software or color space. Furthermore, it potentially leads to below-par results. Moreover, it can also lead to compatibility problems with specific file formats.
Part 3: Danny Gevirtz LUTs: An Iconic List of LUTs Available for Effective Video Editing
Does the work of Danny Gevirtz inspire you? Here are some of the most popular Danny Gevirtz-style LUTs you can use for your content.
1. Creative Filmmaking LUTs
The creative Filmmaking LUT pack consists of 7 unique LUTs designed to enhance your videos. Each LUT offers a unique look, from vintage vibes to the iconic Nolan Blue. Inspired by Christopher Nolan’s film “Dunkirk,” the Nolan Blue LUT gives you a similar color grading. Moreover, you can achieve the perfect sunset color grading with the Warm Nostalgia LUT. There are so many more to explore in this pack that you can use.

2. Sellfy Danny Gevirtz Filmmaker LUT Pack
Danny Gevirtz’s color grading inspires this LUT pack. It provides a collection of 8 unique LUTs designed to give your content a different look. Furthermore, this LUT pack has LUTs from moody and cinematic to basic skin tone LUTs. This pack’s Teal and Orange LUT are designed to enhance skin tones in a video or photo. Moreover, this pack also offers LUT for outdoor scenery and nature footage.

Conclusion
To conclude, LUTs that are inspired capture the essence of a particular style of color grading. Choose your favorite content creator by exploring the world of LUTs and color grading. In addition, many influencers have their LUTs available on the internet. One such content creator is Danny Gevirtz, with some amazing color-grading skills. You can search for Danny Gevirtz LUTs free download to download yours.
Apply LUT on Videos Apply LUT on Videos Learn More
Part 2: What are the Benefits and Drawbacks of Having LUTs in Video Editing?
LUTs are an amazing tool in video editing to improve the color scheme of your videos. However, Look-up Tables also have advantages and disadvantages, which are to be discussed as follows.
Advantages of LUTs in Video Editing
1. Time Efficiency: LUTs save time by quickly applying color grading adjustments. Furthermore, it streamlines the editing process, especially for large volumes of media files.
2. Consistent Look: Using the same LUT across multiple clips ensures consistent color and tone. Moreover, even working with different cameras or lighting conditions throughout your video.
3. Creative Flexibility: LUTs offer a wide range of creative options. It allows you to achieve specific moods and styles or emulate film aesthetics. Similarly, you can enhance your storytelling with correct color grading.
4. Real-Time Preview: Moreover, LUTs provide a real-time preview of the final look. It enables you to make informed, creative decisions. Additionally, you can experiment with different looks during the editing process.
Disadvantages of LUTs in Video Editing
1. Generic Look: Pre-made LUTs may not perfectly match your creative vision. Similarly, it results in a generic or overused appearance that lacks uniqueness or creativity.
2. Limited Control: LUTs offer overall color and tone adjustments, but limitations exist. They may not provide precise control over individual color parameters. It limits the customization options for each clip.
3. Compatibility Issues: Not all LUTs are compatible with every editing software or color space. Furthermore, it potentially leads to below-par results. Moreover, it can also lead to compatibility problems with specific file formats.
Part 3: Danny Gevirtz LUTs: An Iconic List of LUTs Available for Effective Video Editing
Does the work of Danny Gevirtz inspire you? Here are some of the most popular Danny Gevirtz-style LUTs you can use for your content.
1. Creative Filmmaking LUTs
The creative Filmmaking LUT pack consists of 7 unique LUTs designed to enhance your videos. Each LUT offers a unique look, from vintage vibes to the iconic Nolan Blue. Inspired by Christopher Nolan’s film “Dunkirk,” the Nolan Blue LUT gives you a similar color grading. Moreover, you can achieve the perfect sunset color grading with the Warm Nostalgia LUT. There are so many more to explore in this pack that you can use.
2. Sellfy Danny Gevirtz Filmmaker LUT Pack
Danny Gevirtz’s color grading inspires this LUT pack. It provides a collection of 8 unique LUTs designed to give your content a different look. Furthermore, this LUT pack has LUTs from moody and cinematic to basic skin tone LUTs. This pack’s Teal and Orange LUT are designed to enhance skin tones in a video or photo. Moreover, this pack also offers LUT for outdoor scenery and nature footage.
Conclusion
To conclude, LUTs that are inspired capture the essence of a particular style of color grading. Choose your favorite content creator by exploring the world of LUTs and color grading. In addition, many influencers have their LUTs available on the internet. One such content creator is Danny Gevirtz, with some amazing color-grading skills. You can search for Danny Gevirtz LUTs free download to download yours.
Techniques You Never Heard of for Learning YouTube AI Marketing
Techniques You Never Heard of for Learning AI Marketing YouTube
An easy yet powerful editor
Numerous effects to choose from
Detailed tutorials provided by the official channel
YouTube is one of the largest entertainment websites, where you can watch, share, and create videos. Millions of active users on YouTube have taken premium subscriptions on YouTube to enjoy hassle-free entertainment. YouTube was launched back in 2005. With the passage of time and advancements in technology, YouTube has also evolved.

Artificial intelligence is one of the recent and most famous advancements in technology. The introduction of artificial intelligence in the industry has proved to be a boon. The introduction of artificial intelligence has made things easy to manage in every industry. AI can easily be applied in any industry be it manufacturing or the IT sector. Artificial intelligence has made work easier and increased the efficiency of people working in different areas. Even YouTube has started using AI techniques for many tasks. In this article, we have listed some of the applications of AI on YouTube.
In this article
01 [How Is YouTube Using Artificial Intelligence?](#Part 1)
02 [How Is YouTube Using AI to Recommend Videos?](#Part 2)
Part 1 How Is YouTube Using Artificial Intelligence?
Tools like artificial intelligence and machine learning have made things easier to manage. Even the introduction of Artificial Intelligence on YouTube has helped a lot to smoothen its procedure. YouTube being one of the most engaging websites has applied YouTube Intelligence to manage all its activities smoothly. Read further to know how YouTube is using artificial intelligence currently!

01Automatic Removal of Inappropriate Content
One of the main applications of AI on YouTube is to remove inappropriate content automatically. YouTube uses artificial intelligence and machine learning to remove the violative and inappropriate content from the platform. As this content was one of the main reasons for the rise in racism and terrorism. To avoid all these harmful after effects, YouTube introduced the “Trashy Video Classifier” to scan and examine the feedback.
Although these algorithms might not be 100% accurate, they can perform the task more easily and efficiently than the manual examination of the content. Due to these algorithms, it has become easier to automatically remove the controversial content from the platform immediately. AI aided feature helps in determining the inappropriate content faster. However, it doesn’t provide 100% accurate results. This is the reason why YouTube has a large team of human specialists to check the accuracy of determining violative content.
02Add New Video Effects
The introduction of artificial intelligence and machine learning in the market has made it easier to add new video effects without the use of any external equipment. You can now swap out backgrounds from videos with just one click due to the in-built AI features on YouTube. This AI neural feature is prepared by Google’s AI YouTube researchers to make it easier for the AI algorithms to understand video patterns. This feature makes it easier for the system to maintain the correct pace with the video.
03Maintain Age Restrictions
Being an online platform, YouTube is open to everyone. There are many creators and viewers on the platform with different interests. Moreover, it is accessible to all age groups, which makes it necessary to optimize the content according to the age groups. YouTube has always been very particular about the age-restricted content. A lot of content is published on the platform that can be harmful to the children’s minds and growth. YouTube uses different AI tools and algorithms to maintain the age restrictions of adult content.
YouTube has guaranteed that the mature content will not be accessible to the kids and youngsters aged below 13 years. It has also created a separate application for the kids to maintain the age restrictions from the matured content.
Earlier, the YouTubers used to flag their content as mature themselves, but now the platform is planning to flag the content using machine learning technology. YouTube had also used machine learning technology to thwart the age-restricted content automatically in 2017.
04”Up Next” Feature
The “Up Next” feature of YouTube is also a result of artificial intelligence. With many creators uploading a large number of videos every minute, it was becoming difficult for the platform to manage the suggestion engine properly. So, YouTube has introduced the AI technique to streamline the recommendation process to maintain the real-time and latest suggestion.
This feature is a mix of two algorithms, one is used to optimize the suggestion engine according to the search history and watch history of the user, and the other is to determine according to the ranking. As the main aim is to provide the content so that the user can spend his/her maximum time watching YouTube videos. This helps in creating a better sidebar full of user-specific recommendations. YouTube’s special recommendation feature ensures to recommend different videos to the different viewers as per their interests.
05Training on Depth Prediction
YouTube has a lot of data stored that provides easy knowledge of AI algorithms. According to the recent data and announcement, it is now clear that Google’s AI YouTube researchers used the “mannequin challenge” to understand depth predictions.
In this challenge, they researched around 2000 groups, with 1 group in each video. Video had many people standing still like they have been frozen and one person was going through the scene to shoot the video. A better understanding of depth prediction can further help in generating the development of Augmented Reality (AR).
06Tackle Fake News
Among the different features of the most engaging online platform comes the ability to detect and tackle fake news and misleading content. YouTube can understand and detect fake news. With so many users on different social media platforms, it has now become common to spread fake and false news. Unlike other platforms, YouTube is using artificial intelligence to detect and remove misleading content that is against YouTube’s privacy policy.
YouTube understands that this type of content can be harmful to the audience and can be the reason for disputes among different communities. Hence, giving rise to racism and terrorism. To reduce its wrong impact on society, YouTube is using AI technology and removing this type of fake and misleading content. Around 11 million videos were removed from the platform within a single quarter. The introduction of AI has also proved that the technology works more effectively and efficiently rather than the manual removal of such content.
Part 2 How Is YouTube Using AI to Recommend Videos?

YouTube aims at finding the perfect video for each user separately and anticipating the users to spend more time on the platform. Keeping both these things in mind, it decided to use AI technology to recommend videos and optimize the suggestion panel. Just like Netflix, AI technology makes it easier for the platform to determine the best suggestions for different viewers. It recommends the videos after researching the user’s age, interests, watch time, etc.
YouTube generally focuses on increasing the watch time of the viewer, that’s why it recommends the videos keeping the user’s interests on priority. The goal is to watch more rather than watch the best.
YouTube uses different AI algorithms to understand things and recommend optimized videos to stand out from the crowd. First of all, it uses AI algorithms to understand the user’s interest by scanning his/her search history and watching history. It creates a list based on the findings and then ranks the videos as per the google rankings. Each video on YouTube has a different ranking.
YouTube has been changing its algorithms over time. Earlier, it used to rank videos according to view counts. But soon people understood the technique and started using the eye-catchy title and thumbnail to gain a large number of views. Due to this, viewers even started complaining about the content and YouTube changed its algorithms to resolve this issue.
YouTube introduced AI and ML technology to customize the recommendations in 2016. This introduction has made things easier for YouTube as well as its viewers. It has now announced to ban the “borderline content”.
For Win 7 or later (64-bit)
For macOS 10.12 or later
● Ending Thoughts →
● Applying AI on YouTube has made it easier for the platform to manage activities more effectively and efficiently. As a result, many new features are added to enhance the convenience and maintain the quality of the user experience.
● Moreover, YouTube is now experimenting with AI and ML for automatically adding video chapters. This feature will be beneficial for the content creators.
● It will assist them in creating and uploading, resulting in the elimination of the time used in adding timestamps manually. Even the creators are uploading AI-generated YouTube videos that are created with the help of an AI YouTube video maker.
● You can even learn about the different applications of AI and ML from different YouTube channels. Many accessible YouTube channels for machine learning are available on the platform.
● YouTube intelligence can also be seen on the homepage, recommendations, notifications, and subscriptions. The latest trending videos are also ranked with the help of artificial intelligence and machine learning.
YouTube is one of the largest entertainment websites, where you can watch, share, and create videos. Millions of active users on YouTube have taken premium subscriptions on YouTube to enjoy hassle-free entertainment. YouTube was launched back in 2005. With the passage of time and advancements in technology, YouTube has also evolved.
Artificial intelligence is one of the recent and most famous advancements in technology. The introduction of artificial intelligence in the industry has proved to be a boon. The introduction of artificial intelligence has made things easy to manage in every industry. AI can easily be applied in any industry be it manufacturing or the IT sector. Artificial intelligence has made work easier and increased the efficiency of people working in different areas. Even YouTube has started using AI techniques for many tasks. In this article, we have listed some of the applications of AI on YouTube.
In this article
01 [How Is YouTube Using Artificial Intelligence?](#Part 1)
02 [How Is YouTube Using AI to Recommend Videos?](#Part 2)
Part 1 How Is YouTube Using Artificial Intelligence?
Tools like artificial intelligence and machine learning have made things easier to manage. Even the introduction of Artificial Intelligence on YouTube has helped a lot to smoothen its procedure. YouTube being one of the most engaging websites has applied YouTube Intelligence to manage all its activities smoothly. Read further to know how YouTube is using artificial intelligence currently!
01Automatic Removal of Inappropriate Content
One of the main applications of AI on YouTube is to remove inappropriate content automatically. YouTube uses artificial intelligence and machine learning to remove the violative and inappropriate content from the platform. As this content was one of the main reasons for the rise in racism and terrorism. To avoid all these harmful after effects, YouTube introduced the “Trashy Video Classifier” to scan and examine the feedback.
Although these algorithms might not be 100% accurate, they can perform the task more easily and efficiently than the manual examination of the content. Due to these algorithms, it has become easier to automatically remove the controversial content from the platform immediately. AI aided feature helps in determining the inappropriate content faster. However, it doesn’t provide 100% accurate results. This is the reason why YouTube has a large team of human specialists to check the accuracy of determining violative content.
02Add New Video Effects
The introduction of artificial intelligence and machine learning in the market has made it easier to add new video effects without the use of any external equipment. You can now swap out backgrounds from videos with just one click due to the in-built AI features on YouTube. This AI neural feature is prepared by Google’s AI YouTube researchers to make it easier for the AI algorithms to understand video patterns. This feature makes it easier for the system to maintain the correct pace with the video.
03Maintain Age Restrictions
Being an online platform, YouTube is open to everyone. There are many creators and viewers on the platform with different interests. Moreover, it is accessible to all age groups, which makes it necessary to optimize the content according to the age groups. YouTube has always been very particular about the age-restricted content. A lot of content is published on the platform that can be harmful to the children’s minds and growth. YouTube uses different AI tools and algorithms to maintain the age restrictions of adult content.
YouTube has guaranteed that the mature content will not be accessible to the kids and youngsters aged below 13 years. It has also created a separate application for the kids to maintain the age restrictions from the matured content.
Earlier, the YouTubers used to flag their content as mature themselves, but now the platform is planning to flag the content using machine learning technology. YouTube had also used machine learning technology to thwart the age-restricted content automatically in 2017.
04”Up Next” Feature
The “Up Next” feature of YouTube is also a result of artificial intelligence. With many creators uploading a large number of videos every minute, it was becoming difficult for the platform to manage the suggestion engine properly. So, YouTube has introduced the AI technique to streamline the recommendation process to maintain the real-time and latest suggestion.
This feature is a mix of two algorithms, one is used to optimize the suggestion engine according to the search history and watch history of the user, and the other is to determine according to the ranking. As the main aim is to provide the content so that the user can spend his/her maximum time watching YouTube videos. This helps in creating a better sidebar full of user-specific recommendations. YouTube’s special recommendation feature ensures to recommend different videos to the different viewers as per their interests.
05Training on Depth Prediction
YouTube has a lot of data stored that provides easy knowledge of AI algorithms. According to the recent data and announcement, it is now clear that Google’s AI YouTube researchers used the “mannequin challenge” to understand depth predictions.
In this challenge, they researched around 2000 groups, with 1 group in each video. Video had many people standing still like they have been frozen and one person was going through the scene to shoot the video. A better understanding of depth prediction can further help in generating the development of Augmented Reality (AR).
06Tackle Fake News
Among the different features of the most engaging online platform comes the ability to detect and tackle fake news and misleading content. YouTube can understand and detect fake news. With so many users on different social media platforms, it has now become common to spread fake and false news. Unlike other platforms, YouTube is using artificial intelligence to detect and remove misleading content that is against YouTube’s privacy policy.
YouTube understands that this type of content can be harmful to the audience and can be the reason for disputes among different communities. Hence, giving rise to racism and terrorism. To reduce its wrong impact on society, YouTube is using AI technology and removing this type of fake and misleading content. Around 11 million videos were removed from the platform within a single quarter. The introduction of AI has also proved that the technology works more effectively and efficiently rather than the manual removal of such content.
Part 2 How Is YouTube Using AI to Recommend Videos?
YouTube aims at finding the perfect video for each user separately and anticipating the users to spend more time on the platform. Keeping both these things in mind, it decided to use AI technology to recommend videos and optimize the suggestion panel. Just like Netflix, AI technology makes it easier for the platform to determine the best suggestions for different viewers. It recommends the videos after researching the user’s age, interests, watch time, etc.
YouTube generally focuses on increasing the watch time of the viewer, that’s why it recommends the videos keeping the user’s interests on priority. The goal is to watch more rather than watch the best.
YouTube uses different AI algorithms to understand things and recommend optimized videos to stand out from the crowd. First of all, it uses AI algorithms to understand the user’s interest by scanning his/her search history and watching history. It creates a list based on the findings and then ranks the videos as per the google rankings. Each video on YouTube has a different ranking.
YouTube has been changing its algorithms over time. Earlier, it used to rank videos according to view counts. But soon people understood the technique and started using the eye-catchy title and thumbnail to gain a large number of views. Due to this, viewers even started complaining about the content and YouTube changed its algorithms to resolve this issue.
YouTube introduced AI and ML technology to customize the recommendations in 2016. This introduction has made things easier for YouTube as well as its viewers. It has now announced to ban the “borderline content”.
For Win 7 or later (64-bit)
For macOS 10.12 or later
● Ending Thoughts →
● Applying AI on YouTube has made it easier for the platform to manage activities more effectively and efficiently. As a result, many new features are added to enhance the convenience and maintain the quality of the user experience.
● Moreover, YouTube is now experimenting with AI and ML for automatically adding video chapters. This feature will be beneficial for the content creators.
● It will assist them in creating and uploading, resulting in the elimination of the time used in adding timestamps manually. Even the creators are uploading AI-generated YouTube videos that are created with the help of an AI YouTube video maker.
● You can even learn about the different applications of AI and ML from different YouTube channels. Many accessible YouTube channels for machine learning are available on the platform.
● YouTube intelligence can also be seen on the homepage, recommendations, notifications, and subscriptions. The latest trending videos are also ranked with the help of artificial intelligence and machine learning.
How to Make A Jaw-Dropping Time Lapse Video?
Are you looking for a handy tutorial that will give you a full-fledged time lapse video? Well, here’s some two cents of what would be the ideal guide that you shall refer to! Learn more about the complete steps involved in making your time lapse video. Find out more here:
Part 1: What is Time Lapse?
1. Technical basics of Time Lapse Photography and Videography
Time-lapse is a specialized type of shot that can be achieved in-camera, through editing, or a combination of both. Time-lapse is a technique where frames are shot much slower than a normal rate (e.g., 24 frames per minute instead of per second).
Professional time-lapses are a series of raw photos even though they are sometimes perceived as videos. In a nutshell, a time-lapse is a short video that processes by revealing the evolution of a series of events, invisible to the eye.
The simplest and most useful formula is time per frame (TPF), multiplied by frames per second (FPS), multiplied by 60 seconds. Using this formula will tell you how long to record to end up with your desired time lapse length or “recording time” (RT). TPF x FPS x 60 = RT
2. What is a Time-lapse video used for?
The use of time-lapse photography and video is an excellent storytelling technique since compelling stories are essential to effective marketing. A time-lapse can also offer excellent insight into the advancement of developmental projects.
① Scientific research
- Time-lapses may be utilized to spread the word about scientific investigations to a wide audience. You can use time-lapse photography to gain money by selling the material of interesting scientific investigations to documentary makers or instructional websites.
- Scientists can visualize processes that would be challenging or sometimes even impossible to study in real life, thanks to time-lapse photography
② Individual enjoyment
Time-lapses are also utilized by filmmakers for scenes requiring extended durations of time with little significant activity occurring during the shot (such as night slowly turning into day).
③ Commercial use
- Time-lapse videos are a wonderful instrument for enhancing the perception of your brand because they are. As a result, many consumers find it interesting.
- Time-lapse videos are the epitome of the old saying that “good things come in small packages” for any brand.
3. How to Make a Time-lapse video?
Start with a stable tripod or surface and adjust the settings on your phone camera or DSLR. Use slow shutter speed, use still mode, and don’t forget to use the timer. Find a stable surface and place your camera this way, you can get your hands on a creative time-lapse video.
Part 2: Record or Shoot Your Time-Lapse Video
1. Select Your Subject
The best way to create a time-lapse video is to pick your subject very carefully. Movement is the most crucial factor to consider while selecting a time-lapse subject. Any movement—whether it be caused by people, animals, vehicles, water, clouds, or anything else—can create an exciting and captivating time-lapse.
- Some of the iconic ideas of filming a time-lapse include:
- A stunning glimpse of the day and night cycle of life at sea.
- Construction of a building from ground till its completion
- Capturing the traffic movement
- Ice melting
- Sun setting
- A great shot of a galaxy
2. Prepare Right Equipment
Choose your equipment before heading out to capture time lapses. There are several options available for time-lapse cameras and applications, ranging from basic and affordable to sophisticated and pricy.
① Camera
You cannot make a time-lapse without owning a camera, whether it is a mobile phone, a compact, or a DSLR. The quality of the final result will be as good as the quality of the equipment you use.
- Smartphone camera apps (iPhone/Android)
All good smartphones now possess a built-in camera with good optical quality, for example: recently Apple Company launched its new iPhone 14 with a magnificent 48-megapixel camera. By using such cameras we have been able to produce really good pictures, although not in negative conditions, such as those with low-light, etc.
For apple: use IguanaLapse or TimeLapse to create your great time-lapses
For Android: use Time-Lapse – Lite
- Point-and-shoot cameras
Even though smartphone cameras have taken over in this digital era, it is still not possible to say that point-and-shoot cameras are not doing their magic. A point-and-shoot camera is really handy.
Some examples of point-and-shoot cameras which are best for creating fun time-lapse videos include Olympus Tough TG-6, Nikon Coolpix W300, Fujifilm XP140, Panasonic Lumix ZS70 / TZ90, and many others in the list.
- Action cameras
Action cameras, also known as action cams are compact, rugged, handheld, or mountable digital cameras that are designed to capture what you see when you are immersing in a movement. The action camera is usually mounted to your helmet, chest, handlebars of a bike or motorcycle, or tripod to record life.
The best action cameras for creating time-lapses include GoPro Hero11 Black, Insta360 ONE RS Twin Edition, DJI Action 2, DJI Pocket 2, and GoPro Hero9 Black.
- DSLR cameras
This is the best choice in terms of cost/benefit: it produces excellent results and high image quality. The best and top-rated DSLRs for creating terrific time-lapses include Nikon D850, Canon 80D, Canon EOS 90D, Sony A7 III, and others.
② Tripod/Gimbal/other stabilizers
Owning a solid and stable tripod is essential for the success of a time-lapse video. A good tripod will support the load without any problems and will keep the arsenal stable for the duration of the shooting session. The best way to use a tripod for filming a time-lapse is to use orient on a tripod that is quite high (at least 170cm).
Some best tripods used to record time-lapses include BONFOTO B671c, Patekfly Flexible Tripod, Sirui Easy Traveler ET-2204, and Vanguard Alta Pro 263AB 100.
A gimbal is a tool that uses motors and intelligent sensors to support and stabilize a camera. The best gimbal and other stabilizers used to film time-lapses include Moza Air 2, DJI RS 2, Zhiyun Crane-2S, Benro RedDog R1, iKan EC1 Beholder, and Feiyu AK4500.
③ Intervalometer/other camera shutter triggers
An intervalometer is a small device able to trigger the shutter of your camera every ‘n’ second, ‘n’ times (also infinite). It can be external, or as we saw earlier, integrated into the camera.
Some of the best intervalometer include Nikon Integrated Intervalometer. With a Nikon D3, you can go into Shooting Menu, and then activate” Interval Timer Shooting”.
3. List Pro Tips for Time-lapse Recording
- Make sure batteries are fully charged
- Set interval to match the movement in the scene
- Select music before shooting the time-lapse
- Use your backup camera
- Shoot in manual mode to avoid flicker
- Lock down focus
- Shoot in RAW format
- Add motion to the time-lapse
- Get comfortable, shoot longer
- Avoid bumping or moving the tripod
- Show shadow movement
- Use apps to plan your shots
- Shoot lots of images
Part 3: Edit Your Time Lapse Video
1. 3 Best Ways to Create Time Lapse from Photos
① Windows Photos App (Windows)
If you are using Windows, you probably are familiar with the general features of the Photos App. One of its distinguishing features is to import the photos and create a mind-blowing time-lapse out of those photos. To create time-lapse on your Windows Photos App, you must follow some simple steps:
- Open the Windows Photos app and import the pictures which you want to transform into a time-lapse.
- Go to Menu > Edit > Speed. For proper time-lapse, select a speed between 4x and 12x.
- Go to Save movie > save the video on your desktop or other device and you’re done with filming a great time-lapse video.
② QuickTime Player (Mac)
In your Apple devices (iPhones, iPads, and MacBook), you can create time-lapses by converting an image sequence to a movie or time-lapse video in QuickTime Player. For this, follow the simple steps and you will get a great time-lapse at the tip of your fingertips.
- Go to QuickTime App on your mac devices and open File > open image sequence.
- Select the image sequence folder and choose media.
- Adjust the quality of the movie by clicking on the options and choosing the resolution, frame rate, and video format.
- Click ‘open’ and time-lapse will be ready for access.
③ Filmora (Windows & Mac)
Through Wondershare Filmora software, it is now possible to drag your favorite image sequence into the timeline and transform it into a cool-looking time-lapse. If you’re looking for easy and efficient software to create attractive time-lapses, Filmora is your best go-to software. Using drag-and-drop, you can create time-lapse effects with Filmora’s built-in slow/fast motion effects. Filmora has over 150 free filters available for you if you wish to apply filters to your movie.
Filmora Video Editor creates a masterpiece for your video with the easiest interface for Windows & Mac users. Wondershare created the Filmora family of video editing and production software. Products on Filmora are available for a variety of users, from novice to expert. A timeline, preview window, and effects library are some of Filmora’s common features. These may all be accessed and managed using a drag-and-drop interface. Both Windows and macOS machines can use the Filmora software library.
How to Create a Time-lapse using Filmora
To create a time-lapse from photos in Filmora software, follow the mentioned steps:
Step 1: Download and install Wondershare Filmora
Go to google chrome and download the setup for Filmora. Install into your desktop.
Free Download For Win 7 or later(64-bit)
Free Download For macOS 10.14 or later
Step 2: Launch Filmora video editor
After downloading and installing, launch the Filmora timeline and import the photos to the media library.
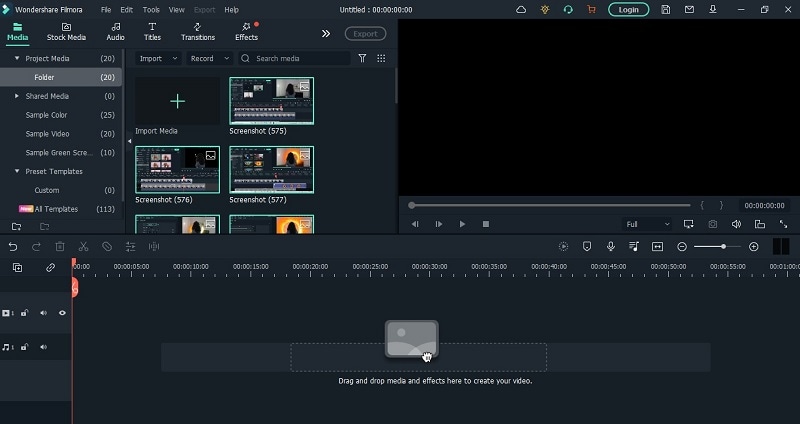
Step 3: Preview and adjust the photos.
Drag the images down to the timeline and move the pointer to reset and order the images according to your required time-lapse video. Don’t forget to resize and match the sizes of all the pictures so make a uniform time-lapse.

Step 4: Adjust the Speed
Select one of the photos in the timeline and right-click. Click on Speed and Duration > Custom Speed panel > Duration > change the duration of the photo to 00:00:00:01 and hit OK.
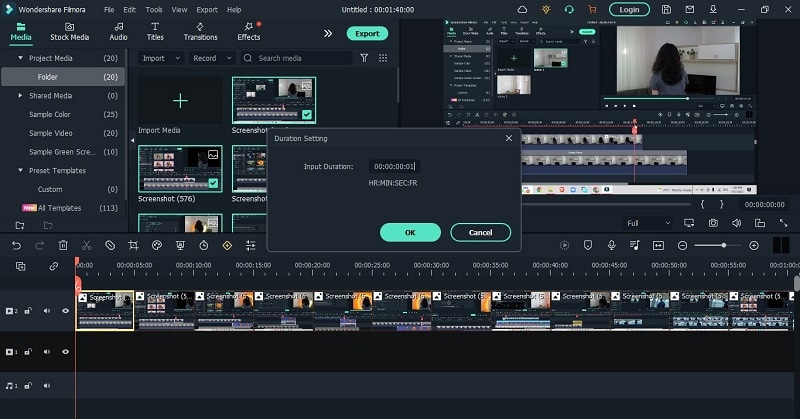
Step 5: Add effects and audio
Even though this step is optional, still it is recommended that to make your time-lapse more presentable, go to effects and choose your favorite pre-set. Go to Audio menu to choose from the music library or add your own custom audio by importing audio file into the timeline.
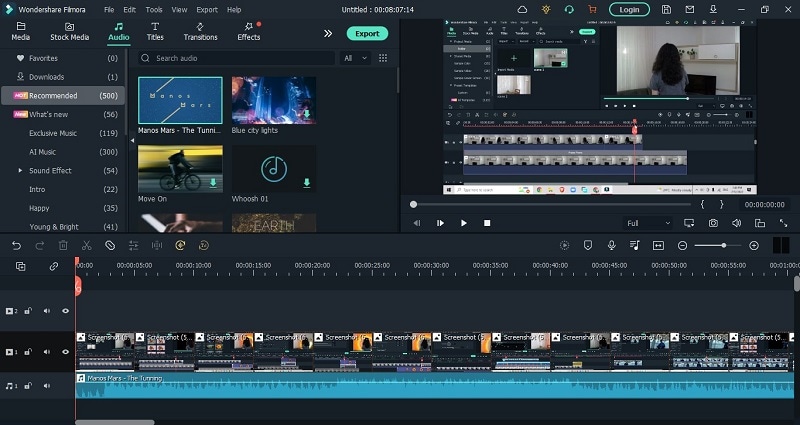
Step 6 Render and Export media
Export your file after rendering it in the full screen. Always check if there are any additional changes required before exporting the media file.

Step 7: Save into your desktop
Change the video format and video and audio parameters such as Bit Rate, Encoder, and Resolution of the video.
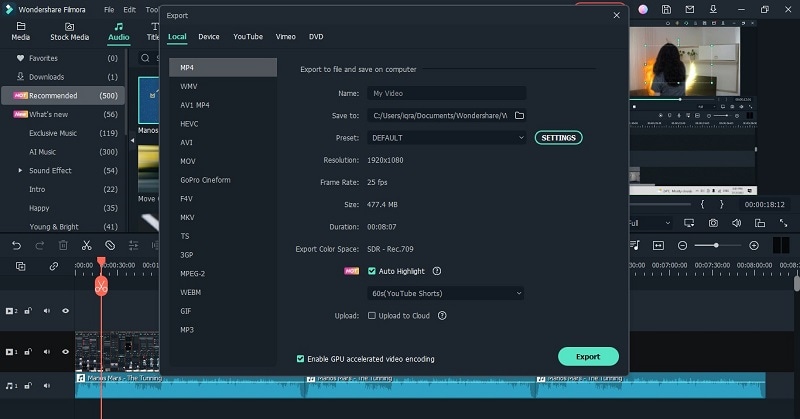
Other software for creating time-lapse
Besides Filmora, there are some interesting options for the users which involve:
o iMovie
o LRTimelapse
o Lightroom
o Adobe Premiere Pro
o After Effects
o Photoshop
2. 3 Best Ways to Convert Video to Time Lapse
① Filmora(Windows & Mac)
Filmora offers yet another very distinguishing feature through which it can convert video footage into an excellent time-lapse video. This feature of Filmora empowers the users and boosts their content and increases audience engagement as well.
In a few simple steps, you can get a creative time-lapse on your windows and mac devices.
- Download and install Filmora 11
- Launch Filmora timeline on your device and import the footage to the media library
- Drag your video onto the video column in the timeline. Select the loaded video and click the “Play” button. While playing the video, drag the slider bar at the start time and hit the “Split” icon to cut out the part you want to do time-lapse editing.
- Right-click on the video clip in the timeline to select Speed and Duration. Find the Speed option and drag the slider bar to the right to increase the speed.
- Click the Play button to preview the result. Filmora now supports up to 100x fast motion and 0.01x slow mo.
- Export your video
② Lapse It Pro (Android & iPhone)
One of the top apps for time-lapse photography is Lapse It Pro. A collection of further time lapses made by other people is available on Lapse It. You can post your videos and favorite those of others while using this social function, which also lets you watch other people’s videos. Through user control, the software makes the smartphone’s capacity to record time lapses as effective as possible.
The lapse It pro version is currently not free, although the Lapse its app is free and it is available on both, Android and Apple.
Steps to Use Lapse It Pro:
- Download the app on your android or apple device
- Configure the time interval between the shots and set a time or photo-based limit while clicking pictures.
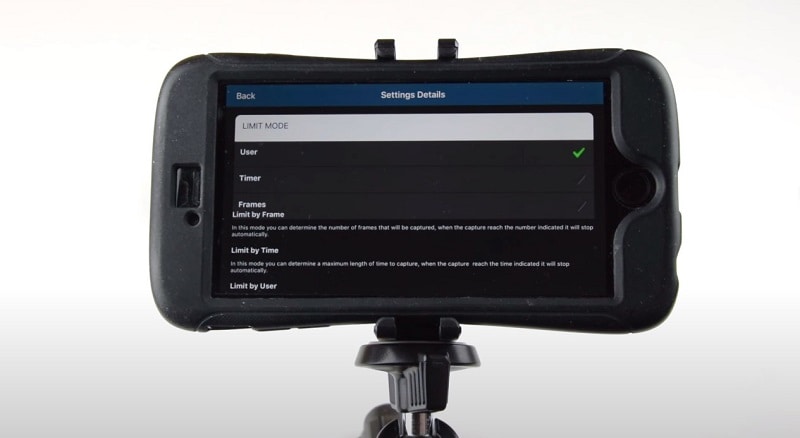
- Adjust the resolution of your camera before taking pictures.
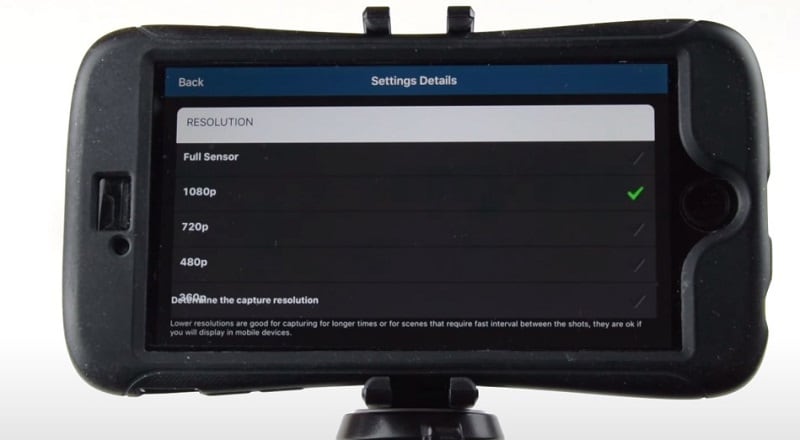
- Take a lot of pictures through the app using your device’s inbuilt camera
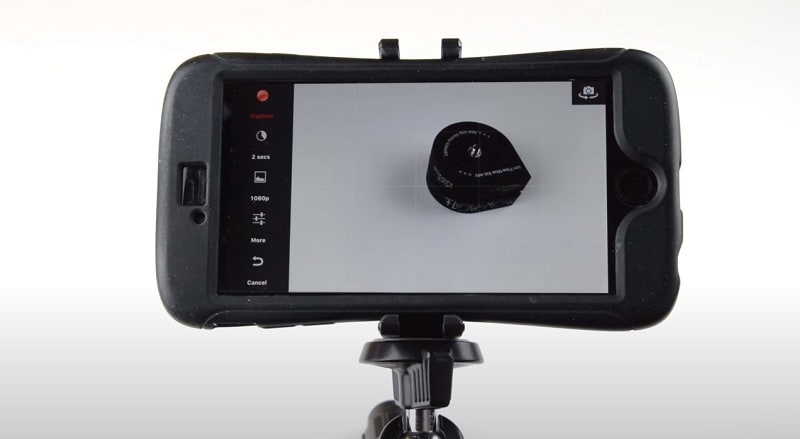
- Edit the order of the pictures
- Stitch the pictures together to form a time-lapse
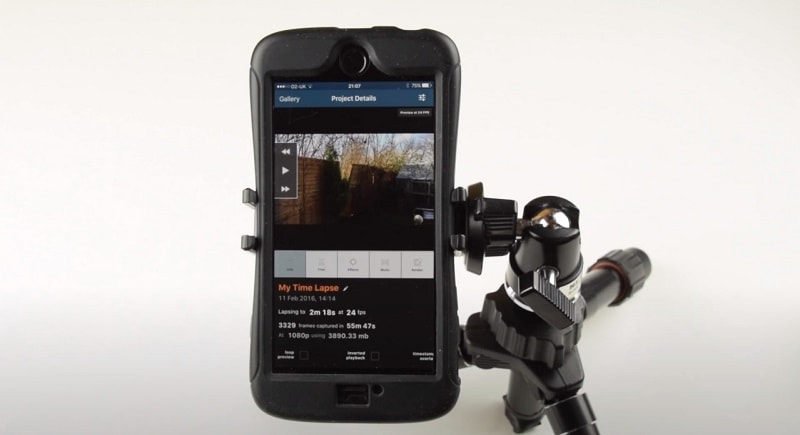
- Add filters and adjust color settings
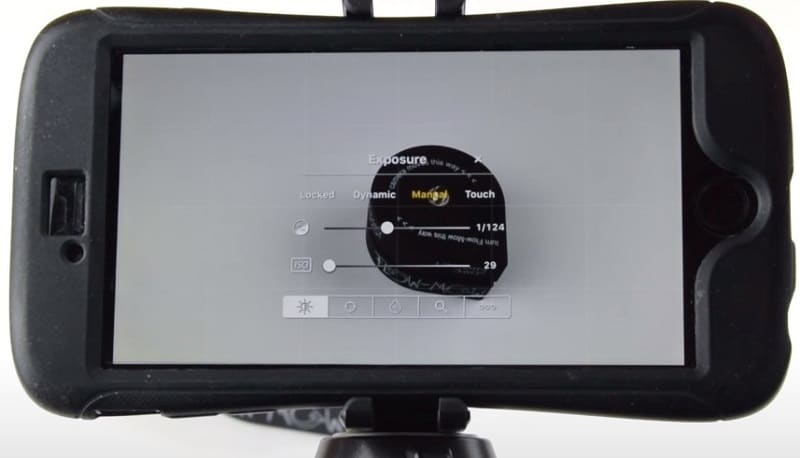
- Render and preview
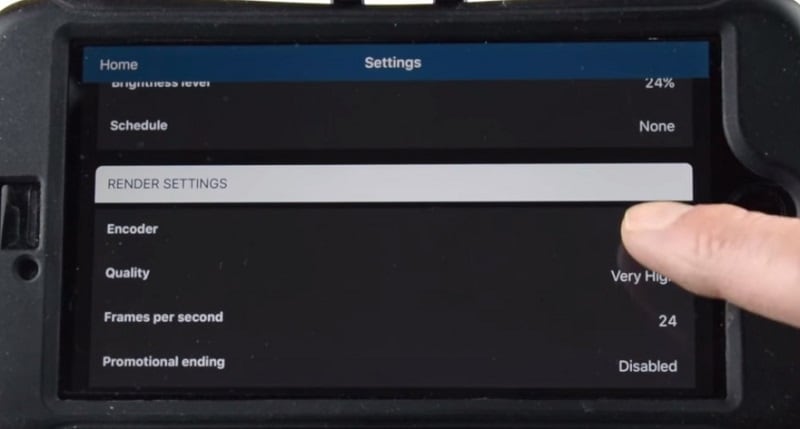
- Export the file to your device
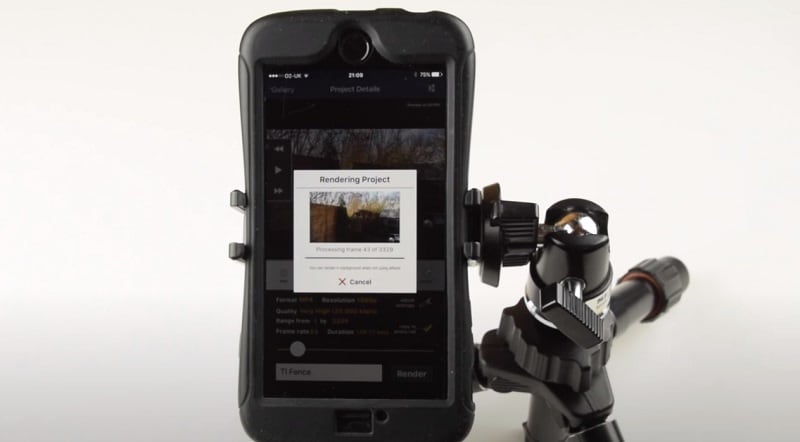
③ Invideo (Online)
InVideo is a do-it-yourself (DIY) video creation platform that enables users to turn their ideas into videos in real time. The platform lets users create, edit, preview, and share videos with team members. It’s a fantastic solution for combining your time-lapse footage into an amazing video project.
InVideo provides three distinct methods for creating videos:
- Text-to-Video: Upload your footage and let InVideo turn it into a series of scenes that you can customize
- Blank Templates: Start with a stripped-down template and craft an amazing video from scratch
- Premade Templates: Pick a template from an extensive library of premade templates
Steps to Use InVideo:
To create a time-lapse through InVideo, follow the mentioned steps:
Step 1. Download and install InVideo
Step 2. Sign up and sign in to your InVideo account
Step 3. Upload your footage to the ‘Add your media files here’ tab.
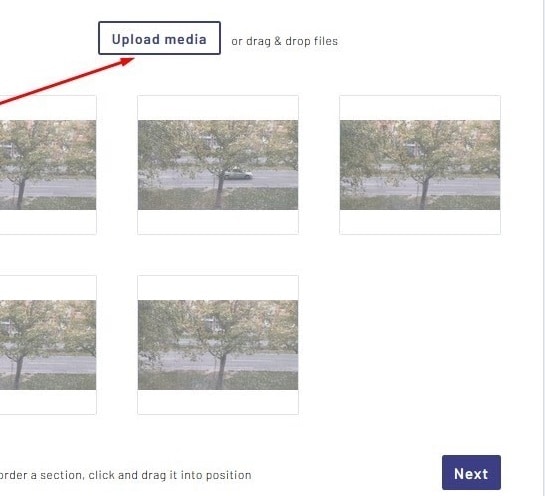
Step 4. Do not upload footage exceeding 200 MBs.
Step 5. Click ‘Next’ and you will be redirected to the Storyboard.
Step 6. Preview all your scenes in Storyboard mode. Rearrange them, add new ones in between, and delete any that you don’t want to use in your project. You can also duplicate scenes if necessary.
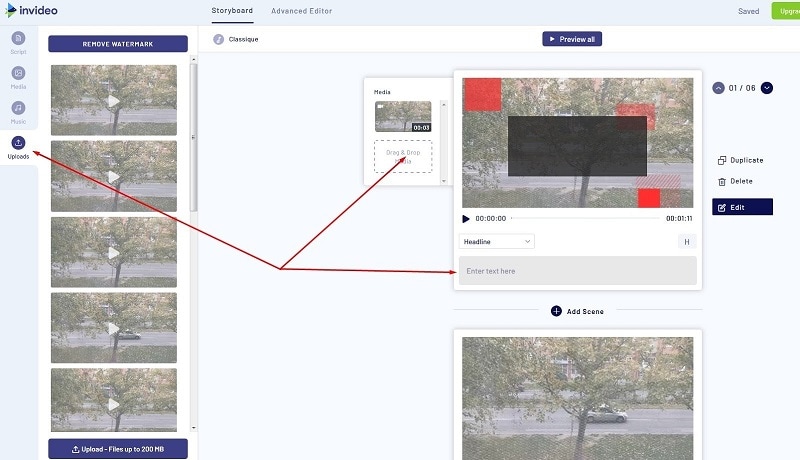
Step 7: You can also add captions to your scenes. To view all the captions you’ve created, go to the Scripts tab. You’ll be able to customize your captions further in the Advanced Editor mode.
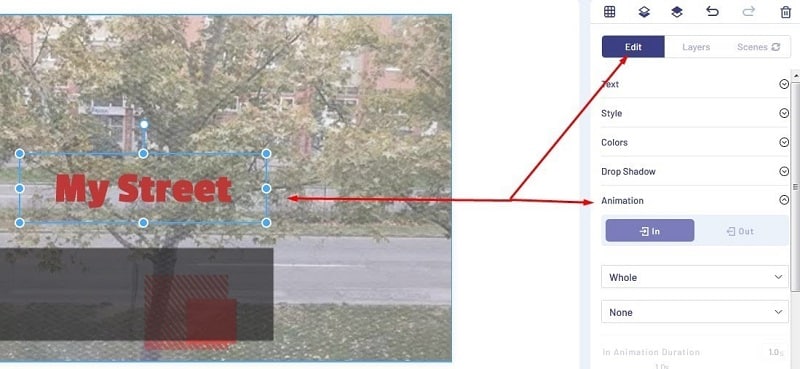
Step 8. To add audio files to your video, go to the Music tab.
Step 9. Edit your video by clicking on Advanced Editor.

Step 10. Apply filters and review the timeline, export, save the video and you’re good to go.
3. Which Way is Right for You to Edit a Time-Lapse Video?
There are many ways to edit a time-lapse video, with varying degrees of success. Each application and software has its pros and cons. Although some best and most useful methods to create and edit time-lapse videos have been discussed earlier in this essay it is crucial to highlight that Filmora is regarded as software that possesses almost all the assets that we need while we edit our time-lapse videos.
Through Filmora, you can effortlessly make a pro-level time-lapse video either from still images or existing video. Most of the software would offer only one feature at a time so it is tremendous that Filmora lets you easily access multiple options to create a seamless time-lapse video in a spur of some minutes.
Besides multiple ways to create time-lapse, Filmora also offers basic & advanced editing features for time-lapse production. After creating a time-lapse in Filmora, you can drag through the multiple post-production editing features which include: Split Screen, Keyframing, Motion Tracking, Speed Ramping, Screen Recorder, Instant Mode, Pre-set Templates, and Auto Beat Sync. And many others.
Besides these ways of editing your time-lapses, Filmora also offers no disturbing pop-up ad experience while editing which provides a smooth editing platform for editors.
Part 4: Share & Enjoy the Best Time-Lapse Video
1. Share Your Quality Time-Lapse Video Across Social Platforms
Time-lapse & social media serve as the perfect combination in today’s times when social media publicity has become an incredibly important avenue for businesses. You can share your time lapses on different social media platforms including:
- YouTube
When people talk about today’s most popular social sharing websites, YouTube often gets left out of the conversation in favor of sites like Facebook and Twitter. But don’t be fooled: YouTube has a lot going for it.
By uploading your time-lapses on YouTube, you can create a YouTube link and share it with your friends and social circle so they can easily access your content, you can get found in search by uploading your own written transcript about the time-lapse, adding an end screen or cards to promote your time-lapse video, and add creative effects to your time-lapses with YouTube Enhancements.
- TikTok
TikTok is a social media platform for creating, sharing, and discovering short videos. The app is used by young people as an outlet to express themselves through singing, dancing, comedy, and lip-syncing, and allows users to create videos and share them across a community.
Since the duration of the time-lapse videos is mostly kept short, TikTok is the best app to approach if you want to increase your audience engagement.
The Meta app, Instagram is the most used app as per 2022 statistics. Through this app, people used to update their day-to-day routine and check-ins by uploading pictures. Now, the platform has added a ‘Reels’ section which plays the short videos to keep the audience hooked to the app, more than ever.
Upload your time-lapses on Instagram as Reels and see your content boost within hours.
2. Promote Your Time-Lapse Video on Popular Websites
Professional video editors and photographers who are looking for a paid platform to promote their business can access the most widely used and reliable websites which include the following:
- Shutterstock
With this app on your mobile phones and other devices, you can Transform Your Marketing Campaigns, Social Media, Websites, and Designs. Uploading your time-lapse content to earn good money on Shutterstock will work best in your favor.
- Pond5
Pond5 is the world’s largest marketplace for HD & 4K stock video, plus millions of music tracks, SFX, motion graphics, and images. Signing up and posting your time-lapse to promote your digital work can be a good choice if you’re looking for earning money online.
- Adobe Stock
Adobe Stock is a new service that provides designers and businesses with access to millions of high-quality, curated, royalty-free images and videos. This is also a good choice for professional photographers and videographers to post their time-lapses.
- Getty
Getty is an American visual media company and is a supplier of stock images, editorial photography, video, and music for business. By uploading your time lapses on this platform, you can be provided with exceptional opportunities to engage employees, entertain clients, and promote your brand.
3. Enjoy the Attractive Time-Lapse Video Examples
Over the internet, you will find numerous creatively designed time-lapses but a few of them still top the list. Some of the iconic time-lapses created to date include the following:
- Multiverse By Hiroshi Kondo, a mind-bending TimeLapse video of Taiwan
- Paris Day & Night by Teeter-Totter-Tam is a 5-minutes TimeLapse journey through one of the prettiest cities in the world, Paris from day to night.
- Solar Panel Installation from a Crane - David Dupuy
- Death Is the Road to Awe is a sample of TimeLapse video footage from that film shot in the American Southwest.
Part 5: FAQs – Time-Lapse Video Creation
① How to easily make a time-lapse video like a pro?
Most smartphone cameras have their time-lapse feature built in. To shoot your time-lapse video, simply open up the camera on your phone and select the “Time-Lapse” feature.
Place your phone in a secure spot where it won’t move around a lot. Then, tap the record button to start recording your time-lapse. When you’re done, tap it again. Your video will play back compressed into a shorter period for a time lapse effect.
PRO TIP: If you’re planning to make a landscape video, turn your phone so your time-lapse video is wide instead of tall
② What are the best time lapse editors or software?
The top five Best Free TimeLapse Software include:
- Wondershare Filmora- Windows and Mac
- Adobe Premiere Pro – Professional software
- Final Cut Pro – Mac software for time-lapse videos
- iMovie – User-friendly
- LRTimelapse – Sophisticated tool for more experienced users
③ Can I speed up or slow down a time-lapse video using Filmora?
Filmora also allows you to adjust the duration of the video clip to change the video speed. After importing the video clip to the timeline, right-click it and choose Speed and Duration to open the custom speed pop-up. Go to the Duration section and you will see the original duration of the video. Adjusting the duration of the video longer will add a slow-motion effect to the video. Changing the duration of the video to a shorter time will speed up the playback speed of the video. Just directly input the number in the field to speed up/slow down the video.
④ How to make my time-lapse video look better?
- Using a Slow Shutter
One solution to making your time lapses look more natural is to use a slow shutter so that each frame has a bit of motion.
- Blend in Video
Capture a time-lapse with fast movement and then mask in video with slow movement, maybe I could have the best of both worlds.
- Use filters
You can use Filters to spruce up the content with the time-lapse.
- Add Audio
Audio is an essential part if you want to leverage the content reach of your time-lapse video.
Conclusion
Time lapse videos are among the most powerful marketing tactics available in the mass media age of today. Similar to aerial photography, time-lapse videos can tell an engaging story for a low production cost, and they can be viewed fast by the audience. Filmora has helped the professionals as well as the beginners in the photography and videography to boost their content through online platforms.
This article will guide you through the most useful software and ways to promote your content and boost your audience engagement through creating mind-blowing time-lapses. Software like above mentioned ones take extremely little time and focus to comprehend the tale in a time lapse, which is a huge advantage in today’s competitive industry.
Free Download For macOS 10.14 or later
Step 2: Launch Filmora video editor
After downloading and installing, launch the Filmora timeline and import the photos to the media library.
Step 3: Preview and adjust the photos.
Drag the images down to the timeline and move the pointer to reset and order the images according to your required time-lapse video. Don’t forget to resize and match the sizes of all the pictures so make a uniform time-lapse.
Step 4: Adjust the Speed
Select one of the photos in the timeline and right-click. Click on Speed and Duration > Custom Speed panel > Duration > change the duration of the photo to 00:00:00:01 and hit OK.
Step 5: Add effects and audio
Even though this step is optional, still it is recommended that to make your time-lapse more presentable, go to effects and choose your favorite pre-set. Go to Audio menu to choose from the music library or add your own custom audio by importing audio file into the timeline.
Step 6 Render and Export media
Export your file after rendering it in the full screen. Always check if there are any additional changes required before exporting the media file.
Step 7: Save into your desktop
Change the video format and video and audio parameters such as Bit Rate, Encoder, and Resolution of the video.
Other software for creating time-lapse
Besides Filmora, there are some interesting options for the users which involve:
o iMovie
o LRTimelapse
o Lightroom
o Adobe Premiere Pro
o After Effects
o Photoshop
2. 3 Best Ways to Convert Video to Time Lapse
① Filmora(Windows & Mac)
Filmora offers yet another very distinguishing feature through which it can convert video footage into an excellent time-lapse video. This feature of Filmora empowers the users and boosts their content and increases audience engagement as well.
In a few simple steps, you can get a creative time-lapse on your windows and mac devices.
- Download and install Filmora 11
- Launch Filmora timeline on your device and import the footage to the media library
- Drag your video onto the video column in the timeline. Select the loaded video and click the “Play” button. While playing the video, drag the slider bar at the start time and hit the “Split” icon to cut out the part you want to do time-lapse editing.
- Right-click on the video clip in the timeline to select Speed and Duration. Find the Speed option and drag the slider bar to the right to increase the speed.
- Click the Play button to preview the result. Filmora now supports up to 100x fast motion and 0.01x slow mo.
- Export your video
② Lapse It Pro (Android & iPhone)
One of the top apps for time-lapse photography is Lapse It Pro. A collection of further time lapses made by other people is available on Lapse It. You can post your videos and favorite those of others while using this social function, which also lets you watch other people’s videos. Through user control, the software makes the smartphone’s capacity to record time lapses as effective as possible.
The lapse It pro version is currently not free, although the Lapse its app is free and it is available on both, Android and Apple.
Steps to Use Lapse It Pro:
- Download the app on your android or apple device
- Configure the time interval between the shots and set a time or photo-based limit while clicking pictures.
- Adjust the resolution of your camera before taking pictures.
- Take a lot of pictures through the app using your device’s inbuilt camera
- Edit the order of the pictures
- Stitch the pictures together to form a time-lapse
- Add filters and adjust color settings
- Render and preview
- Export the file to your device
③ Invideo (Online)
InVideo is a do-it-yourself (DIY) video creation platform that enables users to turn their ideas into videos in real time. The platform lets users create, edit, preview, and share videos with team members. It’s a fantastic solution for combining your time-lapse footage into an amazing video project.
InVideo provides three distinct methods for creating videos:
- Text-to-Video: Upload your footage and let InVideo turn it into a series of scenes that you can customize
- Blank Templates: Start with a stripped-down template and craft an amazing video from scratch
- Premade Templates: Pick a template from an extensive library of premade templates
Steps to Use InVideo:
To create a time-lapse through InVideo, follow the mentioned steps:
Step 1. Download and install InVideo
Step 2. Sign up and sign in to your InVideo account
Step 3. Upload your footage to the ‘Add your media files here’ tab.
Step 4. Do not upload footage exceeding 200 MBs.
Step 5. Click ‘Next’ and you will be redirected to the Storyboard.
Step 6. Preview all your scenes in Storyboard mode. Rearrange them, add new ones in between, and delete any that you don’t want to use in your project. You can also duplicate scenes if necessary.
Step 7: You can also add captions to your scenes. To view all the captions you’ve created, go to the Scripts tab. You’ll be able to customize your captions further in the Advanced Editor mode.
Step 8. To add audio files to your video, go to the Music tab.
Step 9. Edit your video by clicking on Advanced Editor.
Step 10. Apply filters and review the timeline, export, save the video and you’re good to go.
3. Which Way is Right for You to Edit a Time-Lapse Video?
There are many ways to edit a time-lapse video, with varying degrees of success. Each application and software has its pros and cons. Although some best and most useful methods to create and edit time-lapse videos have been discussed earlier in this essay it is crucial to highlight that Filmora is regarded as software that possesses almost all the assets that we need while we edit our time-lapse videos.
Through Filmora, you can effortlessly make a pro-level time-lapse video either from still images or existing video. Most of the software would offer only one feature at a time so it is tremendous that Filmora lets you easily access multiple options to create a seamless time-lapse video in a spur of some minutes.
Besides multiple ways to create time-lapse, Filmora also offers basic & advanced editing features for time-lapse production. After creating a time-lapse in Filmora, you can drag through the multiple post-production editing features which include: Split Screen, Keyframing, Motion Tracking, Speed Ramping, Screen Recorder, Instant Mode, Pre-set Templates, and Auto Beat Sync. And many others.
Besides these ways of editing your time-lapses, Filmora also offers no disturbing pop-up ad experience while editing which provides a smooth editing platform for editors.
Part 4: Share & Enjoy the Best Time-Lapse Video
1. Share Your Quality Time-Lapse Video Across Social Platforms
Time-lapse & social media serve as the perfect combination in today’s times when social media publicity has become an incredibly important avenue for businesses. You can share your time lapses on different social media platforms including:
- YouTube
When people talk about today’s most popular social sharing websites, YouTube often gets left out of the conversation in favor of sites like Facebook and Twitter. But don’t be fooled: YouTube has a lot going for it.
By uploading your time-lapses on YouTube, you can create a YouTube link and share it with your friends and social circle so they can easily access your content, you can get found in search by uploading your own written transcript about the time-lapse, adding an end screen or cards to promote your time-lapse video, and add creative effects to your time-lapses with YouTube Enhancements.
- TikTok
TikTok is a social media platform for creating, sharing, and discovering short videos. The app is used by young people as an outlet to express themselves through singing, dancing, comedy, and lip-syncing, and allows users to create videos and share them across a community.
Since the duration of the time-lapse videos is mostly kept short, TikTok is the best app to approach if you want to increase your audience engagement.
The Meta app, Instagram is the most used app as per 2022 statistics. Through this app, people used to update their day-to-day routine and check-ins by uploading pictures. Now, the platform has added a ‘Reels’ section which plays the short videos to keep the audience hooked to the app, more than ever.
Upload your time-lapses on Instagram as Reels and see your content boost within hours.
2. Promote Your Time-Lapse Video on Popular Websites
Professional video editors and photographers who are looking for a paid platform to promote their business can access the most widely used and reliable websites which include the following:
- Shutterstock
With this app on your mobile phones and other devices, you can Transform Your Marketing Campaigns, Social Media, Websites, and Designs. Uploading your time-lapse content to earn good money on Shutterstock will work best in your favor.
- Pond5
Pond5 is the world’s largest marketplace for HD & 4K stock video, plus millions of music tracks, SFX, motion graphics, and images. Signing up and posting your time-lapse to promote your digital work can be a good choice if you’re looking for earning money online.
- Adobe Stock
Adobe Stock is a new service that provides designers and businesses with access to millions of high-quality, curated, royalty-free images and videos. This is also a good choice for professional photographers and videographers to post their time-lapses.
- Getty
Getty is an American visual media company and is a supplier of stock images, editorial photography, video, and music for business. By uploading your time lapses on this platform, you can be provided with exceptional opportunities to engage employees, entertain clients, and promote your brand.
3. Enjoy the Attractive Time-Lapse Video Examples
Over the internet, you will find numerous creatively designed time-lapses but a few of them still top the list. Some of the iconic time-lapses created to date include the following:
- Multiverse By Hiroshi Kondo, a mind-bending TimeLapse video of Taiwan
- Paris Day & Night by Teeter-Totter-Tam is a 5-minutes TimeLapse journey through one of the prettiest cities in the world, Paris from day to night.
- Solar Panel Installation from a Crane - David Dupuy
- Death Is the Road to Awe is a sample of TimeLapse video footage from that film shot in the American Southwest.
Part 5: FAQs – Time-Lapse Video Creation
① How to easily make a time-lapse video like a pro?
Most smartphone cameras have their time-lapse feature built in. To shoot your time-lapse video, simply open up the camera on your phone and select the “Time-Lapse” feature.
Place your phone in a secure spot where it won’t move around a lot. Then, tap the record button to start recording your time-lapse. When you’re done, tap it again. Your video will play back compressed into a shorter period for a time lapse effect.
PRO TIP: If you’re planning to make a landscape video, turn your phone so your time-lapse video is wide instead of tall
② What are the best time lapse editors or software?
The top five Best Free TimeLapse Software include:
- Wondershare Filmora- Windows and Mac
- Adobe Premiere Pro – Professional software
- Final Cut Pro – Mac software for time-lapse videos
- iMovie – User-friendly
- LRTimelapse – Sophisticated tool for more experienced users
③ Can I speed up or slow down a time-lapse video using Filmora?
Filmora also allows you to adjust the duration of the video clip to change the video speed. After importing the video clip to the timeline, right-click it and choose Speed and Duration to open the custom speed pop-up. Go to the Duration section and you will see the original duration of the video. Adjusting the duration of the video longer will add a slow-motion effect to the video. Changing the duration of the video to a shorter time will speed up the playback speed of the video. Just directly input the number in the field to speed up/slow down the video.
④ How to make my time-lapse video look better?
- Using a Slow Shutter
One solution to making your time lapses look more natural is to use a slow shutter so that each frame has a bit of motion.
- Blend in Video
Capture a time-lapse with fast movement and then mask in video with slow movement, maybe I could have the best of both worlds.
- Use filters
You can use Filters to spruce up the content with the time-lapse.
- Add Audio
Audio is an essential part if you want to leverage the content reach of your time-lapse video.
Conclusion
Time lapse videos are among the most powerful marketing tactics available in the mass media age of today. Similar to aerial photography, time-lapse videos can tell an engaging story for a low production cost, and they can be viewed fast by the audience. Filmora has helped the professionals as well as the beginners in the photography and videography to boost their content through online platforms.
This article will guide you through the most useful software and ways to promote your content and boost your audience engagement through creating mind-blowing time-lapses. Software like above mentioned ones take extremely little time and focus to comprehend the tale in a time lapse, which is a huge advantage in today’s competitive industry.
Also read:
- Updated Learn Eight Simple Steps that Will Allow You to Create a Stunning Text Reveal Animation in Filmora. Simple yet Very Professional
- New In 2024, Step by Step to Rotate Videos in Davinci Resolve
- Updated In 2024, How to Create Sports Intro and YouTube Endscreen?
- Updated Achieving GoPro Slow Motion with Quality An In-Depth Overview
- In 2024, DVD Slideshow Builder Review and Tutorial
- Updated In 2024, Difference Between Time Lapse and Hyperlapse
- Quick Answer What Is a GIF File, In 2024
- Updated WMV File Format Has Many Benefits over the Video Industry. If You Are Excited to Know More About the Format and Its Pros and Cons, Then Lets Start the Discussion for 2024
- Updated How to Concatenate Videos Using FFmpeg
- New Which Is the Best Video Slideshow Maker Available Online? Methods to Prepare Custom Slideshows for Google Presentation. How to Make a Slide Show Video?
- Updated How to Perfect Quick and Efficient Video Editing | Keyboard Shortcuts in Filmora for 2024
- New In This Article, We Will Introduce You Our Top 5 Picks of Websites and Software Converter Online to Convert Powerpoint to Mp4
- Detailed Review of Kodak LUTs for 2024
- In 2024, Step by Step to Crop a Video with CyberLink PowerDirector
- 2024 Approved Are You a Vlogger Looking for Good Color Correction and Video Grading Presets? Here Youll Find Different Vlog LUTs that You Can Use for Your Videos
- New In 2024, How to Animate Text in A Video
- 2024 Approved Sometimes It May Happen to You that You Are Watching a Video that Has Very Low Graphics or, in Other Words, Low Visual Quality. You Might Wish to Change, Instead Improve the Video Quality. Here, AI Upscaling Video Comes to Use
- 2024 Approved All About GIF Keyboard That You May Want to Know
- New While Emojis Have High End Credibility Towards Different Media Utilities, People Also Ask About Ways and Methods to Add Emoji to iPhone. Be Here to Get the Easiest Solutions to the Query for 2024
- 2024 Approved You Must Be Wondering Which the Best Online Transparent Image-Maker Is! Well, There Is No Need to Get Confused as Here; You Will Get a Curated List for the Same
- Updated 2024 Approved How to Merge Audio and Video in VLC Media Player
- Updated 10 Best Meme Text to Speech Tools Windows, Mac, Android, iPhone&Online
- Updated This Review Post Introduces You to EasyHDR to Review and Customize Your HDR Photos. Youll Also Learn the Best Desktop Application to Edit Your HDR Videos Effortlessly for 2024
- Updated 2024 Approved 3 Best Effects to Appear on Camera
- In 2024, How to Add a Custom Transition to OBS
- 12 Top Marketing Slideshow Templates for 2024
- New Adding a Spooky Shadow Effect with Filmora
- New Whatre the Best Alternatives to Pexels, In 2024
- In 2024, Steps To Fade Audio In Premier Pro
- New 2024 Approved How to Use OBS Chroma Key With/Without Green Screen Easy Solutions
- New How To Use Face Tracking In After Effects To Make Your Videos Pop
- Lets Learn How to Convert a Normal Video Into a Film Shot in the 1920S with Wondershare Filmora
- Updated Step by Step to Add Border to Video Using Premiere Pro
- New How to Record Clips Using Your Camera and Edit Them Using Wondershare Filmora to Make a Loop Video? A Complete Guide for Beginners
- New Guide Adopting Lumetri Color Presets in Effective Color Grading for 2024
- Do You Want Your Music Videos to Look Like Professional Music Videos? You Can Always Choose From Music Videos LUTs to Give Your Videos a Cinematic Touch
- Updated Legend Intro Maker – Create Intro Video with Ease for 2024
- New How to Customize Your Loading Text Effect?
- Understanding More About CapCut Lenta Template and Slow-Motion Videos for 2024
- Updated How to Create a Smooth Cut Transition Effect, In 2024
- New In 2024, 8 Free Photo Collage with Music Video Maker
- Updated 2024 Approved 5 Tried-And-True Methods to GIF Making
- Updated In 2024, Free Ways to Download Mobile Phone Green Screen Videos and Pictures No Copyright
- New 2024 Approved How To Make Split Screen Videos in Filmora
- New Looking for Final Cut Pro Alternative App for Your Android Smartphone or iPhone? Here Is the List of the Best FCP Alternative Apps for Android and iOS Users
- Updated How Can You Create Outstanding Educational Teaching Videos?
- Updated TikTok Face Zoom | Create Your Face Zoom TikTok Now for 2024
- About Tecno Pova 5 FRP Bypass
- In 2024, How To Get the Apple ID Verification Code From Apple iPhone 8 Plus in the Best Ways
- In 2024, Full Guide to Fix iToolab AnyGO Not Working On Lava Blaze 2 Pro | Dr.fone
- How do I reset my Poco F5 5G Phone without technical knowledge? | Dr.fone
- A Step-by-Step Guide on Using ADB and Fastboot to Remove FRP Lock from your Xiaomi Redmi K70
- How to Stop Life360 from Tracking You On OnePlus 11 5G? | Dr.fone
- What Does Enter PUK Code Mean And Why Did The Sim Get PUK Blocked On Vivo Y27 5G Device
- Apply These Techniques to Improve How to Detect Fake GPS Location On Realme 11 Pro+ | Dr.fone
- Read This Guide to Find a Reliable Alternative to Fake GPS On Xiaomi Redmi 12 5G | Dr.fone
- Guide to Mirror Your Samsung Galaxy F14 5G to Other Android devices | Dr.fone
- How to recover deleted contacts from Realme 10T 5G.
- How can I get more stardust in pokemon go On Xiaomi 13 Ultra? | Dr.fone
- Play Store Stuck on Downloading Of Itel P55T? 7 Ways to Resolve | Dr.fone
- 8 Solutions to Fix Find My Friends Location Not Available On Honor V Purse | Dr.fone
- Use Device Manager to identify missing hardware drivers with Windows Device Manager on Windows 11/10/7
- How To Revive Your Bricked Nokia C12 Plus in Minutes | Dr.fone
- How to restore wiped videos on Honor Play 7T
- Why is iPogo not working On Honor Magic5 Ultimate? Fixed | Dr.fone
- The 6 Best SIM Unlock Services That Actually Work On Your Lenovo Device
- In 2024, A Step-by-Step Guide on Using ADB and Fastboot to Remove FRP Lock on your Oppo Find N3 Flip
- Will iSpoofer update On Vivo Y78 5G | Dr.fone
- In 2024, Top 9 Realme C51 Monitoring Apps for Parental Controls | Dr.fone
- In 2024, How to Transfer Contacts from Motorola Razr 40 Ultra to iPhone XS/11 | Dr.fone
- In 2024, How to Bypass iCloud Lock from iPhone 15 Pro
- In 2024, How to Unlock Poco Phone Pattern Lock without Factory Reset
- Fix Tecno Spark 20 Pro Android System Webview Crash 2024 Issue | Dr.fone
- How to Track WhatsApp Messages on Lava Yuva 2 Pro Without Them Knowing? | Dr.fone
- In 2024, Full Guide to Bypass Nokia C300 FRP
- How to Fix Life360 Shows Wrong Location On Realme Narzo N55? | Dr.fone
- Easy Steps to Translate Video on Twitter for 2024
- A Complete Guide To OEM Unlocking on Itel A70
- How To Change Country on App Store for iPhone 14 With 7 Methods | Dr.fone
- How to Restore iPhone 15 from Backup when iTunes Backup is Corrupt or not compatible | Stellar
- A Guide Infinix GT 10 Pro Wireless and Wired Screen Mirroring | Dr.fone
- In 2024, How to Cast Honor Play 7T Screen to PC Using WiFi | Dr.fone
- In 2024, How Do You Remove Restricted Mode on iPhone 12 | Dr.fone
- In 2024, How to Transfer Contacts from Nokia C12 Pro to iPhone XS/11 | Dr.fone
- Catch or Beat Sleeping Snorlax on Pokemon Go For Motorola Edge 2023 | Dr.fone
- Title: Are You Looking for an Ideal Halloween Countdown Video Clip for Your Video? This Article Will Walk You Through the Best Ones You Can Use to Get the Job Done Perfectly
- Author: Morgan
- Created at : 2024-05-19 05:11:41
- Updated at : 2024-05-20 05:11:41
- Link: https://ai-video-editing.techidaily.com/are-you-looking-for-an-ideal-halloween-countdown-video-clip-for-your-video-this-article-will-walk-you-through-the-best-ones-you-can-use-to-get-the-job-done-/
- License: This work is licensed under CC BY-NC-SA 4.0.
