
:max_bytes(150000):strip_icc():format(webp)/GettyImages-1198110246-e12a30f2b10645edb984dc66113911c9.jpg)
Are You Searching the Internet for Top Wedding LUTs Premiere Pro? This Article Provides Suggestions on the Best LUT Color Presets for 2024
Are You Searching the Internet for Top Wedding LUTs Premiere Pro? This Article Provides Suggestions on the Best LUT Color Presets
A wedding is an important event that legally combines two souls. Hence, this occasion is momentous and special for both partners. Thus, wedding pictures and videos are captured to record these memorable moments. But your visual content may need better quality due to camera problems or amateur photography.
In this situation, using wedding LUTs Premiere Pro is an ideal solution. This article provides the best free wedding LUTs, including implementation steps.
Empower your videos with a new mood using different LUTs. Filmora now offers 100+ top-quality 3D LUTs cover a broad range of scenarios. Transform your videos with Filmora’s powerful 3D LUTs.
Apply LUT on Videos Apply LUT on Videos Learn More


Part 1: What Are The Best Wedding LUTs Available for Premiere Pro?
LUTs and look-up tables are unique editing tools that enhance color gradients. For videos and photos, LUTs are a great source of color-enhancing tools. Meanwhile, for enhancing video content, there are specialized wedding LUTs free. To choose the best wedding LUT for yourself, proceed here:
1. Colorify Wedding LUTs
Upscale your important wedding videography and photography with Colorify Wedding LUTs. This LUT wedding pack has special color presets that provide stunning visual looks. The color presets are packed within filters that enhance color brightness and sharpness. Thus, your important wedding videos and photos will be enhanced with enchanting colors. After all, this is amongst the best wedding LUTs available.

2. Blackmagic Film Wedding and Standard LUTs
Wedding visual content is always special. With Blackmagic wedding LUTs for Premiere Pro, you can enhance color schemas. Hence, your videos can be transformed with engaging black gradients. There are 25 LUTs to upscale the colors of your visual content. Every LUT offers unique color grades for upgrading color resolutions and overall quality.

3. Slog3 Film Wedding and Standard LUTs
Weddings are incomplete without the videos of this critical event. Thus, upscaling video colors is essential to promote video quality and engagement. In this matter, using this wedding LUTs free download is a great solution. After all, the pack contains 25 Sony Slog3 wedding LUTs. So, you can apply LUTs on your all-important wedding videos. The colors will be enhanced with stylish and unique gradients.

4. Film Wedding LUTs Pack
Add cinematic looks to your wedding photos and videos with this LUTs pack. There are 20 LUT film grades that can improve and enhance your wedding content. Meanwhile, you can also adjust intensity, contrast, and saturation. All the LUT colors preset are available in unique color composure and styles. This LUTs Premiere Pro free pack is compatible with Mac and Windows.

5. Rustic Wedding LUTs
Make your wedding photography and videography more enchanting. This wedding LUTs for Premiere Pro pack comprises 11 LUT presets in cube format. So, you can apply these LUTs to your wedding visual content. Meanwhile, you will see instant color corrections and color enhancements. This way, your wedding content will appear livelier and more engaging.

Part 2: How Can You Add Wedding LUTs in Premiere Pro?
Wedding LUTs are useful tools for upgrading colors within wedding visual content. Premiere Pro is the most frequently used tool for video editing with several features. As a user, you may not understand the operations of Premiere Pro software. Thus, to add LUTs through Premiere Pro, follow these easy steps:
Step 1: Open Adobe Premiere Pro on your device. Make sure to add a video clip that needs editing in the timeline. After this, move into the “Color” workspace from the top of your screen.

Step 2: On the bottom left, there is a project window. From there, you need to click the “New Item” tab and choose “Adjustment Layer.” Now adjust the settings of the video from the available panel. This includes “Width,” “Height,” “Timebase,” and “Pixel Aspect Ratio.” Click “OK.” after you are done with settings.

Step 3: Drag the adjustment layer into the timeline from the project window. Set the length of the adjustment layer similar to the video’s length. Select the adjustment layer, and click “Lumetri Color” from the right-hand panel. From the “Basic Correction” category, set “Input LUT” and click the “Browse” option from the drop-down menu. Choose your LUT pack from the folder and press “Open” to apply the LUTs to the video.

Part 3: Finding The Best Wedding LUTs in Wondershare Filmora
Video editing can consume a lot of time and resources. While using LUTs, you can enhance the color gradients of your photos and videos without editing. Meanwhile, finding good yet reliable wedding LUTs can be difficult. In Wondershare Filmora , you can find more than 200 LUTs to support your needs. The interesting thing is every LUT will be unique with more distinctive colors.
Add LUTs on Video For Win 7 or later(64-bit)
Add LUTs on Video For macOS 10.14 or later
Meanwhile, Filmora also upscales video content through effects, stickers, and text. You can even use AI audio stretch, AI audio denoise, and silence detection.

Key Features of Wondershare Filmora
Making video editing simpler and smarter, Wondershare Filmora is a trusted solution. After all, this software comes with extensive functionalities. Let’s find some of its other extended features:
AI Smart Cutout and Reframe
Using AI smart cutout feature, users can paint backgrounds and even people. This way, the imperfections in videos are rectified for a flawless experience. Meanwhile, with auto-reframe, you can even resize a row of videos. No need for any editing skills in all cases.
Unlimited Editing Tools
The availability of pan and zoom, crop, keyframing, masking, and other tools make Filmora special. This means users don’t need to look for other editing tools. Every type of video adjustment is present within a single solution. After video editing, you can proceed with video export to the device.
Extended Audio Technology
With Filmora, you can enhance your video engagement by adding audio tracks. The video and audio synchronization is clear and appropriate. Meanwhile, you can use an audio visualizer to make your music come alive. With audio ducking, fade your music to stand out in the dialogue.
Part 4: What are The Benefits and Drawbacks of Using LUTs?
LUTs are video editing mechanisms that optimally improve video quality. There are many benefits to using LUTs. Also, there are drawbacks of LUTs that cannot be neglected. Let’s discuss both benefits and disadvantages:
Benefits
- LUTs are fast and efficient in their color grading schemas. So they can enhance upscale color resolutions in a calculated way.
- With maximum consistency, LUTs apply color grading across the frames in the video. Hence, this provides a consistent look to the video in unique colors.
- Using LUTs, you can carry experiments on your video through filter presets. The presets are available in different colors and styles, and you can adjust them.
Drawbacks
- There is a lack of personalization in most LUT filter presets. Hence, you cannot customize the color and styles for desired looks.
- Due to limited precision, LUTs can involve color inaccuracies in their process. This happens because LUTs follow discrete values rather than using continuous gradients.
Conclusion
Like other events, weddings are also important occasions. This is why videography and photography are standard in this type of event. To improve the quality of video content, you need wedding LUTs Premiere Pro free. Meanwhile, in this article, you discovered the 5 best wedding LUTs to use. Finally, Wondershare Filmora has the availability of more than 200 LUT presets. You can even find wedding LUTs free in Filmora.
Add LUTs on Video For Win 7 or later(64-bit)
Add LUTs on Video For macOS 10.14 or later
Apply LUT on Videos Apply LUT on Videos Learn More
Part 1: What Are The Best Wedding LUTs Available for Premiere Pro?
LUTs and look-up tables are unique editing tools that enhance color gradients. For videos and photos, LUTs are a great source of color-enhancing tools. Meanwhile, for enhancing video content, there are specialized wedding LUTs free. To choose the best wedding LUT for yourself, proceed here:
1. Colorify Wedding LUTs
Upscale your important wedding videography and photography with Colorify Wedding LUTs. This LUT wedding pack has special color presets that provide stunning visual looks. The color presets are packed within filters that enhance color brightness and sharpness. Thus, your important wedding videos and photos will be enhanced with enchanting colors. After all, this is amongst the best wedding LUTs available.
2. Blackmagic Film Wedding and Standard LUTs
Wedding visual content is always special. With Blackmagic wedding LUTs for Premiere Pro, you can enhance color schemas. Hence, your videos can be transformed with engaging black gradients. There are 25 LUTs to upscale the colors of your visual content. Every LUT offers unique color grades for upgrading color resolutions and overall quality.
3. Slog3 Film Wedding and Standard LUTs
Weddings are incomplete without the videos of this critical event. Thus, upscaling video colors is essential to promote video quality and engagement. In this matter, using this wedding LUTs free download is a great solution. After all, the pack contains 25 Sony Slog3 wedding LUTs. So, you can apply LUTs on your all-important wedding videos. The colors will be enhanced with stylish and unique gradients.
4. Film Wedding LUTs Pack
Add cinematic looks to your wedding photos and videos with this LUTs pack. There are 20 LUT film grades that can improve and enhance your wedding content. Meanwhile, you can also adjust intensity, contrast, and saturation. All the LUT colors preset are available in unique color composure and styles. This LUTs Premiere Pro free pack is compatible with Mac and Windows.
5. Rustic Wedding LUTs
Make your wedding photography and videography more enchanting. This wedding LUTs for Premiere Pro pack comprises 11 LUT presets in cube format. So, you can apply these LUTs to your wedding visual content. Meanwhile, you will see instant color corrections and color enhancements. This way, your wedding content will appear livelier and more engaging.
Part 2: How Can You Add Wedding LUTs in Premiere Pro?
Wedding LUTs are useful tools for upgrading colors within wedding visual content. Premiere Pro is the most frequently used tool for video editing with several features. As a user, you may not understand the operations of Premiere Pro software. Thus, to add LUTs through Premiere Pro, follow these easy steps:
Step 1: Open Adobe Premiere Pro on your device. Make sure to add a video clip that needs editing in the timeline. After this, move into the “Color” workspace from the top of your screen.
Step 2: On the bottom left, there is a project window. From there, you need to click the “New Item” tab and choose “Adjustment Layer.” Now adjust the settings of the video from the available panel. This includes “Width,” “Height,” “Timebase,” and “Pixel Aspect Ratio.” Click “OK.” after you are done with settings.
Step 3: Drag the adjustment layer into the timeline from the project window. Set the length of the adjustment layer similar to the video’s length. Select the adjustment layer, and click “Lumetri Color” from the right-hand panel. From the “Basic Correction” category, set “Input LUT” and click the “Browse” option from the drop-down menu. Choose your LUT pack from the folder and press “Open” to apply the LUTs to the video.
Part 3: Finding The Best Wedding LUTs in Wondershare Filmora
Video editing can consume a lot of time and resources. While using LUTs, you can enhance the color gradients of your photos and videos without editing. Meanwhile, finding good yet reliable wedding LUTs can be difficult. In Wondershare Filmora , you can find more than 200 LUTs to support your needs. The interesting thing is every LUT will be unique with more distinctive colors.
Add LUTs on Video For Win 7 or later(64-bit)
Add LUTs on Video For macOS 10.14 or later
Meanwhile, Filmora also upscales video content through effects, stickers, and text. You can even use AI audio stretch, AI audio denoise, and silence detection.
Key Features of Wondershare Filmora
Making video editing simpler and smarter, Wondershare Filmora is a trusted solution. After all, this software comes with extensive functionalities. Let’s find some of its other extended features:
AI Smart Cutout and Reframe
Using AI smart cutout feature, users can paint backgrounds and even people. This way, the imperfections in videos are rectified for a flawless experience. Meanwhile, with auto-reframe, you can even resize a row of videos. No need for any editing skills in all cases.
Unlimited Editing Tools
The availability of pan and zoom, crop, keyframing, masking, and other tools make Filmora special. This means users don’t need to look for other editing tools. Every type of video adjustment is present within a single solution. After video editing, you can proceed with video export to the device.
Extended Audio Technology
With Filmora, you can enhance your video engagement by adding audio tracks. The video and audio synchronization is clear and appropriate. Meanwhile, you can use an audio visualizer to make your music come alive. With audio ducking, fade your music to stand out in the dialogue.
Part 4: What are The Benefits and Drawbacks of Using LUTs?
LUTs are video editing mechanisms that optimally improve video quality. There are many benefits to using LUTs. Also, there are drawbacks of LUTs that cannot be neglected. Let’s discuss both benefits and disadvantages:
Benefits
- LUTs are fast and efficient in their color grading schemas. So they can enhance upscale color resolutions in a calculated way.
- With maximum consistency, LUTs apply color grading across the frames in the video. Hence, this provides a consistent look to the video in unique colors.
- Using LUTs, you can carry experiments on your video through filter presets. The presets are available in different colors and styles, and you can adjust them.
Drawbacks
- There is a lack of personalization in most LUT filter presets. Hence, you cannot customize the color and styles for desired looks.
- Due to limited precision, LUTs can involve color inaccuracies in their process. This happens because LUTs follow discrete values rather than using continuous gradients.
Conclusion
Like other events, weddings are also important occasions. This is why videography and photography are standard in this type of event. To improve the quality of video content, you need wedding LUTs Premiere Pro free. Meanwhile, in this article, you discovered the 5 best wedding LUTs to use. Finally, Wondershare Filmora has the availability of more than 200 LUT presets. You can even find wedding LUTs free in Filmora.
Add LUTs on Video For Win 7 or later(64-bit)
Add LUTs on Video For macOS 10.14 or later
Top Animated Title Makers
You know that your video needs a title, but rather than just type in some bland text to introduce the video, you can create an animated title page that is far more attractive. Animated titles make a video more attractive and when done correctly, they can even guarantee that your target audience will stick around long enough to watch the entire video. They can also be very useful for introducing the content of the video.
But to make an effective animated title, you need a tool that is designed to do just that. In this article, we look at some of the top animated title makers that you can use to create the perfect animated title for your video.
Part 1. Animated Title Maker Online
If you don’t want to install software on your computer to create the animated title, the following are the top online tools to choose from;
Animaker
Link: https://www.animaker.com/text-animation-maker
Rating: 4.5/5
Animaker is an online tool that is specifically designed to help you create text animations that you can then add to your video project. Available online on all browsers, Animaker has a simple user interface that makes it easy to create text animations in a matter of minutes. It is so easy to use that even the average beginner can create stunning text animations.
If you don’t want to create the animations from scratch, Animaker has numerous pre-designed templates for you to choose from that you can then just edit to fit your design. It also has a lot of customizable infographics that you can repurpose.

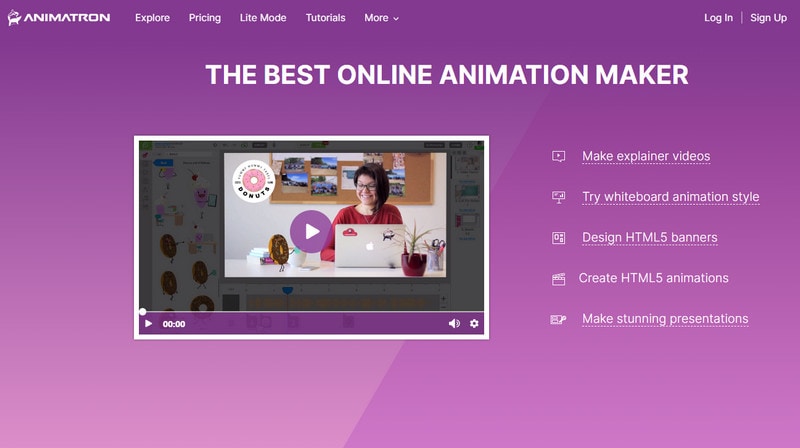
Animatron Studio
Link: https://www.animatron.com/studio
Rating: 4.5/5
The Animatron Studio is a one-stop solution for generating all types of animated texts. You can use it to create the perfect animated title for your video, but its numerous features also mean that it is one of the best ways to create attention-grabbing animated banner ads that can be posted on various ad sites,
It has a wealth of resources that you can use to create the title including more than 500,000 royalty-free images, videos, and audio to include in your project. If you don’t want to build the animated content from the ground up, you can select from the 200 pre-animated sets that Animatron Studio provides.
Kapwing Title Maker
Link: https://www.kapwing.com/animated-text-video-maker
Rating: 4.5/5
If your goal is to do more than just create an animated title for your video, Kapwing is a good solution. It is a complete online video editor that can also be used to create animated titles. As such, you can expect Kapwing to have more advanced features that allow you to customize the animated title in various ways.
For instance, it has a huge selection of animations that you can apply to the text. But you also get the option to upload your own animations, colors, and fonts. But please note that the free version of Kapwing will add a watermark to the video.

Biteable Animated Text Maker
Link: https://biteable.com/animated/text/
Rating: 4.5/5
Biteable is one of the most popular solutions that you can use to create all kinds of animated texts. It is simple enough to use that it is useful to both professionals and amateur video creators. It has numerous useful features including custom scenes, foundations, backgrounds, and characters all of which can work together to create the perfect animated title.
One of the main benefits of choosing Biteable is that you can share the videos you edit directly on social media without having to download the video.

Flexclip Video Maker
Link: https://www.flexclip.com/editor/
Rating: 4.5/5
Flexclip is another very easy-to-use and easily accessible solution to create animated texts for videos. Rather than create the texts from scratch, Flexclip allows you to create stunning animated texts just by selecting several parameters.
There are also a lot of pre-made designer text templates that are fully customizable. All you have to do is select one of the templates, and change the text, font, and any images to make it unique to you and your video.

Part 2. Animated Title Maker for Computer
Online tools can be useful, especially since they are more easily accessible. But if you want additional features and more ways to customize your animated title, the following desktop solutions may be more applicable to you;
Filmora
Rating: 4.5/5
Wondershare Filmora is a complete suite of video editing tools that can also come in handy when creating animated titles for videos. It is a very simple video editor with a simple user interface, making it an ideal solution even for beginner users. Adding a title to your video is easy and you get to choose from more than 200 different animations that you can apply to bring the text to life.
Filmora is also very useful because it comes with advanced editing features for the professional editor. You can use it to edit all aspects of the video including the clips and even any audio that may be on the project.

Adobe Animate
Rating: 4.5/5
Adobe Animate is a great option to create various animations for your video project, including animated texts. Used by animators to create 2D animated content, Adobe Animate has a lot of features designed to facilitate this kind of animation and is, therefore, one of the go-to solutions for designers looking to create illustrations like logos and infographics.
But like other Adobe programs, Adobe Animate is not very easy to use and the beginner may find that it takes quite a long time to figure out how it works. But once you figure it out, the 800+ web fonts can make it very easy for you to customize your animated title in various ways.

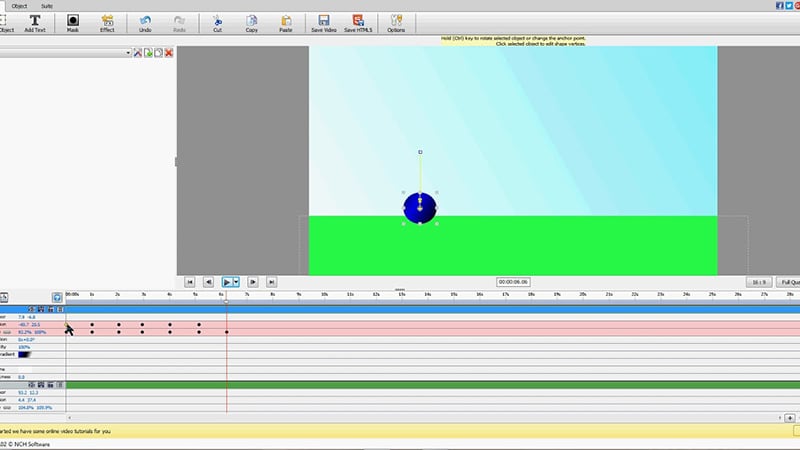
Express Animate
Rating: 4.5/5
Express Animate is a completely free program that you can download on your computer. It is a complete video editor which means that you can use it to animate text and characters, but it is also a great way to edit other aspects of the video including the audio tracks and adding digital effects.
With a simple user interface, Express Animate allows users to create 2D animations that can be used to create unique videos. It is also a good way to create GIFs and memes.
Movavi Video Editor
Rating: 4.5/5
Movavi Video Editor is another complete suite of editing tools that can also come in handy when you want to create an animated title for your video. Designed for both professionals and beginners, this video has all the advanced features you will need to edit all aspects of your video, including a built-in audio editor.
When it comes to animation, Movavi has a lot of effects and transitions as well as pre-made title templates to choose from. Once you have selected the title, you can easily customize the font and color to fit into your project.

Windows Movie Maker
Rating: 4.5/5
For PC users Windows Movie Maker is a simple to use and free way to edit videos. Included with the Windows OS, you likely don’t need to install any software to use and even though it is a free solution, Windows Movie Maker does have the necessary features to create and add animated titles to any video.
It comes with numerous effects, transitions, and templates to choose from when animating text. And it can also be used to edit videos in other ways including trimming and merging clips.

Part 3. Animated Title Maker Apps
If you are editing your videos on your mobile device, the following are the top animated title-making apps to choose from;
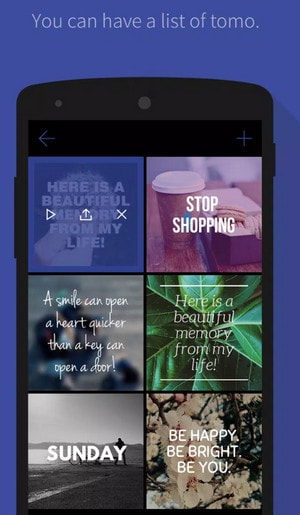
Tomo
Rating: 4.5/5
Link: https://m.apkpure.com/tomo-animate-text-in-video/com.entzeners.app.tomo
Tomo is one of the best apps that you can use to animate text in a video. It has robust features that allow you to easily add text to the video and then animate the text using various transitions and effects. Once the edits are complete, Tomo allows you to share the completed video directly on social media apps like Instagram and Twitter.
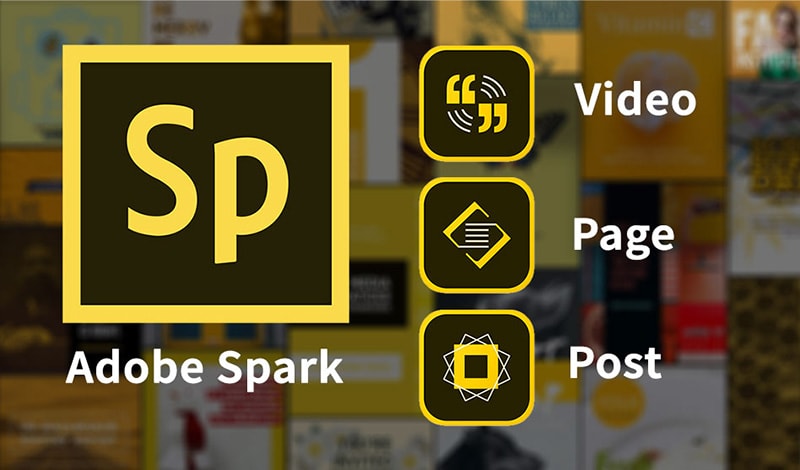
Adobe Spark
Rating: 4.5/5
Link:https://apps.apple.com/us/app/adobe-spark-post-design-maker/id1051937863
Available for both Android and iOS devices, Adobe Spark is a video editing tool that has numerous tools to add and edit texts on videos. You can use the professionally designed templates that you have access to when using Adobe Spark to create stunning animation titles. And since it easily integrates with other apps on the device, sharing the videos is very easy.
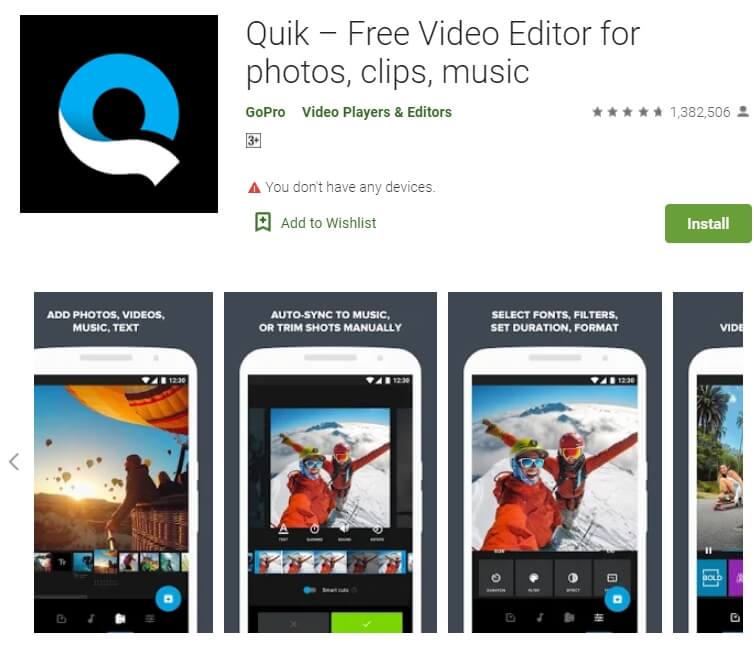
Quik
Rating: 4.5/5
Link: https://play.google.com/store/apps/details?id=com.gopro.smarty&hl=en&gl=US
Quik is an app that is dedicated to text animations and therefore one of the best solutions when you want to add and edit texts on videos. It is available for both iOS and Android and although the free version of the app is slightly limited, its basic editing features are still better than what you find on other more expensive solutions.
Hyper-type Animated Text Videos
Rating: 4.5/5
Link: https://itunes.apple.com/us/app/hype-type-animated-text-videos
This app gives you two options when it comes to animating the text on your video; auto-motion and typography. It focuses on just adding and editing text on a video and as such may not have any of the other video editing features you will find on some of the other apps. But if your goal is to create an interactive animated video title, Hyper-type Animated Text Videos is a great solution.
Vimeo
Rating: 4.5/5
Link: https://play.google.com/store/apps/details?id=com.vimeo.android.videoapp&hl=en&gl=US
Also available for both iOS and Android devices, Vimeo can also be a handy solution for the creation and editing of animated titles for videos. It has a lot of features to edit not just the text in videos, but also all other elements including audio. You even get a wide selection of royalty-free music that you can add to the video and motion stickers to make your title stand out even more. But the free version of Vimeo will add a watermark to the video.

Free Download For Win 7 or later(64-bit)
Free Download For macOS 10.14 or later
Why You Should Master Slideshows In Lightroom, Fresh Insight?
Why You Should Master Slideshows in Lightroom, Fresh Insight
An easy yet powerful editor
Numerous effects to choose from
Detailed tutorials provided by the official channel
Adobe Lightroom is an image manipulation software which is developed by Adobe Inc. It is used for editing, importing, saving and sharing a large no. of digital images. Lightroom editing functions include HSL, colour grading, lens correction, white balance, the transformation of spot removal, red-eye correction and adjustment brushing. Lightroom has a feature of slideshow module which you must have heard about it before.
The process of creating a slideshow video can be time-consuming but once you have created it, you can rewind your memories in just 3-4 minutes. If you want you can share the video on your social media accounts.
In this article
01 [What is Lightroom and What Advantages Does It Have for Making Slideshows](#Part 1)
02 [What Does Slideshows in Lightroom Do to Different Groups of People](#Part 2)
03 [How to Create a Professional-looking Slideshow with Lightroom](#Part 3)
04 [Hot FAQs About Slideshows in Lightroom](#Part 4)
Part 1 What is lightroom and what advantages does it have for making slideshows?
Lightroom helps in editing the images and it allows the users to edit the images by using external features. Photographers usually like working on the lightroom because it is a very popular and easy tool. It is perfect for beginners and graphic designers who are looking for an easy and straightforward editor.
Lightroom is used for image retouching. Lightroom includes improving the color tone, color balance, cropping, filters, removing red-eye effect, and many more things. Lightroom supports some the image formats like JPEG, PSD, PNG and TIFF. You can also edit the raw images.
Advantages
● Easy to use - The lightroom interface is less complex, which makes it easy to use especially for the newcomers.
● Tidy interface - In lightroom, it is easier to search for images as it gathers the metadata on each image on its own. So you can find the image with a very specific date, time, resolution, model, etc.
● Editing capabilities - With editing capabilities like contrast, exposure, clarity, warmth, and saturation, Lightroom can give the desired look to the image which photographers want to create.
Part 2 What do slideshows in Lightroom do to a different group of people?
01Enable or Disable People View
If you are a beginner and people view is disabled, all pre-existing face model data is deleted from lightroom servers. Lightroom will no longer analyze new images and will not group them in clusters automatically. You need to enable it so that the lightroom desktop can analyze images in the cloud to identify people and form clusters in people’s view.
02View people in your photos
● In the My Photos panel at the upper-left side of the screen, select People to view the people view. You can access People clusters in which each cluster contains images of a particular person. Below the cover photo of each cluster, you can see the total number of photos for each person.
● To view photos of that person you can click on any cluster. In the cluster at the upper right corner of the screen, you can view the total number of photos.
03Sort options in People View
To sort People clusters follow the steps:
● In the My Photos panel at the upper left side of the screen, select People to view People View.
● Click on the three dots at the upper right corner of the screen, from the drop-down list select Sort By, and then select the following option:
● First Name: Sort the clusters in the alphabetical order of the first name.
● Last Name: Sort the clusters in the alphabetical order of the last name.
● Count: Sort the clusters with the highest number of photos to the least no. of photos in a cluster.
Part 3 How to create a professional-looking slideshow with Lightroom?
Do you know that you can create a professional-looking slideshow using lightroom? Here are some steps that you can follow to make a professional-looking slideshow.
Step 1 - Photo selection
The first thing you have to do is select the images you want to include in making the slideshow. There are a lot of ways to do this in Lightroom.
● In the grid view select the photos you want to include. Select CTRL (CMD) key and click on each image.
● Add those images to Quick Collection because it is easiest to work with. Click the B key to add them to the quick collection.
● It will be added to the collection panel when you will name the collection for the slideshow.

Step 2 - Arrange the photos
Now, it is time for arranging the photos in a sequence in which you want them to watch in a slideshow. If you want to rearrange them simply drag and drop each image in the grid view where you want to make them appear in a slideshow.
Try to arrange the photos in such a way so that they can tell a story to the viewers who are watching it.
Step 3 – Create a slideshow
Once you have arranged the photos in a sequence, then create a slideshow.
● Click on the ‘slideshow’ menu given at the top of your screen.
● This will lead you to the slideshow module view in lightroom.
● Click on the ‘Create Slideshow’ given at the top right of the central panel.
● Add a name to your slideshow and then click on create.
● Once you have created it and named your slideshow, all the changes will be automatically saved in lightroom.

Step 4 – Select a template for a slideshow
From the template browser given on the left-hand side panel, you can select a template for your slideshow. Before adding anything, do a run-through on your slideshow to see how it looks.
Step 5 – Designing the lightroom slideshow
You can customize your slideshow to make it more professional. You can make following changes or enrichments by using the features given at the right-hand side panel:
● Titles - You can add text, company logo, introduction or any other important information. You can easily add these things in your slideshow in lightroom.
● Watermarks and overlays - You can add watermarks and custom overlay text in every slide you want to by using the overlays windows.
● Layout - You can change the spacing for each slide by unselecting the Link All Box and selecting the ratio which you prefer. Although the program automatically sets the spacing for each slide.
● Options – You can add a frame or you can change the border it allows you to select how your images are going to be displayed in each slide.
● Background – You can add a background to enhance an image, not to divert attention from it. You can add an image as your background or add any colour as your background. You can create background by using various options available.
● Music – You can add music of your choice using an mp3 file.
● Transitions - Setting a transitions between the slides can really make a huge impact on your overall experience. You can use the auto option or you can set the transitions manually.
Step - 6 Completion of slideshow
Once you have made all the desired changes, you can press “Play” option to run the slideshow. If you still want to make any changes you can go back and change whatever you like. Once it’s done and you are happy with the results it’s time to export the slideshow in the form of video or PDF.

Part 4 Hot FAQs about slideshow in lightroom
Q1. How can you make a slideshow in lightroom?
A. You can create a slideshow by using the slideshow module in lightroom, where you can select templates, layouts, add tiles or songs, choose transitions and playback options.
Q2. Where is the slideshow module in lightroom?
A. Start by clicking on ‘slideshow’ option given at the top menu of your screen. This will open the slideshow module view in lightroom. The right and left panels in slideshow module will look different than the ones in the library module.
Q3. How can you change the sequence of the photos in slideshow lightroom?
A. You can control the order of the photos in a Lightroom folder by dragging and dropping each image from one place to the other in the filmstrip view. To rearrange grab the image and drag on it until you see a black bar appear between two images.
Q4. What is the transition effect in slideshow?
A. Transitions are often called – the movement you see when slide changes to another slide in a slideshow. They are different from animation effect. You can set it manually or with an auto option.
Q5. How to make your slideshow more attractive?
A. There are a lot of options to make your look slideshow more attractive. By using the beautiful template, layouts, background and adding transitions with the perfect time ratio. This will enhance the look of your slideshow and will make it more attractive.
If you are not able to follow the interface of lightroom you can consider Filmora for making attractive slideshows. Wondershare Filmora Video Editor allows you to crop, pan and zoom the slideshow automatically or manually by applying pan and zoom photo placement. It has its own music track and sound effect gallery that allows you to customize the slideshows. Filmora allows you to record your own voiceovers as well. It has also fade-in, fade-out effects with amazing transitions. It exports the videos at resolutions of up to 4K.
For Win 7 or later (64-bit)
For macOS 10.12 or later
● Ending Thoughts →
● Adobe Lightroom is one of the best software for making slideshows due to its amazing features like color grading, red eye correction, transformation of spot removal, white balance etc.
● Lightroom has a feature of slideshow module in which you can create quality slideshow presentations for your business.
● If you are not able to use lightroom you can consider using Filmora for creating amazing slideshows.
Adobe Lightroom is an image manipulation software which is developed by Adobe Inc. It is used for editing, importing, saving and sharing a large no. of digital images. Lightroom editing functions include HSL, colour grading, lens correction, white balance, the transformation of spot removal, red-eye correction and adjustment brushing. Lightroom has a feature of slideshow module which you must have heard about it before.
The process of creating a slideshow video can be time-consuming but once you have created it, you can rewind your memories in just 3-4 minutes. If you want you can share the video on your social media accounts.
In this article
01 [What is Lightroom and What Advantages Does It Have for Making Slideshows](#Part 1)
02 [What Does Slideshows in Lightroom Do to Different Groups of People](#Part 2)
03 [How to Create a Professional-looking Slideshow with Lightroom](#Part 3)
04 [Hot FAQs About Slideshows in Lightroom](#Part 4)
Part 1 What is lightroom and what advantages does it have for making slideshows?
Lightroom helps in editing the images and it allows the users to edit the images by using external features. Photographers usually like working on the lightroom because it is a very popular and easy tool. It is perfect for beginners and graphic designers who are looking for an easy and straightforward editor.
Lightroom is used for image retouching. Lightroom includes improving the color tone, color balance, cropping, filters, removing red-eye effect, and many more things. Lightroom supports some the image formats like JPEG, PSD, PNG and TIFF. You can also edit the raw images.
Advantages
● Easy to use - The lightroom interface is less complex, which makes it easy to use especially for the newcomers.
● Tidy interface - In lightroom, it is easier to search for images as it gathers the metadata on each image on its own. So you can find the image with a very specific date, time, resolution, model, etc.
● Editing capabilities - With editing capabilities like contrast, exposure, clarity, warmth, and saturation, Lightroom can give the desired look to the image which photographers want to create.
Part 2 What do slideshows in Lightroom do to a different group of people?
01Enable or Disable People View
If you are a beginner and people view is disabled, all pre-existing face model data is deleted from lightroom servers. Lightroom will no longer analyze new images and will not group them in clusters automatically. You need to enable it so that the lightroom desktop can analyze images in the cloud to identify people and form clusters in people’s view.
02View people in your photos
● In the My Photos panel at the upper-left side of the screen, select People to view the people view. You can access People clusters in which each cluster contains images of a particular person. Below the cover photo of each cluster, you can see the total number of photos for each person.
● To view photos of that person you can click on any cluster. In the cluster at the upper right corner of the screen, you can view the total number of photos.
03Sort options in People View
To sort People clusters follow the steps:
● In the My Photos panel at the upper left side of the screen, select People to view People View.
● Click on the three dots at the upper right corner of the screen, from the drop-down list select Sort By, and then select the following option:
● First Name: Sort the clusters in the alphabetical order of the first name.
● Last Name: Sort the clusters in the alphabetical order of the last name.
● Count: Sort the clusters with the highest number of photos to the least no. of photos in a cluster.
Part 3 How to create a professional-looking slideshow with Lightroom?
Do you know that you can create a professional-looking slideshow using lightroom? Here are some steps that you can follow to make a professional-looking slideshow.
Step 1 - Photo selection
The first thing you have to do is select the images you want to include in making the slideshow. There are a lot of ways to do this in Lightroom.
● In the grid view select the photos you want to include. Select CTRL (CMD) key and click on each image.
● Add those images to Quick Collection because it is easiest to work with. Click the B key to add them to the quick collection.
● It will be added to the collection panel when you will name the collection for the slideshow.
Step 2 - Arrange the photos
Now, it is time for arranging the photos in a sequence in which you want them to watch in a slideshow. If you want to rearrange them simply drag and drop each image in the grid view where you want to make them appear in a slideshow.
Try to arrange the photos in such a way so that they can tell a story to the viewers who are watching it.
Step 3 – Create a slideshow
Once you have arranged the photos in a sequence, then create a slideshow.
● Click on the ‘slideshow’ menu given at the top of your screen.
● This will lead you to the slideshow module view in lightroom.
● Click on the ‘Create Slideshow’ given at the top right of the central panel.
● Add a name to your slideshow and then click on create.
● Once you have created it and named your slideshow, all the changes will be automatically saved in lightroom.
Step 4 – Select a template for a slideshow
From the template browser given on the left-hand side panel, you can select a template for your slideshow. Before adding anything, do a run-through on your slideshow to see how it looks.
Step 5 – Designing the lightroom slideshow
You can customize your slideshow to make it more professional. You can make following changes or enrichments by using the features given at the right-hand side panel:
● Titles - You can add text, company logo, introduction or any other important information. You can easily add these things in your slideshow in lightroom.
● Watermarks and overlays - You can add watermarks and custom overlay text in every slide you want to by using the overlays windows.
● Layout - You can change the spacing for each slide by unselecting the Link All Box and selecting the ratio which you prefer. Although the program automatically sets the spacing for each slide.
● Options – You can add a frame or you can change the border it allows you to select how your images are going to be displayed in each slide.
● Background – You can add a background to enhance an image, not to divert attention from it. You can add an image as your background or add any colour as your background. You can create background by using various options available.
● Music – You can add music of your choice using an mp3 file.
● Transitions - Setting a transitions between the slides can really make a huge impact on your overall experience. You can use the auto option or you can set the transitions manually.
Step - 6 Completion of slideshow
Once you have made all the desired changes, you can press “Play” option to run the slideshow. If you still want to make any changes you can go back and change whatever you like. Once it’s done and you are happy with the results it’s time to export the slideshow in the form of video or PDF.
Part 4 Hot FAQs about slideshow in lightroom
Q1. How can you make a slideshow in lightroom?
A. You can create a slideshow by using the slideshow module in lightroom, where you can select templates, layouts, add tiles or songs, choose transitions and playback options.
Q2. Where is the slideshow module in lightroom?
A. Start by clicking on ‘slideshow’ option given at the top menu of your screen. This will open the slideshow module view in lightroom. The right and left panels in slideshow module will look different than the ones in the library module.
Q3. How can you change the sequence of the photos in slideshow lightroom?
A. You can control the order of the photos in a Lightroom folder by dragging and dropping each image from one place to the other in the filmstrip view. To rearrange grab the image and drag on it until you see a black bar appear between two images.
Q4. What is the transition effect in slideshow?
A. Transitions are often called – the movement you see when slide changes to another slide in a slideshow. They are different from animation effect. You can set it manually or with an auto option.
Q5. How to make your slideshow more attractive?
A. There are a lot of options to make your look slideshow more attractive. By using the beautiful template, layouts, background and adding transitions with the perfect time ratio. This will enhance the look of your slideshow and will make it more attractive.
If you are not able to follow the interface of lightroom you can consider Filmora for making attractive slideshows. Wondershare Filmora Video Editor allows you to crop, pan and zoom the slideshow automatically or manually by applying pan and zoom photo placement. It has its own music track and sound effect gallery that allows you to customize the slideshows. Filmora allows you to record your own voiceovers as well. It has also fade-in, fade-out effects with amazing transitions. It exports the videos at resolutions of up to 4K.
For Win 7 or later (64-bit)
For macOS 10.12 or later
● Ending Thoughts →
● Adobe Lightroom is one of the best software for making slideshows due to its amazing features like color grading, red eye correction, transformation of spot removal, white balance etc.
● Lightroom has a feature of slideshow module in which you can create quality slideshow presentations for your business.
● If you are not able to use lightroom you can consider using Filmora for creating amazing slideshows.
Best Tips on How to Design Travel Slideshow
Best Tips on How to Design Travel Slideshow
An easy yet powerful editor
Numerous effects to choose from
Detailed tutorials provided by the official channel
A single travel trip besides numerous memories also has innumerable pictures and videos. Sharing all of these pictures and videos with your friends, and dear ones are tedious and not a practical thing to do. Here comes your creativity, where you can make an impressive slideshow using some of the most interesting images and videos from your clips. Creating a digital slideshow will not only help you to share your files online with your loved ones but will also work as a keepsake where you relive the moments later.

So now when decided to create a slideshow, the next question is how, tips, tools, templates, and software can be used. The article below will cover all these aspects that will help you in designing and creating a wonderful travel slideshow.
In this article
01 [Tips and steps for creating a travel slideshow](#Part 1)
02 [Importance of using a travel slideshow template](#Part 2)
03 [Best tool for creating a travel slideshow- Wondershare Filmora](#Part 3)
Part 1 Tips and steps for creating a travel slideshow
Want to hear the words- cool and wow when you play your slideshow in front of your dear ones. The below-listed tips will help you create an engaging and engrossing slideshow.

01Identify the audience
Before creating a slideshow, you first need to ascertain who is your target audience. The slideshow can be created for your friends, family, relatives, or YouTube or social media platform viewers. Depending on the target audience, the content and other slideshow elements will vary.
02Choose a travel story
Next, you need to decide upon the story of your travel slideshow. Depending on the story, you can pick up the content to be included. The story can be based on the places you visited, food, local shopping, and others. Also draft a story that has an introduction, a middle part, and an end.
03Sort the pictures and videos
Next comes the trickiest part of selecting the pictures and videos to be added to the slideshow. For any trip, there are hundreds of images but you cannot add them all to your slideshow. So, depending on the target audience and your travel story, pick up the most appropriate ones. Pick up the number of images and videos so that the total slideshow length is around 5-7 minutes.
04Edit images and add effects
Next comes the editing part. Check out the images that need editing like cropping, color correction, and others. Also, you can add some effects to make your slideshow interesting. To edit the files and add effects, there are several editing online and desktop-based tools available. You can choose the ones that meet your requirements.
05Add transitions
Next, choose the transitions you want to add between the images and the videos. There are slideshow-making tools where you can check out different types of transition effects and use them.
06Add Music
Music will set the right tone and mood for your slideshow. You can either download the relevant song from any online site or a music library or can also combine multiple audio clips to be added to the slideshow.
Part 2 Importance of using a travel slideshow template
For some, slideshow creation can be a simple task of adding a few images and videos but for the ones who need to create something interesting, several elements go into the making of a slideshow. Moreover, when it comes to travel, the task becomes even trickier with so many things to include and grab the attention of the viewers.
So, if you are not experienced or a pro at making a slideshow but want to create something impressive, templates come to a great rescue. The templates are like ready-to-use designs where you simply need to add the required elements that in turn will create a travel slideshow.
Using a template for creating a travel slideshow served several benefits as enlisted below.
● Save time in drafting a design.
● Save efforts.
● Helps in creating a professional-looking impressive slideshow.
● Multiple elements can be added.
● Helps in creating a slideshow with some story.
There are several online sites and tools available from where you can select and pick a travel slideshow template of your choice.

Part 3 Best tool for creating a travel slideshow- Wondershare Filmora
For creating your travel slideshow in an interesting manner and that too in a hassle-free manner, Wondershare Filmora Video Editor is excellent. Though it is a professional video editing tool with advanced features, it supports multiple additional tasks as well including slideshow making. Using the software, your slideshow having pictures, videos, and music files can be created in no time.
For Win 7 or later (64-bit)
For macOS 10.12 or later
You can even edit the files for further customization using the built-in functions. Add transitions, filters, effects, and other elements for creating a slideshow of your choice. An array of templates in different categories will further help you to quickly create a presentation based on your theme. There is also a stock collection of videos, images, and other files that can be used for your slideshow.

Steps to create a travel slideshow using Wondershare Filmora
Step 1. From the official software page, download and install the program, and at the main interface choose the New Project option.
Step 2. Next, the videos and images that need to be included in the slideshow have to be imported and added to the Media Library of the software. Next, drag and move these files to the timeline. The sequence can be changed as desired.
Note: Before moving the files to the timeline, you can edit and customize them by using the built-in features of the software like rotate, crop, and zoom.
Step 3. An array of transitions is available in the software from which you can choose the ones that fit into your theme. Some of the popular ones are cross-merge, sweep clockwise, cross split, and others.
Step 4. Also add filters, overlays, effects, and other elements to your slideshow.
Step 5. Next comes the music, add the local music file or use the one from the inbuilt audio library. The Voice-over recording option is also available in the software.
Step 6. Finally, export and save the slideshow. You can save it to your local system, or DVD, or can even share it directly to YouTube or Vimeo.
● Ending Thoughts →
● For creating an interesting travel slideshow consider all the important elements like the story, theme, pictures, music, and others.
● Templates help to a great extent for creating a slideshow in a simple quick-manner.
● Wondershare Filmora is an excellent tool for finding a template as well as creating a travel slideshow.
A single travel trip besides numerous memories also has innumerable pictures and videos. Sharing all of these pictures and videos with your friends, and dear ones are tedious and not a practical thing to do. Here comes your creativity, where you can make an impressive slideshow using some of the most interesting images and videos from your clips. Creating a digital slideshow will not only help you to share your files online with your loved ones but will also work as a keepsake where you relive the moments later.
So now when decided to create a slideshow, the next question is how, tips, tools, templates, and software can be used. The article below will cover all these aspects that will help you in designing and creating a wonderful travel slideshow.
In this article
01 [Tips and steps for creating a travel slideshow](#Part 1)
02 [Importance of using a travel slideshow template](#Part 2)
03 [Best tool for creating a travel slideshow- Wondershare Filmora](#Part 3)
Part 1 Tips and steps for creating a travel slideshow
Want to hear the words- cool and wow when you play your slideshow in front of your dear ones. The below-listed tips will help you create an engaging and engrossing slideshow.
01Identify the audience
Before creating a slideshow, you first need to ascertain who is your target audience. The slideshow can be created for your friends, family, relatives, or YouTube or social media platform viewers. Depending on the target audience, the content and other slideshow elements will vary.
02Choose a travel story
Next, you need to decide upon the story of your travel slideshow. Depending on the story, you can pick up the content to be included. The story can be based on the places you visited, food, local shopping, and others. Also draft a story that has an introduction, a middle part, and an end.
03Sort the pictures and videos
Next comes the trickiest part of selecting the pictures and videos to be added to the slideshow. For any trip, there are hundreds of images but you cannot add them all to your slideshow. So, depending on the target audience and your travel story, pick up the most appropriate ones. Pick up the number of images and videos so that the total slideshow length is around 5-7 minutes.
04Edit images and add effects
Next comes the editing part. Check out the images that need editing like cropping, color correction, and others. Also, you can add some effects to make your slideshow interesting. To edit the files and add effects, there are several editing online and desktop-based tools available. You can choose the ones that meet your requirements.
05Add transitions
Next, choose the transitions you want to add between the images and the videos. There are slideshow-making tools where you can check out different types of transition effects and use them.
06Add Music
Music will set the right tone and mood for your slideshow. You can either download the relevant song from any online site or a music library or can also combine multiple audio clips to be added to the slideshow.
Part 2 Importance of using a travel slideshow template
For some, slideshow creation can be a simple task of adding a few images and videos but for the ones who need to create something interesting, several elements go into the making of a slideshow. Moreover, when it comes to travel, the task becomes even trickier with so many things to include and grab the attention of the viewers.
So, if you are not experienced or a pro at making a slideshow but want to create something impressive, templates come to a great rescue. The templates are like ready-to-use designs where you simply need to add the required elements that in turn will create a travel slideshow.
Using a template for creating a travel slideshow served several benefits as enlisted below.
● Save time in drafting a design.
● Save efforts.
● Helps in creating a professional-looking impressive slideshow.
● Multiple elements can be added.
● Helps in creating a slideshow with some story.
There are several online sites and tools available from where you can select and pick a travel slideshow template of your choice.
Part 3 Best tool for creating a travel slideshow- Wondershare Filmora
For creating your travel slideshow in an interesting manner and that too in a hassle-free manner, Wondershare Filmora Video Editor is excellent. Though it is a professional video editing tool with advanced features, it supports multiple additional tasks as well including slideshow making. Using the software, your slideshow having pictures, videos, and music files can be created in no time.
For Win 7 or later (64-bit)
For macOS 10.12 or later
You can even edit the files for further customization using the built-in functions. Add transitions, filters, effects, and other elements for creating a slideshow of your choice. An array of templates in different categories will further help you to quickly create a presentation based on your theme. There is also a stock collection of videos, images, and other files that can be used for your slideshow.
Steps to create a travel slideshow using Wondershare Filmora
Step 1. From the official software page, download and install the program, and at the main interface choose the New Project option.
Step 2. Next, the videos and images that need to be included in the slideshow have to be imported and added to the Media Library of the software. Next, drag and move these files to the timeline. The sequence can be changed as desired.
Note: Before moving the files to the timeline, you can edit and customize them by using the built-in features of the software like rotate, crop, and zoom.
Step 3. An array of transitions is available in the software from which you can choose the ones that fit into your theme. Some of the popular ones are cross-merge, sweep clockwise, cross split, and others.
Step 4. Also add filters, overlays, effects, and other elements to your slideshow.
Step 5. Next comes the music, add the local music file or use the one from the inbuilt audio library. The Voice-over recording option is also available in the software.
Step 6. Finally, export and save the slideshow. You can save it to your local system, or DVD, or can even share it directly to YouTube or Vimeo.
● Ending Thoughts →
● For creating an interesting travel slideshow consider all the important elements like the story, theme, pictures, music, and others.
● Templates help to a great extent for creating a slideshow in a simple quick-manner.
● Wondershare Filmora is an excellent tool for finding a template as well as creating a travel slideshow.
Also read:
- Updated 2024 Approved Learn How to Make Modern TikTok Velocity Dance Videos in Filmora Just Like the Ones You See on TikTok and Instagram Reels
- New In 2024, A Guide to Adding Audio in Wondershare Filmora
- Updated 6 Instant Mp4 to GIF Online Tools for You for 2024
- Updated Do You Want to Know About the Best Filmic Pro LUTs for Video Editing? This Article Provides Details on the Best Recommendations
- New In 2024, 2 Methods to Crop a Video Using After Effects
- A Guide To Adopting Lumetri Color Presets in Effective Color Grading for 2024
- Looking For a Cheap Camera to Make Slow Motion Video? Get It Now
- New In 2024, Have the Desire to Create a Stylish Glitch Effect to a Text on Your Video? Use Filmora for the Editing, Following the Given Steps Explained in Detail
- Updated In 2024, Tips That Show Anybody How To Make Youtube Slideshow – Guaranteed
- Updated What If YouTube Zoom to Fill Not Working for 2024
- 2024 Approved Using VN Editor To Add Luts for Video Editing
- 2024 Approved Are You a Video Editor Making Use of iMovie? Do You Wish to Read How to Change Orientation in iMovie? Youre in the Right Place! At the End of This Guide, Youd Have Learned How to Change Video Orientation in iMovie
- New In 2024, 10 Best Voice Over Generators Windows, Mac, Android, iPhone, and Online
- New 2024 Approved How to Get Motion Blur in Roblox?
- How to Create Discord Logo GIF for 2024
- In 2024, If You Are Experiencing a Color Distortion in Your Video, You Are in the Right Place. We Have Provided a Detailed Guide with Three Methods that Will Help You Correct This Issue
- New How To Quick Guide for Creating Google Slideshows
- Use The Best LUTs for Lightroom
- In 2024, How to Use Zoom in Google
- Updated Create Photoshop GIFs with Zero Hustle for 2024
- In 2024, Have You Ever Played Roblox Games? Read This Article to Find Out How to Get Motion Blur in Roblox Using Simple and Efficient Ways
- Updated Splitting the Clips in Adobe After Effects Step by Step
- Updated In 2024, Learn How to Extract Sound From Video Using the Different Online and Software Tools. Details About Their Features, Pros/Cons, and More Are Given
- New In 2024, How to Slow Down a Video on iPhone and Android The Easy Way
- Updated 2024 Approved The Ultimate Guide to Make a Text Collage
- 2024 Approved How Much Wedding Videographer Cost
- New In 2024, Explore the Potential of Slow-Motion Video for Different Industries. Read This Guide and Choose the Best Slow-Motion Camera App to Create Stunning Videos
- Updated 2024 Approved Unlock Your Video Editing Potential With Filmora From Wondershare
- Updated Frame Blending Is a Great Way to Smooth Out Your Video Footage in Adobe Premiere Pro. Using This Technique, You Can Create a More Natural Looking Motion by Averaging Out the Frames in Your Clips
- New 2024 Approved 20 Best Video Background Templates
- Updated Find Out the Best Animated Text Video Tools and Learn How to Animate Text in a Video in Simple Steps. Discover the Best Fonts to Animate Text Along with the Text Animation Templates
- 2024 Approved Best Cloud Storage Service for Videos
- Updated Creating Collages on Canva Is Simple and Quick. The Tool Lets You Create some Amazing Customized Collages as Needed. So, Get Ready to Explore the World of Canva Collages
- Updated 2024 Approved 3 In-Camera Transitions Tricks To Make Videos
- New VSCO Slow Motion
- New How to Use Kahoot! On Zoom
- New In 2024, Best Cloud Storage Service for Videos
- 2024 Approved How to Convert Videos to Slow Motion?
- In 2024, How to Come up With the Best Pokemon Team On Huawei P60? | Dr.fone
- In 2024, Android Unlock Code Sim Unlock Your Asus Phone and Remove Locked Screen
- In 2024, 7 Ways to Unlock a Locked Samsung Galaxy A34 5G Phone
- Hide location on Apple iPhone XS and Android without others knowing | Dr.fone
- In 2024, Will Pokémon Go Ban the Account if You Use PGSharp On OnePlus Nord N30 SE | Dr.fone
- In 2024, A Step-by-Step Guide on Using ADB and Fastboot to Remove FRP Lock from your Oppo F25 Pro 5G
- 8 Best Apps for Screen Mirroring Itel P55 5G PC | Dr.fone
- 10 Fake GPS Location Apps on Android Of your Honor Magic V2 | Dr.fone
- Complete Review & Guide to Techeligible FRP Bypass and More For Tecno Phantom V Fold
- New Coqui Voice Cloning The Ultimate Solution to Streamline Audio Content for 2024
- In 2024, Motorola Moto G14 ADB Format Tool for PC vs. Other Unlocking Tools Which One is the Best?
- In 2024, Ultimate Guide on Infinix Hot 40i FRP Bypass
- How can I get more stardust in pokemon go On Google Pixel 8? | Dr.fone
- In 2024, FRP Hijacker by Hagard Download and Bypass your OnePlus Ace 2 FRP Locks
- In 2024, How To Unlock Apple iPhone 13 3 Ways To Unlock
- In 2024, How OnePlus Nord N30 5G Mirror Screen to PC? | Dr.fone
- How to Fix Android.Process.Media Has Stopped on Realme C53 | Dr.fone
- How does the stardust trade cost In pokemon go On Motorola Moto G04? | Dr.fone
- 7 Ways to Lock Apps on Apple iPhone 6s Plus and iPad Securely | Dr.fone
- In 2024, 3 Methods to Mirror Realme GT 5 Pro to Roku | Dr.fone
- How To Reset the Security Questions of Your Apple ID From Your iPhone 14 Pro
- Updated What Is AI Background Generator? | Wondershare Virbo Glossary
- In 2024, Top IMEI Unlokers for Your Vivo Y100t Phone
- In 2024, Unlocking Made Easy The Best 10 Apps for Unlocking Your Vivo Y100A Device
- Undeleted lost videos from Play 7T
- In 2024, How to Transfer Data After Switching From Itel A70 to Latest Samsung | Dr.fone
- In 2024, Complete Tutorial to Use VPNa to Fake GPS Location On Oppo Find X6 | Dr.fone
- Android Screen Stuck General Samsung Galaxy S23 Tactical Edition Partly Screen Unresponsive | Dr.fone
- In 2024, Best Ways to Bypass iCloud Activation Lock from Apple iPhone 15 Pro Max/iPad/iPod
- Updated IOS&Android Best Apps to Create Animoji and Memoji Videos
- How to Reset Apple ID and Apple Password From Apple iPhone 6 Plus
- 4 Solutions to Fix Unfortunately Your App Has Stopped Error on Realme 12+ 5G | Dr.fone
- In 2024, Pattern Locks Are Unsafe Secure Your Xiaomi Redmi Note 12R Phone Now with These Tips
- Title: Are You Searching the Internet for Top Wedding LUTs Premiere Pro? This Article Provides Suggestions on the Best LUT Color Presets for 2024
- Author: Morgan
- Created at : 2024-05-19 05:12:30
- Updated at : 2024-05-20 05:12:30
- Link: https://ai-video-editing.techidaily.com/are-you-searching-the-internet-for-top-wedding-luts-premiere-pro-this-article-provides-suggestions-on-the-best-lut-color-presets-for-2024/
- License: This work is licensed under CC BY-NC-SA 4.0.
