
:max_bytes(150000):strip_icc():format(webp)/patch-tuesday-2625783-d6bcf232b3c64fc5958037ad31299bd9.png)
Do You Want to Get Green Screen Effects on Your Video without Green Screen Setup in Your Background? Learn How to Get Virtual Green Screen Background and Shoot Videos Like a Pro
Do You Want to Get Green Screen Effects on Your Video without Green Screen Setup in Your Background? Learn How to Get Virtual Green Screen Background and Shoot Videos Like a Pro
We have seen video creators on YouTube using green screen effects to beautify their background to make the video look professional and eye-catching. The same is applicable for gamers who live stream their gameplay on Twitch. Instead of physically hanging green screens in the background, some video creators opt for virtual green screens. Yes, it is possible to shoot videos with a virtual green background, and you do not have to buy screen greens and deal with the problem of hanging them in the background.
The concept of using virtual greenscreen is rather new, but it is getting popular among amateur video creators who do not want to invest in purchasing green screens initially. When you use a virtual background to shoot your video, the actual physical background is replaced completely with a virtual green background. Thereafter, you have to replace this virtual background with anything by using a video editor. In this article, we will illustrate how to use a virtual green screen to shoot video.
1. Free Virtual Green Screen
In order to shoot a video with green virtual background, you cannot shoot your video with your regular camera app. Otherwise, your physical background will get recorded, and replacing that through video editor is going to be time-consuming. Therefore, there are specific apps available through which you have to shoot your video so that your physical background gets completely replaced by virtual greenscreen in real-time.
Snap Camera from Snapchat is a free app through which you can shoot your video to get a virtual green background. The app comes with a Green Screen filter that makes this virtual background effect possible. However, you will need a camera recording app that can record your video with green screen effects from Snap Camera. We will be using OBS Studio for recording the video which is also available for free. Snap Camera is compatible with Windows 10 and Mac 10.11+, and hence, you can use it to shoot video from your computer webcam. Here are the steps to follow –
Step 1: Download and install Snap Camera app on your computer.
Step 2: Set up your webcam perfectly so that its angle is direct to your face.
Step 3: Open Snap Camera app and you will see yourself on the app through your webcam. Select the appropriate Lens(filter) and you have to select Green Screen Snap Filter.

Step 4: You should see a green virtual background by now. Now, you have to launch OBS Studio (webcam recording software).
Step 5: Go to Sources and click on “+” icon and select Video Capture Device option.

Step 6: While configuration the new device, select Snap Camera as Device. This will enable green screen virtual backgrounds and you can start recording. After recording is done, save the file on your hard drive.

Now that you have recorded the video with green virtual background without green screen, it is time to edit the virtual greenscreen out with the video editor.
2. Best Way To Apply Green Screen Effect To Your Recorded Video
The best video editor to add green effect to your recorded video with virtual green screen is Wondershare Filmora. There are loads of video editors available with green screen feature but Filmora has the simplest steps to add green screen effects. That is why you do not have to be an expert video editor to add green screen effects to your video.
Apart from green screen effects, you can enhance the video quality by adjusting different parameters and adding other video effects to make the video interesting. Here are the steps to follow to add green screen effects to the recorded video with green virtual background.
For Win 7 or later (64-bit)
For macOS 10.12 or later
Step 1: Download and install Wondershare Filmora. Launch the video editor and select Create New Project option to get started.
Step 2: Import the recorded video with virtual green screen and drag it onto the Timeline.
Step 3: Get the stunning photo or video effect with which you want to replace the virtual background without green screen in the recorded video. Put it directly on the Timeline.
Please note that your recorded green screen video is above the replacement video on the Timeline.

Step 4: Double-click on the recorded video and you will see a panel on the upper-left side. From that panel, turn on Chroma Key option. We have already stated that green screen effect is technically referred to as Chroma Key.
Now you will the superimposed version of the replacement video effect on the green screen background of your recorded video.

Step 5: You can adjust several parameters available to fine tune the green screen effect. When you are done, click on Ok button.
Conclusion
You can now have virtual background without green screen purchase on your video. All you need is a proper application to replace your physical background with a virtual green screen and record the entire video. We have recommended free Snap Camera app and OBS Studio for this job. Then you need to edit the green screen virtual backgrounds with a video editor for which we have recommended Wondershare Filmora.
For macOS 10.12 or later
Step 1: Download and install Wondershare Filmora. Launch the video editor and select Create New Project option to get started.
Step 2: Import the recorded video with virtual green screen and drag it onto the Timeline.
Step 3: Get the stunning photo or video effect with which you want to replace the virtual background without green screen in the recorded video. Put it directly on the Timeline.
Please note that your recorded green screen video is above the replacement video on the Timeline.
Step 4: Double-click on the recorded video and you will see a panel on the upper-left side. From that panel, turn on Chroma Key option. We have already stated that green screen effect is technically referred to as Chroma Key.
Now you will the superimposed version of the replacement video effect on the green screen background of your recorded video.
Step 5: You can adjust several parameters available to fine tune the green screen effect. When you are done, click on Ok button.
Conclusion
You can now have virtual background without green screen purchase on your video. All you need is a proper application to replace your physical background with a virtual green screen and record the entire video. We have recommended free Snap Camera app and OBS Studio for this job. Then you need to edit the green screen virtual backgrounds with a video editor for which we have recommended Wondershare Filmora.
How to Make A Funny Vlog for TikTok?
TikTok has been among the few social media platforms that have gained an exponential following in a truly short time. Regardless of this stunted digital environment, the platform made its statement of becoming part of the all-time greats.
TikTok became known as a short-video platform that influenced the making of funny vlogs. If you are interested in making a funny vlog, you are at the right place.
In this article
01 Ideas for Creating A Funny Vlog for TikTok
02 5 Popular Funny Vloggers on TikTok
Part 1: Ideas for Creating A Funny Vlog for TikTok
When creating a funny vlog across TikTok, there are numerous ideas that one can think of. However, since TikTok videos are of small lengths, achieving diversity is difficult yet possible. You’ll surely get your break if you understand the following ideas for creating a funny vlog.

React to Other Videos
While it may seem the most mainstream style of creating funny content across TikTok, it is also the most effective way of making people laugh while watching your video. This will also bring recurring viewers across your channel.
Display Failure Videos
It is always great to see people trying and doing something funny across the video. Failure videos are believed to be the other way of creating content for a funny vlog on your TikTok, which shall make people laugh hard.
Use Goofy and Peculiar Voices
Unrealistic and weird voices can make your short video seem funny. If you consider talking about something in a silly voice, it will make people burst out of laughter.
Trolling Family Members
One of the best ways to make something good out of TikTok is creating candid moments. This can always be done if you troll or prank your family members out of nowhere. Just keep reminding that you have to ensure no one gets injured due to it.
Impersonations
Making impersonated videos of major celebrities is another way of showing funny content to the viewers on TikTok. If you consider some funny examples for this, it will surely bring you effective results.
Make Puns and Funny Statements
Another great way to create a funny vlog for your TikTok is to be good at making puns. This is purely hilarious content and needs someone to be highly great in it.
Physical Challenges
This can be a bit risky, but it can become quite fun to make and show to the world if executed with care. However, this can be conducted individually or in a group of people, as you find it appropriate.
Use Effects of TikTok
TikTok makes sure to provide something funny in effects to its users. The use of effects for TikTok is an excellent technique to make funny vlogs; however, it can get funny if the elements used across it have a dubious meaning.
Run Everything in Reverse
One of the most straightforward techniques to make a funny vlog is to run everything in reverse order. The simplest thing of a video becomes the funniest to watch.
Part 2: 5 Popular Funny Vloggers on TikTok
This part will provide some popular examples of TikTokers who have made a considerate performance in providing funny content to people across the platform.
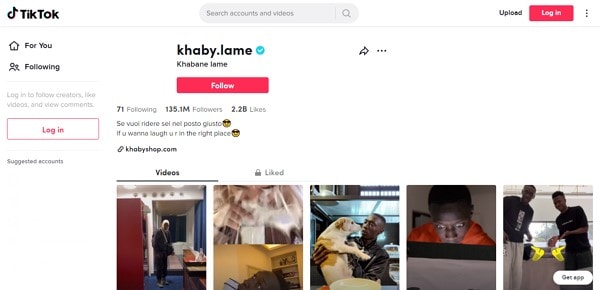
Khaby Lame
This is, without a doubt, the first-choice in TikTok accounts that would always come while relating to funny content. Khaby started his journey as a TikToker with a remarkably simple motive of pointing out the simplicity in different tasks, which were displayed to be difficult. Although it sounds pretty basic, the technique taken by Khaby has been so considerate it brought him millions of followers for creating funny content.
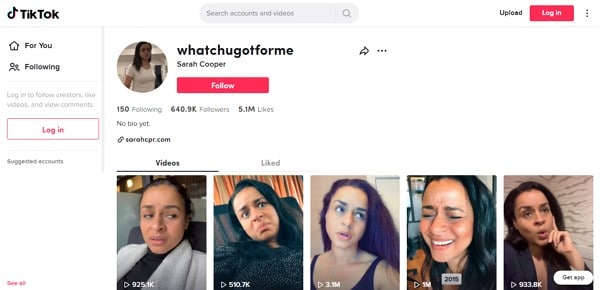
Sarah Cooper
Want to see a great impersonation of Donald Trump? It is undoubtedly great to see every time. With Sarah Cooper, it just becomes an entirely different story. Her impersonation has been so perfect that she has been referred to as one of the best funny vloggers on TikTok. Her likes across the platform may not be that great, but she has shown some stature in presenting funny content in a great way.
Dobre Twins
This twin duo is known across many social media platforms for its funny content. As the twins started using TikTok, they started creating good funny vlogs, which gained quite the traction for them. Their unique ideas to present different things have presented the following worth 23 million likes across TikTok, which is quite commendable. However, Lucas and Marcus are only known to operate this TikTok account.

Image alt: dobre twins funny tiktoker
Brittany Broski
Quite a few TikTokers actually make funny videos with impressive comedy. Brittany Broski is a celebrity in this genre, where she has taken great use of her comedy skills to present great vlogs with different and unique topics. Her take on comedy is entirely different, which makes her funny vlog unique and better than others.

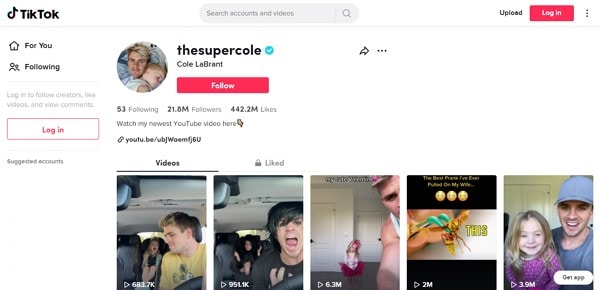
Cole LeBrant
This TikToker makes a good collection of funny vlogs across his account with his family. The variety and variability in his videos make him a different version of fun compared to other TikTokers. He has built a great reach across the account, which makes him an impressive choice.
Part 3: How to Make a Funny Vlog?
Funny vlogs are a fabulous way to interact with people of different tastes. It can be something that cherishes the moods of the viewers, regardless of their current emotions. To make this happen, you need a good platform that helps you create a video for your viewers to watch. Wondershare Filmora fulfills the needs of a video editor by providing you with the perfect options while editing the video for TikTok.
For Win 7 or later (64-bit)
For macOS 10.12 or later
If you are looking forward to understanding how to create a funny vlog for your TikTok using Filmora, you need to follow a set of simple steps. These are shown as follows:
Step 1: Launch and Import Video
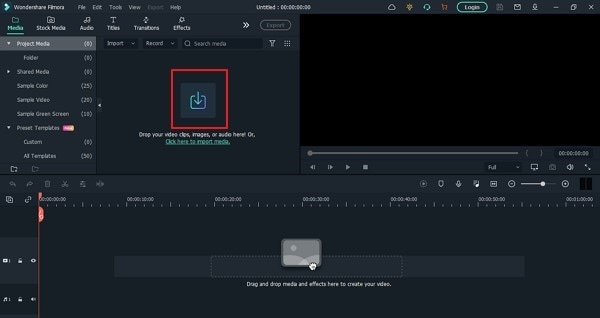
To start, you need to have Wondershare Filmora installed across your device. Launch the tool and click on “New Project” to start from scratch. Once the screen opens up, you need to click on the “Arrow Head” icon across the ‘Media’ Tab to import the audio you wish to amend for TikTok.
Step 2: Perform Basic Editing
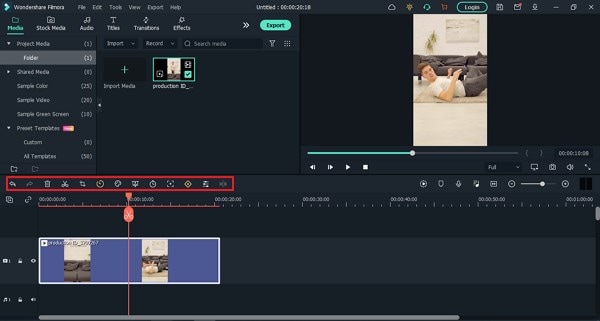
Wondershare Filmora provides users with multiple options for editing their files. At first, drag the file onto the timeline. Following this, you can merge different videos or enhance the video by trimming it. Along with that, you can also consider splitting the image or changing its playback speed for different results.
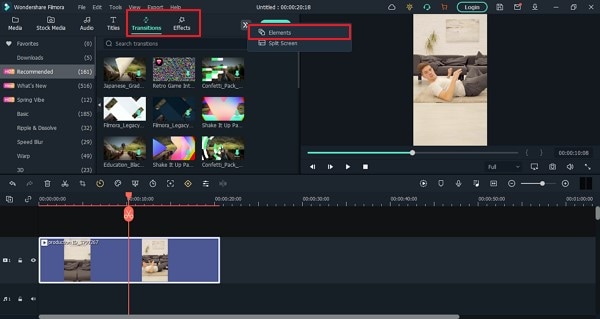
Step 3: Add Effects and Transitions
After you are done with some basic editing, you can add different effects from the “Effects” section. To make the video look exclusive, you can also include “Transitions” across it. Use the “Elements” tab to include stickers and emojis to enhance your TikTok video.
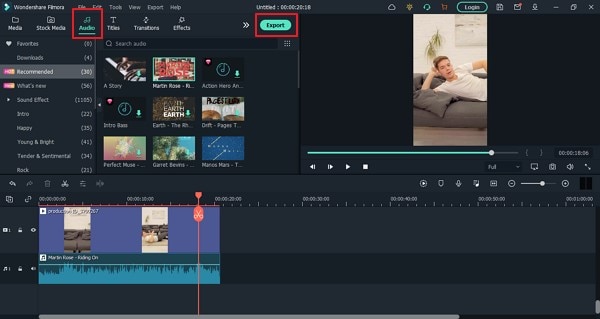
Step 4: Manage the Audio
For managing the audio of your video, you can make several changes across it. You can detach audio and change the audio with another soundtrack. Filmora also allows you to add audio from the “Audio” section, which contains royalty-free music to add. Once you are done, click on the “Export” button to set the settings of the video before exporting it back onto the device.
Closing Words
This article has presented some of the finest tips that can be utilized for creating funny vlogs on your TikTok. If you coherently use these tips, you can get significant results across your account in the name of the followers. Along with that, you can also use Filmora for making the best funny vlog with different editing tools.
Wondershare Filmora
Get started easily with Filmora’s powerful performance, intuitive interface, and countless effects!
Try It Free Try It Free Try It Free Learn More >

02 5 Popular Funny Vloggers on TikTok
Part 1: Ideas for Creating A Funny Vlog for TikTok
When creating a funny vlog across TikTok, there are numerous ideas that one can think of. However, since TikTok videos are of small lengths, achieving diversity is difficult yet possible. You’ll surely get your break if you understand the following ideas for creating a funny vlog.
React to Other Videos
While it may seem the most mainstream style of creating funny content across TikTok, it is also the most effective way of making people laugh while watching your video. This will also bring recurring viewers across your channel.
Display Failure Videos
It is always great to see people trying and doing something funny across the video. Failure videos are believed to be the other way of creating content for a funny vlog on your TikTok, which shall make people laugh hard.
Use Goofy and Peculiar Voices
Unrealistic and weird voices can make your short video seem funny. If you consider talking about something in a silly voice, it will make people burst out of laughter.
Trolling Family Members
One of the best ways to make something good out of TikTok is creating candid moments. This can always be done if you troll or prank your family members out of nowhere. Just keep reminding that you have to ensure no one gets injured due to it.
Impersonations
Making impersonated videos of major celebrities is another way of showing funny content to the viewers on TikTok. If you consider some funny examples for this, it will surely bring you effective results.
Make Puns and Funny Statements
Another great way to create a funny vlog for your TikTok is to be good at making puns. This is purely hilarious content and needs someone to be highly great in it.
Physical Challenges
This can be a bit risky, but it can become quite fun to make and show to the world if executed with care. However, this can be conducted individually or in a group of people, as you find it appropriate.
Use Effects of TikTok
TikTok makes sure to provide something funny in effects to its users. The use of effects for TikTok is an excellent technique to make funny vlogs; however, it can get funny if the elements used across it have a dubious meaning.
Run Everything in Reverse
One of the most straightforward techniques to make a funny vlog is to run everything in reverse order. The simplest thing of a video becomes the funniest to watch.
Part 2: 5 Popular Funny Vloggers on TikTok
This part will provide some popular examples of TikTokers who have made a considerate performance in providing funny content to people across the platform.
Khaby Lame
This is, without a doubt, the first-choice in TikTok accounts that would always come while relating to funny content. Khaby started his journey as a TikToker with a remarkably simple motive of pointing out the simplicity in different tasks, which were displayed to be difficult. Although it sounds pretty basic, the technique taken by Khaby has been so considerate it brought him millions of followers for creating funny content.
Sarah Cooper
Want to see a great impersonation of Donald Trump? It is undoubtedly great to see every time. With Sarah Cooper, it just becomes an entirely different story. Her impersonation has been so perfect that she has been referred to as one of the best funny vloggers on TikTok. Her likes across the platform may not be that great, but she has shown some stature in presenting funny content in a great way.
Dobre Twins
This twin duo is known across many social media platforms for its funny content. As the twins started using TikTok, they started creating good funny vlogs, which gained quite the traction for them. Their unique ideas to present different things have presented the following worth 23 million likes across TikTok, which is quite commendable. However, Lucas and Marcus are only known to operate this TikTok account.
Image alt: dobre twins funny tiktoker
Brittany Broski
Quite a few TikTokers actually make funny videos with impressive comedy. Brittany Broski is a celebrity in this genre, where she has taken great use of her comedy skills to present great vlogs with different and unique topics. Her take on comedy is entirely different, which makes her funny vlog unique and better than others.
Cole LeBrant
This TikToker makes a good collection of funny vlogs across his account with his family. The variety and variability in his videos make him a different version of fun compared to other TikTokers. He has built a great reach across the account, which makes him an impressive choice.
Part 3: How to Make a Funny Vlog?
Funny vlogs are a fabulous way to interact with people of different tastes. It can be something that cherishes the moods of the viewers, regardless of their current emotions. To make this happen, you need a good platform that helps you create a video for your viewers to watch. Wondershare Filmora fulfills the needs of a video editor by providing you with the perfect options while editing the video for TikTok.
For Win 7 or later (64-bit)
For macOS 10.12 or later
If you are looking forward to understanding how to create a funny vlog for your TikTok using Filmora, you need to follow a set of simple steps. These are shown as follows:
Step 1: Launch and Import Video
To start, you need to have Wondershare Filmora installed across your device. Launch the tool and click on “New Project” to start from scratch. Once the screen opens up, you need to click on the “Arrow Head” icon across the ‘Media’ Tab to import the audio you wish to amend for TikTok.
Step 2: Perform Basic Editing
Wondershare Filmora provides users with multiple options for editing their files. At first, drag the file onto the timeline. Following this, you can merge different videos or enhance the video by trimming it. Along with that, you can also consider splitting the image or changing its playback speed for different results.
Step 3: Add Effects and Transitions
After you are done with some basic editing, you can add different effects from the “Effects” section. To make the video look exclusive, you can also include “Transitions” across it. Use the “Elements” tab to include stickers and emojis to enhance your TikTok video.
Step 4: Manage the Audio
For managing the audio of your video, you can make several changes across it. You can detach audio and change the audio with another soundtrack. Filmora also allows you to add audio from the “Audio” section, which contains royalty-free music to add. Once you are done, click on the “Export” button to set the settings of the video before exporting it back onto the device.
Closing Words
This article has presented some of the finest tips that can be utilized for creating funny vlogs on your TikTok. If you coherently use these tips, you can get significant results across your account in the name of the followers. Along with that, you can also use Filmora for making the best funny vlog with different editing tools.
Wondershare Filmora
Get started easily with Filmora’s powerful performance, intuitive interface, and countless effects!
Try It Free Try It Free Try It Free Learn More >
You Can Make Attractive Videos by Adding Text Behind Objects. This Article Will Explain How to Use Wondershare Filmora to Create These Videos
Adding text behind objects in your videos can be a great way to start your videos. For example, you can do so to create an attractive intro or startup a video. So, if you hope to make a video like a pro, let’s learn how to add text behind objects in your videos by Filmora.

Part 1. What Are The Benefits of Adding Text Behind Objects in Videos?
Your videos must maintain quality to create content worthy of a huge audience. You may have a YouTube channel or be starting down the road. Then you must give this a try because
Give a cool look
Adding text behind an object in a video looks cool! Now, your object could be a silhouette of a person or a huge skyscraper. You can add a text tile behind the object, creating the illusion. Due to this, the text will be flying in real-time.
Show creativity
Blasting your channel with innovative and creative content is the key to building a big audience. But, of course, you can always opt for many ways to create a video showing your creativity. One of those ways is to add text behind your object.
You can create an attractive intro by adding text behind objects that captivate the viewer. It ensures that your subscribers stay tuned to your channel and your content.
Build up a solid audience
Every day can be a real struggle if you are a daily content creator on YouTube. The audience demands good content. But your daily videos can get boring if you do not use new methods to edit your videos.
You can add text behind videos to spice up your intros and hook your daily audience even more. That will show the audience that you are genuinely putting in the effort.
Part 2. What Will You Need To Add Text Behind Videos?
Now there are a few things that you will need to add text behind videos. First, take a look at the basic priorities to perform this feature.
1. A Static Object Video
Adding text behind an object can be tricky if the object isn’t static. For example, the effect will be ruined if an object moves around a lot in a video.
Our goal is to create a smooth text behind the video effect. And this can only be achieved if the target object remains static in the video and does not move about its position.
2. A Video Editing Software - Wondershare Filmora
Once you select a video source, you aim to add it to a video editor. For this purpose, Wondershare Filmora would be your best choice. Wondershare Filmora allows you to create innovative and attractive videos.
Free Download For Win 7 or later(64-bit)
Free Download For macOS 10.14 or later
It has a very engaging system UI, allowing even beginner users to get their hands on it instantly. You will learn how to add text behind your videos with a few simple steps.

Now that you know the requirements for the video, let’s move on to the step-by-step guide to add text to your video.
Part 3. Step-by-Step Guide To Add Text Behind Videos
We look at two examples of how to add text behind videos in Wondershare Filmora.
- A static video with an object that can be easily masked out.
- A video with high contrast and a clean background.
Add Text behind a Static Video
First, we will go with adding text behind a static object. For this, scroll more to get the step-by-step process.
Step1 Download Wondershare Filmora
If you are a beginner just starting in the video editing business, Wondershare Filmora is the best choice. Follow the steps below to download the free version of Wondershare Filmora:
- First, download the Wondershare Filmora on your PC or Mac.
- Open the setup and install the Wondershare Filmora.
After downloading the Wondershare Filmora software, let’s edit the video. Scroll below to learn how to start the editing process!
Step2 Add the Video to the Timeline
We will first look at the static video example. For this, follow the below instructions:
- You have to start by importing your video in the import library.
- From the import library, you can click on the video and drag it down below to the timeline.

![]()
Note: Adding video to the timelines will allow you to create a workspace to edit your video.
Now let’s move on to how we will add the text tile to our video.
Step3 Add the Text Tile
It is time to add the text tile you will animate behind the object. To do that, follow the steps mentioned as such.:
- Go to the Titles icon on the bar above the import library.
- A drop-down option will be available on the left side.
- Scroll down to the Plain text.
- Here, you can see many text tiles to add to your video.
- You can choose anyone you like.
- The most commonly used tile is the Basic 6.
- When you add the text tile to the timeline, you must ensure that the text is of equal length to the video.
- To do that, drag the right corner of the text tile and drag it to the right to match the length of the video.

Step4 Edit the Text Tile
After you have added the text tile you desire, you need to type in the text. For this article, we will keep it simple. We will be typing a simple statement such as “Hello, World.“
- Double-click the Text tile to open the settings menu.
- After the settings menu is opened, type in the text box on the import window.
You will notice changes on the main window that your text has changed.

- After the text appears, you can make the font look as desired.
- Look above the text window, and you will see the type of text font selected.
- Click on the drop-down option and choose whatever you like.
Let’s move on to animate the text tile.
Step5 Animate the text tile
After adding text, it is time to animate it. This animation will decide how your text will appear behind the target object.
- First, you must open the text settings by double-clicking on the text tile in the timeline.
- In the settings opened in the import window, you will have to click on the animation tab in the upper left corner, aside from the Preset
- Now scroll down to where you will see the Right Roll
- Click on Right Roll and then click on the OK in the bottom right corner of the import window.

![]()
Note: You may notice now that the text appears in front of our object. Don’t worry now! We are getting there. With a few simple steps, we will see the results.
Now let us move on to the more significant part of the editing, masking the object. Again, look ahead to see how you can mask the object!
Step6 Mask the Object
To mask our object, we will need to be technical. We will begin by adding the same footage of the static object on our timeline. Follow the steps mentioned below:
- Drag and drop the static object footage above the timeline text. Make sure the text stays in the middle of the sandwich.

- We will hide the video in the first track to simplify things. In addition, this will make our editing easier.
- We will have to look in the effects library to insert the masking effect.
- You can see the Effects icon on the bar at the top.
- Click on the Effects.
- You will see the search bar at the top of the import window.
- In the search bar, type in Image mask.
- Drag the Image mask effect on the video above the text tile.
Now the masking effect has been added. But we would have to adjust so that it stays upon our object.
- Double-click on the video and the settings option will open up.
- Go into the Effects
![]()
Note: You must select your target object’s mask shape exactly as its shape.
- We have to mask out a building, so that we will need a vertical rectangle.

- After you have selected the shape of your object, we will need to convert it to the object’s size so that it only masks the building.
- To do that, scroll down below the import window to the settings.
- Here you can see the X, Y, and width settings.
- First, move the width bar so that it matches the width of the building.

- Now drag the X bar until the mask is confined to the building. You would have created the mask only limited to the building.

- Once you complete this step, click OK in the bottom right corner.
- Now un-hide the original video that you imported in the beginning.
Finally, play the video in the main play window from the beginning.

You have successfully created a text behind the object effect. Now that you know how to add text behind static objects let us move to learn how to add text to a video that has high contrast and a clean background.
Add text behind a high contrast and clean background
Besides the text can be added behind a static object, it can also be added to a clean background with high contrast. But how is it? Let’s dive into it.
Step1 Import the video into the timeline
- Import the video from the location in your PC media.
- When imported, drag and drop it onto the timeline.

Step2 Add the text tile
To add the text to your video, follow the steps mentioned below.
- Click on the titles icon on the bar above the import window.
- On the left drop-down option, scroll down to the titles.
- Select the Plain text option.
- You will notice that multiple options will pop up in the import window.
- Select the text title that suits you best.
- After you have selected the text style, drag and drop it down above your video in the timeline.

- Our next step would be to add the text.
- Double-click on the text tile. Doing so will open the settings menu in the import window.
- Type in the text that you want. For reference, we will keep it simple such as, “Hello world.”
- You can also adjust the font of your text.
- Above the type box, a drop-down option will show you the range of fonts available.
- Select the font you desire.

Now that you have added the text, it is time to animate it.
Step3 Take a snapshot
After typing in the text, you will notice in the main play window that your text still appears in front of your object. Therefore, we want to take it behind the object. To do so, first, you will need to take a snapshot.
Follow the steps mentioned to take a snapshot:
- Hide the main video. You can see the Eye icon aside from your main video in the edit column on the left side of the timeline.
- Click on the Eye icon to hide the main video.
- In the main play window, you will notice that the screen turns black, which leaves only the text on the screen.

- In the main play screen, you can notice a small camera icon.
- This camera icon is used to take snapshots of your screen.
- Click on the camera icon to take a snapshot of your screen.
- Your snapshot will now be saved in the main import window.

Now that we have taken a snapshot, we will need to import it into the timeline. Scroll below for more.
Step4 Add the snapshot
After taking it, your goal is to import it into the timeline. To perform this action, perform the following steps:
- Before adding the snapshot to the timeline, we must delete the main text tile.
- Then drag and drop the snapshot from the import library into the timeline above the video.
- Make sure that the snapshot is aligned well with the length of the video.
- If it is longer than the video, drag it from the right to match the length of the video.
- If its length is smaller than the video, drag it to the right to increase its length.

After adding the snapshot, we will have to change its blending mode.
Step5 Change the blending of the snapshot
To create the effect of your text behind the video, you must alter the main text’s blending mode. In this case, it will be the snapshot we took.
![]()
Note: Changing the blending mode of the snapshot will allow it to blend with the transparent background and will create the effect of the text behind the object in the video.
Follow the steps mentioned below to change the blending of the snapshot:
- Double-click the snapshot.
- If you select the compositing tab, the blending options will pop up.
- From default, it would be set to Normal. Click on the Normal
- It will show a drop-down option.
- Scroll down below until you can see an option labeled Then click on Overlay.

- And press OK in the bottom right corner to confirm your changes.
The text can be blended with the background.
- Click on the Eye icon to un-hide the video from the timeline.
- Now play the video from the start from the main play screen to see the final changes.

Congratulations! The above steps allow you to add text behind objects in your videos.
Conclusion
Modern media is full of creative content. And if you are a content creator that wants to make it through the world of YouTube and video creating, you need to be the best. You can only be the best at what you do if you keep pushing the boundaries of your creativity.
Adding text behind objects could be the first step in making your intros shine with creativity and innovation. It allows you to maintain and build your viewing audience. The more the audience, the more your content gets watched!
Free Download For macOS 10.14 or later
It has a very engaging system UI, allowing even beginner users to get their hands on it instantly. You will learn how to add text behind your videos with a few simple steps.
Now that you know the requirements for the video, let’s move on to the step-by-step guide to add text to your video.
Part 3. Step-by-Step Guide To Add Text Behind Videos
We look at two examples of how to add text behind videos in Wondershare Filmora.
- A static video with an object that can be easily masked out.
- A video with high contrast and a clean background.
Add Text behind a Static Video
First, we will go with adding text behind a static object. For this, scroll more to get the step-by-step process.
Step1 Download Wondershare Filmora
If you are a beginner just starting in the video editing business, Wondershare Filmora is the best choice. Follow the steps below to download the free version of Wondershare Filmora:
- First, download the Wondershare Filmora on your PC or Mac.
- Open the setup and install the Wondershare Filmora.
After downloading the Wondershare Filmora software, let’s edit the video. Scroll below to learn how to start the editing process!
Step2 Add the Video to the Timeline
We will first look at the static video example. For this, follow the below instructions:
- You have to start by importing your video in the import library.
- From the import library, you can click on the video and drag it down below to the timeline.
![]()
Note: Adding video to the timelines will allow you to create a workspace to edit your video.
Now let’s move on to how we will add the text tile to our video.
Step3 Add the Text Tile
It is time to add the text tile you will animate behind the object. To do that, follow the steps mentioned as such.:
- Go to the Titles icon on the bar above the import library.
- A drop-down option will be available on the left side.
- Scroll down to the Plain text.
- Here, you can see many text tiles to add to your video.
- You can choose anyone you like.
- The most commonly used tile is the Basic 6.
- When you add the text tile to the timeline, you must ensure that the text is of equal length to the video.
- To do that, drag the right corner of the text tile and drag it to the right to match the length of the video.
Step4 Edit the Text Tile
After you have added the text tile you desire, you need to type in the text. For this article, we will keep it simple. We will be typing a simple statement such as “Hello, World.“
- Double-click the Text tile to open the settings menu.
- After the settings menu is opened, type in the text box on the import window.
You will notice changes on the main window that your text has changed.
- After the text appears, you can make the font look as desired.
- Look above the text window, and you will see the type of text font selected.
- Click on the drop-down option and choose whatever you like.
Let’s move on to animate the text tile.
Step5 Animate the text tile
After adding text, it is time to animate it. This animation will decide how your text will appear behind the target object.
- First, you must open the text settings by double-clicking on the text tile in the timeline.
- In the settings opened in the import window, you will have to click on the animation tab in the upper left corner, aside from the Preset
- Now scroll down to where you will see the Right Roll
- Click on Right Roll and then click on the OK in the bottom right corner of the import window.
![]()
Note: You may notice now that the text appears in front of our object. Don’t worry now! We are getting there. With a few simple steps, we will see the results.
Now let us move on to the more significant part of the editing, masking the object. Again, look ahead to see how you can mask the object!
Step6 Mask the Object
To mask our object, we will need to be technical. We will begin by adding the same footage of the static object on our timeline. Follow the steps mentioned below:
- Drag and drop the static object footage above the timeline text. Make sure the text stays in the middle of the sandwich.
- We will hide the video in the first track to simplify things. In addition, this will make our editing easier.
- We will have to look in the effects library to insert the masking effect.
- You can see the Effects icon on the bar at the top.
- Click on the Effects.
- You will see the search bar at the top of the import window.
- In the search bar, type in Image mask.
- Drag the Image mask effect on the video above the text tile.
Now the masking effect has been added. But we would have to adjust so that it stays upon our object.
- Double-click on the video and the settings option will open up.
- Go into the Effects
![]()
Note: You must select your target object’s mask shape exactly as its shape.
- We have to mask out a building, so that we will need a vertical rectangle.
- After you have selected the shape of your object, we will need to convert it to the object’s size so that it only masks the building.
- To do that, scroll down below the import window to the settings.
- Here you can see the X, Y, and width settings.
- First, move the width bar so that it matches the width of the building.
- Now drag the X bar until the mask is confined to the building. You would have created the mask only limited to the building.
- Once you complete this step, click OK in the bottom right corner.
- Now un-hide the original video that you imported in the beginning.
Finally, play the video in the main play window from the beginning.
You have successfully created a text behind the object effect. Now that you know how to add text behind static objects let us move to learn how to add text to a video that has high contrast and a clean background.
Add text behind a high contrast and clean background
Besides the text can be added behind a static object, it can also be added to a clean background with high contrast. But how is it? Let’s dive into it.
Step1 Import the video into the timeline
- Import the video from the location in your PC media.
- When imported, drag and drop it onto the timeline.
Step2 Add the text tile
To add the text to your video, follow the steps mentioned below.
- Click on the titles icon on the bar above the import window.
- On the left drop-down option, scroll down to the titles.
- Select the Plain text option.
- You will notice that multiple options will pop up in the import window.
- Select the text title that suits you best.
- After you have selected the text style, drag and drop it down above your video in the timeline.
- Our next step would be to add the text.
- Double-click on the text tile. Doing so will open the settings menu in the import window.
- Type in the text that you want. For reference, we will keep it simple such as, “Hello world.”
- You can also adjust the font of your text.
- Above the type box, a drop-down option will show you the range of fonts available.
- Select the font you desire.
Now that you have added the text, it is time to animate it.
Step3 Take a snapshot
After typing in the text, you will notice in the main play window that your text still appears in front of your object. Therefore, we want to take it behind the object. To do so, first, you will need to take a snapshot.
Follow the steps mentioned to take a snapshot:
- Hide the main video. You can see the Eye icon aside from your main video in the edit column on the left side of the timeline.
- Click on the Eye icon to hide the main video.
- In the main play window, you will notice that the screen turns black, which leaves only the text on the screen.
- In the main play screen, you can notice a small camera icon.
- This camera icon is used to take snapshots of your screen.
- Click on the camera icon to take a snapshot of your screen.
- Your snapshot will now be saved in the main import window.
Now that we have taken a snapshot, we will need to import it into the timeline. Scroll below for more.
Step4 Add the snapshot
After taking it, your goal is to import it into the timeline. To perform this action, perform the following steps:
- Before adding the snapshot to the timeline, we must delete the main text tile.
- Then drag and drop the snapshot from the import library into the timeline above the video.
- Make sure that the snapshot is aligned well with the length of the video.
- If it is longer than the video, drag it from the right to match the length of the video.
- If its length is smaller than the video, drag it to the right to increase its length.
After adding the snapshot, we will have to change its blending mode.
Step5 Change the blending of the snapshot
To create the effect of your text behind the video, you must alter the main text’s blending mode. In this case, it will be the snapshot we took.
![]()
Note: Changing the blending mode of the snapshot will allow it to blend with the transparent background and will create the effect of the text behind the object in the video.
Follow the steps mentioned below to change the blending of the snapshot:
- Double-click the snapshot.
- If you select the compositing tab, the blending options will pop up.
- From default, it would be set to Normal. Click on the Normal
- It will show a drop-down option.
- Scroll down below until you can see an option labeled Then click on Overlay.
- And press OK in the bottom right corner to confirm your changes.
The text can be blended with the background.
- Click on the Eye icon to un-hide the video from the timeline.
- Now play the video from the start from the main play screen to see the final changes.
Congratulations! The above steps allow you to add text behind objects in your videos.
Conclusion
Modern media is full of creative content. And if you are a content creator that wants to make it through the world of YouTube and video creating, you need to be the best. You can only be the best at what you do if you keep pushing the boundaries of your creativity.
Adding text behind objects could be the first step in making your intros shine with creativity and innovation. It allows you to maintain and build your viewing audience. The more the audience, the more your content gets watched!
How to Use a Stabilization Tool in Filmora
Does your video shake so much? Shaking movement on your camera is often inevitable, especially if you don’t use a camera stabilizer or a camera with no built-in image stabilization. As a result, it can make your video look distracting and difficult to watch.
But you don’t need to worry. You can use a stabilization tool in Filmora . A stabilization tool is a feature that can help to correct for camera shake and other types of movement. If you are a handheld shooter, you will find this tool extremely helpful.
Part 1: When do you need to stabilize your video?
Now, let’s talk about when you should stabilize your video. If you’re shooting something that is moving, like people or animals, you will definitely want to stabilize your video. This will help ensure that the video is smooth and steady.
Another time you may want to stabilize your video is if you’re shooting in a low-light situation. It will help to ensure that your video is not too shaky.
Finally, if you’re shooting a video that’s going to be displayed on a large screen, you may want to stabilize your video. Stabilizing your video will help ensure the output is crisp and clear.
Part 2: How to stabilize your video with Filmora
Filmora has a stabilization feature that can help to smooth your video and make it look more professional. If you haven’t installed Filmora yet, you can download it for free.
Free Download For Win 7 or later(64-bit)
Free Download For macOS 10.14 or later
So, should you have a wobble movement in your video, follow these steps to make it smoother in no time:
Step1 Launch Filmora 11 and create a new project.
Step2 Import your video to Filmora.

Step3 After you import your video to Filmora, the Stabilization must have been off. So, switch the Stabilization toggle on, then a loading bar will start going up to analyze the clip.

Step4 Once it finishes analyzing, the smooth level will default to 10. See the preview whether you like how it turns out.
Before

After

Please note that the center point of your image will always be the most stable. The more shaky a clip is, the more it will crop into that image.
If you are unsatisfied with the default setting, increasing the Smoothness Level will result in more cropping to the image. On the contrary, if you put the Smoothness Level down to zero, you are no longer cropping into the image, but the result won’t be as smooth.

Should the cropping bother you, such as it crops the subject’s hair out of the frame, you can adjust it with Edge Processing.
If you change it to None, you will see the black bars that simulate how it stabilizes the clip. Try to hit play on the preview screen, and then you can see more clearly how the tool keeps the center of the frame to make it stable and less shaky.

As Reflect is the default, the Extend uses artificial intelligence to extend the pixels, as you are often aware in Photoshop.

Besides the three, there is also the Tile option. Each of them would give a different result. You can try and use the one that works best for you.
Summary
When you’re shooting a video, you must have wanted it to be as smooth and stable as possible. By stabilizing your video, you can help ensure it’s smooth and easy to watch.
Filmora offers a Stabilization feature that allows you to easily improve your video’s quality. Simply select the video clip you want to stabilize and click the stabilization button. Filmora will do the rest, giving you a smooth and stable video.
Free Download For macOS 10.14 or later
So, should you have a wobble movement in your video, follow these steps to make it smoother in no time:
Step1 Launch Filmora 11 and create a new project.
Step2 Import your video to Filmora.
Step3 After you import your video to Filmora, the Stabilization must have been off. So, switch the Stabilization toggle on, then a loading bar will start going up to analyze the clip.
Step4 Once it finishes analyzing, the smooth level will default to 10. See the preview whether you like how it turns out.
Before
After
Please note that the center point of your image will always be the most stable. The more shaky a clip is, the more it will crop into that image.
If you are unsatisfied with the default setting, increasing the Smoothness Level will result in more cropping to the image. On the contrary, if you put the Smoothness Level down to zero, you are no longer cropping into the image, but the result won’t be as smooth.
Should the cropping bother you, such as it crops the subject’s hair out of the frame, you can adjust it with Edge Processing.
If you change it to None, you will see the black bars that simulate how it stabilizes the clip. Try to hit play on the preview screen, and then you can see more clearly how the tool keeps the center of the frame to make it stable and less shaky.
As Reflect is the default, the Extend uses artificial intelligence to extend the pixels, as you are often aware in Photoshop.
Besides the three, there is also the Tile option. Each of them would give a different result. You can try and use the one that works best for you.
Summary
When you’re shooting a video, you must have wanted it to be as smooth and stable as possible. By stabilizing your video, you can help ensure it’s smooth and easy to watch.
Filmora offers a Stabilization feature that allows you to easily improve your video’s quality. Simply select the video clip you want to stabilize and click the stabilization button. Filmora will do the rest, giving you a smooth and stable video.
Also read:
- New In 2024, Best 12 Best Freeze Frame Video Editing Examples
- In 2024, How to Animate Text in A Video
- Guide To Creating the Best Video Collages for 2024
- New In 2024, How to Use LUTS to Color Grade on Your iPhone
- Updated In 2024, Storyboards Are Amazing Way if You Want to Present Your Story in a Visual Way, Like Explaining Any Process or Giving Any Information. It Is a Graphic Layout to Tell You a Story
- New 2024 Approved Create Photoshop GIFs with Zero Hustle
- Updated In 2024, Do You Want to Remove Unnecessary Sound From Your Video? We Are Providing You the List of the Best Software to Remove Audio From Video for Mac and Apple
- How To Use Virtual Green Screen to Shoot Video
- Wondering How to Edit a Video to Slow Motion on iPhone and Android Devices? Find Out How to Use Wondershare Filmora to Create and Edit Slo Mo Videos in a Few Clicks for 2024
- Step by Step to Add Border to Video Using Premiere Pro for 2024
- In 2024, The Complete Guide to GIF for Discord Profile
- New Best 8 Top Premiere Pro Slideshow Templates for 2024
- Updated In 2024, Best Way to Freeze-Frame in Final Cut Pro
- Detailed Tutorial to Resize Your Video in VLC
- In 2024, How to Make Audio Visualizer in Filmora Easy
- This Article Talks About Pixel Art Wallpapers. It Gives Examples of Different Pixel Art to Show You How to Customize Your Own Pixel Art Wallpapers, and How to Make a Pixel Art Gif on Filmora for 2024
- 2024 Approved How I Got Free After Effects Templates Slideshow with Simple Trick
- New In 2024, How to Create Freeze Frame Clone Effect
- New In 2024, Are You a Newbie Across YouTube? Want to Know Who the Best Vloggers Are? This Article Provides You with the Best Vloggers on YouTube
- Are You Looking to Create some Impressive Slow-Motion Video Content? Get This Done with some Impressive Android Slow Motion Video Apps for 2024
- New How to Add Green Screen in OBS
- LumaFusion Offers Various Look Up Table Presets, or LUTs, Such as FiLMiC deLog and FiLMiC DeFlat, and Several Stylistic LUTs for Use with Neutral Use Video. You Can Also Manually Add the LUTs
- New How to Create a Custom Sequence Preset in Premiere Pro
- Updated In 2024, Separate Audio From Video in DaVinci Resolve Step by Step
- Create a Kickass COD Warzone Thumbnail for Free for 2024
- New 2024 Approved Timeline Template Is a Visual Representation Showing the Passage of Time. It Includes Text, Diagrams, Images and Icons. They Are Perfect for Telling Stories, Events Etc
- In 2024, Secret Tips & Tricks to Use in Filmora
- How To Add Scrolling Text Effect
- Reasons for Oppo Find X7 Ultra Stuck on Startup Screen and Ways To Fix Them | Dr.fone
- How to Fix My Itel P40 Location Is Wrong | Dr.fone
- How To Remove Flashlight From Apple iPhone 13 Pro Lock Screen | Dr.fone
- Best Oppo A59 5G Pattern Lock Removal Tools Remove Android Pattern Lock Without Losing Data
- In 2024, CatchEmAll Celebrate National Pokémon Day with Virtual Location On Motorola Moto G23 | Dr.fone
- In 2024, How To Pause Life360 Location Sharing For Nokia C12 Pro | Dr.fone
- Apply These Techniques to Improve How to Detect Fake GPS Location On Vivo X Fold 2 | Dr.fone
- Unlock Your Vivo Y200 Phone with Ease The 3 Best Lock Screen Removal Tools
- How To Unlock Any Xiaomi Redmi Note 12 Pro 5G Phone Password Using Emergency Call
- New In 2024, What Is AI Voice Text to Speech?
- Full Guide to Unlock Your Oppo A18
- In 2024, Hassle-Free Ways to Remove FRP Lock from Xiaomi 13 Ultra Phones with/without a PC
- New 2024 Approved The Top 10 AI Avatar Generators
- In 2024, Downloading SamFw FRP Tool 3.0 for Samsung Galaxy XCover 7
- New 2024 Approved Your Selling Strategy With LazLive Live Selling
- In 2024, Resolve Your iPhone 8 Keeps Asking for Outlook Password | Dr.fone
- 5 Quick Methods to Bypass Nokia C210 FRP
- How to unlock a disable iPhone 14 using macOS finder
- In 2024, Full Guide on Mirroring Your Poco C50 to Your PC/Mac | Dr.fone
- Unlock Realme 12 5G Phone Password Without Factory Reset Full Guide Here
- How To Transfer Data From iPhone 13 To Android? | Dr.fone
- Title: Do You Want to Get Green Screen Effects on Your Video without Green Screen Setup in Your Background? Learn How to Get Virtual Green Screen Background and Shoot Videos Like a Pro
- Author: Morgan
- Created at : 2024-05-19 05:11:41
- Updated at : 2024-05-20 05:11:41
- Link: https://ai-video-editing.techidaily.com/do-you-want-to-get-green-screen-effects-on-your-video-without-green-screen-setup-in-your-background-learn-how-to-get-virtual-green-screen-background-and-sho/
- License: This work is licensed under CC BY-NC-SA 4.0.
