
:max_bytes(150000):strip_icc():format(webp)/how-to-watch-taylor-swift-movies-in-order-a8e26851d3d94bf183a144766801c16c.jpg)
Doable Ways to Create Transparent Background in Procreate for 2024
Doable Ways to Create Transparent Background in Procreate
Doable Ways to Make Transparent Background in Procreate
An easy yet powerful editor
Numerous effects to choose from
Detailed tutorials provided by the official channel
Figuring out the crucial steps to make the canvas excellent is one of the loveliest things users are performing for exporting the closing Procreate-projects. Once after getting expert with things trick you can be able to position the canvas surprisingly on great back for a memorable moment. You can make the most of it for your procreate mission that you have created.
Out of many essentials tools you have ever used for experiencing the benefits of equipment & skills, the Procreate is a kind of solution that comes with one of the most trustworthy as well as brilliant capability to erase the undesired background from the pictures. It is more than a general tool and there are some specified approaches to do so, but in today possible scenario, you can easily focus around choice of right selections to erase a background at ease. People can explore the chances of creating various attractive methods to work in the PNG structure after removing the desired background.
In this article
01 [How to Delete a White Background with Procreate for the IPad?](#Part 1)
02 [How to Make Transparent Background with Procreate for iPhone?](#Part 2)
03 [How to Create Popping Thumbnails or Profile Photos](#Part 3)
Part 1 How to Delete a White Background with Procreate for the IPad?

In case you are facing discoloration problem too then it is always a better idea to cast image with desired background and remove the objects.
Now turning your background with a lovely image or your own is just a matter of few clicks. With great transparent background procreate, you will be heading towards the satisfaction of obtaining transparent background. With few crucial steps you can stay from the other competitors or it will make your posts viral. With stepwise guidelines on removing the background as well as replacing it with a transparent one in Procreate is what you need the most today.
When it comes to deleting the white-background with a Procreate, then with great selection of tools you can easily create amazing performance for your post. If you are still in a dilemma to make use of the white coloured Background. After tapping on the top-left corner of the screen, you can open-up brilliant level of opportunities to make the most out of it. Are you ready to begin? Next you will learn about how to turn the background into a desired canvas for all your Instagram stories.
The following steps will provide you a quick walkthrough of entire process, stepwise:-
Step 1: First you are required to open the picture with Procreate. Get your desired image for the edit or open your picture & turn-off the overall visibility of background layer by layers-icon, tap it, it is presented on the top-right corner. Here, you will see layer labelled as the background, you need to uncheck the layer’s box for turning-off overall visibility at the bottom of Layers menu.
It is an important step to perform as if you want to deleting any white background from the image otherwise background will be treated as transparent with white-background showing through, thus you will experience no changes to the document. You are not required to remove background from image procreate if your image is not having a background layer.
Step 2: Create the selection at around white area of an image & delete background
For you to perform the step of procreate remove white background, you are required to make selection around white area. For this, open-up the selection-menu and it is placed in the form round icon named ‘S’ at the top-left-corner of the screen. At this menu, choose auto & Add. To create such level of perfection in selection, just hold & tap over any area of white-background at this screen. You can also increase threshold of your selection by moving the fingers/stylus at the right. For the opposite process, you can move the same to the left.You need to adjust the desired threshold until selection-area on your screen lines-up in accordance with an edges of the subject. You are now heading towards the process of make background transparent procreatefor your desired image quickly.
With your current selection still in active state, just tap on wrench-icon it the top-left area of your screen, then navigate to Add-menu, and here tap on the Cut option. Congrats, you have effectively deleted the background from an image.
**Step 3:**Just release the selection in the form of tapping on Selection-menu icon and repeat the process again for negative space-areas & at last clean-up stray-pixels with through an Eraser. You can repeat the process further from the step-2 in case any stray pixels still remains there as it is a normal situation to face while removing the pixels background with ‘remove background on procreate’ option.You can also take the Eraser & then manually erase those stray-pixels in there is any.
Step 4: Export your final work as PNG-file to preserve the transparency
After finishing the task of deleting background from the picture you can easily export your work to a desirable file format. The image you want to export can be in the form of PNG to retain the transparency. Other useful formats you can choose is JPEG but this doesn’tsupport transparency. So, be wise & be careful while choose your file formats.You are now having procreate export transparent backgroundand can also place the same to any sort of backdrop like an app, website, or any other workspace.
Part 2 How to Make Transparent Background with Procreate for iPhone?

Let’s dive-in quickly into the process of making the background transparent with procreate, if you are an iPhone User.
● GO Into an option of Canvas
It is up-to you whether you want to create a new canvas or want to work-upon already saved canvas. In your device through procreate app, you can do the same without any worries.
● Tap onto the option of Layers Panel
This option is located at the top-right corner of your toolbar. This option looks similar to the two-squares on the top of one another.
● Replace dull looking background with transparent background
You can quickly go down to the layers-panel placed at the bottom to choose the background color.Transparent background in procreateis always a good option to consider.
● Put uncheck before the box
At the right of toolbar you can be able to see words ‘Background color’ and if it is checked then you need to uncheck it. Now your goal to make the background completely transparent with procreate make background transparent tool, will be achieved. Now your background is completely transparent and ready to use.
Part 3 How to Create Popping Thumbnails or Profile Photos

There are various tools available in the market to make a popping thumbnail for your YouTube or Instagram pages. Thumbnail maker like Filmora can be an interesting option to choose as it is quick and effective. You can also customized as well as download the thumbnails at no cost with the same. However, they comes with certain limitations like overall size of the image to be downloaded. For better versions you can use premium tools. With better creativity and great imagination you can make the thumbnail as crisp as possible.
● Upload your desired photo to Filmora’s thumbnail maker templates.
You can easily create your video thumbnail, but you need some inspiration and for that you can make use of amazing tool like Filmora. With access to more than 50 free templates you can achieve your goal of making popping thumbnails.
● Adding text, clipart, or perfect quality of background can give it a boost
After picking your template, one can make use of thumbnail to stand out different in terms of adding text, clipart or background. For adding custom background to your thumbnail you can make use of procreate that can remove the background with procreateremove white backgroundfeatures and give you better featured image with nice background. Also to clarify the objectives of your thumbnail you can add titles, and also consider placing the same on the top of any dark color background if your thumbnail is light in color. For making the background darker just choose remove white background procreateas discussed above.
● Just Download your finished product to your device
After polishing the thumbnails with creative stuff, you can download the same to your device or export it to your smartphone.
Voila, you just have create your own custom popping thumbnail. With remove background on procreate, you can never feel disappointed.
****Wondershare Filmora Video Editor App to Remove Unwanted Background Easily**
For Win 7 or later (64-bit)
For macOS 10.12 or later
In case you are searching for any professional tool to remove het background and replace the one with any of your favorite picture then there is a tool for you to consider. With greater different functionalities, you can make any Instagram post or story interesting through the help of Fillmora App. This has set of brilliant solutions to provide with most brilliant picture and video editing features. It is interesting, fun-loving as well as attractive enough to turn any moments extraordinary.
Handy features to enjoy:-
● You can make use of this tool to create custom thumbnails for your YouTube or Instagram page.
● Great varieties of templates for making popping thumbnails
● Greater capability to beautifully construct picture editing animations
● Varieties of Effects for every age group
● Attractive filters, GIFs packs and images to turn any dull looking background into an amazing moment.
● Delete white background quickly
● Right selection of tools to make the editing effective
● Flawless features to crop, cut-up, cut, trim & mix operations.
● Single click operation to turn the images into a beauty mode
● Options to save your creations into your device or virtual space
● Share your creations to your community, to your friends via Facebook, Instagram, YouTube, and Twitter quickly.
It is a greater idea to try this app for making use of its image editing features for deleting the white background in an easy manner.
● Ending Thoughts →
● With great varieties of features it is now very easy for you to create some automated selections in just single tap.
● Deleting the white background through a pro-tool like Procreate is smart, quick & seamless process.
● You are not going to get confused, even if you are using it for the very first time.
● It is the trend that every Instagram user is following for posting better images with nice background options.
Figuring out the crucial steps to make the canvas excellent is one of the loveliest things users are performing for exporting the closing Procreate-projects. Once after getting expert with things trick you can be able to position the canvas surprisingly on great back for a memorable moment. You can make the most of it for your procreate mission that you have created.
Out of many essentials tools you have ever used for experiencing the benefits of equipment & skills, the Procreate is a kind of solution that comes with one of the most trustworthy as well as brilliant capability to erase the undesired background from the pictures. It is more than a general tool and there are some specified approaches to do so, but in today possible scenario, you can easily focus around choice of right selections to erase a background at ease. People can explore the chances of creating various attractive methods to work in the PNG structure after removing the desired background.
In this article
01 [How to Delete a White Background with Procreate for the IPad?](#Part 1)
02 [How to Make Transparent Background with Procreate for iPhone?](#Part 2)
03 [How to Create Popping Thumbnails or Profile Photos](#Part 3)
Part 1 How to Delete a White Background with Procreate for the IPad?
In case you are facing discoloration problem too then it is always a better idea to cast image with desired background and remove the objects.
Now turning your background with a lovely image or your own is just a matter of few clicks. With great transparent background procreate, you will be heading towards the satisfaction of obtaining transparent background. With few crucial steps you can stay from the other competitors or it will make your posts viral. With stepwise guidelines on removing the background as well as replacing it with a transparent one in Procreate is what you need the most today.
When it comes to deleting the white-background with a Procreate, then with great selection of tools you can easily create amazing performance for your post. If you are still in a dilemma to make use of the white coloured Background. After tapping on the top-left corner of the screen, you can open-up brilliant level of opportunities to make the most out of it. Are you ready to begin? Next you will learn about how to turn the background into a desired canvas for all your Instagram stories.
The following steps will provide you a quick walkthrough of entire process, stepwise:-
Step 1: First you are required to open the picture with Procreate. Get your desired image for the edit or open your picture & turn-off the overall visibility of background layer by layers-icon, tap it, it is presented on the top-right corner. Here, you will see layer labelled as the background, you need to uncheck the layer’s box for turning-off overall visibility at the bottom of Layers menu.
It is an important step to perform as if you want to deleting any white background from the image otherwise background will be treated as transparent with white-background showing through, thus you will experience no changes to the document. You are not required to remove background from image procreate if your image is not having a background layer.
Step 2: Create the selection at around white area of an image & delete background
For you to perform the step of procreate remove white background, you are required to make selection around white area. For this, open-up the selection-menu and it is placed in the form round icon named ‘S’ at the top-left-corner of the screen. At this menu, choose auto & Add. To create such level of perfection in selection, just hold & tap over any area of white-background at this screen. You can also increase threshold of your selection by moving the fingers/stylus at the right. For the opposite process, you can move the same to the left.You need to adjust the desired threshold until selection-area on your screen lines-up in accordance with an edges of the subject. You are now heading towards the process of make background transparent procreatefor your desired image quickly.
With your current selection still in active state, just tap on wrench-icon it the top-left area of your screen, then navigate to Add-menu, and here tap on the Cut option. Congrats, you have effectively deleted the background from an image.
**Step 3:**Just release the selection in the form of tapping on Selection-menu icon and repeat the process again for negative space-areas & at last clean-up stray-pixels with through an Eraser. You can repeat the process further from the step-2 in case any stray pixels still remains there as it is a normal situation to face while removing the pixels background with ‘remove background on procreate’ option.You can also take the Eraser & then manually erase those stray-pixels in there is any.
Step 4: Export your final work as PNG-file to preserve the transparency
After finishing the task of deleting background from the picture you can easily export your work to a desirable file format. The image you want to export can be in the form of PNG to retain the transparency. Other useful formats you can choose is JPEG but this doesn’tsupport transparency. So, be wise & be careful while choose your file formats.You are now having procreate export transparent backgroundand can also place the same to any sort of backdrop like an app, website, or any other workspace.
Part 2 How to Make Transparent Background with Procreate for iPhone?
Let’s dive-in quickly into the process of making the background transparent with procreate, if you are an iPhone User.
● GO Into an option of Canvas
It is up-to you whether you want to create a new canvas or want to work-upon already saved canvas. In your device through procreate app, you can do the same without any worries.
● Tap onto the option of Layers Panel
This option is located at the top-right corner of your toolbar. This option looks similar to the two-squares on the top of one another.
● Replace dull looking background with transparent background
You can quickly go down to the layers-panel placed at the bottom to choose the background color.Transparent background in procreateis always a good option to consider.
● Put uncheck before the box
At the right of toolbar you can be able to see words ‘Background color’ and if it is checked then you need to uncheck it. Now your goal to make the background completely transparent with procreate make background transparent tool, will be achieved. Now your background is completely transparent and ready to use.
Part 3 How to Create Popping Thumbnails or Profile Photos
There are various tools available in the market to make a popping thumbnail for your YouTube or Instagram pages. Thumbnail maker like Filmora can be an interesting option to choose as it is quick and effective. You can also customized as well as download the thumbnails at no cost with the same. However, they comes with certain limitations like overall size of the image to be downloaded. For better versions you can use premium tools. With better creativity and great imagination you can make the thumbnail as crisp as possible.
● Upload your desired photo to Filmora’s thumbnail maker templates.
You can easily create your video thumbnail, but you need some inspiration and for that you can make use of amazing tool like Filmora. With access to more than 50 free templates you can achieve your goal of making popping thumbnails.
● Adding text, clipart, or perfect quality of background can give it a boost
After picking your template, one can make use of thumbnail to stand out different in terms of adding text, clipart or background. For adding custom background to your thumbnail you can make use of procreate that can remove the background with procreateremove white backgroundfeatures and give you better featured image with nice background. Also to clarify the objectives of your thumbnail you can add titles, and also consider placing the same on the top of any dark color background if your thumbnail is light in color. For making the background darker just choose remove white background procreateas discussed above.
● Just Download your finished product to your device
After polishing the thumbnails with creative stuff, you can download the same to your device or export it to your smartphone.
Voila, you just have create your own custom popping thumbnail. With remove background on procreate, you can never feel disappointed.
****Wondershare Filmora Video Editor App to Remove Unwanted Background Easily**
For Win 7 or later (64-bit)
For macOS 10.12 or later
In case you are searching for any professional tool to remove het background and replace the one with any of your favorite picture then there is a tool for you to consider. With greater different functionalities, you can make any Instagram post or story interesting through the help of Fillmora App. This has set of brilliant solutions to provide with most brilliant picture and video editing features. It is interesting, fun-loving as well as attractive enough to turn any moments extraordinary.
Handy features to enjoy:-
● You can make use of this tool to create custom thumbnails for your YouTube or Instagram page.
● Great varieties of templates for making popping thumbnails
● Greater capability to beautifully construct picture editing animations
● Varieties of Effects for every age group
● Attractive filters, GIFs packs and images to turn any dull looking background into an amazing moment.
● Delete white background quickly
● Right selection of tools to make the editing effective
● Flawless features to crop, cut-up, cut, trim & mix operations.
● Single click operation to turn the images into a beauty mode
● Options to save your creations into your device or virtual space
● Share your creations to your community, to your friends via Facebook, Instagram, YouTube, and Twitter quickly.
It is a greater idea to try this app for making use of its image editing features for deleting the white background in an easy manner.
● Ending Thoughts →
● With great varieties of features it is now very easy for you to create some automated selections in just single tap.
● Deleting the white background through a pro-tool like Procreate is smart, quick & seamless process.
● You are not going to get confused, even if you are using it for the very first time.
● It is the trend that every Instagram user is following for posting better images with nice background options.
Best Jump Cut Editing Tricks
The jump cut is more common than ever, from YouTube to movie montages. A jump cut is a method for transitioning from one shot to another without including any interstitial video. A jump cut is a cinematic technique when the editor abruptly cuts from one shot to another without any discernible transition.
When filmmakers wish to display someone’s views or ideas without having to invest time and money in recording them, for example, this may be utilized for creative effects. Learn all there is to know about jump cuts in the next paragraphs, including their history, how to create one, how to edit one, and how to utilize one in your next social media video.
Part 1: What is Jump Cut in Films?
To produce a smooth viewing experience, the director, editor, and cinematographer collaborate. Certain cuts have the power to startle a viewer out of this experience and remind them that they are watching a movie. The term “jump cut” refers to one of these cuts. Jump cuts are often discouraged in cinema, yet there are efficient methods to use them to provide the greatest narrative possible.
In video editing, a jump cut is the transition between two images of the same topic taken from the same or comparable angles and at two distinct times. This gives the impression that the action is ‘jumping’ ahead in time.
Most of the time, you want your videos’ cuts to flow seamlessly. This offers continuity and a nice watching experience for your viewers. Although it’s one of the most fundamental editing procedures, doing it correctly requires a bit more experience and ability. Let’s thus try to make your jump cut technique even better.
Part 2: 10 Most Shocking Jump Cuts in Film History
1. City of God
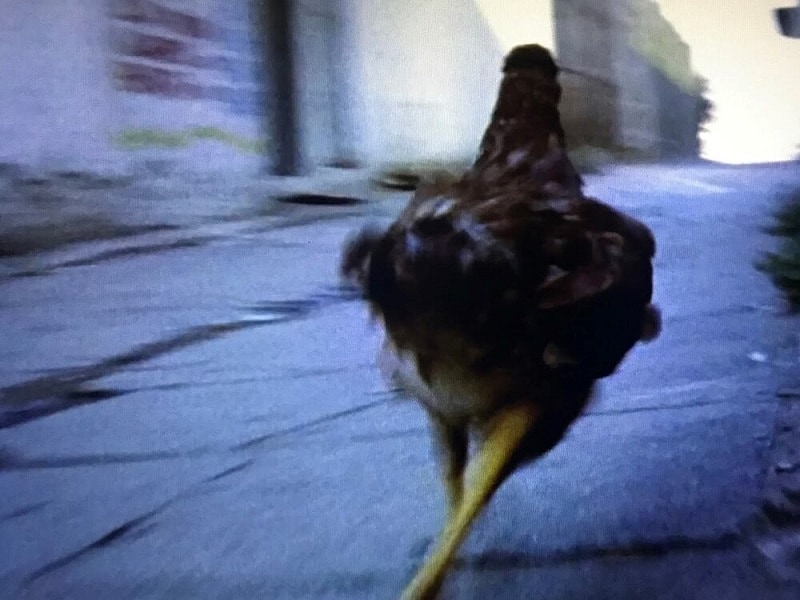
With the combination of jump cuts, repetitive action, frantic montage, and a final bullet time graphic match wipe, the opening sequence of City of God drives the viewer into the pulse of the music and the violence in Rio. This seems like a prescription for catastrophe, yet it works in City of God. The screen is made electrified.
The chicken forces the characters to cross paths, which causes the two scenes to collide. Rezende now captures Rocket and Liz’s expressions in slow motion, resulting in a dramatic scene. After a circular pan-centering Rocket, which melts into a different moment of ten years ago, the shot comes to a close.
2. The Ring
In the pivotal scenes of “The Ring,” director Gore Verbinski used a jump cut to give the impression that Samara Morgan, the ghost, moves quickly around the room. By deleting or including anything in the frame, which is unsettling for both characters and viewers, this is a tried-and-true method of increasing the number of scares.
Jump cuts may also be distracting if done improperly or inappropriately, even though they are often intended to confuse or surprise the audience. There is a time and place for the method, even if a jump cut is far from the sole tool in the video editor’s toolbox.

3. Juno
In the movie Juno, director Jason Reitman portrays the tale of a young adolescent who becomes pregnant and ultimately gives her kid up. Each leap represents a new stage in the character’s development as a result of this life-changing experience. Jump cuts in Jason Reitman’s comedy-drama Juno depict the youthful heroine’s journey both physically and mentally.
Jump cuts are a technique used by Reitman to convey both the passage of time and the changes in Juno’s life. like visiting the adoptive parents or getting regular checks at the doctor. You might think of each jump cut as one of the five phases of grieving. In the last chapter, “summer,” Juno has a better understanding of what she is giving up and how it will impact both her life and everyone else’s.

4. Samara Kills Noah the Ring
It’s a tremendously imaginative and horrifying conclusion after a whole film’s worth of very subtle build-up that couldn’t be farther from the really low expectations U.S. horror remakes often attract. Gerbinski cleverly arranges for Samara to “jump cut” in front of Noah while still flashing with TV static, shocking him and causing him to trip and fall.
It’s fair to say that American horror films tend to rely on lazy jump scares, created by quick-cut images and loud sound effects, and that typically goes double for cynical state-side remakes of foreign language horror hits. However, Gore Verbinski’s surprisingly stylish and moody 2002 remake of The Ring makes clever use of jump cuts during a crucial climactic scene to fully hammer home the terror of the film’s spectral, black-haired antagonist Sam

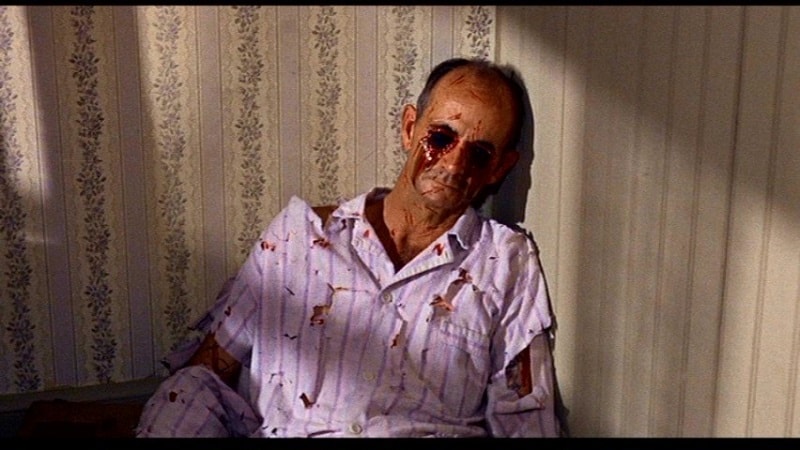
5. Dan’s Corpse – The Birds
Instead of using a single cut or even zooming on Dan’s disfigured face, Hitch chooses to use two jump cuts that each bring us a little bit closer to Fawcett’s face.
When seen now, it is a straightforward yet shocking effect, but in 1963, it was unquestionably genuinely horrifying. It was just one more of his many deliberate choices to depart from established cinematic norms. Although the jump cut is a simple editing method by today’s standards, it was far less popular in earlier times, as seen by its skillful and startling use in Alfred Hitchcock’s great 1963 horror film The Birds.
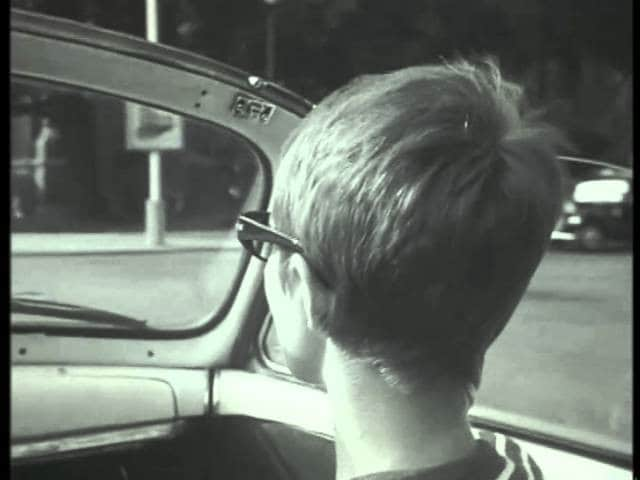
6. Taking A Ride – Breathless
According to the Director Pierre Rissient, the jump cut technique was unplanned and developed out of a pressing necessity to trim Breathless from two and a half hours down to ninety minutes. The best example of this is when Patricia and Michel are driving about in their automobile, and Godard cuts between identical pictures of Patricia to show time passing while also heightening the urgency of the story of the couple on the run in the movie.
The significance of this sequence is that it dismantled rules for how a scene might be put together, despite the fact that it seemed absolutely primitive in retrospect. Not every movie that uses a jump cut in a dramatic or unexpected way must be in the horror category.
7. Charlie’s Head Hereditary
It’s one of the strangest and really unsettling jump cuts we’ve seen in recent memory, and it definitely deserves the surprisingly intricate gore display that it has. One of the most eerie and masterfully orchestrated horror movies of the decade, if not the whole 21st century, is Ari Aster’s Hereditary. Aster turns his attention to Peter, who is gazing out into the horizon, just as Annie can be heard screaming in agony, having found Charlie’s corpse in the garage.
While Annie’s screams can still be heard, the editor jump cuts from Peter’s face to Charlie’s severed, mangled head by the side of the road as it is being eaten by insects. After bringing his sister’s headless corpse-filled automobile home, a terrified Peter parks it and gets into bed.

8. Human Evolution in a Single Cut 2001: A Space Odyssey
This brief clip illustrates how man evolved from the monkey to the contemporary day, where we had been to space. In this brief sequence, which depicts the origins of modern man, new technology that has evolved over millions of years is dramatically upgraded.
The sequence includes a jump cut as the bone, a weapon of prehistoric man, travels through the air. Then, the picture jumps forward by nearly a million years, and the bone is replaced by a spacecraft with a like form.

9. Dr Erin Mears’s Death Contagion
In the masterpiece Contagion, the jump cut clustering that is seen experimentally is produced by the model. Afterward, leap intensities mean-revert until the next jump. But more crucially, Contagion vividly captures the danger of widespread fear, prejudice, and disinformation during a pandemic, particularly when it comes to social media and the internet.
In this shocking edit in film history, the editor made it all feasible by using a jump cut. Regardless of how realistic Contagion seems, it should still be seen as a work of fiction.

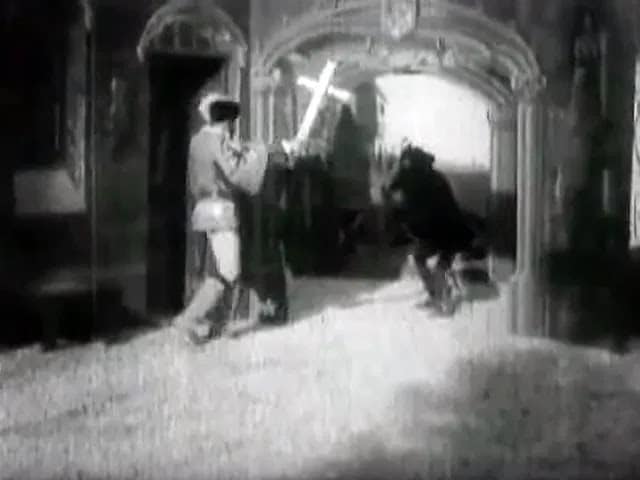
10. The Jump Cut as a Special Effect the Haunted Castle
Whether a visual effect is created by hand or with a computer, selling it needs a community. The same is true for editing as well. In some cases, the visual impression is really the cuts. The modest cut is the most basic and traditional visual effect in movie magic. The method really dates back to early filmmakers and cinematic illusionists.
Amazed by the unexpected outcome, using a cut that has been deftly snuck into a whip-pan, two shots may be combined with full-scale sets and miniatures. A progressive makeup effect, such as the notorious metamorphosis in The Haunted Castle, may likewise be covered up using cuts.
Part 3: How do We Use Jump Cuts Today?
The viewing experience is impacted differently by various editing methods. Jump cuts may be helpful for video editing in filmmaking since they highlight just the most important elements of a story while also indicating the passage of time. The jump cut is now often used in music videos, vlogs, and YouTuber material, making it a preferred option for creators of online content.
Today’s movies often use “jump cuts,” particularly as the number of horror movies produced has increased. The use of jump cuts makes the picture highly unsettling. One editing method, the jump cut, is still as effective now as it was back when pictures were stitched together and celluloid was cut with a razor blade. It is a well-liked method of video editing that is often used to indicate the passage of time, highlight an emotion, or heighten tension.
The shots did not quite run in a fluid session in the early phases of filming to provide the audience with a steady view of the screen. Instead, there were “jumps” in the movie, and the forward return was partially omitted. This “jump shot” idea may be compared to the expression. Today, however, despite all of the technological advancements we have at our disposal, movie makers and producers are attempting to recreate the look.
Part 4: Top 9 Editing Tools to Smooth Over Jump Cuts
Even more of a barrier than the difficulty of acquiring a new talent is often the expense of video editing software. Consider using free video editing software to get started if you are unsure of how to spend your money or even whether you want to.
On PC
1. Filmora Video Editor
Supported Platforms: Windows and Mac
Description: Both Windows and Mac are compatible with the app. Trimming, transitions, overlays, and other basic video editing features are available. It does not, however, include several cutting-edge capabilities, including as motion tracking and multicam. After launching the software to edit jump cuts, you may also choose the other options that best suits your requirements including the multi-layer effects and elements.

A freemium video editing program largely geared at novices is Wondershare Filmora. There are a ton of filters and over-effects included with it, and they can work true jump cut magic on your films. A considerable number of functions are available in the free edition, however; videos are exported with the Filmora watermark, which must be removed by upgrading to the pro version. A huge library of drag-and-drop transitions, effects, and titles are among the many creative tools and production elements included in the application. Another feature is an intro designer with hundreds of themes.
Free Download For Win 7 or later(64-bit)
Free Download For macOS 10.14 or later
Key Features:
- People who wish to learn jump cuts will find this extremely helpful.
- Support for 4K editing and GIFs
- Effects for camera shaking, noise reduction, and reversing the color
- Free to use elements and transitions to make jump cuts look epic.
2. Windows Movie Maker
Supported Platforms: Windows
Description: For those who want to go back to the fundamentals, Windows Video Editor, a built-in editor from Microsoft, is a useful program. It’s fantastic for quickly editing brief video footage that you need available right away. While it includes the fundamental editing capabilities like cropping, cutting, and adding text or music, Windows Video Editor is more of a picture editor. The free Video Editor program, which comes with Windows 10 and later, is useful for simple video editing.

No editor simplifies the process more, whether trimming home movies or creating YouTube videos that go popular. You won’t have any trouble using this tool, even if you’re a newbie. The user interface is quite simple to use. All the capabilities and resources you need to edit your films are easily accessible.
Pros
- Auto-movie features for cutting your video clips into bespoke lengths
- Adding music, titles, and credits is simple using the animation tab.
- portion of 3D effects with little modification
Cons
- Certain playback choices eliminate special effects.
- Jump Cuts & Picture in Picture may be challenging
- a resource-intensive program
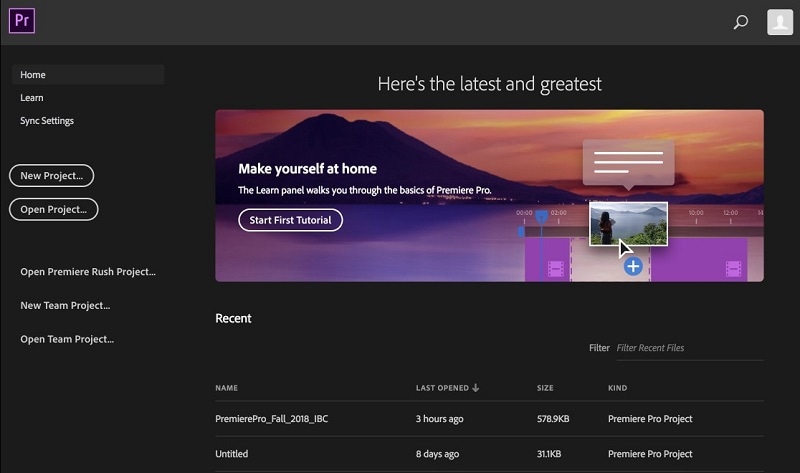
3. Adobe Premiere Pro
Supported Platforms: Windows and Mac
Description: A timeline-based video editor called Adobe Premiere Pro was created by the renowned Adobe Systems. It features a wide range of video editing tools, including the Ripple Edit, Rolling Edit, and Slip Tools. It’s a wonderful option for YouTubers because of features like Multiple Sequence Support, Multi-Camera Editing, Time Remapping, Color Correction Tools, and Audio Mixer Interface.
The program has a user-friendly interface and runs on both Windows and Mac. Its responsive user interface aids in achieving peak performance. Beginners may find working with it a bit confusing, but the good news is that there are many tutorials available. The timeline-based video editing program in the Creative Cloud is called Adobe Premiere Pro. Programs for web development and graphic design are among the other Adobe CC products. It has several fantastic capabilities, like the capacity to automatically color-correct your video, create multi-camera sequences, include audio effects, and more.
Pros
- Excellent capabilities for editing videos
- Capable of handling big tasks
- Renowned color-matching and correcting tools
Cons
- High system specifications
- Demands a pricey subscription
- If you are new to video editing, learning Premiere might be difficult.
4. VEGAS Pro
Supported Platforms: Windows
Description: Vegas Pro is a video editing program that is well-liked by seasoned video amateurs since it falls short of being professional software but isn’t the best choice for everyday users.
It provides a variety of tools and features that enable users to produce high-quality films. Vegas Pro may be difficult to learn, and it is not the most affordable video editing program. For it to function properly, a strong computer is also needed. So, Vegas Pro may not be your best choice if you don’t have a more recent PC.

Pros
- Direct YouTube upload
- Burning CD option available for films
- Color Rectification for Jump cuts
Cons
- Quite few cutting-edge features
- Outmoded UI
- Learning curve is there.
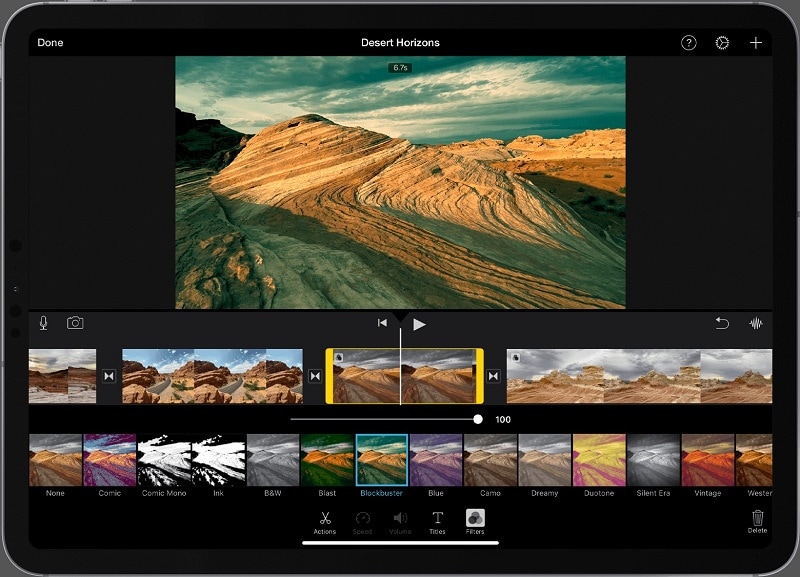
5. iMovie
Supported Platforms: Mac, iOS
Description: Apple-iOS based video editing software is available from iMovie, allowing you to begin editing on an iPhone or iPad and complete it on a Mac. iMovie is straightforward and offers a straightforward drag-and-drop interface to transfer files from your disk to your desktop, as many native Apple products do. It’s a simple approach to create effective films that can help your YouTube marketing efforts.

The basic capabilities of video editing software are included; however, the more complex functions are not very excellent. Any Mac user should check it out however since it is free. Apple makes the video editing program iMovie, which is compatible with iOS, macOS, and iPad OS devices. You may create 4K resolution videos using the program, which is free, straightforward, and simple to use.
Pros
- Choose from a variety of styles to include gorgeously animated titles and credits.
- Picture-in-picture and split-screen techniques may give your school report a broadcast vibe.
- Pick from 10 inventive video filters to give your videos a more dramatic feel.
Cons
- iMovie might be difficult to learn. Not “beginner user-friendly” is the layout.
- Due to its simplicity, iMovie cannot be considered a professional video editing program.
- Audio may sometimes spill into transitions.
6. Final Cut Pro X
Supported Platforms: Mac Only
Description: A popular editing program for GoPro footage, FINAL CUT PRO X’s desktop video editing software is offered in both a free and a paid version. Despite the free version’s fewer features, it still includes the full video editing suite, including a mask tool and chroma key functionality for green-screen video effects.

Final Cut Pro X is an effective option for small businesses and is best for clip resizing, scaling, trimming, snapping, and rotation. It also provides credit scrolling, frame stepping, time mapping, audio editing, and real-time preview. If you have the money to splash out for the full version, the suite of tools expands to include video stabilization, robust post-production effects, slideshow/presentation capabilities, 3D diagram templates, and direct social media publishing.
Pros
- picture filters that are simple to apply and resemble those on Instagram
- Masking tools for obscuring, distorting, or emphasizing certain components
- Tools for color correcting for a more professional appearance
Cons
- accessible for only one platform
- less settings for background animation
On iPhone
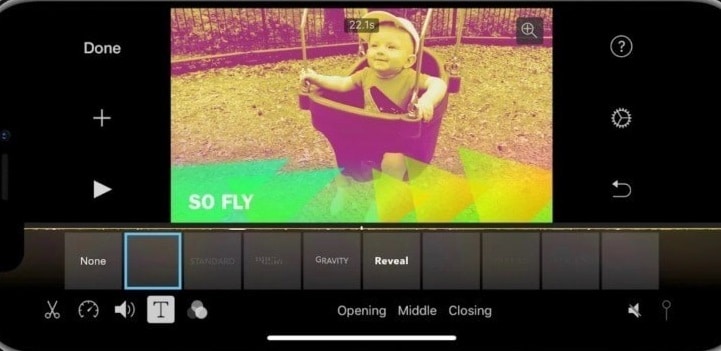
7. iMovie
With iMovie, you may work on your project interchangeably on an iPhone, iPad, or Mac thanks to the fact that data are maintained on Apple’s cloud. Additionally, iMovie is always being updated, so you can always anticipate new features and enhancements.
Key Characteristics:
- Support for 4K resolution, enabling users to produce movies with a cinematic quality
- Working on the same project from your iPad, iPhone, and Mac thanks to cloud storage
- Numerous studio-quality title animations for credits that look professional
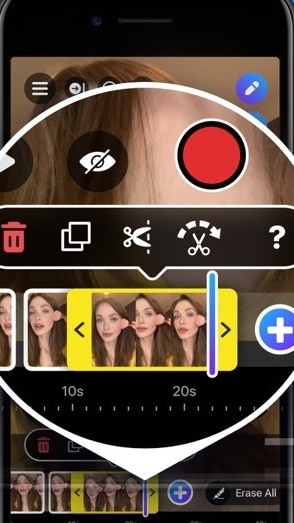
8. Jumpcut
Anyone who wants to make high-quality videos without spending any money should consider Jumpcut, which has a ton of straightforward and user-friendly features, including 3D video editing and a sound effects library, to experiment with various video compositions and styles.
You can quickly and easily export your finished video to YouTube, Facebook, Google Drive, and other mobile devices after finishing your video editing with special effects, overlays, texts, and transitions.
Key Characteristics:
- Online publishing and sharing tools for social media that allow for instant video sharing
- a sizable collection of visual effects and video transitions for customizing videos
- Tools for optimizing videos, such stabilizing
9. VlogEasy
VlogEasy is a powerful HD video and photo editor with professional features that is one of the most well-known name brands among mobile video editing apps for creators. The free version grants access to many of the features and effects, but not all, in exchange for having to view in-app advertisements.
This free video editing program offers the simplest way to edit a video; you can cut, merge, and enhance videos on any device — even on your camera or smartphone — through its non-destructive processing, and you can quickly create a high-definition video. VlogEasy is a freemium video editor with all video editing features: cut video, trim video, crop video, merge video, edit video with music, edit video for YouTube, add stickers to video, add text to video,
Key Characteristics:
- Rapid and simple video trimming and deletion
- 4K video assistance
- A variety of video features
Part 5: How is a Jump Cut Used in Social Media Videos
Jump from your lodge to the Subtropical Swimming Paradise to Archery to exploring the forest - the possibilities are endless - using the Jump Cut in social media videos, it’s a unique way to capture all those experiences for you and your family to look back on later.
Jump Cuts on TikTok
Jump cuts are quite simple to master and apply to almost all of the other transitions. After shooting your first clip, change the subject or the action in preparation for shooting your second clip. Try to keep the new action or subject in the same position. The magic will happen in the edit, when you combine the clips.
Jump Cuts on Instagram
You will need a smartphone to film your jump cut and a tool to “edit” your video to help you put it all together. Once all your video clips are in order, the next step is to cut down each video to just your jumps. You need to crop the video as you land in the location and as you jump out. You will need to use Instagram to film your separate clips on your smartphone first, then put them together in Instagram Reels.
Part 6: Creative Ways to Jump Cuts Like a Pro
Jump cuts can enhance your videos’ quality, making them worthwhile to learn for any content creator who wants to use editing as a tool rather than a barrier.
Way 1: Add shots and cutaways
When it comes to integrating jump cuts, think about immersing your audience in the story. Jump cuts are the opposite of continuity editing. instead of a seamless and immersive progression, we create something that feels less natural by chopping up a single clip. If you need even more convincing, keep in mind that boosting your content will also improve the experience of your viewers. And focusing on that will make them keep coming back to your videos for the foreseeable future.
Way 2: Intentionally Using Jump Cuts
While this editing method does serve that purpose, a good jump cut is more of a stylistic choice, and stylistic choices are what make a film stronger as long as they are planned and integrated, rather than thrown together during editing. Of course, the added benefit is that you’ll likely get some advice on other types of cuts you can use in your videos.
Free Download For macOS 10.14 or later
Key Features:
- People who wish to learn jump cuts will find this extremely helpful.
- Support for 4K editing and GIFs
- Effects for camera shaking, noise reduction, and reversing the color
- Free to use elements and transitions to make jump cuts look epic.
2. Windows Movie Maker
Supported Platforms: Windows
Description: For those who want to go back to the fundamentals, Windows Video Editor, a built-in editor from Microsoft, is a useful program. It’s fantastic for quickly editing brief video footage that you need available right away. While it includes the fundamental editing capabilities like cropping, cutting, and adding text or music, Windows Video Editor is more of a picture editor. The free Video Editor program, which comes with Windows 10 and later, is useful for simple video editing.
No editor simplifies the process more, whether trimming home movies or creating YouTube videos that go popular. You won’t have any trouble using this tool, even if you’re a newbie. The user interface is quite simple to use. All the capabilities and resources you need to edit your films are easily accessible.
Pros
- Auto-movie features for cutting your video clips into bespoke lengths
- Adding music, titles, and credits is simple using the animation tab.
- portion of 3D effects with little modification
Cons
- Certain playback choices eliminate special effects.
- Jump Cuts & Picture in Picture may be challenging
- a resource-intensive program
3. Adobe Premiere Pro
Supported Platforms: Windows and Mac
Description: A timeline-based video editor called Adobe Premiere Pro was created by the renowned Adobe Systems. It features a wide range of video editing tools, including the Ripple Edit, Rolling Edit, and Slip Tools. It’s a wonderful option for YouTubers because of features like Multiple Sequence Support, Multi-Camera Editing, Time Remapping, Color Correction Tools, and Audio Mixer Interface.
The program has a user-friendly interface and runs on both Windows and Mac. Its responsive user interface aids in achieving peak performance. Beginners may find working with it a bit confusing, but the good news is that there are many tutorials available. The timeline-based video editing program in the Creative Cloud is called Adobe Premiere Pro. Programs for web development and graphic design are among the other Adobe CC products. It has several fantastic capabilities, like the capacity to automatically color-correct your video, create multi-camera sequences, include audio effects, and more.
Pros
- Excellent capabilities for editing videos
- Capable of handling big tasks
- Renowned color-matching and correcting tools
Cons
- High system specifications
- Demands a pricey subscription
- If you are new to video editing, learning Premiere might be difficult.
4. VEGAS Pro
Supported Platforms: Windows
Description: Vegas Pro is a video editing program that is well-liked by seasoned video amateurs since it falls short of being professional software but isn’t the best choice for everyday users.
It provides a variety of tools and features that enable users to produce high-quality films. Vegas Pro may be difficult to learn, and it is not the most affordable video editing program. For it to function properly, a strong computer is also needed. So, Vegas Pro may not be your best choice if you don’t have a more recent PC.
Pros
- Direct YouTube upload
- Burning CD option available for films
- Color Rectification for Jump cuts
Cons
- Quite few cutting-edge features
- Outmoded UI
- Learning curve is there.
5. iMovie
Supported Platforms: Mac, iOS
Description: Apple-iOS based video editing software is available from iMovie, allowing you to begin editing on an iPhone or iPad and complete it on a Mac. iMovie is straightforward and offers a straightforward drag-and-drop interface to transfer files from your disk to your desktop, as many native Apple products do. It’s a simple approach to create effective films that can help your YouTube marketing efforts.
The basic capabilities of video editing software are included; however, the more complex functions are not very excellent. Any Mac user should check it out however since it is free. Apple makes the video editing program iMovie, which is compatible with iOS, macOS, and iPad OS devices. You may create 4K resolution videos using the program, which is free, straightforward, and simple to use.
Pros
- Choose from a variety of styles to include gorgeously animated titles and credits.
- Picture-in-picture and split-screen techniques may give your school report a broadcast vibe.
- Pick from 10 inventive video filters to give your videos a more dramatic feel.
Cons
- iMovie might be difficult to learn. Not “beginner user-friendly” is the layout.
- Due to its simplicity, iMovie cannot be considered a professional video editing program.
- Audio may sometimes spill into transitions.
6. Final Cut Pro X
Supported Platforms: Mac Only
Description: A popular editing program for GoPro footage, FINAL CUT PRO X’s desktop video editing software is offered in both a free and a paid version. Despite the free version’s fewer features, it still includes the full video editing suite, including a mask tool and chroma key functionality for green-screen video effects.
Final Cut Pro X is an effective option for small businesses and is best for clip resizing, scaling, trimming, snapping, and rotation. It also provides credit scrolling, frame stepping, time mapping, audio editing, and real-time preview. If you have the money to splash out for the full version, the suite of tools expands to include video stabilization, robust post-production effects, slideshow/presentation capabilities, 3D diagram templates, and direct social media publishing.
Pros
- picture filters that are simple to apply and resemble those on Instagram
- Masking tools for obscuring, distorting, or emphasizing certain components
- Tools for color correcting for a more professional appearance
Cons
- accessible for only one platform
- less settings for background animation
On iPhone
7. iMovie
With iMovie, you may work on your project interchangeably on an iPhone, iPad, or Mac thanks to the fact that data are maintained on Apple’s cloud. Additionally, iMovie is always being updated, so you can always anticipate new features and enhancements.
Key Characteristics:
- Support for 4K resolution, enabling users to produce movies with a cinematic quality
- Working on the same project from your iPad, iPhone, and Mac thanks to cloud storage
- Numerous studio-quality title animations for credits that look professional
8. Jumpcut
Anyone who wants to make high-quality videos without spending any money should consider Jumpcut, which has a ton of straightforward and user-friendly features, including 3D video editing and a sound effects library, to experiment with various video compositions and styles.
You can quickly and easily export your finished video to YouTube, Facebook, Google Drive, and other mobile devices after finishing your video editing with special effects, overlays, texts, and transitions.
Key Characteristics:
- Online publishing and sharing tools for social media that allow for instant video sharing
- a sizable collection of visual effects and video transitions for customizing videos
- Tools for optimizing videos, such stabilizing
9. VlogEasy
VlogEasy is a powerful HD video and photo editor with professional features that is one of the most well-known name brands among mobile video editing apps for creators. The free version grants access to many of the features and effects, but not all, in exchange for having to view in-app advertisements.
This free video editing program offers the simplest way to edit a video; you can cut, merge, and enhance videos on any device — even on your camera or smartphone — through its non-destructive processing, and you can quickly create a high-definition video. VlogEasy is a freemium video editor with all video editing features: cut video, trim video, crop video, merge video, edit video with music, edit video for YouTube, add stickers to video, add text to video,
Key Characteristics:
- Rapid and simple video trimming and deletion
- 4K video assistance
- A variety of video features
Part 5: How is a Jump Cut Used in Social Media Videos
Jump from your lodge to the Subtropical Swimming Paradise to Archery to exploring the forest - the possibilities are endless - using the Jump Cut in social media videos, it’s a unique way to capture all those experiences for you and your family to look back on later.
Jump Cuts on TikTok
Jump cuts are quite simple to master and apply to almost all of the other transitions. After shooting your first clip, change the subject or the action in preparation for shooting your second clip. Try to keep the new action or subject in the same position. The magic will happen in the edit, when you combine the clips.
Jump Cuts on Instagram
You will need a smartphone to film your jump cut and a tool to “edit” your video to help you put it all together. Once all your video clips are in order, the next step is to cut down each video to just your jumps. You need to crop the video as you land in the location and as you jump out. You will need to use Instagram to film your separate clips on your smartphone first, then put them together in Instagram Reels.
Part 6: Creative Ways to Jump Cuts Like a Pro
Jump cuts can enhance your videos’ quality, making them worthwhile to learn for any content creator who wants to use editing as a tool rather than a barrier.
Way 1: Add shots and cutaways
When it comes to integrating jump cuts, think about immersing your audience in the story. Jump cuts are the opposite of continuity editing. instead of a seamless and immersive progression, we create something that feels less natural by chopping up a single clip. If you need even more convincing, keep in mind that boosting your content will also improve the experience of your viewers. And focusing on that will make them keep coming back to your videos for the foreseeable future.
Way 2: Intentionally Using Jump Cuts
While this editing method does serve that purpose, a good jump cut is more of a stylistic choice, and stylistic choices are what make a film stronger as long as they are planned and integrated, rather than thrown together during editing. Of course, the added benefit is that you’ll likely get some advice on other types of cuts you can use in your videos.
5 Tips for Aquasoft Slideshow
21. 5 Tips for Aquasoft Slideshow
An easy yet powerful editor
Numerous effects to choose from
Detailed tutorials provided by the official channel
Aquasoft slideshows are one of a kind in giving a creative boost to your graphic design skills. Stay here to get a knowhow of creating one of your own!
Part 1 What’s Aquasoft Slideshow?
Bored with those customary slideshows having a graphic monotony of simple images, bland videos and ordinary effects? Perhaps it’s time to spark up your creations with some over the top design elements that keep your work out of the common realm. When looking for interesting ways to experiment with your graphic design skills, you can try hands at working with the Aquasoft slideshow to supplement your creations with that missing spunk.
Diving into some specific details of the aforesaid software application, picking the tool as your next slideshow designer entitles you with a vast canvas to explore your creative capabilities. Working with the Aquasoft slideshow creator program, you can create the most stunning and jaw dropping slideshow movies with images, videos, music and text in premium quality output to cherish your most loved moments of fun and entertainment with family and friends.
Talking of the slideshow maker’s most appealing features, there’s a really long list to mention. However, a few of the essential and commonly preferred ones are enlisted below:
● If the slideshow is set to describe your most recent holiday, the use of animated land, air and water routes, along with the most depictive satellite images and road maps with expanded zoom levels would be best in conveying the exact feel to the viewers.
● You can add life to those boring still captures with motifs and wide screen animations. If this is not enough, you can even work with creating your own animation transitions with texts, images and videos.
● The app comes with an inbuilt animation studio, where you can create and animate collages, while editing them either as a whole, or picking up one component at a time. You can further, work with any number of images and a huge library of preset design elements.
● Working with the Aquasoft slideshow program, you are given full control over the content design and placement. From short slideshow movies for family entertainment, to large slideshow presentations for professional projects, you can do it all!
● The ‘Effects Kit’ of the software is loaded with exact transitions to express your most diverse creative imagery, both for still as well as animated images and videos. Some of the best ones include, blur, masks, color corrections, sepia, soft shadow and many more.
● You can edit your images and videos in the software to give them the right shape and orientation, and work with its ‘Non-destructive Image Processing’ tool to retain the original image quality and design your own complex image effects.
● The app allows you to supplement your presentations with the subtlest and peppy background music, while having an entire control of dubbing and sound effects. You can further, add your own customized audio in the app’s timeline, like, speech dubbing.
● You can add interesting titles, subtitles, captions, etc., to your images and videos for an exact and comprehensive message delivery, while customizing them with high end text formatting options, like, font, color, size, etc.
Part 2 How Do I Make an Aquasoft Slideshow?
Having entered into the exciting world of Aquasoft slideshows and known about the latter’s creative excellence; you might obviously feel drawn towards designing an Aquasoft masterpiece of your own. Without further ado, let us dive into the step by step process of making an Aquasoft slide show in the following section:
Detailed User Guide to Create Aquasoft Slideshow
Step 1: Download the Software Program
Visit the official Aquasoft website to initiate a free download the slideshow product kit to your Windows or MacOS compatible system and proceed to install and launch the software.
Step 2: Project Selection
Launching the Aquasoft slideshow program successfully will guide you to the latter’s welcome interface, where you will have to select a new slideshow project in the 4:3 aspect ratio. Move ahead with selecting a presentation layout by navigating to the ‘View’ tab in the toolbar at the top and clicking on the ‘Layout’ option from its dropdown menu. You will also see the project ‘Timeline’ appear at this instant.
Step 3: Add Your Images
When you are done with choosing the layout, navigate to the top toolbar again and hit the ‘Add’ tab. From the dropdown that follows, click on ‘Images’ to include a photo within the presentation. You can also include a complete directory of images by selecting the ‘Directory’ option from the ‘Add’ dropdown. Your chosen images will appear in the project ‘Timeline’.
If you want to rearrange the order of the selected images, you can do so by clicking on the ‘Edit’ tab in the toolbar at the top, followed by choosing the ‘Sort’ option from the dropdown that follows next. The app sets the images in a natural logical order, while also allowing you to rearrange them manually.

Step 4: Include a Background Music
To complement your Aquasoft Slideshow Ultimate presentation with a suitable background audio, visit the top toolbar and click on the ‘Add’ tab and select ‘Background Music’ from the list of options that appears next. A series of music titles will appear as you click on the ‘+’ icon in the ‘Background Music’ interface. You are allowed to reset the order of the listed music files through a mouse click.
If you want to remove the music titles, click on the ‘Trash Bin’ icon beside the ‘+’ button. To adjust the settings of a particular music tile, click on the same and make suitable parameter adjustments. When you are satisfied with the changes, click ‘OK’. Your final selections of the background music will appear in the app’s project timeline.

Step 5: Let’s Play!
You can choose to play your slideshow at this stage with simple elements of images and music. All you need to do is, navigate to the ‘Menu Bar’ below the top toolbar and click on Play’ button. You can alternatively press the F9 key from your system’s keyboard to run the slideshow. The app works intelligently to supplement your presentation with random transition effects that play a new animation every time you run the slideshow.
If you are not satisfied with the default arrangements, you can also proceed to make adjustments in the transition play duration and even customize a transition style of your own with text and effects.

Step 6: Adjust Your Image Properties
To proceed with making adjustments to specific image characteristics, select the desired image and its properties will appear at the right side. You can now work with assigning a particular transition, comments and text to the image, while also making adjustments to the image screen time.
For adhering to the concern of adjusting the play durations of several images in a single instant, select them in the ‘Image List’ through the ‘Ctrl+ A’ command from your system’s keyboard and enter a specific play duration. Your entry will be applied to all the selected images.
You can however, escape the 2-way process by navigating to the ‘Program Settings’ tab and adjusting the pre-set image play duration. Your changes will be applicable to all the slideshow images that have their ‘Use Default Duration’ option enabled.

Step 7: Add Suitable Transitions
If the randomly included transitions of the slideshow program do not suit your presentation style, choose to add your preferred one from the software’s ‘Transition Library’ and tap the ‘Adjust’ button to customise the properties of your selection. You can also click on the ‘Play’ icon in the ‘Menu Bar’ and run the slideshow from the current image to see how the applied transition appears over the image.

Step 8: Text Customizations
Navigate to the ‘Images’ menu and hit the ‘Text’ tab to include text add-on within the slideshow images while formatting them suitably. You can further, add animations to the text and customize them to stay with or leave the text after the image play duration is over, by tapping the ‘Edit’ button. To present a combined play of text and image, while avoiding the separate text animation, click on the ‘Show Text with Image’ checkbox at the bottom right corner of the ‘Images’ menu.

Step 9: Add Comments to the Images
Navigate to the ‘Sound’ tab and enable your system’s microphone to add recorded comments to your slideshow. Start with clicking on the ‘Record’ button and narrate the comment. Don’t worry about the sync of image and comment play durations as the software program will automatically adjust both to be in line with each other.
If you are interested to add a particular sound file to a specific image, navigate to the ‘Yellow Folder’ at the top right corner to make your selection.

Step 10: Adding Effects to the Images
To complement the images of your Aquasoft Slideshow Ultimate 12 presentation with stunning images, navigate to the toolbar at the bottom of the editing workspace and click on the ‘Image Effects’ icon. To add the effect, drag it to a desired image in the project timeline. When you have reached the right place, drop the effect to apply it. To see the effect preview, navigate to the ‘Layout Designer Panel’ at the left, where you can find your image with the chosen effect.

Step 11: Collage Creation
Try hands at including a collage in your slideshow to play several numbers of images and texts within the same time frame. To do this, navigate to the ‘Object Toolbar’ at the bottom of the project timeline and select the ‘Collage’ object, followed by dragging the same to the ‘Image List’ to add the latter to your presentation. Once you are done with this, proceed to choose the desired images that you wish to add to the collage, succeeded by dragging the same to the ‘Collage’ object.
Move ahead with expanding the collage, to ensure a proper display of the images. You can further, apply selected transitions to the created collage under the latter’s ‘Object Settings’.

Step 12: Edit Your Collage
Start with selecting the first image of your collage and adjusting its size in the ‘Layout Designer’ through the position frame at the edges of the photo. Next, you can proceed with positioning the image at the desired place within the collage. Repeat the process till all the images in your collage are at their respective places and within the respective size ratio.
Move ahead with including a relevant text at the end of your collage by selecting the ‘Text’ object in the bottom toolbar. Navigate to the last image of your collage and tap on ‘Text’ object to include it within the last image. You can make suitable formatting adjustments to the added text in the ‘Text’ tab of the ‘Object Settings’. Position your text at the appropriate place within the image and check a preview of the same by clicking on the ‘Play’ button in the ‘Menu Bar’ above the project timeline.

Step 13: Including a Chapter
If you are not satisfied with a single image track, proceed to add chapters to your presentation. Start with selecting the ‘Chapter’ object from the ‘Object Toolbar’ to insert the former in the timeline, followed by dragging 2 images into the same. Tap the ‘Play’ button to open the chapter and add suitable text and animation to it in similar way as you would do for a collage. Position the images at the desired place using the red ‘Position Bar’.

Part 3 What Makes People to Uninstall Aquasoft Slideshow Premium?
Although a very reliable slideshow software program, the Aquasoft Slideshow Premium application suffers from viewer disruption and uninstallation. While there are a number of underlying reasons to the user disloyalty, it is often observed that a variety of issues are put forward post the uninstallation process. Entering into the domain, let us talk about some of the potential causes and after effects of the Aquasoft Slideshow Premium software uninstallation in the following section:
01Reasons Behind the Uninstallation of Aquasoft Slideshow Premium Software
● Compatibility Issues
Working with the aforesaid slideshow creator program tends to cause a distortion in the normalized running of the other already existing applications within your device. While some of them may encounter a temporary shutdown, others may permanently cease to operate, causing a great deal of inconvenience.
● Flawless Running Issues
When using the tool on a regular basis, you may encounter frequent and periodic software crashes, along with a complete standby of the program, prohibiting you from moving ahead with the slideshow creation process, or a flawless execution of the created slideshow presentation.
● Re-installation Cringes
The software enters into repeated installation and uninstallation cycles out of the blue, causing much inconvenience at the user’s disposal, making it a necessity to permanently get rid of the program.
● Reduced User Credibility
The software reviews often report of unsatisfied users with an unreliable working experience. If that was not enough, some of the most trusted product review websites and long term users of the program have rendered the utility to be malicious.
● Absence in Control Panel
While all your system and application software can be found on the Control Panel and Windows listings, the aforesaid slideshow creator program is an exception. This leads to the unavailability of troubleshooting methods and settings adjustments, in case the program encounters a problem while running.
● Incomplete Removal
One of the biggest glitches with the software is that you possibly can never uninstall it completely, because some of the latter’s associated processes and software file traces tend to remain forever on your system, causing interference with the working of other programs.
● Never-ending Uninstallation Process
While you may opt to take the program out of your system to get rid of the inconvenience, that too is not an easy process to say the least. The uninstallation process once initiated does not seem to reach its end to what you can call ages!
02Uninstallation Inconsistencies of Aquasoft Slideshow Premium Software
● Uninstaller Issues
Inconsistencies lie within the software itself, with its inbuilt uninstaller program refusing to work in cohesion with the assigned task. Sometimes it may refrain from opening up, while in other cases, the program comes to an unannounced run halt amid the uninstallation process.
● Issues of File Processing
The preset uninstallation package often fails to run or process a particular file which is necessary for uninstalling the program. The running process may often not initiate or stop midway, hence causing users enough discomfort to move towards getting rid of the program.
● Processing Errors
Often during the uninstallation process, you may encounter a series of processing errors leading to unsuccessful installation of most of the important files, which causes the leash over of partially deleted program files, barging your system’s memory with unusable data and irrelevant information.
● Startup Prevention
It may be a common instance to notice that the program refrains from being completely uninstalled due to some different program installed in your device. The allied program may interfere with the uninterrupted running of the Aquasoft uninstallation program.
Part 4 Tips for Aquasoft Slideshow
Aquasoft slideshows are exemplary elements in the domain of content presentation that give you the liberty to explore your editing creativity and design stunning graphic masterpieces within the quickest time span. While there are thousands of ways that you can use uplift your Aquasoft slideshows in your own unique styles, going through the following tips can be handy in adding life to your presentations:
01Use Keyframes
Take a complete control of the styles and appearance of the slideshow elements, playing to your heart’s content with effects, filters, sound, video and photographic animations to give the perfect look, sound and movements of your presentation pieces to develop a graphic work of art. The Aquasoft slideshow creator program offers a range of keyframe elements to compliment your slideshow presentations.
02Prefer Live Presentations
After you are done with creating your presentation, do take the liberty to use the ‘Live Preview’ feature of the tool to examine the exact appearance of the applied effects, transitions and filters, music and themes, color and title overlays and other elements, to ensure a precise placement of the included components.
03360 Effect Rotations
If you have worked with animated and moving elements, videos, etc., in your presentation, use the 360 rotation effect for a complete visualization of the applied effects. You can also play with the effect to present titles, images and videos in 3-dimensional space to make your slideshows stand ahead in the line of customary graphic presentations.
04Synchronize Your Audio
When adding background music to your presentations, take care to synchronize the same with the slide contents and elements. Adjust the audio settings and parameters to match the screen time and run frequencies of elements appearing in parallel. Unmatched audio is a barrier to flawless presentation, and proves to be a pivotal distraction of your audience.
05Avoid Overcrowding
When creating your slideshows, it may be a common confusion to select the perfect customization element, where most of us end up crowding the slides with a heap of components, making the presentation a messy bank of elements that often shadows the actual contents. Refine your choices to choose a maximum of 2 or 3 complementary effects that suit the theme of your slideshow.
Creating Top Rated Slideshow Presentations in Filmora
The Aquasoft slideshow creator software program is indeed a dependable tool to craft elegant slideshow presentations, however, if you are keen on searching some other reliable alternative, the Wondershare Filmora Video Editor franchise can be a smart choice. Choosing the program to create your slideshow projects, you are entitled to access a plethora of editing effects, audio and video elements, text overlays and filters, and tons of pre-set background themes and music choices to complement your creations with.
The software is additionally, free to work on, has a welcoming interface that guides you through the slideshow creation process with stepwise screen instructions and is seamlessly compatible with all of your Windows and MacOs devices.
For Win 7 or later (64-bit)
For macOS 10.12 or later
● Ending Thoughts →
● Aquasoft slideshows are a convincing means to create a buzz of your content in front of a personal as well as a professional audience.
● The Aquasoft program however, has the limitation of interfering with other system programs, leading to its uninstallation by moot users.
● Talking of the most preferable Aquasoft alternatives, Wondershare Filmora slideshow creator software can be an intelligent pick.
Aquasoft slideshows are one of a kind in giving a creative boost to your graphic design skills. Stay here to get a knowhow of creating one of your own!
Part 1 What’s Aquasoft Slideshow?
Bored with those customary slideshows having a graphic monotony of simple images, bland videos and ordinary effects? Perhaps it’s time to spark up your creations with some over the top design elements that keep your work out of the common realm. When looking for interesting ways to experiment with your graphic design skills, you can try hands at working with the Aquasoft slideshow to supplement your creations with that missing spunk.
Diving into some specific details of the aforesaid software application, picking the tool as your next slideshow designer entitles you with a vast canvas to explore your creative capabilities. Working with the Aquasoft slideshow creator program, you can create the most stunning and jaw dropping slideshow movies with images, videos, music and text in premium quality output to cherish your most loved moments of fun and entertainment with family and friends.
Talking of the slideshow maker’s most appealing features, there’s a really long list to mention. However, a few of the essential and commonly preferred ones are enlisted below:
● If the slideshow is set to describe your most recent holiday, the use of animated land, air and water routes, along with the most depictive satellite images and road maps with expanded zoom levels would be best in conveying the exact feel to the viewers.
● You can add life to those boring still captures with motifs and wide screen animations. If this is not enough, you can even work with creating your own animation transitions with texts, images and videos.
● The app comes with an inbuilt animation studio, where you can create and animate collages, while editing them either as a whole, or picking up one component at a time. You can further, work with any number of images and a huge library of preset design elements.
● Working with the Aquasoft slideshow program, you are given full control over the content design and placement. From short slideshow movies for family entertainment, to large slideshow presentations for professional projects, you can do it all!
● The ‘Effects Kit’ of the software is loaded with exact transitions to express your most diverse creative imagery, both for still as well as animated images and videos. Some of the best ones include, blur, masks, color corrections, sepia, soft shadow and many more.
● You can edit your images and videos in the software to give them the right shape and orientation, and work with its ‘Non-destructive Image Processing’ tool to retain the original image quality and design your own complex image effects.
● The app allows you to supplement your presentations with the subtlest and peppy background music, while having an entire control of dubbing and sound effects. You can further, add your own customized audio in the app’s timeline, like, speech dubbing.
● You can add interesting titles, subtitles, captions, etc., to your images and videos for an exact and comprehensive message delivery, while customizing them with high end text formatting options, like, font, color, size, etc.
Part 2 How Do I Make an Aquasoft Slideshow?
Having entered into the exciting world of Aquasoft slideshows and known about the latter’s creative excellence; you might obviously feel drawn towards designing an Aquasoft masterpiece of your own. Without further ado, let us dive into the step by step process of making an Aquasoft slide show in the following section:
Detailed User Guide to Create Aquasoft Slideshow
Step 1: Download the Software Program
Visit the official Aquasoft website to initiate a free download the slideshow product kit to your Windows or MacOS compatible system and proceed to install and launch the software.
Step 2: Project Selection
Launching the Aquasoft slideshow program successfully will guide you to the latter’s welcome interface, where you will have to select a new slideshow project in the 4:3 aspect ratio. Move ahead with selecting a presentation layout by navigating to the ‘View’ tab in the toolbar at the top and clicking on the ‘Layout’ option from its dropdown menu. You will also see the project ‘Timeline’ appear at this instant.
Step 3: Add Your Images
When you are done with choosing the layout, navigate to the top toolbar again and hit the ‘Add’ tab. From the dropdown that follows, click on ‘Images’ to include a photo within the presentation. You can also include a complete directory of images by selecting the ‘Directory’ option from the ‘Add’ dropdown. Your chosen images will appear in the project ‘Timeline’.
If you want to rearrange the order of the selected images, you can do so by clicking on the ‘Edit’ tab in the toolbar at the top, followed by choosing the ‘Sort’ option from the dropdown that follows next. The app sets the images in a natural logical order, while also allowing you to rearrange them manually.
Step 4: Include a Background Music
To complement your Aquasoft Slideshow Ultimate presentation with a suitable background audio, visit the top toolbar and click on the ‘Add’ tab and select ‘Background Music’ from the list of options that appears next. A series of music titles will appear as you click on the ‘+’ icon in the ‘Background Music’ interface. You are allowed to reset the order of the listed music files through a mouse click.
If you want to remove the music titles, click on the ‘Trash Bin’ icon beside the ‘+’ button. To adjust the settings of a particular music tile, click on the same and make suitable parameter adjustments. When you are satisfied with the changes, click ‘OK’. Your final selections of the background music will appear in the app’s project timeline.
Step 5: Let’s Play!
You can choose to play your slideshow at this stage with simple elements of images and music. All you need to do is, navigate to the ‘Menu Bar’ below the top toolbar and click on Play’ button. You can alternatively press the F9 key from your system’s keyboard to run the slideshow. The app works intelligently to supplement your presentation with random transition effects that play a new animation every time you run the slideshow.
If you are not satisfied with the default arrangements, you can also proceed to make adjustments in the transition play duration and even customize a transition style of your own with text and effects.
Step 6: Adjust Your Image Properties
To proceed with making adjustments to specific image characteristics, select the desired image and its properties will appear at the right side. You can now work with assigning a particular transition, comments and text to the image, while also making adjustments to the image screen time.
For adhering to the concern of adjusting the play durations of several images in a single instant, select them in the ‘Image List’ through the ‘Ctrl+ A’ command from your system’s keyboard and enter a specific play duration. Your entry will be applied to all the selected images.
You can however, escape the 2-way process by navigating to the ‘Program Settings’ tab and adjusting the pre-set image play duration. Your changes will be applicable to all the slideshow images that have their ‘Use Default Duration’ option enabled.
Step 7: Add Suitable Transitions
If the randomly included transitions of the slideshow program do not suit your presentation style, choose to add your preferred one from the software’s ‘Transition Library’ and tap the ‘Adjust’ button to customise the properties of your selection. You can also click on the ‘Play’ icon in the ‘Menu Bar’ and run the slideshow from the current image to see how the applied transition appears over the image.
Step 8: Text Customizations
Navigate to the ‘Images’ menu and hit the ‘Text’ tab to include text add-on within the slideshow images while formatting them suitably. You can further, add animations to the text and customize them to stay with or leave the text after the image play duration is over, by tapping the ‘Edit’ button. To present a combined play of text and image, while avoiding the separate text animation, click on the ‘Show Text with Image’ checkbox at the bottom right corner of the ‘Images’ menu.
Step 9: Add Comments to the Images
Navigate to the ‘Sound’ tab and enable your system’s microphone to add recorded comments to your slideshow. Start with clicking on the ‘Record’ button and narrate the comment. Don’t worry about the sync of image and comment play durations as the software program will automatically adjust both to be in line with each other.
If you are interested to add a particular sound file to a specific image, navigate to the ‘Yellow Folder’ at the top right corner to make your selection.
Step 10: Adding Effects to the Images
To complement the images of your Aquasoft Slideshow Ultimate 12 presentation with stunning images, navigate to the toolbar at the bottom of the editing workspace and click on the ‘Image Effects’ icon. To add the effect, drag it to a desired image in the project timeline. When you have reached the right place, drop the effect to apply it. To see the effect preview, navigate to the ‘Layout Designer Panel’ at the left, where you can find your image with the chosen effect.
Step 11: Collage Creation
Try hands at including a collage in your slideshow to play several numbers of images and texts within the same time frame. To do this, navigate to the ‘Object Toolbar’ at the bottom of the project timeline and select the ‘Collage’ object, followed by dragging the same to the ‘Image List’ to add the latter to your presentation. Once you are done with this, proceed to choose the desired images that you wish to add to the collage, succeeded by dragging the same to the ‘Collage’ object.
Move ahead with expanding the collage, to ensure a proper display of the images. You can further, apply selected transitions to the created collage under the latter’s ‘Object Settings’.
Step 12: Edit Your Collage
Start with selecting the first image of your collage and adjusting its size in the ‘Layout Designer’ through the position frame at the edges of the photo. Next, you can proceed with positioning the image at the desired place within the collage. Repeat the process till all the images in your collage are at their respective places and within the respective size ratio.
Move ahead with including a relevant text at the end of your collage by selecting the ‘Text’ object in the bottom toolbar. Navigate to the last image of your collage and tap on ‘Text’ object to include it within the last image. You can make suitable formatting adjustments to the added text in the ‘Text’ tab of the ‘Object Settings’. Position your text at the appropriate place within the image and check a preview of the same by clicking on the ‘Play’ button in the ‘Menu Bar’ above the project timeline.
Step 13: Including a Chapter
If you are not satisfied with a single image track, proceed to add chapters to your presentation. Start with selecting the ‘Chapter’ object from the ‘Object Toolbar’ to insert the former in the timeline, followed by dragging 2 images into the same. Tap the ‘Play’ button to open the chapter and add suitable text and animation to it in similar way as you would do for a collage. Position the images at the desired place using the red ‘Position Bar’.
Part 3 What Makes People to Uninstall Aquasoft Slideshow Premium?
Although a very reliable slideshow software program, the Aquasoft Slideshow Premium application suffers from viewer disruption and uninstallation. While there are a number of underlying reasons to the user disloyalty, it is often observed that a variety of issues are put forward post the uninstallation process. Entering into the domain, let us talk about some of the potential causes and after effects of the Aquasoft Slideshow Premium software uninstallation in the following section:
01Reasons Behind the Uninstallation of Aquasoft Slideshow Premium Software
● Compatibility Issues
Working with the aforesaid slideshow creator program tends to cause a distortion in the normalized running of the other already existing applications within your device. While some of them may encounter a temporary shutdown, others may permanently cease to operate, causing a great deal of inconvenience.
● Flawless Running Issues
When using the tool on a regular basis, you may encounter frequent and periodic software crashes, along with a complete standby of the program, prohibiting you from moving ahead with the slideshow creation process, or a flawless execution of the created slideshow presentation.
● Re-installation Cringes
The software enters into repeated installation and uninstallation cycles out of the blue, causing much inconvenience at the user’s disposal, making it a necessity to permanently get rid of the program.
● Reduced User Credibility
The software reviews often report of unsatisfied users with an unreliable working experience. If that was not enough, some of the most trusted product review websites and long term users of the program have rendered the utility to be malicious.
● Absence in Control Panel
While all your system and application software can be found on the Control Panel and Windows listings, the aforesaid slideshow creator program is an exception. This leads to the unavailability of troubleshooting methods and settings adjustments, in case the program encounters a problem while running.
● Incomplete Removal
One of the biggest glitches with the software is that you possibly can never uninstall it completely, because some of the latter’s associated processes and software file traces tend to remain forever on your system, causing interference with the working of other programs.
● Never-ending Uninstallation Process
While you may opt to take the program out of your system to get rid of the inconvenience, that too is not an easy process to say the least. The uninstallation process once initiated does not seem to reach its end to what you can call ages!
02Uninstallation Inconsistencies of Aquasoft Slideshow Premium Software
● Uninstaller Issues
Inconsistencies lie within the software itself, with its inbuilt uninstaller program refusing to work in cohesion with the assigned task. Sometimes it may refrain from opening up, while in other cases, the program comes to an unannounced run halt amid the uninstallation process.
● Issues of File Processing
The preset uninstallation package often fails to run or process a particular file which is necessary for uninstalling the program. The running process may often not initiate or stop midway, hence causing users enough discomfort to move towards getting rid of the program.
● Processing Errors
Often during the uninstallation process, you may encounter a series of processing errors leading to unsuccessful installation of most of the important files, which causes the leash over of partially deleted program files, barging your system’s memory with unusable data and irrelevant information.
● Startup Prevention
It may be a common instance to notice that the program refrains from being completely uninstalled due to some different program installed in your device. The allied program may interfere with the uninterrupted running of the Aquasoft uninstallation program.
Part 4 Tips for Aquasoft Slideshow
Aquasoft slideshows are exemplary elements in the domain of content presentation that give you the liberty to explore your editing creativity and design stunning graphic masterpieces within the quickest time span. While there are thousands of ways that you can use uplift your Aquasoft slideshows in your own unique styles, going through the following tips can be handy in adding life to your presentations:
01Use Keyframes
Take a complete control of the styles and appearance of the slideshow elements, playing to your heart’s content with effects, filters, sound, video and photographic animations to give the perfect look, sound and movements of your presentation pieces to develop a graphic work of art. The Aquasoft slideshow creator program offers a range of keyframe elements to compliment your slideshow presentations.
02Prefer Live Presentations
After you are done with creating your presentation, do take the liberty to use the ‘Live Preview’ feature of the tool to examine the exact appearance of the applied effects, transitions and filters, music and themes, color and title overlays and other elements, to ensure a precise placement of the included components.
03360 Effect Rotations
If you have worked with animated and moving elements, videos, etc., in your presentation, use the 360 rotation effect for a complete visualization of the applied effects. You can also play with the effect to present titles, images and videos in 3-dimensional space to make your slideshows stand ahead in the line of customary graphic presentations.
04Synchronize Your Audio
When adding background music to your presentations, take care to synchronize the same with the slide contents and elements. Adjust the audio settings and parameters to match the screen time and run frequencies of elements appearing in parallel. Unmatched audio is a barrier to flawless presentation, and proves to be a pivotal distraction of your audience.
05Avoid Overcrowding
When creating your slideshows, it may be a common confusion to select the perfect customization element, where most of us end up crowding the slides with a heap of components, making the presentation a messy bank of elements that often shadows the actual contents. Refine your choices to choose a maximum of 2 or 3 complementary effects that suit the theme of your slideshow.
Creating Top Rated Slideshow Presentations in Filmora
The Aquasoft slideshow creator software program is indeed a dependable tool to craft elegant slideshow presentations, however, if you are keen on searching some other reliable alternative, the Wondershare Filmora Video Editor franchise can be a smart choice. Choosing the program to create your slideshow projects, you are entitled to access a plethora of editing effects, audio and video elements, text overlays and filters, and tons of pre-set background themes and music choices to complement your creations with.
The software is additionally, free to work on, has a welcoming interface that guides you through the slideshow creation process with stepwise screen instructions and is seamlessly compatible with all of your Windows and MacOs devices.
For Win 7 or later (64-bit)
For macOS 10.12 or later
● Ending Thoughts →
● Aquasoft slideshows are a convincing means to create a buzz of your content in front of a personal as well as a professional audience.
● The Aquasoft program however, has the limitation of interfering with other system programs, leading to its uninstallation by moot users.
● Talking of the most preferable Aquasoft alternatives, Wondershare Filmora slideshow creator software can be an intelligent pick.
Top 10 Free Spanish Text To Speech Converter Websites
Best Text To Speech Converter and Video Editor
Filmora’s Text to Speech (TTS) function allows you to convert your text files to voiceover and bring more elements to enrich your video.
Free Download Free Download Free Download Learn More >

Text to Speech (TTS) is a technology that basically converts digital text into artificial audio. In this article, we’ll be sharing with you the 10 best Spanish text-to-speech converter websites that you can use for free. But before actually moving to the list, here is a little information on this topic.
When it comes to free text to speech converter websites, there are a lot of them on the internet but not all of them support the Spanish language as the majority of websites only support English. While creating this list of best free Spanish text to speech converter websites, we made sure to include only the trustworthy and legit sites that have positive feedback and don’t misuse your data or information because cybersecurity is a serious issue and today’s internet is full of scams and frauds. So one thing we can assure you is that all the TTS websites listed in this article are not only free but trustworthy as well.
As we all know, free stuff always comes with limitations (in most cases). However, we have tried our very best to provide you with a list of the best TTS converter websites that offer the highest benefits with the lowest limitations for free. Therefore, some websites in this list might be completely free while some might have a free plan to use but whatever they might be, know that they offer the best for something that’s free and includes support for Spanish.
1. Voicemaker.in

Basic intro: Voicemaker is a professional online Text to Speech converter that converts any text into audio using its realistic AI voices. It supports 90+ different languages along with SSML Tags and a large number of voice options for each of them. Its AI engine uses both Standard TTS and Neural TTS with the most natural-sounding voices. On top of that, they provide many adjustment options for audio like voice effects, pauses, emphasis, speed, pitch, volume, etc. also with the ‘Say as’ option. Plus, they also have advanced audio settings, and voice settings available.
Even though Voicemaker.in is not completely free as it has various pricing plans, it wouldn’t hurt to say that Voicemaker falls under the list of one of the best free Spanish Text to Speech converter websites.
Features:
- 70+ free voices including Standard & Neural TTS available across 30+ different languages including Spanish.
- Well-designed and well-optimized interface.
- Allows up to 100 Text-to-speech conversions per week in the free plan.
- Allows commercial use on sites like YouTube as long as proper credit is given.
- Supports SSML tags and neural TTS along with Standard TTS.
- Advanced options and settings for adjusting the audio along with voice effects.
- More features like Pronunciation editor, Dark mode, etc. with 50+ fresh new AI voices coming soon.
- Also has API integration facilities for developers (not free).
- No login required to try and use.
- Email support is available even for the free plan.
Cons:
- Only allows up to 250 characters per convert.
- Neural TTS is a bit more limited in the free plan.
2. Kukarella

Basic intro: Kukarella is an amazing online Text-to-Speech software that lets you easily create beautiful voiceovers with realistic AI voices. It is powered by Google, Amazon, Microsoft, and IBM which can be used both as a Text-to-voice software and an Audio-to-text software. Kukarella also provides you with the functionality to narrate books or scripts with multiple voices which is a beta feature. In terms of voices and language options, it has one of the largest libraries of around 670 voices across 100+ different languages and accents which is truly remarkable. Plus, it also has a well-designed UI with advanced features for a better experience.
Kukarella can be your best choice for converting Spanish text into speech for free as it offers a ton of features even in its free plan compared to other similar websites.
Features:
- It allows up to 3000 characters per month for text to speech conversion.
- It offers one of the largest collections of 159 free voices with many voice options for Spanish.
- Can be used for audio transcription with 7 minutes of audio transcription per month.
- It includes the Table Reads feature to narrate books or scripts using multiple voices.
- 3 free voice effects like Pitch, Pause, and Speed are included in the free plan.
- Access to Projects and Files for up to 24 hours.
Cons:
- Commercial rights are not included in the free plan, so not suitable for commercial purposes.
- Doesn’t offer any discounts for top-ups like in paid plans.
3. Texttospeech.io

Basic intro: Texttospeech.io is a free online Text To Speech converter that provides natural voices across Spanish and many other languages in real-time. It is a completely free Text to Speech converter and claims that it will always be free. It has a simple and straightforward interface with a lot of features, especially for something that’s completely free. Aside from Text to Speech, it also provides other services like PDF speaker, Image speaker, Text to MP3, RSS Reader, etc. Plus, you get even more features when you register an account for free.
Texttospeech.io is really one of the best free Spanish Text to Speech converter websites that runs with donations and advertisements. Below are the features of this wonderful TTS website:
Features:
- It has a simple and straightforward interface for easy use.
- Absolutely free website that runs with the help of donations and advertisements.
- Has a huge library of voices across many languages.
- Not only a Text to Speech converter but also a PDF speaker, Image speaker, etc.
- It reads aloud ebooks, pdfs, or any text files you upload.
- Advanced options to change the rate, pitch, speed, and volume of the voice.
- No login is required to use, but additional features available for free when you register an account.
- Also has the option to download the converted audio as mp3.
Cons:
- Has advertisements on the website.
- May not be the best option for commercial purposes
4. NaturalReader

Basic intro: NaturalReader is a free Text to Speech software that is suitable for any type of needs whether it be for personal use, reading purposes, or commercial purposes. It is one of the best and most popular text-to-speech websites available today that can generate natural-sounding voices in high quality. It also supports OCR technology which helps users to listen to text from scanned documents or images. And there’s even more to it, so NaturalReader can be one of the best choices for free Spanish Text to Speech converter website.
NaturalReader is available online and also as installable software and chrome extensions. It too has various pricing plans but below are the features of the free version of NaturalReader Online:
Features:
- Can read or convert the scanned documents or images into audios with its OCR functionality.
- It offers over 100 natural-sounding voices available in 16 different languages including Spanish to try.
- Also includes a Pronunciation editor for additional adjustments.
- Designed as a reading aid to help dyslexic readers with different viewing settings.
- Advanced editor to change the speed and volume of the audio along with options for dark mode, hotkeys, etc.
- It allows conversion up to 20 minutes per day with Premium voices in the free plan.
Cons:
- You can try premium voices but does not allow downloading them.
- Free voices are very limited.
5. TTSReader

Basic intro: TTSReader is one of the very few Text to Speech converter websites that are completely free. Well, it seems to have a commercial plan but it is still completely free for personal and general use. Not just simple text, but it can also instantly read-aloud text, pdfs & ebooks with natural-sounding voices. It is a lightweight online tool that doesn’t require creating accounts and there’s no need for any download as well. Despite being a completely free Text-to-Speech converter, it has some really great features in it. There are various options of natural-sounding voices in Spanish and different languages and accents. Plus, it also has a commercial plan that you can use to create audios for commercial purposes.
TTSReader is a limitless free online Text-to-Speech converter that you can use to convert Spanish text into audio without any worries. Following are the features of this free TTS website:
Features:
- Simple and easy-to-use interface
- Completely free for personal or general use.
- It allows you to manually add pauses and alter the speed of the voice.
- Has many options for voices including male and female, accents, and languages.
- It reads aloud ebooks, pdfs, or any text files you upload.
- Also available for mobile devices for instant access.
- Automatically remembers the preferences of the previous session and also has options for screen recording.
- Has a ‘Record Audio’ option for saving audio in webm format which is almost like downloading.
Cons:
- Has advertisements on the website.
- May not be the best option for commercial purposes
6. Murf.ai

Basic Intro: Murf.ai is a professional and advanced Text to Speech converter website that uses the latest AI and Machine Learning technologies for generating artificial voice. It is a very popular online tool that is widely known for its ability to make studio-quality voiceovers easily in minutes. Murf is mainly focused on creating realistic natural human voices with AI by getting rid of robotic and unnatural tones. And it is not just a Text to Speech converter. It can also be used for converting speech into editable text (transcription), making high-quality voiceovers for videos, generating AI video from audio, etc.
Even though Murf is free to try and use with its free plan, it also offers various pricing plans with premium features. But still, it can be considered one of the best free Text-to-Speech converters with its awesome features in the free plan:
Features:
- 10 minutes of voice generation & 10 minutes of transcription for free
- Has different functionalities aside from Text to speech conversion like transcription, making and editing voiceovers, etc.
- It offers over 120 different types of AI voices for men, and women to try.
- No login required and no credit card needed for the free plan.
- It offers the most natural-sounding AI voices in 20 different languages.
- Advanced options available like pitch adjustment, adding pauses, emphasizing specific words, speed, etc. for extra adjustments.
- Free grammar and punctuation assistants are available for correction of the text.
- Free trial allows you to render up to 10 minutes of voice from the text.
- It provides royalty-free background music to add to videos or voiceovers.
Cons:
- Does not allow downloading output audio/video, can only share with its link.
- Allows only one user without options for collaboration in the free plan.
7. Notevibes

Basic Intro: Notevibes is another free Spanish Text-to-Speech converter website on our list that can instantly convert your text into natural-sounding speech with AI. With around 221 high-quality voices and 25 different languages including the premium ones, they have a huge collection of voice options from the most popular providers like Google, Microsoft, Amazon, and IBM to choose from. Notevibes also comes with great features for additional adjustments along with a well-designed interface, so you will have an overall better experience generating voice from the text without any difficulties.
Notevibes actually is a premium Text-to-Speech software, but it also has a free version which we would say is self-sufficient with many voice options for the Spanish language.
Features:
- It allows up to 2000 characters for text to speech conversion.
- Large library of free voice options in many languages including Spanish.
- Advanced editor to add pauses in one click, change speed, and pitch, control volume, etc.
- It has a simple and straightforward interface for easy use.
- Ability to emphasize specific words along with unique options of spell-out, cardinal, ordinal, and digits.
- It grants you intellectual rights to freely use or sell voices (in some paid plans only).
- Backups are available for 14 days, so your work is safe (only for paid plans).
- Has options for adding dialogs and downloading the audio as mp3.
Cons:
- Very limited on the number of characters
- Does not provide commercial rights in the free version.
8. Wideo

Basic intro: Wideo can be the simplest Text to Speech converter website that you can use online. It is very simple and straightforward that everybody can use it without any problem. However, Wideo is originally an online video maker that helps you create promo videos, explainer videos, demo videos, presentations, etc. while text to speech conversion is another one of its functionalities. But still, it has got all the basic features that a Text to Speech converter should have. Wideo free Text to Speech software integrates with Google Text-to-Speech API, so the quality of its voices is as good as other paid software. Additionally, this free Text to Speech functionality works even better with Wideo’s video maker.
Wideo Text to Speech software is completely free to use online. It is one of the simplest websites you can use for converting Spanish text into speech for free.
Features:
- Can convert up to 2000 characters per day
- It offers a large list of voices and languages including Spanish to choose from.
- Completely free and easy-to-use Text to Speech converter.
- Professional video maker available along with TTS functionality.
- Has the ability to adjust the speed of the voice.
- It allows you to preview the audio and download it as an mp3 file for free.
- No advertisements and popups on the site and no login and credit card required.
Cons:
- Lacks some advanced text-to-speech features
- Limitations on the number of characters without any specific pricing plan to remove the restriction.
9. IBM Watson Text to Speech

Basic intro: IBM Watson Text to Speech is a popular as well as powerful online Text to Speech converter that converts text into natural-sounding speech in a variety of languages and voices. It uses the latest AI and Machine Learning technology to provide real-time speech synthesis service for multilingual natural-sounding voices. And, IBM Watson Text to Speech also allows the creation of a distinct custom AI voice for a particular brand or business. Plus, one of its strongest points is that it provides end-to-end encryption, so the data are safe and privacy is maintained.
IBM Watson Text to Speech is one of the leaders in the field of TTS with its up-to-date technologies. Despite being so advanced and professional, it is generous enough to offer a free plan ‘Lite’ with the features below:
Features:
- It offers 35 natural-sounding neural voices across 16 different languages including Spanish.
- Allows a maximum of 10,000 characters per month for conversion.
- It provides End-to-end encryption even in the free plan.
- It uses the latest AI and Machine learning technology for real-time speech synthesis.
- Professional features like the creation of custom neural voices with AI (in paid plans only)
- Advanced audio adjustment tools available along with options for downloads.
Cons:
- Not suitable for beginner and basic use.
- Cannot get started right away as it requires login and detailed information.
10. Amazon Polly

Basic intro: When it comes to a professional Text to Speech service, Amazon Polly is always on the list. But it is not just advanced and professional, it is also a free Text to Speech converter that you can use to turn text into life-like speech, create applications that talk, etc. Amazon Polly is a cloud-based service by Amazon that uses deep learning technologies and AI technology to synthesize realistic human speech in dozens of voices across many different languages. It offers Neural Text-to-Speech voices in addition to Standard TTS voices that deliver advanced improvements in speech quality through a new machine learning approach. Plus, one of the unique features of Amazon Polly is that it lets you create a custom AI voice for the brand or organization.
Amazon Polly is an advanced text-to-speech service that is almost always up to date with the latest technology. Despite that, it does offer a free plan to try Amazon Polly with its AWS Free Tier.
Features:
- Ability to stream audio in real-time or store & redistribute speech.
- Customisation & control options available for speech output.
- It offers 5 million characters free per month for 12 months with the AWS Free Tier.
- It provides one of the most realistic and natural-sounding voices with its latest technology.
- A large number of voice options are available across a broad set of languages including Spanish.
- Supports API integration for applications or any products.
- It can create a custom voice for the exclusive use of your organization.
Cons:
- Not suitable for beginner and basic use.
- Cannot get started right away as it requires login and detailed information.
Conclusion
Above are the 10 best Spanish Text to Speech converter websites that lets you convert text into audio for free. As you might have already noticed, this article also contains some websites that are not completely free but offer a free plan. We could have managed to research a list of all completely free TTS converter websites but we believe these websites offer even greater value in their free version than the completely free ones. Also, each TTS converter in this list can be used for a specific purpose. For example, NaturalReader might be the best choice for listening to text from documents, texttospeech.io for personal use while Murf.ai can be used to learn about new AI TTS technologies.
Therefore, its upto you to decide what you want to use. This is our collection of 10 Best Free Spanish Text to Speech Converter Websites and we hope that this will be helpful to you.
Text to Speech (TTS) is a technology that basically converts digital text into artificial audio. In this article, we’ll be sharing with you the 10 best Spanish text-to-speech converter websites that you can use for free. But before actually moving to the list, here is a little information on this topic.
When it comes to free text to speech converter websites, there are a lot of them on the internet but not all of them support the Spanish language as the majority of websites only support English. While creating this list of best free Spanish text to speech converter websites, we made sure to include only the trustworthy and legit sites that have positive feedback and don’t misuse your data or information because cybersecurity is a serious issue and today’s internet is full of scams and frauds. So one thing we can assure you is that all the TTS websites listed in this article are not only free but trustworthy as well.
As we all know, free stuff always comes with limitations (in most cases). However, we have tried our very best to provide you with a list of the best TTS converter websites that offer the highest benefits with the lowest limitations for free. Therefore, some websites in this list might be completely free while some might have a free plan to use but whatever they might be, know that they offer the best for something that’s free and includes support for Spanish.
1. Voicemaker.in
Basic intro: Voicemaker is a professional online Text to Speech converter that converts any text into audio using its realistic AI voices. It supports 90+ different languages along with SSML Tags and a large number of voice options for each of them. Its AI engine uses both Standard TTS and Neural TTS with the most natural-sounding voices. On top of that, they provide many adjustment options for audio like voice effects, pauses, emphasis, speed, pitch, volume, etc. also with the ‘Say as’ option. Plus, they also have advanced audio settings, and voice settings available.
Even though Voicemaker.in is not completely free as it has various pricing plans, it wouldn’t hurt to say that Voicemaker falls under the list of one of the best free Spanish Text to Speech converter websites.
Features:
- 70+ free voices including Standard & Neural TTS available across 30+ different languages including Spanish.
- Well-designed and well-optimized interface.
- Allows up to 100 Text-to-speech conversions per week in the free plan.
- Allows commercial use on sites like YouTube as long as proper credit is given.
- Supports SSML tags and neural TTS along with Standard TTS.
- Advanced options and settings for adjusting the audio along with voice effects.
- More features like Pronunciation editor, Dark mode, etc. with 50+ fresh new AI voices coming soon.
- Also has API integration facilities for developers (not free).
- No login required to try and use.
- Email support is available even for the free plan.
Cons:
- Only allows up to 250 characters per convert.
- Neural TTS is a bit more limited in the free plan.
2. Kukarella
Basic intro: Kukarella is an amazing online Text-to-Speech software that lets you easily create beautiful voiceovers with realistic AI voices. It is powered by Google, Amazon, Microsoft, and IBM which can be used both as a Text-to-voice software and an Audio-to-text software. Kukarella also provides you with the functionality to narrate books or scripts with multiple voices which is a beta feature. In terms of voices and language options, it has one of the largest libraries of around 670 voices across 100+ different languages and accents which is truly remarkable. Plus, it also has a well-designed UI with advanced features for a better experience.
Kukarella can be your best choice for converting Spanish text into speech for free as it offers a ton of features even in its free plan compared to other similar websites.
Features:
- It allows up to 3000 characters per month for text to speech conversion.
- It offers one of the largest collections of 159 free voices with many voice options for Spanish.
- Can be used for audio transcription with 7 minutes of audio transcription per month.
- It includes the Table Reads feature to narrate books or scripts using multiple voices.
- 3 free voice effects like Pitch, Pause, and Speed are included in the free plan.
- Access to Projects and Files for up to 24 hours.
Cons:
- Commercial rights are not included in the free plan, so not suitable for commercial purposes.
- Doesn’t offer any discounts for top-ups like in paid plans.
3. Texttospeech.io
Basic intro: Texttospeech.io is a free online Text To Speech converter that provides natural voices across Spanish and many other languages in real-time. It is a completely free Text to Speech converter and claims that it will always be free. It has a simple and straightforward interface with a lot of features, especially for something that’s completely free. Aside from Text to Speech, it also provides other services like PDF speaker, Image speaker, Text to MP3, RSS Reader, etc. Plus, you get even more features when you register an account for free.
Texttospeech.io is really one of the best free Spanish Text to Speech converter websites that runs with donations and advertisements. Below are the features of this wonderful TTS website:
Features:
- It has a simple and straightforward interface for easy use.
- Absolutely free website that runs with the help of donations and advertisements.
- Has a huge library of voices across many languages.
- Not only a Text to Speech converter but also a PDF speaker, Image speaker, etc.
- It reads aloud ebooks, pdfs, or any text files you upload.
- Advanced options to change the rate, pitch, speed, and volume of the voice.
- No login is required to use, but additional features available for free when you register an account.
- Also has the option to download the converted audio as mp3.
Cons:
- Has advertisements on the website.
- May not be the best option for commercial purposes
4. NaturalReader
Basic intro: NaturalReader is a free Text to Speech software that is suitable for any type of needs whether it be for personal use, reading purposes, or commercial purposes. It is one of the best and most popular text-to-speech websites available today that can generate natural-sounding voices in high quality. It also supports OCR technology which helps users to listen to text from scanned documents or images. And there’s even more to it, so NaturalReader can be one of the best choices for free Spanish Text to Speech converter website.
NaturalReader is available online and also as installable software and chrome extensions. It too has various pricing plans but below are the features of the free version of NaturalReader Online:
Features:
- Can read or convert the scanned documents or images into audios with its OCR functionality.
- It offers over 100 natural-sounding voices available in 16 different languages including Spanish to try.
- Also includes a Pronunciation editor for additional adjustments.
- Designed as a reading aid to help dyslexic readers with different viewing settings.
- Advanced editor to change the speed and volume of the audio along with options for dark mode, hotkeys, etc.
- It allows conversion up to 20 minutes per day with Premium voices in the free plan.
Cons:
- You can try premium voices but does not allow downloading them.
- Free voices are very limited.
5. TTSReader
Basic intro: TTSReader is one of the very few Text to Speech converter websites that are completely free. Well, it seems to have a commercial plan but it is still completely free for personal and general use. Not just simple text, but it can also instantly read-aloud text, pdfs & ebooks with natural-sounding voices. It is a lightweight online tool that doesn’t require creating accounts and there’s no need for any download as well. Despite being a completely free Text-to-Speech converter, it has some really great features in it. There are various options of natural-sounding voices in Spanish and different languages and accents. Plus, it also has a commercial plan that you can use to create audios for commercial purposes.
TTSReader is a limitless free online Text-to-Speech converter that you can use to convert Spanish text into audio without any worries. Following are the features of this free TTS website:
Features:
- Simple and easy-to-use interface
- Completely free for personal or general use.
- It allows you to manually add pauses and alter the speed of the voice.
- Has many options for voices including male and female, accents, and languages.
- It reads aloud ebooks, pdfs, or any text files you upload.
- Also available for mobile devices for instant access.
- Automatically remembers the preferences of the previous session and also has options for screen recording.
- Has a ‘Record Audio’ option for saving audio in webm format which is almost like downloading.
Cons:
- Has advertisements on the website.
- May not be the best option for commercial purposes
6. Murf.ai
Basic Intro: Murf.ai is a professional and advanced Text to Speech converter website that uses the latest AI and Machine Learning technologies for generating artificial voice. It is a very popular online tool that is widely known for its ability to make studio-quality voiceovers easily in minutes. Murf is mainly focused on creating realistic natural human voices with AI by getting rid of robotic and unnatural tones. And it is not just a Text to Speech converter. It can also be used for converting speech into editable text (transcription), making high-quality voiceovers for videos, generating AI video from audio, etc.
Even though Murf is free to try and use with its free plan, it also offers various pricing plans with premium features. But still, it can be considered one of the best free Text-to-Speech converters with its awesome features in the free plan:
Features:
- 10 minutes of voice generation & 10 minutes of transcription for free
- Has different functionalities aside from Text to speech conversion like transcription, making and editing voiceovers, etc.
- It offers over 120 different types of AI voices for men, and women to try.
- No login required and no credit card needed for the free plan.
- It offers the most natural-sounding AI voices in 20 different languages.
- Advanced options available like pitch adjustment, adding pauses, emphasizing specific words, speed, etc. for extra adjustments.
- Free grammar and punctuation assistants are available for correction of the text.
- Free trial allows you to render up to 10 minutes of voice from the text.
- It provides royalty-free background music to add to videos or voiceovers.
Cons:
- Does not allow downloading output audio/video, can only share with its link.
- Allows only one user without options for collaboration in the free plan.
7. Notevibes
Basic Intro: Notevibes is another free Spanish Text-to-Speech converter website on our list that can instantly convert your text into natural-sounding speech with AI. With around 221 high-quality voices and 25 different languages including the premium ones, they have a huge collection of voice options from the most popular providers like Google, Microsoft, Amazon, and IBM to choose from. Notevibes also comes with great features for additional adjustments along with a well-designed interface, so you will have an overall better experience generating voice from the text without any difficulties.
Notevibes actually is a premium Text-to-Speech software, but it also has a free version which we would say is self-sufficient with many voice options for the Spanish language.
Features:
- It allows up to 2000 characters for text to speech conversion.
- Large library of free voice options in many languages including Spanish.
- Advanced editor to add pauses in one click, change speed, and pitch, control volume, etc.
- It has a simple and straightforward interface for easy use.
- Ability to emphasize specific words along with unique options of spell-out, cardinal, ordinal, and digits.
- It grants you intellectual rights to freely use or sell voices (in some paid plans only).
- Backups are available for 14 days, so your work is safe (only for paid plans).
- Has options for adding dialogs and downloading the audio as mp3.
Cons:
- Very limited on the number of characters
- Does not provide commercial rights in the free version.
8. Wideo
Basic intro: Wideo can be the simplest Text to Speech converter website that you can use online. It is very simple and straightforward that everybody can use it without any problem. However, Wideo is originally an online video maker that helps you create promo videos, explainer videos, demo videos, presentations, etc. while text to speech conversion is another one of its functionalities. But still, it has got all the basic features that a Text to Speech converter should have. Wideo free Text to Speech software integrates with Google Text-to-Speech API, so the quality of its voices is as good as other paid software. Additionally, this free Text to Speech functionality works even better with Wideo’s video maker.
Wideo Text to Speech software is completely free to use online. It is one of the simplest websites you can use for converting Spanish text into speech for free.
Features:
- Can convert up to 2000 characters per day
- It offers a large list of voices and languages including Spanish to choose from.
- Completely free and easy-to-use Text to Speech converter.
- Professional video maker available along with TTS functionality.
- Has the ability to adjust the speed of the voice.
- It allows you to preview the audio and download it as an mp3 file for free.
- No advertisements and popups on the site and no login and credit card required.
Cons:
- Lacks some advanced text-to-speech features
- Limitations on the number of characters without any specific pricing plan to remove the restriction.
9. IBM Watson Text to Speech
Basic intro: IBM Watson Text to Speech is a popular as well as powerful online Text to Speech converter that converts text into natural-sounding speech in a variety of languages and voices. It uses the latest AI and Machine Learning technology to provide real-time speech synthesis service for multilingual natural-sounding voices. And, IBM Watson Text to Speech also allows the creation of a distinct custom AI voice for a particular brand or business. Plus, one of its strongest points is that it provides end-to-end encryption, so the data are safe and privacy is maintained.
IBM Watson Text to Speech is one of the leaders in the field of TTS with its up-to-date technologies. Despite being so advanced and professional, it is generous enough to offer a free plan ‘Lite’ with the features below:
Features:
- It offers 35 natural-sounding neural voices across 16 different languages including Spanish.
- Allows a maximum of 10,000 characters per month for conversion.
- It provides End-to-end encryption even in the free plan.
- It uses the latest AI and Machine learning technology for real-time speech synthesis.
- Professional features like the creation of custom neural voices with AI (in paid plans only)
- Advanced audio adjustment tools available along with options for downloads.
Cons:
- Not suitable for beginner and basic use.
- Cannot get started right away as it requires login and detailed information.
10. Amazon Polly
Basic intro: When it comes to a professional Text to Speech service, Amazon Polly is always on the list. But it is not just advanced and professional, it is also a free Text to Speech converter that you can use to turn text into life-like speech, create applications that talk, etc. Amazon Polly is a cloud-based service by Amazon that uses deep learning technologies and AI technology to synthesize realistic human speech in dozens of voices across many different languages. It offers Neural Text-to-Speech voices in addition to Standard TTS voices that deliver advanced improvements in speech quality through a new machine learning approach. Plus, one of the unique features of Amazon Polly is that it lets you create a custom AI voice for the brand or organization.
Amazon Polly is an advanced text-to-speech service that is almost always up to date with the latest technology. Despite that, it does offer a free plan to try Amazon Polly with its AWS Free Tier.
Features:
- Ability to stream audio in real-time or store & redistribute speech.
- Customisation & control options available for speech output.
- It offers 5 million characters free per month for 12 months with the AWS Free Tier.
- It provides one of the most realistic and natural-sounding voices with its latest technology.
- A large number of voice options are available across a broad set of languages including Spanish.
- Supports API integration for applications or any products.
- It can create a custom voice for the exclusive use of your organization.
Cons:
- Not suitable for beginner and basic use.
- Cannot get started right away as it requires login and detailed information.
Conclusion
Above are the 10 best Spanish Text to Speech converter websites that lets you convert text into audio for free. As you might have already noticed, this article also contains some websites that are not completely free but offer a free plan. We could have managed to research a list of all completely free TTS converter websites but we believe these websites offer even greater value in their free version than the completely free ones. Also, each TTS converter in this list can be used for a specific purpose. For example, NaturalReader might be the best choice for listening to text from documents, texttospeech.io for personal use while Murf.ai can be used to learn about new AI TTS technologies.
Therefore, its upto you to decide what you want to use. This is our collection of 10 Best Free Spanish Text to Speech Converter Websites and we hope that this will be helpful to you.
Also read:
- In 2024, If You Are a Marketer Who Want to Create Facebook Ads to Boost Your Business, You Are Coming to the Right Place. Well Share You some Useful Tips to Start Your First FB Ads Campaign
- In 2024, List of Supported iPhone Video Formats and Best iPhone Video Editor
- New 10 Innovative AR Teaching Examples to Tell You What Is AR in Teaching for 2024
- New In 2024, Ways to Make Canva Collages
- Updated In 2024, 8 Top Premiere Pro Slideshow Templates
- Updated In 2024, This Article Introduces How Sheila Become a Youtuber and How She Started Video Editing
- 2024 Approved Create Risograph Effect In Photoshop A Beginners Guide
- New Wondering if You Can Make DIY Green Screen Video for Streaming? Learn the Easy Steps to Setup DIY Green Screen, Shoot the Video and Edit It Out to Add Green Screen Effects for 2024
- 2024 Approved How to Record Video Streams With FFmpeg on Windows and Mac?
- New Your Search for the Best GIF Creator Tools Ends Here for 2024
- Do You Want a LUT that You Can Use for Your High-Definition Content? You Can Use Rec 709 LUT Premiere Pro for Your HD Digital Media to Give the Perfect Result for 2024
- Updated In 2024, Learn How to Create Inspiring Motivational Videos Using AI. Explore Tools Like Midjourney, Runway Gen2, Chat-GPT, and Filmora AI for Seamless Content Creation. Start Your Journey
- New 2024 Approved How to Create a Clideo Slideshow
- How to Create a Special Animated Transition in Filmora in Just 2 Minutes. This Simple Step-by-Step Guide Will Show You the Easy Way for 2024
- It Is Crucial to Introduce Your Kids to the Different Colors and Practice the Color Matching Game. So, Here Are the Various Factors Related to Color Matching for Your Child with a Tool to Help You in It Ideally for 2024
- Updated 2024 Approved Easily Combine Videos and Audios with 5 Simple Online Tools
- In 2024, 3 Best Effects to Appear on Camera
- Updated Shotcut Review – Is It The Best Free Video Editor?
- New The Best Peter McKinnon LUTs for Perfect Video Editing for 2024
- New 2024 Approved Top 9 Sparkle Effects Photo and Video Editors You Should Know
- New In 2024, Guide to Make Timelapse Video with iMovie
- New How to Create Cooking Video Intro and Outro for YouTube Channel for 2024
- New Hey! Are You Looking for Video Reverse Effects in Your Videos? Then, You Are at the Right Place. This Article Will Guide You in Creating a Video Reverse Effect
- New In 2024, Have You Ever Tried DaVinci Resolve for Creating a Motion Blur Effect? Read This Article to Discover How to Use DaVinci Resolve Motion Blur with the Help of Detailed Instructions
- Best Animated Text Generator for 2024
- Updated How to Merge FLV Files Windows, Mac,Android, iPhone & Online for 2024
- The Ultimate Guide to Make a Text Collage for 2024
- 2024 Approved Splitting Video in VSDC Step by Step
- Updated How to Choose A Nice GoPro for Vlogging?
- Updated How to Use Lumetri Color in Adobe After Effects for 2024
- In 2024, This Article Describes Different Ways for Removing Gif Backgrounds, How We Can Use Them, and How This Way Differs From One Another
- In 2024, 3 Methods to Combine 2 or 3 Videos Into 1
- New MP3 Cutter Download for Computer and Mobile
- 2024 Approved Are You Working on Editing a Video and Youd Like to Add Text to It? Learn the Various Ways that You Can Add Text to a Video
- Updated 2024 Approved 3 Methods to Combine 2 or 3 Videos Into 1
- Updated 2024 Approved Top 5 Solutions on How to Add Emojis to iPhone
- Updated 2024 Approved How to Add the Popular Video Text Effects to Your Video?
- New In 2024, Here, You Will Learn How to Add a Realistic Fire Effect Using Wondershare Filmora. That Will Help to Boost Your Channel and Decorate Your YouTube Channel with Creative and Unique Effects
- Updated In 2024, Convert MP4 to 60 FPS GIF A Step-by-Step Guide
- Updated A Detailed Guide to Do Color Correction in OBS
- Learn How to Easily Concatenate Videos Using FFmpeg in This Step-by-Step Guide. From Installation to Execution, We Cover It All to Streamline Your Video Editing Process
- How to Downgrade iPhone 12 Pro without Losing Anything? | Dr.fone
- Here are Some Pro Tips for Pokemon Go PvP Battles On Motorola G54 5G | Dr.fone
- Updated Best 12 AI Voice Cloning Tools Online & Offline for 2024
- 3 Solutions to Hard Reset Samsung Galaxy F54 5G Phone Using PC | Dr.fone
- In 2024, Detailed guide of ispoofer for pogo installation On Vivo Y100A | Dr.fone
- 3 Effective Methods to Fake GPS location on Android For your Vivo X100 Pro | Dr.fone
- What are Location Permissions Life360 On Tecno Spark 10 5G? | Dr.fone
- How To Transfer WhatsApp From iPhone X to other iPhone 14 devices? | Dr.fone
- How to install and update device drivers manually in Windows 11 & 10 & 7
- Prevent Cross-Site Tracking on Nokia G42 5G and Browser | Dr.fone
- In 2024, How to use Snapchat Location Spoofer to Protect Your Privacy On Apple iPhone 15? | Dr.fone
- How to Rescue Lost Music from Nubia Z50 Ultra
- In 2024, Sim Unlock Oppo A59 5G Phones without Code 2 Ways to Remove Android Sim Lock
- New Guide How To Check iCloud Activation Lock Status On Your iPhone 11
- In 2024, Top 10 Password Cracking Tools For Samsung Galaxy M14 5G
- Complete guide for recovering pictures files on Y36.
- Mastering Android Device Manager The Ultimate Guide to Unlocking Your Vivo V27e Device
- A Quick Guide to Vivo S17 Pro FRP Bypass Instantly
- 10 Fake GPS Location Apps on Android Of your Oppo A56s 5G | Dr.fone
- How To Restore Missing Pictures Files from Z50S Pro.
- How to Bypass FRP from Oppo A1x 5G?
- How to Transfer Data from Xiaomi Redmi Note 12R to Other Android Devices? | Dr.fone
- In 2024, How to Unlock iPhone 13 Pro without Passcode or Face ID | Dr.fone
- In 2024, How To Fix Apple iPhone 15 Pro Unavailable Issue With Ease
- A Detailed Guide on Faking Your Location in Mozilla Firefox On Motorola Defy 2 | Dr.fone
- In 2024, Why Your WhatsApp Location is Not Updating and How to Fix On Samsung Galaxy F04 | Dr.fone
- Device unlock Ace 2
- Top IMEI Unlokers for Your Lava Blaze Curve 5G Phone
- All About Factory Reset, What Is It and What It Does to Your Honor X50? | Dr.fone
- Title: Doable Ways to Create Transparent Background in Procreate for 2024
- Author: Morgan
- Created at : 2024-05-19 05:12:13
- Updated at : 2024-05-20 05:12:13
- Link: https://ai-video-editing.techidaily.com/doable-ways-to-create-transparent-background-in-procreate-for-2024/
- License: This work is licensed under CC BY-NC-SA 4.0.
