
Easily Combine Videos and Audios with 5 Simple Online Tools

Easily Combine Videos and Audios with 5 Simple Online Tools
When it comes to creating multimedia content, merging videos and audio can be a tricky task. But with the right tools, it can be a breeze. In this article, we will share the top 5 online tools for merging videos and audio quickly and easily.
These tools will streamline your editing process and help you create seamless multimedia content that will captivate your audience. Whether you are a professional video editor or just someone looking to create a personal video, these tools will come in handy. These tools have something for everyone, from basic editing features to advanced ones. So, let’s dive in and look at the best tools to merge videos and audio online.
- Merge Audio and Video Online Using Media.io for FREE
- Merge Audio and Video Online Without Watermark in 123APPS
- Mix Audio With Video Online in Clideo
- Veed.io Video Audio Merger Online
- Combine Video and Audio Online With FlexClip
- Join Video and Audio Online or Offline? Which To Choose?
- [Bonus] Merge Audio and Video Offline With Wondershare Filmora
5 Tools To Merge Video and Audio Online
There are a plethora of online tools available for merging videos and audio. However, not all tools are created equal. We have rounded up the top 5 online tools that are user-friendly, reliable, and efficient.
These tools will make it easy to merge your videos and audio and offer a range of features to help you create professional-looking multimedia content. Whether you are a beginner or an experienced video editor, these tools will help you finish the job in no time. So, without further ado, let’s look at the top 5 online tools for merging videos and audio online.
1. Merge Audio and Video Online Using Media.io for FREE

Ratings from G2: 4.5 out of 5
Pricing:
- Free - $0
- Basic - $3.95 / monthly
- Pro - $6.66 / annually
Sound is crucial in videos as it can enhance engagement, replace poor narration, and promote music videos. Use Media.io Online Video Editor to add music to videos for free easily. It’s a user-friendly program with multitrack timeline editing for all formats, allowing for adjustments such as trimming, splitting, fade effects, texts, elements, and picture overlays. Importantly, it doesn’t leave watermarks on your videos.
Pros
- Fast compression speeds
- No file limits
- No watermarks
- Smart output settings
Cons
- Lacks some advanced functionality
Here’s how to merge audio and video using Media.io:
Step1 Begin by opening Media.io Online Video Editor and uploading your video and audio files.

Step2 Improve the background audio by editing it with options such as trimming, splitting, copying, and deleting.
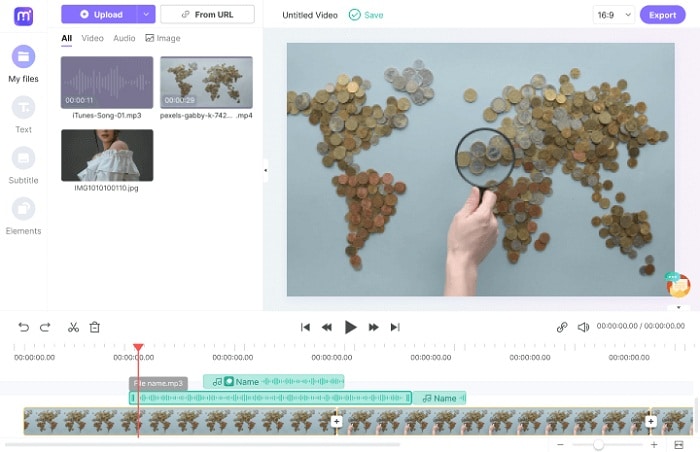
Step3 Adjust the aspect ratio, export the video, name the file, choose the resolution quality, then it’s finished.

You can learn more details about how to add audio to a video and how to edit videos using Media.io with the video below:
2. Merge Audio and Video Online Without Watermark in 123APPS

Ratings from G2: No rating yet
Pricing:
- Free
Add music to videos and easily edit using this powerful video editing platform. Publish videos with background audio of your choice, free and high-quality, without the need for downloads, software, or browser extensions. User-friendly interface, no learning curve, and works on any device, including Mac, PC, and mobile. The platform supports various file formats, including MP4, MOV, AVI, and WMV for video and MP3, WAV, and OGG for audio.
Pros
- Free and easy to use
- Multiple functions provided
Cons
- Lacks some advanced functionality
- Too basic for video cutting
Here’s how to merge audio and video using 123APPS:
Step1 Go to 123APPS and select “Video Tools“ > “Add Audio to Video.”
Step2 Upload the video and audio
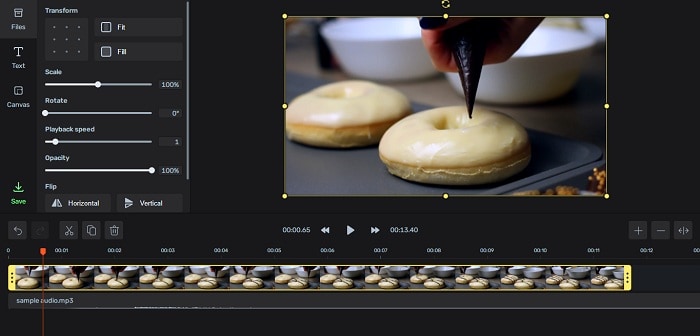
Step3 Use the “Sound“ option to crop and adjust the audio volume
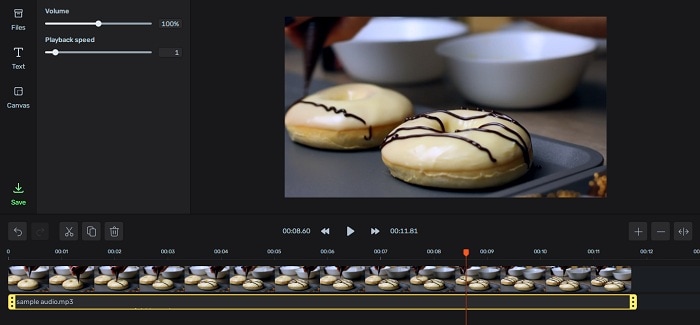
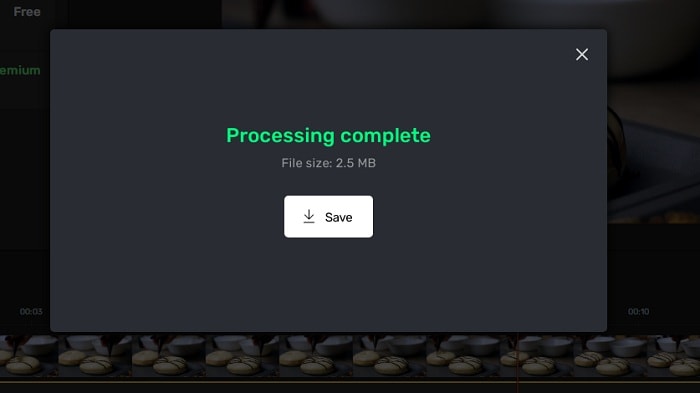
Step4 Select the output video format and download the final video with audio included.
3. Mix Audio With Video Online in Clideo
Ratings from G2: 4.8 out of 5
Pricing:
- Free - $0 with a watermark
- Monthly - $9.00
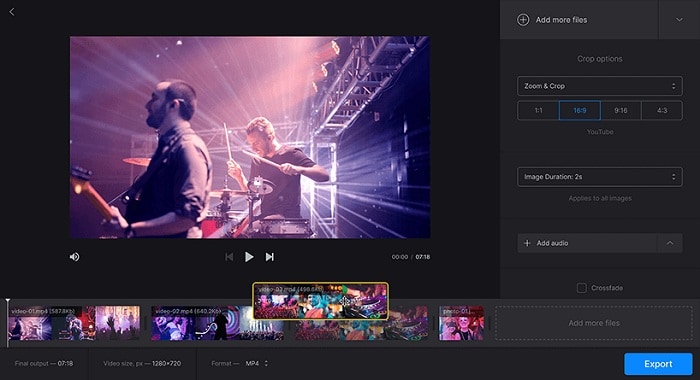
Clideo is a free, easy-to-use, browser-based video merging tool by Softo. It supports almost all video formats and allows you to add borders, choose aspect ratio templates or crop the video, apply transition effects, and add music. You can import multiple videos and arrange them in your desired order with drag and drop.
Pros
- Free to use with unlimited videos
- Easy to use
- Supports multiple video formats
Cons
- Lack of themes and design elements
Here’s how to merge audio and video using Clideo:
Step1 Go to Clideo’s page to add music to videos.
Step2 Drag and drop a video from your computer to access the editor.
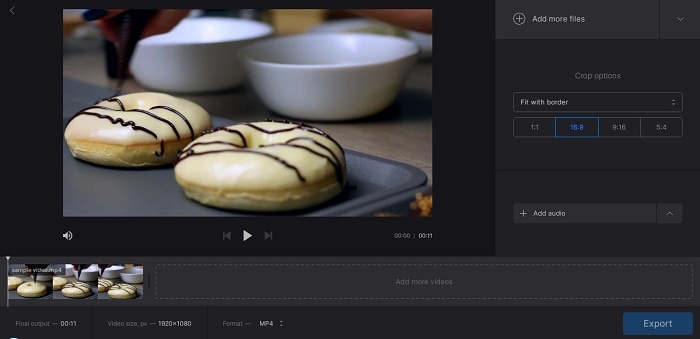
Step3 Add the audio file and sync it with the video.
Step4 Select “Export“ and wait for it to finish, then download the final video.

4. Veed.io Video Audio Merger Online

Ratings from G2: 4.2 out of 5
Pricing:
- Free - $0
- Monthly - $12.00
VEED is a versatile video editor that makes it simple to merge, join, and combine various media files online. Whether using a Windows, Mac, or mobile device, you can easily cut, trim, and arrange multiple video clips into one file on a user-friendly timeline. You can also add audio, image files, and subtitles with a single click.
Compatible with all browsers and versions, VEED supports all file formats and allows you to upload multiple file types, arrange your video tracks, and export as one file. With VEED, you can easily create a seamless Instagram Story or YouTube Ad and even resize your clips in one click.
Pros
- Attractive and well-organized layout
- Compatible with all devices, including smartphones
- Simple and easy to begin using
Cons
- Cannot specify precise starting and ending times for video cuts
- The free version includes watermarks on output videos
- Limited to videos shorter than 10 minutes and 250 MB in size
Here’s how to merge audio and video using VEED:
Step1 Go to VEED’s website and upload your video files and audio.
Step2 Use the cutter/splitter tool to trim any file ends as needed.
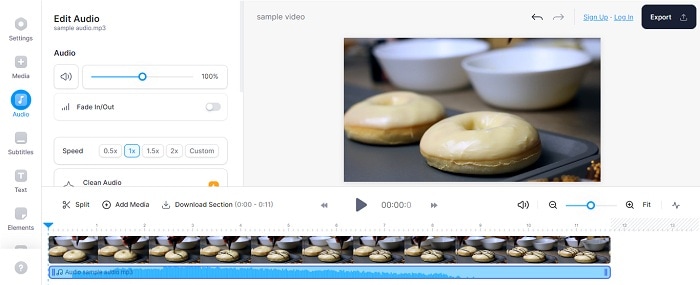
Step3 Click the “Export“ button to merge the files into a single video. Download the newly created merged video file.

5. Combine Video and Audio Online With FlexClip

Ratings from G2: 4.0 out of 5
Pricing:
- Free - $0
- Basic - $9.99 per month
- Plus - $19.99 per month
- Business - $29.99 per month
FlexClip’s online audio and video merger is a simple solution for combining audio and video files. The process is as easy as uploading your video and audio files and then syncing them by adjusting the slider. The entire process takes just a few minutes, and there is no loss in video or audio quality, nor will a watermark be added to the output.
Once you have successfully merged your audio and video, you can easily share the video to YouTube or download it to your computer with just one click. It’s an efficient and effective way to merge audio and video.
Pros
- The stock library is royalty-free and allows for the monetization of projects without copyright restrictions
- The user interface is simple and easy to navigate
- The pricing is reasonable compared to other professional video editors
Cons
- The features are more basic compared to other professional video editors
- The video converter has limited output format options
Here’s how to merge audio and video using FlexClip:
Step1 Open the FlexClip website and drag and drop your video clip into the Media section. Add it to the timeline.
Step2 Upload your audio file from your computer to the Media section.

Step3 Adjust the audio and video on the timeline by dragging the slider.

Step4 Finish editing or select a resolution to download the merged video.
Join Video and Audio Online or Offline? Which To Choose?
Merging audio and video can be done either online or offline. Each method has its advantages and disadvantages.
Online video and audio merging join audio and video files using an online tool. The main advantage of this method is that it is easily accessible and requires no software installation. Many online tools are also free to use and offer various editing options. Additionally, online tools are often compatible with many file formats, making working with different audio and video files easy.
On the other hand, offline video and audio merging requires video editing software installed on a computer. The main advantage of this method is that it offers more advanced editing options and greater control over the final output. Offline tools also typically offer a wider range of output options and higher-quality output. However, offline tools can be more expensive and require a certain level of technical expertise to use effectively.
[Bonus] Merge Audio and Video Offline With Wondershare Filmora
Free Download For Win 7 or later(64-bit)
Free Download For macOS 10.14 or later
Merging audio and video offline with Filmora is a great option for those who want more advanced editing capabilities and are okay with downloading software to their computer. This powerful video editing software allows you to easily merge, trim, and edit multiple video and audio files, while also providing a wide range of creative tools, including effects, filters, and animations. With Filmora, you can create professional-quality videos with minimal effort.
Filmora is a powerful video editing software that allows users to merge audio and video offline easily. The software boasts a user-friendly interface that makes it easy for users to navigate and access the various features, including adding audio to video and syncing them together.
With Filmora, users can import audio and video files and use the software’s timeline to arrange and sync them. It also provides a wide range of options for editing, such as trimming, cutting, and adjusting the volume of audio tracks. Filmora also offers a variety of export options, including a choice of resolutions and file formats, making it a great choice for those looking to merge audio and video offline.
Here’s how to merge audio and video using Filmora:
Step1 Drag and drop or use the “Import Media“ button to add audio and video files to Filmora.

Step2 Arrange the media files on the timeline and sync the video with the audio.

Step3 Right-click the video, select “Detach Audio,“ delete the original audio, and replace it with new audio.

Step4 Choose a format and click “Export“ to save the final video.

Conclusion
There are many ways to merge audio and video, whether online or offline. Each method has its own set of advantages and disadvantages. It ultimately depends on your needs and preferences. Filmora is a great offline option for those looking for a professional video editor with a user-friendly interface, while online options offer a quick and easy solution for basic editing needs.
5 Tools To Merge Video and Audio Online
There are a plethora of online tools available for merging videos and audio. However, not all tools are created equal. We have rounded up the top 5 online tools that are user-friendly, reliable, and efficient.
These tools will make it easy to merge your videos and audio and offer a range of features to help you create professional-looking multimedia content. Whether you are a beginner or an experienced video editor, these tools will help you finish the job in no time. So, without further ado, let’s look at the top 5 online tools for merging videos and audio online.
1. Merge Audio and Video Online Using Media.io for FREE

Ratings from G2: 4.5 out of 5
Pricing:
- Free - $0
- Basic - $3.95 / monthly
- Pro - $6.66 / annually
Sound is crucial in videos as it can enhance engagement, replace poor narration, and promote music videos. Use Media.io Online Video Editor to add music to videos for free easily. It’s a user-friendly program with multitrack timeline editing for all formats, allowing for adjustments such as trimming, splitting, fade effects, texts, elements, and picture overlays. Importantly, it doesn’t leave watermarks on your videos.
Pros
- Fast compression speeds
- No file limits
- No watermarks
- Smart output settings
Cons
- Lacks some advanced functionality
Here’s how to merge audio and video using Media.io:
Step1 Begin by opening Media.io Online Video Editor and uploading your video and audio files.

Step2 Improve the background audio by editing it with options such as trimming, splitting, copying, and deleting.

Step3 Adjust the aspect ratio, export the video, name the file, choose the resolution quality, then it’s finished.

You can learn more details about how to add audio to a video and how to edit videos using Media.io with the video below:
2. Merge Audio and Video Online Without Watermark in 123APPS

Ratings from G2: No rating yet
Pricing:
- Free
Add music to videos and easily edit using this powerful video editing platform. Publish videos with background audio of your choice, free and high-quality, without the need for downloads, software, or browser extensions. User-friendly interface, no learning curve, and works on any device, including Mac, PC, and mobile. The platform supports various file formats, including MP4, MOV, AVI, and WMV for video and MP3, WAV, and OGG for audio.
Pros
- Free and easy to use
- Multiple functions provided
Cons
- Lacks some advanced functionality
- Too basic for video cutting
Here’s how to merge audio and video using 123APPS:
Step1 Go to 123APPS and select “Video Tools“ > “Add Audio to Video.”
Step2 Upload the video and audio

Step3 Use the “Sound“ option to crop and adjust the audio volume

Step4 Select the output video format and download the final video with audio included.

3. Mix Audio With Video Online in Clideo

Ratings from G2: 4.8 out of 5
Pricing:
- Free - $0 with a watermark
- Monthly - $9.00
Clideo is a free, easy-to-use, browser-based video merging tool by Softo. It supports almost all video formats and allows you to add borders, choose aspect ratio templates or crop the video, apply transition effects, and add music. You can import multiple videos and arrange them in your desired order with drag and drop.
Pros
- Free to use with unlimited videos
- Easy to use
- Supports multiple video formats
Cons
- Lack of themes and design elements
Here’s how to merge audio and video using Clideo:
Step1 Go to Clideo’s page to add music to videos.
Step2 Drag and drop a video from your computer to access the editor.

Step3 Add the audio file and sync it with the video.
Step4 Select “Export“ and wait for it to finish, then download the final video.

4. Veed.io Video Audio Merger Online

Ratings from G2: 4.2 out of 5
Pricing:
- Free - $0
- Monthly - $12.00
VEED is a versatile video editor that makes it simple to merge, join, and combine various media files online. Whether using a Windows, Mac, or mobile device, you can easily cut, trim, and arrange multiple video clips into one file on a user-friendly timeline. You can also add audio, image files, and subtitles with a single click.
Compatible with all browsers and versions, VEED supports all file formats and allows you to upload multiple file types, arrange your video tracks, and export as one file. With VEED, you can easily create a seamless Instagram Story or YouTube Ad and even resize your clips in one click.
Pros
- Attractive and well-organized layout
- Compatible with all devices, including smartphones
- Simple and easy to begin using
Cons
- Cannot specify precise starting and ending times for video cuts
- The free version includes watermarks on output videos
- Limited to videos shorter than 10 minutes and 250 MB in size
Here’s how to merge audio and video using VEED:
Step1 Go to VEED’s website and upload your video files and audio.
Step2 Use the cutter/splitter tool to trim any file ends as needed.

Step3 Click the “Export“ button to merge the files into a single video. Download the newly created merged video file.

5. Combine Video and Audio Online With FlexClip

Ratings from G2: 4.0 out of 5
Pricing:
- Free - $0
- Basic - $9.99 per month
- Plus - $19.99 per month
- Business - $29.99 per month
FlexClip’s online audio and video merger is a simple solution for combining audio and video files. The process is as easy as uploading your video and audio files and then syncing them by adjusting the slider. The entire process takes just a few minutes, and there is no loss in video or audio quality, nor will a watermark be added to the output.
Once you have successfully merged your audio and video, you can easily share the video to YouTube or download it to your computer with just one click. It’s an efficient and effective way to merge audio and video.
Pros
- The stock library is royalty-free and allows for the monetization of projects without copyright restrictions
- The user interface is simple and easy to navigate
- The pricing is reasonable compared to other professional video editors
Cons
- The features are more basic compared to other professional video editors
- The video converter has limited output format options
Here’s how to merge audio and video using FlexClip:
Step1 Open the FlexClip website and drag and drop your video clip into the Media section. Add it to the timeline.
Step2 Upload your audio file from your computer to the Media section.

Step3 Adjust the audio and video on the timeline by dragging the slider.

Step4 Finish editing or select a resolution to download the merged video.
Join Video and Audio Online or Offline? Which To Choose?
Merging audio and video can be done either online or offline. Each method has its advantages and disadvantages.
Online video and audio merging join audio and video files using an online tool. The main advantage of this method is that it is easily accessible and requires no software installation. Many online tools are also free to use and offer various editing options. Additionally, online tools are often compatible with many file formats, making working with different audio and video files easy.
On the other hand, offline video and audio merging requires video editing software installed on a computer. The main advantage of this method is that it offers more advanced editing options and greater control over the final output. Offline tools also typically offer a wider range of output options and higher-quality output. However, offline tools can be more expensive and require a certain level of technical expertise to use effectively.
[Bonus] Merge Audio and Video Offline With Wondershare Filmora
Free Download For Win 7 or later(64-bit)
Free Download For macOS 10.14 or later
Merging audio and video offline with Filmora is a great option for those who want more advanced editing capabilities and are okay with downloading software to their computer. This powerful video editing software allows you to easily merge, trim, and edit multiple video and audio files, while also providing a wide range of creative tools, including effects, filters, and animations. With Filmora, you can create professional-quality videos with minimal effort.
Filmora is a powerful video editing software that allows users to merge audio and video offline easily. The software boasts a user-friendly interface that makes it easy for users to navigate and access the various features, including adding audio to video and syncing them together.
With Filmora, users can import audio and video files and use the software’s timeline to arrange and sync them. It also provides a wide range of options for editing, such as trimming, cutting, and adjusting the volume of audio tracks. Filmora also offers a variety of export options, including a choice of resolutions and file formats, making it a great choice for those looking to merge audio and video offline.
Here’s how to merge audio and video using Filmora:
Step1 Drag and drop or use the “Import Media“ button to add audio and video files to Filmora.

Step2 Arrange the media files on the timeline and sync the video with the audio.

Step3 Right-click the video, select “Detach Audio,“ delete the original audio, and replace it with new audio.

Step4 Choose a format and click “Export“ to save the final video.

Conclusion
There are many ways to merge audio and video, whether online or offline. Each method has its own set of advantages and disadvantages. It ultimately depends on your needs and preferences. Filmora is a great offline option for those looking for a professional video editor with a user-friendly interface, while online options offer a quick and easy solution for basic editing needs.
What Are the Best 15 Slideshow Presentation Examples Your Audience Will Love
What’s the Best 15 Slideshow Presentation Examples Your Audience Will Love
An easy yet powerful editor
Numerous effects to choose from
Detailed tutorials provided by the official channel
No matter what type of industry or business you are in, slideshow presentations have become an important tool for several tasks like showcasing your products, and services, engaging with the clients and prospective buyers, changing their perceptions, leading to sales, and much more. Great presentations are a combination of style, content, effects, text, media files, and much more. There are several tools and software available these days that can help you create a slideshow presentation of your choice.
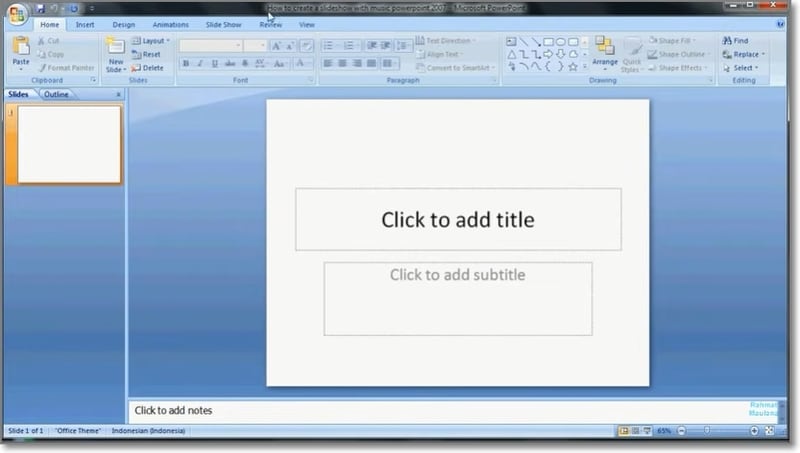
More in detail about these presentations, best powerpoint slideshow examples, and more are discussed in the following parts of the topic.
In this article
01 [Tips for creating an impressive slideshow presentation](#Part 1)
02 [Best 15 slideshow presentation examples](#Part 2)
03 [The best tool to edit your videos for slideshow presentations- Wondershare Filmora](#Part 3)
Part 1 Tips For Creating An Impressive Slideshow Presentation
To create a unique and engaging slideshow presentation, we have shortlisted some tips that will surely work. Check them as below.
● Have a theme
First of all, have a theme for a slideshow based on which the other elements can be selected. The theme or the story you want to portray can be based on the target audience and the purpose of creating a slideshow. For instance, if you want to generate sales from your products, create a slideshow that shows the benefits of your products and compares them with others in the same category.
● Keep it simple
The real purpose of a slideshow presentation is to convey your data or message in a simple manner that can be easily related. Since the slides move one after the other in a slideshow, they should be created in a manner so that the viewer can quickly understand them.
● Keep minimum text
Though text can be included in a slideshow, keep them to a minimum. A slideshow is a creative presentation having pictures, videos, graphs, and several other elements. So, keep the text whenever necessary and don’t include too much-written content. Moreover, a viewer can relate to and recall the product, brand, or service more through a message rather than a text.
● Include compelling visuals
Include relevant visuals like videos and images into your slideshow. Make sure that the files are in high resolution and clear and support the theme or the message you are trying to convey through the presentation.
● Add effects, filters, overlays, and other elements
Instead of adding the raw image and video footage, edit and customize them to make them more interesting and engaging. There are several professional video editing tools like Wondershare Filmora and others that can help you add effects, transitions, overlays, filters, and customize files as needed. Additional elements like graphs, charts, and more can also be added to the presentation.
● Use Templates
Templates are ready-made design that helps you create a slideshow presentation quickly and easily. The templates in a variety of designs in different categories are available for you to choose the most suitable one. You can check the collection of templates from various online sites and tools.
Part 2 Best 15 Slideshow Presentation Examples
A wide range of presentations in different categories is created by people. To help you check what a unique and engaging presentation looks like, below listed are the top slideshow examples.
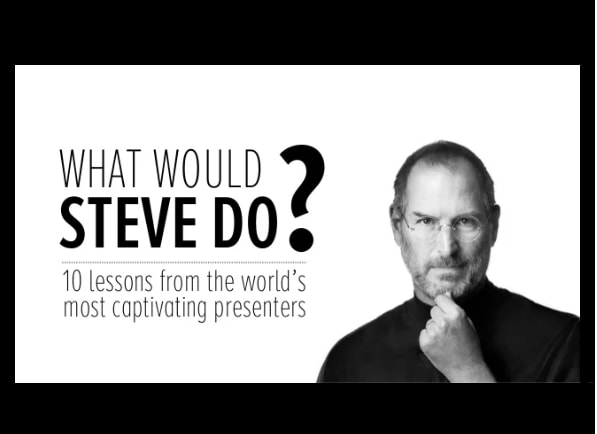
What would Steve Do? 10 Lessons from the World’s most captivating presenters by HubSpot
Powerful Body Language Tips for your next presentation

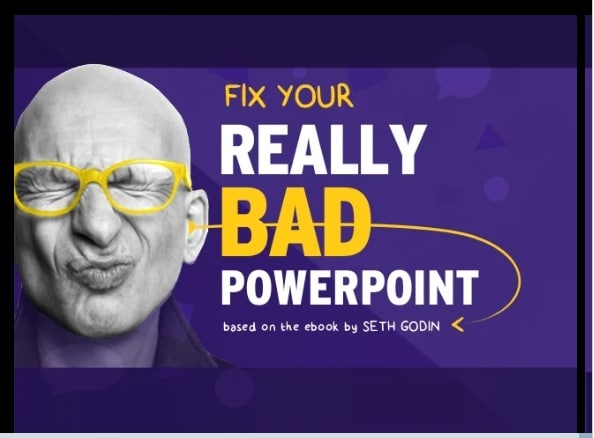
Fix your bad PowerPoint by Seth Godin
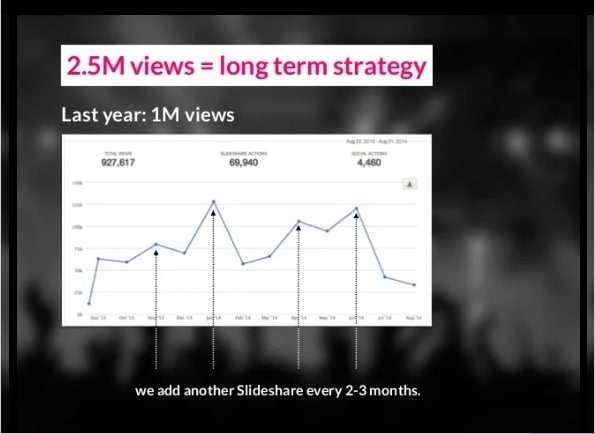
How I got 2.5 million views on SlideShare by Nick Demey
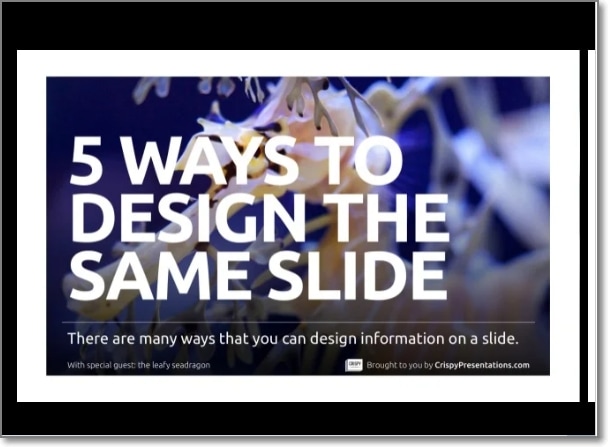
Killer ways to design the same slide
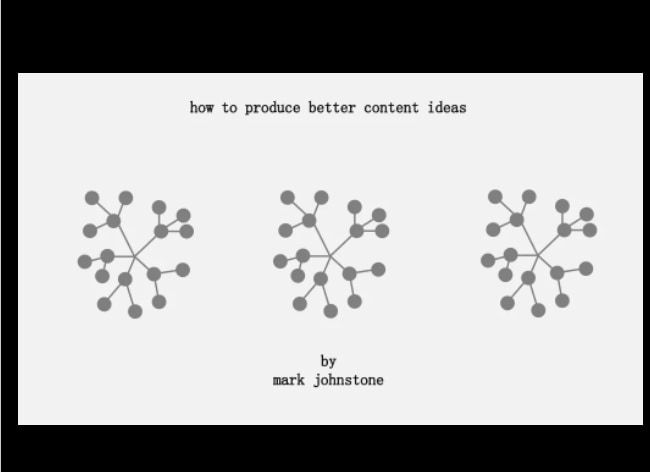
How to Produce Better Content Ideas by Mark Johnstone
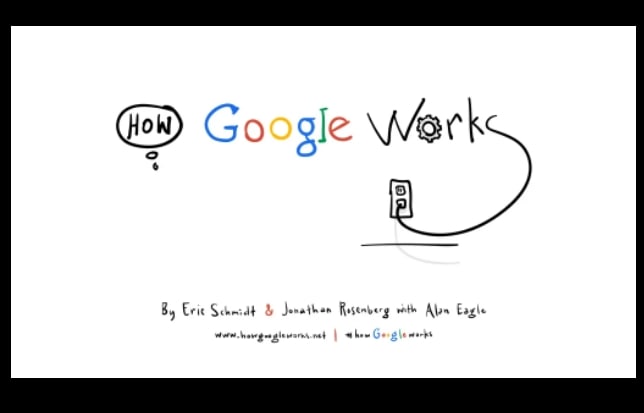
How Google Works by Eric Schmid
Why Content Marketing Fails by Rand Fishkin

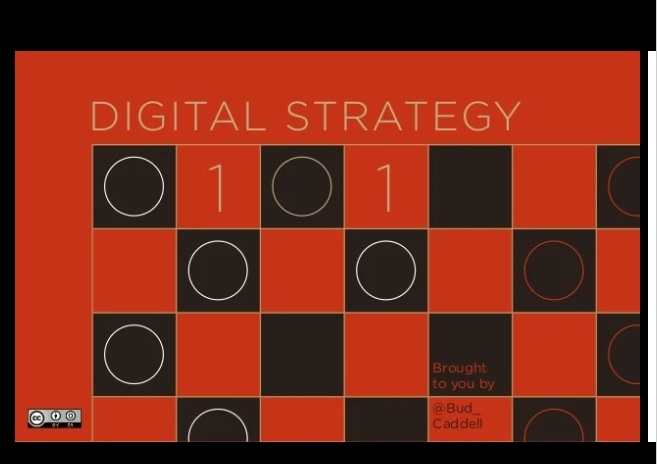
Digital Strategy 101 By Bud Caddell
The History of SEO by HubSpot

How to really get into marketing by Inbound.org

Search for meaning in B2B Marketing by Velocity Partners

The What If techniques by Motivate Design

Ways to Win the Internets by Upworthy

Crap: The Content Marketing Deluge by Velocity Partners

Part 3 The Best Tool To Edit Your Videos For Slideshow Presentations - Wondershare Filmora
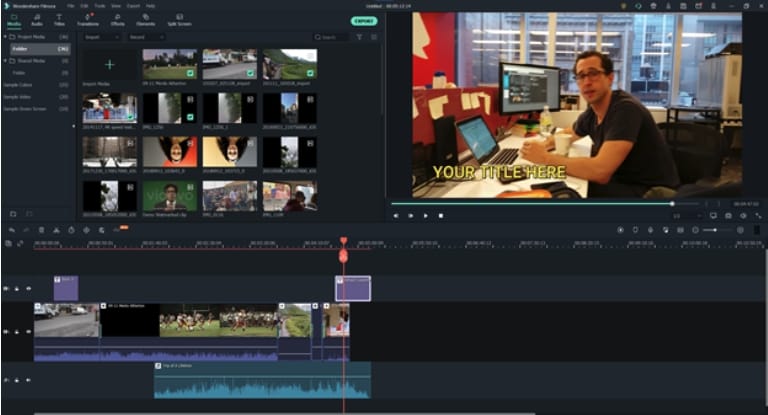
As discussed in the above parts of the article, images and videos play a very crucial role in creating an impressive slideshow presentation. To further make these media files bright, clear, and relevant to your theme editing and customization can be done for this task, several software and programs are available. One such excellent tool is Wondershare Filmora Video Editor which works as a complete video editing software with advanced features.
Your files can be edited like a professional and that too in a hassle-free manner using the program. Some of the key editing features of the software include cropping, cutting, adding effects, transitions, overlays, green screen, split screen, AI portrait, masking, and more.
For Win 7 or later (64-bit)
For macOS 10.12 or later
Additionally, the tool also supports making a slideshow with music files and also has a built-in media library. Templates in different categories are also present.
● Ending Thoughts →
● Slideshow presentations are used for creating awareness about products and services, sending a message, presenting data, and several other tasks.
● To create a slideshow, several factors like media files, theme, colors, text, effects and other factors have to be considered.
● Several popular great slideshow presentation examples can be referred to as what a unique presentation looks like.
● Wondershare Filmora is an excellent tool for editing slideshow videos and also for creating a slideshow.
No matter what type of industry or business you are in, slideshow presentations have become an important tool for several tasks like showcasing your products, and services, engaging with the clients and prospective buyers, changing their perceptions, leading to sales, and much more. Great presentations are a combination of style, content, effects, text, media files, and much more. There are several tools and software available these days that can help you create a slideshow presentation of your choice.

More in detail about these presentations, best powerpoint slideshow examples, and more are discussed in the following parts of the topic.
In this article
01 [Tips for creating an impressive slideshow presentation](#Part 1)
02 [Best 15 slideshow presentation examples](#Part 2)
03 [The best tool to edit your videos for slideshow presentations- Wondershare Filmora](#Part 3)
Part 1 Tips For Creating An Impressive Slideshow Presentation
To create a unique and engaging slideshow presentation, we have shortlisted some tips that will surely work. Check them as below.
● Have a theme
First of all, have a theme for a slideshow based on which the other elements can be selected. The theme or the story you want to portray can be based on the target audience and the purpose of creating a slideshow. For instance, if you want to generate sales from your products, create a slideshow that shows the benefits of your products and compares them with others in the same category.
● Keep it simple
The real purpose of a slideshow presentation is to convey your data or message in a simple manner that can be easily related. Since the slides move one after the other in a slideshow, they should be created in a manner so that the viewer can quickly understand them.
● Keep minimum text
Though text can be included in a slideshow, keep them to a minimum. A slideshow is a creative presentation having pictures, videos, graphs, and several other elements. So, keep the text whenever necessary and don’t include too much-written content. Moreover, a viewer can relate to and recall the product, brand, or service more through a message rather than a text.
● Include compelling visuals
Include relevant visuals like videos and images into your slideshow. Make sure that the files are in high resolution and clear and support the theme or the message you are trying to convey through the presentation.
● Add effects, filters, overlays, and other elements
Instead of adding the raw image and video footage, edit and customize them to make them more interesting and engaging. There are several professional video editing tools like Wondershare Filmora and others that can help you add effects, transitions, overlays, filters, and customize files as needed. Additional elements like graphs, charts, and more can also be added to the presentation.
● Use Templates
Templates are ready-made design that helps you create a slideshow presentation quickly and easily. The templates in a variety of designs in different categories are available for you to choose the most suitable one. You can check the collection of templates from various online sites and tools.
Part 2 Best 15 Slideshow Presentation Examples
A wide range of presentations in different categories is created by people. To help you check what a unique and engaging presentation looks like, below listed are the top slideshow examples.
What would Steve Do? 10 Lessons from the World’s most captivating presenters by HubSpot

Powerful Body Language Tips for your next presentation

Fix your bad PowerPoint by Seth Godin

How I got 2.5 million views on SlideShare by Nick Demey

Killer ways to design the same slide

How to Produce Better Content Ideas by Mark Johnstone

How Google Works by Eric Schmid

Why Content Marketing Fails by Rand Fishkin

Digital Strategy 101 By Bud Caddell

The History of SEO by HubSpot

How to really get into marketing by Inbound.org

Search for meaning in B2B Marketing by Velocity Partners

The What If techniques by Motivate Design

Ways to Win the Internets by Upworthy

Crap: The Content Marketing Deluge by Velocity Partners

Part 3 The Best Tool To Edit Your Videos For Slideshow Presentations - Wondershare Filmora
As discussed in the above parts of the article, images and videos play a very crucial role in creating an impressive slideshow presentation. To further make these media files bright, clear, and relevant to your theme editing and customization can be done for this task, several software and programs are available. One such excellent tool is Wondershare Filmora Video Editor which works as a complete video editing software with advanced features.
Your files can be edited like a professional and that too in a hassle-free manner using the program. Some of the key editing features of the software include cropping, cutting, adding effects, transitions, overlays, green screen, split screen, AI portrait, masking, and more.
For Win 7 or later (64-bit)
For macOS 10.12 or later
Additionally, the tool also supports making a slideshow with music files and also has a built-in media library. Templates in different categories are also present.

● Ending Thoughts →
● Slideshow presentations are used for creating awareness about products and services, sending a message, presenting data, and several other tasks.
● To create a slideshow, several factors like media files, theme, colors, text, effects and other factors have to be considered.
● Several popular great slideshow presentation examples can be referred to as what a unique presentation looks like.
● Wondershare Filmora is an excellent tool for editing slideshow videos and also for creating a slideshow.
No matter what type of industry or business you are in, slideshow presentations have become an important tool for several tasks like showcasing your products, and services, engaging with the clients and prospective buyers, changing their perceptions, leading to sales, and much more. Great presentations are a combination of style, content, effects, text, media files, and much more. There are several tools and software available these days that can help you create a slideshow presentation of your choice.

More in detail about these presentations, best powerpoint slideshow examples, and more are discussed in the following parts of the topic.
In this article
01 [Tips for creating an impressive slideshow presentation](#Part 1)
02 [Best 15 slideshow presentation examples](#Part 2)
03 [The best tool to edit your videos for slideshow presentations- Wondershare Filmora](#Part 3)
Part 1 Tips For Creating An Impressive Slideshow Presentation
To create a unique and engaging slideshow presentation, we have shortlisted some tips that will surely work. Check them as below.
● Have a theme
First of all, have a theme for a slideshow based on which the other elements can be selected. The theme or the story you want to portray can be based on the target audience and the purpose of creating a slideshow. For instance, if you want to generate sales from your products, create a slideshow that shows the benefits of your products and compares them with others in the same category.
● Keep it simple
The real purpose of a slideshow presentation is to convey your data or message in a simple manner that can be easily related. Since the slides move one after the other in a slideshow, they should be created in a manner so that the viewer can quickly understand them.
● Keep minimum text
Though text can be included in a slideshow, keep them to a minimum. A slideshow is a creative presentation having pictures, videos, graphs, and several other elements. So, keep the text whenever necessary and don’t include too much-written content. Moreover, a viewer can relate to and recall the product, brand, or service more through a message rather than a text.
● Include compelling visuals
Include relevant visuals like videos and images into your slideshow. Make sure that the files are in high resolution and clear and support the theme or the message you are trying to convey through the presentation.
● Add effects, filters, overlays, and other elements
Instead of adding the raw image and video footage, edit and customize them to make them more interesting and engaging. There are several professional video editing tools like Wondershare Filmora and others that can help you add effects, transitions, overlays, filters, and customize files as needed. Additional elements like graphs, charts, and more can also be added to the presentation.
● Use Templates
Templates are ready-made design that helps you create a slideshow presentation quickly and easily. The templates in a variety of designs in different categories are available for you to choose the most suitable one. You can check the collection of templates from various online sites and tools.
Part 2 Best 15 Slideshow Presentation Examples
A wide range of presentations in different categories is created by people. To help you check what a unique and engaging presentation looks like, below listed are the top slideshow examples.
What would Steve Do? 10 Lessons from the World’s most captivating presenters by HubSpot

Powerful Body Language Tips for your next presentation

Fix your bad PowerPoint by Seth Godin

How I got 2.5 million views on SlideShare by Nick Demey

Killer ways to design the same slide

How to Produce Better Content Ideas by Mark Johnstone

How Google Works by Eric Schmid

Why Content Marketing Fails by Rand Fishkin

Digital Strategy 101 By Bud Caddell

The History of SEO by HubSpot

How to really get into marketing by Inbound.org

Search for meaning in B2B Marketing by Velocity Partners

The What If techniques by Motivate Design

Ways to Win the Internets by Upworthy

Crap: The Content Marketing Deluge by Velocity Partners

Part 3 The Best Tool To Edit Your Videos For Slideshow Presentations - Wondershare Filmora
As discussed in the above parts of the article, images and videos play a very crucial role in creating an impressive slideshow presentation. To further make these media files bright, clear, and relevant to your theme editing and customization can be done for this task, several software and programs are available. One such excellent tool is Wondershare Filmora Video Editor which works as a complete video editing software with advanced features.
Your files can be edited like a professional and that too in a hassle-free manner using the program. Some of the key editing features of the software include cropping, cutting, adding effects, transitions, overlays, green screen, split screen, AI portrait, masking, and more.
For Win 7 or later (64-bit)
For macOS 10.12 or later
Additionally, the tool also supports making a slideshow with music files and also has a built-in media library. Templates in different categories are also present.

● Ending Thoughts →
● Slideshow presentations are used for creating awareness about products and services, sending a message, presenting data, and several other tasks.
● To create a slideshow, several factors like media files, theme, colors, text, effects and other factors have to be considered.
● Several popular great slideshow presentation examples can be referred to as what a unique presentation looks like.
● Wondershare Filmora is an excellent tool for editing slideshow videos and also for creating a slideshow.
No matter what type of industry or business you are in, slideshow presentations have become an important tool for several tasks like showcasing your products, and services, engaging with the clients and prospective buyers, changing their perceptions, leading to sales, and much more. Great presentations are a combination of style, content, effects, text, media files, and much more. There are several tools and software available these days that can help you create a slideshow presentation of your choice.

More in detail about these presentations, best powerpoint slideshow examples, and more are discussed in the following parts of the topic.
In this article
01 [Tips for creating an impressive slideshow presentation](#Part 1)
02 [Best 15 slideshow presentation examples](#Part 2)
03 [The best tool to edit your videos for slideshow presentations- Wondershare Filmora](#Part 3)
Part 1 Tips For Creating An Impressive Slideshow Presentation
To create a unique and engaging slideshow presentation, we have shortlisted some tips that will surely work. Check them as below.
● Have a theme
First of all, have a theme for a slideshow based on which the other elements can be selected. The theme or the story you want to portray can be based on the target audience and the purpose of creating a slideshow. For instance, if you want to generate sales from your products, create a slideshow that shows the benefits of your products and compares them with others in the same category.
● Keep it simple
The real purpose of a slideshow presentation is to convey your data or message in a simple manner that can be easily related. Since the slides move one after the other in a slideshow, they should be created in a manner so that the viewer can quickly understand them.
● Keep minimum text
Though text can be included in a slideshow, keep them to a minimum. A slideshow is a creative presentation having pictures, videos, graphs, and several other elements. So, keep the text whenever necessary and don’t include too much-written content. Moreover, a viewer can relate to and recall the product, brand, or service more through a message rather than a text.
● Include compelling visuals
Include relevant visuals like videos and images into your slideshow. Make sure that the files are in high resolution and clear and support the theme or the message you are trying to convey through the presentation.
● Add effects, filters, overlays, and other elements
Instead of adding the raw image and video footage, edit and customize them to make them more interesting and engaging. There are several professional video editing tools like Wondershare Filmora and others that can help you add effects, transitions, overlays, filters, and customize files as needed. Additional elements like graphs, charts, and more can also be added to the presentation.
● Use Templates
Templates are ready-made design that helps you create a slideshow presentation quickly and easily. The templates in a variety of designs in different categories are available for you to choose the most suitable one. You can check the collection of templates from various online sites and tools.
Part 2 Best 15 Slideshow Presentation Examples
A wide range of presentations in different categories is created by people. To help you check what a unique and engaging presentation looks like, below listed are the top slideshow examples.
What would Steve Do? 10 Lessons from the World’s most captivating presenters by HubSpot

Powerful Body Language Tips for your next presentation

Fix your bad PowerPoint by Seth Godin

How I got 2.5 million views on SlideShare by Nick Demey

Killer ways to design the same slide

How to Produce Better Content Ideas by Mark Johnstone

How Google Works by Eric Schmid

Why Content Marketing Fails by Rand Fishkin

Digital Strategy 101 By Bud Caddell

The History of SEO by HubSpot

How to really get into marketing by Inbound.org

Search for meaning in B2B Marketing by Velocity Partners

The What If techniques by Motivate Design

Ways to Win the Internets by Upworthy

Crap: The Content Marketing Deluge by Velocity Partners

Part 3 The Best Tool To Edit Your Videos For Slideshow Presentations - Wondershare Filmora
As discussed in the above parts of the article, images and videos play a very crucial role in creating an impressive slideshow presentation. To further make these media files bright, clear, and relevant to your theme editing and customization can be done for this task, several software and programs are available. One such excellent tool is Wondershare Filmora Video Editor which works as a complete video editing software with advanced features.
Your files can be edited like a professional and that too in a hassle-free manner using the program. Some of the key editing features of the software include cropping, cutting, adding effects, transitions, overlays, green screen, split screen, AI portrait, masking, and more.
For Win 7 or later (64-bit)
For macOS 10.12 or later
Additionally, the tool also supports making a slideshow with music files and also has a built-in media library. Templates in different categories are also present.

● Ending Thoughts →
● Slideshow presentations are used for creating awareness about products and services, sending a message, presenting data, and several other tasks.
● To create a slideshow, several factors like media files, theme, colors, text, effects and other factors have to be considered.
● Several popular great slideshow presentation examples can be referred to as what a unique presentation looks like.
● Wondershare Filmora is an excellent tool for editing slideshow videos and also for creating a slideshow.
How to Loop QuickTime Video
If you are a Mac user, QuickTime Player is where you play and watch videos. QuickTime by Apple comes pre-installed on every Mac. It happens to be the default video player for macOS users. Under normal circumstances, QuickTime plays a video only once. However, there are times when you want to watch a video repeatedly in a loop.
When you have a short video clip, it is usual that you want to watch it in a loop. The same is applicable to music videos. You may want to listen to the song repeatedly in the background while you work on your Mac. You may also want to show a demonstration video endlessly on the display screen. In all such scenarios, you have to play a loop video on QuickTime. We will illustrate how to play a video in a loop on QuickTime.
Part 1. Steps to Loop Video with QuickTime Player
You can play any video on your Mac via QuickTime Player. But the video player plays the video only once by default. If you want to watch the video again, you have to play it again. Instead of manually playing it over and over again, you can put the video in a loop. Here are the steps on how to loop QuickTime video.
Step 1: Play the video of your choice on QuickTime Player.
Step 2: Click on the View menu from the top menu bar.
Step 3: Click on the Loop option located at the bottom of the View menu. Alternatively, you can press the Option + Command + L shortcut keys to loop the video.

Thereafter, the video you are playing won’t stop at its end mark. It will restart again and again until your pause or close the QuickTime player.
Part 2. QuickTime Alternatives to Loop Video
QuickTime Player is where you can play videos in a loop. However, if you want to loop videos for your video project, you will need a video editor. If you are looking for QuickTime Player alternatives to loop video on your Mac, we have the following options.
1. iMovie
iMovie by Apple comes pre-installed on Mac as well. iMovie is a video editing application. You can import videos on your Mac and extend the video durations by looping. This is useful when you want to play a video clips in your video project multiple times. Here are the steps on how to loop video via iMovie similar to QuickTime loop video.
Step 1: Launch the iMovie app on your Mac. Once iMovie opens, click on Create New option. Thereafter, click on the Movie option to get started.

Step 2: Go to the File menu and click on the Import Media option. Select the desired video from your Mac. Alternatively, select any media file from All Events or Photos under the Libraries section.
Step 3: Drop the video on the timeline. You can drag and drop the video clip multiple times on the timeline. This will loop the video and extend the video duration. There should be no gap between the clips on the timeline.

Step 4: Once you have looped the desired video, go to File> Share> File option to save the video file.
2. Filmora for Mac
You already know how to loop video in QuickTime Player. But you cannot extend the video duration by looping permanently in QuickTime Player. You can do that on iMovie, but iMovie has limitations as it is a free app. If you are looking for a premium QuickTime Player alternative, Wondershare Filmora is for you.
Filmora is a premium video editor with a wide range of video editing features. It has a user-friendly interface so that everyone can operate it easily. You can trim a video and add transitions between the loops. Here are the steps on how to loop a video on Filmora for Mac.
Step 1: Download and install Wondershare Filmora. Open Filmora and click on New Project.

Free Download For Win 7 or later(64-bit)
Free Download For macOS 10.14 or later
Step 2: Drag and drop the desired video file from your device into the Project Media folder. Thereafter, drag and drop the video file into the timeline.

Step 3: Drag and drop the video clip into the timeline again. Place it by the side of the first video clip. There should not be any gap and they should be in the same channel on the timeline. Alternative, you can also copy and paste the video clip for looping.

Step 4: Play the video and watch it in a loop through the Viewer on Filmora. If you are satisfied, click on the Export button to save the video in any file format as per your preference.
Part 3. Related FAQs
How do I make my video player loop?
If you are a Mac user, the default video player is QuickTime Player. Go to View> Loop to make your Mac video player loop a video. If you are using any other video player like VLC Media Player, you can look at the View menu. Alternatively, you can look for a Loop icon to repeatedly play the video.
How to loop YouTube video on Mac?
On your Mac, open the video on YouTube that you want to put in a loop. Once you are on the watch screen of the video, right-click on the video. Choose the Loop option to play the video repeatedly.
Can QuickTime player loop audio?
Yes, you can loop any audio file on QuickTime Player. The steps are the same for looping a video. You need to play the audio and go to View> Loop option to play the audio file repeatedly. However, some have complained that looping audio may leave a gap at the beginning of the audio track.
Conclusion
Looping a video that we like to the highest degree is quite common. If you are playing any desired video on QuickTime Player, we have illustrated how to go for it. We have also provided you with a free and a premium QuickTime Player alternative. You can choose any of them as per your requirements to loop a video.
Free Download For macOS 10.14 or later
Step 2: Drag and drop the desired video file from your device into the Project Media folder. Thereafter, drag and drop the video file into the timeline.

Step 3: Drag and drop the video clip into the timeline again. Place it by the side of the first video clip. There should not be any gap and they should be in the same channel on the timeline. Alternative, you can also copy and paste the video clip for looping.

Step 4: Play the video and watch it in a loop through the Viewer on Filmora. If you are satisfied, click on the Export button to save the video in any file format as per your preference.
Part 3. Related FAQs
How do I make my video player loop?
If you are a Mac user, the default video player is QuickTime Player. Go to View> Loop to make your Mac video player loop a video. If you are using any other video player like VLC Media Player, you can look at the View menu. Alternatively, you can look for a Loop icon to repeatedly play the video.
How to loop YouTube video on Mac?
On your Mac, open the video on YouTube that you want to put in a loop. Once you are on the watch screen of the video, right-click on the video. Choose the Loop option to play the video repeatedly.
Can QuickTime player loop audio?
Yes, you can loop any audio file on QuickTime Player. The steps are the same for looping a video. You need to play the audio and go to View> Loop option to play the audio file repeatedly. However, some have complained that looping audio may leave a gap at the beginning of the audio track.
Conclusion
Looping a video that we like to the highest degree is quite common. If you are playing any desired video on QuickTime Player, we have illustrated how to go for it. We have also provided you with a free and a premium QuickTime Player alternative. You can choose any of them as per your requirements to loop a video.
Free Download For macOS 10.14 or later
Step 2: Drag and drop the desired video file from your device into the Project Media folder. Thereafter, drag and drop the video file into the timeline.

Step 3: Drag and drop the video clip into the timeline again. Place it by the side of the first video clip. There should not be any gap and they should be in the same channel on the timeline. Alternative, you can also copy and paste the video clip for looping.

Step 4: Play the video and watch it in a loop through the Viewer on Filmora. If you are satisfied, click on the Export button to save the video in any file format as per your preference.
Part 3. Related FAQs
How do I make my video player loop?
If you are a Mac user, the default video player is QuickTime Player. Go to View> Loop to make your Mac video player loop a video. If you are using any other video player like VLC Media Player, you can look at the View menu. Alternatively, you can look for a Loop icon to repeatedly play the video.
How to loop YouTube video on Mac?
On your Mac, open the video on YouTube that you want to put in a loop. Once you are on the watch screen of the video, right-click on the video. Choose the Loop option to play the video repeatedly.
Can QuickTime player loop audio?
Yes, you can loop any audio file on QuickTime Player. The steps are the same for looping a video. You need to play the audio and go to View> Loop option to play the audio file repeatedly. However, some have complained that looping audio may leave a gap at the beginning of the audio track.
Conclusion
Looping a video that we like to the highest degree is quite common. If you are playing any desired video on QuickTime Player, we have illustrated how to go for it. We have also provided you with a free and a premium QuickTime Player alternative. You can choose any of them as per your requirements to loop a video.
Free Download For macOS 10.14 or later
Step 2: Drag and drop the desired video file from your device into the Project Media folder. Thereafter, drag and drop the video file into the timeline.

Step 3: Drag and drop the video clip into the timeline again. Place it by the side of the first video clip. There should not be any gap and they should be in the same channel on the timeline. Alternative, you can also copy and paste the video clip for looping.

Step 4: Play the video and watch it in a loop through the Viewer on Filmora. If you are satisfied, click on the Export button to save the video in any file format as per your preference.
Part 3. Related FAQs
How do I make my video player loop?
If you are a Mac user, the default video player is QuickTime Player. Go to View> Loop to make your Mac video player loop a video. If you are using any other video player like VLC Media Player, you can look at the View menu. Alternatively, you can look for a Loop icon to repeatedly play the video.
How to loop YouTube video on Mac?
On your Mac, open the video on YouTube that you want to put in a loop. Once you are on the watch screen of the video, right-click on the video. Choose the Loop option to play the video repeatedly.
Can QuickTime player loop audio?
Yes, you can loop any audio file on QuickTime Player. The steps are the same for looping a video. You need to play the audio and go to View> Loop option to play the audio file repeatedly. However, some have complained that looping audio may leave a gap at the beginning of the audio track.
Conclusion
Looping a video that we like to the highest degree is quite common. If you are playing any desired video on QuickTime Player, we have illustrated how to go for it. We have also provided you with a free and a premium QuickTime Player alternative. You can choose any of them as per your requirements to loop a video.
How to Create Cinematic Style Videos? [Easy Guide for Beginners]
Do you find cinematic-style videos appealing? Do you wish to give your content a cinematic vibe? Hold on to this article for more!
A cinematic video style resembles a film. The act is employed in film making and visual storytelling that considers aspect ratio, composition, color, lighting style, type of film, editing, filters, and set design. The cinematic background music plays an equally important role. The article is a guide to creating a cinematic intro for YouTube.
Additionally, we will discuss the procedure to work on travel intro for a vlog. So, let us not waste time anymore! Time to start the adventure!
In this article
01 How to Create a Cinematic Intro for Your Video?
02 How to Cinematic Travel Intro for Your Travel Vlog?
03 3 Trendy Sites to Download Cinematic Background Music
Part 1: How to Create a Cinematic Intro for Your Video?
Every content creator wishes to bring new ideas to the set. The part played by cinematic background music cannot be avoided no matter what innovation is ahead of us. A cinematic and classy intro to your video displays the effort performed on your work. It compels the audience to keep following you.
For this very reason, the article conveys a guide to creating a powerful cinematic intro. Let us begin this!
For Win 7 or later (64-bit)
For macOS 10.12 or later
Step 1: Launch Wondershare Filmora to begin. Import the targeted music in the program and drag it to the timeline. Now, trim the music to 30 seconds and listen to the end part. Select the last note to match the beat in the beginning part of the music.

Step 2: Moving on, add markers to the music. Use “M” from the keyboard to mark the specific part of the track. After you are done, drag the first track onto the timeline. Trim the video to match it to the first marker.

Step 3: Perform a similar process for the rest of the video clips and trim them according to the markers. The user is directed to create a 2.35:1 widescreen cinemascope bar opener. To do so, drag two black mattes onto the timeline on top of each other.

Step 4: Drag the end of both clips to match the length of the whole video. Now, it is time to animate it. Insert 240° in the y-axis for the first keyframe. Similarly, use 422.2° for the second keyframe. For the bottom y-axis, use -240° for the first keyframe and -422.2° for the second keyframe.

Step 5: After the animation is completed, head to the “Titles” tab and look for cinematic packs. Choose one and drag it onto the timeline. Secondly, alter the duration and animation of the title. The user is expected to insert a dissolve transition at the end of the title.

Step 6: Perform the same process for the rest of the tracks. Time the titles to match the clip’s ending. Now, add a dissolve transition at the end of the clip. Trim the clip into two parts and apply square blur by navigating to the “Effects” tab to blur the video clips.

Step 7: Moving on, adjust the alpha for blur intensity. Add a dissolve transition between the cuts. In the final step, go to the “Animation” and then “Customize.” Reframe the last clip and animate a zoom-out effect. Reduce the “Scale” percent to do so. A creative cinematic intro is ready!

Part 2: How to Cinematic Travel Intro for Your Travel Vlog?
Vacationing and traveling offer exposure to learn more about people and the world around us. Are you a traveler? Do you prefer a solo vacation or with your family? Whatever your answer might be, we have got you!
To make an astonishing and engaging cinematic travel for your travel vlog, Filmora is there for us. The section shall reflect on the whole procedure using royalty-free cinematic music. Let us initiate!
For Win 7 or later (64-bit)
For macOS 10.12 or later
Step 1: The first step is simple. Open Wondershare Filmora and head to the “Media” tab. Import the targeted travel video clips onto the timeline and rearrange them. Now, navigate to the “Effects” section and search “cinematic.”

Step 2: Pick one and drag it onto the second track to present cinematic bars and a widescreen look to the video. Now, move to the “Titles” section and choose the suitable one. Drag it to the third track. Double click on it to access the “Advanced settings” and make the required alterations.

Step 3: You can modify the font size, color, and timing of the video. Again, use the “Titles” panel and hit the “Subtitles” category. Select one and drag to the third track. Make relevant changes through the same procedure as above.

Step 4: After that, duplicate the subtitle track on the timeline and repeat the required changes. Sync the text to the audio once you are done with the process.

Step 5: The user is instructed to go back to the “Titles” section and search “cinematic end credits.” Pick one and drag it to the third track. Double click on it to make a few alterations. You have performed the procedure successfully.

Part 3: 3 Trendy Sites to Download Cinematic Background Music
The use of royalty-free cinematic music creates an unmatched vibe. If you do not use it, you might not run for competition. Therefore, you need to access a great music platform for this purpose. Allow us to introduce you to three workable marketplaces. The cinematic background music that they offer is mind-boggling for sure. So, let’s go? Shall we?
Pixabay
Pixabay is an online marketplace that can be accessed effortlessly. The user is free to tailor the filter options to give the system an idea of the music requirement. You can change the results from genre to movement and theme to categories as needed. Essentially, royalty-free cinematic music can be downloaded with one tap of a button.
Moreover, the duration of the track is shown to decide consciously. Cinematic dramatic, caves of dawn, honor and sword, the introvert, and chill abstract are some music offered by Pixabay.

Chosic
Chosic is a house for a wide range of cinematic background music tracks. You can preview the audio tracks before downloading them and tackle the search bar according to your movie themes and type of set design.
Furthermore, the search filters are tailored based on relevancy, popularity, and random audios. Press the download button to have the audio in MP3 format. Epic cinematic, the inspiration, discovery, and the battle are renowned cinematic background music from Chosic.

Mixkit
Mixkit has got to be an excellent choice to deal with your everyday needs of royalty-free cinematic music. With Mixkit in the frame, the user can create movie magic using the impeccable cinematic music collection. Cinematic trailer, slow trail, piano horror, motivational cinematic, and silent descent are a few examples of a strong cinematic collection.

Final Thoughts
Every content creator wishes to transform their work using different effects and filters. Adding a cinematic style video compels the audience to be on the verge of their seats, giving them a film notion. The article highlighted three apps to download good quality and cinematic background music. Filmora also brought a thrill to the vlogs and YouTube intros.
Versatile Video Editor - Wondershare Filmora
An easy yet powerful editor
Numerous effects to choose from
Detailed tutorials provided by the official channel
02 How to Cinematic Travel Intro for Your Travel Vlog?
03 3 Trendy Sites to Download Cinematic Background Music
Part 1: How to Create a Cinematic Intro for Your Video?
Every content creator wishes to bring new ideas to the set. The part played by cinematic background music cannot be avoided no matter what innovation is ahead of us. A cinematic and classy intro to your video displays the effort performed on your work. It compels the audience to keep following you.
For this very reason, the article conveys a guide to creating a powerful cinematic intro. Let us begin this!
For Win 7 or later (64-bit)
For macOS 10.12 or later
Step 1: Launch Wondershare Filmora to begin. Import the targeted music in the program and drag it to the timeline. Now, trim the music to 30 seconds and listen to the end part. Select the last note to match the beat in the beginning part of the music.

Step 2: Moving on, add markers to the music. Use “M” from the keyboard to mark the specific part of the track. After you are done, drag the first track onto the timeline. Trim the video to match it to the first marker.

Step 3: Perform a similar process for the rest of the video clips and trim them according to the markers. The user is directed to create a 2.35:1 widescreen cinemascope bar opener. To do so, drag two black mattes onto the timeline on top of each other.

Step 4: Drag the end of both clips to match the length of the whole video. Now, it is time to animate it. Insert 240° in the y-axis for the first keyframe. Similarly, use 422.2° for the second keyframe. For the bottom y-axis, use -240° for the first keyframe and -422.2° for the second keyframe.

Step 5: After the animation is completed, head to the “Titles” tab and look for cinematic packs. Choose one and drag it onto the timeline. Secondly, alter the duration and animation of the title. The user is expected to insert a dissolve transition at the end of the title.

Step 6: Perform the same process for the rest of the tracks. Time the titles to match the clip’s ending. Now, add a dissolve transition at the end of the clip. Trim the clip into two parts and apply square blur by navigating to the “Effects” tab to blur the video clips.

Step 7: Moving on, adjust the alpha for blur intensity. Add a dissolve transition between the cuts. In the final step, go to the “Animation” and then “Customize.” Reframe the last clip and animate a zoom-out effect. Reduce the “Scale” percent to do so. A creative cinematic intro is ready!

Part 2: How to Cinematic Travel Intro for Your Travel Vlog?
Vacationing and traveling offer exposure to learn more about people and the world around us. Are you a traveler? Do you prefer a solo vacation or with your family? Whatever your answer might be, we have got you!
To make an astonishing and engaging cinematic travel for your travel vlog, Filmora is there for us. The section shall reflect on the whole procedure using royalty-free cinematic music. Let us initiate!
For Win 7 or later (64-bit)
For macOS 10.12 or later
Step 1: The first step is simple. Open Wondershare Filmora and head to the “Media” tab. Import the targeted travel video clips onto the timeline and rearrange them. Now, navigate to the “Effects” section and search “cinematic.”

Step 2: Pick one and drag it onto the second track to present cinematic bars and a widescreen look to the video. Now, move to the “Titles” section and choose the suitable one. Drag it to the third track. Double click on it to access the “Advanced settings” and make the required alterations.

Step 3: You can modify the font size, color, and timing of the video. Again, use the “Titles” panel and hit the “Subtitles” category. Select one and drag to the third track. Make relevant changes through the same procedure as above.

Step 4: After that, duplicate the subtitle track on the timeline and repeat the required changes. Sync the text to the audio once you are done with the process.

Step 5: The user is instructed to go back to the “Titles” section and search “cinematic end credits.” Pick one and drag it to the third track. Double click on it to make a few alterations. You have performed the procedure successfully.

Part 3: 3 Trendy Sites to Download Cinematic Background Music
The use of royalty-free cinematic music creates an unmatched vibe. If you do not use it, you might not run for competition. Therefore, you need to access a great music platform for this purpose. Allow us to introduce you to three workable marketplaces. The cinematic background music that they offer is mind-boggling for sure. So, let’s go? Shall we?
Pixabay
Pixabay is an online marketplace that can be accessed effortlessly. The user is free to tailor the filter options to give the system an idea of the music requirement. You can change the results from genre to movement and theme to categories as needed. Essentially, royalty-free cinematic music can be downloaded with one tap of a button.
Moreover, the duration of the track is shown to decide consciously. Cinematic dramatic, caves of dawn, honor and sword, the introvert, and chill abstract are some music offered by Pixabay.

Chosic
Chosic is a house for a wide range of cinematic background music tracks. You can preview the audio tracks before downloading them and tackle the search bar according to your movie themes and type of set design.
Furthermore, the search filters are tailored based on relevancy, popularity, and random audios. Press the download button to have the audio in MP3 format. Epic cinematic, the inspiration, discovery, and the battle are renowned cinematic background music from Chosic.

Mixkit
Mixkit has got to be an excellent choice to deal with your everyday needs of royalty-free cinematic music. With Mixkit in the frame, the user can create movie magic using the impeccable cinematic music collection. Cinematic trailer, slow trail, piano horror, motivational cinematic, and silent descent are a few examples of a strong cinematic collection.

Final Thoughts
Every content creator wishes to transform their work using different effects and filters. Adding a cinematic style video compels the audience to be on the verge of their seats, giving them a film notion. The article highlighted three apps to download good quality and cinematic background music. Filmora also brought a thrill to the vlogs and YouTube intros.
Versatile Video Editor - Wondershare Filmora
An easy yet powerful editor
Numerous effects to choose from
Detailed tutorials provided by the official channel
02 How to Cinematic Travel Intro for Your Travel Vlog?
03 3 Trendy Sites to Download Cinematic Background Music
Part 1: How to Create a Cinematic Intro for Your Video?
Every content creator wishes to bring new ideas to the set. The part played by cinematic background music cannot be avoided no matter what innovation is ahead of us. A cinematic and classy intro to your video displays the effort performed on your work. It compels the audience to keep following you.
For this very reason, the article conveys a guide to creating a powerful cinematic intro. Let us begin this!
For Win 7 or later (64-bit)
For macOS 10.12 or later
Step 1: Launch Wondershare Filmora to begin. Import the targeted music in the program and drag it to the timeline. Now, trim the music to 30 seconds and listen to the end part. Select the last note to match the beat in the beginning part of the music.

Step 2: Moving on, add markers to the music. Use “M” from the keyboard to mark the specific part of the track. After you are done, drag the first track onto the timeline. Trim the video to match it to the first marker.

Step 3: Perform a similar process for the rest of the video clips and trim them according to the markers. The user is directed to create a 2.35:1 widescreen cinemascope bar opener. To do so, drag two black mattes onto the timeline on top of each other.

Step 4: Drag the end of both clips to match the length of the whole video. Now, it is time to animate it. Insert 240° in the y-axis for the first keyframe. Similarly, use 422.2° for the second keyframe. For the bottom y-axis, use -240° for the first keyframe and -422.2° for the second keyframe.

Step 5: After the animation is completed, head to the “Titles” tab and look for cinematic packs. Choose one and drag it onto the timeline. Secondly, alter the duration and animation of the title. The user is expected to insert a dissolve transition at the end of the title.

Step 6: Perform the same process for the rest of the tracks. Time the titles to match the clip’s ending. Now, add a dissolve transition at the end of the clip. Trim the clip into two parts and apply square blur by navigating to the “Effects” tab to blur the video clips.

Step 7: Moving on, adjust the alpha for blur intensity. Add a dissolve transition between the cuts. In the final step, go to the “Animation” and then “Customize.” Reframe the last clip and animate a zoom-out effect. Reduce the “Scale” percent to do so. A creative cinematic intro is ready!

Part 2: How to Cinematic Travel Intro for Your Travel Vlog?
Vacationing and traveling offer exposure to learn more about people and the world around us. Are you a traveler? Do you prefer a solo vacation or with your family? Whatever your answer might be, we have got you!
To make an astonishing and engaging cinematic travel for your travel vlog, Filmora is there for us. The section shall reflect on the whole procedure using royalty-free cinematic music. Let us initiate!
For Win 7 or later (64-bit)
For macOS 10.12 or later
Step 1: The first step is simple. Open Wondershare Filmora and head to the “Media” tab. Import the targeted travel video clips onto the timeline and rearrange them. Now, navigate to the “Effects” section and search “cinematic.”

Step 2: Pick one and drag it onto the second track to present cinematic bars and a widescreen look to the video. Now, move to the “Titles” section and choose the suitable one. Drag it to the third track. Double click on it to access the “Advanced settings” and make the required alterations.

Step 3: You can modify the font size, color, and timing of the video. Again, use the “Titles” panel and hit the “Subtitles” category. Select one and drag to the third track. Make relevant changes through the same procedure as above.

Step 4: After that, duplicate the subtitle track on the timeline and repeat the required changes. Sync the text to the audio once you are done with the process.

Step 5: The user is instructed to go back to the “Titles” section and search “cinematic end credits.” Pick one and drag it to the third track. Double click on it to make a few alterations. You have performed the procedure successfully.

Part 3: 3 Trendy Sites to Download Cinematic Background Music
The use of royalty-free cinematic music creates an unmatched vibe. If you do not use it, you might not run for competition. Therefore, you need to access a great music platform for this purpose. Allow us to introduce you to three workable marketplaces. The cinematic background music that they offer is mind-boggling for sure. So, let’s go? Shall we?
Pixabay
Pixabay is an online marketplace that can be accessed effortlessly. The user is free to tailor the filter options to give the system an idea of the music requirement. You can change the results from genre to movement and theme to categories as needed. Essentially, royalty-free cinematic music can be downloaded with one tap of a button.
Moreover, the duration of the track is shown to decide consciously. Cinematic dramatic, caves of dawn, honor and sword, the introvert, and chill abstract are some music offered by Pixabay.

Chosic
Chosic is a house for a wide range of cinematic background music tracks. You can preview the audio tracks before downloading them and tackle the search bar according to your movie themes and type of set design.
Furthermore, the search filters are tailored based on relevancy, popularity, and random audios. Press the download button to have the audio in MP3 format. Epic cinematic, the inspiration, discovery, and the battle are renowned cinematic background music from Chosic.

Mixkit
Mixkit has got to be an excellent choice to deal with your everyday needs of royalty-free cinematic music. With Mixkit in the frame, the user can create movie magic using the impeccable cinematic music collection. Cinematic trailer, slow trail, piano horror, motivational cinematic, and silent descent are a few examples of a strong cinematic collection.

Final Thoughts
Every content creator wishes to transform their work using different effects and filters. Adding a cinematic style video compels the audience to be on the verge of their seats, giving them a film notion. The article highlighted three apps to download good quality and cinematic background music. Filmora also brought a thrill to the vlogs and YouTube intros.
Versatile Video Editor - Wondershare Filmora
An easy yet powerful editor
Numerous effects to choose from
Detailed tutorials provided by the official channel
02 How to Cinematic Travel Intro for Your Travel Vlog?
03 3 Trendy Sites to Download Cinematic Background Music
Part 1: How to Create a Cinematic Intro for Your Video?
Every content creator wishes to bring new ideas to the set. The part played by cinematic background music cannot be avoided no matter what innovation is ahead of us. A cinematic and classy intro to your video displays the effort performed on your work. It compels the audience to keep following you.
For this very reason, the article conveys a guide to creating a powerful cinematic intro. Let us begin this!
For Win 7 or later (64-bit)
For macOS 10.12 or later
Step 1: Launch Wondershare Filmora to begin. Import the targeted music in the program and drag it to the timeline. Now, trim the music to 30 seconds and listen to the end part. Select the last note to match the beat in the beginning part of the music.

Step 2: Moving on, add markers to the music. Use “M” from the keyboard to mark the specific part of the track. After you are done, drag the first track onto the timeline. Trim the video to match it to the first marker.

Step 3: Perform a similar process for the rest of the video clips and trim them according to the markers. The user is directed to create a 2.35:1 widescreen cinemascope bar opener. To do so, drag two black mattes onto the timeline on top of each other.

Step 4: Drag the end of both clips to match the length of the whole video. Now, it is time to animate it. Insert 240° in the y-axis for the first keyframe. Similarly, use 422.2° for the second keyframe. For the bottom y-axis, use -240° for the first keyframe and -422.2° for the second keyframe.

Step 5: After the animation is completed, head to the “Titles” tab and look for cinematic packs. Choose one and drag it onto the timeline. Secondly, alter the duration and animation of the title. The user is expected to insert a dissolve transition at the end of the title.

Step 6: Perform the same process for the rest of the tracks. Time the titles to match the clip’s ending. Now, add a dissolve transition at the end of the clip. Trim the clip into two parts and apply square blur by navigating to the “Effects” tab to blur the video clips.

Step 7: Moving on, adjust the alpha for blur intensity. Add a dissolve transition between the cuts. In the final step, go to the “Animation” and then “Customize.” Reframe the last clip and animate a zoom-out effect. Reduce the “Scale” percent to do so. A creative cinematic intro is ready!

Part 2: How to Cinematic Travel Intro for Your Travel Vlog?
Vacationing and traveling offer exposure to learn more about people and the world around us. Are you a traveler? Do you prefer a solo vacation or with your family? Whatever your answer might be, we have got you!
To make an astonishing and engaging cinematic travel for your travel vlog, Filmora is there for us. The section shall reflect on the whole procedure using royalty-free cinematic music. Let us initiate!
For Win 7 or later (64-bit)
For macOS 10.12 or later
Step 1: The first step is simple. Open Wondershare Filmora and head to the “Media” tab. Import the targeted travel video clips onto the timeline and rearrange them. Now, navigate to the “Effects” section and search “cinematic.”

Step 2: Pick one and drag it onto the second track to present cinematic bars and a widescreen look to the video. Now, move to the “Titles” section and choose the suitable one. Drag it to the third track. Double click on it to access the “Advanced settings” and make the required alterations.

Step 3: You can modify the font size, color, and timing of the video. Again, use the “Titles” panel and hit the “Subtitles” category. Select one and drag to the third track. Make relevant changes through the same procedure as above.

Step 4: After that, duplicate the subtitle track on the timeline and repeat the required changes. Sync the text to the audio once you are done with the process.

Step 5: The user is instructed to go back to the “Titles” section and search “cinematic end credits.” Pick one and drag it to the third track. Double click on it to make a few alterations. You have performed the procedure successfully.

Part 3: 3 Trendy Sites to Download Cinematic Background Music
The use of royalty-free cinematic music creates an unmatched vibe. If you do not use it, you might not run for competition. Therefore, you need to access a great music platform for this purpose. Allow us to introduce you to three workable marketplaces. The cinematic background music that they offer is mind-boggling for sure. So, let’s go? Shall we?
Pixabay
Pixabay is an online marketplace that can be accessed effortlessly. The user is free to tailor the filter options to give the system an idea of the music requirement. You can change the results from genre to movement and theme to categories as needed. Essentially, royalty-free cinematic music can be downloaded with one tap of a button.
Moreover, the duration of the track is shown to decide consciously. Cinematic dramatic, caves of dawn, honor and sword, the introvert, and chill abstract are some music offered by Pixabay.

Chosic
Chosic is a house for a wide range of cinematic background music tracks. You can preview the audio tracks before downloading them and tackle the search bar according to your movie themes and type of set design.
Furthermore, the search filters are tailored based on relevancy, popularity, and random audios. Press the download button to have the audio in MP3 format. Epic cinematic, the inspiration, discovery, and the battle are renowned cinematic background music from Chosic.

Mixkit
Mixkit has got to be an excellent choice to deal with your everyday needs of royalty-free cinematic music. With Mixkit in the frame, the user can create movie magic using the impeccable cinematic music collection. Cinematic trailer, slow trail, piano horror, motivational cinematic, and silent descent are a few examples of a strong cinematic collection.

Final Thoughts
Every content creator wishes to transform their work using different effects and filters. Adding a cinematic style video compels the audience to be on the verge of their seats, giving them a film notion. The article highlighted three apps to download good quality and cinematic background music. Filmora also brought a thrill to the vlogs and YouTube intros.
Versatile Video Editor - Wondershare Filmora
An easy yet powerful editor
Numerous effects to choose from
Detailed tutorials provided by the official channel
Also read:
- New In 2024, The Ultimate Wedding Videography Checklist
- New How to Make an Adobe Slideshow the Easy Way for 2024
- 6 Instant Mp4 to GIF Online Tools for You for 2024
- Top 5 Ways To Convert Hdr To Sdr Videos
- New Guide Adopting Lumetri Color Presets in Effective Color Grading for 2024
- In 2024, How To Make a Timelapse in After Effects
- In 2024, What Is the Best Voice Changer for WhatsApp? Discover the Seven (7) Best Voice Changers for WhatsApp Here in This Post
- Updated How to Add Miniature Effect in Video with Filmora for 2024
- Fast and Easy Method to Match Color in Photoshop for 2024
- Top 5 Online Video Converter for Instagram for 2024
- Updated How to Create Intro Video with Filmora
- New In 2024, This Post Will Make You Learn Anything and Everything About Animated GIFs, the Ways to Use Cool Gifs in My Marketing, and How to Create Unique Custom Animated Gifs
- New Ultimate Guide to Countdown Animation in Videos for 2024
- Updated In 2024, Vintage Film Effect 1990S - How to Make
- Updated How to Add Custom Subtitles to Netflix
- New How to Add Subtitles to MKV Videos on All Platforms
- New In 2024, Cropping a Video in Davinci Resolve Step by Step
- New Doable Ways to Make Transparent Background in Procreate for 2024
- Step-by-Step Guide to Speed Up and Slow Down a Video for 2024
- New 2024 Approved Learn How to Trim/Crop Video in Microsoft PowerPoint
- Updated How Do You Create In-Camera Transitions in Your Videos? A Complete Guide for Beginners to Create These Transitions Using Their Camera at Home for 2024
- Have You Ever Watched YouTube Live Streams? In Fact, You Can Also Start a Live Streaming on YouTube if You Want. Here Well Share some Tips to Live Stream on YouTube
- Updated Do You Know You Can Trim and Cut Your Video Into the Desired Portions Using a Reliable Video Splitter? Get an Easy Video Splitter Now to Simplify Your Work. Here Are 33 Carefully Chosen Apps to Help You in This for 2024
- Do You Know Everything Related to Wondershare Filmoras Video Editing Interface? If You Are Unaware of It, Read and Learn About Filmoras Interface
- New 2024 Approved This Article Aims to Show You How to Export Videos in Filmora
- Updated In 2024, How to Use LUTs Perfectly in Final Cut Pro
- New 2024 Approved How to Make First Impression Review Video
- New In 2024, Want to Learn How to Crop or Trim Video in PowerPoint? We Have Got You Covered; We Have Given a Step-by-Step Guide that Will Allow You to Trim and Crop Videos Using This Presentation Program
- 2024 Approved Guide To Cropping and Combining Content in Wondershare Filmora Latest
- In 2024, Confused About Deciding the Next Destination for Your Trip? This Article Features some of the Best Vloggers You Can Find for Gaining Inspiration for Traveling
- New In 2024, Frame Blending Is a Great Way to Smooth Out Your Video Footage in Adobe Premiere Pro. Using This Technique, You Can Create a More Natural Looking Motion by Averaging Out the Frames in Your Clips
- Best iPhone LUTs App to Use
- Updated 2024 Approved How to Make a Photo Collage on Mac/iPhone Using iPhoto?
- Easy Ways to Manage Your Vivo Y27 4G Location Settings | Dr.fone
- How To Unlock A Found Apple iPhone XR? | Dr.fone
- How to Simulate GPS Movement in AR games On Apple iPhone 14 Plus? | Dr.fone
- 5 Ways to Restart Tecno Camon 20 Pro 5G Without Power Button | Dr.fone
- In 2024, Complete Guide For Apple iPhone XS Lock Screen
- How to Easily Hard reset my Nubia Z50S Pro | Dr.fone
- How to Fix Apple iPhone 13 Find My Friends No Location Found? | Dr.fone
- How to Unlock Oppo Find X7 Phone without PIN
- How to Turn Off Find My Apple iPhone SE (2020) when Phone is Broken?
- How To Restore Missing Call Logs from Google Pixel Fold
- 6 Proven Ways to Unlock Xiaomi Civi 3 Phone When You Forget the Password
- What is the best Pokemon for pokemon pvp ranking On Honor 90 Pro? | Dr.fone
- Top 5 Car Locator Apps for Samsung Galaxy F14 5G | Dr.fone
- Change Location on Yik Yak For your Vivo V27e to Enjoy More Fun | Dr.fone
- How to Change Spotify Location After Moving to Another Country On Huawei P60 | Dr.fone
- Hacks to do pokemon go trainer battles For Poco X6 | Dr.fone
- How To Fix OEM Unlock Missing on Nokia C22?
- How to Change Google Play Location On Infinix Smart 8 | Dr.fone
- In 2024, How to Fix Locked Apple ID from Apple iPhone 8
- How To Update or Downgrade iPhone XR Without iTunes? | Dr.fone
- How To Transfer WhatsApp From Apple iPhone 11 to other iPhone 11 Pro Max devices? | Dr.fone
- Top 10 Fixes for Phone Keep Disconnecting from Wi-Fi On Vivo Y77t | Dr.fone
- In 2024, Easy Fixes How To Recover Forgotten iCloud Password From your Apple iPhone XS
- Title: Easily Combine Videos and Audios with 5 Simple Online Tools
- Author: Morgan
- Created at : 2024-06-15 18:56:24
- Updated at : 2024-06-16 18:56:24
- Link: https://ai-video-editing.techidaily.com/easily-combine-videos-and-audios-with-5-simple-online-tools/
- License: This work is licensed under CC BY-NC-SA 4.0.


