:max_bytes(150000):strip_icc():format(webp)/tropical-beach-wallpaper-beach-backgrounds-587fbb765f9b584db3241860.jpg)
Final Cut Pro for iPad- Is It Available?

Final Cut Pro for iPad- Is It Available?
Final Cut Pro by Apple is the most popular premium video editor among macOS users. Starting from social media videos to short films and movies, Final Cut Pro is a popular choice. Even though video editing using FCP is mostly done on Mac, there are many who prefer video editing on their powerful phones. It is quite shocking that Final Cut Pro for Android and iOS users is not yet available.
Since it is an Apple-exclusive application, you would have expected FCP mobile app for iPhone and iPad. But Apple is yet to develop a mobile app for Final Cut Pro. Naturally, we have to look for Final Cut Pro alternative mobile apps for smartphone users. The alternatives need to be as feature-rich and powerful as FCP. Here is the list of the best Final Cut Pro alternative apps for Android and iOS users.
Part 1. Final Cut Pro Alternative App for Android
There is no Final Cut Pro app available for Android users. It is not surprising because Final Cut Pro is an Apple product. When you search for Final Cut Pro on Play Store, you will come across an FCP app. But it is a fake app and not developed by Apple. Here is our recommendation of the best Final Cut Pro alternative app for Android users.
1. Filmora
Filmora is the best alternative to Final Cut Pro for Android users. The app has a super high rating on Play Store. Filmora is available for free and you can create amazing HD videos. You can add stunning effects, animations, texts, filters, backgrounds, and much more. You can obviously perform the basic video edits such as trim, cut, join, and likewise. The app allows easy sharing of edited videos on social media platforms.
You can add keyframes for personalized creativity animations. There is a wide range of music available to pick from. Besides, there are amazing stickers and emojis available to apply to your video. The user interface is super intuitive for everyone to use easily without prior experience. The free version attaches a watermark and you can remove it by upgrading to VIP membership.

Link – https://play.google.com/store/apps/details?id=com.wondershare.filmorago&hl=en\_IN&gl=US
2. InShot
InShot is an extremely popular video editor app among Android users. It is featured as the Editor’s Choice on Play Store. The app has all the features and functionalities you need for basic and advanced video editing. In spite of being a powerful app, the graphical interface is user-friendly.
There are beautiful transitions, stickers, text effects, voice effects, and frames available. You can make picture-in-picture videos, slideshow videos, and slow-motion videos. You can also create stories and GIFs for social media. Besides, there is a keyframe option for texts and stickers. You can easily add voiceover, music, and voice effect to enhance the video content.

Link –https://play.google.com/store/apps/details?id=com.camerasideas.instashot&hl=en\_IN&gl=US
3. KineMaster
KineMaster is a popular video editing app among beginners. You can create your video from scratch using its video templates. KineMaster has a wide range of different categories of video templates to get started. Starting from basic adjustments to adding filters and effects, everything is available on KineMaster.
The user interface is super easy to operate. The app comes with an incredible collection of assets such as animations and clip graphics. You can remove the background from your video or photo instantly. Besides, you can save the edited video in desired video quality and share it instantly on social media platforms.

Link – https://play.google.com/store/apps/details?id=com.nexstreaming.app.kinemasterfree&hl=en\_IN&gl=US
4. Funimate
Funimate is a relatively new video editing app. But in a short time, the app has managed to become a top video editor app on Play Store. This is because it is extremely powerful and it is comparable to Final Cut Pro in terms of features. The app has a stunning collection of video and text effects that will enhance video content. You can work with multiple video layers just like Final Cut Pro.
The keyframe effect is a strong point for customized and personalized animations. You can choose from the different transitions, overlays, and backgrounds. Besides, there is a wide range of chic effects and filters to go with modern video trends. There is a dedicated 3D space available to experiment with object and text animations. You can sync music and choose AI effects and video masks.

Link – https://play.google.com/store/apps/details?id=com.avcrbt.funimate&hl=en\_IN&gl=US
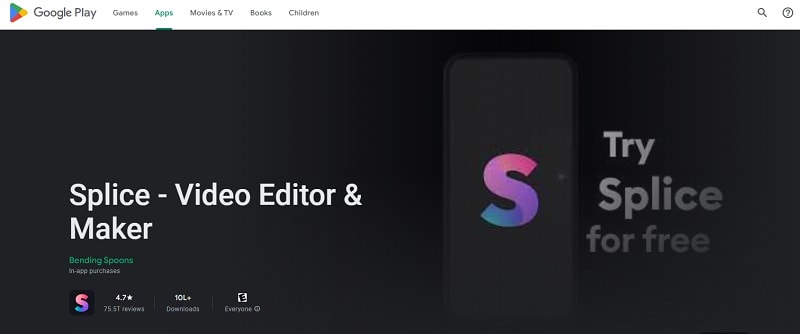
5. Splice
This is another relatively new video editor app but has a superb rating from users. The powerful video editor app makes it easy for beginners to edit videos comfortably. It has a dedicated timeline to work on your video clip and edit as per your requirements. There are beautiful text effects and overlays available.
Besides, you can add and sync music perfectly. Moreover, you can adjust the speed of your video to get the slow-motion effect. The basic video editing tools are available and you can create videos from your photos. There are amazing transitions and video effects present to apply to your photos and video clips. Overall, the video editor is suitable for beginners as well as professionals.
Link – https://play.google.com/store/apps/details?id=com.splice.video.editor&hl=en\_IN&gl=US
Part 2. Final Cut Pro Alternative App for iPhone
Since Final Cut Pro is from Apple, you would have expected an FCP app for iPhone and iPad. Unfortunately, Apple has no plan yet to launch Final Cut Pro mobile app. Here are the Final Cut Pro alternative apps for iPhone and iPad users.
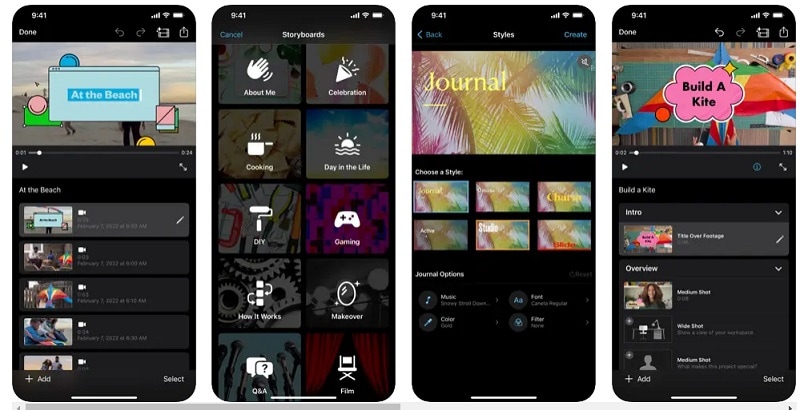
1. iMovie
iMovie by Apple is considered to be an ideal alternative to Final Cut Pro. Even though it is not as advanced as FCP, but there are powerful features for professionals as well. You can create videos from scratch and there are beautiful templates available to get started. You can also make Hollywood-style cinematic trailers to get your viewers excited.
Apart from templates of different categories, there are different text styles and textures available to pick from. You can get the popular picture-in-picture, split screen, and green screen effect options. It supports editing 4K videos at 60 fps. You can send your video projects to iPad and Mac conveniently.
Link – https://apps.apple.com/us/app/imovie/id377298193
2. Quik
Quik by GoPro is one of the most popular video editors. GoPro is the leading action camera brand. Naturally, there is huge traction for its video editor. First of all, its speed adjustment feature is the highlight of the app. You can go for super slow, regular slow, freeze, timelapse, hyper-lapse, and fast motion.
Select from a wide range of themes to get started. There is no dearth of filters, transitions, and effects. Some of the filters are super exclusive to the app. You can share your edited video on social media platforms instantly. The multi-selection timeline is suitable for advanced video editors. The app has exclusive features for GoPro owners.

Link – https://apps.apple.com/us/app/gopro-quik-video-editor/id561350520
3. Magisto
If you are into storytelling with your videos, this is the best app to edit your videos. It has all the features and options to make your video look classic and eye-catching. As a matter of fact, it is arguably the best video editor for social media video creators. You can use its artificial intelligence feature to select the best parts of your video automatically.
There are ready-made templates available to make your video look professional as well as entertaining. You can perform all the basic video editing tasks swiftly. You can work with the music part comfortably so that your video content enhances. Starting from slideshow videos to short videos for social media, the app is perfect for different genres of video making.

Link – https://apps.apple.com/us/app/magisto-video-editor-maker/id486781045
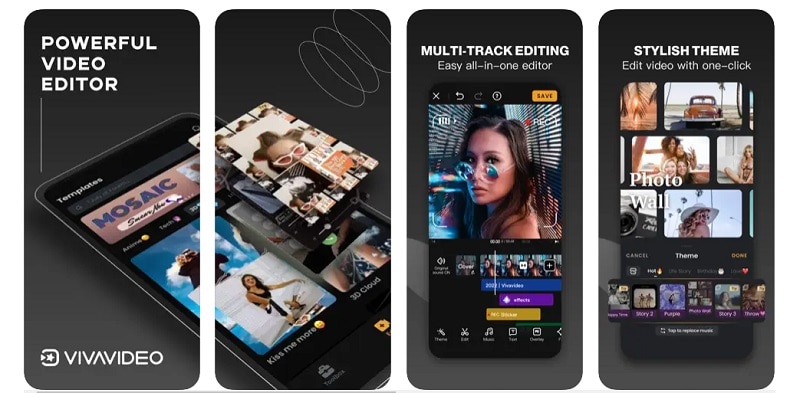
4. VivaVideo
VivaVideo is a highly rated video editing app. The app lets you change video speed, supports high-resolution output, and comes with dynamic effects. You can make short videos with your photos. You can decorate them beautifully with frames and objects available.
There are several cinematic filters available to enhance video quality. Apart from these, you get to select from a wide collection of text effects and emojis. You can work with keyframes and export video in 4k resolution. You can also create GIFs for social media platforms instantly.
Link – https://apps.apple.com/us/app/vivavideo-video-editor-maker/id738897668
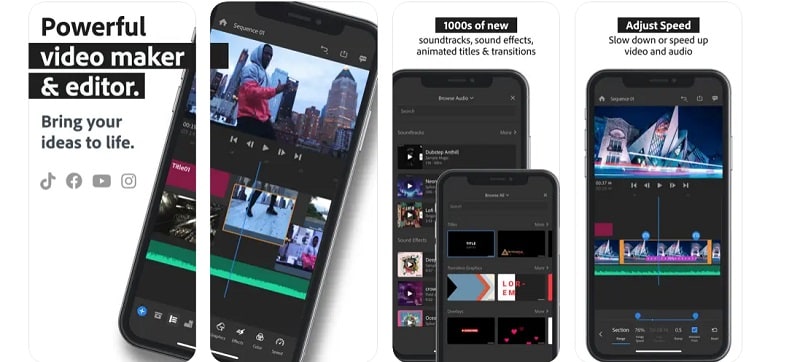
5. Adobe Premiere Rush
Adobe Premiere is the biggest competitor of Final Cut Pro. But Adobe has gone one step ahead of FCP by releasing its mobile app. Adobe Premiere Rush is undoubtedly a powerful video editor. It is true that all the features of the Adobe Premiere desktop application are not available. But it is still great for a professional video creator.
There are multi-track timeline, customizable animated templates, and stunning video and text effects. The app has AI sensors for automated color balancing. The premium content library has everything you need. There are different aspect ratios available for creating videos for all devices. You can export edited videos in 4K resolution.
Link – https://apps.apple.com/us/app/adobe-premiere-rush-edit-video/id1188753863
Part 3. Related FAQs
1. Is Final Cut Pro a free app?
No, Final Cut Pro is not a free app. It is a paid app that costs $299.99 for lifetime access. However, you can download the free trial version of Final Cut Pro. You can use the trial version for 90 days before purchasing the product.
2. Does Final Cut Pro have a mobile app?
No, Final Cut Pro does not have any mobile app as of now. It is exclusively for iMac and MacBook users. You can use Filmora mobile app if you are looking for an FCP alternative.
3. Is Final Cut Pro Apple only?
Apple is the developer of Final Cut Pro. Therefore, it is an Apple-exclusive product. Naturally, it works only on macOS-based devices such as iMac and MacBook.
Free Download For Win 7 or later(64-bit)
Free Download For macOS 10.14 or later
Part 1. Final Cut Pro Alternative App for Android
There is no Final Cut Pro app available for Android users. It is not surprising because Final Cut Pro is an Apple product. When you search for Final Cut Pro on Play Store, you will come across an FCP app. But it is a fake app and not developed by Apple. Here is our recommendation of the best Final Cut Pro alternative app for Android users.
1. Filmora
Filmora is the best alternative to Final Cut Pro for Android users. The app has a super high rating on Play Store. Filmora is available for free and you can create amazing HD videos. You can add stunning effects, animations, texts, filters, backgrounds, and much more. You can obviously perform the basic video edits such as trim, cut, join, and likewise. The app allows easy sharing of edited videos on social media platforms.
You can add keyframes for personalized creativity animations. There is a wide range of music available to pick from. Besides, there are amazing stickers and emojis available to apply to your video. The user interface is super intuitive for everyone to use easily without prior experience. The free version attaches a watermark and you can remove it by upgrading to VIP membership.

Link – https://play.google.com/store/apps/details?id=com.wondershare.filmorago&hl=en\_IN&gl=US
2. InShot
InShot is an extremely popular video editor app among Android users. It is featured as the Editor’s Choice on Play Store. The app has all the features and functionalities you need for basic and advanced video editing. In spite of being a powerful app, the graphical interface is user-friendly.
There are beautiful transitions, stickers, text effects, voice effects, and frames available. You can make picture-in-picture videos, slideshow videos, and slow-motion videos. You can also create stories and GIFs for social media. Besides, there is a keyframe option for texts and stickers. You can easily add voiceover, music, and voice effect to enhance the video content.

Link –https://play.google.com/store/apps/details?id=com.camerasideas.instashot&hl=en\_IN&gl=US
3. KineMaster
KineMaster is a popular video editing app among beginners. You can create your video from scratch using its video templates. KineMaster has a wide range of different categories of video templates to get started. Starting from basic adjustments to adding filters and effects, everything is available on KineMaster.
The user interface is super easy to operate. The app comes with an incredible collection of assets such as animations and clip graphics. You can remove the background from your video or photo instantly. Besides, you can save the edited video in desired video quality and share it instantly on social media platforms.

Link – https://play.google.com/store/apps/details?id=com.nexstreaming.app.kinemasterfree&hl=en\_IN&gl=US
4. Funimate
Funimate is a relatively new video editing app. But in a short time, the app has managed to become a top video editor app on Play Store. This is because it is extremely powerful and it is comparable to Final Cut Pro in terms of features. The app has a stunning collection of video and text effects that will enhance video content. You can work with multiple video layers just like Final Cut Pro.
The keyframe effect is a strong point for customized and personalized animations. You can choose from the different transitions, overlays, and backgrounds. Besides, there is a wide range of chic effects and filters to go with modern video trends. There is a dedicated 3D space available to experiment with object and text animations. You can sync music and choose AI effects and video masks.

Link – https://play.google.com/store/apps/details?id=com.avcrbt.funimate&hl=en\_IN&gl=US
5. Splice
This is another relatively new video editor app but has a superb rating from users. The powerful video editor app makes it easy for beginners to edit videos comfortably. It has a dedicated timeline to work on your video clip and edit as per your requirements. There are beautiful text effects and overlays available.
Besides, you can add and sync music perfectly. Moreover, you can adjust the speed of your video to get the slow-motion effect. The basic video editing tools are available and you can create videos from your photos. There are amazing transitions and video effects present to apply to your photos and video clips. Overall, the video editor is suitable for beginners as well as professionals.

Link – https://play.google.com/store/apps/details?id=com.splice.video.editor&hl=en\_IN&gl=US
Part 2. Final Cut Pro Alternative App for iPhone
Since Final Cut Pro is from Apple, you would have expected an FCP app for iPhone and iPad. Unfortunately, Apple has no plan yet to launch Final Cut Pro mobile app. Here are the Final Cut Pro alternative apps for iPhone and iPad users.
1. iMovie
iMovie by Apple is considered to be an ideal alternative to Final Cut Pro. Even though it is not as advanced as FCP, but there are powerful features for professionals as well. You can create videos from scratch and there are beautiful templates available to get started. You can also make Hollywood-style cinematic trailers to get your viewers excited.
Apart from templates of different categories, there are different text styles and textures available to pick from. You can get the popular picture-in-picture, split screen, and green screen effect options. It supports editing 4K videos at 60 fps. You can send your video projects to iPad and Mac conveniently.

Link – https://apps.apple.com/us/app/imovie/id377298193
2. Quik
Quik by GoPro is one of the most popular video editors. GoPro is the leading action camera brand. Naturally, there is huge traction for its video editor. First of all, its speed adjustment feature is the highlight of the app. You can go for super slow, regular slow, freeze, timelapse, hyper-lapse, and fast motion.
Select from a wide range of themes to get started. There is no dearth of filters, transitions, and effects. Some of the filters are super exclusive to the app. You can share your edited video on social media platforms instantly. The multi-selection timeline is suitable for advanced video editors. The app has exclusive features for GoPro owners.

Link – https://apps.apple.com/us/app/gopro-quik-video-editor/id561350520
3. Magisto
If you are into storytelling with your videos, this is the best app to edit your videos. It has all the features and options to make your video look classic and eye-catching. As a matter of fact, it is arguably the best video editor for social media video creators. You can use its artificial intelligence feature to select the best parts of your video automatically.
There are ready-made templates available to make your video look professional as well as entertaining. You can perform all the basic video editing tasks swiftly. You can work with the music part comfortably so that your video content enhances. Starting from slideshow videos to short videos for social media, the app is perfect for different genres of video making.

Link – https://apps.apple.com/us/app/magisto-video-editor-maker/id486781045
4. VivaVideo
VivaVideo is a highly rated video editing app. The app lets you change video speed, supports high-resolution output, and comes with dynamic effects. You can make short videos with your photos. You can decorate them beautifully with frames and objects available.
There are several cinematic filters available to enhance video quality. Apart from these, you get to select from a wide collection of text effects and emojis. You can work with keyframes and export video in 4k resolution. You can also create GIFs for social media platforms instantly.

Link – https://apps.apple.com/us/app/vivavideo-video-editor-maker/id738897668
5. Adobe Premiere Rush
Adobe Premiere is the biggest competitor of Final Cut Pro. But Adobe has gone one step ahead of FCP by releasing its mobile app. Adobe Premiere Rush is undoubtedly a powerful video editor. It is true that all the features of the Adobe Premiere desktop application are not available. But it is still great for a professional video creator.
There are multi-track timeline, customizable animated templates, and stunning video and text effects. The app has AI sensors for automated color balancing. The premium content library has everything you need. There are different aspect ratios available for creating videos for all devices. You can export edited videos in 4K resolution.

Link – https://apps.apple.com/us/app/adobe-premiere-rush-edit-video/id1188753863
Part 3. Related FAQs
1. Is Final Cut Pro a free app?
No, Final Cut Pro is not a free app. It is a paid app that costs $299.99 for lifetime access. However, you can download the free trial version of Final Cut Pro. You can use the trial version for 90 days before purchasing the product.
2. Does Final Cut Pro have a mobile app?
No, Final Cut Pro does not have any mobile app as of now. It is exclusively for iMac and MacBook users. You can use Filmora mobile app if you are looking for an FCP alternative.
3. Is Final Cut Pro Apple only?
Apple is the developer of Final Cut Pro. Therefore, it is an Apple-exclusive product. Naturally, it works only on macOS-based devices such as iMac and MacBook.
Free Download For Win 7 or later(64-bit)
Free Download For macOS 10.14 or later
Guide To Using Luts Perfectly in Final Cut Pro
Final Cut Pro is a powerful video editing software available for Mac OS. You can create professional-looking videos using this tool. To give your videos a more professional touch, you can use LUTs as well. It is a quick way to color grade and improve the feel of your media content. They are essentially a set of instructions that apply a particular color grading to your video.
Moreover, with so many options available, you can choose from any color grading style you want. From cinematic to retro, LUTs offer you a variety of color adjustment tones and overlays. All you have to do is to choose from free LUTs for Final Cut Pro and download your preferred one.
- Part 2: How to Apply LUTs on Final Cut Pro
- Part 3: Discussing Wondershare Filmora LUTs - The Best Video Editing Platform
Part 1: Discovering The Top Best LUTs for FCPX
You are at the right place if you’re having trouble finding the best LUTs for FCPX. This section will provide you with one of the best LUTs you can choose for your videos.
1.Free Cinematic LUTs Pack for Video Editing
This free LUT pack is a perfect choice to give your videos a cinematic look. It features a soft blue color grading with high contrast that can make your footage look like it was shot on film. This LUT is especially effective for outdoor scenes and action shots. Moreover, its color grading enhances the drama and feel of your video footage.

2.10 Free Vintage Color Presets for Final Cut Pro
10 Free Vintage Color Presets for Final Cut Pro is a great pack if you’re looking for a vintage or retro feel. It has a warm, yellowish color grading that can give your videos a nostalgic look. This pack is ideal for footage shot in the 70s, 80s, or 90s. It highlights the muddiness and brown shades in your video to add a touch of authenticity to it.

3. Perfect Green Video LUT
Perfect Green Video LUT is a pack of 3 cinematic-style LUTs. This pack is ideal for travel or nature videos as it increases the green tone in your videos. It has a lush, green color grading that can make your videos look vibrant and lively. Additionally, this pack is effective for outdoor scenes as it improves your video’s natural colors and makes it look more dynamic.

4. Cyberpunk Color Grades
Cyberpunk Color Grades is a pack of modern cyberpunk-style LUTs. It is a fantastic LUT pack if you’re working on a music video or a creative project. It has a bold, colorful grading with high saturation that can make your video stand out. This LUT pack is perfect for scenes with many neon lights or bright backgrounds. Moreover, it adds an extra pop of color and makes your videos look more energetic.

5. Pro Retouching Essentials Pack by Prince Meyson
Prince Meyson offers this skin tone enhancer LUT pack. It has a neutral, balanced color grading that can make your videos look more polished and professional. This LUT is ideal for interviews, documentaries, or corporate videos. Moreover, this pack is perfect for portraits and close-up shots. It can enhance the natural colors of your footage and make it look more refined.

Part 2: How to Apply LUTs on Final Cut Pro
Now that you’ve discovered there are many Final Cut Pro LUTs free to download. The most important thing is to learn how to use these free LUTs on your video using FCPX. Here are some methods to learn to apply LUTs using Final Cut Pro in simple steps.
Method 1 Using Custom Layer
Step1
Open Final Cut Pro and import your video. Once the video is imported, click on the clip you want to apply the LUT.

Step2
Go to the “Effect Browser” and search for the LUT option from the search menu. After selecting it, you will get a “Custom LUT” layer. Select the custom LUT layer and drag and drop it onto your video clip. Then, click on the video clip and go to the “Inspector” window.

Step3
Select the “Custom LUT” option in the inspector window and choose your desired LUT from the LUT drop-down menu. Final Cut Pro will apply your desired LUT to your video clip.

Method 2 Using Adjustment Layer
Step1
Click the plugin button once you’ve imported your video clip and choose RT Adjustment Layer. Furthermore, if you don’t have this plugin, you can download it for free.

Step2
An icon will appear once you’ve selected RT Adjustment Layer. Drag and drop this icon on top of your video clip.

Step3
Drag and drop the “Custom LUT” layer onto your RT Adjustment Layer from the Effect Browser. Click on the RT Adjustment Layer and choose your desired LUT from the “Inspector” menu.

Method 3 Change Settings To Enable LUTs
Step1
Import your video into Final Cut Pro and click on your video in the library and open the inspector window.

Step2
In the section of the “Inspector” menu, click the drop-down menu and select the “General” option. It will open up new options in the menu where you have to choose the “Camera LUT” option and select your preferred LUT. After selecting your LUT, save your video by choosing the option.

Part 3: Discussing Wondershare Filmora LUTs - The Best Video Editing Platform
If you’re looking for a great video editing tool, Wondershare Filmora might be just what you need. With many features embedded in it, it makes it easy to create professional-looking videos. Moreover, you can apply LUTs to add a cinematic touch to your footage. With over 200+ LUTs available, you can improve the color grading of your videos. Additionally, this tool allows you to adjust its intensity as well.
Furthermore, Wondershare Filmora offers options for color adjustments and enhancements. You can add transitions, templates, effects, and filters to your videos. In addition to this, it offers over 10 billion free media assets that you can use to enhance your videos. With Wondershare Filmora, you can play around with different features and options to make your content look fantastic.

Empower your videos with a new mood using different LUTs. Filmora now offers 100+ top-quality 3D LUTs cover a broad range of scenarios. Transform your videos with Filmora’s powerful 3D LUTs.
Apply LUT on Videos Apply LUT on Videos Learn More

Conclusion
In conclusion, Final Cut Pro is a powerful tool for video editing. This tool allows you to make color corrections and color adjustments to your videos. Furthermore, Final Cut Pro offers the option to use LUTs for color grading. You can find many best LUTs for FCPX available online to use in this tool. However, Wondershare Filmora is another amazing tool that you use to color-grade your videos professionally.
Part 1: Discovering The Top Best LUTs for FCPX
You are at the right place if you’re having trouble finding the best LUTs for FCPX. This section will provide you with one of the best LUTs you can choose for your videos.
1.Free Cinematic LUTs Pack for Video Editing
This free LUT pack is a perfect choice to give your videos a cinematic look. It features a soft blue color grading with high contrast that can make your footage look like it was shot on film. This LUT is especially effective for outdoor scenes and action shots. Moreover, its color grading enhances the drama and feel of your video footage.

2.10 Free Vintage Color Presets for Final Cut Pro
10 Free Vintage Color Presets for Final Cut Pro is a great pack if you’re looking for a vintage or retro feel. It has a warm, yellowish color grading that can give your videos a nostalgic look. This pack is ideal for footage shot in the 70s, 80s, or 90s. It highlights the muddiness and brown shades in your video to add a touch of authenticity to it.

3. Perfect Green Video LUT
Perfect Green Video LUT is a pack of 3 cinematic-style LUTs. This pack is ideal for travel or nature videos as it increases the green tone in your videos. It has a lush, green color grading that can make your videos look vibrant and lively. Additionally, this pack is effective for outdoor scenes as it improves your video’s natural colors and makes it look more dynamic.

4. Cyberpunk Color Grades
Cyberpunk Color Grades is a pack of modern cyberpunk-style LUTs. It is a fantastic LUT pack if you’re working on a music video or a creative project. It has a bold, colorful grading with high saturation that can make your video stand out. This LUT pack is perfect for scenes with many neon lights or bright backgrounds. Moreover, it adds an extra pop of color and makes your videos look more energetic.

5. Pro Retouching Essentials Pack by Prince Meyson
Prince Meyson offers this skin tone enhancer LUT pack. It has a neutral, balanced color grading that can make your videos look more polished and professional. This LUT is ideal for interviews, documentaries, or corporate videos. Moreover, this pack is perfect for portraits and close-up shots. It can enhance the natural colors of your footage and make it look more refined.

Part 2: How to Apply LUTs on Final Cut Pro
Now that you’ve discovered there are many Final Cut Pro LUTs free to download. The most important thing is to learn how to use these free LUTs on your video using FCPX. Here are some methods to learn to apply LUTs using Final Cut Pro in simple steps.
Method 1 Using Custom Layer
Step1
Open Final Cut Pro and import your video. Once the video is imported, click on the clip you want to apply the LUT.

Step2
Go to the “Effect Browser” and search for the LUT option from the search menu. After selecting it, you will get a “Custom LUT” layer. Select the custom LUT layer and drag and drop it onto your video clip. Then, click on the video clip and go to the “Inspector” window.

Step3
Select the “Custom LUT” option in the inspector window and choose your desired LUT from the LUT drop-down menu. Final Cut Pro will apply your desired LUT to your video clip.

Method 2 Using Adjustment Layer
Step1
Click the plugin button once you’ve imported your video clip and choose RT Adjustment Layer. Furthermore, if you don’t have this plugin, you can download it for free.

Step2
An icon will appear once you’ve selected RT Adjustment Layer. Drag and drop this icon on top of your video clip.

Step3
Drag and drop the “Custom LUT” layer onto your RT Adjustment Layer from the Effect Browser. Click on the RT Adjustment Layer and choose your desired LUT from the “Inspector” menu.

Method 3 Change Settings To Enable LUTs
Step1
Import your video into Final Cut Pro and click on your video in the library and open the inspector window.

Step2
In the section of the “Inspector” menu, click the drop-down menu and select the “General” option. It will open up new options in the menu where you have to choose the “Camera LUT” option and select your preferred LUT. After selecting your LUT, save your video by choosing the option.

Part 3: Discussing Wondershare Filmora LUTs - The Best Video Editing Platform
If you’re looking for a great video editing tool, Wondershare Filmora might be just what you need. With many features embedded in it, it makes it easy to create professional-looking videos. Moreover, you can apply LUTs to add a cinematic touch to your footage. With over 200+ LUTs available, you can improve the color grading of your videos. Additionally, this tool allows you to adjust its intensity as well.
Furthermore, Wondershare Filmora offers options for color adjustments and enhancements. You can add transitions, templates, effects, and filters to your videos. In addition to this, it offers over 10 billion free media assets that you can use to enhance your videos. With Wondershare Filmora, you can play around with different features and options to make your content look fantastic.

Empower your videos with a new mood using different LUTs. Filmora now offers 100+ top-quality 3D LUTs cover a broad range of scenarios. Transform your videos with Filmora’s powerful 3D LUTs.
Apply LUT on Videos Apply LUT on Videos Learn More

Conclusion
In conclusion, Final Cut Pro is a powerful tool for video editing. This tool allows you to make color corrections and color adjustments to your videos. Furthermore, Final Cut Pro offers the option to use LUTs for color grading. You can find many best LUTs for FCPX available online to use in this tool. However, Wondershare Filmora is another amazing tool that you use to color-grade your videos professionally.
How to Record Super Slow Motion Videos on Your Huawei/Samsung/iPhone?
Super Slow Motion has long been among the finest (and most exploited) video effects. The method was initially limited to high-end lenses, but super slo-mo has become increasingly superior as smartphone technology advances.
Super slo-mo is a terrific technique to learn how to use if you want to accentuate a dramatic moment or extend the humiliation of a friend you captured in an embarrassing scenario. This article has stepwise guides and tips for recording super slo-mo on your phone. Let’s get going!
In this article
01 What’s the Difference Between Slow-Mo and Super Slow-Mo?
02 How to Record Super Slo-Mo Videos with Samsung Galaxy S20 and Later models?
03 How to Edit Super Slow Motion Video in Samsung Galaxy S21?
04 How to Record Super Slow Motion Video with Huawei Mate 20 and Later Phones?
05 How to Shoot Slo-Mo Videos on iPhone?
06 Tips for Recording Super Slow Motion Video
Part 1: What’s the Difference Between Slow-Mo and Super Slow-Mo?
Super Slow-Mo (960fps) is a technology that allows users to shoot films at 960fps using a top-speed lens, capturing events that the naked eye cannot ordinarily notice by viewing them 32 times slower than regular videos (30fps) and four times slower than videos produced using the current Slow Motion feature (240fps).
Super Slow-mo movie may be displayed as 6-12 sec long on old smartphones, such as Galaxy S9/S9+ and Note9. However, the newer versions, such as Galaxy S10 Series, can play super slow-mo movies up to 14.8 sec.
You’ll understand the difference between the Slow-Mo and Super Slow-Mo better after reading the below information:
Slow Motion
Video is produced at an 8-times slower rate than usual, equivalent to the speed of a movie, advertisement, or sporting event.
Super Slow Motion
Videos are played 32 times slower than usual, catching minute changes in facial gestures and fast-moving elements.
Part 2: How to Record Super Slo-Mo Videos with Samsung Galaxy S20 and Later models?
Models That Support Super Slow-Mo: Galaxy S20, Galaxy S20+, Galaxy S20+ Ultra, Galaxy Z Flip, and later models.
Slow-motion video is often created by filming at a fast frame per second (fps) speed and then playing back at a far slower pace. This results in intriguing videos with slowed-down motion. The event is captured at 960 frames per second with the Super Slow-mo function, four times quicker than conventional slow motion. When it’s replayed at 30 frames per second, it’s 32 times slower, making mundane moments appear spectacular.
To capture super slow-motion videos with your Samsung Galaxy S20 and later models, follow the instructions below:
Step 1: Launch the camera on your phone by tapping the Camera app.
Step 2: Now, click on the Super Slow-Mo option to proceed.
Step 3: Press the White Circle in the center to start the recording and press it again to stop when you are done.
Note: Make sure that your phone’s video resolution is already on HD because Super Slow-Mo only supports HD resolutions.
Part 3: How to Edit Super Slow Motion Video in Samsung Galaxy S21?
Only capturing the super slow-motion videos is not enough, especially if you are a content creator. Even in the super slow-mo, there might be some unnecessary parts (since it is more detailed) that you need to cut out or the parts that need some enhancements to make the video look captivating.
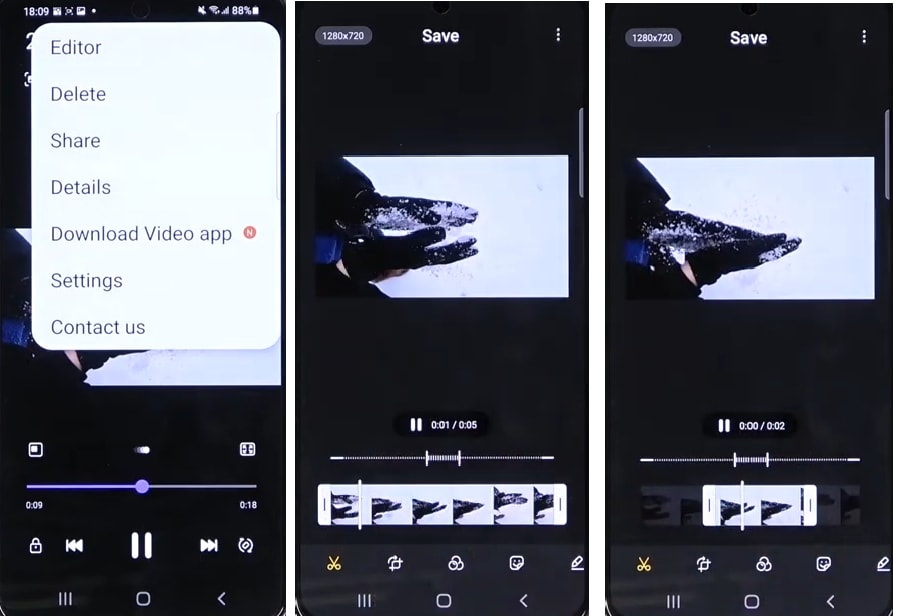
However, not every phone is eligible to edit super slow-mo videos by not degrading the video resolutions. But Samsung Galaxy S21 allows you to do that by keeping the video resolution intact. You can edit the Super Slow-Mo videos with Galaxy S21 by following these instructions:
Step 1: Open the Camera app and navigate the super slow-mo video you wish to edit.
Step 2: Now, play it and tap the screen. You will see three vertical dots in the right corner. Click on them.
Step 3: Select the Editor option from the dropdown menu that appears.
Step 4: After that, you can adjust the length, crop the video, add effects, add stickers, add music, etc., by selecting from the bottom menu.
Step 5: After you’re done editing, click on the Save option at the top to save the video to your Gallery.
Part 4: How to Record Super Slow Motion Video with Huawei Mate 20 and Later Phones?
Models That Support Super Slow-Mo: Huawei Mate 20/20 Pro/20 X and later Mate models.
Before we demonstrate how to capture a super slow-mo with a Huawei Mate 20 and later models, we’ll explain this popular capture mode.
To begin, you should be aware that a camera/camera sensor collects a specific number of frames per second. The movie becomes legible by combining these pictures; the more images there are, the more fluent the video will be. The naked eye is thought to decipher about 60 pictures every second.
The benefit of improved camera sensors is that you can capture a maximum number of photos per second (some smartphones can record up to 960 / second) and slow down the sampling rate to produce a super slow-motion effect on the Huawei Mate 20 or later models.
Now, follow the stepwise guide to record super slow-mo with Huawei Mate 40 or later models:
Step 1: Launch your phone’s Camera go to More to select the Slow-Mo option.
Step 2: By default, you will see 4x on the slow-mo capture mode, which means the video will be recorded at 120FPS. Huawei Mate 40 allows you to capture up to 128X, i.e, 3840FPS for fast moving objects. To enable the Super Slo-Mo feature, select the 32X or 128X in this mode.
Step 3: Click on the Circle in the center to start and stop the recording. The video will be saved in your Gallery.
Part 5: How to Shoot Slo-Mo Videos on iPhone?
Slow-motion film on your iPhone essentially means slowing the fps so that everything appears to move slower inside the video. It is a popular effect employed by artists to produce one-of-a-kind video clips of sports footage, natural scenes, or sequences with a lot of dramatic motion.
Slow-motion films are supported by all iPhones, beginning with the 5S model, and the capability gets more robust and more stable with each successive generation. Shooting slow-motion films with your iPhone are addicting and enjoyable, and it adds drama to various settings.
Here is a step-by-step method for filming slow-mo with an iPhone, regardless of model.
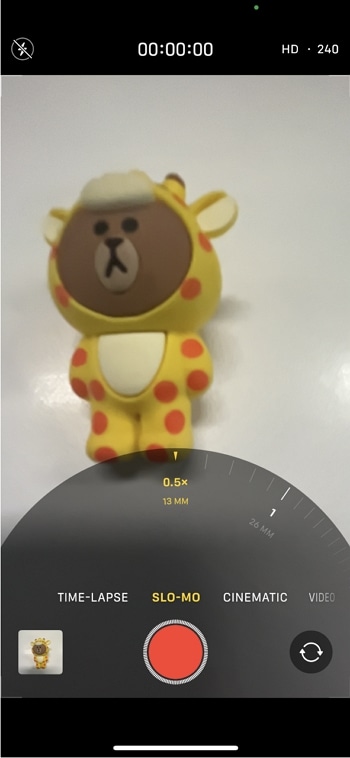
Step 1: Launch the Camera app on your iPhone and go to the Slow-Mo effect by sliding from the options above. Change the frame rate on the upper right corner to 120, 240, 720, depending on the iPhone models you’re using.
Step 2: Now, start the recording by clicking the Red Circle in the center or either of the Volume button.
Step 3: After you’re done recording, press the Red Circle again and head towards the Gallery to view the recorded video.
For more details, check: How to make slo-mo video on your iPhone.
Part 6: Tips for Recording Super Slow Motion Video
Although super slow-motion videos are easy to record, they can be challenging for a content creator. But don’t worry, with the following tips, we have got you covered:
Utilize A Tripod
It’s critical to keep your phone as steady as possible when filming in Super Slow-mo since shaking might conflict with your video and hinder it from recognizing motions when set to auto-record. To get the most out of Super Slow-mo, we recommend using a tripod whenever feasible.
You can check these tripods for iPhone
Transition Between Single and Multi-Takes
To boost your chances of catching the ideal timing in Super Slow-mo, your phone allows you to record in Multi-Take mode, which can capture many bursts of Super Slow-mo in one video.
When combined with an auto record, additional Super Slow-mo videos will be captured as much as the focus box senses activity and will end only when you end filming. The manual record works similarly. However, you’ll have to physically hit the trigger each time you wish to record a picture in Super Slow-mo.
As the name indicates, Single-Take will record a single Super Slow-mo clip and then cease recording a moment or two later. Because Multi-Take clips are often more extensive, this could save a large storage capacity.
Readjust the Focus
The focus or auto-recording is tiny by default. Fortunately, you can enlarge it to improve its odds of recognizing movement. To adjust the size of the box, hold it until only its edges are visible, then move any corner from the others to expand the box’s area. Simply tap anywhere outside the borders to verify the adjustment when you’re happy with the size.
Capture in Natural Light
Because of the large number of frames it collects, Super Slow-mo works the best in natural daylight situations. Though not visible to the human eye, indoor lighting, especially LED bulbs and tiny fluorescents, seems to flash at very high rates. Even if the environment is well-lit, Super Slow-mo detects this and shows your subject in a substantially darker tone.
View the Video at Normal Speed
If you wish to watch your Super Slow-mo movies at regular speed, deactivate Super Slow-mo playing by tapping on the option directly below the video. This will give you a greater understanding of your phone’s incredible capacity to bring the world to a halt.
Learn more about : How to Convert normal video to slo-mo video?
Besides the tips mentioned above, you can also watch this video to get some tips and tricks in recording slo-mo video with iPhone.
Conclusion
Super Slow Motion videos are excellent for showcasing the action and conveying tales, and they are also entertaining and straightforward to create. Your only constraints are time and imagination. However, your Android or iPhone’s camera has many more tricks in its sleeve: Live images, time-lapse, Panoramas, and Portrait mode let you express yourself freely!
02 How to Record Super Slo-Mo Videos with Samsung Galaxy S20 and Later models?
03 How to Edit Super Slow Motion Video in Samsung Galaxy S21?
04 How to Record Super Slow Motion Video with Huawei Mate 20 and Later Phones?
05 How to Shoot Slo-Mo Videos on iPhone?
06 Tips for Recording Super Slow Motion Video
Part 1: What’s the Difference Between Slow-Mo and Super Slow-Mo?
Super Slow-Mo (960fps) is a technology that allows users to shoot films at 960fps using a top-speed lens, capturing events that the naked eye cannot ordinarily notice by viewing them 32 times slower than regular videos (30fps) and four times slower than videos produced using the current Slow Motion feature (240fps).
Super Slow-mo movie may be displayed as 6-12 sec long on old smartphones, such as Galaxy S9/S9+ and Note9. However, the newer versions, such as Galaxy S10 Series, can play super slow-mo movies up to 14.8 sec.
You’ll understand the difference between the Slow-Mo and Super Slow-Mo better after reading the below information:
Slow Motion
Video is produced at an 8-times slower rate than usual, equivalent to the speed of a movie, advertisement, or sporting event.
Super Slow Motion
Videos are played 32 times slower than usual, catching minute changes in facial gestures and fast-moving elements.
Part 2: How to Record Super Slo-Mo Videos with Samsung Galaxy S20 and Later models?
Models That Support Super Slow-Mo: Galaxy S20, Galaxy S20+, Galaxy S20+ Ultra, Galaxy Z Flip, and later models.
Slow-motion video is often created by filming at a fast frame per second (fps) speed and then playing back at a far slower pace. This results in intriguing videos with slowed-down motion. The event is captured at 960 frames per second with the Super Slow-mo function, four times quicker than conventional slow motion. When it’s replayed at 30 frames per second, it’s 32 times slower, making mundane moments appear spectacular.
To capture super slow-motion videos with your Samsung Galaxy S20 and later models, follow the instructions below:
Step 1: Launch the camera on your phone by tapping the Camera app.
Step 2: Now, click on the Super Slow-Mo option to proceed.
Step 3: Press the White Circle in the center to start the recording and press it again to stop when you are done.
Note: Make sure that your phone’s video resolution is already on HD because Super Slow-Mo only supports HD resolutions.
Part 3: How to Edit Super Slow Motion Video in Samsung Galaxy S21?
Only capturing the super slow-motion videos is not enough, especially if you are a content creator. Even in the super slow-mo, there might be some unnecessary parts (since it is more detailed) that you need to cut out or the parts that need some enhancements to make the video look captivating.
However, not every phone is eligible to edit super slow-mo videos by not degrading the video resolutions. But Samsung Galaxy S21 allows you to do that by keeping the video resolution intact. You can edit the Super Slow-Mo videos with Galaxy S21 by following these instructions:
Step 1: Open the Camera app and navigate the super slow-mo video you wish to edit.
Step 2: Now, play it and tap the screen. You will see three vertical dots in the right corner. Click on them.
Step 3: Select the Editor option from the dropdown menu that appears.
Step 4: After that, you can adjust the length, crop the video, add effects, add stickers, add music, etc., by selecting from the bottom menu.
Step 5: After you’re done editing, click on the Save option at the top to save the video to your Gallery.

Part 4: How to Record Super Slow Motion Video with Huawei Mate 20 and Later Phones?
Models That Support Super Slow-Mo: Huawei Mate 20/20 Pro/20 X and later Mate models.
Before we demonstrate how to capture a super slow-mo with a Huawei Mate 20 and later models, we’ll explain this popular capture mode.
To begin, you should be aware that a camera/camera sensor collects a specific number of frames per second. The movie becomes legible by combining these pictures; the more images there are, the more fluent the video will be. The naked eye is thought to decipher about 60 pictures every second.
The benefit of improved camera sensors is that you can capture a maximum number of photos per second (some smartphones can record up to 960 / second) and slow down the sampling rate to produce a super slow-motion effect on the Huawei Mate 20 or later models.
Now, follow the stepwise guide to record super slow-mo with Huawei Mate 40 or later models:
Step 1: Launch your phone’s Camera go to More to select the Slow-Mo option.
Step 2: By default, you will see 4x on the slow-mo capture mode, which means the video will be recorded at 120FPS. Huawei Mate 40 allows you to capture up to 128X, i.e, 3840FPS for fast moving objects. To enable the Super Slo-Mo feature, select the 32X or 128X in this mode.
Step 3: Click on the Circle in the center to start and stop the recording. The video will be saved in your Gallery.
Part 5: How to Shoot Slo-Mo Videos on iPhone?
Slow-motion film on your iPhone essentially means slowing the fps so that everything appears to move slower inside the video. It is a popular effect employed by artists to produce one-of-a-kind video clips of sports footage, natural scenes, or sequences with a lot of dramatic motion.
Slow-motion films are supported by all iPhones, beginning with the 5S model, and the capability gets more robust and more stable with each successive generation. Shooting slow-motion films with your iPhone are addicting and enjoyable, and it adds drama to various settings.
Here is a step-by-step method for filming slow-mo with an iPhone, regardless of model.
Step 1: Launch the Camera app on your iPhone and go to the Slow-Mo effect by sliding from the options above. Change the frame rate on the upper right corner to 120, 240, 720, depending on the iPhone models you’re using.
Step 2: Now, start the recording by clicking the Red Circle in the center or either of the Volume button.
Step 3: After you’re done recording, press the Red Circle again and head towards the Gallery to view the recorded video.

For more details, check: How to make slo-mo video on your iPhone.
Part 6: Tips for Recording Super Slow Motion Video
Although super slow-motion videos are easy to record, they can be challenging for a content creator. But don’t worry, with the following tips, we have got you covered:
Utilize A Tripod
It’s critical to keep your phone as steady as possible when filming in Super Slow-mo since shaking might conflict with your video and hinder it from recognizing motions when set to auto-record. To get the most out of Super Slow-mo, we recommend using a tripod whenever feasible.
You can check these tripods for iPhone
Transition Between Single and Multi-Takes
To boost your chances of catching the ideal timing in Super Slow-mo, your phone allows you to record in Multi-Take mode, which can capture many bursts of Super Slow-mo in one video.
When combined with an auto record, additional Super Slow-mo videos will be captured as much as the focus box senses activity and will end only when you end filming. The manual record works similarly. However, you’ll have to physically hit the trigger each time you wish to record a picture in Super Slow-mo.
As the name indicates, Single-Take will record a single Super Slow-mo clip and then cease recording a moment or two later. Because Multi-Take clips are often more extensive, this could save a large storage capacity.
Readjust the Focus
The focus or auto-recording is tiny by default. Fortunately, you can enlarge it to improve its odds of recognizing movement. To adjust the size of the box, hold it until only its edges are visible, then move any corner from the others to expand the box’s area. Simply tap anywhere outside the borders to verify the adjustment when you’re happy with the size.
Capture in Natural Light
Because of the large number of frames it collects, Super Slow-mo works the best in natural daylight situations. Though not visible to the human eye, indoor lighting, especially LED bulbs and tiny fluorescents, seems to flash at very high rates. Even if the environment is well-lit, Super Slow-mo detects this and shows your subject in a substantially darker tone.
View the Video at Normal Speed
If you wish to watch your Super Slow-mo movies at regular speed, deactivate Super Slow-mo playing by tapping on the option directly below the video. This will give you a greater understanding of your phone’s incredible capacity to bring the world to a halt.
Learn more about : How to Convert normal video to slo-mo video?
Besides the tips mentioned above, you can also watch this video to get some tips and tricks in recording slo-mo video with iPhone.
Conclusion
Super Slow Motion videos are excellent for showcasing the action and conveying tales, and they are also entertaining and straightforward to create. Your only constraints are time and imagination. However, your Android or iPhone’s camera has many more tricks in its sleeve: Live images, time-lapse, Panoramas, and Portrait mode let you express yourself freely!
02 How to Record Super Slo-Mo Videos with Samsung Galaxy S20 and Later models?
03 How to Edit Super Slow Motion Video in Samsung Galaxy S21?
04 How to Record Super Slow Motion Video with Huawei Mate 20 and Later Phones?
05 How to Shoot Slo-Mo Videos on iPhone?
06 Tips for Recording Super Slow Motion Video
Part 1: What’s the Difference Between Slow-Mo and Super Slow-Mo?
Super Slow-Mo (960fps) is a technology that allows users to shoot films at 960fps using a top-speed lens, capturing events that the naked eye cannot ordinarily notice by viewing them 32 times slower than regular videos (30fps) and four times slower than videos produced using the current Slow Motion feature (240fps).
Super Slow-mo movie may be displayed as 6-12 sec long on old smartphones, such as Galaxy S9/S9+ and Note9. However, the newer versions, such as Galaxy S10 Series, can play super slow-mo movies up to 14.8 sec.
You’ll understand the difference between the Slow-Mo and Super Slow-Mo better after reading the below information:
Slow Motion
Video is produced at an 8-times slower rate than usual, equivalent to the speed of a movie, advertisement, or sporting event.
Super Slow Motion
Videos are played 32 times slower than usual, catching minute changes in facial gestures and fast-moving elements.
Part 2: How to Record Super Slo-Mo Videos with Samsung Galaxy S20 and Later models?
Models That Support Super Slow-Mo: Galaxy S20, Galaxy S20+, Galaxy S20+ Ultra, Galaxy Z Flip, and later models.
Slow-motion video is often created by filming at a fast frame per second (fps) speed and then playing back at a far slower pace. This results in intriguing videos with slowed-down motion. The event is captured at 960 frames per second with the Super Slow-mo function, four times quicker than conventional slow motion. When it’s replayed at 30 frames per second, it’s 32 times slower, making mundane moments appear spectacular.
To capture super slow-motion videos with your Samsung Galaxy S20 and later models, follow the instructions below:
Step 1: Launch the camera on your phone by tapping the Camera app.
Step 2: Now, click on the Super Slow-Mo option to proceed.
Step 3: Press the White Circle in the center to start the recording and press it again to stop when you are done.
Note: Make sure that your phone’s video resolution is already on HD because Super Slow-Mo only supports HD resolutions.
Part 3: How to Edit Super Slow Motion Video in Samsung Galaxy S21?
Only capturing the super slow-motion videos is not enough, especially if you are a content creator. Even in the super slow-mo, there might be some unnecessary parts (since it is more detailed) that you need to cut out or the parts that need some enhancements to make the video look captivating.
However, not every phone is eligible to edit super slow-mo videos by not degrading the video resolutions. But Samsung Galaxy S21 allows you to do that by keeping the video resolution intact. You can edit the Super Slow-Mo videos with Galaxy S21 by following these instructions:
Step 1: Open the Camera app and navigate the super slow-mo video you wish to edit.
Step 2: Now, play it and tap the screen. You will see three vertical dots in the right corner. Click on them.
Step 3: Select the Editor option from the dropdown menu that appears.
Step 4: After that, you can adjust the length, crop the video, add effects, add stickers, add music, etc., by selecting from the bottom menu.
Step 5: After you’re done editing, click on the Save option at the top to save the video to your Gallery.

Part 4: How to Record Super Slow Motion Video with Huawei Mate 20 and Later Phones?
Models That Support Super Slow-Mo: Huawei Mate 20/20 Pro/20 X and later Mate models.
Before we demonstrate how to capture a super slow-mo with a Huawei Mate 20 and later models, we’ll explain this popular capture mode.
To begin, you should be aware that a camera/camera sensor collects a specific number of frames per second. The movie becomes legible by combining these pictures; the more images there are, the more fluent the video will be. The naked eye is thought to decipher about 60 pictures every second.
The benefit of improved camera sensors is that you can capture a maximum number of photos per second (some smartphones can record up to 960 / second) and slow down the sampling rate to produce a super slow-motion effect on the Huawei Mate 20 or later models.
Now, follow the stepwise guide to record super slow-mo with Huawei Mate 40 or later models:
Step 1: Launch your phone’s Camera go to More to select the Slow-Mo option.
Step 2: By default, you will see 4x on the slow-mo capture mode, which means the video will be recorded at 120FPS. Huawei Mate 40 allows you to capture up to 128X, i.e, 3840FPS for fast moving objects. To enable the Super Slo-Mo feature, select the 32X or 128X in this mode.
Step 3: Click on the Circle in the center to start and stop the recording. The video will be saved in your Gallery.
Part 5: How to Shoot Slo-Mo Videos on iPhone?
Slow-motion film on your iPhone essentially means slowing the fps so that everything appears to move slower inside the video. It is a popular effect employed by artists to produce one-of-a-kind video clips of sports footage, natural scenes, or sequences with a lot of dramatic motion.
Slow-motion films are supported by all iPhones, beginning with the 5S model, and the capability gets more robust and more stable with each successive generation. Shooting slow-motion films with your iPhone are addicting and enjoyable, and it adds drama to various settings.
Here is a step-by-step method for filming slow-mo with an iPhone, regardless of model.
Step 1: Launch the Camera app on your iPhone and go to the Slow-Mo effect by sliding from the options above. Change the frame rate on the upper right corner to 120, 240, 720, depending on the iPhone models you’re using.
Step 2: Now, start the recording by clicking the Red Circle in the center or either of the Volume button.
Step 3: After you’re done recording, press the Red Circle again and head towards the Gallery to view the recorded video.

For more details, check: How to make slo-mo video on your iPhone.
Part 6: Tips for Recording Super Slow Motion Video
Although super slow-motion videos are easy to record, they can be challenging for a content creator. But don’t worry, with the following tips, we have got you covered:
Utilize A Tripod
It’s critical to keep your phone as steady as possible when filming in Super Slow-mo since shaking might conflict with your video and hinder it from recognizing motions when set to auto-record. To get the most out of Super Slow-mo, we recommend using a tripod whenever feasible.
You can check these tripods for iPhone
Transition Between Single and Multi-Takes
To boost your chances of catching the ideal timing in Super Slow-mo, your phone allows you to record in Multi-Take mode, which can capture many bursts of Super Slow-mo in one video.
When combined with an auto record, additional Super Slow-mo videos will be captured as much as the focus box senses activity and will end only when you end filming. The manual record works similarly. However, you’ll have to physically hit the trigger each time you wish to record a picture in Super Slow-mo.
As the name indicates, Single-Take will record a single Super Slow-mo clip and then cease recording a moment or two later. Because Multi-Take clips are often more extensive, this could save a large storage capacity.
Readjust the Focus
The focus or auto-recording is tiny by default. Fortunately, you can enlarge it to improve its odds of recognizing movement. To adjust the size of the box, hold it until only its edges are visible, then move any corner from the others to expand the box’s area. Simply tap anywhere outside the borders to verify the adjustment when you’re happy with the size.
Capture in Natural Light
Because of the large number of frames it collects, Super Slow-mo works the best in natural daylight situations. Though not visible to the human eye, indoor lighting, especially LED bulbs and tiny fluorescents, seems to flash at very high rates. Even if the environment is well-lit, Super Slow-mo detects this and shows your subject in a substantially darker tone.
View the Video at Normal Speed
If you wish to watch your Super Slow-mo movies at regular speed, deactivate Super Slow-mo playing by tapping on the option directly below the video. This will give you a greater understanding of your phone’s incredible capacity to bring the world to a halt.
Learn more about : How to Convert normal video to slo-mo video?
Besides the tips mentioned above, you can also watch this video to get some tips and tricks in recording slo-mo video with iPhone.
Conclusion
Super Slow Motion videos are excellent for showcasing the action and conveying tales, and they are also entertaining and straightforward to create. Your only constraints are time and imagination. However, your Android or iPhone’s camera has many more tricks in its sleeve: Live images, time-lapse, Panoramas, and Portrait mode let you express yourself freely!
02 How to Record Super Slo-Mo Videos with Samsung Galaxy S20 and Later models?
03 How to Edit Super Slow Motion Video in Samsung Galaxy S21?
04 How to Record Super Slow Motion Video with Huawei Mate 20 and Later Phones?
05 How to Shoot Slo-Mo Videos on iPhone?
06 Tips for Recording Super Slow Motion Video
Part 1: What’s the Difference Between Slow-Mo and Super Slow-Mo?
Super Slow-Mo (960fps) is a technology that allows users to shoot films at 960fps using a top-speed lens, capturing events that the naked eye cannot ordinarily notice by viewing them 32 times slower than regular videos (30fps) and four times slower than videos produced using the current Slow Motion feature (240fps).
Super Slow-mo movie may be displayed as 6-12 sec long on old smartphones, such as Galaxy S9/S9+ and Note9. However, the newer versions, such as Galaxy S10 Series, can play super slow-mo movies up to 14.8 sec.
You’ll understand the difference between the Slow-Mo and Super Slow-Mo better after reading the below information:
Slow Motion
Video is produced at an 8-times slower rate than usual, equivalent to the speed of a movie, advertisement, or sporting event.
Super Slow Motion
Videos are played 32 times slower than usual, catching minute changes in facial gestures and fast-moving elements.
Part 2: How to Record Super Slo-Mo Videos with Samsung Galaxy S20 and Later models?
Models That Support Super Slow-Mo: Galaxy S20, Galaxy S20+, Galaxy S20+ Ultra, Galaxy Z Flip, and later models.
Slow-motion video is often created by filming at a fast frame per second (fps) speed and then playing back at a far slower pace. This results in intriguing videos with slowed-down motion. The event is captured at 960 frames per second with the Super Slow-mo function, four times quicker than conventional slow motion. When it’s replayed at 30 frames per second, it’s 32 times slower, making mundane moments appear spectacular.
To capture super slow-motion videos with your Samsung Galaxy S20 and later models, follow the instructions below:
Step 1: Launch the camera on your phone by tapping the Camera app.
Step 2: Now, click on the Super Slow-Mo option to proceed.
Step 3: Press the White Circle in the center to start the recording and press it again to stop when you are done.
Note: Make sure that your phone’s video resolution is already on HD because Super Slow-Mo only supports HD resolutions.
Part 3: How to Edit Super Slow Motion Video in Samsung Galaxy S21?
Only capturing the super slow-motion videos is not enough, especially if you are a content creator. Even in the super slow-mo, there might be some unnecessary parts (since it is more detailed) that you need to cut out or the parts that need some enhancements to make the video look captivating.
However, not every phone is eligible to edit super slow-mo videos by not degrading the video resolutions. But Samsung Galaxy S21 allows you to do that by keeping the video resolution intact. You can edit the Super Slow-Mo videos with Galaxy S21 by following these instructions:
Step 1: Open the Camera app and navigate the super slow-mo video you wish to edit.
Step 2: Now, play it and tap the screen. You will see three vertical dots in the right corner. Click on them.
Step 3: Select the Editor option from the dropdown menu that appears.
Step 4: After that, you can adjust the length, crop the video, add effects, add stickers, add music, etc., by selecting from the bottom menu.
Step 5: After you’re done editing, click on the Save option at the top to save the video to your Gallery.

Part 4: How to Record Super Slow Motion Video with Huawei Mate 20 and Later Phones?
Models That Support Super Slow-Mo: Huawei Mate 20/20 Pro/20 X and later Mate models.
Before we demonstrate how to capture a super slow-mo with a Huawei Mate 20 and later models, we’ll explain this popular capture mode.
To begin, you should be aware that a camera/camera sensor collects a specific number of frames per second. The movie becomes legible by combining these pictures; the more images there are, the more fluent the video will be. The naked eye is thought to decipher about 60 pictures every second.
The benefit of improved camera sensors is that you can capture a maximum number of photos per second (some smartphones can record up to 960 / second) and slow down the sampling rate to produce a super slow-motion effect on the Huawei Mate 20 or later models.
Now, follow the stepwise guide to record super slow-mo with Huawei Mate 40 or later models:
Step 1: Launch your phone’s Camera go to More to select the Slow-Mo option.
Step 2: By default, you will see 4x on the slow-mo capture mode, which means the video will be recorded at 120FPS. Huawei Mate 40 allows you to capture up to 128X, i.e, 3840FPS for fast moving objects. To enable the Super Slo-Mo feature, select the 32X or 128X in this mode.
Step 3: Click on the Circle in the center to start and stop the recording. The video will be saved in your Gallery.
Part 5: How to Shoot Slo-Mo Videos on iPhone?
Slow-motion film on your iPhone essentially means slowing the fps so that everything appears to move slower inside the video. It is a popular effect employed by artists to produce one-of-a-kind video clips of sports footage, natural scenes, or sequences with a lot of dramatic motion.
Slow-motion films are supported by all iPhones, beginning with the 5S model, and the capability gets more robust and more stable with each successive generation. Shooting slow-motion films with your iPhone are addicting and enjoyable, and it adds drama to various settings.
Here is a step-by-step method for filming slow-mo with an iPhone, regardless of model.
Step 1: Launch the Camera app on your iPhone and go to the Slow-Mo effect by sliding from the options above. Change the frame rate on the upper right corner to 120, 240, 720, depending on the iPhone models you’re using.
Step 2: Now, start the recording by clicking the Red Circle in the center or either of the Volume button.
Step 3: After you’re done recording, press the Red Circle again and head towards the Gallery to view the recorded video.

For more details, check: How to make slo-mo video on your iPhone.
Part 6: Tips for Recording Super Slow Motion Video
Although super slow-motion videos are easy to record, they can be challenging for a content creator. But don’t worry, with the following tips, we have got you covered:
Utilize A Tripod
It’s critical to keep your phone as steady as possible when filming in Super Slow-mo since shaking might conflict with your video and hinder it from recognizing motions when set to auto-record. To get the most out of Super Slow-mo, we recommend using a tripod whenever feasible.
You can check these tripods for iPhone
Transition Between Single and Multi-Takes
To boost your chances of catching the ideal timing in Super Slow-mo, your phone allows you to record in Multi-Take mode, which can capture many bursts of Super Slow-mo in one video.
When combined with an auto record, additional Super Slow-mo videos will be captured as much as the focus box senses activity and will end only when you end filming. The manual record works similarly. However, you’ll have to physically hit the trigger each time you wish to record a picture in Super Slow-mo.
As the name indicates, Single-Take will record a single Super Slow-mo clip and then cease recording a moment or two later. Because Multi-Take clips are often more extensive, this could save a large storage capacity.
Readjust the Focus
The focus or auto-recording is tiny by default. Fortunately, you can enlarge it to improve its odds of recognizing movement. To adjust the size of the box, hold it until only its edges are visible, then move any corner from the others to expand the box’s area. Simply tap anywhere outside the borders to verify the adjustment when you’re happy with the size.
Capture in Natural Light
Because of the large number of frames it collects, Super Slow-mo works the best in natural daylight situations. Though not visible to the human eye, indoor lighting, especially LED bulbs and tiny fluorescents, seems to flash at very high rates. Even if the environment is well-lit, Super Slow-mo detects this and shows your subject in a substantially darker tone.
View the Video at Normal Speed
If you wish to watch your Super Slow-mo movies at regular speed, deactivate Super Slow-mo playing by tapping on the option directly below the video. This will give you a greater understanding of your phone’s incredible capacity to bring the world to a halt.
Learn more about : How to Convert normal video to slo-mo video?
Besides the tips mentioned above, you can also watch this video to get some tips and tricks in recording slo-mo video with iPhone.
Conclusion
Super Slow Motion videos are excellent for showcasing the action and conveying tales, and they are also entertaining and straightforward to create. Your only constraints are time and imagination. However, your Android or iPhone’s camera has many more tricks in its sleeve: Live images, time-lapse, Panoramas, and Portrait mode let you express yourself freely!
Motion Tracking Using The Best Video Editors
One of the powerful editing features offered by several premium-grade video editors is motion tracking. It not only boosts the overall video quality but also helps ensuring the object is engaged throughout the video. Many users fail to apply the motion tracking effect to the videos because they don’t use a reliable tool. The primary motive of this discussion is to provide you with the best-in-class motion tracker.
Not only will we tell you the name of the software, but we will also guide you through the procedure of doing this. Moreover, many of you don’t know what motion tracking is. So, this article will also provide significant information about this.
Part 1: What Is Motion Tracking in Video Editing?
Motion tracking helps you analyze the movements of different objects in your video content. This process involves various tasks that can be very helpful in video editing. For example, tracking and identifying the position of elements over time. The main purpose of motion tracking is to add graphics. Moreover, you can also add digital effects to the tracked objects.
You will need special software or video editing tools to perform this process. Here’s how you can understand the motion tracking process with ease:
Selection of Object
The editor can select the object that he wants to track in an effective manner. This object can be a person or any moving element that needs tracking. Moreover, it can also be a moving vehicle or a logo as well. Tracking these moving elements in the frame can allow the editor to improve the areas which have high contrast or distinct features.
Tracking Points
Selecting the object allows the software to identify specific points in the frame. These points can have distinct features or a high contrast that may affect the video quality. With the help of video motion tracking, the editor can note down these areas and improve them to enhance the viewer experience.
Data Mapping
Once the software tracks the movements, it can be very useful for the editor. This is because it calculates the changes in position and rotation of each point. Moreover, it also maps the tracked data into a visual representation for the coordinating system. Using this system, the movements of the objects can be recreated in a 3D space.
Using Effects and Refinement
After obtaining the motion tracking data, the video editor can apply different effects on the object. These effects can include adding graphics and text to the scene. Moreover, it can also help in animation or compositing visual elements. To ensure the accurate alignment of the effects, the editor may need to use extra tracking techniques or manual adjustments.
Start Motion Tracking For Win 7 or later(64-bit)
Start Motion Tracking For macOS 10.14 or later
Part 2: How to Perform Motion Tracking in Adobe After Effects?
As you have gained knowledge about motion tracking, there are many platforms that offer this feature. Adobe After Effects is a video editing platform that can help you perform video motion tracking. If you are a user of this tool, you can learn the steps to motion track your video below:
Step 1: Open Adobe After Effects on your computer and import your video files to the timeline of the platform. Add the object you wish to motion track on Adobe After Effects.
![]()
Step 2: Lead to the “Layer” tab from the top and select the “New” option from the drop-down menu. Continue to select “Null Object” to add a layer to the timeline.
![]()
Step 3: Select the video clip and continue to the “Animation” tab from the top. Select “Track Motion” from the drop-down menu that appears. This will generate a box for selecting the object for motion tracking. You can extend the box and drag it anywhere in the video clip. To check the motion tracking object, click the “Analyze Forward” button on the bottom-right corner of the screen.
![]()
Step 4: As the object is analyzed, click the “Edit Target” button to open a new screen. Continue to change the layer to “Null Object” and click “OK.” Continue to select “Apply” and click “OK” against the pop-up menu that opens. This is how Adobe After Effects applies the motion tracker.
![]()
Part 3: Wondershare Filmora: A Comprehensive Solution to Video Editing
Do you know that there is a video editing platform that makes all video motion tracking process easy? Wondershare Filmora presents a coherent video editing system for its users with high-quality outputs. The platform integrates some of the greatest features and makes it useful for all users. Even if you are a rookie in video editing, this video editing platform can help you make the best of videos.
Start Motion Tracking For Win 7 or later(64-bit)
Start Motion Tracking For macOS 10.14 or later
Motion Tracking is possible with Wondershare Filmora, which is entirely automated. All you have to do is click a button, and the process will execute. Wondershare Filmora helps users apply different effects and track them within the videos. Instead of objects, you can increase your video motion tracking into effects and other elements.
![]()
Features of Wondershare Filmora Video Editor
To know more about this video editing platform, look into the prominent features offered by Filmora. There is much that this software provides apart from motion tracking videos. This will help you generate a better understanding of this best motion-tracking software.
Auto Beat Sync
You can synchronize your audio and videos across this automated video editor. Filmora provides an auto beat sync function that helps users create videos that can be synchronized. Smoothen your videos and make them look professional with a single click. This does not leave behind any noise or echo within the videos .
Text-to-Speech Function
Wondershare Filmora features a dedicated AI text-to-speech functionality. This helps in the automatic conversion of text into speech across the video editor. Users have to add text which will be converted to speech. In this way, creating voiceovers is not only easy but also quick.
Speed Ramping
While you can motion-track your videos, the platform also provides a speed ramping system. Adjusting the speed uniformly or through ramping is effective with Filmora, as it makes it simple to cover. You can adjust the speeds using sliders and graphs.
Part 4: Guide: Perform Paper Motion Tracking With High Quality Using Wondershare Filmora
Filmora is a popular video editing platform among video editors for motion track videos. It offers exquisite features along with a smooth and sleek interface. You can also ensure the best quality integration of motion tracking in videos with Filmora. Do you wish to learn the steps to perform motion tracking with this best motion tracking software? Worry no more because the below-given steps will help you in this matter:
Start Motion Tracking For Win 7 or later(64-bit)
Start Motion Tracking For macOS 10.14 or later
Step 1: Import Video in Filmora
To get started, launch Filmora on your device, select “New Project,” and choose the “Click here to import media” option. To proceed, add the video you want to apply motion tracking. Once the video is visible in the “Import Media” section, drag it to “Timeline.”
![]()
Step 2: Add Motion Tracking in the Video
Select the video in “Timeline” and click the “Motion Tracking” button from the “Toolbar” present above the “Timeline.” Conversely, double-click the video and choose the “Video” tab from the editing settings.
![]()
Step 3: Customize Motion Tracking and Initiate It
To enable the box customization, double-click the “Motion Tracking Box.” Drag the “Motion Tracking Box” on the moving object and cover the whole object in the box. You can also adjust the duration of motion tracking by trimming the video in the timeline. Once done, click the “Click to start Motion Track” button and wait a few moments.
![]()
Step 4: Add Elements or Effects to the Video
Next, select “OK” from the prompt window and go to the “Element” section. Choose an “Element” and drag it into “Timeline” above your video section. To adjust the element, you must double-click on it. There is no restriction on using an element, as you can add “Effects” or other things.
You need to revert to the “Motion Tracking” section and select the drop-down appearing against the option. Choose the name of your “Effect” or “Element” that you’ve applied to before. The particular motion track will be enhanced through an effect or element.
![]()
Step 5: Export Motion Tracked Video in Device
For exporting video, click the “Export” button and personalize the “Export Settings.” Finally, tap “Export” and save the video on your device.
![]()
Conclusion
This article has pointed out the prominence of motion tracking in video editing. An idea for performing video motion tracking in Adobe After Effects has been provided. The article has offered Wondershare Filmora as the ideal solution to this requirement.
You can embed the motion tracking function and perform all the processes within a few seconds. If you have an object that you want to focus on in a video, trying motion tracking is the best option for this.
Start Motion Tracking For Win 7 or later(64-bit)
Start Motion Tracking For macOS 10.14 or later
Part 2: How to Perform Motion Tracking in Adobe After Effects?
As you have gained knowledge about motion tracking, there are many platforms that offer this feature. Adobe After Effects is a video editing platform that can help you perform video motion tracking. If you are a user of this tool, you can learn the steps to motion track your video below:
Step 1: Open Adobe After Effects on your computer and import your video files to the timeline of the platform. Add the object you wish to motion track on Adobe After Effects.
![]()
Step 2: Lead to the “Layer” tab from the top and select the “New” option from the drop-down menu. Continue to select “Null Object” to add a layer to the timeline.
![]()
Step 3: Select the video clip and continue to the “Animation” tab from the top. Select “Track Motion” from the drop-down menu that appears. This will generate a box for selecting the object for motion tracking. You can extend the box and drag it anywhere in the video clip. To check the motion tracking object, click the “Analyze Forward” button on the bottom-right corner of the screen.
![]()
Step 4: As the object is analyzed, click the “Edit Target” button to open a new screen. Continue to change the layer to “Null Object” and click “OK.” Continue to select “Apply” and click “OK” against the pop-up menu that opens. This is how Adobe After Effects applies the motion tracker.
![]()
Part 3: Wondershare Filmora: A Comprehensive Solution to Video Editing
Do you know that there is a video editing platform that makes all video motion tracking process easy? Wondershare Filmora presents a coherent video editing system for its users with high-quality outputs. The platform integrates some of the greatest features and makes it useful for all users. Even if you are a rookie in video editing, this video editing platform can help you make the best of videos.
Start Motion Tracking For Win 7 or later(64-bit)
Start Motion Tracking For macOS 10.14 or later
Motion Tracking is possible with Wondershare Filmora, which is entirely automated. All you have to do is click a button, and the process will execute. Wondershare Filmora helps users apply different effects and track them within the videos. Instead of objects, you can increase your video motion tracking into effects and other elements.
![]()
Features of Wondershare Filmora Video Editor
To know more about this video editing platform, look into the prominent features offered by Filmora. There is much that this software provides apart from motion tracking videos. This will help you generate a better understanding of this best motion-tracking software.
Auto Beat Sync
You can synchronize your audio and videos across this automated video editor. Filmora provides an auto beat sync function that helps users create videos that can be synchronized. Smoothen your videos and make them look professional with a single click. This does not leave behind any noise or echo within the videos .
Text-to-Speech Function
Wondershare Filmora features a dedicated AI text-to-speech functionality. This helps in the automatic conversion of text into speech across the video editor. Users have to add text which will be converted to speech. In this way, creating voiceovers is not only easy but also quick.
Speed Ramping
While you can motion-track your videos, the platform also provides a speed ramping system. Adjusting the speed uniformly or through ramping is effective with Filmora, as it makes it simple to cover. You can adjust the speeds using sliders and graphs.
Part 4: Guide: Perform Paper Motion Tracking With High Quality Using Wondershare Filmora
Filmora is a popular video editing platform among video editors for motion track videos. It offers exquisite features along with a smooth and sleek interface. You can also ensure the best quality integration of motion tracking in videos with Filmora. Do you wish to learn the steps to perform motion tracking with this best motion tracking software? Worry no more because the below-given steps will help you in this matter:
Start Motion Tracking For Win 7 or later(64-bit)
Start Motion Tracking For macOS 10.14 or later
Step 1: Import Video in Filmora
To get started, launch Filmora on your device, select “New Project,” and choose the “Click here to import media” option. To proceed, add the video you want to apply motion tracking. Once the video is visible in the “Import Media” section, drag it to “Timeline.”
![]()
Step 2: Add Motion Tracking in the Video
Select the video in “Timeline” and click the “Motion Tracking” button from the “Toolbar” present above the “Timeline.” Conversely, double-click the video and choose the “Video” tab from the editing settings.
![]()
Step 3: Customize Motion Tracking and Initiate It
To enable the box customization, double-click the “Motion Tracking Box.” Drag the “Motion Tracking Box” on the moving object and cover the whole object in the box. You can also adjust the duration of motion tracking by trimming the video in the timeline. Once done, click the “Click to start Motion Track” button and wait a few moments.
![]()
Step 4: Add Elements or Effects to the Video
Next, select “OK” from the prompt window and go to the “Element” section. Choose an “Element” and drag it into “Timeline” above your video section. To adjust the element, you must double-click on it. There is no restriction on using an element, as you can add “Effects” or other things.
You need to revert to the “Motion Tracking” section and select the drop-down appearing against the option. Choose the name of your “Effect” or “Element” that you’ve applied to before. The particular motion track will be enhanced through an effect or element.
![]()
Step 5: Export Motion Tracked Video in Device
For exporting video, click the “Export” button and personalize the “Export Settings.” Finally, tap “Export” and save the video on your device.
![]()
Conclusion
This article has pointed out the prominence of motion tracking in video editing. An idea for performing video motion tracking in Adobe After Effects has been provided. The article has offered Wondershare Filmora as the ideal solution to this requirement.
You can embed the motion tracking function and perform all the processes within a few seconds. If you have an object that you want to focus on in a video, trying motion tracking is the best option for this.
Also read:
- Updated An Ultimate Guide To Edit a Music Video Aspect Ratio and First Cut
- Updated In 2024, Detailed Steps to Rotate Videos in Blender
- Updated What Slideshow Templates Teach You About Aesthetic
- New 2024 Approved How To Make Boring Videos Look Cool By B Rolls
- New In 2024, Do You Want to Make Your Video Look Like Its From the 90S? Then, Make Sure to Add Vintage Overlays and VHS Sound Effects to Give It the Old Feel
- 2024 Approved What You Should Know About Speech-to-Text Technology
- Updated 2024 Approved Best Video Title Generators
- New | Live Stream on YouTube Using Zoom for 2024
- Updated In 2024, Fixing The Slow Playback Issues in DaVinci Resolve
- New How to Create Simple Slideshow Word for 2024
- How to Loop YouTube Videos on iPhone for 2024
- Updated How to Perfect Quick and Efficient Video Editing | Keyboard Shortcuts in Filmora
- AVI Editors for Windows 11/10/8.1/8/7 Easily Edit AVI Files on PC for 2024
- Best Video Format Converter for PC and Online
- New In 2024, Kdenlive Review – Is It The Best Video Editor?
- Updated Many People Choose Video Editing or Post-Editing as Their Career in These Days. Is This a Good Choice? How to Start a Video Editing Career? This Article Will Tell You the Complete Details
- New In 2024, Five Thoughts on Discord Create Accounts How-To Questions
- In 2024, Storyboards Are Amazing Way if You Want to Present Your Story in a Visual Way, Like Explaining Any Process or Giving Any Information. It Is a Graphic Layout to Tell You a Story
- Updated In 2024, How to Create a Freeze Frame Sequence Effect
- New In 2024, Best 8 Online GIF to APNG Converters
- New Find Out What Ray Tracing Is in After Effects, How It Works, and Learn About Ray-Traced 3D Settings with Simple Instructions
- Updated MAGIX Vegas Pro Review A Professional Video Editing Software for 2024
- New DVD Slideshow Builder 2024 Review and Tutorial
- New Tips for Choosing Location & Scheduling Music Video
- New The Complete Guide to Slideshow Maker with Music for 2024
- Updated In 2024, Want to Add a Motion Blur Effect to Your Photos? This Step-by-Step Tutorial Will Show You How to Use GIMP Software to Get the Effect You Want
- Discover the Best Video Frame Rate Converters for Smooth Playback, Including Online and Offline Options. Learn How to Convert Frame Rates for Free and Elevate Your Video Quality with These Top 8 Tools for 2024
- Updated How To Make a Video by Mouse in Filmora?
- New In 2024, Learn How to Make Your CSGO Montage Impressive
- Updated In 2024, Backup and Organize Your Footage in Minutes
- Updated 2024 Approved Quick Solved How to Add Subtitles to a Video on iPhones
- Updated Gifs Can Convey Your Emotions in a Way that Words Cannot, so They Are Becoming a Popular Way to Express Yourself, and You Must Know How to Make a Gif and You Wont Believe that Its Not Difficult to Do for 2024
- In 2024, Multi Object Tracking The Ultimate Guide
- New How To Import and Adjust the Video Clips on Wondershare Filmora?
- New In 2024, Are You Eager to Discover the Top-Rated and Reliable LUTs that Can Be Used in Shotcut? This Article Will Help You a Lot with This Matter
- How to Add Subtitles to MKV Videos on All Platforms for 2024
- Updated 2024 Approved LumaFusion – One of the Best Video Editors for iOS
- Best Photo Video Maker Apps with Song PC, Mobile, Online for 2024
- 2024 Approved Best Ideas on Using Filmora Green Screen
- Top 7 Phone Number Locators To Track Huawei Nova Y71 Location | Dr.fone
- iPhone 14 iCloud Activation Lock Bypass
- In 2024, Overview of the Best Lava Blaze Curve 5G Screen Mirroring App | Dr.fone
- In 2024, How To Unlock Any Poco C50 Phone Password Using Emergency Call
- How To Transfer WhatsApp From Apple iPhone 11 to other iPhone 14 Pro devices? | Dr.fone
- The way to get back lost data from Honor 100 Pro
- How To Track IMEI Number Of Itel P55 5G Through Google Earth?
- Fix App Not Available in Your Country Play Store Problem on Honor Magic 6 Pro | Dr.fone
- Fix Vivo V30 Android System Webview Crash 2024 Issue | Dr.fone
- How To Unlink Apple ID From Apple iPhone 11 Pro Max
- In 2024, How to Transfer Contacts from Lava Blaze 2 to Outlook | Dr.fone
- Will Pokémon Go Ban the Account if You Use PGSharp On Lava Yuva 3 Pro | Dr.fone
- 10 Best Fake GPS Location Spoofers for Xiaomi 14 Pro | Dr.fone
- How to Detect and Stop mSpy from Spying on Your Motorola Edge 40 Pro | Dr.fone
- The Best Android SIM Unlock Code Generators Unlock Your Vivo V30 Lite 5G Phone Hassle-Free
- Vivo Y100 5G Not Connecting to Wi-Fi? 12 Quick Ways to Fix | Dr.fone
- How Can I Use a Fake GPS Without Mock Location On Apple iPhone 12 mini? | Dr.fone
- Top Apps and Online Tools To Track Vivo Y100i Phone With/Without IMEI Number
- How to Rescue Lost Music from Nubia Red Magic 8S Pro+
- How to Transfer Photos from Honor Magic V2 to New Android? | Dr.fone
- How to Reset Apple iPhone 11 Pro Max to Factory Settings? | Dr.fone
- In 2024, How to Come up With the Best Pokemon Team On Honor Magic 6 Lite? | Dr.fone
- How To Restore Missing Photos Files from ZTE Axon 40 Lite.
- In 2024, Fake Android Location without Rooting For Your Infinix Note 30i | Dr.fone
- What Does Jailbreaking iPhone 11 Pro Max i Do? Get Answers here | Dr.fone
- Title: Final Cut Pro for iPad- Is It Available?
- Author: Morgan
- Created at : 2024-05-19 05:11:37
- Updated at : 2024-05-20 05:11:37
- Link: https://ai-video-editing.techidaily.com/final-cut-pro-for-ipad-is-it-available/
- License: This work is licensed under CC BY-NC-SA 4.0.


