:max_bytes(150000):strip_icc():format(webp)/edit-tweet-after-publish-3476767-34af9aa3b62b4bf4b11891460076916b.png)
Find Out What Track Mattes Are in After Effects and Learn How to Find and Use It with Simple and Easy-to-Follow Instructions

Find Out What Track Mattes Are in After Effects and Learn How to Find and Use It with Simple and Easy-to-Follow Instructions
Are you wondering what Track Mattes is? In After Effects, this tool adds an invisible layer that is used to mask or reveal parts of a layer, including video, graphics, text, shapes, and images. This feature is in the arsenal of any visual effects artist or motion graphic designer.
For After Effects editors, Track Mattes can be an incredibly helpful tool for managing multiple layers and creating complex animations.
In this article, we’ll explore everything you need to know about Track Mattes. We’ll cover topics like the difference between a mask and Track Matte, finding this tool in After Effects, and its four options: Alpha Matter, Alpha Inverted Matte, Luma Matte, and Luma Inverted Matte.
- Alpha Matte
- Alpha Inverted Matte
- Luma Matte
- Luma Inverted Matte
- Differences Between Alpha Channel and Luma Channel
Part 1. What Are Track Mattes In After Effects?
A Track Matte is an element used in video editing to control the opacity of a layer. Essentially, it lets you create a “hole” in a layer so that underlying layers can show through. This tool can be used with video and audio layers, which is essential for creating complex composites in After Effects.
You can use Track Mattes to generate shapes, reveal part of a layer, or keying outs. Interestingly, it remains independent of all layers in your projects, which means you can get visual effects and animations more efficiently than with the masks tool.
Moreover, Track Mattes uses Alpha or Luma channels as a layer mask to determine what parts of the layer to reveal. For instance, you can make a top layer that provides an Alpha or Luminous effect and a bottom layer consisting of the image that will be revealed or shown.
Thus, if you want to use an image to hide your video until you want to unveil it or add a picture in your text, Track Mattes will help you to shape the appearance of a layer above it.
Part 2. Differences Between A Mask And A Track Matte
In Adobe After Effects, there are two types of masking tools: Masks and Track Mattes. Both are used to hide or reveal a portion of a layer.
Here’re some key differences between a Mask and a Track Matte:
- A mask is dependent on a specific layer, while the Track Matter is independent of any layer.
- A mask is applied directly to a layer having an image or a video and transforms with the layers. On the other hand, Track Matte is a stationary mask applied to the composition rather than a layer.
Part 3. Finding The Track Matte Tool In After Effects
Track Matte is located by default in the Timeline Window of the After Effects interface, but if it is unavailable there for some reason, toggle the Transfer Control Pane button on the bottom-left of the timeline.
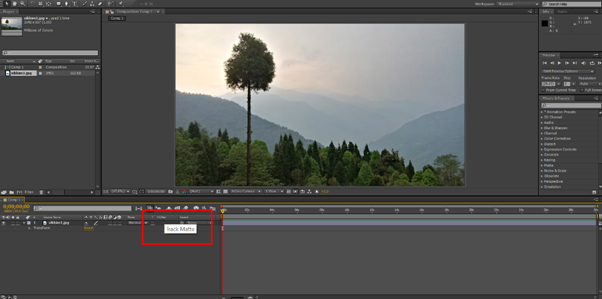
If you are still unable to find the Track Matte option, press the F1 key or do the following steps in sequence:
- Right-click on the area above your layers and select “Columns.”
- Scroll down and click the “Modes” option to enable it.
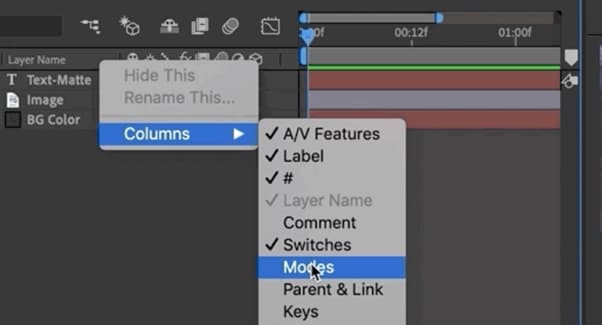
- Track Matte mode, Preserve Underlying Transparency, and Blending Modes will be available now.
Under Track Matte’s drop-down menu, you can find four further options, two with Alpha and two with Luma. We’ll discuss these options in detail in the next section.
Part 4. All Four Track Matte Options In After Effects
After Effects provides four types of Track Matte options: Alpha Matte, Alpha Inverted Matte, Luma Matte, and Luma Inverted Matte, each has its own specific use case. But first, you need to understand what Alpha and Luma are:
Alpha: This Track Matte type uses the layer’s Alpha channel to determine the layer’s opacity.
Luma: This Track Matte type uses the top layer’s brightness to mask the bottom layer.
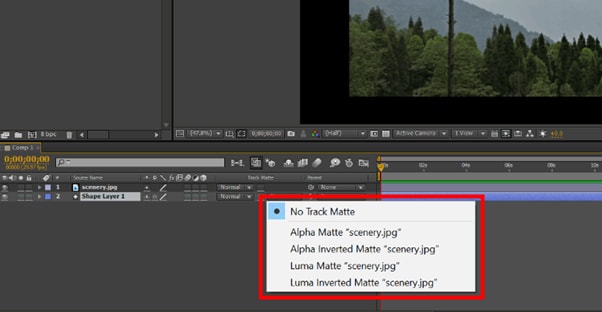
Let’s find out the functions of each option one by one:
Alpha Matte
Alpha Matte is an important option under the Track Matte menu, as it allows you to create a mask based on the transparency of the layer you are using it on. Like the mask, it will use any pixel above 0% opacity and can be useful for various purposes, such as creating a vignette or isolating a certain area of the frame.
Alpha Inverted Matte
The Alpha Inverted Matte option is quite the opposite of the Alpha Matte, and around the Alpha channel, it uses negative space from the above layer and will therefore use pixels with 0% opacity as it had 100% opacity.
Luma Matte
Instead of using the Alpha channel, Luma Mattes uses the brightness level or Luma channel of the upper layer to create a mask for the bottom layer.
Luma Inverted Matte
Opposite of the Luma Matte, the Luma Inverted Matte uses dark or low luminance areas of the upper layer to create a mask for the lower layer.
Differences Between Alpha Channel and Luma Channel
When altering the opacity of a layer, it may look like the brightness settings are changed. This might confuse some users, as both Alpha and Luma channels carry the same information. However, they differ in how they are used.
Alpha channel is a type of Track Matte that stores transparency information. This information determines how opaque or transparent a layer will be when superimposed over another layer.

On the other hand, a Luma channel is a video track that stores brightness information. This information is used to determine how bright or dark an image will be and is further divided into three channels, i.e., Red, Green, and Blue (RGB). Their value ranges from 0 to 255, where 0 represents the darkest value while 255 represents the brightest value.

Video – How to use Track Mattes in Adobe After Effects - Tutorial
Conclusion
In this article, we’ve discussed what Track Matte is in After Effects and how it differs from the mask tool. We also explored where to find the Track Matter option and its four options, i.e., Alpha Matte, Alpha Inverted Matte, Luma Matte, and Luma Inverted Matte. In the end, we discussed the difference between the Alpha and Luma channels to provide a clear view of the two.
Hopefully, this guide resolves your queries, and you now have a better understanding of the Track Matte tool in After Effects.
Free Download For Win 7 or later(64-bit)
Free Download For macOS 10.14 or later
Part 1. What Are Track Mattes In After Effects?
A Track Matte is an element used in video editing to control the opacity of a layer. Essentially, it lets you create a “hole” in a layer so that underlying layers can show through. This tool can be used with video and audio layers, which is essential for creating complex composites in After Effects.
You can use Track Mattes to generate shapes, reveal part of a layer, or keying outs. Interestingly, it remains independent of all layers in your projects, which means you can get visual effects and animations more efficiently than with the masks tool.
Moreover, Track Mattes uses Alpha or Luma channels as a layer mask to determine what parts of the layer to reveal. For instance, you can make a top layer that provides an Alpha or Luminous effect and a bottom layer consisting of the image that will be revealed or shown.
Thus, if you want to use an image to hide your video until you want to unveil it or add a picture in your text, Track Mattes will help you to shape the appearance of a layer above it.
Part 2. Differences Between A Mask And A Track Matte
In Adobe After Effects, there are two types of masking tools: Masks and Track Mattes. Both are used to hide or reveal a portion of a layer.
Here’re some key differences between a Mask and a Track Matte:
- A mask is dependent on a specific layer, while the Track Matter is independent of any layer.
- A mask is applied directly to a layer having an image or a video and transforms with the layers. On the other hand, Track Matte is a stationary mask applied to the composition rather than a layer.
Part 3. Finding The Track Matte Tool In After Effects
Track Matte is located by default in the Timeline Window of the After Effects interface, but if it is unavailable there for some reason, toggle the Transfer Control Pane button on the bottom-left of the timeline.

If you are still unable to find the Track Matte option, press the F1 key or do the following steps in sequence:
- Right-click on the area above your layers and select “Columns.”
- Scroll down and click the “Modes” option to enable it.

- Track Matte mode, Preserve Underlying Transparency, and Blending Modes will be available now.
Under Track Matte’s drop-down menu, you can find four further options, two with Alpha and two with Luma. We’ll discuss these options in detail in the next section.
Part 4. All Four Track Matte Options In After Effects
After Effects provides four types of Track Matte options: Alpha Matte, Alpha Inverted Matte, Luma Matte, and Luma Inverted Matte, each has its own specific use case. But first, you need to understand what Alpha and Luma are:
Alpha: This Track Matte type uses the layer’s Alpha channel to determine the layer’s opacity.
Luma: This Track Matte type uses the top layer’s brightness to mask the bottom layer.

Let’s find out the functions of each option one by one:
Alpha Matte
Alpha Matte is an important option under the Track Matte menu, as it allows you to create a mask based on the transparency of the layer you are using it on. Like the mask, it will use any pixel above 0% opacity and can be useful for various purposes, such as creating a vignette or isolating a certain area of the frame.
Alpha Inverted Matte
The Alpha Inverted Matte option is quite the opposite of the Alpha Matte, and around the Alpha channel, it uses negative space from the above layer and will therefore use pixels with 0% opacity as it had 100% opacity.
Luma Matte
Instead of using the Alpha channel, Luma Mattes uses the brightness level or Luma channel of the upper layer to create a mask for the bottom layer.
Luma Inverted Matte
Opposite of the Luma Matte, the Luma Inverted Matte uses dark or low luminance areas of the upper layer to create a mask for the lower layer.
Differences Between Alpha Channel and Luma Channel
When altering the opacity of a layer, it may look like the brightness settings are changed. This might confuse some users, as both Alpha and Luma channels carry the same information. However, they differ in how they are used.
Alpha channel is a type of Track Matte that stores transparency information. This information determines how opaque or transparent a layer will be when superimposed over another layer.

On the other hand, a Luma channel is a video track that stores brightness information. This information is used to determine how bright or dark an image will be and is further divided into three channels, i.e., Red, Green, and Blue (RGB). Their value ranges from 0 to 255, where 0 represents the darkest value while 255 represents the brightest value.

Video – How to use Track Mattes in Adobe After Effects - Tutorial
Conclusion
In this article, we’ve discussed what Track Matte is in After Effects and how it differs from the mask tool. We also explored where to find the Track Matter option and its four options, i.e., Alpha Matte, Alpha Inverted Matte, Luma Matte, and Luma Inverted Matte. In the end, we discussed the difference between the Alpha and Luma channels to provide a clear view of the two.
Hopefully, this guide resolves your queries, and you now have a better understanding of the Track Matte tool in After Effects.
Free Download For Win 7 or later(64-bit)
Free Download For macOS 10.14 or later
Change Aspect Ratio of Video
Versatile Video Editor - Wondershare Filmora
Videos are a great way to complete the whole story in one go. In social media, videography, entertainment, educational video sharing, or many more areas, viewers and their viewing experience matter a lot. For instance, if a person visited YouTube to see some educational content but finds it out that the overall view of the video content is not up to the mark. Then, what will happen? That person will switch to another channel, which is not good for your business area. Thus, knowing the correct aspect ratio for your video is very important. Here, the aspect ratio refers to the ratio of width to the height of the Video or image visible on the screen. So, here you will learn about ways to change the ratio of a video and how to change video dimensions on premiere pro or iOS devices.

In this article
01 [Change aspect Ratio with Softwares](#Part 1)
02 [Change Video aspect Ratio Online](#Part 2)
03 [Make sure which aspect Ratio You Want to Change](#Part 3)
Part 1 Change aspect Ratio with Softwares
1.1 For beginners & most people
This part is for beginners or people who are not aware of the technicalities related to video size, dimensions, or changing the ratio of Video. A quick and easy-to-use application is Wondershare Filmora, one of the widely used platforms for video editing and adopting it s per the video requirement.
Thus, let’s try to understand how you can change the Video’s aspect ratio using Filmora.
Step1 Download and open the Software
First, visit the official link of Wondershare Filmora and download, install and lunch the tool on your system.
Step2 Set the aspect ratio and upload your file
Right from the main interface, you will find the aspect ratio option. Using the drop-down menu, select the desired one to change the ratio of Video. After that, click on the new project to upload your video file.
Step3 Save and Export
Now, when you upload the video file, it will automatically modify the chosen aspect ratio for the video. Then export the file to save at the desired location on your system.

1.2 For Professional People
Now, here comes the guidance to those professional videographers, movie maker who needs an advanced version to change video size or aspect ratio.
Since you are already aware of technicalities to a certain extent, it becomes easy to use some advanced tools to change the aspect ratio of Video using adobe and OBS Software.
● Adobe PR
The first tool that we shall discuss is Adobe PR, and we will learn how to use Adobe Premiere Pro to change the Video’s aspect ratio. This tool is valuable for worldwide users explicitly working in the video editing field or dedicated professionals who need some technical knowledge to understand the interface. Here are the required steps to handle the adobe PR to change aspect Ratio iPhone Video devices.
Open the ‘File’ Menu> then Go to the ‘New’ Folder > after that, visit the ‘Sequence’ (dialog box) That will give the option of ‘Settings,’ select it> then visit the ‘Video’ section. Then, from the Video section, you need to adjust the Frame size for height and the Horizontal value for width.
Then opt for ‘OK.’
● OBS Studio
Those who know are pretty aware of the professional OBS studio full of features and technical detailing. In this part, you shall see how to use OBS software to change the iMovie aspect ratio following the mentioned steps.
Here, you need to open the ‘Settings .’ Under the ‘Video’ subsection, you will see ‘Output Resolution’ (click on drop-down), then from the given aspect ratios, change the ratio of your Video. Then, press the OK button to apply the changes at the end. That’s it.
Using this professional software will make you able to change the aspect ratio on iPhone Video and change the aspect ratio MP4, MKV, FLV, or other formats. The only need is to have a basic understanding of the technical knowledge related to the software. If you’re already a professional video maker, this software will be the most option.
Part 2 Change Video aspect Ratio Online
Till now, we have covered different software as per the user requirements. Suppose you are not comfortable with downloading any software on your devices. In that case, there are some alternatives for Online Video Editors to change video aspect ratio with ease. Let’s take a look over some of the easy-to-use online tools to change the ratio of the Video. Such tools are quick to use and accessible worldwide. Some of them are mentioned below:
1. veed.io
You can effortlessly change the aspect ratio of your video using ‘Veed.io’. Which supports multiple video formats such as .wmv, .mp4, .mkv, .flv, .3gp and many more. While uploading the video, you need to mention the required width and height of the video and then click on the ‘Resize’ button.
2. Kapwing (kapwing.com)
Another helpful tool while searching for some quick tools to change the ratio of Video through online mode is Kapwing Online Convertor. You can scale, resize your Video by simply uploading your file or pasting the URL there. The interface is quite simple to use and changes the aspect ratio of MP4 or other format videosThere is noNo doubt accessing some online tools to change the Video’s aspect ratio in quick and easy steps. Though there exist certain limitations such as internet connection speed should be good to upload or download the Video. In addition, there is a certain limitation in terms of the size of the Video or other factors. Otherwise, it comes out to be a practical option for small files.
Part 3 Make sure which aspect Ratio You Want to Change
Technical specifications needed by different online platforms are different, such as YouTube, Instagram, Facebook, or other social media platform that needed a video with different aspect ratios to make them suitable s per their criteria. Thus, accordingly, you need to modify or change the aspect ratio on MP4 as per these social media requirements. Here are some famous social media platforms, and their aspect ratio requirements are listed. Let’s check them out one by one:
Twitter: The aspect ratio range that works for Twitter is between 1.1 to 2.1
Instagram: For it, the standard ratios are: 1.91:1, 4:5
Tiktok: Required ratio is 9:16 (Smartphone screen)
YouTube: Standard aspect Ratio for YouTube is 16:9. If the video uploaded is not in this ratio, then YouTube will make an internal adjustment and show the video with an outer band of the black or white strip around the video screen.
Vimeo: Both the options are available with Vimeo that is 16:9, 4:3
Wondershare Filmora
Get started easily with Filmora’s powerful performance, intuitive interface, and countless effects!
Try It Free Try It Free Try It Free Learn More >

Conclusion
Getting the correct information about the iMovie aspect ratio change and Adobe premiere pro-change aspect ratio is crucial to uplift the viewer base to your Video. Furthermore, to a great extent, it matters which platform your Video will launch on as different devices need different aspect ratios. Thus, this article focused on covering all the points covered under how to change the Aspect Ratio of MP4 videos. Thus, whether you are a novice in video making or a professional videographer, or a moviemaker, learn about changing the ratio of Video to open new vistas to your efforts with Wondershare Filmora, Adobe, and OBS web applications.
Videos are a great way to complete the whole story in one go. In social media, videography, entertainment, educational video sharing, or many more areas, viewers and their viewing experience matter a lot. For instance, if a person visited YouTube to see some educational content but finds it out that the overall view of the video content is not up to the mark. Then, what will happen? That person will switch to another channel, which is not good for your business area. Thus, knowing the correct aspect ratio for your video is very important. Here, the aspect ratio refers to the ratio of width to the height of the Video or image visible on the screen. So, here you will learn about ways to change the ratio of a video and how to change video dimensions on premiere pro or iOS devices.

In this article
01 [Change aspect Ratio with Softwares](#Part 1)
02 [Change Video aspect Ratio Online](#Part 2)
03 [Make sure which aspect Ratio You Want to Change](#Part 3)
Part 1 Change aspect Ratio with Softwares
1.1 For beginners & most people
This part is for beginners or people who are not aware of the technicalities related to video size, dimensions, or changing the ratio of Video. A quick and easy-to-use application is Wondershare Filmora, one of the widely used platforms for video editing and adopting it s per the video requirement.
Thus, let’s try to understand how you can change the Video’s aspect ratio using Filmora.
Step1 Download and open the Software
First, visit the official link of Wondershare Filmora and download, install and lunch the tool on your system.
Step2 Set the aspect ratio and upload your file
Right from the main interface, you will find the aspect ratio option. Using the drop-down menu, select the desired one to change the ratio of Video. After that, click on the new project to upload your video file.
Step3 Save and Export
Now, when you upload the video file, it will automatically modify the chosen aspect ratio for the video. Then export the file to save at the desired location on your system.

1.2 For Professional People
Now, here comes the guidance to those professional videographers, movie maker who needs an advanced version to change video size or aspect ratio.
Since you are already aware of technicalities to a certain extent, it becomes easy to use some advanced tools to change the aspect ratio of Video using adobe and OBS Software.
● Adobe PR
The first tool that we shall discuss is Adobe PR, and we will learn how to use Adobe Premiere Pro to change the Video’s aspect ratio. This tool is valuable for worldwide users explicitly working in the video editing field or dedicated professionals who need some technical knowledge to understand the interface. Here are the required steps to handle the adobe PR to change aspect Ratio iPhone Video devices.
Open the ‘File’ Menu> then Go to the ‘New’ Folder > after that, visit the ‘Sequence’ (dialog box) That will give the option of ‘Settings,’ select it> then visit the ‘Video’ section. Then, from the Video section, you need to adjust the Frame size for height and the Horizontal value for width.
Then opt for ‘OK.’
● OBS Studio
Those who know are pretty aware of the professional OBS studio full of features and technical detailing. In this part, you shall see how to use OBS software to change the iMovie aspect ratio following the mentioned steps.
Here, you need to open the ‘Settings .’ Under the ‘Video’ subsection, you will see ‘Output Resolution’ (click on drop-down), then from the given aspect ratios, change the ratio of your Video. Then, press the OK button to apply the changes at the end. That’s it.
Using this professional software will make you able to change the aspect ratio on iPhone Video and change the aspect ratio MP4, MKV, FLV, or other formats. The only need is to have a basic understanding of the technical knowledge related to the software. If you’re already a professional video maker, this software will be the most option.
Part 2 Change Video aspect Ratio Online
Till now, we have covered different software as per the user requirements. Suppose you are not comfortable with downloading any software on your devices. In that case, there are some alternatives for Online Video Editors to change video aspect ratio with ease. Let’s take a look over some of the easy-to-use online tools to change the ratio of the Video. Such tools are quick to use and accessible worldwide. Some of them are mentioned below:
1. veed.io
You can effortlessly change the aspect ratio of your video using ‘Veed.io’. Which supports multiple video formats such as .wmv, .mp4, .mkv, .flv, .3gp and many more. While uploading the video, you need to mention the required width and height of the video and then click on the ‘Resize’ button.
2. Kapwing (kapwing.com)
Another helpful tool while searching for some quick tools to change the ratio of Video through online mode is Kapwing Online Convertor. You can scale, resize your Video by simply uploading your file or pasting the URL there. The interface is quite simple to use and changes the aspect ratio of MP4 or other format videosThere is noNo doubt accessing some online tools to change the Video’s aspect ratio in quick and easy steps. Though there exist certain limitations such as internet connection speed should be good to upload or download the Video. In addition, there is a certain limitation in terms of the size of the Video or other factors. Otherwise, it comes out to be a practical option for small files.
Part 3 Make sure which aspect Ratio You Want to Change
Technical specifications needed by different online platforms are different, such as YouTube, Instagram, Facebook, or other social media platform that needed a video with different aspect ratios to make them suitable s per their criteria. Thus, accordingly, you need to modify or change the aspect ratio on MP4 as per these social media requirements. Here are some famous social media platforms, and their aspect ratio requirements are listed. Let’s check them out one by one:
Twitter: The aspect ratio range that works for Twitter is between 1.1 to 2.1
Instagram: For it, the standard ratios are: 1.91:1, 4:5
Tiktok: Required ratio is 9:16 (Smartphone screen)
YouTube: Standard aspect Ratio for YouTube is 16:9. If the video uploaded is not in this ratio, then YouTube will make an internal adjustment and show the video with an outer band of the black or white strip around the video screen.
Vimeo: Both the options are available with Vimeo that is 16:9, 4:3
Wondershare Filmora
Get started easily with Filmora’s powerful performance, intuitive interface, and countless effects!
Try It Free Try It Free Try It Free Learn More >

Conclusion
Getting the correct information about the iMovie aspect ratio change and Adobe premiere pro-change aspect ratio is crucial to uplift the viewer base to your Video. Furthermore, to a great extent, it matters which platform your Video will launch on as different devices need different aspect ratios. Thus, this article focused on covering all the points covered under how to change the Aspect Ratio of MP4 videos. Thus, whether you are a novice in video making or a professional videographer, or a moviemaker, learn about changing the ratio of Video to open new vistas to your efforts with Wondershare Filmora, Adobe, and OBS web applications.
Videos are a great way to complete the whole story in one go. In social media, videography, entertainment, educational video sharing, or many more areas, viewers and their viewing experience matter a lot. For instance, if a person visited YouTube to see some educational content but finds it out that the overall view of the video content is not up to the mark. Then, what will happen? That person will switch to another channel, which is not good for your business area. Thus, knowing the correct aspect ratio for your video is very important. Here, the aspect ratio refers to the ratio of width to the height of the Video or image visible on the screen. So, here you will learn about ways to change the ratio of a video and how to change video dimensions on premiere pro or iOS devices.

In this article
01 [Change aspect Ratio with Softwares](#Part 1)
02 [Change Video aspect Ratio Online](#Part 2)
03 [Make sure which aspect Ratio You Want to Change](#Part 3)
Part 1 Change aspect Ratio with Softwares
1.1 For beginners & most people
This part is for beginners or people who are not aware of the technicalities related to video size, dimensions, or changing the ratio of Video. A quick and easy-to-use application is Wondershare Filmora, one of the widely used platforms for video editing and adopting it s per the video requirement.
Thus, let’s try to understand how you can change the Video’s aspect ratio using Filmora.
Step1 Download and open the Software
First, visit the official link of Wondershare Filmora and download, install and lunch the tool on your system.
Step2 Set the aspect ratio and upload your file
Right from the main interface, you will find the aspect ratio option. Using the drop-down menu, select the desired one to change the ratio of Video. After that, click on the new project to upload your video file.
Step3 Save and Export
Now, when you upload the video file, it will automatically modify the chosen aspect ratio for the video. Then export the file to save at the desired location on your system.

1.2 For Professional People
Now, here comes the guidance to those professional videographers, movie maker who needs an advanced version to change video size or aspect ratio.
Since you are already aware of technicalities to a certain extent, it becomes easy to use some advanced tools to change the aspect ratio of Video using adobe and OBS Software.
● Adobe PR
The first tool that we shall discuss is Adobe PR, and we will learn how to use Adobe Premiere Pro to change the Video’s aspect ratio. This tool is valuable for worldwide users explicitly working in the video editing field or dedicated professionals who need some technical knowledge to understand the interface. Here are the required steps to handle the adobe PR to change aspect Ratio iPhone Video devices.
Open the ‘File’ Menu> then Go to the ‘New’ Folder > after that, visit the ‘Sequence’ (dialog box) That will give the option of ‘Settings,’ select it> then visit the ‘Video’ section. Then, from the Video section, you need to adjust the Frame size for height and the Horizontal value for width.
Then opt for ‘OK.’
● OBS Studio
Those who know are pretty aware of the professional OBS studio full of features and technical detailing. In this part, you shall see how to use OBS software to change the iMovie aspect ratio following the mentioned steps.
Here, you need to open the ‘Settings .’ Under the ‘Video’ subsection, you will see ‘Output Resolution’ (click on drop-down), then from the given aspect ratios, change the ratio of your Video. Then, press the OK button to apply the changes at the end. That’s it.
Using this professional software will make you able to change the aspect ratio on iPhone Video and change the aspect ratio MP4, MKV, FLV, or other formats. The only need is to have a basic understanding of the technical knowledge related to the software. If you’re already a professional video maker, this software will be the most option.
Part 2 Change Video aspect Ratio Online
Till now, we have covered different software as per the user requirements. Suppose you are not comfortable with downloading any software on your devices. In that case, there are some alternatives for Online Video Editors to change video aspect ratio with ease. Let’s take a look over some of the easy-to-use online tools to change the ratio of the Video. Such tools are quick to use and accessible worldwide. Some of them are mentioned below:
1. veed.io
You can effortlessly change the aspect ratio of your video using ‘Veed.io’. Which supports multiple video formats such as .wmv, .mp4, .mkv, .flv, .3gp and many more. While uploading the video, you need to mention the required width and height of the video and then click on the ‘Resize’ button.
2. Kapwing (kapwing.com)
Another helpful tool while searching for some quick tools to change the ratio of Video through online mode is Kapwing Online Convertor. You can scale, resize your Video by simply uploading your file or pasting the URL there. The interface is quite simple to use and changes the aspect ratio of MP4 or other format videosThere is noNo doubt accessing some online tools to change the Video’s aspect ratio in quick and easy steps. Though there exist certain limitations such as internet connection speed should be good to upload or download the Video. In addition, there is a certain limitation in terms of the size of the Video or other factors. Otherwise, it comes out to be a practical option for small files.
Part 3 Make sure which aspect Ratio You Want to Change
Technical specifications needed by different online platforms are different, such as YouTube, Instagram, Facebook, or other social media platform that needed a video with different aspect ratios to make them suitable s per their criteria. Thus, accordingly, you need to modify or change the aspect ratio on MP4 as per these social media requirements. Here are some famous social media platforms, and their aspect ratio requirements are listed. Let’s check them out one by one:
Twitter: The aspect ratio range that works for Twitter is between 1.1 to 2.1
Instagram: For it, the standard ratios are: 1.91:1, 4:5
Tiktok: Required ratio is 9:16 (Smartphone screen)
YouTube: Standard aspect Ratio for YouTube is 16:9. If the video uploaded is not in this ratio, then YouTube will make an internal adjustment and show the video with an outer band of the black or white strip around the video screen.
Vimeo: Both the options are available with Vimeo that is 16:9, 4:3
Wondershare Filmora
Get started easily with Filmora’s powerful performance, intuitive interface, and countless effects!
Try It Free Try It Free Try It Free Learn More >

Conclusion
Getting the correct information about the iMovie aspect ratio change and Adobe premiere pro-change aspect ratio is crucial to uplift the viewer base to your Video. Furthermore, to a great extent, it matters which platform your Video will launch on as different devices need different aspect ratios. Thus, this article focused on covering all the points covered under how to change the Aspect Ratio of MP4 videos. Thus, whether you are a novice in video making or a professional videographer, or a moviemaker, learn about changing the ratio of Video to open new vistas to your efforts with Wondershare Filmora, Adobe, and OBS web applications.
Videos are a great way to complete the whole story in one go. In social media, videography, entertainment, educational video sharing, or many more areas, viewers and their viewing experience matter a lot. For instance, if a person visited YouTube to see some educational content but finds it out that the overall view of the video content is not up to the mark. Then, what will happen? That person will switch to another channel, which is not good for your business area. Thus, knowing the correct aspect ratio for your video is very important. Here, the aspect ratio refers to the ratio of width to the height of the Video or image visible on the screen. So, here you will learn about ways to change the ratio of a video and how to change video dimensions on premiere pro or iOS devices.

In this article
01 [Change aspect Ratio with Softwares](#Part 1)
02 [Change Video aspect Ratio Online](#Part 2)
03 [Make sure which aspect Ratio You Want to Change](#Part 3)
Part 1 Change aspect Ratio with Softwares
1.1 For beginners & most people
This part is for beginners or people who are not aware of the technicalities related to video size, dimensions, or changing the ratio of Video. A quick and easy-to-use application is Wondershare Filmora, one of the widely used platforms for video editing and adopting it s per the video requirement.
Thus, let’s try to understand how you can change the Video’s aspect ratio using Filmora.
Step1 Download and open the Software
First, visit the official link of Wondershare Filmora and download, install and lunch the tool on your system.
Step2 Set the aspect ratio and upload your file
Right from the main interface, you will find the aspect ratio option. Using the drop-down menu, select the desired one to change the ratio of Video. After that, click on the new project to upload your video file.
Step3 Save and Export
Now, when you upload the video file, it will automatically modify the chosen aspect ratio for the video. Then export the file to save at the desired location on your system.

1.2 For Professional People
Now, here comes the guidance to those professional videographers, movie maker who needs an advanced version to change video size or aspect ratio.
Since you are already aware of technicalities to a certain extent, it becomes easy to use some advanced tools to change the aspect ratio of Video using adobe and OBS Software.
● Adobe PR
The first tool that we shall discuss is Adobe PR, and we will learn how to use Adobe Premiere Pro to change the Video’s aspect ratio. This tool is valuable for worldwide users explicitly working in the video editing field or dedicated professionals who need some technical knowledge to understand the interface. Here are the required steps to handle the adobe PR to change aspect Ratio iPhone Video devices.
Open the ‘File’ Menu> then Go to the ‘New’ Folder > after that, visit the ‘Sequence’ (dialog box) That will give the option of ‘Settings,’ select it> then visit the ‘Video’ section. Then, from the Video section, you need to adjust the Frame size for height and the Horizontal value for width.
Then opt for ‘OK.’
● OBS Studio
Those who know are pretty aware of the professional OBS studio full of features and technical detailing. In this part, you shall see how to use OBS software to change the iMovie aspect ratio following the mentioned steps.
Here, you need to open the ‘Settings .’ Under the ‘Video’ subsection, you will see ‘Output Resolution’ (click on drop-down), then from the given aspect ratios, change the ratio of your Video. Then, press the OK button to apply the changes at the end. That’s it.
Using this professional software will make you able to change the aspect ratio on iPhone Video and change the aspect ratio MP4, MKV, FLV, or other formats. The only need is to have a basic understanding of the technical knowledge related to the software. If you’re already a professional video maker, this software will be the most option.
Part 2 Change Video aspect Ratio Online
Till now, we have covered different software as per the user requirements. Suppose you are not comfortable with downloading any software on your devices. In that case, there are some alternatives for Online Video Editors to change video aspect ratio with ease. Let’s take a look over some of the easy-to-use online tools to change the ratio of the Video. Such tools are quick to use and accessible worldwide. Some of them are mentioned below:
1. veed.io
You can effortlessly change the aspect ratio of your video using ‘Veed.io’. Which supports multiple video formats such as .wmv, .mp4, .mkv, .flv, .3gp and many more. While uploading the video, you need to mention the required width and height of the video and then click on the ‘Resize’ button.
2. Kapwing (kapwing.com)
Another helpful tool while searching for some quick tools to change the ratio of Video through online mode is Kapwing Online Convertor. You can scale, resize your Video by simply uploading your file or pasting the URL there. The interface is quite simple to use and changes the aspect ratio of MP4 or other format videosThere is noNo doubt accessing some online tools to change the Video’s aspect ratio in quick and easy steps. Though there exist certain limitations such as internet connection speed should be good to upload or download the Video. In addition, there is a certain limitation in terms of the size of the Video or other factors. Otherwise, it comes out to be a practical option for small files.
Part 3 Make sure which aspect Ratio You Want to Change
Technical specifications needed by different online platforms are different, such as YouTube, Instagram, Facebook, or other social media platform that needed a video with different aspect ratios to make them suitable s per their criteria. Thus, accordingly, you need to modify or change the aspect ratio on MP4 as per these social media requirements. Here are some famous social media platforms, and their aspect ratio requirements are listed. Let’s check them out one by one:
Twitter: The aspect ratio range that works for Twitter is between 1.1 to 2.1
Instagram: For it, the standard ratios are: 1.91:1, 4:5
Tiktok: Required ratio is 9:16 (Smartphone screen)
YouTube: Standard aspect Ratio for YouTube is 16:9. If the video uploaded is not in this ratio, then YouTube will make an internal adjustment and show the video with an outer band of the black or white strip around the video screen.
Vimeo: Both the options are available with Vimeo that is 16:9, 4:3
Wondershare Filmora
Get started easily with Filmora’s powerful performance, intuitive interface, and countless effects!
Try It Free Try It Free Try It Free Learn More >

Conclusion
Getting the correct information about the iMovie aspect ratio change and Adobe premiere pro-change aspect ratio is crucial to uplift the viewer base to your Video. Furthermore, to a great extent, it matters which platform your Video will launch on as different devices need different aspect ratios. Thus, this article focused on covering all the points covered under how to change the Aspect Ratio of MP4 videos. Thus, whether you are a novice in video making or a professional videographer, or a moviemaker, learn about changing the ratio of Video to open new vistas to your efforts with Wondershare Filmora, Adobe, and OBS web applications.
15 Camera Shake Preset for Premiere Pro
Create High-Quality Video - Wondershare Filmora
An easy and powerful video editor
Numerous video and audio effects to choose from
Detailed tutorials are provided by the official channel
Do you know how professional video footage is made? Most of the time, it’s through small movements on a camera, called Camera Shake. It is used to create realistic and dramatic shots in movies. In contrast, you can accidentally capture some shake on film; most of the time, it has to be created by a team of people. Camera operators will perform different movements with the camera in order to create this effect that we see in many movies, TV shows, and documentaries all around the world.
Putting a shake on footage can add visual interest to your scene. It adds kinetic energy to the shot and can be useful for transitions as well. Are you looking for realistic camera shake effects for your footage? Do you think these effects will help your video stand out from the rest on video sharing sites such as Youtube, Vimeo, or other sites? Look no more. In this article, we will look at 15 camera shake presets for unlimited possibilities! Mix and match to get your favorite camera shake effect. Save your time and costs!
15 Camera Shake Preset for Adobe Premiere Pro
1. Camera Shake Presets By Jorkiy
This preset collection contains 15 camera shake presets for Premiere Pro. The presets produce a live camera effect. Three groups of presets are available. A smooth preset, a quick preset, and a jerky preset. Choose one and apply it to your footage. Surprise your audience with dynamic videos courtesy of this pack.
2. Shake The Camera Or Text By 27
Create a dynamic and realistic camera shake with this awesome preset collection. The length of the presets is 1 minute, and the version for long videos is also included - 10 minutes. The project is perfect for shaking other objects, such as text or particles. Easy to use. Create dynamics in your video using this preset.
3. Real Action Ca1mera Shakes By PlaygroundStudio
12 Action Shakes effects are included in “Real Action Camera Shakes.”. You can use these effects directly in your clips or on adjustment layers. The visuals can be used in presentations, slideshows, TV shows, commercials, promotions, events, and on Facebook and YouTube. This professionally designed and energetically animated Premiere Preset will impress your audience.
4. Camera Shake By Insine
You can add a camera shake to your footage to give it a realistic look. You can also use it to shake other objects like text or particles. Animate your projects with realistic camera movements!
5. Shaking Presets Transitions By Jorkiy
This set of dynamic transitions for Premiere Pro is called Shaking Presets Transitions. There are different kinds of shakes in these transitions. This video pack works with any resolution (4k, full HD, vertical videos, etc.). Impress your audience with breathtaking videos by using this pack.
6. 35 Hit Presets By Animark
Your video will be shaken with these presets. There are 35 presets divided into seven categories. These presets would be ideal for any action, dynamic presentation, trailer, etc. You can choose from FullHD, 4K, Square, Instagram, etc.
7. 30 Shake Transitions By Animark
A stylish shake transition will be added to your video with these presets. Approximately 30 transitions are included in the project. You can create a multitude of different transitions by combining presets. You can use these presets for any action, dynamic social media presentation, trailer, etc.
8. 3D Spin Transitions By PlaygroundStudio
3D With Spin Transitions for Premiere Pro, you get 24 stylish and creative transitioning effects. This feature will look and feel better when presenting slideshows, films, movies, trailers, teasers, promotions, and events videos. PP presets that are action-packed and energetically crafted to impress your audience.
9. Stretched Bounce Transitions By LeftHand
This collection of 12 dynamic transitions presets is called Stretched Bounce Transitions. With these transitions, your videos will look more modern, clean, and cinematic. This transition works with videos and photos with resolutions up to 4K. With presets, you can combine seamless camera movement with an elastic shake. Each of the four directions is included, and there is also a category perfect for music videos with a liquid, psychedelic overlay. You can modify the speed of each preset easily.
10. Shake Transitions By JuliaDesign
Are you capable of creating dynamic videos? Check out these shake transitions to improve them. The pack is small but has a lot of cool effects. Six presets are included, so you can easily pick your favorite. You can customize each transition by adjusting the layer length.
11. Shake Transitions Presets By Jorkiy
The Shake Transitions Presets for Premiere Pro is available for free. Create sharp shaky camera effects by using this set of presets. You can apply a preset to an adjustment layer placed over your frames. The pack is compatible with any resolution (4K, full HD, vertical video, etc.). Surprise your viewers with dynamic videos created with this pack.
12. Camera Shake Flicker Effects By Vesna
14 shake presets are included in this pack, including shake effects and blinking effects. An instructional video is included. Presets last approximately 30 seconds each. It can be used as a camera shake effect, a text shake effect, or a transition effect. The possibilities are endless when you combine them.
13. Smooth Camera Shake By Enduro
Ten smooth camera shake effects are included in this project. Easily applied to the clip or layer above your edit, these are easy to use. You can use presets for effects such as camera shake, text shake, and even transitions. You can combine them to get any unique result you desire.
14. Real Camera Shakes By PlaygroundStudio
You can apply them to a clip or an adjustment layer, and they’re so easy to use. Presentations, slide shows, TV shows, commercials, promotions, events, Facebook, and YouTube videos can all benefit from using them. This energetic and beautifully designed Premiere Preset will impress your audience.
15. Spin Shake Transitions By VSDream
You’re sure to love the 24 dynamic, impactful directional spin shake transitions in the Spin Shake Transitions Premiere Pro template. Sport, travel, action movies, special events, TV shows, sports films, commercials, and trailers are perfect for this project. Anything that requires an extra dose of excitement.
How to import & use Camera Shake Preset in Premiere Pro
The following steps will show you how to use these presets in Premiere Pro.
Firstly, these aren’t just drag-and-drop effects. You must install Adobe Premiere Pro on your computer.
Step1: The first step is to install the presets in your After Effects presets folder. After downloading and unzipping the free presets, copy and paste them.
Step2: As soon as you have copied the presets to the AE presets folder, you can open a PP project and replace the effects in your videos by choosing: Replace with After Effects Composition.
Step3: Verify the composition settings in Premiere Pro, and see if 4K or FHD are selected.
Step4: If you want to start adding presets to NULL objects, you can do so by creating them. To add Motion Blur, you will need footage and the overall composition. Next, you can adjust keyframes and use Motion Tiles.
Conclusion
●If you are tired of the linear style and want to change your videos into cool videos, you can use these 15 Presets for Adobe Premiere Pro. You can even tweak the effects to suit your preferences. These presets have a wide range of uses and can be used easily. It is a completely customizable filter that you can use on any video or audio footage in Adobe Premiere Pro, no matter its format (avi, MPEG, mp4, etc.). You can also control the intensity of these effects, making it suitable for footage.
Do you know how professional video footage is made? Most of the time, it’s through small movements on a camera, called Camera Shake. It is used to create realistic and dramatic shots in movies. In contrast, you can accidentally capture some shake on film; most of the time, it has to be created by a team of people. Camera operators will perform different movements with the camera in order to create this effect that we see in many movies, TV shows, and documentaries all around the world.
Putting a shake on footage can add visual interest to your scene. It adds kinetic energy to the shot and can be useful for transitions as well. Are you looking for realistic camera shake effects for your footage? Do you think these effects will help your video stand out from the rest on video sharing sites such as Youtube, Vimeo, or other sites? Look no more. In this article, we will look at 15 camera shake presets for unlimited possibilities! Mix and match to get your favorite camera shake effect. Save your time and costs!
15 Camera Shake Preset for Adobe Premiere Pro
1. Camera Shake Presets By Jorkiy
This preset collection contains 15 camera shake presets for Premiere Pro. The presets produce a live camera effect. Three groups of presets are available. A smooth preset, a quick preset, and a jerky preset. Choose one and apply it to your footage. Surprise your audience with dynamic videos courtesy of this pack.

2. Shake The Camera Or Text By 27
Create a dynamic and realistic camera shake with this awesome preset collection. The length of the presets is 1 minute, and the version for long videos is also included - 10 minutes. The project is perfect for shaking other objects, such as text or particles. Easy to use. Create dynamics in your video using this preset.

3. Real Action Ca1mera Shakes By PlaygroundStudio
12 Action Shakes effects are included in “Real Action Camera Shakes.”. You can use these effects directly in your clips or on adjustment layers. The visuals can be used in presentations, slideshows, TV shows, commercials, promotions, events, and on Facebook and YouTube. This professionally designed and energetically animated Premiere Preset will impress your audience.

4. Camera Shake By Insine
You can add a camera shake to your footage to give it a realistic look. You can also use it to shake other objects like text or particles. Animate your projects with realistic camera movements!
5. Shaking Presets Transitions By Jorkiy
This set of dynamic transitions for Premiere Pro is called Shaking Presets Transitions. There are different kinds of shakes in these transitions. This video pack works with any resolution (4k, full HD, vertical videos, etc.). Impress your audience with breathtaking videos by using this pack.

6. 35 Hit Presets By Animark
Your video will be shaken with these presets. There are 35 presets divided into seven categories. These presets would be ideal for any action, dynamic presentation, trailer, etc. You can choose from FullHD, 4K, Square, Instagram, etc.
7. 30 Shake Transitions By Animark
A stylish shake transition will be added to your video with these presets. Approximately 30 transitions are included in the project. You can create a multitude of different transitions by combining presets. You can use these presets for any action, dynamic social media presentation, trailer, etc.
8. 3D Spin Transitions By PlaygroundStudio
3D With Spin Transitions for Premiere Pro, you get 24 stylish and creative transitioning effects. This feature will look and feel better when presenting slideshows, films, movies, trailers, teasers, promotions, and events videos. PP presets that are action-packed and energetically crafted to impress your audience.
9. Stretched Bounce Transitions By LeftHand
This collection of 12 dynamic transitions presets is called Stretched Bounce Transitions. With these transitions, your videos will look more modern, clean, and cinematic. This transition works with videos and photos with resolutions up to 4K. With presets, you can combine seamless camera movement with an elastic shake. Each of the four directions is included, and there is also a category perfect for music videos with a liquid, psychedelic overlay. You can modify the speed of each preset easily.
10. Shake Transitions By JuliaDesign
Are you capable of creating dynamic videos? Check out these shake transitions to improve them. The pack is small but has a lot of cool effects. Six presets are included, so you can easily pick your favorite. You can customize each transition by adjusting the layer length.

11. Shake Transitions Presets By Jorkiy
The Shake Transitions Presets for Premiere Pro is available for free. Create sharp shaky camera effects by using this set of presets. You can apply a preset to an adjustment layer placed over your frames. The pack is compatible with any resolution (4K, full HD, vertical video, etc.). Surprise your viewers with dynamic videos created with this pack.
12. Camera Shake Flicker Effects By Vesna
14 shake presets are included in this pack, including shake effects and blinking effects. An instructional video is included. Presets last approximately 30 seconds each. It can be used as a camera shake effect, a text shake effect, or a transition effect. The possibilities are endless when you combine them.
13. Smooth Camera Shake By Enduro
Ten smooth camera shake effects are included in this project. Easily applied to the clip or layer above your edit, these are easy to use. You can use presets for effects such as camera shake, text shake, and even transitions. You can combine them to get any unique result you desire.
14. Real Camera Shakes By PlaygroundStudio
You can apply them to a clip or an adjustment layer, and they’re so easy to use. Presentations, slide shows, TV shows, commercials, promotions, events, Facebook, and YouTube videos can all benefit from using them. This energetic and beautifully designed Premiere Preset will impress your audience.
15. Spin Shake Transitions By VSDream
You’re sure to love the 24 dynamic, impactful directional spin shake transitions in the Spin Shake Transitions Premiere Pro template. Sport, travel, action movies, special events, TV shows, sports films, commercials, and trailers are perfect for this project. Anything that requires an extra dose of excitement.
How to import & use Camera Shake Preset in Premiere Pro
The following steps will show you how to use these presets in Premiere Pro.
Firstly, these aren’t just drag-and-drop effects. You must install Adobe Premiere Pro on your computer.
Step1: The first step is to install the presets in your After Effects presets folder. After downloading and unzipping the free presets, copy and paste them.
Step2: As soon as you have copied the presets to the AE presets folder, you can open a PP project and replace the effects in your videos by choosing: Replace with After Effects Composition.
Step3: Verify the composition settings in Premiere Pro, and see if 4K or FHD are selected.
Step4: If you want to start adding presets to NULL objects, you can do so by creating them. To add Motion Blur, you will need footage and the overall composition. Next, you can adjust keyframes and use Motion Tiles.
Conclusion
●If you are tired of the linear style and want to change your videos into cool videos, you can use these 15 Presets for Adobe Premiere Pro. You can even tweak the effects to suit your preferences. These presets have a wide range of uses and can be used easily. It is a completely customizable filter that you can use on any video or audio footage in Adobe Premiere Pro, no matter its format (avi, MPEG, mp4, etc.). You can also control the intensity of these effects, making it suitable for footage.
Do you know how professional video footage is made? Most of the time, it’s through small movements on a camera, called Camera Shake. It is used to create realistic and dramatic shots in movies. In contrast, you can accidentally capture some shake on film; most of the time, it has to be created by a team of people. Camera operators will perform different movements with the camera in order to create this effect that we see in many movies, TV shows, and documentaries all around the world.
Putting a shake on footage can add visual interest to your scene. It adds kinetic energy to the shot and can be useful for transitions as well. Are you looking for realistic camera shake effects for your footage? Do you think these effects will help your video stand out from the rest on video sharing sites such as Youtube, Vimeo, or other sites? Look no more. In this article, we will look at 15 camera shake presets for unlimited possibilities! Mix and match to get your favorite camera shake effect. Save your time and costs!
15 Camera Shake Preset for Adobe Premiere Pro
1. Camera Shake Presets By Jorkiy
This preset collection contains 15 camera shake presets for Premiere Pro. The presets produce a live camera effect. Three groups of presets are available. A smooth preset, a quick preset, and a jerky preset. Choose one and apply it to your footage. Surprise your audience with dynamic videos courtesy of this pack.

2. Shake The Camera Or Text By 27
Create a dynamic and realistic camera shake with this awesome preset collection. The length of the presets is 1 minute, and the version for long videos is also included - 10 minutes. The project is perfect for shaking other objects, such as text or particles. Easy to use. Create dynamics in your video using this preset.

3. Real Action Ca1mera Shakes By PlaygroundStudio
12 Action Shakes effects are included in “Real Action Camera Shakes.”. You can use these effects directly in your clips or on adjustment layers. The visuals can be used in presentations, slideshows, TV shows, commercials, promotions, events, and on Facebook and YouTube. This professionally designed and energetically animated Premiere Preset will impress your audience.

4. Camera Shake By Insine
You can add a camera shake to your footage to give it a realistic look. You can also use it to shake other objects like text or particles. Animate your projects with realistic camera movements!
5. Shaking Presets Transitions By Jorkiy
This set of dynamic transitions for Premiere Pro is called Shaking Presets Transitions. There are different kinds of shakes in these transitions. This video pack works with any resolution (4k, full HD, vertical videos, etc.). Impress your audience with breathtaking videos by using this pack.

6. 35 Hit Presets By Animark
Your video will be shaken with these presets. There are 35 presets divided into seven categories. These presets would be ideal for any action, dynamic presentation, trailer, etc. You can choose from FullHD, 4K, Square, Instagram, etc.
7. 30 Shake Transitions By Animark
A stylish shake transition will be added to your video with these presets. Approximately 30 transitions are included in the project. You can create a multitude of different transitions by combining presets. You can use these presets for any action, dynamic social media presentation, trailer, etc.
8. 3D Spin Transitions By PlaygroundStudio
3D With Spin Transitions for Premiere Pro, you get 24 stylish and creative transitioning effects. This feature will look and feel better when presenting slideshows, films, movies, trailers, teasers, promotions, and events videos. PP presets that are action-packed and energetically crafted to impress your audience.
9. Stretched Bounce Transitions By LeftHand
This collection of 12 dynamic transitions presets is called Stretched Bounce Transitions. With these transitions, your videos will look more modern, clean, and cinematic. This transition works with videos and photos with resolutions up to 4K. With presets, you can combine seamless camera movement with an elastic shake. Each of the four directions is included, and there is also a category perfect for music videos with a liquid, psychedelic overlay. You can modify the speed of each preset easily.
10. Shake Transitions By JuliaDesign
Are you capable of creating dynamic videos? Check out these shake transitions to improve them. The pack is small but has a lot of cool effects. Six presets are included, so you can easily pick your favorite. You can customize each transition by adjusting the layer length.

11. Shake Transitions Presets By Jorkiy
The Shake Transitions Presets for Premiere Pro is available for free. Create sharp shaky camera effects by using this set of presets. You can apply a preset to an adjustment layer placed over your frames. The pack is compatible with any resolution (4K, full HD, vertical video, etc.). Surprise your viewers with dynamic videos created with this pack.
12. Camera Shake Flicker Effects By Vesna
14 shake presets are included in this pack, including shake effects and blinking effects. An instructional video is included. Presets last approximately 30 seconds each. It can be used as a camera shake effect, a text shake effect, or a transition effect. The possibilities are endless when you combine them.
13. Smooth Camera Shake By Enduro
Ten smooth camera shake effects are included in this project. Easily applied to the clip or layer above your edit, these are easy to use. You can use presets for effects such as camera shake, text shake, and even transitions. You can combine them to get any unique result you desire.
14. Real Camera Shakes By PlaygroundStudio
You can apply them to a clip or an adjustment layer, and they’re so easy to use. Presentations, slide shows, TV shows, commercials, promotions, events, Facebook, and YouTube videos can all benefit from using them. This energetic and beautifully designed Premiere Preset will impress your audience.
15. Spin Shake Transitions By VSDream
You’re sure to love the 24 dynamic, impactful directional spin shake transitions in the Spin Shake Transitions Premiere Pro template. Sport, travel, action movies, special events, TV shows, sports films, commercials, and trailers are perfect for this project. Anything that requires an extra dose of excitement.
How to import & use Camera Shake Preset in Premiere Pro
The following steps will show you how to use these presets in Premiere Pro.
Firstly, these aren’t just drag-and-drop effects. You must install Adobe Premiere Pro on your computer.
Step1: The first step is to install the presets in your After Effects presets folder. After downloading and unzipping the free presets, copy and paste them.
Step2: As soon as you have copied the presets to the AE presets folder, you can open a PP project and replace the effects in your videos by choosing: Replace with After Effects Composition.
Step3: Verify the composition settings in Premiere Pro, and see if 4K or FHD are selected.
Step4: If you want to start adding presets to NULL objects, you can do so by creating them. To add Motion Blur, you will need footage and the overall composition. Next, you can adjust keyframes and use Motion Tiles.
Conclusion
●If you are tired of the linear style and want to change your videos into cool videos, you can use these 15 Presets for Adobe Premiere Pro. You can even tweak the effects to suit your preferences. These presets have a wide range of uses and can be used easily. It is a completely customizable filter that you can use on any video or audio footage in Adobe Premiere Pro, no matter its format (avi, MPEG, mp4, etc.). You can also control the intensity of these effects, making it suitable for footage.
Do you know how professional video footage is made? Most of the time, it’s through small movements on a camera, called Camera Shake. It is used to create realistic and dramatic shots in movies. In contrast, you can accidentally capture some shake on film; most of the time, it has to be created by a team of people. Camera operators will perform different movements with the camera in order to create this effect that we see in many movies, TV shows, and documentaries all around the world.
Putting a shake on footage can add visual interest to your scene. It adds kinetic energy to the shot and can be useful for transitions as well. Are you looking for realistic camera shake effects for your footage? Do you think these effects will help your video stand out from the rest on video sharing sites such as Youtube, Vimeo, or other sites? Look no more. In this article, we will look at 15 camera shake presets for unlimited possibilities! Mix and match to get your favorite camera shake effect. Save your time and costs!
15 Camera Shake Preset for Adobe Premiere Pro
1. Camera Shake Presets By Jorkiy
This preset collection contains 15 camera shake presets for Premiere Pro. The presets produce a live camera effect. Three groups of presets are available. A smooth preset, a quick preset, and a jerky preset. Choose one and apply it to your footage. Surprise your audience with dynamic videos courtesy of this pack.

2. Shake The Camera Or Text By 27
Create a dynamic and realistic camera shake with this awesome preset collection. The length of the presets is 1 minute, and the version for long videos is also included - 10 minutes. The project is perfect for shaking other objects, such as text or particles. Easy to use. Create dynamics in your video using this preset.

3. Real Action Ca1mera Shakes By PlaygroundStudio
12 Action Shakes effects are included in “Real Action Camera Shakes.”. You can use these effects directly in your clips or on adjustment layers. The visuals can be used in presentations, slideshows, TV shows, commercials, promotions, events, and on Facebook and YouTube. This professionally designed and energetically animated Premiere Preset will impress your audience.

4. Camera Shake By Insine
You can add a camera shake to your footage to give it a realistic look. You can also use it to shake other objects like text or particles. Animate your projects with realistic camera movements!
5. Shaking Presets Transitions By Jorkiy
This set of dynamic transitions for Premiere Pro is called Shaking Presets Transitions. There are different kinds of shakes in these transitions. This video pack works with any resolution (4k, full HD, vertical videos, etc.). Impress your audience with breathtaking videos by using this pack.

6. 35 Hit Presets By Animark
Your video will be shaken with these presets. There are 35 presets divided into seven categories. These presets would be ideal for any action, dynamic presentation, trailer, etc. You can choose from FullHD, 4K, Square, Instagram, etc.
7. 30 Shake Transitions By Animark
A stylish shake transition will be added to your video with these presets. Approximately 30 transitions are included in the project. You can create a multitude of different transitions by combining presets. You can use these presets for any action, dynamic social media presentation, trailer, etc.
8. 3D Spin Transitions By PlaygroundStudio
3D With Spin Transitions for Premiere Pro, you get 24 stylish and creative transitioning effects. This feature will look and feel better when presenting slideshows, films, movies, trailers, teasers, promotions, and events videos. PP presets that are action-packed and energetically crafted to impress your audience.
9. Stretched Bounce Transitions By LeftHand
This collection of 12 dynamic transitions presets is called Stretched Bounce Transitions. With these transitions, your videos will look more modern, clean, and cinematic. This transition works with videos and photos with resolutions up to 4K. With presets, you can combine seamless camera movement with an elastic shake. Each of the four directions is included, and there is also a category perfect for music videos with a liquid, psychedelic overlay. You can modify the speed of each preset easily.
10. Shake Transitions By JuliaDesign
Are you capable of creating dynamic videos? Check out these shake transitions to improve them. The pack is small but has a lot of cool effects. Six presets are included, so you can easily pick your favorite. You can customize each transition by adjusting the layer length.

11. Shake Transitions Presets By Jorkiy
The Shake Transitions Presets for Premiere Pro is available for free. Create sharp shaky camera effects by using this set of presets. You can apply a preset to an adjustment layer placed over your frames. The pack is compatible with any resolution (4K, full HD, vertical video, etc.). Surprise your viewers with dynamic videos created with this pack.
12. Camera Shake Flicker Effects By Vesna
14 shake presets are included in this pack, including shake effects and blinking effects. An instructional video is included. Presets last approximately 30 seconds each. It can be used as a camera shake effect, a text shake effect, or a transition effect. The possibilities are endless when you combine them.
13. Smooth Camera Shake By Enduro
Ten smooth camera shake effects are included in this project. Easily applied to the clip or layer above your edit, these are easy to use. You can use presets for effects such as camera shake, text shake, and even transitions. You can combine them to get any unique result you desire.
14. Real Camera Shakes By PlaygroundStudio
You can apply them to a clip or an adjustment layer, and they’re so easy to use. Presentations, slide shows, TV shows, commercials, promotions, events, Facebook, and YouTube videos can all benefit from using them. This energetic and beautifully designed Premiere Preset will impress your audience.
15. Spin Shake Transitions By VSDream
You’re sure to love the 24 dynamic, impactful directional spin shake transitions in the Spin Shake Transitions Premiere Pro template. Sport, travel, action movies, special events, TV shows, sports films, commercials, and trailers are perfect for this project. Anything that requires an extra dose of excitement.
How to import & use Camera Shake Preset in Premiere Pro
The following steps will show you how to use these presets in Premiere Pro.
Firstly, these aren’t just drag-and-drop effects. You must install Adobe Premiere Pro on your computer.
Step1: The first step is to install the presets in your After Effects presets folder. After downloading and unzipping the free presets, copy and paste them.
Step2: As soon as you have copied the presets to the AE presets folder, you can open a PP project and replace the effects in your videos by choosing: Replace with After Effects Composition.
Step3: Verify the composition settings in Premiere Pro, and see if 4K or FHD are selected.
Step4: If you want to start adding presets to NULL objects, you can do so by creating them. To add Motion Blur, you will need footage and the overall composition. Next, you can adjust keyframes and use Motion Tiles.
Conclusion
●If you are tired of the linear style and want to change your videos into cool videos, you can use these 15 Presets for Adobe Premiere Pro. You can even tweak the effects to suit your preferences. These presets have a wide range of uses and can be used easily. It is a completely customizable filter that you can use on any video or audio footage in Adobe Premiere Pro, no matter its format (avi, MPEG, mp4, etc.). You can also control the intensity of these effects, making it suitable for footage.
Best 16 Motion Blur Apps for Videos & Photos
The blur observed in moving objects captured through the camera is called the motion blur effect. This, in particular, occurs due to the movement of the camera, subject, or both elements combined. People observe this effect in their real life through their eyes; thus, the motion blur effect is put into practice to give the clip or photo a touch of reality.
It is essentially used to display the message of speed or show the fast progression of time. Any object moving through a fast motion can be accompanied by the motion blur effect. There are many applications available to cater to this purpose. In this article, we will recommend some top-notch motion blur apps that will help you achieve this feat in no time.
- CapCut
- NSMB - Motion Blur Video
- BlurEffect - Blur Photo & Video
- Snapseed
- Picsart Photo Editor & Video
- Blur Video and Photo Editor
- Blur.r Photo, Pic.ture Motion
- Motion Blur Photo Effect
- Motion Blur Photo Editor
- Wondershare Filmora - The Best Motion Blur Effect App on Desktop
- Vegas Pro - Create Natural-Looking Motion Blurs With Ease
- Adobe Premiere Pro - Professionally Edit Motion Blur Videos
Best 4 Online Motion Blur Tools
Part 1: Best 9 Motion Blur Effect Apps for iPhone and Android
| Name | Price | Support System | Motion Blur for Photos | Motion Blur for Videos |
|---|---|---|---|---|
| CapCut | $0.99 - $74.99 Per Item | iPhone/Android | Yes | Yes |
| NSMB - Motion Blur Video | Not Provided | Android | No | Yes |
| BlurEffect - Blur Photo & Video | Full version: $39.99Premium - Monthly: $3.99Ad-Free & Watermark-Free: $14.99Up to 5 Minutes & Watermark-Free & Ad-Free: $19.99Premium - Annual: $19.99 | iPhone | Yes | Yes |
| Snapseed | Free | iPhone/Android | Yes | No |
| Picsart Photo Editor & Video | Ad Remover: $5.99Girl Minisketch: $1.99Food: $1.99Cartoon Animal Package: $2.99Grunge Stickers: $0.99Girly: $0.99Horoscope: $1.99Cute Thanksgiving: $2.99Happy Thanksgiving: $2.99Aliens: $0.99 | iPhone/Android | Yes | Yes |
| Blur Video and Photo Editor | $0.99 - $99.99 Per Item | Android | Yes | Yes |
| Blur.r Photo, Pic.ture Motion | Monthly Subscription: $ 11.98Weekly Subscription: $ 6.98One Week Subscription: $ 3.98Yearly Subscription: $ 94.98 | iPhone | Yes | No |
| Motion Blur Photo Effect | Premium Access: $7.99 - $29.99 | iPhone | Yes | No |
| Motion Blur Photo Editor | Not Provided | Android | Yes | No |
There are many motion blur effect applications available in the market, providing direct services for iPhone and Android users. However, finding the best app for this purpose is essential, which is why we came up with a list of the best motion blur apps that can be used on iPhone and Android.
1. CapCut
While it is known as an easy-to-use application, CapCut stands among the most premium mobile applications that help you create professional videos that can be posted on social media platforms. CapCut comes up with a dedicated motion blur effect that allows users to create stabilized videos with complete control over the speed of the video.
Following other adjustments in the video, CapCut is a complete tool designed to create advanced videos, including different effects such as motion blur.

Download: Google Play Store | App Store
Key Features
- You can quickly put transitions between the video and the clips to blend in perfectly.
- Video clips can be animated with the help of zoom-in and out effects, providing all major professional touchups a video can have.
- Execute a perfect motion blur video with the help of the multi-track timeline for arranging and previewing clips.
Pros
- It provides the option of including music clips and sound effects on the videos from the vast collection.
- It supports exporting videos in 4K and 60fps with Smart HDR technology.
Cons
- Won’t work perfectly if the RAM and hardware of the phone are limited.
2. NSMB - Motion Blur Video
The motion blur effect is a great feature that can enhance the quality of the video and make it look realistic if used properly. NSMB - Motion Blur Video is an Android motion blur application that features the option of creating such videos in a matter of seconds.
With no particular learning requirement, NSMB makes the process look easy. You have to set the intensity of video, and that’s all you need to do within this application.

Download: Google Play Store
Key Features
- While the platform is easy-to-use, the interface is quite simple to understand, with no confusing structures.
- The platform comes up with an intelligent motion blur that automatically executes the process.
- It works with Android devices from Android 5.0 and later, making it a compatible tool with all major Android devices.
Pros
- You can set the resolution of your exported video to 1080p, which is a Full HD result.
- Set an appropriate fps value for your exported video with the available options.
Cons
- Long rendering times, which are not optimized and take up time.
3. BlurEffect - Blur Photo & Video
BlurEfffect - Blur Photo & Video is another great iOS application that provides the option of adding motion blur effects. This tool is built to include the blur effect to perfection in general. With defining blur options, you can create motion blur effects easily on your added videos. The functions are diverse and quite effective if appropriately observed.

Download: App Store
Key Features
- As the name exclaim, it works perfectly for photos and videos, likewise.
- The paid version of the application can save videos up to 1080p in quality.
- It provides the feature of managing the strength of the “Auto Blurs” feature for controlling motion blur.
Pros
- Multiple effects are available on the platform, including normal blurs, pixelated and dotted blurs, etc.
- It also provides the option of trimming videos before adding the blur effect to them.
Cons
- The resolution of the video is lowered after blurring it out.
4. Snapseed
Google presented a great and quick photo editor for users confused about finding their perfect option. Snapseed was designed as a professional photo editor that allows users to add multiple touchups to the photo that is being edited.
While it backs itself up with Google Photos, this professional photo editor is enhanced and interconnected. Snapseed makes photo touchups simple; however, it does provide advanced functions that can help create motion blur pictures.
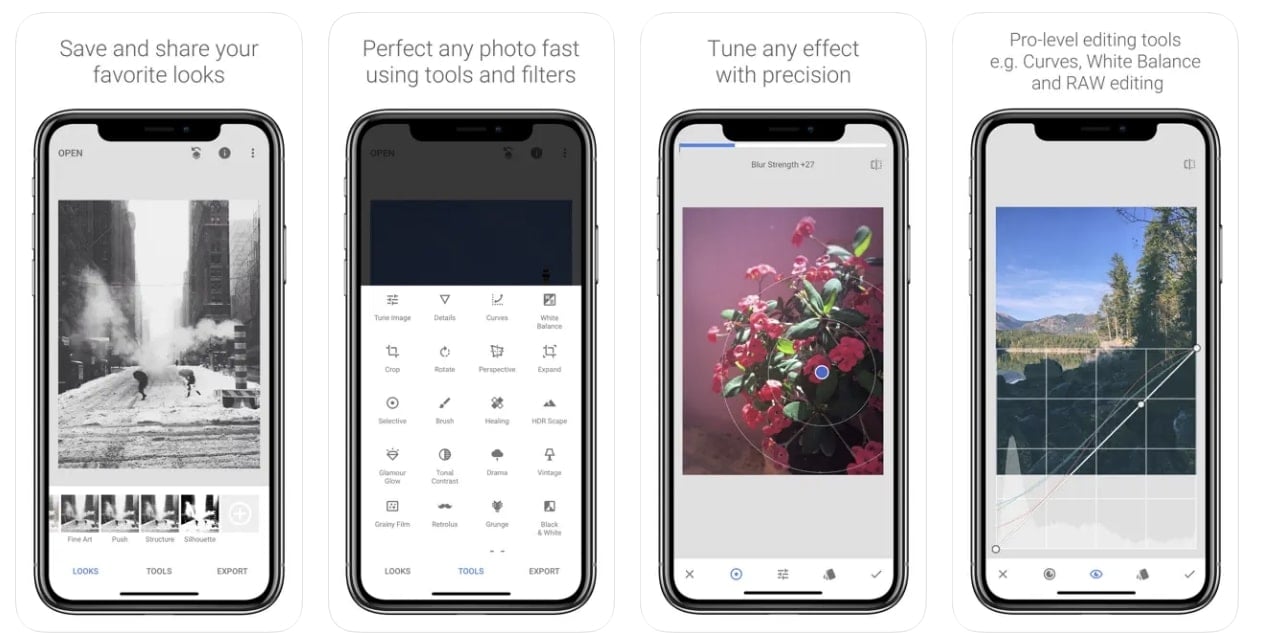
Download: Google Play Store | App Store
Key Features
- It combines with 29 different tools and filters, which also includes creating motion blur pictures.
- 38 predefined text styles are available in the editor for creating the text of different styles and forms.
- Create effects with multiple exposures brought with HDR Scape.
Pros
- Enhance a specific photo element with the help of the Face Enhance feature, which adds focus to the facial features.
- You can selectively retouch the photo and manage its exposure, saturation, and other elements.
Cons
- The application has no undo button, making it challenging to manage edits.
5. Picsart Photo Editor & Video
Picsart is a renowned photo and video editor available on App Store and Play Store. This exceptional editor covers a creative set of features combined with artificial intelligence to present some of the best options for retouching photos and videos. If you seek to create a motion blur effect with this application, it surely won’t disappoint, presenting a high-resolution result.
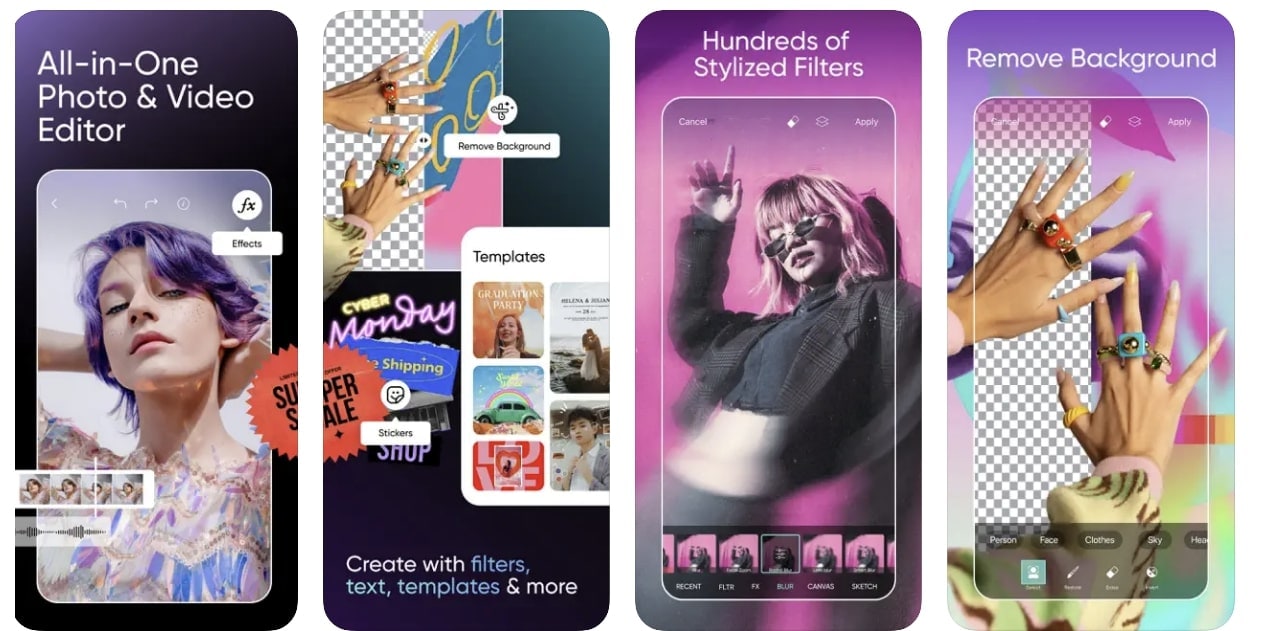
Download: Google Play Store | App Store
Key Features
- It helps users customize photos and videos with customizable brushes, layers, and drawing tools.
- Present a realistic display of motion blur with the help of the multiple effects and filters used for blending in perfectly.
- More than 60 million stickers are available in Picsart, which can be effectively used within any editing media.
Pros
- You can easily share the edited content with your friends through the platform.
- It provides multiple video effects and trendy filters to make video editing easier.
Cons
- There is a lot of lag in the application while editing the video.
6. Blur Video and Photo Editor
This is one of the motion blur apps that provides a simple set of options for managing and enhancing the videos and photos on your Android device. Motion blur can be confusing if not managed properly; however, Blur Video and Photo Editor provides a simple platform to include the blurry effect and make the moving object look perfect in the preview.
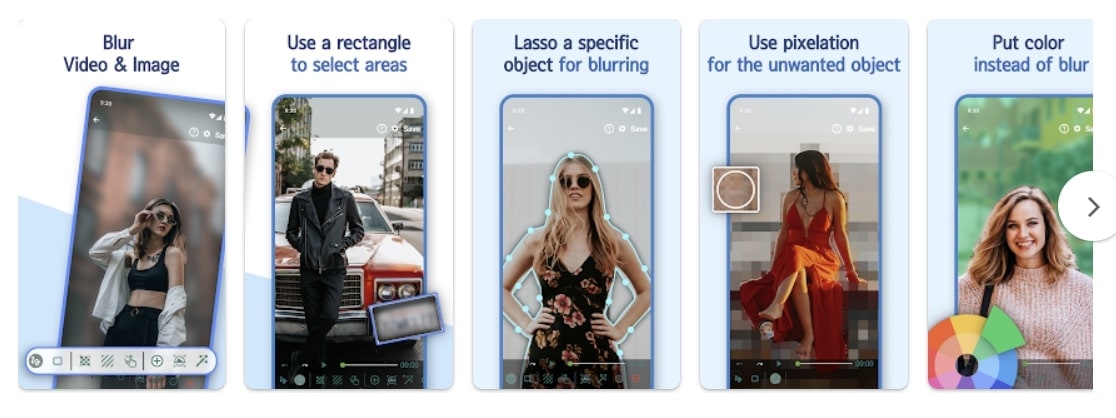
Download: Google Play Store
Key Features
- You can blur out the background of the imported photo or video while adjusting the intensity with the help of an easy tool.
- It also allows you to pixelate the unwanted sections and portions of the media files.
- Define more than one area for blurring with the help of shapes.
Pros
- It features the intuitive option of blurring out an object that is moving in the video.
- You can track an object with a simple definition of the area within the platform.
Cons
- The user interface is not exceptional, with buttons that are not even usable.
7. Blur.r Photo, Pic.ture Motion
Not many tools provide a simple and customized set of options for including motion blur within photos and other media. Blur.r Photo, Pic.ture Motion has been tangibly designed to improvise a perfect motion-blurring photo platform. While it provides a quick set of tools to work with, the results are exquisite and better than most in the market.

Download: App Store
Key Features
- Set the intensity of the blurriness and size on the photo with custom tools.
- A complete set of sharing options is available on the platform, which is covered in a single click.
- For detailed blurring, you can consume the option of Zoom and Pan the photo.
Pros
- You can easily undo and redo actions on the edited photos to avoid repeating actions and wasting time.
- Use different filters within photos to edit them to perfection.
Cons
- It does not allow for adjustment of the intensity of the blur, as stated in the services.
8. Motion Blur Photo Effect
While finding the perfect motion blur effect app on iPhone for presenting realistic effects in photos, you might come across Motion Blur Photo Effect, a perfect motion blur photo application for iOS users. The tool is known for its fast processing and quick execution, with an easy-to-use interface for creating perfect blurred pictures.
You can find multiple features and effects in this application that relate to motion blur, providing a diverse range of options when seeking this effect.

Download: App Store
Key Features
- Protects the user’s privacy while maintaining its policy of avoiding illegal breaches.
- Emphasize the light spot in the background of a picture with the help of the Bokeh effect.
- Get a complete set of blur effects to include in the photo, which features advanced functionality.
Pros
- You can find different types of blur effects, such as Zoom Blur, Motion Blur, and Mosaic Effect, to enhance the motion blur.
- It is extremely simple and quick in procession.
Cons
- It does not provide motion blurring for videos, making it restricted.
9. Motion Blur Photo Editor
Adding realistic effects to images is important if your work involves professional requirements. Motion blur is an effect used in multiple places, which makes it a critical feat to achieve. While obtaining the effect, the simplicity of the procedure holds importance. This is why Motion Blur Photo Editor gives the perfect result with explicit functions and features to enhance the motion blur effect.

Download: Google Play Store
Key Features
- Make your images look realistic with the help of magic effects.
- Manage different elements, including the text and other features, such as the brightness of the tool.
- It allows you to share the rendered result on different social applications.
Pros
- Features support for Android devices with OS 4.2 or above.
- The process of including motion blur in photos is quite basic.
Cons
- An outdated application, which was last updated in 2019.
Part 2: 3 Motion Blur Apps for Mac and Windows
As you have consulted the motion blur apps for iPhone and Android, you might require something more professional. For this, you first have to shift onto a computer or Mac that provides you with a perfect platform for creating content. Let’s find out some top-notch motion blur effect apps that you can use on your Mac and Windows:
1. Wondershare Filmora - The Best Motion Blur Effect App on Desktop
Free Download For Win 7 or later(64-bit)
Free Download For macOS 10.14 or later
Not many tools provide a complete set of tools to manage the videos on your computer and create the best version out of them. Wondershare Filmora is a complete package for creating a motion blur effect on a video.
With a quick and effective toolkit available on the platform, Filmora turns out to simplify the process, thereby making the process look basic. Filmora unleashes the creativity of a beginner, helping them create a perfect video with its intuitive and impressive interface.
Supported System
- Windows, Mac, and iOS
Pricing
- Month Plan: $19.99
- Annual Plan: $49.99
- Perpetual Plan: $79.99
Key Features
- It provides support to a variety of file formats which allows you to recreate motion blur out of any video with ease.
- The variety of video transformation features offered in the tool is exquisite, where you can manage motion tracking, stabilization, and several other video parameters.
- Use effects and transitions to create the perfect motion blur video for yourselves.
Pros
- You can find the support of resolution up to 4K in the video editing platform.
- It also features the option of enhancing GPU acceleration for faster encoding.
Cons
- Puts a watermark on the export video for the free version.
Step-by-Step Guide on How to Create Motion Blur Effect on Filmora
We will now discuss how you can create a motion blur effect on Filmora, the best app for motion blur, using the right tools. First, look into the steps provided below for a better understanding:
Step 1 Add Video File to Platform
Launch Wondershare Filmora on your computer and select “Create New Project” to open a new canvas. Click on the “Arrow” icon to import the video or photo.
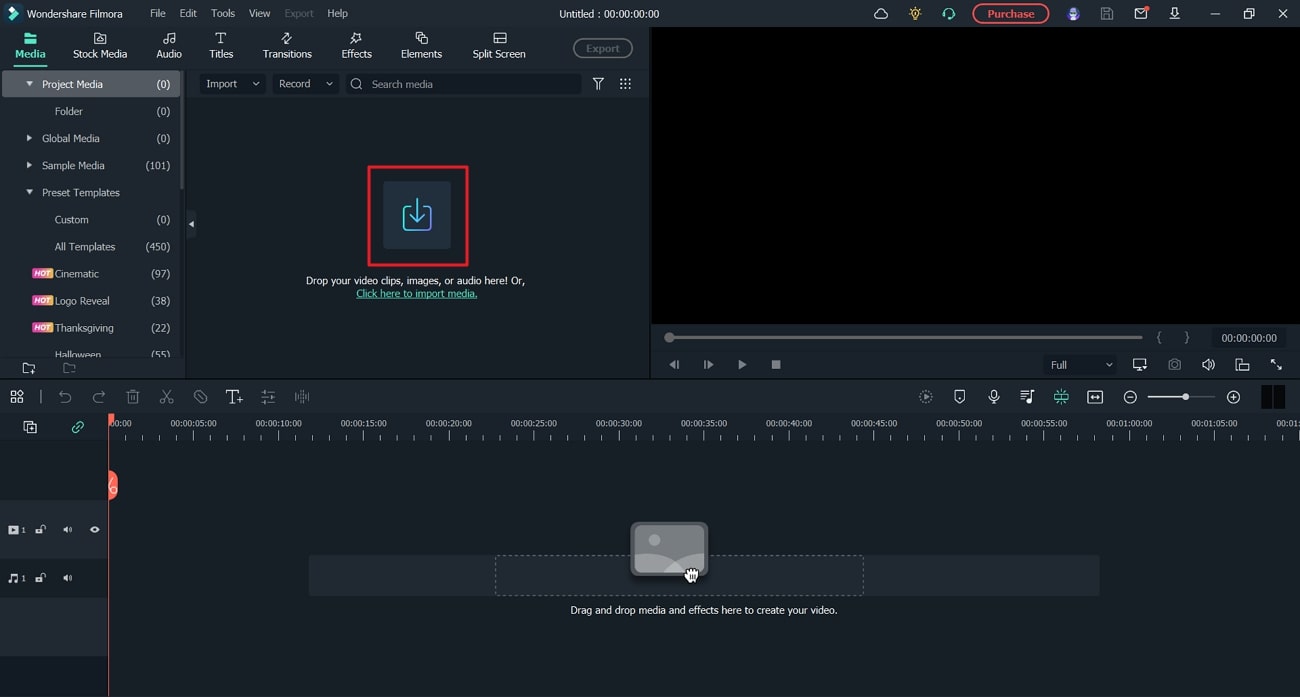
Step 2 Cut Down Sections of Clips
As you add the media into the timeline, lead to the point where you want to add the motion blur. Select the “Scissors” icon for splitting the clip and repeat this for every point where you want to add the effect.
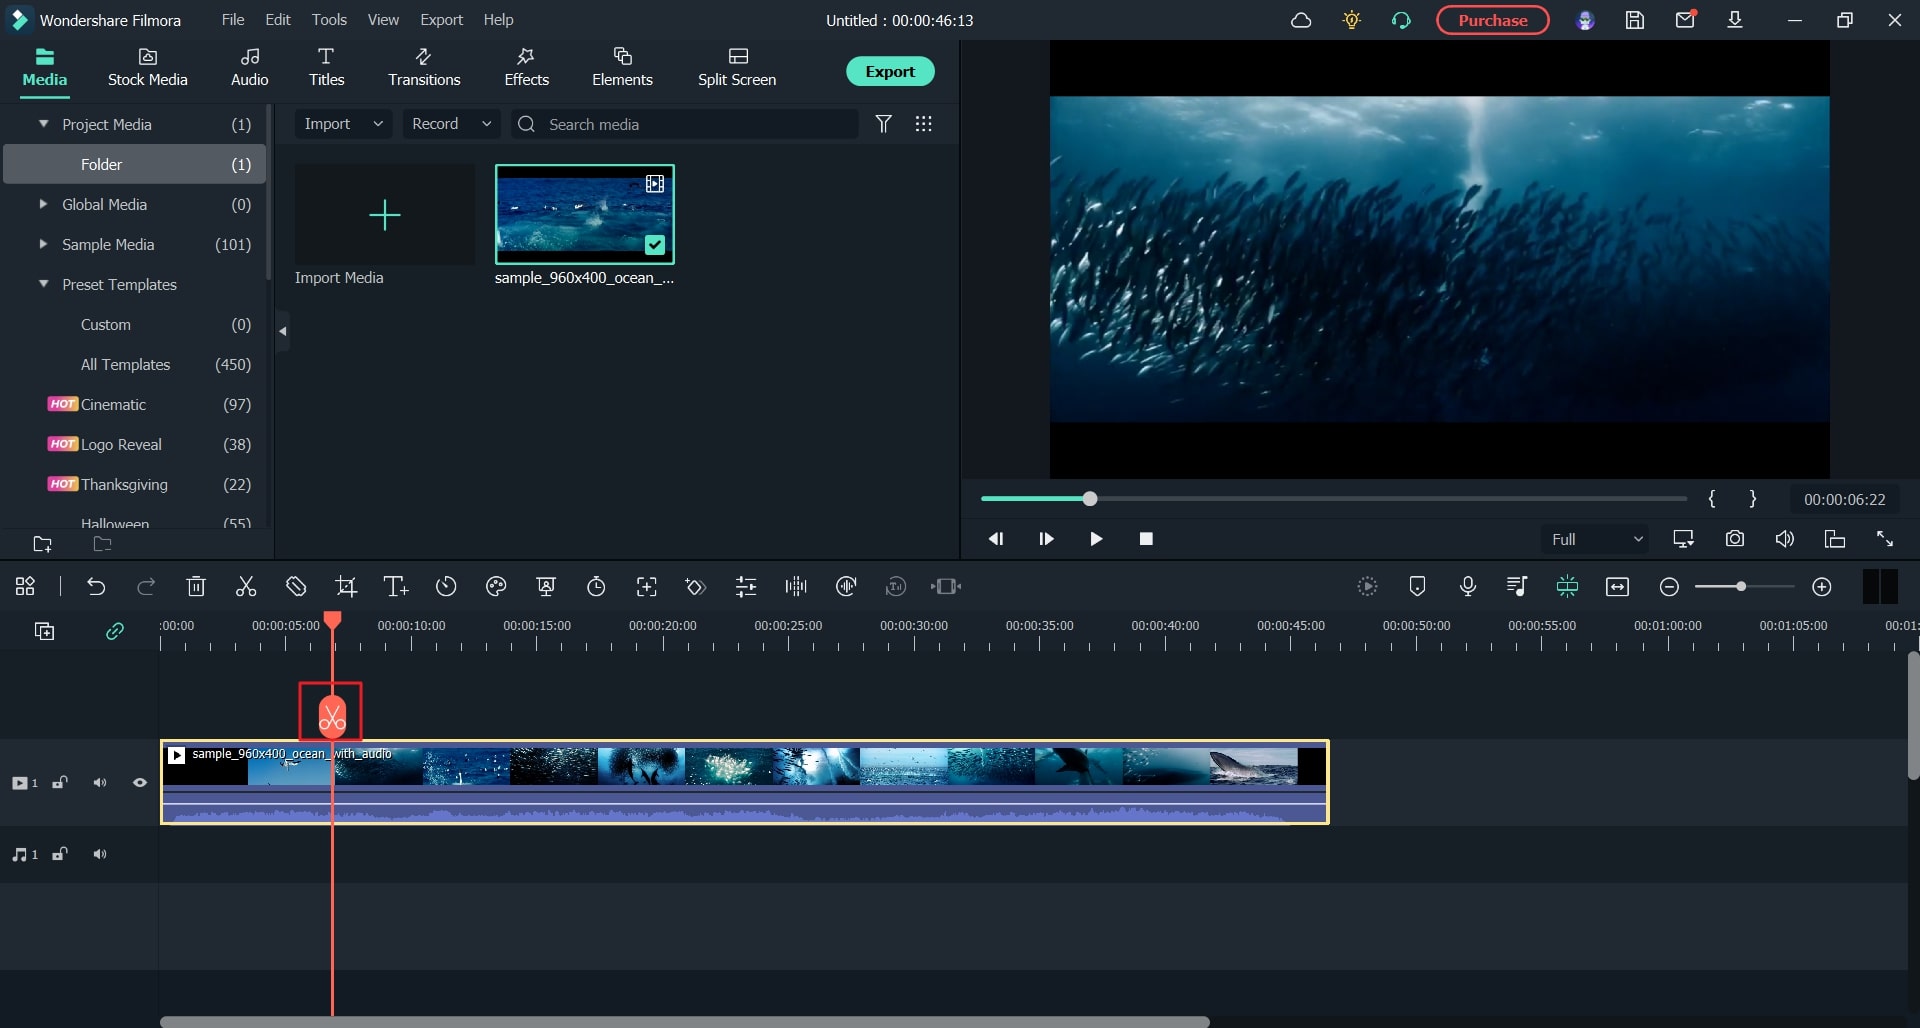
Step 3 Include the Blur Effect
Access the “Effects” tab and look for the “Blur” effect. Add the blur effect by dragging it into the timeline on the split part of the video.
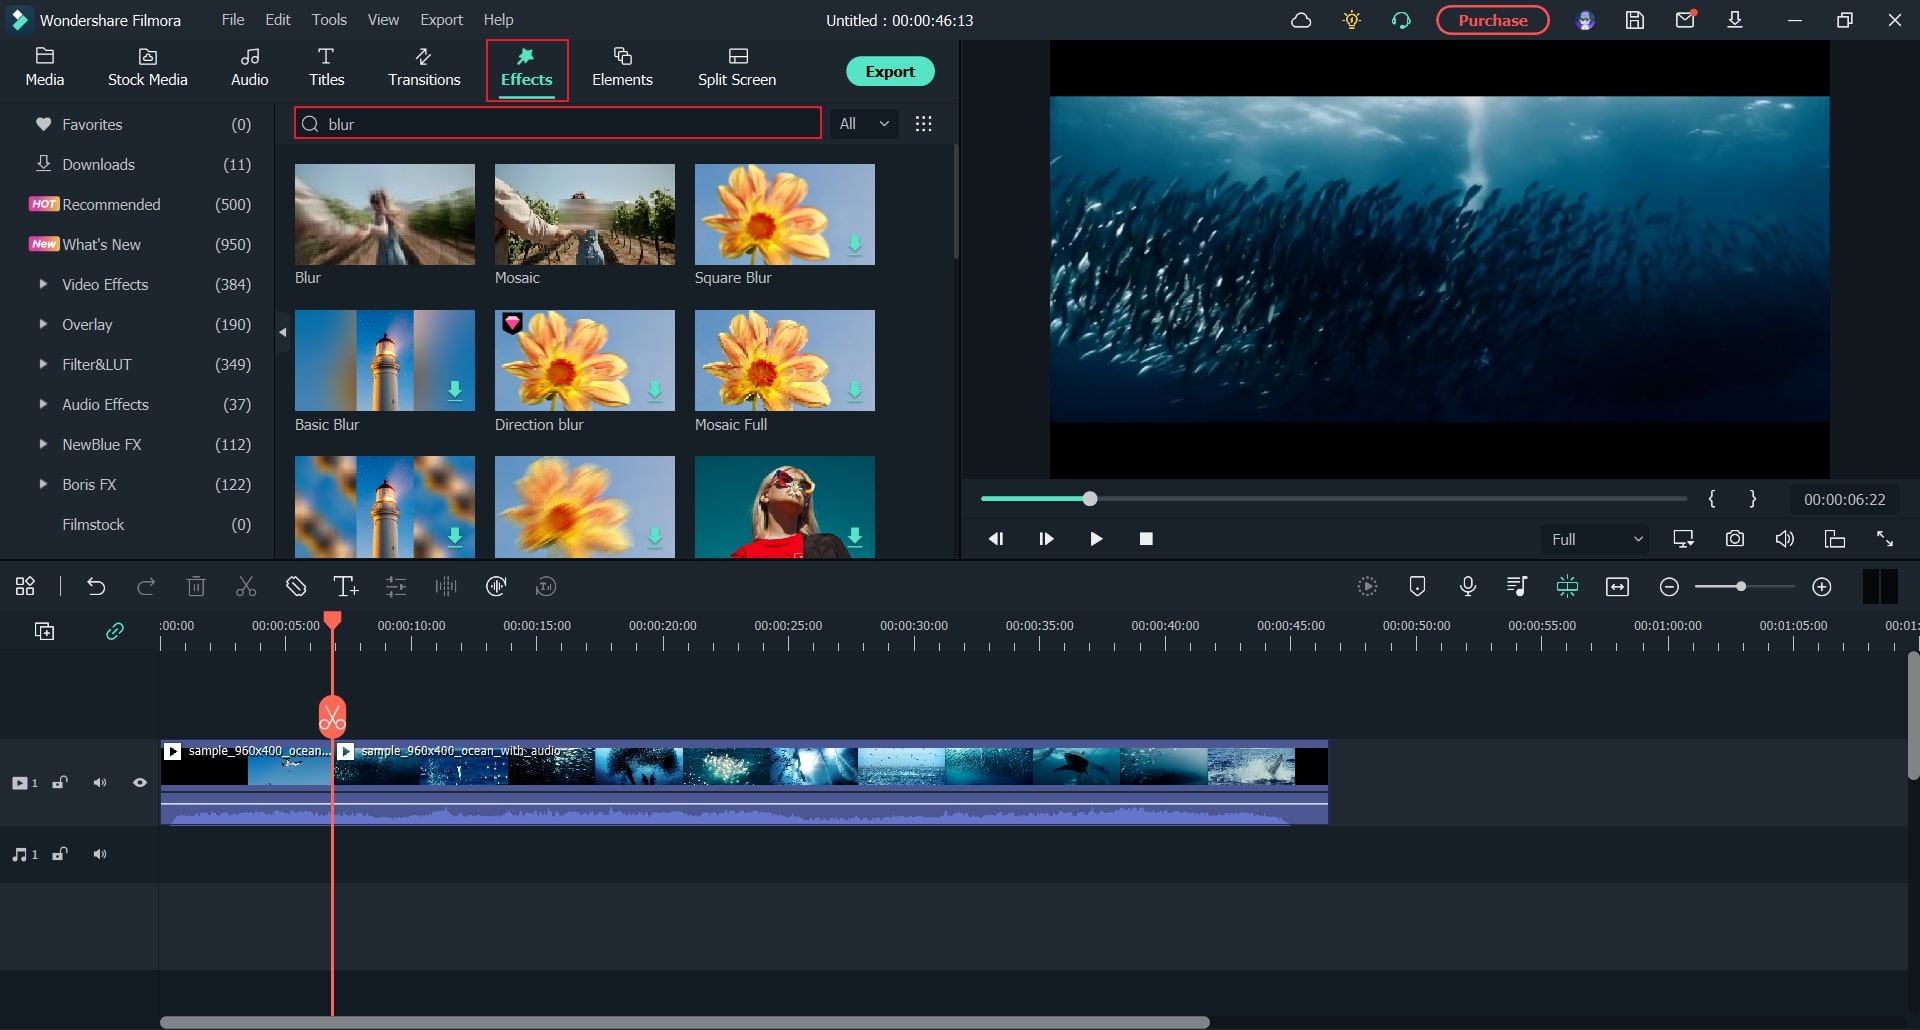
Step 4 Change Parameters to Smoothen Results
Adjust the parameters of the added effect to make it smooth. You can also access the “Dissolve” option in the Transitions. Add the motion blur effect and perform other vital changes in parameters that are required.
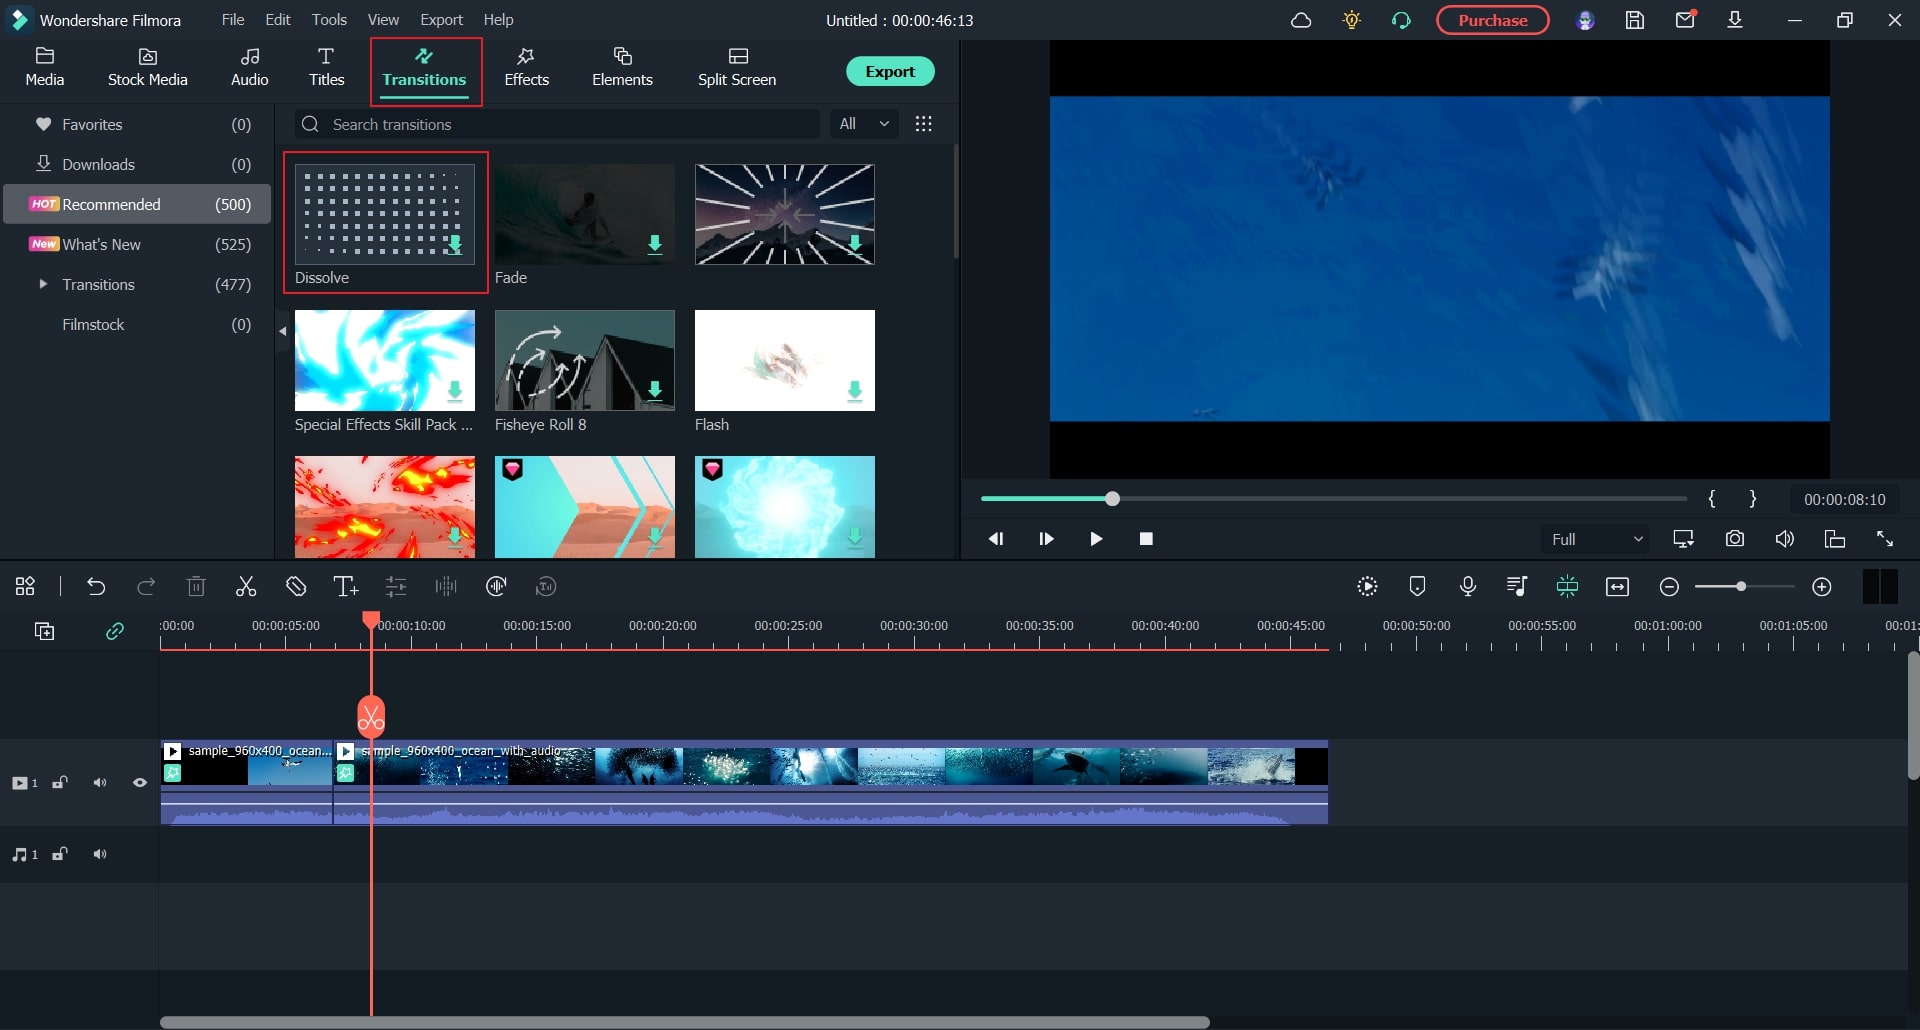
Step 5 Export Video File
Afterward, select the “Export” button and define the desired resolution and frame rate to conclude. You can also share your video on your social media accounts.
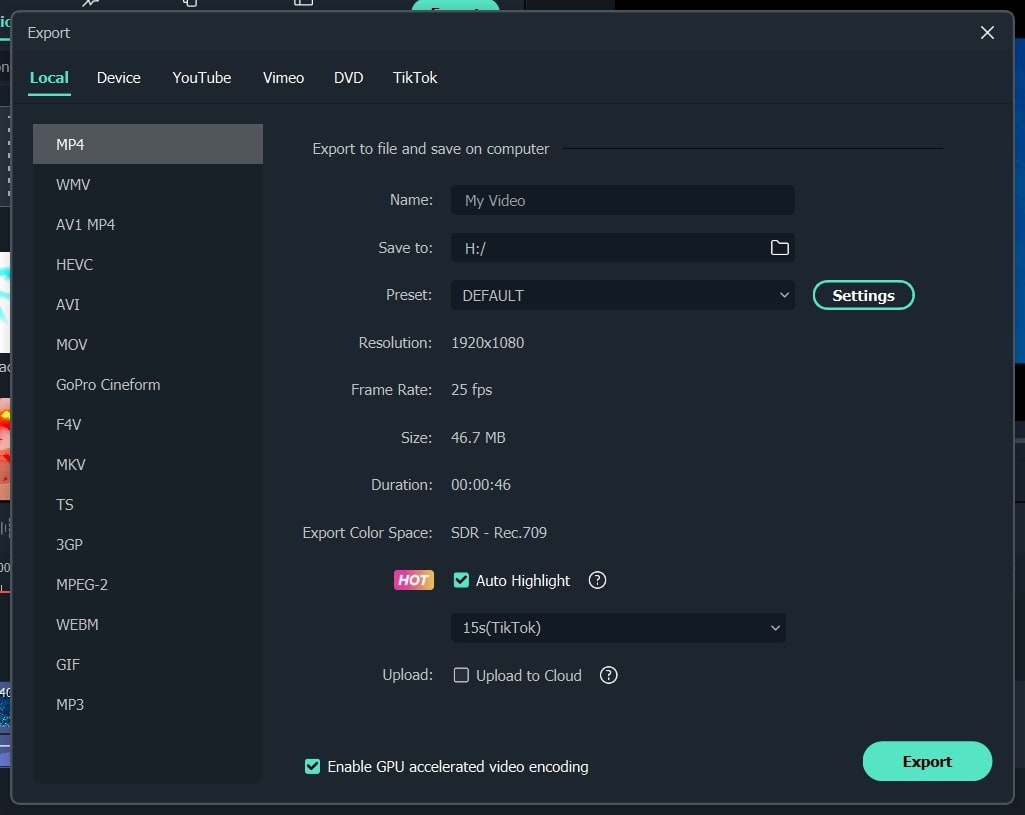
2. Vegas Pro - Create Natural-Looking Motion Blurs With Ease
Vegas Pro is an impressive video editing platform that provides the option of creating motion blurs that look completely natural. It does not edit a specific element in the video but allows you to make changes in any other element that can be used to define motion. Motion blur can be added and edited to a fraction of a second with this platform.
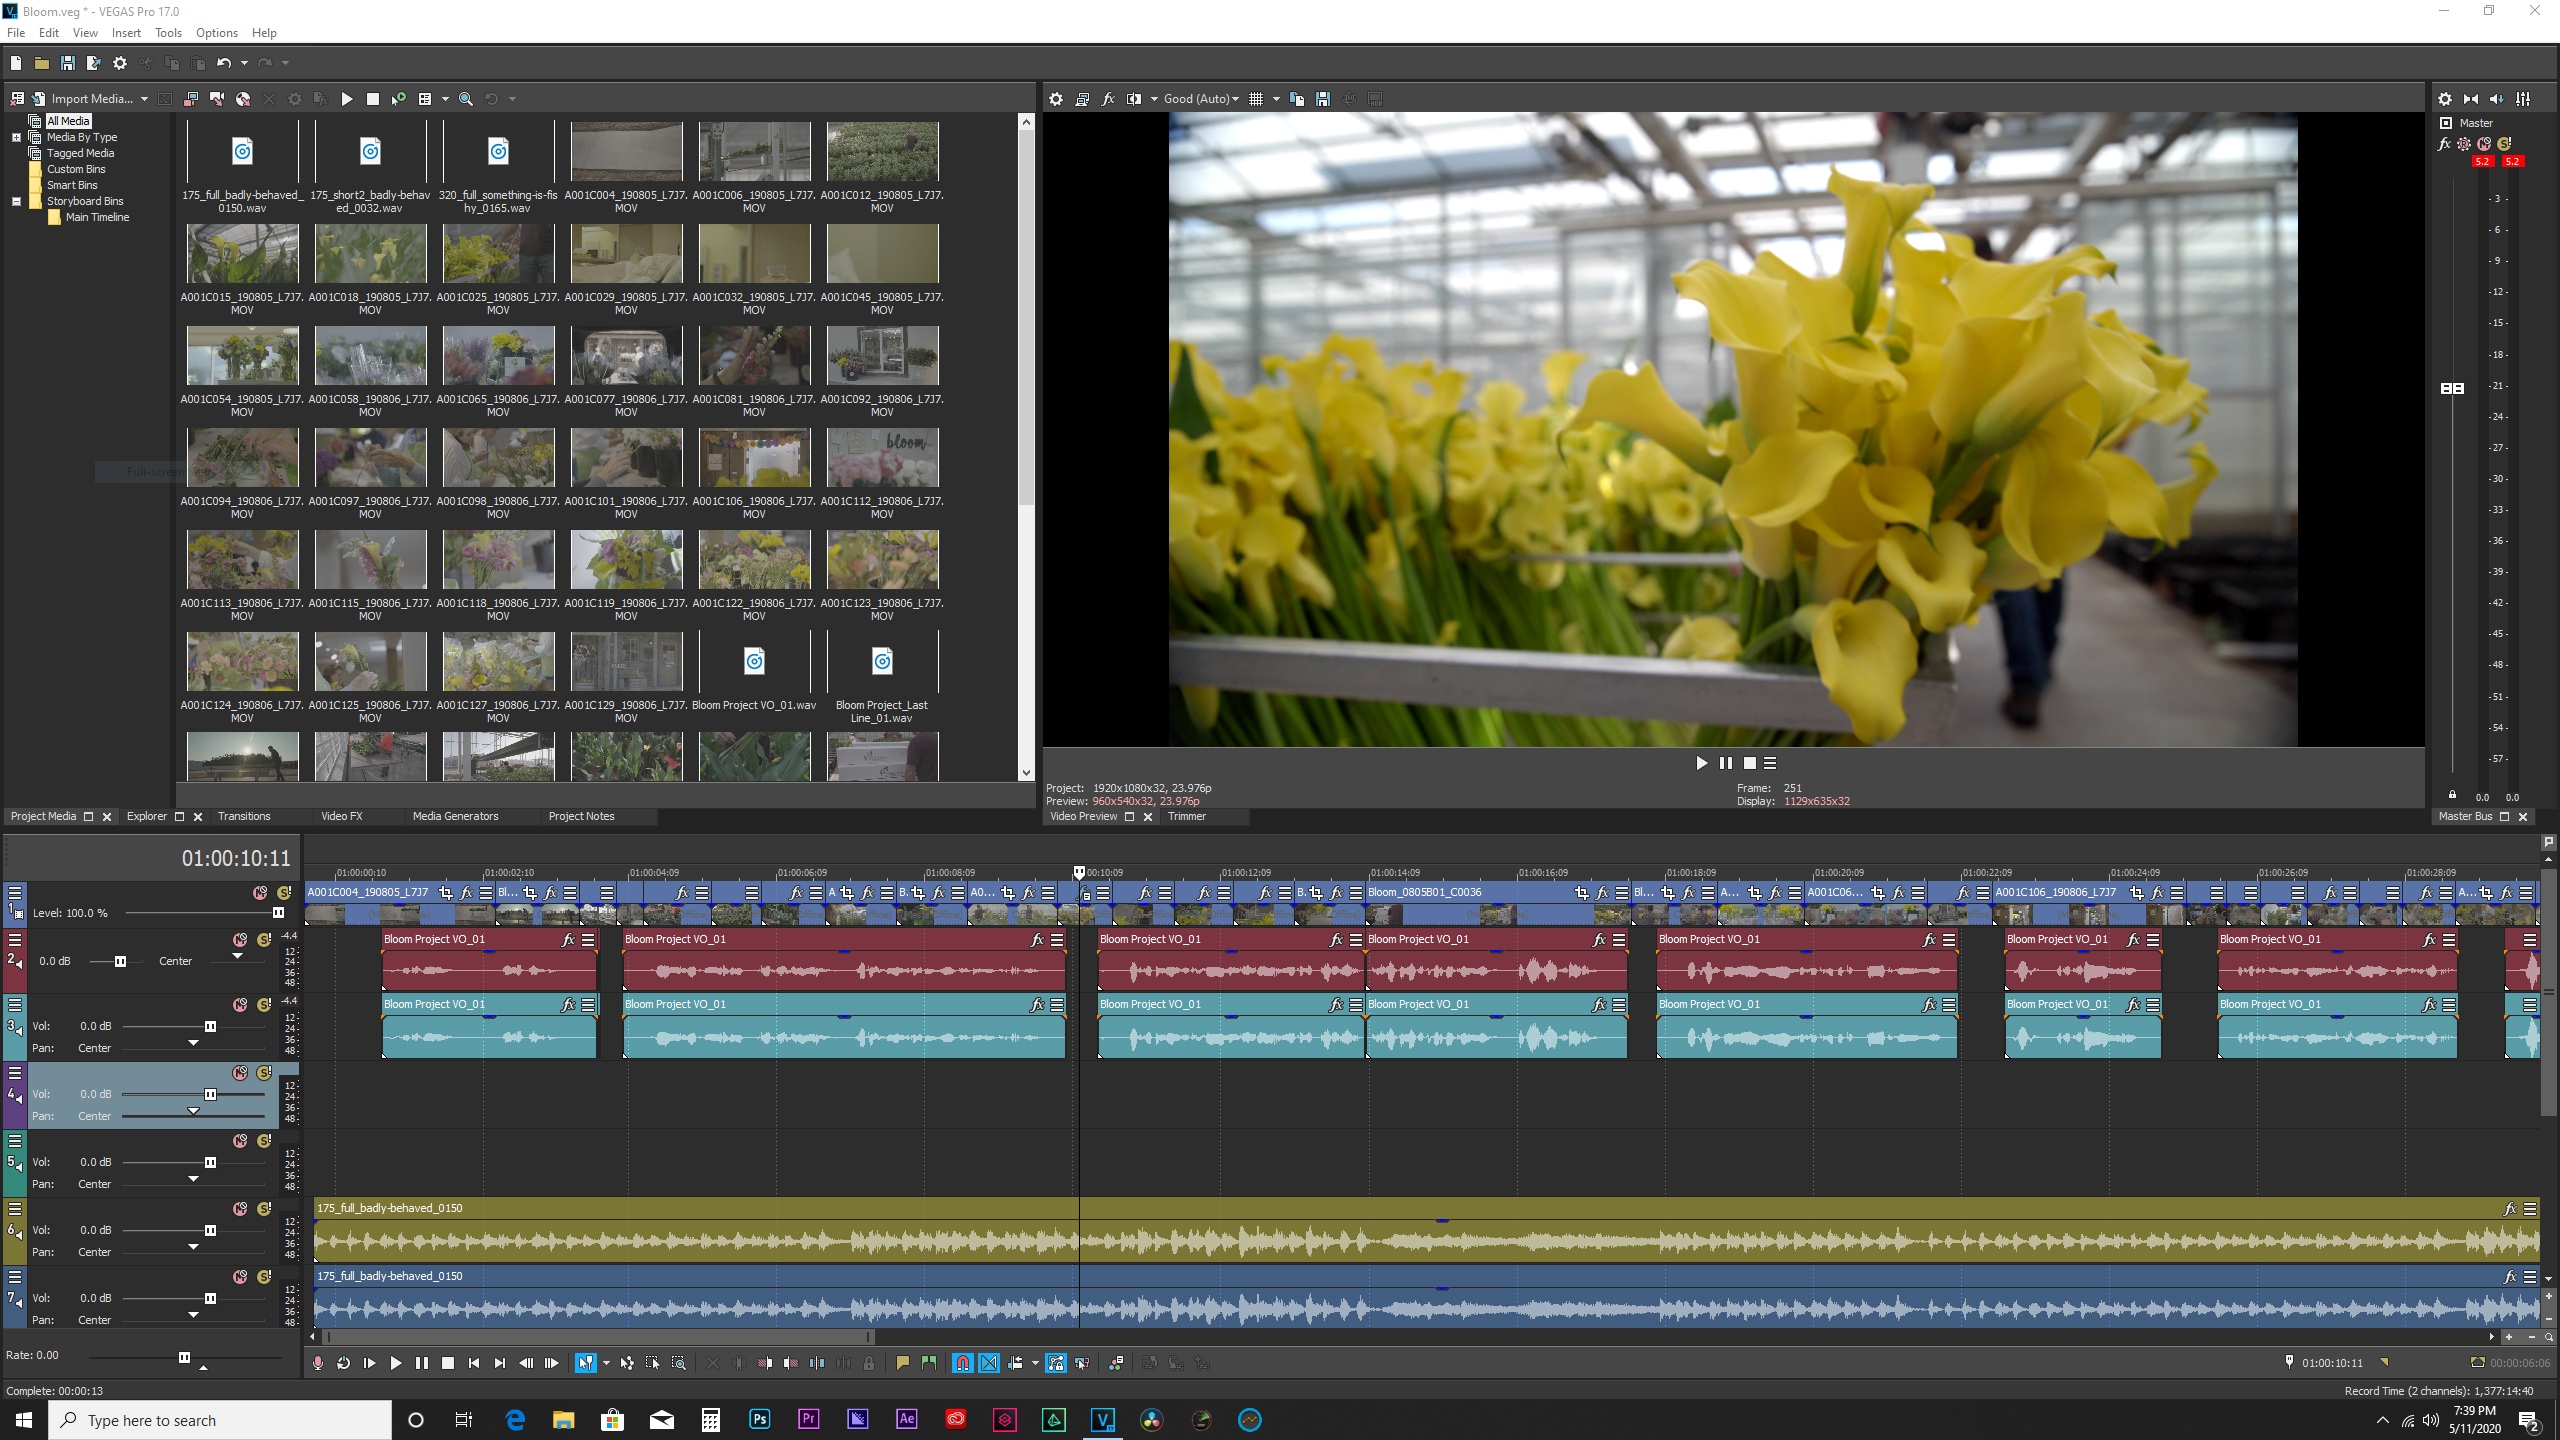
3. Adobe Premiere Pro - Professionally Edit Motion Blur Videos
Adobe Premiere Pro is a great tool for improvising professional videos. With quick edits, you can come across every second of the video and present the perfect editing model with the help of the advanced toolkit. The major issue with such platforms is the high learning curve that prevents many users from considering this platform for tasks like executing motion blur in videos.
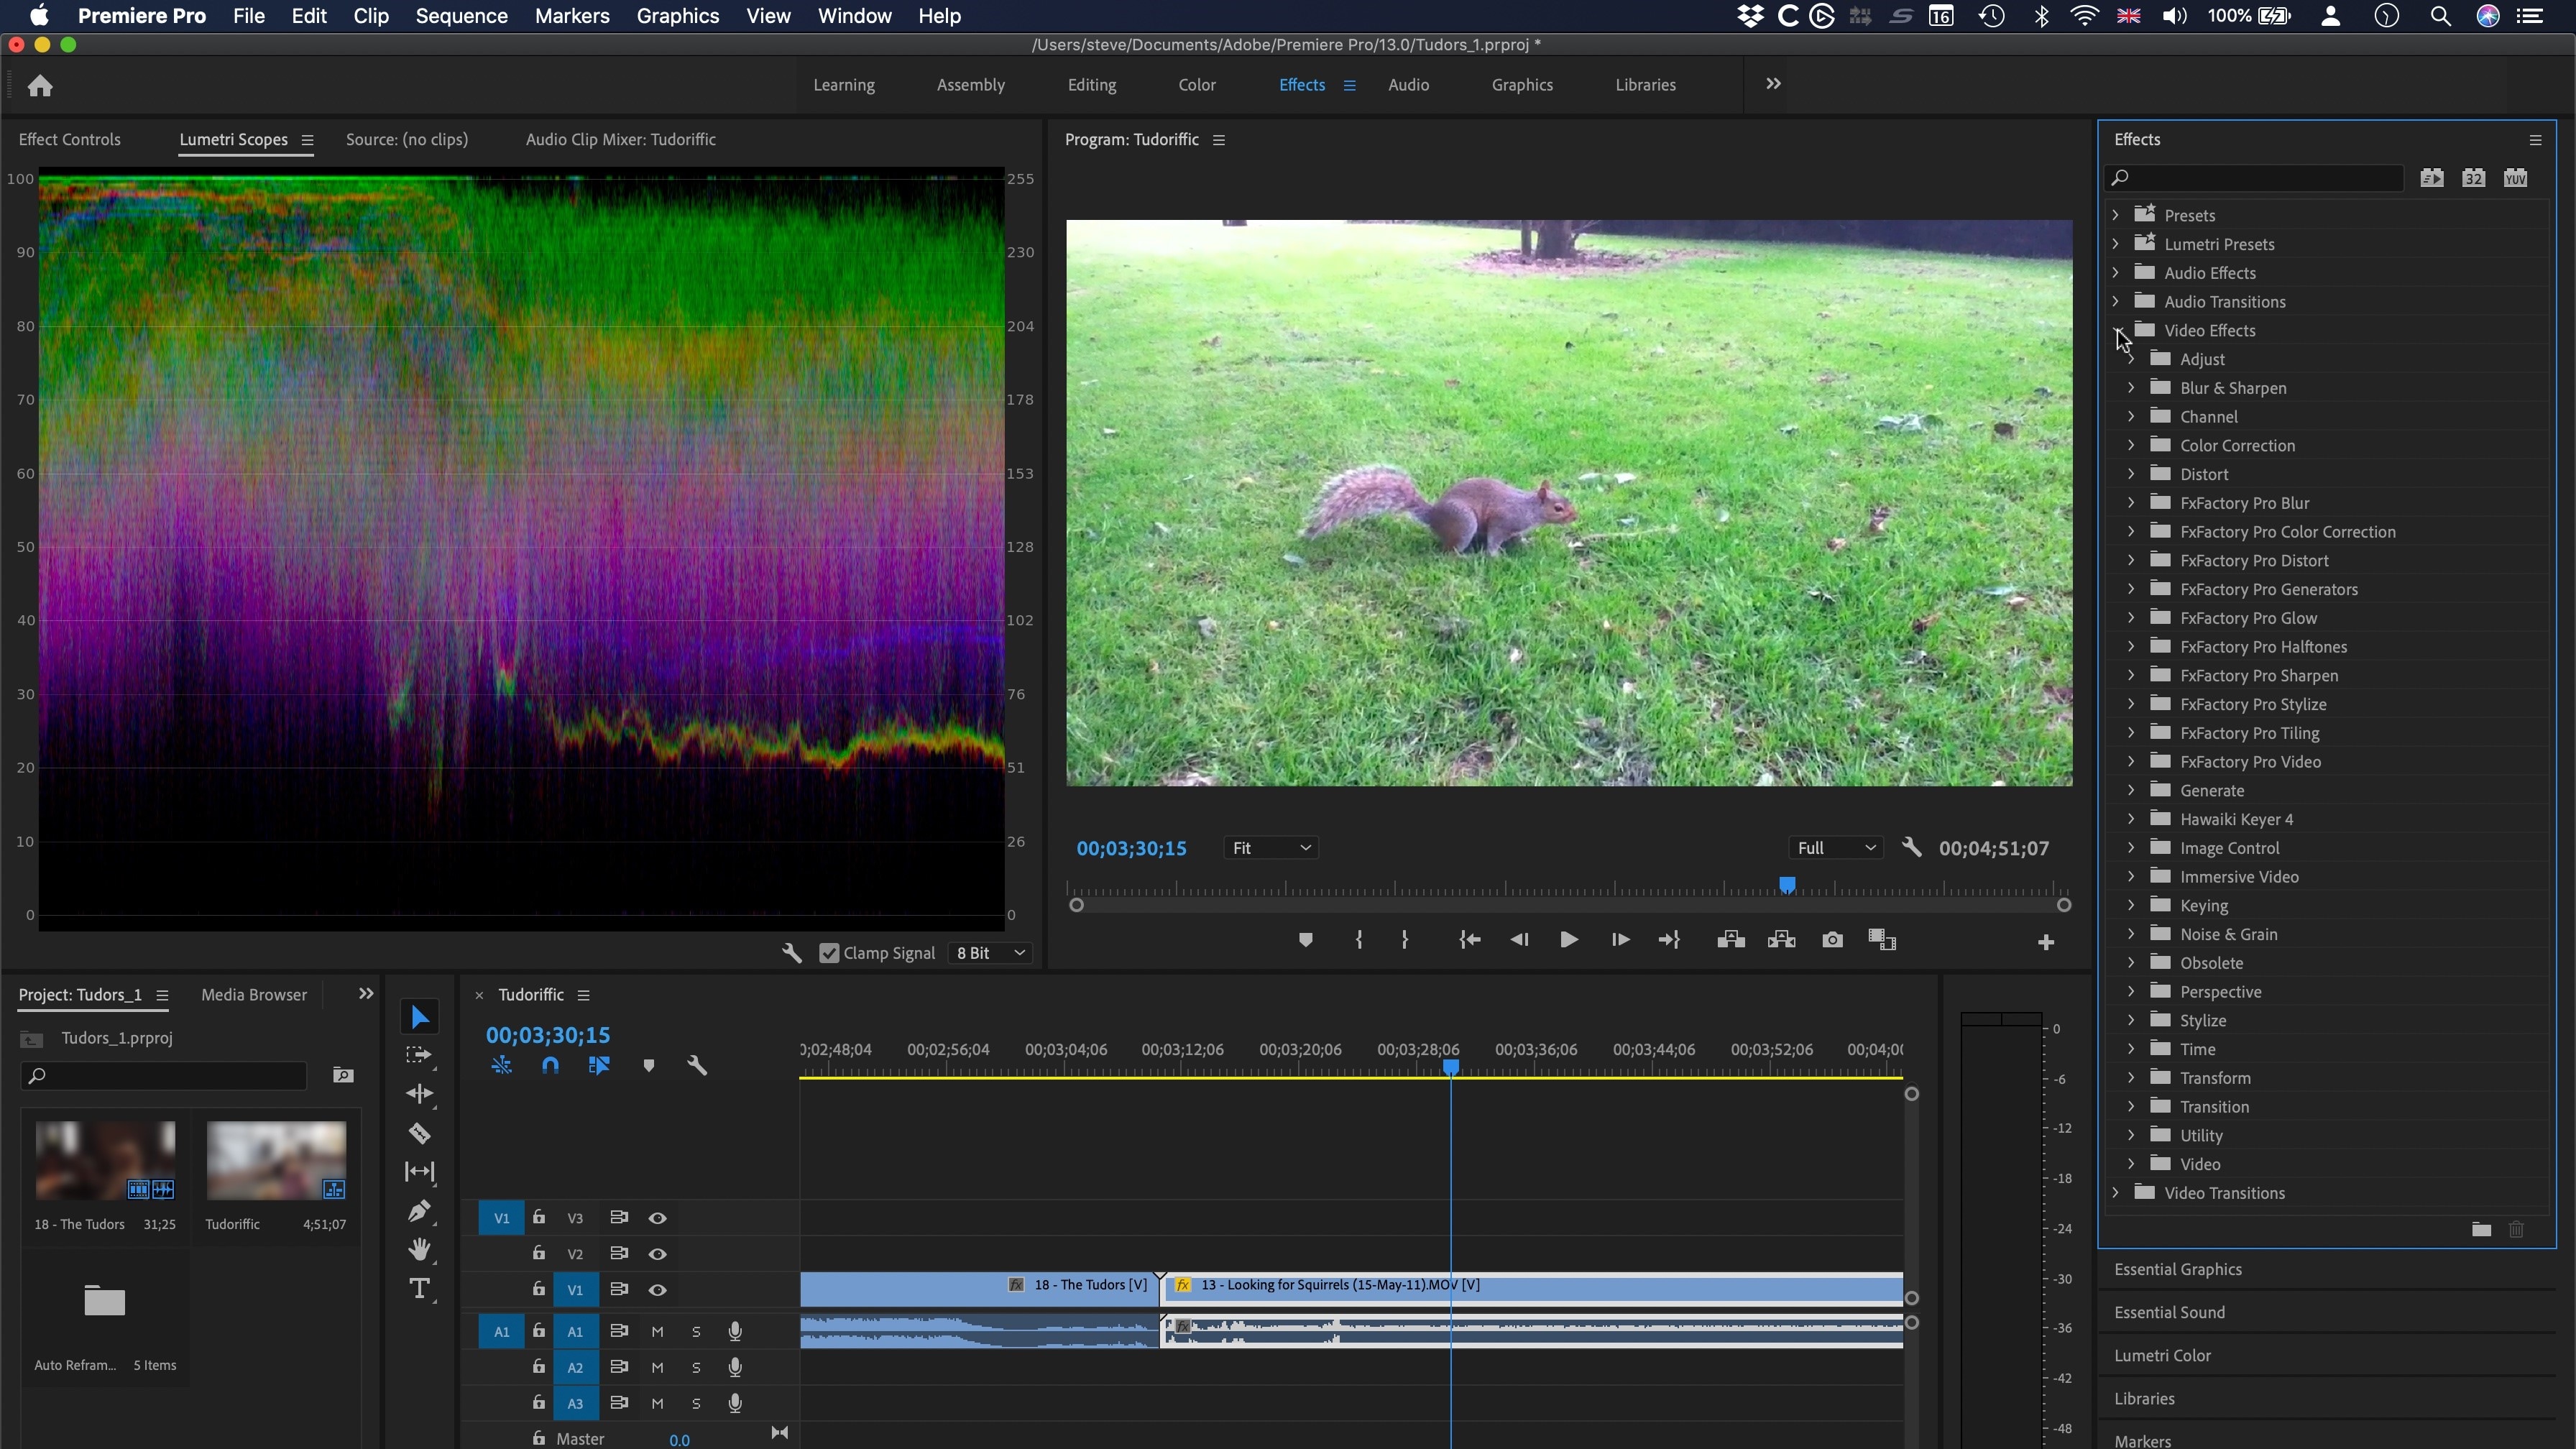
Part 3: Best 4 Online Motion Blur Tools
Many online platforms feature the option of introducing motion blur effects on videos. While we point out the best ones in the list, you should carefully assess them all to know more about them:
1. Lunapic
Lunapic is a great option for introducing motion blur into pictures. Being an online tool, it is pretty straightforward with its functionality, as you will only have to adjust some settings in the picture to edit it. Lunapic, being an online photo editor, provides different editing functions and tools in its interface. The result of motion blur turns out to be excellent in terms of it being an online tool.

Pros
- You can scale the image before putting a motion blur on the output.
- Add different shapes to highlight the image that is being edited.
Cons
- It provides an outdated interface when compared with other online photo editing tools.
2. Aspose
This excellent photo editing platform provides you with a dedicated function of adding motion blur to an image as a filter. Aspose allows adding files from the computer and Dropbox while providing a straightforward process of putting motion blur into a photo. You have to adjust the filter parameters to create the perfect picture.
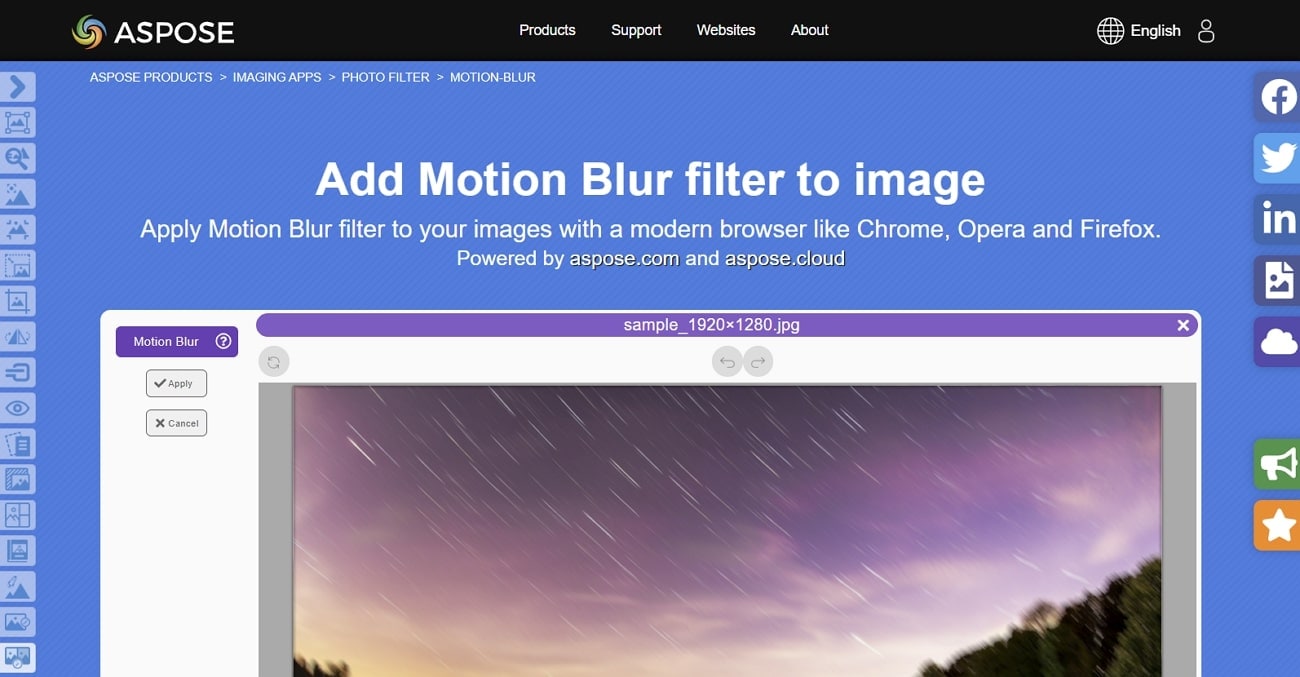
Pros
- You can also detect objects within the image with the help of the “Object detection” feature.
- Create Photo Book Maker along with including motion blurs on the image for managing a collection of pictures.
Cons
- It does not offer any adjustment sliders and options while performing motion blur.
3. Kapwing
As an online tool, Kapwing provides many features that can be used to edit videos. Its ability to blur the videos is exceptional and tends to offer great results with the least of parameters. Users who are uncomfortable with editing videos on professional tools can consider this an alternative.
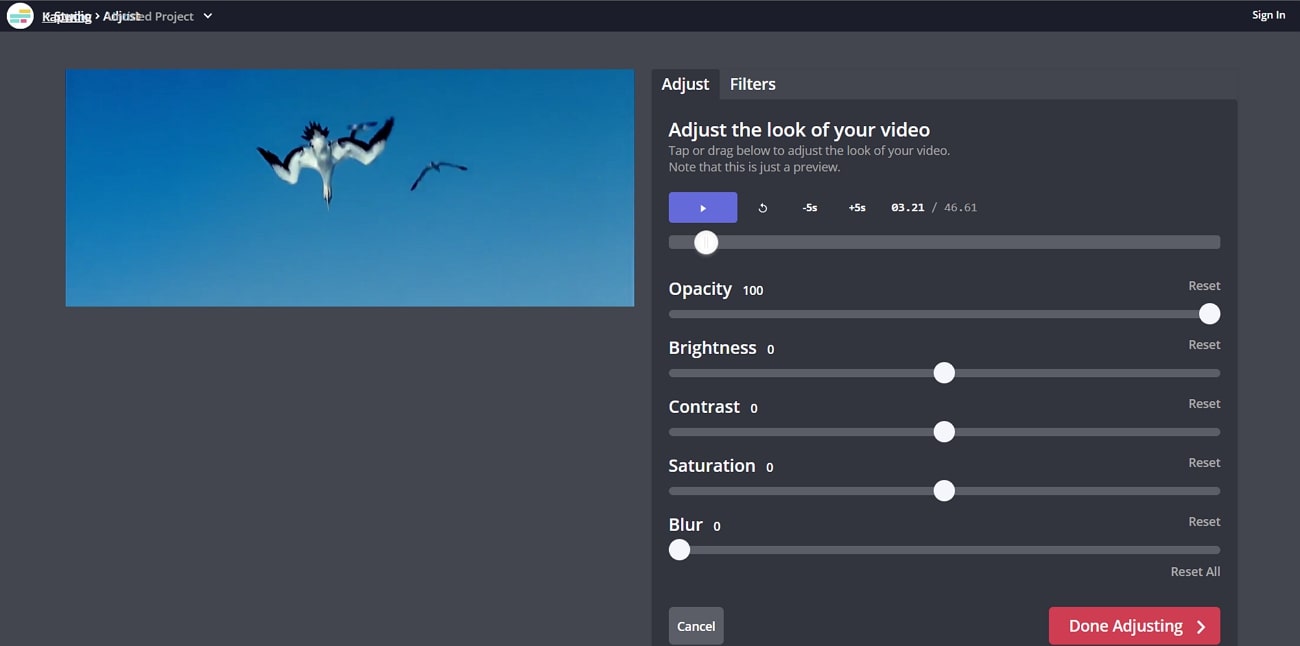
Pros
- No spam and ads are present in the tool while protecting the user’s information.
- The tool provides AI-Powered features, which can be easily used to manage videos.
Cons
- It does not maintain the quality of the videos after exporting the edits.
4. Flixier
For quick motion blurs, people can use Flixier to create motion blurs with its pixelating technology. Along with other features for managing videos and enhancing their outlook, Flixier can be used for editing videos quickly. You can easily attach the effect while setting up its time parameters and other functions.
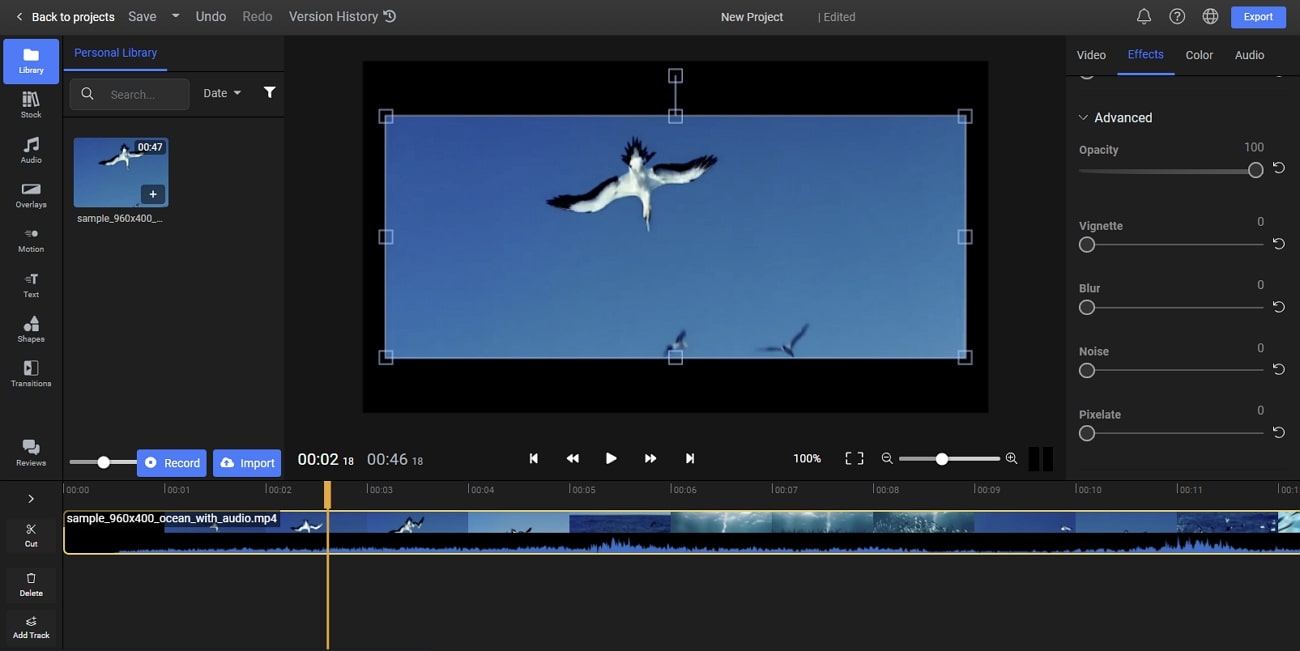
Pros
- You can integrate the features used in Flixier for creating videos for your YouTube channel.
- Works on low-powered devices, including Chromebooks and old devices.
Cons
- There are not a lot of features available on the online platform, limiting its use.
Last Words
This article has provided an overview of the best motion blur apps you can find in the market to create a realistic effect on your photo or video. As the article covers all kinds of compatible devices, it turns out to be an informative article to go through. Ensure to fill in all the details and see which application serves the best purpose.
For iOS and Android devices, CapCut turns out to be a great option to work with. Filmora has shown promising results with its Mac and Windows version, and Kapwing presents an excellent interface to edit videos regardless of being an online editor. Wondershare Filmora provides the best features for creating motion blur pictures and videos if you tend to work on your desktop.
- Wondershare Filmora - The Best Motion Blur Effect App on Desktop
- Vegas Pro - Create Natural-Looking Motion Blurs With Ease
- Adobe Premiere Pro - Professionally Edit Motion Blur Videos
Best 4 Online Motion Blur Tools
Part 1: Best 9 Motion Blur Effect Apps for iPhone and Android
| Name | Price | Support System | Motion Blur for Photos | Motion Blur for Videos |
|---|---|---|---|---|
| CapCut | $0.99 - $74.99 Per Item | iPhone/Android | Yes | Yes |
| NSMB - Motion Blur Video | Not Provided | Android | No | Yes |
| BlurEffect - Blur Photo & Video | Full version: $39.99Premium - Monthly: $3.99Ad-Free & Watermark-Free: $14.99Up to 5 Minutes & Watermark-Free & Ad-Free: $19.99Premium - Annual: $19.99 | iPhone | Yes | Yes |
| Snapseed | Free | iPhone/Android | Yes | No |
| Picsart Photo Editor & Video | Ad Remover: $5.99Girl Minisketch: $1.99Food: $1.99Cartoon Animal Package: $2.99Grunge Stickers: $0.99Girly: $0.99Horoscope: $1.99Cute Thanksgiving: $2.99Happy Thanksgiving: $2.99Aliens: $0.99 | iPhone/Android | Yes | Yes |
| Blur Video and Photo Editor | $0.99 - $99.99 Per Item | Android | Yes | Yes |
| Blur.r Photo, Pic.ture Motion | Monthly Subscription: $ 11.98Weekly Subscription: $ 6.98One Week Subscription: $ 3.98Yearly Subscription: $ 94.98 | iPhone | Yes | No |
| Motion Blur Photo Effect | Premium Access: $7.99 - $29.99 | iPhone | Yes | No |
| Motion Blur Photo Editor | Not Provided | Android | Yes | No |
There are many motion blur effect applications available in the market, providing direct services for iPhone and Android users. However, finding the best app for this purpose is essential, which is why we came up with a list of the best motion blur apps that can be used on iPhone and Android.
1. CapCut
While it is known as an easy-to-use application, CapCut stands among the most premium mobile applications that help you create professional videos that can be posted on social media platforms. CapCut comes up with a dedicated motion blur effect that allows users to create stabilized videos with complete control over the speed of the video.
Following other adjustments in the video, CapCut is a complete tool designed to create advanced videos, including different effects such as motion blur.

Download: Google Play Store | App Store
Key Features
- You can quickly put transitions between the video and the clips to blend in perfectly.
- Video clips can be animated with the help of zoom-in and out effects, providing all major professional touchups a video can have.
- Execute a perfect motion blur video with the help of the multi-track timeline for arranging and previewing clips.
Pros
- It provides the option of including music clips and sound effects on the videos from the vast collection.
- It supports exporting videos in 4K and 60fps with Smart HDR technology.
Cons
- Won’t work perfectly if the RAM and hardware of the phone are limited.
2. NSMB - Motion Blur Video
The motion blur effect is a great feature that can enhance the quality of the video and make it look realistic if used properly. NSMB - Motion Blur Video is an Android motion blur application that features the option of creating such videos in a matter of seconds.
With no particular learning requirement, NSMB makes the process look easy. You have to set the intensity of video, and that’s all you need to do within this application.

Download: Google Play Store
Key Features
- While the platform is easy-to-use, the interface is quite simple to understand, with no confusing structures.
- The platform comes up with an intelligent motion blur that automatically executes the process.
- It works with Android devices from Android 5.0 and later, making it a compatible tool with all major Android devices.
Pros
- You can set the resolution of your exported video to 1080p, which is a Full HD result.
- Set an appropriate fps value for your exported video with the available options.
Cons
- Long rendering times, which are not optimized and take up time.
3. BlurEffect - Blur Photo & Video
BlurEfffect - Blur Photo & Video is another great iOS application that provides the option of adding motion blur effects. This tool is built to include the blur effect to perfection in general. With defining blur options, you can create motion blur effects easily on your added videos. The functions are diverse and quite effective if appropriately observed.

Download: App Store
Key Features
- As the name exclaim, it works perfectly for photos and videos, likewise.
- The paid version of the application can save videos up to 1080p in quality.
- It provides the feature of managing the strength of the “Auto Blurs” feature for controlling motion blur.
Pros
- Multiple effects are available on the platform, including normal blurs, pixelated and dotted blurs, etc.
- It also provides the option of trimming videos before adding the blur effect to them.
Cons
- The resolution of the video is lowered after blurring it out.
4. Snapseed
Google presented a great and quick photo editor for users confused about finding their perfect option. Snapseed was designed as a professional photo editor that allows users to add multiple touchups to the photo that is being edited.
While it backs itself up with Google Photos, this professional photo editor is enhanced and interconnected. Snapseed makes photo touchups simple; however, it does provide advanced functions that can help create motion blur pictures.

Download: Google Play Store | App Store
Key Features
- It combines with 29 different tools and filters, which also includes creating motion blur pictures.
- 38 predefined text styles are available in the editor for creating the text of different styles and forms.
- Create effects with multiple exposures brought with HDR Scape.
Pros
- Enhance a specific photo element with the help of the Face Enhance feature, which adds focus to the facial features.
- You can selectively retouch the photo and manage its exposure, saturation, and other elements.
Cons
- The application has no undo button, making it challenging to manage edits.
5. Picsart Photo Editor & Video
Picsart is a renowned photo and video editor available on App Store and Play Store. This exceptional editor covers a creative set of features combined with artificial intelligence to present some of the best options for retouching photos and videos. If you seek to create a motion blur effect with this application, it surely won’t disappoint, presenting a high-resolution result.

Download: Google Play Store | App Store
Key Features
- It helps users customize photos and videos with customizable brushes, layers, and drawing tools.
- Present a realistic display of motion blur with the help of the multiple effects and filters used for blending in perfectly.
- More than 60 million stickers are available in Picsart, which can be effectively used within any editing media.
Pros
- You can easily share the edited content with your friends through the platform.
- It provides multiple video effects and trendy filters to make video editing easier.
Cons
- There is a lot of lag in the application while editing the video.
6. Blur Video and Photo Editor
This is one of the motion blur apps that provides a simple set of options for managing and enhancing the videos and photos on your Android device. Motion blur can be confusing if not managed properly; however, Blur Video and Photo Editor provides a simple platform to include the blurry effect and make the moving object look perfect in the preview.

Download: Google Play Store
Key Features
- You can blur out the background of the imported photo or video while adjusting the intensity with the help of an easy tool.
- It also allows you to pixelate the unwanted sections and portions of the media files.
- Define more than one area for blurring with the help of shapes.
Pros
- It features the intuitive option of blurring out an object that is moving in the video.
- You can track an object with a simple definition of the area within the platform.
Cons
- The user interface is not exceptional, with buttons that are not even usable.
7. Blur.r Photo, Pic.ture Motion
Not many tools provide a simple and customized set of options for including motion blur within photos and other media. Blur.r Photo, Pic.ture Motion has been tangibly designed to improvise a perfect motion-blurring photo platform. While it provides a quick set of tools to work with, the results are exquisite and better than most in the market.

Download: App Store
Key Features
- Set the intensity of the blurriness and size on the photo with custom tools.
- A complete set of sharing options is available on the platform, which is covered in a single click.
- For detailed blurring, you can consume the option of Zoom and Pan the photo.
Pros
- You can easily undo and redo actions on the edited photos to avoid repeating actions and wasting time.
- Use different filters within photos to edit them to perfection.
Cons
- It does not allow for adjustment of the intensity of the blur, as stated in the services.
8. Motion Blur Photo Effect
While finding the perfect motion blur effect app on iPhone for presenting realistic effects in photos, you might come across Motion Blur Photo Effect, a perfect motion blur photo application for iOS users. The tool is known for its fast processing and quick execution, with an easy-to-use interface for creating perfect blurred pictures.
You can find multiple features and effects in this application that relate to motion blur, providing a diverse range of options when seeking this effect.

Download: App Store
Key Features
- Protects the user’s privacy while maintaining its policy of avoiding illegal breaches.
- Emphasize the light spot in the background of a picture with the help of the Bokeh effect.
- Get a complete set of blur effects to include in the photo, which features advanced functionality.
Pros
- You can find different types of blur effects, such as Zoom Blur, Motion Blur, and Mosaic Effect, to enhance the motion blur.
- It is extremely simple and quick in procession.
Cons
- It does not provide motion blurring for videos, making it restricted.
9. Motion Blur Photo Editor
Adding realistic effects to images is important if your work involves professional requirements. Motion blur is an effect used in multiple places, which makes it a critical feat to achieve. While obtaining the effect, the simplicity of the procedure holds importance. This is why Motion Blur Photo Editor gives the perfect result with explicit functions and features to enhance the motion blur effect.

Download: Google Play Store
Key Features
- Make your images look realistic with the help of magic effects.
- Manage different elements, including the text and other features, such as the brightness of the tool.
- It allows you to share the rendered result on different social applications.
Pros
- Features support for Android devices with OS 4.2 or above.
- The process of including motion blur in photos is quite basic.
Cons
- An outdated application, which was last updated in 2019.
Part 2: 3 Motion Blur Apps for Mac and Windows
As you have consulted the motion blur apps for iPhone and Android, you might require something more professional. For this, you first have to shift onto a computer or Mac that provides you with a perfect platform for creating content. Let’s find out some top-notch motion blur effect apps that you can use on your Mac and Windows:
1. Wondershare Filmora - The Best Motion Blur Effect App on Desktop
Free Download For Win 7 or later(64-bit)
Free Download For macOS 10.14 or later
Not many tools provide a complete set of tools to manage the videos on your computer and create the best version out of them. Wondershare Filmora is a complete package for creating a motion blur effect on a video.
With a quick and effective toolkit available on the platform, Filmora turns out to simplify the process, thereby making the process look basic. Filmora unleashes the creativity of a beginner, helping them create a perfect video with its intuitive and impressive interface.
Supported System
- Windows, Mac, and iOS
Pricing
- Month Plan: $19.99
- Annual Plan: $49.99
- Perpetual Plan: $79.99
Key Features
- It provides support to a variety of file formats which allows you to recreate motion blur out of any video with ease.
- The variety of video transformation features offered in the tool is exquisite, where you can manage motion tracking, stabilization, and several other video parameters.
- Use effects and transitions to create the perfect motion blur video for yourselves.
Pros
- You can find the support of resolution up to 4K in the video editing platform.
- It also features the option of enhancing GPU acceleration for faster encoding.
Cons
- Puts a watermark on the export video for the free version.
Step-by-Step Guide on How to Create Motion Blur Effect on Filmora
We will now discuss how you can create a motion blur effect on Filmora, the best app for motion blur, using the right tools. First, look into the steps provided below for a better understanding:
Step 1 Add Video File to Platform
Launch Wondershare Filmora on your computer and select “Create New Project” to open a new canvas. Click on the “Arrow” icon to import the video or photo.

Step 2 Cut Down Sections of Clips
As you add the media into the timeline, lead to the point where you want to add the motion blur. Select the “Scissors” icon for splitting the clip and repeat this for every point where you want to add the effect.

Step 3 Include the Blur Effect
Access the “Effects” tab and look for the “Blur” effect. Add the blur effect by dragging it into the timeline on the split part of the video.

Step 4 Change Parameters to Smoothen Results
Adjust the parameters of the added effect to make it smooth. You can also access the “Dissolve” option in the Transitions. Add the motion blur effect and perform other vital changes in parameters that are required.

Step 5 Export Video File
Afterward, select the “Export” button and define the desired resolution and frame rate to conclude. You can also share your video on your social media accounts.

2. Vegas Pro - Create Natural-Looking Motion Blurs With Ease
Vegas Pro is an impressive video editing platform that provides the option of creating motion blurs that look completely natural. It does not edit a specific element in the video but allows you to make changes in any other element that can be used to define motion. Motion blur can be added and edited to a fraction of a second with this platform.

3. Adobe Premiere Pro - Professionally Edit Motion Blur Videos
Adobe Premiere Pro is a great tool for improvising professional videos. With quick edits, you can come across every second of the video and present the perfect editing model with the help of the advanced toolkit. The major issue with such platforms is the high learning curve that prevents many users from considering this platform for tasks like executing motion blur in videos.

Part 3: Best 4 Online Motion Blur Tools
Many online platforms feature the option of introducing motion blur effects on videos. While we point out the best ones in the list, you should carefully assess them all to know more about them:
1. Lunapic
Lunapic is a great option for introducing motion blur into pictures. Being an online tool, it is pretty straightforward with its functionality, as you will only have to adjust some settings in the picture to edit it. Lunapic, being an online photo editor, provides different editing functions and tools in its interface. The result of motion blur turns out to be excellent in terms of it being an online tool.

Pros
- You can scale the image before putting a motion blur on the output.
- Add different shapes to highlight the image that is being edited.
Cons
- It provides an outdated interface when compared with other online photo editing tools.
2. Aspose
This excellent photo editing platform provides you with a dedicated function of adding motion blur to an image as a filter. Aspose allows adding files from the computer and Dropbox while providing a straightforward process of putting motion blur into a photo. You have to adjust the filter parameters to create the perfect picture.

Pros
- You can also detect objects within the image with the help of the “Object detection” feature.
- Create Photo Book Maker along with including motion blurs on the image for managing a collection of pictures.
Cons
- It does not offer any adjustment sliders and options while performing motion blur.
3. Kapwing
As an online tool, Kapwing provides many features that can be used to edit videos. Its ability to blur the videos is exceptional and tends to offer great results with the least of parameters. Users who are uncomfortable with editing videos on professional tools can consider this an alternative.

Pros
- No spam and ads are present in the tool while protecting the user’s information.
- The tool provides AI-Powered features, which can be easily used to manage videos.
Cons
- It does not maintain the quality of the videos after exporting the edits.
4. Flixier
For quick motion blurs, people can use Flixier to create motion blurs with its pixelating technology. Along with other features for managing videos and enhancing their outlook, Flixier can be used for editing videos quickly. You can easily attach the effect while setting up its time parameters and other functions.

Pros
- You can integrate the features used in Flixier for creating videos for your YouTube channel.
- Works on low-powered devices, including Chromebooks and old devices.
Cons
- There are not a lot of features available on the online platform, limiting its use.
Last Words
This article has provided an overview of the best motion blur apps you can find in the market to create a realistic effect on your photo or video. As the article covers all kinds of compatible devices, it turns out to be an informative article to go through. Ensure to fill in all the details and see which application serves the best purpose.
For iOS and Android devices, CapCut turns out to be a great option to work with. Filmora has shown promising results with its Mac and Windows version, and Kapwing presents an excellent interface to edit videos regardless of being an online editor. Wondershare Filmora provides the best features for creating motion blur pictures and videos if you tend to work on your desktop.
Also read:
- Updated Getting Into The Details A Review of Kodak LUTs for 2024
- Enhance Your Video Color Accuracy with Video Scopes
- Updated 2024 Approved Free Titles For Final Cut Pro
- 2024 Approved Learn How to Slow Down Time-Lapse Videos on iPhone to Make Detailed and Captivating Slow-Motion Effects in Your Time-Lapse Captures
- 2024 Approved Want to Add Freeze Frame Effect to Your Video on Your Device? Here Are the Steps to Add Freeze Frame on PC, Mac, Smartphone as Well as Online From Any Device
- Synchronizing Videos Can Be Hectic, but Do You Wish to Know a Good Tool for This Purpose? This Article Will Discuss Wondershare Filmora, Which Is Perfect for This
- Updated 2024 Approved Step by Step to Rotate Videos Using OBS
- New In 2024, How to Rotate AVI in Vertical/Portrait Orientation Windows, Mac,Andro
- Updated In 2024, Slow-Motion Edits Are Pretty Mesmerizing, and Weve All Imagined Ourselves in One of Those Visually Appealing, Slowed-Down Movies. Well Teach You How to Make a Smooth Slo-Mo Video Using Twixtor in This Article. Stay Tuned Until the End
- 2024 Approved Best 8 Online MPEG to GIF Converters
- 2024 Approved To Help You Perform This Action, in This Article, We List the Steps You Will Need for Cropping Into Video Clips with PowerDirector. As an Added Bonus, We Have Also Included the Method to Perform the Same Actions in WonderShare Filmora
- Updated Want to Learn How to Crop or Trim Video in PowerPoint? We Have Got You Covered; We Have Given a Step-by-Step Guide that Will Allow You to Trim and Crop Videos Using This Presentation Program for 2024
- New In 2024, This Article Is Regarding the Guidance About the Split of the Audio From the Video in Premiere Pro. And Also, the Discussion of the Wondershare Fllmora as the Replacement and How to Perform a Similar Task in It
- Updated Do You Want to Use a Video Editor for Your iOS Device? This Article Introduces LumaFusion, a Perfect Multi-Track Video Editor Designed to Cater to Your Needs
- How Can You Create Outstanding Educational Teaching Videos?
- Updated How to Make a Movie with Windows Movie Maker?
- Updated In 2024, Best GIF to AVI Converters
- New 2024 Approved Troubleshoot Snapchat Camera Zoomed in Issue 4 Tips
- Easy Ways to Change Aspect Ratio in iMovie, In 2024
- How to Resize FLV Videos EfficientlyWindows, Mac, Android, iPhone & Online for 2024
- Updated In 2024, Discover the Best Video Filter Software . Elevate Your Video Editing with Top Contenders Like Filmora, DaVinci Resolve, HitFilm Express, and More
- Updated Online Calculate and Change Video Aspect Ratio for 2024
- New Looking for the Tools that Can Let You Blend Images Perfectly for Creating an Awesome Collage? Shortlisted for You Are the Best Bend Collage Program for an Effortless Task for 2024
- New Simple Tricks Make 3D GIF Production of Inspiration Pop Up for 2024
- Updated Do You Want to Know About the Best Filmic Pro LUTs for Video Editing? This Article Provides Details on the Best Recommendations for 2024
- Android Screen Stuck General Samsung Galaxy M14 5G Partly Screen Unresponsive | Dr.fone
- Full Guide to Unlock Your Realme C51
- 8 Workable Fixes to the SIM not provisioned MM#2 Error on Vivo Y36 | Dr.fone
- In 2024, Guide on How To Change Your Apple ID Email Address On iPhone 6 Plus | Dr.fone
- Why Apple Account Disabled From your iPhone 6? How to Fix
- How to Fix Error 495 While Download/Updating Android Apps On Vivo Y100 5G | Dr.fone
- In 2024, 2 Ways to Monitor Realme 12 5G Activity | Dr.fone
- How to Change Spotify Location After Moving to Another Country On Honor Magic V2 | Dr.fone
- In 2024, How To Unlock Any Samsung Galaxy A34 5G Phone Password Using Emergency Call
- Bricked Your Oppo F23 5G? Heres A Full Solution | Dr.fone
- Hassle-Free Ways to Remove FRP Lock from Oppo A2 Phones with/without a PC
- How to Flash Dead Tecno Spark 20 Pro Safely | Dr.fone
- What To Do When Realme Narzo 60x 5G Has Black Screen of Death? | Dr.fone
- Will the iPogo Get You Banned and How to Solve It On Vivo S17 Pro | Dr.fone
- All Must-Knows to Use Fake GPS GO Location Spoofer On Nubia Red Magic 9 Pro | Dr.fone
- Simple ways to get recent calls back from Oppo Find X7
- Title: Find Out What Track Mattes Are in After Effects and Learn How to Find and Use It with Simple and Easy-to-Follow Instructions
- Author: Morgan
- Created at : 2024-05-19 05:11:41
- Updated at : 2024-05-20 05:11:41
- Link: https://ai-video-editing.techidaily.com/find-out-what-track-mattes-are-in-after-effects-and-learn-how-to-find-and-use-it-with-simple-and-easy-to-follow-instructions/
- License: This work is licensed under CC BY-NC-SA 4.0.

