
:max_bytes(150000):strip_icc():format(webp)/hexadecimal-code-security-key-krzysztof-zmij-e-plus-getty-images-57c76b825f9b5829f4bd185e.jpg)
Guide To Using Free Luts for OBS
Guide To Using Free Luts for OBS
LUTs are powerful tools that can significantly enhance the visual appeal of your content. You can use this tool to change the look and feel of your images and videos. Moreover, you can use LUTs to bring out the desired mood, style, and tone to your media content. Additionally, LUTs provide endless possibilities for creativity with different color adjustments and grading.
There are many software and tools available on the market to apply LUTs. These tools let you import and apply LUTs to your images and videos. Furthermore, you can apply LUTs even using streaming software like OBS. Moreover, you can improve live streams, videos, and recordings by applying LUTs using OBS. However, many paid and free LUTs for OBS are available for usage.
Part 1: Why Do We Need to Use LUTs for Editing in OBS?
There are many free OBS LUTs available that you can download and use for your content. The real question is the utility of LUTs in OBS. Here are some of the reasons to use LUTs in this tool.
Efficiency and Consistency
LUTs provide a quick and consistent way to apply color transformations. Instead of manually adjusting individual color settings, you can use LUTs. Similarly, it allows you to instantly and precisely grade and correct colors.
Time-Saving
Using LUTs saves time because they offer pre-defined color transformations. Instead of adjusting colors for each project or image, you can use LUTs. Additionally, they allow you to match your desired look or style easily.
Artistic Control and Creative Freedom
Furthermore, it gives artists, filmmakers, and photographers more control over their work. They allow for experimentation and exploration of different looks and styles. You can be more creative by experimenting with varying tones of color to the same content.
Consistent Color Reproduction
LUTs are essential for maintaining consistent color tones. The good part is it maintains consistency across different devices, software, and platforms. They ensure that colors look the same, no matter what the viewing medium, like monitors, projectors, or mobile screens.
Film Emulation and Replication
Moreover, it can replicate classic film stocks’ characteristics and aesthetics. They allow filmmakers and photographers to recreate iconic films’ color response and tonal range. In this way, everyone can experiment with color tones inspired by famous movies.
Workflow Flexibility and Collaboration
Lookup tables offer flexibility and facilitate collaboration in post-production workflows. They can be easily shared and applied to different projects or sequences. Similarly, it ensures consistent color grading across multiple editors or teams.
Calibration and Color Management
Additionally, LUTs play an important role in color calibration and management processes. It allows you to align color spaces, correct color variations, and maintain color accuracy. Furthermore, it will maintain consistent color grading throughout the project.
Real-time Color Processing
Lastly, LUTs are valuable in applications that require real-time color processing. It can be used in live broadcasts, video streaming, or video games. You can make instant adjustments and enhancements in real time.
Empower your videos with a new mood using different LUTs. Filmora now offers 100+ top-quality 3D LUTs cover a broad range of scenarios. Transform your videos with Filmora’s powerful 3D LUTs.
Apply LUT on Videos Apply LUT on Videos Learn More


Part 2: Discussing Some Top-Notch Best LUTs for OBS?
If you are searching for the best LUTs for OBS, you’re at the right place. Here is a list of some of the best LUTs you can apply using OBS. You can choose from different styles and tones according to your preference:
1. Vintage LUTs
Take a step back in time with this pack of Vintage LUTs. This pack gives your videos and images a nostalgic, retro feel. Moreover, this pack has different classic film presets, including monochrome and b&w. It enhances warm tones, adds a vignette, and introduces a gentle fade effect. Furthermore, this pack gives your media content the perfect retro feel.

2. 13 FREE Custom LUTs for Log Footage
Using these 13 cinematic LUTs, you can unleash the power of the silver screen. With these LUTs, you can bring Hollywood magic to your videos. Additionally, this pack enhances contrast and saturation to create a dramatic and cinematic look. Moreover, it enhances your media with rich colors, deep shadows, and vibrant highlights giving them a movie-like feel.

3. Vibrant Nature LUTs for Photo & Video
Vibrant Nature LUTs is an excellent pack that enhances the beauty of nature and the outdoors. It is a pack of five different LUTs specifically used to enhance natural landscapes and environmental shots. Furthermore, this pack highlights the earthy tones, adds depth to greens, and brings out the details of nature. Additionally, you can use this pack to improve the scenery in your pictures and videos.

4. Coastal Haze
Coastal Haze is a fantastic LUT to celebrate love and romance with its color grading. It is an excellent free LUT that enhances the colors and emotions of wedding videos and romantic moments. Moreover, it adds a soft and dreamy touch by improving skin tones. Furthermore, it creates a warm and intimate atmosphere allowing you to beautify your special moments.

5. 20 Dark Moody LUTs Pack
Dive into the world of moody dark colors with this 20 Dark Moody LUTs Pack. Each LUT has a different tone and feel to it. These LUTs add darkness to create a mysterious and serious ambiance. It enhances shadows, deepens blacks, and adds a subtle color grading to create an intense look. With this Moody LUT pack, you can make more professional-looking dark videos.

Part 3: How to Use LUTs in OBS Studio Properly?
If you’ve found the best free LUTs for OBS, you can apply them directly to your video feed. Here are simple steps to apply LUTs using OBS Studio. Following these steps, you can easily apply a LUT effect to your video feed or live stream in OBS.
Step 1: Open OBS and start your video feed or live stream using a webcam or capture card. Once your video stream is running, right-click the “Video Capture Device” option. After that, select “Filters” from the options that appear. In the Filters menu, locate the “Effect Filters” section and click the “+” button. Choose the “Apply LUT” option from the options that appear to add the LUT effect to your video stream.

Step 2: A new window will pop up where you can specify the name of your LUT. To select your desired LUT, click the “Browse” button and navigate to its location on your device. Once you’ve found your LUT, click the “Open” button to apply it directly to your video stream. If needed, you can adjust the intensity of the LUT by making changes in the “Preview” screen.

Part 4: Wondershare Filmora: Another Efficient Platform for Adding LUTs on Videos
Wondershare Filmora is an exceptional video editing tool with the additional ability of color grading. With this powerful tool, you can color grade your videos by manually adjusting settings or applying LUTs. The latest update of Wondershare Filmora includes a library of over 200+ LUTs that you can apply to your media files. Furthermore, you can also customize the intensity of the applied LUTs.
Add LUTs on Video For Win 7 or later(64-bit)
Add LUTs on Video For macOS 10.14 or later
Besides color grading, Filmora also provides a variety of effects, filters, and overlays for your videos. These tools allow you to add artistic touches and improve the overall feel of your content. Additionally, it offers professional-grade features such as AI Cutout. This feature enables you to effortlessly select your subject in a video and change their background.

Conclusion
In conclusion, LUTs are useful tools for color-correcting live streams and video editing projects. You can apply LUTs directly to your live streams, and video feeds with OBS. Many free LUTs for OBS are available, each with a different tone and feel. Furthermore, LUTs can also be used in popular video editing tools like Wondershare Filmora. Lastly, LUTs are essential tools to make your content stand out.
Add LUTs on Video For Win 7 or later(64-bit)
Add LUTs on Video For macOS 10.14 or later
Apply LUT on Videos Apply LUT on Videos Learn More
Part 2: Discussing Some Top-Notch Best LUTs for OBS?
If you are searching for the best LUTs for OBS, you’re at the right place. Here is a list of some of the best LUTs you can apply using OBS. You can choose from different styles and tones according to your preference:
1. Vintage LUTs
Take a step back in time with this pack of Vintage LUTs. This pack gives your videos and images a nostalgic, retro feel. Moreover, this pack has different classic film presets, including monochrome and b&w. It enhances warm tones, adds a vignette, and introduces a gentle fade effect. Furthermore, this pack gives your media content the perfect retro feel.
2. 13 FREE Custom LUTs for Log Footage
Using these 13 cinematic LUTs, you can unleash the power of the silver screen. With these LUTs, you can bring Hollywood magic to your videos. Additionally, this pack enhances contrast and saturation to create a dramatic and cinematic look. Moreover, it enhances your media with rich colors, deep shadows, and vibrant highlights giving them a movie-like feel.
3. Vibrant Nature LUTs for Photo & Video
Vibrant Nature LUTs is an excellent pack that enhances the beauty of nature and the outdoors. It is a pack of five different LUTs specifically used to enhance natural landscapes and environmental shots. Furthermore, this pack highlights the earthy tones, adds depth to greens, and brings out the details of nature. Additionally, you can use this pack to improve the scenery in your pictures and videos.
4. Coastal Haze
Coastal Haze is a fantastic LUT to celebrate love and romance with its color grading. It is an excellent free LUT that enhances the colors and emotions of wedding videos and romantic moments. Moreover, it adds a soft and dreamy touch by improving skin tones. Furthermore, it creates a warm and intimate atmosphere allowing you to beautify your special moments.
5. 20 Dark Moody LUTs Pack
Dive into the world of moody dark colors with this 20 Dark Moody LUTs Pack. Each LUT has a different tone and feel to it. These LUTs add darkness to create a mysterious and serious ambiance. It enhances shadows, deepens blacks, and adds a subtle color grading to create an intense look. With this Moody LUT pack, you can make more professional-looking dark videos.
Part 3: How to Use LUTs in OBS Studio Properly?
If you’ve found the best free LUTs for OBS, you can apply them directly to your video feed. Here are simple steps to apply LUTs using OBS Studio. Following these steps, you can easily apply a LUT effect to your video feed or live stream in OBS.
Step 1: Open OBS and start your video feed or live stream using a webcam or capture card. Once your video stream is running, right-click the “Video Capture Device” option. After that, select “Filters” from the options that appear. In the Filters menu, locate the “Effect Filters” section and click the “+” button. Choose the “Apply LUT” option from the options that appear to add the LUT effect to your video stream.
Step 2: A new window will pop up where you can specify the name of your LUT. To select your desired LUT, click the “Browse” button and navigate to its location on your device. Once you’ve found your LUT, click the “Open” button to apply it directly to your video stream. If needed, you can adjust the intensity of the LUT by making changes in the “Preview” screen.
Part 4: Wondershare Filmora: Another Efficient Platform for Adding LUTs on Videos
Wondershare Filmora is an exceptional video editing tool with the additional ability of color grading. With this powerful tool, you can color grade your videos by manually adjusting settings or applying LUTs. The latest update of Wondershare Filmora includes a library of over 200+ LUTs that you can apply to your media files. Furthermore, you can also customize the intensity of the applied LUTs.
Add LUTs on Video For Win 7 or later(64-bit)
Add LUTs on Video For macOS 10.14 or later
Besides color grading, Filmora also provides a variety of effects, filters, and overlays for your videos. These tools allow you to add artistic touches and improve the overall feel of your content. Additionally, it offers professional-grade features such as AI Cutout. This feature enables you to effortlessly select your subject in a video and change their background.
Conclusion
In conclusion, LUTs are useful tools for color-correcting live streams and video editing projects. You can apply LUTs directly to your live streams, and video feeds with OBS. Many free LUTs for OBS are available, each with a different tone and feel. Furthermore, LUTs can also be used in popular video editing tools like Wondershare Filmora. Lastly, LUTs are essential tools to make your content stand out.
Add LUTs on Video For Win 7 or later(64-bit)
Add LUTs on Video For macOS 10.14 or later
How to Add Photos to Tik Tok Video
Our globe is filled up with the talented people who are making different shades of creativity. The credit also goes to the built-in featured tools which empowers the people to show their creative ideas and present them in a better way.
In this era, the world has completely transformed and social media is playing its vital role. A few years back, we can hardly send or receive messages and can make calls from phones. But today, there are hundreds of social media platforms that are interconnected and can perform a lot more than just messaging and calls. The Tik Tok is one of them and you can easily edit your videos at the palm of our hand.

How to Add Photos to Tik Tok Video Directly
Today I am going to discuss few things about the Tik Tok including how to add pictures to the video directly. However, it is pretty simple and you can accomplish the skill of making Tik Tok videos professionally after reading this article.
So lets dive in…
Before you start editing the video or pictures, it is important to download the Tik Tok app on your device and make an account. Although, you can get access to your Tik Tok with local browser and without downloading the application.

Your pictures will be displayed automatically one by one and you can add animations, music, or voiceover, and can even add effects and transitions to the video.
. Let us get started.
1. Adding a Picture from Effects.
- Go to the bottom of the screen and press that + sign.

- Select the large red icon Camera to take short video.
- Hit the Effects tab at the left of the Record button.

- Click on the green screen.
Here you can select the different effects.
- Now you can take your selfie or take a photo and if you want to choose the photo from the album, you can add that way.
- Hit the effect shown below and you can make your picture size smaller, larger and you can also move it on the screen.

Now click on the Next button and hit the Post button.
So, that’s how you can add photos to your Tik Tok videos and can easily edit to make them eye catching.
Here you will get a few options to add photos to your pictures.
2. Adding a Picture via Uploading.
- Open the Tik Tok app and hit the “+”

- The interphase will change and you will see a large red button in the center.
- Tap that Camera button and directly take a shot.

- Tap on the Photos to select the Image you want to upload.

- Click the

- After editing the images select the Post

3. Adding a picture via Photo Template.
Here is another way to add pictures to your video that is the Photos Template. You will use the pre-designed images.
- Open the Tik Tok app and hit the “+” sign.

- Select the Templates button from the lower bottom of the screen.

- Select the desired Template from the list and it will be downloaded.
- Now select the Photos icon under the Templates icon. You will be referred to the gallery.

- Select the desired image and after complete editing hit the Post

Using Wonder Share Filmora 11.
The rising tendency toward making the Tik Tok videos has proven that filmmaking is not difficult but the emerging number of professional video editors has made it more simple. Tik Tok is the fastest growing and amazing social media platform so one should make sure to make a video that stands out from the crowd. For this, I am introducing a very professional but easy-to-use application “Wonder Share Filmora 11”.
Filmora 11 is one of the most powerful video editors and allows you to edit videos from smartphones, DSLRs, and all types of digital cameras. It provides hundreds of eye-catching visual and audio effects.

Adding a photo to the Tik Tok video.
Before you start the editing process, organize your Media Library. Most of the time our library is flooded with excess pictures and it consumes a lot of time to select the right photos. However, it is not a compulsory step but you can do it to enjoy your editing. So let’s get started!
- Open the Filmora 11 and click on the New Project.
- Import the video file and the photo you want to add. You can drag and drop the image and click on the Import button to get the image.

- Set the same Aspect Ratio and Resolution for both the video and the image.
- Drag the video and drop it into the timeline.
- Now drag the image and drop it above the video track.

In the above screenshot, you can see the image is added to the video. You can further edit it to set it in the proper position you want.
- Drag the image in the timeline and place it at the point you want.
- You can extend or cut the length of the image.
- In the same way, you can directly resize your image in the preview window.
- Drag the edge of the photo and resize it. You can also move it to adjust the placement of the image.

Besides this, you have a wide range of customizable options.
- Double click on the picture in the preview window.
- You will see the Image editing panel on the left side to edit more professionally.
- Hit on the Transform under the Basic
- You can rotate, flip, scale and change the position of the image.

- Select the compositing tab and hit the Blending Mode, you can change the color of the added image. I have selected Linear light, you can select anyone from the drop-down list.
- Here you can change the opacity of the image.

You can even further edit your image by adding Effects, Transitions, Text, overlays, filters, and many more to make it interesting and eye-catching.
- Hit the green Export button in the center of the window.
- Set the Name, Resolution, Frame Rate, Duration, and Format of the video.
- Click on the Auto Highlight and open the drop-down list.
- Click on 15s (Tik Tok) under the upload section.
- Now select the Export button.

Using Kapwing for Online.
We will use Kapwing’s online video editor to add photos to the videos and then upload them on Tik Tok. You just need to do is to have a good internet connection and a browser. You can use the Kapwing on your iPhone, Android, Windows, Tablet, etc. so let’s get started…
- Open the Kapwing App in your browser.
- Click on start editing to proceed and you will find the window below

- Click the upload tab or paste the URL to add a video.

Once you have added a video;
- Click on the upload tab to add the picture to the video.
- Here you can edit your image and hit the Publish tab.

Using BeeCut for Mac.
Bee Cut is a very powerful and easy-to-use application, especially for Mac users. However, it can be installed on iOS, Android, and Windows. Although, its interphase is simple but has many advanced features that make your video stand out. Let’s start,
- Install the Bee Cut app from the app store.
- After the download completes, hit the “Next step” and select the desired Aspect ratio for your Tik Tok video.
- Enjoy amazing editing of your Tik Tok video in this interphase shown down below.

- Once you are done with editing, hit the Export button and share your Tik Tok with family and friends.
Using Inshot for Android.
Inshot is another powerful all-in-one video editor tool. It is one of the most popular video editors among social media influencers. It provides very easy and professional tools for Tik Tok users. You can make your precious moments into an amazing video within a few minutes and a few clicks. The good thing about the app is, that it is used on your smartphone and you can edit by simply dragging and dropping. Inshot is not recommended for long videos, it experiences glitches so, and it works perfectly for the Tik Tok because it has short videos.

FAQS on Dealing with Pictures on TikTok
- How to add a Profile photo or video on Tik Tok?
- Tap on
- Hit Edit profile.
- Select Change Photo or Change Video.
- Take a Photo or Upload it from the gallery. A photo should be 20x20 pixels.
- Why can’t you upload Images on the Tik Tok?
- Don’t have a good internet
- Don’t have the latest version of the app.
- Check your Permission settings.
- How to add Text after adding Pictures on Tik Tok?
- Tap the Text at the bottom of the editing screen.
- Select the desired font, color, and background of your text.
- Select
- Tap on the text to set the position over the image.
- How do I link Google Photos to Tik Tok?
- Open the Google photos app on your device.
- Select a photo you want to share.
- Tap Share under Share to apps select Tik Tok.
- Click on Create link.
How to Add Photos to Tik Tok Video Directly
Today I am going to discuss few things about the Tik Tok including how to add pictures to the video directly. However, it is pretty simple and you can accomplish the skill of making Tik Tok videos professionally after reading this article.
So lets dive in…
Before you start editing the video or pictures, it is important to download the Tik Tok app on your device and make an account. Although, you can get access to your Tik Tok with local browser and without downloading the application.
Your pictures will be displayed automatically one by one and you can add animations, music, or voiceover, and can even add effects and transitions to the video.
. Let us get started.
1. Adding a Picture from Effects.
- Go to the bottom of the screen and press that + sign.
- Select the large red icon Camera to take short video.
- Hit the Effects tab at the left of the Record button.
- Click on the green screen.
Here you can select the different effects.
- Now you can take your selfie or take a photo and if you want to choose the photo from the album, you can add that way.
- Hit the effect shown below and you can make your picture size smaller, larger and you can also move it on the screen.
Now click on the Next button and hit the Post button.
So, that’s how you can add photos to your Tik Tok videos and can easily edit to make them eye catching.
Here you will get a few options to add photos to your pictures.
2. Adding a Picture via Uploading.
- Open the Tik Tok app and hit the “+”
- The interphase will change and you will see a large red button in the center.
- Tap that Camera button and directly take a shot.
- Tap on the Photos to select the Image you want to upload.
- Click the
- After editing the images select the Post
3. Adding a picture via Photo Template.
Here is another way to add pictures to your video that is the Photos Template. You will use the pre-designed images.
- Open the Tik Tok app and hit the “+” sign.
- Select the Templates button from the lower bottom of the screen.
- Select the desired Template from the list and it will be downloaded.
- Now select the Photos icon under the Templates icon. You will be referred to the gallery.
- Select the desired image and after complete editing hit the Post
Using Wonder Share Filmora 11.
The rising tendency toward making the Tik Tok videos has proven that filmmaking is not difficult but the emerging number of professional video editors has made it more simple. Tik Tok is the fastest growing and amazing social media platform so one should make sure to make a video that stands out from the crowd. For this, I am introducing a very professional but easy-to-use application “Wonder Share Filmora 11”.
Filmora 11 is one of the most powerful video editors and allows you to edit videos from smartphones, DSLRs, and all types of digital cameras. It provides hundreds of eye-catching visual and audio effects.
Adding a photo to the Tik Tok video.
Before you start the editing process, organize your Media Library. Most of the time our library is flooded with excess pictures and it consumes a lot of time to select the right photos. However, it is not a compulsory step but you can do it to enjoy your editing. So let’s get started!
- Open the Filmora 11 and click on the New Project.
- Import the video file and the photo you want to add. You can drag and drop the image and click on the Import button to get the image.
- Set the same Aspect Ratio and Resolution for both the video and the image.
- Drag the video and drop it into the timeline.
- Now drag the image and drop it above the video track.
In the above screenshot, you can see the image is added to the video. You can further edit it to set it in the proper position you want.
- Drag the image in the timeline and place it at the point you want.
- You can extend or cut the length of the image.
- In the same way, you can directly resize your image in the preview window.
- Drag the edge of the photo and resize it. You can also move it to adjust the placement of the image.
Besides this, you have a wide range of customizable options.
- Double click on the picture in the preview window.
- You will see the Image editing panel on the left side to edit more professionally.
- Hit on the Transform under the Basic
- You can rotate, flip, scale and change the position of the image.
- Select the compositing tab and hit the Blending Mode, you can change the color of the added image. I have selected Linear light, you can select anyone from the drop-down list.
- Here you can change the opacity of the image.
You can even further edit your image by adding Effects, Transitions, Text, overlays, filters, and many more to make it interesting and eye-catching.
- Hit the green Export button in the center of the window.
- Set the Name, Resolution, Frame Rate, Duration, and Format of the video.
- Click on the Auto Highlight and open the drop-down list.
- Click on 15s (Tik Tok) under the upload section.
- Now select the Export button.
Using Kapwing for Online.
We will use Kapwing’s online video editor to add photos to the videos and then upload them on Tik Tok. You just need to do is to have a good internet connection and a browser. You can use the Kapwing on your iPhone, Android, Windows, Tablet, etc. so let’s get started…
- Open the Kapwing App in your browser.
- Click on start editing to proceed and you will find the window below
- Click the upload tab or paste the URL to add a video.
Once you have added a video;
- Click on the upload tab to add the picture to the video.
- Here you can edit your image and hit the Publish tab.
Using BeeCut for Mac.
Bee Cut is a very powerful and easy-to-use application, especially for Mac users. However, it can be installed on iOS, Android, and Windows. Although, its interphase is simple but has many advanced features that make your video stand out. Let’s start,
- Install the Bee Cut app from the app store.
- After the download completes, hit the “Next step” and select the desired Aspect ratio for your Tik Tok video.
- Enjoy amazing editing of your Tik Tok video in this interphase shown down below.
- Once you are done with editing, hit the Export button and share your Tik Tok with family and friends.
Using Inshot for Android.
Inshot is another powerful all-in-one video editor tool. It is one of the most popular video editors among social media influencers. It provides very easy and professional tools for Tik Tok users. You can make your precious moments into an amazing video within a few minutes and a few clicks. The good thing about the app is, that it is used on your smartphone and you can edit by simply dragging and dropping. Inshot is not recommended for long videos, it experiences glitches so, and it works perfectly for the Tik Tok because it has short videos.
FAQS on Dealing with Pictures on TikTok
- How to add a Profile photo or video on Tik Tok?
- Tap on
- Hit Edit profile.
- Select Change Photo or Change Video.
- Take a Photo or Upload it from the gallery. A photo should be 20x20 pixels.
- Why can’t you upload Images on the Tik Tok?
- Don’t have a good internet
- Don’t have the latest version of the app.
- Check your Permission settings.
- How to add Text after adding Pictures on Tik Tok?
- Tap the Text at the bottom of the editing screen.
- Select the desired font, color, and background of your text.
- Select
- Tap on the text to set the position over the image.
- How do I link Google Photos to Tik Tok?
- Open the Google photos app on your device.
- Select a photo you want to share.
- Tap Share under Share to apps select Tik Tok.
- Click on Create link.
Top Way to Freeze-Frame in Final Cut Pro
Best Way to Freeze Frame in Final Cut Pro
An easy yet powerful editor
Numerous effects to choose from
Detailed tutorials provided by the official channel
The primary purpose of freezing frames is to hold a particular frame in clips in one place, temporarily to stop the action onscreen. You can create the Freeze-Frame clip from any video clip in the browser or the timeline. If a Freeze-Frame clip is created from the browser, it gets affixed to the major storyline at the Playhead location as a connecting clip.

Now, Final Cut Pro is a fantastic video editor available for macOS. It is an entire video editing tool perfect for basic video editing. In addition, it can be valuable to Freeze-Frames in a video. This article will explain why to Freeze-Frame in FCP and its alternatives. We will also introduce how to add a Freeze-Frame Final Cut Pro video editor that can make your videos more appealing.
In this article
01 [Why Do You Need to Freeze-Frame](#Part 1)
02 [How to Freeze-Frames in Final Cut Pro?](#Part 2)
03 [3 Alternative to Freeze-Frames and Why](#Part 3)
Part 1 Why Do You Need to Freeze-Frame
Freeze-Frames is an effective and quick way to begin a drama session when you want to edit a movie. Besides, users of any age, ranging from children to adults, can easily handle it. Participants can use it to create an image using their bodies with no movement, and Freeze-Frames can also be made by individuals, a whole group, or a small group.
Another perfect way to describe a Freeze-Frame is a “still image.” It is a way of pressing the pause button on the remote control and making a statue or taking a photo. The image creation can be quick without discussion, planned, or rehearsed.
Here are some reasons you need a Freeze-Frame app:
● They are beneficial as a quick way of communicating ideas or telling a story.
● In addition, Freeze-Frame can represent objects or people and even abstract concepts like atmosphere or emotions.
● Freeze-Frames can help shyer performers to gain confidence, as there are no lines to learn.

Part 2 How to Freeze-Frames in Final Cut Pro?
FCPX Freeze-Frame clips can temporarily hold a particular frame in place and stop the action onscreen. The Freeze-Frame, as its phrase, freezes or contains the specific frame you want to feature or focus on in a video.
You have to pick or select the frame you want to freeze and follow the steps in the article to freeze the frame of your choice.
In addition, if you do not want to create a separate freeze-frame clip, make a hold segment to stop the action for part of a clip temporarily. This action offers more precise control, especially when a variable speed effect is created.
You can Freeze-Frame on the fly by navigating to a specific frame in a clip or during playback. Thus, A Freeze-Frame clip will preserve any attributes applied to the source clip, such as settings and effects.
Here is how to Freeze-Frame in Final Cut Pro effectively.
Step 1: In the browser or in the timeline in Final Cut Pro, do any one of the following:
● Begin playback of the clip and pause
● Move the Skimmer or Playhead to the portion you wish to freeze.

Step 2: Choose Edit > Add Freeze-Frame (or press Option-F).
Note: How Freeze-Frame gets added to the project depends on whether it got created from the browser or the timeline:
● If the Freeze-Frame was from a browser clip, a new freeze-frame clip gets attached as a connected clip at the Playhead site in the timeline.
● Alternatively, if the freeze-frame was from the timeline, a new freeze-frame clip gets inserted at the Playhead location or the Skimmer in the timeline.

Part 3 Alternative to Freeze-Frames and Why
There are a lot of alternatives to Freeze-Frame in Final-Cut Pro all over the Internet. However, you must be careful while choosing when you want to add customization to your videos.
Additionally, if you are looking for the best editor to add a Freeze-Frame effect to your video, we recommend trying Filmora. Wondershare Filmora Video Editor for Mac and Windows devices comes with tons of Freeze-Frame impacts that you can use to spice-up your video.
For Win 7 or later (64-bit)
For macOS 10.12 or later
Some of the alternatives to adding a Freeze-Frame on Final Cut Pro include:
01AZ Screen Recorder
This is a free android APK alternative to Freeze-Frames in FCP. It is a great application available for anyone who needs to have the ability to record what is happening on their Android device’s screen. One great benefit of using this application is that your Android device does need to be rooted to experience the best the app has to offer.
A blinking red dot will be noticed in the screen’s right bottom corner when users begin to record with this application. This is an indicator that the recording is in progress. In addition, users can pause the recording as per their requirements by just tapping the screen. If you are not comfortable with the location of the blinking red dot, hold and move it to anywhere on the screen that can better suit your needs. Thus, this is an excellent alternative to Final Cut Pro X Freeze-Frame with the exceptional video quality.
Features
● Simple, clean, and easy to use interface
● The application settings options allow users to adjust things like the video output quality and how the clip recording interacts with the screen while the application is running.
● The four icons located in the middle of the application’s home screen clearly outline their options when the application is first open. The four options include adjusting the application’s settings, accessing previously recorded video files, starting recording, and the option to exit.
Pros:
● It has options to increase video quality.
● No watermark
● No time limits
● No frame loss
Cons:
● No option to live stream.

02AndroVid
This Android application allows the creation of new videos by cutting and combining two or more video effects on your phone. Additionally, this application is typically different from the others that let you watch videos or share them with other sites. Bits and pieces can be cut from two or more videos and combined to make a new video. In addition, it is fun to use if you want to create a new music video that features the same song but different steps made when various people are being used.
Users can easily cut and paste with simple instructions, and the application also lets you work with any video stored on your phone.
Features
● Add subtitles to the videos that you create
● Create titles in any color or font that is available with the application
● making the videos from the clips a little more personal and customized before sharing.
Pros
● Allows multiple videos editing
● Allows the addition of a subtitle
● Users can reverse video content
Cons
● You cannot save a lot of work automatically
● It takes time to get the video adjusted

03Action Director
This Android editor also serves as an alternative to Final Cut Pro X Freeze-Frame. This video editing tool allows users to create quality compositions in no time at all. Additionally, you can change the image’s color, cut video clips, add a soundtrack, or insert text with this Video Editor using effortless control. With just a few finger taps on the screen, you can customize any video. This excellent video editing tool lets you create and share your videos quickly and easily.
Features
● Record videos with this Android app.
● Edit video and apply effects from its exclusive list.
● Get more than 12 transitions for your videos
● The useful movie editing guide helps you create videos with action effects and edits.
● Share your videos with your friends.
Pros
● It is fast and easy to use
● It is elementary to control
● Has video sharing option to share videos on another website
Cons
● Requires premium version to export video in high quality
● Ending Thoughts →
● About Final Cut Pro X Freeze-Frame and explained to the user how to use Freeze-Frame in FCP.
● Additionally, the article listed and presented three alternatives to Freeze-Frame and
● Recommended Filmora as the best editing software to use Freeze-Frame effects due to its many editing options.
The primary purpose of freezing frames is to hold a particular frame in clips in one place, temporarily to stop the action onscreen. You can create the Freeze-Frame clip from any video clip in the browser or the timeline. If a Freeze-Frame clip is created from the browser, it gets affixed to the major storyline at the Playhead location as a connecting clip.
Now, Final Cut Pro is a fantastic video editor available for macOS. It is an entire video editing tool perfect for basic video editing. In addition, it can be valuable to Freeze-Frames in a video. This article will explain why to Freeze-Frame in FCP and its alternatives. We will also introduce how to add a Freeze-Frame Final Cut Pro video editor that can make your videos more appealing.
In this article
01 [Why Do You Need to Freeze-Frame](#Part 1)
02 [How to Freeze-Frames in Final Cut Pro?](#Part 2)
03 [3 Alternative to Freeze-Frames and Why](#Part 3)
Part 1 Why Do You Need to Freeze-Frame
Freeze-Frames is an effective and quick way to begin a drama session when you want to edit a movie. Besides, users of any age, ranging from children to adults, can easily handle it. Participants can use it to create an image using their bodies with no movement, and Freeze-Frames can also be made by individuals, a whole group, or a small group.
Another perfect way to describe a Freeze-Frame is a “still image.” It is a way of pressing the pause button on the remote control and making a statue or taking a photo. The image creation can be quick without discussion, planned, or rehearsed.
Here are some reasons you need a Freeze-Frame app:
● They are beneficial as a quick way of communicating ideas or telling a story.
● In addition, Freeze-Frame can represent objects or people and even abstract concepts like atmosphere or emotions.
● Freeze-Frames can help shyer performers to gain confidence, as there are no lines to learn.
Part 2 How to Freeze-Frames in Final Cut Pro?
FCPX Freeze-Frame clips can temporarily hold a particular frame in place and stop the action onscreen. The Freeze-Frame, as its phrase, freezes or contains the specific frame you want to feature or focus on in a video.
You have to pick or select the frame you want to freeze and follow the steps in the article to freeze the frame of your choice.
In addition, if you do not want to create a separate freeze-frame clip, make a hold segment to stop the action for part of a clip temporarily. This action offers more precise control, especially when a variable speed effect is created.
You can Freeze-Frame on the fly by navigating to a specific frame in a clip or during playback. Thus, A Freeze-Frame clip will preserve any attributes applied to the source clip, such as settings and effects.
Here is how to Freeze-Frame in Final Cut Pro effectively.
Step 1: In the browser or in the timeline in Final Cut Pro, do any one of the following:
● Begin playback of the clip and pause
● Move the Skimmer or Playhead to the portion you wish to freeze.
Step 2: Choose Edit > Add Freeze-Frame (or press Option-F).
Note: How Freeze-Frame gets added to the project depends on whether it got created from the browser or the timeline:
● If the Freeze-Frame was from a browser clip, a new freeze-frame clip gets attached as a connected clip at the Playhead site in the timeline.
● Alternatively, if the freeze-frame was from the timeline, a new freeze-frame clip gets inserted at the Playhead location or the Skimmer in the timeline.
Part 3 Alternative to Freeze-Frames and Why
There are a lot of alternatives to Freeze-Frame in Final-Cut Pro all over the Internet. However, you must be careful while choosing when you want to add customization to your videos.
Additionally, if you are looking for the best editor to add a Freeze-Frame effect to your video, we recommend trying Filmora. Wondershare Filmora Video Editor for Mac and Windows devices comes with tons of Freeze-Frame impacts that you can use to spice-up your video.
For Win 7 or later (64-bit)
For macOS 10.12 or later
Some of the alternatives to adding a Freeze-Frame on Final Cut Pro include:
01AZ Screen Recorder
This is a free android APK alternative to Freeze-Frames in FCP. It is a great application available for anyone who needs to have the ability to record what is happening on their Android device’s screen. One great benefit of using this application is that your Android device does need to be rooted to experience the best the app has to offer.
A blinking red dot will be noticed in the screen’s right bottom corner when users begin to record with this application. This is an indicator that the recording is in progress. In addition, users can pause the recording as per their requirements by just tapping the screen. If you are not comfortable with the location of the blinking red dot, hold and move it to anywhere on the screen that can better suit your needs. Thus, this is an excellent alternative to Final Cut Pro X Freeze-Frame with the exceptional video quality.
Features
● Simple, clean, and easy to use interface
● The application settings options allow users to adjust things like the video output quality and how the clip recording interacts with the screen while the application is running.
● The four icons located in the middle of the application’s home screen clearly outline their options when the application is first open. The four options include adjusting the application’s settings, accessing previously recorded video files, starting recording, and the option to exit.
Pros:
● It has options to increase video quality.
● No watermark
● No time limits
● No frame loss
Cons:
● No option to live stream.
02AndroVid
This Android application allows the creation of new videos by cutting and combining two or more video effects on your phone. Additionally, this application is typically different from the others that let you watch videos or share them with other sites. Bits and pieces can be cut from two or more videos and combined to make a new video. In addition, it is fun to use if you want to create a new music video that features the same song but different steps made when various people are being used.
Users can easily cut and paste with simple instructions, and the application also lets you work with any video stored on your phone.
Features
● Add subtitles to the videos that you create
● Create titles in any color or font that is available with the application
● making the videos from the clips a little more personal and customized before sharing.
Pros
● Allows multiple videos editing
● Allows the addition of a subtitle
● Users can reverse video content
Cons
● You cannot save a lot of work automatically
● It takes time to get the video adjusted
03Action Director
This Android editor also serves as an alternative to Final Cut Pro X Freeze-Frame. This video editing tool allows users to create quality compositions in no time at all. Additionally, you can change the image’s color, cut video clips, add a soundtrack, or insert text with this Video Editor using effortless control. With just a few finger taps on the screen, you can customize any video. This excellent video editing tool lets you create and share your videos quickly and easily.
Features
● Record videos with this Android app.
● Edit video and apply effects from its exclusive list.
● Get more than 12 transitions for your videos
● The useful movie editing guide helps you create videos with action effects and edits.
● Share your videos with your friends.
Pros
● It is fast and easy to use
● It is elementary to control
● Has video sharing option to share videos on another website
Cons
● Requires premium version to export video in high quality
● Ending Thoughts →
● About Final Cut Pro X Freeze-Frame and explained to the user how to use Freeze-Frame in FCP.
● Additionally, the article listed and presented three alternatives to Freeze-Frame and
● Recommended Filmora as the best editing software to use Freeze-Frame effects due to its many editing options.
Top Animated Title Makers
You know that your video needs a title, but rather than just type in some bland text to introduce the video, you can create an animated title page that is far more attractive. Animated titles make a video more attractive and when done correctly, they can even guarantee that your target audience will stick around long enough to watch the entire video. They can also be very useful for introducing the content of the video.
But to make an effective animated title, you need a tool that is designed to do just that. In this article, we look at some of the top animated title makers that you can use to create the perfect animated title for your video.
Part 1. Animated Title Maker Online
If you don’t want to install software on your computer to create the animated title, the following are the top online tools to choose from;
Animaker
Link: https://www.animaker.com/text-animation-maker
Rating: 4.5/5
Animaker is an online tool that is specifically designed to help you create text animations that you can then add to your video project. Available online on all browsers, Animaker has a simple user interface that makes it easy to create text animations in a matter of minutes. It is so easy to use that even the average beginner can create stunning text animations.
If you don’t want to create the animations from scratch, Animaker has numerous pre-designed templates for you to choose from that you can then just edit to fit your design. It also has a lot of customizable infographics that you can repurpose.

Animatron Studio
Link: https://www.animatron.com/studio
Rating: 4.5/5
The Animatron Studio is a one-stop solution for generating all types of animated texts. You can use it to create the perfect animated title for your video, but its numerous features also mean that it is one of the best ways to create attention-grabbing animated banner ads that can be posted on various ad sites,
It has a wealth of resources that you can use to create the title including more than 500,000 royalty-free images, videos, and audio to include in your project. If you don’t want to build the animated content from the ground up, you can select from the 200 pre-animated sets that Animatron Studio provides.
Kapwing Title Maker
Link: https://www.kapwing.com/animated-text-video-maker
Rating: 4.5/5
If your goal is to do more than just create an animated title for your video, Kapwing is a good solution. It is a complete online video editor that can also be used to create animated titles. As such, you can expect Kapwing to have more advanced features that allow you to customize the animated title in various ways.
For instance, it has a huge selection of animations that you can apply to the text. But you also get the option to upload your own animations, colors, and fonts. But please note that the free version of Kapwing will add a watermark to the video.

Biteable Animated Text Maker
Link: https://biteable.com/animated/text/
Rating: 4.5/5
Biteable is one of the most popular solutions that you can use to create all kinds of animated texts. It is simple enough to use that it is useful to both professionals and amateur video creators. It has numerous useful features including custom scenes, foundations, backgrounds, and characters all of which can work together to create the perfect animated title.
One of the main benefits of choosing Biteable is that you can share the videos you edit directly on social media without having to download the video.

Flexclip Video Maker
Link: https://www.flexclip.com/editor/
Rating: 4.5/5
Flexclip is another very easy-to-use and easily accessible solution to create animated texts for videos. Rather than create the texts from scratch, Flexclip allows you to create stunning animated texts just by selecting several parameters.
There are also a lot of pre-made designer text templates that are fully customizable. All you have to do is select one of the templates, and change the text, font, and any images to make it unique to you and your video.

Part 2. Animated Title Maker for Computer
Online tools can be useful, especially since they are more easily accessible. But if you want additional features and more ways to customize your animated title, the following desktop solutions may be more applicable to you;
Filmora
Rating: 4.5/5
Wondershare Filmora is a complete suite of video editing tools that can also come in handy when creating animated titles for videos. It is a very simple video editor with a simple user interface, making it an ideal solution even for beginner users. Adding a title to your video is easy and you get to choose from more than 200 different animations that you can apply to bring the text to life.
Filmora is also very useful because it comes with advanced editing features for the professional editor. You can use it to edit all aspects of the video including the clips and even any audio that may be on the project.

Adobe Animate
Rating: 4.5/5
Adobe Animate is a great option to create various animations for your video project, including animated texts. Used by animators to create 2D animated content, Adobe Animate has a lot of features designed to facilitate this kind of animation and is, therefore, one of the go-to solutions for designers looking to create illustrations like logos and infographics.
But like other Adobe programs, Adobe Animate is not very easy to use and the beginner may find that it takes quite a long time to figure out how it works. But once you figure it out, the 800+ web fonts can make it very easy for you to customize your animated title in various ways.

Express Animate
Rating: 4.5/5
Express Animate is a completely free program that you can download on your computer. It is a complete video editor which means that you can use it to animate text and characters, but it is also a great way to edit other aspects of the video including the audio tracks and adding digital effects.
With a simple user interface, Express Animate allows users to create 2D animations that can be used to create unique videos. It is also a good way to create GIFs and memes.
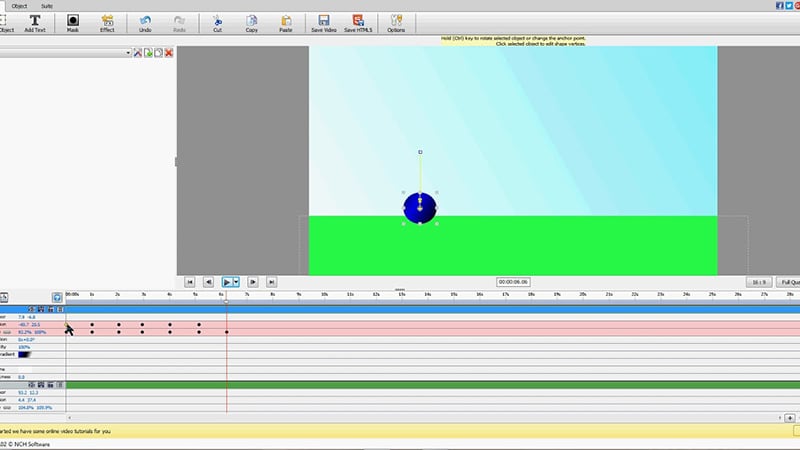
Movavi Video Editor
Rating: 4.5/5
Movavi Video Editor is another complete suite of editing tools that can also come in handy when you want to create an animated title for your video. Designed for both professionals and beginners, this video has all the advanced features you will need to edit all aspects of your video, including a built-in audio editor.
When it comes to animation, Movavi has a lot of effects and transitions as well as pre-made title templates to choose from. Once you have selected the title, you can easily customize the font and color to fit into your project.

Windows Movie Maker
Rating: 4.5/5
For PC users Windows Movie Maker is a simple to use and free way to edit videos. Included with the Windows OS, you likely don’t need to install any software to use and even though it is a free solution, Windows Movie Maker does have the necessary features to create and add animated titles to any video.
It comes with numerous effects, transitions, and templates to choose from when animating text. And it can also be used to edit videos in other ways including trimming and merging clips.

Part 3. Animated Title Maker Apps
If you are editing your videos on your mobile device, the following are the top animated title-making apps to choose from;
Tomo
Rating: 4.5/5
Link: https://m.apkpure.com/tomo-animate-text-in-video/com.entzeners.app.tomo
Tomo is one of the best apps that you can use to animate text in a video. It has robust features that allow you to easily add text to the video and then animate the text using various transitions and effects. Once the edits are complete, Tomo allows you to share the completed video directly on social media apps like Instagram and Twitter.

Adobe Spark
Rating: 4.5/5
Link:https://apps.apple.com/us/app/adobe-spark-post-design-maker/id1051937863
Available for both Android and iOS devices, Adobe Spark is a video editing tool that has numerous tools to add and edit texts on videos. You can use the professionally designed templates that you have access to when using Adobe Spark to create stunning animation titles. And since it easily integrates with other apps on the device, sharing the videos is very easy.
Quik
Rating: 4.5/5
Link: https://play.google.com/store/apps/details?id=com.gopro.smarty&hl=en&gl=US
Quik is an app that is dedicated to text animations and therefore one of the best solutions when you want to add and edit texts on videos. It is available for both iOS and Android and although the free version of the app is slightly limited, its basic editing features are still better than what you find on other more expensive solutions.
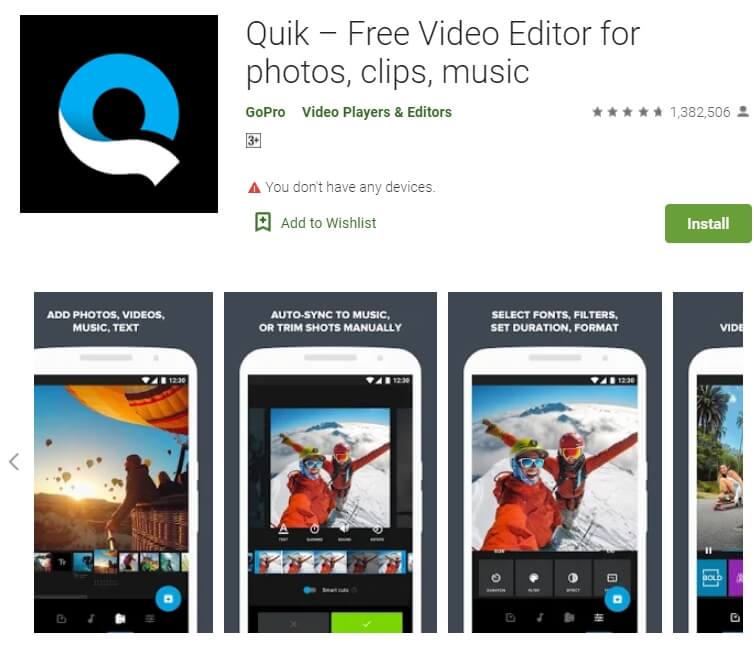
Hyper-type Animated Text Videos
Rating: 4.5/5
Link: https://itunes.apple.com/us/app/hype-type-animated-text-videos
This app gives you two options when it comes to animating the text on your video; auto-motion and typography. It focuses on just adding and editing text on a video and as such may not have any of the other video editing features you will find on some of the other apps. But if your goal is to create an interactive animated video title, Hyper-type Animated Text Videos is a great solution.
Vimeo
Rating: 4.5/5
Link: https://play.google.com/store/apps/details?id=com.vimeo.android.videoapp&hl=en&gl=US
Also available for both iOS and Android devices, Vimeo can also be a handy solution for the creation and editing of animated titles for videos. It has a lot of features to edit not just the text in videos, but also all other elements including audio. You even get a wide selection of royalty-free music that you can add to the video and motion stickers to make your title stand out even more. But the free version of Vimeo will add a watermark to the video.

Free Download For Win 7 or later(64-bit)
Free Download For macOS 10.14 or later
Also read:
- New In 2024, How to Convert Images Into Video - Kapwing Tutorial
- New In 2024, How Can You Import and Adjust the Video Clips on Wondershare Filmora?
- New In 2024, How to Create Cooking Video Intro and End Screen for YouTube Channel?
- Gif to Svg, Svg to Gif, Convert Gif to Svg, Animated Svg to Gif, Convert Svg to Gif, Svg to Gif Converter, Svg to Gif Animation, Svg Animation to Gif, Gif to Svg Converter for 2024
- New In 2024, Are You Eager to Discover the Top-Rated and Reliable LUTs that Can Be Used in Shotcut? This Article Will Help You a Lot with This Matter
- Best Video Title Generators
- Updated Frame Blending Is a Great Way to Smooth Out Your Video Footage in Adobe Premiere Pro. Using This Technique, You Can Create a More Natural Looking Motion by Averaging Out the Frames in Your Clips
- New In 2024, Learn How to Use 3D Camera Tracking in Adobe After Effects and Take Your Skills to the Next Level
- Updated In 2024, CapCut Lenta Template How It Benefits Slow Motion Video
- New How to Remove or Mute Audio in Video with Android Phones, In 2024
- New In 2024, Google Meet Green Screen Is the Latest Addition to the Virtual Meeting App. It Is a Crucial Feature as It Allows Users to Maintain a Semblance of Privacy Through Virtual Backgrounds
- Updated In 2024, Deleting White Background in Photoshop Is Hard? No
- New Want to Convert MP4 Video To 60 FPS GIF? Read This
- Updated In 2024, Discover the Ultimate LUTs for Wondershare Filmora Uncover the Answer
- Updated 2024 Approved Discover the Best Game Recording Software for Your PC in This Developing Industry. Record Your Gameplay in Real Time and Enjoy the Benefits that Come with It
- New How to Overlay Video in Premiere Pro for 2024
- New If Youre Trying to Create a Countdown Effect, but Youre Not Sure Where to Start, Then This Post Is Going to Show You some Ways to Create a Countdown Animation for Your Videos
- 2024 Approved Are You in Search for a Step-by-Step Guide to How to Add Effects in TikTok? Here It Is. To Add some Flavor to Your TikTok Videos. Use These How to Add Effect to TikTok Recommendations
- New 2024 Approved Are You Looking for the Best Video Marketing Agency to Help Your Business Grow Exponentially with Engaging Video Content? Here Is How to Find a High-Quality Video Marketing Company that Takes Your Videos to the Next Level
- 2024 Approved How To Split Screen On Tiktok
- New 2024 Approved How to Add a Green Screen to Zoom
- New In 2024, Here Are a Number of Tools Used in the Market to Resize the Videos. We Are Going to Teach How to Resize the Video in Davinci Resolve and Fimora Wondershare. Once You Have Mastered How to Resize a Video, It Would Be as Simple as the Click
- New Movavi Video Editor Plus Review for 2024
- New Learning The Details Of How To Replace Sky in Lightroom for 2024
- New Want to Apply a Filter on Your Video Using Your iPhone or Mac? Here Are the Simple Steps to Put Add Filters on iMovie. Find Out a Better iMovie Alternative with More Filters for 2024
- In 2024, Steps To Fade Audio In Premier Pro
- What Should Be Considered to Choose A Nice GoPro for Vlogging, In 2024
- 2024 Approved Exploring the Best Slow-Motion App
- Updated 2024 Approved Track Mattes The Ultimate Guide For After Effects
- Updated How to Comment on YouTube Live Chat for 2024
- New In 2024, Explore the Potential of Slow-Motion Video for Different Industries. Read This Guide and Choose the Best Slow-Motion Camera App to Create Stunning Videos
- New Top LUTs for Sony HLG to Download for 2024
- Knowing All Ways To Slow Down Video With Adobe Premiere Pro
- Updated 2024 Approved Backup and Organize Your Footage in Minutes
- New How Much Wedding Videographer Cost
- In 2024, This Article Aim to Teach You How to Make a Night to Day Effect Video with Filmora. Follow the Steps to Figure It Out
- New 2024 Approved Best Jump Cut Editing Tricks
- How To Repair System Issues of iPhone 12? | Dr.fone
- How to identify malfunctioning hardware drivers with Windows Device Manager in Windows 11/10/7
- In 2024, Top 7 Phone Number Locators To Track Xiaomi Redmi Note 12R Location | Dr.fone
- How To Remove Passcode From Apple iPhone 15 Plus? Complete Guide
- Possible solutions to restore deleted messages from Oppo
- In 2024, The Magnificent Art of Pokemon Go Streaming On Lava Blaze 2 Pro? | Dr.fone
- Full Solutions to Fix Error Code 920 In Google Play on Oppo A58 4G | Dr.fone
- Full guide to Apple iPhone SE (2020) iCloud Bypass
- In 2024, Network Locked SIM Card Inserted On Your Sony Xperia 1 V Phone? Unlock It Now
- How to Change your Lava Yuva 2 Location on Twitter | Dr.fone
- In 2024, How to Use Google Assistant on Your Lock Screen Of Vivo Y200 Phone
- 9 Quick Fixes to Unfortunately TouchWiz has stopped Of Itel P40+ | Dr.fone
- In 2024, How To Change Oppo Find X7 Lock Screen Password?
- How to Hide/Fake Snapchat Location on Your Oppo A38 | Dr.fone
- New 2024 Approved 12 Top Stop Motion Studios Worth Recommending
- How To Transfer Data From iPhone 8 To Other iPhone 15 devices? | Dr.fone
- In 2024, Best Free Apple iPhone XS IMEI Checker
- 5 Ways to Transfer Music from Apple iPhone SE to Android | Dr.fone
- Here are Some of the Best Pokemon Discord Servers to Join On OnePlus Open | Dr.fone
- How To Install the Latest iOS/iPadOS Beta Version on Apple iPhone 11 Pro? | Dr.fone
- In 2024, Top 4 SIM Location Trackers To Easily Find Your Lost Realme Narzo 60 Pro 5G Device
- 2024 Approved Top 4 Morgan Freeman Voice Generator Tools for Voice Cloning
- How To Transfer Data From Apple iPhone 13 mini To Other iPhone 11 Pro Max devices? | Dr.fone
- In 2024, How to Mirror Apple iPhone 11 to PC via USB? | Dr.fone
- In 2024, How to Watch Hulu Outside US On Xiaomi Redmi K70E | Dr.fone
- Latest way to get Shiny Meltan Box in Pokémon Go Mystery Box On Oppo K11x | Dr.fone
- In 2024, How to Reset Apple ID and Apple Password From Apple iPhone 6s Plus
- Complete Tutorial to Use GPS Joystick to Fake GPS Location On Oppo A78 | Dr.fone
- How to Transfer Data from Motorola Edge 40 Pro to Other Android Devices? | Dr.fone
- Best 3 Itel A05s Emulator for Mac to Run Your Wanted Android Apps | Dr.fone
- How to Insert a GIF Into Powerpoint for 2024
- Fix Samsung Galaxy S24+ Android System Webview Crash 2024 Issue | Dr.fone
- In 2024, Unlocking Apple iPhone 15 Pro Passcode without a Computer | Dr.fone
- Pokemon Go No GPS Signal? Heres Every Possible Solution On Vivo Y36i | Dr.fone
- Easy steps to recover deleted data from ZTE Nubia Z60 Ultra
- Title: Guide To Using Free Luts for OBS
- Author: Morgan
- Created at : 2024-05-19 05:11:38
- Updated at : 2024-05-20 05:11:38
- Link: https://ai-video-editing.techidaily.com/guide-to-using-free-luts-for-obs/
- License: This work is licensed under CC BY-NC-SA 4.0.
