
:max_bytes(150000):strip_icc():format(webp)/6-best-parental-control-apps-of-2019-featured-c5b50932ab9c4c0fbc0757665e46b6b2.jpg)
How Did AI Video Games Act More Human Than Human?
How Did AI Video Games Act More Human Than Human?
How Did AI Video Games Act More Human Than Human?
An easy yet powerful editor
Numerous effects to choose from
Detailed tutorials provided by the official channel
The gaming world is ever-changing, with developers looking to create innovative ways to immerse players into their digital worlds. One such technology that has begun to sweep is AI in the game industry.
AI is a powerful tool in many ways to improve the gaming experience. It can make artificial intelligence in computer games more believable and add replayability and immersion to games, and we can expect to see even more impressive applications in the future.
In this article
01 [What Is AI in Gaming?](#Part 1)
02 [Why Does AI in Gaming Matter?](#Part 2)
03 [How AI Will Completely Change Video Games](#Part 3)
04 [8 Games with Incredible Artificial Intelligence](#Part 4)
05 [What AI Video Games Assets Do Filmora Have?](#Part 5)
Part 1 What Is AI in Gaming?
In simple terms, AI is a set of algorithms that allow a computer to learn and improve from experience. Although you can apply it in many ways, artificial intelligence in video games is usually helpful to create more intelligent and more believable non-player characters (NPCs).
For example, an AI system might be helpful to determine how an NPC reacts to the player’s actions. If the player tries to steal from an NPC, the AI might make the NPC angry and more likely to attack the player. Alternatively, if the player is friendly to an NPC, the AI game playing might make the NPC more likely to help the player in future interactions.
Part 2 Why Does AI in Gaming Matter?
One of the most vital aspects of AI in video games is that it can make games more believable and immersive for players. When games can convincingly simulate human-like behavior, it can be a much more enjoyable experience for gamers. AI can make NPCs seem more lifelike and make the game world feel more believable.
AI is also becoming increasingly important for creating procedural content. This is where the game generates content on its own, rather than relying on pre-made assets. For example, a game might use procedural generation to create random dungeons or quests that the player can explore. This can add a lot of replayability to a game, as the player never knows what they will encounter next.
Part 3 How AI Will Completely Change Video Games
It is not a secret that AI is changing the world as we know it. With its ability to enable computers to learn and improve from experience, AI is paving the way for a future where machines can handle more complex tasks. And nowhere is this more apparent than in the world of video gaming.
In the past, developers brought in AI primarily for simple things like making certain NPCs (non-player characters) move and act realistically. But now, artificial intelligence in video games is being used for much more complex tasks like generating procedural content and creating believable human-like behavior. This results in a new generation of AI game playing that are more immersive and playable.
Part 4 Games with Incredible Artificial Intelligence
Now, we will look into eight video games that signify why we need the best ai in video games.
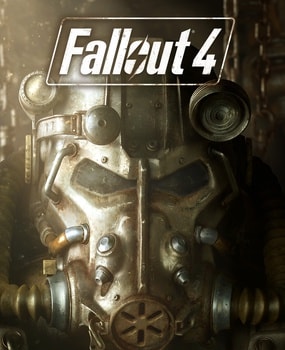
01Fallout 4
One of the most attractive examples of AI in video gaming is Fallout 4. This post-apocalyptic RPG features some of the most believable NPCs ever seen in a game. Each character is fully voiced, and they all have their unique personalities and backstories. The AI generates procedural content, meaning that the game world is always different each time you play.
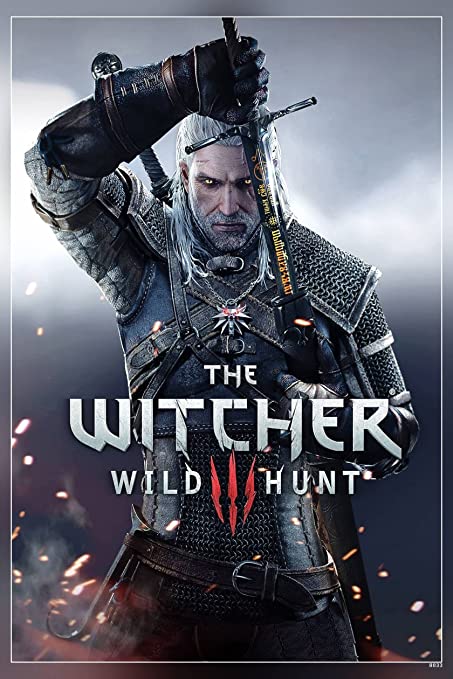
02The Witcher 3: Wild Hunt
The Witcher 3: Wild Hunt is one more great example of an AI video game. This open-world RPG features a vast array of believable NPCs, each with unique personality traits and motivations. The AI is also used to generate procedural content, resulting in a different game world every time you play.
03Grand Theft Auto V
Grand Theft Auto V is yet another example of AI being used to create believable human-like behavior. The NPCs in this play are some of the most lifelike and realistic ever seen. They react to the player’s actions in believable ways, and the AI is used to generate procedural content, resulting in a game world that is always different.

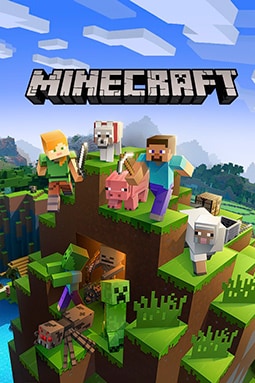
04Minecraft
Minecraft is a game that heavily uses procedural generation to create its content. The terrain and structures in the game are all generated on the fly by the AI, resulting in a different game world every time you play. What’s more, AI is also used to generate the behaviors of mobs (hostile creatures), making them more believable and lifelike.
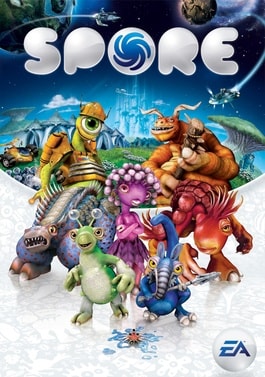
05Spore
Spore is an AI game play that is all about procedural generation. Every creature in the game is generated by AI, meaning that there are many possible creature designs. What’s more, AI is used to create creatures’ behaviors, making them more believable and lifelike.
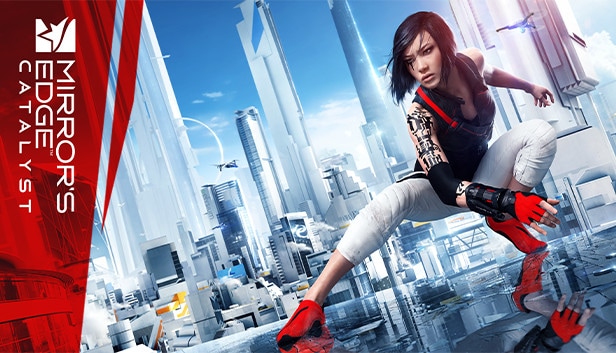
06Mirror’s Edge Catalyst
Mirror’s Edge Catalyst is a game that heavily uses AI to create its content. The levels in the game are all procedurally generated, meaning that they are different every time you play. This is made possible by the game’s AI, which produces the level layouts and obstacles on the fly.
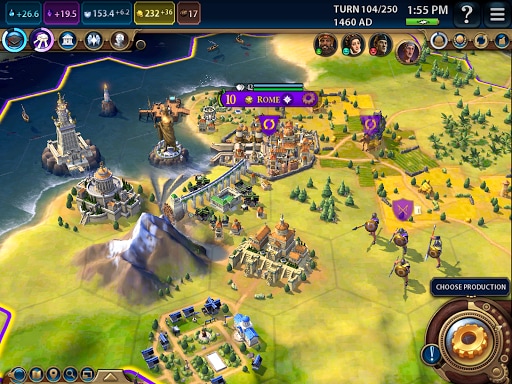
07Civilization VI
One of the most incredible examples of AI in video gaming is Civilization VI. This turn-based strategy game features some of the most believable NPCs ever seen in a game. Each character has its voice fully, and they all have unique personalities and backstories.
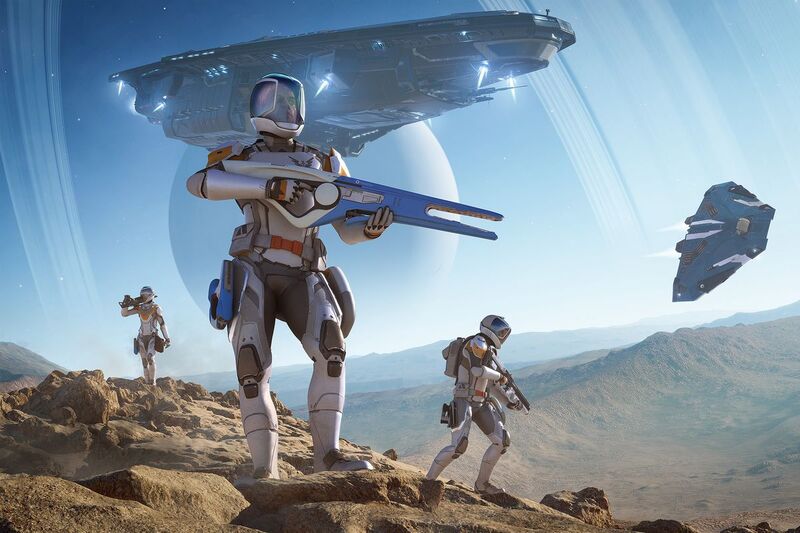
08Elite Dangerous
Elite Dangerous is a space simulation game that uses advanced AI to create believable and realistic human-like behavior. The NPCs in the game are some of the most lifelike and realistic ever seen. They react to the player’s actions in believable ways, and the AI is used to generate procedural content, resulting in a game world that is always different.
Part 5 What AI Video Games Assets Do Wondershare Filmora Video Editor Have?
With the increased use of AI in video games, most gamers have found gaming more enjoyable. However, an outstanding video editor has some assets that can significantly make AI video games better and more human. This video editor is one of the most sorted for and is called Filmora. Filmora is a great video editing software for creating stunning videos. It’s effortless to use and has various features to create professional-looking videos. It’s perfect for making videos for social media, YouTube, and other online platforms.
Its many features have a touch of artificial intelligence, making this program stand out from the other video editors and valuable for editing during ai video games creation.
Screen Recording
The Filmora screen recorder allows the user to concurrently record the screen and camera and the system and microphone audio. You can quickly record games, tutorials, YouTube videos, and other videos and then export them to YouTube, Vimeo, and other devices.
AI Portrait
The AI portrait function in Filmora video editor allows you to locate the human in your movie effortlessly and erase the background with a simple drag and click. There are also several portrait effects and AR stickers to add to your video editing enjoyment.
For Win 7 or later (64-bit)
For macOS 10.12 or later
Video Effects
Filmora customers can choose from various effects to utilize in their video editing software. It’s simple to create whatever effect you want with over 900 free effects, including drag-and-drop transitions, titles, filters, and motion components.
Do visit Wondershare Filmora exclusive website to know more about its latest upgrade and new features launch.
● Ending Thoughts →
● Thus, that was about what an ai video game is and why the characters act more like humans.
● So, as a video game lover, you can now explore the best of ai playing video games to have a personal experience of this new video gaming trend. Also, do try the Filmora software to see how you can change the looks and feel of your video game creation.
The gaming world is ever-changing, with developers looking to create innovative ways to immerse players into their digital worlds. One such technology that has begun to sweep is AI in the game industry.
AI is a powerful tool in many ways to improve the gaming experience. It can make artificial intelligence in computer games more believable and add replayability and immersion to games, and we can expect to see even more impressive applications in the future.
In this article
01 [What Is AI in Gaming?](#Part 1)
02 [Why Does AI in Gaming Matter?](#Part 2)
03 [How AI Will Completely Change Video Games](#Part 3)
04 [8 Games with Incredible Artificial Intelligence](#Part 4)
05 [What AI Video Games Assets Do Filmora Have?](#Part 5)
Part 1 What Is AI in Gaming?
In simple terms, AI is a set of algorithms that allow a computer to learn and improve from experience. Although you can apply it in many ways, artificial intelligence in video games is usually helpful to create more intelligent and more believable non-player characters (NPCs).
For example, an AI system might be helpful to determine how an NPC reacts to the player’s actions. If the player tries to steal from an NPC, the AI might make the NPC angry and more likely to attack the player. Alternatively, if the player is friendly to an NPC, the AI game playing might make the NPC more likely to help the player in future interactions.
Part 2 Why Does AI in Gaming Matter?
One of the most vital aspects of AI in video games is that it can make games more believable and immersive for players. When games can convincingly simulate human-like behavior, it can be a much more enjoyable experience for gamers. AI can make NPCs seem more lifelike and make the game world feel more believable.
AI is also becoming increasingly important for creating procedural content. This is where the game generates content on its own, rather than relying on pre-made assets. For example, a game might use procedural generation to create random dungeons or quests that the player can explore. This can add a lot of replayability to a game, as the player never knows what they will encounter next.
Part 3 How AI Will Completely Change Video Games
It is not a secret that AI is changing the world as we know it. With its ability to enable computers to learn and improve from experience, AI is paving the way for a future where machines can handle more complex tasks. And nowhere is this more apparent than in the world of video gaming.
In the past, developers brought in AI primarily for simple things like making certain NPCs (non-player characters) move and act realistically. But now, artificial intelligence in video games is being used for much more complex tasks like generating procedural content and creating believable human-like behavior. This results in a new generation of AI game playing that are more immersive and playable.
Part 4 Games with Incredible Artificial Intelligence
Now, we will look into eight video games that signify why we need the best ai in video games.
01Fallout 4
One of the most attractive examples of AI in video gaming is Fallout 4. This post-apocalyptic RPG features some of the most believable NPCs ever seen in a game. Each character is fully voiced, and they all have their unique personalities and backstories. The AI generates procedural content, meaning that the game world is always different each time you play.
02The Witcher 3: Wild Hunt
The Witcher 3: Wild Hunt is one more great example of an AI video game. This open-world RPG features a vast array of believable NPCs, each with unique personality traits and motivations. The AI is also used to generate procedural content, resulting in a different game world every time you play.
03Grand Theft Auto V
Grand Theft Auto V is yet another example of AI being used to create believable human-like behavior. The NPCs in this play are some of the most lifelike and realistic ever seen. They react to the player’s actions in believable ways, and the AI is used to generate procedural content, resulting in a game world that is always different.
04Minecraft
Minecraft is a game that heavily uses procedural generation to create its content. The terrain and structures in the game are all generated on the fly by the AI, resulting in a different game world every time you play. What’s more, AI is also used to generate the behaviors of mobs (hostile creatures), making them more believable and lifelike.
05Spore
Spore is an AI game play that is all about procedural generation. Every creature in the game is generated by AI, meaning that there are many possible creature designs. What’s more, AI is used to create creatures’ behaviors, making them more believable and lifelike.
06Mirror’s Edge Catalyst
Mirror’s Edge Catalyst is a game that heavily uses AI to create its content. The levels in the game are all procedurally generated, meaning that they are different every time you play. This is made possible by the game’s AI, which produces the level layouts and obstacles on the fly.
07Civilization VI
One of the most incredible examples of AI in video gaming is Civilization VI. This turn-based strategy game features some of the most believable NPCs ever seen in a game. Each character has its voice fully, and they all have unique personalities and backstories.
08Elite Dangerous
Elite Dangerous is a space simulation game that uses advanced AI to create believable and realistic human-like behavior. The NPCs in the game are some of the most lifelike and realistic ever seen. They react to the player’s actions in believable ways, and the AI is used to generate procedural content, resulting in a game world that is always different.
Part 5 What AI Video Games Assets Do Wondershare Filmora Video Editor Have?
With the increased use of AI in video games, most gamers have found gaming more enjoyable. However, an outstanding video editor has some assets that can significantly make AI video games better and more human. This video editor is one of the most sorted for and is called Filmora. Filmora is a great video editing software for creating stunning videos. It’s effortless to use and has various features to create professional-looking videos. It’s perfect for making videos for social media, YouTube, and other online platforms.
Its many features have a touch of artificial intelligence, making this program stand out from the other video editors and valuable for editing during ai video games creation.
Screen Recording
The Filmora screen recorder allows the user to concurrently record the screen and camera and the system and microphone audio. You can quickly record games, tutorials, YouTube videos, and other videos and then export them to YouTube, Vimeo, and other devices.
AI Portrait
The AI portrait function in Filmora video editor allows you to locate the human in your movie effortlessly and erase the background with a simple drag and click. There are also several portrait effects and AR stickers to add to your video editing enjoyment.
For Win 7 or later (64-bit)
For macOS 10.12 or later
Video Effects
Filmora customers can choose from various effects to utilize in their video editing software. It’s simple to create whatever effect you want with over 900 free effects, including drag-and-drop transitions, titles, filters, and motion components.
Do visit Wondershare Filmora exclusive website to know more about its latest upgrade and new features launch.
● Ending Thoughts →
● Thus, that was about what an ai video game is and why the characters act more like humans.
● So, as a video game lover, you can now explore the best of ai playing video games to have a personal experience of this new video gaming trend. Also, do try the Filmora software to see how you can change the looks and feel of your video game creation.
Best Ways to Add Photos to Tik Tok Video
Our globe is filled up with the talented people who are making different shades of creativity. The credit also goes to the built-in featured tools which empowers the people to show their creative ideas and present them in a better way.
In this era, the world has completely transformed and social media is playing its vital role. A few years back, we can hardly send or receive messages and can make calls from phones. But today, there are hundreds of social media platforms that are interconnected and can perform a lot more than just messaging and calls. The Tik Tok is one of them and you can easily edit your videos at the palm of our hand.

How to Add Photos to Tik Tok Video Directly
Today I am going to discuss few things about the Tik Tok including how to add pictures to the video directly. However, it is pretty simple and you can accomplish the skill of making Tik Tok videos professionally after reading this article.
So lets dive in…
Before you start editing the video or pictures, it is important to download the Tik Tok app on your device and make an account. Although, you can get access to your Tik Tok with local browser and without downloading the application.

Your pictures will be displayed automatically one by one and you can add animations, music, or voiceover, and can even add effects and transitions to the video.
. Let us get started.
1. Adding a Picture from Effects.
- Go to the bottom of the screen and press that + sign.

- Select the large red icon Camera to take short video.
- Hit the Effects tab at the left of the Record button.

- Click on the green screen.
Here you can select the different effects.
- Now you can take your selfie or take a photo and if you want to choose the photo from the album, you can add that way.
- Hit the effect shown below and you can make your picture size smaller, larger and you can also move it on the screen.

Now click on the Next button and hit the Post button.
So, that’s how you can add photos to your Tik Tok videos and can easily edit to make them eye catching.
Here you will get a few options to add photos to your pictures.
2. Adding a Picture via Uploading.
- Open the Tik Tok app and hit the “+”

- The interphase will change and you will see a large red button in the center.
- Tap that Camera button and directly take a shot.

- Tap on the Photos to select the Image you want to upload.

- Click the

- After editing the images select the Post

3. Adding a picture via Photo Template.
Here is another way to add pictures to your video that is the Photos Template. You will use the pre-designed images.
- Open the Tik Tok app and hit the “+” sign.

- Select the Templates button from the lower bottom of the screen.

- Select the desired Template from the list and it will be downloaded.
- Now select the Photos icon under the Templates icon. You will be referred to the gallery.

- Select the desired image and after complete editing hit the Post

Using Wonder Share Filmora 11.
The rising tendency toward making the Tik Tok videos has proven that filmmaking is not difficult but the emerging number of professional video editors has made it more simple. Tik Tok is the fastest growing and amazing social media platform so one should make sure to make a video that stands out from the crowd. For this, I am introducing a very professional but easy-to-use application “Wonder Share Filmora 11”.
Filmora 11 is one of the most powerful video editors and allows you to edit videos from smartphones, DSLRs, and all types of digital cameras. It provides hundreds of eye-catching visual and audio effects.

Adding a photo to the Tik Tok video.
Before you start the editing process, organize your Media Library. Most of the time our library is flooded with excess pictures and it consumes a lot of time to select the right photos. However, it is not a compulsory step but you can do it to enjoy your editing. So let’s get started!
- Open the Filmora 11 and click on the New Project.
- Import the video file and the photo you want to add. You can drag and drop the image and click on the Import button to get the image.

- Set the same Aspect Ratio and Resolution for both the video and the image.
- Drag the video and drop it into the timeline.
- Now drag the image and drop it above the video track.

In the above screenshot, you can see the image is added to the video. You can further edit it to set it in the proper position you want.
- Drag the image in the timeline and place it at the point you want.
- You can extend or cut the length of the image.
- In the same way, you can directly resize your image in the preview window.
- Drag the edge of the photo and resize it. You can also move it to adjust the placement of the image.

Besides this, you have a wide range of customizable options.
- Double click on the picture in the preview window.
- You will see the Image editing panel on the left side to edit more professionally.
- Hit on the Transform under the Basic
- You can rotate, flip, scale and change the position of the image.

- Select the compositing tab and hit the Blending Mode, you can change the color of the added image. I have selected Linear light, you can select anyone from the drop-down list.
- Here you can change the opacity of the image.

You can even further edit your image by adding Effects, Transitions, Text, overlays, filters, and many more to make it interesting and eye-catching.
- Hit the green Export button in the center of the window.
- Set the Name, Resolution, Frame Rate, Duration, and Format of the video.
- Click on the Auto Highlight and open the drop-down list.
- Click on 15s (Tik Tok) under the upload section.
- Now select the Export button.

Using Kapwing for Online.
We will use Kapwing’s online video editor to add photos to the videos and then upload them on Tik Tok. You just need to do is to have a good internet connection and a browser. You can use the Kapwing on your iPhone, Android, Windows, Tablet, etc. so let’s get started…
- Open the Kapwing App in your browser.
- Click on start editing to proceed and you will find the window below

- Click the upload tab or paste the URL to add a video.

Once you have added a video;
- Click on the upload tab to add the picture to the video.
- Here you can edit your image and hit the Publish tab.

Using BeeCut for Mac.
Bee Cut is a very powerful and easy-to-use application, especially for Mac users. However, it can be installed on iOS, Android, and Windows. Although, its interphase is simple but has many advanced features that make your video stand out. Let’s start,
- Install the Bee Cut app from the app store.
- After the download completes, hit the “Next step” and select the desired Aspect ratio for your Tik Tok video.
- Enjoy amazing editing of your Tik Tok video in this interphase shown down below.

- Once you are done with editing, hit the Export button and share your Tik Tok with family and friends.
Using Inshot for Android.
Inshot is another powerful all-in-one video editor tool. It is one of the most popular video editors among social media influencers. It provides very easy and professional tools for Tik Tok users. You can make your precious moments into an amazing video within a few minutes and a few clicks. The good thing about the app is, that it is used on your smartphone and you can edit by simply dragging and dropping. Inshot is not recommended for long videos, it experiences glitches so, and it works perfectly for the Tik Tok because it has short videos.

FAQS on Dealing with Pictures on TikTok
- How to add a Profile photo or video on Tik Tok?
- Tap on
- Hit Edit profile.
- Select Change Photo or Change Video.
- Take a Photo or Upload it from the gallery. A photo should be 20x20 pixels.
- Why can’t you upload Images on the Tik Tok?
- Don’t have a good internet
- Don’t have the latest version of the app.
- Check your Permission settings.
- How to add Text after adding Pictures on Tik Tok?
- Tap the Text at the bottom of the editing screen.
- Select the desired font, color, and background of your text.
- Select
- Tap on the text to set the position over the image.
- How do I link Google Photos to Tik Tok?
- Open the Google photos app on your device.
- Select a photo you want to share.
- Tap Share under Share to apps select Tik Tok.
- Click on Create link.
How to Add Photos to Tik Tok Video Directly
Today I am going to discuss few things about the Tik Tok including how to add pictures to the video directly. However, it is pretty simple and you can accomplish the skill of making Tik Tok videos professionally after reading this article.
So lets dive in…
Before you start editing the video or pictures, it is important to download the Tik Tok app on your device and make an account. Although, you can get access to your Tik Tok with local browser and without downloading the application.
Your pictures will be displayed automatically one by one and you can add animations, music, or voiceover, and can even add effects and transitions to the video.
. Let us get started.
1. Adding a Picture from Effects.
- Go to the bottom of the screen and press that + sign.
- Select the large red icon Camera to take short video.
- Hit the Effects tab at the left of the Record button.
- Click on the green screen.
Here you can select the different effects.
- Now you can take your selfie or take a photo and if you want to choose the photo from the album, you can add that way.
- Hit the effect shown below and you can make your picture size smaller, larger and you can also move it on the screen.
Now click on the Next button and hit the Post button.
So, that’s how you can add photos to your Tik Tok videos and can easily edit to make them eye catching.
Here you will get a few options to add photos to your pictures.
2. Adding a Picture via Uploading.
- Open the Tik Tok app and hit the “+”
- The interphase will change and you will see a large red button in the center.
- Tap that Camera button and directly take a shot.
- Tap on the Photos to select the Image you want to upload.
- Click the
- After editing the images select the Post
3. Adding a picture via Photo Template.
Here is another way to add pictures to your video that is the Photos Template. You will use the pre-designed images.
- Open the Tik Tok app and hit the “+” sign.
- Select the Templates button from the lower bottom of the screen.
- Select the desired Template from the list and it will be downloaded.
- Now select the Photos icon under the Templates icon. You will be referred to the gallery.
- Select the desired image and after complete editing hit the Post
Using Wonder Share Filmora 11.
The rising tendency toward making the Tik Tok videos has proven that filmmaking is not difficult but the emerging number of professional video editors has made it more simple. Tik Tok is the fastest growing and amazing social media platform so one should make sure to make a video that stands out from the crowd. For this, I am introducing a very professional but easy-to-use application “Wonder Share Filmora 11”.
Filmora 11 is one of the most powerful video editors and allows you to edit videos from smartphones, DSLRs, and all types of digital cameras. It provides hundreds of eye-catching visual and audio effects.
Adding a photo to the Tik Tok video.
Before you start the editing process, organize your Media Library. Most of the time our library is flooded with excess pictures and it consumes a lot of time to select the right photos. However, it is not a compulsory step but you can do it to enjoy your editing. So let’s get started!
- Open the Filmora 11 and click on the New Project.
- Import the video file and the photo you want to add. You can drag and drop the image and click on the Import button to get the image.
- Set the same Aspect Ratio and Resolution for both the video and the image.
- Drag the video and drop it into the timeline.
- Now drag the image and drop it above the video track.
In the above screenshot, you can see the image is added to the video. You can further edit it to set it in the proper position you want.
- Drag the image in the timeline and place it at the point you want.
- You can extend or cut the length of the image.
- In the same way, you can directly resize your image in the preview window.
- Drag the edge of the photo and resize it. You can also move it to adjust the placement of the image.
Besides this, you have a wide range of customizable options.
- Double click on the picture in the preview window.
- You will see the Image editing panel on the left side to edit more professionally.
- Hit on the Transform under the Basic
- You can rotate, flip, scale and change the position of the image.
- Select the compositing tab and hit the Blending Mode, you can change the color of the added image. I have selected Linear light, you can select anyone from the drop-down list.
- Here you can change the opacity of the image.
You can even further edit your image by adding Effects, Transitions, Text, overlays, filters, and many more to make it interesting and eye-catching.
- Hit the green Export button in the center of the window.
- Set the Name, Resolution, Frame Rate, Duration, and Format of the video.
- Click on the Auto Highlight and open the drop-down list.
- Click on 15s (Tik Tok) under the upload section.
- Now select the Export button.
Using Kapwing for Online.
We will use Kapwing’s online video editor to add photos to the videos and then upload them on Tik Tok. You just need to do is to have a good internet connection and a browser. You can use the Kapwing on your iPhone, Android, Windows, Tablet, etc. so let’s get started…
- Open the Kapwing App in your browser.
- Click on start editing to proceed and you will find the window below
- Click the upload tab or paste the URL to add a video.
Once you have added a video;
- Click on the upload tab to add the picture to the video.
- Here you can edit your image and hit the Publish tab.
Using BeeCut for Mac.
Bee Cut is a very powerful and easy-to-use application, especially for Mac users. However, it can be installed on iOS, Android, and Windows. Although, its interphase is simple but has many advanced features that make your video stand out. Let’s start,
- Install the Bee Cut app from the app store.
- After the download completes, hit the “Next step” and select the desired Aspect ratio for your Tik Tok video.
- Enjoy amazing editing of your Tik Tok video in this interphase shown down below.
- Once you are done with editing, hit the Export button and share your Tik Tok with family and friends.
Using Inshot for Android.
Inshot is another powerful all-in-one video editor tool. It is one of the most popular video editors among social media influencers. It provides very easy and professional tools for Tik Tok users. You can make your precious moments into an amazing video within a few minutes and a few clicks. The good thing about the app is, that it is used on your smartphone and you can edit by simply dragging and dropping. Inshot is not recommended for long videos, it experiences glitches so, and it works perfectly for the Tik Tok because it has short videos.
FAQS on Dealing with Pictures on TikTok
- How to add a Profile photo or video on Tik Tok?
- Tap on
- Hit Edit profile.
- Select Change Photo or Change Video.
- Take a Photo or Upload it from the gallery. A photo should be 20x20 pixels.
- Why can’t you upload Images on the Tik Tok?
- Don’t have a good internet
- Don’t have the latest version of the app.
- Check your Permission settings.
- How to add Text after adding Pictures on Tik Tok?
- Tap the Text at the bottom of the editing screen.
- Select the desired font, color, and background of your text.
- Select
- Tap on the text to set the position over the image.
- How do I link Google Photos to Tik Tok?
- Open the Google photos app on your device.
- Select a photo you want to share.
- Tap Share under Share to apps select Tik Tok.
- Click on Create link.
Top 8 Video Editor with Useful Masking
Create High-Quality Video - Wondershare Filmora
An easy and powerful YouTube video editor
Numerous video and audio effects to choose from
Detailed tutorials are provided by the official channel
Masking video editing is the process of hiding or obscuring certain elements in a video clip. This can be done for aesthetic purposes and is often used to remove unwanted objects or blemishes from the footage. Masking can be accomplished using a variety of methods, including rotoscoping, chroma-keying, and motion tracking.
In this article
02 Top 8 Video Editor with Useful Masking
What is Masking?
Masks are a feature of editing software that allows you to choose a particular portion of the video or utilize video overlays to hide, duplicate, reveal, or change your footage. The mask is the portion of the video you’ve chosen to pick, either with a template or a custom frame. The mask then becomes isolated, and you may modify it as desired to produce your intended effect.
Masks may be used to do some fantastic things with your videos. You can clone people or objects, overlay several pictures, create glitch effects, blur faces out, etc. Masks add a lot of excitement and color to videos, making them more dynamic, enjoyable to watch, and professional. It can draw attention - and keep it!
Different types of masking
There are three primary types of masking: rotoscoping, chroma-keying, and motion tracking.
Rotoscoping: Rotoscoping is the process of manually tracing an object in a video frame by frame to create a mask. This can be a time-consuming process, but it allows for very precise control over the masked area.
Chroma-keying: Chroma-keying is a type of masking that makes use of color to isolate a particular area of the frame. For example, this is often used to remove a green or blue screen from the footage, but can also be used to isolate other colors.
Motion tracking: Motion tracking is a masking technique that allows you to track the movement of an object in a video clip. This is often used to add special effects, such as explosions, to a video.

Top 8 Video Editor with Useful Masking

Here is the list of Top 8 Video Editors with useful masking Features
1. Adobe Premiere Pro
Adobe Premiere Pro is a professional video editing software with a wide range of features and precise masking controls. It allows you to create custom masks or use the built-in rotoscope tool to isolate objects in your footage quickly.

How to Create a Mask in Premiere Pro
Do you understand how to construct a mask in Adobe Premiere? Shape tools and pen tools may be used to make the Adobe premiere mask.
By Using Shape Tools:
Select the shape tool you’d like to utilize from the Tools panel.
Then, create a mask by drawing a shape on the video clip in the Timeline.
By Using Pen Tools:
Click the pen tool icon in the Tools panel.
Click and drag to draw a path around the object you wish to isolate.
After drawing your path, click the “Mask” button in the Tools panel.
2. Final Cut Pro X
Final Cut Pro X is a proficient video editing software with powerful masking tools. It allows you to create custom masks or isolate objects in your footage.

How to Create a Mask in Final Cut Pro X
With little effort, the Shape Mask tool allows you to make a mask in any shape on the continuum, ranging from an ellipse to a rectangle.
The Shape Mask is a simple mask that may be changed to editable control points in order to create complex bespoke masks (converting it into a Draw Mask).
- Open the Final Cut Pro project and select the clip you wish to mask.
Note: You can’t composite a clip over another one while using isolated clips. Final Cut Pro has this option, which you may find in the Comping window. - To make a clip transparent, select it in the timeline and place the play head at a point within the video clip that shows the portion you wish to make transparent.
- Click the Effects button in the top-right corner of the timeline (or press Command-5) to display the Effects browser.
- Select the Shape Mask effect in the Effects Browser.
Tip: Type “shape” in the Effects browser search bar to quickly locate the Shape Mask effect.
To apply the masking effect to the clip in the timeline, choose one of the following options:
- Drag the effect to the timeline clip.
- Double-click the effect thumbnail in the Effects browser to apply it.
- Use the on-screen controls to modify the shape mask if necessary.
The controls for the Shape Mask appear in the viewer, overlaid on top of the video image. In addition, the Effects area of the Video inspector displays the Shape Mask options. By default, the Shape Mask is set to a partially feathered ellipse shape in the center of the frame.
3. Wondershare Filmora
Filmora 11 is an easy to use video editor with useful masking features. It provides various of masking presets to make masking easy for you. If you are looking for Green Screen, Filmora also covers you. Its Chroma Key allows you to remove the background of almost any color.
Masking in Filmora 11
Filmora 11 has been modified to allow for the masking of keyframes. First, double-click the clip on your timeline to open a settings window in the library. Then, in the videos area, select the “Mask” option. Multiple forms may be selected here.
We picked the ‘Star’ form for this project. After selecting it, you may drag the shape to your clip in the preview area.
Scrolling down in the Windows category will take you to more options where you can change the scale, position, width, height, and radius of your chosen shape. You may also lessen the strength of the form and rotate it to make it blend in better with the other elements you’re trying to hide in your window.
To add the keyframe, simply hit the “Add” button after completing it. You may then modify the mask’s form to match the added frame.
For Win 7 or later (64-bit)
For macOS 10.12 or later
4. Avid Media Composer
Avid Media Composer has a comprehensive masking feature for video editors of different levels. You can either use the built-in masking tools or make your own one.

Masking in Avid Media Composer
In the Masking Effect window, you can choose to either create a new mask or use an existing one. First, select the “Create Mask” option and then click on the “Draw Mask” button to create a new mask.
This will open up the Draw Mask window, where you can draw your mask using the various tools provided. To apply the mask, simply click the “Apply” button.
If you want to use an existing mask, select the “Use Mask” option and then choose the mask you want to use from the drop-down menu.
5. Sony Vegas Pro
Sony Vegas Pro is a professional video editing software with robust masking tools. The interface of the editor may looks complicated for beginners, yet once you get familiar with it, you will be amazed by what you can achieve with the Vegas Pro.

Masking in Sony Vegas Pro
Step 1: Drag the clip from the Explorer or Project Media windows and drop it on the timeline. Then, look for another video that is quite distinct from the first.
Step 2: Drag it to the timeline below the first video event. A new track will be created. Place the original event directly beneath the video occurrence.
The Video Preview window does not display the second video because it is covered by the first video, which resembles one photo sitting on top of another in a stack. So to view the lower clip, we’ll need to add a mask.
6. Magix Movie Edit Pro
Magix Movie Edit Pro is another video editor that is great for adding masks to your video. It is famous for its ease-of-learn and stable rendering. When it comes to masking, it is also quite powerful.

Masking in Magix Movie Edit Pro
They let you apply special effects to only certain parts of a video. You may dramatically improve the aspect of your movies with this Magix Movie Edit Pro Plus feature.
When you apply color effects to the software’s template, it appears that you can only use color effects.
To add additional effects to specific portions of the shot, simply import an image and apply the Alpha Mask property from the Chroma Key menu. Then you must duplicate the video section and place it on a lower track, while keeping the alpha mask picture in between the two videos (click the graphic above for a visual guide).
7. Studio
Studio is a pro-level video editing software. It is preloaded with pro-caliber tool and premium effects to help you create the videos you want. We will show you how to apply masking in Studio in the following paragraphs.

Masking in Studio
Select the clip you want to overlay your media on, then click the ‘Mask’ button on the editing toolbar. After that, open the mask creation window by clicking ‘Create Mask.
First, click “Create Panel” to create a video mask panel.
To make a panel, use the panel of tools on the left side of the preview window. They’ll only be shown in your video when you add assets later if they’re inside this panel. Keep in mind that you may modify the size and placement of your asset within the panel and the panel itself; therefore, you might need to.
To access the media selection possibilities, click on the ‘Asset’ tab of the mask creation window. To discover the picture or video you want to include in your panel, go through your imported files by selecting ‘Select media.’ After that, select the media to be included in your panel video mask and hit ‘Apply.’
Use the left-hand slider or the resizing box in the preview window on the right to change the size and placement of your media in your panel video mask.
To adjust the 3D position of your panel video mask, go to the ‘3D’ tab of the mask creation window.
8. CyberLink PowerDirector
CyberLink PowerDirector has recently enhanced its mask & blend feature to help you create artistic scenes. If you are interested in the feature, you can try it out.

Masking in CyberLink PowerDirector
Drag and drop a photo from the media room into track 2 of your timeline, then drag the background image into track 1.
Then, go to the Quick Settings menu (press the Menu button at the bottom of your screen), select Cloud Print from the drop-down menu, and then select your photo. Then open up the design interface by selecting Mask Designer from the drop-down menu.
You may select from a variety of templates in the Mask Designer. If you want to make your own mask shape, the Mask Designer has three alternatives for you to create new mask types.
Create an image mask: You may use any picture or video, and it will be resized to fit the shape.
Create a text mask: Enter the text you’d like to appear in your photo. Then, go to the left side of the panel under Font/Paragraph on the left side for font style, size, and other options. To alter the text mask itself, go to the preview window and resize it on the left panel.
Conclusion
● Maybe you want to add a picture-in-picture effect, or maybe you want to replace the background with a new image. Whatever the reason, it’s easy to do with most video editing software. We’ve shown you how to mask videos in eight different editors in this article. So now you can get started creating your own custom videos!
Masking video editing is the process of hiding or obscuring certain elements in a video clip. This can be done for aesthetic purposes and is often used to remove unwanted objects or blemishes from the footage. Masking can be accomplished using a variety of methods, including rotoscoping, chroma-keying, and motion tracking.
In this article
02 Top 8 Video Editor with Useful Masking
What is Masking?
Masks are a feature of editing software that allows you to choose a particular portion of the video or utilize video overlays to hide, duplicate, reveal, or change your footage. The mask is the portion of the video you’ve chosen to pick, either with a template or a custom frame. The mask then becomes isolated, and you may modify it as desired to produce your intended effect.
Masks may be used to do some fantastic things with your videos. You can clone people or objects, overlay several pictures, create glitch effects, blur faces out, etc. Masks add a lot of excitement and color to videos, making them more dynamic, enjoyable to watch, and professional. It can draw attention - and keep it!
Different types of masking
There are three primary types of masking: rotoscoping, chroma-keying, and motion tracking.
Rotoscoping: Rotoscoping is the process of manually tracing an object in a video frame by frame to create a mask. This can be a time-consuming process, but it allows for very precise control over the masked area.
Chroma-keying: Chroma-keying is a type of masking that makes use of color to isolate a particular area of the frame. For example, this is often used to remove a green or blue screen from the footage, but can also be used to isolate other colors.
Motion tracking: Motion tracking is a masking technique that allows you to track the movement of an object in a video clip. This is often used to add special effects, such as explosions, to a video.
Top 8 Video Editor with Useful Masking
Here is the list of Top 8 Video Editors with useful masking Features
1. Adobe Premiere Pro
Adobe Premiere Pro is a professional video editing software with a wide range of features and precise masking controls. It allows you to create custom masks or use the built-in rotoscope tool to isolate objects in your footage quickly.
How to Create a Mask in Premiere Pro
Do you understand how to construct a mask in Adobe Premiere? Shape tools and pen tools may be used to make the Adobe premiere mask.
By Using Shape Tools:
Select the shape tool you’d like to utilize from the Tools panel.
Then, create a mask by drawing a shape on the video clip in the Timeline.
By Using Pen Tools:
Click the pen tool icon in the Tools panel.
Click and drag to draw a path around the object you wish to isolate.
After drawing your path, click the “Mask” button in the Tools panel.
2. Final Cut Pro X
Final Cut Pro X is a proficient video editing software with powerful masking tools. It allows you to create custom masks or isolate objects in your footage.
How to Create a Mask in Final Cut Pro X
With little effort, the Shape Mask tool allows you to make a mask in any shape on the continuum, ranging from an ellipse to a rectangle.
The Shape Mask is a simple mask that may be changed to editable control points in order to create complex bespoke masks (converting it into a Draw Mask).
- Open the Final Cut Pro project and select the clip you wish to mask.
Note: You can’t composite a clip over another one while using isolated clips. Final Cut Pro has this option, which you may find in the Comping window. - To make a clip transparent, select it in the timeline and place the play head at a point within the video clip that shows the portion you wish to make transparent.
- Click the Effects button in the top-right corner of the timeline (or press Command-5) to display the Effects browser.
- Select the Shape Mask effect in the Effects Browser.
Tip: Type “shape” in the Effects browser search bar to quickly locate the Shape Mask effect.
To apply the masking effect to the clip in the timeline, choose one of the following options:
- Drag the effect to the timeline clip.
- Double-click the effect thumbnail in the Effects browser to apply it.
- Use the on-screen controls to modify the shape mask if necessary.
The controls for the Shape Mask appear in the viewer, overlaid on top of the video image. In addition, the Effects area of the Video inspector displays the Shape Mask options. By default, the Shape Mask is set to a partially feathered ellipse shape in the center of the frame.
3. Wondershare Filmora
Filmora 11 is an easy to use video editor with useful masking features. It provides various of masking presets to make masking easy for you. If you are looking for Green Screen, Filmora also covers you. Its Chroma Key allows you to remove the background of almost any color.
Masking in Filmora 11
Filmora 11 has been modified to allow for the masking of keyframes. First, double-click the clip on your timeline to open a settings window in the library. Then, in the videos area, select the “Mask” option. Multiple forms may be selected here.
We picked the ‘Star’ form for this project. After selecting it, you may drag the shape to your clip in the preview area.
Scrolling down in the Windows category will take you to more options where you can change the scale, position, width, height, and radius of your chosen shape. You may also lessen the strength of the form and rotate it to make it blend in better with the other elements you’re trying to hide in your window.
To add the keyframe, simply hit the “Add” button after completing it. You may then modify the mask’s form to match the added frame.
For Win 7 or later (64-bit)
For macOS 10.12 or later
4. Avid Media Composer
Avid Media Composer has a comprehensive masking feature for video editors of different levels. You can either use the built-in masking tools or make your own one.
Masking in Avid Media Composer
In the Masking Effect window, you can choose to either create a new mask or use an existing one. First, select the “Create Mask” option and then click on the “Draw Mask” button to create a new mask.
This will open up the Draw Mask window, where you can draw your mask using the various tools provided. To apply the mask, simply click the “Apply” button.
If you want to use an existing mask, select the “Use Mask” option and then choose the mask you want to use from the drop-down menu.
5. Sony Vegas Pro
Sony Vegas Pro is a professional video editing software with robust masking tools. The interface of the editor may looks complicated for beginners, yet once you get familiar with it, you will be amazed by what you can achieve with the Vegas Pro.
Masking in Sony Vegas Pro
Step 1: Drag the clip from the Explorer or Project Media windows and drop it on the timeline. Then, look for another video that is quite distinct from the first.
Step 2: Drag it to the timeline below the first video event. A new track will be created. Place the original event directly beneath the video occurrence.
The Video Preview window does not display the second video because it is covered by the first video, which resembles one photo sitting on top of another in a stack. So to view the lower clip, we’ll need to add a mask.
6. Magix Movie Edit Pro
Magix Movie Edit Pro is another video editor that is great for adding masks to your video. It is famous for its ease-of-learn and stable rendering. When it comes to masking, it is also quite powerful.
Masking in Magix Movie Edit Pro
They let you apply special effects to only certain parts of a video. You may dramatically improve the aspect of your movies with this Magix Movie Edit Pro Plus feature.
When you apply color effects to the software’s template, it appears that you can only use color effects.
To add additional effects to specific portions of the shot, simply import an image and apply the Alpha Mask property from the Chroma Key menu. Then you must duplicate the video section and place it on a lower track, while keeping the alpha mask picture in between the two videos (click the graphic above for a visual guide).
7. Studio
Studio is a pro-level video editing software. It is preloaded with pro-caliber tool and premium effects to help you create the videos you want. We will show you how to apply masking in Studio in the following paragraphs.
Masking in Studio
Select the clip you want to overlay your media on, then click the ‘Mask’ button on the editing toolbar. After that, open the mask creation window by clicking ‘Create Mask.
First, click “Create Panel” to create a video mask panel.
To make a panel, use the panel of tools on the left side of the preview window. They’ll only be shown in your video when you add assets later if they’re inside this panel. Keep in mind that you may modify the size and placement of your asset within the panel and the panel itself; therefore, you might need to.
To access the media selection possibilities, click on the ‘Asset’ tab of the mask creation window. To discover the picture or video you want to include in your panel, go through your imported files by selecting ‘Select media.’ After that, select the media to be included in your panel video mask and hit ‘Apply.’
Use the left-hand slider or the resizing box in the preview window on the right to change the size and placement of your media in your panel video mask.
To adjust the 3D position of your panel video mask, go to the ‘3D’ tab of the mask creation window.
8. CyberLink PowerDirector
CyberLink PowerDirector has recently enhanced its mask & blend feature to help you create artistic scenes. If you are interested in the feature, you can try it out.
Masking in CyberLink PowerDirector
Drag and drop a photo from the media room into track 2 of your timeline, then drag the background image into track 1.
Then, go to the Quick Settings menu (press the Menu button at the bottom of your screen), select Cloud Print from the drop-down menu, and then select your photo. Then open up the design interface by selecting Mask Designer from the drop-down menu.
You may select from a variety of templates in the Mask Designer. If you want to make your own mask shape, the Mask Designer has three alternatives for you to create new mask types.
Create an image mask: You may use any picture or video, and it will be resized to fit the shape.
Create a text mask: Enter the text you’d like to appear in your photo. Then, go to the left side of the panel under Font/Paragraph on the left side for font style, size, and other options. To alter the text mask itself, go to the preview window and resize it on the left panel.
Conclusion
● Maybe you want to add a picture-in-picture effect, or maybe you want to replace the background with a new image. Whatever the reason, it’s easy to do with most video editing software. We’ve shown you how to mask videos in eight different editors in this article. So now you can get started creating your own custom videos!
Finest Approach to Slow Down a Video: CapCut All-in-One Video Editor
Since the slow-motion trend captured everyone’s attention, it never went out of fashion. Keeping this in view, many content creators followed the trend and created slo-mos. In filmmaking, slow motion assisted in emphasizing high-action scenes and details. Many tools and software like Adobe After Effects or Adobe Premiere Pro can do this.
Smartphone video editors were introduced to enhance the application of slow motion. One of these editors is CapCut , a multifunctional video editor capable of slo-mo creation. This article will focus on how to do slow-mo in CapCut. With tools brief review, you can find the detailed guide on the CapCut slow-mo effect . Along with learning how to do some in CapCut, we’ll look into its alternative.
Slow Motion Video Maker Slow your video’s speed with better control of your keyframes to create unique cinematic effects!
Make A Slow Motion Video Make A Slow Motion Video More Features

Part 1: CapCut Video Editor: An Exceptional Mobile App for Video Editing
CapCut is an editing application that caters to the needs of both Android and iPhone users. Whether you are working as a seasoned editor or a team member, it assists all. It harbors numerous video editing tools like the CapCut slow-motion effect. Moreover, users can also access keyframe editor, effects and filters, stock videos, and more.

The tool offers a sleek user interface with cutting-edge AI technology for automated editing. The interface looks artistic and organized for accessible editing. Along with video editing, users can perform audio, text, and image editing. You can access its Resource collection on its site, which is full of tips and tutorials. To give you a broader vision of CapCut slow-mo effect, here are some of its features:
- Video Filters and Effects: CapCut has a free collection of effects and filters to enhance your footage. The video effects and filters add uniqueness and hide any irregularities in videos. The collection keeps updating, and you can use Business, Ads, and other categories.
- Stock Videos: Use CapCut’s free stock media instead of roaming through the internet. If you must show your abilities as an editor, then try its royalty-free videos. These videos are editable, and you can apply multiple pre-installed animations and stickers to them.
- Keyframe Animation: Although CapCut offers a range of stock animations, you can create one. With its keyframe functioning, users can create custom animations. It offers custom settings like scale, position, opacity, and more adjustments.
- Background Remover: If you want to erase messy backgrounds and replace them, CapCut can assist. Its background remover eliminates video backgrounds with accuracy. Moreover, you can replace them with solid or gradient colors, images, and videos.
- Video Upscaler: This tool is available online and enhances video resolution up to 4K. The tool is compatible with diverse video contexts and gives professional outcomes. The tool is backed by AI, and hence, you just need to upload the video for upscaling.
Part 2: How to Create a Slow Mo on CapCut? A Guide
There are two seamless methods of creating slow-mo on CapCut via “Normal” and “Curve” options. The normal method involves slowing down videos via basic playback speed alteration. However, the Curve method involves multiple speed templates for this. If you do not find an expected speed template, you can utilize the “Custom” option. Following is the procedural guide to the CapCut slow-mo effect:
Step 1
After downloading and launching CapCut on your device, access its main menu. From the main menu, click the “New Project” option and upload a video.

Step 2
Once you have added the video, navigate towards the toolbar at the bottom. From there, locate and select the “Edit” option.

Step 3
From the appearing options, select the “Speed” option for the CapCut slow-mo effect.

Step 4
In the speed display, adjust the position of the slider to add the slo-mo effect. Further, go to the “Normal” section to start speed manipulation.

Step 5
Drag the playback speed slider toward the left side of the screen. This will add a slow-mo effect and will increase the video’s duration. In this section, you can also expand the “Make it smoother” option to enhance the quality. Moreover, you can also enable the “Pitch” option to maintain audio quality. Afterward, click the “ü” icon at the bottom right corner to finalize the slo-mo effect.

Part 3: CapCut Slow Mo Alternative: Wondershare Filmora for Smartphone Users
After seeing how to slow down videos on CapCut, you must think that it is so easy. However, there is an alternative editor that offers a minimal interface with similar qualities. Wondershare Filmora is a professional slow-motion creator catered to your needs. Whether you are skilled or just beginning your journey, it can assist you.
Using this CapCut slow-motion video has its benefits, as it offers multiple speed change options. You can change video speed using Normal playback speed or speed “Curve” alteration. In this section, we’ll teach you how to create a slow motion in Filmora. We are going to use the Curve technique to manipulate speed professionally.
Step-by-Step Guide to Slow Down Video in Filmora App
You can find multiple speed templates here to craft a cinematic-level slow motion. By utilizing the Custom speed setting options, this effect is possible. To fashion professional-grade and artistic slow motion in Filmora, follow these steps:
Step 1Import Videos After Creating a New Project
Download the Filmora app from the Play Store or App Store and launch it. Then, click the “New Project” tab and import a video from the device gallery.

Step 2Access the Speed Curve Option
After importing the video, navigate towards the timeline panel and select the video. From the options appearing in the bar at the bottom, select “Speed.” In the speed section, select the “Curve” section to access speed settings.

Step 3Adjust the Speed Curve Settings
From the appearing options, click the “Customize” option and start editing. To create the slo-mo effect, drag the slider in the downward direction. If you notice, the slider points are distant from each other. It is to edit videos and slow down videos at different durations. Once you are done editing in this CapCut slow-mo effect alternative, hit “Export.”

Bonus Part: Edit Your Slow Mo Video on Desktop with Filmora Desktop
No doubt Wondershare Filmora offers precise editing features compared to other apps. However, skilled and professional editors just prefer the desktop version to bring precision. In addition, there is an optical flow option and an extensive timeline panel. Both these features ensure professional outcomes and a smooth slow-motion effect.
Wondershare Filmora is a powerful alternative to CapCut slow-motion download. The software has a range of video editing features that open unlimited editing opportunities. With its various effects and filters, you can seize the audience’s attention. In addition, the software is compatible with Linux and macOS devices for diversity.
Free Download For Win 7 or later(64-bit)
Free Download For macOS 10.14 or later
Step-by-Step Guide to Create Slow Motion in Filmora for Desktop
In this method, we’ll use Filmora’s Uniform Speed functionality to generate a slow-motion video. This feature uses a simple speed slider to enhance or decelerate video speed. Find the guide to Filmora’s Uniform Speed feature attached below:
Step 1Access the Speed Tab to Start Editing
After opening a project in Filmora, select the video in the timeline and access the settings panel. From there, go to the “Speed” > “Uniform Speed” option and change the slider’s position. By dragging it towards the left side, you can add a slow-motion effect.

Step 2Add Optical Flow Effect
To add a layer of smoothness to your slow-motion video, access “AI Frame Interpolation.” You can find this option at the bottom of the Uniform Speed tab. Expand this option and select the “Optical Flow” option.

Step 3Activate Rendering and Export Video
To analyze the outcome of activating optical flow, navigate towards the timeline panel. From the given options, click on the “Render Preview” icon and wait for its completion. Once the rendering is complete, click the “Export” button after the preview.

Video Editing Features of Filmora
CapCut and Wondershare Filmora both possess AI powers to ensure seamless video creation. However, Filmora offers more video editing features, and all of them offer customization. The interface is just perfect for every professional or non-professional. With its accessible interface, you must try the following video editing tools:
1. Screen Recorder
For the seamless generation of tutorials and ‘How to” videos, this editor offers a screen recorder. The recorder is embedded with custom settings to cater to each user’s requirements. You can accommodate screen resolution, microphone settings, and cam settings with it.
2. Keyframing
Transform your illustrations into reality using Filmora’s keyframe editing feature. You can add keyframes at different points in the timeline to adjust the movements. There are custom settings like position, scale, opacity, color, and more for each keyframe.
3. Split Screen
Make your videos happening and captivating simultaneously with Filmora’s split screen option. This allows you to add distinct videos and auto-adjust them at different split screens. You can also enable manual visual, audio, and AI editing for each split video.
4. Assets Backup & Sync
Why worry about finishing a project at once when you can edit it later with Filmora? With its cloud backup option, you can start editing a video where you left off. In addition, the tool also offers synchronization across devices. This means you can access your videos, downloaded assets, and other storage data with a simple login.
5. AI Text-Based Editing
As discussed earlier, the AI algorithms allow you to edit with full efficiency. This feature of Filmora enhances productivity via text-to-speech function. It creates captions out of a video and allows you to seamlessly cut videos by removing text.
Conclusion
In conclusion, this article considered how to do slow-mo in CapCut. In addition, we saw how you can create a slow-motion video on a smartphone using CapCut. During times that demand the creation of sophisticated slow-motion content, we suggest Filmora. This editing software offers a myriad of editing tools and techniques, facilitating the creation and adjustment of slow motion.
Make A Slow Motion Video Make A Slow Motion Video More Features
Part 1: CapCut Video Editor: An Exceptional Mobile App for Video Editing
CapCut is an editing application that caters to the needs of both Android and iPhone users. Whether you are working as a seasoned editor or a team member, it assists all. It harbors numerous video editing tools like the CapCut slow-motion effect. Moreover, users can also access keyframe editor, effects and filters, stock videos, and more.
The tool offers a sleek user interface with cutting-edge AI technology for automated editing. The interface looks artistic and organized for accessible editing. Along with video editing, users can perform audio, text, and image editing. You can access its Resource collection on its site, which is full of tips and tutorials. To give you a broader vision of CapCut slow-mo effect, here are some of its features:
- Video Filters and Effects: CapCut has a free collection of effects and filters to enhance your footage. The video effects and filters add uniqueness and hide any irregularities in videos. The collection keeps updating, and you can use Business, Ads, and other categories.
- Stock Videos: Use CapCut’s free stock media instead of roaming through the internet. If you must show your abilities as an editor, then try its royalty-free videos. These videos are editable, and you can apply multiple pre-installed animations and stickers to them.
- Keyframe Animation: Although CapCut offers a range of stock animations, you can create one. With its keyframe functioning, users can create custom animations. It offers custom settings like scale, position, opacity, and more adjustments.
- Background Remover: If you want to erase messy backgrounds and replace them, CapCut can assist. Its background remover eliminates video backgrounds with accuracy. Moreover, you can replace them with solid or gradient colors, images, and videos.
- Video Upscaler: This tool is available online and enhances video resolution up to 4K. The tool is compatible with diverse video contexts and gives professional outcomes. The tool is backed by AI, and hence, you just need to upload the video for upscaling.
Part 2: How to Create a Slow Mo on CapCut? A Guide
There are two seamless methods of creating slow-mo on CapCut via “Normal” and “Curve” options. The normal method involves slowing down videos via basic playback speed alteration. However, the Curve method involves multiple speed templates for this. If you do not find an expected speed template, you can utilize the “Custom” option. Following is the procedural guide to the CapCut slow-mo effect:
Step 1
After downloading and launching CapCut on your device, access its main menu. From the main menu, click the “New Project” option and upload a video.
Step 2
Once you have added the video, navigate towards the toolbar at the bottom. From there, locate and select the “Edit” option.
Step 3
From the appearing options, select the “Speed” option for the CapCut slow-mo effect.
Step 4
In the speed display, adjust the position of the slider to add the slo-mo effect. Further, go to the “Normal” section to start speed manipulation.
Step 5
Drag the playback speed slider toward the left side of the screen. This will add a slow-mo effect and will increase the video’s duration. In this section, you can also expand the “Make it smoother” option to enhance the quality. Moreover, you can also enable the “Pitch” option to maintain audio quality. Afterward, click the “ü” icon at the bottom right corner to finalize the slo-mo effect.
Part 3: CapCut Slow Mo Alternative: Wondershare Filmora for Smartphone Users
After seeing how to slow down videos on CapCut, you must think that it is so easy. However, there is an alternative editor that offers a minimal interface with similar qualities. Wondershare Filmora is a professional slow-motion creator catered to your needs. Whether you are skilled or just beginning your journey, it can assist you.
Using this CapCut slow-motion video has its benefits, as it offers multiple speed change options. You can change video speed using Normal playback speed or speed “Curve” alteration. In this section, we’ll teach you how to create a slow motion in Filmora. We are going to use the Curve technique to manipulate speed professionally.
Step-by-Step Guide to Slow Down Video in Filmora App
You can find multiple speed templates here to craft a cinematic-level slow motion. By utilizing the Custom speed setting options, this effect is possible. To fashion professional-grade and artistic slow motion in Filmora, follow these steps:
Step 1Import Videos After Creating a New Project
Download the Filmora app from the Play Store or App Store and launch it. Then, click the “New Project” tab and import a video from the device gallery.
Step 2Access the Speed Curve Option
After importing the video, navigate towards the timeline panel and select the video. From the options appearing in the bar at the bottom, select “Speed.” In the speed section, select the “Curve” section to access speed settings.
Step 3Adjust the Speed Curve Settings
From the appearing options, click the “Customize” option and start editing. To create the slo-mo effect, drag the slider in the downward direction. If you notice, the slider points are distant from each other. It is to edit videos and slow down videos at different durations. Once you are done editing in this CapCut slow-mo effect alternative, hit “Export.”
Bonus Part: Edit Your Slow Mo Video on Desktop with Filmora Desktop
No doubt Wondershare Filmora offers precise editing features compared to other apps. However, skilled and professional editors just prefer the desktop version to bring precision. In addition, there is an optical flow option and an extensive timeline panel. Both these features ensure professional outcomes and a smooth slow-motion effect.
Wondershare Filmora is a powerful alternative to CapCut slow-motion download. The software has a range of video editing features that open unlimited editing opportunities. With its various effects and filters, you can seize the audience’s attention. In addition, the software is compatible with Linux and macOS devices for diversity.
Free Download For Win 7 or later(64-bit)
Free Download For macOS 10.14 or later
Step-by-Step Guide to Create Slow Motion in Filmora for Desktop
In this method, we’ll use Filmora’s Uniform Speed functionality to generate a slow-motion video. This feature uses a simple speed slider to enhance or decelerate video speed. Find the guide to Filmora’s Uniform Speed feature attached below:
Step 1Access the Speed Tab to Start Editing
After opening a project in Filmora, select the video in the timeline and access the settings panel. From there, go to the “Speed” > “Uniform Speed” option and change the slider’s position. By dragging it towards the left side, you can add a slow-motion effect.
Step 2Add Optical Flow Effect
To add a layer of smoothness to your slow-motion video, access “AI Frame Interpolation.” You can find this option at the bottom of the Uniform Speed tab. Expand this option and select the “Optical Flow” option.
Step 3Activate Rendering and Export Video
To analyze the outcome of activating optical flow, navigate towards the timeline panel. From the given options, click on the “Render Preview” icon and wait for its completion. Once the rendering is complete, click the “Export” button after the preview.
Video Editing Features of Filmora
CapCut and Wondershare Filmora both possess AI powers to ensure seamless video creation. However, Filmora offers more video editing features, and all of them offer customization. The interface is just perfect for every professional or non-professional. With its accessible interface, you must try the following video editing tools:
1. Screen Recorder
For the seamless generation of tutorials and ‘How to” videos, this editor offers a screen recorder. The recorder is embedded with custom settings to cater to each user’s requirements. You can accommodate screen resolution, microphone settings, and cam settings with it.
2. Keyframing
Transform your illustrations into reality using Filmora’s keyframe editing feature. You can add keyframes at different points in the timeline to adjust the movements. There are custom settings like position, scale, opacity, color, and more for each keyframe.
3. Split Screen
Make your videos happening and captivating simultaneously with Filmora’s split screen option. This allows you to add distinct videos and auto-adjust them at different split screens. You can also enable manual visual, audio, and AI editing for each split video.
4. Assets Backup & Sync
Why worry about finishing a project at once when you can edit it later with Filmora? With its cloud backup option, you can start editing a video where you left off. In addition, the tool also offers synchronization across devices. This means you can access your videos, downloaded assets, and other storage data with a simple login.
5. AI Text-Based Editing
As discussed earlier, the AI algorithms allow you to edit with full efficiency. This feature of Filmora enhances productivity via text-to-speech function. It creates captions out of a video and allows you to seamlessly cut videos by removing text.
Conclusion
In conclusion, this article considered how to do slow-mo in CapCut. In addition, we saw how you can create a slow-motion video on a smartphone using CapCut. During times that demand the creation of sophisticated slow-motion content, we suggest Filmora. This editing software offers a myriad of editing tools and techniques, facilitating the creation and adjustment of slow motion.
Also read:
- New 2024 Approved Detailed Guide to the Best Convertors for Turning GIF Into PDF Files. Know Their Features, Pros, Cons, and More
- 2024 Approved Ultimate Guide to Countdown Animation in Videos
- New This Article Talks in Detail About Why People Look for a Free Title Maker, and 8 Options that Will Benefit Their Work. It Includes Tools Like SEMrush Title Generator, Hubspot Title Generator, and More. Check Out
- Updated 2024 Approved Top 9 Best Solutions To Go For When Creating an AI Thumbnail
- What Is Motion Blur in the Game for 2024 Do You Really Need It?
- Updated What You Should Know About Speech-to-Text Technology
- New Finding Best GIF Websites Is Easy as Pie — Heres What You Should Know
- New How to Use Rule of Thirds in Video
- Updated 2024 Approved Are You Aware that You Can Create Your Own Lower Thirds for Video? Read This Article for a Tutorial on How to Customize One
- Updated VSDC Free Video Editor Review
- New 2024 Approved Easy Steps to Loop YouTube Videos on iPhone
- This Article Shares Valuable Insight Into the Best Brand Story Videos. Also, It Highlights the Importance of a Video Maker in Your Brand Story Video Ad-Making Process and Why Filmora Should Be Your Go-To Choice
- New Top 4 Free 3D Intro Maker to Use for 2024
- New Learn How to Extract Sound From Video Using the Different Online and Software Tools. Details About Their Features, Pros/Cons, and More Are Given for 2024
- New 2024 Approved Learn How to Trim/Crop Video in Microsoft PowerPoint
- New How Much Wedding Videographer Cost for 2024
- New Guaranteed 10 Storyboard Creators To Make Animation Easier
- Looking for a Great Way to Make Your Own Anime Music Video? The Following Are the Top AMV Makers to Choose From
- New 2024 Approved Steps to Create Gold Text Effects After Effects
- New Guaranteed 10 Storyboard Creators To Make Animation Easier For You for 2024
- New Phone Aspect Ratio Vertical Definition, Types & Tips for 2024
- Updated Finding the Best Voice Changers for WhatsApp Free and Paid
- Updated The Complete Guide to Make a Text Collage for 2024
- New 2024 Approved This Article Talks About Pixel Art Wallpapers. It Gives Examples of Different Pixel Art to Show You How to Customize Your Own Pixel Art Wallpapers, and How to Make a Pixel Art Gif on Filmora
- New In 2024, Best 8 Srt File Creators
- Updated This Review Post Introduces You to EasyHDR to Review and Customize Your HDR Photos. Youll Also Learn the Best Desktop Application to Edit Your HDR Videos Effortlessly for 2024
- New 2024 Approved How to Resize FLV Videos EfficientlyWindows, Mac, Android, iPhone & Online
- 2024 Approved How Can You Make a Slideshow Look Aesthetic? Follow the Given Discussion to Learn About Creating an Aesthetic Slideshow All by Yourself
- New 2024 Approved How to Got Free After Effects Templates Slideshow with Simple Trick
- Updated 2024 Approved Why Vimeo Slideshow Maker Become Popular
- Latest way to get Shiny Meltan Box in Pokémon Go Mystery Box On Tecno Spark 20C | Dr.fone
- In 2024, Additional Tips About Sinnoh Stone For OnePlus Ace 2 | Dr.fone
- How to retrieve erased videos from V Purse
- 5 Solutions For Infinix Hot 40i Unlock Without Password
- In 2024, How to Detect and Stop mSpy from Spying on Your Samsung Galaxy A34 5G | Dr.fone
- Is your Vivo S17 working too slow? Heres how you can hard reset it | Dr.fone
- How To Transfer Data From iPhone 6s To Other iPhone 12 Pro Max devices? | Dr.fone
- In 2024, How to Remove Apple ID from Apple iPhone 15 Pro Max without Password?
- Guide on How To Erase Apple iPhone 12 Pro Devices Entirely | Dr.fone
- How to Sign Out of Apple ID On Apple iPhone XS without Password?
- Why does the pokemon go battle league not available On Xiaomi Redmi Note 12 Pro 4G | Dr.fone
- In 2024, Complete Review & Guide to Techeligible FRP Bypass and More For Vivo Y78 5G
- 2 Ways to Transfer Text Messages from Itel A60 to iPhone 15/14/13/12/11/X/8/ | Dr.fone
- In 2024, Troubleshooting Error Connecting to the Apple ID Server On iPhone SE (2020)
- In 2024, Proven Ways in How To Hide Location on Life360 For Oppo F25 Pro 5G | Dr.fone
- Lava support - Forgotten screen lock.
- In 2024, Apple iPhone 15 Pro Backup Password Never Set But Still Asking? Heres the Fix
- In 2024, Guide to Mirror Your OnePlus Ace 3 to Other Android devices | Dr.fone
- How to Reset Gmail Password on Vivo Y27 4G Devices
- Set Your Preferred Job Location on LinkedIn App of your Itel P40 | Dr.fone
- What to Do if Google Play Services Keeps Stopping on OnePlus 11 5G | Dr.fone
- Title: How Did AI Video Games Act More Human Than Human?
- Author: Morgan
- Created at : 2024-05-19 05:11:35
- Updated at : 2024-05-20 05:11:35
- Link: https://ai-video-editing.techidaily.com/how-did-ai-video-games-act-more-human-than-human/
- License: This work is licensed under CC BY-NC-SA 4.0.
