
:max_bytes(150000):strip_icc():format(webp)/GettyImages-155159821-8881bead1d894a0b95bca3c3e288ff54.jpg)
How to Add Filter to Video Online for 2024
How to Add Filter to Video Online
When you record a video with your phone camera, digital camera, or even webcam, the color scheme in the video can differ depending on the surrounding light. If it differs a lot from the natural color scheme, it can affect the viewing experience of the audience negatively. That is why color correction is an essential part of video editing, and that is where video filters can be handy. You do not need a dedicated video editor application to add video filters as you can you can put filter on video online.
Video filters can correct color imbalances and make the video have consistent colors. For example, if you had recorded a video when the sun was setting, you can use a high saturation video filter to make the video color more vivid. You can even set the mood of a video with video filters so that the audience can get the exact emotion you want to portray through your video. We will illustrate the different ways on how to add filter to video online instantly.
Way 1. Use Clideo Filter Editor
Clideo Filter Editor is one of the fastest video editors that you can apply filters to your videos instantly. There is a wide range of different presets to apply temporarily and compare. Therefore, you can choose the best video filter and save your modified video. The user interface is super intuitive for everyone.
The platform is completely secure for uploading and editing videos, and you can upload videos in different file formats. You can use Clideo Filter Editor on your web browser from your Mac, Windows PC as well as smartphone. Here are the steps to add video filters online using Clideo Filter Editor.
Step1Open your web browser and visit “clideo.com/filter-video”.
Step2Click on Choose File button to upload your video from your hard drive. You can also upload video from Google Drive and Dropbox.

Step3After successful uploading, you will see the video filters on the right side of your video. Apply them one and one while playing your video so that you can see the changes in video color scheme instantly.

Step4Finalize a video filter to apply to your video and click on Export to save the modified video on your hard drive on any desired file format.

Way 2. Veed.io Video Filters
If you are looking for some stunning video filters to use on your video, Veed.io Video Filters is the best online platform. You can add filter to video online free, and the platform supports several video file formats. You will find color grading filters as well as effects to apply to your video and get the desired outcome. If you are going to upload videos to social media, you should definitely use Veed.io Video Filters to make your videos feel unique. Here are the steps on how to add filter video online using Veed.io Video Filters.
Step1Open your web browser and visit “veed.io/tools/video-filters”. Click on Get Started button.

Step2On the next screen, click on Browser or drag and drop your video file for adding video filters.

Step3After the video file gets uploaded, you will see Filters on the left side of the video. There are two different tabs – Color Grading and Effects available where there are different video filters available to apply to your video.

Step4Click on the filters to see how they look on your video instantly. Once you have selected a filter for the video, click on Export button to save the edited video in desired file format.

Way 3. Clipchamp Video Filter Editor
Clipchamp video filter editor has a wide range of beautiful video filters to enhance your video instantly. You can correct any color imbalance as well as set any required tone to your video. Starting from Outdoor and Portrait to Indoors and Muted, all the popular professional video filters can do the magic to your video. You can also save the edited video in different video resolution and file format as per your requirements. Here are the steps on how to add filter video online using Clipchamp video filter editor.
Step1Open your web browser and visit “clipchamp.com/en/video-filters-editor”. Click on Create with video filters now button.

Step2You have to sign up on the next screen so that you can apply the video filters.
Step3Once the video editor opens, click on Create a Video button.

Step4Drag and drop your video on the video editor and thereafter on Timeline.

Step5Click on Filters option located at the top and you will see a drop-down containing all the filters. Place your mouse pointer on the filters one by one to see how they look on your video instantly.

Step6Finally, click on the selected filter and click on Export button to save the edited video.

Way 4. FlexClip Video Filter Editor
FlexClip has a collection of online tools to edit your video instantly without installing any video editor application. FlexClip Video Filter Editor has over 20 popular video filters to apply to your video on the go. You can change the video outlook, and the platform supports different types of video file formats. You can add filter to video online free, and there is not going to be any watermark on your edited video. Here are the steps on how you can add filter to your video using FlexClip video filter editor.
Step1Open your web browser and visit “flexclip.com/tools/filter-video”.
Step2Drag and drop your video to the free video filter editor online.

Step3After successful uploading, you will see all the video filters on the left side.

Step4Click on the video filters one to one to apply them to the video and see which one suits the best. You can adjust the intensity of the filters as per your preference.

Step5Once you have applied a filter and you can satisfy with it, click on Export button to save the edited video.

Way 5. Kapwing Filter Video Editor
Kapwing is a popular online video editor, and you can add video filters to your recorded video for free. Kapwing Filter Video Editor works on all devices, and you can access it from any popular web browser. You can upload recorded video as well as paste URL of an online video stored in Google cloud platform to apply video filters. The preset filters enhance video quality starting from colors and saturation to brightness and contrast. You can also share them on social media platforms directly from Kapwing video editor. Here are the steps how to put filter on video online using Kapwing filter video editor.
Step1Open your web browser and visit “kapwing.com/tools/filter-video”. Click on Choose a video button to get started.

Step2Once Kapwing video editor opens, drag and drop your video to upload on the platform. You can also paste video URL from Google Drive or Google Photos.

Step3Click on the video and on the right side, go to Edit tab and click on Filters under Video section.

Step4You will see a host of video filters that you can apply to your video. Click on them to check them out. You can also customize the video filter by going to Adjust tab.

Step5Select the best one and click on Apply Filters button. Finally, click on Export Project button to save the edited video.

Conclusion
If you want to apply video filters to your recorded video in order to enhance the video outlook and adjust the color balance, you can use video filter editors online. We have illustrated five different ways on how to add video filters online for free. Each one of them has different sets of video filters. If you are looking for a dedicated video editor desktop application, we recommend Wondershare Filmora .
Free Download For Win 7 or later(64-bit)
Free Download For macOS 10.14 or later
Free Download For macOS 10.14 or later
2 Solutions to Cut Video in VLC on Windows
Other than playing videos and music, VLC Media Player can also be used as a video editing tool. While advanced video editing requires unconventional and powerful video editing software, VLC offers a simpler and easy-to-learn process of cutting and/or trimming videos.
You can cut a section of your video and make shorter video clips. This means that you can now get rid of parts of a video that you do not need and preserve those that you like. VLC automatically saves the video clips made, so you do not have to save them again.
In this article, we are going to learn the simplest procedure on how to cut and/or trim videos using VLC Media Player. Each step is carefully explained, with screenshots attached.
To Cut Video Using VLC Media Player
- Download VLC Media Player
You need to have the app before using it. To download it, visit Google Play Store or any other suitable app, search and download. There are a variety of versions that is, 32-bit, 64-bit and Windows ARM. You may as well narrow down your search to the version of your gadget, be it Android, iOS, Linux or Windows.
- Install and Open VLC Media Player
The installation process is simple. You click on the icon indicating ‘install’ then open. On opening, you will come across a page that looks like the one attached below.

This is the dashboard of the VLC Media Player.
- Select the file you would like to cut
On the top of the screen is the menu with ‘Media’ being the first on the far left. On clicking the ‘Media’ button, a drop-down menu will appear. Select the first option, ‘Open File’ to access your files. From the dialogue box that appears, locate your video (the one you would like to cut), select it then click to open. The video will start playing.

- Click on Advanced Controls (View > Advanced Controls)
Some videos will play automatically while others will wait for an action. In case your video plays automatically, it is advisable that you pause it.
On the menu is a tab labelled ‘View’. Choose the tab, click open it and on the drop-down menu, select ‘Advanced Options’.

On selecting ‘Advanced Options’, a red button will appear at the bottom-left corner of the VLC. This is the record button.

Its purpose is to indicate the recording of the section of the video that you would like to cut.
- Click to Cut or Trim
If you had paused your video, you can play it at this stage. If you do not want to cut/trim your video from the start, scroll to the point from which you would like to cut it. Click on the red button for the recording to start. If the video does not play automatically, click to play.
After the video has played till the point where you would like to end, click on the red button again to stop the recording. The cut section will be automatically saved on the videos’ folder on C:\Users\Username\Videos.
An easier way to cut videos with Wondershare Filmora
Wondershare Filmora Video Editor is an alternative video editor. Unlike VLC Media Player, Filmora gives you more options. It allows you to split, trim, edit, combine, and crop a video, among others. It also gives you room to add footnotes, a variety of transitions, lower thirds, among other features. You can as well resize your video and enhance its quality.
For Win 7 or later (64-bit)
For macOS 10.14 or later
To Cut/Trim Videos with Wondershare Filmora:
- Drag and Drop the Video
Assuming that you have already downloaded and installed Wondershare Filmora app, click to open. There are two ways through which you can locate your video.
One, you can opt to drag and drop the video from its location to the app’s timeline. Secondly, you can right click on the space at the top left then select the video to be edited from the dialogue box that will appear.

- Trimming the video
After dropping the video on the timeline, it is likely to take up a lot of space, especially if it is long.
To trim the video from the beginning, place your cursor at the starting point and wait for the pointer to appear. Then move the point forward. To trim from the end, place the cursor at that point, hold and move the pointer forward till the required point.


Trimming the video does not mean that you lose the parts. It is more like shortening it to fit in place.
- Cutting the video
Unlike trimming, cutting involves getting rid of a section of the video completely. To do so, you need to first of all isolate that section.
With the video on the timeline, move and point your cursor at the starting point of the video and click on the scissors icon at the top. Then move it to the end of the video section and click on the scissors icon again. By so doing, you will have selected that section.
Once the section has been selected, right click on the video, select and click to delete. You can then drag the remaining parts to make them one.

After cutting or trimming, you can choose to add several effects to the video. Transitions, watermarks, cropping, resizing, ripple effects among others are some of the changes you could make. All these appear on the menu at the top.
- Save and/or Import your video
The final step is saving or importing your file to prevent its loss. By clicking on the ‘Import’ button, you save the file to the Media Library. By selecting ‘save as’, you select the location where you want to store your file.

Conclusion
There are so many video editors, each with different features. Some are simple to use while others will require advanced software to operate. Whether you use VLC Media Player or Wondershare Filmora, the results will be the same. The difference comes in where you have the knowledge and skills to use one app better than the other one.
The above steps on how to use both VLC Media Player and Wondershare Filmora will guide you through the whole process. It is said that, ‘practice makes perfect’. So yes, keep practicing and putting these skills into use. Sooner or later you will be an expert!
This is the dashboard of the VLC Media Player.
- Select the file you would like to cut
On the top of the screen is the menu with ‘Media’ being the first on the far left. On clicking the ‘Media’ button, a drop-down menu will appear. Select the first option, ‘Open File’ to access your files. From the dialogue box that appears, locate your video (the one you would like to cut), select it then click to open. The video will start playing.
- Click on Advanced Controls (View > Advanced Controls)
Some videos will play automatically while others will wait for an action. In case your video plays automatically, it is advisable that you pause it.
On the menu is a tab labelled ‘View’. Choose the tab, click open it and on the drop-down menu, select ‘Advanced Options’.
On selecting ‘Advanced Options’, a red button will appear at the bottom-left corner of the VLC. This is the record button.
Its purpose is to indicate the recording of the section of the video that you would like to cut.
- Click to Cut or Trim
If you had paused your video, you can play it at this stage. If you do not want to cut/trim your video from the start, scroll to the point from which you would like to cut it. Click on the red button for the recording to start. If the video does not play automatically, click to play.
After the video has played till the point where you would like to end, click on the red button again to stop the recording. The cut section will be automatically saved on the videos’ folder on C:\Users\Username\Videos.
An easier way to cut videos with Wondershare Filmora
Wondershare Filmora Video Editor is an alternative video editor. Unlike VLC Media Player, Filmora gives you more options. It allows you to split, trim, edit, combine, and crop a video, among others. It also gives you room to add footnotes, a variety of transitions, lower thirds, among other features. You can as well resize your video and enhance its quality.
For Win 7 or later (64-bit)
For macOS 10.14 or later
To Cut/Trim Videos with Wondershare Filmora:
- Drag and Drop the Video
Assuming that you have already downloaded and installed Wondershare Filmora app, click to open. There are two ways through which you can locate your video.
One, you can opt to drag and drop the video from its location to the app’s timeline. Secondly, you can right click on the space at the top left then select the video to be edited from the dialogue box that will appear.
- Trimming the video
After dropping the video on the timeline, it is likely to take up a lot of space, especially if it is long.
To trim the video from the beginning, place your cursor at the starting point and wait for the pointer to appear. Then move the point forward. To trim from the end, place the cursor at that point, hold and move the pointer forward till the required point.
Trimming the video does not mean that you lose the parts. It is more like shortening it to fit in place.
- Cutting the video
Unlike trimming, cutting involves getting rid of a section of the video completely. To do so, you need to first of all isolate that section.
With the video on the timeline, move and point your cursor at the starting point of the video and click on the scissors icon at the top. Then move it to the end of the video section and click on the scissors icon again. By so doing, you will have selected that section.
Once the section has been selected, right click on the video, select and click to delete. You can then drag the remaining parts to make them one.
After cutting or trimming, you can choose to add several effects to the video. Transitions, watermarks, cropping, resizing, ripple effects among others are some of the changes you could make. All these appear on the menu at the top.
- Save and/or Import your video
The final step is saving or importing your file to prevent its loss. By clicking on the ‘Import’ button, you save the file to the Media Library. By selecting ‘save as’, you select the location where you want to store your file.
Conclusion
There are so many video editors, each with different features. Some are simple to use while others will require advanced software to operate. Whether you use VLC Media Player or Wondershare Filmora, the results will be the same. The difference comes in where you have the knowledge and skills to use one app better than the other one.
The above steps on how to use both VLC Media Player and Wondershare Filmora will guide you through the whole process. It is said that, ‘practice makes perfect’. So yes, keep practicing and putting these skills into use. Sooner or later you will be an expert!
Top Animated Title Makers
You know that your video needs a title, but rather than just type in some bland text to introduce the video, you can create an animated title page that is far more attractive. Animated titles make a video more attractive and when done correctly, they can even guarantee that your target audience will stick around long enough to watch the entire video. They can also be very useful for introducing the content of the video.
But to make an effective animated title, you need a tool that is designed to do just that. In this article, we look at some of the top animated title makers that you can use to create the perfect animated title for your video.
Part 1. Animated Title Maker Online
If you don’t want to install software on your computer to create the animated title, the following are the top online tools to choose from;
Animaker
Link: https://www.animaker.com/text-animation-maker
Rating: 4.5/5
Animaker is an online tool that is specifically designed to help you create text animations that you can then add to your video project. Available online on all browsers, Animaker has a simple user interface that makes it easy to create text animations in a matter of minutes. It is so easy to use that even the average beginner can create stunning text animations.
If you don’t want to create the animations from scratch, Animaker has numerous pre-designed templates for you to choose from that you can then just edit to fit your design. It also has a lot of customizable infographics that you can repurpose.

Animatron Studio
Link: https://www.animatron.com/studio
Rating: 4.5/5
The Animatron Studio is a one-stop solution for generating all types of animated texts. You can use it to create the perfect animated title for your video, but its numerous features also mean that it is one of the best ways to create attention-grabbing animated banner ads that can be posted on various ad sites,
It has a wealth of resources that you can use to create the title including more than 500,000 royalty-free images, videos, and audio to include in your project. If you don’t want to build the animated content from the ground up, you can select from the 200 pre-animated sets that Animatron Studio provides.
Kapwing Title Maker
Link: https://www.kapwing.com/animated-text-video-maker
Rating: 4.5/5
If your goal is to do more than just create an animated title for your video, Kapwing is a good solution. It is a complete online video editor that can also be used to create animated titles. As such, you can expect Kapwing to have more advanced features that allow you to customize the animated title in various ways.
For instance, it has a huge selection of animations that you can apply to the text. But you also get the option to upload your own animations, colors, and fonts. But please note that the free version of Kapwing will add a watermark to the video.

Biteable Animated Text Maker
Link: https://biteable.com/animated/text/
Rating: 4.5/5
Biteable is one of the most popular solutions that you can use to create all kinds of animated texts. It is simple enough to use that it is useful to both professionals and amateur video creators. It has numerous useful features including custom scenes, foundations, backgrounds, and characters all of which can work together to create the perfect animated title.
One of the main benefits of choosing Biteable is that you can share the videos you edit directly on social media without having to download the video.

Flexclip Video Maker
Link: https://www.flexclip.com/editor/
Rating: 4.5/5
Flexclip is another very easy-to-use and easily accessible solution to create animated texts for videos. Rather than create the texts from scratch, Flexclip allows you to create stunning animated texts just by selecting several parameters.
There are also a lot of pre-made designer text templates that are fully customizable. All you have to do is select one of the templates, and change the text, font, and any images to make it unique to you and your video.

Part 2. Animated Title Maker for Computer
Online tools can be useful, especially since they are more easily accessible. But if you want additional features and more ways to customize your animated title, the following desktop solutions may be more applicable to you;
Filmora
Rating: 4.5/5
Wondershare Filmora is a complete suite of video editing tools that can also come in handy when creating animated titles for videos. It is a very simple video editor with a simple user interface, making it an ideal solution even for beginner users. Adding a title to your video is easy and you get to choose from more than 200 different animations that you can apply to bring the text to life.
Filmora is also very useful because it comes with advanced editing features for the professional editor. You can use it to edit all aspects of the video including the clips and even any audio that may be on the project.

Adobe Animate
Rating: 4.5/5
Adobe Animate is a great option to create various animations for your video project, including animated texts. Used by animators to create 2D animated content, Adobe Animate has a lot of features designed to facilitate this kind of animation and is, therefore, one of the go-to solutions for designers looking to create illustrations like logos and infographics.
But like other Adobe programs, Adobe Animate is not very easy to use and the beginner may find that it takes quite a long time to figure out how it works. But once you figure it out, the 800+ web fonts can make it very easy for you to customize your animated title in various ways.

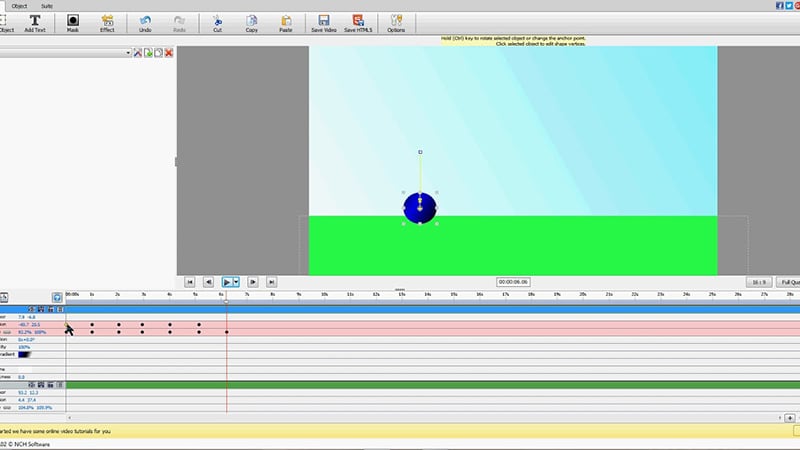
Express Animate
Rating: 4.5/5
Express Animate is a completely free program that you can download on your computer. It is a complete video editor which means that you can use it to animate text and characters, but it is also a great way to edit other aspects of the video including the audio tracks and adding digital effects.
With a simple user interface, Express Animate allows users to create 2D animations that can be used to create unique videos. It is also a good way to create GIFs and memes.
Movavi Video Editor
Rating: 4.5/5
Movavi Video Editor is another complete suite of editing tools that can also come in handy when you want to create an animated title for your video. Designed for both professionals and beginners, this video has all the advanced features you will need to edit all aspects of your video, including a built-in audio editor.
When it comes to animation, Movavi has a lot of effects and transitions as well as pre-made title templates to choose from. Once you have selected the title, you can easily customize the font and color to fit into your project.

Windows Movie Maker
Rating: 4.5/5
For PC users Windows Movie Maker is a simple to use and free way to edit videos. Included with the Windows OS, you likely don’t need to install any software to use and even though it is a free solution, Windows Movie Maker does have the necessary features to create and add animated titles to any video.
It comes with numerous effects, transitions, and templates to choose from when animating text. And it can also be used to edit videos in other ways including trimming and merging clips.

Part 3. Animated Title Maker Apps
If you are editing your videos on your mobile device, the following are the top animated title-making apps to choose from;
Tomo
Rating: 4.5/5
Link: https://m.apkpure.com/tomo-animate-text-in-video/com.entzeners.app.tomo
Tomo is one of the best apps that you can use to animate text in a video. It has robust features that allow you to easily add text to the video and then animate the text using various transitions and effects. Once the edits are complete, Tomo allows you to share the completed video directly on social media apps like Instagram and Twitter.

Adobe Spark
Rating: 4.5/5
Link:https://apps.apple.com/us/app/adobe-spark-post-design-maker/id1051937863
Available for both Android and iOS devices, Adobe Spark is a video editing tool that has numerous tools to add and edit texts on videos. You can use the professionally designed templates that you have access to when using Adobe Spark to create stunning animation titles. And since it easily integrates with other apps on the device, sharing the videos is very easy.
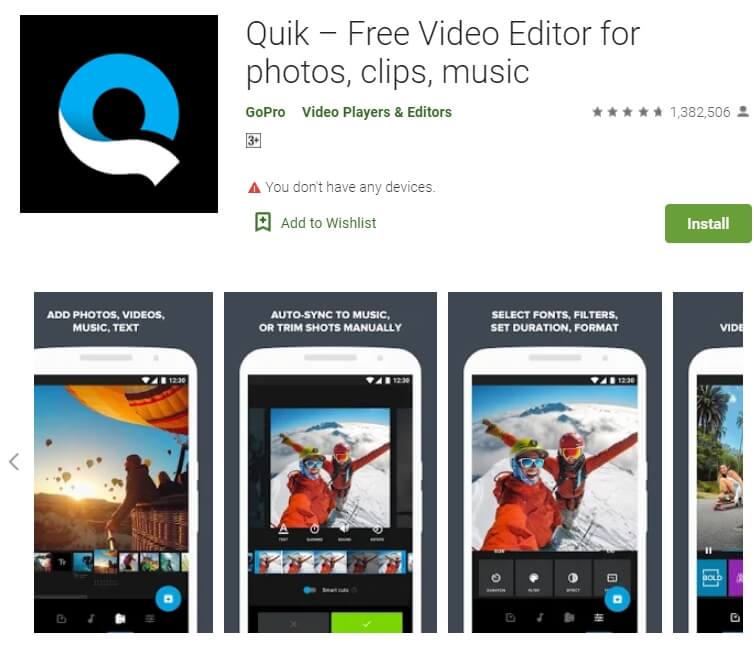
Quik
Rating: 4.5/5
Link: https://play.google.com/store/apps/details?id=com.gopro.smarty&hl=en&gl=US
Quik is an app that is dedicated to text animations and therefore one of the best solutions when you want to add and edit texts on videos. It is available for both iOS and Android and although the free version of the app is slightly limited, its basic editing features are still better than what you find on other more expensive solutions.
Hyper-type Animated Text Videos
Rating: 4.5/5
Link: https://itunes.apple.com/us/app/hype-type-animated-text-videos
This app gives you two options when it comes to animating the text on your video; auto-motion and typography. It focuses on just adding and editing text on a video and as such may not have any of the other video editing features you will find on some of the other apps. But if your goal is to create an interactive animated video title, Hyper-type Animated Text Videos is a great solution.
Vimeo
Rating: 4.5/5
Link: https://play.google.com/store/apps/details?id=com.vimeo.android.videoapp&hl=en&gl=US
Also available for both iOS and Android devices, Vimeo can also be a handy solution for the creation and editing of animated titles for videos. It has a lot of features to edit not just the text in videos, but also all other elements including audio. You even get a wide selection of royalty-free music that you can add to the video and motion stickers to make your title stand out even more. But the free version of Vimeo will add a watermark to the video.

Free Download For Win 7 or later(64-bit)
Free Download For macOS 10.14 or later
Add Effects to Video Online
Recording a video is work half done. Editing the video is an equally important part. Apart from trimming out unnecessary parts and joining trimmed video clips, you have to add video effects to your video clips so that your video looks interesting. In fact, video effects are responsible for enhancing the beauty of the recorded video clips in the eyes of the viewers.
There is a wide range of video effects available to use on your videos, and turn them from ordinary video clips to stunning videos. The best part is that you do not have to install a video editor application on your device to apply video effects. This is because you can add effects to video online and that too for free of cost. We will discuss all the ways to add effects to your videos online that everyone can use conveniently.
- Way 1. Use Veed.io Video Editor
- Way 2. Use Kapwing Video Editor
- Way 3. Use FlexClip Video Effects Editor
Part 1. Popular Video Effects to Use Online
If you are wondering which effects to add to your videos to make them look extra-ordinary, here is the list of the popular video affects you can apply to your videos online.
Sparkle Effect – When you add sparkle effect to your video, you will see tiny flashes of lights like twinkling stars around the subject of the video or the entire frame of the video. There can also be stars shinning and glittering to enhance the glamour factor of the subject in your videos.
Snow Effect – When you add snow effect to video online, you get to see animated snowflakes falling across the video like snowfall in the winter. You need a proper scene to add snow effect, and it represents romantic and joyous mood in a video.
Speed Change Effect – Speed change effect is extremely common whereby you can slow down and fasten up the video playing speed as per your requirements. Slow-motion video is a part of speed change effect to emphasize a scene for a long period of time.
Reverb Effect – In this video effect, you see a particular scene reverberating, especially when the subject goes into imagining things and recalling memories. You can add reverb to video online when there is a jump cut scene in your video to smoothen the transition.
Transition Effect – Transition effect is a special type of video effects that you insert when you are making a transition from one scene to another. Transition effects smoothen the scene cuts for the eyes of the audience and refresh the mind to let them focus on the next scene.
Overlay Effect – Overlay effect is widely used in intro and outro of videos as well as to show titles and call to action options. Beautiful overlay effects can enhance the video content immensely and make it appear soothing to the eyes.
Part 2. Ways to Add Effects to Video Online
Here are the three top video editors available online where you can add effects to your videos in a few simple steps.
Way 1. Use Veed.io Video Editor (https://www.veed.io/tools/video-editor-effects )
Veed.io is one of the most popular video editors where you can apply various video effects to your videos online for free. There are super cool video effects that are eye-catching and visually stunning. Starting from glitch and snow effects to cinematic effects, you can also add emojis, dynamic text effects as well as special effects to your videos. Here are the steps to add effects to video online free using Veed.io.
Step1 Open your web browser and visit “veed.io/tools/video-editor-effects”. Click on Choose Video button.

Step2 Drag and drop your video to add video filters.

Step3 Go to Filters on the left panel and select Effects tab.

Step4 There are several effects available and click on them one by one to check the effects on the video. Select one video effect ultimately to apply to your video.

Step5 Finally, click on Export button to save the edited video in your desired video resolution.

Way 2. Use Kapwing Video Editor (https://www.kapwing.com/tools/add-effects-to-video )
Kapwing Video Editor is one of the fastest video editors where you can enhance your video with video filters. You can add special filters, greenscreen effect, animations, transitions, speed change effects and much more. You can apply pan and zoom effect, fade in and out effect, customize video speed, slow-motion effect, time-lapse effect, slideshow effects just to name a few. Among online video editors, Kapwing video editor has the best collection of video effects. Here are the steps to add effects to video online.
Step1 Open web browser and visit “kapwing.com/tools/add-effects-to-video”. Click on Upload video to start button.

Step2 Drag and drop your video file in Studio. You can even paste URL of your video available on Google Drive and Google Photos.

Step3 Go to Transitions and you will see the different video effects. Place your mouse point on them to see a preview of the effect.

Step4 You can drag and drop any desired effect between two video clips on Timeline. You can also go to Elements> Backgrounds to apply video effects to the background of your video. Similarly, you can check all the different elements, shapes, and emojis to use in your video.

Step5 Finally, click on Export Project button and select any file format and video resolution to save the edited video.

Way 3. Use FlexClip Video Effects Editor (https://www.flexclip.com /)
FlexClip video editor has different categories of video effects starting from elements to overlays. There are also background video effects available that will enhance your video content. Most importantly, there is a wide range of text effects available. FlexClip is perfect for adding effects for branded videos as well. There are also video templates available to create stunning videos from scratch. Here are the steps add sparkle to video online with FlexClip video editor.
Step1 Open your web browser and visit “flexclip.com/editor/app”.
Step2 Drag and drop your video clips and add them to instant viewer.

Step3 To add sparkle effect, you have to go to Photo on the left panel. Thereafter, select GIF tab.

Step4 Search for transparent Sparkle and add it to instant viewer.

Step5 You can go to Text, Elements, and Overlays to add further video effects.

Step6 Finally, click on Export button and sign up to save the edited video.

Part 3. FAQs about Video Effects
1. How do you edit a video with add filters?
Veed.io is the best online video editor to edit your video and add filters to enhance your video content. There are several filters available starting from colour grading to video effects.
2. How to add effects to video online free without watermark?
ClipChamp is a great online video editor where you can add video effects to your videos instantly. You can export and save your edited videos without any watermark and without purchasing any plan.
Free Download For Win 7 or later(64-bit)
Free Download For macOS 10.14 or later
Part 1. Popular Video Effects to Use Online
If you are wondering which effects to add to your videos to make them look extra-ordinary, here is the list of the popular video affects you can apply to your videos online.
Sparkle Effect – When you add sparkle effect to your video, you will see tiny flashes of lights like twinkling stars around the subject of the video or the entire frame of the video. There can also be stars shinning and glittering to enhance the glamour factor of the subject in your videos.
Snow Effect – When you add snow effect to video online, you get to see animated snowflakes falling across the video like snowfall in the winter. You need a proper scene to add snow effect, and it represents romantic and joyous mood in a video.
Speed Change Effect – Speed change effect is extremely common whereby you can slow down and fasten up the video playing speed as per your requirements. Slow-motion video is a part of speed change effect to emphasize a scene for a long period of time.
Reverb Effect – In this video effect, you see a particular scene reverberating, especially when the subject goes into imagining things and recalling memories. You can add reverb to video online when there is a jump cut scene in your video to smoothen the transition.
Transition Effect – Transition effect is a special type of video effects that you insert when you are making a transition from one scene to another. Transition effects smoothen the scene cuts for the eyes of the audience and refresh the mind to let them focus on the next scene.
Overlay Effect – Overlay effect is widely used in intro and outro of videos as well as to show titles and call to action options. Beautiful overlay effects can enhance the video content immensely and make it appear soothing to the eyes.
Part 2. Ways to Add Effects to Video Online
Here are the three top video editors available online where you can add effects to your videos in a few simple steps.
Way 1. Use Veed.io Video Editor (https://www.veed.io/tools/video-editor-effects )
Veed.io is one of the most popular video editors where you can apply various video effects to your videos online for free. There are super cool video effects that are eye-catching and visually stunning. Starting from glitch and snow effects to cinematic effects, you can also add emojis, dynamic text effects as well as special effects to your videos. Here are the steps to add effects to video online free using Veed.io.
Step1 Open your web browser and visit “veed.io/tools/video-editor-effects”. Click on Choose Video button.
Step2 Drag and drop your video to add video filters.
Step3 Go to Filters on the left panel and select Effects tab.
Step4 There are several effects available and click on them one by one to check the effects on the video. Select one video effect ultimately to apply to your video.
Step5 Finally, click on Export button to save the edited video in your desired video resolution.
Way 2. Use Kapwing Video Editor (https://www.kapwing.com/tools/add-effects-to-video )
Kapwing Video Editor is one of the fastest video editors where you can enhance your video with video filters. You can add special filters, greenscreen effect, animations, transitions, speed change effects and much more. You can apply pan and zoom effect, fade in and out effect, customize video speed, slow-motion effect, time-lapse effect, slideshow effects just to name a few. Among online video editors, Kapwing video editor has the best collection of video effects. Here are the steps to add effects to video online.
Step1 Open web browser and visit “kapwing.com/tools/add-effects-to-video”. Click on Upload video to start button.
Step2 Drag and drop your video file in Studio. You can even paste URL of your video available on Google Drive and Google Photos.
Step3 Go to Transitions and you will see the different video effects. Place your mouse point on them to see a preview of the effect.
Step4 You can drag and drop any desired effect between two video clips on Timeline. You can also go to Elements> Backgrounds to apply video effects to the background of your video. Similarly, you can check all the different elements, shapes, and emojis to use in your video.
Step5 Finally, click on Export Project button and select any file format and video resolution to save the edited video.
Way 3. Use FlexClip Video Effects Editor (https://www.flexclip.com /)
FlexClip video editor has different categories of video effects starting from elements to overlays. There are also background video effects available that will enhance your video content. Most importantly, there is a wide range of text effects available. FlexClip is perfect for adding effects for branded videos as well. There are also video templates available to create stunning videos from scratch. Here are the steps add sparkle to video online with FlexClip video editor.
Step1 Open your web browser and visit “flexclip.com/editor/app”.
Step2 Drag and drop your video clips and add them to instant viewer.
Step3 To add sparkle effect, you have to go to Photo on the left panel. Thereafter, select GIF tab.
Step4 Search for transparent Sparkle and add it to instant viewer.
Step5 You can go to Text, Elements, and Overlays to add further video effects.
Step6 Finally, click on Export button and sign up to save the edited video.
Part 3. FAQs about Video Effects
1. How do you edit a video with add filters?
Veed.io is the best online video editor to edit your video and add filters to enhance your video content. There are several filters available starting from colour grading to video effects.
2. How to add effects to video online free without watermark?
ClipChamp is a great online video editor where you can add video effects to your videos instantly. You can export and save your edited videos without any watermark and without purchasing any plan.
Free Download For Win 7 or later(64-bit)
Free Download For macOS 10.14 or later
Also read:
- Updated How to Get Motion Blur in Valorant?
- Updated Ultimate Guide on Magic Effects Video Making
- New 2024 Approved How to Change Aspect Ratio in iMovie
- 2024 Approved How To Add Motion Blur In Davinci Resolve?
- How to Make Random Letter Reveal Intro, In 2024
- Updated 2024 Approved Zoom In and Out on Discord (Desktop + App + Browser Solutions)
- Updated 10 Best Movie Trailer Voice Generators Windows, Mac, Android, iPhone & Online for 2024
- Updated 15 Best CapCut Templates for Slow Motion Editing for 2024
- New 2024 Approved How Can You Make a Slideshow Look Aesthetic? Follow the Given Discussion to Learn About Creating an Aesthetic Slideshow All by Yourself
- New Want to Save Your Edited Video File in MP4 Format in Windows Movie Maker? Here Are the Simple Steps Along with a Better Alternative for 2024
- Updated How to Combine Videos Into One on Instagram
- New In 2024, Have You Ever Tried DaVinci Resolve for Creating a Motion Blur Effect? Read This Article to Discover How to Use DaVinci Resolve Motion Blur with the Help of Detailed Instructions
- Learn How to Trim/Crop Video in Microsoft PowerPoint for 2024
- Secret Tips & Tricks to Use in Filmora
- 2024 Approved 2 Effective Ways to Easily Convert VTT to SRT
- 2024 Approved Cropping Video in VLC Step by Step
- New What Can Be Better than Converting Apple Video Format Into Other Formats so that You Can Use the Files Easily. We Have a Few Options that You Can Use for This Purpose
- Updated Perfecting the Art of Slowing Down Video on Instagram for 2024
- New 2024 Approved Fun & Easy Masking Tricks Wondershare Filmora Tutorial
- Updated 2024 Approved Dollar-Store DIY Hacks to Use for Filmmaking on a Budget
- New Guide of 8 Photo Collage Apps for PC
- Dubbing Videos With Voiceovers | Wondershare Filmora Tutorial
- How to Merge Audio and Video in VLC Media Player for 2024
- Updated Make Videos with Pictures and Music-10 Apps
- Updated 2024 Approved 3 Effective Methods to Correct Color Distortion in Videos
- In 2024, Add a Miniature Effect on Your Video for Filmy Looks. To Add This Effect, Read the Complete Guide and Make Your Video Cinematic by Wondershare Filmora
- New How To Fade Audio With Movavi Editor for 2024
- In 2024, This Article Discusses the Splitting of the Video Clips in DaVinci Resolve Explicitly. There Is Also a Brief Description of Its Best Alternative, Wondershare Filmora. This Is Also Practically Relevant and Reasonable as Well
- Updated 2024 Approved Do You Want to Remove the Video Background in Premier Pro Using the Ultra Key but Dont Know About the Whole Process? Please Read Our Complete Step-by-Step Tutorial and Learn From Scratch as a Beginner
- New In 2024, How to Make Discord Emoji GIF
- Tiktok Video Aspect Ratio for 2024
- Possible solutions to restore deleted messages from Vivo Y27s
- How To Use Special Features - Virtual Location On Realme GT 5 Pro? | Dr.fone
- How to Sony Xperia 5 V Get Deleted Pictures Back with Ease and Safety?
- How to Exit Android Factory Mode On Vivo Y77t? | Dr.fone
- Calls on Asus ROG Phone 8 Go Straight to Voicemail? 12 Fixes | Dr.fone
- How Do You Get Sun Stone Evolutions in Pokémon For Asus ROG Phone 8? | Dr.fone
- Updated 2024 Approved In-Depth Review of Ivona Text to Speech Converter
- In 2024, Why Does iTools Virtual Location Not Work For Apple iPhone 12 Pro/iPad? Solved | Dr.fone
- How to Hard Reset Vivo V30 Without Password | Dr.fone
- How to recover lost data from Samsung Galaxy S21 FE 5G (2023)?
- In 2024, How to Change OnePlus Nord 3 5G Location on Skout | Dr.fone
- In 2024, Complete Tutorial to Use GPS Joystick to Fake GPS Location On Apple iPhone X | Dr.fone
- How to rescue lost call logs from Hot 30 5G
- In 2024, Why is iPogo not working On Tecno Pova 5 Pro? Fixed | Dr.fone
- Top 12 Evil Cartoon Characters of All Time for 2024
- Complete Tutorial to Use GPS Joystick to Fake GPS Location On Realme V30T | Dr.fone
- How To Repair System Issues of iPhone 11 Pro Max? | Dr.fone
- In 2024, How Can We Unlock Our ZTE Axon 40 Lite Phone Screen?
- In 2024, The Best Methods to Unlock the iPhone Locked to Owner for iPhone 15 Plus
- Title: How to Add Filter to Video Online for 2024
- Author: Morgan
- Created at : 2024-05-19 05:11:50
- Updated at : 2024-05-20 05:11:50
- Link: https://ai-video-editing.techidaily.com/how-to-add-filter-to-video-online-for-2024/
- License: This work is licensed under CC BY-NC-SA 4.0.
