
:max_bytes(150000):strip_icc():format(webp)/full-frame-shot-of-speakers-1138109687-33289baddc314b44ae87abc2fc8060cd-e7bccad6d81244509ed97ddf557f89e4.jpg)
How to Add Subtitles to MKV Videos on All Platforms for 2024
How to Add Subtitles to MKV Videos on All Platforms
Many people use MKV files as it’s an open-source format and does not require licenses. This file format functions as a multimedia file container that can help you in storing audio and video tracks. However, there are some key disadvantages of using MKV files, as this format is not supported by various platforms or devices. So, the most suitable video file formats that you can use are FLV and MP4. These two formats offer high-quality results and are supported by multiple platforms.
If you still want to use MKV files and want to add subtitles, this article can assist you. By reading this article, you can learn how to add subtitles to MKV with different methods.
Part 1: How to Add Subtitles to MKV on Windows?
Are you a Windows user and want to add subtitles to MKV? Read this section to find out compatible tools that can add subtitles to your MKV videos efficiently.
1. Wondershare Filmora
Free Download For Win 7 or later(64-bit)
Free Download For macOS 10.14 or later
Wondershare Filmora is a popular tool that provides you with multiple options to edit video files. If you are interested in adding subtitles to your MKV files, you can navigate to its “Speech-to-Text” feature. This feature automatically transcribes the voice used in the video into subtitles. It supports 16 different languages for creating subtitles through this feature.
This feature can also enhance your editing efficiency as you don’t have to write the subtitles on your own. Moreover, the STT feature utilizes advanced algorithms that help the tool create subtitles with high precision. Furthermore, you can also manually add the subtitles to your MKV file using this MKV subtitle editor.
Key Features
- Filmora offers various effects, such as a green screen that can help you to change your background dramatically.
- If you want to resize your videos efficiently, this tool provides the Auto Reframe feature.
- Filmora also offers various preset templates that can help you to craft captivating videos easily.
Step-by-Step Guide to Add Subtitles Using Filmora
Step1 Create a New Filmora Project
Download and install Filmora on your PC and click “Create Project.” Afterward, import the MKV video from your PC to this tool by clicking on the “Arrow” icon.

Step2 Go to Titles Tab
After importing the video, drag it to the timeline. Once done, click on the “Titles” section given on top. Afterward, click on “Subtitles” from the left section. Now you will be able to see different types of subtitles on your screen. Select your favorite style of subtitles and tap on its “Download” icon.

Step3 Choose the Preferred Subtitle Style
After that, tap on the “Plus” icon to add your selected subtitle style to the timeline. Double-click on the added subtitles, which will open the settings. You can manually add the subtitles on the “Input Text” box easily. Moreover, you can easily change the text font, color, opacity, and alignment.

Step4 Export and Save Video
Once you have created subtitles for your imported video, click the “Export” button on top. Using this option, you can save the video file to your device or share it on other platforms.

2. Cisdem Video Converter
Cisdem is an efficient tool that can be used by content creators for various purposes. Along with editing the videos, this tool can help you add subtitles to your video files in any format. It supports various formats for adding subtitles, such as MKV, MP4, AVI, etc. This tool also offers a built-in editor to modify the MKV videos flawlessly. Hence, it’s a basic tool that generates quality results instantly.
Key Features
- Cisdem can function as a video converter that supports more than 300 file formats. You can convert to and from MKV files using this platform easily.
- Through this software, you can professionally add watermarks to your MKV files. It provides various options to add a customized watermark to your desired video files.
- It offers a built-in media player that allows you to play and watch MKV files without interruption.
Steps to Add Subtitles to MKV Using Cisdem Video Converter
Step1 Launch the Cisdem tool on your system and navigate to its “Converter”. Afterward, import the MKV file instantly. Now tap on the “Pencil” icon given on top to open the editing window.

Step2 From the editing window, go to “Subtitle and Audio” and click on “No subtitles.” From the drop-down box, click on “Load Subtitles” to upload your SRT or ASS subtitle file from your system.

Step3 Now press the “Save” button to proceed. As the default output format in this tool is MP4, navigate to the “General Video” section to change it. From this option, select “MKV Video” as the output format. Afterward, hit the “Convert” button to embed the added subtitles easily.

3. VLC Media Player
The VLC Media Player is a commonly used platform that offers various functions. It can be easily accessed and shows compatibility with tons of platforms. It has a simple interface that allows you to operate it easily. Through this tool, you can also add subtitles to MKV proficiently. This MKV subtitle editor supports various caption formats such as VobSub, SubRip, SubViewer, etc.
Key Features
- While watching a video on the VLC media player, you can take instant snapshots of your favorite moments in high resolution.
- This tool offers a screen recorder through which you can capture your activities on a desktop. You can also choose the frame rate and output format for your screen recording.
- You can enhance your video files by adding effects from this tool. Along with applying attractive video effects, you can also change the brightness and hue of your video.
Step-by-Step Guide to Add Subtitles Using VLC
Step1 Open your VLC media player and click on the “Media” tab given on top. From there, tap on the “Convert/Save” option.

Step2 A new dialogue box will open regarding “Open Media.” Now you can instantly upload your MKV file on this tool. By staying on the same window, check the box saying, “Use a subtitle file.” Afterward, browse the SRT file from your computer.

Step3 Now tap on the “Convert/Save” arrowhead and choose the “Convert” option from the drop-down menu. A new window will open from where you have to tap on the “Wretch” icon. On the “Encapsulation” section, select “MKV.”

Step4 By going to the “Audio codec” and “Video codec” sections, check the box “keep original video or audio track.” Now go to the “Subtitle” section and enable the option of “Overlay subtitles on the video.” Once done, hit the “Create” button.

Part 2: How to Add Subtitles to MKV on Mac?
Are you looking for MKV subtitle editors that are compatible with Mac? In this section, you can learn how to add subtitles to MKV on your Mac devices easily.
1. HD Video Converter Deluxe
This tool is highly compatible with Mac users and provides tons of advanced features. Besides being a great video editor, this tool can help you add subtitles to your MKV video files. It supports popular subtitle formats such as ASS, SSA, and SRT. If you want to embed hardcode subtitles into your MKV files, this is the most compatible tool.
Key Features
- If you want to decrease the video file size without harming its high quality, you can use this platform. This tool offers a video compressor through which you can reduce file sizes effectively.
- To combine your various video chunks or clips, this software offers a reliable video merger.
- If you are facing audio problems in your video, this tool can permanently adjust the volume according to your preference.
Step-by-Step Guide to Add Subtitles Using HD Video Converter Deluxe
Step1 Start by launching HD Video Converter Deluxe on your MacBook. Afterward, tap on the “+Video” button to import your MKV file.

Step2 On the Output Profile window, choose “MKV” as your output format. Click on the “OK” button to proceed. Now navigate to the “Edit” tab and select “Subtitle.” From there, check “Enable Subtitle.” Also, check “Extra” and then click on the “Add” button. Now you can import the subtitle file to this tool.

Step3 Click the “Done” button and then hit the “RUN” button to embed the subtitles.

2. Wondershare UniConverter
UniConverter is one of the famous tools that many people prefer due to its high reliability. Among its various advanced features, you can use its “Subtitle Editor” to add subtitles to MKV videos. You can create subtitles manually in your preferred font. Moreover, it provides an auto generator to create subtitles by extracting audio from the video file. This feature supports more than 100 languages to offer more diversity.
Key Features
- The MKV subtitle editor of UniConverter is also capable of converting text into subtitle lines through its TXT to SRT feature.
- You can remove backgrounds from your video and add a new one with a few clicks. This can make your video more captivating.
- It offers a vocal remover that can separate instrumental sounds and vocals from an audio or video file easily.
Step-by-Step Guide to Use the Subtitle Editor of UniConverter
Step1 Run UniConverter on your PC and click on “Subtitle Editor” from its homepage. A new window will open in which you have to import the MKV video file.

Step2 You can click on the “Manual Subtitles” button to add your subtitles with respect to the time duration. Or, you can tap on ‘Import Subtitles’ to upload the subtitles file from your MacBook. Other options are also available such as Text to Subtitles and Auto Subtitles.

Step3 You can edit the added subtitles by going to the “Styles” section. Here, you can change the font, color, and style of your subtitles. Once done, click on the “Save” button.

Part 3: How to Add Subtitles to MKV Online?
If you want to use online platforms to merge subtitles with MKV, here are the top two online tools.
1. Veed
Veed is an easy-to-use online tool that allows you to edit your video clips with high accuracy. Through this online tool, you can add subtitles to your MKV files in 3 different ways. You can upload subtitle files in formats like VVT, TXT, SSA, SRT, and ASS. Otherwise, you can enter the subtitles manually by selecting their color, font, size, and time duration. Moreover, you can use its voice recognition software to auto-create subtitles instantly.
Key Features
- To make your video clips funny and engaging, this tool enables you to add various emojis and stickers to your video files.
- You can explain the content in your video by adding annotations such as text boxes using this tool.
- To remove unwanted objects from your video, you can use the crop feature of Veed.
Step-by-Step Guide to Add Subtitles Using Veed
Step1 Access the official website of Veed and click on “Add Subtitles To video” from its tools. Afterward, click the “Choose Files” button and import your MKV file.

Step2 Once done with uploading, click on “Upload Subtitle File.” You can upload any of its supported subtitle files. Also, choose the language from the given box.

Step3 After importing the subtitles, you can modify them by altering their text color, color effect, style, and alignment. Once done, hit the “Export” button.

2. Flixier
Do you want an interesting tool to create subtitles? Flixier is an efficient online tool that can edit your video and audio files. Without making a user account, you can use this tool to add subtitles to MKV video files. You can upload MKV files from different platforms, such as your device, Google Drive, Zoom, Dropbox, etc. This tool also provides different ways to flawlessly create subtitles for your video files.
Key Features
- The subtitle editor of this tool offers more than 1000 fonts. Thus, you can make your subtitles look stylish by choosing a preferred font.
- To edit your videos, this tool allows you to collaborate with your friends in real-time.
- It offers more than 50 transitions that you can apply to your videos easily.
Step-by-Step Guide to Add Subtitles Using Flixier
Step1 Visit the website of Flixier and click on “Add subtitles to your videos” from its tools. Afterward, tap on “Get Started” to proceed. The tool will ask you to upload your video file.

Step2 Once you have uploaded the MKV video, click on “Text” given on the left side. Afterward, tap “Add Subtitle” to create subtitles for your video. You can add text to the given space to create subtitles. You can also tap on the “Import Subtitle” button to upload the subtitle file. To change the properties of your subtitles, you can edit them from the provided options on your screen.

Step3 Once done with creating and adjusting subtitles, click on the “Export” button.

Conclusion
Subtitles are shown at the bottom of a video and help make the video content comprehensive. If you are dealing with MKV files and want to add subtitles in an instant way, this article has provided all the details. By reading this guide, you can learn how to add subtitles to MKV files on different platforms.
To attain the best results and utilize advanced features, we will highly recommend you use Wondershare Filmora. This tool creates a comfortable environment and gives an intuitive interface to create subtitles.
Part 1: How to Add Subtitles to MKV on Windows?
Are you a Windows user and want to add subtitles to MKV? Read this section to find out compatible tools that can add subtitles to your MKV videos efficiently.
1. Wondershare Filmora
Free Download For Win 7 or later(64-bit)
Free Download For macOS 10.14 or later
Wondershare Filmora is a popular tool that provides you with multiple options to edit video files. If you are interested in adding subtitles to your MKV files, you can navigate to its “Speech-to-Text” feature. This feature automatically transcribes the voice used in the video into subtitles. It supports 16 different languages for creating subtitles through this feature.
This feature can also enhance your editing efficiency as you don’t have to write the subtitles on your own. Moreover, the STT feature utilizes advanced algorithms that help the tool create subtitles with high precision. Furthermore, you can also manually add the subtitles to your MKV file using this MKV subtitle editor.
Key Features
- Filmora offers various effects, such as a green screen that can help you to change your background dramatically.
- If you want to resize your videos efficiently, this tool provides the Auto Reframe feature.
- Filmora also offers various preset templates that can help you to craft captivating videos easily.
Step-by-Step Guide to Add Subtitles Using Filmora
Step1 Create a New Filmora Project
Download and install Filmora on your PC and click “Create Project.” Afterward, import the MKV video from your PC to this tool by clicking on the “Arrow” icon.
Step2 Go to Titles Tab
After importing the video, drag it to the timeline. Once done, click on the “Titles” section given on top. Afterward, click on “Subtitles” from the left section. Now you will be able to see different types of subtitles on your screen. Select your favorite style of subtitles and tap on its “Download” icon.
Step3 Choose the Preferred Subtitle Style
After that, tap on the “Plus” icon to add your selected subtitle style to the timeline. Double-click on the added subtitles, which will open the settings. You can manually add the subtitles on the “Input Text” box easily. Moreover, you can easily change the text font, color, opacity, and alignment.
Step4 Export and Save Video
Once you have created subtitles for your imported video, click the “Export” button on top. Using this option, you can save the video file to your device or share it on other platforms.
2. Cisdem Video Converter
Cisdem is an efficient tool that can be used by content creators for various purposes. Along with editing the videos, this tool can help you add subtitles to your video files in any format. It supports various formats for adding subtitles, such as MKV, MP4, AVI, etc. This tool also offers a built-in editor to modify the MKV videos flawlessly. Hence, it’s a basic tool that generates quality results instantly.
Key Features
- Cisdem can function as a video converter that supports more than 300 file formats. You can convert to and from MKV files using this platform easily.
- Through this software, you can professionally add watermarks to your MKV files. It provides various options to add a customized watermark to your desired video files.
- It offers a built-in media player that allows you to play and watch MKV files without interruption.
Steps to Add Subtitles to MKV Using Cisdem Video Converter
Step1 Launch the Cisdem tool on your system and navigate to its “Converter”. Afterward, import the MKV file instantly. Now tap on the “Pencil” icon given on top to open the editing window.
Step2 From the editing window, go to “Subtitle and Audio” and click on “No subtitles.” From the drop-down box, click on “Load Subtitles” to upload your SRT or ASS subtitle file from your system.
Step3 Now press the “Save” button to proceed. As the default output format in this tool is MP4, navigate to the “General Video” section to change it. From this option, select “MKV Video” as the output format. Afterward, hit the “Convert” button to embed the added subtitles easily.
3. VLC Media Player
The VLC Media Player is a commonly used platform that offers various functions. It can be easily accessed and shows compatibility with tons of platforms. It has a simple interface that allows you to operate it easily. Through this tool, you can also add subtitles to MKV proficiently. This MKV subtitle editor supports various caption formats such as VobSub, SubRip, SubViewer, etc.
Key Features
- While watching a video on the VLC media player, you can take instant snapshots of your favorite moments in high resolution.
- This tool offers a screen recorder through which you can capture your activities on a desktop. You can also choose the frame rate and output format for your screen recording.
- You can enhance your video files by adding effects from this tool. Along with applying attractive video effects, you can also change the brightness and hue of your video.
Step-by-Step Guide to Add Subtitles Using VLC
Step1 Open your VLC media player and click on the “Media” tab given on top. From there, tap on the “Convert/Save” option.
Step2 A new dialogue box will open regarding “Open Media.” Now you can instantly upload your MKV file on this tool. By staying on the same window, check the box saying, “Use a subtitle file.” Afterward, browse the SRT file from your computer.
Step3 Now tap on the “Convert/Save” arrowhead and choose the “Convert” option from the drop-down menu. A new window will open from where you have to tap on the “Wretch” icon. On the “Encapsulation” section, select “MKV.”
Step4 By going to the “Audio codec” and “Video codec” sections, check the box “keep original video or audio track.” Now go to the “Subtitle” section and enable the option of “Overlay subtitles on the video.” Once done, hit the “Create” button.
Part 2: How to Add Subtitles to MKV on Mac?
Are you looking for MKV subtitle editors that are compatible with Mac? In this section, you can learn how to add subtitles to MKV on your Mac devices easily.
1. HD Video Converter Deluxe
This tool is highly compatible with Mac users and provides tons of advanced features. Besides being a great video editor, this tool can help you add subtitles to your MKV video files. It supports popular subtitle formats such as ASS, SSA, and SRT. If you want to embed hardcode subtitles into your MKV files, this is the most compatible tool.
Key Features
- If you want to decrease the video file size without harming its high quality, you can use this platform. This tool offers a video compressor through which you can reduce file sizes effectively.
- To combine your various video chunks or clips, this software offers a reliable video merger.
- If you are facing audio problems in your video, this tool can permanently adjust the volume according to your preference.
Step-by-Step Guide to Add Subtitles Using HD Video Converter Deluxe
Step1 Start by launching HD Video Converter Deluxe on your MacBook. Afterward, tap on the “+Video” button to import your MKV file.
Step2 On the Output Profile window, choose “MKV” as your output format. Click on the “OK” button to proceed. Now navigate to the “Edit” tab and select “Subtitle.” From there, check “Enable Subtitle.” Also, check “Extra” and then click on the “Add” button. Now you can import the subtitle file to this tool.
Step3 Click the “Done” button and then hit the “RUN” button to embed the subtitles.
2. Wondershare UniConverter
UniConverter is one of the famous tools that many people prefer due to its high reliability. Among its various advanced features, you can use its “Subtitle Editor” to add subtitles to MKV videos. You can create subtitles manually in your preferred font. Moreover, it provides an auto generator to create subtitles by extracting audio from the video file. This feature supports more than 100 languages to offer more diversity.
Key Features
- The MKV subtitle editor of UniConverter is also capable of converting text into subtitle lines through its TXT to SRT feature.
- You can remove backgrounds from your video and add a new one with a few clicks. This can make your video more captivating.
- It offers a vocal remover that can separate instrumental sounds and vocals from an audio or video file easily.
Step-by-Step Guide to Use the Subtitle Editor of UniConverter
Step1 Run UniConverter on your PC and click on “Subtitle Editor” from its homepage. A new window will open in which you have to import the MKV video file.
Step2 You can click on the “Manual Subtitles” button to add your subtitles with respect to the time duration. Or, you can tap on ‘Import Subtitles’ to upload the subtitles file from your MacBook. Other options are also available such as Text to Subtitles and Auto Subtitles.
Step3 You can edit the added subtitles by going to the “Styles” section. Here, you can change the font, color, and style of your subtitles. Once done, click on the “Save” button.
Part 3: How to Add Subtitles to MKV Online?
If you want to use online platforms to merge subtitles with MKV, here are the top two online tools.
1. Veed
Veed is an easy-to-use online tool that allows you to edit your video clips with high accuracy. Through this online tool, you can add subtitles to your MKV files in 3 different ways. You can upload subtitle files in formats like VVT, TXT, SSA, SRT, and ASS. Otherwise, you can enter the subtitles manually by selecting their color, font, size, and time duration. Moreover, you can use its voice recognition software to auto-create subtitles instantly.
Key Features
- To make your video clips funny and engaging, this tool enables you to add various emojis and stickers to your video files.
- You can explain the content in your video by adding annotations such as text boxes using this tool.
- To remove unwanted objects from your video, you can use the crop feature of Veed.
Step-by-Step Guide to Add Subtitles Using Veed
Step1 Access the official website of Veed and click on “Add Subtitles To video” from its tools. Afterward, click the “Choose Files” button and import your MKV file.
Step2 Once done with uploading, click on “Upload Subtitle File.” You can upload any of its supported subtitle files. Also, choose the language from the given box.
Step3 After importing the subtitles, you can modify them by altering their text color, color effect, style, and alignment. Once done, hit the “Export” button.
2. Flixier
Do you want an interesting tool to create subtitles? Flixier is an efficient online tool that can edit your video and audio files. Without making a user account, you can use this tool to add subtitles to MKV video files. You can upload MKV files from different platforms, such as your device, Google Drive, Zoom, Dropbox, etc. This tool also provides different ways to flawlessly create subtitles for your video files.
Key Features
- The subtitle editor of this tool offers more than 1000 fonts. Thus, you can make your subtitles look stylish by choosing a preferred font.
- To edit your videos, this tool allows you to collaborate with your friends in real-time.
- It offers more than 50 transitions that you can apply to your videos easily.
Step-by-Step Guide to Add Subtitles Using Flixier
Step1 Visit the website of Flixier and click on “Add subtitles to your videos” from its tools. Afterward, tap on “Get Started” to proceed. The tool will ask you to upload your video file.
Step2 Once you have uploaded the MKV video, click on “Text” given on the left side. Afterward, tap “Add Subtitle” to create subtitles for your video. You can add text to the given space to create subtitles. You can also tap on the “Import Subtitle” button to upload the subtitle file. To change the properties of your subtitles, you can edit them from the provided options on your screen.
Step3 Once done with creating and adjusting subtitles, click on the “Export” button.
Conclusion
Subtitles are shown at the bottom of a video and help make the video content comprehensive. If you are dealing with MKV files and want to add subtitles in an instant way, this article has provided all the details. By reading this guide, you can learn how to add subtitles to MKV files on different platforms.
To attain the best results and utilize advanced features, we will highly recommend you use Wondershare Filmora. This tool creates a comfortable environment and gives an intuitive interface to create subtitles.
Best 12 Best Freeze Frame Video Editing Examples
Top 12 Best Freeze Frame Video Editing Examples
An easy yet powerful editor
Numerous effects to choose from
Detailed tutorials provided by the official channel
Freeze frame effect in video editing is a skill that requires more practice to master. It adds drama and impact to movies. If you want to see more energy and acting in the videos you watch, then you should see more freeze-frame examples.
Sometimes we notice that a particular action stays on longer than necessary in a movie or video. The filmmakers use this skill to emphasize some intense moments further to sustain or pique your interest.
The freeze-frame video editing feature is a valuable skill that helps filmmakers make excellent movies. We have a list of the top 12 examples of freeze-frame effects in movies for you.
In this article
01 [What is freeze-frame video editing?](#Part 1)
02 [Ways to use freeze-frame video editing](#Part 2)
03 [What are the best freeze-frame video editing examples?](#Part 3)
Part 1 What Is Freeze Frame Video Editing?
Freeze frame video editing is a video editing technique that halts movement in a video for a given period. It converts moving pictures into still photography for some time. These video editor effects help filmmakers gear attention to the video editing or filmmaking process. In other words, they are self-reflexive.
Part 2 Ways to Use Freeze Frame in Video editing
Freeze frames can be helpful in 3 significant ways in video editing;
● At the beginning of a movie/video: Freeze-frame at the beginning helps you pique the audience’s interest and give them a sneak peek of what to expect in the movie. This freeze-frame technique was used in the film ‘Good Fellas’ to pique the audience’s interests.
● At the end: Using a freeze-frame allows the audience to choose or decide how the movie ends, whether it is obvious. The ‘breakfast club’ filmmakers use a freeze-frame at the end to emphasize the young boy.
● In the middle, subtly capturing intense moments like in the movie ‘The Departed.’
Part 3 What are the Best Freeze-Frame Video Editing Examples?
It takes a great deal of skill to employ freeze frame with the best results correctly. It might bore the audience or give another impression other than the intended when not done effectively.
But several movie directors have effectively used the freeze-frame video editing technique that wowed the audience.
Here is a list of the best freeze frame examples you would love;
01The Departed

In this 2006 movie, an undercover cop and a mole try to identify each other. Scorsese shows his editing prowess once again as he uses freeze-frame more subtly.
He changes the frame speed instead of stopping on one frame for a considerably longer time. This emphasizes some memorable moments that you may overlook on a first watch.
02Rocky III

The freeze-frame came in during the final match between Apollo and Balboa in this movie.
During the first 3 Rocky movies, Apollo and Balboa had an intriguing rivalry. At the end of Rocky III, the duo decides to engage in a friendly battle to determine who was the Lord in boxing.
The movie ends in a freeze-frame with Rocky swinging a right hook after Apollo imitates the bell, saying, “Ding Dong.”
The freeze-frame allows the audience to guess who the winner will be, thus a longer time to think of the movie after watching.
03400 Blows

In 400 Blows, the main character Antoine, a young Parisian, was hardly out of trouble.
In an attempt to end his troubles, he arrives at the beach after running away from a soccer match.
He is faced with either jumping right in or going back. The movie ends in a freeze-frame as no one finds out. The decision was left to the audience.
04Thelma and Louise

Thelma and Louise is about two (2) friends, Thelma Dickinson and Louise Sawyer. They both rise to defend themselves in a male-dominated world. In the film, Thelma and Louise are both running from the authorities. Louise killed a man who almost raped her friend, Thelma, thus the run. Things get out of control as they try to escape to Mexico, away from the authorities.
While on the run, they get ambushed by the police towards the grand canyon. The audience, at this point, is in suspense as to whether the ladies will survive or not.
Instead of surrendering, they drive right into the grand canyon, and the movie ends in a freeze-frame as they get caught hanging in the air while plunging into the canyon.
Regular movies might decide to give us all the details of the car plunging and exploding.
05The Wolf of Wall Street

Scorsese uses freeze-frame at the beginning of this movie, just as he did in Good Fellas. The freeze-frame effect here helps introduce the character and shows us the plot of the movie hence piquing the audience’s interests immediately.
06Out of Sight

This movie is another excellent example of freeze-frame video editing. What other way to pique the audience’s interest significantly and emphasize them than capture them in a freeze-frame.
07Death Proof

In this movie, the freeze-frame stays till the very end. It captures three women as they raise their hands-on celebration after successfully beating to death a psychopath who has been killing young women.
08Butch Cassidy and the Sundance Kid

This movie follows two train robbers, Butch Cassidy and Harry Longabaugh, known as the ‘Sundance Kid.’ After conducting several robberies, they go on the run as the authorities pursue them. After a gun battle with the authorities, they take cover inside a building, but they get surrounded with no other escape route.
Thus they decide to engage in the last fight instead of surrendering, and you see them in a gun battle with the authorities. The movie ends with them caught in a freeze-frame brandishing their guns at the officers instead of actual bloodshed. Though we all know they will get killed.
09Good Fellas

Initially, we mentioned that a freeze-frame could be of use at the beginning of a movie. Scorsese used this effectively in ‘Good Fellas’ to emphasize the movie plot.
In the opening scene, the characters Henry, Jimmy, and Tonny, played by Ray Liotta, Robert De Niro, and Joe Pesci, respectively, stop their car in the middle of the road.
They open their truck and see a man badly wounded and beaten, Tonny stabs him, and Jimmy shoots him. Henry then closes the truck and looks on in a freeze-frame before uttering the lines, “As far back as I can remember, I have always wanted to be a gangster.”
This lets us know right away what will happen in the movie. That person will get killed, and this is the mob territory.
10Harry Potter and the Prisoner of Azkaban

During a bad and weird year at Hogwarts, Harry potter experiences an extremely joyous moment when he goes anti-gravity on his new Firebolt broom.
He becomes overjoyed and his expression gets captured in a freeze-frame.
11The Breakfast Club

The Breakfast Club is an 80s movie showing teenagers trying to find their identity in life and overcoming the challenges of these years.
This is another freeze frame example where the filmmakers showed great expertise. The character John Bender is caught in a freeze-frame, punching the air to celebrate his victory.
He has just shared a kiss with the class sweetheart Claire. He and his classmates have also just won over the authoritative principal, Mr. Vernon.
12Pulp Fiction: Pumpkin and Honey Bunny.

Pulp Fiction is another movie such as ‘Good Fellas’ with its freeze-frame edition done at the movie’s beginning.
Pumpkin and Honey Bunny are shown at the movie’s beginning, sitting together in a diner. They argue whether it will be safer to rub a bank or a restaurant. In the end, they settle for a diner — the same one they are sitting in.
They kiss and pull out their guns, and the images freeze before the credits roll out.
The freeze-frame gives us a sneak peek of the violence to experience in the movie, and indeed, we were not disappointed.
For Win 7 or later (64-bit)
For macOS 10.12 or later
With Wondershare Filmora Video Editor ‘s speed ramping feature, you can adjust your video speed while controlling the keyframes to create fascinating cinematic videos.
Filmora is a video editing tool developed by wondershare and has exciting features. Filmora makes video editing easy and seamless yet produces professional results.
Filmora’s freeze-frame feature helps bring dynamism and energy to your videos using its keyframe feature.
● Ending Thoughts →
● It is an inexplicable feeling that we get every time we remember a movie we watched a long time ago, the ones whereas kept debating with our friends as to what would have happened.
● That is the purpose of adding freeze-frame effects at the end of videos. So you keep thinking about them.
● Now that you know this effect, you can figure out which freeze-frame video examples you still find very interesting. Also, do not hesitate to try out the new features of Filmora. It would bring out the best of your video to the audience.
Freeze frame effect in video editing is a skill that requires more practice to master. It adds drama and impact to movies. If you want to see more energy and acting in the videos you watch, then you should see more freeze-frame examples.
Sometimes we notice that a particular action stays on longer than necessary in a movie or video. The filmmakers use this skill to emphasize some intense moments further to sustain or pique your interest.
The freeze-frame video editing feature is a valuable skill that helps filmmakers make excellent movies. We have a list of the top 12 examples of freeze-frame effects in movies for you.
In this article
01 [What is freeze-frame video editing?](#Part 1)
02 [Ways to use freeze-frame video editing](#Part 2)
03 [What are the best freeze-frame video editing examples?](#Part 3)
Part 1 What Is Freeze Frame Video Editing?
Freeze frame video editing is a video editing technique that halts movement in a video for a given period. It converts moving pictures into still photography for some time. These video editor effects help filmmakers gear attention to the video editing or filmmaking process. In other words, they are self-reflexive.
Part 2 Ways to Use Freeze Frame in Video editing
Freeze frames can be helpful in 3 significant ways in video editing;
● At the beginning of a movie/video: Freeze-frame at the beginning helps you pique the audience’s interest and give them a sneak peek of what to expect in the movie. This freeze-frame technique was used in the film ‘Good Fellas’ to pique the audience’s interests.
● At the end: Using a freeze-frame allows the audience to choose or decide how the movie ends, whether it is obvious. The ‘breakfast club’ filmmakers use a freeze-frame at the end to emphasize the young boy.
● In the middle, subtly capturing intense moments like in the movie ‘The Departed.’
Part 3 What are the Best Freeze-Frame Video Editing Examples?
It takes a great deal of skill to employ freeze frame with the best results correctly. It might bore the audience or give another impression other than the intended when not done effectively.
But several movie directors have effectively used the freeze-frame video editing technique that wowed the audience.
Here is a list of the best freeze frame examples you would love;
01The Departed
In this 2006 movie, an undercover cop and a mole try to identify each other. Scorsese shows his editing prowess once again as he uses freeze-frame more subtly.
He changes the frame speed instead of stopping on one frame for a considerably longer time. This emphasizes some memorable moments that you may overlook on a first watch.
02Rocky III
The freeze-frame came in during the final match between Apollo and Balboa in this movie.
During the first 3 Rocky movies, Apollo and Balboa had an intriguing rivalry. At the end of Rocky III, the duo decides to engage in a friendly battle to determine who was the Lord in boxing.
The movie ends in a freeze-frame with Rocky swinging a right hook after Apollo imitates the bell, saying, “Ding Dong.”
The freeze-frame allows the audience to guess who the winner will be, thus a longer time to think of the movie after watching.
03400 Blows
In 400 Blows, the main character Antoine, a young Parisian, was hardly out of trouble.
In an attempt to end his troubles, he arrives at the beach after running away from a soccer match.
He is faced with either jumping right in or going back. The movie ends in a freeze-frame as no one finds out. The decision was left to the audience.
04Thelma and Louise
Thelma and Louise is about two (2) friends, Thelma Dickinson and Louise Sawyer. They both rise to defend themselves in a male-dominated world. In the film, Thelma and Louise are both running from the authorities. Louise killed a man who almost raped her friend, Thelma, thus the run. Things get out of control as they try to escape to Mexico, away from the authorities.
While on the run, they get ambushed by the police towards the grand canyon. The audience, at this point, is in suspense as to whether the ladies will survive or not.
Instead of surrendering, they drive right into the grand canyon, and the movie ends in a freeze-frame as they get caught hanging in the air while plunging into the canyon.
Regular movies might decide to give us all the details of the car plunging and exploding.
05The Wolf of Wall Street
Scorsese uses freeze-frame at the beginning of this movie, just as he did in Good Fellas. The freeze-frame effect here helps introduce the character and shows us the plot of the movie hence piquing the audience’s interests immediately.
06Out of Sight
This movie is another excellent example of freeze-frame video editing. What other way to pique the audience’s interest significantly and emphasize them than capture them in a freeze-frame.
07Death Proof
In this movie, the freeze-frame stays till the very end. It captures three women as they raise their hands-on celebration after successfully beating to death a psychopath who has been killing young women.
08Butch Cassidy and the Sundance Kid
This movie follows two train robbers, Butch Cassidy and Harry Longabaugh, known as the ‘Sundance Kid.’ After conducting several robberies, they go on the run as the authorities pursue them. After a gun battle with the authorities, they take cover inside a building, but they get surrounded with no other escape route.
Thus they decide to engage in the last fight instead of surrendering, and you see them in a gun battle with the authorities. The movie ends with them caught in a freeze-frame brandishing their guns at the officers instead of actual bloodshed. Though we all know they will get killed.
09Good Fellas
Initially, we mentioned that a freeze-frame could be of use at the beginning of a movie. Scorsese used this effectively in ‘Good Fellas’ to emphasize the movie plot.
In the opening scene, the characters Henry, Jimmy, and Tonny, played by Ray Liotta, Robert De Niro, and Joe Pesci, respectively, stop their car in the middle of the road.
They open their truck and see a man badly wounded and beaten, Tonny stabs him, and Jimmy shoots him. Henry then closes the truck and looks on in a freeze-frame before uttering the lines, “As far back as I can remember, I have always wanted to be a gangster.”
This lets us know right away what will happen in the movie. That person will get killed, and this is the mob territory.
10Harry Potter and the Prisoner of Azkaban
During a bad and weird year at Hogwarts, Harry potter experiences an extremely joyous moment when he goes anti-gravity on his new Firebolt broom.
He becomes overjoyed and his expression gets captured in a freeze-frame.
11The Breakfast Club
The Breakfast Club is an 80s movie showing teenagers trying to find their identity in life and overcoming the challenges of these years.
This is another freeze frame example where the filmmakers showed great expertise. The character John Bender is caught in a freeze-frame, punching the air to celebrate his victory.
He has just shared a kiss with the class sweetheart Claire. He and his classmates have also just won over the authoritative principal, Mr. Vernon.
12Pulp Fiction: Pumpkin and Honey Bunny.
Pulp Fiction is another movie such as ‘Good Fellas’ with its freeze-frame edition done at the movie’s beginning.
Pumpkin and Honey Bunny are shown at the movie’s beginning, sitting together in a diner. They argue whether it will be safer to rub a bank or a restaurant. In the end, they settle for a diner — the same one they are sitting in.
They kiss and pull out their guns, and the images freeze before the credits roll out.
The freeze-frame gives us a sneak peek of the violence to experience in the movie, and indeed, we were not disappointed.
For Win 7 or later (64-bit)
For macOS 10.12 or later
With Wondershare Filmora Video Editor ‘s speed ramping feature, you can adjust your video speed while controlling the keyframes to create fascinating cinematic videos.
Filmora is a video editing tool developed by wondershare and has exciting features. Filmora makes video editing easy and seamless yet produces professional results.
Filmora’s freeze-frame feature helps bring dynamism and energy to your videos using its keyframe feature.
● Ending Thoughts →
● It is an inexplicable feeling that we get every time we remember a movie we watched a long time ago, the ones whereas kept debating with our friends as to what would have happened.
● That is the purpose of adding freeze-frame effects at the end of videos. So you keep thinking about them.
● Now that you know this effect, you can figure out which freeze-frame video examples you still find very interesting. Also, do not hesitate to try out the new features of Filmora. It would bring out the best of your video to the audience.
How to Create Photoshop GIF The 100% Easy Way
How to Create Photoshop GIF The 100% Easy Way
An easy yet powerful editor
Numerous effects to choose from
Detailed tutorials provided by the official channel
Having trouble creating Photoshop GIFs? Stay tuned to set everything straight.
In this article
01 [Easy Ways to Create an Animated GIF in Photoshop](#Part 1)
02 [6 Ways To Make An Animated GIF Without Photoshop](#Part 2)
Part 1 Easy Ways to Create an Animated GIF in Photoshop
Animated GIFs are a naturally captivating means of information exchange and entertainment. When the talk is about creating these, you can visibly see a flood of creation tools and software solutions. However, standing out in the crowd, are those catchy Photoshop snippets that certainly have the potential to leave you jaw dropped.
A Photoshop GIF is bound to capture attention, owing to its high quality imaging and top rated professional editing outlook. If you possess the editing flare, do try creating one for an amazing editing experience.
Creating Animated Photoshop GIFs: Easiest Solutions
Let’s take a look into some easy and interesting ways of creating a GIF in Photoshop, to leave you with handy solutions, just in case you feel motivated to take up the creation idea.
Before you begin, make sure to install and launch a suitable version the Photoshop application in your device and keep a set of selected images at hand that you will require for GIF creation.
● Step 1: Load Image Files
Photoshop requires you to load your selected files into its creation stack. There is no limit on the image count, but make sure you choose images in a natural series so that the GIF doesn’t give an out of the box feel.

Reach the ‘File’ tab at the top and load your image files into the Photoshop stack using the following path:
File -> Scripts -> Load Files into Stack

● Step 2: Image Selection
In the next pop-up window, click ‘Browse’ and choose the image file you wish to load into the Photoshop stack. In case the selected images seem tom lack proper alignment, click on the ‘Attempt to Automatically Align Source Images’ checkbox to set this straight and make your GIF frame stable.

Click on ‘OK’ when you are happy with your selections.

At this instant, Photoshop starts creating layers for the uploaded images, which you can see in the ‘Layers’ panel at the bottom-right. You are allowed to rearrange the image layers by selecting and dragging them or click on layer names to rename them.

If you notice distortion in Photoshop’s automatic alignment of your images, just crop the images frames to sort this out. Here’s how you can get this done:
● Tap the ‘Crop’ symbol.
● Adjust the crop frame to select the desired portion.
● Click on ‘Enter’ to confirm the action.
If you didn’t permit auto alignment previously, no worries, you can move ahead.
● Step 3: Make a Timeline Setup
Navigate to the ‘Window’ tab in the top menu and click the ’Timeline’ checkbox. You will see the ‘Timeline Window’ pop up below the Photoshop workspace, where you need to select the ‘Create Frame Animation’ tab. This will cause the options for frame animation to pop-up.

Select you topmost image layer, followed by clicking on the ‘Duplicate’ icon to generate a copy of the image frame.

● Step 4: Decide Time Frames
Select your topmost image frame to see a play duration of ‘0 sec’ below its thumbnail. Click to open the drop-down menu beside it and choose suitable time duration for the frame to run. Allot time durations to all successive frames in a similar manner.

● Step 5: Conceal Top Layers
You will see am combination of the first and second image layers in the image thumbnail. To set this right, navigate to ‘Layers’ to hide the top layer.

Continue to hide previous layers in successive frames so that each layer appears in its respective frame at the end of the process.

● Step 6: Preview Your Creation
Tap the ‘Play’ button to see your GIF preview. Ensure a smooth run with correct appearance order of images and precise frame durations.

● Step 7: Time to Share.
When you are satisfied, navigate to the ‘File’ tab and select ‘Save As’. From the menu that drops down, choose the GIF file format and click on ‘Save’.

In the ’GIF Save Options’ that follows, adjust file settings suited to your preference and tap ‘OK’.

As an alternative you can take the following path to open the ‘GIF Preview Window’:
File -> Export -> Save for Web

In the top-right comer, choose the GIF file format from the drop-down menu. There is also an option to resize your image at the bottom-right. It is advisable to keep the image size within 500 pixels for a convenient export across various media sharing platforms. When you finish, click on ‘Save’. Your creation is now ready for a media export.

Part 2 6 Ways to Make an Animated GIF Without Photoshop
The idea to create GIF in Photoshop is fun and exciting, no doubt on that, but you may often want to switch to a different platform. No issues with that, the web is there to sort out everything for you. All you need to do is open your favorite browser to land across a heap of welcoming solutions to create GIFs without Photoshop. Let’s have a look through the best ones:
01**Wondershare Filmora Video Editor **
Filmora by Wondershare is probably the best GIF maker tool you can rely on. This is packed with a diverse inventory of exciting design features that are ready to provide a creative boost to your editing skills. Loaded with a ton of classic audio visual effects, this software is certainly comprises of everything you need to create static and animated GIFs like a pro.

Wondershare Filmora - Best Video Editor for Mac/Windows
5,481,435 people have downloaded it.
Build unique custom animations without breaking a sweat.
Focus on creating epic stories and leave the details to Filmora’s auto features.
Start a creative adventure with drag & drop effects and endless possibilities.
Filmora simplifies advanced features to save you time and effort.
Filmora cuts out repetition so you can move on to your next creative breakthrough.
Key Features
● This is free software with possibly the most convenient interface.
● You get the freedom to play with hundreds of audio-visual effects to your heart’s content.
● You can create GIFs with static images and videos that are simply awesome to say the least.
● You need not worry about specific file formats. The software is compatible with almost all commonly known ones.
● Filmora allows you to expand and explore your editing talent to the fullest. You can play with tools like, cut, trim or combine image frames and make color and speed adjustments to get the perfect results for your artwork.
02Photoscape
This is another GIF maker tool you can choose to create catchy and interesting GIFs. Photoscape is a simple graphic editor that makes GIF creation exciting and fun. Available to you for free, this software allows you to design and edit animated GIFs with a series of image enhancements, like, resizing, color selection, image prints, etc. Photoscape is compatible with your Windows, Linux and Mac supported devices and has a clean interface. However, the program may sometimes take up a slow run.

Key Features
● You can improvise you GIF with image editing tools, like, color and size adjustments, clip arts, effects, overlays, etc.
● It has a unique ‘Photo Batch’ tool that you can use to process and rename multiple images simultaneously.
● Photoscape allows you to create interesting collages by merging a series of images into a single one.
● You can create captivating animated GIFs with multiple still images.
● The software is loaded with a bunch of utilities like, photo splitter, page merger, color picker, image viewer and others to give that perfect professional outlook to your creations.
03Gifted Motion
This is also among the commonly preferred GIF creator software. The best this about the tool is that it is platform independent and compatible with almost any Operating System. Another choice appeal of the software is its direct workability that is, you don’t require any program installations to create GIFs using this tool.

Key Features
● This is a simple graphic editor that runs on JAVA and is quite convenient to use.
● You can use this software to edit and create GIFs with images saved locally in your device.
● File formats supported by the software include PNG, JPEG, BMP and GIF.
● You don’t need to worry about licensing costs or in-app purchases; this tool is absolutely free to use.
● Loading big image files on this software may however, cost you some extra time.
01SSuite GIF Animator
This one is Windows compatible software that works well with both, 32 and 64-bit Operating System configurations. It lies among those ’Green Software Programs’ that cut down on your net energy cost. Apart from high quality animated GIFs, y6ou can also create movies and slides shows with this software.

Key Features
● This is a free of cost, clean and user-friendly graphic editor software.
● You don’t require Windows registration to use this software
● You can conveniently save the software into any USB or memory device; it is easily portable.
● It facilitates a speedy GIF creation and editing.
● You can explore a variety of editing features and add separate time frames to each image using this software.
● Picasion
This is a free, online GIF maker tool that gives you the liberty to import images and videos from different app galleries, like, Picasa, Flickr and others to create and edit motion GIFs. The tool, though having a simple interface and feature packed, is quite ad-stricken, but you can skip that by sticking to the right webpage.

Key Features
● The tool crosses language borders and is available to you in English, Spanish, Portuguese and Russian.
● You can make size adjustments to the GIF images, or add a completely new avatar of your own.
● The tool offers you a variety of editing effects and filters to enhance and improvise your created GIFs.
● You need not limit yourself to specific file formats with this tool; all common ones are conveniently supported.
● It is a quick and clean tool that rescues you from the glitch of a messy interface.
05GifPal
This one is also a free, online GIF creator with amazing editing features and tools. It comes with a diverse library of 20 frames and 30 effects to choose from, for creating normal and animated GIFs. It further has a variety of drawing and text editing tools you can use to add messages to your GIFs to make more impactful.

Key Features
● The tool is packed with a vast set of quality image editing tools that can create attractive motion and animated GIFs.
● The tool allows you to adjust and change the speed of image frames to give a natural flow to your GIF.
● An exclusive feature of the tool is that it allows you to edit frames in its timeline.
● Your creations with the tools are deprived of any default watermarks. You can either add one of your choice, or even create GIFs without a watermark.
● The tool site is free of unwanted and irrelevant ads.
● Key Takeaways from This Episode →
● Making a GIF in Photoshop is a great idea to design animation snippets, both for fun and a target purpose. Using the Photoshop GIF maker ensures quality and class in complete professional styles.
● However, if you are keen on browsing through other GIF creator alternatives, you can safely pick the Filmora GIF Maher software for creating excellent, next level animated GIFs.
Having trouble creating Photoshop GIFs? Stay tuned to set everything straight.
In this article
01 [Easy Ways to Create an Animated GIF in Photoshop](#Part 1)
02 [6 Ways To Make An Animated GIF Without Photoshop](#Part 2)
Part 1 Easy Ways to Create an Animated GIF in Photoshop
Animated GIFs are a naturally captivating means of information exchange and entertainment. When the talk is about creating these, you can visibly see a flood of creation tools and software solutions. However, standing out in the crowd, are those catchy Photoshop snippets that certainly have the potential to leave you jaw dropped.
A Photoshop GIF is bound to capture attention, owing to its high quality imaging and top rated professional editing outlook. If you possess the editing flare, do try creating one for an amazing editing experience.
Creating Animated Photoshop GIFs: Easiest Solutions
Let’s take a look into some easy and interesting ways of creating a GIF in Photoshop, to leave you with handy solutions, just in case you feel motivated to take up the creation idea.
Before you begin, make sure to install and launch a suitable version the Photoshop application in your device and keep a set of selected images at hand that you will require for GIF creation.
● Step 1: Load Image Files
Photoshop requires you to load your selected files into its creation stack. There is no limit on the image count, but make sure you choose images in a natural series so that the GIF doesn’t give an out of the box feel.
Reach the ‘File’ tab at the top and load your image files into the Photoshop stack using the following path:
File -> Scripts -> Load Files into Stack
● Step 2: Image Selection
In the next pop-up window, click ‘Browse’ and choose the image file you wish to load into the Photoshop stack. In case the selected images seem tom lack proper alignment, click on the ‘Attempt to Automatically Align Source Images’ checkbox to set this straight and make your GIF frame stable.
Click on ‘OK’ when you are happy with your selections.
At this instant, Photoshop starts creating layers for the uploaded images, which you can see in the ‘Layers’ panel at the bottom-right. You are allowed to rearrange the image layers by selecting and dragging them or click on layer names to rename them.
If you notice distortion in Photoshop’s automatic alignment of your images, just crop the images frames to sort this out. Here’s how you can get this done:
● Tap the ‘Crop’ symbol.
● Adjust the crop frame to select the desired portion.
● Click on ‘Enter’ to confirm the action.
If you didn’t permit auto alignment previously, no worries, you can move ahead.
● Step 3: Make a Timeline Setup
Navigate to the ‘Window’ tab in the top menu and click the ’Timeline’ checkbox. You will see the ‘Timeline Window’ pop up below the Photoshop workspace, where you need to select the ‘Create Frame Animation’ tab. This will cause the options for frame animation to pop-up.
Select you topmost image layer, followed by clicking on the ‘Duplicate’ icon to generate a copy of the image frame.
● Step 4: Decide Time Frames
Select your topmost image frame to see a play duration of ‘0 sec’ below its thumbnail. Click to open the drop-down menu beside it and choose suitable time duration for the frame to run. Allot time durations to all successive frames in a similar manner.
● Step 5: Conceal Top Layers
You will see am combination of the first and second image layers in the image thumbnail. To set this right, navigate to ‘Layers’ to hide the top layer.
Continue to hide previous layers in successive frames so that each layer appears in its respective frame at the end of the process.
● Step 6: Preview Your Creation
Tap the ‘Play’ button to see your GIF preview. Ensure a smooth run with correct appearance order of images and precise frame durations.
● Step 7: Time to Share.
When you are satisfied, navigate to the ‘File’ tab and select ‘Save As’. From the menu that drops down, choose the GIF file format and click on ‘Save’.
In the ’GIF Save Options’ that follows, adjust file settings suited to your preference and tap ‘OK’.
As an alternative you can take the following path to open the ‘GIF Preview Window’:
File -> Export -> Save for Web
In the top-right comer, choose the GIF file format from the drop-down menu. There is also an option to resize your image at the bottom-right. It is advisable to keep the image size within 500 pixels for a convenient export across various media sharing platforms. When you finish, click on ‘Save’. Your creation is now ready for a media export.
Part 2 6 Ways to Make an Animated GIF Without Photoshop
The idea to create GIF in Photoshop is fun and exciting, no doubt on that, but you may often want to switch to a different platform. No issues with that, the web is there to sort out everything for you. All you need to do is open your favorite browser to land across a heap of welcoming solutions to create GIFs without Photoshop. Let’s have a look through the best ones:
01**Wondershare Filmora Video Editor **
Filmora by Wondershare is probably the best GIF maker tool you can rely on. This is packed with a diverse inventory of exciting design features that are ready to provide a creative boost to your editing skills. Loaded with a ton of classic audio visual effects, this software is certainly comprises of everything you need to create static and animated GIFs like a pro.
Wondershare Filmora - Best Video Editor for Mac/Windows
5,481,435 people have downloaded it.
Build unique custom animations without breaking a sweat.
Focus on creating epic stories and leave the details to Filmora’s auto features.
Start a creative adventure with drag & drop effects and endless possibilities.
Filmora simplifies advanced features to save you time and effort.
Filmora cuts out repetition so you can move on to your next creative breakthrough.
Key Features
● This is free software with possibly the most convenient interface.
● You get the freedom to play with hundreds of audio-visual effects to your heart’s content.
● You can create GIFs with static images and videos that are simply awesome to say the least.
● You need not worry about specific file formats. The software is compatible with almost all commonly known ones.
● Filmora allows you to expand and explore your editing talent to the fullest. You can play with tools like, cut, trim or combine image frames and make color and speed adjustments to get the perfect results for your artwork.
02Photoscape
This is another GIF maker tool you can choose to create catchy and interesting GIFs. Photoscape is a simple graphic editor that makes GIF creation exciting and fun. Available to you for free, this software allows you to design and edit animated GIFs with a series of image enhancements, like, resizing, color selection, image prints, etc. Photoscape is compatible with your Windows, Linux and Mac supported devices and has a clean interface. However, the program may sometimes take up a slow run.
Key Features
● You can improvise you GIF with image editing tools, like, color and size adjustments, clip arts, effects, overlays, etc.
● It has a unique ‘Photo Batch’ tool that you can use to process and rename multiple images simultaneously.
● Photoscape allows you to create interesting collages by merging a series of images into a single one.
● You can create captivating animated GIFs with multiple still images.
● The software is loaded with a bunch of utilities like, photo splitter, page merger, color picker, image viewer and others to give that perfect professional outlook to your creations.
03Gifted Motion
This is also among the commonly preferred GIF creator software. The best this about the tool is that it is platform independent and compatible with almost any Operating System. Another choice appeal of the software is its direct workability that is, you don’t require any program installations to create GIFs using this tool.
Key Features
● This is a simple graphic editor that runs on JAVA and is quite convenient to use.
● You can use this software to edit and create GIFs with images saved locally in your device.
● File formats supported by the software include PNG, JPEG, BMP and GIF.
● You don’t need to worry about licensing costs or in-app purchases; this tool is absolutely free to use.
● Loading big image files on this software may however, cost you some extra time.
01SSuite GIF Animator
This one is Windows compatible software that works well with both, 32 and 64-bit Operating System configurations. It lies among those ’Green Software Programs’ that cut down on your net energy cost. Apart from high quality animated GIFs, y6ou can also create movies and slides shows with this software.
Key Features
● This is a free of cost, clean and user-friendly graphic editor software.
● You don’t require Windows registration to use this software
● You can conveniently save the software into any USB or memory device; it is easily portable.
● It facilitates a speedy GIF creation and editing.
● You can explore a variety of editing features and add separate time frames to each image using this software.
● Picasion
This is a free, online GIF maker tool that gives you the liberty to import images and videos from different app galleries, like, Picasa, Flickr and others to create and edit motion GIFs. The tool, though having a simple interface and feature packed, is quite ad-stricken, but you can skip that by sticking to the right webpage.
Key Features
● The tool crosses language borders and is available to you in English, Spanish, Portuguese and Russian.
● You can make size adjustments to the GIF images, or add a completely new avatar of your own.
● The tool offers you a variety of editing effects and filters to enhance and improvise your created GIFs.
● You need not limit yourself to specific file formats with this tool; all common ones are conveniently supported.
● It is a quick and clean tool that rescues you from the glitch of a messy interface.
05GifPal
This one is also a free, online GIF creator with amazing editing features and tools. It comes with a diverse library of 20 frames and 30 effects to choose from, for creating normal and animated GIFs. It further has a variety of drawing and text editing tools you can use to add messages to your GIFs to make more impactful.
Key Features
● The tool is packed with a vast set of quality image editing tools that can create attractive motion and animated GIFs.
● The tool allows you to adjust and change the speed of image frames to give a natural flow to your GIF.
● An exclusive feature of the tool is that it allows you to edit frames in its timeline.
● Your creations with the tools are deprived of any default watermarks. You can either add one of your choice, or even create GIFs without a watermark.
● The tool site is free of unwanted and irrelevant ads.
● Key Takeaways from This Episode →
● Making a GIF in Photoshop is a great idea to design animation snippets, both for fun and a target purpose. Using the Photoshop GIF maker ensures quality and class in complete professional styles.
● However, if you are keen on browsing through other GIF creator alternatives, you can safely pick the Filmora GIF Maher software for creating excellent, next level animated GIFs.
Edit FLV Video Files with FLV Editor [Windows, Mac,Android, iPhone
FLV is a common container format for transferring digital video and audio information over the Internet. A.flv file is a flash video that may be seen on your computer with Adobe Flash Player, Adobe Air, or some third-party Adobe Flash plugins.
FLV has become the standard video format for web-based streaming video service providers such as Hulu and VEVO due to its superior functionality and tiny size. It’s also the default format for Quicktime on Mac systems.
If you wish to edit FLV videos without any problems, you should utilize a multipurpose video editor that supports the FLV file format.
Best FLV Editor to Edit FlV Video on Windows and Mac - Filmroa Video Editor
Filmora Video Editor is a professional FLV video editing application. This software allows you to edit 4K video files, share completed films directly on social media platforms, and add subtitles and audio files.
You may mix multiple films and enhance your footage with numerous transitions and other effects using this FLV video editing software. Furthermore, the free Filmora application is ideal for adding audio files or video clips from the wide library and uploading your soundtrack.
For Win 7 or later (64-bit)
For macOS 10.14 or later
Therefore, you can use the following steps to edit FLV video on Windows and Mac:
Step 1: Import file:

Step 2: Edit the FLV file:
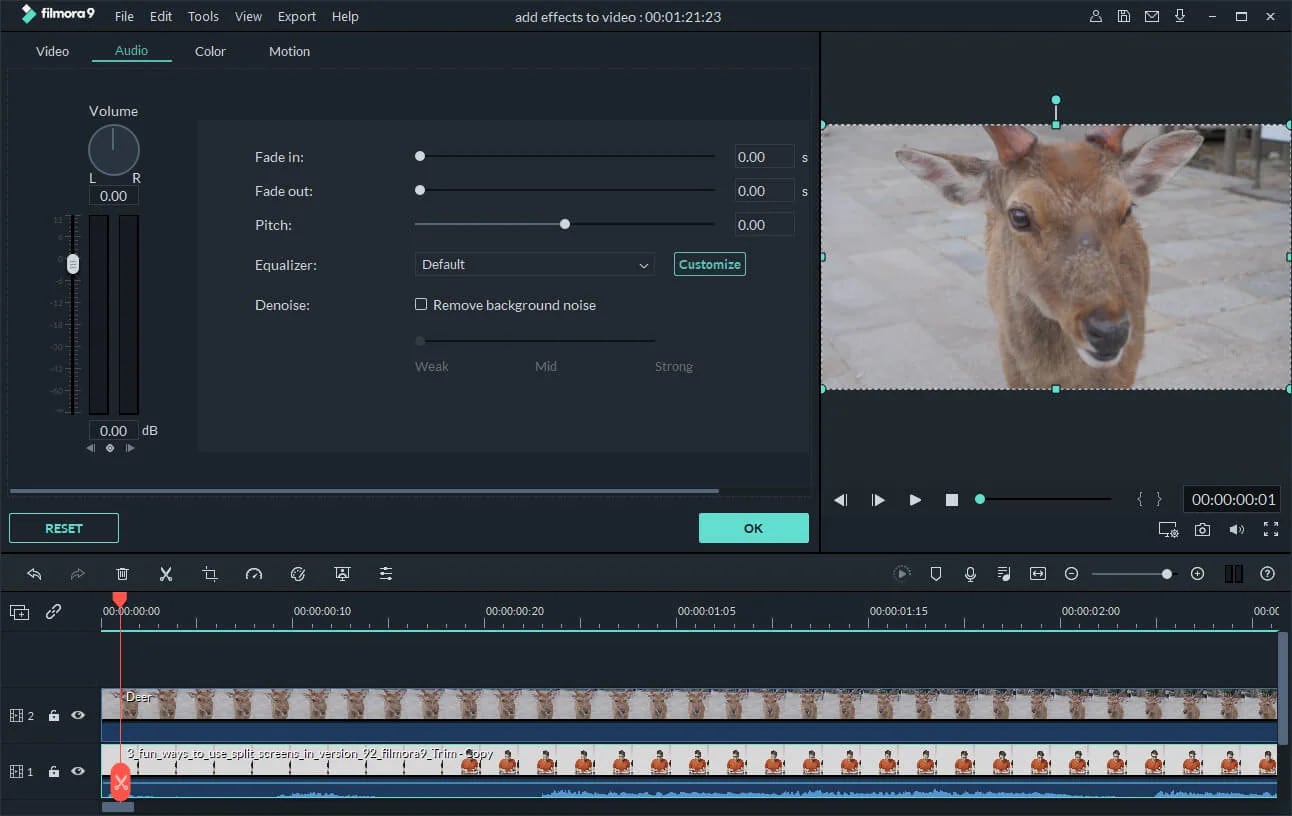
Acquire the perfect tool in your palm for anything you want to do, such as clipping, cropping, rotating, and more.
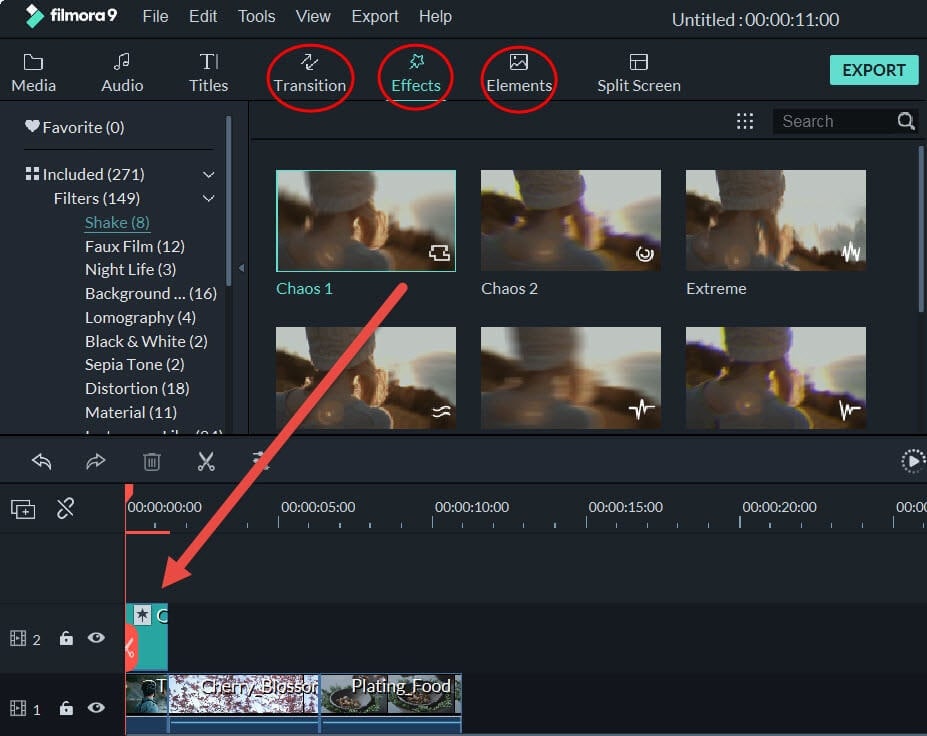
Furthermore, all editing capabilities in the toolbar allow drag-and-drop, making it even easier to touch up your films quickly. Consider the following scenario:
- Drag and drop a transition into the video/photo, or right-click it and select “Apply to All.”
- Please drag & drop a title template to the position where you want it to appear, then adjust it.
- To use the effects, select one from the 50+ available video effects, select it, and apply it to your photos/videos instantaneously.
Step 3: Save or Export the file:

When you’re done, export your modified MP4 files to Windows/Mac and quickly share them on YouTube, with the option of sending a message to Facebook and Twitter. When you click Create in the program window’s middle right corner, you’ll be taken to the Output window below.
Alternative Way to Edit FlV Video on Windows
1. VSDC
VSDC is a free video editor along with a lot of advanced features. Cut, combine, trim, crop, and other editing capabilities are available to help you polish your FLV films.
Although it may not look logical, learning the editing capabilities hidden within modular boxes is simple. One noteworthy aspect of VSDC is its ability to produce good visual effects using many trendy video effects, transitions, and filters.
Furthermore, strong chroma keys, color correction, object modification, and other editing tools can be utilized to edit FLV videos. It not only creates excellent FLV videos, but it also supports a wide range of media conversion, allowing you to convert FLV files to various formats and export them without a watermark.
Therefore, follow the below mentioned steps to edit FLV video using VSDC:
Step 1: Install the software on the Windows. Open the application and import the video.
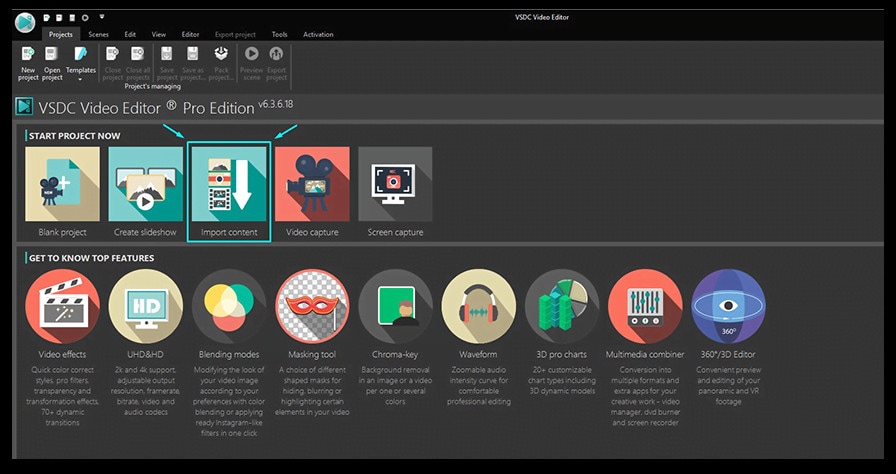
Step 2: Use cutting and splitting tools to edit the video.
The first icon is a picture of a pair of scissors, which is a cutting tool. It’s very useful when you need to cut the beginning or end of a film. Place the cursor exactly where you want to cut, then select “Trim start” or “Trim finish” from the dropdown cutting menu (the small triangle next to the scissors icon).
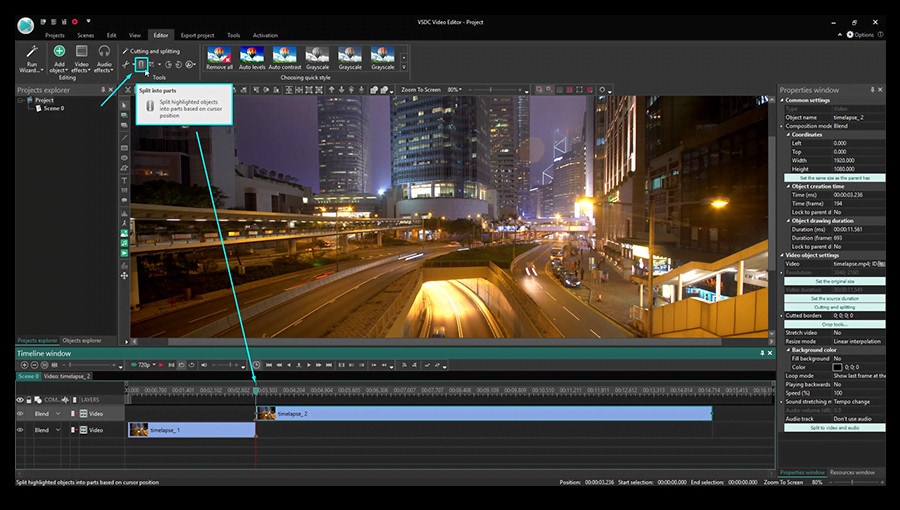
Cropping is also simple. If you have too much additional space around the scene object recorded, just choose the file you want to trim and select the cropping icon from the “Cutting and Splitting” option. A new window will appear, allowing you to select the region of the scene that should stay.
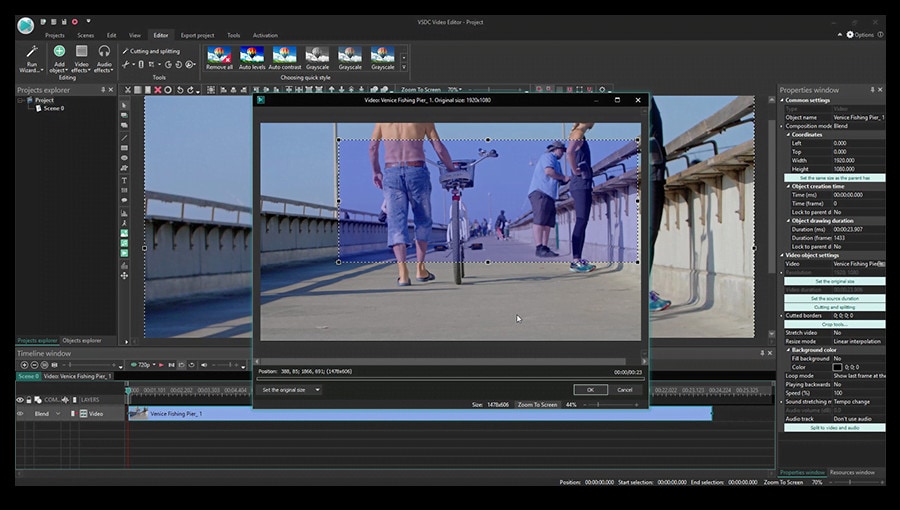
Step 3: Apply effects and transitions.
To use one, first select the video file you wish to edit, then go to the Video effects tab and select the effect you want to use. On the timeline, a new tab will appear, containing all of the effects done to the selected object. You can alter the effect’s duration and position in time by dragging it with the mouse there. The properties pane on the right-hand side can be used to change other parameters.
Transitions follow the same rule. Place your cursor where you want the transition to begin, then choose a transition from the Video effects dropdown menu and manually adjust the duration.
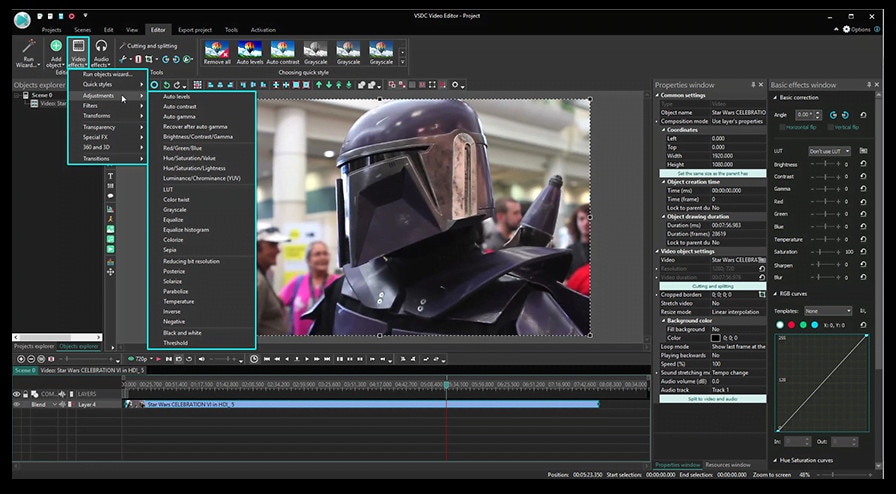
Step 4: Save changes and export video.
Make sure your movie appears exactly how you want it to before exporting it. If the video appears choppy, use the red preview button and lower the preview quality. When the PC’s resources are insufficient to process the video in real time, lagging can occur. Keep in mind that it has no bearing on the outcome. When you’re finished, navigate to the Export project tab and select an export format.
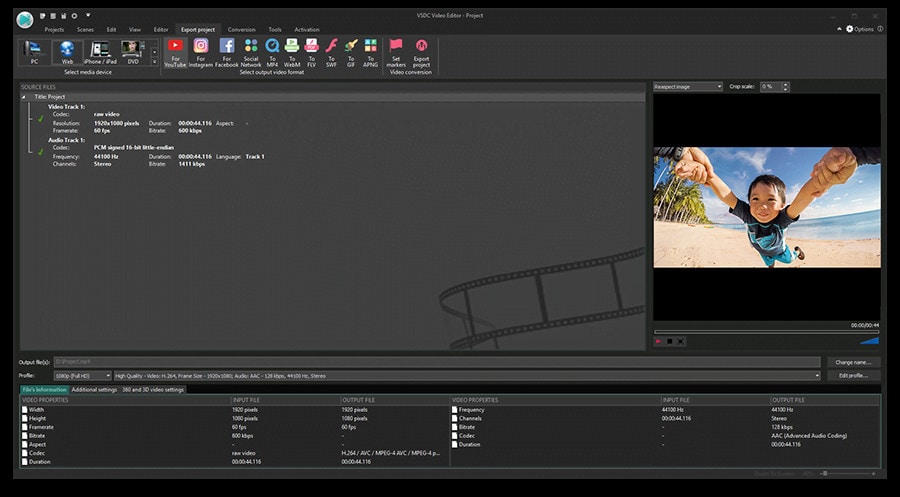
2. Adobe Premiere Pro:
Professional video editors use Premiere Pro to make everything from YouTube videos to Hollywood films like Mank, a 2021 Oscar candidate. It’s also widely utilized in the workflows of designers, animators, and VFX artists, and we can see why after lengthy testing.
We found the software’s UI to be simple to use, and it increased our productivity by separating things into various workspaces, such as editing, effects, and audio. When we tested it on both Mac and PC, we discovered that each workspace helps handle a specific activity while minimizing distraction.
Edit the FLV video with Adobe Premiere Pro using the following steps:
Step 1: Import the video and create initial sequence.
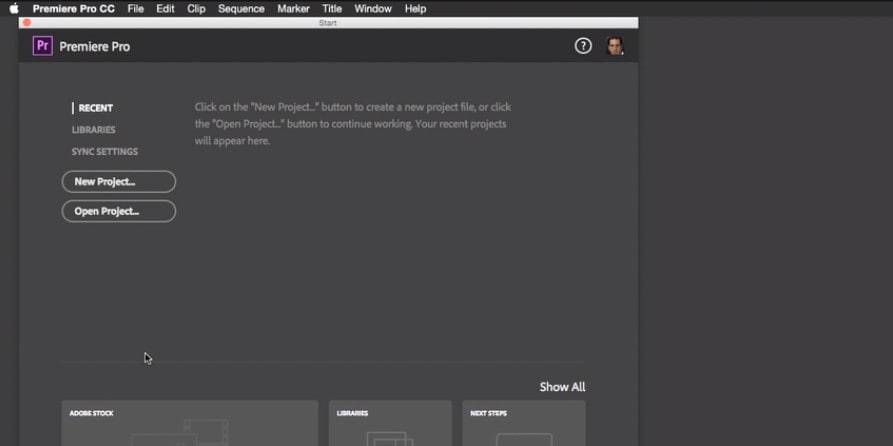
Step 2: In the Timeline, trim and rearrange clips, add audio, and transitions.
Step 3: Add title and graphics.
In Premiere Pro, you may make onscreen titles, as well as stylize and animate your images.
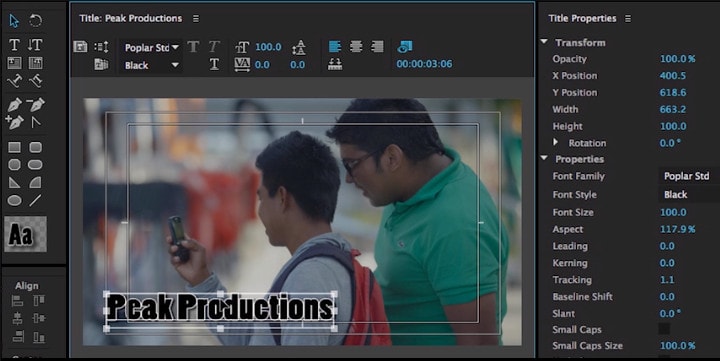
Step 4: Export your video.

Alternative Way to Edit FlV Video on Mac
1. Blender:
Under the GNU General Public License, Blender is a free, open-source 3D content production program that runs on all major operating systems. Blender is one of the greatest video editors for both Windows and Mac, with advanced features such as modifier-based modeling tools, powerful character animation capabilities, a node-based material, etc.
Because it is developed for professionals, it is tough to use as a beginner. However, it is unrestricted in its use and distribution. In addition, color options are changeable and versatile in the UI.
In contrast, this free video editor is perfect for semi-pros or those who want to enhance their video editing skills. However, you’ll need a lot of time and effort to learn it.
Step 1: Open the application.
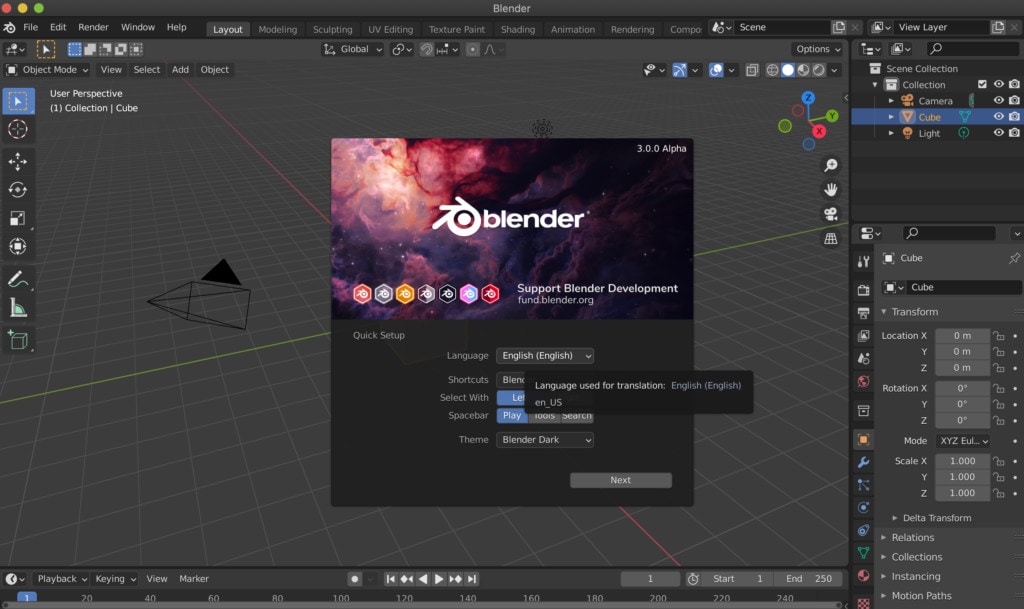
Step 2: Then, go into File->New->Video Editing to open the video editor.
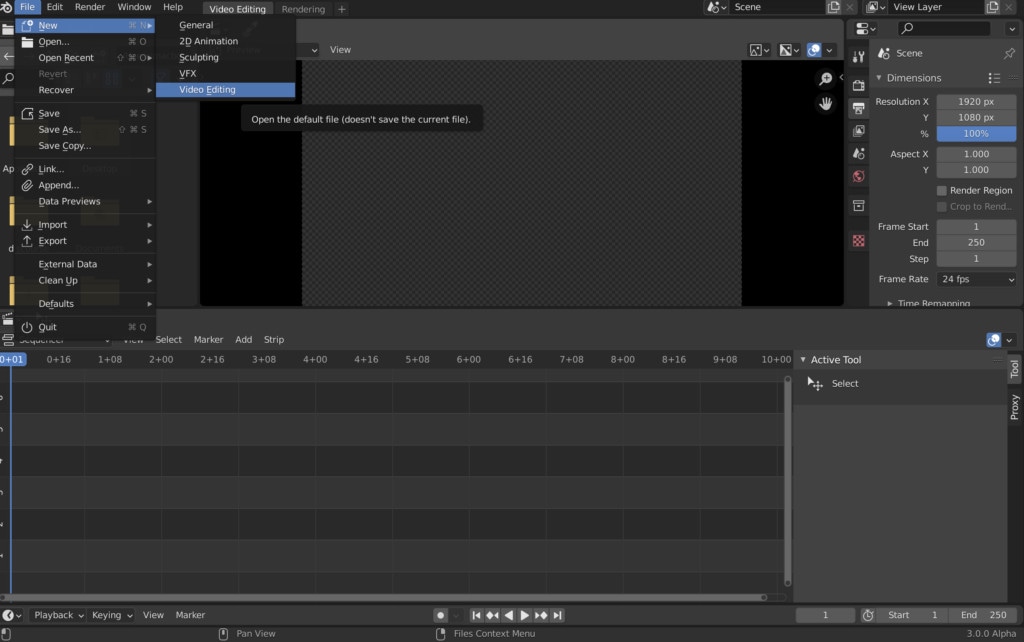
Step 3: Import the video and start editing using the editing tools.
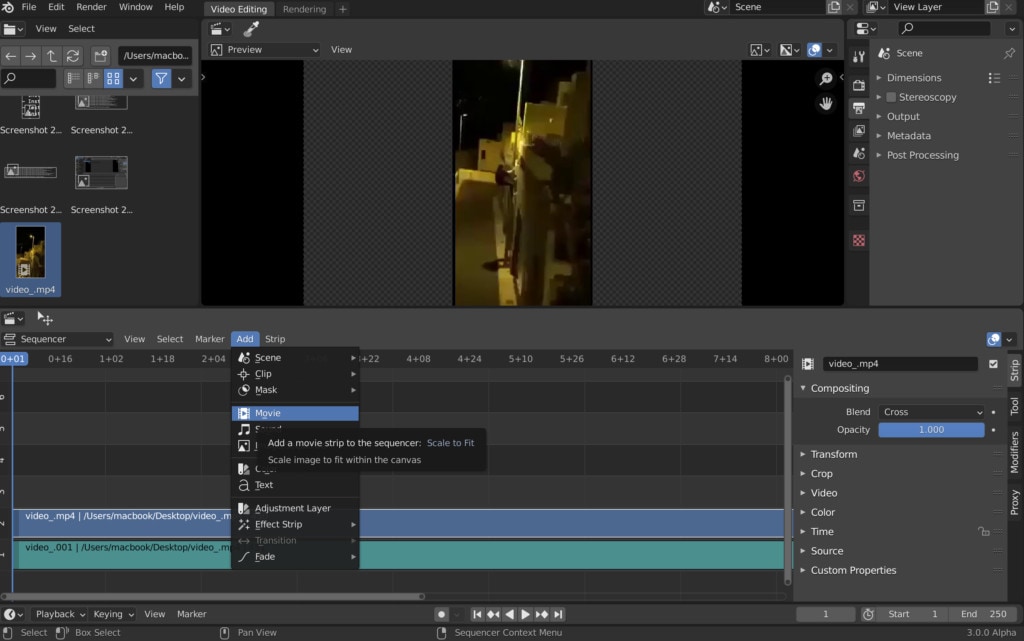
Step 4: Save and export the video.

2. Final Cut Pro:
When it comes to video editing software, Apple’s Final Cut Pro is one of the industry standards. As a result, it’s widely utilized in the television and film industries - at least among Mac users. However, one of the truly convincing reasons to choose it over Premiere Pro is because it is subscription-free: you only pay once.
The software’s Magnetic Timeline, grouping tools, a vast selection of effects, solid organizational capabilities, and simple ways to add and edit audio make it a favorite among professional video editors. 360° video, HDR, and powerful color correcting tools are among the other capabilities. It’s a strong software with a lot of features.
Follow the steps to edit FLV video using Final Cut Pro:
Step 1: Create Project.
To make a movie in Final Cut Pro, you must first establish a project, which keeps track of your editing selections and the media you utilize.
Step 2: Select and add clips to the timeline:
The second stage in making a movie with Final Cut Pro is to add and arrange clips in your project. In the timeline, you can move and reorder clips.
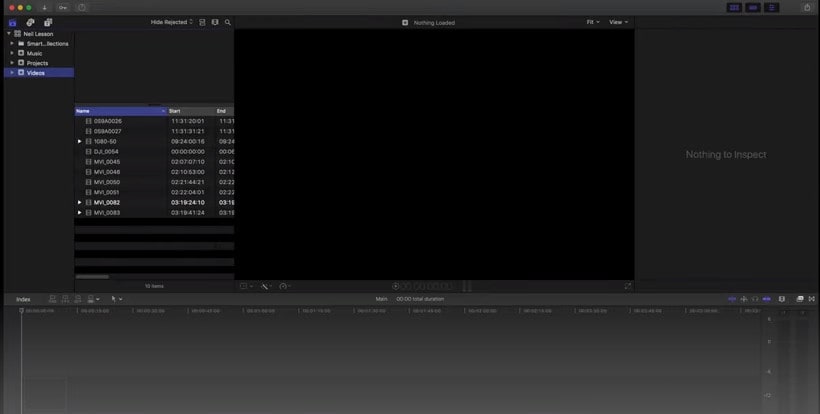
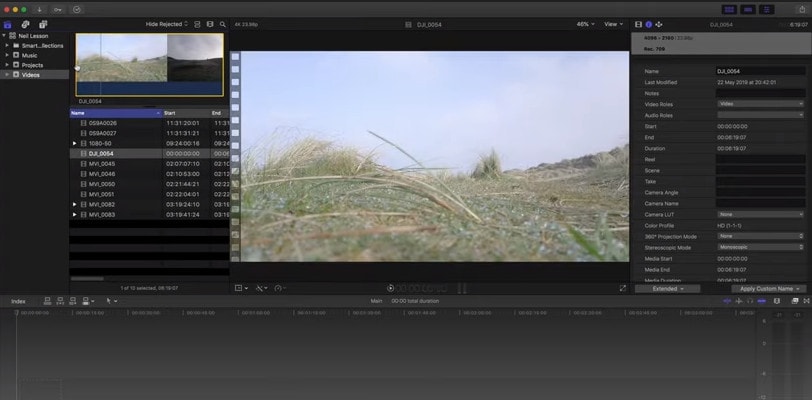
Step 3: Cut and trim video:
Final Cut Pro has a number of features for altering the start and stop points of clips in the timeline, as well as regulating the pacing of shots from one to the next.
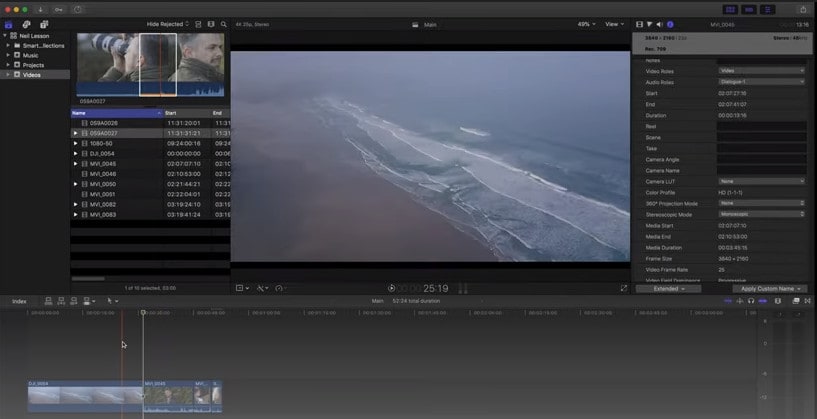
Step 4: Edit the video by adding effects and transitions:
Final Cut Pro includes a number of advanced editing features that make it simple to create a professional film. Visual enhancements and colour correction are among the finishing touches.

Step 5: Save and export video:
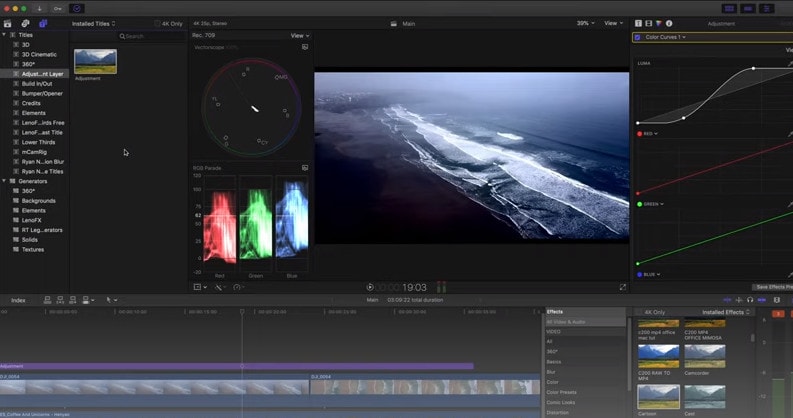
2 Ways to Edit FlV Video on Android:
1. Inshot:
For Android users, Inshot is a fantastic image and video editor. This Android video editor allows you to add popular stickers and emoticons to your films, making them more fashionable and unique.
The program supports HD video output, allowing you more control over your footage. Moreover, the additional sound and video can be synchronized with the available video chronology.
You can quickly blend more than two movies into one with rich effects and sound with this Android editor app. In addition, you can generate a watermark using unique text provided in the app, and subtitles support allow you to produce one with a variety of fonts.
Following are the steps that you can follow to edit FLV video using Inshot:
Step 1: Open the app and import the video.
Tap “Video” to open your phone’s gallery folder and begin editing a video in the InShot app. Select a video to work with. Adjust the canvass after your video has been loaded into the InShot App. For your other social media accounts, there are aspect ratios and sizes that work well with the video. It also has the option of being in portrait or landscape mode.
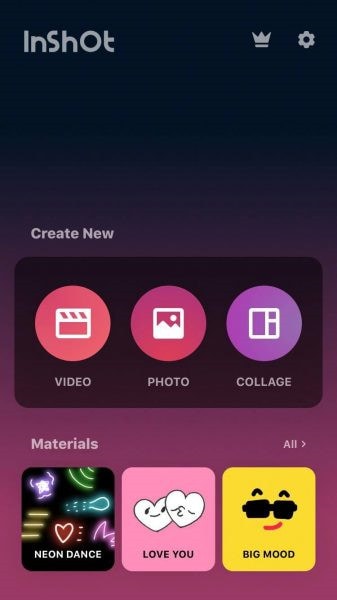
Step 2: Trim and split videos.
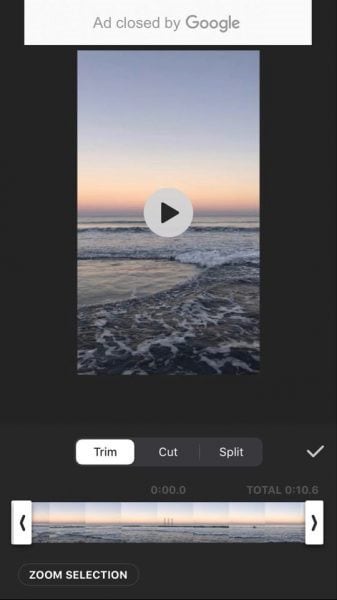
Step 3: Merge videos (optional):
By combining clips, you can combine them into a single film or project. Simply choose the videos you want to import from the drop-down menu. By tapping the “+” button on the lower left of the screen, you can insert and merge more videos. Your project will then be updated using the selected video.
Step 4: Apply filters, add music, text and stickers.
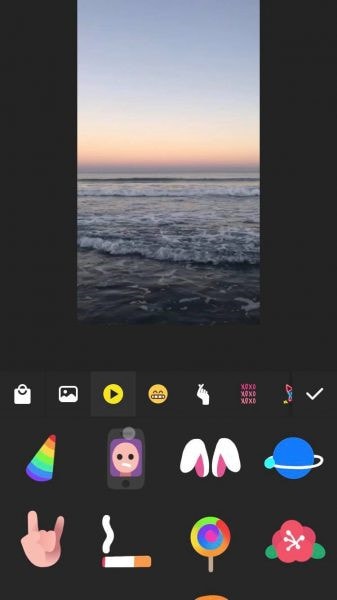
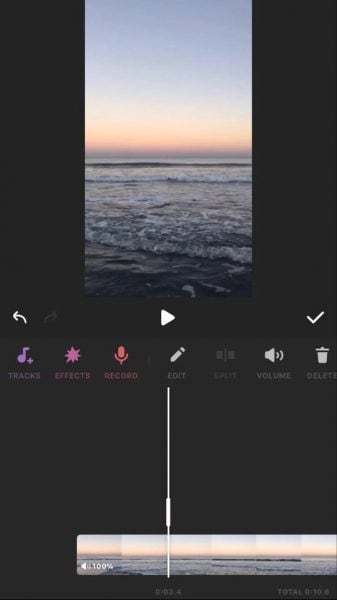
Step 5: Once you are done with the editing process, save the file.
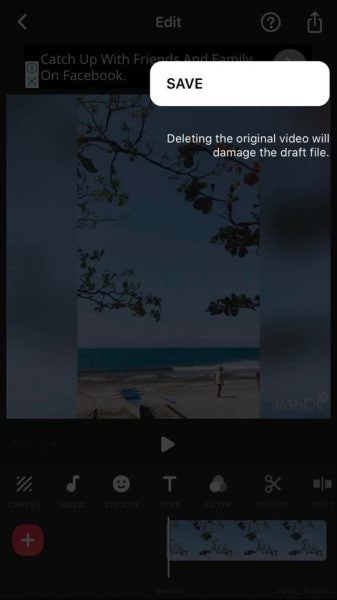
2. Videoshow:
VideoShow has a lot of video editing options. It is a simple and practical video editing program and movie scene maker for art directors and beginners. Using this video cutter, you may reverse, blur, duplicate, edit, merge and split collage clips or films.
You can also use VideoShow to adjust the audio or add subtitles to any video. It also allows you to use different filters on any video on your device. Over 50 intricate themes are included in the program, allowing you to create gorgeous music videos, slide shows, and vlogs in no time.
The annual subscription package is for $135.19, or you can also make a one-time purchase for $225.78.
However, to edit the video, you can use the following steps:
Step 1: Download and install the videoshow application and open it. Upload the video that you want to edit.
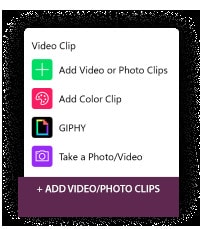
Step 2: Edit the video by applying filters or cutting and trimming the part of the video that you want to remove.
Step 3: Save changes and export the video to your preferred location.
2 Ways to Edit FlV Video on iPhone:
1. LumaFusion:
No other software program on the iPhone comes close to the feature set that LumaFusion offers for video editing. It is the only premium app on this list, and it is well worth every penny.
But, of course, YouTubers aren’t the only ones who use the program; mobile journalists and professional video producers who don’t want to lug along their bulky camera equipment and editing apparatus also use it.
LumaFusion deals with up to six video and audio tracks for photographs, movies, audio, titles, and graphics, and six audio tracks for narration, music, and sound effects. You also receive a magnetic timeline; importing clips is a breeze once they’ve been imported.
There are many transitions and effects to choose from, all of which can be layered. Finally, it includes much royalty-free music, sound effects, and other assets. So if you need a professional video editing tool for your iPhone, LumaFusion ($29.99) is the way to go.
Follow these steps to edit FLV video using LumaFusion:
Step 1: To create your first project, press + at the bottom of the screen. You can create a new project by tapping that area or by tapping the Plus button.
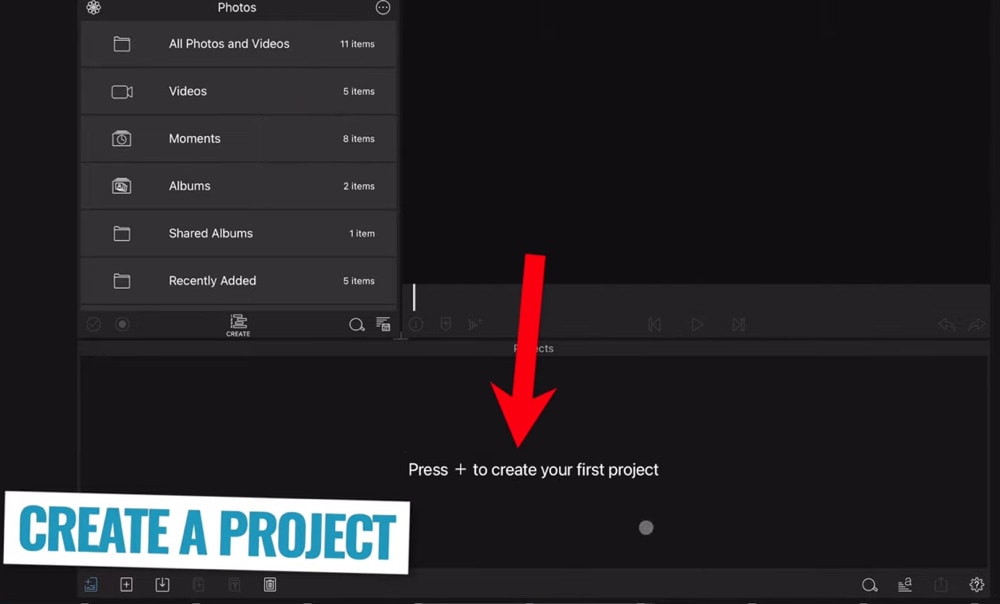
Step 2: Import video:
The Import section is located in the top left corner of the screen. This defaults to the Photos tab when you initially launch a new project. All of the photographs and videos can be seen here.
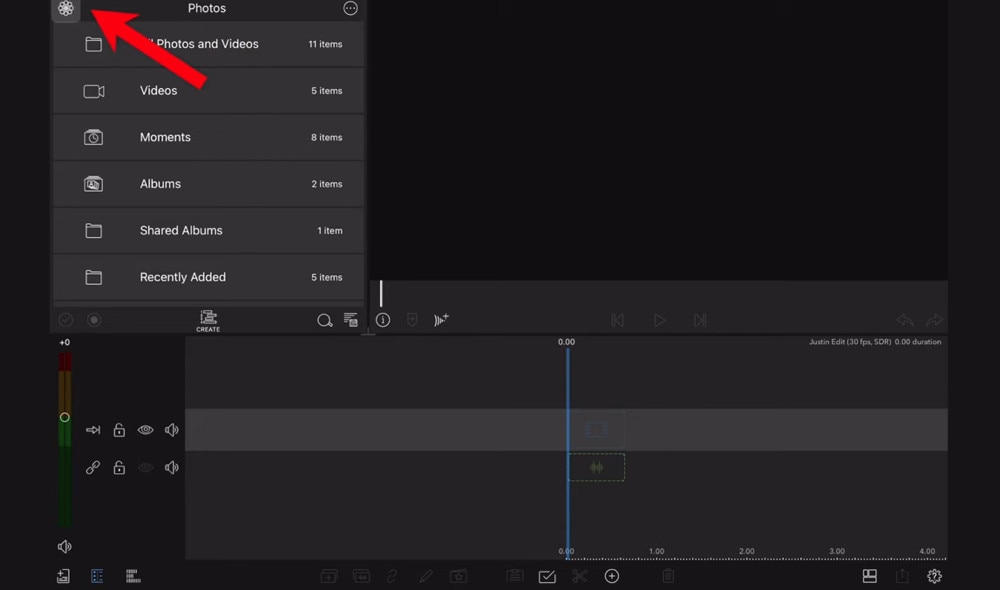
Step 3: Check layout and adjust volume levels
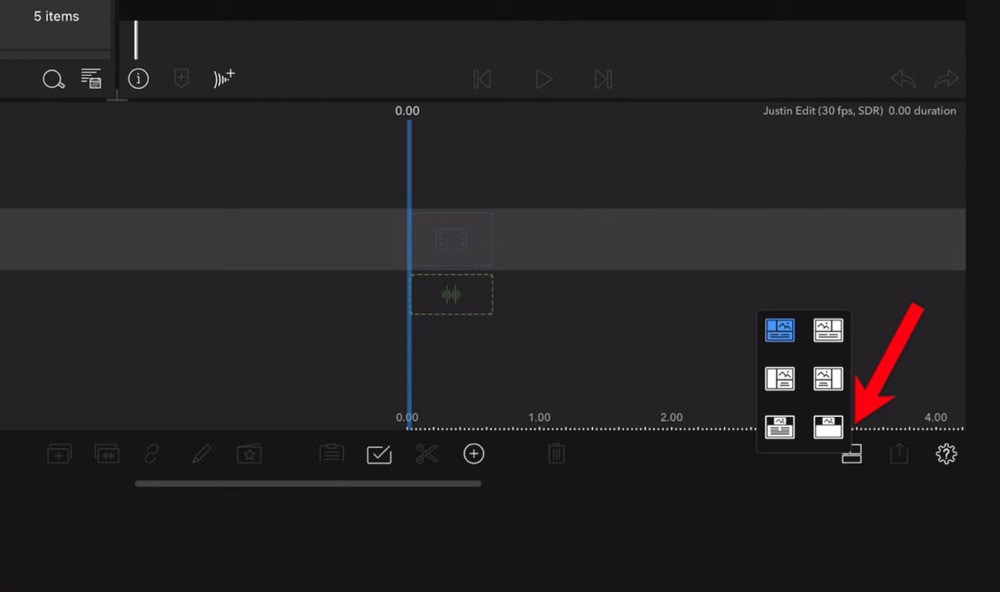
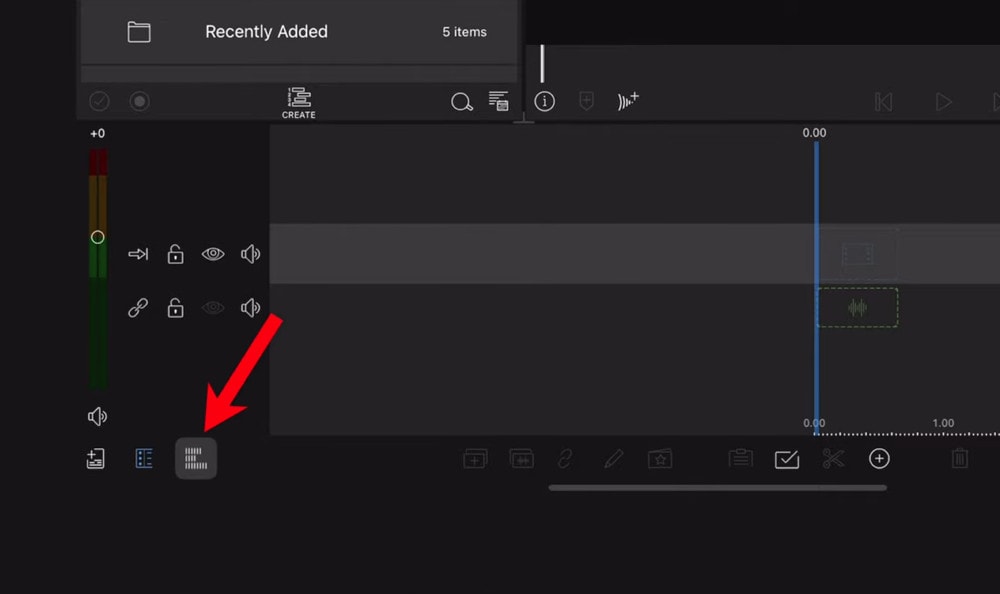
Step 4: Edit the video and add titles.
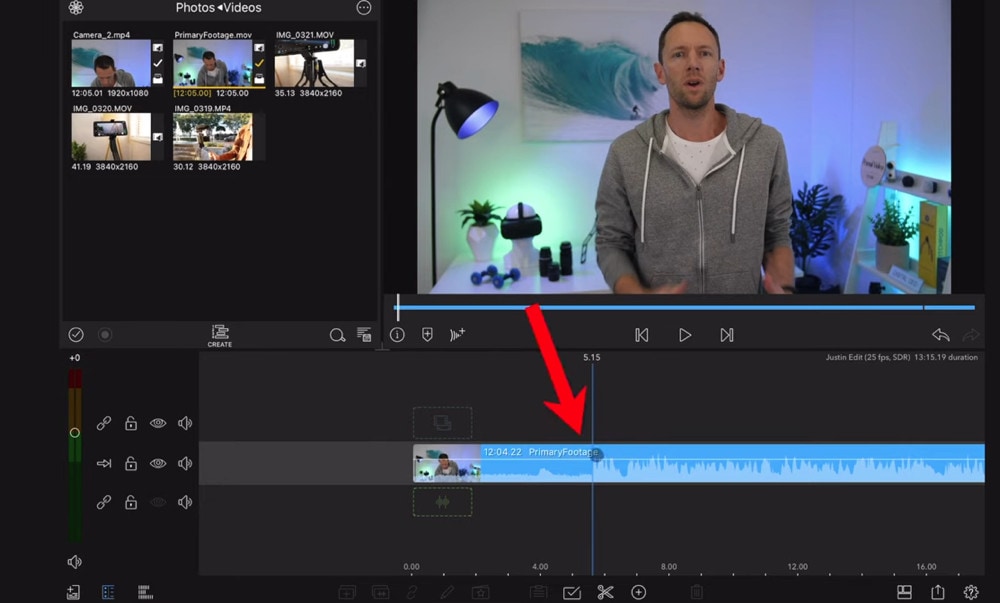
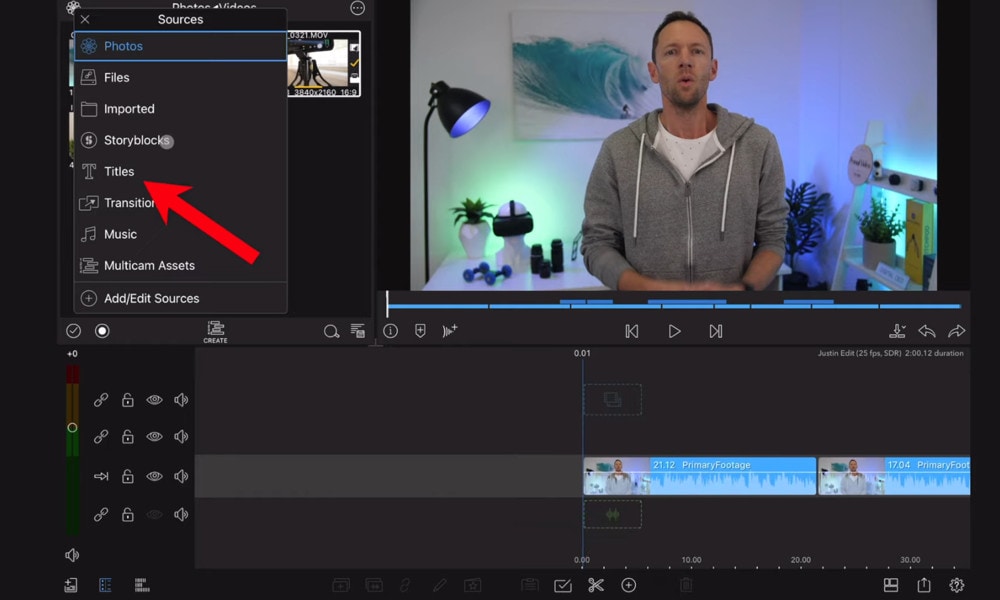
Step 5: Export the video.
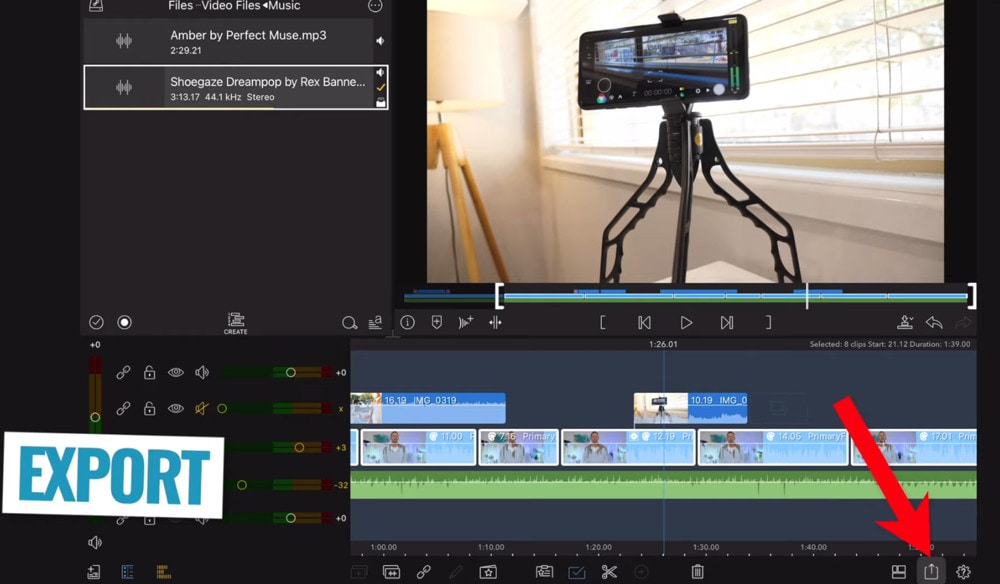
2. Filmora Go:
Without a doubt, Filmora is one of the greatest free video editors for iPhone that does not contain any watermarks. In addition, it’s compatible with both iPhones and Android devices and has a simple user interface.
Filmora is the greatest iPhone video editor for beginners, with themed filters and effects that add flair to your videos without any work.
Filmora has many unique features, including themes for your videos and ‘Materials,’ which are visual effects created by the program. Unfortunately, materials are only available with Filmora Pro, so keep that in mind.
Aside from that, you’ll find all of the typical features here. You can also add titles to videos, utilize stickers and effects, and add music to the background of your movie. You may also add another clip in picture-in-picture mode, which is beneficial.
Below are the following steps to edit FLV video:
Step 1: Open the application and select ‘Create new video’. Now, import the video by choosing the video icon.
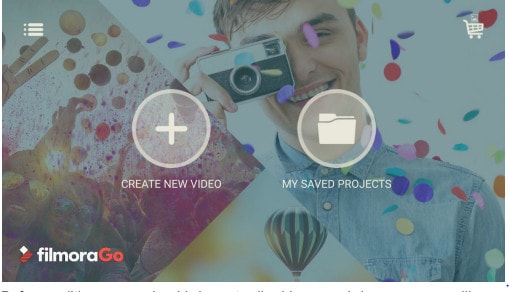
Step 2: Edit the video. Within the edit tool, you can trim and split the video. You can also improve the video quality by adding titles, transitions, and music, and voiceovers.

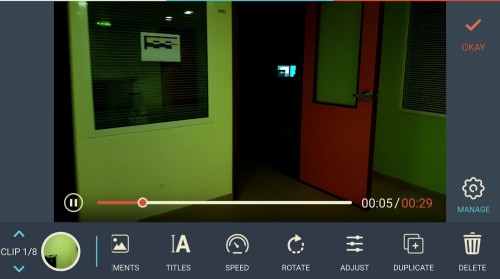

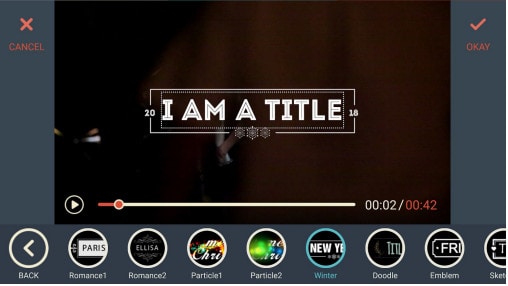
Step 3: After editing the video, select ‘SAVE’ and export the video or download it.
2 Ways to Edit FlV Video Online:
1. Fastreel:
If you’re seeking the finest free online video editor, Fastreel is a terrific tool to start with. This online video editing software provides a wide range of editing options. It can merge, edit, crop, and compress videos to make sharing easier.
It also includes many pre-made templates that you can change to create titles and transitions and other editing features like reverse, looping, and rotating. It’s also quite simple to use, and you can have polished videos in minutes.
There are also numerous pricing options to suit different customers, ranging from a completely free plan with watermarks to paid subscriptions with no limitations.
Use the following steps to edit FLV video:
Step 1: Open Fastreel web and import the video.
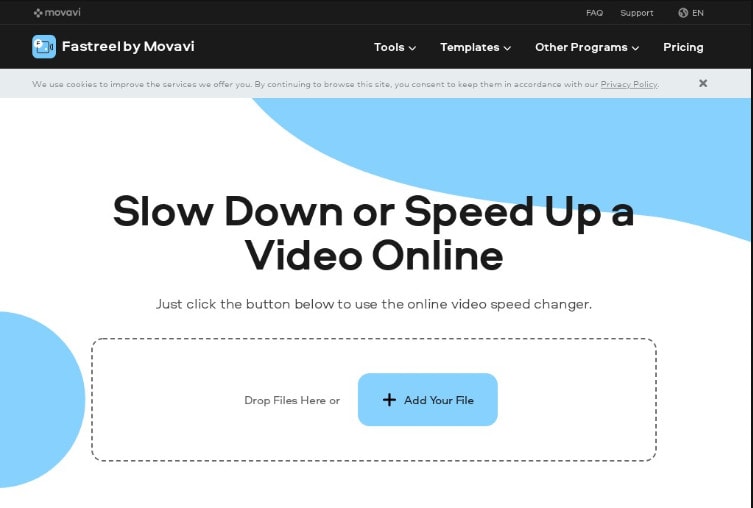
Step 2: Use templates to make it look attractive.
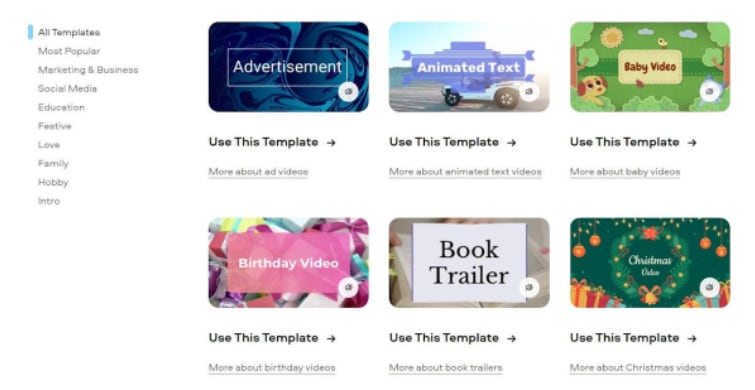
Step 3: Edit the video using the template.
Templates are unfinished videos with all of the effects already applied, such as backdrops, transitions, animated stickers, and titles. There are blank spots for your photos or videos, and you can arrange them in any sequence you like. You can also add music from the Fastreel library or upload your own track after entering your text.
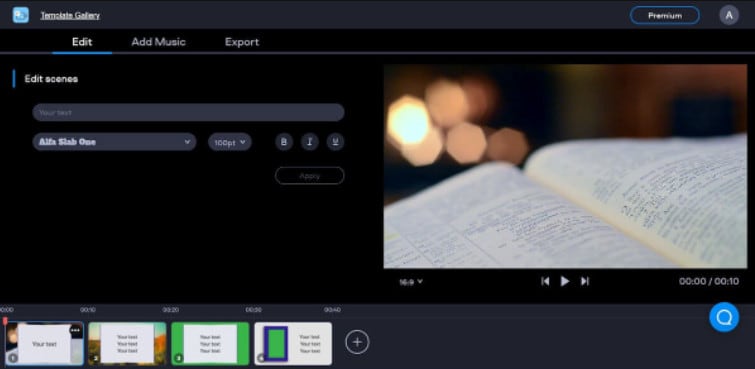
Step 4: Once you are done with edits, save the video and export it.
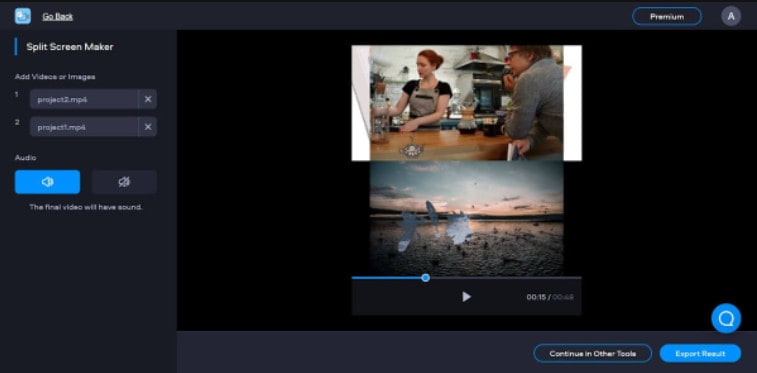
2. WeVideo:
When you’re seeking the greatest video producer online, another wonderful choice to explore is WeVideo.
Google, Dropbox, Rover, and Roche are just a few of the huge names that trust our online editor. Its fast, versatile editing engine and vast stock content collection for adding stock movies, photos, and audio tracks to your productions are ideal for business users.
WeVideo also stands out since it provides unlimited cloud storage for all of your videos, which you can download and watch on any device. The only drawback is that all of this comes at a price, with WeVideo offering a variety of payment plans ranging from $4.99 to $36.99 a month.
Follow the steps to edit videos using WeVideo:
Step 1: Open WeVideo and import the video file.
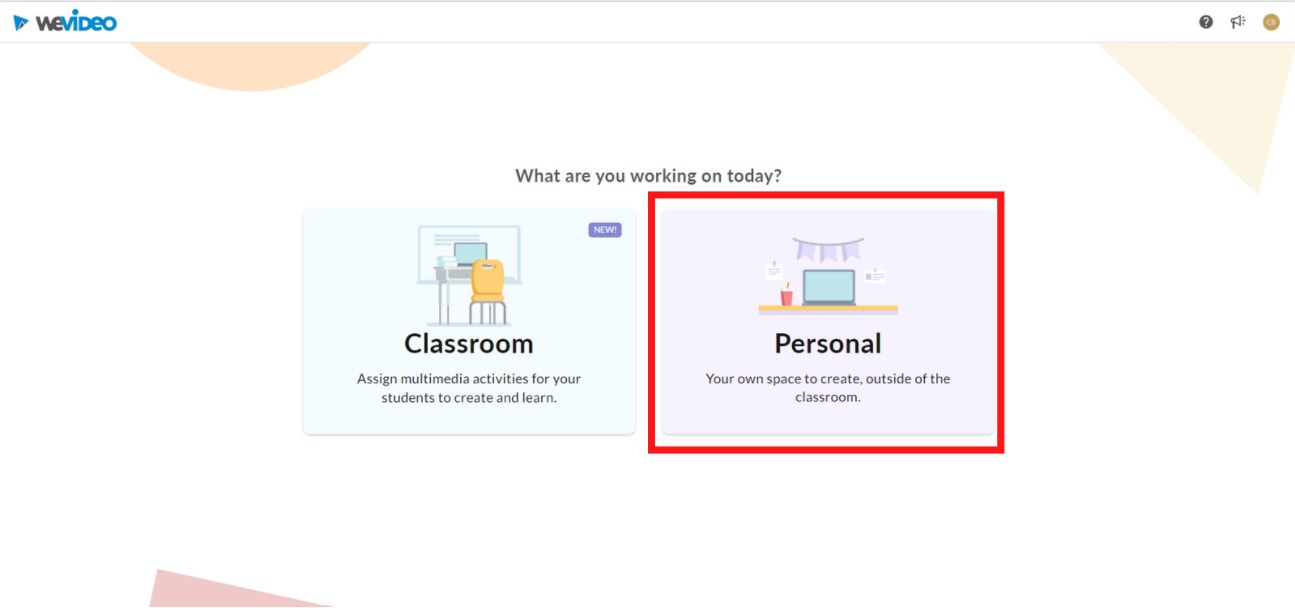
Step 2: Click on create new video in the left-hand corner of the screen.
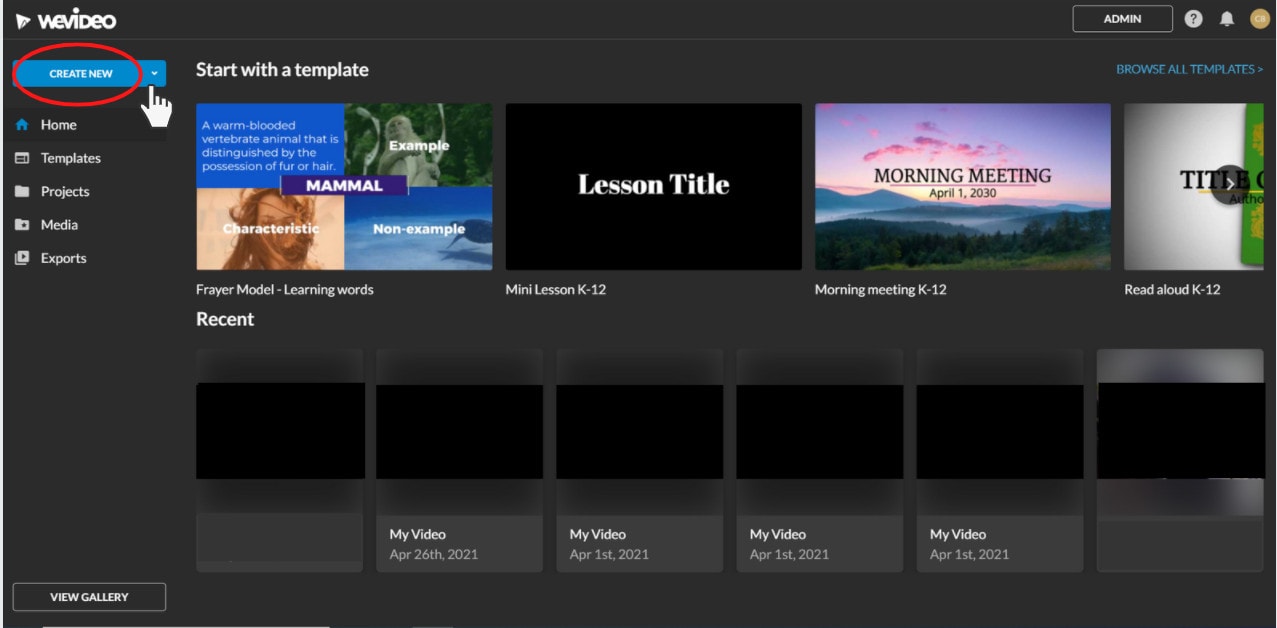
Step 3: Edit the video.
The video clip you imported will appear in the viewing window to the right once you click on it. By moving the arrows and either end, you can edit out the beginning or end of your footage.
- Drag the clip into your timeline from your media pool.
- Place the clip on your timeline by dragging and dropping it.
- Click the scissor symbol after moving the blue marker to the spot where you want to cut your clip.
- Once the material has been chopped, you can erase bits of it by selecting it with your mouse and then pressing delete on your keyboard or rearrange the clips in the timeline by dragging and dropping them to other positions.
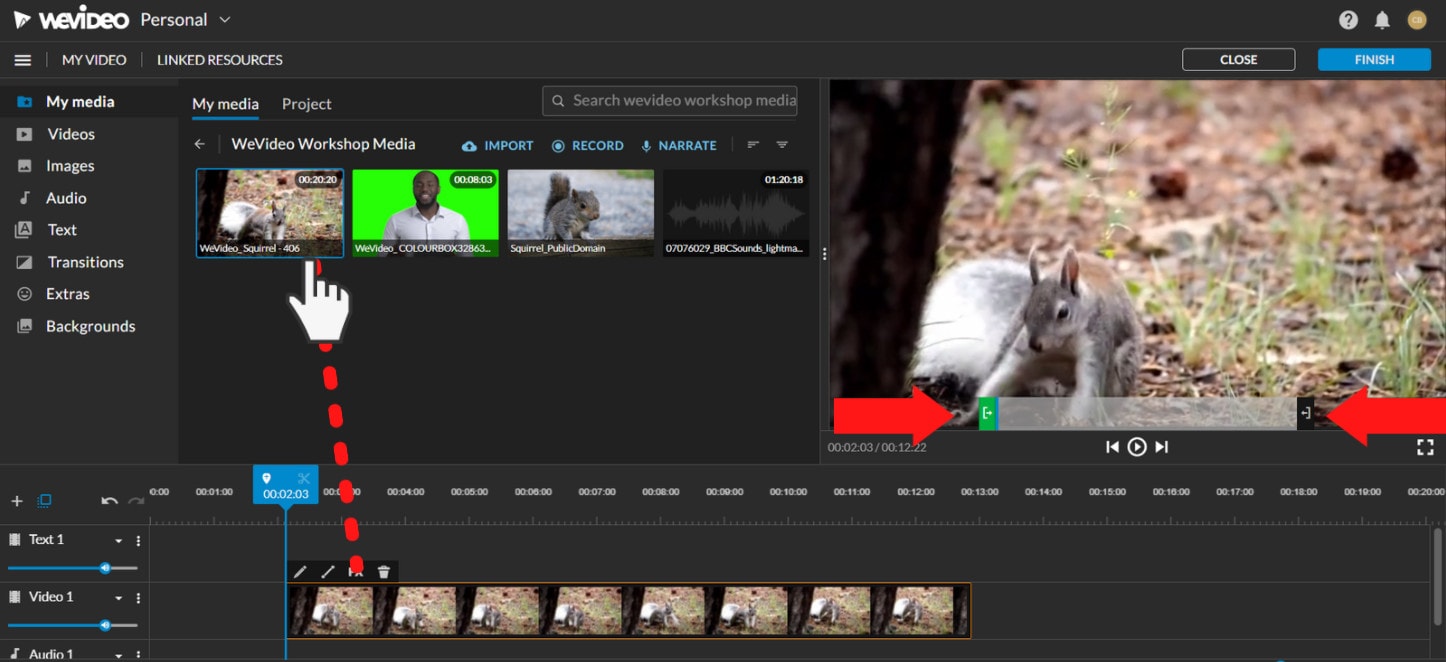
Step 4: Add effects, transitions, and music to the video.
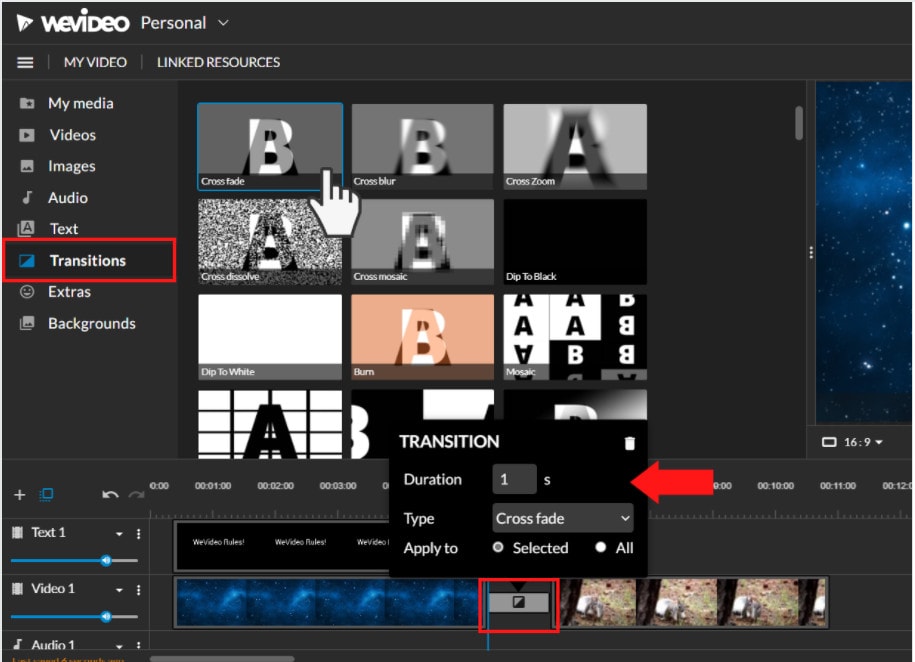
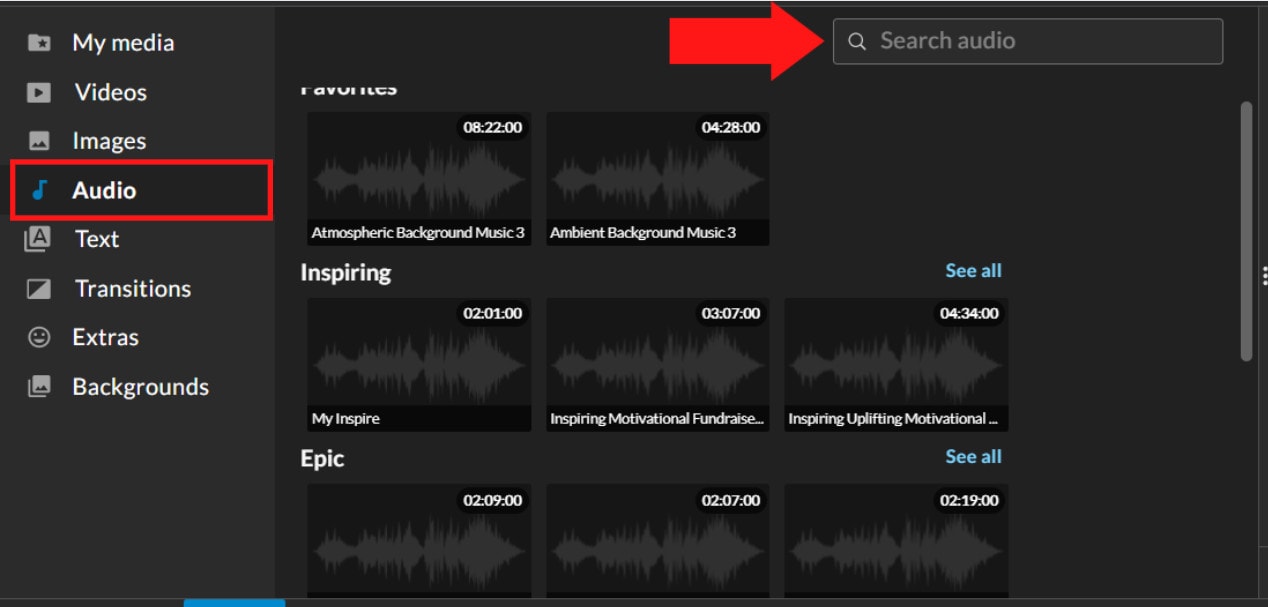
Step 5: Save and export the video by clicking on the Finish tab.
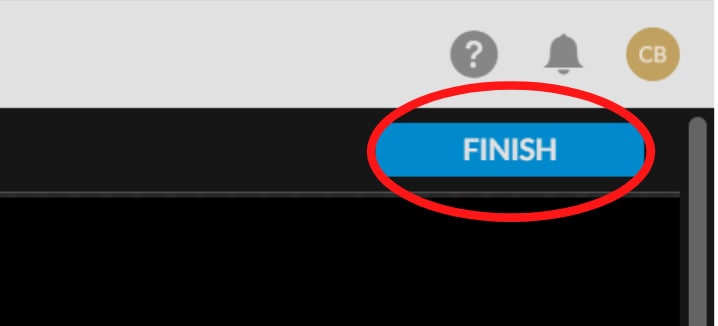
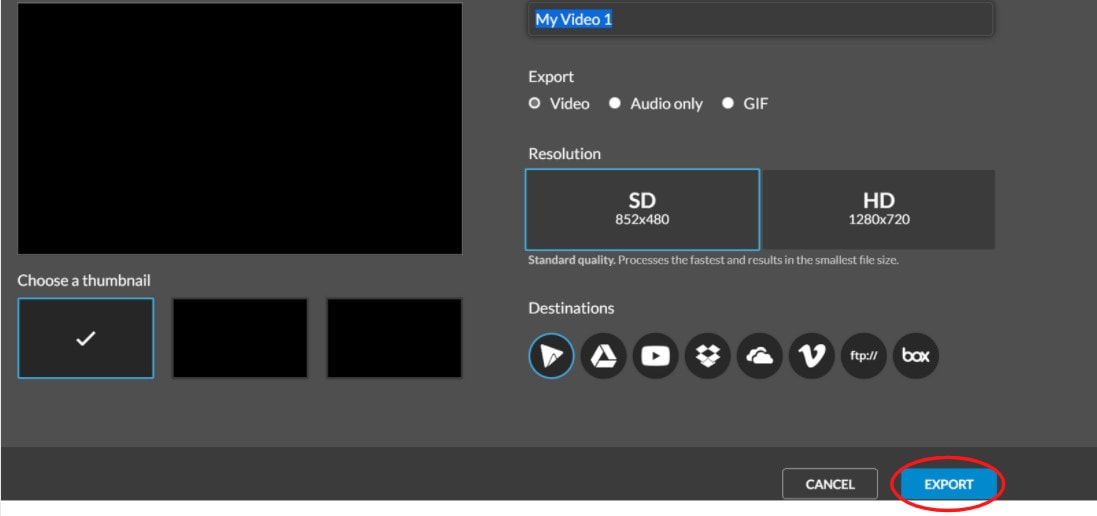
FAQs about editing FLV video
- How to open FLV files?
Any FLV player is required to view FLV files. Various players are available, including VLC, FLV Player, Sothink FLV Player for Mac, Tonec Free FLV Player, Any FLV Player, and others.
- Is Filmora compatible with Mac?
Filmora requires macOS Sierra (version 10.12) or later and the Big Sur (version 11) and Apple M1 chips. Touch Bar compatibility for MacBook Pro users and custom shortcuts to speed up editing.
- What is the best online FLV editor?
There are numerous free online editors to choose from. Fastreel, WeVideo, and FlexClip Video Maker are a few of the most popular.
- Is FLV better than MP4?
Because FLV and MP4 are the two most popular video file formats, it’s crucial to know which one is preferable. Adobe’s proprietary format is FLV. Both formats employ video and audio codecs and have equal performance levels. In their unprocessed state, MP4 files are more adaptable. You can, however, use an FLV file at the same time if you have the correct player.
- How do I choose a video editor?
When comparing video editing software, there are six crucial elements to consider.
- Budget and cost
- Ease of use/learning curve
- Multi-GPGPU acceleration and video format support
- Tools for advanced editing
- Music, special effects, and other goodies
- Customer service is second to none.
For macOS 10.14 or later
Therefore, you can use the following steps to edit FLV video on Windows and Mac:
Step 1: Import file:
Step 2: Edit the FLV file:
Acquire the perfect tool in your palm for anything you want to do, such as clipping, cropping, rotating, and more.
Furthermore, all editing capabilities in the toolbar allow drag-and-drop, making it even easier to touch up your films quickly. Consider the following scenario:
- Drag and drop a transition into the video/photo, or right-click it and select “Apply to All.”
- Please drag & drop a title template to the position where you want it to appear, then adjust it.
- To use the effects, select one from the 50+ available video effects, select it, and apply it to your photos/videos instantaneously.
Step 3: Save or Export the file:
When you’re done, export your modified MP4 files to Windows/Mac and quickly share them on YouTube, with the option of sending a message to Facebook and Twitter. When you click Create in the program window’s middle right corner, you’ll be taken to the Output window below.
Alternative Way to Edit FlV Video on Windows
1. VSDC
VSDC is a free video editor along with a lot of advanced features. Cut, combine, trim, crop, and other editing capabilities are available to help you polish your FLV films.
Although it may not look logical, learning the editing capabilities hidden within modular boxes is simple. One noteworthy aspect of VSDC is its ability to produce good visual effects using many trendy video effects, transitions, and filters.
Furthermore, strong chroma keys, color correction, object modification, and other editing tools can be utilized to edit FLV videos. It not only creates excellent FLV videos, but it also supports a wide range of media conversion, allowing you to convert FLV files to various formats and export them without a watermark.
Therefore, follow the below mentioned steps to edit FLV video using VSDC:
Step 1: Install the software on the Windows. Open the application and import the video.
Step 2: Use cutting and splitting tools to edit the video.
The first icon is a picture of a pair of scissors, which is a cutting tool. It’s very useful when you need to cut the beginning or end of a film. Place the cursor exactly where you want to cut, then select “Trim start” or “Trim finish” from the dropdown cutting menu (the small triangle next to the scissors icon).
Cropping is also simple. If you have too much additional space around the scene object recorded, just choose the file you want to trim and select the cropping icon from the “Cutting and Splitting” option. A new window will appear, allowing you to select the region of the scene that should stay.
Step 3: Apply effects and transitions.
To use one, first select the video file you wish to edit, then go to the Video effects tab and select the effect you want to use. On the timeline, a new tab will appear, containing all of the effects done to the selected object. You can alter the effect’s duration and position in time by dragging it with the mouse there. The properties pane on the right-hand side can be used to change other parameters.
Transitions follow the same rule. Place your cursor where you want the transition to begin, then choose a transition from the Video effects dropdown menu and manually adjust the duration.
Step 4: Save changes and export video.
Make sure your movie appears exactly how you want it to before exporting it. If the video appears choppy, use the red preview button and lower the preview quality. When the PC’s resources are insufficient to process the video in real time, lagging can occur. Keep in mind that it has no bearing on the outcome. When you’re finished, navigate to the Export project tab and select an export format.
2. Adobe Premiere Pro:
Professional video editors use Premiere Pro to make everything from YouTube videos to Hollywood films like Mank, a 2021 Oscar candidate. It’s also widely utilized in the workflows of designers, animators, and VFX artists, and we can see why after lengthy testing.
We found the software’s UI to be simple to use, and it increased our productivity by separating things into various workspaces, such as editing, effects, and audio. When we tested it on both Mac and PC, we discovered that each workspace helps handle a specific activity while minimizing distraction.
Edit the FLV video with Adobe Premiere Pro using the following steps:
Step 1: Import the video and create initial sequence.
Step 2: In the Timeline, trim and rearrange clips, add audio, and transitions.
Step 3: Add title and graphics.
In Premiere Pro, you may make onscreen titles, as well as stylize and animate your images.
Step 4: Export your video.
Alternative Way to Edit FlV Video on Mac
1. Blender:
Under the GNU General Public License, Blender is a free, open-source 3D content production program that runs on all major operating systems. Blender is one of the greatest video editors for both Windows and Mac, with advanced features such as modifier-based modeling tools, powerful character animation capabilities, a node-based material, etc.
Because it is developed for professionals, it is tough to use as a beginner. However, it is unrestricted in its use and distribution. In addition, color options are changeable and versatile in the UI.
In contrast, this free video editor is perfect for semi-pros or those who want to enhance their video editing skills. However, you’ll need a lot of time and effort to learn it.
Step 1: Open the application.
Step 2: Then, go into File->New->Video Editing to open the video editor.
Step 3: Import the video and start editing using the editing tools.
Step 4: Save and export the video.
2. Final Cut Pro:
When it comes to video editing software, Apple’s Final Cut Pro is one of the industry standards. As a result, it’s widely utilized in the television and film industries - at least among Mac users. However, one of the truly convincing reasons to choose it over Premiere Pro is because it is subscription-free: you only pay once.
The software’s Magnetic Timeline, grouping tools, a vast selection of effects, solid organizational capabilities, and simple ways to add and edit audio make it a favorite among professional video editors. 360° video, HDR, and powerful color correcting tools are among the other capabilities. It’s a strong software with a lot of features.
Follow the steps to edit FLV video using Final Cut Pro:
Step 1: Create Project.
To make a movie in Final Cut Pro, you must first establish a project, which keeps track of your editing selections and the media you utilize.
Step 2: Select and add clips to the timeline:
The second stage in making a movie with Final Cut Pro is to add and arrange clips in your project. In the timeline, you can move and reorder clips.
Step 3: Cut and trim video:
Final Cut Pro has a number of features for altering the start and stop points of clips in the timeline, as well as regulating the pacing of shots from one to the next.
Step 4: Edit the video by adding effects and transitions:
Final Cut Pro includes a number of advanced editing features that make it simple to create a professional film. Visual enhancements and colour correction are among the finishing touches.
Step 5: Save and export video:
2 Ways to Edit FlV Video on Android:
1. Inshot:
For Android users, Inshot is a fantastic image and video editor. This Android video editor allows you to add popular stickers and emoticons to your films, making them more fashionable and unique.
The program supports HD video output, allowing you more control over your footage. Moreover, the additional sound and video can be synchronized with the available video chronology.
You can quickly blend more than two movies into one with rich effects and sound with this Android editor app. In addition, you can generate a watermark using unique text provided in the app, and subtitles support allow you to produce one with a variety of fonts.
Following are the steps that you can follow to edit FLV video using Inshot:
Step 1: Open the app and import the video.
Tap “Video” to open your phone’s gallery folder and begin editing a video in the InShot app. Select a video to work with. Adjust the canvass after your video has been loaded into the InShot App. For your other social media accounts, there are aspect ratios and sizes that work well with the video. It also has the option of being in portrait or landscape mode.
Step 2: Trim and split videos.
Step 3: Merge videos (optional):
By combining clips, you can combine them into a single film or project. Simply choose the videos you want to import from the drop-down menu. By tapping the “+” button on the lower left of the screen, you can insert and merge more videos. Your project will then be updated using the selected video.
Step 4: Apply filters, add music, text and stickers.
Step 5: Once you are done with the editing process, save the file.
2. Videoshow:
VideoShow has a lot of video editing options. It is a simple and practical video editing program and movie scene maker for art directors and beginners. Using this video cutter, you may reverse, blur, duplicate, edit, merge and split collage clips or films.
You can also use VideoShow to adjust the audio or add subtitles to any video. It also allows you to use different filters on any video on your device. Over 50 intricate themes are included in the program, allowing you to create gorgeous music videos, slide shows, and vlogs in no time.
The annual subscription package is for $135.19, or you can also make a one-time purchase for $225.78.
However, to edit the video, you can use the following steps:
Step 1: Download and install the videoshow application and open it. Upload the video that you want to edit.
Step 2: Edit the video by applying filters or cutting and trimming the part of the video that you want to remove.
Step 3: Save changes and export the video to your preferred location.
2 Ways to Edit FlV Video on iPhone:
1. LumaFusion:
No other software program on the iPhone comes close to the feature set that LumaFusion offers for video editing. It is the only premium app on this list, and it is well worth every penny.
But, of course, YouTubers aren’t the only ones who use the program; mobile journalists and professional video producers who don’t want to lug along their bulky camera equipment and editing apparatus also use it.
LumaFusion deals with up to six video and audio tracks for photographs, movies, audio, titles, and graphics, and six audio tracks for narration, music, and sound effects. You also receive a magnetic timeline; importing clips is a breeze once they’ve been imported.
There are many transitions and effects to choose from, all of which can be layered. Finally, it includes much royalty-free music, sound effects, and other assets. So if you need a professional video editing tool for your iPhone, LumaFusion ($29.99) is the way to go.
Follow these steps to edit FLV video using LumaFusion:
Step 1: To create your first project, press + at the bottom of the screen. You can create a new project by tapping that area or by tapping the Plus button.
Step 2: Import video:
The Import section is located in the top left corner of the screen. This defaults to the Photos tab when you initially launch a new project. All of the photographs and videos can be seen here.
Step 3: Check layout and adjust volume levels
Step 4: Edit the video and add titles.
Step 5: Export the video.
2. Filmora Go:
Without a doubt, Filmora is one of the greatest free video editors for iPhone that does not contain any watermarks. In addition, it’s compatible with both iPhones and Android devices and has a simple user interface.
Filmora is the greatest iPhone video editor for beginners, with themed filters and effects that add flair to your videos without any work.
Filmora has many unique features, including themes for your videos and ‘Materials,’ which are visual effects created by the program. Unfortunately, materials are only available with Filmora Pro, so keep that in mind.
Aside from that, you’ll find all of the typical features here. You can also add titles to videos, utilize stickers and effects, and add music to the background of your movie. You may also add another clip in picture-in-picture mode, which is beneficial.
Below are the following steps to edit FLV video:
Step 1: Open the application and select ‘Create new video’. Now, import the video by choosing the video icon.
Step 2: Edit the video. Within the edit tool, you can trim and split the video. You can also improve the video quality by adding titles, transitions, and music, and voiceovers.
Step 3: After editing the video, select ‘SAVE’ and export the video or download it.
2 Ways to Edit FlV Video Online:
1. Fastreel:
If you’re seeking the finest free online video editor, Fastreel is a terrific tool to start with. This online video editing software provides a wide range of editing options. It can merge, edit, crop, and compress videos to make sharing easier.
It also includes many pre-made templates that you can change to create titles and transitions and other editing features like reverse, looping, and rotating. It’s also quite simple to use, and you can have polished videos in minutes.
There are also numerous pricing options to suit different customers, ranging from a completely free plan with watermarks to paid subscriptions with no limitations.
Use the following steps to edit FLV video:
Step 1: Open Fastreel web and import the video.
Step 2: Use templates to make it look attractive.
Step 3: Edit the video using the template.
Templates are unfinished videos with all of the effects already applied, such as backdrops, transitions, animated stickers, and titles. There are blank spots for your photos or videos, and you can arrange them in any sequence you like. You can also add music from the Fastreel library or upload your own track after entering your text.
Step 4: Once you are done with edits, save the video and export it.
2. WeVideo:
When you’re seeking the greatest video producer online, another wonderful choice to explore is WeVideo.
Google, Dropbox, Rover, and Roche are just a few of the huge names that trust our online editor. Its fast, versatile editing engine and vast stock content collection for adding stock movies, photos, and audio tracks to your productions are ideal for business users.
WeVideo also stands out since it provides unlimited cloud storage for all of your videos, which you can download and watch on any device. The only drawback is that all of this comes at a price, with WeVideo offering a variety of payment plans ranging from $4.99 to $36.99 a month.
Follow the steps to edit videos using WeVideo:
Step 1: Open WeVideo and import the video file.
Step 2: Click on create new video in the left-hand corner of the screen.
Step 3: Edit the video.
The video clip you imported will appear in the viewing window to the right once you click on it. By moving the arrows and either end, you can edit out the beginning or end of your footage.
- Drag the clip into your timeline from your media pool.
- Place the clip on your timeline by dragging and dropping it.
- Click the scissor symbol after moving the blue marker to the spot where you want to cut your clip.
- Once the material has been chopped, you can erase bits of it by selecting it with your mouse and then pressing delete on your keyboard or rearrange the clips in the timeline by dragging and dropping them to other positions.
Step 4: Add effects, transitions, and music to the video.
Step 5: Save and export the video by clicking on the Finish tab.
FAQs about editing FLV video
- How to open FLV files?
Any FLV player is required to view FLV files. Various players are available, including VLC, FLV Player, Sothink FLV Player for Mac, Tonec Free FLV Player, Any FLV Player, and others.
- Is Filmora compatible with Mac?
Filmora requires macOS Sierra (version 10.12) or later and the Big Sur (version 11) and Apple M1 chips. Touch Bar compatibility for MacBook Pro users and custom shortcuts to speed up editing.
- What is the best online FLV editor?
There are numerous free online editors to choose from. Fastreel, WeVideo, and FlexClip Video Maker are a few of the most popular.
- Is FLV better than MP4?
Because FLV and MP4 are the two most popular video file formats, it’s crucial to know which one is preferable. Adobe’s proprietary format is FLV. Both formats employ video and audio codecs and have equal performance levels. In their unprocessed state, MP4 files are more adaptable. You can, however, use an FLV file at the same time if you have the correct player.
- How do I choose a video editor?
When comparing video editing software, there are six crucial elements to consider.
- Budget and cost
- Ease of use/learning curve
- Multi-GPGPU acceleration and video format support
- Tools for advanced editing
- Music, special effects, and other goodies
- Customer service is second to none.
Also read:
- New How to Loop a Video on Vimeo, In 2024
- Using One of the Best Converter Tools to Turn GIFs Into PNG or JPG. Here, Learn About the Ten Best Ones for Different Operating Systems, with Details on Features, Prices, and More
- In 2024, A Review On 3D LUT Creator
- New Competitive Guide To Use Slow Motion in After Effects for 2024
- In 2024, This Article Will Show You How to Make a Tattoo Disappear on Your Body Magically
- 2024 Approved 2 Effective Ways to Easily Convert VTT to SRT
- New If You Are Trying to Create a Countdown Effect, but Youre Not Sure Where to Start, Then This Post Is Going to Show You some Ways to Create a Countdown Animation for Your Videos
- Updated In 2024, Backup and Organize Your Footage in Minutes
- New Easy Way to Create an Alternate Reality Effect
- In 2024, How to Be a YouTube Vlogger
- Updated Looking Forward to Try Hands at Using the Icecream Slideshow Maker Program to Create High End Slideshow Presentations? Stay Here for a Complete Insight Into the Process for 2024
- Updated In 2024, Top Silence Detection Tools for Better Film Production
- Updated In 2024, Are You Also a Fan of the Slow Mo Guys? Well! Who Isnt? Learn How You Can Create Compelling Slow-Mo Videos Like the Slow Mo Guys Here
- New 2024 Approved Do You Want to Professionally Blur the Background in Your Video? Read This Article to Find Out the Easiest Way to Blur the Background in Videos Using Adobe After Effects
- 2024 Approved The Ultimate Wedding Videography Checklist
- Updated 2024 Approved 10 Best Suggestions for AI Video Interviews
- Looking for the Simple Steps to Add Transition Effects in Your Video? We Will Illustrate How to Add Transition in Filmora and Mention Tips and Tricks for Video Transition Effects
- Updated 2024 Approved Adding a Spooky Shadow Effect with Filmora
- How to Add Transitions in Adobe Premiere Pro for 2024
- New 2024 Approved How to Make Sony Vegas Freeze Frame
- How to Use LUTs in Lumafusion & Free Resource
- Updated So, in This Short Tutorial, Well Learn How to Create a Vintage 1980-Style Video with a Retro Effect that Will Leave Your Audience Yearning for More
- How Can You Get VHS Filter and Glitch Filter to Your Images or Videos, In 2024
- New 2024 Approved How to Edit FLV Video Files with FLV Editor Windows, Mac,Android, iPhone & Online
- Updated Final Cut Pro for iPad- Is It Available for 2024
- Updated Tips & Tricks To Perfectly Use the Audio Mixer in Filmora for 2024
- New 10 Best Slow-Motion Cameras to Try
- OBS Green Screen Guide for 2024
- Updated 2024 Approved How to Make a Slideshow on iPhone
- 2024 Approved Discover How to Create Professional Foggy Text Reflection Effects in the Filmora Video Editor
- 2024 Approved How Have Game Recording Software Improved Their Stature in the Market? An Overview
- 2024 Approved How to Loop a Video on Android
- New 2024 Approved Create a Transparent Image in Minimal Steps with Right Tools. Try Out Best Transparent Maker and Know How to Use Them. In No Time, the Desired Image Will Be Right There with You
- Updated Top 10 Sound Extractors to Extract Sound From Video for 2024
- New Learning How to Create LUTs with LUTs Generator for 2024
- To Add SRT to MP4 Is Not as Hard as You Might Think. All You Just Need Is the Right Tool to Help You Get the Job Done. Read This Article and Learn the 8 Latest Methods to Merge SRT with MP4 Effortlessly
- The Most Efficient Ways to Manage Your Timeline
- New 2024 Approved Detailed Tutorial to Merge Videos in VLC Media Player
- 4 Ways to Sync Contacts from Apple iPhone 13 mini to iPad Easily | Dr.fone
- How to Factory Reset Vivo G2 without Losing Data | Dr.fone
- How to get back lost photos from Vivo X Flip.
- In 2024, Easiest Guide How to Clone Nubia Red Magic 8S Pro Phone? | Dr.fone
- How To Fake GPS On Vivo Y36 For Mobile Legends? | Dr.fone
- Top 4 Android System Repair Software for Oppo K11 5G Bricked Devices | Dr.fone
- In 2024, Things You Should Know When Unlocking Total Wireless Of Apple iPhone XS Max | Dr.fone
- How to Reset a Locked Honor X9b Phone
- Spoofing Life360 How to Do it on Tecno Spark 10 4G? | Dr.fone
- Additional Tips About Sinnoh Stone For Tecno Spark 20 Pro | Dr.fone
- Apply These Techniques to Improve How to Detect Fake GPS Location On Apple iPhone 14 | Dr.fone
- In 2024, How To Get the Apple ID Verification Code From iPhone 15 in the Best Ways
- Title: How to Add Subtitles to MKV Videos on All Platforms for 2024
- Author: Morgan
- Created at : 2024-05-19 05:12:01
- Updated at : 2024-05-20 05:12:01
- Link: https://ai-video-editing.techidaily.com/how-to-add-subtitles-to-mkv-videos-on-all-platforms-for-2024/
- License: This work is licensed under CC BY-NC-SA 4.0.
