

How to Add Text in Adobe Rush for 2024
How to Add Text in Adobe Rush
Adobe Premiere Rush is a tool designed to make it easier to make simple video edits on desktop and mobile devices. But most users who are used to video editing using Adobe Premiere may find Adobe Rush a little complicated. This includes simple tasks like adding text to your video , which can be difficult unless you know how to do it.
In this article, we will share with you how you can add text to a video using Adobe Rush. We will also share with you an Adobe Rush alternative solution that is much simpler to use.
How to Add Text in Adobe Rush
To easily add text to your Adobe Premiere Rush project, follow these very simple steps. These steps apply to both desktop and mobile versions of Adobe Rush.
Step 1Open Adobe Premiere Rush on your computer and then open the video project you are working on.
Step 2With the project open, click on the blue “Plus” icon under the main menu. On mobile devices, the icon would be at the bottom of the main page.
![]()
Step 3Select “Graphics” from the options that appear

Step 4Click on “More” under “Titles” and then search for “Basic Default Title.” Tap “Add” to add a title to the video’s sequence.

Step 5Once the title is in the sequence, you will be able to make changes to it any way you want. To do that, just drag the title in the preview and tap on it. You should then be able to see options to change the color, size, font, and more in the submenu.

For the purpose of this tutorial, we chose to use the basic title, but Adobe Premiere Rush allows you to choose from a wide range of titles and styling effects to suit your project’s requirements. You also have the choice to add numerous graphics and effects to the title.
You can also very easily duplicate the formatted text as many times as you need to. Just right-click on the formatted text and select “duplicate” to create a copy.
Alternative Way to Add Text Effects to a Video
If Adobe Rush is not a viable solution for you, perhaps because of the cost of the program or even its complexity, we have a video editing platform that is easy to use and has all the features you would find on Adobe Rush and so much more.
This video editing suite is Wondershare Filmora , an easy-to-use and highly effective solution that offers numerous ways to edit videos. The following simple steps show you how you can use Filmora to add text effects to your video project;
Free Download For Win 7 or later(64-bit)
Free Download For macOS 10.14 or later
Step 1Install Wondershare Filmora
Start by installing Wondershare Filmora on your computer. You can download the setup file from the main website and then follow the instructions on the installation Wizard to install the program on your computer.
When the installation is complete, open Filmora on your computer.
Step 2Import the Video Files
On the main screen, click on “New Project” to start editing your video.
At this point, you may want to adjust several settings such as the aspect ratio and frame rates. You can do that in the “Project Settings” window.
Once you have all the settings as needed depending on your project, click “Import” to select the video that you would like to edit.
You can also just drag and drop the video into the main window to open it.

Step 3Add the Video/Videos to the Timeline
To edit the video and any of its components, you will need to add the video to the timeline. You can do that by simply dragging and dropping the video clips from the media library to the timeline below.
This will allow you to see the locations within the video that you can add and effects to.
Step 4Select Text Presets and Add Your Text
With the video in the timeline, you are now ready to add your text. To do that, click on the “Titles” tab and then open the “Text & Title” presets.
Filmora offers more than 200+ text effects that apply to various types of videos. Find the title preset that you would like to use and double-click on it and you should be able to see the effect in the “Preview” window.

If you like what you see, place your Playhead icon where you want the add the text and title in the timeline, and then drag and drop the track above the video.
Step 5Select the Duration of the Text
The default duration of any text overlay that you add to the project is 5 seconds. But you can extend this timeline to fit your needs.
To change the duration of the text overlay, select the text in the timeline and click on the “Timer” icon.

Step 6Edit and Customize Your Text
You also have the option to customize your text in various ways including changing the text font, color, and size.
To edit the text, double-click on the “Title” frame in the timeline, and in the window that appears, make as many changes as you want. There are more than 20 text effects to choose from. Just select one and then double-click on any style to apply it to the text.

You can also use the “Animation” icon if you want to change the animation of the text overlay.
You can also click on the “Advanced” tab to get more advanced editing options for the text that you add to the video. In the advanced options window, you can apply a preset and animation or even customize the Text Fill, Border, and Shadow elements of your text.
Step 7Export Your Video
Once you’ve made all the changes you wanted to make to the video, you can click on the “Play” icon to see a preview of the video to make sure it is just the way you want it to be.
If you are happy with everything and you don’t need to make any more changes, click on the “Export” button. In the window that appears, select the output format for the video and if you need to, you can also select other parameters including the Bit Rate, Encoder, Resolution, and more.
Once all your settings are just how you want them to be, click on “Export” to name the video and save all the changes that you just made.
Filmora also gives you the option to upload the video directly to YouTube and you can also choose to burn the video to DVD. If you will be playing the video on mobile devices, click on the “Devices” tab and select the device you will be using from the options listed here including iPhone, iPad, Samsung Galaxy, and more.
Related FAQs
1. Can I Add Captions in Adobe Rush?
Yes. Adobe Premiere Rush does allow you to add captions and subtitles to any video project. The process is very easy, just open the video in Adobe Rush and add an unformatted “Title” as we did in part 1 above. You can then move the title to any section of the screen and format it any way you want. Ensure that you extend the text to cover the full length of the video. Then simply copy and paste the subtitles from the video’s SRT file to the Title. Set the timing of the text to correspond to the video’s duration and you’re all set.
2. Can You Move Text in Adobe Rush?
Yes, you can easily move text in Adobe Rush. Add the text to the video as described in the first part of this article and once it is on the timeline, you can simply drag the text clip to any desired area on the timeline to change its location.
3. How Do I Add a Title in Adobe Rush Mobile?
One of the greatest advantages of choosing Adobe Rush over other video editors is that it can be very easy to use on mobile devices. The steps to add a title using Adobe Rush for mobile are just as simple as the steps to do it on a desktop. Just open Adobe Rush on your mobile device and then open the video you want to edit, tap on the blue “+” icon at the bottom and select “Graphics > More > Basic Default Title” and then tap “Add” to add your title. You also get the same options to edit the text in various ways including the font size, color, and effects.
Free Download For Win 7 or later(64-bit)
Free Download For macOS 10.14 or later
Free Download For macOS 10.14 or later
Step 1Install Wondershare Filmora
Start by installing Wondershare Filmora on your computer. You can download the setup file from the main website and then follow the instructions on the installation Wizard to install the program on your computer.
When the installation is complete, open Filmora on your computer.
Step 2Import the Video Files
On the main screen, click on “New Project” to start editing your video.
At this point, you may want to adjust several settings such as the aspect ratio and frame rates. You can do that in the “Project Settings” window.
Once you have all the settings as needed depending on your project, click “Import” to select the video that you would like to edit.
You can also just drag and drop the video into the main window to open it.
Step 3Add the Video/Videos to the Timeline
To edit the video and any of its components, you will need to add the video to the timeline. You can do that by simply dragging and dropping the video clips from the media library to the timeline below.
This will allow you to see the locations within the video that you can add and effects to.
Step 4Select Text Presets and Add Your Text
With the video in the timeline, you are now ready to add your text. To do that, click on the “Titles” tab and then open the “Text & Title” presets.
Filmora offers more than 200+ text effects that apply to various types of videos. Find the title preset that you would like to use and double-click on it and you should be able to see the effect in the “Preview” window.
If you like what you see, place your Playhead icon where you want the add the text and title in the timeline, and then drag and drop the track above the video.
Step 5Select the Duration of the Text
The default duration of any text overlay that you add to the project is 5 seconds. But you can extend this timeline to fit your needs.
To change the duration of the text overlay, select the text in the timeline and click on the “Timer” icon.
Step 6Edit and Customize Your Text
You also have the option to customize your text in various ways including changing the text font, color, and size.
To edit the text, double-click on the “Title” frame in the timeline, and in the window that appears, make as many changes as you want. There are more than 20 text effects to choose from. Just select one and then double-click on any style to apply it to the text.
You can also use the “Animation” icon if you want to change the animation of the text overlay.
You can also click on the “Advanced” tab to get more advanced editing options for the text that you add to the video. In the advanced options window, you can apply a preset and animation or even customize the Text Fill, Border, and Shadow elements of your text.
Step 7Export Your Video
Once you’ve made all the changes you wanted to make to the video, you can click on the “Play” icon to see a preview of the video to make sure it is just the way you want it to be.
If you are happy with everything and you don’t need to make any more changes, click on the “Export” button. In the window that appears, select the output format for the video and if you need to, you can also select other parameters including the Bit Rate, Encoder, Resolution, and more.
Once all your settings are just how you want them to be, click on “Export” to name the video and save all the changes that you just made.
Filmora also gives you the option to upload the video directly to YouTube and you can also choose to burn the video to DVD. If you will be playing the video on mobile devices, click on the “Devices” tab and select the device you will be using from the options listed here including iPhone, iPad, Samsung Galaxy, and more.
Related FAQs
1. Can I Add Captions in Adobe Rush?
Yes. Adobe Premiere Rush does allow you to add captions and subtitles to any video project. The process is very easy, just open the video in Adobe Rush and add an unformatted “Title” as we did in part 1 above. You can then move the title to any section of the screen and format it any way you want. Ensure that you extend the text to cover the full length of the video. Then simply copy and paste the subtitles from the video’s SRT file to the Title. Set the timing of the text to correspond to the video’s duration and you’re all set.
2. Can You Move Text in Adobe Rush?
Yes, you can easily move text in Adobe Rush. Add the text to the video as described in the first part of this article and once it is on the timeline, you can simply drag the text clip to any desired area on the timeline to change its location.
3. How Do I Add a Title in Adobe Rush Mobile?
One of the greatest advantages of choosing Adobe Rush over other video editors is that it can be very easy to use on mobile devices. The steps to add a title using Adobe Rush for mobile are just as simple as the steps to do it on a desktop. Just open Adobe Rush on your mobile device and then open the video you want to edit, tap on the blue “+” icon at the bottom and select “Graphics > More > Basic Default Title” and then tap “Add” to add your title. You also get the same options to edit the text in various ways including the font size, color, and effects.
Free Download For Win 7 or later(64-bit)
Free Download For macOS 10.14 or later
How Did AI Video Games Act More Human Than Human?
How Did AI Video Games Act More Human Than Human?
An easy yet powerful editor
Numerous effects to choose from
Detailed tutorials provided by the official channel
The gaming world is ever-changing, with developers looking to create innovative ways to immerse players into their digital worlds. One such technology that has begun to sweep is AI in the game industry.
AI is a powerful tool in many ways to improve the gaming experience. It can make artificial intelligence in computer games more believable and add replayability and immersion to games, and we can expect to see even more impressive applications in the future.
In this article
01 [What Is AI in Gaming?](#Part 1)
02 [Why Does AI in Gaming Matter?](#Part 2)
03 [How AI Will Completely Change Video Games](#Part 3)
04 [8 Games with Incredible Artificial Intelligence](#Part 4)
05 [What AI Video Games Assets Do Filmora Have?](#Part 5)
Part 1 What Is AI in Gaming?
In simple terms, AI is a set of algorithms that allow a computer to learn and improve from experience. Although you can apply it in many ways, artificial intelligence in video games is usually helpful to create more intelligent and more believable non-player characters (NPCs).
For example, an AI system might be helpful to determine how an NPC reacts to the player’s actions. If the player tries to steal from an NPC, the AI might make the NPC angry and more likely to attack the player. Alternatively, if the player is friendly to an NPC, the AI game playing might make the NPC more likely to help the player in future interactions.
Part 2 Why Does AI in Gaming Matter?
One of the most vital aspects of AI in video games is that it can make games more believable and immersive for players. When games can convincingly simulate human-like behavior, it can be a much more enjoyable experience for gamers. AI can make NPCs seem more lifelike and make the game world feel more believable.
AI is also becoming increasingly important for creating procedural content. This is where the game generates content on its own, rather than relying on pre-made assets. For example, a game might use procedural generation to create random dungeons or quests that the player can explore. This can add a lot of replayability to a game, as the player never knows what they will encounter next.
Part 3 How AI Will Completely Change Video Games
It is not a secret that AI is changing the world as we know it. With its ability to enable computers to learn and improve from experience, AI is paving the way for a future where machines can handle more complex tasks. And nowhere is this more apparent than in the world of video gaming.
In the past, developers brought in AI primarily for simple things like making certain NPCs (non-player characters) move and act realistically. But now, artificial intelligence in video games is being used for much more complex tasks like generating procedural content and creating believable human-like behavior. This results in a new generation of AI game playing that are more immersive and playable.
Part 4 Games with Incredible Artificial Intelligence
Now, we will look into eight video games that signify why we need the best ai in video games.
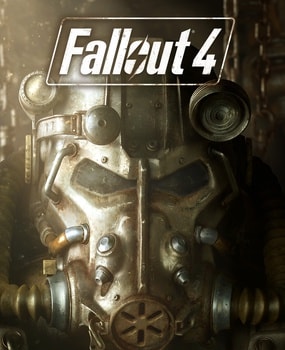
01Fallout 4
One of the most attractive examples of AI in video gaming is Fallout 4. This post-apocalyptic RPG features some of the most believable NPCs ever seen in a game. Each character is fully voiced, and they all have their unique personalities and backstories. The AI generates procedural content, meaning that the game world is always different each time you play.
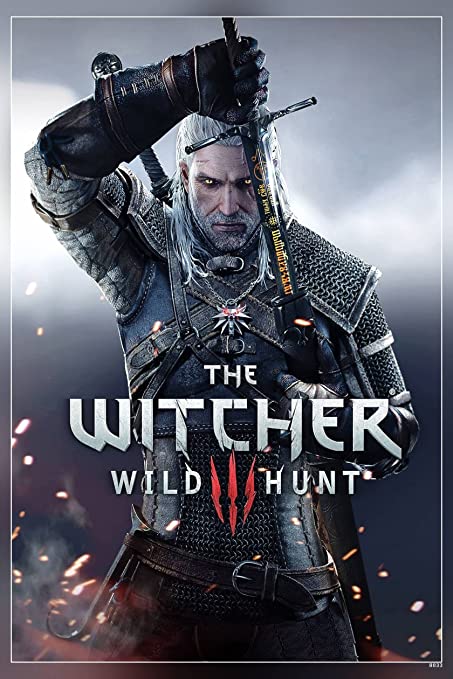
02The Witcher 3: Wild Hunt
The Witcher 3: Wild Hunt is one more great example of an AI video game. This open-world RPG features a vast array of believable NPCs, each with unique personality traits and motivations. The AI is also used to generate procedural content, resulting in a different game world every time you play.
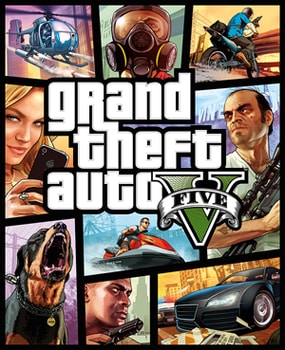
03Grand Theft Auto V
Grand Theft Auto V is yet another example of AI being used to create believable human-like behavior. The NPCs in this play are some of the most lifelike and realistic ever seen. They react to the player’s actions in believable ways, and the AI is used to generate procedural content, resulting in a game world that is always different.
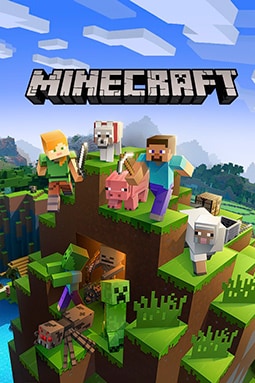
04Minecraft
Minecraft is a game that heavily uses procedural generation to create its content. The terrain and structures in the game are all generated on the fly by the AI, resulting in a different game world every time you play. What’s more, AI is also used to generate the behaviors of mobs (hostile creatures), making them more believable and lifelike.
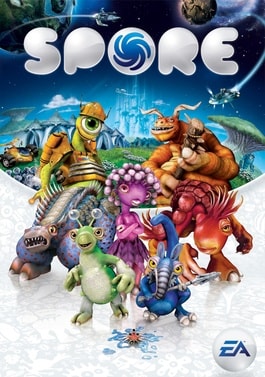
05Spore
Spore is an AI game play that is all about procedural generation. Every creature in the game is generated by AI, meaning that there are many possible creature designs. What’s more, AI is used to create creatures’ behaviors, making them more believable and lifelike.
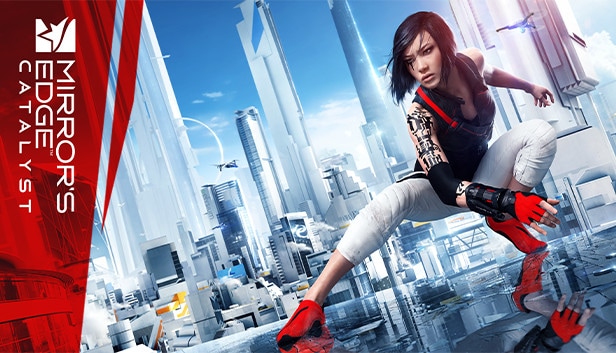
06Mirror’s Edge Catalyst
Mirror’s Edge Catalyst is a game that heavily uses AI to create its content. The levels in the game are all procedurally generated, meaning that they are different every time you play. This is made possible by the game’s AI, which produces the level layouts and obstacles on the fly.
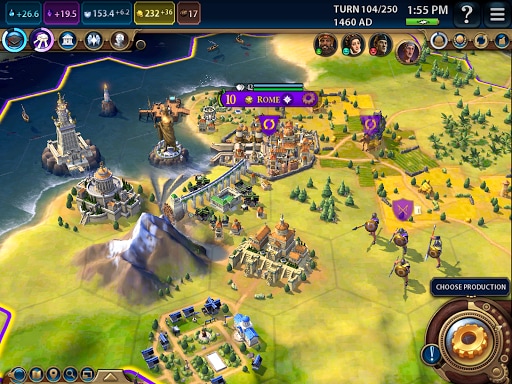
07Civilization VI
One of the most incredible examples of AI in video gaming is Civilization VI. This turn-based strategy game features some of the most believable NPCs ever seen in a game. Each character has its voice fully, and they all have unique personalities and backstories.
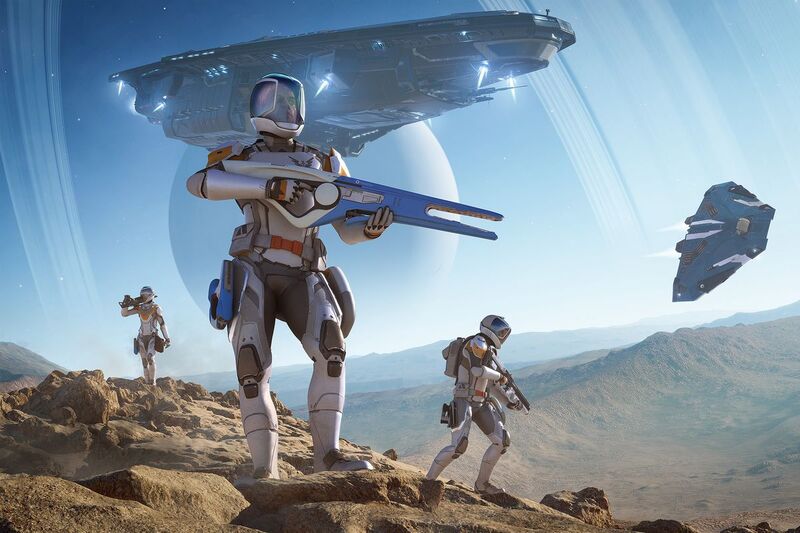
08Elite Dangerous
Elite Dangerous is a space simulation game that uses advanced AI to create believable and realistic human-like behavior. The NPCs in the game are some of the most lifelike and realistic ever seen. They react to the player’s actions in believable ways, and the AI is used to generate procedural content, resulting in a game world that is always different.
Part 5 What AI Video Games Assets Do Wondershare Filmora Video Editor Have?
With the increased use of AI in video games, most gamers have found gaming more enjoyable. However, an outstanding video editor has some assets that can significantly make AI video games better and more human. This video editor is one of the most sorted for and is called Filmora. Filmora is a great video editing software for creating stunning videos. It’s effortless to use and has various features to create professional-looking videos. It’s perfect for making videos for social media, YouTube, and other online platforms.
Its many features have a touch of artificial intelligence, making this program stand out from the other video editors and valuable for editing during ai video games creation.
Screen Recording
The Filmora screen recorder allows the user to concurrently record the screen and camera and the system and microphone audio. You can quickly record games, tutorials, YouTube videos, and other videos and then export them to YouTube, Vimeo, and other devices.
AI Portrait
The AI portrait function in Filmora video editor allows you to locate the human in your movie effortlessly and erase the background with a simple drag and click. There are also several portrait effects and AR stickers to add to your video editing enjoyment.
For Win 7 or later (64-bit)
For macOS 10.12 or later
Video Effects
Filmora customers can choose from various effects to utilize in their video editing software. It’s simple to create whatever effect you want with over 900 free effects, including drag-and-drop transitions, titles, filters, and motion components.
Do visit Wondershare Filmora exclusive website to know more about its latest upgrade and new features launch.
● Ending Thoughts →
● Thus, that was about what an ai video game is and why the characters act more like humans.
● So, as a video game lover, you can now explore the best of ai playing video games to have a personal experience of this new video gaming trend. Also, do try the Filmora software to see how you can change the looks and feel of your video game creation.
The gaming world is ever-changing, with developers looking to create innovative ways to immerse players into their digital worlds. One such technology that has begun to sweep is AI in the game industry.
AI is a powerful tool in many ways to improve the gaming experience. It can make artificial intelligence in computer games more believable and add replayability and immersion to games, and we can expect to see even more impressive applications in the future.
In this article
01 [What Is AI in Gaming?](#Part 1)
02 [Why Does AI in Gaming Matter?](#Part 2)
03 [How AI Will Completely Change Video Games](#Part 3)
04 [8 Games with Incredible Artificial Intelligence](#Part 4)
05 [What AI Video Games Assets Do Filmora Have?](#Part 5)
Part 1 What Is AI in Gaming?
In simple terms, AI is a set of algorithms that allow a computer to learn and improve from experience. Although you can apply it in many ways, artificial intelligence in video games is usually helpful to create more intelligent and more believable non-player characters (NPCs).
For example, an AI system might be helpful to determine how an NPC reacts to the player’s actions. If the player tries to steal from an NPC, the AI might make the NPC angry and more likely to attack the player. Alternatively, if the player is friendly to an NPC, the AI game playing might make the NPC more likely to help the player in future interactions.
Part 2 Why Does AI in Gaming Matter?
One of the most vital aspects of AI in video games is that it can make games more believable and immersive for players. When games can convincingly simulate human-like behavior, it can be a much more enjoyable experience for gamers. AI can make NPCs seem more lifelike and make the game world feel more believable.
AI is also becoming increasingly important for creating procedural content. This is where the game generates content on its own, rather than relying on pre-made assets. For example, a game might use procedural generation to create random dungeons or quests that the player can explore. This can add a lot of replayability to a game, as the player never knows what they will encounter next.
Part 3 How AI Will Completely Change Video Games
It is not a secret that AI is changing the world as we know it. With its ability to enable computers to learn and improve from experience, AI is paving the way for a future where machines can handle more complex tasks. And nowhere is this more apparent than in the world of video gaming.
In the past, developers brought in AI primarily for simple things like making certain NPCs (non-player characters) move and act realistically. But now, artificial intelligence in video games is being used for much more complex tasks like generating procedural content and creating believable human-like behavior. This results in a new generation of AI game playing that are more immersive and playable.
Part 4 Games with Incredible Artificial Intelligence
Now, we will look into eight video games that signify why we need the best ai in video games.
01Fallout 4
One of the most attractive examples of AI in video gaming is Fallout 4. This post-apocalyptic RPG features some of the most believable NPCs ever seen in a game. Each character is fully voiced, and they all have their unique personalities and backstories. The AI generates procedural content, meaning that the game world is always different each time you play.
02The Witcher 3: Wild Hunt
The Witcher 3: Wild Hunt is one more great example of an AI video game. This open-world RPG features a vast array of believable NPCs, each with unique personality traits and motivations. The AI is also used to generate procedural content, resulting in a different game world every time you play.
03Grand Theft Auto V
Grand Theft Auto V is yet another example of AI being used to create believable human-like behavior. The NPCs in this play are some of the most lifelike and realistic ever seen. They react to the player’s actions in believable ways, and the AI is used to generate procedural content, resulting in a game world that is always different.
04Minecraft
Minecraft is a game that heavily uses procedural generation to create its content. The terrain and structures in the game are all generated on the fly by the AI, resulting in a different game world every time you play. What’s more, AI is also used to generate the behaviors of mobs (hostile creatures), making them more believable and lifelike.
05Spore
Spore is an AI game play that is all about procedural generation. Every creature in the game is generated by AI, meaning that there are many possible creature designs. What’s more, AI is used to create creatures’ behaviors, making them more believable and lifelike.
06Mirror’s Edge Catalyst
Mirror’s Edge Catalyst is a game that heavily uses AI to create its content. The levels in the game are all procedurally generated, meaning that they are different every time you play. This is made possible by the game’s AI, which produces the level layouts and obstacles on the fly.
07Civilization VI
One of the most incredible examples of AI in video gaming is Civilization VI. This turn-based strategy game features some of the most believable NPCs ever seen in a game. Each character has its voice fully, and they all have unique personalities and backstories.
08Elite Dangerous
Elite Dangerous is a space simulation game that uses advanced AI to create believable and realistic human-like behavior. The NPCs in the game are some of the most lifelike and realistic ever seen. They react to the player’s actions in believable ways, and the AI is used to generate procedural content, resulting in a game world that is always different.
Part 5 What AI Video Games Assets Do Wondershare Filmora Video Editor Have?
With the increased use of AI in video games, most gamers have found gaming more enjoyable. However, an outstanding video editor has some assets that can significantly make AI video games better and more human. This video editor is one of the most sorted for and is called Filmora. Filmora is a great video editing software for creating stunning videos. It’s effortless to use and has various features to create professional-looking videos. It’s perfect for making videos for social media, YouTube, and other online platforms.
Its many features have a touch of artificial intelligence, making this program stand out from the other video editors and valuable for editing during ai video games creation.
Screen Recording
The Filmora screen recorder allows the user to concurrently record the screen and camera and the system and microphone audio. You can quickly record games, tutorials, YouTube videos, and other videos and then export them to YouTube, Vimeo, and other devices.
AI Portrait
The AI portrait function in Filmora video editor allows you to locate the human in your movie effortlessly and erase the background with a simple drag and click. There are also several portrait effects and AR stickers to add to your video editing enjoyment.
For Win 7 or later (64-bit)
For macOS 10.12 or later
Video Effects
Filmora customers can choose from various effects to utilize in their video editing software. It’s simple to create whatever effect you want with over 900 free effects, including drag-and-drop transitions, titles, filters, and motion components.
Do visit Wondershare Filmora exclusive website to know more about its latest upgrade and new features launch.
● Ending Thoughts →
● Thus, that was about what an ai video game is and why the characters act more like humans.
● So, as a video game lover, you can now explore the best of ai playing video games to have a personal experience of this new video gaming trend. Also, do try the Filmora software to see how you can change the looks and feel of your video game creation.
Color Correction Basics (S-LOG Footage)
S-Log is a gamma curve optimized for digital cameras to maximize the image sensor’s performance. Although these videos may look flat and washed out, they contain lots of color information. Even better, video creators can use color correction to edit the S-Log videos and make them look as natural as possible. That’s what this article is all about.
How to Color-Correct an S-Log Footage
This tutorial assumes that you already have an S-Log footage. If not, you can record S-Log footage using most Canon, Sony, and Panasonic cameras.

Let’s get to the steps!
Step1 Adjust the color settings
Start by adding your video to the timeline on Wondershare Filmora and then double-click the video track. Then, click on the Color tab before tapping Advanced.
Free Download For Win 7 or later(64-bit)
Free Download For macOS 10.14 or later

Step2 Read and study the histogram
Now you’ll see the Advanced Color Correction pop-up window. Here, you’ll see a histogram with the brightest point on the right and the darkest point on the left. From our example, you can see that the video has more dark pixels than bright ones. Horizontally, the histogram shows you how many pixels are in a certain range of brightness.

Step3 Adjust the image colors
Once you’ve understood the histogram, look for pure black and white parts on the video clip. For example, in this video, you can see that the roofs are pure black and the boat at the bottom-right corner is pure white.

After finding the white and black parts in the video, go to the Light section, then adjust the Highlights to see if you can get a pure white on the boat. If the boat or any other image of your choice doesn’t look pure white, increase the Whites slide to make it whiter.

Now adjust the Shadows settings to reduce the effect and make the roofs look closer to pure black. If you want the roofs to look darker, drag the Blacks slider to the left.
Pro tip: Ensure that the darkest and brightest points don’t cross the broken lines on the edge, or the video will start losing details.
Step4 Adjust the color saturation
Does your video still look a little flat? Probably yes! In that case, click the Color section and adjust the Saturation slider to the right to make the video less flat. Saturation simply means how colorful a video clip is to the viewer. Apart from the color saturation, you can also adjust the Vibrance to make your video objects look more colorful.

Step5 Preview and compare the video
Now it’s time to check and compare the results. To make it easier, click the Eye icon at the top-right corner to switch between the original S-Log video and the color-corrected clip. You can also tap the AB icon and choose Split View-Left/Right to view the clips in the side-by-side mode.

Summary
I guess that was easy, right? Up to this juncture, you should be able to perform basic color correction on your video using Wondershare Filmora. Remember, this video editor packs many other editing tools to bring out your creativity. Give it a try!
Free Download For macOS 10.14 or later
Step2 Read and study the histogram
Now you’ll see the Advanced Color Correction pop-up window. Here, you’ll see a histogram with the brightest point on the right and the darkest point on the left. From our example, you can see that the video has more dark pixels than bright ones. Horizontally, the histogram shows you how many pixels are in a certain range of brightness.
Step3 Adjust the image colors
Once you’ve understood the histogram, look for pure black and white parts on the video clip. For example, in this video, you can see that the roofs are pure black and the boat at the bottom-right corner is pure white.
After finding the white and black parts in the video, go to the Light section, then adjust the Highlights to see if you can get a pure white on the boat. If the boat or any other image of your choice doesn’t look pure white, increase the Whites slide to make it whiter.
Now adjust the Shadows settings to reduce the effect and make the roofs look closer to pure black. If you want the roofs to look darker, drag the Blacks slider to the left.
Pro tip: Ensure that the darkest and brightest points don’t cross the broken lines on the edge, or the video will start losing details.
Step4 Adjust the color saturation
Does your video still look a little flat? Probably yes! In that case, click the Color section and adjust the Saturation slider to the right to make the video less flat. Saturation simply means how colorful a video clip is to the viewer. Apart from the color saturation, you can also adjust the Vibrance to make your video objects look more colorful.
Step5 Preview and compare the video
Now it’s time to check and compare the results. To make it easier, click the Eye icon at the top-right corner to switch between the original S-Log video and the color-corrected clip. You can also tap the AB icon and choose Split View-Left/Right to view the clips in the side-by-side mode.
Summary
I guess that was easy, right? Up to this juncture, you should be able to perform basic color correction on your video using Wondershare Filmora. Remember, this video editor packs many other editing tools to bring out your creativity. Give it a try!
How to Use Blender Green Screen
Blender is an open-source cross-platform 3D graphics program, but this doesn’t mean it’s a low-rent option. Just like commercial packages like Lightwave 3D, it is also a very capable compositing package. Unlike Lightwave, it is a modern node-based compositor like Nuke or Fusion. It’s not what the software is designed for, but it does a bangup job of green screen compositing, as you will soon see.
Blender green screen uses technique of the chroma key a color is isolated (in our case the green of thegreen screen), or a particular luminance, it is removed and the area that was occupied by it becomes transparent, thus becoming part of the alpha channel. The transparent parts will thus show the video or the image below, which will thus define the environment in which the subject of the first movie will act.
How to Use Green Screen in Blender
So we need to pull these two elements into Blender and pull a key on the green bits to make the background show through in as naturalistic a way as possible. Blender is a node-based compositor which means the control mechanism is nodes or little LEGO blocks of love which you place on the screen and link with little strings which form your signal path.

Locate the drop-down (it goes up, actually, but you know what we mean) at the bottom of the view, and select “Movie Clip Editor.”
Click the “Open” button and choose and load your green screen footage. (You can also load sequences of images for uncompressed keys in this step if you have the space, and the footage is the right size.)
Once the clip is loaded, go back to the drop-down and select Node Editor.
The screen will be blank, but just go to the bottom of the view and click the middle button marked “Node Tree Type” to Display, and then check the Use Nodes and Backdrop buttons.
Select the “Render Layers” node, and because we won’t need it you can delete it (on the Mac this is the Forward Delete key). Then move the Compositing node out of the way because we won’t need it yet.
**Note: to zoom in and out of the nodes, use the centre scroll wheel of the mouse if you have it. To zoom in and out of the images you are working on, use the V and Alt-V keys.
**Compositing Nodes
Click the Add menu in the bar at the bottom of the view and select “Input -> Movie Clip.” Select the green screen clip you added in the Movie Clip Editor. This is the input. We have to push this through a keyer to remove the green and make those areas transparent.
**Important: in this program flow goes from left to right, so node inputs are on the left of a node, and outputs are on the right of a node.
Now select “Add -> Matte -> Keying” to add a keying node. Also “Add -> Output -> Viewer” to make the output from the key visible. Click on the little yellow dot next to Image output on the Input node, and drag it to Image input on the Keying node. Then drag the little dot next to Image output on the keying node, and drag it to the image input on the viewer node.
You now have to select the key colour, the colour which the keyer is changing to transparent. Click the Key Colour button on the Keying node, and this displays a colour selector. Click the eyedropper, and click on the image in the background somewhere on the green screen.
If you look carefully, you will see that there are some areas which still have a bit of colour and are not fully transparent. You can check this more accurately by dragging the string from the Matte output on the Keying node and linking to the input on the viewer. This is the key you have made. As you can see, the dark bits are supposed to be totally black, and there are still greys showing through. (This is because the source material wasn’t perfect.)
There are many different ways to fix this depending on the shot, but if it’s a reasonably well-shot green screen, all you will need to do is the following.
Adjust the Black Clip slider to expand the amount of greens which turn to black. Then adjust the White Clip to push the whites to prevent them from becoming transparent.
Once you have pure white and pure black, reconnect the image output of the keying node to the image input on the viewer, and you’ll see you have a decent key.
You can adjust the amount of fringing and spill (reflections from the green screen on the model), but generally the keyer does a good job of guessing that for you with a decently-shot green screen.
**Adding the background
After this, adding the background is more of the same with a slight twist. “Add -> Input -> Movie Clip,” navigate to your background clip and load it.
To blend the two layers, you have to make a mix of the two clips so that the background shows through the now transparent bits of the foreground.
“Add -> Colour -> Mix node”. Take the output from the background clip, and feed it to the top image input of the mix node. Take the output from the keying node, and feed it into the lower image input on the mix node.
Click the Alpha channel button next to the drop-down on the mix node.
And finally we have our key. The background is way too sharp and makes the green screen footage look really soft and crappy, so we need to soften the background. There is a really nice Bokeh Blur filter in blender for just this purpose to make the background look out of focus and add lots of gorgeous Bokeh blobs.
“Add -> Filter -> Bokeh Blur” and put it between the background clip and the mix. In Blender, if you add a node and place it over a string between two nodes, the string goes yellow, and dropping it will automatically insert the new node into the signal path connecting inputs and outputs.
Finally add an image to the Bokeh Blur for the shape you want the bokeh to be; we opted for a donut-shaped iris pattern.
To render out your video, connect the output of the Mix node to the input of the compositing node we left lying about earlier. It’s okay for this output to be connected to the input node of the viewer, too, as this means we see progress while rendering.
Make sure you are set up to render the right amount of frames at 30fps in the render panel on the far right. 30fps for 5 seconds (the duration of our clip) is 150 frames. Insert 150 where it says End Fr.
Select a place and a filename to output to in the Output panel further down the right-hand side. Then to render, select the info menu bar from the top-left drop-down, and finally choose “Render Menu -> Render Animation,” and the render will begin.
Wondershare Filmora
If you’re just starting out with video editing, or just want a simple program that works, Wondershare Filmora might be what you’re looking for. It has the essential tools, and anyone can learn to use it easily.
Wondershare Filmora is the one of best video editing software with cool features that compares to other competing video editing Softwares. Many video editing programs claim to offer professional results; Filmora is one of a few consumer-level tools that actually delivers.
For Win 7 or later (64-bit)
For macOS 10.12 or later
Installation Steps
- Click the icon in the center of the Media Library to add files directly.
- Go File > Import Media > Import Media Files.
- Drag and drop to the Media Library directly.
While importing a media file, Wondershar Filmora may ask you if you wish to create a proxy file to accelerate the editing process. Select “Yes” to have a fast video editing experience.

You can also import video clips using your Touch Bar controls if your computer has Touch Bar.
Related FAQs
How do I get rid of the green screen in blender?
This is achieved by Compositing Nodes: Click the Add menu in the bar at the bottom of the view and select “Input -> Movie Clip.” Select the green screen clip you added in the Movie Clip Editor. This is the input. We have to push this through a keyer to remove the green and make those areas transparent.
How do I get rid of objects in green screen?
This can be done by following these prompts: Select “Add -> Matte -> Keying” to add a keying node. Also “Add -> Output -> Viewer” to make the output from the key visible. Click on the little yellow dot next to Image output on the Input node, and drag it to Image input on the Keying node. Then drag the little dot next to Image output on the keying node, and drag it to the image input on the viewer node.
Conclusion
Obviously, to get the best green screen composites you have to shoot good “plates.” “Plates” are the main bits of the shot that you bolt together in movie visual effects. You have the foreground plate and the green screen bit with an actor filmed in front of a green screen. Then you have the background plate which is the bit you want to show through the green bits of the foreground, making the whole thing look as though the background and foreground were filmed at the same time.
For macOS 10.12 or later
Installation Steps
- Click the icon in the center of the Media Library to add files directly.
- Go File > Import Media > Import Media Files.
- Drag and drop to the Media Library directly.
While importing a media file, Wondershar Filmora may ask you if you wish to create a proxy file to accelerate the editing process. Select “Yes” to have a fast video editing experience.
You can also import video clips using your Touch Bar controls if your computer has Touch Bar.
Related FAQs
How do I get rid of the green screen in blender?
This is achieved by Compositing Nodes: Click the Add menu in the bar at the bottom of the view and select “Input -> Movie Clip.” Select the green screen clip you added in the Movie Clip Editor. This is the input. We have to push this through a keyer to remove the green and make those areas transparent.
How do I get rid of objects in green screen?
This can be done by following these prompts: Select “Add -> Matte -> Keying” to add a keying node. Also “Add -> Output -> Viewer” to make the output from the key visible. Click on the little yellow dot next to Image output on the Input node, and drag it to Image input on the Keying node. Then drag the little dot next to Image output on the keying node, and drag it to the image input on the viewer node.
Conclusion
Obviously, to get the best green screen composites you have to shoot good “plates.” “Plates” are the main bits of the shot that you bolt together in movie visual effects. You have the foreground plate and the green screen bit with an actor filmed in front of a green screen. Then you have the background plate which is the bit you want to show through the green bits of the foreground, making the whole thing look as though the background and foreground were filmed at the same time.
Also read:
- New SRT Not Displaying How to Open and Use SRT File in VLC for 2024
- In 2024, Are You in a Funny Chat with a Friend and Want to Send a GIF but Couldnt Find One? Here We Will Provide You with the Top Image for GIF Converters. So, Let Us See How to Turn Images Into GIFs Very Quickly
- New There Are a Few Ways to Remove or Mute Audio in a Video, but How? Read This Article and Learn How to Do It Using Recommended Android Apps
- Updated Are You Interested in the Best LUTs ? Do You Want to Enhance Your Photos and Images with High-End Quality? Then, Quickly Step Into This Article for Mind-Blowing Facts on It
- Updated In 2024, Looking for a Way to Edit Your Profile Picture for Telegram? Heres an Easy and Quick Guide on How to Change, Delete and Hide Your Profile Picture with Simple Steps
- In 2024, Adding Text to Your Collage Not only Makes It Look Sophisticated but Also Versatile. So, if You Too Are Looking for Ways to Create a Collage Text, Check Out Our Article
- 10 Best Meme Text to Speech Tools Windows, Mac, Android, iPhone
- Updated Templates Increase the Editing Possibilities for Beginners and Professionals. Read This Article to Learn About some Customizable Slow-Motion CapCut Templates for 2024
- “Create. Edit. Share. Transform Your Videos with KineMaster! Powerful Tools, Easy to Use.” – a Few Words We Read when We Come up with the Official Web-Site of KineMaster, a Mobile Video Editing Application for 2024
- New In 2024, This Is a Recommendation About Bandicut. If You Are Confused, Please Check It Out
- Updated In 2024, Magic Effects Video Making How To
- New 2024 Approved To Add SRT to MP4 Is Not as Hard as You Might Think. All You Just Need Is the Right Tool to Help You Get the Job Done. Read This Article and Learn the 8 Latest Methods to Merge SRT with MP4 Effortlessly
- In 2024, Are You Looking for the Best Premiere Pro Slideshow Template Online for Free? If Yes, You Can Find a Few Exciting Slideshow Templates Here. They Are Worth Using
- New 2024 Approved Here Are the Steps to Crop a Video in Sony Vegas Pro Step 1 Click on Import and Import the Video to Be Edited. Click on It and Drag-Drop to Timeline
- Updated In 2024, You Will Also Be Guided on How to Use This Software to Crop Your Videos. Dont Worry and Just Take It One Step at a Time
- New 2024 Approved 10 Best Vloggers on YouTube
- In 2024, Repeated Text Animation Tutorial
- Split Audio From Video in Adobe Premiere Pro Step by Step for 2024
- Updated How to Create Sports Intro and YouTube Endscreen, In 2024
- 2024 Approved Turn Your Blog Content Into Audio Podcasts to Reach a Wider Audience and Increase Reader Participation
- 2024 Approved Have You Ever Used an Adjustment Layer in Photoshop? Read This Article to Find Out How to Add, Resize, Change, and Use an Adjustment Layer in Photoshop Efficiently
- Updated How to Speed Up Video with Canva Online Tool, In 2024
- New In 2024, Easy Steps to Create Intro Video with After Effects
- Updated 2024 Approved Everything That You Need to Know About Video Montages- Ideas, Techniques, and Software
- New Best 5 Tips to Freeze-Frame in After Effects
- Updated 2024 Approved Gif to Svg, Svg to Gif, Convert Gif to Svg, Animated Svg to Gif, Convert Svg to Gif, Svg to Gif Converter, Svg to Gif Animation, Svg Animation to Gif, Gif to Svg Converter
- New When Struggling to Find a Suitable Game Recorder for Your PC, You Might Come Across Many Options. Explore the Best Game Recorders for Sharing Game Highlights for 2024
- Updated How to Make GIF With Transparent Background?
- Updated In 2024, How to Download Windows Movie Maker 2012 Version
- Updated Finding the Best Voice Changers for WhatsApp Free and Paid
- Updated Complete Guide to Change Video Resolution in Filmora
- Updated If You Want to Make an Intro Video, Then Adobe After Effects Will Be a Great Choice. This Article Will Show the Steps to Create an Intro Video with After Effects by Your Own
- Guide of 8 Photo Collage Apps for PC for 2024
- How to Vlog? A Ultimate Guide for Beginners
- 2024 Approved Step-By-Step Guide To Creating Halftone Effects In Photoshop
- Updated In 2024, How to Loop Videos with iMovie
- Updated This Article Will Show You the Steps to Make Coin Magic in Videos with Filmora for 2024
- Updated In 2024, Understanding the Dynamics Underlying in AI Slow Motion Editing
- Best 6 WebM to GIF Converters
- New How to Make Falling Text Effect in Filmora?
- Updated How to Change the Speed of Video in DaVinci Resolve, In 2024
- New In 2024, Turn Your Text Into a Podcast Made Possible
- How to Use Pokémon Emerald Master Ball Cheat On Asus ROG Phone 7 Ultimate | Dr.fone
- In 2024, How to Cast Vivo Y27 4G Screen to PC Using WiFi | Dr.fone
- Resolve Your iPhone 6 Keeps Asking for Outlook Password | Dr.fone
- Updated Know All About Animated Business Logos and the Best Tools to Create One for 2024
- In 2024, How to Change/Fake Your Vivo Y100A Location on Viber | Dr.fone
- Is GSM Flasher ADB Legit? Full Review To Bypass Your Samsung Galaxy F34 5G Phone FRP Lock
- How to Change Google Play Location On Realme C67 4G | Dr.fone
- How to Fix Pokemon Go Route Not Working On Honor X50 GT? | Dr.fone
- How to Stop My Spouse from Spying on My Vivo G2 | Dr.fone
- Complete Tutorial for Tecno Spark Go (2023) Hard Reset | Dr.fone
- In 2024, How To Stream Anything From Realme C67 5G to Apple TV | Dr.fone
- In 2024, Complete Fixes To Solve Apple iPhone 12 Pro Max Randomly Asking for Apple ID Password | Dr.fone
- In 2024, Can I Bypass a Forgotten Phone Password Of Samsung Galaxy M34 5G?
- Fake the Location to Get Around the MLB Blackouts on Samsung Galaxy M34 | Dr.fone
- New Update 6 Best Voice Changers You Cant Miss for 2024
- In 2024, Preparation to Beat Giovani in Pokemon Go For Vivo T2 Pro 5G | Dr.fone
- Effective Ways To Fix Checkra1n Error 31 On Apple iPhone 6s Plus
- In 2024, Top IMEI Unlokers for Apple iPhone 13 and Android Phones
- In 2024, Will Pokémon Go Ban the Account if You Use PGSharp On Honor Magic 5 Pro | Dr.fone
- Undelete lost music from Itel A70
- In 2024, 6 Proven Ways to Unlock Samsung Galaxy M54 5G Phone When You Forget the Password
- Title: How to Add Text in Adobe Rush for 2024
- Author: Morgan
- Created at : 2024-06-08 08:36:38
- Updated at : 2024-06-09 08:36:38
- Link: https://ai-video-editing.techidaily.com/how-to-add-text-in-adobe-rush-for-2024/
- License: This work is licensed under CC BY-NC-SA 4.0.
