
How to Concatenate Videos Using FFmpeg for 2024

How to Concatenate Videos Using FFmpeg
Video editing is a crucial aspect of creating content for many people. Whether you’re a YouTuber, a marketer, or just someone who wants to share videos with friends and family, being able to edit and manipulate your videos is key. One of the most basic video editing tasks is concatenating videos, which combines multiple files to create one cohesive video.
FFmpeg is a powerful tool that allows you to do just that, and in this guide, we’ll walk you through the process of FFmpeg concatenate videos. Whether a beginner or an experienced video editor, this guide will provide you with all the information you need to seamlessly merge your videos. From installation to execution, we’ll cover it all so you can streamline your video editing process.
Overview and Installation of FFmpeg
FFmpeg is free, open-source project that allows you to record, convert, and stream digital audio and video. It is a command-line tool widely used in video editing and transcoding. FFmpeg can be used to concatenate videos and other tasks, such as adding subtitles, changing video resolution, and more. It is available for Windows, Mac, and Linux, making it a versatile and accessible tool for anyone to use.
Here’s how to install FFmpeg:
Step1 Log in to your Ubuntu server via SSH and update the package index.
$ sudo apt update
Step2 Install FFmpeg and all the required dependencies
$ sudo apt install ffmpeg
Step3 Verify the version of FFmpeg that you’ve installed.
$ ffmpeg -version
Prerequisite
Before we merge videos using FFmpeg, we must understand the various methods available to us. FFmpeg offers three ways to concatenate videos: a demuxer, a filter, or a protocol. However, each method has its own set of considerations, and the best method for you will depend on the properties of the videos you’re working with.
It’s crucial to ensure that all encoding-related properties align with your chosen method. This includes the timebase, height and width, codecs, and pixel format. Some methods require the videos you’re merging to have the same encoding, while others allow for different encodings. It’s essential to keep this in mind to ensure that the final video is seamless without any breaks. Remember that these prerequisites will help you have a smooth process.
Concatenate Videos With Same Codecs Using FFmpeg
If the videos you want to concatenate have the same codec, you can use the FFmpeg “concat” demuxer or protocol to join them together. This simple and efficient method doesn’t require re-encoding the videos, saving time and preserving the original quality. This section will review the steps to concatenate videos using the “concat” demuxer and “concat” protocols in FFmpeg.
Merge Videos With the “Concat” Demuxer
The concat demuxer in FFmpeg allows you to join together multiple video files with the same codecs by reading a list of file paths from a text file and demuxing them in sequence. Each video starts where the previous one finishes without needing to re-encode the videos. Here’s how to do it:
Step1 Create a .txt file and list the paths of the video files you want to merge.
Join_video.txt
file /Users/Video/input1.mp4
file /Users/Video/input2.mp4
![]()
Note: You can add more than two video files.
Step2 Run the FFmpeg command:
ffmpeg -f concat -safe 0 -i join_video.txt -c copy output_demuxer.mp4
![]()
Note: -safe 0 is added to accept any file name.
-c copy will copy all the streams.
As this method allows you to “stream copy” the files instead of re-encoding them, the concatenation is very fast. This can be a good option if you have videos with the same codecs and want to join them quickly without losing quality.
Join Videos With the “Concat” Protocol
The concat protocol in FFmpeg allows you to join together multiple video files in a specific format that supports file-level concatenation, such as MPEG-2 TS. However, it cannot be used for other video formats like MP4 and WEBM.
Here’s how to use the “concat protocol:
Step1 Run the FFmpeg command:
ffmpeg -i “concat:input1.ts|input2.ts” -c copy output_protocol.ts
![]()
Note: The concat protocol allows you to “stream copy” the files by adding the option -c copy.
Step2 Input the file name of the video using this code:
ffmpeg -i “concat:input1.mp4|input2.mp4” -c copy output_protocol.mp4
![]()
Note: If you try to use this method on video formats that are not supported, only the first input video will be saved in the output video. And the video ends after the first video.
Although this method is limited in terms of supported video formats, it’s very easy to use if you merge videos in the supported formats. It’s a single command in the terminal without needing a text file. Additionally, using the -c copy option makes it efficient as it doesn’t require re-encoding, saving time.
Concatenate MP4 Video Files of Different Codecs & Resolutions Using FFmpeg
If the videos you want to concatenate have different codecs or resolutions, you can still use FFmpeg to join them together. However, this method requires re-encoding the videos, which can take longer and may result in a loss of quality. This section will cover the steps to concatenate videos with different codecs or resolutions using FFmpeg.
Here’s how to do it:
Step1 Provide the names of the input files to FFmpeg.
ffmpeg -i file1.mp4 -i file2.mp4 -i file3.mp4 \
Step2 Use the filter_complex filtergraph parameter to instruct FFmpeg from where to take the audio and video.
-filter_complex “[0:v] [0:a] [1:v] [1:a] [2:v] [2:a]
![]()
Note: [0:v][0:a] means FFmpeg needs to take the video and audio from the 0th video (file1.mp4).
Step3 Tell FFmpeg to concatenate three files (n=3).
concat=n=3:v=1:a=1 [vv] [aa]“ \
![]()
Note: The v=1:a=1 implies one stream for the audio and one stream for the video.
Step4 Map these audio and video outputs to the final video container. This is done as follows:
-map “[vv]“ -map “[aa]“ mergedVideo.mp4
It is important to note that this method requires re-encoding the videos, which can take more time and may result in a loss of quality. However, it offers the flexibility of filtering the videos before concatenating them. The filter_complex method in FFmpeg allows you to concatenate videos of different codecs and resolutions. The final step is to map the audio and video outputs to the final video container. This can be done using the -map command.
Concatenate Videos With Multiple Audio Streams Using FFmpeg
Concatenating videos with multiple audio streams can be more complex than concatenating videos with a single audio stream. This section will cover the steps to concatenate videos with multiple audio streams using FFmpeg. We’ll be using the filter_complex method in FFmpeg, which allows you to manipulate and concatenate multiple audio and video streams in a single command. This method is more advanced but allows you to join videos with different audio streams and create a final video with multiple audio tracks.
Step1 Specify the input files and opening.mkv, episode.mkv, and ending.mkv:
$ ffmpeg -i opening.mkv -i episode.mkv -i ending.mkv -filter_complex
Step2 Use the filter_complex parameter in FFmpeg to specify the input streams for the video and audio.
[0:0] [0:1] [0:2] [1:0] [1:1] [1:2] [2:0] [2:1] [2:2]
![]()
Note: Single video stream ([0:0], [1:0], [2:0])
Dual audio streams ([0:1][0:2], [1:1][1:2], [2:1][2:2])
Step3 Use the concat filter to specify that you want to concatenate 3 files (n=3) with 1 video stream (v=1) and 2 audio streams (a=2). Specify the output streams as [v], [a1], [a2]:
concat=n=3:v=1:a=2 [v] [a1] [a2]
Step4 Use the -map option to map the output streams to the final video container:
-map ‘[v]‘ -map ‘[a1]‘ -map ‘[a2]‘ output.mkv
[Bonus] Join Videos Together With Filmora
While FFmpeg offers a wide range of options for joining videos together, it can have a steep learning curve for some users. An alternative method for joining videos is using Filmora. Wondershare Filmora is a user-friendly video editing software that allows you to easily join multiple videos. It’s a great option for users new to video editing or needing experience with command-line tools like FFmpeg.
Free Download For Win 7 or later(64-bit)
Free Download For macOS 10.14 or later
Filmora has a simple drag-and-drop interface, making adding, arranging, and editing videos and audio tracks easy. Additionally, it offers various features like split, trim, crop, merge, and more. It also has various effects, transitions, and animations to enhance the overall look of your video. With Filmora, you can create professional-looking videos with minimal effort.
How-to Steps
Here’s how to merge videos using Filmora:
Step1 Open Filmora and click “New Project.”

Step2 Go to “File“ > “Import Media“ > “Import Media Files“ to add your video files to the media library.

Step3 Drag and drop the files you want to merge from the media library to the timeline, and then you’ll get the merged video seamlessly.

Step4 Edit your video.

Step5 After editing, click the “Export“ tab to save your videos.

Conclusion
FFmpeg is a powerful tool that allows you to concatenate videos in various ways. Whether you’re working with videos of the same codecs and resolutions or videos with multiple audio streams, FFmpeg can handle it. However, for users new to video editing or needing experience with command-line tools, using Filmora can be a more user-friendly option. It offers a simple drag-and-drop interface and a variety of features and effects to enhance the overall look of your video.
Step2 Run the FFmpeg command:
ffmpeg -f concat -safe 0 -i join_video.txt -c copy output_demuxer.mp4
![]()
Note: -safe 0 is added to accept any file name.
-c copy will copy all the streams.
As this method allows you to “stream copy” the files instead of re-encoding them, the concatenation is very fast. This can be a good option if you have videos with the same codecs and want to join them quickly without losing quality.
Join Videos With the “Concat” Protocol
The concat protocol in FFmpeg allows you to join together multiple video files in a specific format that supports file-level concatenation, such as MPEG-2 TS. However, it cannot be used for other video formats like MP4 and WEBM.
Here’s how to use the “concat protocol:
Step1 Run the FFmpeg command:
ffmpeg -i “concat:input1.ts|input2.ts” -c copy output_protocol.ts
![]()
Note: The concat protocol allows you to “stream copy” the files by adding the option -c copy.
Step2 Input the file name of the video using this code:
ffmpeg -i “concat:input1.mp4|input2.mp4” -c copy output_protocol.mp4
![]()
Note: If you try to use this method on video formats that are not supported, only the first input video will be saved in the output video. And the video ends after the first video.
Although this method is limited in terms of supported video formats, it’s very easy to use if you merge videos in the supported formats. It’s a single command in the terminal without needing a text file. Additionally, using the -c copy option makes it efficient as it doesn’t require re-encoding, saving time.
Concatenate MP4 Video Files of Different Codecs & Resolutions Using FFmpeg
If the videos you want to concatenate have different codecs or resolutions, you can still use FFmpeg to join them together. However, this method requires re-encoding the videos, which can take longer and may result in a loss of quality. This section will cover the steps to concatenate videos with different codecs or resolutions using FFmpeg.
Here’s how to do it:
Step1 Provide the names of the input files to FFmpeg.
ffmpeg -i file1.mp4 -i file2.mp4 -i file3.mp4 \
Step2 Use the filter_complex filtergraph parameter to instruct FFmpeg from where to take the audio and video.
-filter_complex “[0:v] [0:a] [1:v] [1:a] [2:v] [2:a]
![]()
Note: [0:v][0:a] means FFmpeg needs to take the video and audio from the 0th video (file1.mp4).
Step3 Tell FFmpeg to concatenate three files (n=3).
concat=n=3:v=1:a=1 [vv] [aa]“ \
![]()
Note: The v=1:a=1 implies one stream for the audio and one stream for the video.
Step4 Map these audio and video outputs to the final video container. This is done as follows:
-map “[vv]“ -map “[aa]“ mergedVideo.mp4
It is important to note that this method requires re-encoding the videos, which can take more time and may result in a loss of quality. However, it offers the flexibility of filtering the videos before concatenating them. The filter_complex method in FFmpeg allows you to concatenate videos of different codecs and resolutions. The final step is to map the audio and video outputs to the final video container. This can be done using the -map command.
Concatenate Videos With Multiple Audio Streams Using FFmpeg
Concatenating videos with multiple audio streams can be more complex than concatenating videos with a single audio stream. This section will cover the steps to concatenate videos with multiple audio streams using FFmpeg. We’ll be using the filter_complex method in FFmpeg, which allows you to manipulate and concatenate multiple audio and video streams in a single command. This method is more advanced but allows you to join videos with different audio streams and create a final video with multiple audio tracks.
Step1 Specify the input files and opening.mkv, episode.mkv, and ending.mkv:
$ ffmpeg -i opening.mkv -i episode.mkv -i ending.mkv -filter_complex
Step2 Use the filter_complex parameter in FFmpeg to specify the input streams for the video and audio.
[0:0] [0:1] [0:2] [1:0] [1:1] [1:2] [2:0] [2:1] [2:2]
![]()
Note: Single video stream ([0:0], [1:0], [2:0])
Dual audio streams ([0:1][0:2], [1:1][1:2], [2:1][2:2])
Step3 Use the concat filter to specify that you want to concatenate 3 files (n=3) with 1 video stream (v=1) and 2 audio streams (a=2). Specify the output streams as [v], [a1], [a2]:
concat=n=3:v=1:a=2 [v] [a1] [a2]
Step4 Use the -map option to map the output streams to the final video container:
-map ‘[v]‘ -map ‘[a1]‘ -map ‘[a2]‘ output.mkv
[Bonus] Join Videos Together With Filmora
While FFmpeg offers a wide range of options for joining videos together, it can have a steep learning curve for some users. An alternative method for joining videos is using Filmora. Wondershare Filmora is a user-friendly video editing software that allows you to easily join multiple videos. It’s a great option for users new to video editing or needing experience with command-line tools like FFmpeg.
Free Download For Win 7 or later(64-bit)
Free Download For macOS 10.14 or later
Filmora has a simple drag-and-drop interface, making adding, arranging, and editing videos and audio tracks easy. Additionally, it offers various features like split, trim, crop, merge, and more. It also has various effects, transitions, and animations to enhance the overall look of your video. With Filmora, you can create professional-looking videos with minimal effort.
How-to Steps
Here’s how to merge videos using Filmora:
Step1 Open Filmora and click “New Project.”

Step2 Go to “File“ > “Import Media“ > “Import Media Files“ to add your video files to the media library.

Step3 Drag and drop the files you want to merge from the media library to the timeline, and then you’ll get the merged video seamlessly.

Step4 Edit your video.

Step5 After editing, click the “Export“ tab to save your videos.

Conclusion
FFmpeg is a powerful tool that allows you to concatenate videos in various ways. Whether you’re working with videos of the same codecs and resolutions or videos with multiple audio streams, FFmpeg can handle it. However, for users new to video editing or needing experience with command-line tools, using Filmora can be a more user-friendly option. It offers a simple drag-and-drop interface and a variety of features and effects to enhance the overall look of your video.
Dollar-Store DIY Hacks to Use for Filmmaking
Filmmaking is usually an expensive hobby, but slowly over time, it’s become more affordable. Regular gear like cameras and lights are slightly cheaper, but there are plenty of ways to DIY regular items to use as film gear.
Making DIY film gear may not give you the same look as professional gear, but it could be a fun project and give you similar looks on a budget. In this article, let’s look at some dollar-store DIY hacks that you can use for filmmaking on a budget.
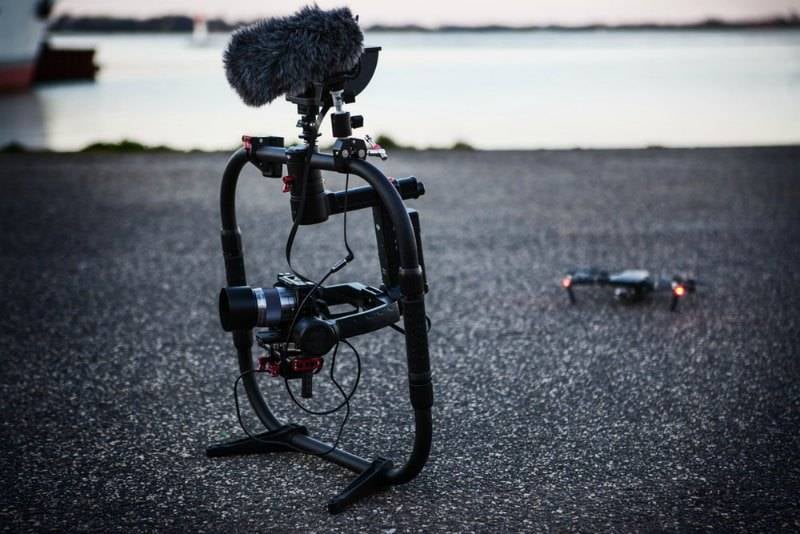
Tip 1. Add foreground elements to improve the frame of videos
Let’s start with something we can do to enhance your framing. Sometimes we want to direct our audience’s attention to a specific part of the frame. In this case, it’s the talent of placing an object in the shot’s foreground that can help us do that. While also making a more attractive frame. At the dollar store, try using something like these fake plants.
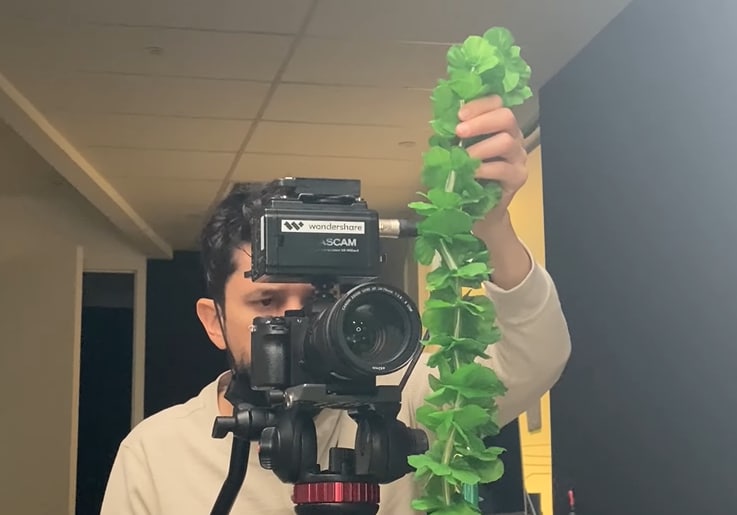
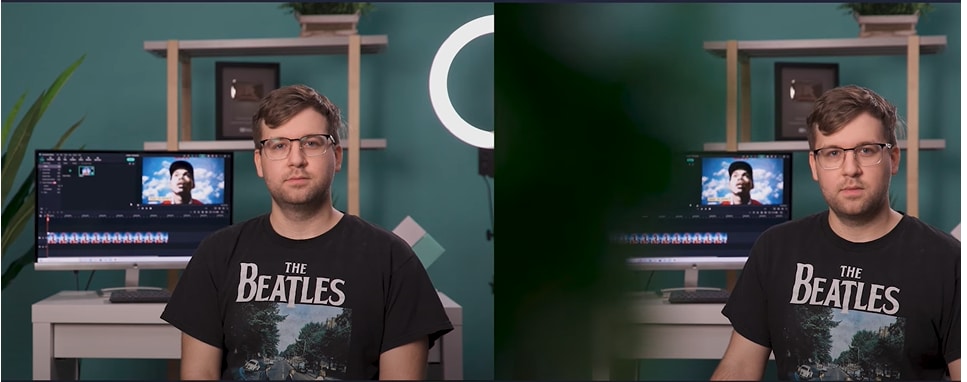
You can place it in front of your lens. Then focus on the talent behind it, giving a blurry foreground that perfectly frames the talent. Here’s how the shot looks with and without foreground elements.
![]()
Note: Remember, you can also use a different angle than simply approaching the object from the front. You can try and use different perspectives until you find the shot or footage you are looking for.
Tip 2. Adjust lights with poster boards
The shot below looks dark and boring because the background has no light. Here’s the shot with and without the lights.

A practical light is a light that shows up on screen rather than lighting talent from off-screen. For example, some dollar stores have small LED accent lights for around three dollars.
Others even have lights with adhesive backings that allow you to place them all over the room—creating great lighting accents with small eye-catching pockets of light.

On film sets, crews use a bounce to reflect light from one light source in another direction. At the dollar store, we can find something like this poster board to get a similar effect.
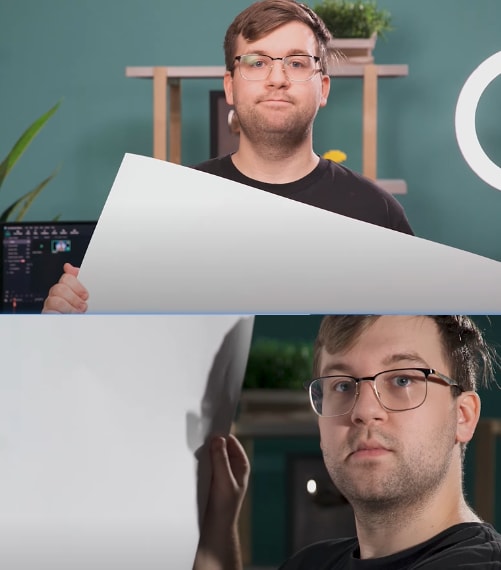
By reflecting the light onto the bounce, we get softer, more spread-out light when it’s reflected. Then you will get the result in a nicer look. Using poster boards, you can do multiple things with light.
- Use white to bounce light.
- Use black as a flag to shape or block light.

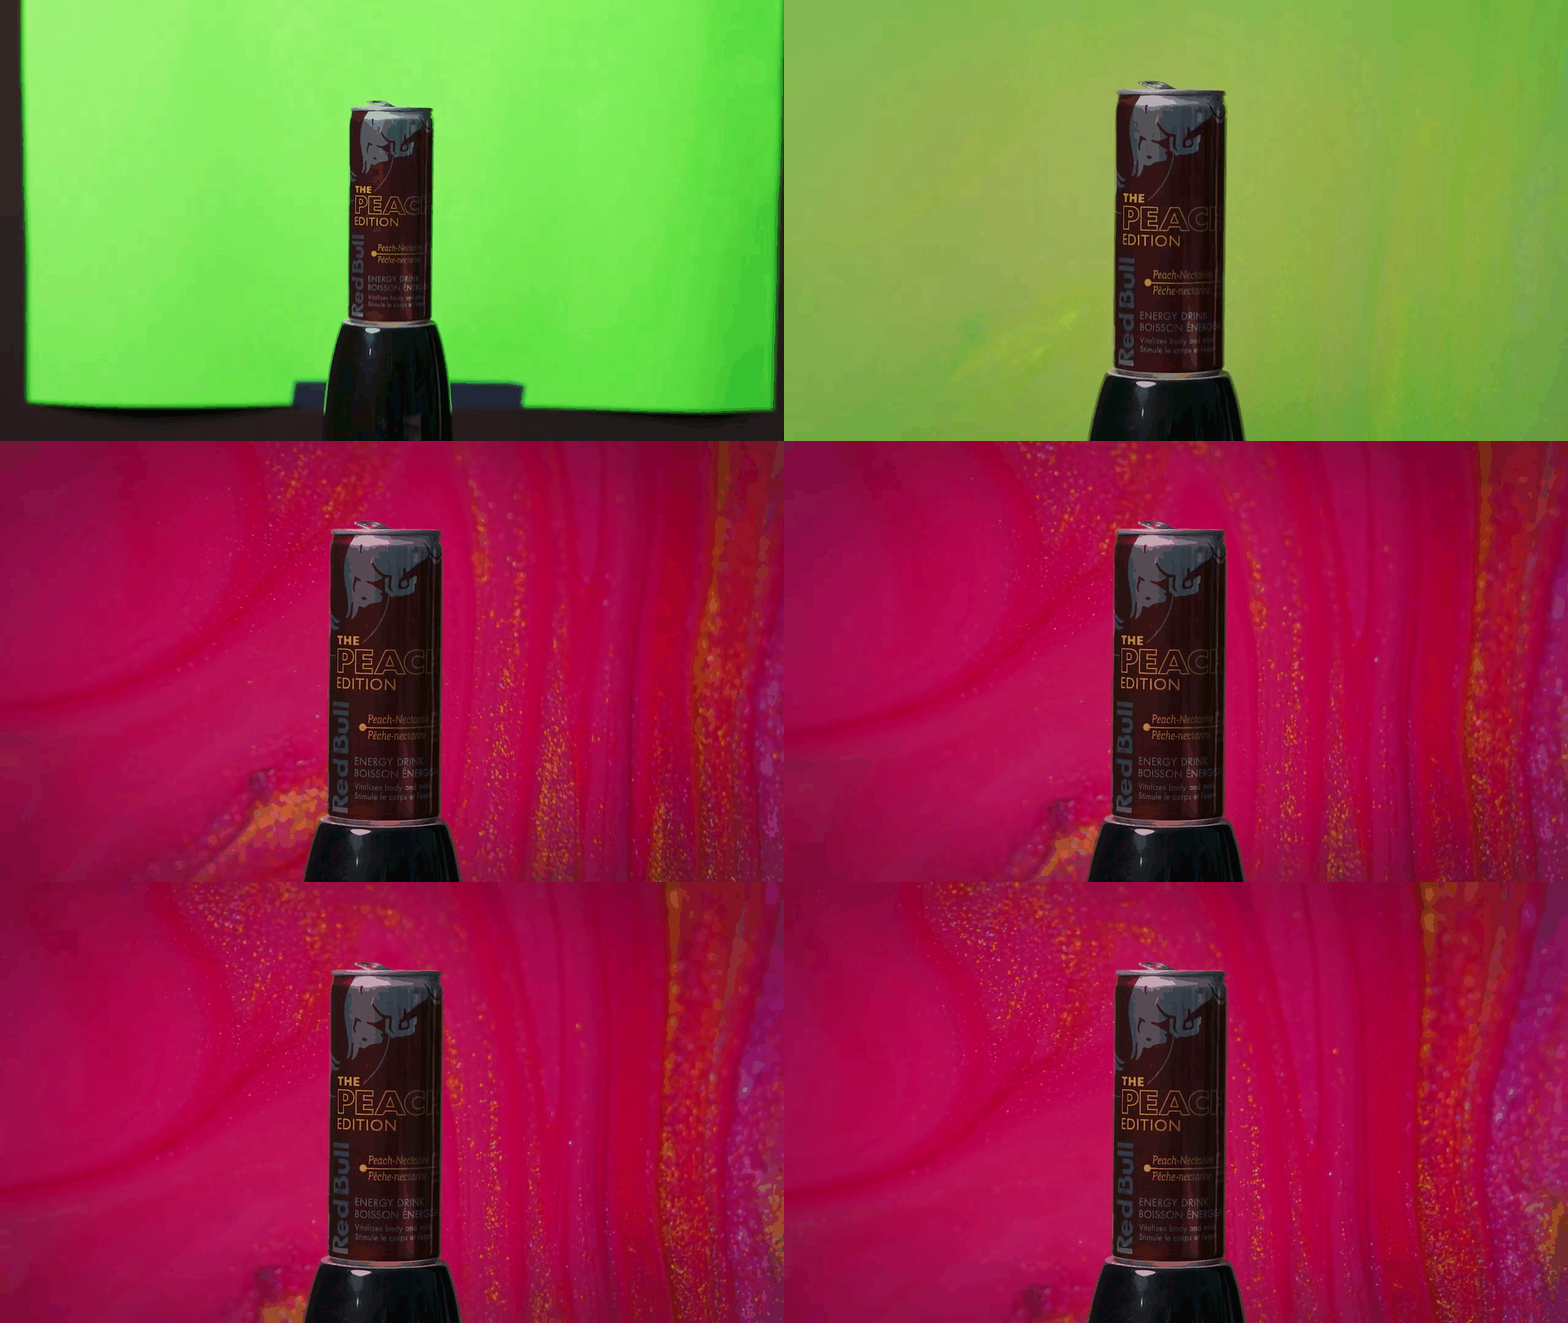
- You can also use green for a small green screen when filming a product video
You might have seen how big production companies create those alienated landscapes, such as in the movie Avatar and many more.
The concept is recording your object in front of a green screen behind it. Then, it’s much easier to add a separately filmed background to the final footage with a video editor like Filmora.
Tip 3. Smooth audio with felt pads or socks
Do you ever have audio pop while you are recording? It can get annoying. So, to fix the issues, we are now teaching you three practical ways.
1. Felt pads
Felt pads with adhesive backs can be stuck onto noisy props like a coffee mug. This way, we won’t hear the mug hitting the table when we’re recording sound.

2. Socks as pop filters
Professionals use what they call a pop filter because a pop filter can reduce the loud pops from their mouths. But what is pop? Pops usually occur when people say words that start with the letter P or B.
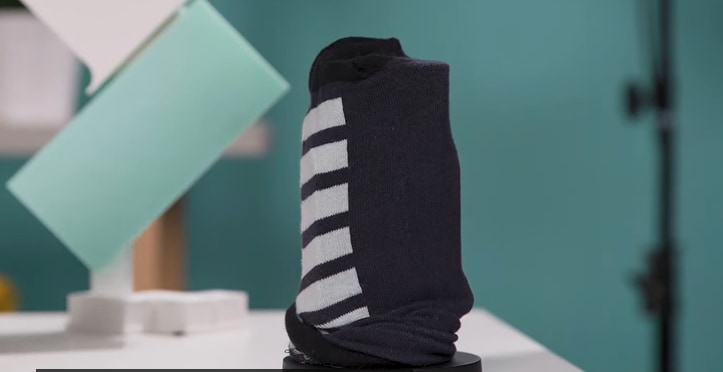
Then what is a pop filter? You might have seen in some YouTube videos, especially live streamers, where they use a microphone with a plate on its head; that’s called a pop filter. You can purchase pricey gear like a pop filter, or we can get a pack of cheap socks at the dollar store and place them over the mic.
It will make your voiceover slightly quieter, but it should also get rid of the popping. So keep adding socks until you hear no more pops in your voiceover.
Conclusion
See how easy it was! Keep in mind these dollar store hacks in your next video. And you can edit your footage like a pro with an easy-to-use video editor like Wondershare Filmora . Keep exploring different ideas and perspectives to record.
Free Download For Win 7 or later(64-bit)
Free Download For macOS 10.14 or later
Tip 2. Adjust lights with poster boards
The shot below looks dark and boring because the background has no light. Here’s the shot with and without the lights.

A practical light is a light that shows up on screen rather than lighting talent from off-screen. For example, some dollar stores have small LED accent lights for around three dollars.
Others even have lights with adhesive backings that allow you to place them all over the room—creating great lighting accents with small eye-catching pockets of light.

On film sets, crews use a bounce to reflect light from one light source in another direction. At the dollar store, we can find something like this poster board to get a similar effect.

By reflecting the light onto the bounce, we get softer, more spread-out light when it’s reflected. Then you will get the result in a nicer look. Using poster boards, you can do multiple things with light.
- Use white to bounce light.
- Use black as a flag to shape or block light.

- You can also use green for a small green screen when filming a product video
You might have seen how big production companies create those alienated landscapes, such as in the movie Avatar and many more.
The concept is recording your object in front of a green screen behind it. Then, it’s much easier to add a separately filmed background to the final footage with a video editor like Filmora.

Tip 3. Smooth audio with felt pads or socks
Do you ever have audio pop while you are recording? It can get annoying. So, to fix the issues, we are now teaching you three practical ways.
1. Felt pads
Felt pads with adhesive backs can be stuck onto noisy props like a coffee mug. This way, we won’t hear the mug hitting the table when we’re recording sound.

2. Socks as pop filters
Professionals use what they call a pop filter because a pop filter can reduce the loud pops from their mouths. But what is pop? Pops usually occur when people say words that start with the letter P or B.
Then what is a pop filter? You might have seen in some YouTube videos, especially live streamers, where they use a microphone with a plate on its head; that’s called a pop filter. You can purchase pricey gear like a pop filter, or we can get a pack of cheap socks at the dollar store and place them over the mic.
It will make your voiceover slightly quieter, but it should also get rid of the popping. So keep adding socks until you hear no more pops in your voiceover.

Conclusion
See how easy it was! Keep in mind these dollar store hacks in your next video. And you can edit your footage like a pro with an easy-to-use video editor like Wondershare Filmora . Keep exploring different ideas and perspectives to record.
Free Download For Win 7 or later(64-bit)
Free Download For macOS 10.14 or later
With the HDR Feature, You Can Make Your Images Look More Realistic and Add More Depth to Them. But if You Are Clueless as to How This Can Be Done Using Your Android Devices and the Best Situations for the Same, Then This Article Will Just Be an Apt Read
The present-day high-end smartphones, like iPhone, Samsung, and Huawei, come packed in with advanced camera features that can let you capture interesting and bright images having depth. To get this done, you first need to check if your smartphone has an HDR mode and if it does, how to use the same.
So, we are here to help you to learn in detail about HDR Android photography and how to use the HDR mode on your smartphone. Keep reading till the read and we assure you that you will be able to capture some breath-taking images with your phone.

Part 1: What is HDR photography?
First things first. Before using the HDR feature on your smartphone, let’s learn what actually is the function of HDR.
Standing for High Dynamic Range, HDR is an image capturing method where the dynamic range of an image is high. When we talk about dynamic range, it refers to the difference between the lightest and the darkest elements of a picture. Thus, in HDR images the range dynamic range of the image is greater than the actual capture and thus making the image look more real with higher contrast, colors, and saturation.
While using the HDR image capturing method, the subject is captured in multiple shots having different exposures. These multiple captured shots are then combined into a single picture thus making it look detailed and saturated.
Though HDR enhances the overall looks of an image it is not suitable only in certain situations and subjects like landscape, subjects captured in sunlight or bright background, low or dim light conditions, and more.

Part 2: How to tell if I can shoot HDR images on my Android devices or not?
HDR images can be captured using DSLR cameras, but you need to have a thorough knowledge of the camera and the process of capturing the HDR images. A simpler alternative to this is using an Android device. The principle of capturing HDR images using an Android phone is simpler in comparison to a professional DSLR camera and also quick. Using an Android device, the imbalance in the exposure is corrected and the details of the image background, as well as the foreground, are enhanced.
How-to steps to check the HDR camera Android feature
So now that you know that HDR images can be easily captured using your Android device, the next important thing is to check if your phone supports the HDR feature or not as not all Android devices have the HDR mode. Below listed are some of the options where you can the HDR option in the camera app of your Android device.
- Check for the HDR option under the Shooting Mode menu (this can be found on high-end Samsung phones.)
- In the devices like HTC One X, Desire X, and others with custom Camera apps, the feature can be found under the Camera Scenes section.
- In case you cannot locate the HDR option in both the above methods then try looking for it under the Settings menu of Camera. Devices like Sony Xperia T and Xperia V have the option here.
- For the Nexus 4 device that runs on Android 4.2 OS, the option of HDR mode can be turned on by simply long-tapping the viewfinder and then tapping on the HDR icon.
- You may also find the option of HDR mode under the labels like Backlight HDR or Backlight Correction HDR. On the Samsung Galaxy devices, HDR is labeled as Rich Tone and can be located under the Smart Modes menu.
Part 3: How to Take an HDR Shot with Your Android devices?
Once you have found the HDR mode on your Android device, using the feature is simple.
Below listed are the steps to take HDR shots on your Android phone.
Step1 First of all, open the camera app on your phone and find the option of HDR.
Step2 Enable the HDR option on your device.
Step3 Once the feature is enabled, you simply need to capture images like you would normally do- point and focus on the image subject and click the image.
The rest will be taken care and your HDR shot image will be captured.
![]()
Note: ensure to hold your phone with stable hands while capturing the image or you can even use a tripod. In Samsung devices, two images will be captured- one with normal exposure and the other one with HDR (image name having HDR word). You can choose the one as required.
Part 4: How to Use HDR Apps android to take HDR photography
As we have mentioned above not all Android phones come with HDR function. So, if your device does not have this function, no need to worry as there are Android apps available for the same. You can search and download one such HDR-capable camera app on your device from Google Play Store and enjoy capturing HDR images.
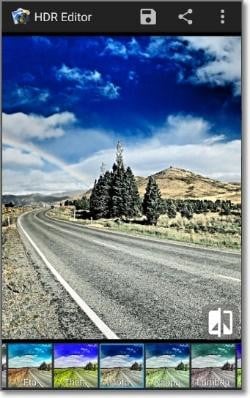
One such widely used app is HDR Camera that simple to use and allows for capturing high-quality HDR pictures. Using the upgraded version of the app you can even edit your captured images.
Steps to using HDR Camera Apps
Step1 First of all, download, install, and launch the HDR Camera app on your Android smartphone.
Step2 The interface of the app looks like the interface of the Android camera and the majority of the screen is taken up by the viewfinder.
Step3 Next, simply start taking the picture as you would do normally by pointing towards the subject and clicking on the shutter button.
Step4 If you have opted for the advanced version of the app, you can even add a pre-set filter or edit your images as needed.
Step5 Finally, save the HDR-captured image on your phone.
Part 5: Video Guide HDR on your Android device
If you are still not clear about using the HDR feature on your Android smartphone, the YouTube video tutorial will help you to learn the entire process.
https://www.youtube.com/watch?v=myMGalkNiP8
Part 6: Pro tip: How to Edit HDR Video without Washed Out Color
In several situations, you would want to edit the HDR videos recorded using your phone or other device but the major problem lies when the editing makes your video washed out. So, to ensure that this does not happen with your recordings, we suggest using a professional tool and one of the best that we recommend here is Wondershare Filmora .
This is a versatile Windows and Mac-based software that can let you edit and customize videos simply and quickly. The software is known for its multi-video editing facilities, it comes packed in with all basic as well as advanced features that may be needed for enhancing your overall videos.
The software supports all key video formats and to further make the files look interesting, you can add multiple effects supported by the tool.
Free Download For Win 7 or later(64-bit)
Free Download For macOS 10.14 or later
Steps to edit HDR videos using Wondershare Filmora
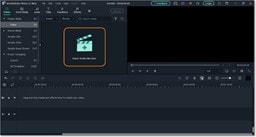
Step1 Download, install, and launch the software on your system. Click on the Create New Project on the main interface.
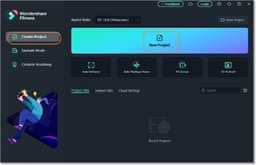
Step2 On the next screen that appears, tap on the Import Media Files Here button to browse and add the HDR video that has to be edited. Multiple files can be added here for batch processing.
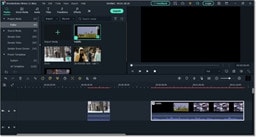
Step3 Next, drag and move the added videos to the timeline at the bottom of the software interface. After the videos are added to the timeline, you can edit using the editing tool as needed.
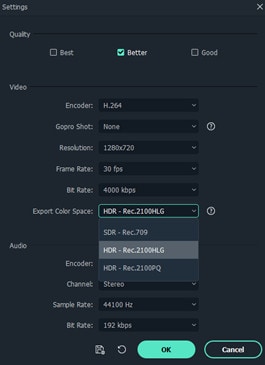
Step4 When done with editing, click on the Export button, choose the target format, also, click the ‘Export Color Space’ drop/down icon from the ‘settings’ to change HDR video output quality (default quality is SDR - Rec.709). Then click on the ‘OK’ button once you’re done to finalize the operation.
Final Words
To take your mobile photography to another level and capture interesting and bright images, HDR mode is one of the great options to use. So, even if your smartphone does not support the HDR feature, install an app from the Google Store. When it comes to HDR videos and their editing, Wondershare Filmora works as the best tool as it helps to add those little tweaks and customize your files without worrying about the quality or washed-out color.
Part 4: How to Use HDR Apps android to take HDR photography
As we have mentioned above not all Android phones come with HDR function. So, if your device does not have this function, no need to worry as there are Android apps available for the same. You can search and download one such HDR-capable camera app on your device from Google Play Store and enjoy capturing HDR images.
One such widely used app is HDR Camera that simple to use and allows for capturing high-quality HDR pictures. Using the upgraded version of the app you can even edit your captured images.
Steps to using HDR Camera Apps
Step1 First of all, download, install, and launch the HDR Camera app on your Android smartphone.
Step2 The interface of the app looks like the interface of the Android camera and the majority of the screen is taken up by the viewfinder.
Step3 Next, simply start taking the picture as you would do normally by pointing towards the subject and clicking on the shutter button.
Step4 If you have opted for the advanced version of the app, you can even add a pre-set filter or edit your images as needed.
Step5 Finally, save the HDR-captured image on your phone.

Part 5: Video Guide HDR on your Android device
If you are still not clear about using the HDR feature on your Android smartphone, the YouTube video tutorial will help you to learn the entire process.
https://www.youtube.com/watch?v=myMGalkNiP8
Part 6: Pro tip: How to Edit HDR Video without Washed Out Color
In several situations, you would want to edit the HDR videos recorded using your phone or other device but the major problem lies when the editing makes your video washed out. So, to ensure that this does not happen with your recordings, we suggest using a professional tool and one of the best that we recommend here is Wondershare Filmora .
This is a versatile Windows and Mac-based software that can let you edit and customize videos simply and quickly. The software is known for its multi-video editing facilities, it comes packed in with all basic as well as advanced features that may be needed for enhancing your overall videos.
The software supports all key video formats and to further make the files look interesting, you can add multiple effects supported by the tool.
Free Download For Win 7 or later(64-bit)
Free Download For macOS 10.14 or later
Steps to edit HDR videos using Wondershare Filmora
Step1 Download, install, and launch the software on your system. Click on the Create New Project on the main interface.

Step2 On the next screen that appears, tap on the Import Media Files Here button to browse and add the HDR video that has to be edited. Multiple files can be added here for batch processing.

Step3 Next, drag and move the added videos to the timeline at the bottom of the software interface. After the videos are added to the timeline, you can edit using the editing tool as needed.

Step4 When done with editing, click on the Export button, choose the target format, also, click the ‘Export Color Space’ drop/down icon from the ‘settings’ to change HDR video output quality (default quality is SDR - Rec.709). Then click on the ‘OK’ button once you’re done to finalize the operation.

Final Words
To take your mobile photography to another level and capture interesting and bright images, HDR mode is one of the great options to use. So, even if your smartphone does not support the HDR feature, install an app from the Google Store. When it comes to HDR videos and their editing, Wondershare Filmora works as the best tool as it helps to add those little tweaks and customize your files without worrying about the quality or washed-out color.
Turn Any Video Into a Paper Rip Effect with Filmora
Video editors use different effects to add creative flair to their projects. These effects can also create a transition between clips, make text or images stand out, or add movement to a static image.
One of the most fantastic effects is the paper rip effect. It can add a unique look to videos and a touch of creativity to any project. We will discuss the best software and techniques to achieve this effect quickly. So, let’s get started!
Part 1. What Is a Paper Rip Effect?
You must be wondering what is a paper rip effect in videos. It is a visual effect in which a piece of paper or other material appears torn apart or ripped. It is often used for transitions between shots or scenes in a video. Or, you can make the effect for your thumbnail.
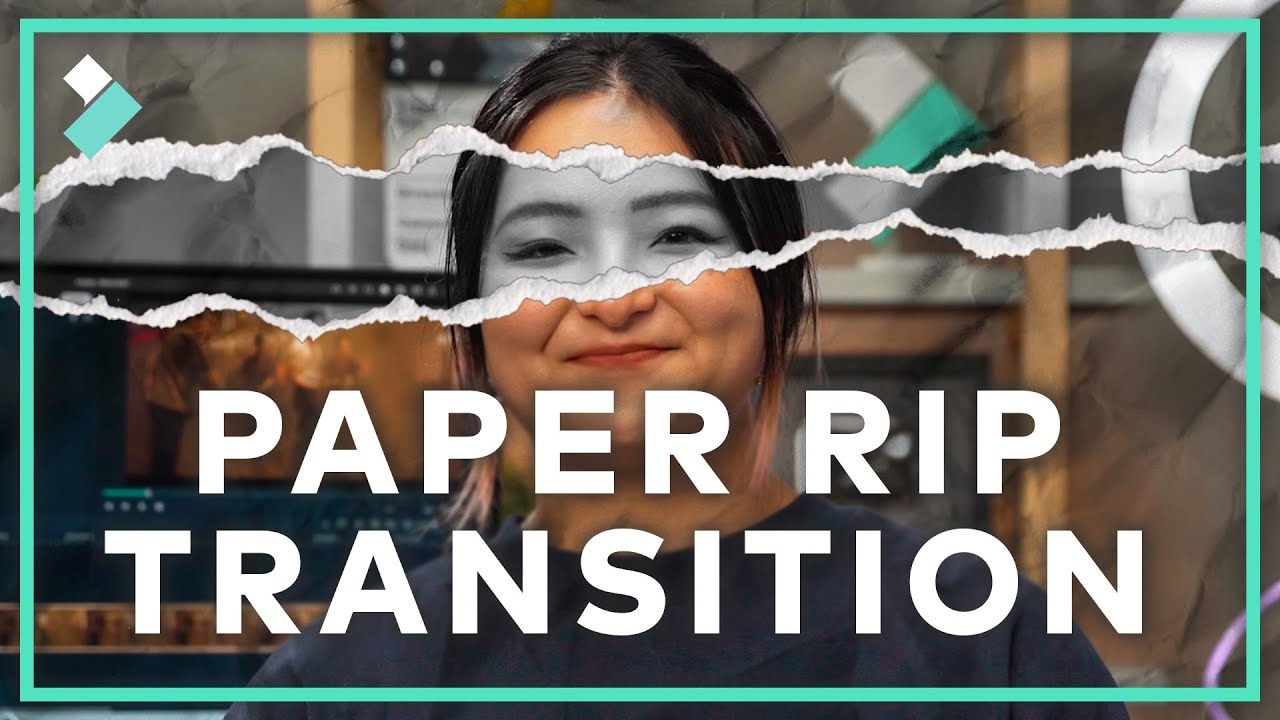
Now, as we have seen what a paper rip effect looks like, isn’t it cool? So let’s see which software we need to make the magic happen.
Part 2. How to Make a Paper Rip Effect
We here take Wondershare Filmora as our editing tool to make the paper rip effect. It has many practical features allow you to customize your video with special effects, transitions, and more.
Free Download For Win 7 or later(64-bit)
Free Download For macOS 10.14 or later
- Over 1,000 video effects, transitions, titles, etc., to spice up high-quality videos.
- Support speech-to-text that allows smooth conversion of voiceover to text.
- Over 2,000+ audio resources range from music and audio effects, and much more.
- The shortcut key saves you time while editing videos.
Stepwise Guide to Make the Paper Rip Effect
Step1 Download Wondershare Filmora from the official website. If you have already downloaded the Wondershare Filmora. Open it, and let’s start editing the video.
Step2 First, we need to find a photo of a white paper that you can easily download from the internet and two videos in which you want to add this effect. Then import these three files to the media gallery.

Step3 Drag and drop Clip 1 onto the timeline and move the playhead to the last frame of the clip.

Alt text: Paper rip effect.
Step4 Now right-click on Clip 1 to open the menu and select Add Freeze Frame.

Step5 After adding a freeze frame, cut here.

Step6 Drag and drop the paper photo onto the second video track of the timeline, and make sure it starts at the cut on the first video track.

Step7 Double-click the paper picture on the timeline to open the settings window and then open the Compositing menu. Then Change the Blending Mode from Normal to Multiply.

In the preview window, we can see that the freeze frame has the paper texture now!

Step8 Now you can use the new feature of Filmora to export this small portion of the video. First, click and drag the playhead to the start of the freeze frame and press “I” on the keyboard to set the IN POINT, then move the playhead to the end of this freeze frame and press “O” on the keyboard to set the OUT POINT.

![]()
Note: If you have the latest version, Filmora will automatically set the OUT POINT on the timeline.
Step9 Then click Export and choose Create Video. Let’s name it freeze frame 1 and click on Export.

It will only export the selected part on the timeline. Once the exporting process is completed, Right-Click on the timeline and Cancel the selected range.

Step10 Import the Freeze Frame 1 to the media folder and replace the Freeze Frame + Paper Photo with this clip. Then adjust the length of this clip to 1 second.
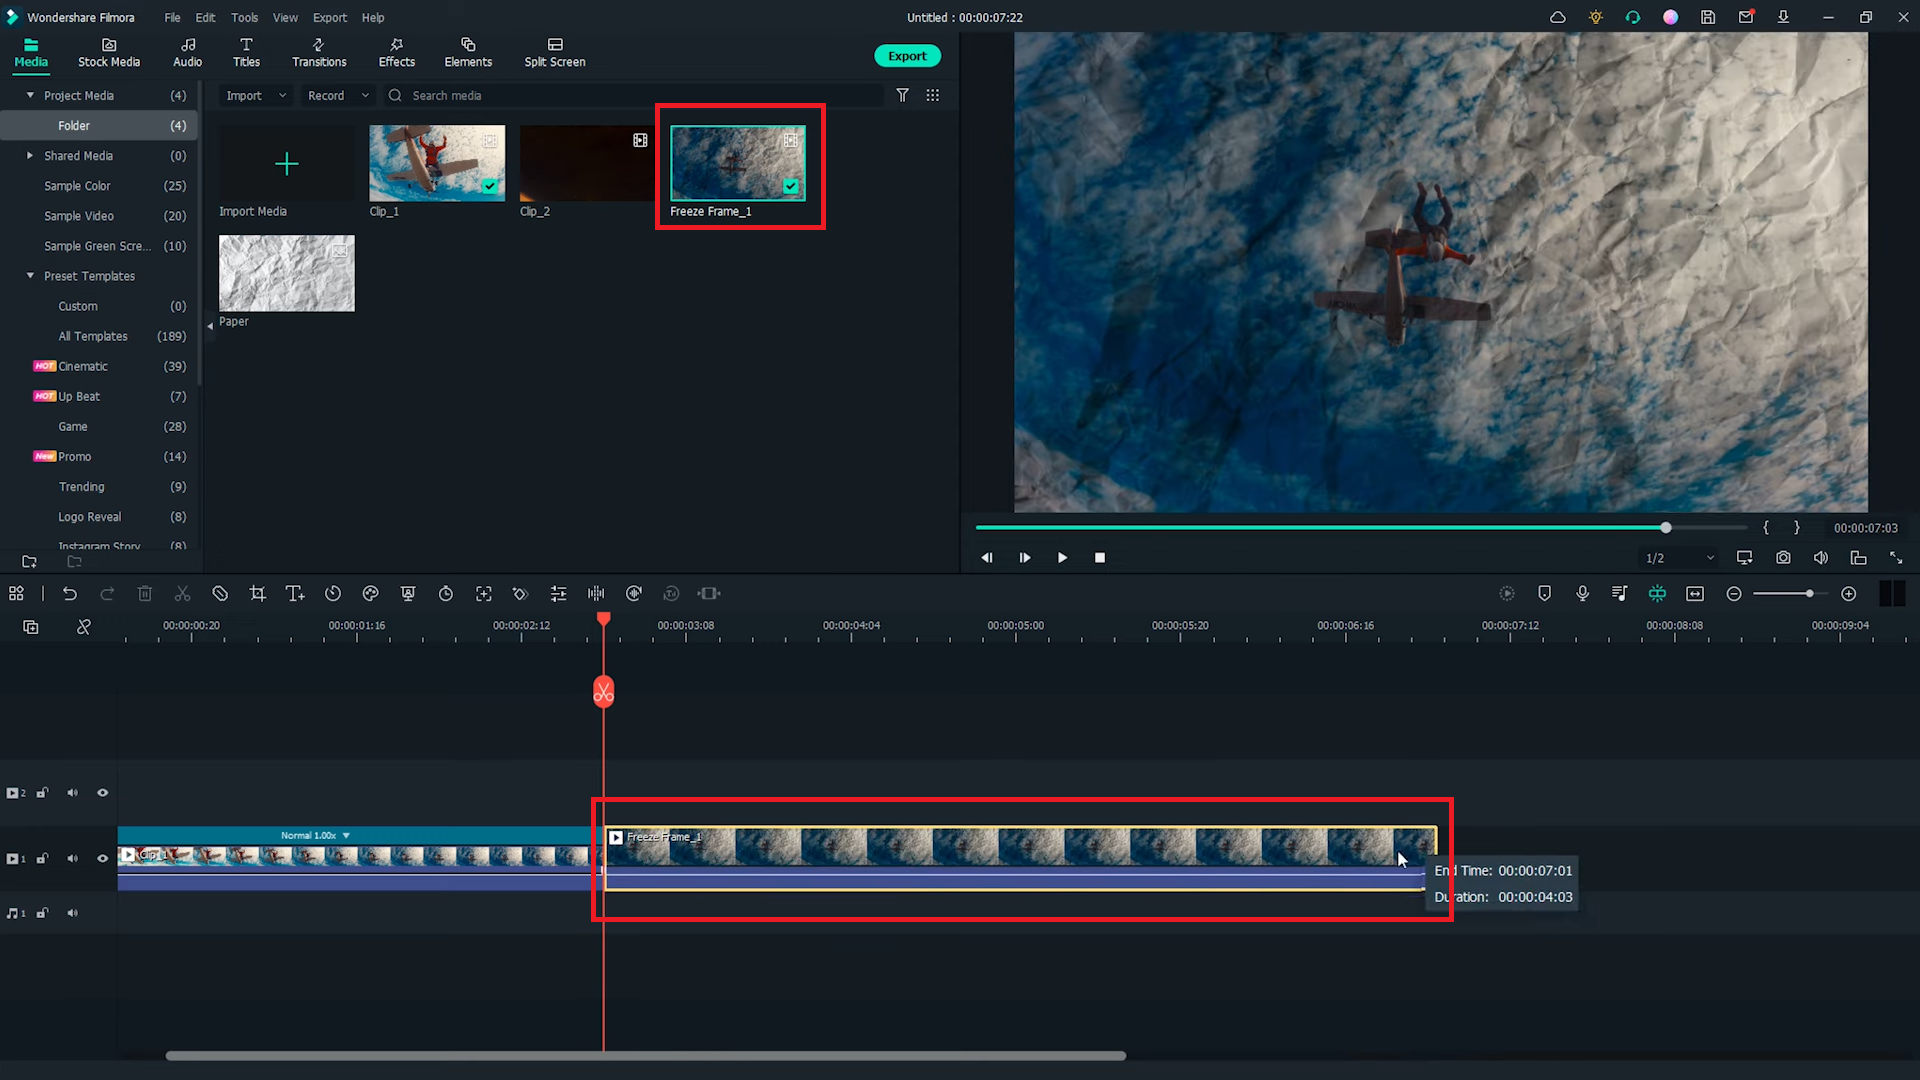
Step11 Now let’s make the second part of the transition effect. You should drag and Drop Clip 2 onto the timeline and move the playhead to the clip’s first frame. Then Add a Freeze Frame; you can also do it by pressing the Alt+F keys. Now click and drag the playhead to the end of the freeze frame and make a Cut.

Step12 Drag and drop the paper photo onto the second video track of the timeline and make sure it starts at the beginning of the freeze frame on the first video track. And again, change the blending mode to Multiply as well.

Step13 Select the range you want to export by setting IN and OUT points as we did before. Press the I key on the keyboard to set the in point, drag the playhead to the out point, and press the O key.

Step14 This time use the shortcut Control + E to open the export window. Again, let’s name it freeze frame 2 and then export it.
Step15 You can use the keyboard shortcut Shift + X to cancel the selected range. Then import freeze frame 2 into the media folder and replace the freeze frame + paper photo. Adjust the length of this new clip to about 1 second.

Step16 Now you can add several Filmora transitions to finish the effect. Go to the Transitions window and find Evaporate 2.

Step17 Drag and drop it onto the cut between clip 1 and freeze frame 1 and the cut between clip 2 and freeze frame 2. You can also adjust the length of the transition.

Step18 Then, find Torned Paper Transition 4 in the Transitions window. Drag and drop it to the cut between freeze frame 1 and freeze frame 2. Then choose Prefix mode in the transition setting video. Adjust the length if needed.

Finally, it’s done. Let’s play the video and see how the paper effect and transitions enhanced the video.

Conclusion
We hope this post has helped you achieve the desired effect on your video. With Filmora’s intuitive user interface, you can customize your paper rip effect with text, images, and more to create a truly unique and eye-catching video. So get creative and start turning your videos into paper rip effects today!
Free Download For macOS 10.14 or later
- Over 1,000 video effects, transitions, titles, etc., to spice up high-quality videos.
- Support speech-to-text that allows smooth conversion of voiceover to text.
- Over 2,000+ audio resources range from music and audio effects, and much more.
- The shortcut key saves you time while editing videos.
Stepwise Guide to Make the Paper Rip Effect
Step1 Download Wondershare Filmora from the official website. If you have already downloaded the Wondershare Filmora. Open it, and let’s start editing the video.
Step2 First, we need to find a photo of a white paper that you can easily download from the internet and two videos in which you want to add this effect. Then import these three files to the media gallery.

Step3 Drag and drop Clip 1 onto the timeline and move the playhead to the last frame of the clip.

Alt text: Paper rip effect.
Step4 Now right-click on Clip 1 to open the menu and select Add Freeze Frame.

Step5 After adding a freeze frame, cut here.

Step6 Drag and drop the paper photo onto the second video track of the timeline, and make sure it starts at the cut on the first video track.

Step7 Double-click the paper picture on the timeline to open the settings window and then open the Compositing menu. Then Change the Blending Mode from Normal to Multiply.

In the preview window, we can see that the freeze frame has the paper texture now!

Step8 Now you can use the new feature of Filmora to export this small portion of the video. First, click and drag the playhead to the start of the freeze frame and press “I” on the keyboard to set the IN POINT, then move the playhead to the end of this freeze frame and press “O” on the keyboard to set the OUT POINT.

![]()
Note: If you have the latest version, Filmora will automatically set the OUT POINT on the timeline.
Step9 Then click Export and choose Create Video. Let’s name it freeze frame 1 and click on Export.

It will only export the selected part on the timeline. Once the exporting process is completed, Right-Click on the timeline and Cancel the selected range.

Step10 Import the Freeze Frame 1 to the media folder and replace the Freeze Frame + Paper Photo with this clip. Then adjust the length of this clip to 1 second.

Step11 Now let’s make the second part of the transition effect. You should drag and Drop Clip 2 onto the timeline and move the playhead to the clip’s first frame. Then Add a Freeze Frame; you can also do it by pressing the Alt+F keys. Now click and drag the playhead to the end of the freeze frame and make a Cut.

Step12 Drag and drop the paper photo onto the second video track of the timeline and make sure it starts at the beginning of the freeze frame on the first video track. And again, change the blending mode to Multiply as well.

Step13 Select the range you want to export by setting IN and OUT points as we did before. Press the I key on the keyboard to set the in point, drag the playhead to the out point, and press the O key.

Step14 This time use the shortcut Control + E to open the export window. Again, let’s name it freeze frame 2 and then export it.
Step15 You can use the keyboard shortcut Shift + X to cancel the selected range. Then import freeze frame 2 into the media folder and replace the freeze frame + paper photo. Adjust the length of this new clip to about 1 second.

Step16 Now you can add several Filmora transitions to finish the effect. Go to the Transitions window and find Evaporate 2.

Step17 Drag and drop it onto the cut between clip 1 and freeze frame 1 and the cut between clip 2 and freeze frame 2. You can also adjust the length of the transition.

Step18 Then, find Torned Paper Transition 4 in the Transitions window. Drag and drop it to the cut between freeze frame 1 and freeze frame 2. Then choose Prefix mode in the transition setting video. Adjust the length if needed.

Finally, it’s done. Let’s play the video and see how the paper effect and transitions enhanced the video.

Conclusion
We hope this post has helped you achieve the desired effect on your video. With Filmora’s intuitive user interface, you can customize your paper rip effect with text, images, and more to create a truly unique and eye-catching video. So get creative and start turning your videos into paper rip effects today!
Also read:
- [New] 2024 Approved Discover a World of Creative Slide Show Patterns at No Cost
- [New] 2024 Approved Inexpensive PCs Revealed by Best OBS Setup
- [New] Excellence in HD Conversion Elevate Your Views for 2024
- [Updated] 2024 Approved Smooth Sailing with Instagram Fixes for Frustrations
- 4 Easy Ways for Your Samsung Galaxy F54 5G Hard Reset | Dr.fone
- Alibaba Yitian 710 CPU Leads the Race as Top Arm-Based Processor for Cloud Servers, Research Finds
- Critical Aspects to Assess When Looking for an Unbound Cellular Phone
- Farm-Tastic Fun & Games Top Friendly Farming Titles
- Global Launch Alert: Lenovo's Innovative Mini PC - The Yoga Portal AI Enhanced by Powerful Intel Desktop Chips
- How To Change Motorola Moto G04 Lock Screen Clock in Seconds
- Revamped Gamer's Choice: Discover the Latest Upgrades to Maingear's North Desktop Lineup
- Top 5 Solutions: How to Stop Constant Wi-Fi Drops on Your iPhone
- Unleash Full Screen Flexibility with PIP on iPhone YouTube App
- Unlock Efficient Digital Sanitization: How To Effectively Use Stellar File Eraser 5 on Your Windows System
- Unveiling the Latest in Technology with Tom's Gear Insights
- Updated Education Animation Is Useful for Parents, Teachers and Students. Check It for You
- Upgrade Required: Inadequate CPU Power for Optimal Vanguard Performance
- Title: How to Concatenate Videos Using FFmpeg for 2024
- Author: Morgan
- Created at : 2024-10-01 18:11:15
- Updated at : 2024-10-06 06:02:29
- Link: https://ai-video-editing.techidaily.com/how-to-concatenate-videos-using-ffmpeg-for-2024/
- License: This work is licensed under CC BY-NC-SA 4.0.
