:max_bytes(150000):strip_icc():format(webp)/how-to-set-up-speech-to-text-on-android-0-928c48ab121248f9aa543a136d971f9a.jpg)
How to Create Custom Lower Thirds in Filmora

How to Create Custom Lower Thirds in Filmora
As a video creator, there are times when you need to use Lower Thirds. Although many lower-third presets are available, making unique and personalized ones can ensure your video stands out.
So, to empower your inner video creator, this article will show you how to make your own Lower Thirds in Filmora.
Part 1: What is Lower Third
A Lower Third is a mix of motion graphic design and texts that are placed in the lower area of the screen. It provides additional information, such as a person’s name or other relevant information, without distracting the audience from the main content.
Lower Thirds can be used in various settings, such as news broadcasts or interviews, to help provide viewers with additional context.
Part 2: How to Make Your Own Lower Thirds in Filmora
Free Download For Win 7 or later(64-bit)
Free Download For macOS 10.14 or later
(1) A simple line and texts

Step1 Create a simple line
Go to the Media library > Sample Media folder > choose a color sample. For this tutorial, we will select the white color. Then, drag and drop this sample color onto the upper video track.

Double-click the white sample clip to open the settings and scale it to 30%. Then, reposition the white bar to your desired place.

Step2 Mask the white sample
Since we want to create a thin horizontal shape, you need to make some adjustments to the white sample by using an image mask. So, go to the Effect window > Utility > Image Mask. Then, drag and drop the “Image Mask” onto the white color sample.

After that, double-click the white sample on the timeline and find the Image Mask setting. Choose the shape that works best for your needs. For this tutorial, we are going to use this one. Then, adjust the X and Y-axis scale numbers until it becomes a thin white line. Click OK.

Step3 Add a text for your lower thirds
Go to Titles > Plain Text > Basic 6 and drop it onto the second video track above the white line clip. Don’t worry about the exact position yet. We can adjust it later.

Double-click on the text clip to open the settings, then type some text there and adjust the size and font.

Step4 Add animation to the text
Click Advanced > Animation > Up Down 1 animation. Adjust the animation length by dragging the two brackets on the timeline on the right side. Click Ok.

Step5 Add keyframes to the white line clip when entering
Double-click on the white line clip on the timeline to show the animation keyframe setting window. Then, playback the animation of the text, find a position before the text animation starts and move the play head there. Make sure it is close enough to when the texts show up so the white line enters the keyframe right before the text enters.

Click to add a keyframe, double-check to make sure it is the final position you want, and the opacity should be 100 at this point.
After that, move the play head to the left for a few frames and click add again. To make sure the white line is out of the frame before entering, you need to change the Y-axis number. Change the opacity to 0 as the white line starts in transparent color.

These two keyframes will create an effect of the line entering the frame while turning from transparent to white. Playback the animation and adjust the keyframes marks by dragging them to the left or right until you feel the timing looks good.
Step6 Add keyframes to the white line clip when exiting
Playback again to find where the texts disappear, then move the play head to a position after it. Also, make sure it’s close enough to where the texts disappear so you can ensure the white line exits right after the texts disappear. Then, add the keyframe.

You don’t need to change the setting this time because this keyframe is used to keep the position and opacity unchanged.
Instead, move the play head again to the right for a few frames and add another keyframe. Move the texts out of the frame by changing the y-axis number, then change the opacity to 0. This keyframe is used to create the white line animation exiting the frame and turning back to transparent in the meantime.

Playback the video and see how it looks.
(2) A name card with a solid background

Sometimes you might want to create a name card with a solid background like the sample above. To create it, we can use the same method. Here’s how to do it:
Step1 Make the lower third background
Select the white color sample from the sample color folder and drop it onto the upper video track of the video.

Change the scale to 30%, then reposition the white sample to your desired place. Click OK.

Step2 Create an image mask for the lower third background
Drag and drop the Image Mask onto the white sample clip on the timeline.

Double-click on the white sample clip to activate the video setting window and find the Image Mask settings. Then, choose the mask shape you need. You can also adjust its size by changing the X or Y-axis.

Step3 Add some text
Once the background card is in place, go to Titles > Plain Text > ‘Basic 6’ and drop it onto the third video track.

Now, type in the texts as needed. Reposition and scale the texts to make sure they are on top of the background shape.

Step4 Add animation to the text
Click Advanced > Animation > Push. Then, adjust the animation length accordingly. Click Ok.

Double-click on the background clip to show the animation tab setting. Then, playback the text animation and find a position earlier than the start and add a keyframe.

Similar to the tutorial before, move the play head again a few frames earlier to the left and add another keyframe. If you want to have the name card flying in from the left while expanding, you can change the X-axis and scale of the background card to 0. Change the opacity to 0 to create a color change from transparent to white.

To let the background card exit the frame, add two more keyframes to the background card. Add a keyframe with no changes to settings. Move the play head to the right for a few frames and add another keyframe.

If you want the name card to exit to the bottom, change the Y-axis number until it exits. Change the scale and opacity to 0. Then, playback and adjust the keyframes.
Finally, you can add a Subscribe button from the new default Filmora element pack “Social Media.”

Wrapping up
These are two ways you can create your own Lower Thirds in FIlmora. You can also change the keyframe settings to customize your lower thirds even more. Now, it’s time to try it yourself, and let us know what you think!
Free Download For macOS 10.14 or later
(1) A simple line and texts

Step1 Create a simple line
Go to the Media library > Sample Media folder > choose a color sample. For this tutorial, we will select the white color. Then, drag and drop this sample color onto the upper video track.

Double-click the white sample clip to open the settings and scale it to 30%. Then, reposition the white bar to your desired place.

Step2 Mask the white sample
Since we want to create a thin horizontal shape, you need to make some adjustments to the white sample by using an image mask. So, go to the Effect window > Utility > Image Mask. Then, drag and drop the “Image Mask” onto the white color sample.

After that, double-click the white sample on the timeline and find the Image Mask setting. Choose the shape that works best for your needs. For this tutorial, we are going to use this one. Then, adjust the X and Y-axis scale numbers until it becomes a thin white line. Click OK.

Step3 Add a text for your lower thirds
Go to Titles > Plain Text > Basic 6 and drop it onto the second video track above the white line clip. Don’t worry about the exact position yet. We can adjust it later.

Double-click on the text clip to open the settings, then type some text there and adjust the size and font.

Step4 Add animation to the text
Click Advanced > Animation > Up Down 1 animation. Adjust the animation length by dragging the two brackets on the timeline on the right side. Click Ok.

Step5 Add keyframes to the white line clip when entering
Double-click on the white line clip on the timeline to show the animation keyframe setting window. Then, playback the animation of the text, find a position before the text animation starts and move the play head there. Make sure it is close enough to when the texts show up so the white line enters the keyframe right before the text enters.

Click to add a keyframe, double-check to make sure it is the final position you want, and the opacity should be 100 at this point.
After that, move the play head to the left for a few frames and click add again. To make sure the white line is out of the frame before entering, you need to change the Y-axis number. Change the opacity to 0 as the white line starts in transparent color.

These two keyframes will create an effect of the line entering the frame while turning from transparent to white. Playback the animation and adjust the keyframes marks by dragging them to the left or right until you feel the timing looks good.
Step6 Add keyframes to the white line clip when exiting
Playback again to find where the texts disappear, then move the play head to a position after it. Also, make sure it’s close enough to where the texts disappear so you can ensure the white line exits right after the texts disappear. Then, add the keyframe.

You don’t need to change the setting this time because this keyframe is used to keep the position and opacity unchanged.
Instead, move the play head again to the right for a few frames and add another keyframe. Move the texts out of the frame by changing the y-axis number, then change the opacity to 0. This keyframe is used to create the white line animation exiting the frame and turning back to transparent in the meantime.

Playback the video and see how it looks.
(2) A name card with a solid background

Sometimes you might want to create a name card with a solid background like the sample above. To create it, we can use the same method. Here’s how to do it:
Step1 Make the lower third background
Select the white color sample from the sample color folder and drop it onto the upper video track of the video.

Change the scale to 30%, then reposition the white sample to your desired place. Click OK.

Step2 Create an image mask for the lower third background
Drag and drop the Image Mask onto the white sample clip on the timeline.

Double-click on the white sample clip to activate the video setting window and find the Image Mask settings. Then, choose the mask shape you need. You can also adjust its size by changing the X or Y-axis.

Step3 Add some text
Once the background card is in place, go to Titles > Plain Text > ‘Basic 6’ and drop it onto the third video track.

Now, type in the texts as needed. Reposition and scale the texts to make sure they are on top of the background shape.

Step4 Add animation to the text
Click Advanced > Animation > Push. Then, adjust the animation length accordingly. Click Ok.

Double-click on the background clip to show the animation tab setting. Then, playback the text animation and find a position earlier than the start and add a keyframe.

Similar to the tutorial before, move the play head again a few frames earlier to the left and add another keyframe. If you want to have the name card flying in from the left while expanding, you can change the X-axis and scale of the background card to 0. Change the opacity to 0 to create a color change from transparent to white.

To let the background card exit the frame, add two more keyframes to the background card. Add a keyframe with no changes to settings. Move the play head to the right for a few frames and add another keyframe.

If you want the name card to exit to the bottom, change the Y-axis number until it exits. Change the scale and opacity to 0. Then, playback and adjust the keyframes.
Finally, you can add a Subscribe button from the new default Filmora element pack “Social Media.”

Wrapping up
These are two ways you can create your own Lower Thirds in FIlmora. You can also change the keyframe settings to customize your lower thirds even more. Now, it’s time to try it yourself, and let us know what you think!
How to Create a Text Effect Video with Filmora
If your video needs to have texts and titles, instead of static text effects, you should opt for video text effects. Basically, you will be showing eye-catching animated texts instead of unappealing still texts. You can get the attention of the audience towards your texts instantly and get the messages across swiftly. There are literally unlimited types of video editing text effects available but a handful of them are widely used by video creators.
If you want to add those popular text effects to your video, you will need a professional video editor. Wondershare Filmora is the best video editor to add all the popular and amazing video text effects. Filmora is equally popular among professionals and amateurs due to its wide range of text effects and intuitive user interface. We will list down the popular text effects in Filmora and illustrate how to add them to your video using Filmora.
Part 1. Popular text effects in Filmora
There are unlimited text effects available in Filmora but some of them are extremely popular that video creators regularly use in their videos. Here is the list of the popular Filmora video editor text effects that you should be aware of.
1. Text Swipe Effect
Text swipe effects are the most commonly used in today’s videos on social media and video streaming platforms. In this effect, the text slides into the video frame from a particular direction. The entire text can swipe in if it is a one-liner and it can even swipe in word by word or sentence by sentence.
If you want to show short texts and you do not want to experiment with text animations, the text swipe effect is the safest option. For example, if you want to display your social media handles, your location, a coupon code, or a correction phrase that you have uttered wrongly, text swipe effects should be on your video.
2. Type Text Effect
The type text effect in Filmora is referred to as the typewriter text effect in Premiere Pro and After Effects. The effect displays the text as if it is being typed in real-time as it is done in a typewriter. The characters will appear on the screen with a cursor on the screen and therefore, it takes more duration than most other text effects.
The type text effect is particularly useful when you are displaying a large size of text on the screen. It is also widely used when showing a paragraph of text instead of a simple line. This helps in drawing the attention of the audience to the paragraph and retaining the attention for a longer duration of time.
3. WordArt Effect
WordArt is synonymous with MS Word where large words have 3D effects and highlighted background. Apart from 3D effect, text can have a thick stroke or outline as well as a gradient color style when WordArt effect is applied. In Filmora, you will find a plethora of WordArt effects and some are them are modern while others have a retro feel to them.
The WordArt effect is particularly popular while displaying titles and funny texts on the entire screen or covering a large part of the video. These are mostly used in the opening or ending scenes of the video. Besides, some video creators use them while making transitions from one scene to another.
4. Keyframe
If you want to create text animations as per your requirements, you have to use keyframes in any video editor. You can always apply the ready-made video editing text effects but if you want to customize and personalize, you can add keyframes in between two timestamps. Thereafter, you need to change text styles and parameters for each frame so that it looks like an animation.
If you want to add uniqueness to text animations so that you can make the audience wonder and appreciate, keyframes are the way. Adding keyframes in the text layer on Filmora is super easy and you can get effects like texts slowly scaling up, dancing randomly, changing fonts, and much more.
5. Color Text Effect
The color text effect is becoming extremely popular and it is widely used for opening and ending credits. Flashing different colors through your texts and titles against a darker background can act as a feast for the human eyes. There are different types of color text effects available that can make your text stand out.
When you are using color text effect, you need to maintain a large font size for your text so that it is widely visible. Even if your background is not dark, you can use a darker box in the background of the text or a darker frame around the text to amplify the effect.
6. Bounce to Zoom Effect
The bounce to zoom effect is widely used during a transition from one scene to another. It is regarded as a funny text effect where the text can swipe in and bounce and enlarge in size. Alternatively, the characters can bounce individually and zoom in and out with the motion as if they are dancing.
Apart from transitions, you can use the bounce to zoom effect to showcase a few important texts at the bottom of the video so that the viewers notice your text. Generally, the effect lasts for a few seconds before the text disappears. When you are using it for a larger text, you can use it for promotions and advertisements as well.
Part 2. How to Add Text Effects with Filmora
When it comes to adding text effects and animations, there is no better alternative to Filmora . Thanks to its super intuitive user interface, adding and customizing text effects in videos is as simple as text effect video online. Apart from the popular text effects we have discussed, there are so many categories of text effect and animation templates available on Filmora. Here are the steps on how to create text effect video in Filmora.
Free Download For Win 7 or later(64-bit)
Free Download For macOS 10.14 or later
Step1 Download and install Wondershare Filmora as per your operating system. Filmora is available for Windows and Mac users. Launch Filmora and click on New Project on the welcome screen.

Step2 Import your video clips under Project Media folder and drop them onto the timeline. Go to Titles menu option and you will see different categories and templates of text effects and templates from the left panel.

Step3 Search for a popular text effect from the search box. Select a text effect template and drop it on the timeline. Adjust its place on the timeline depending on where you want the text to appear. Double-click on the text layer and edit the text as per your requirements.
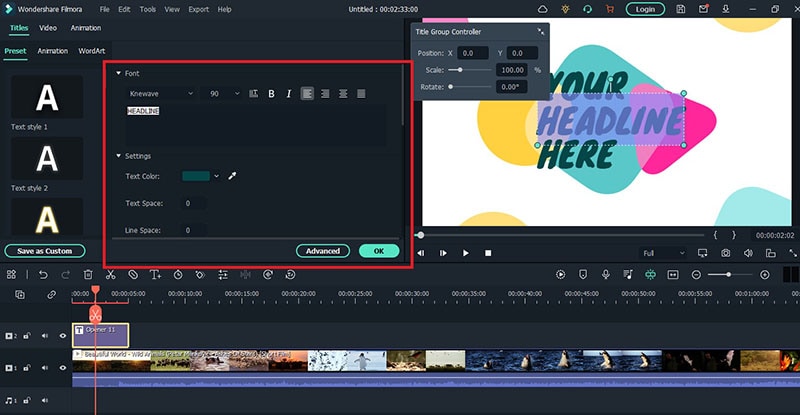
You can edit the style from fonts and settings section. You can also go to Advanced section available for more minute editing and get the desired text effect.
Conclusion
If texts are an essential part of your video, you should apply amazing video editing text effects to the texts and titles present in your video. You can use the common and the popular video text effects as well as use unique text effects to make your video stand out easily. There is no better video editor to add text effects to your video other than Wondershare Filmora for its unlimited text effect and animation templates.
Part 1. Popular text effects in Filmora
There are unlimited text effects available in Filmora but some of them are extremely popular that video creators regularly use in their videos. Here is the list of the popular Filmora video editor text effects that you should be aware of.
1. Text Swipe Effect
Text swipe effects are the most commonly used in today’s videos on social media and video streaming platforms. In this effect, the text slides into the video frame from a particular direction. The entire text can swipe in if it is a one-liner and it can even swipe in word by word or sentence by sentence.
If you want to show short texts and you do not want to experiment with text animations, the text swipe effect is the safest option. For example, if you want to display your social media handles, your location, a coupon code, or a correction phrase that you have uttered wrongly, text swipe effects should be on your video.
2. Type Text Effect
The type text effect in Filmora is referred to as the typewriter text effect in Premiere Pro and After Effects. The effect displays the text as if it is being typed in real-time as it is done in a typewriter. The characters will appear on the screen with a cursor on the screen and therefore, it takes more duration than most other text effects.
The type text effect is particularly useful when you are displaying a large size of text on the screen. It is also widely used when showing a paragraph of text instead of a simple line. This helps in drawing the attention of the audience to the paragraph and retaining the attention for a longer duration of time.
3. WordArt Effect
WordArt is synonymous with MS Word where large words have 3D effects and highlighted background. Apart from 3D effect, text can have a thick stroke or outline as well as a gradient color style when WordArt effect is applied. In Filmora, you will find a plethora of WordArt effects and some are them are modern while others have a retro feel to them.
The WordArt effect is particularly popular while displaying titles and funny texts on the entire screen or covering a large part of the video. These are mostly used in the opening or ending scenes of the video. Besides, some video creators use them while making transitions from one scene to another.
4. Keyframe
If you want to create text animations as per your requirements, you have to use keyframes in any video editor. You can always apply the ready-made video editing text effects but if you want to customize and personalize, you can add keyframes in between two timestamps. Thereafter, you need to change text styles and parameters for each frame so that it looks like an animation.
If you want to add uniqueness to text animations so that you can make the audience wonder and appreciate, keyframes are the way. Adding keyframes in the text layer on Filmora is super easy and you can get effects like texts slowly scaling up, dancing randomly, changing fonts, and much more.
5. Color Text Effect
The color text effect is becoming extremely popular and it is widely used for opening and ending credits. Flashing different colors through your texts and titles against a darker background can act as a feast for the human eyes. There are different types of color text effects available that can make your text stand out.
When you are using color text effect, you need to maintain a large font size for your text so that it is widely visible. Even if your background is not dark, you can use a darker box in the background of the text or a darker frame around the text to amplify the effect.
6. Bounce to Zoom Effect
The bounce to zoom effect is widely used during a transition from one scene to another. It is regarded as a funny text effect where the text can swipe in and bounce and enlarge in size. Alternatively, the characters can bounce individually and zoom in and out with the motion as if they are dancing.
Apart from transitions, you can use the bounce to zoom effect to showcase a few important texts at the bottom of the video so that the viewers notice your text. Generally, the effect lasts for a few seconds before the text disappears. When you are using it for a larger text, you can use it for promotions and advertisements as well.
Part 2. How to Add Text Effects with Filmora
When it comes to adding text effects and animations, there is no better alternative to Filmora . Thanks to its super intuitive user interface, adding and customizing text effects in videos is as simple as text effect video online. Apart from the popular text effects we have discussed, there are so many categories of text effect and animation templates available on Filmora. Here are the steps on how to create text effect video in Filmora.
Free Download For Win 7 or later(64-bit)
Free Download For macOS 10.14 or later
Step1 Download and install Wondershare Filmora as per your operating system. Filmora is available for Windows and Mac users. Launch Filmora and click on New Project on the welcome screen.

Step2 Import your video clips under Project Media folder and drop them onto the timeline. Go to Titles menu option and you will see different categories and templates of text effects and templates from the left panel.

Step3 Search for a popular text effect from the search box. Select a text effect template and drop it on the timeline. Adjust its place on the timeline depending on where you want the text to appear. Double-click on the text layer and edit the text as per your requirements.

You can edit the style from fonts and settings section. You can also go to Advanced section available for more minute editing and get the desired text effect.
Conclusion
If texts are an essential part of your video, you should apply amazing video editing text effects to the texts and titles present in your video. You can use the common and the popular video text effects as well as use unique text effects to make your video stand out easily. There is no better video editor to add text effects to your video other than Wondershare Filmora for its unlimited text effect and animation templates.
How to Crop Videos in Windows Media Player
In this generation, we are so much engaged in social media forms. We loved to upload and post some pictures and videos. To show the happiness that we had. But sometimes, we are not satisfied with our videos and photos. That is why we gave time to edit, put some effects , transitions and other forms of editing. It is such a big help, especially if you are running some online business. To get and gain the interest and attention of your viewers and costumers, your videos and pictures must be catchy and have some good edits. By doing some basic editing skills can help you boost your social media platform. And also by taking away some unwanted things in your videos and pictures can improved the focus of your video.
One of the basic way of editing is cropping.
Need to modify the point of interest of your video clipped? you don’t need to re-shoot your footage. The crop device can help!
Cropping is the manner of shifting or adjusting the rims of a photograph or video clip.Often used for image modifying, it’s also useful whilst modifying video. With cropping, you may take away pointless or distracting quantities of a video clip or alternate its dimensions to in shape inside a positive area.Whether you’re running with pictures from a digital digicam or display video, you’ll in all likelihood run into instances whilst you want to crop those clips.
In this article you will learn how to crop a video through windows media player and with Filmora Wondershare. Here are ways to crop your video clip.
How to crop a video in Windows Media Player
Actually, Windows Media Player can not crop a video directly. However plug-ins including the SolveigMM WMP Trimmer may be set up and used to cut or edit videos in Windows Media Player for free. Detailed steps are furnished right here to train you a way to deployation and use this unique plug-in.
As said earlier, the Windows Media Player isn’t always a video editor and can not be used immediately to trim or crop your films until with the assist of plug-ins. However, the stages underneath offer info on how to use Windows Media Player to make the edit. Please follow carefully with the steps below and use the SolveigMM WMP Trimmer to your device/Windows Media Player to make an easy edits in your video file.
Step 1: Download and install the SolveigMM WMP Trimmer plug-in. To download the plugin, click this link: https://www.solveigmm.com/en/products/wmp-trimmer-plugin/
Step 3: On Windows Media Player, click on the principle menu object and navigate to Tools Plug-ins SolveigMM WMP Trimmer Plugin.

Your plug-in will be enabled after selecting it from the menu.
Step 4: While playingthe document you need to edit, flow the blue slider to the segment of the film you need to trim/reduce and click “Start”. Manually type the time of the video you need to begin deciding on into the Start box in case you discover the usage of the slider difficult. Click the “End” button on the factor you need the trimming to end.

Step 5: Find and press the “In” button to trim the chosen component; The “Out” button to reduce the chosen component out of the authentic media document.
Note that SolveigMM WMP Trimmer Plugin supports to edit videos including cutting or trimming, however, it doesn’t offer an option to crop video.
An alternative way to crop video on Windows by Wondershare Filmora
Wondershare Filmora Video Editor is one of the great video enhancing software program with cool functions that compares to different competing video enhancing Softwares program. Many video enhancing applications claimed to provide expert results; Filmora is one in every of some consumer-stage equipment that definitely delivers.
For Win 7 or later (64-bit)
For macOS 10.14 or later
Here in Filmora, it is not just trimming but this tool can help you to adjust the focus of your video clip. Here are steps on how to crop a video using wondershare filmora.
1. Install and launch your Filmora Wondershare app.

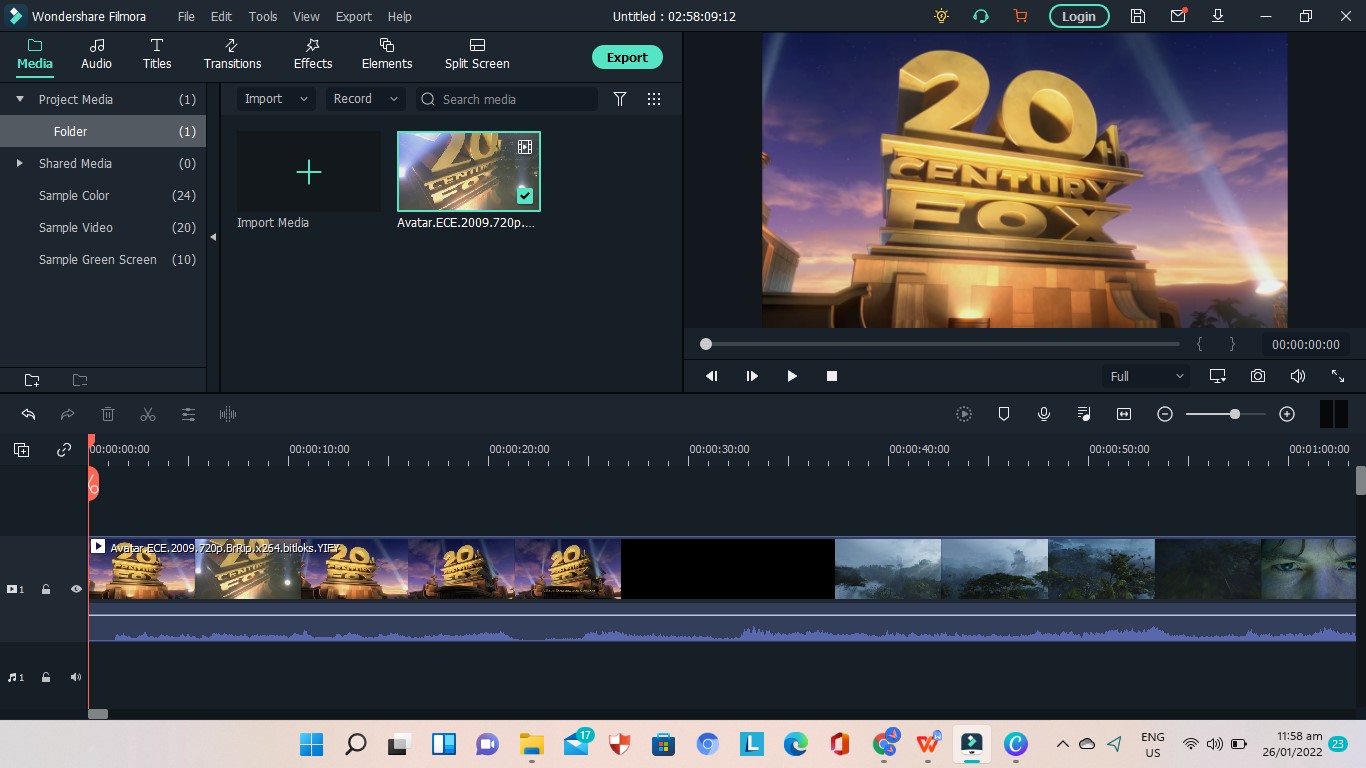
2. Find the import media. Click it and choose your preferred video fromyour files that you want to edit. Wait a second until the video is finished importing.
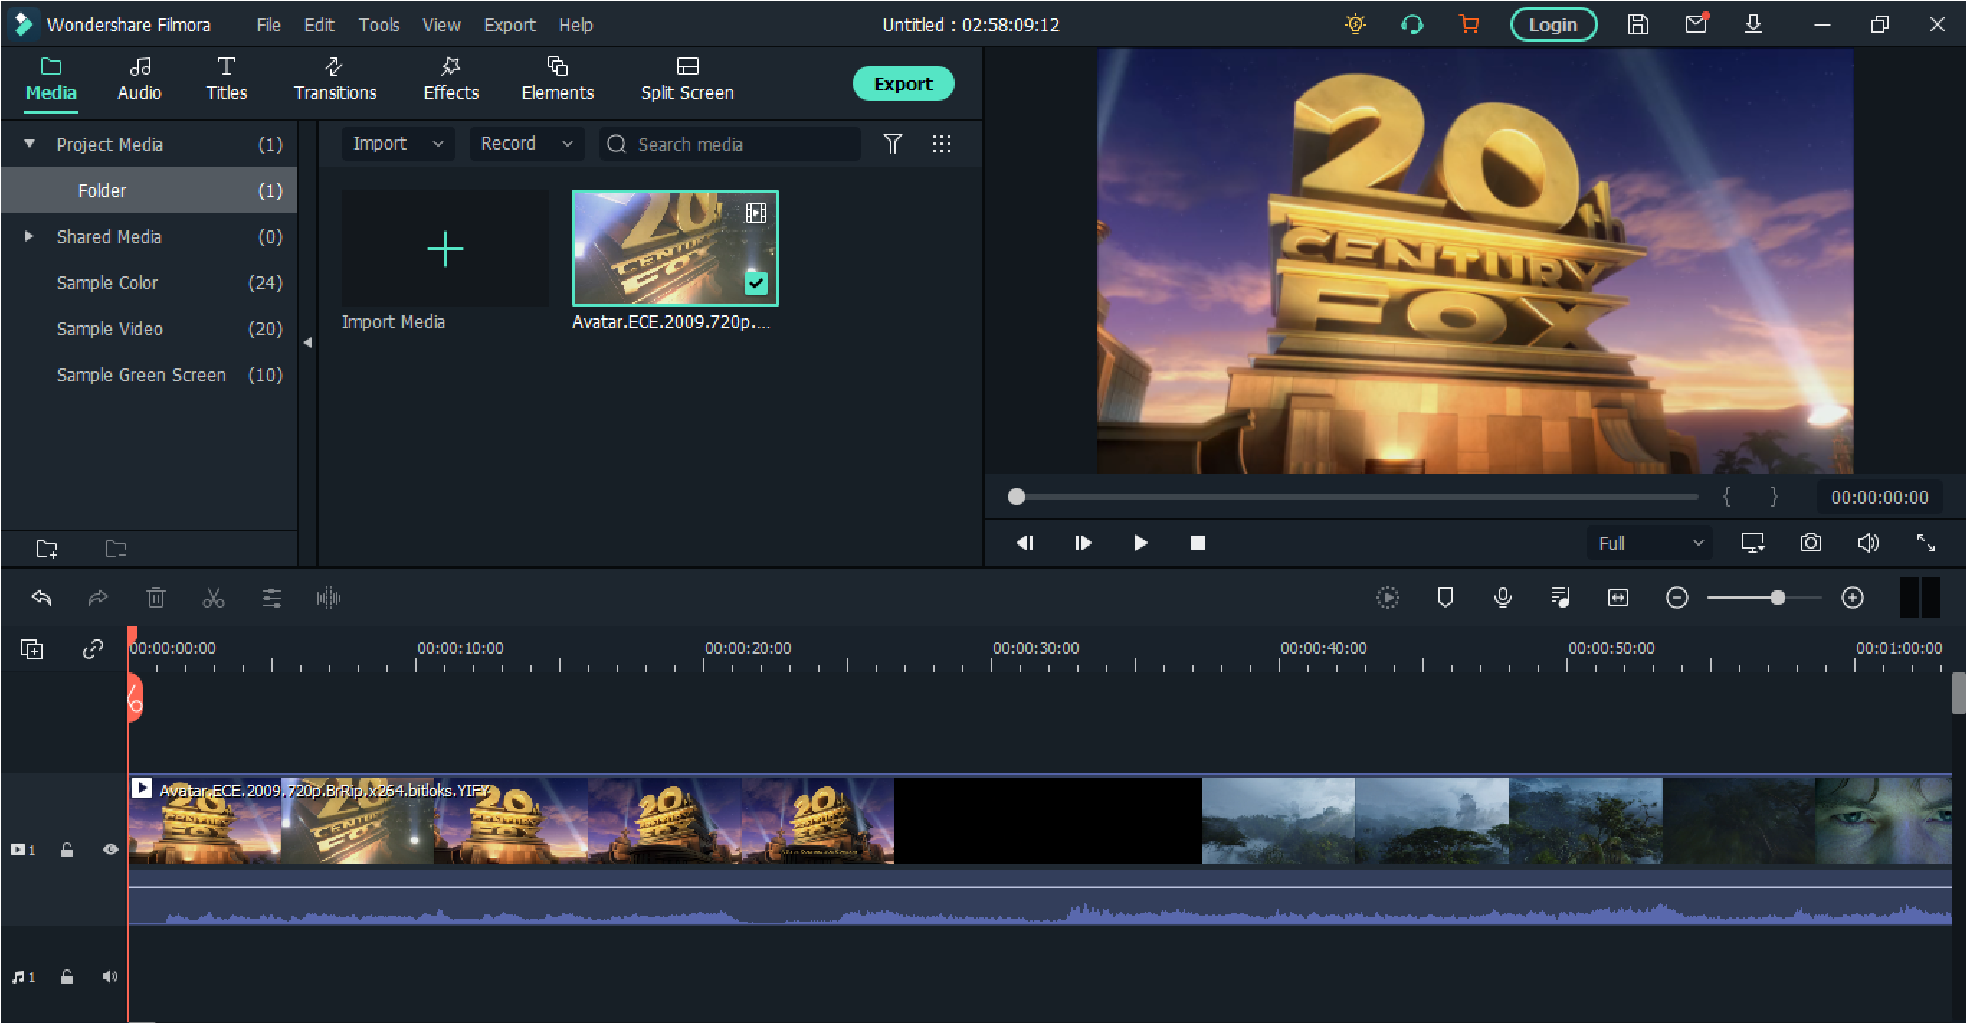
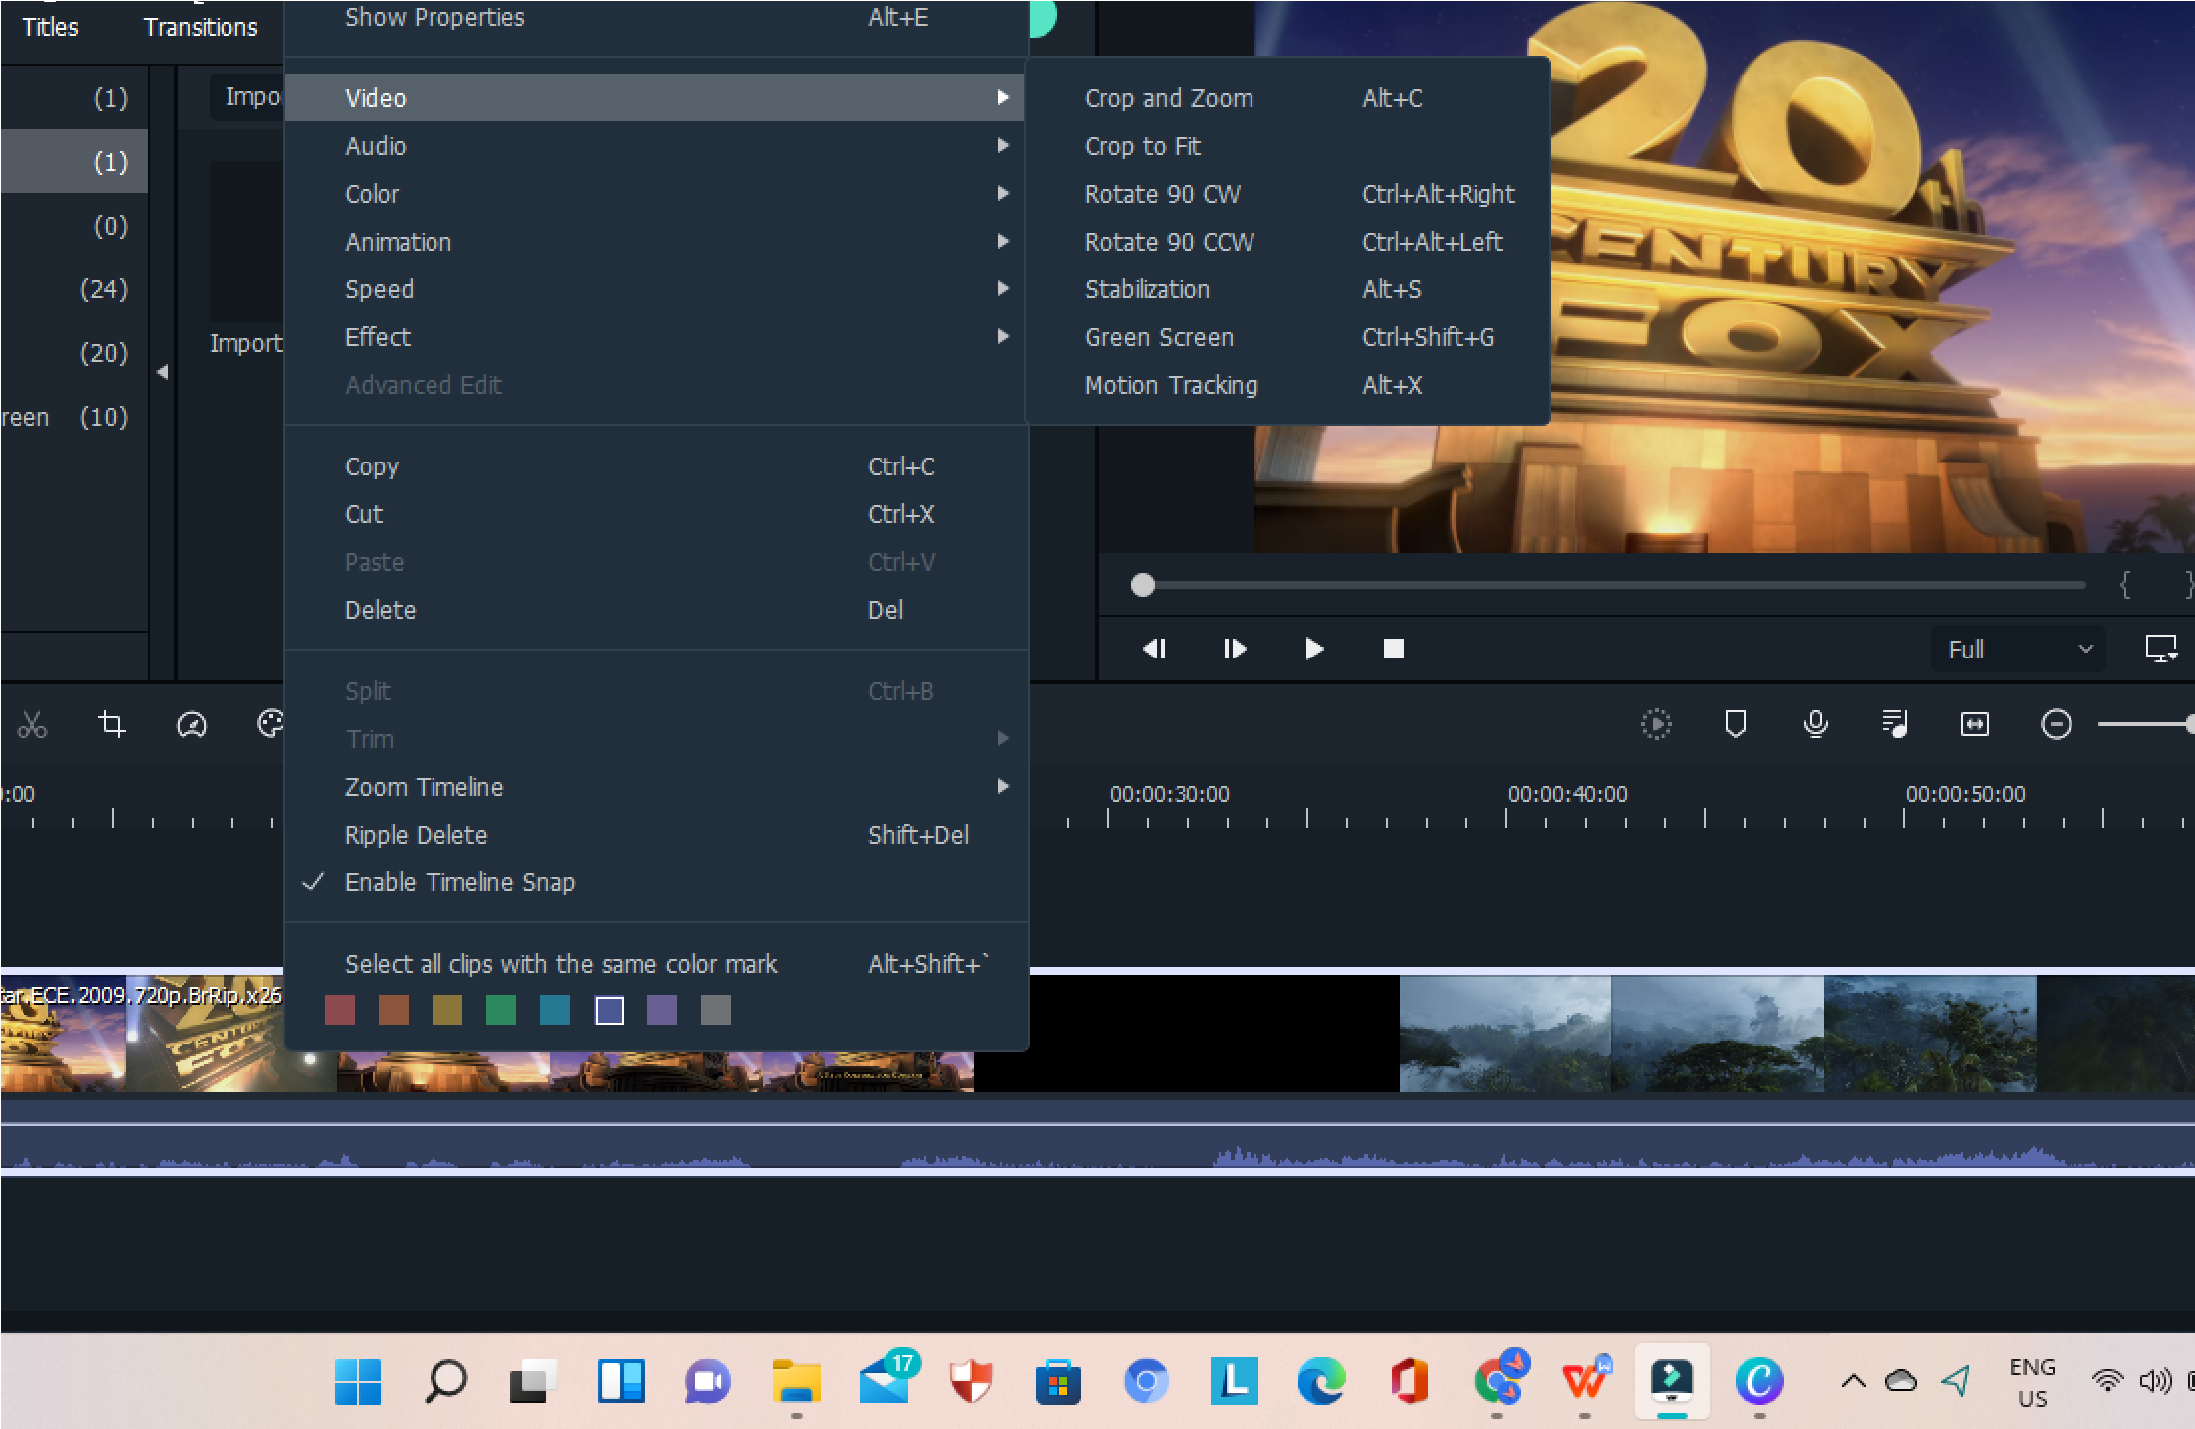
3. Drag the video to the lower left side. After dragging ,right-click yourmouse and choose video and then click “crop and zoom.”
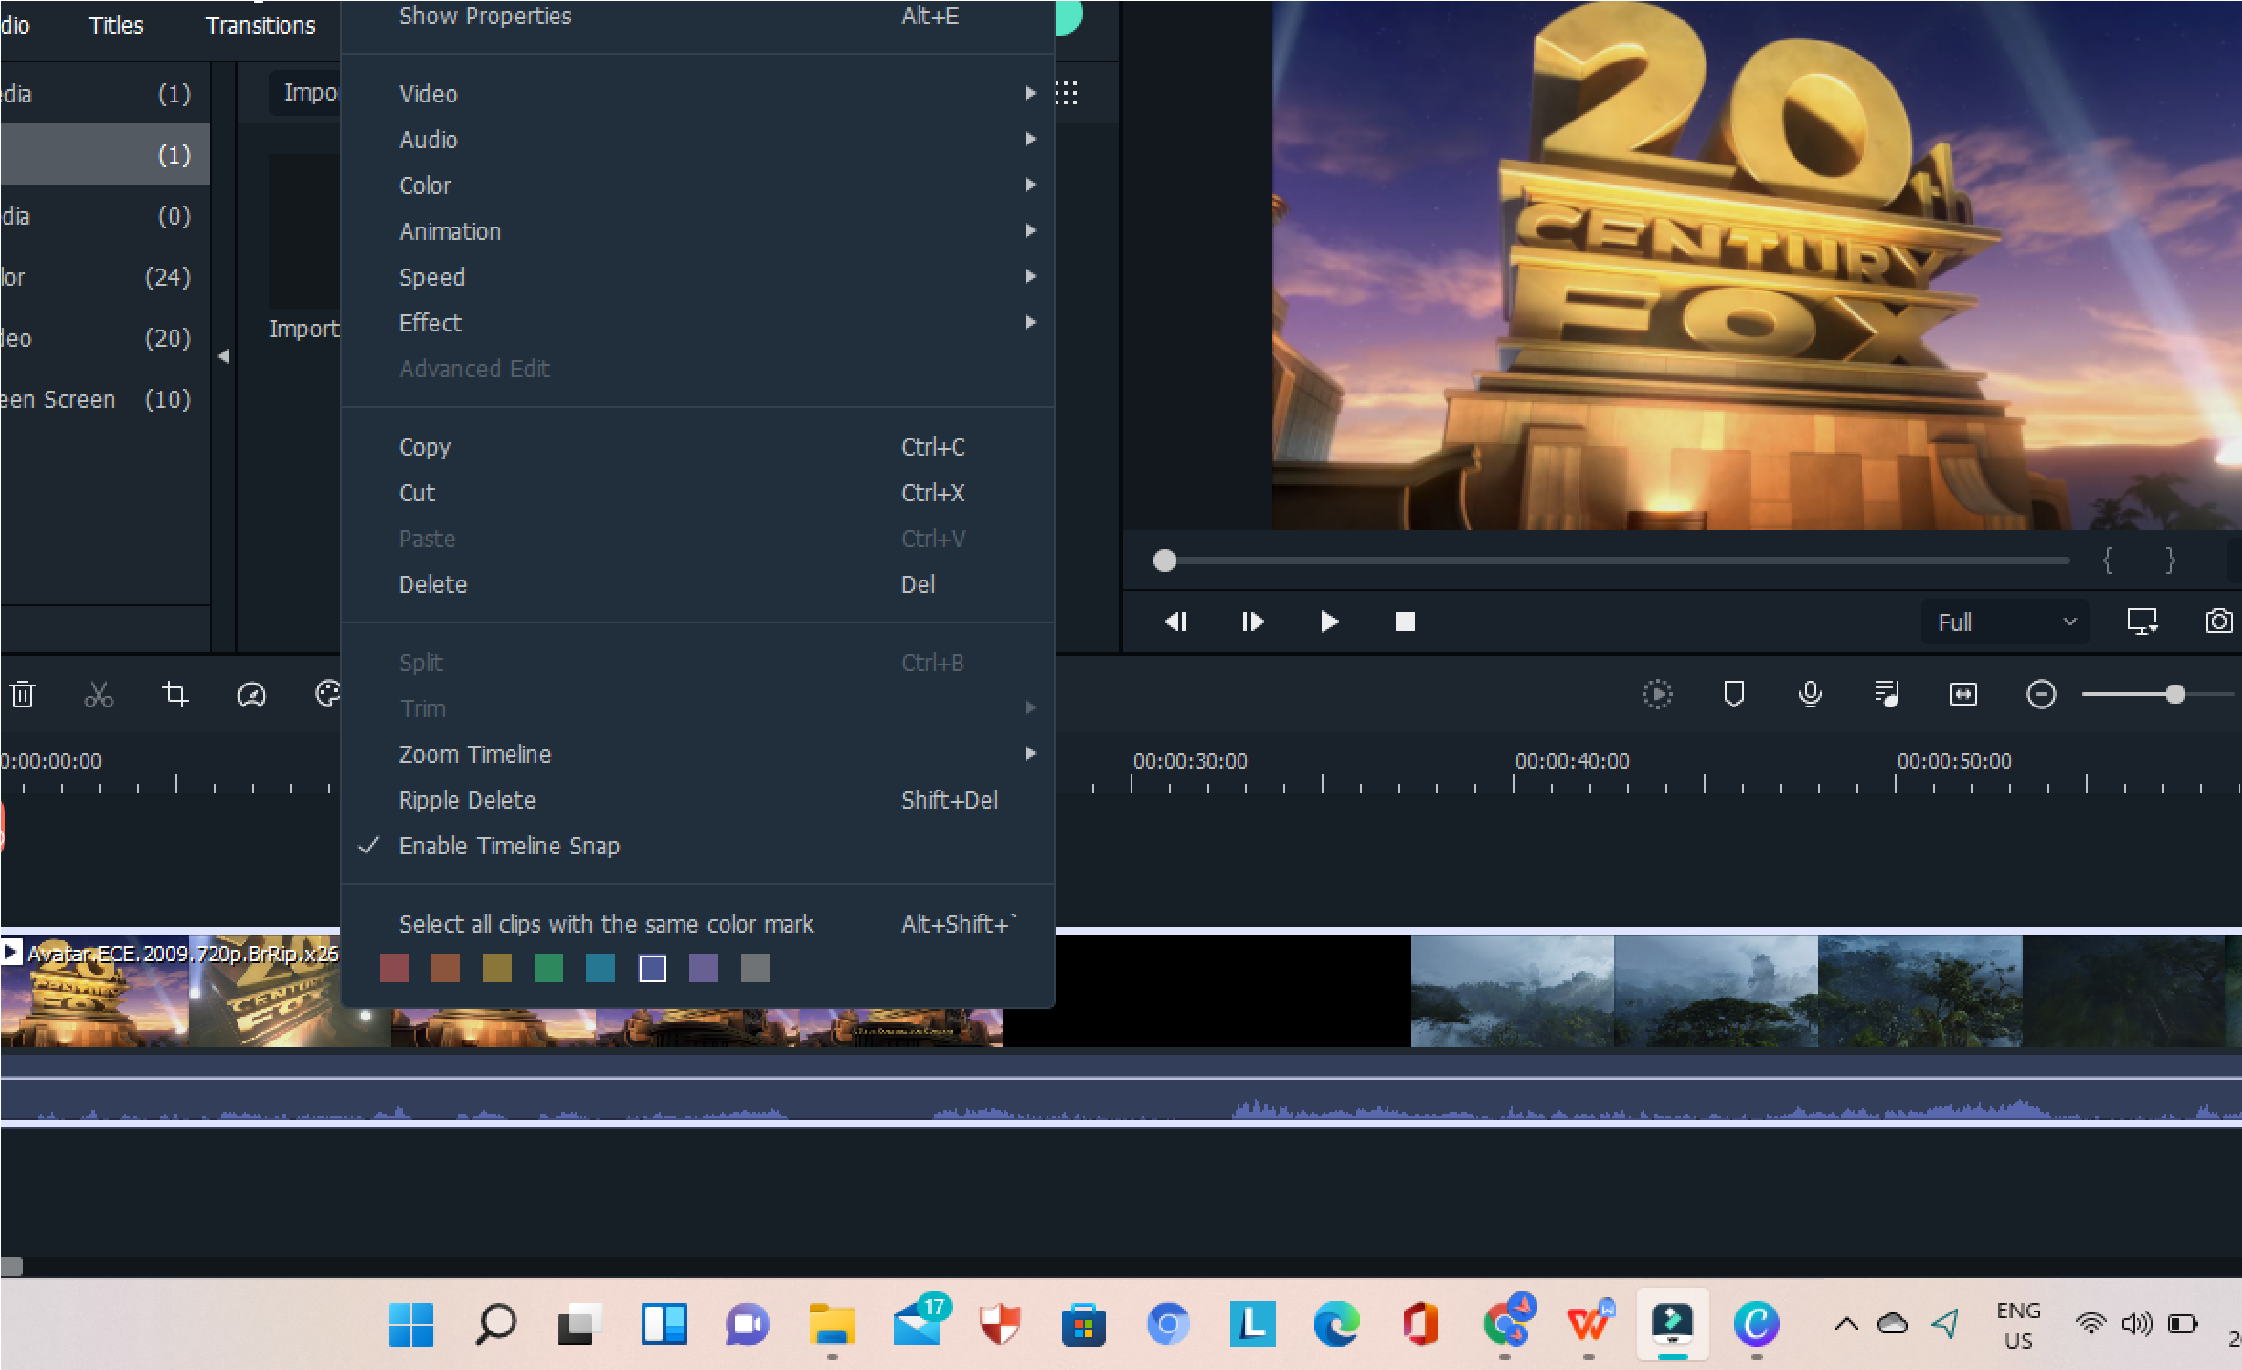
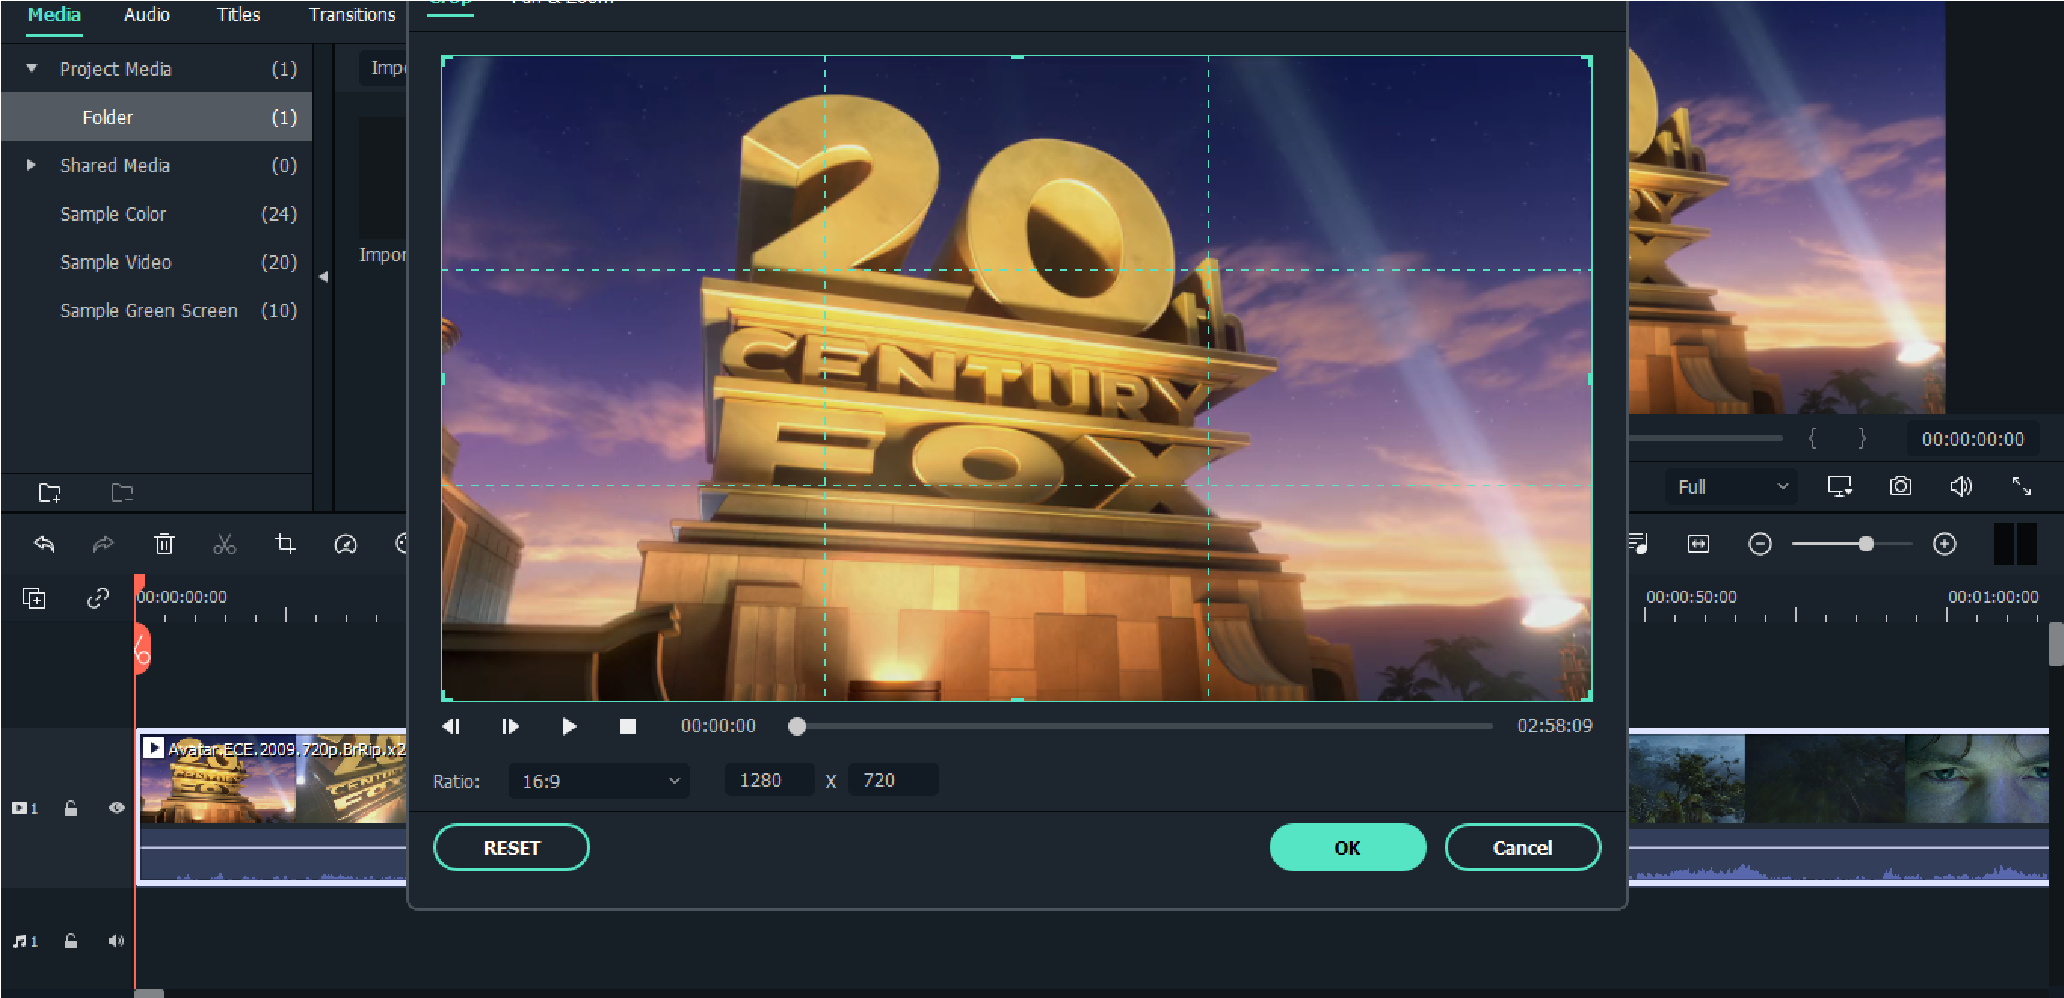
4. Now, you can adjust the focus of your video.
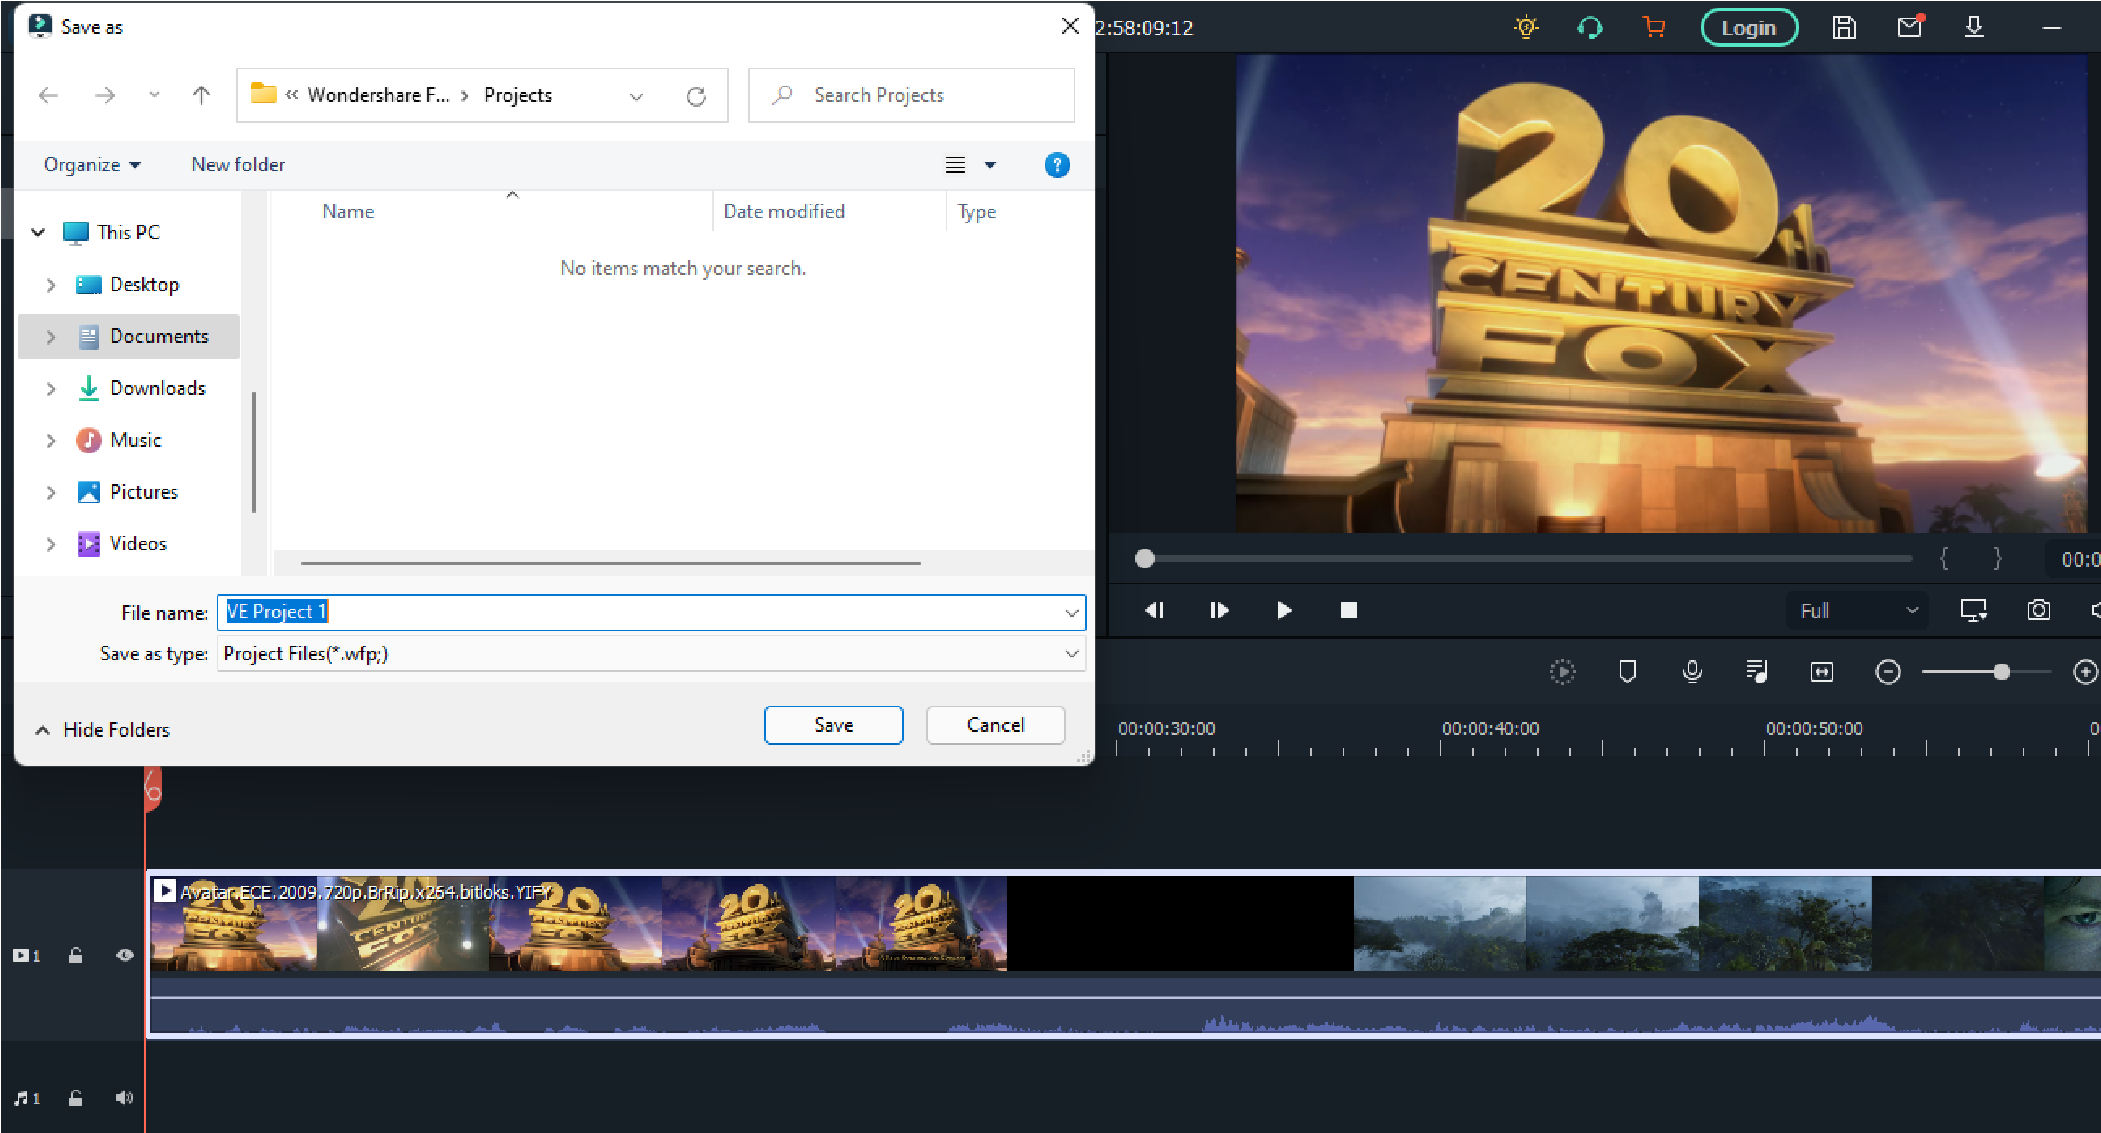
5. After cropping, if you are satisfied with your edit you can now save your project by clicking the save project icon.
Conclusion
In this guide, you have acquired some knowledge about using crop on a video clip. Though this process or step could be very difficult but using Filmora Wondershare you can easily follow the steps provided above.
Therefore, cropping video is necessary. It is one of the basic editing skill that you need to know. It is functional to your online business, work projects, school projects and other related stuffs. Cropping will help you to emphasize more about your subject.
It is easier for you to do the edit if you used some software programs. You can used Filmora Wondershare or any of the best editing software programs. While you are giving the best videos and photos of your costumer and viewers you are also improving and enhancing your editing skills.
However, you also need to be careful in doing some edits. Before you save your project you need to make sure that you are cropping the right portion of your video.
Your plug-in will be enabled after selecting it from the menu.
Step 4: While playingthe document you need to edit, flow the blue slider to the segment of the film you need to trim/reduce and click “Start”. Manually type the time of the video you need to begin deciding on into the Start box in case you discover the usage of the slider difficult. Click the “End” button on the factor you need the trimming to end.

Step 5: Find and press the “In” button to trim the chosen component; The “Out” button to reduce the chosen component out of the authentic media document.
Note that SolveigMM WMP Trimmer Plugin supports to edit videos including cutting or trimming, however, it doesn’t offer an option to crop video.
An alternative way to crop video on Windows by Wondershare Filmora
Wondershare Filmora Video Editor is one of the great video enhancing software program with cool functions that compares to different competing video enhancing Softwares program. Many video enhancing applications claimed to provide expert results; Filmora is one in every of some consumer-stage equipment that definitely delivers.
For Win 7 or later (64-bit)
For macOS 10.14 or later
Here in Filmora, it is not just trimming but this tool can help you to adjust the focus of your video clip. Here are steps on how to crop a video using wondershare filmora.
1. Install and launch your Filmora Wondershare app.

2. Find the import media. Click it and choose your preferred video fromyour files that you want to edit. Wait a second until the video is finished importing.

3. Drag the video to the lower left side. After dragging ,right-click yourmouse and choose video and then click “crop and zoom.”


4. Now, you can adjust the focus of your video.

5. After cropping, if you are satisfied with your edit you can now save your project by clicking the save project icon.

Conclusion
In this guide, you have acquired some knowledge about using crop on a video clip. Though this process or step could be very difficult but using Filmora Wondershare you can easily follow the steps provided above.
Therefore, cropping video is necessary. It is one of the basic editing skill that you need to know. It is functional to your online business, work projects, school projects and other related stuffs. Cropping will help you to emphasize more about your subject.
It is easier for you to do the edit if you used some software programs. You can used Filmora Wondershare or any of the best editing software programs. While you are giving the best videos and photos of your costumer and viewers you are also improving and enhancing your editing skills.
However, you also need to be careful in doing some edits. Before you save your project you need to make sure that you are cropping the right portion of your video.
Your plug-in will be enabled after selecting it from the menu.
Step 4: While playingthe document you need to edit, flow the blue slider to the segment of the film you need to trim/reduce and click “Start”. Manually type the time of the video you need to begin deciding on into the Start box in case you discover the usage of the slider difficult. Click the “End” button on the factor you need the trimming to end.

Step 5: Find and press the “In” button to trim the chosen component; The “Out” button to reduce the chosen component out of the authentic media document.
Note that SolveigMM WMP Trimmer Plugin supports to edit videos including cutting or trimming, however, it doesn’t offer an option to crop video.
An alternative way to crop video on Windows by Wondershare Filmora
Wondershare Filmora Video Editor is one of the great video enhancing software program with cool functions that compares to different competing video enhancing Softwares program. Many video enhancing applications claimed to provide expert results; Filmora is one in every of some consumer-stage equipment that definitely delivers.
For Win 7 or later (64-bit)
For macOS 10.14 or later
Here in Filmora, it is not just trimming but this tool can help you to adjust the focus of your video clip. Here are steps on how to crop a video using wondershare filmora.
1. Install and launch your Filmora Wondershare app.

2. Find the import media. Click it and choose your preferred video fromyour files that you want to edit. Wait a second until the video is finished importing.

3. Drag the video to the lower left side. After dragging ,right-click yourmouse and choose video and then click “crop and zoom.”


4. Now, you can adjust the focus of your video.

5. After cropping, if you are satisfied with your edit you can now save your project by clicking the save project icon.

Conclusion
In this guide, you have acquired some knowledge about using crop on a video clip. Though this process or step could be very difficult but using Filmora Wondershare you can easily follow the steps provided above.
Therefore, cropping video is necessary. It is one of the basic editing skill that you need to know. It is functional to your online business, work projects, school projects and other related stuffs. Cropping will help you to emphasize more about your subject.
It is easier for you to do the edit if you used some software programs. You can used Filmora Wondershare or any of the best editing software programs. While you are giving the best videos and photos of your costumer and viewers you are also improving and enhancing your editing skills.
However, you also need to be careful in doing some edits. Before you save your project you need to make sure that you are cropping the right portion of your video.
Your plug-in will be enabled after selecting it from the menu.
Step 4: While playingthe document you need to edit, flow the blue slider to the segment of the film you need to trim/reduce and click “Start”. Manually type the time of the video you need to begin deciding on into the Start box in case you discover the usage of the slider difficult. Click the “End” button on the factor you need the trimming to end.

Step 5: Find and press the “In” button to trim the chosen component; The “Out” button to reduce the chosen component out of the authentic media document.
Note that SolveigMM WMP Trimmer Plugin supports to edit videos including cutting or trimming, however, it doesn’t offer an option to crop video.
An alternative way to crop video on Windows by Wondershare Filmora
Wondershare Filmora Video Editor is one of the great video enhancing software program with cool functions that compares to different competing video enhancing Softwares program. Many video enhancing applications claimed to provide expert results; Filmora is one in every of some consumer-stage equipment that definitely delivers.
For Win 7 or later (64-bit)
For macOS 10.14 or later
Here in Filmora, it is not just trimming but this tool can help you to adjust the focus of your video clip. Here are steps on how to crop a video using wondershare filmora.
1. Install and launch your Filmora Wondershare app.

2. Find the import media. Click it and choose your preferred video fromyour files that you want to edit. Wait a second until the video is finished importing.

3. Drag the video to the lower left side. After dragging ,right-click yourmouse and choose video and then click “crop and zoom.”


4. Now, you can adjust the focus of your video.

5. After cropping, if you are satisfied with your edit you can now save your project by clicking the save project icon.

Conclusion
In this guide, you have acquired some knowledge about using crop on a video clip. Though this process or step could be very difficult but using Filmora Wondershare you can easily follow the steps provided above.
Therefore, cropping video is necessary. It is one of the basic editing skill that you need to know. It is functional to your online business, work projects, school projects and other related stuffs. Cropping will help you to emphasize more about your subject.
It is easier for you to do the edit if you used some software programs. You can used Filmora Wondershare or any of the best editing software programs. While you are giving the best videos and photos of your costumer and viewers you are also improving and enhancing your editing skills.
However, you also need to be careful in doing some edits. Before you save your project you need to make sure that you are cropping the right portion of your video.
Best Video Editing Courses Online with Certificate
The best way to learn video editing is from people who are experts in the field. Plus, getting a certification is a nice bonus that can more easily land you a great job when you’re done. With that said, we’re offering a comprehensive list of the best video editing courses with certification — ones you’ll be glad to complete.
Read below to find out all about these courses. What they teach, who they are from, and how they will benefit you.
List of the Best Online Video Editing Courses With Certification
You’re about to see a list of video editing courses categorized into four groups. Each caters to specific needs that will help you make a better decision.
Courses With Certification for Popular Video Editor Platforms
| Course Name | Vendor |
|---|---|
| Premiere Pro CC for Beginners: Video Editing in Premiere | Udemy |
| Video Editing in DaVinci Resolve 18/17 | Udemy |
| DaVinci Resolve Fundamentals | LinkedIn Learning |
| PowerDirector 15 – Video Editing for PC Users | Udemy |
| Mastering Final Cut Pro | Coursera |
| Learning Final Cut Pro X – Video Editing Mastery | Udemy |
Video Editing Tutorials - Mastering The Basics
| Course Name | Vendor |
|---|---|
| Video Production Essentials | Fiverr Learn |
| Free Video Editing Courses and Tutorials | Udemy |
| Introduction to Video Editing | |
| Video editing fundamentals | |
| Online Video Editing Classes | Skillshare |
| The Complete Video Production Bootcamp | Udemy |
Video Editing Courses With Certification For Mobile Users
| Course Name | Vendor |
|---|---|
| Smartphone Video For Beginners – iPhone Video Editing Course | Udemy |
Cinematic Level Video Editing Courses
| Course Name | Vendor |
|---|---|
| VIDEO EDITING. Techniques loved by pro broadcast filmmakers | Udemy |
| The History of Film and Video Editing |
What You Will Learn From Each Course
Each video editing course online with certification offers something unique. Below, you can see a detailed comparison between all of them. As a result, you’ll know exactly which course to choose and which video editing tool to start with.
1. Courses With Certification for Popular Video Editor Platforms
First, let’s break down all the courses in this group. You’ll learn about its ratings, duration, contents, and more.
Premiere Pro CC for Beginners: Video Editing in Premiere

Initially, this course dives into the basics of video editing. Then, you get into more advanced topics that will help you distinguish yourself from the complete beginners.
- Vendor: Udemy
- Cost: $19.99
- Duration: 24.5 hours
- Rating: 4.7 / 5
- Level: Beginner-Advanced
Key topics inside this course:
- How to export your videos for High-Definition Playback and 4K
- Video color correction
- How to apply visual effects
- Design clean and modern titles for any video
- The editing process of a video from beginning to end
- Load the perfect settings at the start of each project
- Color grading
- Edit green screen footage
- How to add motion to titles, photos, and videos
At the end of the course, you’ll have the skills necessary to edit an entire video from start to finish. Additionally, you’ll know your way around Adobe Premiere Pro. Most of the topics taught inside will be enough to help you land a video editing job or edit your videos professionally.
Video Editing in DaVinci Resolve 18/17

With this video editing course, you will master editing in DaVinci Resolve. It includes beginner lessons, as well as a few advanced editing techniques. Over 30.000 students have currently completed it.
- Vendor: Udemy
- Cost: $84.99
- Duration: 11.5 hours
- Rating: 4.6 / 5
- Level: Beginner-Advanced
Key topics inside this course:
- How to add effects to videos in DaVinci Resolve
- Color Grading with multiple tools
- Master different types of Nodes
- Complete tests doing various projects
- Cut page quick and easy video editing
- Adding motion graphics
- Effective color-correcting methods
- Using Color Wheels, Power windows, Scopes, Curves, Qualifiers, and more
This course aims to teach you how to use DaVinci Resolve. After you’ve mastered the platform, the mentor shows you various tips and tricks to edit videos more professionally using this tool.
PowerDirector 15 - Video Editing for PC Users
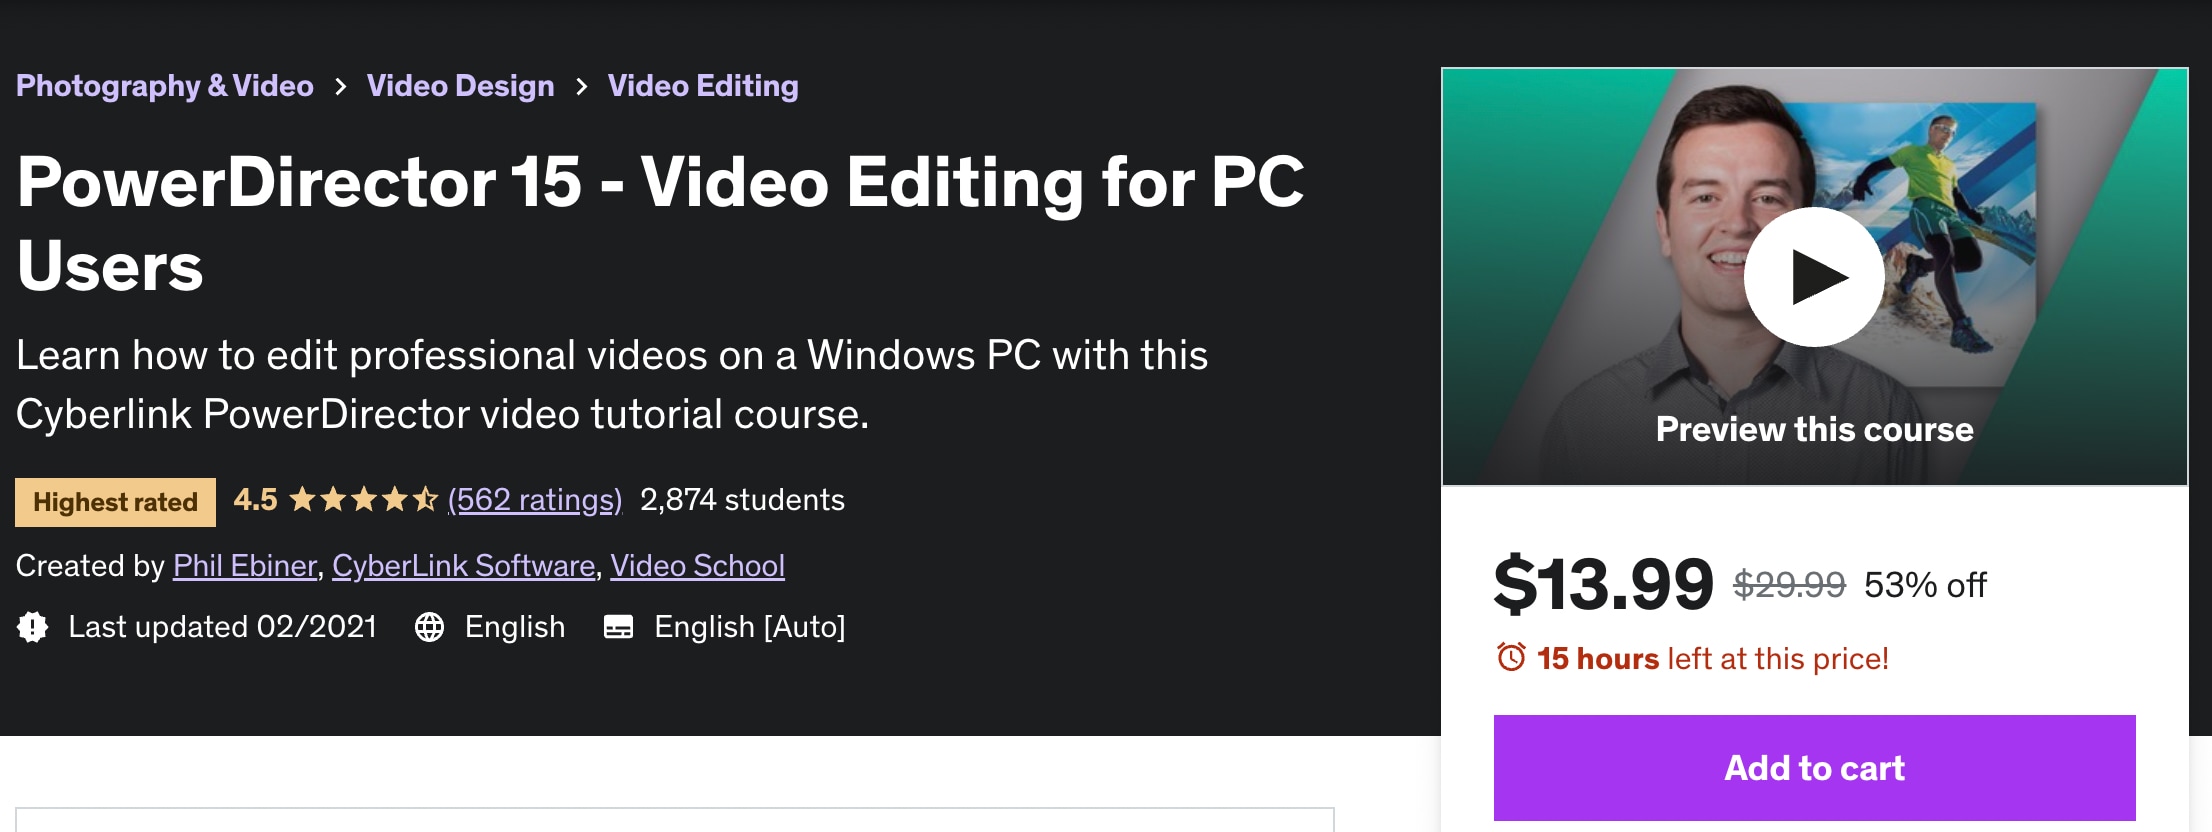
Power Director 15 is a great app to learn video editing if you’re a Windows user. This course covers everything necessary for you to know your way around this program quickly.
- Vendor: Udemy
- Cost: $13.99
- Duration: 4h
- Rating: 4.5 / 5
- Level: Beginner
Key topics inside this course:
- How to export high-quality videos for any device or platform
- How to use every feature in Power Director, including the newest ones
- Add professional titles and animated graphics to any video
- Master using blend modes, masks, and the action camera center
The knowledge in this video editing course online with certification will allow you to edit videos the way you envision. You will have the ability to create anything you want, and deliver exceptional results.

Mastering Final Cut Pro is an online video editing course with certification that grants you the knowledge to use this tool. In addition, you and over 30.000 other students get to learn from Apple Certified trainers.
- Vendor: Coursera
- Cost: $49
- Duration: 40h
- Rating: 4.5 / 5
- Level: Beginner
Key topics inside this course:
- The best ways to import and export project files with Final Cut Pro
- How to apply effects and modern transitions
- Creating a project and editing a video from start to finish
- Change the timing of clips
This is the perfect course if you’ve never used Final Cut Pro. It’s beginner-friendly and takes you through every step of using the platform, from creating a project to editing it and finally exporting a high-quality video.
Learning Final Cut Pro X – Video Editing Mastery
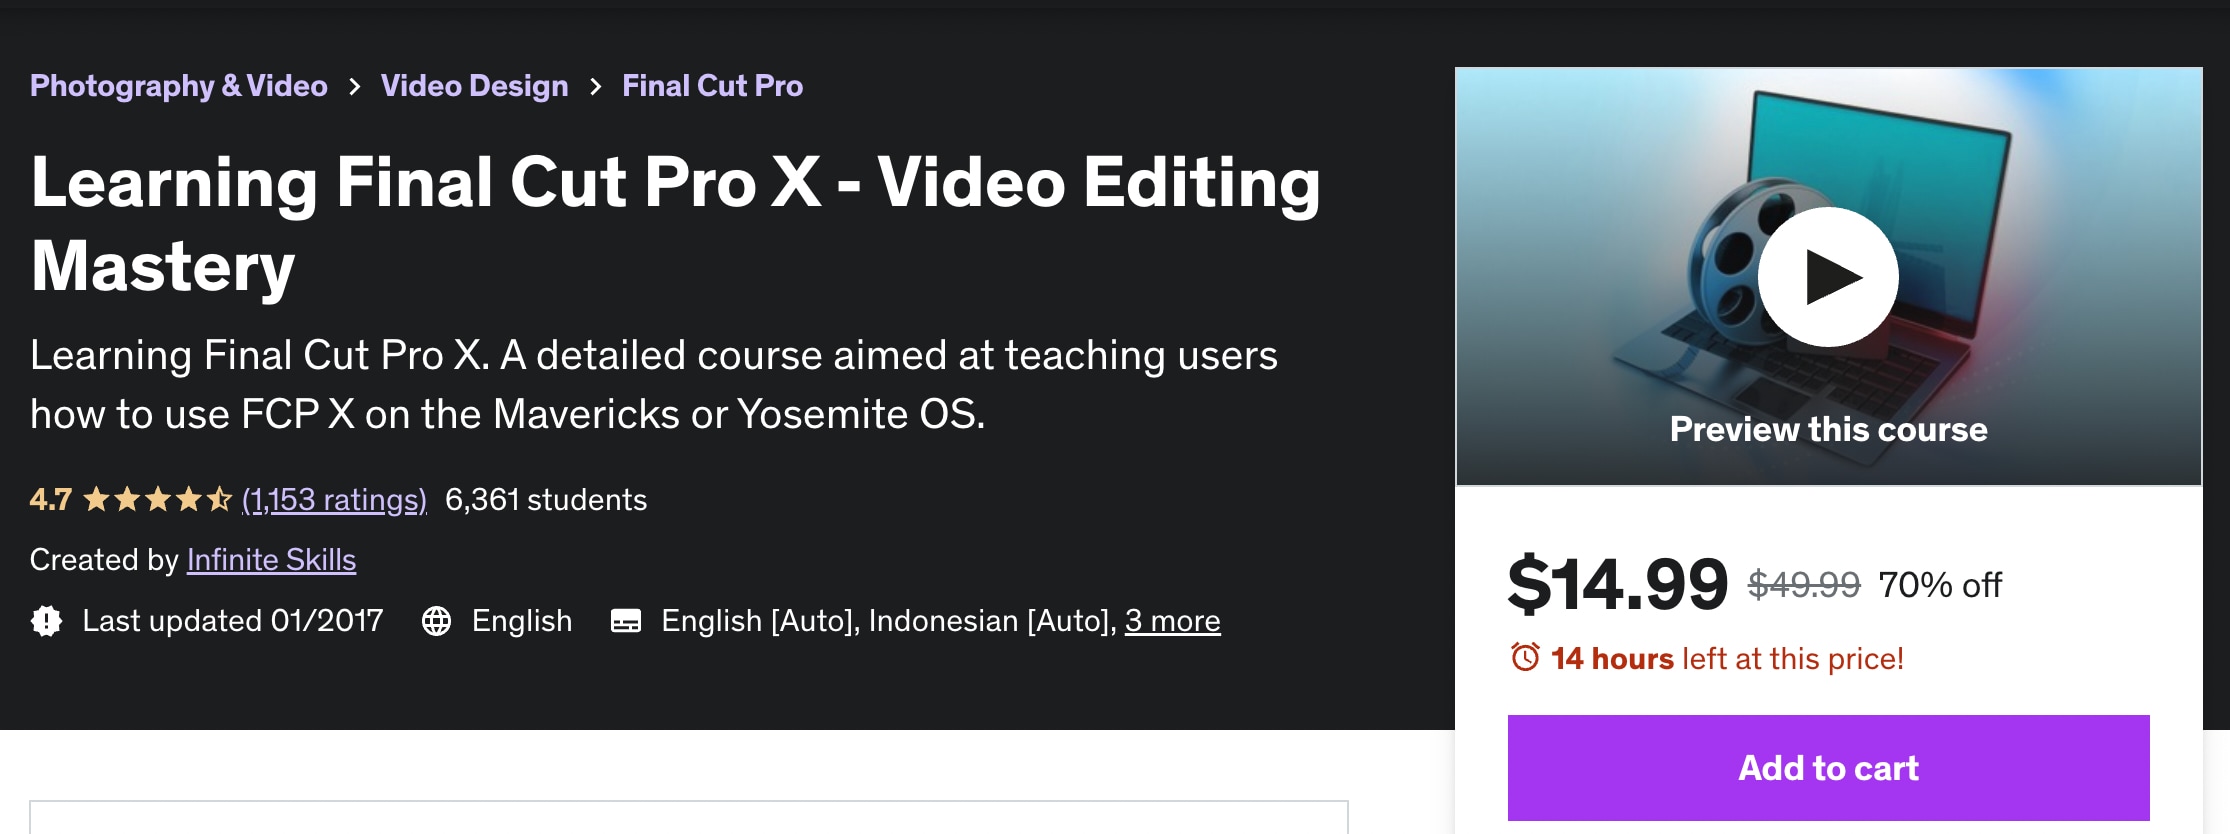
This is a video editing course for anyone using Mavericks OS. It’s designed to take full advantage of this Operating System alongside the Final Cut Pro X platform.
- Vendor: Udemy
- Cost: $14.99
- Duration: 6h 30min
- Rating: 4.7 / 5
- Level: Beginner
Key topics inside this course:
- Mastering the user interface and choosing your preferences
- Learning helpful shortcuts to speed up your workflow
- Best and quickest methods to import media
- How to organize your clips
- Using the timeline
- Working with effects, keyframes, compounds clips, and audio clips
- How to use generators and white screens
- The best export settings and other tips
If you’ve ever wanted to master Final Cut Pro X, there’s no better place to go. This course is designed to start on a beginner-friendly level. But, it moves to more advanced lessons later down the line.
2. Video Editing Tutorials - Mastering The Basics
The following video editing courses include lessons mainly on the basics of video editing. They won’t focus on any specific platform or tool. Instead, you’ll be learning the most important principles of creating a high-quality and modern video.
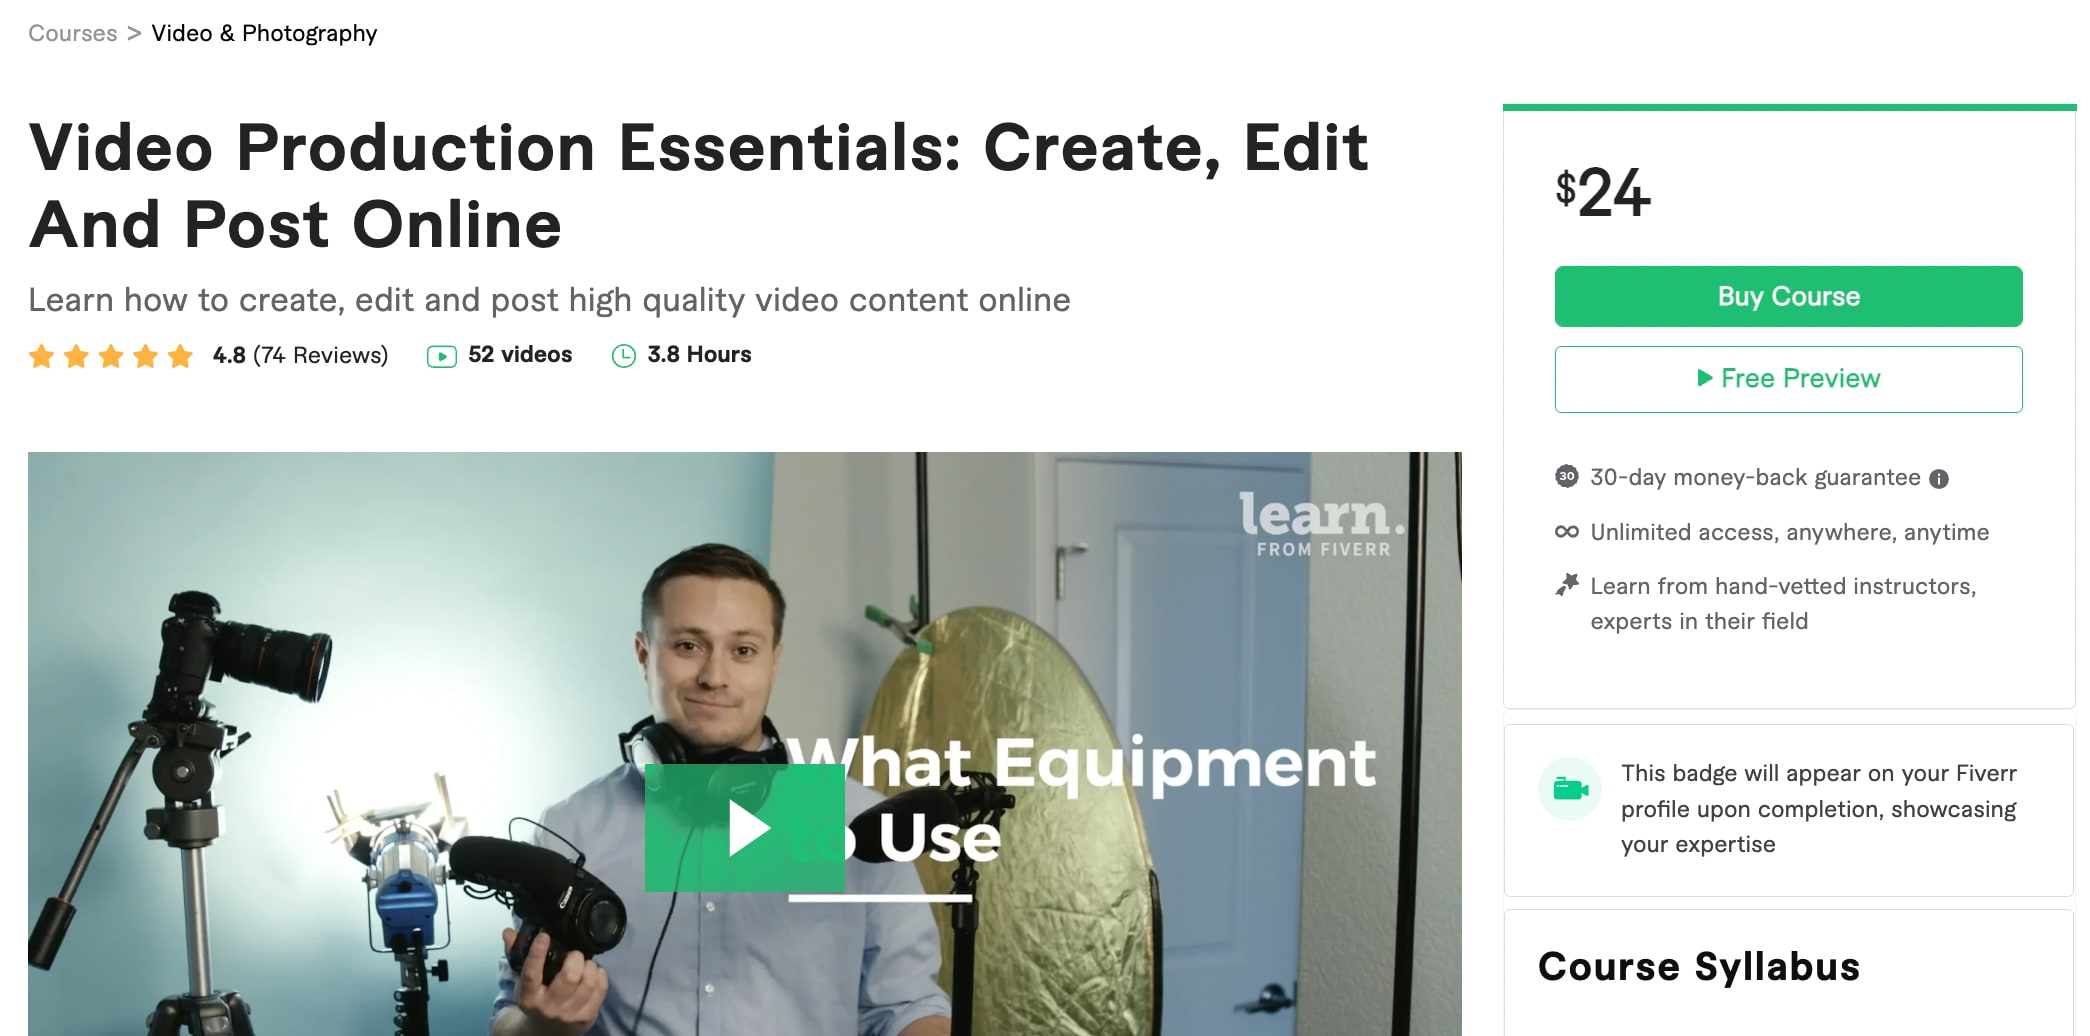
A fairly simple course designed to teach you the process of creating and editing a video from scratch. This is one of the best video editing courses online, featuring several professional mentors.
- Vendor: Fiverr Learn
- Cost: $24
- Duration: 6h 38min
- Rating: 4.8 / 5
- Level: Beginner to Intermediate
Key topics inside this course:
- What equipment to use for professional video editing
- How to shoot high-quality video with your smartphone
- Professional video and audio recording techniques
- Exporting settings for high-quality online viewing
- Fundamentals of using a DSLR or Mirrorless camera
- Create high-converting CTAs for your videos
The course will help you understand crucial facts about many different types of videos that are in demand today. You’ll learn how to use and navigate video editing tools to create anything you can imagine. The mentors even offer a few tips for growing your own Youtube channel.
Free Video Editing Courses and Tutorials
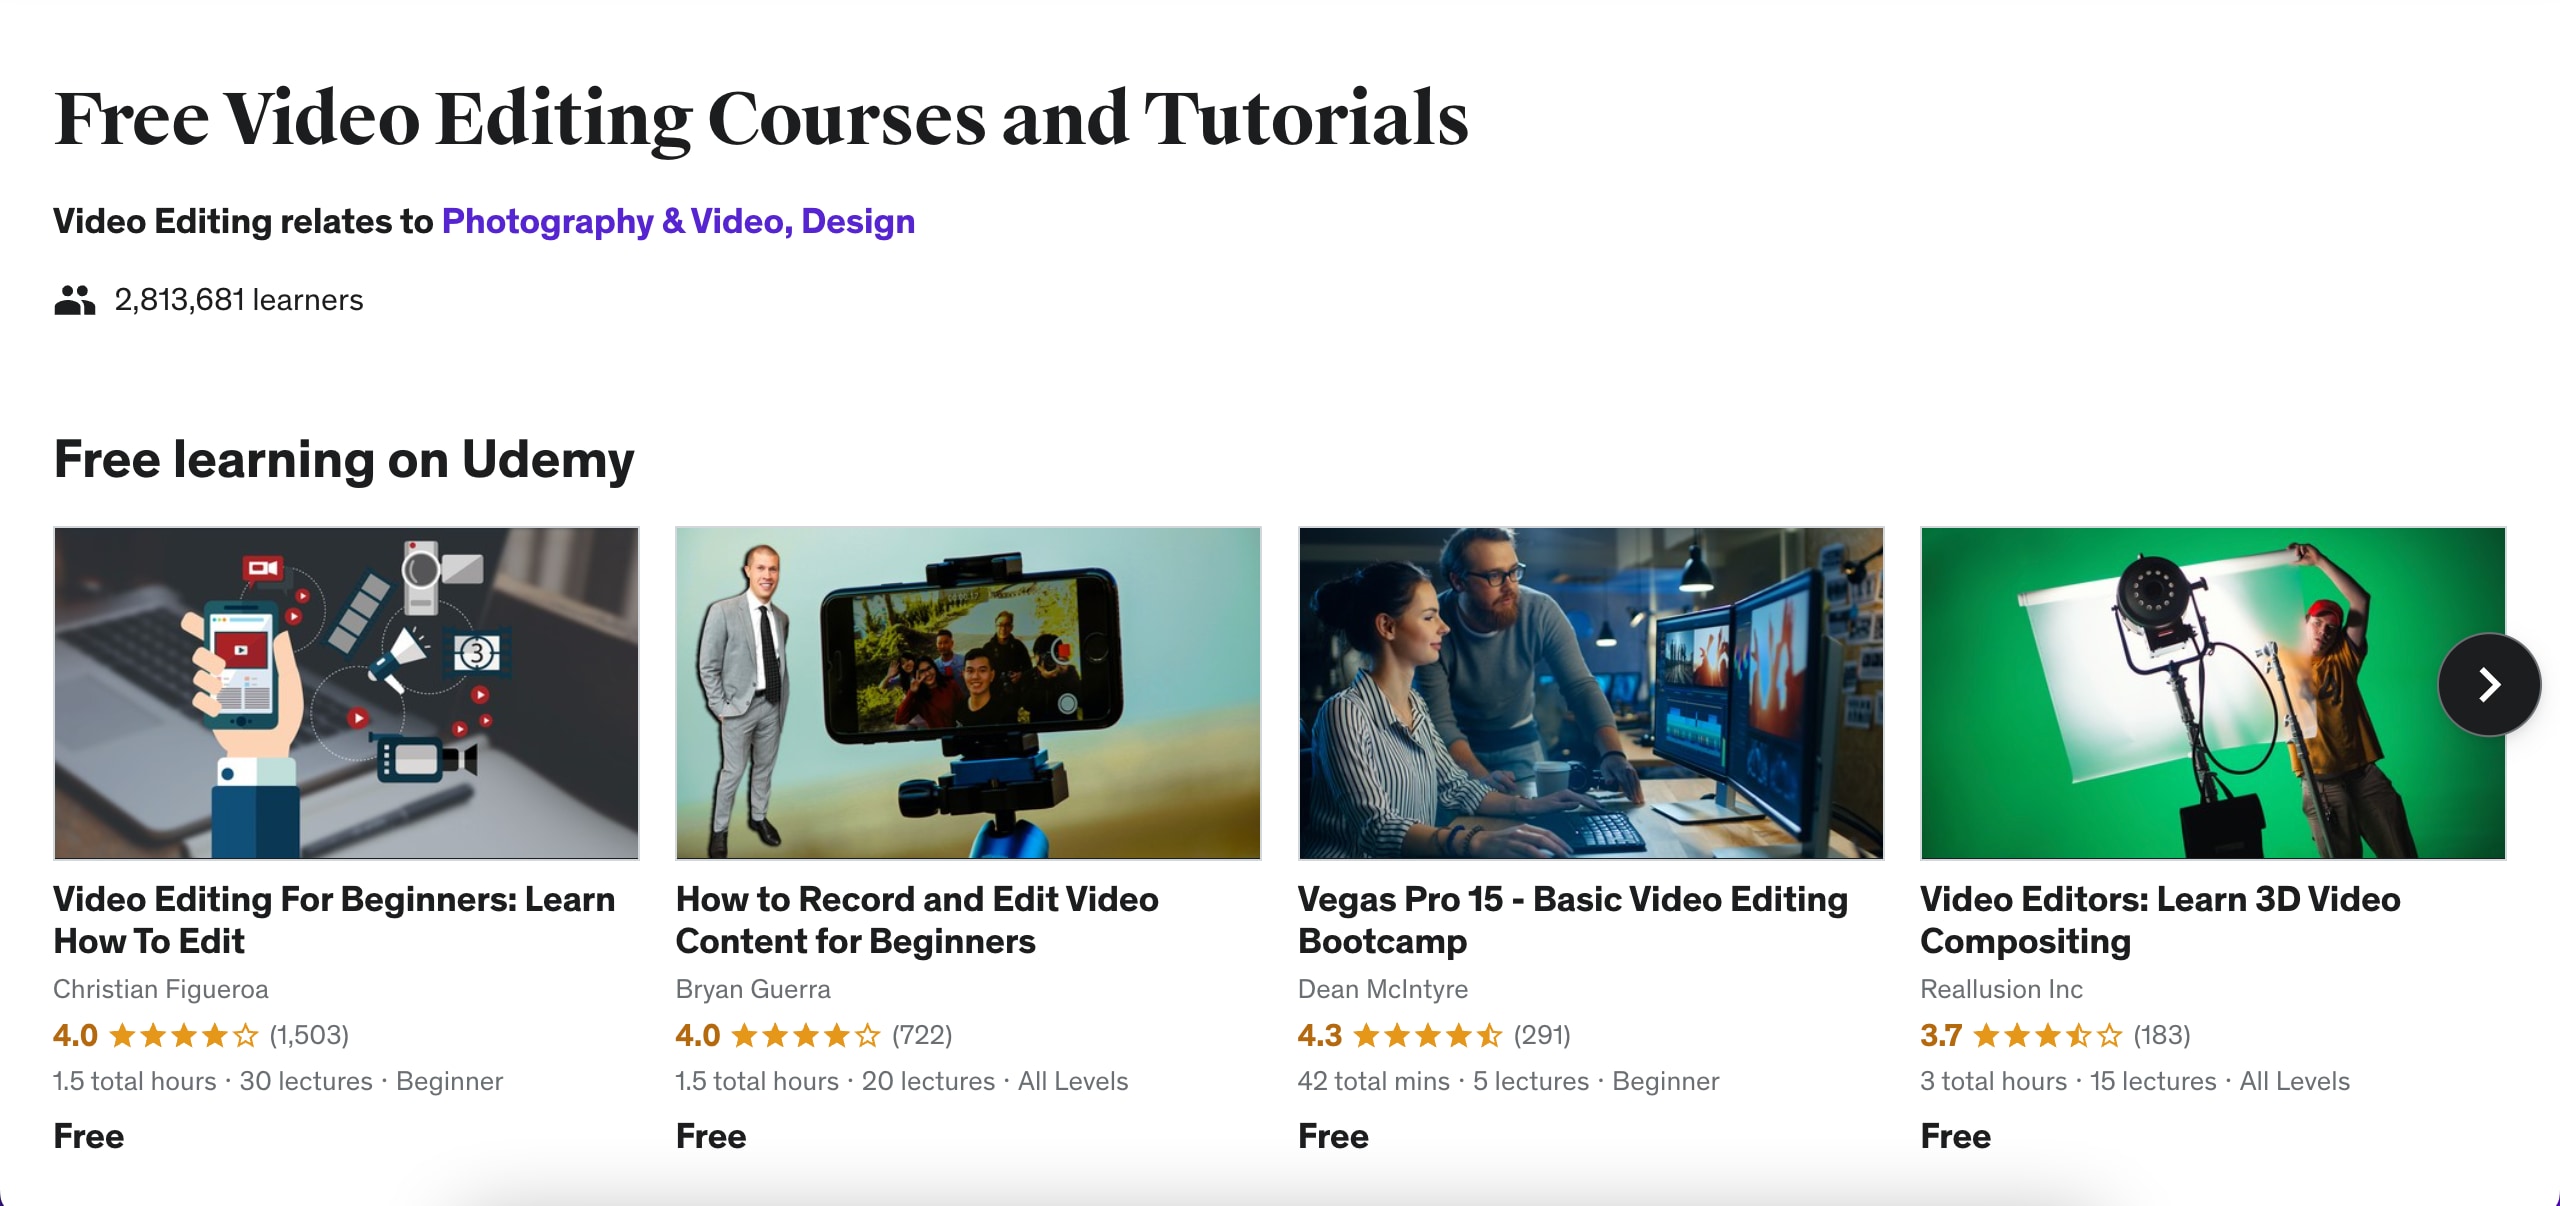
This pick is slightly different. Here, you can see a list of a few of the best video editing courses that are completely free. They are still taught by experts and offer plenty of useful knowledge, especially for beginners.
- Vendor: Udemy
- Cost: Free
- Duration: Unknown
- Rating: Varies
- Level: Beginner to Intermediate
Key topics inside this course:
- Beginner lessons on editing all types of videos
- How to record professional video content
- Beginner lessons for many different video editing platforms
- 3D Video Composition
- Understand how to use Premiere Pro
- Video editing on your smartphone
- Camtasia 9 Mastery Course
- How to create social media marketing videos
This is a list of many different video editing courses that are free on Udemy. Millions of members have enrolled and are learning for free. Best of all, it’s a great way to dive into video editing for free. Then, you can choose some of the paid ones for more advanced lessons.
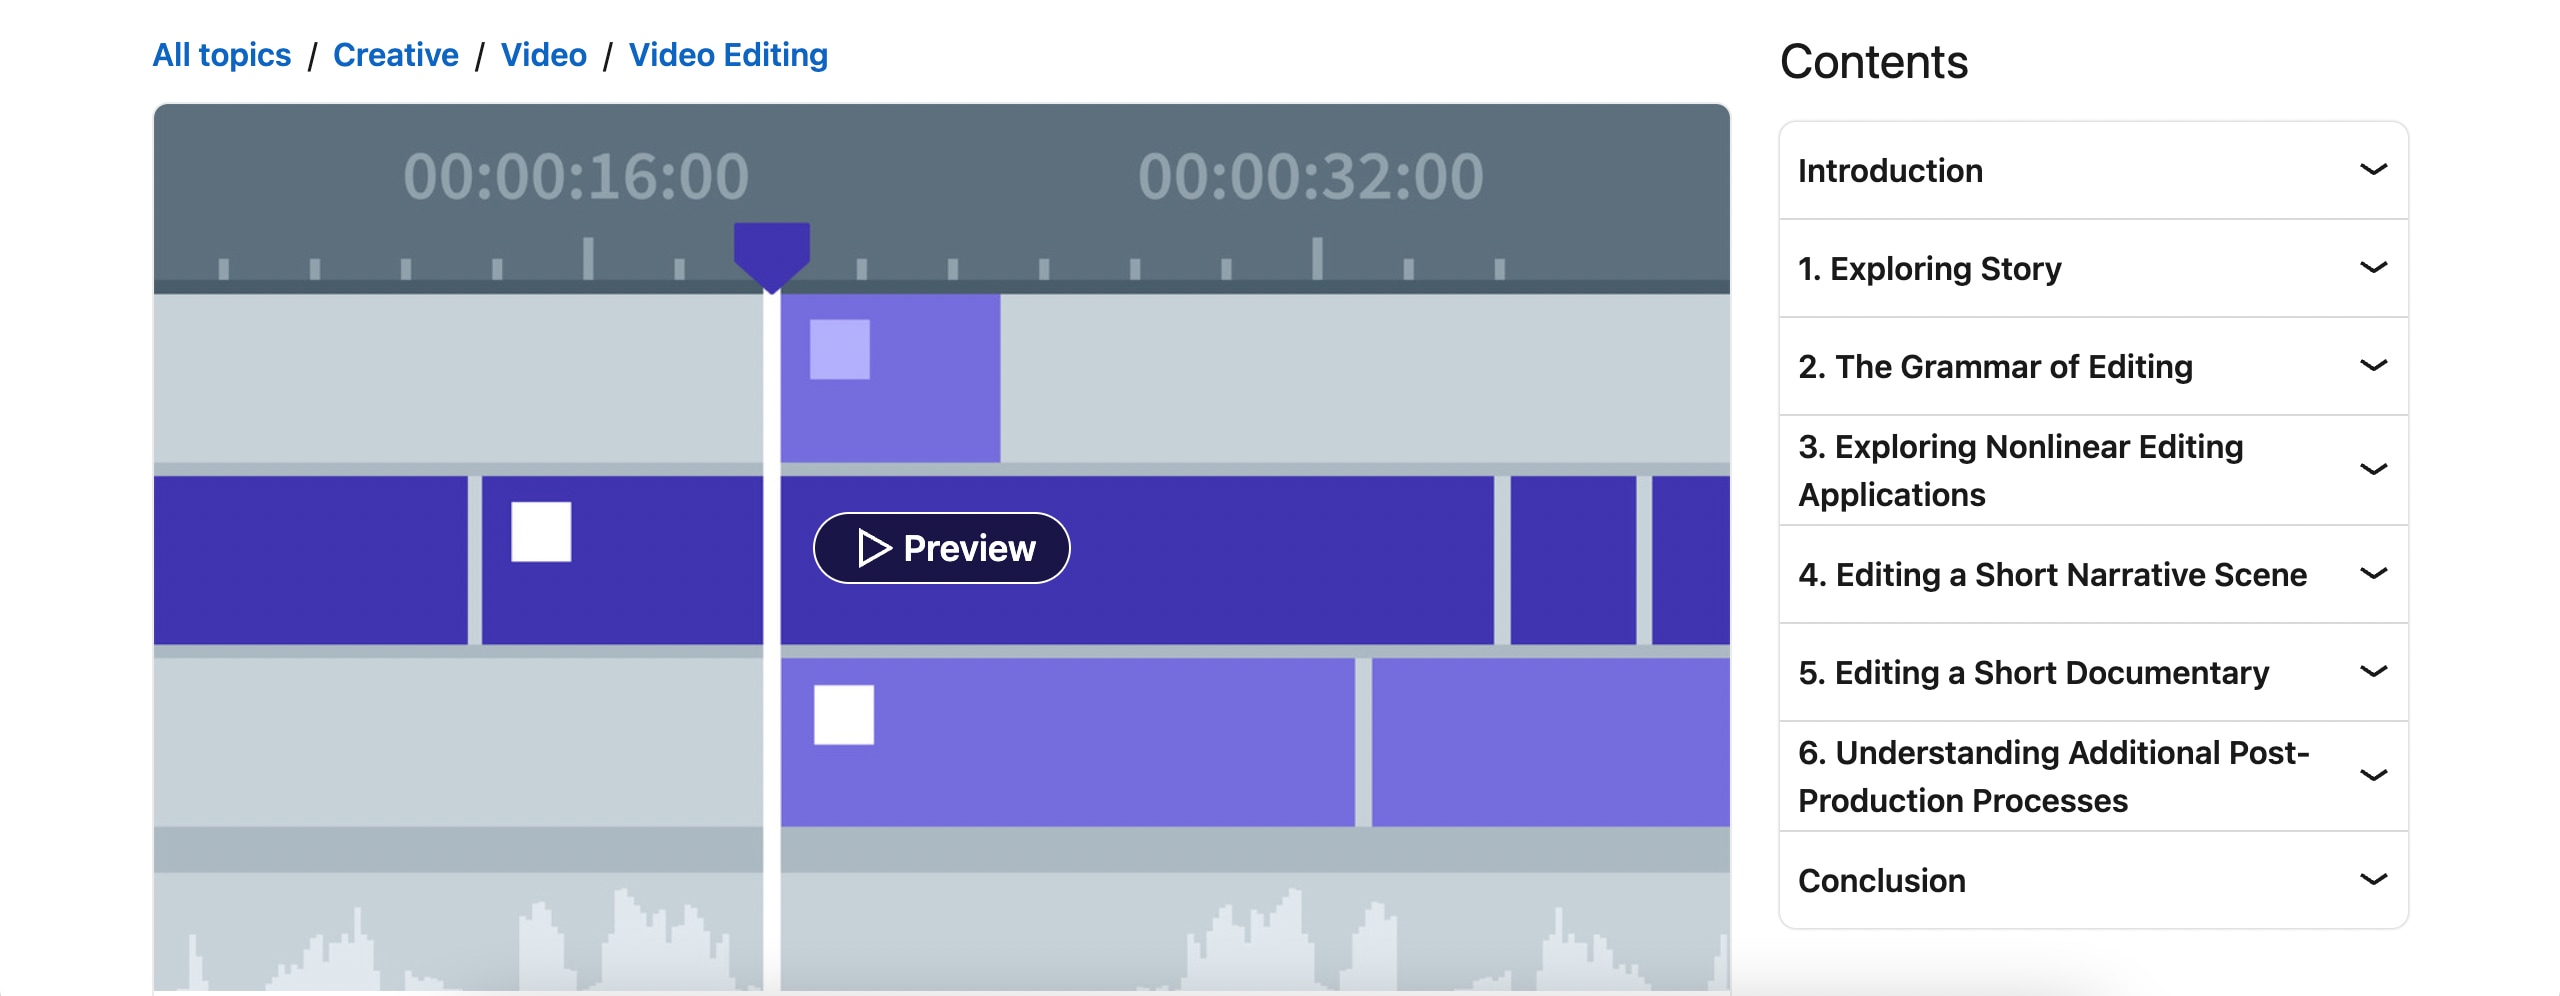
This course gives you a LinkedIn Learning Certificate and the knowledge to edit your first-ever video. There are 6 different lesson categories that you will enjoy going through. Each one focuses on another skill or principle.
- Vendor: LinkedIn Learning
- Cost: $34.99
- Duration: 2h 53min
- Rating: 4.7 / 5
- Level: Beginner
Key topics inside this course:
- The importance of storytelling in video editing
- Structures and transitions
- Timing and pacing
- Shot composition
- Comparing different editing applications
- Track-based editing vs. storyline-based editing
- Organizing your files
- How to edit a short documentary
- Audio editing lessons
- Post-production processes
This course offers a video editing certification that proves you’re well accustomed to the basic principles of this skill. You will know your way around different editing platforms. You will learn how to edit modern videos. And you will know exactly where to focus your efforts for improving yourself and your skills next.
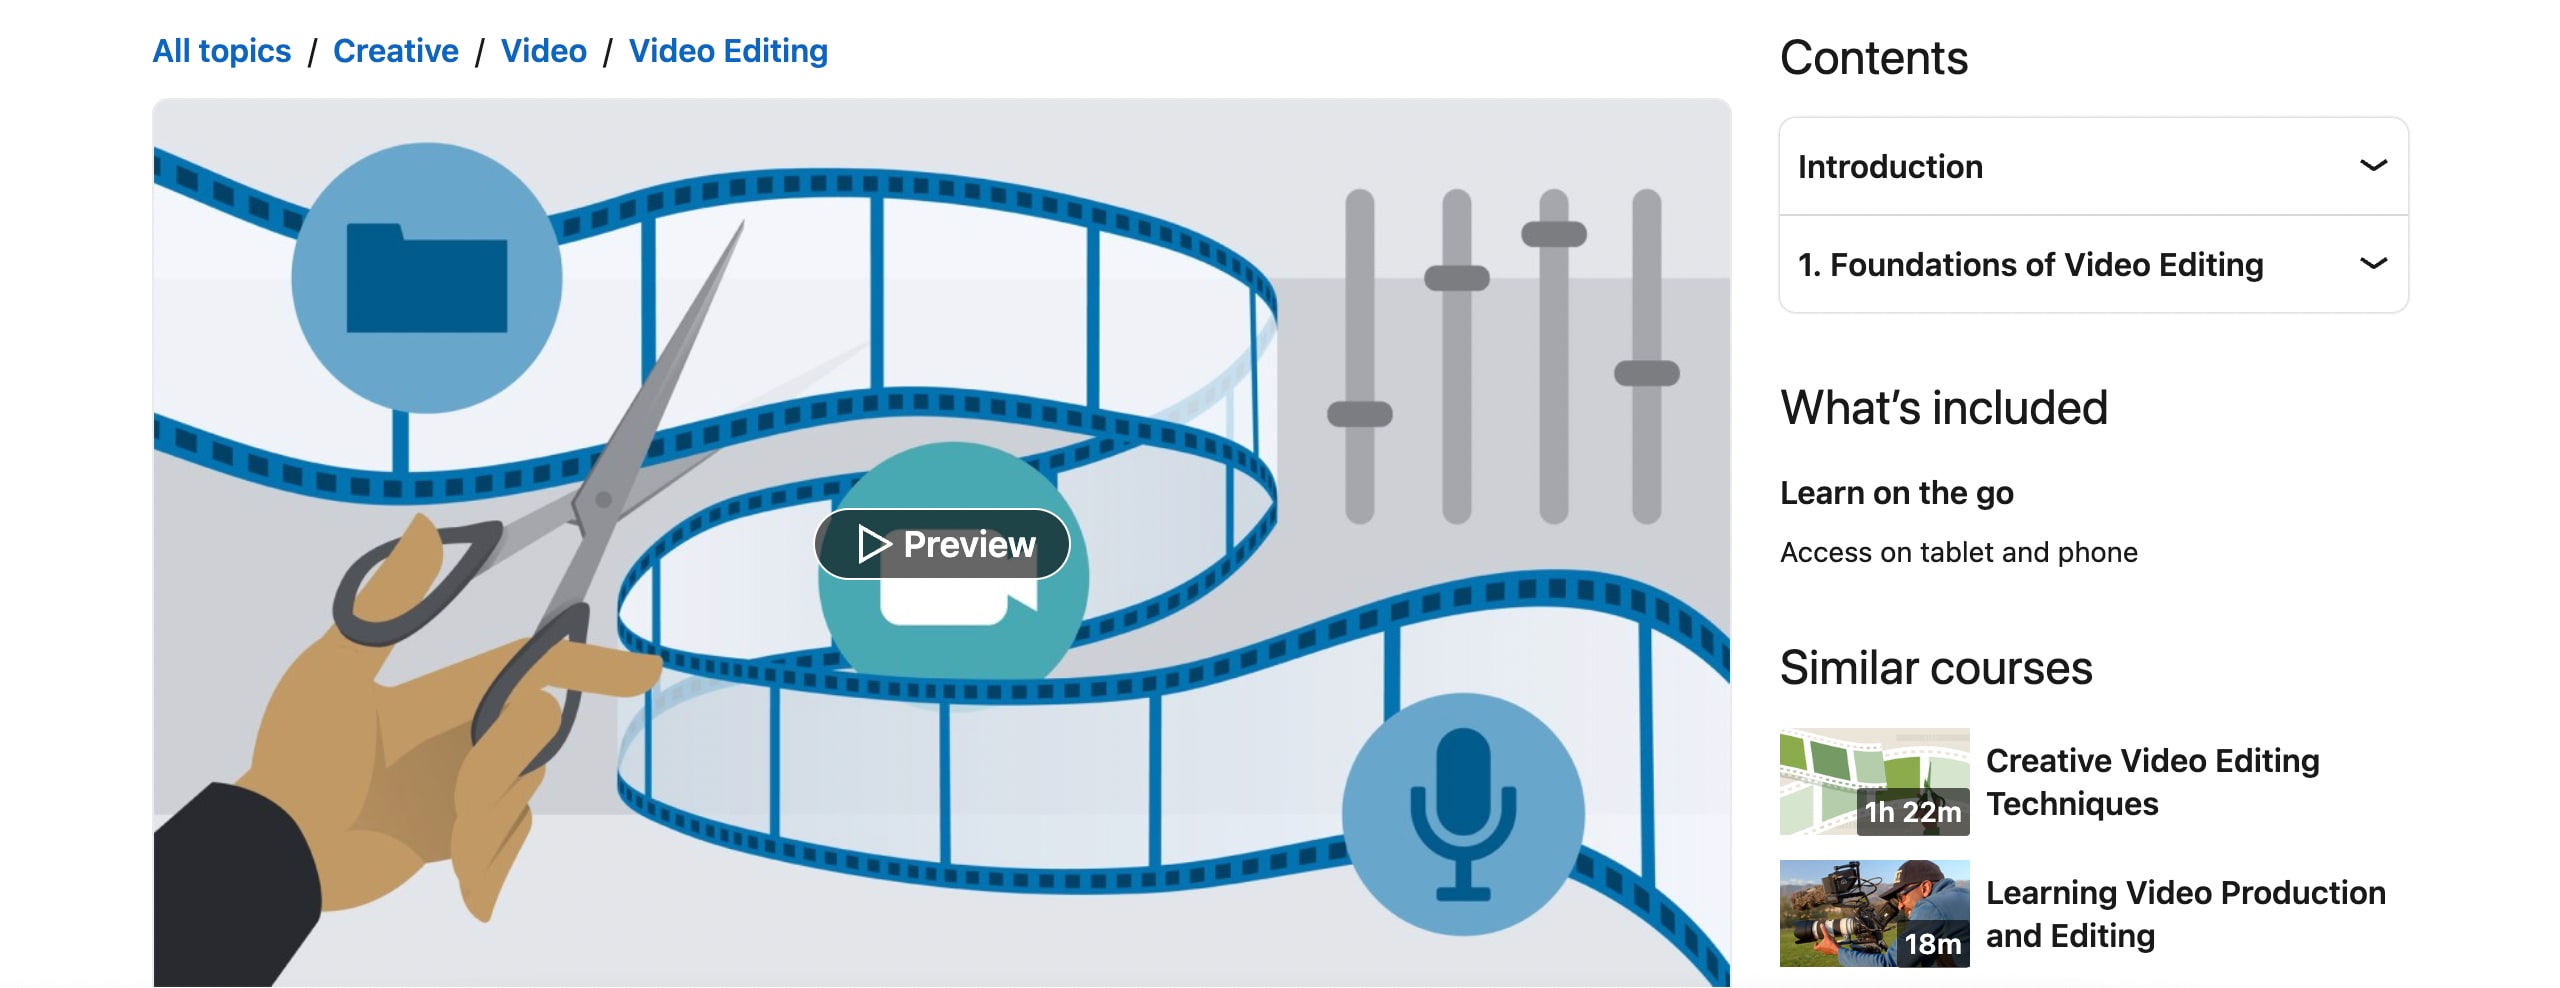
This course features essential video editing foundations in one exciting program. It’s a short course designed to introduce you to video editing. To be more precise, you will mainly learn about the post-production process of video editing.
- Vendor: LinkedIn Learning
- Cost: LinkedIn Learning Membership Only ($39.99)
- Duration: 37min
- Rating: 4.7 / 5
- Level: Beginner
Key topics inside this course:
- Trimming or fine-tuning the product
- Audio editing process
- How to add images to your videos
- Video effects tutorials
- Color correction
- How to use text to your advantage
- Export and delivery settings
This certificate will prove that you know what it takes to edit a video professionally. It tells us that you are familiar with all the different parts that come together to create a video worth watching.
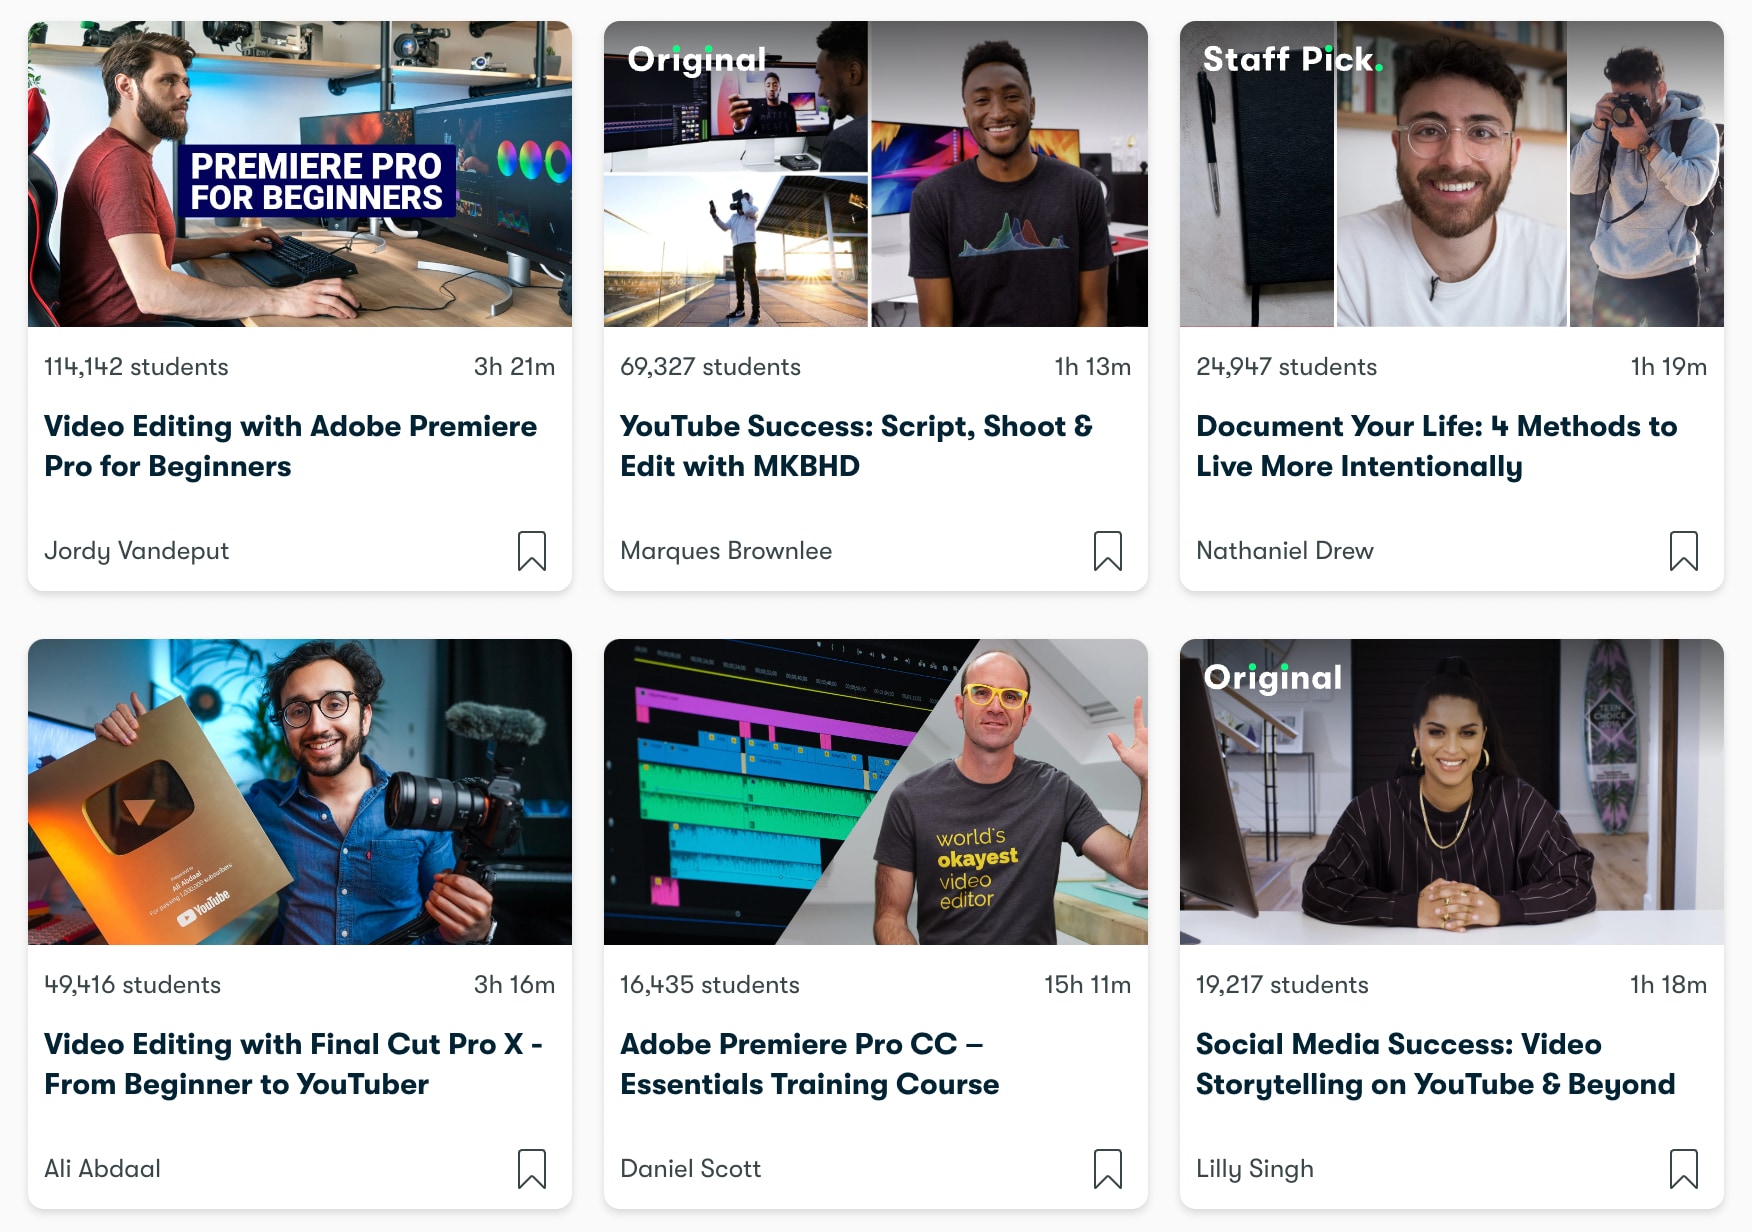
This is a list of video editing courses by some of the most popular video editors on the planet. You’ll learn from huge names such as Marques Brownies, Nathaniel Drew, Jordy Vandeput, and many more. So, pick your favorite, and start learning.
- Vendor: Skillshare
- Cost: Depends
- Duration: 37min
- Rating: Varies
- Level: From Beginner to Pro
Key topics inside this course:
- How to create mind-blowing Youtube videos
- Adobe Premiere Pro for Beginners
- How to document your life
- Final Cut Pro X - Beginner to Youtuber
- Introduction to Filmmaking
- Mastering TikTok videos
- iPhone Filmmaking
- Advanced training for all video editing apps
There are courses for all skill levels here. You can start as a complete beginner and finish as a master who knows how to create a worthwhile video. Or, you can choose one that improves your current skills.
The Complete Video Production Bootcamp
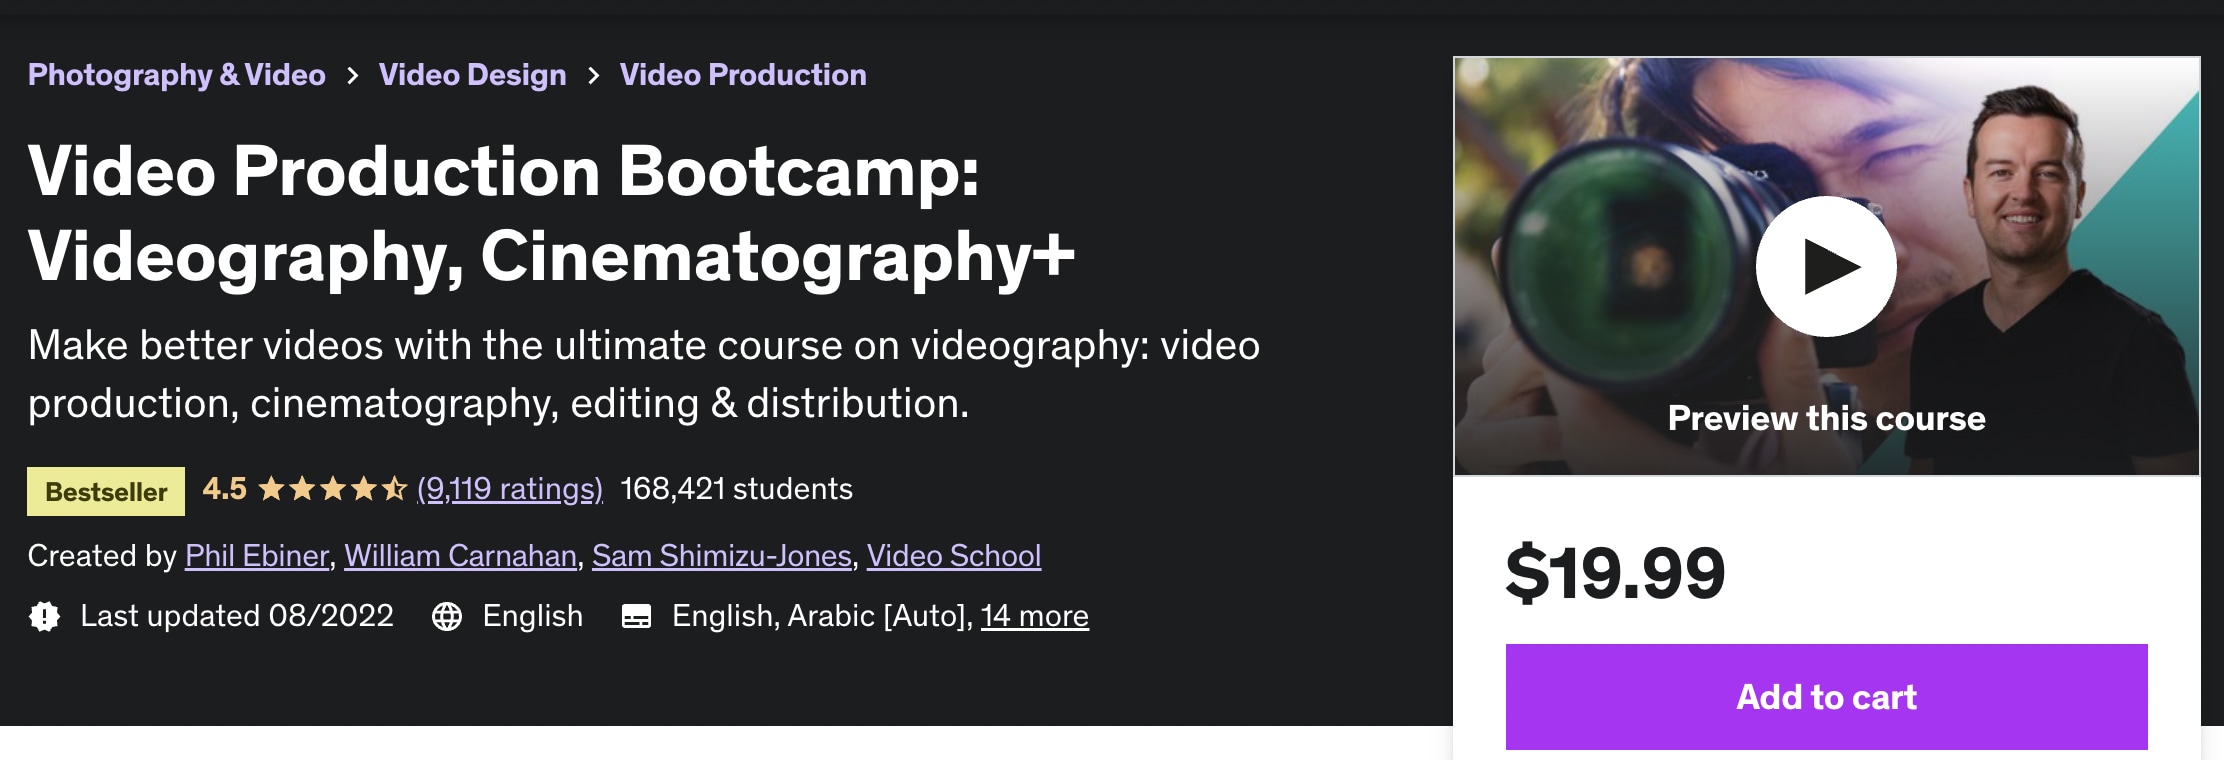
A nine-hour course on everything video editing related. To be more precise, you will dive into video production tutorials, cinematography, editing & distribution, and more. Companies like Nasdaq, Box, NetApp, and more offer this course to their employees.
- Vendor: Udemy
- Cost: $19.99
- Duration: 9h
- Rating: 4.5 / 5
- Level: Beginner
Key topics inside this course:
- Video storytelling
- How to record better audio
- Tips for posting videos online
- Discover the best equipment to use
- How to set up the perfect lighting
- How to get more engagement on your videos
- Create professional videos with any equipment
Over 160.000 students have benefited from the contents of this course. It dives into both beginner and advanced video editing lessons. So even if you don’t have any experience in this, you will still easily understand everything taught inside.
3. Video Editing Courses With Certification For Mobile Users
The courses you will see in this list are exclusively for mobile users. You can still make great videos on your mobile device if you don’t have a computer. All of the knowledge you need for this is below.
Smartphone Video For Beginners – iPhone Video Editing Course
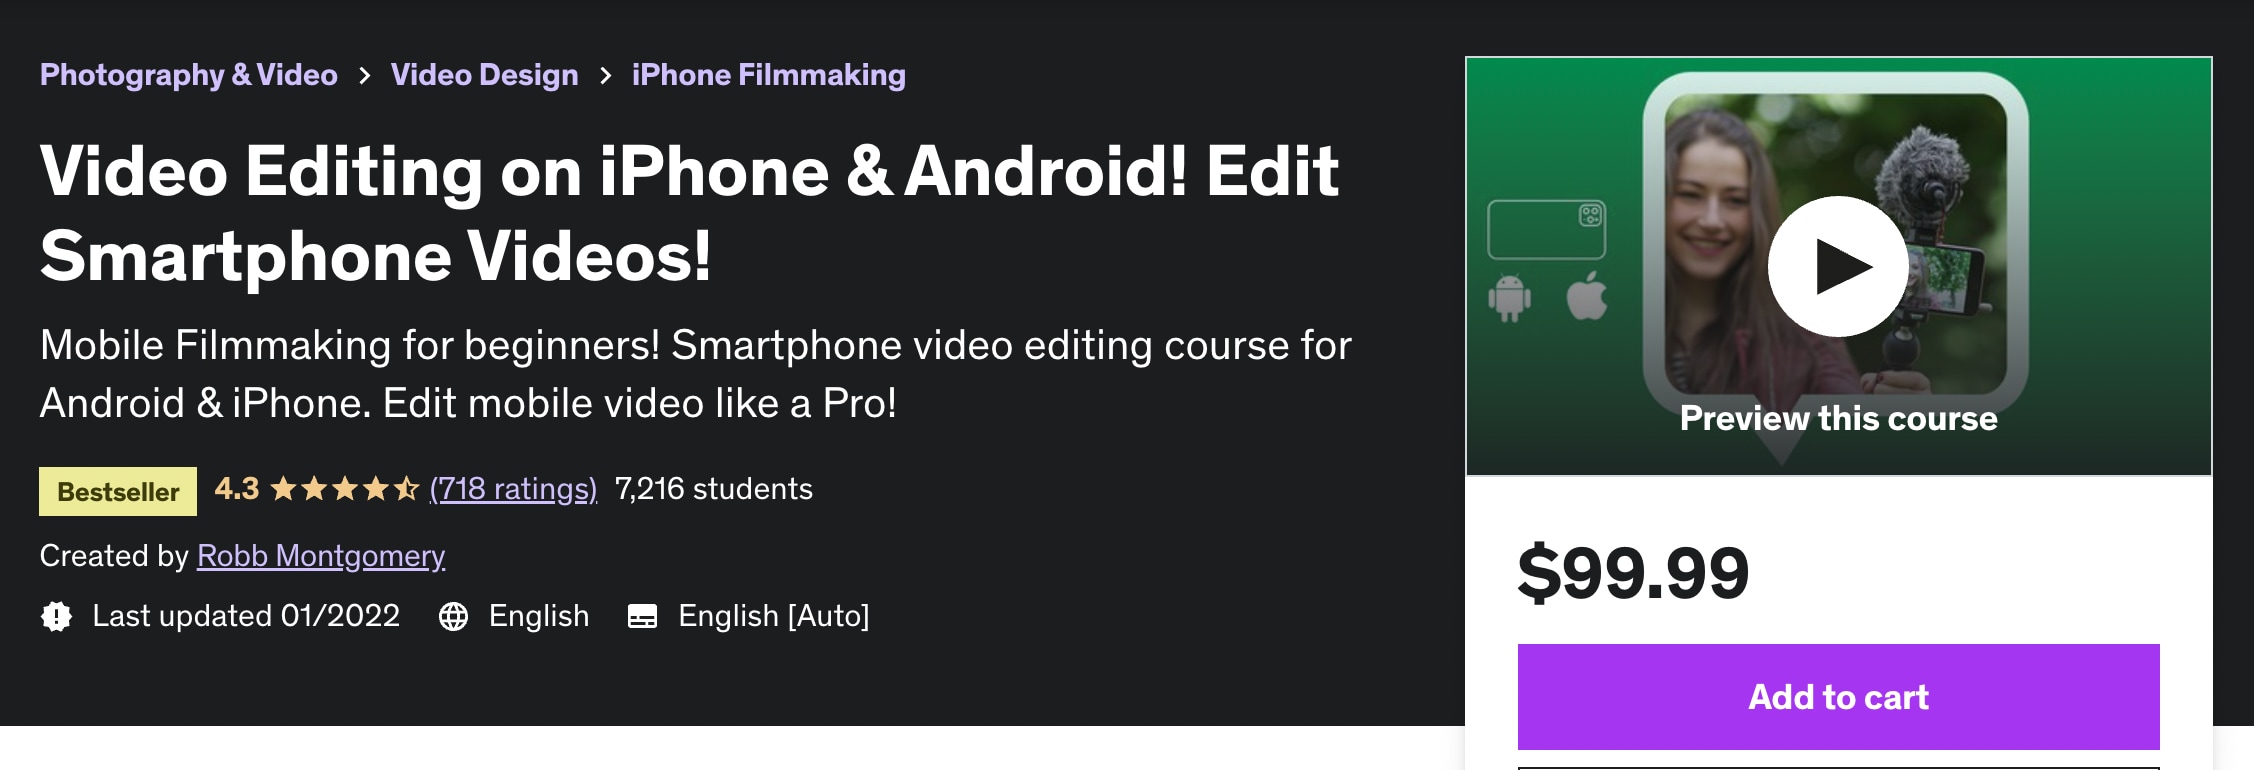
Dive into five hours of content teaching you how to create unbelievable videos on your phone. You’ll be surprised by how it’s possible to create such professional videos on a smartphone.
- Vendor: Udemy
- Cost: $99.99
- Duration: 5h
- Rating: 4.3 / 5
- Level: Beginner
Key topics inside this course:
- Must-have gear for editing on a smartphone (Affordable options)
- How to set up your phone’s camera for optimal results
- Must-have free apps for professional smartphone video editing
- Using gimbals, action cams, and drones with your phone
- Video storytelling on a smartphone
- Phone resolutions, frame rates, ProRes, color space, and more
- How to make Cinematic shots, hit the right angles, and similar
This outstanding course will give you a certification proving you’re one of the rare video editors who can create wonders from their phones. From now on, you can’t use the excuse that you don’t have an excellent PC to create amazing videos.
4. Cinematic Level Video Editing Courses
The final category will introduce you to video editing courses online with certification for cinematic-level skills. Completing these courses will prove you are a master video editor who knows no bounds.
VIDEO EDITING. Techniques loved by pro broadcast filmmakers
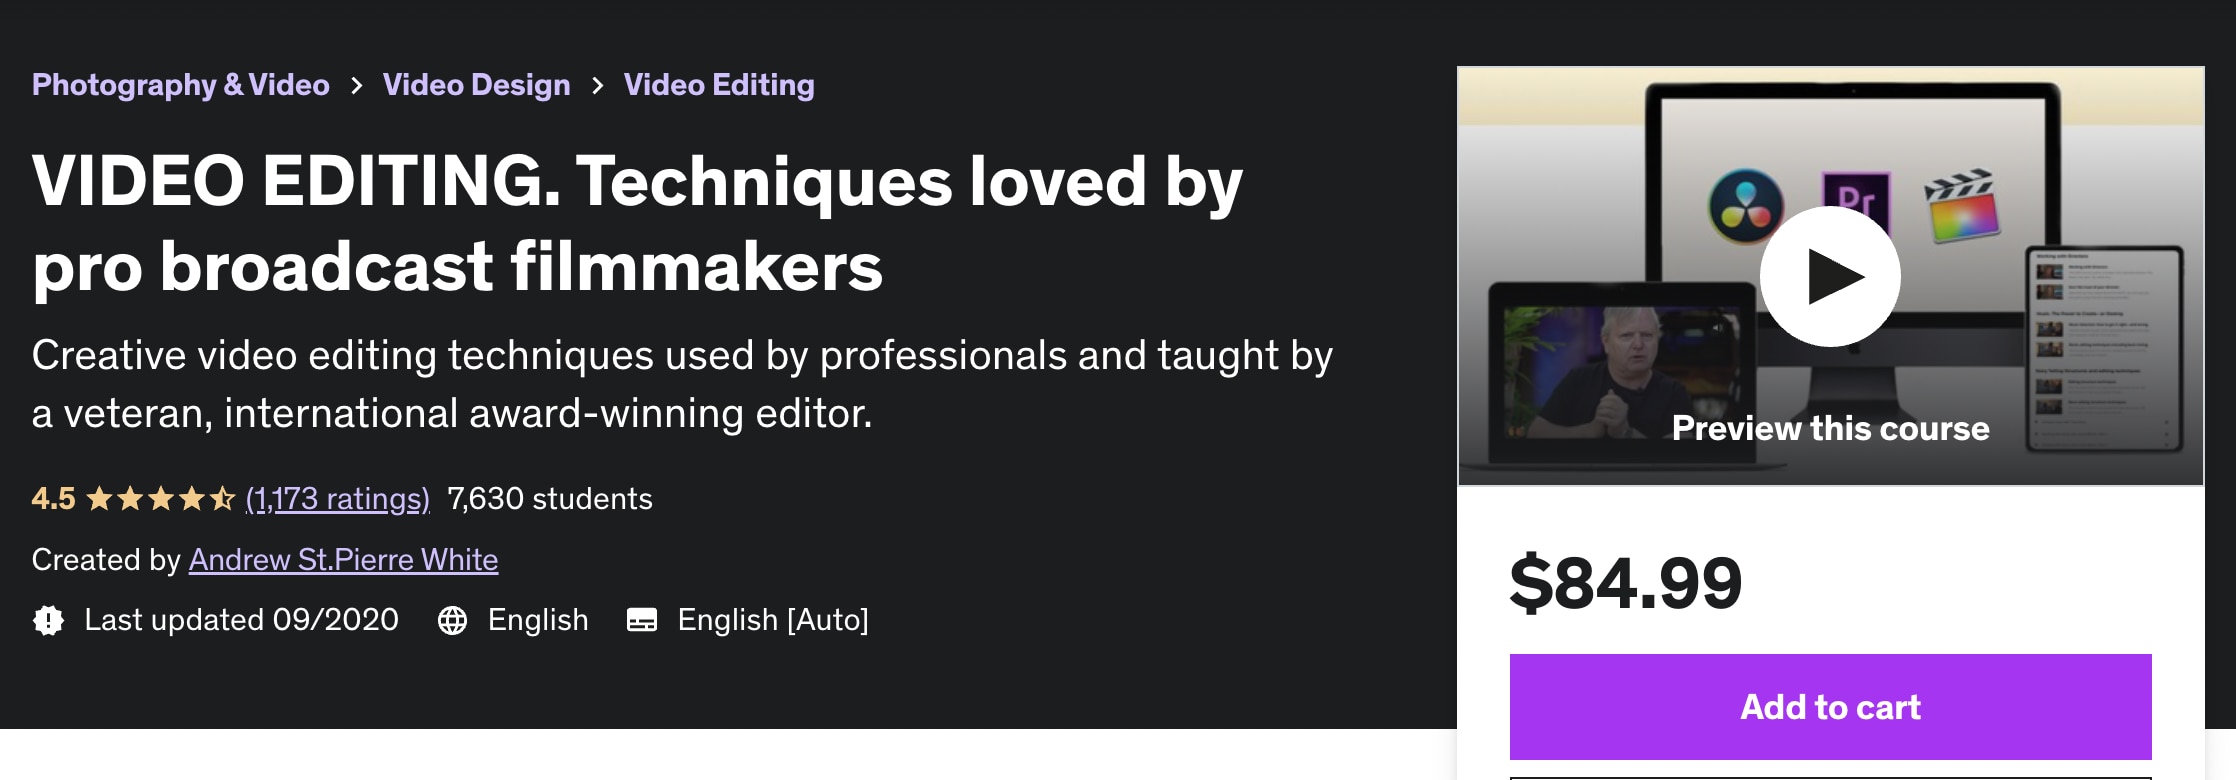
Your teacher for this course will be Andrew St.Pierre White, an award-winning video editing veteran. He will teach you tips and tricks used by professionals to this day. Timeless advice that will take your career to the next level.
- Vendor: Udemy
- Cost: $84.99
- Duration: 3h 30min
- Rating: 4.5 / 5
- Level: Advanced to Pro
Key topics inside this course:
- How to entertain and inspire any audience
- Understand the balance between good editing and good content
- Amazing techniques used in TV production
- Turn great editing into great results
- Turn amateur videos into professional productions
- Most common mistakes filmmakers make
Once you know the basics of video editing, this course will take your skills to the next level. You will learn how the big players make professional videos that capture massive audiences. Plus, your mentor will show you how to work with big names in this industry.
The History of Film and Video Editing
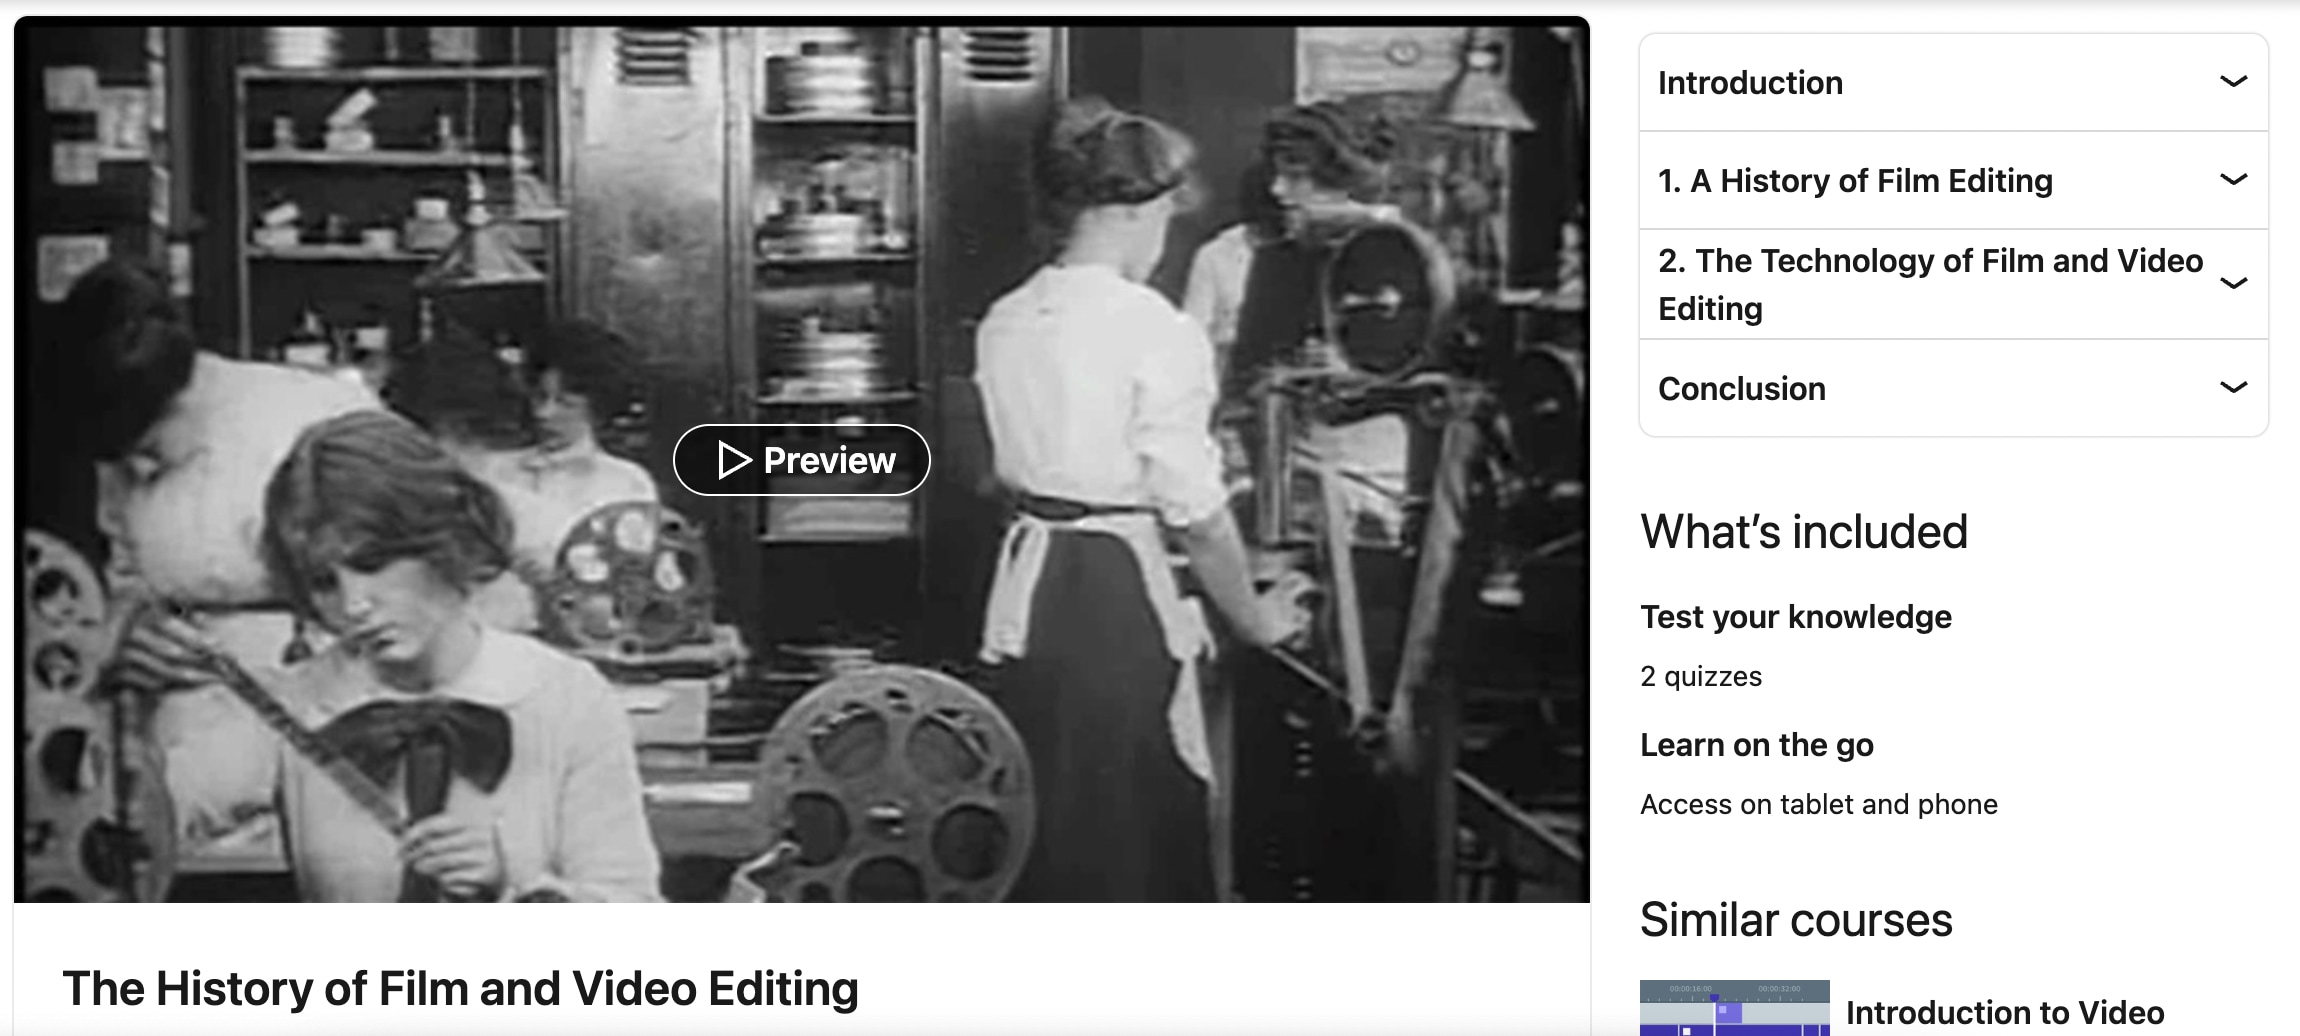
Never underestimate how much history can teach you. Completing this course will teach you more about video editing than many pro filmmakers. Find out how video editing has progressed through the last century.
- Vendor: LinkedIn Learning
- Cost: $34.99
- Duration: 2h 10min
- Rating: 4.8 / 5
- Level: Everyone
Key topics inside this course:
- Early days of photography and film
- Continuity editing and montage theory
- When sound was born
- Establishing the standards for editing
- Evolution of editing techniques
- Technology
- The rise of the digital era
By learning the history of video editing, you will be more aware. You will realize what people love to see and detect patterns. These patterns will guide you toward becoming a professional video editor.
Make Your Video Editing Journey Easier
Now that we’re done with learning, it’s time to start doing. You already have enough fantastic courses to learn everything necessary to edit videos professionally. But now, how do you use your skills and achieve the easiest and quickest results?
Your best option is to use the Filmora video editor.
What Is Filmora and Filmora?
It’s as powerful as Adobe Premiere Pro but more straightforward to navigate. In addition, Filmora lets you command an arsenal of unique tools necessary for creating modern videos.
Free Download For Win 7 or later(64-bit)
Free Download For macOS 10.14 or later
Anyone on both Windows and Mac can use Filmora. In addition, if you’re a mobile user, you can download Filmora and enjoy the same benefits.
Aside from its easy-to-use interface, Filmora is packed with editing resources that will never leave you wondering how or what to do next. Of course, you can watch the free Youtube tutorials to master the platform entirely.
For example, we have prepared you with a video tutorial below to start your video editing journey with no delay!
Lastly, you can easily export in any format necessary for your project. It doesn’t get easier than this.
Conclusion
The video editing certification online courses you see here are more than enough to prepare you. You will learn everything it takes to edit any video. Use this information wisely and take advantage of this beautiful opportunity to become one of the best video editors.
Video Editing Tutorials - Mastering The Basics
| Course Name | Vendor |
|---|---|
| Video Production Essentials | Fiverr Learn |
| Free Video Editing Courses and Tutorials | Udemy |
| Introduction to Video Editing | |
| Video editing fundamentals | |
| Online Video Editing Classes | Skillshare |
| The Complete Video Production Bootcamp | Udemy |
Video Editing Courses With Certification For Mobile Users
| Course Name | Vendor |
|---|---|
| Smartphone Video For Beginners – iPhone Video Editing Course | Udemy |
Cinematic Level Video Editing Courses
| Course Name | Vendor |
|---|---|
| VIDEO EDITING. Techniques loved by pro broadcast filmmakers | Udemy |
| The History of Film and Video Editing |
What You Will Learn From Each Course
Each video editing course online with certification offers something unique. Below, you can see a detailed comparison between all of them. As a result, you’ll know exactly which course to choose and which video editing tool to start with.
1. Courses With Certification for Popular Video Editor Platforms
First, let’s break down all the courses in this group. You’ll learn about its ratings, duration, contents, and more.
Premiere Pro CC for Beginners: Video Editing in Premiere

Initially, this course dives into the basics of video editing. Then, you get into more advanced topics that will help you distinguish yourself from the complete beginners.
- Vendor: Udemy
- Cost: $19.99
- Duration: 24.5 hours
- Rating: 4.7 / 5
- Level: Beginner-Advanced
Key topics inside this course:
- How to export your videos for High-Definition Playback and 4K
- Video color correction
- How to apply visual effects
- Design clean and modern titles for any video
- The editing process of a video from beginning to end
- Load the perfect settings at the start of each project
- Color grading
- Edit green screen footage
- How to add motion to titles, photos, and videos
At the end of the course, you’ll have the skills necessary to edit an entire video from start to finish. Additionally, you’ll know your way around Adobe Premiere Pro. Most of the topics taught inside will be enough to help you land a video editing job or edit your videos professionally.
Video Editing in DaVinci Resolve 18/17

With this video editing course, you will master editing in DaVinci Resolve. It includes beginner lessons, as well as a few advanced editing techniques. Over 30.000 students have currently completed it.
- Vendor: Udemy
- Cost: $84.99
- Duration: 11.5 hours
- Rating: 4.6 / 5
- Level: Beginner-Advanced
Key topics inside this course:
- How to add effects to videos in DaVinci Resolve
- Color Grading with multiple tools
- Master different types of Nodes
- Complete tests doing various projects
- Cut page quick and easy video editing
- Adding motion graphics
- Effective color-correcting methods
- Using Color Wheels, Power windows, Scopes, Curves, Qualifiers, and more
This course aims to teach you how to use DaVinci Resolve. After you’ve mastered the platform, the mentor shows you various tips and tricks to edit videos more professionally using this tool.
PowerDirector 15 - Video Editing for PC Users

Power Director 15 is a great app to learn video editing if you’re a Windows user. This course covers everything necessary for you to know your way around this program quickly.
- Vendor: Udemy
- Cost: $13.99
- Duration: 4h
- Rating: 4.5 / 5
- Level: Beginner
Key topics inside this course:
- How to export high-quality videos for any device or platform
- How to use every feature in Power Director, including the newest ones
- Add professional titles and animated graphics to any video
- Master using blend modes, masks, and the action camera center
The knowledge in this video editing course online with certification will allow you to edit videos the way you envision. You will have the ability to create anything you want, and deliver exceptional results.

Mastering Final Cut Pro is an online video editing course with certification that grants you the knowledge to use this tool. In addition, you and over 30.000 other students get to learn from Apple Certified trainers.
- Vendor: Coursera
- Cost: $49
- Duration: 40h
- Rating: 4.5 / 5
- Level: Beginner
Key topics inside this course:
- The best ways to import and export project files with Final Cut Pro
- How to apply effects and modern transitions
- Creating a project and editing a video from start to finish
- Change the timing of clips
This is the perfect course if you’ve never used Final Cut Pro. It’s beginner-friendly and takes you through every step of using the platform, from creating a project to editing it and finally exporting a high-quality video.
Learning Final Cut Pro X – Video Editing Mastery

This is a video editing course for anyone using Mavericks OS. It’s designed to take full advantage of this Operating System alongside the Final Cut Pro X platform.
- Vendor: Udemy
- Cost: $14.99
- Duration: 6h 30min
- Rating: 4.7 / 5
- Level: Beginner
Key topics inside this course:
- Mastering the user interface and choosing your preferences
- Learning helpful shortcuts to speed up your workflow
- Best and quickest methods to import media
- How to organize your clips
- Using the timeline
- Working with effects, keyframes, compounds clips, and audio clips
- How to use generators and white screens
- The best export settings and other tips
If you’ve ever wanted to master Final Cut Pro X, there’s no better place to go. This course is designed to start on a beginner-friendly level. But, it moves to more advanced lessons later down the line.
2. Video Editing Tutorials - Mastering The Basics
The following video editing courses include lessons mainly on the basics of video editing. They won’t focus on any specific platform or tool. Instead, you’ll be learning the most important principles of creating a high-quality and modern video.

A fairly simple course designed to teach you the process of creating and editing a video from scratch. This is one of the best video editing courses online, featuring several professional mentors.
- Vendor: Fiverr Learn
- Cost: $24
- Duration: 6h 38min
- Rating: 4.8 / 5
- Level: Beginner to Intermediate
Key topics inside this course:
- What equipment to use for professional video editing
- How to shoot high-quality video with your smartphone
- Professional video and audio recording techniques
- Exporting settings for high-quality online viewing
- Fundamentals of using a DSLR or Mirrorless camera
- Create high-converting CTAs for your videos
The course will help you understand crucial facts about many different types of videos that are in demand today. You’ll learn how to use and navigate video editing tools to create anything you can imagine. The mentors even offer a few tips for growing your own Youtube channel.
Free Video Editing Courses and Tutorials

This pick is slightly different. Here, you can see a list of a few of the best video editing courses that are completely free. They are still taught by experts and offer plenty of useful knowledge, especially for beginners.
- Vendor: Udemy
- Cost: Free
- Duration: Unknown
- Rating: Varies
- Level: Beginner to Intermediate
Key topics inside this course:
- Beginner lessons on editing all types of videos
- How to record professional video content
- Beginner lessons for many different video editing platforms
- 3D Video Composition
- Understand how to use Premiere Pro
- Video editing on your smartphone
- Camtasia 9 Mastery Course
- How to create social media marketing videos
This is a list of many different video editing courses that are free on Udemy. Millions of members have enrolled and are learning for free. Best of all, it’s a great way to dive into video editing for free. Then, you can choose some of the paid ones for more advanced lessons.

This course gives you a LinkedIn Learning Certificate and the knowledge to edit your first-ever video. There are 6 different lesson categories that you will enjoy going through. Each one focuses on another skill or principle.
- Vendor: LinkedIn Learning
- Cost: $34.99
- Duration: 2h 53min
- Rating: 4.7 / 5
- Level: Beginner
Key topics inside this course:
- The importance of storytelling in video editing
- Structures and transitions
- Timing and pacing
- Shot composition
- Comparing different editing applications
- Track-based editing vs. storyline-based editing
- Organizing your files
- How to edit a short documentary
- Audio editing lessons
- Post-production processes
This course offers a video editing certification that proves you’re well accustomed to the basic principles of this skill. You will know your way around different editing platforms. You will learn how to edit modern videos. And you will know exactly where to focus your efforts for improving yourself and your skills next.

This course features essential video editing foundations in one exciting program. It’s a short course designed to introduce you to video editing. To be more precise, you will mainly learn about the post-production process of video editing.
- Vendor: LinkedIn Learning
- Cost: LinkedIn Learning Membership Only ($39.99)
- Duration: 37min
- Rating: 4.7 / 5
- Level: Beginner
Key topics inside this course:
- Trimming or fine-tuning the product
- Audio editing process
- How to add images to your videos
- Video effects tutorials
- Color correction
- How to use text to your advantage
- Export and delivery settings
This certificate will prove that you know what it takes to edit a video professionally. It tells us that you are familiar with all the different parts that come together to create a video worth watching.

This is a list of video editing courses by some of the most popular video editors on the planet. You’ll learn from huge names such as Marques Brownies, Nathaniel Drew, Jordy Vandeput, and many more. So, pick your favorite, and start learning.
- Vendor: Skillshare
- Cost: Depends
- Duration: 37min
- Rating: Varies
- Level: From Beginner to Pro
Key topics inside this course:
- How to create mind-blowing Youtube videos
- Adobe Premiere Pro for Beginners
- How to document your life
- Final Cut Pro X - Beginner to Youtuber
- Introduction to Filmmaking
- Mastering TikTok videos
- iPhone Filmmaking
- Advanced training for all video editing apps
There are courses for all skill levels here. You can start as a complete beginner and finish as a master who knows how to create a worthwhile video. Or, you can choose one that improves your current skills.
The Complete Video Production Bootcamp

A nine-hour course on everything video editing related. To be more precise, you will dive into video production tutorials, cinematography, editing & distribution, and more. Companies like Nasdaq, Box, NetApp, and more offer this course to their employees.
- Vendor: Udemy
- Cost: $19.99
- Duration: 9h
- Rating: 4.5 / 5
- Level: Beginner
Key topics inside this course:
- Video storytelling
- How to record better audio
- Tips for posting videos online
- Discover the best equipment to use
- How to set up the perfect lighting
- How to get more engagement on your videos
- Create professional videos with any equipment
Over 160.000 students have benefited from the contents of this course. It dives into both beginner and advanced video editing lessons. So even if you don’t have any experience in this, you will still easily understand everything taught inside.
3. Video Editing Courses With Certification For Mobile Users
The courses you will see in this list are exclusively for mobile users. You can still make great videos on your mobile device if you don’t have a computer. All of the knowledge you need for this is below.
Smartphone Video For Beginners – iPhone Video Editing Course

Dive into five hours of content teaching you how to create unbelievable videos on your phone. You’ll be surprised by how it’s possible to create such professional videos on a smartphone.
- Vendor: Udemy
- Cost: $99.99
- Duration: 5h
- Rating: 4.3 / 5
- Level: Beginner
Key topics inside this course:
- Must-have gear for editing on a smartphone (Affordable options)
- How to set up your phone’s camera for optimal results
- Must-have free apps for professional smartphone video editing
- Using gimbals, action cams, and drones with your phone
- Video storytelling on a smartphone
- Phone resolutions, frame rates, ProRes, color space, and more
- How to make Cinematic shots, hit the right angles, and similar
This outstanding course will give you a certification proving you’re one of the rare video editors who can create wonders from their phones. From now on, you can’t use the excuse that you don’t have an excellent PC to create amazing videos.
4. Cinematic Level Video Editing Courses
The final category will introduce you to video editing courses online with certification for cinematic-level skills. Completing these courses will prove you are a master video editor who knows no bounds.
VIDEO EDITING. Techniques loved by pro broadcast filmmakers

Your teacher for this course will be Andrew St.Pierre White, an award-winning video editing veteran. He will teach you tips and tricks used by professionals to this day. Timeless advice that will take your career to the next level.
- Vendor: Udemy
- Cost: $84.99
- Duration: 3h 30min
- Rating: 4.5 / 5
- Level: Advanced to Pro
Key topics inside this course:
- How to entertain and inspire any audience
- Understand the balance between good editing and good content
- Amazing techniques used in TV production
- Turn great editing into great results
- Turn amateur videos into professional productions
- Most common mistakes filmmakers make
Once you know the basics of video editing, this course will take your skills to the next level. You will learn how the big players make professional videos that capture massive audiences. Plus, your mentor will show you how to work with big names in this industry.
The History of Film and Video Editing

Never underestimate how much history can teach you. Completing this course will teach you more about video editing than many pro filmmakers. Find out how video editing has progressed through the last century.
- Vendor: LinkedIn Learning
- Cost: $34.99
- Duration: 2h 10min
- Rating: 4.8 / 5
- Level: Everyone
Key topics inside this course:
- Early days of photography and film
- Continuity editing and montage theory
- When sound was born
- Establishing the standards for editing
- Evolution of editing techniques
- Technology
- The rise of the digital era
By learning the history of video editing, you will be more aware. You will realize what people love to see and detect patterns. These patterns will guide you toward becoming a professional video editor.
Make Your Video Editing Journey Easier
Now that we’re done with learning, it’s time to start doing. You already have enough fantastic courses to learn everything necessary to edit videos professionally. But now, how do you use your skills and achieve the easiest and quickest results?
Your best option is to use the Filmora video editor.
What Is Filmora and Filmora?
It’s as powerful as Adobe Premiere Pro but more straightforward to navigate. In addition, Filmora lets you command an arsenal of unique tools necessary for creating modern videos.
Free Download For Win 7 or later(64-bit)
Free Download For macOS 10.14 or later
Anyone on both Windows and Mac can use Filmora. In addition, if you’re a mobile user, you can download Filmora and enjoy the same benefits.
Aside from its easy-to-use interface, Filmora is packed with editing resources that will never leave you wondering how or what to do next. Of course, you can watch the free Youtube tutorials to master the platform entirely.
For example, we have prepared you with a video tutorial below to start your video editing journey with no delay!
Lastly, you can easily export in any format necessary for your project. It doesn’t get easier than this.
Conclusion
The video editing certification online courses you see here are more than enough to prepare you. You will learn everything it takes to edit any video. Use this information wisely and take advantage of this beautiful opportunity to become one of the best video editors.
Also read:
- 2024 Approved The Availability of the Slow-Motion Feature on the iPhone Is Often Debated. This Article Will Guide You on How to Slow Down a Video on iPhone
- 2024 Approved Step-by-Step Guide to Speed Up and Slow Down a Video
- New Best Jump Cut Editing Tricks
- How to Enable and Use OBS Zoom Camera
- How to Polish Your Music Video Edits Using Filmora
- New 2024 Approved How to Use LUTs in Adobe Premiere Pro
- New In 2024, Time Lapse Video Is Very Interesting and Creative, Which Usually Attracts More Attention. This Article Will Show You How to Make a Time Lapse Video with Adobe After Effects
- MAGIX Vegas Pro Review A Professional Video Editing Software for 2024
- Updated How to Zoom in Discord
- Updated Have You Ever Wondered How Those PowerPoint, Looping Slideshows You See in Conferences and Reception Areas Display and Move to the Next Slide Automatically without Clicking a Mouse? You Dont Have to Be Amazed at This for 2024
- Updated 2024 Approved Easy Ways to Edit Recorded Video
- New 2024 Approved Looking Forward to Try Hands at Using the Icecream Slideshow Maker Program to Create High End Slideshow Presentations? Stay Here for a Complete Insight Into the Process
- New Do You Want to Use a Video Editor for Your iOS Device? This Article Introduces LumaFusion, a Perfect Multi-Track Video Editor Designed to Cater to Your Needs for 2024
- New 2024 Approved Understanding More About CapCut Lenta Template and Slow-Motion Videos
- In 2024, How to Use Blender Green Screen
- New 2024 Approved In This Article You Will Learn How to Crop a Video Through Windows Media Player and with Filmora Wondershare. Here Are Ways to Crop Your Video Clip
- New How To Make a Polaroid Collage
- Updated Create Glitch Text Effect for 2024
- Discord Is Becoming More Popular with Time with Millions of Users. Are You Thinking of Getting a GIF for Discord Profile? If Yes, Learn From This Piece Since We Have a Conclusive Summary of Getting a GIF Profile Picture for Discord
- New Create Slide Masking Effect Intro
- Updated In 2024, Turn Your Text Into a Podcast Made Possible
- Updated In 2024, Powerpoint Slideshow Icon, Slide Sorter View Icon, Slideshow Icon Powerpoint, Slide Show View Icon
- In 2024, How to Make Vintage Film Effect 1980S
- In 2024, Top 5 Online Video Converter for Instagram
- Updated 2024 Approved How to Convert a GIF to a Video for Instagram
- 10 Best Free Text to Speech Software Windows, Mac,Android, iPhone & Online
- 11 Tips to Make Product Ad Videos for 2024
- 2024 Approved Top Animated Title Makers
- You Can Learn How to Color Grade Your Picture in Lightroom Effectively. By Understanding the Process of Color Grading in Lightroom, You Can Create Unique Works, and Improve Your Abilities for 2024
- New Want to Convert MP4 Video To 60 FPS GIF? Read This
- Updated 2024 Approved Merge MP4 Online? Its Easy With These 5 Tools
- New Best 4 Love Video Maker with Music for 2024
- New How To Add Motion Blur Effect To Photos in GIMP for 2024
- A Full Review of Leeming LUT Pro
- In 2024, Free Ways To Split Video For Whatsapp Status On All Platforms
- In 2024, Do You Intend to Include Motion Blur on Your Video Using Video Star? This Article Explains How to Use Motion Blur on Video Star with Exquisite Control
- New In 2024, Best 16 Motion Blur Apps for Videos & Photos
- 2024 Approved 30+ Amazing Templates for VN Video Editor
- Updated In 2024, Discover the Various Techniques of Video Framing, Which Involve Capturing the Essence of a Subject While Eliminating Distractions in the Background, Andlearn How to Apply Them Skillfully to Achieve Desired Results
- New 2024 Approved Detailed Tutorial to Crop a Video in KineMaster
- In 2024, If You Want to Know More About the Basics of Final Cut Pro, It Would Be Helpful to Watch a Beginner Tutorial, with the Length of only 20 Minutes, an Introduction of the Whole Program
- 2024 Approved Do You Want to Add Subtitles to Your MKV Files Easily? This Article Will Introduce 7 Simple Ways Through Which You Can Add Subtitles to MKV on Different Devices
- 2024 Approved How to Comment on YouTube Live Chat
- Updated 2024 Approved A Guide to Color Grade Your Picture in LightRoom
- There Are Many Aspects to Consider when It Comes to Publishing a Video. Safety and Privacy Aspects Are some of Them. If Youre Looking to Blur Out a Bystander or Cut Out Profanities From Your Video with Filmora, This Is the Right Article for You
- Updated Premiere Pro Slow Playback Issues Finding The Best Solutions
- Updated Why Did Filmora AI Portrait Attract People for 2024
- New 7 Best MP4 Video Editors on Mac Edit MP4 Videos Easily
- New How To Unlink Audio and Video in DaVinci Resolve
- Updated The Latest 100+ Best TikTok Captions to Improve Your Next Post
- In 2024, How to Unlock Apple iPhone 15 Pro Max, Apples New iPhone | Dr.fone
- In 2024, How to use Pokemon Go Joystick on Realme 10T 5G? | Dr.fone
- In 2024, Edit and Send Fake Location on Telegram For your Lenovo ThinkPhone in 3 Ways | Dr.fone
- In 2024, How Nokia C02 Mirror Screen to PC? | Dr.fone
- 9 Best Phone Monitoring Apps for Honor Magic 6 Pro | Dr.fone
- How to Change GPS Location on Vivo Y27 5G Easily & Safely | Dr.fone
- How to Come up With the Best Pokemon Team On Nubia Red Magic 8S Pro? | Dr.fone
- In 2024, How To Bypass iCloud By Checkra1n Even On Apple iPhone 15 If Youve Tried Everything
- What You Want To Know About Two-Factor Authentication for iCloud From your Apple iPhone 7 Plus
- 10 Free Location Spoofers to Fake GPS Location on your Vivo Y100i Power 5G | Dr.fone
- In 2024, The Best Android SIM Unlock Code Generators Unlock Your Samsung Galaxy A23 5G Phone Hassle-Free
- A Detailed VPNa Fake GPS Location Free Review On Tecno Spark 10 4G | Dr.fone
- All Must-Knows to Use Fake GPS GO Location Spoofer On Realme Note 50 | Dr.fone
- How to Mirror Xiaomi Redmi K70 to Mac? | Dr.fone
- In 2024, 9 Best Free Android Monitoring Apps to Monitor Phone Remotely For your Realme C51 | Dr.fone
- How to play MOV files on Xiaomi ?
- My Videos Arent Playing on Huawei P60 – What Can I Do? | Dr.fone
- How To Restore Missing Pictures Files from Infinix Smart 7 HD.
- How to Change Netflix Location to Get More Country Version On Oppo F23 5G | Dr.fone
- Top 15 Augmented Reality Games Like Pokémon GO To Play On Apple iPhone 11 Pro Max | Dr.fone
- MKV playback issues on Xiaomi Redmi Note 12 4G
- In 2024, 3 Methods to Mirror Itel A05s to Roku | Dr.fone
- In 2024, 2 Ways to Transfer Text Messages from Realme Narzo N53 to iPhone 15/14/13/12/11/X/8/ | Dr.fone
- In 2024, 9 Mind-Blowing Tricks to Hatch Eggs in Pokemon Go Without Walking On Samsung Galaxy S23 Ultra | Dr.fone
- In 2024, Top IMEI Unlokers for Your Vivo V30 Pro Phone
- A How-To Guide on Bypassing the Apple iPhone XR iCloud Lock
- How to Change Oppo Find X6 Pro Location on Skout | Dr.fone
- Video File Repair - How to Fix Corrupted video files of Honor Play 40C?
- Easy Ways to Manage Your ZTE Blade A73 5G Location Settings | Dr.fone
- Title: How to Create Custom Lower Thirds in Filmora
- Author: Morgan
- Created at : 2024-05-19 05:11:35
- Updated at : 2024-05-20 05:11:35
- Link: https://ai-video-editing.techidaily.com/how-to-create-custom-lower-thirds-in-filmora/
- License: This work is licensed under CC BY-NC-SA 4.0.

