
:max_bytes(150000):strip_icc():format(webp)/GettyImages-1094009490-2694d308001d46049e0755f4dd7fdf4c.jpg)
How to Make a Slow Motion Video in Wondershare Filmora
How to Make a Slow Motion Video in Wondershare Filmora
How to make a video slow motion on your PC and other devices? It is easier than most people think. Slow-motion videos are cool and exciting. You could be watching a CGI fight scene or a dog making a face when trying to catch a treat. The slow-moving objects make it more exciting and intriguing. Probably it is a gender reveal party or a dramatic waterfall, and you are wondering how do I make a video slow motion. In this article, we provide you with a guide on how to make video to slow motion quickly and the easy way.
Slow Motion Video Maker Slow your video’s speed with better control of your keyframes to create unique cinematic effects!
Make A Slow Motion Video Make A Slow Motion Video More Features

Part 1. Introducing Wondershare Filmora: A Great Help for Making Slow Motion Videos
If you are looking for a solution on how to put videos in slow mo, you need to try Wondershare Filmora. The recent Filmora V13 comes with some brilliant tools that make editing videos easier and fun. The fully-equipped suite is now powered by AI allowing users to effortlessly create outstanding videos in minutes. With new features to realize your ideas and bring them to life, Filmora empowers you to work smarter and not harder.
Free Download For Win 7 or later(64-bit)
Free Download For macOS 10.14 or later
How do you make a video slow motion with Filmora? The solution lies in the unique video editing features of the software. From manually editing the speed of the video to using slo mo effects, Filmora is a great choice. Using Filmora for creating slow motion videos has various advantages to your video editing journey:
- Precise speed control: Filmora allows you to precisely set the speed of your videos up to a single frame, giving you creative control over your slo mo effects.
- AI-powered capabilities: Powered by artificial intelligence, FIlmora gives you accurate results quickly and efficiently
- Easy to Use: Filmora is a versatile video editing software that is easy to learn and use
- High-quality output: Filmora offers a wide range of editing features, allowing you to export slo mo video without compromising the quality
- Multiple slow-motion effects: Get access to a variety of slo mo video effects, including speed ramp, time remap, optical flow, and more
Ready to add some epic slow-motion action to your videos? In the next section, we’ll guide you step-by-step through how to make a slo mo video in just a few clicks. You will be turning your ordinary footage into amazing slo-mo clips in the simplest way possible.
Part 2. How to Make a Video Slow Motion: Step-by-Step Guide
Wondershare Filmora allows users to create a video slow motion using the Speed Ramping feature. This feature is specifically designed for adjusting the speed of videos with better control of keyframes, allowing you to create unique cinematic effects. You may want your YouTube clips to look cool or slow down your video for particular reasons. Take your video editing skills to the next level with the Speed Ramping feature. Filmora makes it possible to create slow motions of high quality with smooth transitions for incredible results.

The Speed Ramping feature is effective in:
- Applying Professional Speed Effect: Quickly change the speed of your video by making it more creative.
- Speed Ramping Template Presets: Get access to Filmora’s six present speed ramping effects. They include Bullet Time, Hero Moment, Montage, Flash in, and Jumper. These effects help in creating a professional speed change effect with ease.
- Support for Customized Speed Ramping Template: Filmora allows you to create a unique speed ramping effect for your own and save it for later use.
- Maintaining the Audio Pitch: The Speed Ramping feature by Filmora allows you to maintain the original audio pitch even after changing the speed of the video.
The Speed Ramping feature is quite effective in making video slow motion with Filmora. Let’s have a look at the steps you will need to follow:
Step 1: Find the Speed Ramping Tab
Once you have launched Filmora and imported your files, double clip on the video clip or audio clip you want to create a slow motion from. Then click, Speed followed by Speed Ramping in the pop-up editing window. You may also right-click on the video clip on the timeline and choose Speed Ramping, or click on the Speed icon on the toolbar followed by Speed Ramping.

Step 2: Customize the Speed Ramps
After starting the feature, you need to customize the speed ramps to achieve the desired results. The quickest way is to select a speed ramp present from the available Hero Moment, Montage, Jumper, Bullet Time, Flash Out, and Flash In. Customizing the speed ramps will, however, give you more creative outcomes.

Strp 3: Apply the Speed Ramping
With the speed ramp ready, place the play head where you want to create a slo mo video. Then click the Add icon to add the speed keyframes. Drag the keyframe dot downward or upward as desired to control the point speed. This will give you the specific slow motion video that you want while maintaining the audio pitch. When you are satisfied with the adjustments, click OK to save the settings and export your creation.

Creating slow motion videos with the speed ramping feature can be beneficial in many ways. The slow-motion effects draw attention to specific details of the video. It could be a big reveal happening or a flashback that allows viewers to realize the clues you were giving all along. When you slow down scenes in your video, it lets people focus on specific details, gestures, or objects.
Conclusion
Creating a slow motion video can be exciting. There’s just something that makes slo mo fun and interesting to watch. How to do video slow motion you may ask. With the right software, slowing down videos is a fun and thrilling effect. To this effect, we recommend using Wondershare Filmora to create slow motions in your projects and keep your audience engaged. The Speed ramping feature of Filmors is easy to use and can be customized to achieve specific results.
Make A Slow Motion Video Make A Slow Motion Video More Features
Part 1. Introducing Wondershare Filmora: A Great Help for Making Slow Motion Videos
If you are looking for a solution on how to put videos in slow mo, you need to try Wondershare Filmora. The recent Filmora V13 comes with some brilliant tools that make editing videos easier and fun. The fully-equipped suite is now powered by AI allowing users to effortlessly create outstanding videos in minutes. With new features to realize your ideas and bring them to life, Filmora empowers you to work smarter and not harder.
Free Download For Win 7 or later(64-bit)
Free Download For macOS 10.14 or later
How do you make a video slow motion with Filmora? The solution lies in the unique video editing features of the software. From manually editing the speed of the video to using slo mo effects, Filmora is a great choice. Using Filmora for creating slow motion videos has various advantages to your video editing journey:
- Precise speed control: Filmora allows you to precisely set the speed of your videos up to a single frame, giving you creative control over your slo mo effects.
- AI-powered capabilities: Powered by artificial intelligence, FIlmora gives you accurate results quickly and efficiently
- Easy to Use: Filmora is a versatile video editing software that is easy to learn and use
- High-quality output: Filmora offers a wide range of editing features, allowing you to export slo mo video without compromising the quality
- Multiple slow-motion effects: Get access to a variety of slo mo video effects, including speed ramp, time remap, optical flow, and more
Ready to add some epic slow-motion action to your videos? In the next section, we’ll guide you step-by-step through how to make a slo mo video in just a few clicks. You will be turning your ordinary footage into amazing slo-mo clips in the simplest way possible.
Part 2. How to Make a Video Slow Motion: Step-by-Step Guide
Wondershare Filmora allows users to create a video slow motion using the Speed Ramping feature. This feature is specifically designed for adjusting the speed of videos with better control of keyframes, allowing you to create unique cinematic effects. You may want your YouTube clips to look cool or slow down your video for particular reasons. Take your video editing skills to the next level with the Speed Ramping feature. Filmora makes it possible to create slow motions of high quality with smooth transitions for incredible results.
The Speed Ramping feature is effective in:
- Applying Professional Speed Effect: Quickly change the speed of your video by making it more creative.
- Speed Ramping Template Presets: Get access to Filmora’s six present speed ramping effects. They include Bullet Time, Hero Moment, Montage, Flash in, and Jumper. These effects help in creating a professional speed change effect with ease.
- Support for Customized Speed Ramping Template: Filmora allows you to create a unique speed ramping effect for your own and save it for later use.
- Maintaining the Audio Pitch: The Speed Ramping feature by Filmora allows you to maintain the original audio pitch even after changing the speed of the video.
The Speed Ramping feature is quite effective in making video slow motion with Filmora. Let’s have a look at the steps you will need to follow:
Step 1: Find the Speed Ramping Tab
Once you have launched Filmora and imported your files, double clip on the video clip or audio clip you want to create a slow motion from. Then click, Speed followed by Speed Ramping in the pop-up editing window. You may also right-click on the video clip on the timeline and choose Speed Ramping, or click on the Speed icon on the toolbar followed by Speed Ramping.
Step 2: Customize the Speed Ramps
After starting the feature, you need to customize the speed ramps to achieve the desired results. The quickest way is to select a speed ramp present from the available Hero Moment, Montage, Jumper, Bullet Time, Flash Out, and Flash In. Customizing the speed ramps will, however, give you more creative outcomes.
Strp 3: Apply the Speed Ramping
With the speed ramp ready, place the play head where you want to create a slo mo video. Then click the Add icon to add the speed keyframes. Drag the keyframe dot downward or upward as desired to control the point speed. This will give you the specific slow motion video that you want while maintaining the audio pitch. When you are satisfied with the adjustments, click OK to save the settings and export your creation.
Creating slow motion videos with the speed ramping feature can be beneficial in many ways. The slow-motion effects draw attention to specific details of the video. It could be a big reveal happening or a flashback that allows viewers to realize the clues you were giving all along. When you slow down scenes in your video, it lets people focus on specific details, gestures, or objects.
Conclusion
Creating a slow motion video can be exciting. There’s just something that makes slo mo fun and interesting to watch. How to do video slow motion you may ask. With the right software, slowing down videos is a fun and thrilling effect. To this effect, we recommend using Wondershare Filmora to create slow motions in your projects and keep your audience engaged. The Speed ramping feature of Filmors is easy to use and can be customized to achieve specific results.
Guide To Slowing Down Videos in Snapchat: Discussing the Details
Applying slow-motion effects using sophisticated cameras or apps was a matter of the past. In this digital era, mobile technology makes all kinds of video editing right in your palm. Snapchat is one such exciting application that combines editing and social interaction. Primarily, it’s a social media platform to share your moments in one-time played snaps.
Some of its features also include speed modifiers for creating slow-motion videos on Snapchat. The slow-motion Snapchat option is pretty simple to apply to your pre-recorded videos. This guide will teach you how to slow down a Snapchat video to avoid ambiguity. Keep reading and get some mobile apps for slow-motion videos other than Snapchat.
Slow Motion Video Maker Slow your video’s speed with better control of your keyframes to create unique cinematic effects!
Make A Slow Motion Video Make A Slow Motion Video More Features
Part 1: How Are Slow-Motion Videos Used by Social Media Users?
Snapchat offers creative sets of features to enhance the impact of captured media. This social media app can instantly slow down your video without any effort. Such videos can retain the viewers’ attention and urge them to explore the details. Plus, slow-motion videos encourage the audience to stay tuned to the upcoming content. Look at the below point to explore the uses of slow motion in Snapchat:
- Creating Comedy: Sometimes, people use slow-motion to turn their captured moments into comedy. For instance, you can add slow motion to your friend’s video of eating noodles. This way, a playful, hilarious, and entertaining element will be added to your content.
- Emphasizing Detail: Social media users usually slow down the video to enhance details. At normal speed, such details can easily be missed. Slowing down the sports, action shots, and fast-paced activities can reveal interesting details.
- Showcasing Skills: Dance and performance art videos can be slowed down with Snapchat. Social media users use slow-motion Snapchat to show talent and skills. Such footage allows viewers to appreciate the performance after watching the details.
- Capturing Nature: Aesthetic lovers use slow-motion effects to make their content appealing. They slow down the falling raindrops, clouds movements, and fluttering of butterfly wings. Capturing the beauty of nature this way resonates with social media users.
- Product Demonstration: Social media influencers showcase the product’s features in slow-motion videos. Snapchat assists them in making detailed and engaging videos with just a swap. Fashion and technology industries are influencing purchasing decisions through such videos.
Part 2: How to Slow Down Videos on Snapchat? A Simple Guide
You might be familiar with this famous social media app. If not, then let us simply tell you that it’s a platform to share fleeting pictures and videos. This top social media app was introduced in 2011, and according to stats, it grows 23% each year.
Some of its essential features include taking pictures and videos by adding filters and lenses. Now, let’s come to the point and learn how to make slow-motion videos on Snapchat:
Step 1
After getting Snapchat on your mobile phone, log in to an account. Open the app and record a video. To record, tap and hold down the “Capture” button at the lower part of the screen. Let it go when you are done recording a suitable clip.

Step 2
You can crop the video by clicking on the “Loop” button on the right side. Otherwise, just swipe the screen from left to right until you get a “Snail” icon. It will be the slow-motion effect that will reduce the speed of your video.

Step 3
Optionally, you can decorate or edit the clip using the right-side toolbar. When you are done editing, touch the “Save” icon at the bottom-left side. It will save the video in your camera roll or Snapchat Memories. Besides using the “Save” icon, you can click the “Next” button to share the video with your friends.

Part 3: Other Ways to Slow Down Videos to Post on Snapchat
The slow-motion effect is no more challenging as many apps are available online to do this. If you are unsatisfied with Snapchat’s motion video, this part is for you. Here, you can pick any app to make slow-motion videos and use plenty of editing features. These apps are useful for creating professional slow-mo videos right with your iOS or Android.
1. CapCut (Android | iOS )
This tool has made video creation effortless with video assets and flexible editing. It contains a cloud storage system that allows users to collaborate on projects freely. With its powerful features, users can remove background, split audio, and insert sounds. CapCut offers a feature to turn your normal videos into slow motion and alter the duration of clips.

Key Features
- It enables you to customize the pace of your video scenes separately. You can make slow-motion videos by using its “Speed” slider. Users can also track the previous and the latest video durations.
- The speed ramping features allow you to ensure a smooth transition in slow motions. To do so, you can choose the bullet, montage, and hero presets.
- Apart from making slow-motion videos, users can extract audio from videos. They just have to upload a video, and CapCut will extract original quality sound.
2. InShot (Android | iOS )
InShot claims to release your creativity through its video editing features. It offers seamless video trimming, splitting, and merging to get desired media. Users can adjust the speed of clips and add slow-motion or fast motions. Besides, they can insert sound effects, voice-overs, and popular music in their vlogs.

Key Features
- Despite slow-motion Snapchat, you can make a smooth slow motion in this editing app. It offers a speed option from which you can choose any Speed rate for your video.
- InShot tries to make your content breathe with its text and stickers. Users can add animated stickers and text using the timeline functions.
- Another specialty of this app is its aesthetic filters, such as Film and Cinema. Moreover, there are AI effects to provide a professional look to projects.
3. Videoshop (Android | iOS )
If you find slowing down videos on Snapchat difficult, try this video editing app. With its advanced editing tools, this versatile app can level up your social media expression. Some of its essential editing features involve rotation, merging, and flipping clips. Users can perform color correction, reverse, and slow down video functions.

Key Features
- Turning videos into fast motion, slow motion, and the reverse is quicker on Videoshop. You can swipe the speed slider towards the left and make a personalized slow-motion video.
- After getting a slow-mo, users can share it on popular social media apps. Some platforms include Snapchat, TikTok, WhatsApp, YouTube, etc.
- Besides, there are unlimited editing features to fine-tune your editing. It offers special effects, lip sync, animated titles, and GIFs to meet diverse needs.
Bonus Part: Guide made to Make Slow Motion Videos Easy with Wondershare Filmora
No doubt, the apps mentioned above are handy video editing tools. Such apps facilitate smartphone users, but what about PC users? For them, Wondershare Filmora is designed as an efficient video editing platform. This application is easy for all users and provides a wide range of editing tools. Beginners or non-tech persons can utilize an AI copilot editor for assistance in editing.
Free Download For Win 7 or later(64-bit)
Free Download For macOS 10.14 or later
How to Make Slow Motion Video with Optical Flow in Filmora
This editing platform can make slow-motion Snapchat videos of high quality. Users can adjust the slow-motion speed, apply speed ramping, or reverse the videos. Let’s explore all these features and get a slow-motion video by following the given steps:
Step 1Access Filmora and Import Media to Start a Project
Go to the official site of Filmora and ensure you install the latest version. Launch and enter the main interface. Click “New Project” and look for “Import” in the media panel. Browse and bring media to Filmora to start editing in the timeline section.

Step 2Discover the Uniform Speed Option
Place your cursor on the media and right-click on it. Look for the “Uniform Speed” option from the list and navigate toward the right-side panel. Alternatively, you can press the “Ctrl + R” key using your keyboard.

Step 3Adjust Speed for Slow Motion video with optical Flow
From Uniform Speed, move the “Speed” slider to the left. Keep moving until you set the desired “Duration” of the video. Afterward, head to the “AI Frame Interpolation” and extend the menu. Choose the “Optical Flow” option from the menu and get a preview of the results.

Step 4Continue Editing or Exporting the File
Lastly, shift to the top right corner and press “Export” if you are done editing. Otherwise, explore other features of Filmora.

Filmora is more than just a simple tool with cutting, trimming, and merging features. It is an AI platform that can generate music, scripts, and images for diverse needs. With its cloud storage, you can start editing where you left off. Smartphone users don’t have to worry because Filmora is now available as a mobile app.
Some Smart and Unique Features of Filmora
Completely exploring Filmora is not possible without knowing its key features. Thus, head down here and get a brief introduction to Filmora’s powerful functionalities.
AI Vocal Remover: Try this hot feature of Filmora to separate vocals from any song. This way, you can effortlessly remove vocals from audio and soundtracks. It enables you to dub videos with fresh and high-quality sound.
AI Copywriting: No more internet surfing for unique content when Filmora is here to help. With the ChatGPT plug-in, Filmora generates YouTube Titles and scripts. The AI-generated content proves engaging and perfectly aligns with your requirements.
Instant Mode: Like other editing apps, Filmora is also equipped with Instant mode. It provides video assets where you just have to upload clips in predesigned video templates. One thing Filmora has done differently is the editing options available until the last moment.
AI Smart Cutout: Who needs to record content with a green screen in this tech-based era? Enable this feature and remove unwanted objects and people with accuracy. Thus, users can make a clean video even when not recorded with a clean background.
Conclusion
Ultimately, the slow-motion filter is one of the options in Snapchat to make attractive snaps. In this guide, you’ve learned how to slow down videos on Snapchat. Besides, there were a few alternatives in the form of mobile apps. In search of a reliable platform, you can trust Filmora to make slow-motion videos easily.
Make A Slow Motion Video Make A Slow Motion Video More Features
Part 1: How Are Slow-Motion Videos Used by Social Media Users?
Snapchat offers creative sets of features to enhance the impact of captured media. This social media app can instantly slow down your video without any effort. Such videos can retain the viewers’ attention and urge them to explore the details. Plus, slow-motion videos encourage the audience to stay tuned to the upcoming content. Look at the below point to explore the uses of slow motion in Snapchat:
- Creating Comedy: Sometimes, people use slow-motion to turn their captured moments into comedy. For instance, you can add slow motion to your friend’s video of eating noodles. This way, a playful, hilarious, and entertaining element will be added to your content.
- Emphasizing Detail: Social media users usually slow down the video to enhance details. At normal speed, such details can easily be missed. Slowing down the sports, action shots, and fast-paced activities can reveal interesting details.
- Showcasing Skills: Dance and performance art videos can be slowed down with Snapchat. Social media users use slow-motion Snapchat to show talent and skills. Such footage allows viewers to appreciate the performance after watching the details.
- Capturing Nature: Aesthetic lovers use slow-motion effects to make their content appealing. They slow down the falling raindrops, clouds movements, and fluttering of butterfly wings. Capturing the beauty of nature this way resonates with social media users.
- Product Demonstration: Social media influencers showcase the product’s features in slow-motion videos. Snapchat assists them in making detailed and engaging videos with just a swap. Fashion and technology industries are influencing purchasing decisions through such videos.
Part 2: How to Slow Down Videos on Snapchat? A Simple Guide
You might be familiar with this famous social media app. If not, then let us simply tell you that it’s a platform to share fleeting pictures and videos. This top social media app was introduced in 2011, and according to stats, it grows 23% each year.
Some of its essential features include taking pictures and videos by adding filters and lenses. Now, let’s come to the point and learn how to make slow-motion videos on Snapchat:
Step 1
After getting Snapchat on your mobile phone, log in to an account. Open the app and record a video. To record, tap and hold down the “Capture” button at the lower part of the screen. Let it go when you are done recording a suitable clip.
Step 2
You can crop the video by clicking on the “Loop” button on the right side. Otherwise, just swipe the screen from left to right until you get a “Snail” icon. It will be the slow-motion effect that will reduce the speed of your video.
Step 3
Optionally, you can decorate or edit the clip using the right-side toolbar. When you are done editing, touch the “Save” icon at the bottom-left side. It will save the video in your camera roll or Snapchat Memories. Besides using the “Save” icon, you can click the “Next” button to share the video with your friends.
Part 3: Other Ways to Slow Down Videos to Post on Snapchat
The slow-motion effect is no more challenging as many apps are available online to do this. If you are unsatisfied with Snapchat’s motion video, this part is for you. Here, you can pick any app to make slow-motion videos and use plenty of editing features. These apps are useful for creating professional slow-mo videos right with your iOS or Android.
1. CapCut (Android | iOS )
This tool has made video creation effortless with video assets and flexible editing. It contains a cloud storage system that allows users to collaborate on projects freely. With its powerful features, users can remove background, split audio, and insert sounds. CapCut offers a feature to turn your normal videos into slow motion and alter the duration of clips.
Key Features
- It enables you to customize the pace of your video scenes separately. You can make slow-motion videos by using its “Speed” slider. Users can also track the previous and the latest video durations.
- The speed ramping features allow you to ensure a smooth transition in slow motions. To do so, you can choose the bullet, montage, and hero presets.
- Apart from making slow-motion videos, users can extract audio from videos. They just have to upload a video, and CapCut will extract original quality sound.
2. InShot (Android | iOS )
InShot claims to release your creativity through its video editing features. It offers seamless video trimming, splitting, and merging to get desired media. Users can adjust the speed of clips and add slow-motion or fast motions. Besides, they can insert sound effects, voice-overs, and popular music in their vlogs.
Key Features
- Despite slow-motion Snapchat, you can make a smooth slow motion in this editing app. It offers a speed option from which you can choose any Speed rate for your video.
- InShot tries to make your content breathe with its text and stickers. Users can add animated stickers and text using the timeline functions.
- Another specialty of this app is its aesthetic filters, such as Film and Cinema. Moreover, there are AI effects to provide a professional look to projects.
3. Videoshop (Android | iOS )
If you find slowing down videos on Snapchat difficult, try this video editing app. With its advanced editing tools, this versatile app can level up your social media expression. Some of its essential editing features involve rotation, merging, and flipping clips. Users can perform color correction, reverse, and slow down video functions.
Key Features
- Turning videos into fast motion, slow motion, and the reverse is quicker on Videoshop. You can swipe the speed slider towards the left and make a personalized slow-motion video.
- After getting a slow-mo, users can share it on popular social media apps. Some platforms include Snapchat, TikTok, WhatsApp, YouTube, etc.
- Besides, there are unlimited editing features to fine-tune your editing. It offers special effects, lip sync, animated titles, and GIFs to meet diverse needs.
Bonus Part: Guide made to Make Slow Motion Videos Easy with Wondershare Filmora
No doubt, the apps mentioned above are handy video editing tools. Such apps facilitate smartphone users, but what about PC users? For them, Wondershare Filmora is designed as an efficient video editing platform. This application is easy for all users and provides a wide range of editing tools. Beginners or non-tech persons can utilize an AI copilot editor for assistance in editing.
Free Download For Win 7 or later(64-bit)
Free Download For macOS 10.14 or later
How to Make Slow Motion Video with Optical Flow in Filmora
This editing platform can make slow-motion Snapchat videos of high quality. Users can adjust the slow-motion speed, apply speed ramping, or reverse the videos. Let’s explore all these features and get a slow-motion video by following the given steps:
Step 1Access Filmora and Import Media to Start a Project
Go to the official site of Filmora and ensure you install the latest version. Launch and enter the main interface. Click “New Project” and look for “Import” in the media panel. Browse and bring media to Filmora to start editing in the timeline section.
Step 2Discover the Uniform Speed Option
Place your cursor on the media and right-click on it. Look for the “Uniform Speed” option from the list and navigate toward the right-side panel. Alternatively, you can press the “Ctrl + R” key using your keyboard.
Step 3Adjust Speed for Slow Motion video with optical Flow
From Uniform Speed, move the “Speed” slider to the left. Keep moving until you set the desired “Duration” of the video. Afterward, head to the “AI Frame Interpolation” and extend the menu. Choose the “Optical Flow” option from the menu and get a preview of the results.
Step 4Continue Editing or Exporting the File
Lastly, shift to the top right corner and press “Export” if you are done editing. Otherwise, explore other features of Filmora.
Filmora is more than just a simple tool with cutting, trimming, and merging features. It is an AI platform that can generate music, scripts, and images for diverse needs. With its cloud storage, you can start editing where you left off. Smartphone users don’t have to worry because Filmora is now available as a mobile app.
Some Smart and Unique Features of Filmora
Completely exploring Filmora is not possible without knowing its key features. Thus, head down here and get a brief introduction to Filmora’s powerful functionalities.
AI Vocal Remover: Try this hot feature of Filmora to separate vocals from any song. This way, you can effortlessly remove vocals from audio and soundtracks. It enables you to dub videos with fresh and high-quality sound.
AI Copywriting: No more internet surfing for unique content when Filmora is here to help. With the ChatGPT plug-in, Filmora generates YouTube Titles and scripts. The AI-generated content proves engaging and perfectly aligns with your requirements.
Instant Mode: Like other editing apps, Filmora is also equipped with Instant mode. It provides video assets where you just have to upload clips in predesigned video templates. One thing Filmora has done differently is the editing options available until the last moment.
AI Smart Cutout: Who needs to record content with a green screen in this tech-based era? Enable this feature and remove unwanted objects and people with accuracy. Thus, users can make a clean video even when not recorded with a clean background.
Conclusion
Ultimately, the slow-motion filter is one of the options in Snapchat to make attractive snaps. In this guide, you’ve learned how to slow down videos on Snapchat. Besides, there were a few alternatives in the form of mobile apps. In search of a reliable platform, you can trust Filmora to make slow-motion videos easily.
How to Use Kahoot! On Zoom
In the educational game Kahoot! participants respond to multiple-choice questions based on trivia. Each participant uses their own controller to answer questions in the online game. There are several question kinds to pick from, allowing for complete customization of the test. Each player needs their own controller for Kahoot! The game questions will be shown in the Zoom/Google Meet window, but the answers must be entered using the controller. With the Kahoot!! app for Zoom, presenters may use play and friendly rivalry to increase participant engagement. Users may organize knowledge- and feedback-gathering pulse checks with staff members, encourage original thought with word clouds, and empower participants’ voices with surveys, open-ended questions, and other tools. Utilizing the brainstorm tool, organizations may crowdsource ideas and advance teamwork.
Engagement has emerged as a crucial component of successful learning, collaboration, and connection as the globe has increased the use of video communications in social and professional situations. Users may access, host, and play Kahoot!! games and educational information with other meeting participants using the Kahoot!! app for Zoom without ever leaving the Zoom Meeting or requiring a second device. Corporate executives may motivate their staff via speeches, meetings, and online activities. Meeting hosts will have immediate access to data and statistics from their Kahoot!! experience, allowing them to respond in real time to audience engagement with the material. Additionally, hosts may email the Kahoot!! games to all participants so they can practice and improve their scores, which will increase participant engagement and learning retention. Hosts can also distribute the Kahoot!! games as self-paced challenges with individuals who couldn’t attend in person.
Part 1: Key Features of Kahoot
What more is there to discuss, Kahoot!? Every pupil adores it. Many instructors and educators use it all around the world to make learning simple, enjoyable, and interesting. Everyone may use it since it is free and extremely simple to use. These are some of its attributes:
- Quizzes may be made in a matter of minutes.
- Develop games based on the abilities of the kids. Playing at home or in the Zoom is simple for them.
- Various templates are offered. You can choose one of them with confidence.
- Kahoot! has the ability to be organized into many folders according to topics or subjects.
- Additionally, multiple choice questions may be included by quiz makers.
- Teachers using Kahoot! may combine different questions into one format, such as quizzes, polls, riddles, and slides.
- Use Apple Schoolwork, Google Zooms, and Microsoft Teams to share student-centered tasks.
Part 2: How to Host a Kahoot! Session within a Zoom Meeting
With the Zoom app, Kahoot! may be viewed, hosted, and used. It’s amazing that Kahoot!!, one of the most well-known brands in quiz-based learning, still provides a free-to-use platform, making it very accessible to both instructors and students. It’s also a useful resource for a hybrid class that combines online and classroom instruction. Most devices will be able to use the cloud-based service using a web browser. This implies that students using computers, tablets, and cellphones in class or at home may access this. Participants in Zoom Meetings may play games and learn without having to leave the Zoom meeting or bring a second device.
Step1Sign up for Zoom ahead of time and get ready. On the other hand, launch the Kahoot! test in your web browser, then be ready to share your screen in Zoom.
Step2As the participants come, allow them in and check to see whether you and they can both hear each other. To access the Kahoot! quiz, make sure they have a device or another browser tab open.
Step3Open the Kahoot! test and share it using Zoom’s “Share Screen” feature. While your screen is shared, continue to host the Kahoot! as normal. To view participants next to your shared screen, we advise selecting Side-by-Side Mode.
Part 3: How to Participate in Kahoot! Sessions within a Zoom Meeting
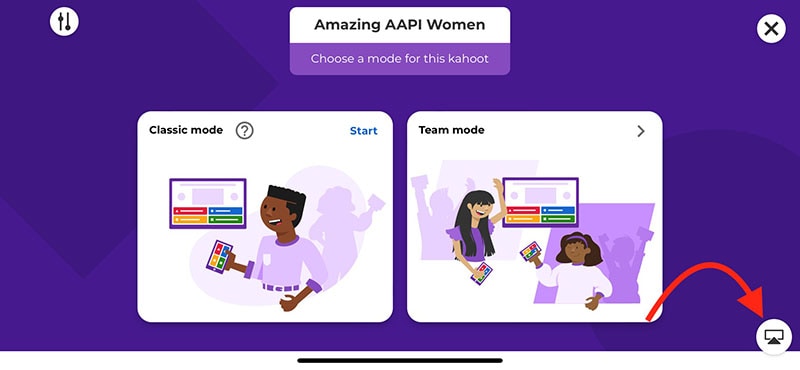
With more than 40 million ready-made games available on Kahoot!!, getting started is fast and simple. When time and resources are limited, hybrid or distant learning is ideal. After linking the Kahoot! to your Zoom account, you may utilize it. Use this app and start a meeting. Go to Apps on the toolbar and choose the program you wish to use. Select Who is Hosting to locate their host or to join a Kahoot! session being hosted by a friend or another player. Players may post a question to a shared screen on the Kahoot! platform. Kahoot!! just needs an account to be made in order to use it since it is free. Most devices may be used by students to access Kahoot!! from wherever there is an internet connection. This is how:
Step1Take the time to check that Zoom, Skype, Cisco Webex, or Google Hangout are operating and that your camera, microphone, and speaker are all operational.
Step2In the right-side panel, add the Kahoot!! app to your list of apps and click Join.
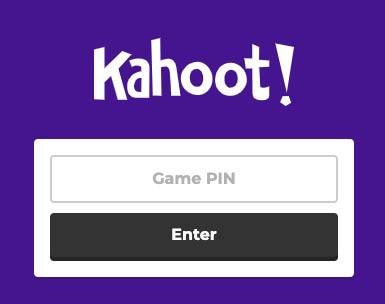
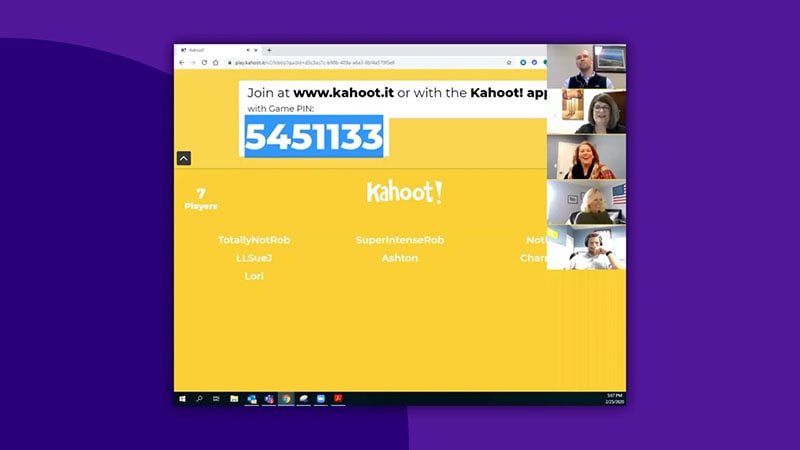
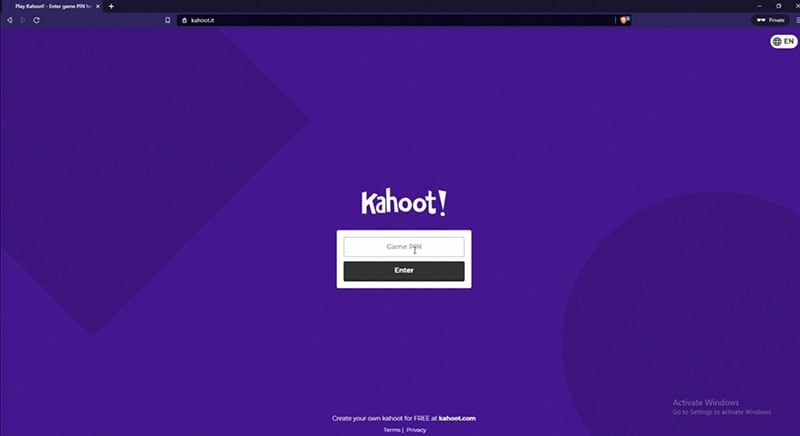
Step3The lobby will reveal your game PIN when you click the Play button, allowing the computer to show you a Kahoot! You may enter the game PIN and press Enter to join the Kahoot! session once the host shows their screen with you. To participate in a Kahoot! session, you don’t need a Kahoot! account.
Part 4: How to Record Zoom Meetings
Zoom is a conference tool that enables real-time, high-quality, low-latency communication. Filmora is an excellent video recorder for that reason, enabling users to capture on-screen activity such Zoom audio tracks and video conversations. Wondershare One of the most versatile and portable Zoom voice recorders is the Filmora. Even novices may easily utilize it due to its user-friendly UI. All you have to do is click the record button after choosing the proper audio source in the settings. The all-in-one video editing program Filmora allows you to record your screen with audio, a facecam, and a green screen effect. You can record the entire screen or just a portion of it, and you can perform a number of quick edits on your video using tools like trimming, cropping, changing the audio track’s volume, and so on.
How to Use Filmora to Record Zoom Lectures
Having said that, Filmora is a great Zoom recorder that can capture games, audio, and video conversations. This video recorder may be used to make video clip lessons in addition to recording movies, video games, and webcam footage. In addition to Zoom, it can also capture internet streaming audio. Here is information on how to record Zoom meetings using this software:
Step1Download and Install Filmora on your PC
To use this program for a number of tasks, including screen recording and recording editing, you must first download and install it on your computer. To achieve this, download the recording program by clicking the link below. Launch the program as soon as the download is finished to start the installation process, and then adhere to the on-screen directions to install and make this software available for usage.
Step2Choose the Record’s Ideal Position in the Zoom
Use it on your PC at this point. As soon as you start the program, a window interface with two choices for screen recording, editing already recorded videos, and generating videos will display. Choose the Recording option from the menu. When you click the record button, the program will direct you to the recording interface, where you can easily adjust the settings for your camera and audio. To add the microphone or Zoom sound in that particular field, use the necessary buttons as described below:
Step3Press the Record Button
It goes without saying that you must test your recording tools to ensure they are functional and capturing the highest quality audio. But once you’re ready, click the record button, which will allow you 3-5 seconds before starting to record the personalized screen of your PC as seen below:
Step4Export and Save Your Zoom Recording
You may now save the Zoom video for sharing on social media after making and modifying it. The following file types may be used to save the document: MP4, WMV, AVI, MOV, GIF, and MP3. The finest feature of Wondershare Filmora is the direct export and sharing of Zoom video recordings to YouTube; the only need is that you must be signed in to your YouTube account inside the application:
Because the MOV format is only available for online movies, you may also export your Zoom recordings to MP4 if you want to publish them to your YouTube channel. You are free to choose the format that best suits your needs. You may choose the encoder from a drop-down menu in the export options.
Conclusion
With the aid of several interesting tools and programs made accessible in this virtual environment, learning has now become enjoyable. Of them is Kahoot! In Zoom. It is an application that acts as a learning tool by providing fun games, tests, and a variety of other chances. In only a few minutes, quizzes may be made and distributed. Games and quizzes may be planned using this platform quite easily. The Kahoot! with Zoom will make it simpler than ever for corporate leaders to engage and encourage their team members with Kahoot!! engaging game-based learning experiences at a time when many organizations are staying virtual or planning for a hybrid model. Head towards recording Kahoot with Filmora to experience a smooth Kahoot! usage on Zoom. Plus, you can also share the gameplay afterwards.
In the educational game Kahoot! participants respond to multiple-choice questions based on trivia. Each participant uses their own controller to answer questions in the online game. There are several question kinds to pick from, allowing for complete customization of the test. Each player needs their own controller for Kahoot! The game questions will be shown in the Zoom/Google Meet window, but the answers must be entered using the controller. With the Kahoot!! app for Zoom, presenters may use play and friendly rivalry to increase participant engagement. Users may organize knowledge- and feedback-gathering pulse checks with staff members, encourage original thought with word clouds, and empower participants’ voices with surveys, open-ended questions, and other tools. Utilizing the brainstorm tool, organizations may crowdsource ideas and advance teamwork.
Engagement has emerged as a crucial component of successful learning, collaboration, and connection as the globe has increased the use of video communications in social and professional situations. Users may access, host, and play Kahoot!! games and educational information with other meeting participants using the Kahoot!! app for Zoom without ever leaving the Zoom Meeting or requiring a second device. Corporate executives may motivate their staff via speeches, meetings, and online activities. Meeting hosts will have immediate access to data and statistics from their Kahoot!! experience, allowing them to respond in real time to audience engagement with the material. Additionally, hosts may email the Kahoot!! games to all participants so they can practice and improve their scores, which will increase participant engagement and learning retention. Hosts can also distribute the Kahoot!! games as self-paced challenges with individuals who couldn’t attend in person.
Part 1: Key Features of Kahoot
What more is there to discuss, Kahoot!? Every pupil adores it. Many instructors and educators use it all around the world to make learning simple, enjoyable, and interesting. Everyone may use it since it is free and extremely simple to use. These are some of its attributes:
- Quizzes may be made in a matter of minutes.
- Develop games based on the abilities of the kids. Playing at home or in the Zoom is simple for them.
- Various templates are offered. You can choose one of them with confidence.
- Kahoot! has the ability to be organized into many folders according to topics or subjects.
- Additionally, multiple choice questions may be included by quiz makers.
- Teachers using Kahoot! may combine different questions into one format, such as quizzes, polls, riddles, and slides.
- Use Apple Schoolwork, Google Zooms, and Microsoft Teams to share student-centered tasks.
Part 2: How to Host a Kahoot! Session within a Zoom Meeting
With the Zoom app, Kahoot! may be viewed, hosted, and used. It’s amazing that Kahoot!!, one of the most well-known brands in quiz-based learning, still provides a free-to-use platform, making it very accessible to both instructors and students. It’s also a useful resource for a hybrid class that combines online and classroom instruction. Most devices will be able to use the cloud-based service using a web browser. This implies that students using computers, tablets, and cellphones in class or at home may access this. Participants in Zoom Meetings may play games and learn without having to leave the Zoom meeting or bring a second device.
Step1Sign up for Zoom ahead of time and get ready. On the other hand, launch the Kahoot! test in your web browser, then be ready to share your screen in Zoom.
Step2As the participants come, allow them in and check to see whether you and they can both hear each other. To access the Kahoot! quiz, make sure they have a device or another browser tab open.
Step3Open the Kahoot! test and share it using Zoom’s “Share Screen” feature. While your screen is shared, continue to host the Kahoot! as normal. To view participants next to your shared screen, we advise selecting Side-by-Side Mode.
Part 3: How to Participate in Kahoot! Sessions within a Zoom Meeting
With more than 40 million ready-made games available on Kahoot!!, getting started is fast and simple. When time and resources are limited, hybrid or distant learning is ideal. After linking the Kahoot! to your Zoom account, you may utilize it. Use this app and start a meeting. Go to Apps on the toolbar and choose the program you wish to use. Select Who is Hosting to locate their host or to join a Kahoot! session being hosted by a friend or another player. Players may post a question to a shared screen on the Kahoot! platform. Kahoot!! just needs an account to be made in order to use it since it is free. Most devices may be used by students to access Kahoot!! from wherever there is an internet connection. This is how:
Step1Take the time to check that Zoom, Skype, Cisco Webex, or Google Hangout are operating and that your camera, microphone, and speaker are all operational.
Step2In the right-side panel, add the Kahoot!! app to your list of apps and click Join.
Step3The lobby will reveal your game PIN when you click the Play button, allowing the computer to show you a Kahoot! You may enter the game PIN and press Enter to join the Kahoot! session once the host shows their screen with you. To participate in a Kahoot! session, you don’t need a Kahoot! account.
Part 4: How to Record Zoom Meetings
Zoom is a conference tool that enables real-time, high-quality, low-latency communication. Filmora is an excellent video recorder for that reason, enabling users to capture on-screen activity such Zoom audio tracks and video conversations. Wondershare One of the most versatile and portable Zoom voice recorders is the Filmora. Even novices may easily utilize it due to its user-friendly UI. All you have to do is click the record button after choosing the proper audio source in the settings. The all-in-one video editing program Filmora allows you to record your screen with audio, a facecam, and a green screen effect. You can record the entire screen or just a portion of it, and you can perform a number of quick edits on your video using tools like trimming, cropping, changing the audio track’s volume, and so on.
How to Use Filmora to Record Zoom Lectures
Having said that, Filmora is a great Zoom recorder that can capture games, audio, and video conversations. This video recorder may be used to make video clip lessons in addition to recording movies, video games, and webcam footage. In addition to Zoom, it can also capture internet streaming audio. Here is information on how to record Zoom meetings using this software:
Step1Download and Install Filmora on your PC
To use this program for a number of tasks, including screen recording and recording editing, you must first download and install it on your computer. To achieve this, download the recording program by clicking the link below. Launch the program as soon as the download is finished to start the installation process, and then adhere to the on-screen directions to install and make this software available for usage.
Step2Choose the Record’s Ideal Position in the Zoom
Use it on your PC at this point. As soon as you start the program, a window interface with two choices for screen recording, editing already recorded videos, and generating videos will display. Choose the Recording option from the menu. When you click the record button, the program will direct you to the recording interface, where you can easily adjust the settings for your camera and audio. To add the microphone or Zoom sound in that particular field, use the necessary buttons as described below:
Step3Press the Record Button
It goes without saying that you must test your recording tools to ensure they are functional and capturing the highest quality audio. But once you’re ready, click the record button, which will allow you 3-5 seconds before starting to record the personalized screen of your PC as seen below:
Step4Export and Save Your Zoom Recording
You may now save the Zoom video for sharing on social media after making and modifying it. The following file types may be used to save the document: MP4, WMV, AVI, MOV, GIF, and MP3. The finest feature of Wondershare Filmora is the direct export and sharing of Zoom video recordings to YouTube; the only need is that you must be signed in to your YouTube account inside the application:
Because the MOV format is only available for online movies, you may also export your Zoom recordings to MP4 if you want to publish them to your YouTube channel. You are free to choose the format that best suits your needs. You may choose the encoder from a drop-down menu in the export options.
Conclusion
With the aid of several interesting tools and programs made accessible in this virtual environment, learning has now become enjoyable. Of them is Kahoot! In Zoom. It is an application that acts as a learning tool by providing fun games, tests, and a variety of other chances. In only a few minutes, quizzes may be made and distributed. Games and quizzes may be planned using this platform quite easily. The Kahoot! with Zoom will make it simpler than ever for corporate leaders to engage and encourage their team members with Kahoot!! engaging game-based learning experiences at a time when many organizations are staying virtual or planning for a hybrid model. Head towards recording Kahoot with Filmora to experience a smooth Kahoot! usage on Zoom. Plus, you can also share the gameplay afterwards.
An Ultimate Guide to Edit a Music Video: Aspect Ratio and First Cut
Are you planning to edit your music video? Do you need on out how to edit your first music video draft? Editing a music video is a creative task but can be challenging.
One of the key elements of this process is selecting the aspect ratio and making the first cut. In this blog, we will explore these steps in detail, providing important tips and tricks. Whether you’re a beginner or an experienced editor, get ready to take your music video to the next level. Let’s get started.
Which software will you need?
As we have a lot of software in the market, we must select the right software for high-quality editing. Wondershare Filmora is an amazing video editing software. It offers a ton of video editing tools. You can add special effects, transitions, and more to make your music video captivating.
Free Download For Win 7 or later(64-bit)
Free Download For macOS 10.14 or later
![]()
Note: Before you start editing your project, make sure that you have a backup. You can copy the project to an external USB or hard drive for a backup.
Adjust the aspect ratio
The aspect ratio is known as the size of the video frame. For example, the most common aspect ratios are 16:9 and 4:3. The first number represents the width, and the second represents the height.
You should always ask your cinematographer about the aspect ratio. There are chances when cameras won’t shoot at the intended aspect ratio they were framed for. In that case, you’ll need to crop or letterbox them when editing.

How to find the width/height of the frame?
Most of the frames that are being shot on the camera are 3424 pixels wide, which is a little under 4k. If you have a measurement of one side of the frame, you can find the other by using some math. Let’s suppose your frame is 3424 pixels wide. You can use this formula to find the height.
Formula: 3424 pixels wide x 1 high / 2.35 wide (or whatever your aspect ratio)

Now you can cancel out the width from the multiplier and the denominator.
= 3424 pixels wide x 1 high / 2.35 wide

Now you are left with the equation:
= 3424 pixels high / 2.35
After solving this equation, you will get the answer which is: 1457 pixels high. Let’s adjust it on the music video as well, follow the steps given below:
Free Download For Win 7 or later(64-bit)
Free Download For macOS 10.14 or later
Step1Open the aspect ratio setting tab
Open your music video project in Filmora and click on the screen icon, as shown in the picture.
![]()
Then select the Change Project Aspect Ratio.

Step2Add values
Now set the project Width to 3424 pixels and its Height to 1457 pixels. You can also adjust the frame rate by selecting the one in which you shot the video. Then click OK.

Assembly
The next step is assembly. You will arrange the shots, clips, and elements in this process and get everything in order. It can be daunting and inspiring for you, as it’s a blank canvas you are going to start with. Before editing, you can also get some guidance from your art director.
If your music video has shots of the band performing, drop them off first and sync them with the audio. On the contrary, if you are doing a narrative style, you can arrange the shots according to the story you want to portray.

Step1Drop the media
You can start by dragging and dropping the music onto the audio timeline. Then you can add the shots of your music video.

Step2Arrange the shots
Arrange the shots according to the storyboard you created and sync them with the audio.

Step3Add the title
Once you arrange all shots in order, you can add the title of your music video. Click on the Titles, then choose your desired style and add the name of your music video in the title box. You can also change the text’s size, font, and color.

Step4Flip the clip
One last thing is, if you shot any scene in mirror-image format, you can flip it. Click on the clip you want to flip and select the flip icon in the video properties.

Send your first draft
The first draft is the video in which you added audio and re-ordered the shots. You decided on the pace and flow of the video to create a basic structure. You made changes to make it interesting and captivating.
Before you put too much effort into editing your video, send it to your director, producer, or client for review. It will help ensure that any big changes can be made before you invest too much time in the edit.
For first drafts, you don’t need anything fancy. A lower-resolution and more compressed file can make sending it to a director or client much easier. You can also add a timer on the music video, so the person reviewing it can give you accurate timing on where he wants any revision.
How to add the timer in the music video?
- Click on Effects and search for Timecode in the search bar.
- Choose the timer style you like and drop it onto the new timeline.
- Extend the timer to the end of the video.
- Adjust the position and add the duration of your music video.

Now you are all set to export the first draft of your music video. You can also adjust the video format on the export option, but MP4 is recommended.
Conclusion
We hope this blog has helped you edit the initials of your music video. By adjusting the aspect ratio to fit the desired screen size and properly planning the first cut, you can lay a solid foundation for the rest of the editing process.
These two steps can greatly impact the overall look and feel of the final product. Remember to communicate with your director, producer, or client throughout the process to ensure that the final product meets their expectations.
Free Download For macOS 10.14 or later
![]()
Note: Before you start editing your project, make sure that you have a backup. You can copy the project to an external USB or hard drive for a backup.
Adjust the aspect ratio
The aspect ratio is known as the size of the video frame. For example, the most common aspect ratios are 16:9 and 4:3. The first number represents the width, and the second represents the height.
You should always ask your cinematographer about the aspect ratio. There are chances when cameras won’t shoot at the intended aspect ratio they were framed for. In that case, you’ll need to crop or letterbox them when editing.
How to find the width/height of the frame?
Most of the frames that are being shot on the camera are 3424 pixels wide, which is a little under 4k. If you have a measurement of one side of the frame, you can find the other by using some math. Let’s suppose your frame is 3424 pixels wide. You can use this formula to find the height.
Formula: 3424 pixels wide x 1 high / 2.35 wide (or whatever your aspect ratio)
Now you can cancel out the width from the multiplier and the denominator.
= 3424 pixels wide x 1 high / 2.35 wide
Now you are left with the equation:
= 3424 pixels high / 2.35
After solving this equation, you will get the answer which is: 1457 pixels high. Let’s adjust it on the music video as well, follow the steps given below:
Free Download For Win 7 or later(64-bit)
Free Download For macOS 10.14 or later
Step1Open the aspect ratio setting tab
Open your music video project in Filmora and click on the screen icon, as shown in the picture.
![]()
Then select the Change Project Aspect Ratio.
Step2Add values
Now set the project Width to 3424 pixels and its Height to 1457 pixels. You can also adjust the frame rate by selecting the one in which you shot the video. Then click OK.
Assembly
The next step is assembly. You will arrange the shots, clips, and elements in this process and get everything in order. It can be daunting and inspiring for you, as it’s a blank canvas you are going to start with. Before editing, you can also get some guidance from your art director.
If your music video has shots of the band performing, drop them off first and sync them with the audio. On the contrary, if you are doing a narrative style, you can arrange the shots according to the story you want to portray.
Step1Drop the media
You can start by dragging and dropping the music onto the audio timeline. Then you can add the shots of your music video.
Step2Arrange the shots
Arrange the shots according to the storyboard you created and sync them with the audio.
Step3Add the title
Once you arrange all shots in order, you can add the title of your music video. Click on the Titles, then choose your desired style and add the name of your music video in the title box. You can also change the text’s size, font, and color.
Step4Flip the clip
One last thing is, if you shot any scene in mirror-image format, you can flip it. Click on the clip you want to flip and select the flip icon in the video properties.
Send your first draft
The first draft is the video in which you added audio and re-ordered the shots. You decided on the pace and flow of the video to create a basic structure. You made changes to make it interesting and captivating.
Before you put too much effort into editing your video, send it to your director, producer, or client for review. It will help ensure that any big changes can be made before you invest too much time in the edit.
For first drafts, you don’t need anything fancy. A lower-resolution and more compressed file can make sending it to a director or client much easier. You can also add a timer on the music video, so the person reviewing it can give you accurate timing on where he wants any revision.
How to add the timer in the music video?
- Click on Effects and search for Timecode in the search bar.
- Choose the timer style you like and drop it onto the new timeline.
- Extend the timer to the end of the video.
- Adjust the position and add the duration of your music video.
Now you are all set to export the first draft of your music video. You can also adjust the video format on the export option, but MP4 is recommended.
Conclusion
We hope this blog has helped you edit the initials of your music video. By adjusting the aspect ratio to fit the desired screen size and properly planning the first cut, you can lay a solid foundation for the rest of the editing process.
These two steps can greatly impact the overall look and feel of the final product. Remember to communicate with your director, producer, or client throughout the process to ensure that the final product meets their expectations.
Also read:
- New Want to Apply a Filter on Your Video Using Your iPhone or Mac? Here Are the Simple Steps to Put Add Filters on iMovie. Find Out a Better iMovie Alternative with More Filters for 2024
- Updated How to Add Green Screen Effects In Phhotoshop
- In 2024, FLV Editors for Windows 11/10/8.1/8/7 Easily Edit FLV Videos on PC
- New 2024 Approved Want to Immediately Know All About Discord GIF?
- New 2024 Approved A Complete Overview of VSCO Video Editor
- New Follow the Trend of Making Slow-Motion Videos with a Camera Lenta CapCut Template. Learn Everything About CapCut and Find Its Alternatives in This Article for 2024
- Updated Here, You Will Learn How to Add a Realistic Fire Effect Using Wondershare Filmora. That Will Help to Boost Your Channel and Decorate Your YouTube Channel with Creative and Unique Effects for 2024
- In 2024, How to Merge Audio and Video Using FFmpeg
- New Unleash the Power of Video Slow Motion with Wondershare Filmora. Find Out How to Create Slow Motion Video with the Effective Speed Ramping Feature on Filmora
- 2024 Approved Creating Testimonial Videos For Health And Wellness Business Industry
- New Top 11 Best Video Editing Apps for iPhone
- It Is Crucial to Introduce Your Kids to the Different Colors and Practice the Color Matching Game. So, Here Are the Various Factors Related to Color Matching for Your Child with a Tool to Help You in It Ideally
- New Searching for the Best Video Editor to Make Your Video More Attractive? This Article Introduce You Everything About Choosing a Video Editing Software
- 2024 Approved Discover the Top 5 Free Online Video Filter Editors to Transform Your Videos with Captivating Color Grading and Correction Presets. Elevate Your Digital Storytelling Effortlessly
- The Complete Guide to Make a Text Collage
- New 2024 Approved Detailed Tutorial to Merge Videos in VLC Media Player
- New 2024 Approved Learn Topaz Video Enhance AI Review and Achieve Powerful Video Conversion
- In 2024, Here, You Will Learn How to Add a Realistic Fire Effect Using Wondershare Filmora. That Will Help to Boost Your Channel and Decorate Your YouTube Channel with Creative and Unique Effects
- In 2024, How to Create Realistic Fire Effects
- New How to Make Simple Slideshow Word for 2024
- Here are Some Pro Tips for Pokemon Go PvP Battles On Samsung Galaxy A14 5G | Dr.fone
- In 2024, Pokémon Go Cooldown Chart On Apple iPhone 15 Pro | Dr.fone
- How to Spy on Text Messages from Computer & Xiaomi Redmi 13C | Dr.fone
- New Best Video Translator App for PC You Cannot Miss
- In 2024, How to Screen Mirroring Infinix Note 30 VIP? | Dr.fone
- Hard Resetting an Honor X50 GT Device Made Easy | Dr.fone
- How to Transfer Text Messages from Tecno Spark 20 Pro+ to New Phone | Dr.fone
- How Can We Bypass Itel A05s FRP?
- Where Is the Best Place to Catch Dratini On Honor Magic 6 | Dr.fone
- In 2024, How To Change Country on App Store for Apple iPhone 6s With 7 Methods | Dr.fone
- In 2024, 3 Ways to Track Vivo S18 Pro without Them Knowing | Dr.fone
- Is Your iPhone 13 Pro Max in Security Lockout? Proper Ways To Unlock
- Title: How to Make a Slow Motion Video in Wondershare Filmora
- Author: Morgan
- Created at : 2024-05-19 05:11:36
- Updated at : 2024-05-20 05:11:36
- Link: https://ai-video-editing.techidaily.com/how-to-make-a-slow-motion-video-in-wondershare-filmora/
- License: This work is licensed under CC BY-NC-SA 4.0.
