How to Make a Super Easy Rotating Video Effect

How to Make a Super Easy Rotating Video Effect
Controlling camera direction to the subject’s hands and filming is trending nowadays. Create this effect by using easy film hacks, as shown in this article.
Many users make rotating illusion videos for TikTok or any branding video. The foremost items to record are explained in this article with detailed instructions. The best editing tool is also clarified below for instant results. So keep reading to get a hand with filming and editing a professional rotating transition video!
Part 1. What is a Rotating Video Illusion/Effect
Rotating transition video is a trending feature used by models and influencers. The brands also use this style to record the model’s videos in advertisements. It could be any makeup transition or clothing transition video.

It helps to indulge the audience with your content and show the after and before transitions. You can try this with any object or any character. But first, let’s figure out the requirements for rotating effects.
Part 2. Prerequisites to Make a Rotating Video Effect
You will need a few items to create a rotating transition video. First, look at the fundamental priorities for creating this feature.
The Subject Matters
To record a successful rotating video, you need a person or a subject to perform in front of the camera. It can be a model hired by a brand, a social influencer, or maybe it’s you. Keep in mind the following things before recording:
- The person should get two different costumes.
- All the actions need to be rehearsed before shooting
- Show affinity and control of the camera.

Shotting Equipment
To record a professional video, you need a good camera. You can use a smartphone to record this footage. There is no need to have a tripod stand or any gear to hold the camera because the camera will be in a rotating position, the same as the subject’s hand.
For this, you need a filmmaker or any person living with you. Just give instructions as shown below to him to record a perfect video for yourself:
- Record the whole video in just one direction.
- Don’t shake the camera because it gives blurry footage.
- Ensure to focus on the subject during recording.
- Don’t zoom in or out while recording the video.
- Keep the subject in the middle of the frame during the recording process.
- The hand rotation timing is the same as the camera’s rotation.
![]()
Note: Ensure to record one footage multiple times so that you can choose the perfect one later for editing.

Filming of the First Footage
To make the footage for the rotating video illusion, we have to record it at least twice to get crystal clear and high-resolution results. Therefore, ensure that we have camera movement in the same direction during all recording times.
![]()
Note: You can film the video either in the vertical format of the camera or in horizontal format. It all depends upon your script!
Follow the below-mentioned steps to record the first footage for the video:
- Hold the camera in a perfect format, whatever you choose.
- Let the subject stand or sit in the middle of the frame.
- The filmmaker can rotate the camera when the subject’s hand rotates.
- Try your best to rotate the camera 180 degrees.
- Ensure that the camera lens faces the ground at the end of the rotation.

After filming the first footage for the video, it’s time to record the second footage to transition between the two.
Filming of the Second Footage
To create a second shot, you have to remember that the costume and location of the filming are different from the first footage. Follow the below steps to record it:
- The first step is to hold the camera in the same direction as the first footage.
- When editing, make sure the subject’s position matches the first footage.
- Make sure the subject’s hand movement is in the opposite direction from the first shot.

Now you have both scenes and footage ready. Next, you have to edit them by inserting them into editing software. Follow the step guides below to perform this action!
Part 3. Step-by-Step Guide to Edit on Filmora
To create a professional rotating video illusion, Wondershare Filmora is an ideal tool. Even beginners can quickly get the hang of it due to its highly engaging system user interface (UI). You will discover how to create a rotating video effect in a few clicks.
Free Download For Win 7 or later(64-bit)
Free Download For macOS 10.14 or later

Step1 Download Wondershare Filmora
To edit your video like a pro, download the most recent version of Wondershare Filmora.
- Download and open Wondershare Filmora on your PC or Mac.
Step2 Import the Footage
Import recorded footage to start the editing process. It is better to have all your footage in one folder before importing all the clips. The main import window locates in the upper left corner when it is first launched.
- Click on the Import icon in the import window’s center.
- Wondershare Filmora will then immediately point you toward your PC
- Navigate to the location where your preferred Videos and Photos are kept.
- Choose every footage you wish to import.
- Once you click Open, the files will import.

It’s time to prepare the footage for editing after inserting it into the Filmora. Follow the next steps to do this!
Step3 Add Footage to the Timeline
The videos you’ve imported will be added to the timeline after that. You can import both footages at once and put them all at once into the timeline.
Alternatively, you can add them one at a time as needed. Follow the procedures as shown to add an item to your timeline.
- To choose a photo or movie, use the right-click
- Holding the Right-click, and move it to the timeline from the bottom.

Your images and videos have been imported into the timeline; now it’s time to trim them according to requirements.
Step4 Trim the Clips
To insert transition effects, you must trim the clip at a specific point and speed up the clip at the required duration. For this, follow the next actions as shown below:
- Playback clips and stop the playhead where you want by pressing the Space button from the Keyboard.
- Then, click on the Split icon present on the playhead.
- It will trim the clip from that point and separate it from its former one.

After splitting or trimming the clips, you now have to adjust the speed of the clips, as shown below!
Step5 Adjust Speed and Duration
There is a need to increase the speed of some scenes where the transition starts or ends. For this, follow the below actions:
- Find the section which needs to speed up, such as in the last half of each rotation.
- Right-click on the section of the clip in the timeline.
- Then, select the Speed option as shown in the icon of the timer present on the upper tab of the timeline.
- Select the Fast option, and if you want to lower the speed, select the Slow option**.**
- Choose the speed range according to your requirement.
- Select that required option and play it back to check if it is correct.

The video is all set; give it the final touches by following the last step, as shown below!
Step6 Playback the Video
After adding and adjusting all the features, double-check the video by playback. If you find any duration issue, review it and adjust it according to your requirement.
You can playback the video by clicking on the Play button. Perform this a few more times to ensure the speed looks okay and adjust if it is too slow or too fast.

You can also view it in full screen by selecting the last option on the tab. If there is no problem, you can export it locally or directly share it on TikTok or anywhere you want to gain views and attract an audience. You can also use it as a magic trick to inspire other people or as a transition for videos!
Conclusion
Keep creating and experimenting with other features on Wondershare Filmora. For example, you can use different effects, try on stock media, and then create or film your own. In this way, you’ll get professional results.
If you are showing new strategies daily to your viewers, they will hook up with you, and it’ll assist in the algorithm working by your side. That’s why keep doing it and enjoying the rest!

Filming of the First Footage
To make the footage for the rotating video illusion, we have to record it at least twice to get crystal clear and high-resolution results. Therefore, ensure that we have camera movement in the same direction during all recording times.
![]()
Note: You can film the video either in the vertical format of the camera or in horizontal format. It all depends upon your script!
Follow the below-mentioned steps to record the first footage for the video:
- Hold the camera in a perfect format, whatever you choose.
- Let the subject stand or sit in the middle of the frame.
- The filmmaker can rotate the camera when the subject’s hand rotates.
- Try your best to rotate the camera 180 degrees.
- Ensure that the camera lens faces the ground at the end of the rotation.

After filming the first footage for the video, it’s time to record the second footage to transition between the two.
Filming of the Second Footage
To create a second shot, you have to remember that the costume and location of the filming are different from the first footage. Follow the below steps to record it:
- The first step is to hold the camera in the same direction as the first footage.
- When editing, make sure the subject’s position matches the first footage.
- Make sure the subject’s hand movement is in the opposite direction from the first shot.

Now you have both scenes and footage ready. Next, you have to edit them by inserting them into editing software. Follow the step guides below to perform this action!
Part 3. Step-by-Step Guide to Edit on Filmora
To create a professional rotating video illusion, Wondershare Filmora is an ideal tool. Even beginners can quickly get the hang of it due to its highly engaging system user interface (UI). You will discover how to create a rotating video effect in a few clicks.
Free Download For Win 7 or later(64-bit)
Free Download For macOS 10.14 or later

Step1 Download Wondershare Filmora
To edit your video like a pro, download the most recent version of Wondershare Filmora.
- Download and open Wondershare Filmora on your PC or Mac.
Step2 Import the Footage
Import recorded footage to start the editing process. It is better to have all your footage in one folder before importing all the clips. The main import window locates in the upper left corner when it is first launched.
- Click on the Import icon in the import window’s center.
- Wondershare Filmora will then immediately point you toward your PC
- Navigate to the location where your preferred Videos and Photos are kept.
- Choose every footage you wish to import.
- Once you click Open, the files will import.

It’s time to prepare the footage for editing after inserting it into the Filmora. Follow the next steps to do this!
Step3 Add Footage to the Timeline
The videos you’ve imported will be added to the timeline after that. You can import both footages at once and put them all at once into the timeline.
Alternatively, you can add them one at a time as needed. Follow the procedures as shown to add an item to your timeline.
- To choose a photo or movie, use the right-click
- Holding the Right-click, and move it to the timeline from the bottom.

Your images and videos have been imported into the timeline; now it’s time to trim them according to requirements.
Step4 Trim the Clips
To insert transition effects, you must trim the clip at a specific point and speed up the clip at the required duration. For this, follow the next actions as shown below:
- Playback clips and stop the playhead where you want by pressing the Space button from the Keyboard.
- Then, click on the Split icon present on the playhead.
- It will trim the clip from that point and separate it from its former one.

After splitting or trimming the clips, you now have to adjust the speed of the clips, as shown below!
Step5 Adjust Speed and Duration
There is a need to increase the speed of some scenes where the transition starts or ends. For this, follow the below actions:
- Find the section which needs to speed up, such as in the last half of each rotation.
- Right-click on the section of the clip in the timeline.
- Then, select the Speed option as shown in the icon of the timer present on the upper tab of the timeline.
- Select the Fast option, and if you want to lower the speed, select the Slow option**.**
- Choose the speed range according to your requirement.
- Select that required option and play it back to check if it is correct.

The video is all set; give it the final touches by following the last step, as shown below!
Step6 Playback the Video
After adding and adjusting all the features, double-check the video by playback. If you find any duration issue, review it and adjust it according to your requirement.
You can playback the video by clicking on the Play button. Perform this a few more times to ensure the speed looks okay and adjust if it is too slow or too fast.

You can also view it in full screen by selecting the last option on the tab. If there is no problem, you can export it locally or directly share it on TikTok or anywhere you want to gain views and attract an audience. You can also use it as a magic trick to inspire other people or as a transition for videos!
Conclusion
Keep creating and experimenting with other features on Wondershare Filmora. For example, you can use different effects, try on stock media, and then create or film your own. In this way, you’ll get professional results.
If you are showing new strategies daily to your viewers, they will hook up with you, and it’ll assist in the algorithm working by your side. That’s why keep doing it and enjoying the rest!
Are You Aware that AV1 Has the Potential to Change the Way We Watch Videos Online? Read on to Learn More About AV1 and How It Could Impact Your Life
Have you heard about the AV1 format video? This format is a new compression standard that promises to improve video quality while reducing file size. If you frequently stream video, the AV1 files could make an impact on your life, and we are just beginning to see its potential. Let’s take a further look at what AV1 is and what you need to know about this new video codec.
Part 1: Where does it come from?
AV1 (AOMedia Video 1) is a new video compression format that is being developed by the Alliance for Open Media (AOMedia). AOMedia is a consortium of major tech companies including Google, Microsoft, Netflix, and Amazon. The AV1 codec is an improvement on VP9 in several ways, most notably in its ability to compress video more efficiently.
Although the AV1 codec is still in the early stages of development, it is already being adopted by some major tech companies. Netflix has announced that it will start using AV1 for its streaming service, and Google has said that AV1 will be the default codec for YouTube.
How can streaming platforms and users benefit from a new codec?

The importance of codecs
A codec is a device that encodes and decodes digital audio signals. Without a codec, your audio would sound garbled and distorted. There are two metrics to take into account to judge the performance of video codecs: quality and bitrate.
The benefits of the new codec
Two of the most popular video formats, provide high-quality video at a relatively low bit rate.
The new AV1 codec offers several benefits for streaming platforms and their users. Take a look at a few of them:
- Lower bitrate
- Reduced costs for encoding
For streaming platforms, AV1 could lead to reducing costs for encoding as well as increasing quality and compatibility. For users, AV1 could improve streaming quality, especially on mobile devices.
- Smaller size with better quality
AV1 files will take up less space on your hard drive or be smaller in file size when streamed online. Since AV1 can compress video files to a much smaller size without sacrificing quality, users will be able to save data when streaming video on their devices!
- More efficient
AV1 will use less processing power to decode a video compared to other video codecs. As a result, the streaming platforms can save on bandwidth costs, which can be passed on to users in the form of lower subscription prices eventually.
- Royalty-free
The ultimate goal of AOMedia is to develop an open and royalty-free video codec that can be used by anyone. So, you will have better video quality, lower bandwidth costs, and faster loading times.
AV1 is just one of the many new technologies that are revolutionizing online media delivery. With its superior quality and efficiency, AV1 is poised to become the standard codec for online video in the years to come where everyone can access more affordable and high-quality videos.
Part 2: What are the Trends of Codec War AV1?
As we have already discussed, AV1 is a newer codec that promises better compression. This video format has already been widely used and gaining traction in the streaming industry. It is being used more for live broadcasts and other time-sensitive applications.
Who will prevail?
Since both codecs have their pros and cons, it’s unclear which one will ultimately prevail. However, as the world moves towards more open standards for video codecs, there is growing concern that AV1 codec will be used to monopolize the market. While AV1 is free to use, it is encumbered by patents held by members of the Alliance for Open Media (AOMedia), which includes companies like Google, Microsoft, and Apple.
How would AV1 monopolize the market?

The EU Commissions’ questionnaire, as reported by Reuters , unveiled that the alliance and its members had been requiring companies to cross-license their patents for no charge to receive the AV1 format. These companies had no affiliation with AOM when AV1 was originally devised. This was a non-negotiable requisite for companies who owned patents that were necessary to contribute to the AV1 standard’s technical specifications.
As a result, this action is concerned to hinder innovation and thus prevents the new entities feasible to flourish. Therefore, there is a growing movement to antitrust AV1 which has been investigated by the European Commission.
What happened after the AV1 Antitrust Investigation

The European Commission is looking into whether this licensing scheme violates antitrust law and whether the companies involved are colluding to keep AV1 closed off to competitors. The investigation is in its early stages, and no formal charges have been filed against Google at this time.
However, if the Commission finds that Google has indeed abused its market position, it could order Google to make changes to AV1 or face steep fines. Although the fines have yet to be determined, each company involved could ultimately pay up to 10% of their global turnover.
Nonetheless, this issue has shed light on the competitive landscape of the codec market. Well, although the outcome of the antitrust investigation is still uncertain, it is clear that it has the potential to shake up the codec market.
Part 3: What Should You Expect in the Future?
H.266 codec

H.266 is the next-generation video codec that is being developed to improve upon the current standard and the latest advances in video technology. We can expect H.266 to continue to evolve and be improved upon as time goes on. Some of their transcendence that you can look forward to:
- Improve compression efficiency
H.266/VVC is designed to improve compression efficiency by 20-50% over previous versions. You can have a video of the same file size and bit rate but make it look significantly better.
- Inter-Layer Prediction (ILP) usage
The H.266 codec uses a new type of inter-frame prediction called Inter-Layer Prediction (ILP). ILP allows the codec to exploit the correlations between different layers of a video signal. Therefore, it gives better results on image quality and file size when you encode a video with the H.266 codec.
- Higher-quality video
We can expect higher-quality video content to become more widespread. This new codec will also enable new types of content, such as virtual reality and 360-degree video, to be streamed and enjoyed by a wider audience.
AV2 codec
The AV2 codec is an improvement on the current AV1. The AV2 codec is said to be more efficient and have better quality than the AV1 codec. It is still in development and is not yet available for use.
Since this codec is expected to provide better quality video at lower bit rates than other codecs, it would be ideal for use in video applications such as streaming and video conferencing. So, what can we expect from the AV2 codec in the future? Here are a few things to look out for:
- Improved quality at lower bitrates
- Wider adoption in streaming and conferencing applications
- Continued development and improvement
FAQs: To cater to people also ask
1. How do I open an AV1 file?
AV1 is a relatively new file format. If you have an AV1 file that you need to open, you can use one of the following methods:
- Use a media player that supports AV1, such as VLC Media Player or MPV
- Use conversion software to convert the AV1 file into a more widely-supported file format
2. Can MP4 contain AV1?
Yes. While AV1 is a relatively new codec, it is already supported by many popular media players and devices. MP4 is a container format, which means it can hold multiple types of data. The data can be encoded using any codec, including AV1. Therefore, you can encode your content in AV1 and store it in an MP4 container for playback on the devices.
Free Download For Win 7 or later(64-bit)
Free Download For macOS 10.14 or later
Free Download For macOS 10.14 or later
Getting Into The Details: A Review of Kodak LUTs
If you’re from the 20th century, you might have used Kodak cameras. Those cameras had a distinct look and feel, creating a nostalgic look. However, as technology has advanced, we now have access to more advanced cameras. Moreover, these new cameras can capture high-quality images with accurate details. However, you can still achieve that classic Kodak look with the help of LUTs.
To add up, these LUTs can mimic the characteristics of specific films or looks, including Kodak films. There are various LUTs available to download, offering different film looks and styles. In contrast, you can get the classic Kodak film look with your modern cameras. There are different options for Kodak 2383 LUTs free download on the internet. You can download these LUTs to apply on your digital media.
Part 1: An Overview of Some Famous Kodak LUTs and Powergrade Print Films
There are many different presets available that give you Kodak films-like color grading. Here are some of the Kodak film presets that you can use.
Kodak 2383
Kodak 2383 is a color film known for its unique qualities. When used, it enhances the richness of black shades, adding depth and intensity to your images. Additionally, it brings out neutral highlights, creating a distinctive Kodak film look. Moreover, this color film is suitable for both traditional camera films and digital prints. Additionally, you can expect your images to have a timeless quality and a distinct character.
Moreover, you can give your photos a dramatic touch with black shades and neutral highlights. These color films are a unique way to give your content a classic Kodak film look. You can experience the richness and clarity it brings to your images using this film. You can get the Kodak 2383 LUT download link online.
Kodak 2393
Kodak 2393 is a Powergrade film preset that you can use. This editable LUT can improve your media files by adding richer colors, especially in the shadows. When you apply this LUT, it brings out the natural beauty of your video with the right amount of saturation. Furthermore, you can make your videos a more natural and lifelike appearance with this Powergrade.
Moreover, it works particularly well in adding depth and richness to darker areas of your footage. Similarly, it ensures that every detail is visible in a natural way. Furthermore, this LUT can achieve a more natural and realistic look. Additionally, it is a great choice if you’re looking to add vibrance and naturalness to your media files.
Kodak 2302
Kodak 2302 is a high-resolution black-and-white color print film. Furthermore, this film is specifically designed for blue-sensitive printing. It allows for the precise reproduction of details and tones in black-and-white imagery. Moreover, this Kodak 2302 film offers exceptional image quality. Additionally, it uses electron beam recorders to create positive and negative titles.
In addition to this, it also creates RGB separations using beam recorders. Similarly, this technology creates accurate color reproduction and improves the final print’s quality. Kodak 2302 is coated with an ESTAR base to enhance its performance further. This special coating improves the film’s physical properties, making it more durable and resistant.
Empower your videos with a new mood using different LUTs. Filmora now offers 100+ top-quality 3D LUTs cover a broad range of scenarios. Transform your videos with Filmora’s powerful 3D LUTs.
Apply LUT on Videos Apply LUT on Videos Learn More

Part 2: The Best Kodak LUTs Free Available in the Market
You might find many Kodak 2393 LUT free download links, but some of them are not authentic. Here is a list of authentic Kodak-inspired LUTs that you can download and use.
1. Kinetic
Kinetic LUT is a great preset inspired by the iconic Kodak 2383 and 2393 films. With Kinetic, you can bring a vibrant and dynamic color palette to your digital media. This LUT enhances shades such as deep blues and rich reds, adding depth and intensity to your visuals. Moreover, it creates dynamic shadows to bring a sense of richness and dimension to your content. It is a pack of 5 Kodak-inspired LUTs.

2. Kodak Film 2383 - Vlog
The Kodak Film 2383 - Vlog LUT is a perfect choice for adding a Kodak-inspired look to your vlogs. This LUT brings an authentic touch to your content. Moreover, this LUT enhances the color grading of your content with yellowish and bluish tones. Furthermore, it aims to recreate the look and feel of shooting with Kodak film stock. Experiment, explore, and find the perfect balance that brings out the best in your vlogs.

3. Kodak 2383 Print Film LUT
The Kodak 2383 Print Film LUT allows you to create a modern cinematic look. You can use digital videos and transform them into old-style Kodak films look. Moreover, this LUT replicates the color grading of the Kodak 2383 print film. Additionally, it captures the essence of the original film stock, providing an authentic feel. It is a great LUT to make your video content look more natural.

4. Free LUTs Kodak Color
It is a collection of LUTs inspired by the iconic Kodak film look. LUTs Kodak Color is created to enhance your media with vibrant colors and a cinematic look. It is a Kodak LUT free pack that you can download from the internet. Moreover, it adds vibrancy to your media, making the colors pop and come to life. Additionally, these LUTs decrease the white balance, giving your media a warmer tone.

5. KODAK Film Emulation LUT
The KODAK Film Emulation LUT is a collection of 16 cinematic LUTs. These LUTs are inspired by the iconic Kodak 2383 film. Furthermore, these LUTs allow you to achieve the timeless and distinctive look of Kodak film. Moreover, to increase the authenticity of Kodak films, this LUT highlights rich red and blue tones. This LUT replicates Kodak film stock to improve the character of your digital media files.

6. Kodak Film LUTs and Presets
The Kodak Film LUTs and Presets pack features 17 LUTs inspired by the iconic Kodak film look. These LUTs are created to give your digital files a timeless aesthetic. Moreover, it fades certain colors and adds vibrant tones to your media files. Furthermore, replicating Kodak films adds richness and depth to your content with color grading. Additionally, it maintains a perfect balance between classic and modern looks.

7. CL-Kodak
CL-Kodak is a collection of 28 Kodak-style LUTs. Each LUT is designed to elevate your color grading game. Furthermore, you can color grade your media with the iconic reddish tones of Kodak films. Additionally, these LUTs add a grainy texture to your media. These LUTs support Kodak cameras up to 8K resolution. Using these LUTs, you can give your digital files the authentic nostalgic feel of Kodak films.

Part 3: Wondershare Filmora: Reviewing LUTs in Video Editor
There are many great video editing software that exist in the market. Wondershare Filmora , being among the best, offers features to enhance your videos, including color grading and adjustment capabilities. With Filmora, you can modify the colors and tones of your videos to get the desired look and feel. Furthermore, you can apply LUTs using Wondershare Filmora. You can import different LUTs in the tool and apply them directly to your files.
Add LUTs on Video For Win 7 or later(64-bit)
Add LUTs on Video For macOS 10.14 or later
In its newest update, Filmora has introduced over 200+ LUTs you can download and use. Filmora has expanded your creative color grading and adjustment options with this feature. These LUTs cover many styles, from bold and modern to retro and vintage looks. With such a vast selection, you can easily find the perfect LUT to match the mood and tone of your video project.

Key Features of Wondershare Filmora
- Filmora offers complete video editing features to help you edit your videos. You can trim and merge clips and apply transitions. Moreover, you can add text and titles, import music and sound effects, and much more.
- Furthermore, Wondershare Filmora provides advanced tools for precise control over your videos. You can adjust the brightness and contrast. Furthermore, you can control saturation and other parameters.
- You can create dynamic animations and apply effects at any frame with keyframing. Moreover, using this feature, you can add effects to specific sections of your video.
Conclusion
To conclude, using LUTs is a simple and effective way to transform your media files. Moreover, you can also add a nostalgic or cinematic feel to your videos. You can experiment with different film looks by exploring different LUTs. Furthermore, you can even get Kodak 2393 Powergrade free download options online. These Kodak-film-inspired LUTs can take you back to the 20th century.
Apply LUT on Videos Apply LUT on Videos Learn More

Part 2: The Best Kodak LUTs Free Available in the Market
You might find many Kodak 2393 LUT free download links, but some of them are not authentic. Here is a list of authentic Kodak-inspired LUTs that you can download and use.
1. Kinetic
Kinetic LUT is a great preset inspired by the iconic Kodak 2383 and 2393 films. With Kinetic, you can bring a vibrant and dynamic color palette to your digital media. This LUT enhances shades such as deep blues and rich reds, adding depth and intensity to your visuals. Moreover, it creates dynamic shadows to bring a sense of richness and dimension to your content. It is a pack of 5 Kodak-inspired LUTs.

2. Kodak Film 2383 - Vlog
The Kodak Film 2383 - Vlog LUT is a perfect choice for adding a Kodak-inspired look to your vlogs. This LUT brings an authentic touch to your content. Moreover, this LUT enhances the color grading of your content with yellowish and bluish tones. Furthermore, it aims to recreate the look and feel of shooting with Kodak film stock. Experiment, explore, and find the perfect balance that brings out the best in your vlogs.

3. Kodak 2383 Print Film LUT
The Kodak 2383 Print Film LUT allows you to create a modern cinematic look. You can use digital videos and transform them into old-style Kodak films look. Moreover, this LUT replicates the color grading of the Kodak 2383 print film. Additionally, it captures the essence of the original film stock, providing an authentic feel. It is a great LUT to make your video content look more natural.

4. Free LUTs Kodak Color
It is a collection of LUTs inspired by the iconic Kodak film look. LUTs Kodak Color is created to enhance your media with vibrant colors and a cinematic look. It is a Kodak LUT free pack that you can download from the internet. Moreover, it adds vibrancy to your media, making the colors pop and come to life. Additionally, these LUTs decrease the white balance, giving your media a warmer tone.

5. KODAK Film Emulation LUT
The KODAK Film Emulation LUT is a collection of 16 cinematic LUTs. These LUTs are inspired by the iconic Kodak 2383 film. Furthermore, these LUTs allow you to achieve the timeless and distinctive look of Kodak film. Moreover, to increase the authenticity of Kodak films, this LUT highlights rich red and blue tones. This LUT replicates Kodak film stock to improve the character of your digital media files.

6. Kodak Film LUTs and Presets
The Kodak Film LUTs and Presets pack features 17 LUTs inspired by the iconic Kodak film look. These LUTs are created to give your digital files a timeless aesthetic. Moreover, it fades certain colors and adds vibrant tones to your media files. Furthermore, replicating Kodak films adds richness and depth to your content with color grading. Additionally, it maintains a perfect balance between classic and modern looks.

7. CL-Kodak
CL-Kodak is a collection of 28 Kodak-style LUTs. Each LUT is designed to elevate your color grading game. Furthermore, you can color grade your media with the iconic reddish tones of Kodak films. Additionally, these LUTs add a grainy texture to your media. These LUTs support Kodak cameras up to 8K resolution. Using these LUTs, you can give your digital files the authentic nostalgic feel of Kodak films.

Part 3: Wondershare Filmora: Reviewing LUTs in Video Editor
There are many great video editing software that exist in the market. Wondershare Filmora , being among the best, offers features to enhance your videos, including color grading and adjustment capabilities. With Filmora, you can modify the colors and tones of your videos to get the desired look and feel. Furthermore, you can apply LUTs using Wondershare Filmora. You can import different LUTs in the tool and apply them directly to your files.
Add LUTs on Video For Win 7 or later(64-bit)
Add LUTs on Video For macOS 10.14 or later
In its newest update, Filmora has introduced over 200+ LUTs you can download and use. Filmora has expanded your creative color grading and adjustment options with this feature. These LUTs cover many styles, from bold and modern to retro and vintage looks. With such a vast selection, you can easily find the perfect LUT to match the mood and tone of your video project.

Key Features of Wondershare Filmora
- Filmora offers complete video editing features to help you edit your videos. You can trim and merge clips and apply transitions. Moreover, you can add text and titles, import music and sound effects, and much more.
- Furthermore, Wondershare Filmora provides advanced tools for precise control over your videos. You can adjust the brightness and contrast. Furthermore, you can control saturation and other parameters.
- You can create dynamic animations and apply effects at any frame with keyframing. Moreover, using this feature, you can add effects to specific sections of your video.
Conclusion
To conclude, using LUTs is a simple and effective way to transform your media files. Moreover, you can also add a nostalgic or cinematic feel to your videos. You can experiment with different film looks by exploring different LUTs. Furthermore, you can even get Kodak 2393 Powergrade free download options online. These Kodak-film-inspired LUTs can take you back to the 20th century.
The Premiere Pro Video Templates Help Make Original Content of Broadcast Quality. The Article Introduces 10 Free Premiere Pro Templates that Are Sure to Make Your Life Easy
The Premiere Pro templates are a great help to start working on the video right away. You don’t need to create your video from scratch thus, saving time. Moreover, there are fully adaptable features that make your video eye-catching. The article provides knowledge about 10 free Premiere Pro templates. So, let us commence this! Are you with us?
Part 1: 10 Popular Websites to Find Premiere Pro Templates
There is an extensive range of websites to access the free Adobe Premiere templates. It is important to know the workability of such websites and what they bring to the house. Therefore, the sub-section of this write-up would shed light on 10 of such websites where you can download Adobe Premiere templates and find them compatible with the software.
So, what are we waiting for? Let us begin the process!
1. Envato Elements
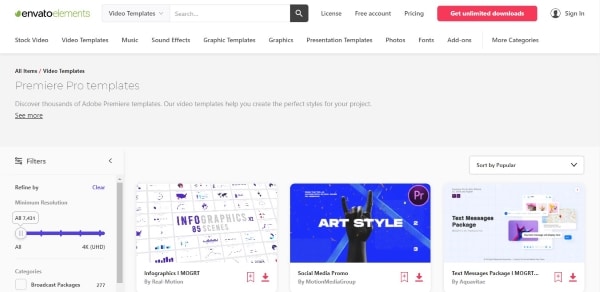
The first website offering Adobe Premiere templates is known as Envato Elements. One can count on this webpage to access millions of creative assets. Envato Elements comes up with Adobe Premiere Pro templates free, stock videos, graphic templates, photos, and website templates.
Moreover, if you are into print and website design, you will find Envato Elements beside you. The search bar makes the search effective as you can choose between categories or applications. The search filter has made life easy for designers and creators.
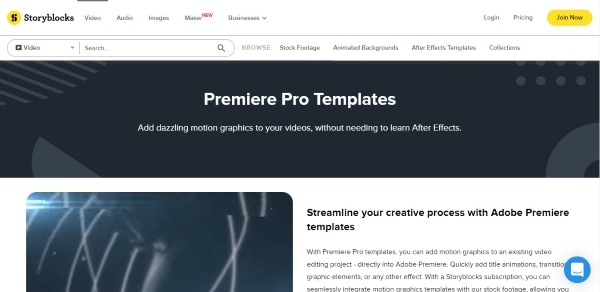
2. Storyblocks
Storyblocks are the next big thing if you need to download Premiere templates without much effort. This website presents an awful load of green screen footage, music and sound effects, animated backgrounds, royalty stock footage, and templates for Premiere Pro. It also has a Maker, enabling the user to make the professional video in seconds.
The filtering option of Storyblocks is to die for. Style or software can filter the templates and effects to have what we need without wasting much time.
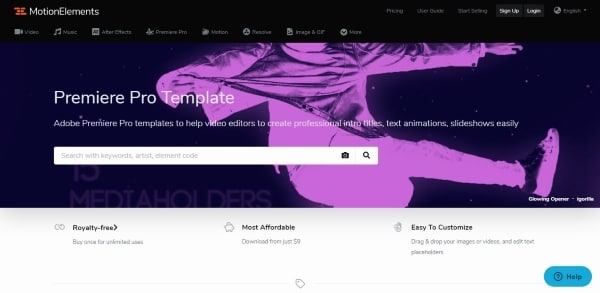
3. MotionElements
The third royalty-free marketplace making a brand name for itself is MotionElements. The website offers more than 3 million assets for its users in different industry sectors. You can access Premiere Pro templates free download with other stock videos and audio files.
From images, music, templates, effects to transitions, logos, and animations, MotionElements has covered its basis. The search filter gives multiple categories, including software, category, and style.
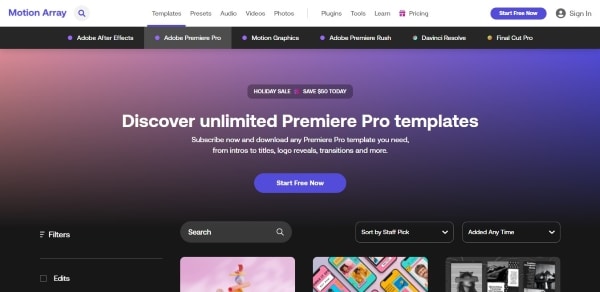
4. Motion Array
Claiming to be an all-in-one video and filmmaker’s platform, Motion Array takes complete responsibility for making your projects successful. The website takes the raw concept of your project and turns it into completion. Adobe Premiere Pro templates can be downloaded via Motion Array with other effects.
You can have Adobe Premiere Pro, Final Cut, DaVinci, and After Effects templates. The stock motion graphics, sound effects, videos, and photos are some of the strengths of Motion Array. The unlimited downloads save you from emptying your wallet.
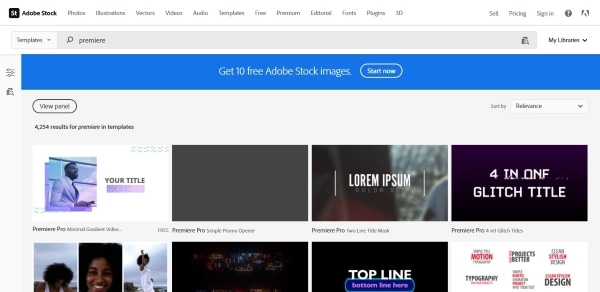
5. Adobe Stock
While we are on the subject of template Adobe Premiere free, how can we forget about Adobe Stock? Adobe Stock is a serious archive for templates, especially for Adobe Creative Suite applications. Moreover, getting hands-on an impeccable library of stock photos, audio, and videos, is one of the strongest traits of Adobe Stock.
The search filter has different options to make the search easier, for instance, application, categories, transitions, and whatnot. If you type free in the search bar, you will find Premiere Pro video templates so that downloading them wouldn’t cost a penny.
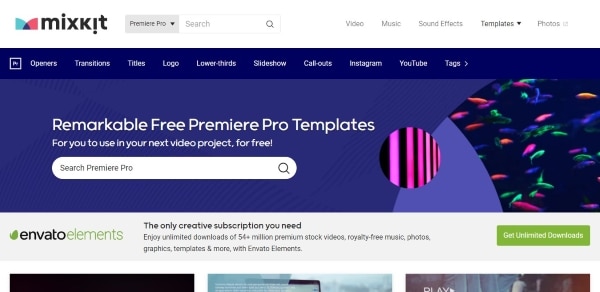
6. Mixkit
Mixkit is the top choice for getting Premiere Pro split-screen template among other royalty-free assets. Mixkit offers free Premiere Pro templates with After Effects, Final Cut Pro, DaVinci Resolve, and much more.
Moreover, Mixkit can be used for stock videos, music, sound effects, and music tracks. The quality is always high, so you don’t need to worry about that.
7. VideoHive
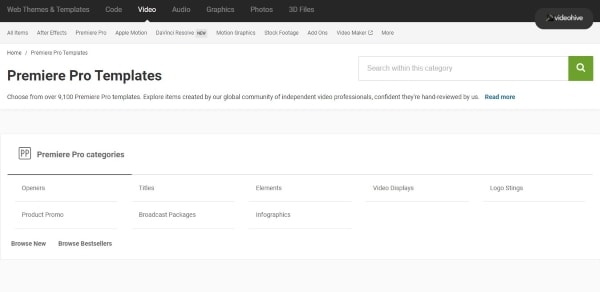
VideoHive offers the best quality and fast researched Premiere Pro templates. With more than 9,100 free Adobe Premiere templates, VideoHive helps add motion graphics and effects to your videos. Most filmmakers prefer the usage of motion graphics as it improves time and cost-effectiveness and enhances ease in adding animations to the projects.
If you are interested in making a slideshow, animated title, transition, or logo stings, you will find VideoHive there for you.
8. Videezy
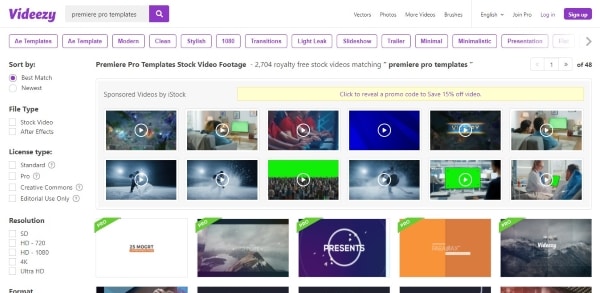
Videezy is a fair choice if you need to access Premiere templates free in the most effortless fashion. The search bar of Videezy stock marketplace has interactive filter options. The user is free to navigate by sorting the results based on their presence on the website. Moreover, you can choose between the file type and bring productivity to the media industry.
The resolution can also be decided as Videezy offers SD, HD 720, HD 1080, 4K, and Ultra HD. Doesn’t it feel like a dream come true?
9. Videvo
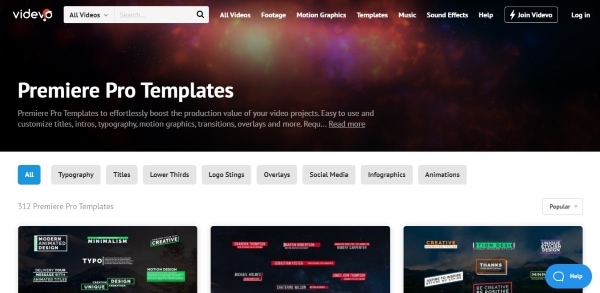
Videvo is the right shop for you if you prefer the ease-of-use over-complicated workability. Offering an interactive interface and progressive search results, Videvo boosts the production value of your projects multifold. Furthermore, this free Premiere Pro templates provider is an allrounder from the video footage, motion graphics, templates, music, and sound effects.
The user is free to customize titles, intros, typographs, overlays, and transitions. Launch the website, download the template, and get into the process.
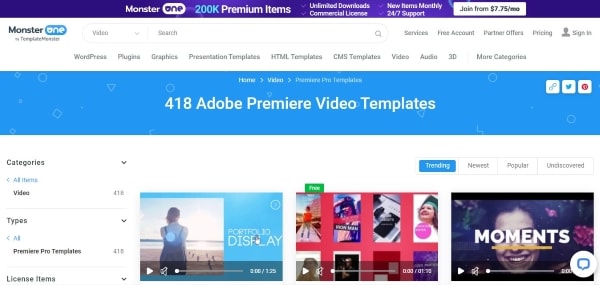
10. Monsterone
Offering Trending, Newest, Popular, and Undiscovered filtering options and choosing the right tags, Monsterone has made it to the bucket list of professionals in the field. More than 400 Premiere Pro templates can be downloaded to start working on the deadline right away.
The templates can be effortlessly previewed and launched before accessing them. It helps the user make a conscious choice. The resolution can also be set as the user deems necessary.
The Bottom Line
We are surrounded by videos 24/7. It is true for most creative professionals in the industry who are expected to edit the video to make it more captivating and attractive. One needs to have access to free Premiere Pro templates to obtain a sense of originality as we save money and time on making videos from scratch.
For this very reason, the article discussed 10 compatible and popular websites where Premiere templates free are found. We expect the user to make the right choice based on their niche in the industry. The video editing process can be accelerated by using a phenomenal tool which is Wondershare Filmora.
Filmora has the right toolbox set to make video editing easier and flawless. From cropping to flipping and motion tracking to adding keyframes, Filmora knows it all. One can also count on this tool to add backgrounds in Hollywood effect to gain innovation at all costs.
Wondershare Filmstock is your one-stop shop for royalty-free effects, video footage, clips, video effects, and audio tracks. Do not forget to review Filmora and Filmstock about their workability in the flesh.
Click here to find 10 Free After Effects Logo Templates .
Wondershare Filmora
Get started easily with Filmora’s powerful performance, intuitive interface, and countless effects!
Try It Free Try It Free Try It Free Learn More >


Also read:
- [Updated] 2024 Approved Streamlining Your Live Broadcast PS4 Recording via OBS Studio
- [Updated] In 2024, Action Cams for Aspiring Filmmakers - 2023 Edition
- [Updated] Subscriber Supreme Ranked Global YouTube Personalities by Numbers for 2024
- 2024 Approved Exclusive List 12 Flawless Non-Timebound Tools
- Addressing VIDEO Warping After Downloading Win10 Update
- Enhance Printer Functionality on Windows OS
- Enterprises Evolve with Open Access to ChatGPT, Whisper APIs
- In 2024, Top 5 Free Online Video Filter Editors Improve Your Videos with Filters
- Leap Into Innovation: Migrating Your Mac to Ventura OS X
- Master Storytelling: The Ultimate List of Chatbot Prompts for Character Creation
- New Best 4 Love Video Maker with Music for 2024
- New How to Be a Good Podcast Host for 2024
- New In 2024, Are You Thinking of Learning Video Editing in the Final Cut Pro Software? In This Article, You Will Learn Different Ways of Splitting and Merging Multiple Videos at Once as a New Skill to Get Your Business to a New Level
- New In 2024, Easy Steps to Create Intro Video with After Effects
- Sonic Canvas Painting Sounds on a Mac
- Updated A Guide To Motion Tracking Using The Best Video Editors for 2024
- Updated How to Apply Video Filters Mobile and Desktop for 2024
- Title: How to Make a Super Easy Rotating Video Effect
- Author: Morgan
- Created at : 2024-10-01 03:56:09
- Updated at : 2024-10-05 18:47:37
- Link: https://ai-video-editing.techidaily.com/how-to-make-a-super-easy-rotating-video-effect/
- License: This work is licensed under CC BY-NC-SA 4.0.

