:max_bytes(150000):strip_icc():format(webp)/Instagram_Login-5c004ff2c9e77c000104174d.png)
How to Make Split Screen Videos in Filmora for 2024

How to Make Split Screen Videos in Filmora
To show the interactions and exchanges of things between the characters are widely seen in movies. It seems they are close to each other, but they aren’t.
In this article, we will go with the video editor, Wondershare Filmora, to make split-screen videos instantly. Let’s move forward to check what you need to make these videos!
Part 1. Prerequisites To Make Split Screen Video To Interact
There is no need to make complex videos. Because nowadays, only short videos get viral and are more trending. The interaction videos should be as simple as passing props or playing with someone!
Split-screen videos are widely used in movies and films because it is a visual way to describe any story. The actions will be based on real-time interactions between the characters. The essential things you are required to make these videos are described as follows:
1. Storyboard
First of all, you have to create a story with your friends and family, with whomever you want to create a video. For this, follow the below steps:
- Make a script of a story by coordination, such as writing all dialogues and actions so that there will be no difficulty during a performance on screen.
- Practice those actions again and again to get a professional look.
- The storyboard should be based on the split screen templates available on Wondershare Filmora , or you can create your customized too.

Free Download For Win 7 or later(64-bit)
Free Download For macOS 10.14 or later
2. Characters on the screen
The friends with whom you are interacting should be on the screen and have assets to record a video wherever they are. It will be one person on one split screen or two persons on one. It all depends upon your story and script.
3. Prop to interact
A prop will be any particular thing used to show interaction and should be present in the homes of both characters.
![]()
Note: The prop can be any object like a tissue roll, mobile phone, or anything seen as a passing object from one character to another.

4. A helper at home
There will be one person at home during video shooting to pretend a friend’s or family’s hand reaching to the other character from off-camera.
For example, while performing a high-five action, insert the hand of any member with whom you are living in the scene, showing as the character adjacent to you. After setting up everything in a row, it’s time to record scenes for the video.

5. Record different takes
To give a professional look to the video, you have to record different takes for each person from different angles. After recording, everyone has to send footage to only one person to edit on Filmora.
After getting things and recording, it’s time to edit it on Wondershare Filmora. For this, follow the lines below!
Part 2. Steps To Edit Split Screen Video in Filmora
Split-screen video editing is as simple as throwing a prop toward someone. Wondershare Filmora with a premium domain will get your back!
Filmora is a more creative and instant platform to edit any video or to give birth to new ideas. One of the prominent features is having ready-to-use templates for editing split-screen video. Meanwhile, you can also do a manual setup for editing. Follow the steps mentioned below to edit a video by using split-screen effects.
Split Screen Effect With Templates
Step1Import footage to Filmora
After picking up the best footage of every character, download the Wondershare Filmora (if you have not already). Then to import the clips, perform the following steps:
Free Download For Win 7 or later(64-bit)
Free Download For macOS 10.14 or later
- First, click on the “Click here to Import Media” button, as shown below.

- Then, select the clips you want to edit from your PC, and then they’ll be shown in the media section of Filmora.
Step2Add split screen effect to the timeline
Before adding the clips to the timeline, add the split screen effect to the timeline by following the below-mentioned steps:
- Click on the two-headed arrow at the upper tab.
- Then the drop-down list of two options will pop up, as shown below.

- Click on the Split Screen option, and it will show many split screen effects.

- Select the effect, whatever suits you, and download it then.
- After downloading, drag and drop the effect on the timeline section.

Step3Add clips to the effect
After adding the effect to the timeline, it’s time to implement it on the clips or footage. For this, follow the below-mentioned steps:
- Drag and drop the clips based on your storyboard in the required section.
- Then import the takes wherever and however you want, according to the storyboard.

If you don’t want any templates to be used in your video, then you can manually make a screen split layout. To do this, check the below section.
Manual Split Screen Layout
If the storyboard is organized in such a way that you can’t find out any of the templates suitable, then you can easily create a customized one for your video. In a customized split screen, you can set the duration and adjust the frame rate according to your choice.
Step1Import the clips
First, you must create a timeline to edit your split-screen video. To do this, take a look at the below steps!
- Click on the Import icon in the main preview when you open Wondershare Filmora.
- Then, import all the clips or footage you want to edit.

Step2Add all footages to the timeline
After importing all the clips of interaction videos into Filmora, our next step is to add our videos to the timeline.
- Simply click on the imported clips present in the project media section.
- Then drag it to the timeline below and drop it in the required track of videos.
Do the above-mentioned steps with all the clips present in the project media block.

Doing so will create a working timeline you can view and edit as you go along the editing process.
Step3Adjust the frame rate of all clips
It is all set that your storyboard is customized, for this you have to resize all the clips manually. To arrange clips according to the size, follow the below-mentioned steps:
- First, double-click on the clip you want to edit in the timeline.
- The Basic settings of the video will open in which you have a lot of options to edit.
- Click on the Transform option, and its setting will pop up on the top left side.
- Find out the Scale option from the settings and check out its range.

Adjust the scale rate according to your choice by sliding from its section.

![]()
Note: Repeat this process with all other clips present in the timeline to adjust them in such a way so that the hands moving from frame to frame will line up.

Step4Adjust the timing of clips
After adjusting the frame, you now have to adjust the timing of the clips. To perform this action, follow the below steps:
- Arrange and move around the clips on the timeline so that the timing of the scene lines up between each shot.
- Drag the edge of the clip to the right side if you want to increase the timing and duration.
- While dragging the edge of the clip to the left side, if you want to decrease the timing of the clip.
![]()
Note: The most important part is the first time a hand is supposed to move from one frame to another.
What to do if there is any lag in the preview?
If you’re experiencing lag during the preview, click on the “render” button on the top right of the timeline. It will help to render for a smooth preview.

Step5Splitting the clips
If the timing in your scene starts to fall out of sync, then do the following steps:
- First, try splitting all of the clips.
- Ensure to split before they start to fall out of sync.

![]()
Note: Splitting the clip before one person’s dialogue is preferred.
Step6Full-screen moment
After splitting the clips according to adjustments and storyboard, you can now make one of the characters’ videos in full screen. For this, follow the below steps:
- First, make another cut in the clips before the next hand-crossing action.
- Take one of the characters’ videos from clips in-between moment and make them full screen.

![]()
Note: You can quickly do full screen by double-clicking on the clip and unchecking the “transform“ heading in the top left window.

Final Results
You’re now free to re-adjust your clips in the next part back into sync. If you still want to make any adjustments in duration or cutting or sizing, you can do it easily. Because it’s a customizable effect. Give a pat on your Back! You did a great job and accomplish the results!

Free Download For Win 7 or later(64-bit)
Free Download For macOS 10.14 or later
Conclusion
An instant way to make split screen video and edit it is hidden in Wondershare Filmora . You can unwrap it by following the above-mentioned steps and giving a new life to your interaction videos.
Enjoy new and creative ideas with your family and friends and make your video trendy by Filmora. If you are an influencer, you can interact with other bloggers and influencers and make split-screen videos. It will be a great treat for you and your social media followers!
Free Download For macOS 10.14 or later
2. Characters on the screen
The friends with whom you are interacting should be on the screen and have assets to record a video wherever they are. It will be one person on one split screen or two persons on one. It all depends upon your story and script.
3. Prop to interact
A prop will be any particular thing used to show interaction and should be present in the homes of both characters.
![]()
Note: The prop can be any object like a tissue roll, mobile phone, or anything seen as a passing object from one character to another.

4. A helper at home
There will be one person at home during video shooting to pretend a friend’s or family’s hand reaching to the other character from off-camera.
For example, while performing a high-five action, insert the hand of any member with whom you are living in the scene, showing as the character adjacent to you. After setting up everything in a row, it’s time to record scenes for the video.

5. Record different takes
To give a professional look to the video, you have to record different takes for each person from different angles. After recording, everyone has to send footage to only one person to edit on Filmora.
After getting things and recording, it’s time to edit it on Wondershare Filmora. For this, follow the lines below!
Part 2. Steps To Edit Split Screen Video in Filmora
Split-screen video editing is as simple as throwing a prop toward someone. Wondershare Filmora with a premium domain will get your back!
Filmora is a more creative and instant platform to edit any video or to give birth to new ideas. One of the prominent features is having ready-to-use templates for editing split-screen video. Meanwhile, you can also do a manual setup for editing. Follow the steps mentioned below to edit a video by using split-screen effects.
Split Screen Effect With Templates
Step1Import footage to Filmora
After picking up the best footage of every character, download the Wondershare Filmora (if you have not already). Then to import the clips, perform the following steps:
Free Download For Win 7 or later(64-bit)
Free Download For macOS 10.14 or later
- First, click on the “Click here to Import Media” button, as shown below.

- Then, select the clips you want to edit from your PC, and then they’ll be shown in the media section of Filmora.
Step2Add split screen effect to the timeline
Before adding the clips to the timeline, add the split screen effect to the timeline by following the below-mentioned steps:
- Click on the two-headed arrow at the upper tab.
- Then the drop-down list of two options will pop up, as shown below.

- Click on the Split Screen option, and it will show many split screen effects.

- Select the effect, whatever suits you, and download it then.
- After downloading, drag and drop the effect on the timeline section.

Step3Add clips to the effect
After adding the effect to the timeline, it’s time to implement it on the clips or footage. For this, follow the below-mentioned steps:
- Drag and drop the clips based on your storyboard in the required section.
- Then import the takes wherever and however you want, according to the storyboard.

If you don’t want any templates to be used in your video, then you can manually make a screen split layout. To do this, check the below section.
Manual Split Screen Layout
If the storyboard is organized in such a way that you can’t find out any of the templates suitable, then you can easily create a customized one for your video. In a customized split screen, you can set the duration and adjust the frame rate according to your choice.
Step1Import the clips
First, you must create a timeline to edit your split-screen video. To do this, take a look at the below steps!
- Click on the Import icon in the main preview when you open Wondershare Filmora.
- Then, import all the clips or footage you want to edit.

Step2Add all footages to the timeline
After importing all the clips of interaction videos into Filmora, our next step is to add our videos to the timeline.
- Simply click on the imported clips present in the project media section.
- Then drag it to the timeline below and drop it in the required track of videos.
Do the above-mentioned steps with all the clips present in the project media block.

Doing so will create a working timeline you can view and edit as you go along the editing process.
Step3Adjust the frame rate of all clips
It is all set that your storyboard is customized, for this you have to resize all the clips manually. To arrange clips according to the size, follow the below-mentioned steps:
- First, double-click on the clip you want to edit in the timeline.
- The Basic settings of the video will open in which you have a lot of options to edit.
- Click on the Transform option, and its setting will pop up on the top left side.
- Find out the Scale option from the settings and check out its range.

Adjust the scale rate according to your choice by sliding from its section.

![]()
Note: Repeat this process with all other clips present in the timeline to adjust them in such a way so that the hands moving from frame to frame will line up.

Step4Adjust the timing of clips
After adjusting the frame, you now have to adjust the timing of the clips. To perform this action, follow the below steps:
- Arrange and move around the clips on the timeline so that the timing of the scene lines up between each shot.
- Drag the edge of the clip to the right side if you want to increase the timing and duration.
- While dragging the edge of the clip to the left side, if you want to decrease the timing of the clip.
![]()
Note: The most important part is the first time a hand is supposed to move from one frame to another.
What to do if there is any lag in the preview?
If you’re experiencing lag during the preview, click on the “render” button on the top right of the timeline. It will help to render for a smooth preview.

Step5Splitting the clips
If the timing in your scene starts to fall out of sync, then do the following steps:
- First, try splitting all of the clips.
- Ensure to split before they start to fall out of sync.

![]()
Note: Splitting the clip before one person’s dialogue is preferred.
Step6Full-screen moment
After splitting the clips according to adjustments and storyboard, you can now make one of the characters’ videos in full screen. For this, follow the below steps:
- First, make another cut in the clips before the next hand-crossing action.
- Take one of the characters’ videos from clips in-between moment and make them full screen.

![]()
Note: You can quickly do full screen by double-clicking on the clip and unchecking the “transform“ heading in the top left window.

Final Results
You’re now free to re-adjust your clips in the next part back into sync. If you still want to make any adjustments in duration or cutting or sizing, you can do it easily. Because it’s a customizable effect. Give a pat on your Back! You did a great job and accomplish the results!

Free Download For Win 7 or later(64-bit)
Free Download For macOS 10.14 or later
Conclusion
An instant way to make split screen video and edit it is hidden in Wondershare Filmora . You can unwrap it by following the above-mentioned steps and giving a new life to your interaction videos.
Enjoy new and creative ideas with your family and friends and make your video trendy by Filmora. If you are an influencer, you can interact with other bloggers and influencers and make split-screen videos. It will be a great treat for you and your social media followers!
What Is MOV Format and How To Edit MOV Video Creatively?
We come across different media files every day, and surprisingly, every file has a unique format. Different devices and different programs support and entertain different file formats. It is hard to find the correct file format for your device.
The following article will shed light on MOV format. Not just this, apart from its introduction, pros and cons, if you plan to edit your MOV video format, we will also introduce a video editor. Let’s start!
In this article
02 What Are Pros and Coins about MOV Video Format?
03 Best MOV Video Editor- Filmora Video Editor
04 How to Edit MOV Video Files in An Creative Way?
05 Differences Between MP4 and MOV
Part 1. What Is MOV Format?
You might be using the MOV format without noticing and knowing what it is? MOV is a QuickTime file developed by Apple Inc. It is a multimedia container file. MOV file format is capable of keeping multiple types of data on different tracks, which may include audio, video, or even texts.

Does the MOV video format only work on Mac? MOV is developed by Apple, but it does not mean that it is not compatible with other devices. You can use it on Windows along with Sony and DVD. MOV file format is the same as MPEG-4 format file. It is sometimes considered as the basis for the MPEG-4 file format.
Part 2. What Are Pros and Coins about MOV Video Format
Do you know what benefits you get from the MOV video format? Or else, why not discuss its disadvantages? The following section of this article will shed light on both the advantages and also disadvantages of the MOV format.
Advantages of MOV Format
MOV file format is a famous format because of the simplicity it provides in editing and also because it embeds well in different programs. The format is very convenient as it holds various media content like videos, audio, everything in one compact place. MOV video files are easily edited as the primary elements are adjusted.
MOV format is widely used on the web, and because of this reason, the format is ideal for sharing files on the internet. The format is perfect for Mac and QuickTime Player. It is highly compatible with different platforms like Mac, Windows, iOS, and Android. Do you know about the storage space of MOV? The format acquires low storage space, making it a great file format.
Drawbacks of MOV Format
Moving on to its drawbacks, MOV has lossy compression of video tracks. The overall quality of the video might also be damaged while compressing the video. Every track of the MOV format file is encoded with a specific codec. Only those apps can smoothly play a MOV file that supports and recognize the encoded codec. In this case, you might need to convert the file format.
Part 3. Best MOV Video Editor- Filmora Video Editor
Are you looking for a great video editor to edit your MOV format videos? We might have something for you. Let’s introduce Wondershare Filmora to edit drastic videos. The software is very easy to understand and use. Its intuitive interface guides the user about every step.

For Win 7 or later (64-bit)
For macOS 10.12 or later
Filmora Video Editor has enormous features that could make a stunning video. You cannot find a better video editor than Filmora because of its features like cutting, trimming, joining, splitting, and so much more than this. Let’s share a few more features of Filmora:
Auto Reframe
Isn’t it easy if your video gets automatically focused? With Filmora, Auto Reframe feature, the AI technology automatically detects the focal point of the video and keeps it in the frame. With this feature, the main object of the video always remains in focus.
Stabilize Video
Do you know what wonders Stabilize Video feature can do? While filming a video, your hand might shake, and your video quality is disturbed, but with Filmora, you can fix the video. Use its Stabilize Video feature and smooth the shaky footage.
Silence Detection
You are not always speaking in a video; some parts of the video are silent. What to do with such parts? Well, take help from Filmora and remove the silent instances from your video. The Silence Detection feature spontaneously detects the silent parts of the MOV file format video and removes them, saving your precious time.
Split Screen
Are you creating a tutorial? Split Screen is the ideal feature to use for creating such videos. Filmora lets you display multiple videos on a single screen with this feature. You can simultaneously incorporate various clips by using the different provided templates.
Part 4. How to Edit MOV Video Files in An Creative Way?
Filmora is a stunning video editor with uncountable features. You can create mind-blowing videos with Wondershare Filmora. Apart from features like trim, cut, join, split, you also get some great advanced features like Motion Tracking, AI Portrait, Pan & Zoom, and a lot more.
The video editor is easy to use, and even novice users can understand the software and work with it. Filmora is a famous editor because of its functionalities. If you are looking for a video editor to edit your MOV file format, try Filmora, you will not be disappointed. Follow the steps below for assistance:
Step 1: Importing Media
After installing Filmora, launch it on your device. From the home screen, head to the ‘File’ tab and look for the ‘Import Media’ option. A sub-menu will appear as you hover on the option, click on the ‘Import Media Files’, and locate the MOV format file from the device to work with.

Step 2: Add Audio Effects
Do you want to make your video interesting? Try by adding some sound effects. For this, head to the ‘Audio’ section from the top menu and look for your preferred effect.

Step 3: Add Transitions
You might mix and join various videos but do they look good? For smooth transitions, move to the ‘Transition’ tab and select a cool effect.

Step 4: Elements and Titles
Have you tried adding any cool elements to your MOV video? From the ‘Elements’ section, add things like Laser Eye, fun emoji, and a lot more. Along with this, add titles to your video from the ‘Titles’ tab.

Step 5: Export MOV File
Are you satisfied with the final MOV video format file? If you are, export the video to your device. Hit the ‘Export’ button and select ‘MOV’ format as your output format to save the video.

Part 5. Differences Between MP4 and MOV
Both MP4 and MOV file format is almost the same thing. Some of the minor differences that exist are MOV format is recommended best for Mac devices. On the contrary, MP4 is universal that can be used on any device irrespective of the operating system or the software.

MP4 files are more compressed, thus taking less space than MOV video format, which takes slightly more space. The quality of payback that MP4 provides is less than what the MOV file format provides. MOV format, thus, for this reason, is used more by professionals.
Final Thoughts
The article has everything you need to know about the MOV format. From its introduction to the steps of editing a MOV video format, we shared everything in detail. It’s time to talk about a nice video creator and also a video editor. We are talking about Wondershare Filmora. The video editor will wow you with its features and editing capabilities.
The video editor offers regular options like split, cut, trim, join, etc. Whereas it also comes with advanced editing features like Color Match, Chroma Key Background, Auto Highlight, and whatnot. If you want to create a stunning and eye-catching video, take help from Filmora.
Wondershare Filmora
Get started easily with Filmora’s powerful performance, intuitive interface, and countless effects!
Try It Free Try It Free Try It Free Learn More >

02 What Are Pros and Coins about MOV Video Format?
03 Best MOV Video Editor- Filmora Video Editor
04 How to Edit MOV Video Files in An Creative Way?
05 Differences Between MP4 and MOV
Part 1. What Is MOV Format?
You might be using the MOV format without noticing and knowing what it is? MOV is a QuickTime file developed by Apple Inc. It is a multimedia container file. MOV file format is capable of keeping multiple types of data on different tracks, which may include audio, video, or even texts.

Does the MOV video format only work on Mac? MOV is developed by Apple, but it does not mean that it is not compatible with other devices. You can use it on Windows along with Sony and DVD. MOV file format is the same as MPEG-4 format file. It is sometimes considered as the basis for the MPEG-4 file format.
Part 2. What Are Pros and Coins about MOV Video Format
Do you know what benefits you get from the MOV video format? Or else, why not discuss its disadvantages? The following section of this article will shed light on both the advantages and also disadvantages of the MOV format.
Advantages of MOV Format
MOV file format is a famous format because of the simplicity it provides in editing and also because it embeds well in different programs. The format is very convenient as it holds various media content like videos, audio, everything in one compact place. MOV video files are easily edited as the primary elements are adjusted.
MOV format is widely used on the web, and because of this reason, the format is ideal for sharing files on the internet. The format is perfect for Mac and QuickTime Player. It is highly compatible with different platforms like Mac, Windows, iOS, and Android. Do you know about the storage space of MOV? The format acquires low storage space, making it a great file format.
Drawbacks of MOV Format
Moving on to its drawbacks, MOV has lossy compression of video tracks. The overall quality of the video might also be damaged while compressing the video. Every track of the MOV format file is encoded with a specific codec. Only those apps can smoothly play a MOV file that supports and recognize the encoded codec. In this case, you might need to convert the file format.
Part 3. Best MOV Video Editor- Filmora Video Editor
Are you looking for a great video editor to edit your MOV format videos? We might have something for you. Let’s introduce Wondershare Filmora to edit drastic videos. The software is very easy to understand and use. Its intuitive interface guides the user about every step.

For Win 7 or later (64-bit)
For macOS 10.12 or later
Filmora Video Editor has enormous features that could make a stunning video. You cannot find a better video editor than Filmora because of its features like cutting, trimming, joining, splitting, and so much more than this. Let’s share a few more features of Filmora:
Auto Reframe
Isn’t it easy if your video gets automatically focused? With Filmora, Auto Reframe feature, the AI technology automatically detects the focal point of the video and keeps it in the frame. With this feature, the main object of the video always remains in focus.
Stabilize Video
Do you know what wonders Stabilize Video feature can do? While filming a video, your hand might shake, and your video quality is disturbed, but with Filmora, you can fix the video. Use its Stabilize Video feature and smooth the shaky footage.
Silence Detection
You are not always speaking in a video; some parts of the video are silent. What to do with such parts? Well, take help from Filmora and remove the silent instances from your video. The Silence Detection feature spontaneously detects the silent parts of the MOV file format video and removes them, saving your precious time.
Split Screen
Are you creating a tutorial? Split Screen is the ideal feature to use for creating such videos. Filmora lets you display multiple videos on a single screen with this feature. You can simultaneously incorporate various clips by using the different provided templates.
Part 4. How to Edit MOV Video Files in An Creative Way?
Filmora is a stunning video editor with uncountable features. You can create mind-blowing videos with Wondershare Filmora. Apart from features like trim, cut, join, split, you also get some great advanced features like Motion Tracking, AI Portrait, Pan & Zoom, and a lot more.
The video editor is easy to use, and even novice users can understand the software and work with it. Filmora is a famous editor because of its functionalities. If you are looking for a video editor to edit your MOV file format, try Filmora, you will not be disappointed. Follow the steps below for assistance:
Step 1: Importing Media
After installing Filmora, launch it on your device. From the home screen, head to the ‘File’ tab and look for the ‘Import Media’ option. A sub-menu will appear as you hover on the option, click on the ‘Import Media Files’, and locate the MOV format file from the device to work with.

Step 2: Add Audio Effects
Do you want to make your video interesting? Try by adding some sound effects. For this, head to the ‘Audio’ section from the top menu and look for your preferred effect.

Step 3: Add Transitions
You might mix and join various videos but do they look good? For smooth transitions, move to the ‘Transition’ tab and select a cool effect.

Step 4: Elements and Titles
Have you tried adding any cool elements to your MOV video? From the ‘Elements’ section, add things like Laser Eye, fun emoji, and a lot more. Along with this, add titles to your video from the ‘Titles’ tab.

Step 5: Export MOV File
Are you satisfied with the final MOV video format file? If you are, export the video to your device. Hit the ‘Export’ button and select ‘MOV’ format as your output format to save the video.

Part 5. Differences Between MP4 and MOV
Both MP4 and MOV file format is almost the same thing. Some of the minor differences that exist are MOV format is recommended best for Mac devices. On the contrary, MP4 is universal that can be used on any device irrespective of the operating system or the software.

MP4 files are more compressed, thus taking less space than MOV video format, which takes slightly more space. The quality of payback that MP4 provides is less than what the MOV file format provides. MOV format, thus, for this reason, is used more by professionals.
Final Thoughts
The article has everything you need to know about the MOV format. From its introduction to the steps of editing a MOV video format, we shared everything in detail. It’s time to talk about a nice video creator and also a video editor. We are talking about Wondershare Filmora. The video editor will wow you with its features and editing capabilities.
The video editor offers regular options like split, cut, trim, join, etc. Whereas it also comes with advanced editing features like Color Match, Chroma Key Background, Auto Highlight, and whatnot. If you want to create a stunning and eye-catching video, take help from Filmora.
Wondershare Filmora
Get started easily with Filmora’s powerful performance, intuitive interface, and countless effects!
Try It Free Try It Free Try It Free Learn More >

02 What Are Pros and Coins about MOV Video Format?
03 Best MOV Video Editor- Filmora Video Editor
04 How to Edit MOV Video Files in An Creative Way?
05 Differences Between MP4 and MOV
Part 1. What Is MOV Format?
You might be using the MOV format without noticing and knowing what it is? MOV is a QuickTime file developed by Apple Inc. It is a multimedia container file. MOV file format is capable of keeping multiple types of data on different tracks, which may include audio, video, or even texts.

Does the MOV video format only work on Mac? MOV is developed by Apple, but it does not mean that it is not compatible with other devices. You can use it on Windows along with Sony and DVD. MOV file format is the same as MPEG-4 format file. It is sometimes considered as the basis for the MPEG-4 file format.
Part 2. What Are Pros and Coins about MOV Video Format
Do you know what benefits you get from the MOV video format? Or else, why not discuss its disadvantages? The following section of this article will shed light on both the advantages and also disadvantages of the MOV format.
Advantages of MOV Format
MOV file format is a famous format because of the simplicity it provides in editing and also because it embeds well in different programs. The format is very convenient as it holds various media content like videos, audio, everything in one compact place. MOV video files are easily edited as the primary elements are adjusted.
MOV format is widely used on the web, and because of this reason, the format is ideal for sharing files on the internet. The format is perfect for Mac and QuickTime Player. It is highly compatible with different platforms like Mac, Windows, iOS, and Android. Do you know about the storage space of MOV? The format acquires low storage space, making it a great file format.
Drawbacks of MOV Format
Moving on to its drawbacks, MOV has lossy compression of video tracks. The overall quality of the video might also be damaged while compressing the video. Every track of the MOV format file is encoded with a specific codec. Only those apps can smoothly play a MOV file that supports and recognize the encoded codec. In this case, you might need to convert the file format.
Part 3. Best MOV Video Editor- Filmora Video Editor
Are you looking for a great video editor to edit your MOV format videos? We might have something for you. Let’s introduce Wondershare Filmora to edit drastic videos. The software is very easy to understand and use. Its intuitive interface guides the user about every step.

For Win 7 or later (64-bit)
For macOS 10.12 or later
Filmora Video Editor has enormous features that could make a stunning video. You cannot find a better video editor than Filmora because of its features like cutting, trimming, joining, splitting, and so much more than this. Let’s share a few more features of Filmora:
Auto Reframe
Isn’t it easy if your video gets automatically focused? With Filmora, Auto Reframe feature, the AI technology automatically detects the focal point of the video and keeps it in the frame. With this feature, the main object of the video always remains in focus.
Stabilize Video
Do you know what wonders Stabilize Video feature can do? While filming a video, your hand might shake, and your video quality is disturbed, but with Filmora, you can fix the video. Use its Stabilize Video feature and smooth the shaky footage.
Silence Detection
You are not always speaking in a video; some parts of the video are silent. What to do with such parts? Well, take help from Filmora and remove the silent instances from your video. The Silence Detection feature spontaneously detects the silent parts of the MOV file format video and removes them, saving your precious time.
Split Screen
Are you creating a tutorial? Split Screen is the ideal feature to use for creating such videos. Filmora lets you display multiple videos on a single screen with this feature. You can simultaneously incorporate various clips by using the different provided templates.
Part 4. How to Edit MOV Video Files in An Creative Way?
Filmora is a stunning video editor with uncountable features. You can create mind-blowing videos with Wondershare Filmora. Apart from features like trim, cut, join, split, you also get some great advanced features like Motion Tracking, AI Portrait, Pan & Zoom, and a lot more.
The video editor is easy to use, and even novice users can understand the software and work with it. Filmora is a famous editor because of its functionalities. If you are looking for a video editor to edit your MOV file format, try Filmora, you will not be disappointed. Follow the steps below for assistance:
Step 1: Importing Media
After installing Filmora, launch it on your device. From the home screen, head to the ‘File’ tab and look for the ‘Import Media’ option. A sub-menu will appear as you hover on the option, click on the ‘Import Media Files’, and locate the MOV format file from the device to work with.

Step 2: Add Audio Effects
Do you want to make your video interesting? Try by adding some sound effects. For this, head to the ‘Audio’ section from the top menu and look for your preferred effect.

Step 3: Add Transitions
You might mix and join various videos but do they look good? For smooth transitions, move to the ‘Transition’ tab and select a cool effect.

Step 4: Elements and Titles
Have you tried adding any cool elements to your MOV video? From the ‘Elements’ section, add things like Laser Eye, fun emoji, and a lot more. Along with this, add titles to your video from the ‘Titles’ tab.

Step 5: Export MOV File
Are you satisfied with the final MOV video format file? If you are, export the video to your device. Hit the ‘Export’ button and select ‘MOV’ format as your output format to save the video.

Part 5. Differences Between MP4 and MOV
Both MP4 and MOV file format is almost the same thing. Some of the minor differences that exist are MOV format is recommended best for Mac devices. On the contrary, MP4 is universal that can be used on any device irrespective of the operating system or the software.

MP4 files are more compressed, thus taking less space than MOV video format, which takes slightly more space. The quality of payback that MP4 provides is less than what the MOV file format provides. MOV format, thus, for this reason, is used more by professionals.
Final Thoughts
The article has everything you need to know about the MOV format. From its introduction to the steps of editing a MOV video format, we shared everything in detail. It’s time to talk about a nice video creator and also a video editor. We are talking about Wondershare Filmora. The video editor will wow you with its features and editing capabilities.
The video editor offers regular options like split, cut, trim, join, etc. Whereas it also comes with advanced editing features like Color Match, Chroma Key Background, Auto Highlight, and whatnot. If you want to create a stunning and eye-catching video, take help from Filmora.
Wondershare Filmora
Get started easily with Filmora’s powerful performance, intuitive interface, and countless effects!
Try It Free Try It Free Try It Free Learn More >

02 What Are Pros and Coins about MOV Video Format?
03 Best MOV Video Editor- Filmora Video Editor
04 How to Edit MOV Video Files in An Creative Way?
05 Differences Between MP4 and MOV
Part 1. What Is MOV Format?
You might be using the MOV format without noticing and knowing what it is? MOV is a QuickTime file developed by Apple Inc. It is a multimedia container file. MOV file format is capable of keeping multiple types of data on different tracks, which may include audio, video, or even texts.

Does the MOV video format only work on Mac? MOV is developed by Apple, but it does not mean that it is not compatible with other devices. You can use it on Windows along with Sony and DVD. MOV file format is the same as MPEG-4 format file. It is sometimes considered as the basis for the MPEG-4 file format.
Part 2. What Are Pros and Coins about MOV Video Format
Do you know what benefits you get from the MOV video format? Or else, why not discuss its disadvantages? The following section of this article will shed light on both the advantages and also disadvantages of the MOV format.
Advantages of MOV Format
MOV file format is a famous format because of the simplicity it provides in editing and also because it embeds well in different programs. The format is very convenient as it holds various media content like videos, audio, everything in one compact place. MOV video files are easily edited as the primary elements are adjusted.
MOV format is widely used on the web, and because of this reason, the format is ideal for sharing files on the internet. The format is perfect for Mac and QuickTime Player. It is highly compatible with different platforms like Mac, Windows, iOS, and Android. Do you know about the storage space of MOV? The format acquires low storage space, making it a great file format.
Drawbacks of MOV Format
Moving on to its drawbacks, MOV has lossy compression of video tracks. The overall quality of the video might also be damaged while compressing the video. Every track of the MOV format file is encoded with a specific codec. Only those apps can smoothly play a MOV file that supports and recognize the encoded codec. In this case, you might need to convert the file format.
Part 3. Best MOV Video Editor- Filmora Video Editor
Are you looking for a great video editor to edit your MOV format videos? We might have something for you. Let’s introduce Wondershare Filmora to edit drastic videos. The software is very easy to understand and use. Its intuitive interface guides the user about every step.

For Win 7 or later (64-bit)
For macOS 10.12 or later
Filmora Video Editor has enormous features that could make a stunning video. You cannot find a better video editor than Filmora because of its features like cutting, trimming, joining, splitting, and so much more than this. Let’s share a few more features of Filmora:
Auto Reframe
Isn’t it easy if your video gets automatically focused? With Filmora, Auto Reframe feature, the AI technology automatically detects the focal point of the video and keeps it in the frame. With this feature, the main object of the video always remains in focus.
Stabilize Video
Do you know what wonders Stabilize Video feature can do? While filming a video, your hand might shake, and your video quality is disturbed, but with Filmora, you can fix the video. Use its Stabilize Video feature and smooth the shaky footage.
Silence Detection
You are not always speaking in a video; some parts of the video are silent. What to do with such parts? Well, take help from Filmora and remove the silent instances from your video. The Silence Detection feature spontaneously detects the silent parts of the MOV file format video and removes them, saving your precious time.
Split Screen
Are you creating a tutorial? Split Screen is the ideal feature to use for creating such videos. Filmora lets you display multiple videos on a single screen with this feature. You can simultaneously incorporate various clips by using the different provided templates.
Part 4. How to Edit MOV Video Files in An Creative Way?
Filmora is a stunning video editor with uncountable features. You can create mind-blowing videos with Wondershare Filmora. Apart from features like trim, cut, join, split, you also get some great advanced features like Motion Tracking, AI Portrait, Pan & Zoom, and a lot more.
The video editor is easy to use, and even novice users can understand the software and work with it. Filmora is a famous editor because of its functionalities. If you are looking for a video editor to edit your MOV file format, try Filmora, you will not be disappointed. Follow the steps below for assistance:
Step 1: Importing Media
After installing Filmora, launch it on your device. From the home screen, head to the ‘File’ tab and look for the ‘Import Media’ option. A sub-menu will appear as you hover on the option, click on the ‘Import Media Files’, and locate the MOV format file from the device to work with.

Step 2: Add Audio Effects
Do you want to make your video interesting? Try by adding some sound effects. For this, head to the ‘Audio’ section from the top menu and look for your preferred effect.

Step 3: Add Transitions
You might mix and join various videos but do they look good? For smooth transitions, move to the ‘Transition’ tab and select a cool effect.

Step 4: Elements and Titles
Have you tried adding any cool elements to your MOV video? From the ‘Elements’ section, add things like Laser Eye, fun emoji, and a lot more. Along with this, add titles to your video from the ‘Titles’ tab.

Step 5: Export MOV File
Are you satisfied with the final MOV video format file? If you are, export the video to your device. Hit the ‘Export’ button and select ‘MOV’ format as your output format to save the video.

Part 5. Differences Between MP4 and MOV
Both MP4 and MOV file format is almost the same thing. Some of the minor differences that exist are MOV format is recommended best for Mac devices. On the contrary, MP4 is universal that can be used on any device irrespective of the operating system or the software.

MP4 files are more compressed, thus taking less space than MOV video format, which takes slightly more space. The quality of payback that MP4 provides is less than what the MOV file format provides. MOV format, thus, for this reason, is used more by professionals.
Final Thoughts
The article has everything you need to know about the MOV format. From its introduction to the steps of editing a MOV video format, we shared everything in detail. It’s time to talk about a nice video creator and also a video editor. We are talking about Wondershare Filmora. The video editor will wow you with its features and editing capabilities.
The video editor offers regular options like split, cut, trim, join, etc. Whereas it also comes with advanced editing features like Color Match, Chroma Key Background, Auto Highlight, and whatnot. If you want to create a stunning and eye-catching video, take help from Filmora.
Wondershare Filmora
Get started easily with Filmora’s powerful performance, intuitive interface, and countless effects!
Try It Free Try It Free Try It Free Learn More >

Best 12 Best Freeze Frame Video Editing Examples
Top 12 Best Freeze Frame Video Editing Examples
An easy yet powerful editor
Numerous effects to choose from
Detailed tutorials provided by the official channel
Freeze frame effect in video editing is a skill that requires more practice to master. It adds drama and impact to movies. If you want to see more energy and acting in the videos you watch, then you should see more freeze-frame examples.
Sometimes we notice that a particular action stays on longer than necessary in a movie or video. The filmmakers use this skill to emphasize some intense moments further to sustain or pique your interest.
The freeze-frame video editing feature is a valuable skill that helps filmmakers make excellent movies. We have a list of the top 12 examples of freeze-frame effects in movies for you.
In this article
01 [What is freeze-frame video editing?](#Part 1)
02 [Ways to use freeze-frame video editing](#Part 2)
03 [What are the best freeze-frame video editing examples?](#Part 3)
Part 1 What Is Freeze Frame Video Editing?
Freeze frame video editing is a video editing technique that halts movement in a video for a given period. It converts moving pictures into still photography for some time. These video editor effects help filmmakers gear attention to the video editing or filmmaking process. In other words, they are self-reflexive.
Part 2 Ways to Use Freeze Frame in Video editing
Freeze frames can be helpful in 3 significant ways in video editing;
● At the beginning of a movie/video: Freeze-frame at the beginning helps you pique the audience’s interest and give them a sneak peek of what to expect in the movie. This freeze-frame technique was used in the film ‘Good Fellas’ to pique the audience’s interests.
● At the end: Using a freeze-frame allows the audience to choose or decide how the movie ends, whether it is obvious. The ‘breakfast club’ filmmakers use a freeze-frame at the end to emphasize the young boy.
● In the middle, subtly capturing intense moments like in the movie ‘The Departed.’
Part 3 What are the Best Freeze-Frame Video Editing Examples?
It takes a great deal of skill to employ freeze frame with the best results correctly. It might bore the audience or give another impression other than the intended when not done effectively.
But several movie directors have effectively used the freeze-frame video editing technique that wowed the audience.
Here is a list of the best freeze frame examples you would love;
01The Departed
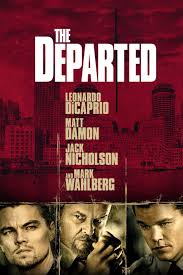
In this 2006 movie, an undercover cop and a mole try to identify each other. Scorsese shows his editing prowess once again as he uses freeze-frame more subtly.
He changes the frame speed instead of stopping on one frame for a considerably longer time. This emphasizes some memorable moments that you may overlook on a first watch.
02Rocky III
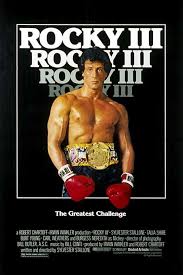
The freeze-frame came in during the final match between Apollo and Balboa in this movie.
During the first 3 Rocky movies, Apollo and Balboa had an intriguing rivalry. At the end of Rocky III, the duo decides to engage in a friendly battle to determine who was the Lord in boxing.
The movie ends in a freeze-frame with Rocky swinging a right hook after Apollo imitates the bell, saying, “Ding Dong.”
The freeze-frame allows the audience to guess who the winner will be, thus a longer time to think of the movie after watching.
03400 Blows
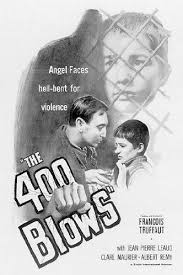
In 400 Blows, the main character Antoine, a young Parisian, was hardly out of trouble.
In an attempt to end his troubles, he arrives at the beach after running away from a soccer match.
He is faced with either jumping right in or going back. The movie ends in a freeze-frame as no one finds out. The decision was left to the audience.
04Thelma and Louise
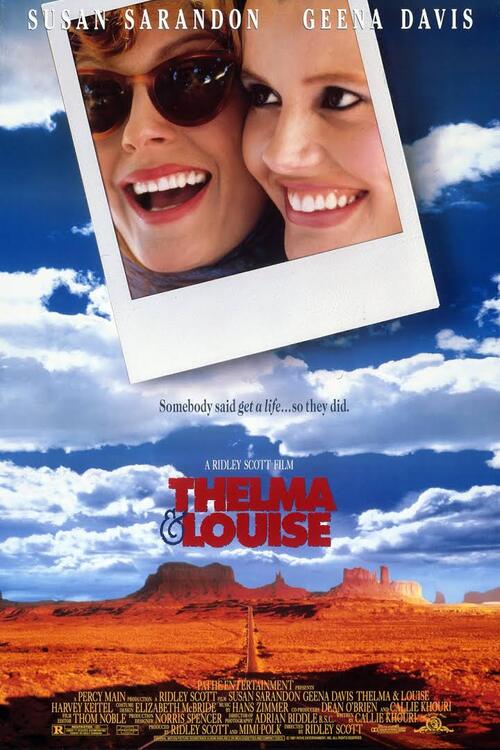
Thelma and Louise is about two (2) friends, Thelma Dickinson and Louise Sawyer. They both rise to defend themselves in a male-dominated world. In the film, Thelma and Louise are both running from the authorities. Louise killed a man who almost raped her friend, Thelma, thus the run. Things get out of control as they try to escape to Mexico, away from the authorities.
While on the run, they get ambushed by the police towards the grand canyon. The audience, at this point, is in suspense as to whether the ladies will survive or not.
Instead of surrendering, they drive right into the grand canyon, and the movie ends in a freeze-frame as they get caught hanging in the air while plunging into the canyon.
Regular movies might decide to give us all the details of the car plunging and exploding.
05The Wolf of Wall Street
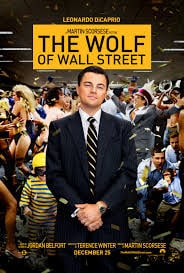
Scorsese uses freeze-frame at the beginning of this movie, just as he did in Good Fellas. The freeze-frame effect here helps introduce the character and shows us the plot of the movie hence piquing the audience’s interests immediately.
06Out of Sight
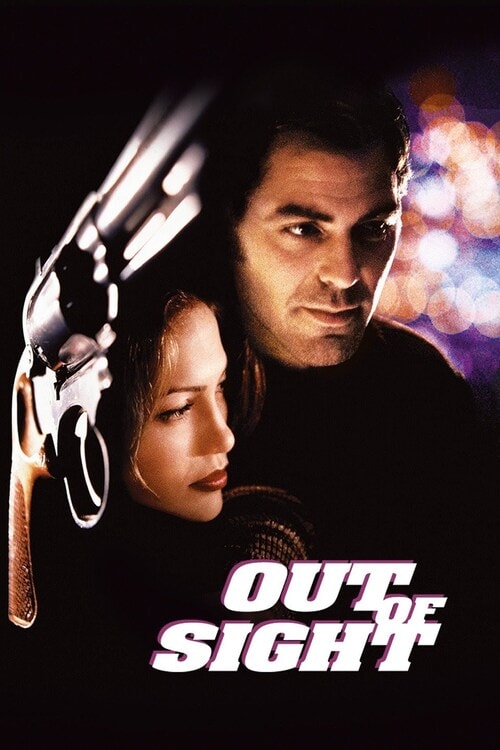
This movie is another excellent example of freeze-frame video editing. What other way to pique the audience’s interest significantly and emphasize them than capture them in a freeze-frame.
07Death Proof
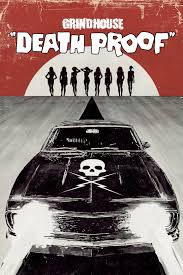
In this movie, the freeze-frame stays till the very end. It captures three women as they raise their hands-on celebration after successfully beating to death a psychopath who has been killing young women.
08Butch Cassidy and the Sundance Kid
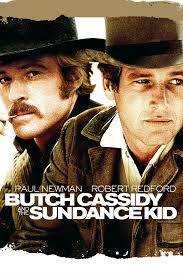
This movie follows two train robbers, Butch Cassidy and Harry Longabaugh, known as the ‘Sundance Kid.’ After conducting several robberies, they go on the run as the authorities pursue them. After a gun battle with the authorities, they take cover inside a building, but they get surrounded with no other escape route.
Thus they decide to engage in the last fight instead of surrendering, and you see them in a gun battle with the authorities. The movie ends with them caught in a freeze-frame brandishing their guns at the officers instead of actual bloodshed. Though we all know they will get killed.
09Good Fellas
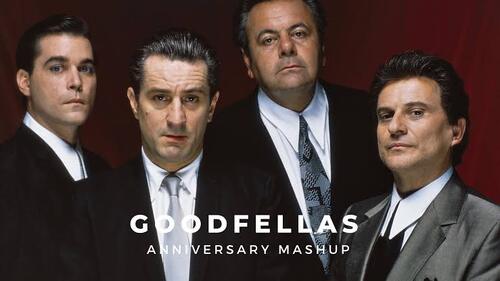
Initially, we mentioned that a freeze-frame could be of use at the beginning of a movie. Scorsese used this effectively in ‘Good Fellas’ to emphasize the movie plot.
In the opening scene, the characters Henry, Jimmy, and Tonny, played by Ray Liotta, Robert De Niro, and Joe Pesci, respectively, stop their car in the middle of the road.
They open their truck and see a man badly wounded and beaten, Tonny stabs him, and Jimmy shoots him. Henry then closes the truck and looks on in a freeze-frame before uttering the lines, “As far back as I can remember, I have always wanted to be a gangster.”
This lets us know right away what will happen in the movie. That person will get killed, and this is the mob territory.
10Harry Potter and the Prisoner of Azkaban
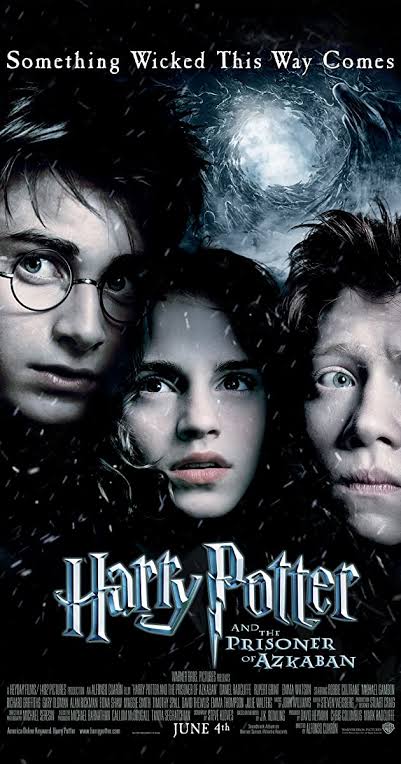
During a bad and weird year at Hogwarts, Harry potter experiences an extremely joyous moment when he goes anti-gravity on his new Firebolt broom.
He becomes overjoyed and his expression gets captured in a freeze-frame.
11The Breakfast Club
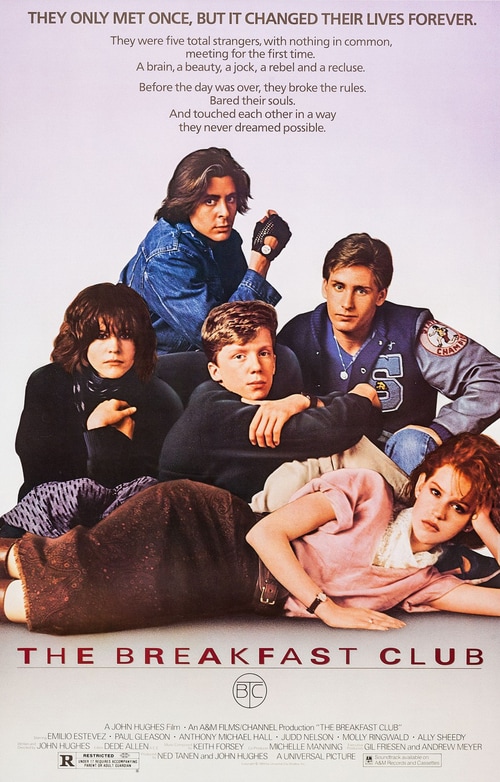
The Breakfast Club is an 80s movie showing teenagers trying to find their identity in life and overcoming the challenges of these years.
This is another freeze frame example where the filmmakers showed great expertise. The character John Bender is caught in a freeze-frame, punching the air to celebrate his victory.
He has just shared a kiss with the class sweetheart Claire. He and his classmates have also just won over the authoritative principal, Mr. Vernon.
12Pulp Fiction: Pumpkin and Honey Bunny.
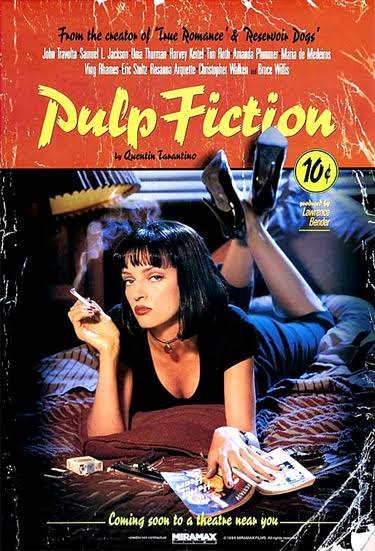
Pulp Fiction is another movie such as ‘Good Fellas’ with its freeze-frame edition done at the movie’s beginning.
Pumpkin and Honey Bunny are shown at the movie’s beginning, sitting together in a diner. They argue whether it will be safer to rub a bank or a restaurant. In the end, they settle for a diner — the same one they are sitting in.
They kiss and pull out their guns, and the images freeze before the credits roll out.
The freeze-frame gives us a sneak peek of the violence to experience in the movie, and indeed, we were not disappointed.
For Win 7 or later (64-bit)
For macOS 10.12 or later
With Wondershare Filmora Video Editor ‘s speed ramping feature, you can adjust your video speed while controlling the keyframes to create fascinating cinematic videos.
Filmora is a video editing tool developed by wondershare and has exciting features. Filmora makes video editing easy and seamless yet produces professional results.
Filmora’s freeze-frame feature helps bring dynamism and energy to your videos using its keyframe feature.
● Ending Thoughts →
● It is an inexplicable feeling that we get every time we remember a movie we watched a long time ago, the ones whereas kept debating with our friends as to what would have happened.
● That is the purpose of adding freeze-frame effects at the end of videos. So you keep thinking about them.
● Now that you know this effect, you can figure out which freeze-frame video examples you still find very interesting. Also, do not hesitate to try out the new features of Filmora. It would bring out the best of your video to the audience.
Freeze frame effect in video editing is a skill that requires more practice to master. It adds drama and impact to movies. If you want to see more energy and acting in the videos you watch, then you should see more freeze-frame examples.
Sometimes we notice that a particular action stays on longer than necessary in a movie or video. The filmmakers use this skill to emphasize some intense moments further to sustain or pique your interest.
The freeze-frame video editing feature is a valuable skill that helps filmmakers make excellent movies. We have a list of the top 12 examples of freeze-frame effects in movies for you.
In this article
01 [What is freeze-frame video editing?](#Part 1)
02 [Ways to use freeze-frame video editing](#Part 2)
03 [What are the best freeze-frame video editing examples?](#Part 3)
Part 1 What Is Freeze Frame Video Editing?
Freeze frame video editing is a video editing technique that halts movement in a video for a given period. It converts moving pictures into still photography for some time. These video editor effects help filmmakers gear attention to the video editing or filmmaking process. In other words, they are self-reflexive.
Part 2 Ways to Use Freeze Frame in Video editing
Freeze frames can be helpful in 3 significant ways in video editing;
● At the beginning of a movie/video: Freeze-frame at the beginning helps you pique the audience’s interest and give them a sneak peek of what to expect in the movie. This freeze-frame technique was used in the film ‘Good Fellas’ to pique the audience’s interests.
● At the end: Using a freeze-frame allows the audience to choose or decide how the movie ends, whether it is obvious. The ‘breakfast club’ filmmakers use a freeze-frame at the end to emphasize the young boy.
● In the middle, subtly capturing intense moments like in the movie ‘The Departed.’
Part 3 What are the Best Freeze-Frame Video Editing Examples?
It takes a great deal of skill to employ freeze frame with the best results correctly. It might bore the audience or give another impression other than the intended when not done effectively.
But several movie directors have effectively used the freeze-frame video editing technique that wowed the audience.
Here is a list of the best freeze frame examples you would love;
01The Departed

In this 2006 movie, an undercover cop and a mole try to identify each other. Scorsese shows his editing prowess once again as he uses freeze-frame more subtly.
He changes the frame speed instead of stopping on one frame for a considerably longer time. This emphasizes some memorable moments that you may overlook on a first watch.
02Rocky III

The freeze-frame came in during the final match between Apollo and Balboa in this movie.
During the first 3 Rocky movies, Apollo and Balboa had an intriguing rivalry. At the end of Rocky III, the duo decides to engage in a friendly battle to determine who was the Lord in boxing.
The movie ends in a freeze-frame with Rocky swinging a right hook after Apollo imitates the bell, saying, “Ding Dong.”
The freeze-frame allows the audience to guess who the winner will be, thus a longer time to think of the movie after watching.
03400 Blows

In 400 Blows, the main character Antoine, a young Parisian, was hardly out of trouble.
In an attempt to end his troubles, he arrives at the beach after running away from a soccer match.
He is faced with either jumping right in or going back. The movie ends in a freeze-frame as no one finds out. The decision was left to the audience.
04Thelma and Louise

Thelma and Louise is about two (2) friends, Thelma Dickinson and Louise Sawyer. They both rise to defend themselves in a male-dominated world. In the film, Thelma and Louise are both running from the authorities. Louise killed a man who almost raped her friend, Thelma, thus the run. Things get out of control as they try to escape to Mexico, away from the authorities.
While on the run, they get ambushed by the police towards the grand canyon. The audience, at this point, is in suspense as to whether the ladies will survive or not.
Instead of surrendering, they drive right into the grand canyon, and the movie ends in a freeze-frame as they get caught hanging in the air while plunging into the canyon.
Regular movies might decide to give us all the details of the car plunging and exploding.
05The Wolf of Wall Street

Scorsese uses freeze-frame at the beginning of this movie, just as he did in Good Fellas. The freeze-frame effect here helps introduce the character and shows us the plot of the movie hence piquing the audience’s interests immediately.
06Out of Sight

This movie is another excellent example of freeze-frame video editing. What other way to pique the audience’s interest significantly and emphasize them than capture them in a freeze-frame.
07Death Proof

In this movie, the freeze-frame stays till the very end. It captures three women as they raise their hands-on celebration after successfully beating to death a psychopath who has been killing young women.
08Butch Cassidy and the Sundance Kid

This movie follows two train robbers, Butch Cassidy and Harry Longabaugh, known as the ‘Sundance Kid.’ After conducting several robberies, they go on the run as the authorities pursue them. After a gun battle with the authorities, they take cover inside a building, but they get surrounded with no other escape route.
Thus they decide to engage in the last fight instead of surrendering, and you see them in a gun battle with the authorities. The movie ends with them caught in a freeze-frame brandishing their guns at the officers instead of actual bloodshed. Though we all know they will get killed.
09Good Fellas

Initially, we mentioned that a freeze-frame could be of use at the beginning of a movie. Scorsese used this effectively in ‘Good Fellas’ to emphasize the movie plot.
In the opening scene, the characters Henry, Jimmy, and Tonny, played by Ray Liotta, Robert De Niro, and Joe Pesci, respectively, stop their car in the middle of the road.
They open their truck and see a man badly wounded and beaten, Tonny stabs him, and Jimmy shoots him. Henry then closes the truck and looks on in a freeze-frame before uttering the lines, “As far back as I can remember, I have always wanted to be a gangster.”
This lets us know right away what will happen in the movie. That person will get killed, and this is the mob territory.
10Harry Potter and the Prisoner of Azkaban

During a bad and weird year at Hogwarts, Harry potter experiences an extremely joyous moment when he goes anti-gravity on his new Firebolt broom.
He becomes overjoyed and his expression gets captured in a freeze-frame.
11The Breakfast Club

The Breakfast Club is an 80s movie showing teenagers trying to find their identity in life and overcoming the challenges of these years.
This is another freeze frame example where the filmmakers showed great expertise. The character John Bender is caught in a freeze-frame, punching the air to celebrate his victory.
He has just shared a kiss with the class sweetheart Claire. He and his classmates have also just won over the authoritative principal, Mr. Vernon.
12Pulp Fiction: Pumpkin and Honey Bunny.

Pulp Fiction is another movie such as ‘Good Fellas’ with its freeze-frame edition done at the movie’s beginning.
Pumpkin and Honey Bunny are shown at the movie’s beginning, sitting together in a diner. They argue whether it will be safer to rub a bank or a restaurant. In the end, they settle for a diner — the same one they are sitting in.
They kiss and pull out their guns, and the images freeze before the credits roll out.
The freeze-frame gives us a sneak peek of the violence to experience in the movie, and indeed, we were not disappointed.
For Win 7 or later (64-bit)
For macOS 10.12 or later
With Wondershare Filmora Video Editor ‘s speed ramping feature, you can adjust your video speed while controlling the keyframes to create fascinating cinematic videos.
Filmora is a video editing tool developed by wondershare and has exciting features. Filmora makes video editing easy and seamless yet produces professional results.
Filmora’s freeze-frame feature helps bring dynamism and energy to your videos using its keyframe feature.
● Ending Thoughts →
● It is an inexplicable feeling that we get every time we remember a movie we watched a long time ago, the ones whereas kept debating with our friends as to what would have happened.
● That is the purpose of adding freeze-frame effects at the end of videos. So you keep thinking about them.
● Now that you know this effect, you can figure out which freeze-frame video examples you still find very interesting. Also, do not hesitate to try out the new features of Filmora. It would bring out the best of your video to the audience.
Freeze frame effect in video editing is a skill that requires more practice to master. It adds drama and impact to movies. If you want to see more energy and acting in the videos you watch, then you should see more freeze-frame examples.
Sometimes we notice that a particular action stays on longer than necessary in a movie or video. The filmmakers use this skill to emphasize some intense moments further to sustain or pique your interest.
The freeze-frame video editing feature is a valuable skill that helps filmmakers make excellent movies. We have a list of the top 12 examples of freeze-frame effects in movies for you.
In this article
01 [What is freeze-frame video editing?](#Part 1)
02 [Ways to use freeze-frame video editing](#Part 2)
03 [What are the best freeze-frame video editing examples?](#Part 3)
Part 1 What Is Freeze Frame Video Editing?
Freeze frame video editing is a video editing technique that halts movement in a video for a given period. It converts moving pictures into still photography for some time. These video editor effects help filmmakers gear attention to the video editing or filmmaking process. In other words, they are self-reflexive.
Part 2 Ways to Use Freeze Frame in Video editing
Freeze frames can be helpful in 3 significant ways in video editing;
● At the beginning of a movie/video: Freeze-frame at the beginning helps you pique the audience’s interest and give them a sneak peek of what to expect in the movie. This freeze-frame technique was used in the film ‘Good Fellas’ to pique the audience’s interests.
● At the end: Using a freeze-frame allows the audience to choose or decide how the movie ends, whether it is obvious. The ‘breakfast club’ filmmakers use a freeze-frame at the end to emphasize the young boy.
● In the middle, subtly capturing intense moments like in the movie ‘The Departed.’
Part 3 What are the Best Freeze-Frame Video Editing Examples?
It takes a great deal of skill to employ freeze frame with the best results correctly. It might bore the audience or give another impression other than the intended when not done effectively.
But several movie directors have effectively used the freeze-frame video editing technique that wowed the audience.
Here is a list of the best freeze frame examples you would love;
01The Departed

In this 2006 movie, an undercover cop and a mole try to identify each other. Scorsese shows his editing prowess once again as he uses freeze-frame more subtly.
He changes the frame speed instead of stopping on one frame for a considerably longer time. This emphasizes some memorable moments that you may overlook on a first watch.
02Rocky III

The freeze-frame came in during the final match between Apollo and Balboa in this movie.
During the first 3 Rocky movies, Apollo and Balboa had an intriguing rivalry. At the end of Rocky III, the duo decides to engage in a friendly battle to determine who was the Lord in boxing.
The movie ends in a freeze-frame with Rocky swinging a right hook after Apollo imitates the bell, saying, “Ding Dong.”
The freeze-frame allows the audience to guess who the winner will be, thus a longer time to think of the movie after watching.
03400 Blows

In 400 Blows, the main character Antoine, a young Parisian, was hardly out of trouble.
In an attempt to end his troubles, he arrives at the beach after running away from a soccer match.
He is faced with either jumping right in or going back. The movie ends in a freeze-frame as no one finds out. The decision was left to the audience.
04Thelma and Louise

Thelma and Louise is about two (2) friends, Thelma Dickinson and Louise Sawyer. They both rise to defend themselves in a male-dominated world. In the film, Thelma and Louise are both running from the authorities. Louise killed a man who almost raped her friend, Thelma, thus the run. Things get out of control as they try to escape to Mexico, away from the authorities.
While on the run, they get ambushed by the police towards the grand canyon. The audience, at this point, is in suspense as to whether the ladies will survive or not.
Instead of surrendering, they drive right into the grand canyon, and the movie ends in a freeze-frame as they get caught hanging in the air while plunging into the canyon.
Regular movies might decide to give us all the details of the car plunging and exploding.
05The Wolf of Wall Street

Scorsese uses freeze-frame at the beginning of this movie, just as he did in Good Fellas. The freeze-frame effect here helps introduce the character and shows us the plot of the movie hence piquing the audience’s interests immediately.
06Out of Sight

This movie is another excellent example of freeze-frame video editing. What other way to pique the audience’s interest significantly and emphasize them than capture them in a freeze-frame.
07Death Proof

In this movie, the freeze-frame stays till the very end. It captures three women as they raise their hands-on celebration after successfully beating to death a psychopath who has been killing young women.
08Butch Cassidy and the Sundance Kid

This movie follows two train robbers, Butch Cassidy and Harry Longabaugh, known as the ‘Sundance Kid.’ After conducting several robberies, they go on the run as the authorities pursue them. After a gun battle with the authorities, they take cover inside a building, but they get surrounded with no other escape route.
Thus they decide to engage in the last fight instead of surrendering, and you see them in a gun battle with the authorities. The movie ends with them caught in a freeze-frame brandishing their guns at the officers instead of actual bloodshed. Though we all know they will get killed.
09Good Fellas

Initially, we mentioned that a freeze-frame could be of use at the beginning of a movie. Scorsese used this effectively in ‘Good Fellas’ to emphasize the movie plot.
In the opening scene, the characters Henry, Jimmy, and Tonny, played by Ray Liotta, Robert De Niro, and Joe Pesci, respectively, stop their car in the middle of the road.
They open their truck and see a man badly wounded and beaten, Tonny stabs him, and Jimmy shoots him. Henry then closes the truck and looks on in a freeze-frame before uttering the lines, “As far back as I can remember, I have always wanted to be a gangster.”
This lets us know right away what will happen in the movie. That person will get killed, and this is the mob territory.
10Harry Potter and the Prisoner of Azkaban

During a bad and weird year at Hogwarts, Harry potter experiences an extremely joyous moment when he goes anti-gravity on his new Firebolt broom.
He becomes overjoyed and his expression gets captured in a freeze-frame.
11The Breakfast Club

The Breakfast Club is an 80s movie showing teenagers trying to find their identity in life and overcoming the challenges of these years.
This is another freeze frame example where the filmmakers showed great expertise. The character John Bender is caught in a freeze-frame, punching the air to celebrate his victory.
He has just shared a kiss with the class sweetheart Claire. He and his classmates have also just won over the authoritative principal, Mr. Vernon.
12Pulp Fiction: Pumpkin and Honey Bunny.

Pulp Fiction is another movie such as ‘Good Fellas’ with its freeze-frame edition done at the movie’s beginning.
Pumpkin and Honey Bunny are shown at the movie’s beginning, sitting together in a diner. They argue whether it will be safer to rub a bank or a restaurant. In the end, they settle for a diner — the same one they are sitting in.
They kiss and pull out their guns, and the images freeze before the credits roll out.
The freeze-frame gives us a sneak peek of the violence to experience in the movie, and indeed, we were not disappointed.
For Win 7 or later (64-bit)
For macOS 10.12 or later
With Wondershare Filmora Video Editor ‘s speed ramping feature, you can adjust your video speed while controlling the keyframes to create fascinating cinematic videos.
Filmora is a video editing tool developed by wondershare and has exciting features. Filmora makes video editing easy and seamless yet produces professional results.
Filmora’s freeze-frame feature helps bring dynamism and energy to your videos using its keyframe feature.
● Ending Thoughts →
● It is an inexplicable feeling that we get every time we remember a movie we watched a long time ago, the ones whereas kept debating with our friends as to what would have happened.
● That is the purpose of adding freeze-frame effects at the end of videos. So you keep thinking about them.
● Now that you know this effect, you can figure out which freeze-frame video examples you still find very interesting. Also, do not hesitate to try out the new features of Filmora. It would bring out the best of your video to the audience.
Freeze frame effect in video editing is a skill that requires more practice to master. It adds drama and impact to movies. If you want to see more energy and acting in the videos you watch, then you should see more freeze-frame examples.
Sometimes we notice that a particular action stays on longer than necessary in a movie or video. The filmmakers use this skill to emphasize some intense moments further to sustain or pique your interest.
The freeze-frame video editing feature is a valuable skill that helps filmmakers make excellent movies. We have a list of the top 12 examples of freeze-frame effects in movies for you.
In this article
01 [What is freeze-frame video editing?](#Part 1)
02 [Ways to use freeze-frame video editing](#Part 2)
03 [What are the best freeze-frame video editing examples?](#Part 3)
Part 1 What Is Freeze Frame Video Editing?
Freeze frame video editing is a video editing technique that halts movement in a video for a given period. It converts moving pictures into still photography for some time. These video editor effects help filmmakers gear attention to the video editing or filmmaking process. In other words, they are self-reflexive.
Part 2 Ways to Use Freeze Frame in Video editing
Freeze frames can be helpful in 3 significant ways in video editing;
● At the beginning of a movie/video: Freeze-frame at the beginning helps you pique the audience’s interest and give them a sneak peek of what to expect in the movie. This freeze-frame technique was used in the film ‘Good Fellas’ to pique the audience’s interests.
● At the end: Using a freeze-frame allows the audience to choose or decide how the movie ends, whether it is obvious. The ‘breakfast club’ filmmakers use a freeze-frame at the end to emphasize the young boy.
● In the middle, subtly capturing intense moments like in the movie ‘The Departed.’
Part 3 What are the Best Freeze-Frame Video Editing Examples?
It takes a great deal of skill to employ freeze frame with the best results correctly. It might bore the audience or give another impression other than the intended when not done effectively.
But several movie directors have effectively used the freeze-frame video editing technique that wowed the audience.
Here is a list of the best freeze frame examples you would love;
01The Departed

In this 2006 movie, an undercover cop and a mole try to identify each other. Scorsese shows his editing prowess once again as he uses freeze-frame more subtly.
He changes the frame speed instead of stopping on one frame for a considerably longer time. This emphasizes some memorable moments that you may overlook on a first watch.
02Rocky III

The freeze-frame came in during the final match between Apollo and Balboa in this movie.
During the first 3 Rocky movies, Apollo and Balboa had an intriguing rivalry. At the end of Rocky III, the duo decides to engage in a friendly battle to determine who was the Lord in boxing.
The movie ends in a freeze-frame with Rocky swinging a right hook after Apollo imitates the bell, saying, “Ding Dong.”
The freeze-frame allows the audience to guess who the winner will be, thus a longer time to think of the movie after watching.
03400 Blows

In 400 Blows, the main character Antoine, a young Parisian, was hardly out of trouble.
In an attempt to end his troubles, he arrives at the beach after running away from a soccer match.
He is faced with either jumping right in or going back. The movie ends in a freeze-frame as no one finds out. The decision was left to the audience.
04Thelma and Louise

Thelma and Louise is about two (2) friends, Thelma Dickinson and Louise Sawyer. They both rise to defend themselves in a male-dominated world. In the film, Thelma and Louise are both running from the authorities. Louise killed a man who almost raped her friend, Thelma, thus the run. Things get out of control as they try to escape to Mexico, away from the authorities.
While on the run, they get ambushed by the police towards the grand canyon. The audience, at this point, is in suspense as to whether the ladies will survive or not.
Instead of surrendering, they drive right into the grand canyon, and the movie ends in a freeze-frame as they get caught hanging in the air while plunging into the canyon.
Regular movies might decide to give us all the details of the car plunging and exploding.
05The Wolf of Wall Street

Scorsese uses freeze-frame at the beginning of this movie, just as he did in Good Fellas. The freeze-frame effect here helps introduce the character and shows us the plot of the movie hence piquing the audience’s interests immediately.
06Out of Sight

This movie is another excellent example of freeze-frame video editing. What other way to pique the audience’s interest significantly and emphasize them than capture them in a freeze-frame.
07Death Proof

In this movie, the freeze-frame stays till the very end. It captures three women as they raise their hands-on celebration after successfully beating to death a psychopath who has been killing young women.
08Butch Cassidy and the Sundance Kid

This movie follows two train robbers, Butch Cassidy and Harry Longabaugh, known as the ‘Sundance Kid.’ After conducting several robberies, they go on the run as the authorities pursue them. After a gun battle with the authorities, they take cover inside a building, but they get surrounded with no other escape route.
Thus they decide to engage in the last fight instead of surrendering, and you see them in a gun battle with the authorities. The movie ends with them caught in a freeze-frame brandishing their guns at the officers instead of actual bloodshed. Though we all know they will get killed.
09Good Fellas

Initially, we mentioned that a freeze-frame could be of use at the beginning of a movie. Scorsese used this effectively in ‘Good Fellas’ to emphasize the movie plot.
In the opening scene, the characters Henry, Jimmy, and Tonny, played by Ray Liotta, Robert De Niro, and Joe Pesci, respectively, stop their car in the middle of the road.
They open their truck and see a man badly wounded and beaten, Tonny stabs him, and Jimmy shoots him. Henry then closes the truck and looks on in a freeze-frame before uttering the lines, “As far back as I can remember, I have always wanted to be a gangster.”
This lets us know right away what will happen in the movie. That person will get killed, and this is the mob territory.
10Harry Potter and the Prisoner of Azkaban

During a bad and weird year at Hogwarts, Harry potter experiences an extremely joyous moment when he goes anti-gravity on his new Firebolt broom.
He becomes overjoyed and his expression gets captured in a freeze-frame.
11The Breakfast Club

The Breakfast Club is an 80s movie showing teenagers trying to find their identity in life and overcoming the challenges of these years.
This is another freeze frame example where the filmmakers showed great expertise. The character John Bender is caught in a freeze-frame, punching the air to celebrate his victory.
He has just shared a kiss with the class sweetheart Claire. He and his classmates have also just won over the authoritative principal, Mr. Vernon.
12Pulp Fiction: Pumpkin and Honey Bunny.

Pulp Fiction is another movie such as ‘Good Fellas’ with its freeze-frame edition done at the movie’s beginning.
Pumpkin and Honey Bunny are shown at the movie’s beginning, sitting together in a diner. They argue whether it will be safer to rub a bank or a restaurant. In the end, they settle for a diner — the same one they are sitting in.
They kiss and pull out their guns, and the images freeze before the credits roll out.
The freeze-frame gives us a sneak peek of the violence to experience in the movie, and indeed, we were not disappointed.
For Win 7 or later (64-bit)
For macOS 10.12 or later
With Wondershare Filmora Video Editor ‘s speed ramping feature, you can adjust your video speed while controlling the keyframes to create fascinating cinematic videos.
Filmora is a video editing tool developed by wondershare and has exciting features. Filmora makes video editing easy and seamless yet produces professional results.
Filmora’s freeze-frame feature helps bring dynamism and energy to your videos using its keyframe feature.
● Ending Thoughts →
● It is an inexplicable feeling that we get every time we remember a movie we watched a long time ago, the ones whereas kept debating with our friends as to what would have happened.
● That is the purpose of adding freeze-frame effects at the end of videos. So you keep thinking about them.
● Now that you know this effect, you can figure out which freeze-frame video examples you still find very interesting. Also, do not hesitate to try out the new features of Filmora. It would bring out the best of your video to the audience.
YouTube Algorithm Hacks
Every day, more than 1 billion hours of YouTube videos are seen by users worldwide, including cat videos and videos for cats. The YouTube algorithm determines the videos YouTube recommends to its more than 2 billion human users (and untold numbers of feline users).

The subject of how to encourage YouTube’s algorithm to promote your videos and give you more likes is crucial for marketers, influencers, and creators alike.
We’ll discuss what the algorithm is (and isn’t), the most recent updates for 2022, and how experts use
YouTube’s search and discovery tools to push their videos in front of viewers in this blog post.
Let’s start!
Part 1. YouTube’s algorithm’s history
The YouTube algorithm: What is it? Let’s take a quick look at how YouTube’s algorithm has evolved through time and how it functions now in order to respond to your question.
2005 to 2011: Click-and-view optimization
In order to crowdsource footage of Janet Jackson and Justin Timberlake’s infamous Superbowl performance, according to YouTube founder Jawed Karim (a.k.a. the star of Me at the Zoo), YouTube was established in 2005. Therefore, it should not be surprising that YouTube’s algorithm for many years displayed suggested videos that had the most views or clicks. Unfortunately, this resulted in an increase in deceptive titles and thumbnails, or clickbait. User experience suffered as a result of videos that made viewers feel duped, dissatisfied, or just plain irritated.
2012: Watch time optimization
YouTube made changes to its recommendation engine in 2012 to account for the amount of time spent watching each video as well as the total amount of time spent on the site. According to theory, when people find videos important and engaging, they watch them for a longer period of time, possibly all the way through. Due to this, some creators tried to make their movies shorter to enhance the likelihood that viewers would watch them through, while others made their videos longer to boost overall viewing time. YouTube maintained the official line—create content your audience wants to watch, and the algorithm will reward you—while refusing to support either of these strategies. However, as anyone who has used the internet for any length of time can attest, not all time spent online is created equal. YouTube has adopted a new strategy.
2015–2016: maximizing fulfillment
In addition to emphasizing direct reaction metrics like Shares, Likes, and Dislikes (and, of course, the extremely cruel “not interested” button), YouTube started monitoring viewer happiness directly using user surveys in 2005. YouTube published a whitepaper titled Deep Neural Networks for YouTube Recommendations in 2016 that detailed some of the inner workings of its AI.
2016-present: demonetization, and brand safety
The size and popularity of YouTube have led to an increase in content moderation difficulties over time, and what the algorithm suggests is now a major topic for news outlets and the government in addition to creators and advertisers.
YouTube has stated that it takes seriously its obligation to promote a variety of viewpoints while limiting the spread of damaging false material. For instance, algorithm modifications implemented in the beginning of 2019 have reduced consumption of questionable content by 70%. (According to YouTube, borderline content is that which is harmful or misleading but doesn’t quite go against community standards. On the other hand, offensive material is taken down right away.)
Creators are impacted by this problem because they worry about unintentionally breaking the constantly evolving community rules and getting punished with strikes, demonetization, or worse. (In fact, enhancing openness for community norms for artists is one of YouTube’s priorities for 2021, according to CEO Susan Wojcicki.) Brands and advertisers are also impacted since they don’t want their name and logo to be associated with white nationalists.
Politicians in America are growing more concerned about the societal impact of social media algorithms like YouTube’s. Democrats introduced the “Protecting Americans from Dangerous Algorithms Act” in early 2021, and YouTube (and other platforms) have been called to testify before Senate committees about their algorithms. Let’s now discuss what is known about this hazardous beast’s mechanism.
Part 2. How will YouTube’s algorithm function in 2022?
The YouTube algorithm chooses videos for users with the intention of finding the most relevant content for them and keeping them interested. When we refer to “the algorithm,” we mean one of three selection or discovery techniques that are related but slightly different: three different algorithms: one that chooses videos for YouTube’s main page, one that ranks the results of any given search, and one that chooses what videos users should watch next are used.
According to YouTube, in 2022 the majority of channels’ top traffic sources would often be their homepage and suggested videos. With the exception of explainer or instructional films, which frequently receive the most traffic via search (e.g., “how to tune up a bicycle”)
Part 3. How is the algorithm set up on YouTube?
What ranking factors does YouTube consider when deciding which videos to display to users? Every traffic source varies a little. But in the end, a combination of factors including customization (the history and preferences of the viewer) performance (the success of the video) external variables (the overall audience or market)
Part 4. How YouTube determines its homepage algorithm
The YouTube algorithm presents a wide selection of videos that it thinks a user might like to view every time they open the YouTube app or type in youtube.com. Because the computer hasn’t yet determined what the viewer wants—acoustic versions of popular songs, for example—this selection is frequently broad. talks that are motivating against procrastination? to watch their preferred possum vlogger? Two categories of ranking signals are used to determine which videos appear on the homepage:
Performance:
YouTube gauges performance using indicators including the click-through rate, typical viewing time, typical percentage of views, likes, and disapproval ratings from viewers. After you upload a video, the algorithm initially displays it to a small number of users on their homepage. If it appeals to, engages, and satisfies those viewers (i.e., they click on it, watch it through, like it, share it, etc.), then it is then presented to an increasing number of users on their homepages.
Personalization:
However, the trending tab does not include YouTube. According to their past activity, also known as their watch history, or personalization, YouTube suggests videos to users based on what it believes are relevant to their interests. More of the same will be presented to a user if they frequently watch a particular channel or show they have an interest in. This element is also responsive to behavioral alterations throughout time as a person’s affinities and interests change.
Conclusion
It’s a fallacy that the algorithm would penalize you for publishing too regularly or insufficiently frequently, even if YouTube undoubtedly promotes the idea of uploading constantly in order to develop and maintain a relationship with your audience. The growth of the audience is unrelated to the interval between uploads. The zeitgeist can change quickly, but by keeping an eye on Google Trends and giving yourself opportunity to explore, you won’t fall behind.
Free Download For Win 7 or later(64-bit)
Free Download For macOS 10.14 or later
Free Download For macOS 10.14 or later
Also read:
- Updated In 2024, Top 15 LUTS to Buy
- Want to Make an Epic CSGO Montage? You Are in the Right Place. This In-Depth Guide Will Explain How You Can Make an Attention-Grabbing Gaming Montage
- New 2024 Approved Sometimes It May Happen to You that You Are Watching a Video that Has Very Low Graphics or, in Other Words, Low Visual Quality. You Might Wish to Change, Instead Improve the Video Quality. Here, AI Upscaling Video Comes to Use
- In 2024, Detailed Steps to Rotate Videos in Davinci Resolve
- We Are Going to Share a Detailed Insight Into How AR Integration Can Help the Entire Edtech World. Well Also Share some of the Real-World Examples of Augmented Reality (AR) in Teaching so that You Can Understand Its Benefits in the Education Sector
- New Free for 2024
- Updated Video Course and Online Learning Are Very Popular Nowadays. Here We Are Going to Recommend some of the Best Video Websites for Teachers to Use for 2024
- New | Top GIF to MP4 Converters for 2024
- Updated How to Create an Adobe Slideshow the Easy Way for 2024
- New 2024 Approved Doable Ways to Make Transparent Background in Procreate
- In 2024, 3 Methods to Combine 2 or 3 Videos Into 1
- Top 5 Ways To Convert Hdr To Sdr Videos
- New 2024 Approved How to Use Kahoot! On Zoom
- Updated In 2024, Do You Find Choosing a Good LUT to Color-Correct Your Media Files Difficult? Discover some of the Best Professional LUTs From 3D LUT Creator to Download
- New 2024 Approved Detailed Steps to Rotate Videos Using OBS
- New In 2024, 4 Solutions to Crop a Video on Android Easily
- Updated In 2024, Unlocking the Power of DaVinci Resolve Scopes Enhance Your Color Grad
- Updated How to Make Vintage Film Effect 1980S
- New Top LUTs for Sony HLG to Download for 2024
- Updated How to Choose A Nice GoPro for Vlogging, In 2024
- If You Want an App to Make Videos with Pictures and Music for Social Media Posts, We Are with the Best Apps to Make Videos with Music and Pictures for 2024
- Updated How to Windows Online Movie Maker Complete Guide for 2024
- In 2024, Replacing the Sky in Adobe After Effects An Extensive Guide
- Updated 2024 Approved How to Make an Instant Slideshow on Mac
- New 2024 Approved Are You in a Funny Chat with a Friend and Want to Send a GIF but Couldnt Find One? Here We Will Provide You with the Top Image for GIF Converters. So, Let Us See How to Turn Images Into GIFs Very Quickly
- Detailed Guide to Rotate Videos in Blender for 2024
- Step-by-Step Guide | Control Playback Speed in Premiere Pro for 2024
- Updated In 2024, Use Path Blur In Photoshop To Create Motion Effect
- Updated List of Supported Whatsapp Video Format You May Want to Know
- With Everything Centered Around Videos on the Digital Platform, the Use and the Need for AI-Based Editing Tools Have Also Increased Manifold. We Have Curated a List of the Top Programs that Can Help You with AI Video Editing for 2024
- New 2024 Approved How to Apply Gaussian Blur Effect to Videos In Premiere Pro?
- Updated Change Background Color in After Effects for 2024
- New In 2024, What Are the 10 Best GIF Creator?
- In 2024, Is pgsharp legal when you are playing pokemon On Itel S23? | Dr.fone
- Different Methods To Unlock Your iPhone 15 Pro
- In 2024, Is Your iPhone 7 Plus in Security Lockout? Proper Ways To Unlock | Dr.fone
- How to Unlock Oppo A1 5G Phone Forgot Password
- In 2024, 9 Best Free Android Monitoring Apps to Monitor Phone Remotely For your Samsung Galaxy S24 | Dr.fone
- 10 Easy-to-Use FRP Bypass Tools for Unlocking Google Accounts On HTC
- How to sign .odt file electronically
- How to Mirror ZTE Nubia Z60 Ultra to Mac? | Dr.fone
- Here are Some Pro Tips for Pokemon Go PvP Battles On Samsung Galaxy S24 Ultra | Dr.fone
- Can I play MKV movies on Motorola ?
- Full Guide How To Fix Connection Is Not Private on Oppo A18 | Dr.fone
- In 2024, Easy Guide to Oppo Find N3 Flip FRP Bypass With Best Methods
- In 2024, Top 5 Itel P55 5G Bypass FRP Tools for PC That Actually Work
- Disabling Apple iPhone 6s Parental Restrictions With/Without Password
- How to Quickly Fix Bluetooth Not Working on Tecno Camon 30 Pro 5G | Dr.fone
- How to Reset Nokia C12 Pro Without the Home Button | Dr.fone
- In 2024, How to Get and Use Pokemon Go Promo Codes On Apple iPhone 14 Plus | Dr.fone
- How To Unlock Any Realme 11 Pro+ Phone Password Using Emergency Call
- In 2024, Fake Android Location without Rooting For Your OnePlus Ace 2 Pro | Dr.fone
- Simple Solutions to Fix Android SystemUI Has Stopped Error For Infinix Hot 40i | Dr.fone
- Easily Unlock Your Vivo X100 Pro Device SIM
- In 2024, Does Samsung Galaxy XCover 6 Pro Tactical Edition Have Find My Friends? | Dr.fone
- In 2024, How to Migrate Android Data From Xiaomi 14 to New Android Phone? | Dr.fone
- How to Use Life360 on Windows PC For Poco X5? | Dr.fone
- In 2024, How to Watch Hulu Outside US On Vivo T2 Pro 5G | Dr.fone
- In 2024, Best Infinix Note 30 VIP Racing Edition Pattern Lock Removal Tools Remove Android Pattern Lock Without Losing Data
- In 2024, 7 Ways to Unlock a Locked Samsung Galaxy A24 Phone
- Updated Make Your Pictures Speak Online With the Best Tools Recommended for 2024
- Universal Unlock Pattern for Oppo F25 Pro 5G
- Title: How to Make Split Screen Videos in Filmora for 2024
- Author: Morgan
- Created at : 2024-05-19 05:11:53
- Updated at : 2024-05-20 05:11:53
- Link: https://ai-video-editing.techidaily.com/how-to-make-split-screen-videos-in-filmora-for-2024/
- License: This work is licensed under CC BY-NC-SA 4.0.

