
In 2024, An Introduction to LUTs | Their Overview and Benefits
An Introduction to LUTs | Their Overview and Benefits
In video editing, you mainly face problems related to color grading and lower attractiveness of video. To cater to these issues, you can use the LUTs because they can upscale the performance of your video in no time. Yet, if you are not familiar with the concept of LUTs, this article is for you. Here, we will discuss the meaning of having LUTs in editing and other metrics of this exceptional element.
By the end of this article, you will also discover a tool that will help you with LUTs video editing. Thus, let’s get below to learn more about LUTs.
Part 1: What Do You Know About LUTs?
LUTs are data files that stand for Look-Up Tables. These are used in video editing because they have mathematical algorithms that can color-transform both videos and photos. LUTs can also upscale the contrast and color grading of simple videos and make them color-friendly. If you are a filmmaker or a videographer, you should be familiar with the concept of LUTs.

LUTs video editing also ensures that white balance and all the color metrics in your videos are consistent so they can be used for professional purposes. Moreover, you can also implement your creativity in the video with them. There are several formats of LUTs, such as 3DL, CUBE, DAT, CSP, and more, that you can discover in various editing tools. You can find them across several platforms, such as Adobe Photoshop, DaVinci Resolve, and more.
Empower your videos with a new mood using different LUTs. Filmora now offers 100+ top-quality 3D LUTs cover a broad range of scenarios. Transform your videos with Filmora’s powerful 3D LUTs.
Apply LUT on Videos Apply LUT on Videos Learn More


Part 2: What Are the Different Types of LUTs Available for Utility?
To fully understand LUT editing, you need to be aware of the types of LUTs. In this section, we will discuss the types of LUTs. Have a look below to find out more about them:
Technical LUTs
You can use technical LUTs for postproduction editing. It can help with gamma correction, white balance adjustments, and color grading. Moreover, the main purpose of using this LUT is to ensure consistency in the videos.
Creative LUTs
If you are an artist and want to work on art photos and videos, you can use creative LUTs. With this, you can adjust colors and contrast to customize the outlook of your media. Moreover, it can also create cozy and environment-friendly looks in your videos.
Camera Specific LUTs
As the name indicates, you can use camera-specific LUTs to work with different camera brands. The camera can lead to several color dysfunctionality, but you can correct them with camera-specific LUTs. It never compromises the quality of the video, so you can use it without any issues.
Display LUTs
If you wish to customize the colors of videos or photos for a specific display device, this is your best option. It can modify the video as per the computer or television specifications. Above all, you can match the output look of your video with your intentional look with this.
Input LUTs
With this, you can manage the colors of your video from the beginning. It can help you to apply a consistent starting point to your video in an optimized manner.
Part 3: Why Are LUTs Beneficial in the Current Video Editing Fraternity?
There are several reasons that show that LUTs are beneficial for the current video editing fraternity. While you have learned some important points explaining what are LUTs, here are some of the reasons explaining their importance:
Improved Color Grading
By using LUTs, you can apply predesigned colors to the videos and photos. It can save you both time and effort and fasten the procedure of working. Thus, if you are working on tight deadlines, this can be your savior.
Highest Consistency
If you don’t have consistency in your videos, no one will watch them for a long time. To solve this issue, you can use LUTs because they can add a sense of consistency to any type of video.
Creativity Ratio
There is a wide array of creative options in LUTs. From adding vibrant colors to modifying styles, LUTs can help you with everything. Thus, it is an optimized solution to add creativity to videos.
Compatibility of LUTs
LUTs are compatible with a considerable number of video editing software. So, you can also streamline your workflow efficiency with the help of LUTs while editing your favorite videos.
Part 4: What Do You Believe About The Future of LUTs in the Video Industry?
In this digital world, you need to work with the most modernized solutions to solve your digital problems. We all make videos and photos, but bad colors can degrade their performance and attractiveness. For this reason, you can use LUTs editing. However, to import or apply LUTs, you need to know the best video editing platform.
The best and most optimized platform that can be used for this purpose is Wondershare Filmora . With this tool, you can apply LUTs to the videos and can also preview them before actually downloading the video. Other than this, it also has an effect mask by which you can apply special effect filters to the videos. It also offers video cover and export process optimization.
Add LUTs on Video For Win 7 or later(64-bit)
Add LUTs on Video For macOS 10.14 or later

Key Features of Wondershare Filmora
Wondershare Filmora has built much in LUTs video editing over time. From changing its existence from a category to a dedicated section, Filmora has come a long way. Find out some important features about Filmora and its exceptional functionality:
- With Filmora, you can optimize the cache file management along with using the feedback channels.
- You can make the interface adjustments and can also customize the intensity of LUTs from 0 to 100%.
- There are several adjustment filters in it, and you can also work on several types of videos with it, including travel and more.
Conclusion
In the following article, you have learned what are LUTs in video editing. From the definition to the compatible video editing software, you can find everything about LUTs above. Moreover, there are several types of LUTs, and you can use them as per your need. If you are looking for a platform to apply LUTs to the video, the answer is Wondershare Filmora.
Apply LUT on Videos Apply LUT on Videos Learn More
Part 2: What Are the Different Types of LUTs Available for Utility?
To fully understand LUT editing, you need to be aware of the types of LUTs. In this section, we will discuss the types of LUTs. Have a look below to find out more about them:
Technical LUTs
You can use technical LUTs for postproduction editing. It can help with gamma correction, white balance adjustments, and color grading. Moreover, the main purpose of using this LUT is to ensure consistency in the videos.
Creative LUTs
If you are an artist and want to work on art photos and videos, you can use creative LUTs. With this, you can adjust colors and contrast to customize the outlook of your media. Moreover, it can also create cozy and environment-friendly looks in your videos.
Camera Specific LUTs
As the name indicates, you can use camera-specific LUTs to work with different camera brands. The camera can lead to several color dysfunctionality, but you can correct them with camera-specific LUTs. It never compromises the quality of the video, so you can use it without any issues.
Display LUTs
If you wish to customize the colors of videos or photos for a specific display device, this is your best option. It can modify the video as per the computer or television specifications. Above all, you can match the output look of your video with your intentional look with this.
Input LUTs
With this, you can manage the colors of your video from the beginning. It can help you to apply a consistent starting point to your video in an optimized manner.
Part 3: Why Are LUTs Beneficial in the Current Video Editing Fraternity?
There are several reasons that show that LUTs are beneficial for the current video editing fraternity. While you have learned some important points explaining what are LUTs, here are some of the reasons explaining their importance:
Improved Color Grading
By using LUTs, you can apply predesigned colors to the videos and photos. It can save you both time and effort and fasten the procedure of working. Thus, if you are working on tight deadlines, this can be your savior.
Highest Consistency
If you don’t have consistency in your videos, no one will watch them for a long time. To solve this issue, you can use LUTs because they can add a sense of consistency to any type of video.
Creativity Ratio
There is a wide array of creative options in LUTs. From adding vibrant colors to modifying styles, LUTs can help you with everything. Thus, it is an optimized solution to add creativity to videos.
Compatibility of LUTs
LUTs are compatible with a considerable number of video editing software. So, you can also streamline your workflow efficiency with the help of LUTs while editing your favorite videos.
Part 4: What Do You Believe About The Future of LUTs in the Video Industry?
In this digital world, you need to work with the most modernized solutions to solve your digital problems. We all make videos and photos, but bad colors can degrade their performance and attractiveness. For this reason, you can use LUTs editing. However, to import or apply LUTs, you need to know the best video editing platform.
The best and most optimized platform that can be used for this purpose is Wondershare Filmora . With this tool, you can apply LUTs to the videos and can also preview them before actually downloading the video. Other than this, it also has an effect mask by which you can apply special effect filters to the videos. It also offers video cover and export process optimization.
Add LUTs on Video For Win 7 or later(64-bit)
Add LUTs on Video For macOS 10.14 or later
Key Features of Wondershare Filmora
Wondershare Filmora has built much in LUTs video editing over time. From changing its existence from a category to a dedicated section, Filmora has come a long way. Find out some important features about Filmora and its exceptional functionality:
- With Filmora, you can optimize the cache file management along with using the feedback channels.
- You can make the interface adjustments and can also customize the intensity of LUTs from 0 to 100%.
- There are several adjustment filters in it, and you can also work on several types of videos with it, including travel and more.
Conclusion
In the following article, you have learned what are LUTs in video editing. From the definition to the compatible video editing software, you can find everything about LUTs above. Moreover, there are several types of LUTs, and you can use them as per your need. If you are looking for a platform to apply LUTs to the video, the answer is Wondershare Filmora.
How to Windows Online Movie Maker [Complete Guide]
The likelihood is that video will soon play a significant role in your content marketing approach, if it hasn’t already – and for that using windows online movie maker is inevitable. You are an emerging brand, a sole proprietor, or even a podcaster. Knowing the importance of video marketing to content producers and agencies is second nature if you’re an astute digital marketer It may be costly and challenging to utilize video editing software. Fortunately, there are free online video editors available.
Before very recently, video editing needed highly specialized skills and was done manually using different tools. Windows Movie Maker used to be a standard component of every Windows user’s toolbox and was a highly recommended video editing product for novices. With the windows movie maker online, the application was well-liked for its ease of use and entertaining special effects, but most significantly - it was free. It came pre-installed on all Windows machines. You may do that with the help of our handy list of the top three online video creators.
Part 1. How to Make a Video Online [Use Movie Maker Windows Online]
Using the help of Movie Maker, you may create videos online with your browser. It enables you to create professional-caliber videos without having to purchase video editing tools at professional-caliber costs. For every genre and need, this web program includes stock video, animated text, audio tracks, and on-screen effects. Your own video clips are uploaded. Then, use the simple drag-and-drop online video editor in Movie Maker to edit footage and add special effects and music to make your movie shine.
Making fantastic compilation films from your already-existing photographs and videos doesn’t need you to be a skilled editor. Even for amateur video makers, the platform’s UI is simple to use and straightforward to navigate. The customizing choices in Movie Maker are many. You have the option of uploading your own fonts and logos. You may also watermark your films and alter the text’s color. Additionally, there are a ton of very unique components like stickers, vector shapes, and masks that may enhance the visual appeal of your video productions and widen your creative boundaries.
Steps to Make Video with Movie Maker Online
Step1 Go to Movie Maker Online
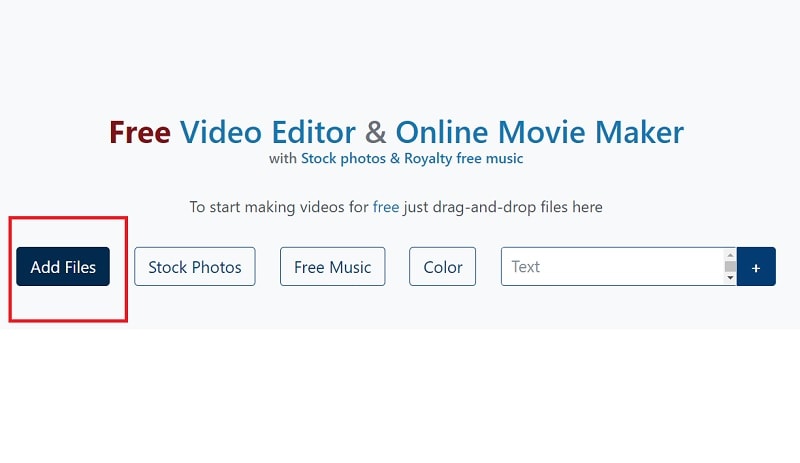
Using Movie Maker Online, you can quickly and easily make incredibly interesting compilation films using your already-posted photographs and videos. You’ll immediately be sent to the editor, where you can begin organizing your films. Here’s the official link to the toolkit:
Step2 Upload Files to Web
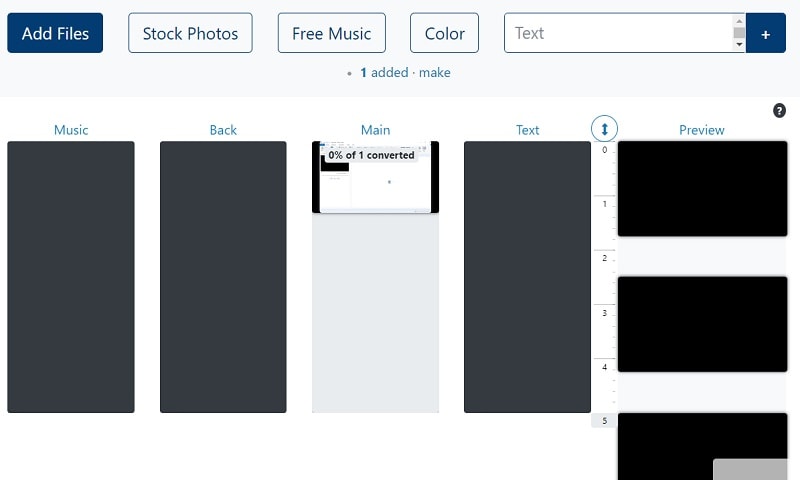
Your photographs, videos, and text may all be uploaded. If you like the default music, you may skip the step to change it; otherwise, you can choose another song from our library or upload your own MP3 file. Files from a variety of sources and devices may be added. Click the Import Media button to start importing your own media. Click Open after locating the video you wish to modify.
Step3 Create an online video
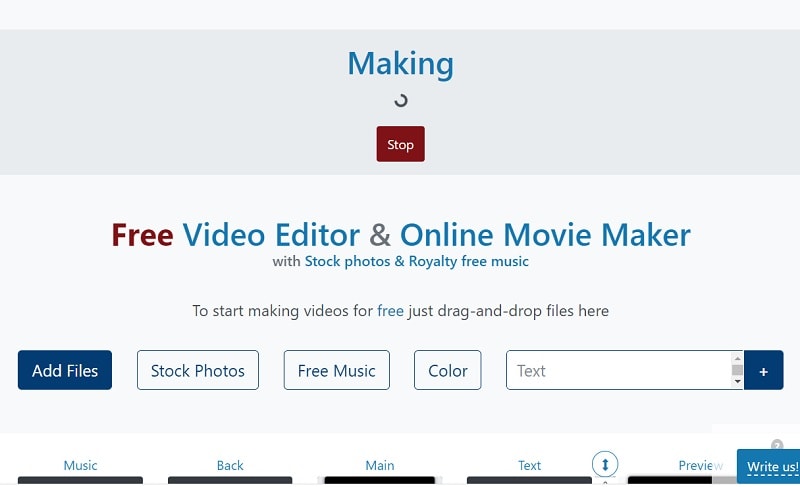
Add your music to your video compilation after all of your clips have been placed on the timeline. To accomplish that, choose a song depending on the genre or mood you want by clicking on the Music option on the left menu panel. To listen to the music track, click the little icon to the left of it. Text, colors, pictures, and video may all be customized to your heart’s delight. Add effects, drag, cut, etc. Press the Make Video button.
Step4 Save and Share with Others
Sharing your films on Facebook, Instagram, YouTube, and other platforms is made effortless. You may also send your loved ones the URLs to your videos. When you are happy with the changes, click the Save & Share option in the upper right corner, choose the quality you want to download your movie in, and then click the Export button. Download the updated video, then post it.
Part 2. Other Windows Online Movie Makers to Use [Top 3]
1. Kizoa
Link: Kizoa
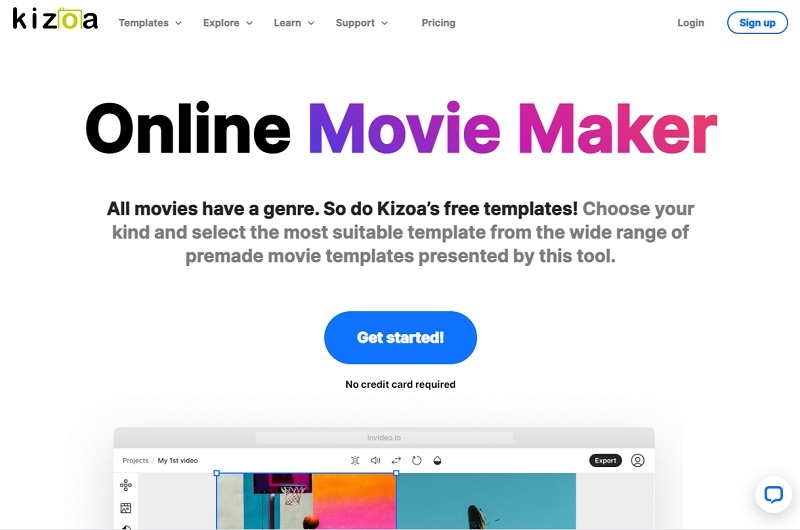
Customizing the appearance of your film is one of the finest ways to make it seem like it is your own. With the Kizoa tool, you may trim, apply a crossfade effect, choose the required resolution, and format for an output video in addition to merging files. Utilize Kizoa’s online video creator to produce eye-catching videos that will hold your audience’s attention. Create any kind of video, from personal family video slideshows to expert films to advertise your company. With the drag-and-drop movie production tool from Kizoa, you can create your very own video in a matter of minutes.
Use a video template as your starting point if you need inspiration. Key framing, animated overlays, noise reduction, transitions, and titles are just a few of the features it provides to help you produce excellent footage. For rapid video editing, there is a video production wizard. Windows Movie Maker’s auto movie themes pale in comparison to those provided by this program. Its extensive collection of stock footage and audio tracks helps you to concentrate on the crucial elements without having to drastically decrease the length of your film or the number of scenes.
2. FlexClip
Link: FlexClip
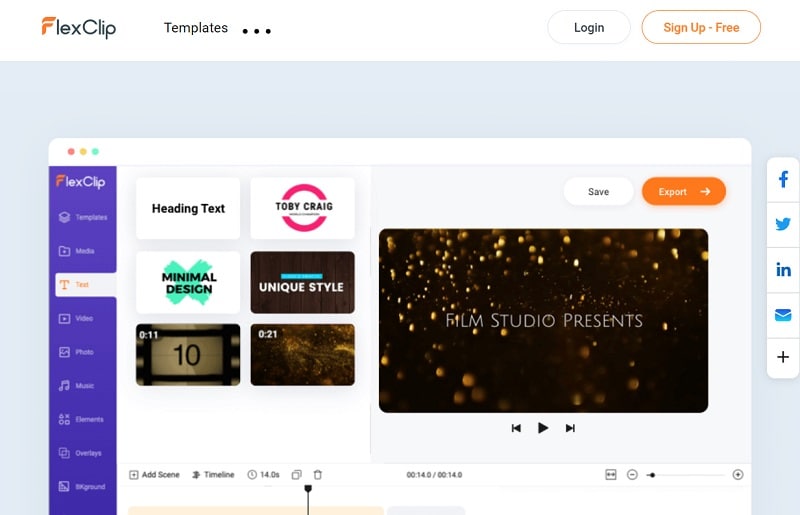
With the aid of the online video effects tool FlexClip, you may quickly and easily make entertaining short films. It has a ton of video editing features that you may use without logging in or creating an account, like merging, compressing, compiling, adding text, creating memes, etc. For those that are muted, you may use FlexClip to add animated text that blends in with the style of your film. Additionally, you may add your logo so that everyone is aware of who created the masterpiece they just saw.
An online video editor called FlexClip is mainly focused on producing high-quality marketing, advertising, and promotional films for companies. Recording a single video that will function on all social networking and video-sharing websites is almost impossible. Instagram, YouTube, and Facebook Marketing are among the partners of FlexClip that have received expert approval. It is used by marketers and enthusiasts to quickly create looping movies and stop motion animation. But as it only provides very basic functionality, it may not be the greatest choice for more intricate, demanding editing.
3. Veed.Io
Link: Veed.Io
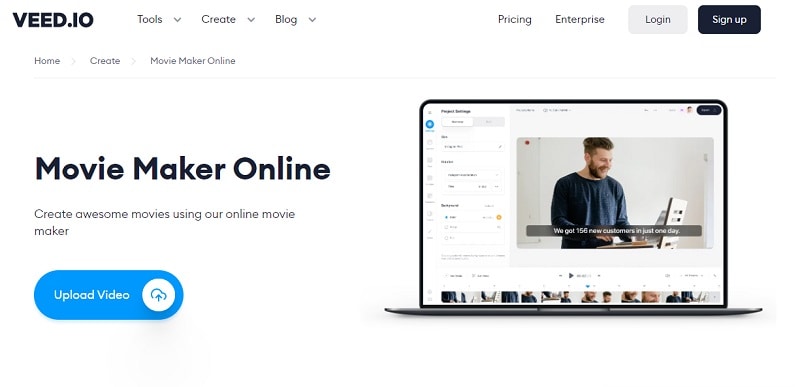
With only a few mouse clicks, users of the browser-based video editing program VEED may create professional-caliber movies. The greatest movie-making tools, including filters, effects, and stickers, are available on VEED. There are no intricate timelines, layers, or intricacy since it is a simple program that runs in your web browser. Simple drag-and-drop functionality is all you need to convey your tales. You may modify your video using its features. Using the video track below, you may combine, divide, or cut your files. Visit our website to see all of our filters, stickers, add-ons, and other tools.
Any device, whether an iPhone or Android phone, a MacBook, a Windows or Linux computer, may use VEED’s online video editor. You have access to all the resources you need to make amazing videos using VEED’s online video editor. Our user-friendly interface is very simple to use and is contemporary and intuitive. The native video sizes on each of the publishing sites, including Facebook, YouTube, and Vimeo, may all be altered using Veed. Finally, click “Export” in the editor’s upper-right corner, and your video will render quickly. Share some!
Conclusion
Use this editing list to produce more compelling video mashups for YouTube and other social media platforms in order to expand your audience, cultivate real connections with them, and eventually increase conversion rates. Because they combine the complex capabilities of the expensive, professional video suites with the user-friendliness and cost that appeal to novices, these online makers are a popular among editors of all skill levels. Make an investment in one of these video editing tools and own it.
Free Download For Win 7 or later(64-bit)
Free Download For macOS 10.14 or later
Part 1. How to Make a Video Online [Use Movie Maker Windows Online]
Using the help of Movie Maker, you may create videos online with your browser. It enables you to create professional-caliber videos without having to purchase video editing tools at professional-caliber costs. For every genre and need, this web program includes stock video, animated text, audio tracks, and on-screen effects. Your own video clips are uploaded. Then, use the simple drag-and-drop online video editor in Movie Maker to edit footage and add special effects and music to make your movie shine.
Making fantastic compilation films from your already-existing photographs and videos doesn’t need you to be a skilled editor. Even for amateur video makers, the platform’s UI is simple to use and straightforward to navigate. The customizing choices in Movie Maker are many. You have the option of uploading your own fonts and logos. You may also watermark your films and alter the text’s color. Additionally, there are a ton of very unique components like stickers, vector shapes, and masks that may enhance the visual appeal of your video productions and widen your creative boundaries.
Steps to Make Video with Movie Maker Online
Step1 Go to Movie Maker Online
Using Movie Maker Online, you can quickly and easily make incredibly interesting compilation films using your already-posted photographs and videos. You’ll immediately be sent to the editor, where you can begin organizing your films. Here’s the official link to the toolkit:
Step2 Upload Files to Web
Your photographs, videos, and text may all be uploaded. If you like the default music, you may skip the step to change it; otherwise, you can choose another song from our library or upload your own MP3 file. Files from a variety of sources and devices may be added. Click the Import Media button to start importing your own media. Click Open after locating the video you wish to modify.
Step3 Create an online video
Add your music to your video compilation after all of your clips have been placed on the timeline. To accomplish that, choose a song depending on the genre or mood you want by clicking on the Music option on the left menu panel. To listen to the music track, click the little icon to the left of it. Text, colors, pictures, and video may all be customized to your heart’s delight. Add effects, drag, cut, etc. Press the Make Video button.
Step4 Save and Share with Others
Sharing your films on Facebook, Instagram, YouTube, and other platforms is made effortless. You may also send your loved ones the URLs to your videos. When you are happy with the changes, click the Save & Share option in the upper right corner, choose the quality you want to download your movie in, and then click the Export button. Download the updated video, then post it.
Part 2. Other Windows Online Movie Makers to Use [Top 3]
1. Kizoa
Link: Kizoa
Customizing the appearance of your film is one of the finest ways to make it seem like it is your own. With the Kizoa tool, you may trim, apply a crossfade effect, choose the required resolution, and format for an output video in addition to merging files. Utilize Kizoa’s online video creator to produce eye-catching videos that will hold your audience’s attention. Create any kind of video, from personal family video slideshows to expert films to advertise your company. With the drag-and-drop movie production tool from Kizoa, you can create your very own video in a matter of minutes.
Use a video template as your starting point if you need inspiration. Key framing, animated overlays, noise reduction, transitions, and titles are just a few of the features it provides to help you produce excellent footage. For rapid video editing, there is a video production wizard. Windows Movie Maker’s auto movie themes pale in comparison to those provided by this program. Its extensive collection of stock footage and audio tracks helps you to concentrate on the crucial elements without having to drastically decrease the length of your film or the number of scenes.
2. FlexClip
Link: FlexClip
With the aid of the online video effects tool FlexClip, you may quickly and easily make entertaining short films. It has a ton of video editing features that you may use without logging in or creating an account, like merging, compressing, compiling, adding text, creating memes, etc. For those that are muted, you may use FlexClip to add animated text that blends in with the style of your film. Additionally, you may add your logo so that everyone is aware of who created the masterpiece they just saw.
An online video editor called FlexClip is mainly focused on producing high-quality marketing, advertising, and promotional films for companies. Recording a single video that will function on all social networking and video-sharing websites is almost impossible. Instagram, YouTube, and Facebook Marketing are among the partners of FlexClip that have received expert approval. It is used by marketers and enthusiasts to quickly create looping movies and stop motion animation. But as it only provides very basic functionality, it may not be the greatest choice for more intricate, demanding editing.
3. Veed.Io
Link: Veed.Io
With only a few mouse clicks, users of the browser-based video editing program VEED may create professional-caliber movies. The greatest movie-making tools, including filters, effects, and stickers, are available on VEED. There are no intricate timelines, layers, or intricacy since it is a simple program that runs in your web browser. Simple drag-and-drop functionality is all you need to convey your tales. You may modify your video using its features. Using the video track below, you may combine, divide, or cut your files. Visit our website to see all of our filters, stickers, add-ons, and other tools.
Any device, whether an iPhone or Android phone, a MacBook, a Windows or Linux computer, may use VEED’s online video editor. You have access to all the resources you need to make amazing videos using VEED’s online video editor. Our user-friendly interface is very simple to use and is contemporary and intuitive. The native video sizes on each of the publishing sites, including Facebook, YouTube, and Vimeo, may all be altered using Veed. Finally, click “Export” in the editor’s upper-right corner, and your video will render quickly. Share some!
Conclusion
Use this editing list to produce more compelling video mashups for YouTube and other social media platforms in order to expand your audience, cultivate real connections with them, and eventually increase conversion rates. Because they combine the complex capabilities of the expensive, professional video suites with the user-friendliness and cost that appeal to novices, these online makers are a popular among editors of all skill levels. Make an investment in one of these video editing tools and own it.
Free Download For Win 7 or later(64-bit)
Free Download For macOS 10.14 or later
VN Video Editor Templates: A Game-Changer for Your Videos
Creating engaging and professional-looking videos can be difficult, especially if you need to familiarize yourself with video editing software. However, with the right tools, it can be a breeze. The VN Video Editor is a powerful and user-friendly software that allows you to create stunning videos easily.
One of the best things about VN Video Editor is that this app comes with a wide variety of templates that you can use to make your videos look even better. This article will share amazing templates for VN Video Editor that you can download for free.
These templates have been carefully crafted to help you create professional-looking videos in no time. Whether you’re creating videos for your business or YouTube channel or just for fun, these templates will take your videos to the next level. So, without further ado, let’s dive in and explore the best templates for VN Video Editor that you can use to make your videos stand out.

- Travel Vlog Template in VN Video Editor
- Production Introduction Video Template in VN Video Editor
- VN Cooking Vlog Template
- VN Fashion Video Template
- Beauty Video Template of VN Video Editor
Overview of VN Video Editor and Its Templates
VN Video Editor is a popular video editing software on desktop and mobile devices. The mobile version of VN Video Editor is available on both Google Play Store and App Store. The app’s mobile version is particularly useful for those who want to create and edit videos on the go. The app is user-friendly and intuitive, making it easy for anyone to create professional-looking videos.

One of the best features of VN Video Editor is its wide variety of templates, which makes it easy for users to create videos that look great in just a few minutes. In addition, the templates are very customizable; users can change the color and text and add their media files.
The templates are also useful for those who need to become more familiar with video editing and want to create professional-looking videos without spending much time on the editing process.
The templates include various styles and themes, such as modern, classic, and vintage. They also come with various layouts, such as split-screen and collage. Moreover, these templates can create a wide range of videos, from promotional and product demonstrations to travel vlogs and personal videos.
How To Use & Download VN Video Templates
Using templates in VN Video Editor is a great way to create professional-looking videos quickly and easily. The process is straightforward and can be done in just a few steps. Here’s a quick guide on how to use and download templates in VN Video Editor.
Step1 Download VN Video Editor and launch it on your mobile phone. Tap the “Template“ button.

Step2 Choose the free available templates you want to use.

Step3 Click the “Download“ button to download your template.

Step4 Click the “Use Template“ button to start the editing process.

Step5 Select the images or clips you want and click “Next.”

Step6 Make desired adjustments to your template.

Step7 Click the “Export“ button and adjust the “Export Settings.”

Step8 Click “Save“ and wait for your exported clip.

5 Amazing Templates in VN Video Editor
VN Video Editor is a powerful and user-friendly app with various templates. These templates can create a wide range of videos, from promotional and product demonstrations to travel vlogs and personal videos. This section will introduce you to 5 amazing templates you can use in VN Video Editor to create professional-looking videos.
1. Travel Vlog Template in VN Video Editor

This template is perfect for capturing the essence of your travels. It features a split-screen layout that lets you showcase multiple footage and locations at once, giving your audience a glimpse of all the exciting places you’ve visited. The template also includes customizable text and map animations to help you create a professional and engaging travel vlog.
2. Production Introduction Video Template in VN Video Editor

This template is designed to help you introduce your products or services professionally and engagingly. It features a clean and modern design highlighting your products and services and includes customizable text, product demonstrations, and animations to help create a video that stands out.
3. VN Cooking Vlog Template

This template is perfect for creating cooking videos that are both informative and engaging. It features a split-screen layout that lets you showcase multiple recipes and cooking techniques and includes customizable text and animations to help you create a professional cooking vlog.
4. VN Fashion Video Template

This template is perfect for creating fashion videos that are both stylish and engaging. It features a clean and modern design highlighting the latest fashion trends and includes customizable text and animations to help create a video that stands out in the fashion industry.
5. Beauty Video Template of VN Video Editor

This template is designed to help you create videos that showcase your beauty and skincare products professionally and engagingly. It features a clean and modern design highlighting your products and services and includes customizable text and animations to help create a video that stands out in the beauty industry.
Each template has its unique style and design and can be easily customized to match your brand or style. With the help of these templates, you can create professional-looking videos in no time.
20+ VN Code Video Templates
In addition to the templates that come with VN Video Editor, a wide variety of templates are available from other vloggers and creators. These templates are created by app users who have shared their designs for others to use. These templates are often more specialized and niche-focused than the templates that come with the app, making them ideal for creating videos on specific topics.
1. 10 VN Video Templates for Instagram Reel
This provides access to 10 VN Video Templates for Instagram Reel made by YouTuber Bagus Muhamad. These templates are designed to help you create engaging and professional-looking Instagram Reel videos quickly and easily.
These templates come in various styles and themes, such as modern, classic, and vintage. They also come with various layouts, such as split-screen and collage. All templates are fully customizable with the VN Video Editor. You can change the color and text and add your media files.
These templates are perfect for creating Instagram Reel videos that attract attention. With the help of these templates, you can create professional-looking videos in no time.
2. 10 VN Cinematic Video Templates
This provides access to 10 VN Cinematic Video Templates by YouTuber Dhemusz Official. These templates are designed to help you create cinematic and professional-looking videos quickly and easily.
They come in various styles and themes, such as modern, classic, and vintage. They also come with various layouts, such as split-screen and collage. All templates are fully customizable with the VN Video Editor, and you can change the color and text and add your media files to them.
These templates are perfect for creating videos with a cinematic feel and look, making them great for movie trailers, short films, and more. With the help of these templates, you can create professional-looking videos in no time.
3. 8 VN Video Templates
This provides access to a collection of 8 VN Video Templates created by YouTuber desiwithcamera. These templates offer a unique blend of style and functionality, making it easy for users to create professional-looking videos.
Each template boasts a different aesthetic, including modern, classic, and vintage themes and diverse layout options such as split-screen and collage. The templates are fully customizable with the VN Video Editor, enabling users to incorporate their media files, adjust colors and add texts, thus making it stand out from the crowd.
These templates suit various videos, such as product reviews, personal vlogs, and event videos. With these templates, you can elevate your video editing skills and create visually stunning videos in minutes.
[Bonus] VN’s Best Alternative - Filmora Mobile Video Editor
Filmora Mobile Video Editor is a great alternative to VN Video Editor. It is a powerful and user-friendly video editing app that allows you to create stunning videos on your mobile device. It comes with various templates and features similar to VN Video Editor.
Free Download For Win 7 or later(64-bit)
Free Download For macOS 10.14 or later

Here are some of the key template features of Filmora Mobile Video Editor:
- Variety of Templates: Filmora Mobile Video Editor offers a wide range of templates for various types of videos, such as travel vlogs, product reviews, and personal vlogs.
- Customizable Templates: Filmora Mobile Video Editor’s templates are fully customizable, allowing you to add your media files and text and adjust the colors to match your brand or style.
- Unique Templates: Filmora Mobile Video Editor provides unique templates with different themes and styles that are not commonly found in other video editing apps.
- Animated Templates: Filmora Mobile Video Editor has a variety of animated templates that add dynamic movement to your videos and give them a professional look.
- Split-screen templates: Filmora Mobile Video Editor also has a variety of split-screen templates that allow you to showcase multiple footages at once, giving your videos a unique and interesting look.
Using these templates, you can easily create professional-looking videos that stand out. The templates in Filmora Mobile Video Editor are perfect for those who need to become more familiar with video editing and want to create professional-looking videos without spending much time on the editing process.
Conclusion
VN Video Editor is a powerful and user-friendly video editing app with various templates to choose from. These templates are perfect for creating professional-looking videos quickly and easily.
However, Filmora Mobile Video Editor is also a great alternative for VN. It offers similar features, such as customizable templates and various templates for various types of videos. It also has unique preset templates not commonly found in other video editing apps, and its animated templates add dynamic movement to your videos, giving them a professional look.
Overview of VN Video Editor and Its Templates
VN Video Editor is a popular video editing software on desktop and mobile devices. The mobile version of VN Video Editor is available on both Google Play Store and App Store. The app’s mobile version is particularly useful for those who want to create and edit videos on the go. The app is user-friendly and intuitive, making it easy for anyone to create professional-looking videos.
One of the best features of VN Video Editor is its wide variety of templates, which makes it easy for users to create videos that look great in just a few minutes. In addition, the templates are very customizable; users can change the color and text and add their media files.
The templates are also useful for those who need to become more familiar with video editing and want to create professional-looking videos without spending much time on the editing process.
The templates include various styles and themes, such as modern, classic, and vintage. They also come with various layouts, such as split-screen and collage. Moreover, these templates can create a wide range of videos, from promotional and product demonstrations to travel vlogs and personal videos.
How To Use & Download VN Video Templates
Using templates in VN Video Editor is a great way to create professional-looking videos quickly and easily. The process is straightforward and can be done in just a few steps. Here’s a quick guide on how to use and download templates in VN Video Editor.
Step1 Download VN Video Editor and launch it on your mobile phone. Tap the “Template“ button.
Step2 Choose the free available templates you want to use.
Step3 Click the “Download“ button to download your template.
Step4 Click the “Use Template“ button to start the editing process.
Step5 Select the images or clips you want and click “Next.”
Step6 Make desired adjustments to your template.
Step7 Click the “Export“ button and adjust the “Export Settings.”
Step8 Click “Save“ and wait for your exported clip.
5 Amazing Templates in VN Video Editor
VN Video Editor is a powerful and user-friendly app with various templates. These templates can create a wide range of videos, from promotional and product demonstrations to travel vlogs and personal videos. This section will introduce you to 5 amazing templates you can use in VN Video Editor to create professional-looking videos.
1. Travel Vlog Template in VN Video Editor
This template is perfect for capturing the essence of your travels. It features a split-screen layout that lets you showcase multiple footage and locations at once, giving your audience a glimpse of all the exciting places you’ve visited. The template also includes customizable text and map animations to help you create a professional and engaging travel vlog.
2. Production Introduction Video Template in VN Video Editor
This template is designed to help you introduce your products or services professionally and engagingly. It features a clean and modern design highlighting your products and services and includes customizable text, product demonstrations, and animations to help create a video that stands out.
3. VN Cooking Vlog Template
This template is perfect for creating cooking videos that are both informative and engaging. It features a split-screen layout that lets you showcase multiple recipes and cooking techniques and includes customizable text and animations to help you create a professional cooking vlog.
4. VN Fashion Video Template
This template is perfect for creating fashion videos that are both stylish and engaging. It features a clean and modern design highlighting the latest fashion trends and includes customizable text and animations to help create a video that stands out in the fashion industry.
5. Beauty Video Template of VN Video Editor
This template is designed to help you create videos that showcase your beauty and skincare products professionally and engagingly. It features a clean and modern design highlighting your products and services and includes customizable text and animations to help create a video that stands out in the beauty industry.
Each template has its unique style and design and can be easily customized to match your brand or style. With the help of these templates, you can create professional-looking videos in no time.
20+ VN Code Video Templates
In addition to the templates that come with VN Video Editor, a wide variety of templates are available from other vloggers and creators. These templates are created by app users who have shared their designs for others to use. These templates are often more specialized and niche-focused than the templates that come with the app, making them ideal for creating videos on specific topics.
1. 10 VN Video Templates for Instagram Reel
This provides access to 10 VN Video Templates for Instagram Reel made by YouTuber Bagus Muhamad. These templates are designed to help you create engaging and professional-looking Instagram Reel videos quickly and easily.
These templates come in various styles and themes, such as modern, classic, and vintage. They also come with various layouts, such as split-screen and collage. All templates are fully customizable with the VN Video Editor. You can change the color and text and add your media files.
These templates are perfect for creating Instagram Reel videos that attract attention. With the help of these templates, you can create professional-looking videos in no time.
2. 10 VN Cinematic Video Templates
This provides access to 10 VN Cinematic Video Templates by YouTuber Dhemusz Official. These templates are designed to help you create cinematic and professional-looking videos quickly and easily.
They come in various styles and themes, such as modern, classic, and vintage. They also come with various layouts, such as split-screen and collage. All templates are fully customizable with the VN Video Editor, and you can change the color and text and add your media files to them.
These templates are perfect for creating videos with a cinematic feel and look, making them great for movie trailers, short films, and more. With the help of these templates, you can create professional-looking videos in no time.
3. 8 VN Video Templates
This provides access to a collection of 8 VN Video Templates created by YouTuber desiwithcamera. These templates offer a unique blend of style and functionality, making it easy for users to create professional-looking videos.
Each template boasts a different aesthetic, including modern, classic, and vintage themes and diverse layout options such as split-screen and collage. The templates are fully customizable with the VN Video Editor, enabling users to incorporate their media files, adjust colors and add texts, thus making it stand out from the crowd.
These templates suit various videos, such as product reviews, personal vlogs, and event videos. With these templates, you can elevate your video editing skills and create visually stunning videos in minutes.
[Bonus] VN’s Best Alternative - Filmora Mobile Video Editor
Filmora Mobile Video Editor is a great alternative to VN Video Editor. It is a powerful and user-friendly video editing app that allows you to create stunning videos on your mobile device. It comes with various templates and features similar to VN Video Editor.
Free Download For Win 7 or later(64-bit)
Free Download For macOS 10.14 or later
Here are some of the key template features of Filmora Mobile Video Editor:
- Variety of Templates: Filmora Mobile Video Editor offers a wide range of templates for various types of videos, such as travel vlogs, product reviews, and personal vlogs.
- Customizable Templates: Filmora Mobile Video Editor’s templates are fully customizable, allowing you to add your media files and text and adjust the colors to match your brand or style.
- Unique Templates: Filmora Mobile Video Editor provides unique templates with different themes and styles that are not commonly found in other video editing apps.
- Animated Templates: Filmora Mobile Video Editor has a variety of animated templates that add dynamic movement to your videos and give them a professional look.
- Split-screen templates: Filmora Mobile Video Editor also has a variety of split-screen templates that allow you to showcase multiple footages at once, giving your videos a unique and interesting look.
Using these templates, you can easily create professional-looking videos that stand out. The templates in Filmora Mobile Video Editor are perfect for those who need to become more familiar with video editing and want to create professional-looking videos without spending much time on the editing process.
Conclusion
VN Video Editor is a powerful and user-friendly video editing app with various templates to choose from. These templates are perfect for creating professional-looking videos quickly and easily.
However, Filmora Mobile Video Editor is also a great alternative for VN. It offers similar features, such as customizable templates and various templates for various types of videos. It also has unique preset templates not commonly found in other video editing apps, and its animated templates add dynamic movement to your videos, giving them a professional look.
Blender Green Screen Effects
Blender is an open-source cross-platform 3D graphics program, but this doesn’t mean it’s a low-rent option. Just like commercial packages like Lightwave 3D, it is also a very capable compositing package. Unlike Lightwave, it is a modern node-based compositor like Nuke or Fusion. It’s not what the software is designed for, but it does a bangup job of green screen compositing, as you will soon see.
Blender green screen uses technique of the chroma key a color is isolated (in our case the green of thegreen screen), or a particular luminance, it is removed and the area that was occupied by it becomes transparent, thus becoming part of the alpha channel. The transparent parts will thus show the video or the image below, which will thus define the environment in which the subject of the first movie will act.
How to Use Green Screen in Blender
So we need to pull these two elements into Blender and pull a key on the green bits to make the background show through in as naturalistic a way as possible. Blender is a node-based compositor which means the control mechanism is nodes or little LEGO blocks of love which you place on the screen and link with little strings which form your signal path.

Locate the drop-down (it goes up, actually, but you know what we mean) at the bottom of the view, and select “Movie Clip Editor.”
Click the “Open” button and choose and load your green screen footage. (You can also load sequences of images for uncompressed keys in this step if you have the space, and the footage is the right size.)
Once the clip is loaded, go back to the drop-down and select Node Editor.
The screen will be blank, but just go to the bottom of the view and click the middle button marked “Node Tree Type” to Display, and then check the Use Nodes and Backdrop buttons.
Select the “Render Layers” node, and because we won’t need it you can delete it (on the Mac this is the Forward Delete key). Then move the Compositing node out of the way because we won’t need it yet.
**Note: to zoom in and out of the nodes, use the centre scroll wheel of the mouse if you have it. To zoom in and out of the images you are working on, use the V and Alt-V keys.
**Compositing Nodes
Click the Add menu in the bar at the bottom of the view and select “Input -> Movie Clip.” Select the green screen clip you added in the Movie Clip Editor. This is the input. We have to push this through a keyer to remove the green and make those areas transparent.
**Important: in this program flow goes from left to right, so node inputs are on the left of a node, and outputs are on the right of a node.
Now select “Add -> Matte -> Keying” to add a keying node. Also “Add -> Output -> Viewer” to make the output from the key visible. Click on the little yellow dot next to Image output on the Input node, and drag it to Image input on the Keying node. Then drag the little dot next to Image output on the keying node, and drag it to the image input on the viewer node.
You now have to select the key colour, the colour which the keyer is changing to transparent. Click the Key Colour button on the Keying node, and this displays a colour selector. Click the eyedropper, and click on the image in the background somewhere on the green screen.
If you look carefully, you will see that there are some areas which still have a bit of colour and are not fully transparent. You can check this more accurately by dragging the string from the Matte output on the Keying node and linking to the input on the viewer. This is the key you have made. As you can see, the dark bits are supposed to be totally black, and there are still greys showing through. (This is because the source material wasn’t perfect.)
There are many different ways to fix this depending on the shot, but if it’s a reasonably well-shot green screen, all you will need to do is the following.
Adjust the Black Clip slider to expand the amount of greens which turn to black. Then adjust the White Clip to push the whites to prevent them from becoming transparent.
Once you have pure white and pure black, reconnect the image output of the keying node to the image input on the viewer, and you’ll see you have a decent key.
You can adjust the amount of fringing and spill (reflections from the green screen on the model), but generally the keyer does a good job of guessing that for you with a decently-shot green screen.
**Adding the background
After this, adding the background is more of the same with a slight twist. “Add -> Input -> Movie Clip,” navigate to your background clip and load it.
To blend the two layers, you have to make a mix of the two clips so that the background shows through the now transparent bits of the foreground.
“Add -> Colour -> Mix node”. Take the output from the background clip, and feed it to the top image input of the mix node. Take the output from the keying node, and feed it into the lower image input on the mix node.
Click the Alpha channel button next to the drop-down on the mix node.
And finally we have our key. The background is way too sharp and makes the green screen footage look really soft and crappy, so we need to soften the background. There is a really nice Bokeh Blur filter in blender for just this purpose to make the background look out of focus and add lots of gorgeous Bokeh blobs.
“Add -> Filter -> Bokeh Blur” and put it between the background clip and the mix. In Blender, if you add a node and place it over a string between two nodes, the string goes yellow, and dropping it will automatically insert the new node into the signal path connecting inputs and outputs.
Finally add an image to the Bokeh Blur for the shape you want the bokeh to be; we opted for a donut-shaped iris pattern.
To render out your video, connect the output of the Mix node to the input of the compositing node we left lying about earlier. It’s okay for this output to be connected to the input node of the viewer, too, as this means we see progress while rendering.
Make sure you are set up to render the right amount of frames at 30fps in the render panel on the far right. 30fps for 5 seconds (the duration of our clip) is 150 frames. Insert 150 where it says End Fr.
Select a place and a filename to output to in the Output panel further down the right-hand side. Then to render, select the info menu bar from the top-left drop-down, and finally choose “Render Menu -> Render Animation,” and the render will begin.
Wondershare Filmora
If you’re just starting out with video editing, or just want a simple program that works, Wondershare Filmora might be what you’re looking for. It has the essential tools, and anyone can learn to use it easily.
Wondershare Filmora is the one of best video editing software with cool features that compares to other competing video editing Softwares. Many video editing programs claim to offer professional results; Filmora is one of a few consumer-level tools that actually delivers.
For Win 7 or later (64-bit)
For macOS 10.12 or later
Installation Steps
- Click the icon in the center of the Media Library to add files directly.
- Go File > Import Media > Import Media Files.
- Drag and drop to the Media Library directly.
While importing a media file, Wondershar Filmora may ask you if you wish to create a proxy file to accelerate the editing process. Select “Yes” to have a fast video editing experience.

You can also import video clips using your Touch Bar controls if your computer has Touch Bar.
Related FAQs
How do I get rid of the green screen in blender?
This is achieved by Compositing Nodes: Click the Add menu in the bar at the bottom of the view and select “Input -> Movie Clip.” Select the green screen clip you added in the Movie Clip Editor. This is the input. We have to push this through a keyer to remove the green and make those areas transparent.
How do I get rid of objects in green screen?
This can be done by following these prompts: Select “Add -> Matte -> Keying” to add a keying node. Also “Add -> Output -> Viewer” to make the output from the key visible. Click on the little yellow dot next to Image output on the Input node, and drag it to Image input on the Keying node. Then drag the little dot next to Image output on the keying node, and drag it to the image input on the viewer node.
Conclusion
Obviously, to get the best green screen composites you have to shoot good “plates.” “Plates” are the main bits of the shot that you bolt together in movie visual effects. You have the foreground plate and the green screen bit with an actor filmed in front of a green screen. Then you have the background plate which is the bit you want to show through the green bits of the foreground, making the whole thing look as though the background and foreground were filmed at the same time.
For macOS 10.12 or later
Installation Steps
- Click the icon in the center of the Media Library to add files directly.
- Go File > Import Media > Import Media Files.
- Drag and drop to the Media Library directly.
While importing a media file, Wondershar Filmora may ask you if you wish to create a proxy file to accelerate the editing process. Select “Yes” to have a fast video editing experience.
You can also import video clips using your Touch Bar controls if your computer has Touch Bar.
Related FAQs
How do I get rid of the green screen in blender?
This is achieved by Compositing Nodes: Click the Add menu in the bar at the bottom of the view and select “Input -> Movie Clip.” Select the green screen clip you added in the Movie Clip Editor. This is the input. We have to push this through a keyer to remove the green and make those areas transparent.
How do I get rid of objects in green screen?
This can be done by following these prompts: Select “Add -> Matte -> Keying” to add a keying node. Also “Add -> Output -> Viewer” to make the output from the key visible. Click on the little yellow dot next to Image output on the Input node, and drag it to Image input on the Keying node. Then drag the little dot next to Image output on the keying node, and drag it to the image input on the viewer node.
Conclusion
Obviously, to get the best green screen composites you have to shoot good “plates.” “Plates” are the main bits of the shot that you bolt together in movie visual effects. You have the foreground plate and the green screen bit with an actor filmed in front of a green screen. Then you have the background plate which is the bit you want to show through the green bits of the foreground, making the whole thing look as though the background and foreground were filmed at the same time.
Also read:
- Updated In 2024, 6 Instant Mp4 to GIF Online Tools
- In 2024, You Must Be Wondering Which the Best Online Transparent Image-Maker Is! Well, There Is No Need to Get Confused as Here; You Will Get a Curated List for the Same
- New Here Is a Guide on How You Can Resize Videos via Handbrake and Wondershare Filmora. The Former Is a Lightweight Tool Perfect for Batch Resizing Videos, While the Latter Is a Powerful Free Video Editing Software
- With Looping Videos, People Stay on Your Site Longer, Boosting Engagement. With Video Being Watched on Mobile over 3X More than Any Other Content, Its an Essential Part of Mobile Advertising for 2024
- Updated What Are AR Emoji Stickers & How to Add Them to Your Video
- Updated 3 Actionable Ways to Create Countdown Animation for Videos
- Updated 2024 Approved Secret Tips & Tricks to Use in Filmora
- New Do You Want to Know About the Photo Video Maker with Song? Are You Ready to Discover It in Detail? This Article Will Give You Valuable Insights on This Topic
- New Guide to Create Intro Video with KineMaster
- Updated 2024 Approved How to Shoot Cinematic Footage with Phone
- Updated How to Create a Custom Slide Show in PowerPoint
- New 2024 Approved TOP 10 Types of Video Framing From Novice to Master
- Updated How to Do Datamoshing Effect in After Effects?
- In 2024, Did You Know Cameras Have a Built-In Feature to Shoot Slow-Motion Clips? This Article Is About Using Sony S&Q to Capture Slow-Motion Scenes
- Updated 2024 Approved Do You Seek a Guide to Add Motion in Blender? This Article Explains the Blender Motion Blur Effect in Detail and Helps You Master It
- In 2024, Guide To Cropping and Combining Content in Wondershare Filmora Latest
- New 2024 Approved Top Shortcut Towards Timeline Template
- New Slow Motion Video Editors To Look Out For for 2024
- New Hyperlapse VS Timelapse Videos
- New 2024 Approved Top GIF to MP4 Converters
- New In 2024, Have You Ever Tried DaVinci Resolve for Creating a Motion Blur Effect? Read This Article to Discover How to Use DaVinci Resolve Motion Blur with the Help of Detailed Instructions
- 2024 Approved Have You Ever Used an Adjustment Layer in Photoshop? Read This Article to Find Out How to Add, Resize, Change, and Use an Adjustment Layer in Photoshop Efficiently
- New Best Green Screen Software for Beginner on Mac
- In 2024, Unlink Audio and Video in DaVinci Resolve Detailed Steps
- Updated Do You Know You Can Trim and Cut Your Video Into the Desired Portions Using a Reliable Video Splitter? Get an Easy Video Splitter Now to Simplify Your Work. Here Are 33 Carefully Chosen Apps to Help You in This for 2024
- Updated How to Speed Up Video with Canva Online Tool, In 2024
- How to Polish Your Music Video Edits Using Filmora
- 2024 Approved This Is the Method Employed During Every Evening Weather Broadcast The Newscaster Is Standing in Front of a Blank Screen, but the Viewers at Home See a Weather Map
- How to Bypass iCloud Lock from Apple iPhone 7
- In 2024, Top 10 Telegram Spy Tools On Samsung Galaxy A05 for Parents | Dr.fone
- How and Where to Find a Shiny Stone Pokémon For Motorola Edge 40? | Dr.fone
- In 2024, How to Change/Add Location Filters on Snapchat For your OnePlus Nord CE 3 Lite 5G | Dr.fone
- In 2024, How to Sign Out of Apple ID On iPhone 13 Pro Max without Password?
- In 2024, Which Pokémon can Evolve with a Moon Stone For Lava Storm 5G? | Dr.fone
- How To Fix Unresponsive Touch Screen on Oppo Find X6 | Dr.fone
- Top 7 Skype Hacker to Hack Any Skype Account On your OnePlus Nord CE 3 5G | Dr.fone
- How to get the dragon scale and evolution-enabled pokemon On Apple iPhone 15 Plus? | Dr.fone
- 6 Fixes to Unfortunately WhatsApp has stopped Error Popups On Vivo Y78t | Dr.fone
- Title: In 2024, An Introduction to LUTs | Their Overview and Benefits
- Author: Morgan
- Created at : 2024-06-24 01:30:24
- Updated at : 2024-06-25 01:30:24
- Link: https://ai-video-editing.techidaily.com/in-2024-an-introduction-to-luts-their-overview-and-benefits/
- License: This work is licensed under CC BY-NC-SA 4.0.
