
:max_bytes(150000):strip_icc():format(webp)/GettyImages-184415451-9f59b82b64ac421cad0f28540a515b5f.jpg)
In 2024, How to Add Subtitles to Videos With Kapwing
How to Add Subtitles to Videos With Kapwing
Content creators always prefer to add subtitles to their videos for better comprehension. The reason is that some people cannot understand your language and needs subtitles to understand the content. Moreover, if your viewer is facing an audio problem and won’t be able to hear your voice, subtitles can help there. In this article, we will introduce the Kapwing subtitle maker, through which you can add subtitles in many ways.
There are some drawbacks to using online tools, such as file size restrictions or internet availability. Yet, with the Kapwing tool, you won’t get disappointed. Kapwing is an online tool that offers various options to edit videos. One of the great features of Kapwing is its subtitle maker, which can help you in adding subtitles to your videos easily. To learn how to use the Kapwing subtitles feature, continue reading this article.
Part 1: Upload the Subtitle File to Kapwing
If you have a subtitle file for your video, Kapwing can help you. If you have a subtitle file for your video, Kapwing can help you. Without creating a user account, you can upload the subtitle file on this tool. With this subtitle editor, you can upload video files from your computer or cloud storage platforms. Moreover, it supports the subtitle files of SRT and VVT format. To use Kapwing subtitle maker for uploading a subtitle file, read the below steps:
Step 1 Navigate to the official site of Kapwing and select its “Subtitles” tool. Afterward, click on “Choose a video,” which will open a new window on your screen.

Step 2 Click on the “Upload” button given on top to import your video file on this tool. Once done, click on the “Subtitle” option displayed on the left side. On the subtitles window, click on the “Upload SRT/VVT” button to import your subtitle file.

Step 3 After uploading the file, your subtitles will sync with your video. To edit your subtitles, navigate to the right panel. From that, you can select text position, background color, opacity, font, and alignment.

Step 4 Once done with making the changes on added subtitles, you can click on the “Export Project” button to save or share the file.

Part 2: Automatically Generate your Subtitle on Kapwing
Do you want to generate subtitles for your video instantly? Kapwing subtitle maker offers an Auto-Subtitle Generator that converts your voice into subtitles. This feature supports many languages so that anyone across the world can utilize this tool. Moreover, it also offers a translating feature that can help you in converting your subtitles into another language.
However, to use this feature, you must create your user account. Also, you should upgrade your account to fully use this feature without any restrictions. If you don’t have an upgraded account, you can only auto-generate subtitles for the 7 minutes video. To use the auto-subtitle generator of Kapwing, check the below steps:
Step 1 Begin by accessing the website of the Kapwing tool. Click on “Subtitles” from the “Tools” tab and then tap on the “Choose a video” button. Upload the video file on which you want to add subtitles from your PC.

Step 2 Once done with importing the video, click on “Subtitles” from the left section. From the new window, click on “Auto-generate.” The tool will automatically create subtitles for your video by detecting the language.

Step 3 Once you created the subtitles through this feature, go to the “Translate” tab to translate subtitles into your preferred language. You can also edit the subtitles to change their background, opacity, text font, and size. Once done, click on the “Export Project” button.

Part 3: Manually Add Subtitles to the Video on Kapwing
If you don’t want to use the auto-generator and do not have a subtitle file, you can use the manual option. Kapwing allows you to add subtitles manually in its friendly user interface. After adding Kapwing captions, you can choose your preferred font and style for further enhancement.
Step 1 After accessing the website of Kapwing, select the “Subtitles” tool to proceed. Now select the “Choose a video” button to open the Kapwing editor window.

Step 2 Import your video file by tapping on the “Upload” button. Afterward, go to the “Subtitles” section and click on the “Add Subtitle” button. On the typing space, enter your subtitles. You can also choose the duration for your subtitles from the same window. To add subtitles further, you can click on the “Add Subtitles” button again.

Step 3 After adding the complete subtitles, you can choose their font, style, color, and opacity from the right panel. Once done, hit the “Export Project” button.

Part 4: How to Add Subtitles to Videos with the Best Alternative of Kapwing
If you are not satisfied with the performance of the Kapwing subtitle maker, you can try the Wondershare Filmora tool. As Kapwing is an online tool, it does come with certain restrictions. For example, the time to upload video files on this tool can be time-consuming. Moreover, you would need a strong internet connection throughout. But, with Filmora, you can add subtitles to your video files without facing file size restrictions.
Free Download For Win 7 or later(64-bit)
Free Download For macOS 10.14 or later
Filmora has an easy-to-use interface that offers multiple options to edit and alter video files. This platform is compatible with a mainstream operating system such as Windows. It provides a “Speech to Text” feature that enables you to create subtitles for your video automatically. With a single tap, you can add subtitles to your video without any hassle. To use the Speech to Text feature, check the below steps:
Step 1 Import Video File from the PC
Launch Filmora on your PC and click on the “Create New Project” button to open the Filmora editor on your device. To import your video file from your PC, tap on the “Arrow” icon. After uploading the file, drag it to the timeline.

Step 2 Enable Speech to Text Feature
From the timeline, locate the feature of “Speech to Text.” Now choose the language in which you want to create the subtitles and specify the other settings as well. Afterward, tap on the “OK” button to begin the process.

Step 3 Customize Subtitles and Save the Changes
After the conversion, you can double-click the added subtitles to make modifications. After making the adjustments, hit the “OK” button. Now go to the “Export” button and select the video format in which you want to export the video, or you can also share it on social media platforms.

Conclusion
By adding subtitles to your video, you can enhance your targeted audience and can also engage with them. It also helps in making your video content diverse for people across the globe. There are various online subtitle generators like Kapwing that can help you in adding subtitles, as described in this article. However, there are some drawbacks to using the Kapwing subtitle maker that can disrupt your work. If you want to use a proficient subtitle maker, you can use Wondershare Filmora to get the best results.
Free Download For macOS 10.14 or later
Filmora has an easy-to-use interface that offers multiple options to edit and alter video files. This platform is compatible with a mainstream operating system such as Windows. It provides a “Speech to Text” feature that enables you to create subtitles for your video automatically. With a single tap, you can add subtitles to your video without any hassle. To use the Speech to Text feature, check the below steps:
Step 1 Import Video File from the PC
Launch Filmora on your PC and click on the “Create New Project” button to open the Filmora editor on your device. To import your video file from your PC, tap on the “Arrow” icon. After uploading the file, drag it to the timeline.
Step 2 Enable Speech to Text Feature
From the timeline, locate the feature of “Speech to Text.” Now choose the language in which you want to create the subtitles and specify the other settings as well. Afterward, tap on the “OK” button to begin the process.
Step 3 Customize Subtitles and Save the Changes
After the conversion, you can double-click the added subtitles to make modifications. After making the adjustments, hit the “OK” button. Now go to the “Export” button and select the video format in which you want to export the video, or you can also share it on social media platforms.
Conclusion
By adding subtitles to your video, you can enhance your targeted audience and can also engage with them. It also helps in making your video content diverse for people across the globe. There are various online subtitle generators like Kapwing that can help you in adding subtitles, as described in this article. However, there are some drawbacks to using the Kapwing subtitle maker that can disrupt your work. If you want to use a proficient subtitle maker, you can use Wondershare Filmora to get the best results.
How to Add VHS Green Screen to Your Video
Create High-Quality Video - Wondershare Filmora
An easy and powerful YouTube video editor
Numerous video and audio effects to choose from
Detailed tutorials provided by the official channel
When making a video, it is always fun to add an effect. You can do this for either atmospheric or aesthetic reasons. VHS green screen effects are among the world’s most popular effects people use today.
We’ll give you the low-down on VHS Green Screen, including how it became popular and where to get these effects for free. Keep reading to learn more.
In this article
01 What Is VHS?
02 How Did VHS Green Screen Become Popular?
03 Free VHS Green Screen Effect Resource to Download
04 How to Edit VHS Green Screen with Filmora
What Is VHS?
Since its introduction in 1976, VHS has been the most frequently used video cassette recording technology. The VHS format is a consumer-level analog video cassette recording standard for videotaping. The acronym VHS referred to Vertical Helical Scan and was eventually modified as the popularity of this technology increased.
Produced by a Japan Victor Company, the technology uses a magnetic tape measuring half an inch. By the 1950s, magnetic tape video recording had become a vital part of the television industry. The technology is exclusively utilized in professional settings like TV studios and medical imaging (fluoroscopy).
As consumer access to videotape increased in the 1970s, a new economy centered on home video emerged, drastically altering the economics of the film and television industries. By 1980, VHS had captured 70% of the market and had established itself as the industry standard for entertainment and instruction.
The original standard has a picture quality equivalent to that of analog television. High-definition television content could be recorded and re-created using digital VHS (D-VHS). Progressively, a new format was launched dubbed S-VHS (Super VHS), which featured improved video quality from 240 to 400 lines; however, people did not use it extensively.
VHS tape, compared to its competition at the time, Betamax tapes had longer tape lifespans. VHS tapes were preferred because they recorded three times as long as Betamax tapes because of their higher storage capacity.
The last VHS recorder manufacturer, Funai Electric of Japan, discontinued manufacturing in 2016 after the introduction of DVDs into the market.
How Did VHS Green Screen Become Popular?
The green screen effect allows you to superimpose subjects onto different virtual background video clips. Essentially, you take a video that’s going to be your background, then overlay another video on top of this background. Using green screen properly will make your video stands out from the crowd. Let’s look at some that made increased the popularity of the VHS green screen:
- Clarity and Interactivity
VHS green screen allows for better understanding and comprehension, especially when explaining complex concepts and processes.
VHS green screen allows users to interact with virtual elements. Essentially, it enhances customer engagement while improving communication between you and the audience.
- Creativity and Versatility
Differentiation is key to the world of business. Therefore, adding VHS green screen to your content allows it to be unique and customized to your business. The best part is: Your imagination is the only limit.
The green screen also helps people avoid building and breaking down sets, allowing them to complete several shoots in a single session, which provides greater efficiency for their business.
- Save Time
With VHS green screen, you can shoot your video anywhere and anytime. That means it helps you remove the extended production time while providing you with one location and infinite possibilities. For this reason, it’s ideal for those who want to get the job done swiftly without hindering the quality.
- Budget and Logistical Solution
It eliminates expenses in the production line, like location, travel, and operational costs. In turn, you’ll free up more budget that you can spend on other things that your business needs.
Additionally, it allows you to control your environment. Shooting a video depends on the weather; however, shooting a video on VHS green screen disregards weather. It also provides an effective solution to problems in different areas, including travel, lighting, sound, and location.
Branding
VHS green screen popularity has grown over the years because it allows you to superimpose your logo onto the background. This makes your videos look professional and clean and provides you with a chance to advertise your business or brand your service or product with your company identity.
Free VHS Green Screen Effect Resource to Download
If you are looking for free VHS green screen effects to make your videos stand out, here are some resources that you might want to consider.
1. ANFX
ANFX is a stock video, after-effects projects, and motion graphics download hub. You can download a range of VHS green screen effects. All items that you will find on this website are licensed under a Creative Commons (CC) Attribution 4.0 International License. That means you can use the effects for any legal purpose, but you have to give them credit.

2. Videezy
As one of the world’s largest video communities, Videezy offers free high-quality footage designed to make filmmaking easy and affordable. You can also download a range of free VHS green screen effects in 4k. The site has more than 4,000 free green screen videos.

3. Gfycat
VHS green screens for animated gifs is a thing, and Gfycat is a good resource for making animated gifs. It is free to use the green screen gifs on this platform. This user-generated short video hosting company is one of the first web services that offered video encoding of GIFs.

4. Videvo
Videvo offers VHS green-screen effects, music, motion graphics, and sound effects. The site has a variety of effects available in resolutions from 720p-4k. While you’ll need to pay for some premium clips, there are loads of free resources. The site is particularly helpful for those who want green-screen effects that allow them to present content as though it is on a phone, computer, or tablet.

5. Pixabay
This user-submitted content site offers free content for commercial use. You can make attributions or choose not to. The effects on this site are of high quality. All contents are released to users under Creative Commons CC0, making them safe to use without giving credit to the artist or asking for permission. What’s more? You can even use the effects for commercial purposes.

6. YouTube
YouTube is home to millions of users looking for parts to build their videos. You will need to learn how to download YouTube videos to take advantage of these resources. There are tons of YouTube channels devoted to providing users with free VHS green screen effects. Some of the notable channels include BestGreenScreen, HD Green Screen, Free Green HD, and Green Screen Animation.

How to Edit VHS Green Screen with Filmora
Filmora is a relatively new program that has taken the world by storm. This professional video editor is a lifeline for all videographers and creators who work with videos to increase their proficiency and create professional-grade videos without breaking the bank. To learn how to Use VHS green screen in Filmora, follow the steps below.
Step 1\
Import the video with the VHS green screen and the background video into the media library.

Step 2\
Drag the video with the green screen and the background video that you want to replace the green screen with into the timeline and add it to one of the tracks. The video with the green screen should come second in the timeline.

Step 3\
Right-click the green screen on the timeline and select the Green Screen option.

Step 4\
Select a color from the green screen menu.

Various settings under this menu allow you to customize how your video is affected by VHS Green Screen. Experiments with different settings may allow you to make good videos even better or give your videos a whole new feel.
The Tolerance slider adjusts how much of the green screen will be allowed in your subject.
Edge Thickness allows you to adjust the amount of the edge thickness you’ll bring into the shot.
Use the Edge Feather slider to soften the edges of your subject.
Touch your mouse’s right button and move your cursor to select the video you want to insert into the timeline or “Add Video to Timeline” if you are using a project that does not accept videos as sources.
Open Project Settings > Video Editor tab > VHS Green Screen and select Source Video from the drop-down menu to change the video from whatever it is currently set as.
You can also add VHS Green Screen to a Sub-track by pressing Ctrl + Alt combination.
After selecting your video and adding it to the timeline, you will see the Video Properties window.
You can edit the Source Video under Source Video Settings in the Video Properties menu or use the keyframes window to change its settings via a timeline.
You can also watch the below video to get a better underestanding about how to use Green Screen in Filmora.
For Win 7 or later (64-bit)
For macOS 10.12 or later
Conclusion
● VHS video effects have become popular over the years because of the many benefits they offer. They allow you to save time, make unique content, be creative, and more. You can use Filmora’s green screen feature to make your videos stand out.
When making a video, it is always fun to add an effect. You can do this for either atmospheric or aesthetic reasons. VHS green screen effects are among the world’s most popular effects people use today.
We’ll give you the low-down on VHS Green Screen, including how it became popular and where to get these effects for free. Keep reading to learn more.
In this article
01 What Is VHS?
02 How Did VHS Green Screen Become Popular?
03 Free VHS Green Screen Effect Resource to Download
04 How to Edit VHS Green Screen with Filmora
What Is VHS?
Since its introduction in 1976, VHS has been the most frequently used video cassette recording technology. The VHS format is a consumer-level analog video cassette recording standard for videotaping. The acronym VHS referred to Vertical Helical Scan and was eventually modified as the popularity of this technology increased.
Produced by a Japan Victor Company, the technology uses a magnetic tape measuring half an inch. By the 1950s, magnetic tape video recording had become a vital part of the television industry. The technology is exclusively utilized in professional settings like TV studios and medical imaging (fluoroscopy).
As consumer access to videotape increased in the 1970s, a new economy centered on home video emerged, drastically altering the economics of the film and television industries. By 1980, VHS had captured 70% of the market and had established itself as the industry standard for entertainment and instruction.
The original standard has a picture quality equivalent to that of analog television. High-definition television content could be recorded and re-created using digital VHS (D-VHS). Progressively, a new format was launched dubbed S-VHS (Super VHS), which featured improved video quality from 240 to 400 lines; however, people did not use it extensively.
VHS tape, compared to its competition at the time, Betamax tapes had longer tape lifespans. VHS tapes were preferred because they recorded three times as long as Betamax tapes because of their higher storage capacity.
The last VHS recorder manufacturer, Funai Electric of Japan, discontinued manufacturing in 2016 after the introduction of DVDs into the market.
How Did VHS Green Screen Become Popular?
The green screen effect allows you to superimpose subjects onto different virtual background video clips. Essentially, you take a video that’s going to be your background, then overlay another video on top of this background. Using green screen properly will make your video stands out from the crowd. Let’s look at some that made increased the popularity of the VHS green screen:
- Clarity and Interactivity
VHS green screen allows for better understanding and comprehension, especially when explaining complex concepts and processes.
VHS green screen allows users to interact with virtual elements. Essentially, it enhances customer engagement while improving communication between you and the audience.
- Creativity and Versatility
Differentiation is key to the world of business. Therefore, adding VHS green screen to your content allows it to be unique and customized to your business. The best part is: Your imagination is the only limit.
The green screen also helps people avoid building and breaking down sets, allowing them to complete several shoots in a single session, which provides greater efficiency for their business.
- Save Time
With VHS green screen, you can shoot your video anywhere and anytime. That means it helps you remove the extended production time while providing you with one location and infinite possibilities. For this reason, it’s ideal for those who want to get the job done swiftly without hindering the quality.
- Budget and Logistical Solution
It eliminates expenses in the production line, like location, travel, and operational costs. In turn, you’ll free up more budget that you can spend on other things that your business needs.
Additionally, it allows you to control your environment. Shooting a video depends on the weather; however, shooting a video on VHS green screen disregards weather. It also provides an effective solution to problems in different areas, including travel, lighting, sound, and location.
Branding
VHS green screen popularity has grown over the years because it allows you to superimpose your logo onto the background. This makes your videos look professional and clean and provides you with a chance to advertise your business or brand your service or product with your company identity.
Free VHS Green Screen Effect Resource to Download
If you are looking for free VHS green screen effects to make your videos stand out, here are some resources that you might want to consider.
1. ANFX
ANFX is a stock video, after-effects projects, and motion graphics download hub. You can download a range of VHS green screen effects. All items that you will find on this website are licensed under a Creative Commons (CC) Attribution 4.0 International License. That means you can use the effects for any legal purpose, but you have to give them credit.
2. Videezy
As one of the world’s largest video communities, Videezy offers free high-quality footage designed to make filmmaking easy and affordable. You can also download a range of free VHS green screen effects in 4k. The site has more than 4,000 free green screen videos.
3. Gfycat
VHS green screens for animated gifs is a thing, and Gfycat is a good resource for making animated gifs. It is free to use the green screen gifs on this platform. This user-generated short video hosting company is one of the first web services that offered video encoding of GIFs.
4. Videvo
Videvo offers VHS green-screen effects, music, motion graphics, and sound effects. The site has a variety of effects available in resolutions from 720p-4k. While you’ll need to pay for some premium clips, there are loads of free resources. The site is particularly helpful for those who want green-screen effects that allow them to present content as though it is on a phone, computer, or tablet.
5. Pixabay
This user-submitted content site offers free content for commercial use. You can make attributions or choose not to. The effects on this site are of high quality. All contents are released to users under Creative Commons CC0, making them safe to use without giving credit to the artist or asking for permission. What’s more? You can even use the effects for commercial purposes.
6. YouTube
YouTube is home to millions of users looking for parts to build their videos. You will need to learn how to download YouTube videos to take advantage of these resources. There are tons of YouTube channels devoted to providing users with free VHS green screen effects. Some of the notable channels include BestGreenScreen, HD Green Screen, Free Green HD, and Green Screen Animation.
How to Edit VHS Green Screen with Filmora
Filmora is a relatively new program that has taken the world by storm. This professional video editor is a lifeline for all videographers and creators who work with videos to increase their proficiency and create professional-grade videos without breaking the bank. To learn how to Use VHS green screen in Filmora, follow the steps below.
Step 1\
Import the video with the VHS green screen and the background video into the media library.
Step 2\
Drag the video with the green screen and the background video that you want to replace the green screen with into the timeline and add it to one of the tracks. The video with the green screen should come second in the timeline.
Step 3\
Right-click the green screen on the timeline and select the Green Screen option.
Step 4\
Select a color from the green screen menu.
Various settings under this menu allow you to customize how your video is affected by VHS Green Screen. Experiments with different settings may allow you to make good videos even better or give your videos a whole new feel.
The Tolerance slider adjusts how much of the green screen will be allowed in your subject.
Edge Thickness allows you to adjust the amount of the edge thickness you’ll bring into the shot.
Use the Edge Feather slider to soften the edges of your subject.
Touch your mouse’s right button and move your cursor to select the video you want to insert into the timeline or “Add Video to Timeline” if you are using a project that does not accept videos as sources.
Open Project Settings > Video Editor tab > VHS Green Screen and select Source Video from the drop-down menu to change the video from whatever it is currently set as.
You can also add VHS Green Screen to a Sub-track by pressing Ctrl + Alt combination.
After selecting your video and adding it to the timeline, you will see the Video Properties window.
You can edit the Source Video under Source Video Settings in the Video Properties menu or use the keyframes window to change its settings via a timeline.
You can also watch the below video to get a better underestanding about how to use Green Screen in Filmora.
For Win 7 or later (64-bit)
For macOS 10.12 or later
Conclusion
● VHS video effects have become popular over the years because of the many benefits they offer. They allow you to save time, make unique content, be creative, and more. You can use Filmora’s green screen feature to make your videos stand out.
Color Match Game Top Tips for You
Color Match Game Top Tips for You
An easy yet powerful editor
Numerous effects to choose from
Detailed tutorials provided by the official channel
A child is like a soft, unmolded clay; how you shape them, they will acquire precisely those features. And so, it is necessary to introduce them to the different and crucial tasks and activities that are beneficial for them.
And one of the various tasks is the Color Match Game which helps them get introduced to and familiar with the different colors. Children need something fun and exciting every time, and so, when you make them learn the color through a game, they learn about the color with enthusiasm and will.
We have put forth the following discussion about this fun activity; including the name of the six best color matching games and the best tool for it as well. So, without any further delay, let us start with our discussion.
In this article
01 [Why is Learning about Colors Useful for Children?](#Part 1)
02 [Top 6 Color Match Games](#Part 2)
03 [Where to Experience Professional Color Match Function?](#Part 3)
Part 1 Why is Learning about Colors Useful for Children?
There is always a reason behind every beneficial or a ‘must-do’ task. So, there are reasons behind introducing your child and making them aware of colours as well. So, we will be starting our discussing by understanding and discussing why it is useful for the children to learn about different colours.

The following list points out the importance of learning colours for children.
● Integrates basic knowledge
Knowing about the different colours is the basic and the most initial information that every child must have. We need colours in every instance of our lives. Therefore, it is vital for the children to learn about them from the initial stages of their lives.
So, learning about the colours integrates the basic knowledge of colours in their minds which is to stay with them throughout their lives and utilize them as and when the necessity arises.
● Offers them a means for verbal communication
When a child learns about colours, they attain a way to describe the world around them. Therefore, it helps in enhancing their method of communication. As a result, it also nurtures and improves their verbal skills to a large extent.
When they know about the colours, it inaugurates a novel hallway of set communicating and knowing about the world around them.
● Offers a way of describing the world
For the children, this world is an absolutely new place. They have been introduced to this planet quite recently and are exploring and discovering the different aspects. And one of the major aspects of the world is its colour.
So, when they learn about colours, they tend to find a way to describe the environment. It gives them a better understanding of the world and their surrounding as they learn about the colours.
● Learning to classify and sort
When a child learns about colours, they tend to learn about sorting things and classifying the different objects based on colours. For example, they might be able to separate blue balloons from the red ones from a bunch of balloons in front of them.
Though it is based on colours, they learn the process of classification and sorting, which then gets applied to the other factors in life.
● Learning about safety and health through colours
The colour red is commonly associated with danger, and the colour danger is associated with safety. And this is generalized across almost all cultures. That is commonly reflected through the traffic lights, where we stop at red colour, get ready to move in the colour tallow and the green colour gives us the signal to move or the message of being out of danger.
Also, the colour blue indicates paleness or bruises in the skin. The colour red indicates rashes or blood. So, the knowledge of colour helps the children learn about safety and health.
● Learn about association
The above point of learning about health and safety with the help of colours includes learning another important aspect in life, which is association. If a child is unable to understand that the colour red is associated with danger, green is associated with safety and the like; then the knowledge will be of no use.
So, when the child learns about colours and connects them to the different safety and health measures, they automatically learn how to associate one thing with another. This process is crucial and will benefit them throughout their lives.
● Learn about letters
Eventually, as the child learns about colours, they would spell them as well. So, as a result, they will learn how to spell different colours. That will be a way to practice spelling, and this will result in them learning about letters and words a lot more efficiently and excitingly.
Part 2 Top 6 Color Match Games
Now that we have discussed about the importance and benefits of learning colors for the kids, it is important that we know about the top six such Color Match Games that will help your children learn about learn in the most exciting way.
Here is the list of the top 6 color matching games online.
01Blendoku
Blendoku is one of the simplest yet most exciting color games for your children. This color matching game was designed based on color principles. The children are provided with a grid and blocks of varied colors in the game. Their task is to put the color blocks in their appropriate location on the grid.
Here, your children have to study the shades of the colors and arrange the color blocks to show lighter shades to the darker shades. The game includes four levels, and you can play each of them whenever you want. The levels are simple, medium, hard and master level.

02Pigments
Pigments is an exciting game that involves creativity and skills as well. In this game, one needs to mix two primary colors to form a secondary color. And then, the secondary color they create is the color of the pigment they need to strike away.
For example, in the game, you can mix yellow and blue colors, which are primary colors, which will form the color blue, a secondary color. And then, you will have to stroke off the blue color. It gives your kids a chance to explore, be creative and learn the vast sphere of colors, hues and shades.

03Color Kids: Coloring Game
Color Kids: Coloring Game is the best coloring video game for kids. The concept of this game is simple. It requires your children to color the different shapes. The design of the game is simple and emphasizes the matching, tracing, and building skills essential for your kids.

04I Love Hue
I Love Hue is the prettiest color matching game online based on arranging the colour tiles based on their shades, similar to that of Blendoku. You get a specified time limit or a particular number of lives for the game.
So, along with the knowledge of colors, your kids can also gain time management from the very initial levels of their lives.

05Polyforge
Polyforge has a fantastic outlook, and it deals with it just colors but also geometrical shapes. Thus, one gets to know about the different hues and at the same time about the shapes as well. This game also acts as a way of bringing peace and relaxation. So, this color matching game is a multi-purpose game indeed!

06Kami
Kami is a Japanese art-styled, origami puzzle game involving colors. Here, adding to the unique art style of the game, there is soothing Japanese zen music that relaxes. The rule of the game is pretty simple. One has to turn the papers into the same color.

Part 3 Where to Experience Professional Color Match Function?
Did you know you too can play with colors, match them and create incredible videos? And that is possible through the most wonderful video editing tool- Wondershare Filmora Video Editor . Its “Color Match” feature enables you to color correct the videos effectively and here are the steps for it.
● Drag the photos or the videos you want to edit
● Choose the portion of the video you want to edit and select the “Color Match” feature
● Opt for a frame as a reference page and then click on the “Match” option.
● You can compare and edit the video’s color settings or the image after using the “Color Match” function and make your videos and photos the way you want!
For Win 7 or later (64-bit)
For macOS 10.12 or later
● Key Takeaways from This Episode →
● In the above discussion, we have enveloped the following topics.
● We discussed why it is necessary for the kids to be introduced to colors, why it is essential to learn about the use of colors, and how this knowledge will benefit them in their lives.
● Next, we discussed the top 6 color matching games online that are fun, exciting and interesting to play.
● Lastly, we introduced Filmora 1which can help you create beautiful videos and edit them in the most creative and colorful way you want through its color match function!
A child is like a soft, unmolded clay; how you shape them, they will acquire precisely those features. And so, it is necessary to introduce them to the different and crucial tasks and activities that are beneficial for them.
And one of the various tasks is the Color Match Game which helps them get introduced to and familiar with the different colors. Children need something fun and exciting every time, and so, when you make them learn the color through a game, they learn about the color with enthusiasm and will.
We have put forth the following discussion about this fun activity; including the name of the six best color matching games and the best tool for it as well. So, without any further delay, let us start with our discussion.
In this article
01 [Why is Learning about Colors Useful for Children?](#Part 1)
02 [Top 6 Color Match Games](#Part 2)
03 [Where to Experience Professional Color Match Function?](#Part 3)
Part 1 Why is Learning about Colors Useful for Children?
There is always a reason behind every beneficial or a ‘must-do’ task. So, there are reasons behind introducing your child and making them aware of colours as well. So, we will be starting our discussing by understanding and discussing why it is useful for the children to learn about different colours.
The following list points out the importance of learning colours for children.
● Integrates basic knowledge
Knowing about the different colours is the basic and the most initial information that every child must have. We need colours in every instance of our lives. Therefore, it is vital for the children to learn about them from the initial stages of their lives.
So, learning about the colours integrates the basic knowledge of colours in their minds which is to stay with them throughout their lives and utilize them as and when the necessity arises.
● Offers them a means for verbal communication
When a child learns about colours, they attain a way to describe the world around them. Therefore, it helps in enhancing their method of communication. As a result, it also nurtures and improves their verbal skills to a large extent.
When they know about the colours, it inaugurates a novel hallway of set communicating and knowing about the world around them.
● Offers a way of describing the world
For the children, this world is an absolutely new place. They have been introduced to this planet quite recently and are exploring and discovering the different aspects. And one of the major aspects of the world is its colour.
So, when they learn about colours, they tend to find a way to describe the environment. It gives them a better understanding of the world and their surrounding as they learn about the colours.
● Learning to classify and sort
When a child learns about colours, they tend to learn about sorting things and classifying the different objects based on colours. For example, they might be able to separate blue balloons from the red ones from a bunch of balloons in front of them.
Though it is based on colours, they learn the process of classification and sorting, which then gets applied to the other factors in life.
● Learning about safety and health through colours
The colour red is commonly associated with danger, and the colour danger is associated with safety. And this is generalized across almost all cultures. That is commonly reflected through the traffic lights, where we stop at red colour, get ready to move in the colour tallow and the green colour gives us the signal to move or the message of being out of danger.
Also, the colour blue indicates paleness or bruises in the skin. The colour red indicates rashes or blood. So, the knowledge of colour helps the children learn about safety and health.
● Learn about association
The above point of learning about health and safety with the help of colours includes learning another important aspect in life, which is association. If a child is unable to understand that the colour red is associated with danger, green is associated with safety and the like; then the knowledge will be of no use.
So, when the child learns about colours and connects them to the different safety and health measures, they automatically learn how to associate one thing with another. This process is crucial and will benefit them throughout their lives.
● Learn about letters
Eventually, as the child learns about colours, they would spell them as well. So, as a result, they will learn how to spell different colours. That will be a way to practice spelling, and this will result in them learning about letters and words a lot more efficiently and excitingly.
Part 2 Top 6 Color Match Games
Now that we have discussed about the importance and benefits of learning colors for the kids, it is important that we know about the top six such Color Match Games that will help your children learn about learn in the most exciting way.
Here is the list of the top 6 color matching games online.
01Blendoku
Blendoku is one of the simplest yet most exciting color games for your children. This color matching game was designed based on color principles. The children are provided with a grid and blocks of varied colors in the game. Their task is to put the color blocks in their appropriate location on the grid.
Here, your children have to study the shades of the colors and arrange the color blocks to show lighter shades to the darker shades. The game includes four levels, and you can play each of them whenever you want. The levels are simple, medium, hard and master level.
02Pigments
Pigments is an exciting game that involves creativity and skills as well. In this game, one needs to mix two primary colors to form a secondary color. And then, the secondary color they create is the color of the pigment they need to strike away.
For example, in the game, you can mix yellow and blue colors, which are primary colors, which will form the color blue, a secondary color. And then, you will have to stroke off the blue color. It gives your kids a chance to explore, be creative and learn the vast sphere of colors, hues and shades.
03Color Kids: Coloring Game
Color Kids: Coloring Game is the best coloring video game for kids. The concept of this game is simple. It requires your children to color the different shapes. The design of the game is simple and emphasizes the matching, tracing, and building skills essential for your kids.
04I Love Hue
I Love Hue is the prettiest color matching game online based on arranging the colour tiles based on their shades, similar to that of Blendoku. You get a specified time limit or a particular number of lives for the game.
So, along with the knowledge of colors, your kids can also gain time management from the very initial levels of their lives.
05Polyforge
Polyforge has a fantastic outlook, and it deals with it just colors but also geometrical shapes. Thus, one gets to know about the different hues and at the same time about the shapes as well. This game also acts as a way of bringing peace and relaxation. So, this color matching game is a multi-purpose game indeed!
06Kami
Kami is a Japanese art-styled, origami puzzle game involving colors. Here, adding to the unique art style of the game, there is soothing Japanese zen music that relaxes. The rule of the game is pretty simple. One has to turn the papers into the same color.
Part 3 Where to Experience Professional Color Match Function?
Did you know you too can play with colors, match them and create incredible videos? And that is possible through the most wonderful video editing tool- Wondershare Filmora Video Editor . Its “Color Match” feature enables you to color correct the videos effectively and here are the steps for it.
● Drag the photos or the videos you want to edit
● Choose the portion of the video you want to edit and select the “Color Match” feature
● Opt for a frame as a reference page and then click on the “Match” option.
● You can compare and edit the video’s color settings or the image after using the “Color Match” function and make your videos and photos the way you want!
For Win 7 or later (64-bit)
For macOS 10.12 or later
● Key Takeaways from This Episode →
● In the above discussion, we have enveloped the following topics.
● We discussed why it is necessary for the kids to be introduced to colors, why it is essential to learn about the use of colors, and how this knowledge will benefit them in their lives.
● Next, we discussed the top 6 color matching games online that are fun, exciting and interesting to play.
● Lastly, we introduced Filmora 1which can help you create beautiful videos and edit them in the most creative and colorful way you want through its color match function!
15 Best Free MP4 Video Rotators [Windows,Mac, Android, iPhone & Online
Have you ever encountered a problem where you saved a video in the wrong orientation? So you ask yourself what’s the best tool to rotate. There are tools that help to flip videos recorded so that you don’t get frustrated while you watch them later on your pc or phone. So why don’t you take a look at the best video rotators that are available for Android, iOs, Windows, Mac, and online tools?
Best MP4 Video Rotators to Rotate MP4 Video on Windows and Mac - Filmroa Video Editor
Filmora Video Editor allows you to rotate your video to any angle. You can also zoom in and crop out the parts of the video that you don’t want to see. It also includes predefined aspect ratios such as 16:9, 9:16, 4:5, 1:1, and others to help you quickly discover the ideal aspect ratio for YouTube, Instagram, and other sites. Let’s look at how to modify the orientation of a video in Filmora.
For Win 7 or later (64-bit)
For macOS 10.14 or later
How to change the video orientation in Filmora
Step 1:Import the video file into Filmora, and then drag it to the timeline.
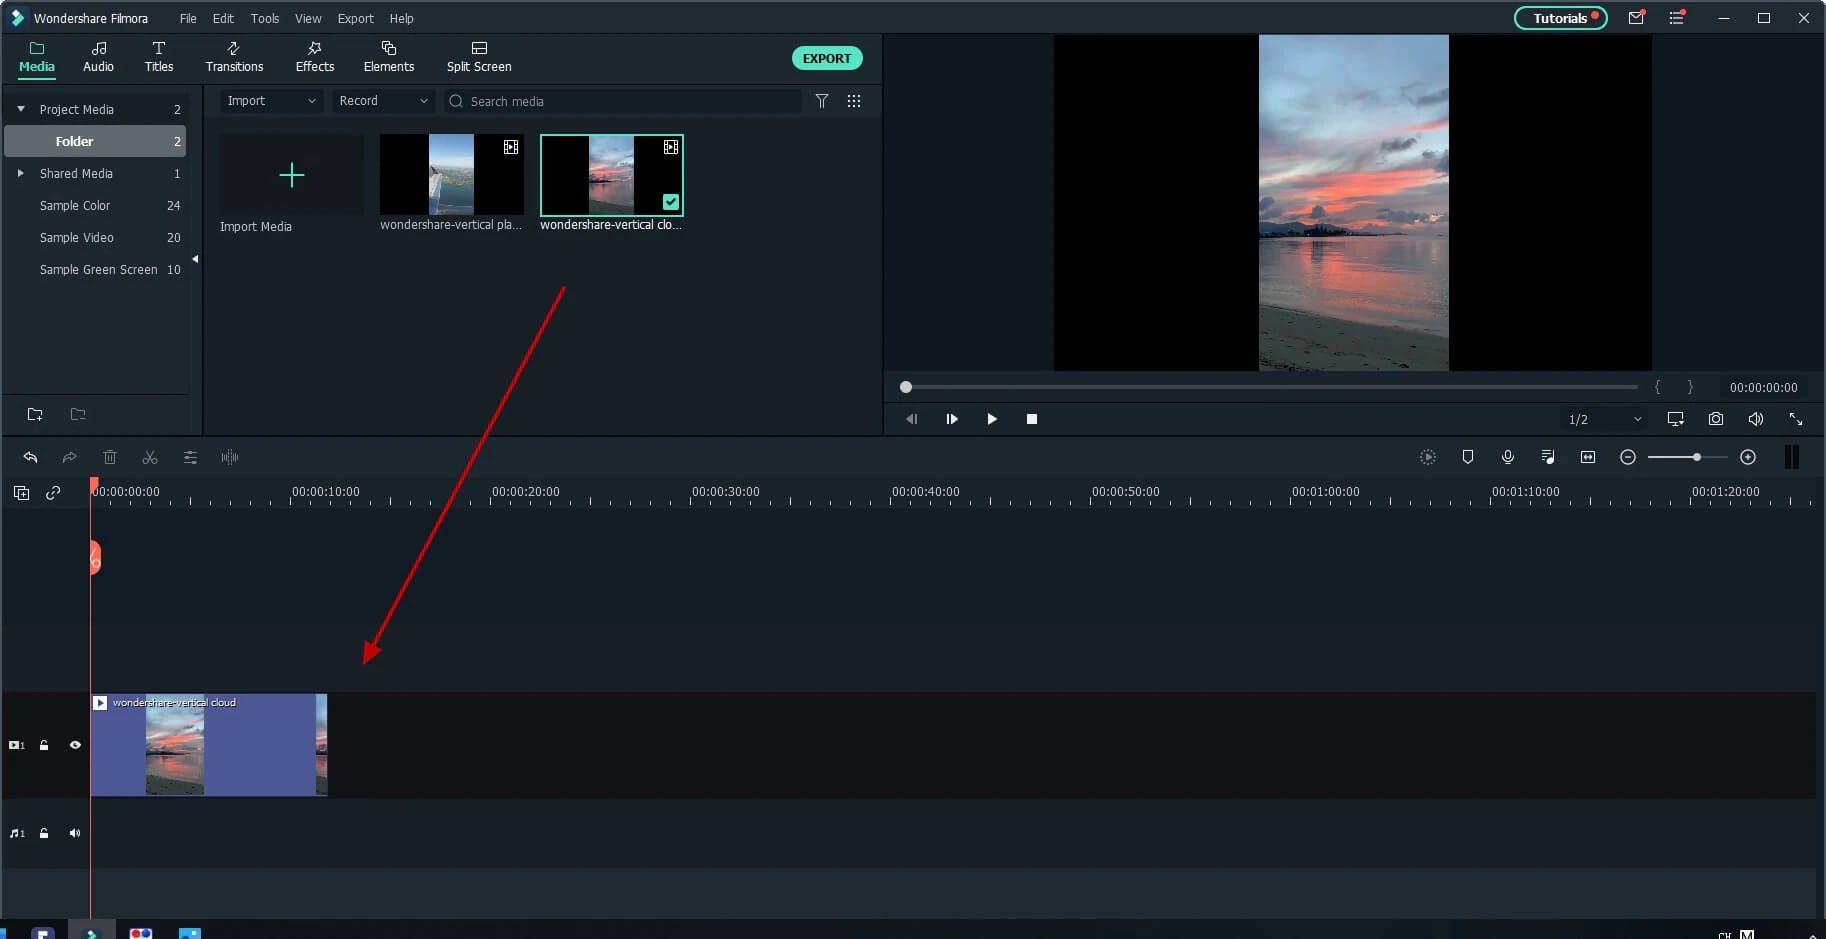
Step 2: To enter the video editing panel, double-click the video clip in the timeline. Locate the “Rotate” option under the “Transform” menu. You can drag the slider or enter a specific number to adjust the rotation value. You can rotate up to 360 degrees. When you enter “90” in the box, the video clip will be rotated 90 degrees.
By dragging the “Scale” slider, you can make the full image screen, or you can directly adjust its position, size, shape, etc., in the Viewer panel.
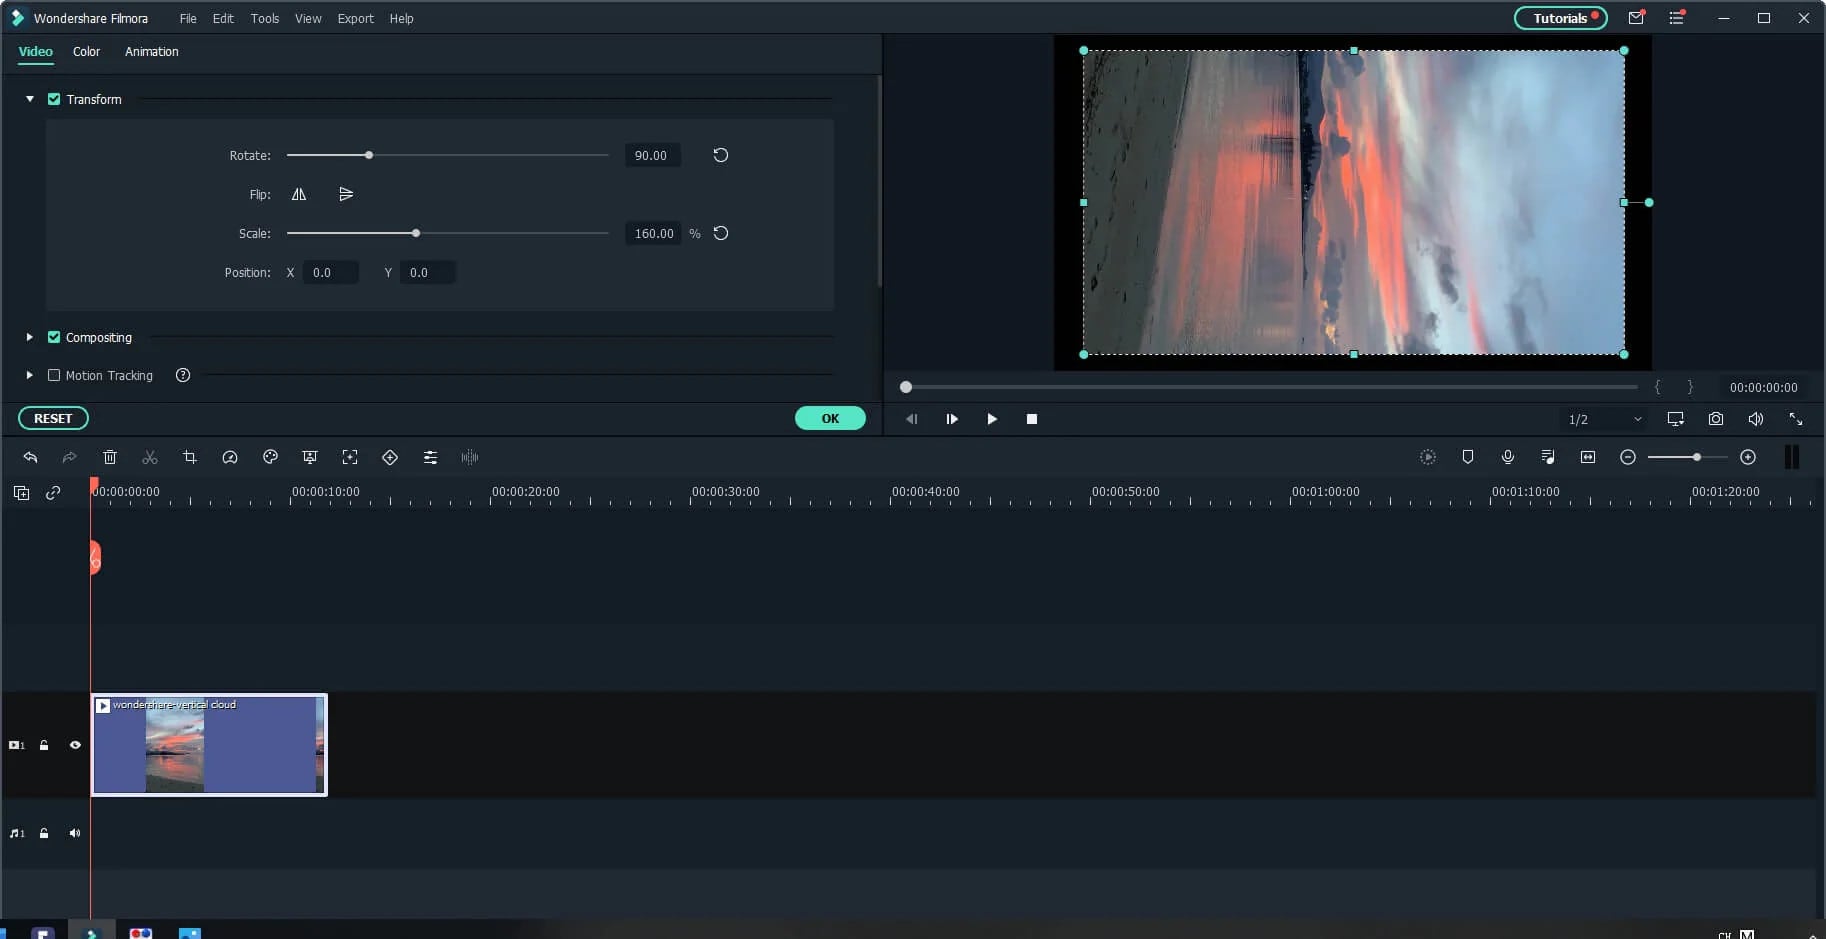
Step 3: After you are satisfied, click the export button. You can change the format here, or you can upload the file to YouTube.
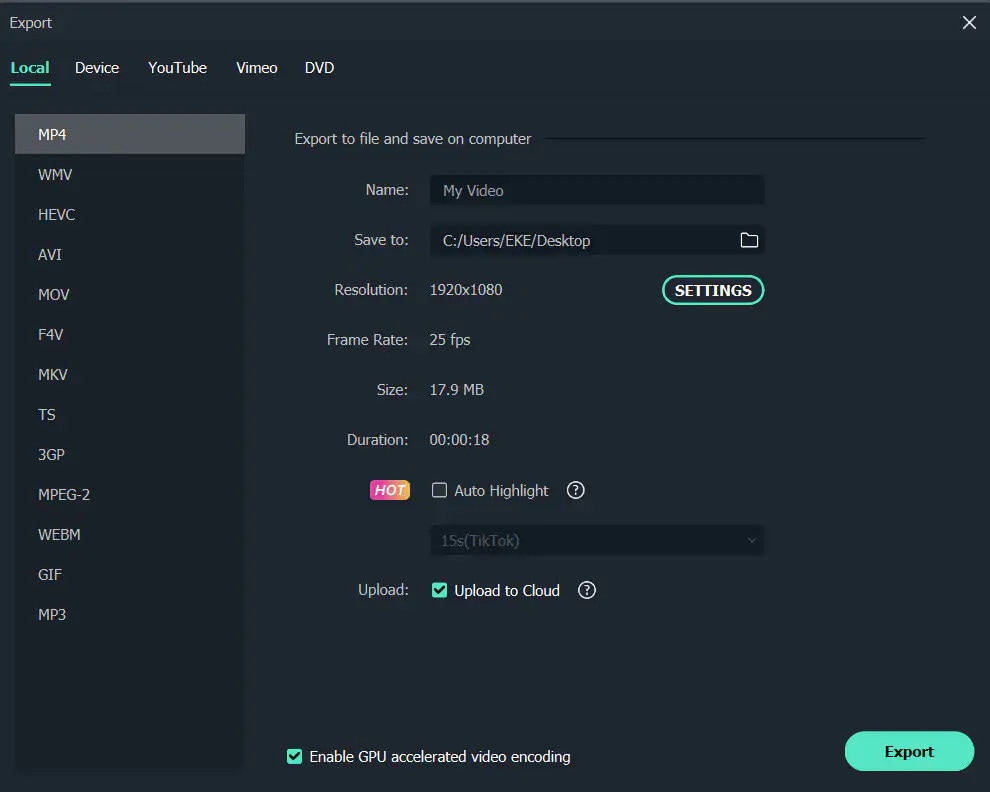
Top 3 Free MP4 Video Rotators on Windows
Looking for the best free video rotator?
If you are looking for a free video rotator for windows, then this article has got you covered. A list of the top 3 free video rotators for windows has been listed.
- VSDC Free Video Editor

It is a highly functional video editing suite with easy controls. It provides anyone who is a beginner to easily access and edit the video easily.
It helps you rotate the videos in increments of 90 degrees, be it clockwise or anticlockwise )
VSDC is a free video editor with non-linear editing capabilities. Users may swiftly convert video and audio files from one format to another with VSDC. A built-in disk burning tool for DVDs is also included in the software. This free program, designed for educational purposes, can be used by businesses or individuals.
VSDC Free Video Editor features
- Built-In DVD Burning Tool
- Colour Blending And Filters
- Specific Multimedia Devices Creation
- Desktop Video Capture
- Export To Social Networking Sites
- Masking
- Non-Linear Video Editing
- Subpixel Accuracy
- Supports Popular Formats
- Video File Converter
Pros
- It’s completely free.
- There is no watermark.
- There are numerous free video editing programs available.
- Support a wide range of file formats
Cons
There isn’t a macOS version available.
Take a severe learning curve into consideration.
There are numerous premium-only features.
The timeline isn’t the same as most NLE editing software.
- Windows Movie Maker
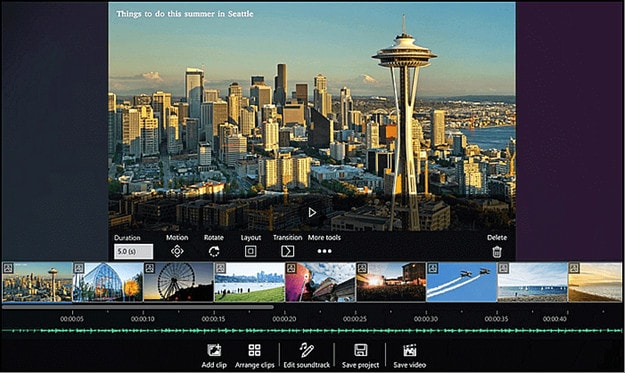
The most well-known video rotator and editor are probably Windows Movie Maker. Most of us who grew up with Microsoft’s various operating systems have had access to it because it comes as a free download with most Microsoft products. It can handle a wide range of files and is generally simple to use. Adding features like sound, music, special effects, or even speeding up the video is simple, and you’ll love the variety of skins available.
For beginners, Windows Video Maker is ideal. It is available for free on Windows PCs and includes basic capabilities and workflow aspects found in professional video editing systems. Its user-friendly interface resembles a simplified version of a video editor timeline and is simple enough for even inexperienced editors to understand.
Features of Windows Movie Maker
- Customization Tool’s title
- Auto Movie Options
- Credit Customization Tool
- Special Effects Options
- Overlays for Transitions
Pros:
- Various video editing functions;
- A variety of output possibilities
Cons:
- Many different versions of the same product;
- No longer included in the Windows operating system.
3.EaseUS Video Editor
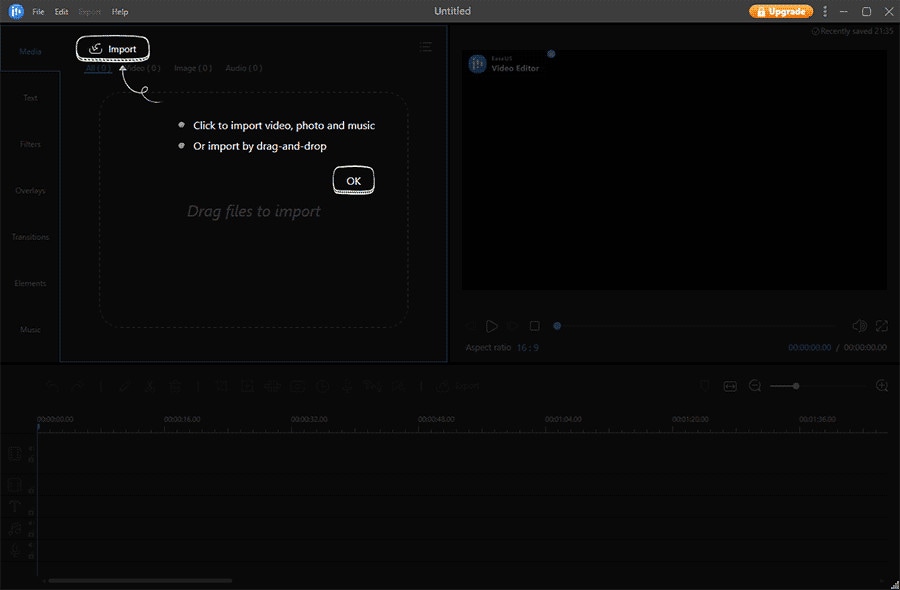
EaseUS Video Editor is one of the few most popular video rotators we have today. Its video editing provides tools that can change the video orientation by 90 degrees anticlockwise and clockwise, which can flip vertically and horizontally.
In terms of videos, adding great filters, sound, music, subtitles and other elements to have a great video output can be achieved using the EaseUS. Moreover, it accepts video formats and can convert files to MP4 and other great features.
Features of EaseUS Video Editor
- Can easily trim, cut, split, merge, rotate, and mix video clips.
- Ability to apply stylish video effects
- Can add or remove the watermark and reduce background or wind noise from a video.
Pros:
- User-friendly interface, perfect for beginners
- Easily trim, cut, split, merge, rotate, mix video clips
- A full range of free visual and audio effects
- Change of contrast, exposure, brightness, and other video aspects
- Use the voiceover function to add your comments to the video
Cons:
- The software has no version for macOS
Top 3 Free MP4 Video Rotators on Mac
- iMovie
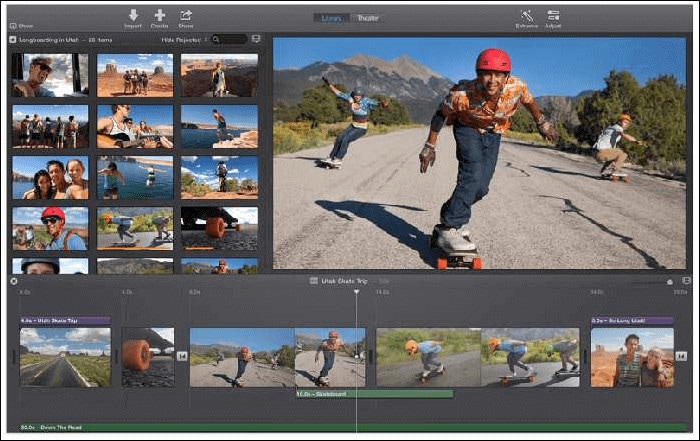
The iMovie for Mac users is an exceptional video rotator. You can turn any video or movie you may have into an amazing masterpiece with more features due to the special after-effects it has. Simple application to use and navigate easily, although when importing video takes a while at certain times.
Features of the iMovie include
- Full range of options to modify
- Ability to enhance colour settings
- Easily crop and edit video clips ease
- Ability to change the speed of clips.
Pros:
- Nice interface;
- The function is to create fun Movie Trailers.
Cons:
- Supports only a few video formats;
- Pre-processing and import trans-coding can be time-consuming.
- Movavi Video Editor
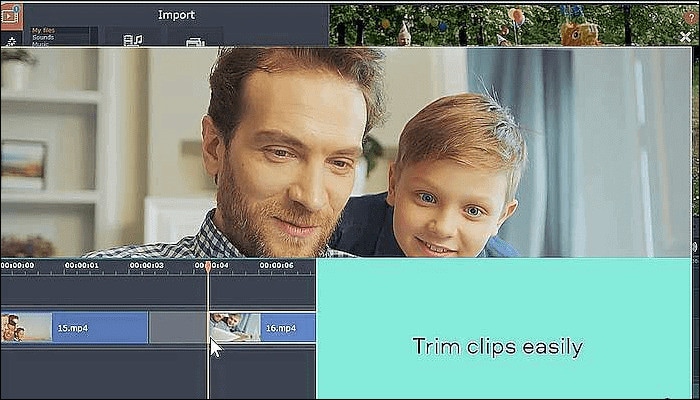
Movavi has a free version that is easy to use, especially for beginners. It allows you to add titles, filters, transitions, and special effects to your videos and photographs to make attractive movies. You can use the animation to smoothly move things around the screen in your film. On the multi-track timeline, you can add as many tracks as you wish. From the expanded built-in collection, you can get more example video clips, stickers, and audio tracks.
Features of Movavi Video Editor
- You can upload files and photographs in almost any format.
- To make videos automatically, use the Montage Wizard.
- Transition Wizard allows you to quickly put together slideshows.
- Enhance image quality by cutting, cropping, and rotating videos on the timeline.
- Apply artistic filters, and make transitions between portions as smooth as possible.
- Create animated headlines, stickers, callouts, and video overlays:
Pros:
- It’s appropriate for newcomers and casual users alike.
- A number of video formats are supported, including.mov (QuickTime)
- Chroma Key and Slow Motion are examples of special effects.
Cons
- Only the premium version supports the advanced features.
- It uses the basic colour grading tool
- QuickTime Player
The key advantage of Apple’s QuickTime is that it comes pre-installed on your Mac’s macOS operating system. It’s powerful enough to rotate your clip, yet it’s simple enough for beginners to do. iTunes files can be played and edited with QuickTime. After rotation, it exports a new video file, leaving the old clip on the Mac. The output video will be compressed slightly, resulting in a smaller rotational video file than the original.
Features of QuickTime Player
- Anything can be recorded, including video, audio, and the screen.
- Cropping, audio detachment, combining, and rotation are all simple video editing techniques.
- From 4K to 480p video compression
- Quickly share your video: directly upload videos to YouTube
Pros:
- With macOS, it comes pre-installed.
- Work with iTunes files Streaming video player with no configuration
Cons:
- Only QuickTime Pro 7 unlocks the editing feature.
- There will be no more Windows versions.
- It isn’t compatible with standard subtitle files.
Top 3 Free MP4 Video Rotators on Android
When we use a smartphone to capture a video or download one from a website, we occasionally discover that the video has been inverted. As a result, we’ll require a video rotator app to correct the problem. On the market, there are many different sorts of tools for various platforms. However, you may have discovered that separating the wheat from the chaff can be difficult at times. To save you time, I’ve compiled a list of 3 video rotator applications for Android
- VivaVideo
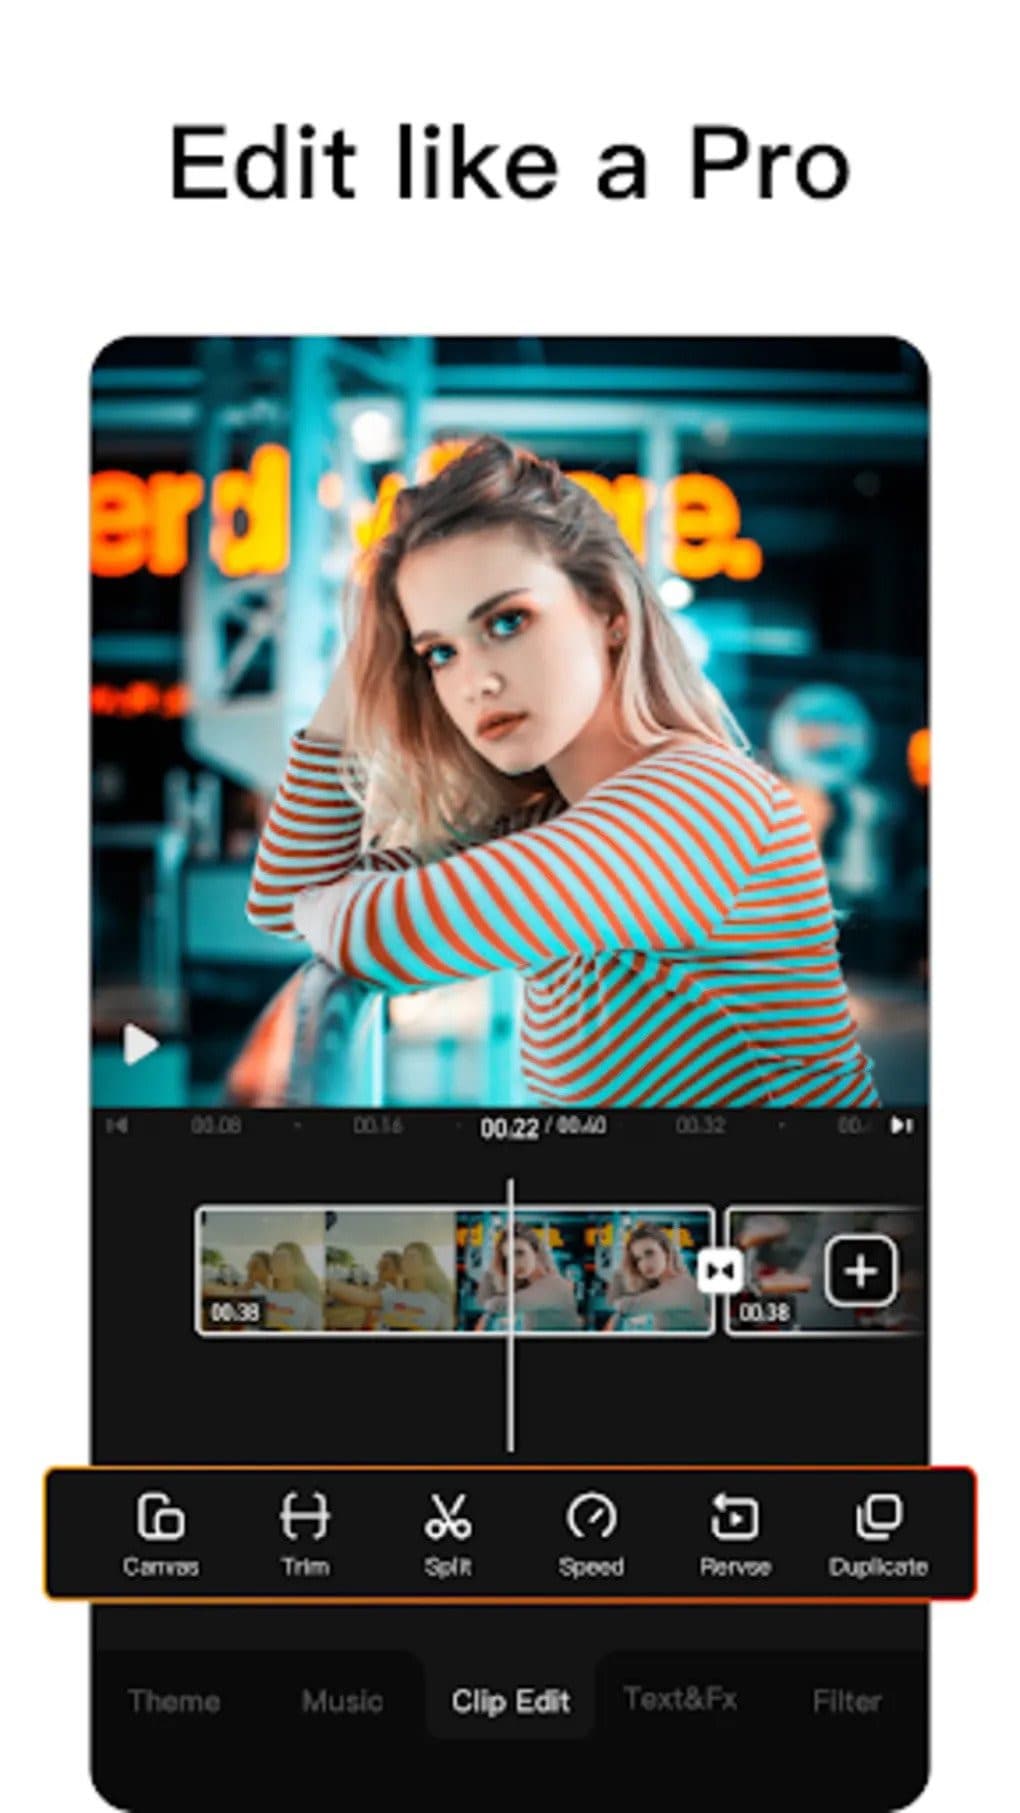
VivaVideo is one of the top movie producers and free video rotators for Android devices as a media editor. This application allows you to alter the orientation of your videos. Aside from rotating videos, this software also includes cropping, combining, cutting, and other editing features. “The best video editor software is VivaVideo - Video Maker App,” an Android expert previously said. This program is a video producer as well as an editor.
Features of VivaVideo
- It allows you to add music to videos.
- Combine videos clips into one video
- Can apply video effects.
- After you’ve finished editing your videos, you may save and share them on YouTube and TikTok! To rotate video, use this program!
Pros
- It has an In-app camera with live effects previews for capturing videos.
- More than 60 effects to choose from with additional downloadable effects.
- Enhance the videos using themes.
- Ability to Merge videos and create montages with storyboarding features
- Edit frames within a video
Cons
- There is no negative review to say about this app
2.Google Photos
This app may already be installed on your smartphone, but you are unaware of its full potential. This program includes a built-in picture and video editor in addition to backing up your photos. This program includes three essential video editing tools that are extremely basic and easy to use.
The first is to stabilize the video; if your video is unsteady, you can use this option in Google Photos to stabilize it. You may also use the timeline below the video to cut the video. If you mistakenly captured the video in the wrong orientation, there is a tool to rotate it.
Features of Google Photos
- You can modify photographs and videos in Google Photos.
- On Google Photos, make a collage or a movie.
- Recover photos or videos that were recently erased.
- Clear off some space on Google Photos…
- Place photos in the Archive.
Pros
Google Images automatically backs up all of your device’s photos and videos.
Despite its many advantages, the reason I choose Google Photos is that it helps me save space on my smartphone.
The original quality of images stored in Google Photos is really high. Photos and videos are saved in the same resolution as when they were taken.
Over time, Google has improved the Google Photos interface, and it now incorporates AI to provide consumers with even better performance.
Cons
There aren’t many effects, and there aren’t any other editing tools.
The lack of a password-protection option in Google Photos is annoying. Some photos are private, and you may not wish to share them with others.
Users of Google Photos will no longer have limitless storage.
3Adobe Rush
Adobe Rush is a new video editor that Adobe released via a partnership with Samsung’s latest flagship smartphone. This app is a simple yet powerful tool for editing videos on the go, on your smartphone.
This app comes with some powerful tools which you find on some high-end video editing apps. You get a timeline interface to edit your videos perfectly, and you get some music recommendations right into the app.
Features Of Adobe Rush
- In the timeline, you can make changes to your video.
- Audio can be added and refined.
- Change the colour, size, and position of the video.
- Make a title.
- Add transitions, pan and zoom effects, and reframe your clips automatically.
- Change the clip’s attributes.
- Change your video’s aspect ratio.
- Create the illusion of a picture-in-picture effect.
Pros
- It has a user-friendly UI that is responsive and snappy.
- It’s easy to use and provides helpful advice for newcomers.
- It enables Adobe users to quickly and easily produce stunning videos that are customized to their preferences.
- When compared to its competitors, exporting files is a breeze.
- Unlike most of its competitors, it comes with good colour and title tools.
- YouTube, Facebook, Vimeo, Snapchat, Instagram, and Twitter are just a few of the social media channels where the finished files can be simply shared.
- It synchronizes projects between desktop and mobile devices, making them more accessible.
Cons
- When compared to its competitors, it is a little costly.
- It renders projects slowly and only supports three transitions.
- The app does not have storyboard templates and cannot specify the exact structure for output files.
- It only comes with a few video and audio editing capabilities.
- Many standard video effects are missing.
Top 3 Free MP4 Video Rotators on iPhone
1.Splice

Trimming, cropping, effects, titles, speed adjustments, animation, transitions, and music are all available in this well-known video editor, which has a cultish following of dedicated Splicers.
Splice’s music library is one of its strongest assets. It offers a large selection of free music and sound effects to layer over your video, as well as the ability to sync your movie to the beat of your soundtrack.
Features of Splice
Clips should be cropped and trimmed to focus on the highlights.
With an Audio Library and iTunes Integration, you may add music to your videos.
To smooth transitions between clips and images, use transitions.
Enhance videos with effects.
Pros:
- Developed by GoPro, award-winning, highly regarded.
Cons:
- Only available on iOS devices.
2. Clips

It’s easy to miss pre-loaded apps like Apple’s Clips, but this video editing tool has lots of impressive features to enjoy, thanks to the weight of the tech giant’s greatest brains behind it. Take, for example, their live tiles setting. You can use this to generate animated captions and titles that appear as you speak.
To liven things up, you may add animated emojis and backgrounds, and music tracks dynamically sync to the length of your video.
Features of Clips
- Ability to generate animated captions
- Full access to Animated emojis and backgrounds
- Ability to have your music sync to your videos
Pros:
- Simple to use, unique features, and Apple’s support.
Cons:
- It’s only for iOS devices (obviously! ), and it has trouble with a big number of clips.
3. Quik

You may apply transitions and effects to up to 200 photographs and video clips from your photo library or GoPro Plus with this free software. You may not only crop, zoom, and rotate photos and video clips, but you can also customize them with 26 different themes, fonts, effects, and artwork.
You may make HD 1080p or 720p films for social sharing in cinema, square, or portrait formats, and you can store your draft creations for up to seven days.
Features of Quik
- Everything that is available for free.
- There are no limits to the number of mural events.
- Editing is unrestricted.
- There are now a total of 25 more photo and video filters.
Pros:
- Tons of features, including access to 100+ free songs,
- Flashbacks and QuikStories, which make videos based on your most recent footage,
- syncs footage to the beat of your soundtrack, and AI editing help.
Cons:
- Limited control and no trimming option; customers have claimed that it is occasionally glitchy.
Top 3 Free MP4 Video Rotators Online
1.Online Video Cutter
This web tool comes in helpful when you need to rapidly edit a small video file. It is not necessary to install it; you may use it right from your browser. The clip can only be rotated 90, 180, or 270 degrees. It’ll come in handy, especially if you’ve closed the video in portrait mode and want to watch it on a big screen. The service’s provider says that the files will be automatically erased from the servers a few hours after you accomplish your task, resulting in a high level of security.
Features of Online Video cutter.
- It Supports Any Video Format. …
- Completely Online for you to access
- Additional Settings to make more edits to videos
- Easy to use, User-friendly interface.
Pros:
It has a very simple user interface.
You do not need to pay for a license to utilize it.
Almost every video format is supported.
Cons:
Only suitable for little clips
Performing simply the most basic functions, such as rotating and cropping
2.EzGif
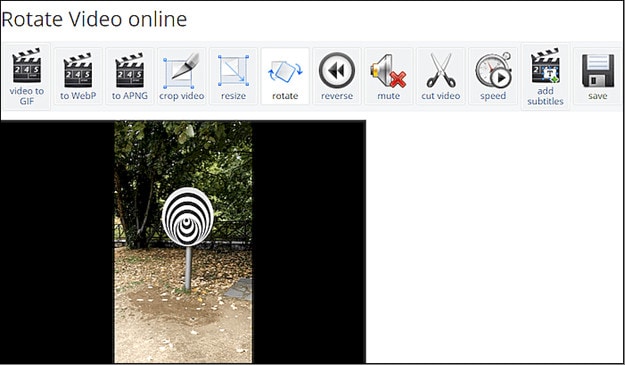
This unique internet tool not only creates animated GIFs but can also rotate video. You simply choose the clip from your local folder. However, the file’s maximum size is limited to 100MB. A basic tool for rotating the video through 90, 180, and 270 degrees. You can also vertically and horizontally flip the video before exporting it in a different format and encoding.
Features of EzGif
- A simple user interface to find your way around the website.
- Ability to do resizing and rotating of videos and images.
- Capable of video conversions and editing
Pros:
- Many video formats are supported, including MP4, WebM, AVI, MPEG, FLV, MOV, and 3GP.
- The rotation procedure is quick and simple to utilize.
- After rotating, provide a preview function.
Cons:
- The maximum file size is 100 megabytes.
- There are no filters or transitions, and only basic editing functions are available.
3.Videorotate
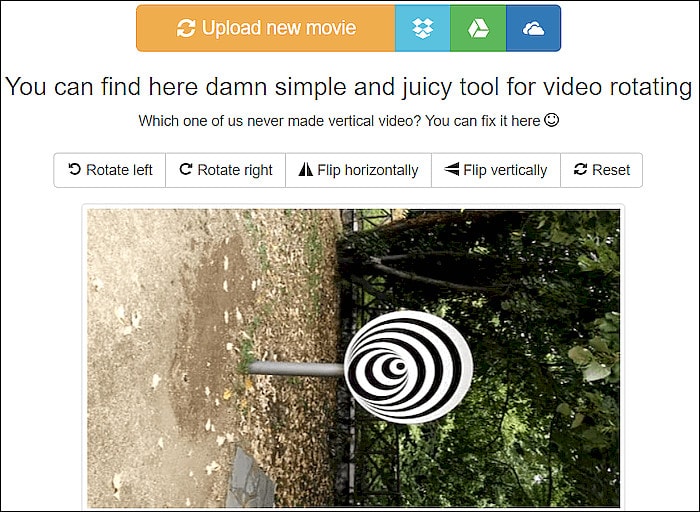
- This is a free online video rotator that is simple and quick to use. You can upload your video from a local folder or import a recorded clip from major cloud services like Dropbox, Google Drive, and One Drive, just like the other online services (there are buttons for each of them). You can flip the clip or rotate it left and right. Other video capabilities available on the site include cropping, stabilizing, and slicing.
Features of Videorotate
- Ability to crop, stabilize and slice videos.
Pros:
- Simple and straightforward to use
- Clips from your Dropbox, Google Drive, and OneDrive accounts can be uploaded.
- A specific “Reset” button is available.
Cons:
- For basic operations, a service for newcomers is available.
- Only a few video file formats are supported.
FAQs about Video Rotator
- What is the best way to rotate a video?
Use an easy-to-use video editing program. It’s easy to rotate a video, even if you’ve never edited one before. You can also use some media players.
- How do I rotate a video permanently?
In this guide, we will show you exactly how to rotate video in Windows with EaseUS Video Editor and save it permanently.
3.How can I rotate a video for free on the internet?
It’s simple to rotate a video online, and there are various services that offer free online video rotators.
- Videorotate
- Ezgif
- Video cutter on the internet
- How do I mirror a video on the internet?
The websites that support video rotation also offer the ability to “flip” the video vertically and horizontally. You’ll have “mirroring” frames in this manner as if you’re filming your pals in the mirror.
For macOS 10.14 or later
How to change the video orientation in Filmora
Step 1:Import the video file into Filmora, and then drag it to the timeline.
Step 2: To enter the video editing panel, double-click the video clip in the timeline. Locate the “Rotate” option under the “Transform” menu. You can drag the slider or enter a specific number to adjust the rotation value. You can rotate up to 360 degrees. When you enter “90” in the box, the video clip will be rotated 90 degrees.
By dragging the “Scale” slider, you can make the full image screen, or you can directly adjust its position, size, shape, etc., in the Viewer panel.
Step 3: After you are satisfied, click the export button. You can change the format here, or you can upload the file to YouTube.
Top 3 Free MP4 Video Rotators on Windows
Looking for the best free video rotator?
If you are looking for a free video rotator for windows, then this article has got you covered. A list of the top 3 free video rotators for windows has been listed.
- VSDC Free Video Editor
It is a highly functional video editing suite with easy controls. It provides anyone who is a beginner to easily access and edit the video easily.
It helps you rotate the videos in increments of 90 degrees, be it clockwise or anticlockwise )
VSDC is a free video editor with non-linear editing capabilities. Users may swiftly convert video and audio files from one format to another with VSDC. A built-in disk burning tool for DVDs is also included in the software. This free program, designed for educational purposes, can be used by businesses or individuals.
VSDC Free Video Editor features
- Built-In DVD Burning Tool
- Colour Blending And Filters
- Specific Multimedia Devices Creation
- Desktop Video Capture
- Export To Social Networking Sites
- Masking
- Non-Linear Video Editing
- Subpixel Accuracy
- Supports Popular Formats
- Video File Converter
Pros
- It’s completely free.
- There is no watermark.
- There are numerous free video editing programs available.
- Support a wide range of file formats
Cons
There isn’t a macOS version available.
Take a severe learning curve into consideration.
There are numerous premium-only features.
The timeline isn’t the same as most NLE editing software.
- Windows Movie Maker
The most well-known video rotator and editor are probably Windows Movie Maker. Most of us who grew up with Microsoft’s various operating systems have had access to it because it comes as a free download with most Microsoft products. It can handle a wide range of files and is generally simple to use. Adding features like sound, music, special effects, or even speeding up the video is simple, and you’ll love the variety of skins available.
For beginners, Windows Video Maker is ideal. It is available for free on Windows PCs and includes basic capabilities and workflow aspects found in professional video editing systems. Its user-friendly interface resembles a simplified version of a video editor timeline and is simple enough for even inexperienced editors to understand.
Features of Windows Movie Maker
- Customization Tool’s title
- Auto Movie Options
- Credit Customization Tool
- Special Effects Options
- Overlays for Transitions
Pros:
- Various video editing functions;
- A variety of output possibilities
Cons:
- Many different versions of the same product;
- No longer included in the Windows operating system.
3.EaseUS Video Editor
EaseUS Video Editor is one of the few most popular video rotators we have today. Its video editing provides tools that can change the video orientation by 90 degrees anticlockwise and clockwise, which can flip vertically and horizontally.
In terms of videos, adding great filters, sound, music, subtitles and other elements to have a great video output can be achieved using the EaseUS. Moreover, it accepts video formats and can convert files to MP4 and other great features.
Features of EaseUS Video Editor
- Can easily trim, cut, split, merge, rotate, and mix video clips.
- Ability to apply stylish video effects
- Can add or remove the watermark and reduce background or wind noise from a video.
Pros:
- User-friendly interface, perfect for beginners
- Easily trim, cut, split, merge, rotate, mix video clips
- A full range of free visual and audio effects
- Change of contrast, exposure, brightness, and other video aspects
- Use the voiceover function to add your comments to the video
Cons:
- The software has no version for macOS
Top 3 Free MP4 Video Rotators on Mac
- iMovie
The iMovie for Mac users is an exceptional video rotator. You can turn any video or movie you may have into an amazing masterpiece with more features due to the special after-effects it has. Simple application to use and navigate easily, although when importing video takes a while at certain times.
Features of the iMovie include
- Full range of options to modify
- Ability to enhance colour settings
- Easily crop and edit video clips ease
- Ability to change the speed of clips.
Pros:
- Nice interface;
- The function is to create fun Movie Trailers.
Cons:
- Supports only a few video formats;
- Pre-processing and import trans-coding can be time-consuming.
- Movavi Video Editor
Movavi has a free version that is easy to use, especially for beginners. It allows you to add titles, filters, transitions, and special effects to your videos and photographs to make attractive movies. You can use the animation to smoothly move things around the screen in your film. On the multi-track timeline, you can add as many tracks as you wish. From the expanded built-in collection, you can get more example video clips, stickers, and audio tracks.
Features of Movavi Video Editor
- You can upload files and photographs in almost any format.
- To make videos automatically, use the Montage Wizard.
- Transition Wizard allows you to quickly put together slideshows.
- Enhance image quality by cutting, cropping, and rotating videos on the timeline.
- Apply artistic filters, and make transitions between portions as smooth as possible.
- Create animated headlines, stickers, callouts, and video overlays:
Pros:
- It’s appropriate for newcomers and casual users alike.
- A number of video formats are supported, including.mov (QuickTime)
- Chroma Key and Slow Motion are examples of special effects.
Cons
- Only the premium version supports the advanced features.
- It uses the basic colour grading tool
- QuickTime Player
The key advantage of Apple’s QuickTime is that it comes pre-installed on your Mac’s macOS operating system. It’s powerful enough to rotate your clip, yet it’s simple enough for beginners to do. iTunes files can be played and edited with QuickTime. After rotation, it exports a new video file, leaving the old clip on the Mac. The output video will be compressed slightly, resulting in a smaller rotational video file than the original.
Features of QuickTime Player
- Anything can be recorded, including video, audio, and the screen.
- Cropping, audio detachment, combining, and rotation are all simple video editing techniques.
- From 4K to 480p video compression
- Quickly share your video: directly upload videos to YouTube
Pros:
- With macOS, it comes pre-installed.
- Work with iTunes files Streaming video player with no configuration
Cons:
- Only QuickTime Pro 7 unlocks the editing feature.
- There will be no more Windows versions.
- It isn’t compatible with standard subtitle files.
Top 3 Free MP4 Video Rotators on Android
When we use a smartphone to capture a video or download one from a website, we occasionally discover that the video has been inverted. As a result, we’ll require a video rotator app to correct the problem. On the market, there are many different sorts of tools for various platforms. However, you may have discovered that separating the wheat from the chaff can be difficult at times. To save you time, I’ve compiled a list of 3 video rotator applications for Android
- VivaVideo
VivaVideo is one of the top movie producers and free video rotators for Android devices as a media editor. This application allows you to alter the orientation of your videos. Aside from rotating videos, this software also includes cropping, combining, cutting, and other editing features. “The best video editor software is VivaVideo - Video Maker App,” an Android expert previously said. This program is a video producer as well as an editor.
Features of VivaVideo
- It allows you to add music to videos.
- Combine videos clips into one video
- Can apply video effects.
- After you’ve finished editing your videos, you may save and share them on YouTube and TikTok! To rotate video, use this program!
Pros
- It has an In-app camera with live effects previews for capturing videos.
- More than 60 effects to choose from with additional downloadable effects.
- Enhance the videos using themes.
- Ability to Merge videos and create montages with storyboarding features
- Edit frames within a video
Cons
- There is no negative review to say about this app
2.Google Photos
This app may already be installed on your smartphone, but you are unaware of its full potential. This program includes a built-in picture and video editor in addition to backing up your photos. This program includes three essential video editing tools that are extremely basic and easy to use.
The first is to stabilize the video; if your video is unsteady, you can use this option in Google Photos to stabilize it. You may also use the timeline below the video to cut the video. If you mistakenly captured the video in the wrong orientation, there is a tool to rotate it.
Features of Google Photos
- You can modify photographs and videos in Google Photos.
- On Google Photos, make a collage or a movie.
- Recover photos or videos that were recently erased.
- Clear off some space on Google Photos…
- Place photos in the Archive.
Pros
Google Images automatically backs up all of your device’s photos and videos.
Despite its many advantages, the reason I choose Google Photos is that it helps me save space on my smartphone.
The original quality of images stored in Google Photos is really high. Photos and videos are saved in the same resolution as when they were taken.
Over time, Google has improved the Google Photos interface, and it now incorporates AI to provide consumers with even better performance.
Cons
There aren’t many effects, and there aren’t any other editing tools.
The lack of a password-protection option in Google Photos is annoying. Some photos are private, and you may not wish to share them with others.
Users of Google Photos will no longer have limitless storage.
3Adobe Rush
Adobe Rush is a new video editor that Adobe released via a partnership with Samsung’s latest flagship smartphone. This app is a simple yet powerful tool for editing videos on the go, on your smartphone.
This app comes with some powerful tools which you find on some high-end video editing apps. You get a timeline interface to edit your videos perfectly, and you get some music recommendations right into the app.
Features Of Adobe Rush
- In the timeline, you can make changes to your video.
- Audio can be added and refined.
- Change the colour, size, and position of the video.
- Make a title.
- Add transitions, pan and zoom effects, and reframe your clips automatically.
- Change the clip’s attributes.
- Change your video’s aspect ratio.
- Create the illusion of a picture-in-picture effect.
Pros
- It has a user-friendly UI that is responsive and snappy.
- It’s easy to use and provides helpful advice for newcomers.
- It enables Adobe users to quickly and easily produce stunning videos that are customized to their preferences.
- When compared to its competitors, exporting files is a breeze.
- Unlike most of its competitors, it comes with good colour and title tools.
- YouTube, Facebook, Vimeo, Snapchat, Instagram, and Twitter are just a few of the social media channels where the finished files can be simply shared.
- It synchronizes projects between desktop and mobile devices, making them more accessible.
Cons
- When compared to its competitors, it is a little costly.
- It renders projects slowly and only supports three transitions.
- The app does not have storyboard templates and cannot specify the exact structure for output files.
- It only comes with a few video and audio editing capabilities.
- Many standard video effects are missing.
Top 3 Free MP4 Video Rotators on iPhone
1.Splice
Trimming, cropping, effects, titles, speed adjustments, animation, transitions, and music are all available in this well-known video editor, which has a cultish following of dedicated Splicers.
Splice’s music library is one of its strongest assets. It offers a large selection of free music and sound effects to layer over your video, as well as the ability to sync your movie to the beat of your soundtrack.
Features of Splice
Clips should be cropped and trimmed to focus on the highlights.
With an Audio Library and iTunes Integration, you may add music to your videos.
To smooth transitions between clips and images, use transitions.
Enhance videos with effects.
Pros:
- Developed by GoPro, award-winning, highly regarded.
Cons:
- Only available on iOS devices.
2. Clips
It’s easy to miss pre-loaded apps like Apple’s Clips, but this video editing tool has lots of impressive features to enjoy, thanks to the weight of the tech giant’s greatest brains behind it. Take, for example, their live tiles setting. You can use this to generate animated captions and titles that appear as you speak.
To liven things up, you may add animated emojis and backgrounds, and music tracks dynamically sync to the length of your video.
Features of Clips
- Ability to generate animated captions
- Full access to Animated emojis and backgrounds
- Ability to have your music sync to your videos
Pros:
- Simple to use, unique features, and Apple’s support.
Cons:
- It’s only for iOS devices (obviously! ), and it has trouble with a big number of clips.
3. Quik
You may apply transitions and effects to up to 200 photographs and video clips from your photo library or GoPro Plus with this free software. You may not only crop, zoom, and rotate photos and video clips, but you can also customize them with 26 different themes, fonts, effects, and artwork.
You may make HD 1080p or 720p films for social sharing in cinema, square, or portrait formats, and you can store your draft creations for up to seven days.
Features of Quik
- Everything that is available for free.
- There are no limits to the number of mural events.
- Editing is unrestricted.
- There are now a total of 25 more photo and video filters.
Pros:
- Tons of features, including access to 100+ free songs,
- Flashbacks and QuikStories, which make videos based on your most recent footage,
- syncs footage to the beat of your soundtrack, and AI editing help.
Cons:
- Limited control and no trimming option; customers have claimed that it is occasionally glitchy.
Top 3 Free MP4 Video Rotators Online
1.Online Video Cutter
This web tool comes in helpful when you need to rapidly edit a small video file. It is not necessary to install it; you may use it right from your browser. The clip can only be rotated 90, 180, or 270 degrees. It’ll come in handy, especially if you’ve closed the video in portrait mode and want to watch it on a big screen. The service’s provider says that the files will be automatically erased from the servers a few hours after you accomplish your task, resulting in a high level of security.
Features of Online Video cutter.
- It Supports Any Video Format. …
- Completely Online for you to access
- Additional Settings to make more edits to videos
- Easy to use, User-friendly interface.
Pros:
It has a very simple user interface.
You do not need to pay for a license to utilize it.
Almost every video format is supported.
Cons:
Only suitable for little clips
Performing simply the most basic functions, such as rotating and cropping
2.EzGif
This unique internet tool not only creates animated GIFs but can also rotate video. You simply choose the clip from your local folder. However, the file’s maximum size is limited to 100MB. A basic tool for rotating the video through 90, 180, and 270 degrees. You can also vertically and horizontally flip the video before exporting it in a different format and encoding.
Features of EzGif
- A simple user interface to find your way around the website.
- Ability to do resizing and rotating of videos and images.
- Capable of video conversions and editing
Pros:
- Many video formats are supported, including MP4, WebM, AVI, MPEG, FLV, MOV, and 3GP.
- The rotation procedure is quick and simple to utilize.
- After rotating, provide a preview function.
Cons:
- The maximum file size is 100 megabytes.
- There are no filters or transitions, and only basic editing functions are available.
3.Videorotate
- This is a free online video rotator that is simple and quick to use. You can upload your video from a local folder or import a recorded clip from major cloud services like Dropbox, Google Drive, and One Drive, just like the other online services (there are buttons for each of them). You can flip the clip or rotate it left and right. Other video capabilities available on the site include cropping, stabilizing, and slicing.
Features of Videorotate
- Ability to crop, stabilize and slice videos.
Pros:
- Simple and straightforward to use
- Clips from your Dropbox, Google Drive, and OneDrive accounts can be uploaded.
- A specific “Reset” button is available.
Cons:
- For basic operations, a service for newcomers is available.
- Only a few video file formats are supported.
FAQs about Video Rotator
- What is the best way to rotate a video?
Use an easy-to-use video editing program. It’s easy to rotate a video, even if you’ve never edited one before. You can also use some media players.
- How do I rotate a video permanently?
In this guide, we will show you exactly how to rotate video in Windows with EaseUS Video Editor and save it permanently.
3.How can I rotate a video for free on the internet?
It’s simple to rotate a video online, and there are various services that offer free online video rotators.
- Videorotate
- Ezgif
- Video cutter on the internet
- How do I mirror a video on the internet?
The websites that support video rotation also offer the ability to “flip” the video vertically and horizontally. You’ll have “mirroring” frames in this manner as if you’re filming your pals in the mirror.
Also read:
- New Dubbing Videos With Voiceovers | Wondershare Filmora Tutorial
- New In 2024, How to Create a Light Sweep (Shine) Effect with Filmora
- 2024 Approved How to Create a Clideo Slideshow
- New In 2024, Here, You Will Get the Basic Steps to Use the Speed Ramping Effect in Your Videos by Wondershare Filmora Software. In This Article, You Get a Guide to Adding the BCC Glitch Effect to Give Your Sports Montages a More Professional Look
- 2024 Approved Storyboards Are Amazing Way if You Want to Present Your Story in a Visual Way, Like Explaining Any Process or Giving Any Information. It Is a Graphic Layout to Tell You a Story
- New How To Create Quiz Videos Detailed Guide for 2024
- New 2024 Approved 2 Solutions to Cut Video in VLC on Windows
- New How to Create Emoji on Mac That Take Less Than 10 Mins
- Updated 2024 Approved With This Article, We Will Be Looking at Steps to Rotate a Video in Cyberlink PowerDirector to Help You when Required. We Have Also Mentioned the Steps You Will Need to Follow in Wondershare Filmora
- New What Can Be Better than Converting Apple Video Format Into Other Formats so that You Can Use the Files Easily. We Have a Few Options that You Can Use for This Purpose
- Make Super Easy Coin Magic With Filmora for 2024
- Updated Getting Into The Details A Review of Kodak LUTs for 2024
- How To Create Transparent Background On Picsart
- New All Things About Adding Effects In Kinemaster
- New 2024 Approved How to Create Your Own LUTs for Your Video with Filmora
- Updated Recommended Video Background Changers
- Updated 2024 Approved Mastering FFmpeg How to Merge Audio and Video with Ease
- In 2024, How To Combine Videos On TikTok
- Updated 2024 Approved 15 Camera Shake Preset for Premiere Pro to Add Camera Shake with Simple Keyframes. Each Preset Is Editable with Easy Steps. Make Your Video Shocking and Impressive with These Camera Shake Effects
- New 2024 Approved Top Best Free LUTs For Premiere Pro
- New 2024 Approved 4 Methods for Rotating Your GoPro Videos Professionally
- Updated Top 10 Picks for Flawless Slow Motion Video Generation for 2024
- New The Premiere Pro Video Templates Help Make Original Content of Broadcast Quality. The Article Introduces 10 Free Premiere Pro Templates that Are Sure to Make Your Life Easy for 2024
- In 2024, Top 5 Best Video Denoisers
- Updated Step by Step to Rotate Videos Using OBS for 2024
- 2024 Approved All About GIF Keyboard That You May Want to Know
- New Make Eye Zoom Transition Effect with Filmora for 2024
- Updated AR Is a Trend These Days. Here, You Can Browse the List of Top 10 Picks for AR Video Editing Apps
- Updated How to Create a Bokeh Effect for 2024
- 2024 Approved Text Animation Intro Tutorial in Filmora
- Updated 2024 Approved An Intro Video Describing You and Your Content Is the First and the Foremost Thing Which a Viewer Sees. Thinking of How to Make an Interesting Intro Video, This Blog Is Surely a Supportive Guide for You. Learn More Here
- Updated Learning How to Slow Down a Video on iPhone Properly for 2024
- Updated How to Make a DIY Vlog or Video for 2024
- 2024 Approved Learn How to Trim/Crop Video in Microsoft PowerPoint
- Create A Freeze Frame Sequence In Your Videos for 2024
- New In 2024, There Are Many Vlogging Cameras You Can Find in the Market. However, to Get a Good Start in Vlogging, some Sony Vlogging Cameras and Canon Vlog Cameras Are to Consider. This Article Introduces You to the Respective List
- 2024 Approved Do You Want to Use a Video Editor for Your iOS Device? This Article Introduces LumaFusion, a Perfect Multi-Track Video Editor Designed to Cater to Your Needs
- How to Record Super Slow Motion Videos on Your Phone?
- 2024 Approved Turn Your Blog Content Into Audio Podcasts to Reach a Wider Audience and Increase Reader Participation
- Updated 2024 Approved 15 Best Free MP4 Video Rotators Windows,Mac, Android, iPhone & Online
- Updated 2024 Approved Color Matching Is the Trickiest Part of Graphic Designing. Learn in Detail About Using Canva Color Match Ideally While Working on Your Pins, Social Media Posts, and Other Designs
- Fix Cant Take Screenshot Due to Security Policy on Meizu 21 | Dr.fone
- 3 Ways of How to Get Someones Apple ID Off iPhone 15 Plus without Password
- In 2024, Reasons why Pokémon GPS does not Work On Nubia Z50S Pro? | Dr.fone
- New Is It That Easy to Make My Own Animated Character, In 2024
- In 2024, How to use Pokemon Go Joystick on Samsung Galaxy F15 5G? | Dr.fone
- In 2024, Top Apps and Online Tools To Track Infinix Smart 7 HD Phone With/Without IMEI Number
- How to Use Google Assistant on Your Lock Screen Of Poco C50 Phone
- Fix App Not Available in Your Country Play Store Problem on OnePlus Open | Dr.fone
- Best Fixes For Honor X50 Hard Reset | Dr.fone
- Register | Online for 2024
- All About Factory Reset, What Is It and What It Does to Your Infinix Hot 40? | Dr.fone
- Different Methods for Resetting Realme Narzo 60 5G Phones with Screen Locked and Not | Dr.fone
- How to Unlock Itel S23 Phone without Google Account?
- All Must-Knows to Use Fake GPS GO Location Spoofer On Realme GT Neo 5 | Dr.fone
- How to Remove MDM from iPhone SE without losing data?
- Updated Perfect Guide To Excel in TikTok Live Shopping for 2024
- Cellular Network Not Available for Voice Calls On Vivo S17 | Dr.fone
- Unlock Apple ID without Phone Number On iPhone 6s
- In 2024, Why does the pokemon go battle league not available On Vivo V30 Lite 5G | Dr.fone
- In 2024, Full Guide to Bypass Nokia C22 FRP
- In 2024, Hassle-Free Ways to Remove FRP Lock on Oppowith/without a PC
- Unlock Your iPhone 15 Plus in Minutes with ICCID Code Everything You Need to Know
- In 2024, How to Transfer Data from Oppo A78 5G to BlackBerry | Dr.fone
- How To Unlock Apple iPhone X Official Method to Unlock Your Apple iPhone X
- In 2024, 5 Most Effective Methods to Unlock Apple iPhone 8 in Lost Mode
- In 2024, How to Fake GPS on Android without Mock Location For your Realme GT Neo 5 SE | Dr.fone
- Will iSpoofer update On Realme GT 5 | Dr.fone
- Pokemon Go No GPS Signal? Heres Every Possible Solution On Vivo V29 Pro | Dr.fone
- Top 5 Tracking Apps to Track Samsung Galaxy A25 5G without Them Knowing | Dr.fone
- Top 4 Android System Repair Software for OnePlus 11 5G Bricked Devices | Dr.fone
- 3 Ways to Fake GPS Without Root On Realme V30 | Dr.fone
- Title: In 2024, How to Add Subtitles to Videos With Kapwing
- Author: Morgan
- Created at : 2024-05-19 05:12:01
- Updated at : 2024-05-20 05:12:01
- Link: https://ai-video-editing.techidaily.com/in-2024-how-to-add-subtitles-to-videos-with-kapwing/
- License: This work is licensed under CC BY-NC-SA 4.0.
