
In 2024, How to Do Censor Effects with Filmora

How to Do Censor Effects with Filmora
There are many aspects to consider when it comes to publishing a video. Safety and privacy aspects are some of them. If you’re looking to blur out a bystander or cut out profanities from your video with Filmora, this is the right article for you.
Part 1. How to add a beep sound to a video with Filmora
Filmora’s powerful video editing menu includes easy tweaking on audio. You can censor any part of speech you want to exclude from your video with just these simple steps.
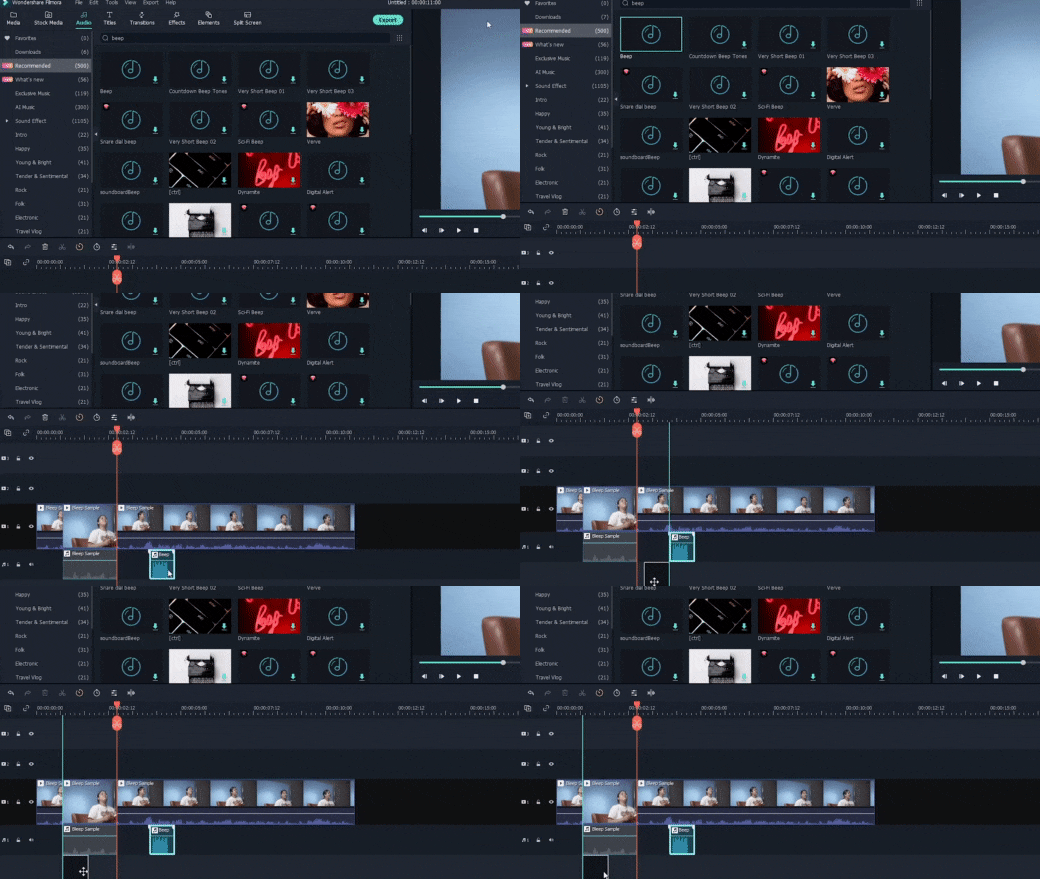
Step1 Create a new project and import the video to Filmora.

Step2 Separate the audio component from the video by right-clicking on the video and selecting the Detach Audio option. You can now edit each of them individually.

Step3 Mark the part to place the start of the beep using the playhead and click the Split icon on the editor’s toolbar.

Step4 Place the playhead at the end of the censored segment and click Split. Double-click on the segment to open the audio editing menu, then you can remove that part of the audio or lower the volume.

Step5 Click the Audio>Audio Effects menu on the upper left corner of the screen. After you find the Beep effect, drag the track to the audio timeline and place it in between the split section. Adjust trimming and volume until the censor is placed correctly.
Part 2. How to add mosaic to video with Filmora
Whether you want to hide a passerby’s face or your own, or even other types of objects, Wondershare Filmora is ready to take on the task. While its nifty face-off function automatically follows the movement of a marked face, the mosaic effect is the fast and perfect solution for a static object in the video.
Step1 After importing a video to Filmora, tap on the Effects tab and find the Mosaic filter from the gallery.

Step2 Drag the Mosaic filter to the timeline just above the main video track.

Step3 A yellow box will appear in the viewer. You can drag and adjust its size to hide the targetted object. You can also adjust the opacity and intensity of the effect using the adjustment menu, accessible when you double-click the yellow box.

If the targetted object moves, you can set the automatic tracking before adding the mosaic filter by clicking on the Motion Tracking>Start Tracking located above the timeline. Before you place the filter, preview and adjust the tracking frame to ensure tight proof censor.

Conclusion
Wondershare Filmora offers a large array of special effects that goes beyond simply trimming, cropping, splitting, or adding transitions to your video. You can add some special effects to your video as well, such as Blur, Face-Off, Mosaic, Tilt Shift and Jump Cut at Beat. On top of completing it with audio effects, you can also add subtitles or typography easily.
With Filmora, you can always enhance your video within minutes with excellent quality.
Free Download For Win 7 or later(64-bit)
Free Download For macOS 10.14 or later
Free Download For macOS 10.14 or later
Find Out The Best Dark Moody LUTs During Editing
Look-up tables (LUTs) are visual editing tools used as color presets. By using LUTs, you can enhance color grading within photos and videos. This way, your visual content looks more aesthetic, engaging, and appealing. Meanwhile, within LUTs, there are several color presets to use. The most popular one is dark moody LUT. In this article, you’ll find useful information on dark moody LUTs with the best recommendations.
Part 1: What Do Dark Moody LUTs Represent?
Like another color preset, dark moody LUTs provide special and unique color grading. So, you’ll experience darkened shadows, desaturated tones, blue tints, green hues, and others. The dark preset filters offer moody looks with pitch-dark effects to your visual content. Hence, these types of LUTs add a foreboding atmosphere.
Dark and moody LUTs are used in horror films or thriller cinematography. After all, they provide dedicated dark contrast with gloomy looks to the visual content. Hence, a special dark horror effect is blended, which adds mystery, tension, and fear. For adding dark moody LUTs, several tools are available for enhancing colors.
Empower your videos with a new mood using different LUTs. Filmora now offers 100+ top-quality 3D LUTs cover a broad range of scenarios. Transform your videos with Filmora’s powerful 3D LUTs.
Apply LUT on Videos Apply LUT on Videos Learn More

Part 2: Best Dark Moody LUTs You Can Find
LUTs are perfect for enhancing color gradients with minimal effort. This means you don’t need to spend long hours on video editing. With dark moody LUTs, there is an option to make your video more cinematic. Let’s find some of the best dark moody LUTs to make things easier:
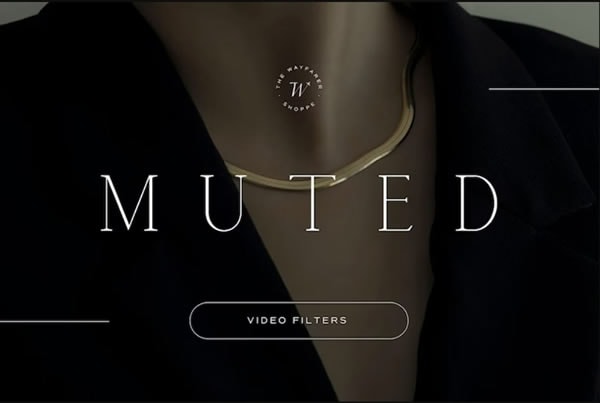
1. Dark Moody LUTS Fashion
Elevate your photos and videos with these cinematic dark moody LUTs filters. There are 4 LUT presets that could be utilized to blend dark contrast. Hence, you can provide muted looks to your visual content with a mystery tone. The LUTs are ideal for fashion use because of dark shadows. For social media content, these LUTs are ideal.
2. Dark and Moody Cinematic 3D LUTs
Videography and photography are incomplete without color enhancement through editing. Saving time, these dark and moody cinematic 3D LUTs pack is a perfect solution. If you want desaturated contrast with muted colors, there are 8 different LUTs to assist. Apply all the LUT preset filters easily without hassles. With 4 separate files, the LUTs will suit almost every editing tool.

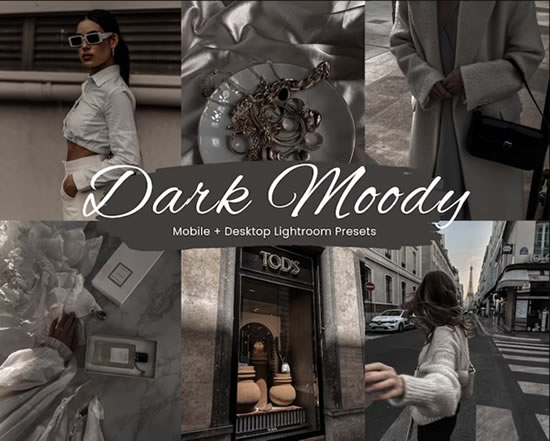
3. Dark Moody Lightroom Presets
Improvise your closest visual media with dark moody Lightroom presets. You will get 20 different dark LUTs Premiere Pro free in this pack. All available LUT filter presets are unique, with different dark contrasts and tones. Thus, you can add a moody touch with desaturated color gradients. This way, your photos, and videos will enlighten with a murk appearance.
4. Film Noir LUTs and Presets Pack
Adding film-like dark cinematic looks is possible with this LUTs preset pack. The availability of 50 preset filters allows adding dark moods to your visual media. The content becomes visually appealing with crushed black hues and darker and gloomy textures. The filters are instantly applied and can be edited with desired intensity and contrast.

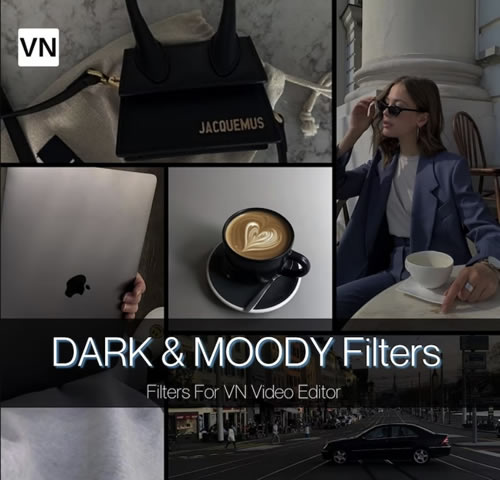
5. Dark & Moody Aesthetic Filters
This dark and moody LUTs filter pack has everything to beautify your photos and videos. With 5 different filter presets, transform color gradients with cool hues and less vibrant colors. This will provide dark aesthetic looks to your visual content with desaturated tone. This exceptional grading with moody filters allows upscaling colors for social media content.
6. MOODY NORDIC LUTS
The Nordic region is known for its attractive landscapes with dark weather. Adding such LUTs to your videos enhances color hues with gloomy and dark gradients. This will provide cinematic looks to your videos in an engaging way. The available LUTs are in 5 color presets, and each one is unique. Thus, your travel videos can become more pleasing using Nordic effects.

Part 3: Wondershare Filmora: A Great Platform For Using Dark Moody LUTs
For video upgradation, editing is essential to overcome underlying visual hindrances. Meanwhile, a good video editor is necessary for this purpose. Meet Wondershare Filmora that is a creative video editing platform for content creators. Using this tool, you can use 100+ LUTs, including dark moody LUTs. You can also utilize elements, stickers, transitions, and other effects.
Add LUTs on Video For Win 7 or later(64-bit)
Add LUTs on Video For macOS 10.14 or later
Filmora is the industry-leading tool for enhancing video quality with suitable color gradients. The filters are fully creative with adjustable contrast and saturation. Meanwhile, Filmora has added 100+ LUTs in its new updates. This means there are more than 200 LUTs in Filmora. When it comes to usability, Filmora offers best-in-class tools with amazing functionalities.

Key Features Of Wondershare Filmora
Filmora is an easy-to-use platform that delivers video editing with optimized solutions. Let’s find more of its features that make it an exceptional tool:
- Audio Support: With Filmora, users can add songs, voiceovers, and music to their videos. This can make their videos more enchanting. Meanwhile, there is also an option to merge, split, crop, or customize audio speed. Using an audio visualizer is also a possibility by adjusting audio bass, treble, and frequencies.
- Color Grading: There is a color wheel by which you can set desired color palette. This way, you can transform your video into desired color contrast with necessary gradients. The color intensity could also be adjusted from 0 – 100% range. With available LUT preset filters, different color effects could be applied.
- Split Screen: The availability of a split screen function allows for playing different videos at one time. Thus, combining or comparing different videos will be easier to process. This will save you time and simplify your video editing procedure.
- Text-to-Speech: Filmora’s text-to-speech allows you to create voiceovers from text files. This will enrich your video and give useful content with more elements. The transcription process is quick and fast with more accuracy. This feature is available in up to 16 types of languages.
Conclusion
Using LUTs, you can enhance and optimize the color grading of your video. Meanwhile, if your video is horror or suspense relevant, use dark LUTs Premiere Pro free. This adds dark shades to your video with desaturated contrasts and crushed black hues. So, if you want the best dark moody LUTs free download, Filmora is the right solution. This tool provides unique and special LUTs in different categories.
Add LUTs on Video For Win 7 or later(64-bit)
Add LUTs on Video For macOS 10.14 or later
Apply LUT on Videos Apply LUT on Videos Learn More

Part 2: Best Dark Moody LUTs You Can Find
LUTs are perfect for enhancing color gradients with minimal effort. This means you don’t need to spend long hours on video editing. With dark moody LUTs, there is an option to make your video more cinematic. Let’s find some of the best dark moody LUTs to make things easier:
1. Dark Moody LUTS Fashion
Elevate your photos and videos with these cinematic dark moody LUTs filters. There are 4 LUT presets that could be utilized to blend dark contrast. Hence, you can provide muted looks to your visual content with a mystery tone. The LUTs are ideal for fashion use because of dark shadows. For social media content, these LUTs are ideal.

2. Dark and Moody Cinematic 3D LUTs
Videography and photography are incomplete without color enhancement through editing. Saving time, these dark and moody cinematic 3D LUTs pack is a perfect solution. If you want desaturated contrast with muted colors, there are 8 different LUTs to assist. Apply all the LUT preset filters easily without hassles. With 4 separate files, the LUTs will suit almost every editing tool.

3. Dark Moody Lightroom Presets
Improvise your closest visual media with dark moody Lightroom presets. You will get 20 different dark LUTs Premiere Pro free in this pack. All available LUT filter presets are unique, with different dark contrasts and tones. Thus, you can add a moody touch with desaturated color gradients. This way, your photos, and videos will enlighten with a murk appearance.

4. Film Noir LUTs and Presets Pack
Adding film-like dark cinematic looks is possible with this LUTs preset pack. The availability of 50 preset filters allows adding dark moods to your visual media. The content becomes visually appealing with crushed black hues and darker and gloomy textures. The filters are instantly applied and can be edited with desired intensity and contrast.

5. Dark & Moody Aesthetic Filters
This dark and moody LUTs filter pack has everything to beautify your photos and videos. With 5 different filter presets, transform color gradients with cool hues and less vibrant colors. This will provide dark aesthetic looks to your visual content with desaturated tone. This exceptional grading with moody filters allows upscaling colors for social media content.

6. MOODY NORDIC LUTS
The Nordic region is known for its attractive landscapes with dark weather. Adding such LUTs to your videos enhances color hues with gloomy and dark gradients. This will provide cinematic looks to your videos in an engaging way. The available LUTs are in 5 color presets, and each one is unique. Thus, your travel videos can become more pleasing using Nordic effects.

Part 3: Wondershare Filmora: A Great Platform For Using Dark Moody LUTs
For video upgradation, editing is essential to overcome underlying visual hindrances. Meanwhile, a good video editor is necessary for this purpose. Meet Wondershare Filmora that is a creative video editing platform for content creators. Using this tool, you can use 100+ LUTs, including dark moody LUTs. You can also utilize elements, stickers, transitions, and other effects.
Add LUTs on Video For Win 7 or later(64-bit)
Add LUTs on Video For macOS 10.14 or later
Filmora is the industry-leading tool for enhancing video quality with suitable color gradients. The filters are fully creative with adjustable contrast and saturation. Meanwhile, Filmora has added 100+ LUTs in its new updates. This means there are more than 200 LUTs in Filmora. When it comes to usability, Filmora offers best-in-class tools with amazing functionalities.

Key Features Of Wondershare Filmora
Filmora is an easy-to-use platform that delivers video editing with optimized solutions. Let’s find more of its features that make it an exceptional tool:
- Audio Support: With Filmora, users can add songs, voiceovers, and music to their videos. This can make their videos more enchanting. Meanwhile, there is also an option to merge, split, crop, or customize audio speed. Using an audio visualizer is also a possibility by adjusting audio bass, treble, and frequencies.
- Color Grading: There is a color wheel by which you can set desired color palette. This way, you can transform your video into desired color contrast with necessary gradients. The color intensity could also be adjusted from 0 – 100% range. With available LUT preset filters, different color effects could be applied.
- Split Screen: The availability of a split screen function allows for playing different videos at one time. Thus, combining or comparing different videos will be easier to process. This will save you time and simplify your video editing procedure.
- Text-to-Speech: Filmora’s text-to-speech allows you to create voiceovers from text files. This will enrich your video and give useful content with more elements. The transcription process is quick and fast with more accuracy. This feature is available in up to 16 types of languages.
Conclusion
Using LUTs, you can enhance and optimize the color grading of your video. Meanwhile, if your video is horror or suspense relevant, use dark LUTs Premiere Pro free. This adds dark shades to your video with desaturated contrasts and crushed black hues. So, if you want the best dark moody LUTs free download, Filmora is the right solution. This tool provides unique and special LUTs in different categories.
Add LUTs on Video For Win 7 or later(64-bit)
Add LUTs on Video For macOS 10.14 or later
End Your Struggles with Choppy Playback on DaVinci Resolve. Read This Guide to Find Effective Fixes and Reliable DaVinci Resolve Slow Playback Alternatives
Davinci Resolve is a well-known video editing software with an intuitive interface. This all-in-all program combines editing, color correction, motion graphics, and visual effects. Video editors don’t need to switch to many apps when DaVinci Resolve can do different tasks. High-quality editing of original camera images can only be done through this tool.
Hollywood films and series use this software to streamline the show. Overall, it’s incredible software, but sometimes DaVinci Resolve slow playback issues arise. To fix this issue, you can read this guide for effective and guaranteed solutions. There, you will also find a trustworthy alternative to avoid DaVinci Resolve slow-down playback.
Slow Motion Video Maker Slow your video’s speed with better control of your keyframes to create unique cinematic effects!
Make A Slow Motion Video Make A Slow Motion Video More Features

Part 1: Finding the Best Resolution for DaVinci Resolve Slow Playback Issue
As Highlighted, DaVinci Resolve is a good video editor for all kinds of use cases. Although it’s a powerful tool, it still shows some errors like choppy and slow playback. Modern problems require modern solutions. Thus, read the given fixes to make DaVinci Resolve faster playback. All the methods are easy and helpful for a smooth playback experience on Windows and macOS.
- Solution 1: Lower Playback Resolution
- Solution 2: Change Timeline Resolution
- Solution 3: Enable Render Cache
- Solution 4: Disable the Live Save Feature
- Solution 5: Use Proxy Media Files
- Solution 6: Disable Color Grades
Solution 1: Lower Playback Resolution
In DaVinci Resolve, full timeline proxy resolution is set by default. To enjoy a smooth playback while editing, you should reduce the playback resolution. Open your project in DaVinci Resolve and press the “Playback” menu from the top. Then, select “Timeline Proxy Resolution” and pick one either “Half” or “Quarter” options. It will reduce the playback resolution and speed up the playback.

Solution 2: Change Timeline Resolution
DaVinci Resolve can work on 4K high-resolution footage that might disrupt the playback. So, cutting down the resolution to speed up your playback is suggested. To do so, click the “Settings” icon from the bottom right side and enter the “Project Settings” window. Expand the “Time Resolution” menu and choose 1920x1080 HD if working on 4K or high resolutions. Now, apply the changes by hitting on “Save.”
Adjust the timeline resolution and right-click on the timeline in the Media Pool. Choose “Timeline” and then “Timeline Settings.” Lastly, check the “Use Project Settings” option and decide a resolution to click on “OK.”

Solution 3: Enable Render Cache
It’s another solution to fix the DaVinci resolve slow playback. Render cache is a file that stores the rendered frames and makes the rendering faster. Start by hitting the “Playback” option and choose “Render Cache.” Then, you’ll see 3 options: None, Smart, and User. You should select “Smart” and let DaVinci Resolve pick one clip to be cached.

Solution 4: Disable the Live Save Feature
Every change you make gets saved with the Live Save option in DaVinci Resolve. If your remote drive is linked, this feature can drag the playback speed down. You can disable it for a DaVinci resolve faster playback.
Look for the “User Preference” menu and click on the top left side button of DaVinci Resolve. Go to the “Preferences” under the user tab. From the “Project Save and load,” check the “Disable Live Save” option. Now, you should remember to manually save your projects after editing.

Solution 5: Use Proxy Media Files
Another solution is to use proxy media during the project editing. Proxy files are small copy files transcoded from a larger, original video file. Get the proxy file to increase the playback and go to your “Media Pool” in DaVinci Resolve. Right-click on the intended file and choose “Generate Proxy Media” from the list.

Solution 6: Disable Color Grades
If you are still failing to resolve the slow playback issue on Davinci Resolve, try this fix. Disable color grades and other effects in the first place. To do so, head to the DaVinci Resolve Edit Page. After getting there, press the “Bypass Color Grades and Fusion Effects” button from the top right side. This way, you can surely solve the DaVinci Resolve slow-down playback error.

Part 2: What Makes a Slow-Motion Video Good?
After resolving the DaVinci Resolve slow playback, let’s continue further editing. Create a slow-motion video to emphasize certain information in the video. It involves technical and creative elements for a good-quality video. You can read this section to understand the points that contribute to a good Slow-motion video.
- Frame Rate: Keep the frame rate higher for a good slow-motion video. In this regard, you can use common frame rates such as 60fps, 120fps, and 140fps. Moreover, you should pick video clips that are originally captured in a high frame rate.
- Shutter Speed: Minimize the motion blur in footage and use a faster shutter speed. It is important when you are shooting fast-moving objects. Adjusting the shutter speed can enhance the look of slow-motion videos.
- Resolution: A good slow motion is only possible when it is captured in high-quality resolution. Better image quality allows more detail in such footage. Moreover, you can optimize the camera settings for the desired resolution.
- Editing and Timing: Thoughtfully chosen clips, timings, and editing can set the stage. Thus, maintain a cohesive flow and pay more attention to the video pacing. Edit all segments in a way that fits seamlessly to contribute a good slow-motion video.
Part 3: Making Slow Playback Issues Go Away with Perfect Alternative: Wondershare Filmora
Sometimes, issues like DaVinci Resolve slow down playback do not go easily. Resolving them requires a lot of effort that might prove frustrating beyond limits. So, it seems better there to switch towards a better option. In this regard, Wondershare Filmora is the most effective solution in video editing. Professionals can rely on Filmora, which offers AI-integrated features for easy video-making.
Users can use its AI Copilot Editing for assistance if they are new to video editing. Moreover, Filmora can generate AI music, images, and scripts. It can ensure your workflow with the quickest editing. Discover more features of this application to unlock your creativity.
Free Download For Win 7 or later(64-bit)
Free Download For macOS 10.14 or later
How to Make a Slow-motion video with Optical Flow
Slow-motion videos with high resolution are not easy to create. Without any playback lagging, this tool can provide you with slow-motion video. Following are those steps that can lead you to easily create such videos:
Step 1Install Filmora and Import Your Project
Launch Filmora’s latest version in your system. Open it and choose the “New Project” option from its main interface. After getting into the editing screen, press the “Ctrl + I” keys to bring the media to Filmora. Drag and drop the file in the timeline section to start editing.

Step 2Explore the Speed Option and Use Optical Flow Feature
In the Timeline, right-click on the video and choose the “Uniform Speed” option. An extended menu will appear on the right side. Now, turn the video into slow motion with the “Speed” slider. Afterward, head down and extend the “AI Frame Interpolation” menu. From the list, select the “Optical Flow” option for slow but high-quality speed.

Step 3Continue Editing or Export as Desired
Now, you can extend your editing and work on “Reverse Speed” and “Ripple Edit.” If you have nothing to edit more, look for the “Export” option from the top-right corner. Click on it and export with customized parameters.

Conclusion
In short, there are several ways to fix DaVinci Resolve’s slow playback error. As explained earlier, you can use any solution for a smooth playback experience. If you don’t want to waste time resolving such issues, switch to Wondershare Filmora. It is a reliable, all-in-all tool for video editors that doesn’t cause any playback lagging. So, start creating slow-motion videos with optical flow.
Make A Slow Motion Video Make A Slow Motion Video More Features

Part 1: Finding the Best Resolution for DaVinci Resolve Slow Playback Issue
As Highlighted, DaVinci Resolve is a good video editor for all kinds of use cases. Although it’s a powerful tool, it still shows some errors like choppy and slow playback. Modern problems require modern solutions. Thus, read the given fixes to make DaVinci Resolve faster playback. All the methods are easy and helpful for a smooth playback experience on Windows and macOS.
- Solution 1: Lower Playback Resolution
- Solution 2: Change Timeline Resolution
- Solution 3: Enable Render Cache
- Solution 4: Disable the Live Save Feature
- Solution 5: Use Proxy Media Files
- Solution 6: Disable Color Grades
Solution 1: Lower Playback Resolution
In DaVinci Resolve, full timeline proxy resolution is set by default. To enjoy a smooth playback while editing, you should reduce the playback resolution. Open your project in DaVinci Resolve and press the “Playback” menu from the top. Then, select “Timeline Proxy Resolution” and pick one either “Half” or “Quarter” options. It will reduce the playback resolution and speed up the playback.

Solution 2: Change Timeline Resolution
DaVinci Resolve can work on 4K high-resolution footage that might disrupt the playback. So, cutting down the resolution to speed up your playback is suggested. To do so, click the “Settings” icon from the bottom right side and enter the “Project Settings” window. Expand the “Time Resolution” menu and choose 1920x1080 HD if working on 4K or high resolutions. Now, apply the changes by hitting on “Save.”
Adjust the timeline resolution and right-click on the timeline in the Media Pool. Choose “Timeline” and then “Timeline Settings.” Lastly, check the “Use Project Settings” option and decide a resolution to click on “OK.”

Solution 3: Enable Render Cache
It’s another solution to fix the DaVinci resolve slow playback. Render cache is a file that stores the rendered frames and makes the rendering faster. Start by hitting the “Playback” option and choose “Render Cache.” Then, you’ll see 3 options: None, Smart, and User. You should select “Smart” and let DaVinci Resolve pick one clip to be cached.

Solution 4: Disable the Live Save Feature
Every change you make gets saved with the Live Save option in DaVinci Resolve. If your remote drive is linked, this feature can drag the playback speed down. You can disable it for a DaVinci resolve faster playback.
Look for the “User Preference” menu and click on the top left side button of DaVinci Resolve. Go to the “Preferences” under the user tab. From the “Project Save and load,” check the “Disable Live Save” option. Now, you should remember to manually save your projects after editing.

Solution 5: Use Proxy Media Files
Another solution is to use proxy media during the project editing. Proxy files are small copy files transcoded from a larger, original video file. Get the proxy file to increase the playback and go to your “Media Pool” in DaVinci Resolve. Right-click on the intended file and choose “Generate Proxy Media” from the list.

Solution 6: Disable Color Grades
If you are still failing to resolve the slow playback issue on Davinci Resolve, try this fix. Disable color grades and other effects in the first place. To do so, head to the DaVinci Resolve Edit Page. After getting there, press the “Bypass Color Grades and Fusion Effects” button from the top right side. This way, you can surely solve the DaVinci Resolve slow-down playback error.

Part 2: What Makes a Slow-Motion Video Good?
After resolving the DaVinci Resolve slow playback, let’s continue further editing. Create a slow-motion video to emphasize certain information in the video. It involves technical and creative elements for a good-quality video. You can read this section to understand the points that contribute to a good Slow-motion video.
- Frame Rate: Keep the frame rate higher for a good slow-motion video. In this regard, you can use common frame rates such as 60fps, 120fps, and 140fps. Moreover, you should pick video clips that are originally captured in a high frame rate.
- Shutter Speed: Minimize the motion blur in footage and use a faster shutter speed. It is important when you are shooting fast-moving objects. Adjusting the shutter speed can enhance the look of slow-motion videos.
- Resolution: A good slow motion is only possible when it is captured in high-quality resolution. Better image quality allows more detail in such footage. Moreover, you can optimize the camera settings for the desired resolution.
- Editing and Timing: Thoughtfully chosen clips, timings, and editing can set the stage. Thus, maintain a cohesive flow and pay more attention to the video pacing. Edit all segments in a way that fits seamlessly to contribute a good slow-motion video.
Part 3: Making Slow Playback Issues Go Away with Perfect Alternative: Wondershare Filmora
Sometimes, issues like DaVinci Resolve slow down playback do not go easily. Resolving them requires a lot of effort that might prove frustrating beyond limits. So, it seems better there to switch towards a better option. In this regard, Wondershare Filmora is the most effective solution in video editing. Professionals can rely on Filmora, which offers AI-integrated features for easy video-making.
Users can use its AI Copilot Editing for assistance if they are new to video editing. Moreover, Filmora can generate AI music, images, and scripts. It can ensure your workflow with the quickest editing. Discover more features of this application to unlock your creativity.
Free Download For Win 7 or later(64-bit)
Free Download For macOS 10.14 or later
How to Make a Slow-motion video with Optical Flow
Slow-motion videos with high resolution are not easy to create. Without any playback lagging, this tool can provide you with slow-motion video. Following are those steps that can lead you to easily create such videos:
Step 1Install Filmora and Import Your Project
Launch Filmora’s latest version in your system. Open it and choose the “New Project” option from its main interface. After getting into the editing screen, press the “Ctrl + I” keys to bring the media to Filmora. Drag and drop the file in the timeline section to start editing.

Step 2Explore the Speed Option and Use Optical Flow Feature
In the Timeline, right-click on the video and choose the “Uniform Speed” option. An extended menu will appear on the right side. Now, turn the video into slow motion with the “Speed” slider. Afterward, head down and extend the “AI Frame Interpolation” menu. From the list, select the “Optical Flow” option for slow but high-quality speed.

Step 3Continue Editing or Export as Desired
Now, you can extend your editing and work on “Reverse Speed” and “Ripple Edit.” If you have nothing to edit more, look for the “Export” option from the top-right corner. Click on it and export with customized parameters.

Conclusion
In short, there are several ways to fix DaVinci Resolve’s slow playback error. As explained earlier, you can use any solution for a smooth playback experience. If you don’t want to waste time resolving such issues, switch to Wondershare Filmora. It is a reliable, all-in-all tool for video editors that doesn’t cause any playback lagging. So, start creating slow-motion videos with optical flow.
How to Create an URL for Your Video?
A well-personalized video is an effective way to get your way around the viewers easily. Besides, you can also easily impress them with your products or services by uniquely pressing them.

Now, imagine if you have an easier way to share your videos with audiences on different platforms! Well, this way you will save a lot of time. For this, you need to upload the video to the link, and then you can share the URL link on various platforms. Keep reading to understand the entire process.
Part 1: Method1: Upload videos to a video hosting platform
The method to upload the video to the link will vary based on the video-sharing platform you are using. Let’s understand this with an example. If you are using YouTube, then you need to follow the below-given steps to upload and generate a link for your video.
- First of all, you need to log into your YouTube channel or account.
- Now, you need to click on the video icon. You can find it on the right-hand side of the screen.
- Then, click on the Upload a Video option.
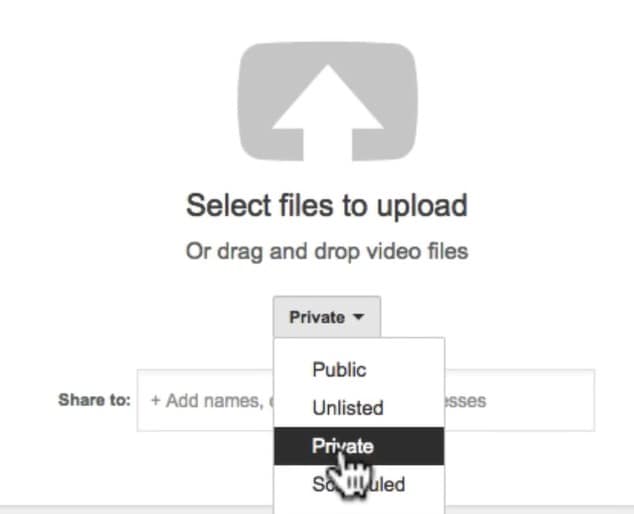
- Click on the Select Files option and choose the video that you want to upload. You can also drag and drop the video to upload it.
- Once done, click on Publish option to complete the process.
Now, to complete your YouTube video upload share, you need to find the link to your video. For this, you need to click on the pause button and then right-click on the video. Now choose the Copy video URL. Now, you can share that video on other platforms just by pasting the video link.
How To Make Video Private and Public?
- Sign in to your YouTube account.
- Choose the Videos option.
- Now choose the video that you want to update.
- Then you need to click on the down arrow located under Visibility and select Private or Public based on your preference and then click on the Save option.
Different Video Hosting Platforms that You can Use
1. Vimeo
One of the best alternatives to YouTube is Vimeo. This platform allows the user to create, manage and enjoy an easy video upload share process. This platform has more than 250 million active users. It offers different subscription plans, and for unlimited upload limits, webinars, live streaming and more, you can go for its premium package. Some of the impressive features of this platform are:
- Custom CTAs- Calls to Actions
- Support video hosting in 8K quality.
- Easy access to different video editing templates
- CRM- Customer Relationship Management integrations
- Supports content analytics
- video upload share option for social media
2. Streamable

Speaking about Streamable, this is a video editing as well as sharing tool that will allow you to stream videos in 4K quality, and you can even embed the videos. You will have the freedom to upload your videos in different formats and can also resize them in vertical, landscape and square formats. Some unique features of Streamable are:
- Content management tool
- Brand overlay
- Easy-to-customize templates
- Content Library
- Audio capture
- Faster data export and import and more
3. Uscreen
This is an excellent all-in-one platform that helps video creators to sell, manage and market their content while expanding their business. Besides, the platform also helps the users to create mobile and TV apps and offers tools to market the videos. Some features for Uscreen to consider are:
- Different membership options.
- Support offline viewing of content, including videos.
- A professional video player
- You will enjoy full ownership of your audience’s data
- Supports different retention and marketing tools.
- Supports more than 150 hours of video storage and more.
4. Dailymotion

This platform is also called “the home for videos that matter”. Dailymotion is used by many well-known clients such as MLB, CNN and more to host video content. If you are a creator, you can easily upload your videos on this platform for free. Creators can utilize different features available on the platform, such as:
- Easily embeddable and shareable videos
- Easy video sharing using your video link on social media platforms
- You can upload videos of up to 4K quality.
- Password-protected videos
Part 2: Upload your videos to a cloud disk and share to others
As per some studies, more than 85 percent of businesses utilize videos for marketing strategy. Video content is entertaining, easy to understand and can offer better ROI as you can reuse it. However, with the huge volume of these files, it has become more challenging to find a good storage option.

This is where cloud storage comes to play. There are different cloud disk or storage platforms where you can upload video to link and share your videos with others. For example, Google storage or Google Drive. So, let’s know the process of uploading a video to Google Drive.
- First, visit your Google Drive Account and then click on the new option.
- Now, you need to click on File Upload and then select the video that you want to upload.
- You can now see the selected video uploading in the screen’s lower left corner. It will take some time.
- Once done, Google Drive will begin processing the video.
- Once your video is available on Google Drive, you can move it to different folders or change the name.
Now, let’s talk about how to generate a link to your video and share that link with others.
- Open your Google Drive account.
- Choose the video that you want to share and right-click on it.
- Now, you need to click on the Get Link option.
- Then, choose the Anyone with the Link option from the viewer option.
- Now, click on the Copy Link option, and you can now share that link with anyone you want.
There are different reasons that make cloud storage options a perfect choice for video creators or other users. For example:
- You don’t have to worry about data loss.
- Cloud storage is highly scalable.
- There will be no space or storage limit
- The users can enjoy real-time video content updates
- One can access and share videos using any device.
However, some of the cloud storage platforms are not free to use. You will get up to 10GB to 20GB for free. For more storage limits, you will have to buy a subscription plan. For example, if you are using Dropbox, then you will have to pay around USD 20 per month to get up to 3TB of storage.
Besides, there are some content restrictions that you will have to consider. You are not allowed to upload videos that support malicious attacks, hate speech, graphic violence, predatory behavior or videos that promote any dangerous behavior. Besides, the platforms support certain types of video formats, such as OGG, WebM files, WMV, MTS, AVI, and WMV. FLV, 3GPP, MPEG 4, MOV and other file formats.
If you are looking for some free cloud storage platforms, then you can give Google Drive, Dropbox, Box, NeXT cloud, pCloud, Amazon Cloud Drive and OneDrive a try.
Part 3: How to Make Videos That Go Viral?
To make your videos go viral, you will have to make stunning videos by adding some unique special effects. And for this, you can use the Filmora tool. This is a creative video editing tool for a video creator. The platform offers some great features to vloggers, gamers and others. For example, it supports 4K editing, noise removal, advanced text editor, GIF support, video stabilization, equalizer and more. Now, let’s talk about how to use this platform to make or edit a video.
- Open Filmora and choose the desired aspect ratio. Now, click on the New Project option and import the video.
- Then you need to choose the frame rate and resolution for the video.
- Once done, you can go on and transition music between your video clips, or you can use different visual effects.
- Once you are done with editing, you can then explore the videos and then share the videos on different platforms directly from Filmora.
Free Download For Win 7 or later(64-bit)
Free Download For macOS 10.14 or later
FAQs
Why Create a Video Link?
The first reason to consider here is when upload video to link, you can easily share the videos in various formats. Besides, you can share it without worrying about the video size. The video can be shared on multiple platforms and social media channels. It is a faster way to share your video content.
How To Locate the URL of Your Video?
To locate your video URL, you can open the video online. The link that you will see in the browser’s address bar will be the URL of your video. You can then copy the URL and paste it or share it on other platforms. It also applies to YouTube and other video-sharing platforms.
How Do I Get My YouTube Channel’s URL?
You need to sign in to your YouTube Studio. Then from the left Menu, choose Customization and then choose the Basic info. Under the Channel URL option, you can see the URL of your YouTube channel. Now you can copy the Channel URL and share it with others.
Also read:
- [New] Essential Guide to DSLR and Live Streaming on Computers for 2024
- [Updated] In 2024, Android SDK Update Essential Tools for FB Video Extraction
- [Updated] Permitted Recording YouTube Video Screenshots, In 2024
- Deep Dive Into ShareX Feedback & Substitutes
- New 2024 Approved How to Slow Down a Video on iPhone and Android The Easy Way
- New In 2024, How to Use Kahoot! On Zoom
- Thinking About Changing Your Netflix Region Without a VPN On OnePlus Nord N30 SE? | Dr.fone
- Unraveling Your Israeli Expedition: Key Expressions & Guidance
- Updated Knowing All Ways To Slow Down Video With Adobe Premiere Pro for 2024
- Updated Making Creative and Engaging Youtube Videos Is Now Easy with Several Tools. Now, YouTube Also Offers You Its Own Built-In Video Editor Through Which You Can Edit and Enhance the Video Quality for 2024
- Ways to stop parent tracking your Xiaomi Redmi 12 | Dr.fone
- Title: In 2024, How to Do Censor Effects with Filmora
- Author: Morgan
- Created at : 2024-09-28 17:29:04
- Updated at : 2024-10-06 01:11:28
- Link: https://ai-video-editing.techidaily.com/in-2024-how-to-do-censor-effects-with-filmora/
- License: This work is licensed under CC BY-NC-SA 4.0.

