
:max_bytes(150000):strip_icc():format(webp)/Apple-Watch-Ultra-2-23e8ec3e4ee04c6e98c9d654a35f59ec.jpg)
In 2024, How to Edit FLV Video Files with FLV Editor Windows, Mac,Android, iPhone & Online
How to Edit FLV Video Files with FLV Editor [Windows, Mac,Android, iPhone & Online]
FLV is a common container format for transferring digital video and audio information over the Internet. A.flv file is a flash video that may be seen on your computer with Adobe Flash Player, Adobe Air, or some third-party Adobe Flash plugins.
FLV has become the standard video format for web-based streaming video service providers such as Hulu and VEVO due to its superior functionality and tiny size. It’s also the default format for Quicktime on Mac systems.
If you wish to edit FLV videos without any problems, you should utilize a multipurpose video editor that supports the FLV file format.
Best FLV Editor to Edit FlV Video on Windows and Mac - Filmroa Video Editor
Filmora Video Editor is a professional FLV video editing application. This software allows you to edit 4K video files, share completed films directly on social media platforms, and add subtitles and audio files.
You may mix multiple films and enhance your footage with numerous transitions and other effects using this FLV video editing software. Furthermore, the free Filmora application is ideal for adding audio files or video clips from the wide library and uploading your soundtrack.
For Win 7 or later (64-bit)
For macOS 10.14 or later
Therefore, you can use the following steps to edit FLV video on Windows and Mac:
Step 1: Import file:

Step 2: Edit the FLV file:
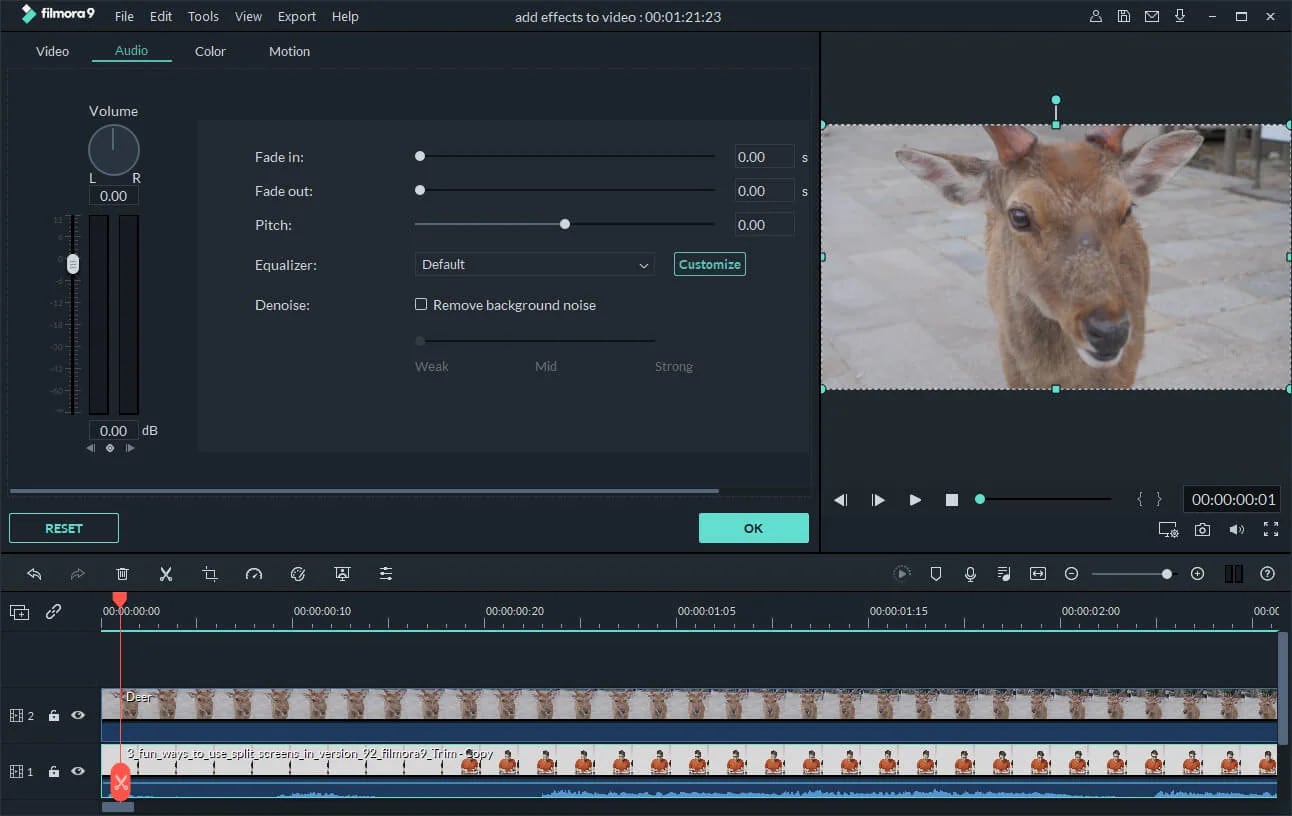
Acquire the perfect tool in your palm for anything you want to do, such as clipping, cropping, rotating, and more.
Furthermore, all editing capabilities in the toolbar allow drag-and-drop, making it even easier to touch up your films quickly. Consider the following scenario:
- Drag and drop a transition into the video/photo, or right-click it and select “Apply to All.”
- Please drag & drop a title template to the position where you want it to appear, then adjust it.
- To use the effects, select one from the 50+ available video effects, select it, and apply it to your photos/videos instantaneously.
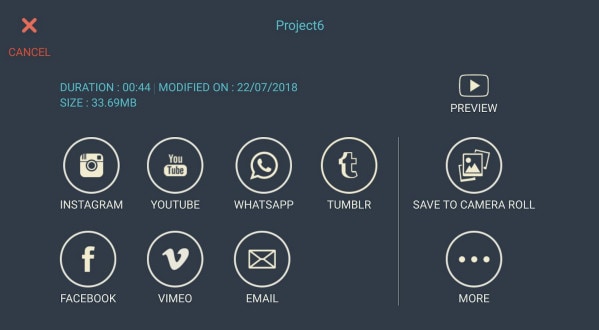
Step 3: Save or Export the file:

When you’re done, export your modified MP4 files to Windows/Mac and quickly share them on YouTube, with the option of sending a message to Facebook and Twitter. When you click Create in the program window’s middle right corner, you’ll be taken to the Output window below.
Alternative Way to Edit FlV Video on Windows
1. VSDC
VSDC is a free video editor along with a lot of advanced features. Cut, combine, trim, crop, and other editing capabilities are available to help you polish your FLV films.
Although it may not look logical, learning the editing capabilities hidden within modular boxes is simple. One noteworthy aspect of VSDC is its ability to produce good visual effects using many trendy video effects, transitions, and filters.
Furthermore, strong chroma keys, color correction, object modification, and other editing tools can be utilized to edit FLV videos. It not only creates excellent FLV videos, but it also supports a wide range of media conversion, allowing you to convert FLV files to various formats and export them without a watermark.
Therefore, follow the below mentioned steps to edit FLV video using VSDC:
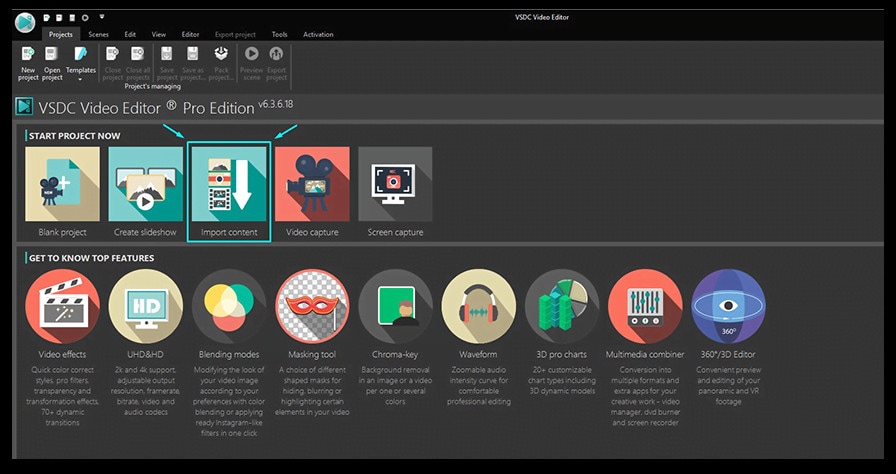
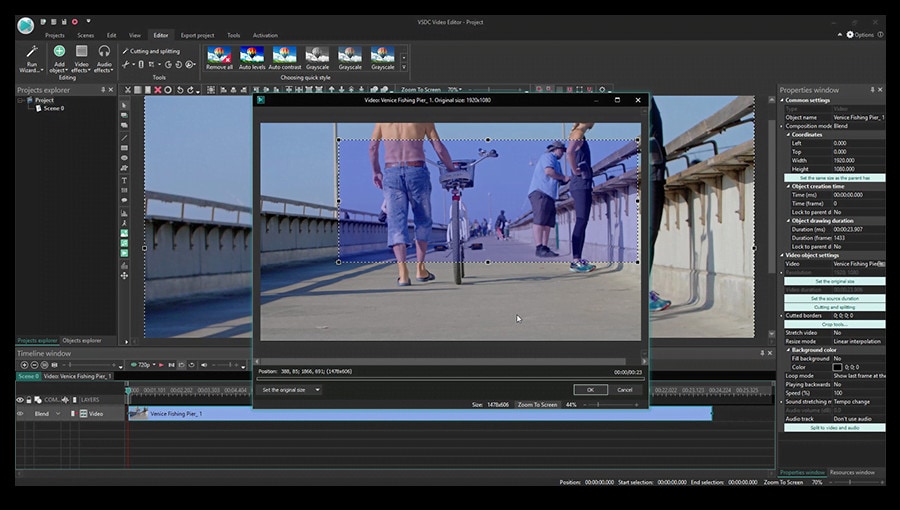
Step 1: Install the software on the Windows. Open the application and import the video.
Step 2: Use cutting and splitting tools to edit the video.
The first icon is a picture of a pair of scissors, which is a cutting tool. It’s very useful when you need to cut the beginning or end of a film. Place the cursor exactly where you want to cut, then select “Trim start” or “Trim finish” from the dropdown cutting menu (the small triangle next to the scissors icon).
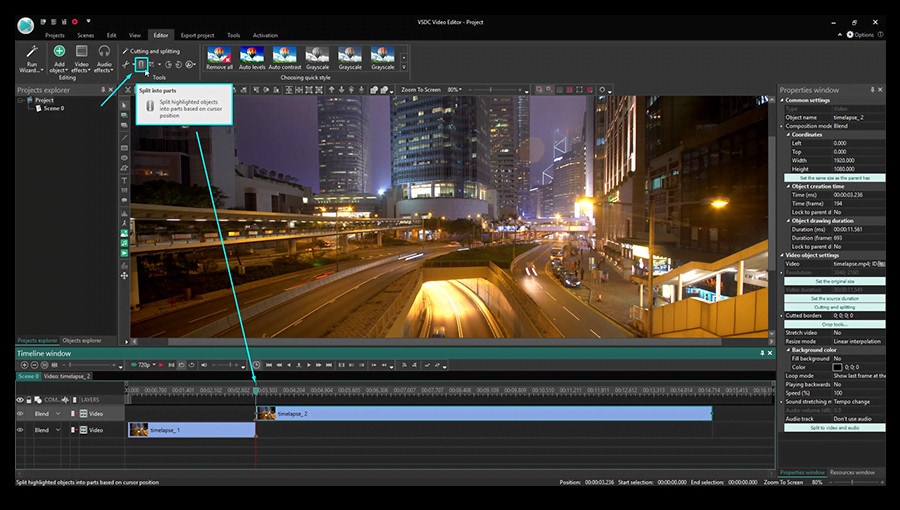
Cropping is also simple. If you have too much additional space around the scene object recorded, just choose the file you want to trim and select the cropping icon from the “Cutting and Splitting” option. A new window will appear, allowing you to select the region of the scene that should stay.
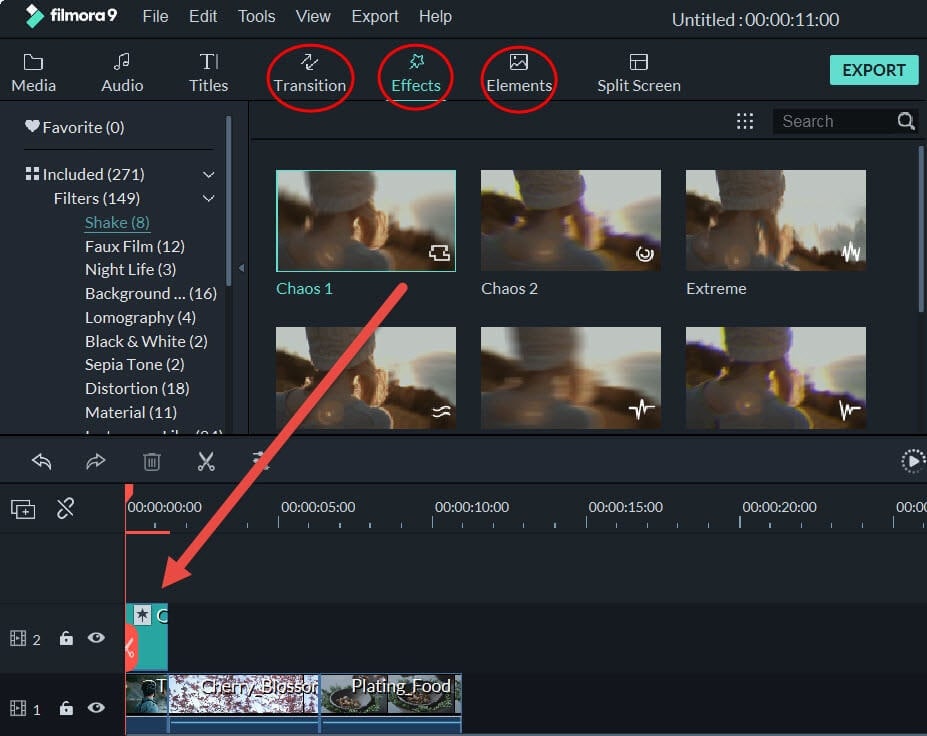
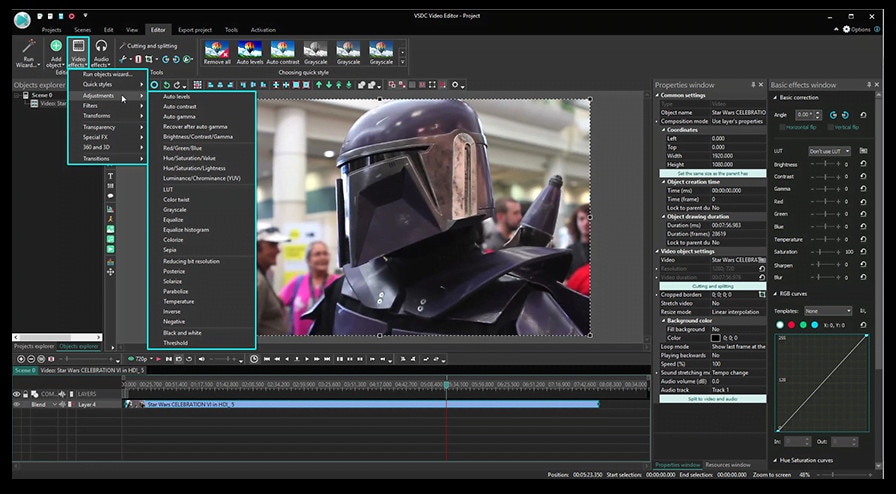
Step 3: Apply effects and transitions.
To use one, first select the video file you wish to edit, then go to the Video effects tab and select the effect you want to use. On the timeline, a new tab will appear, containing all of the effects done to the selected object. You can alter the effect’s duration and position in time by dragging it with the mouse there. The properties pane on the right-hand side can be used to change other parameters.
Transitions follow the same rule. Place your cursor where you want the transition to begin, then choose a transition from the Video effects dropdown menu and manually adjust the duration.
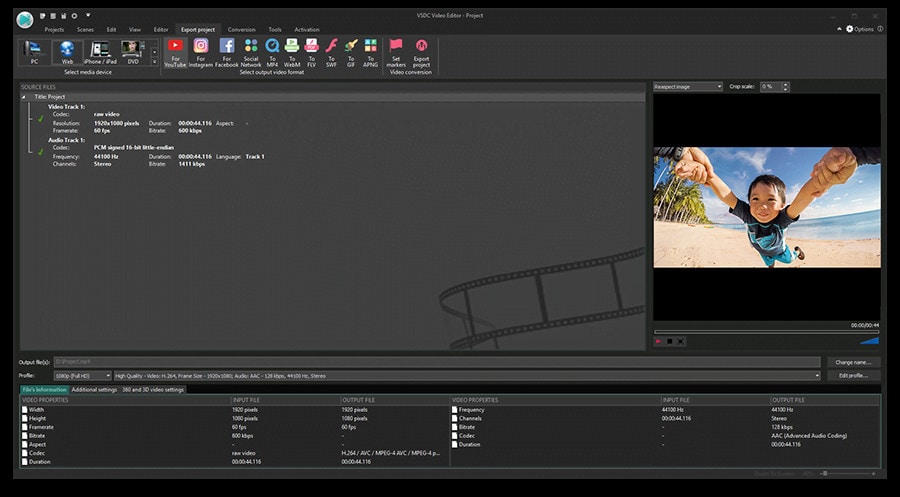
Step 4: Save changes and export video.
Make sure your movie appears exactly how you want it to before exporting it. If the video appears choppy, use the red preview button and lower the preview quality. When the PC’s resources are insufficient to process the video in real time, lagging can occur. Keep in mind that it has no bearing on the outcome. When you’re finished, navigate to the Export project tab and select an export format.
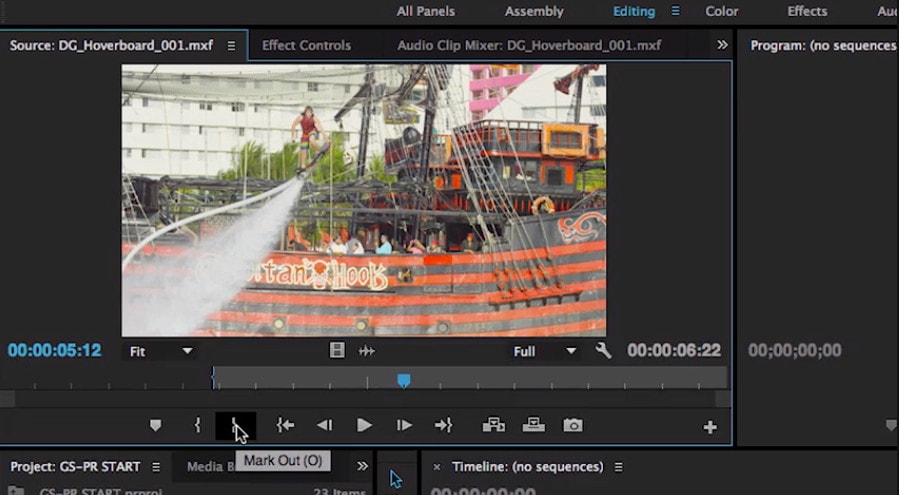
2. Adobe Premiere Pro:
Professional video editors use Premiere Pro to make everything from YouTube videos to Hollywood films like Mank, a 2021 Oscar candidate. It’s also widely utilized in the workflows of designers, animators, and VFX artists, and we can see why after lengthy testing.
We found the software’s UI to be simple to use, and it increased our productivity by separating things into various workspaces, such as editing, effects, and audio. When we tested it on both Mac and PC, we discovered that each workspace helps handle a specific activity while minimizing distraction.
Edit the FLV video with Adobe Premiere Pro using the following steps:
Step 1: Import the video and create initial sequence.
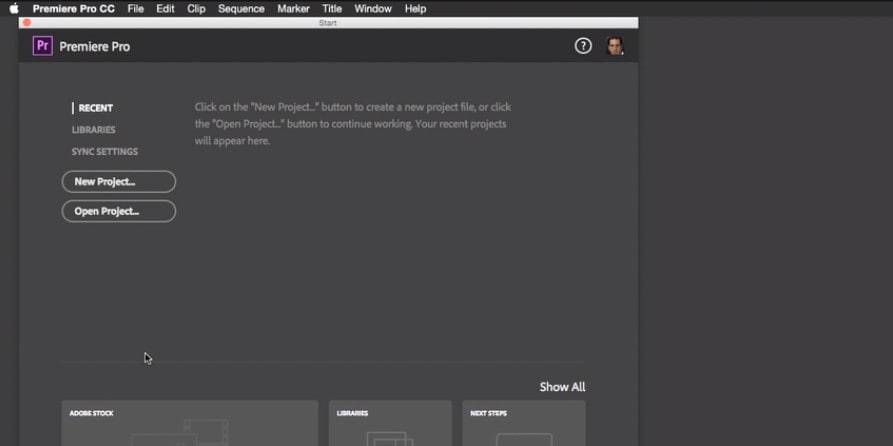
Step 2: In the Timeline, trim and rearrange clips, add audio, and transitions.
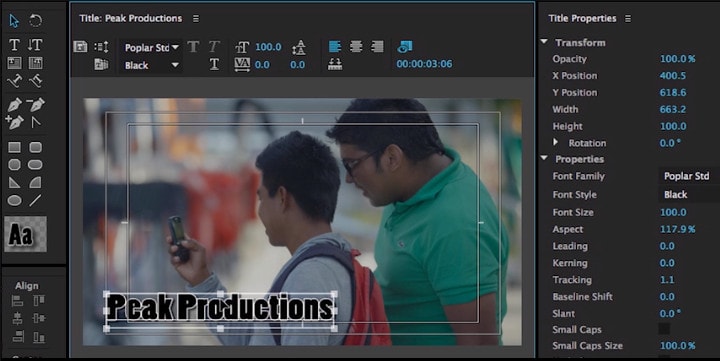
Step 3: Add title and graphics.
In Premiere Pro, you may make onscreen titles, as well as stylize and animate your images.
Step 4: Export your video.

Alternative Way to Edit FlV Video on Mac
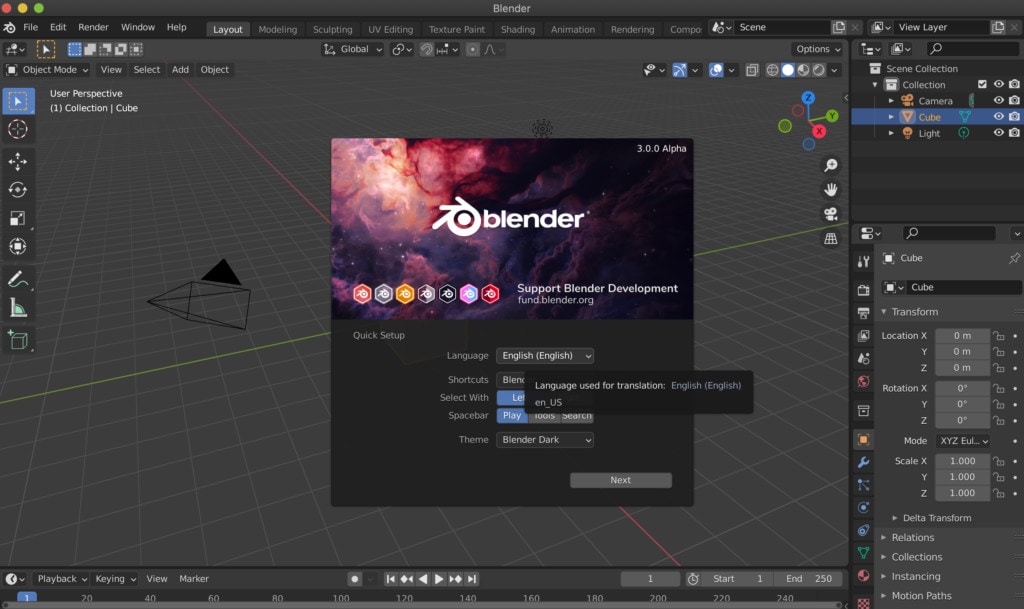
1. Blender:
Under the GNU General Public License, Blender is a free, open-source 3D content production program that runs on all major operating systems. Blender is one of the greatest video editors for both Windows and Mac, with advanced features such as modifier-based modeling tools, powerful character animation capabilities, a node-based material, etc.
Because it is developed for professionals, it is tough to use as a beginner. However, it is unrestricted in its use and distribution. In addition, color options are changeable and versatile in the UI.
In contrast, this free video editor is perfect for semi-pros or those who want to enhance their video editing skills. However, you’ll need a lot of time and effort to learn it.
Step 1: Open the application.
Step 2: Then, go into File->New->Video Editing to open the video editor.
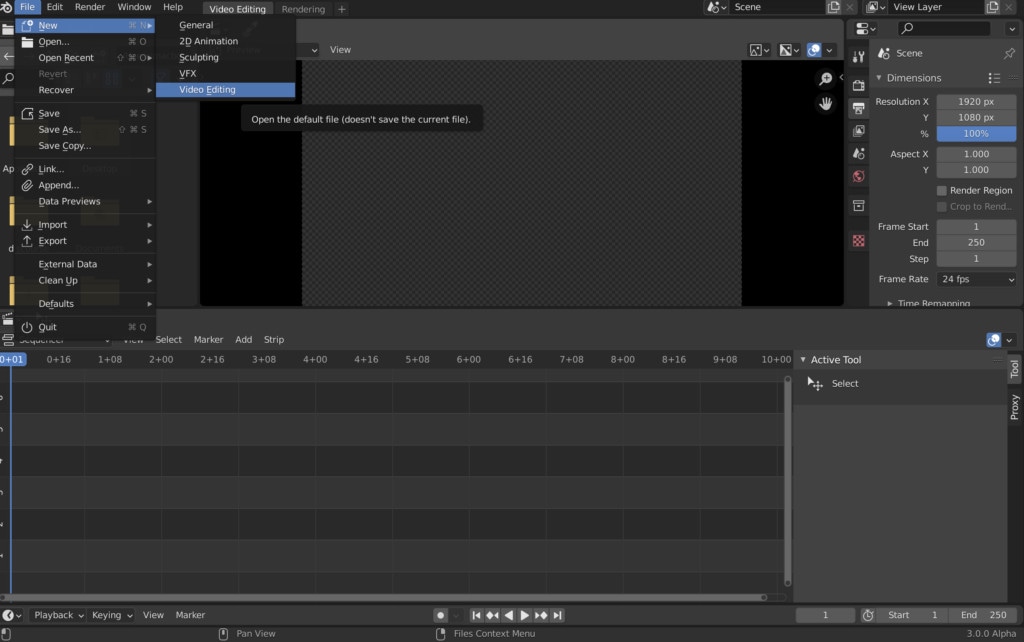
Step 3: Import the video and start editing using the editing tools.
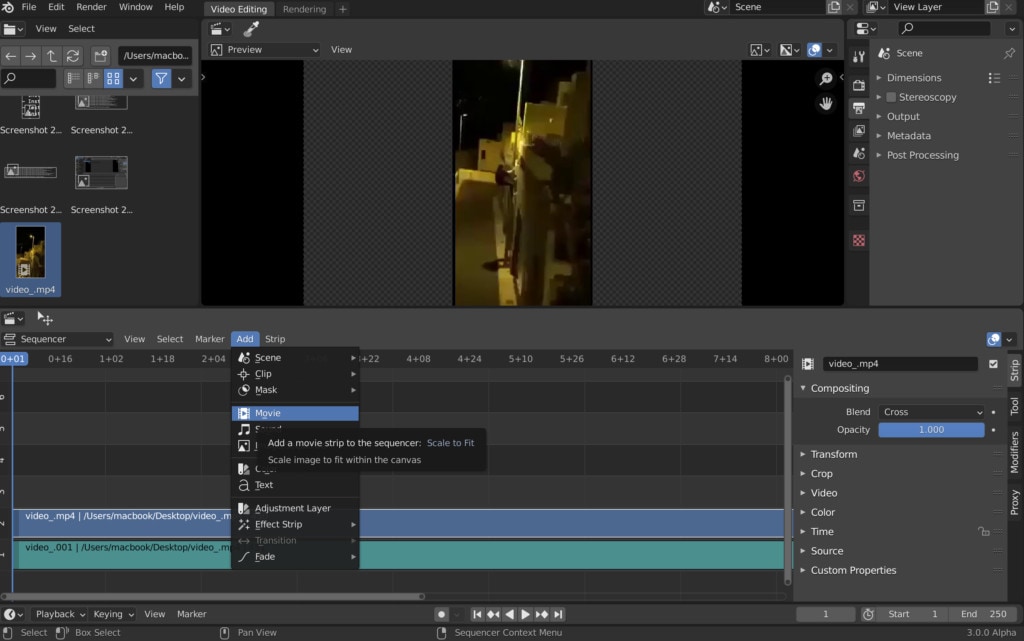
Step 4: Save and export the video.

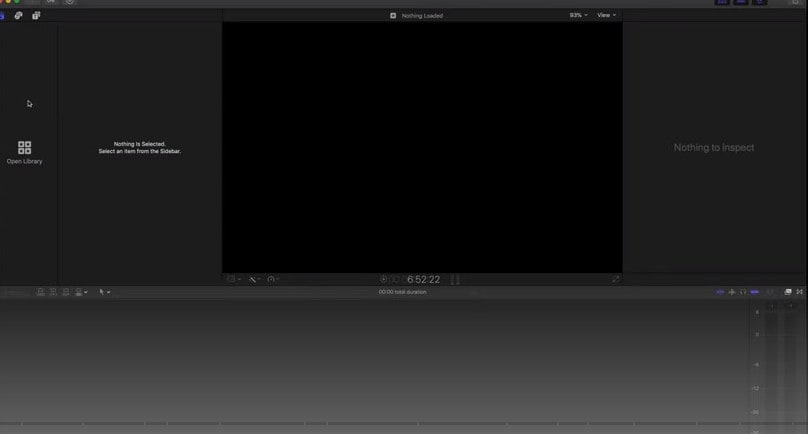
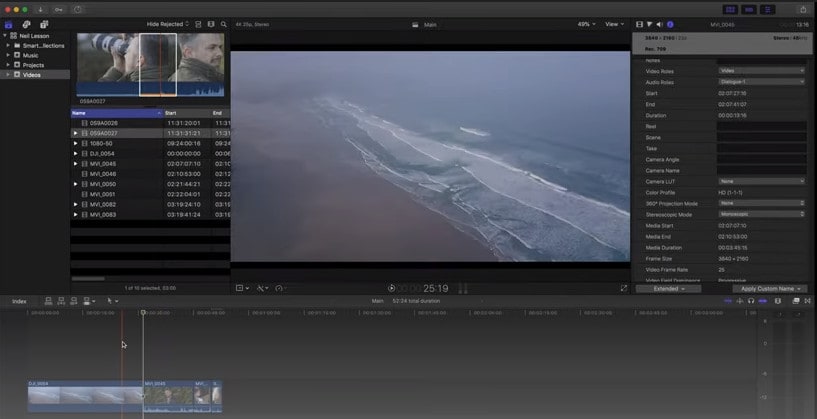
2. Final Cut Pro:
When it comes to video editing software, Apple’s Final Cut Pro is one of the industry standards. As a result, it’s widely utilized in the television and film industries - at least among Mac users. However, one of the truly convincing reasons to choose it over Premiere Pro is because it is subscription-free: you only pay once.
The software’s Magnetic Timeline, grouping tools, a vast selection of effects, solid organizational capabilities, and simple ways to add and edit audio make it a favorite among professional video editors. 360° video, HDR, and powerful color correcting tools are among the other capabilities. It’s a strong software with a lot of features.
Follow the steps to edit FLV video using Final Cut Pro:
Step 1: Create Project.
To make a movie in Final Cut Pro, you must first establish a project, which keeps track of your editing selections and the media you utilize.
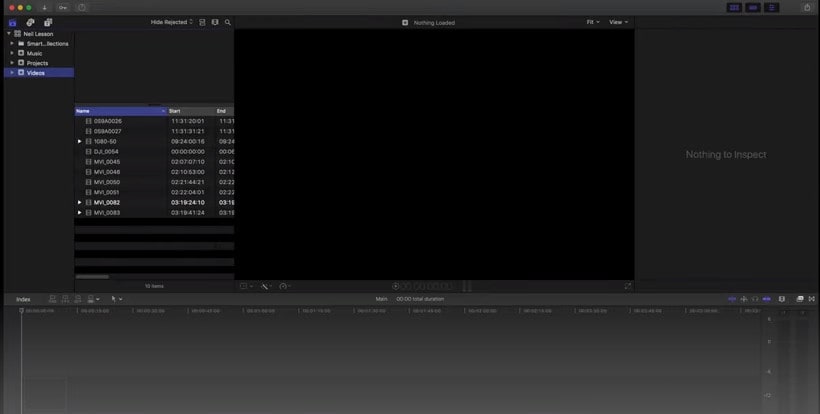
Step 2: Select and add clips to the timeline:
The second stage in making a movie with Final Cut Pro is to add and arrange clips in your project. In the timeline, you can move and reorder clips.
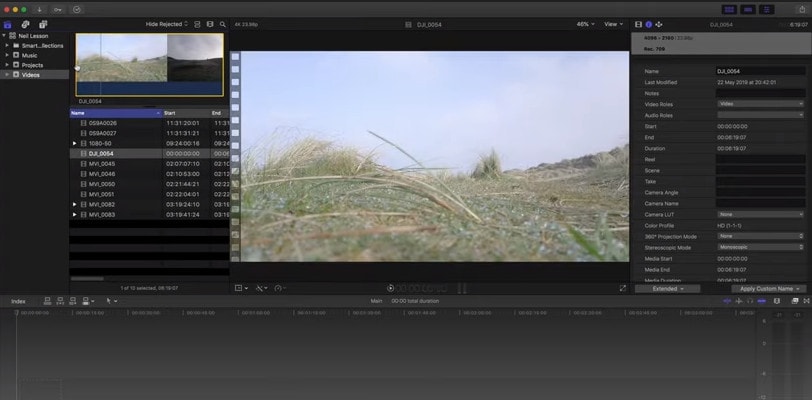
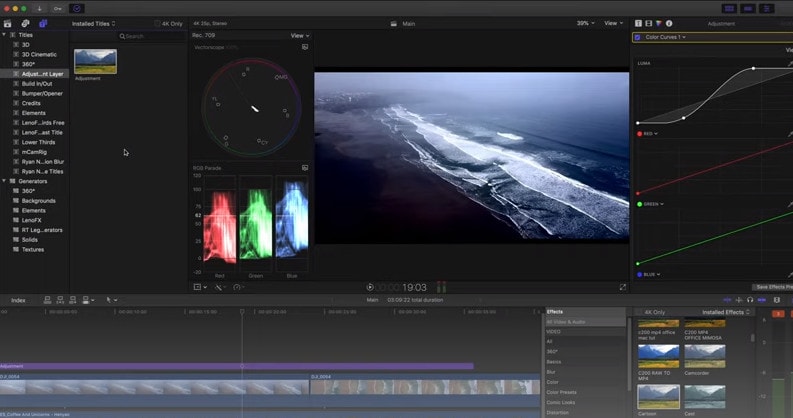
Step 3: Cut and trim video:
Final Cut Pro has a number of features for altering the start and stop points of clips in the timeline, as well as regulating the pacing of shots from one to the next.
Step 4: Edit the video by adding effects and transitions:
Final Cut Pro includes a number of advanced editing features that make it simple to create a professional film. Visual enhancements and colour correction are among the finishing touches.

Step 5: Save and export video:
2 Ways to Edit FlV Video on Android:
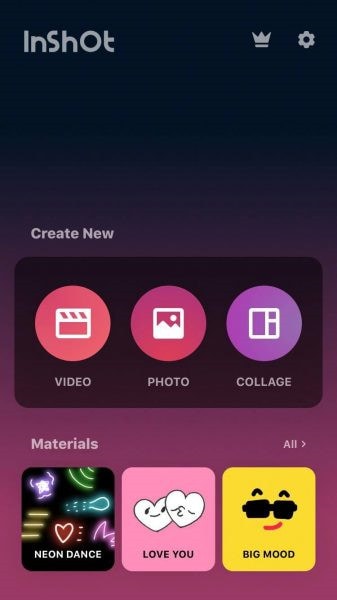
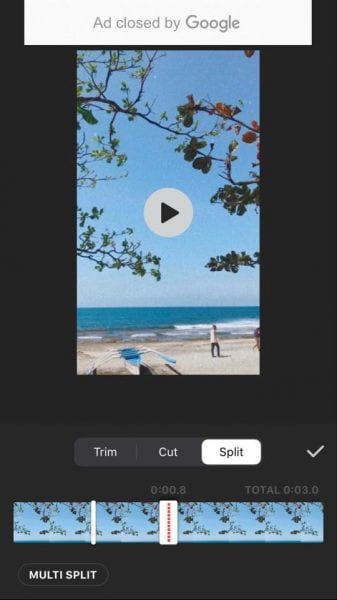
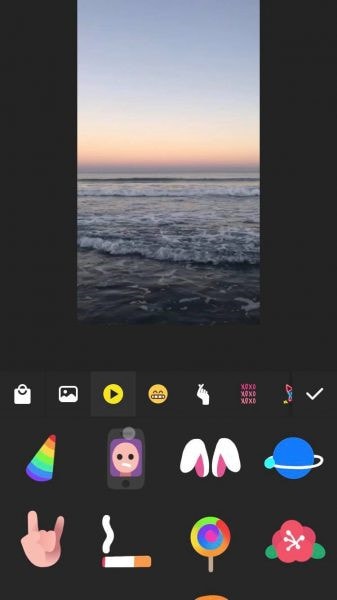
1. Inshot:
For Android users, Inshot is a fantastic image and video editor. This Android video editor allows you to add popular stickers and emoticons to your films, making them more fashionable and unique.
The program supports HD video output, allowing you more control over your footage. Moreover, the additional sound and video can be synchronized with the available video chronology.
You can quickly blend more than two movies into one with rich effects and sound with this Android editor app. In addition, you can generate a watermark using unique text provided in the app, and subtitles support allow you to produce one with a variety of fonts.
Following are the steps that you can follow to edit FLV video using Inshot:
Step 1: Open the app and import the video.
Tap “Video” to open your phone’s gallery folder and begin editing a video in the InShot app. Select a video to work with. Adjust the canvass after your video has been loaded into the InShot App. For your other social media accounts, there are aspect ratios and sizes that work well with the video. It also has the option of being in portrait or landscape mode.
Step 2: Trim and split videos.
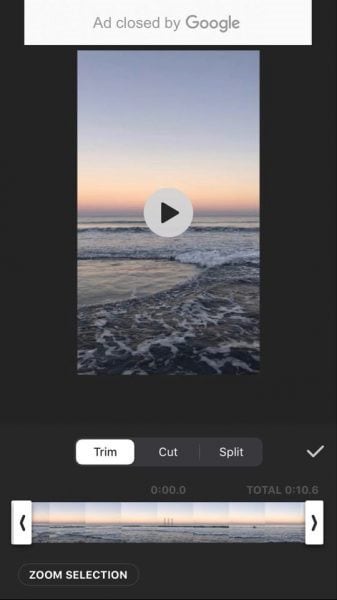
Step 3: Merge videos (optional):
By combining clips, you can combine them into a single film or project. Simply choose the videos you want to import from the drop-down menu. By tapping the “+” button on the lower left of the screen, you can insert and merge more videos. Your project will then be updated using the selected video.
Step 4: Apply filters, add music, text and stickers.
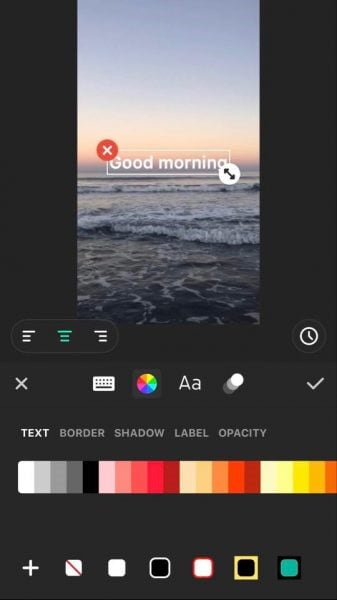
Step 5: Once you are done with the editing process, save the file.
2. Videoshow:
VideoShow has a lot of video editing options. It is a simple and practical video editing program and movie scene maker for art directors and beginners. Using this video cutter, you may reverse, blur, duplicate, edit, merge and split collage clips or films.
You can also use VideoShow to adjust the audio or add subtitles to any video. It also allows you to use different filters on any video on your device. Over 50 intricate themes are included in the program, allowing you to create gorgeous music videos, slide shows, and vlogs in no time.
The annual subscription package is for $135.19, or you can also make a one-time purchase for $225.78.
However, to edit the video, you can use the following steps:
Step 1: Download and install the videoshow application and open it. Upload the video that you want to edit.
Step 2: Edit the video by applying filters or cutting and trimming the part of the video that you want to remove.
Step 3: Save changes and export the video to your preferred location.
2 Ways to Edit FlV Video on iPhone:
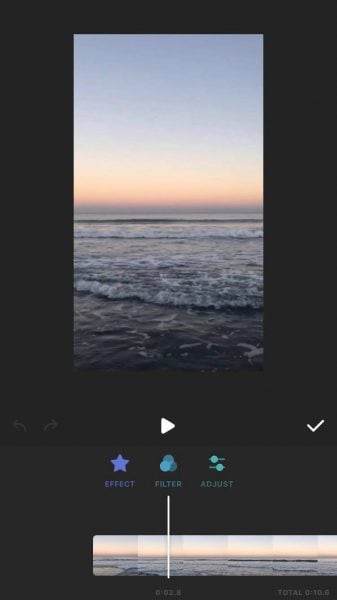
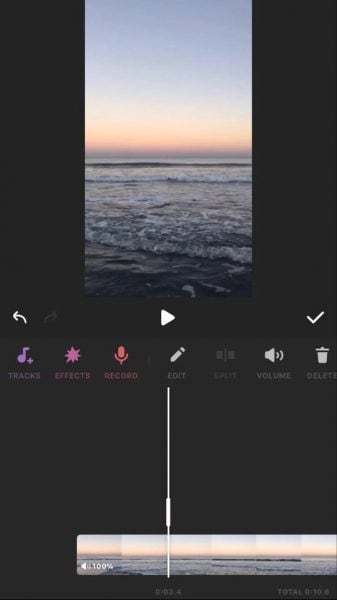
1. LumaFusion:
No other software program on the iPhone comes close to the feature set that LumaFusion offers for video editing. It is the only premium app on this list, and it is well worth every penny.
But, of course, YouTubers aren’t the only ones who use the program; mobile journalists and professional video producers who don’t want to lug along their bulky camera equipment and editing apparatus also use it.
LumaFusion deals with up to six video and audio tracks for photographs, movies, audio, titles, and graphics, and six audio tracks for narration, music, and sound effects. You also receive a magnetic timeline; importing clips is a breeze once they’ve been imported.
There are many transitions and effects to choose from, all of which can be layered. Finally, it includes much royalty-free music, sound effects, and other assets. So if you need a professional video editing tool for your iPhone, LumaFusion ($29.99) is the way to go.
Follow these steps to edit FLV video using LumaFusion:
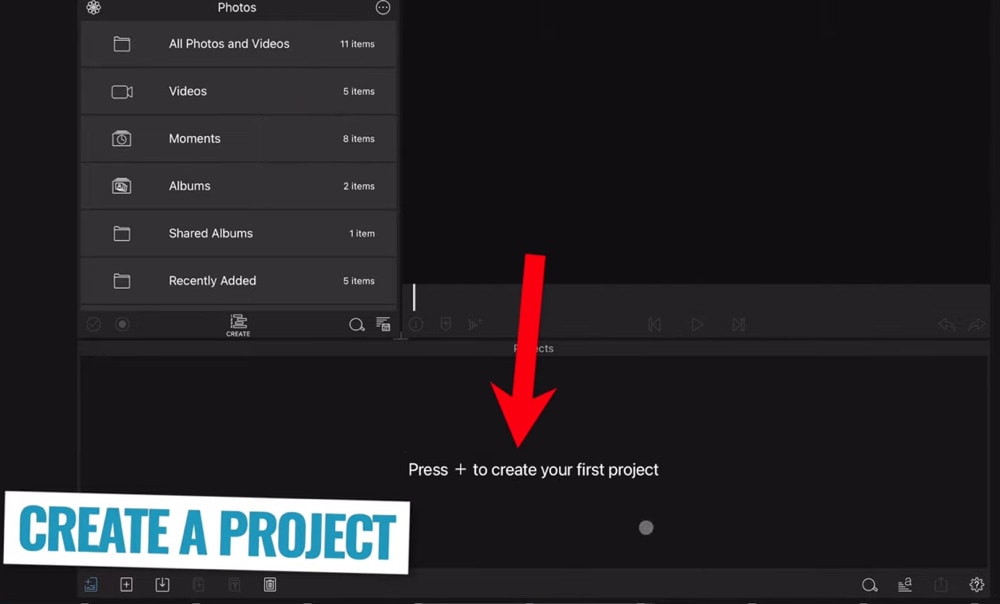
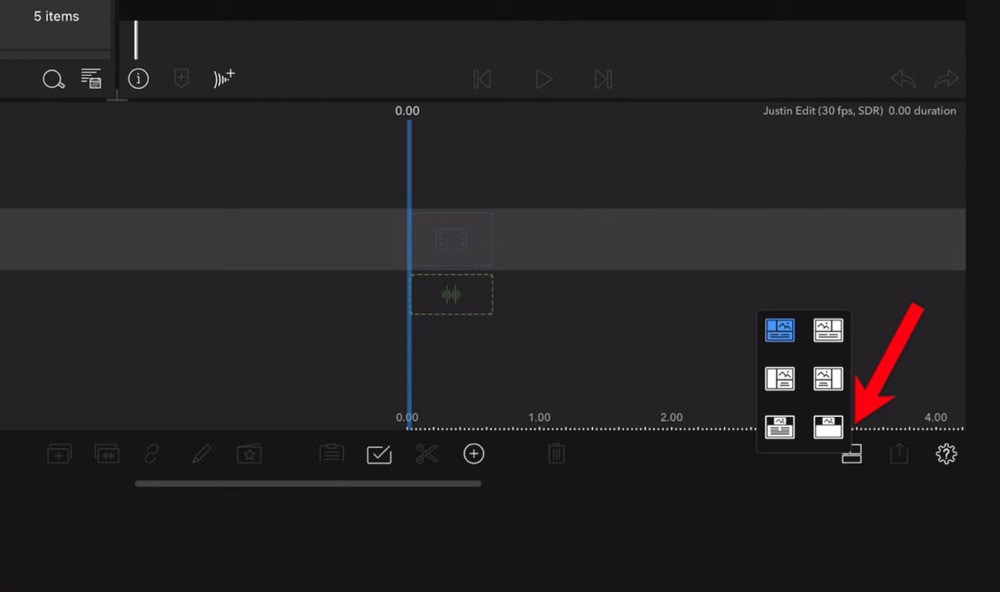
Step 1: To create your first project, press + at the bottom of the screen. You can create a new project by tapping that area or by tapping the Plus button.
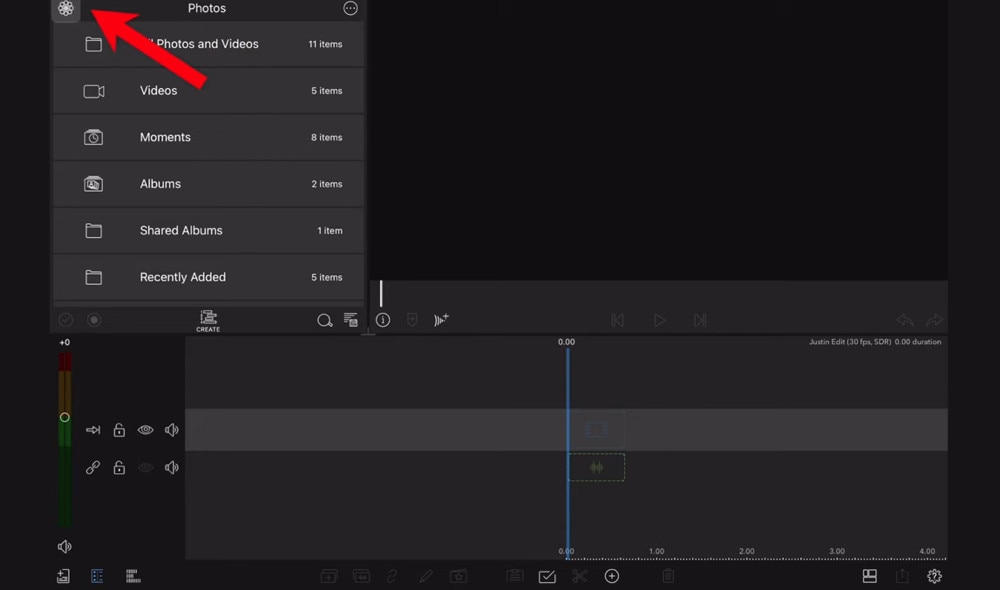
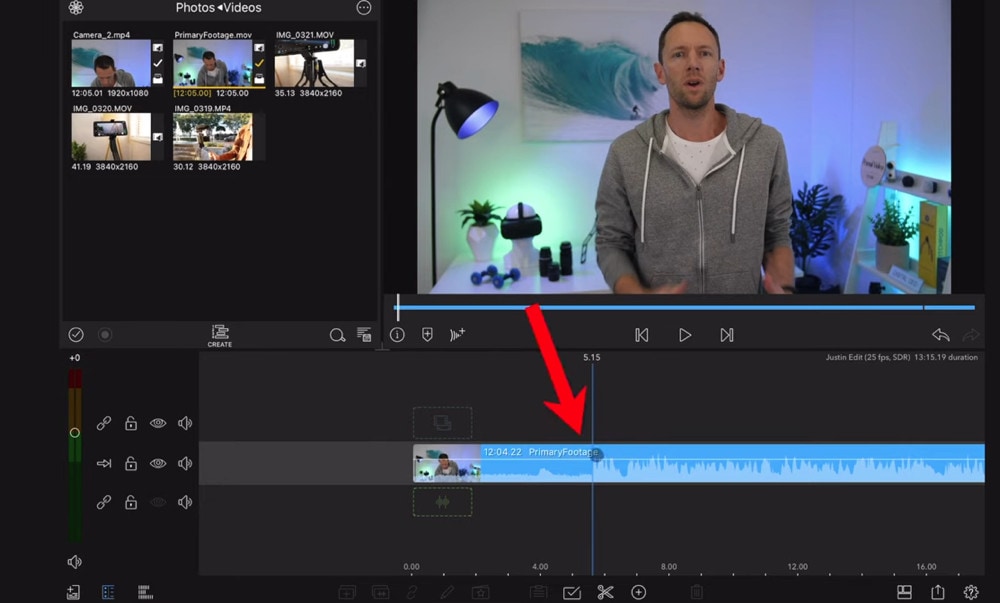
Step 2: Import video:
The Import section is located in the top left corner of the screen. This defaults to the Photos tab when you initially launch a new project. All of the photographs and videos can be seen here.
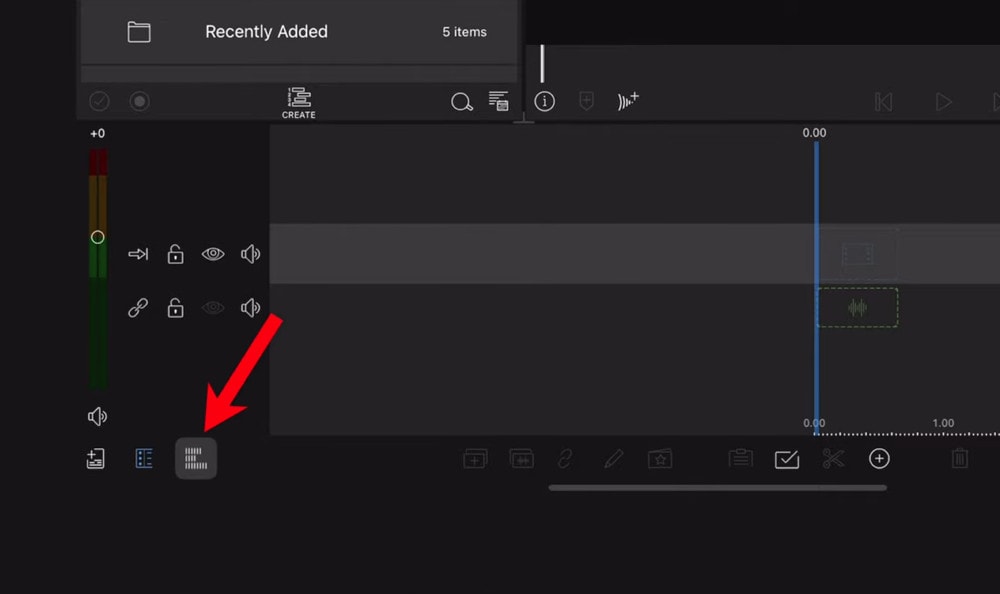
Step 3: Check layout and adjust volume levels
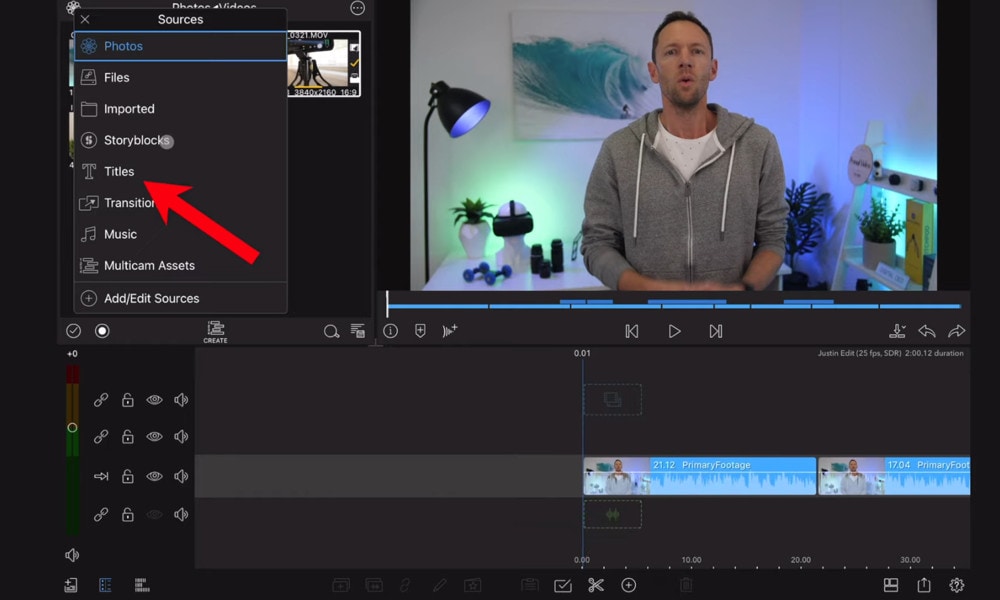
Step 4: Edit the video and add titles.
Step 5: Export the video.
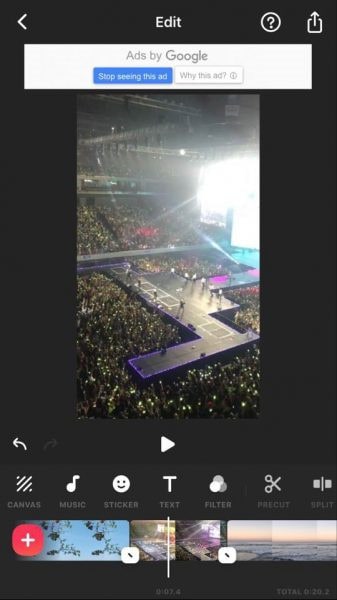
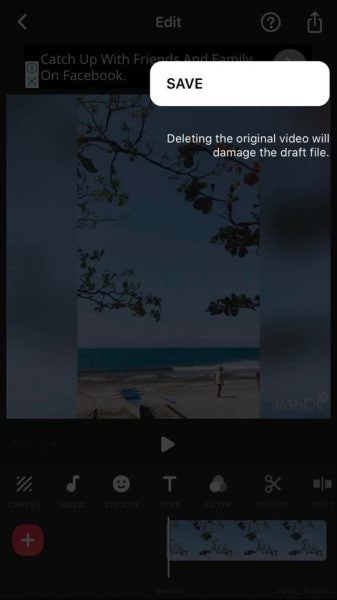
2. Filmora Go:
Without a doubt, Filmora is one of the greatest free video editors for iPhone that does not contain any watermarks. In addition, it’s compatible with both iPhones and Android devices and has a simple user interface.
Filmora is the greatest iPhone video editor for beginners, with themed filters and effects that add flair to your videos without any work.
Filmora has many unique features, including themes for your videos and ‘Materials,’ which are visual effects created by the program. Unfortunately, materials are only available with Filmora Pro, so keep that in mind.
Aside from that, you’ll find all of the typical features here. You can also add titles to videos, utilize stickers and effects, and add music to the background of your movie. You may also add another clip in picture-in-picture mode, which is beneficial.
Below are the following steps to edit FLV video:
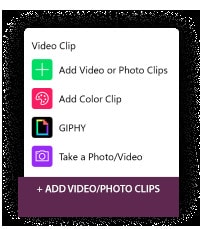
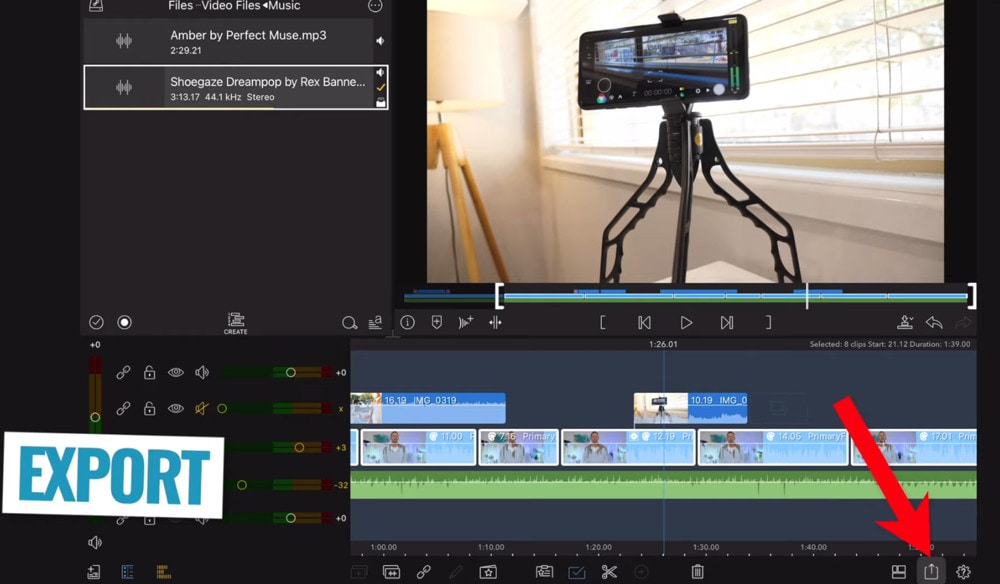
Step 1: Open the application and select ‘Create new video’. Now, import the video by choosing the video icon.
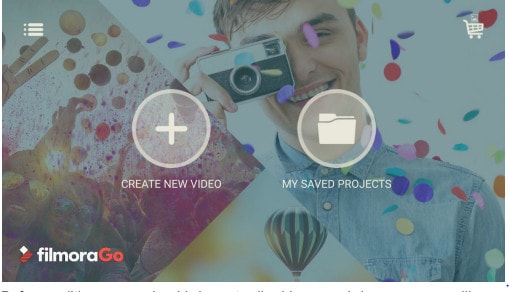
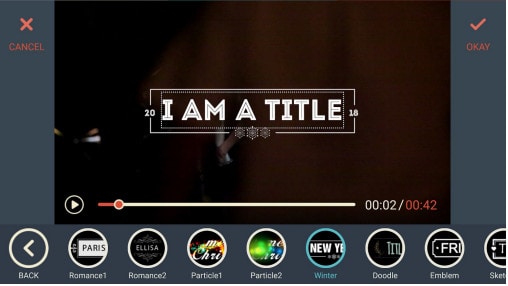
Step 2: Edit the video. Within the edit tool, you can trim and split the video. You can also improve the video quality by adding titles, transitions, and music, and voiceovers.

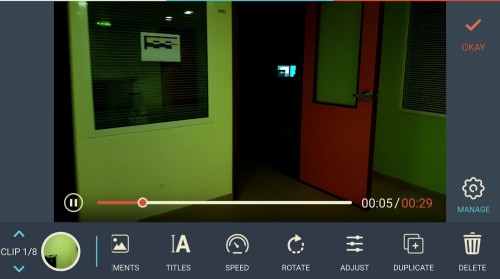

Step 3: After editing the video, select ‘SAVE’ and export the video or download it.
2 Ways to Edit FlV Video Online:
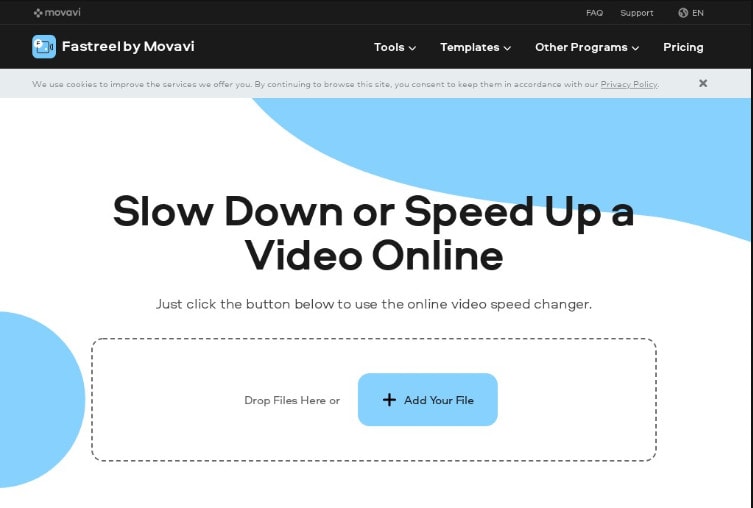
1. Fastreel:
If you’re seeking the finest free online video editor, Fastreel is a terrific tool to start with. This online video editing software provides a wide range of editing options. It can merge, edit, crop, and compress videos to make sharing easier.
It also includes many pre-made templates that you can change to create titles and transitions and other editing features like reverse, looping, and rotating. It’s also quite simple to use, and you can have polished videos in minutes.
There are also numerous pricing options to suit different customers, ranging from a completely free plan with watermarks to paid subscriptions with no limitations.
Use the following steps to edit FLV video:
Step 1: Open Fastreel web and import the video.
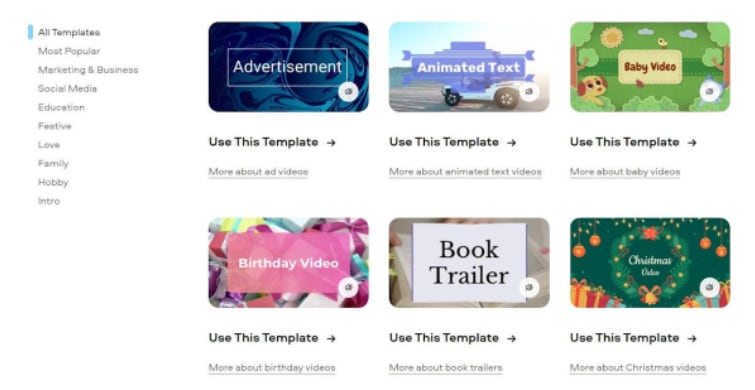
Step 2: Use templates to make it look attractive.
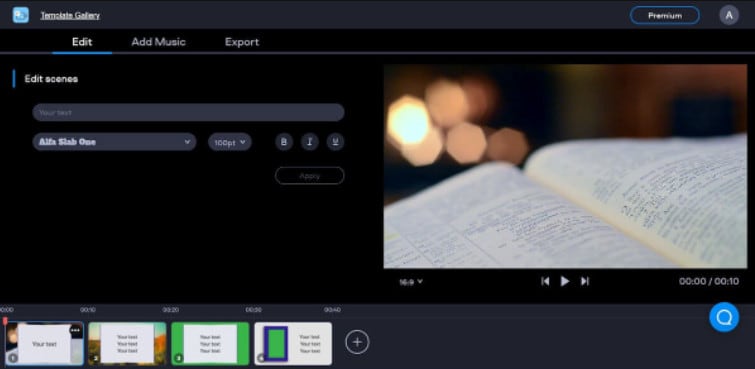
Step 3: Edit the video using the template.
Templates are unfinished videos with all of the effects already applied, such as backdrops, transitions, animated stickers, and titles. There are blank spots for your photos or videos, and you can arrange them in any sequence you like. You can also add music from the Fastreel library or upload your own track after entering your text.
Step 4: Once you are done with edits, save the video and export it.
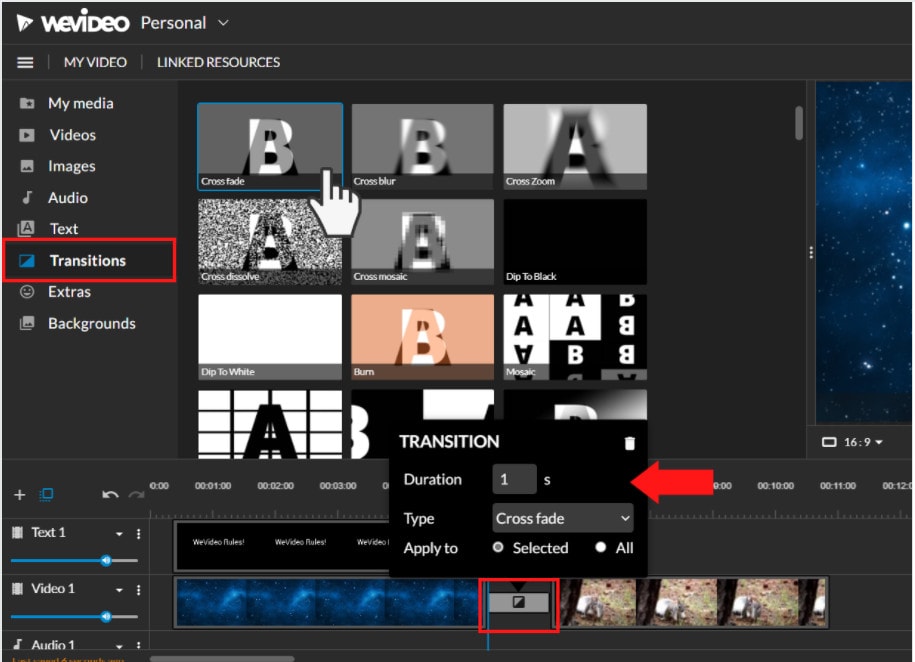
2. WeVideo:
When you’re seeking the greatest video producer online, another wonderful choice to explore is WeVideo.
Google, Dropbox, Rover, and Roche are just a few of the huge names that trust our online editor. Its fast, versatile editing engine and vast stock content collection for adding stock movies, photos, and audio tracks to your productions are ideal for business users.
WeVideo also stands out since it provides unlimited cloud storage for all of your videos, which you can download and watch on any device. The only drawback is that all of this comes at a price, with WeVideo offering a variety of payment plans ranging from $4.99 to $36.99 a month.
Follow the steps to edit videos using WeVideo:
Step 1: Open WeVideo and import the video file.
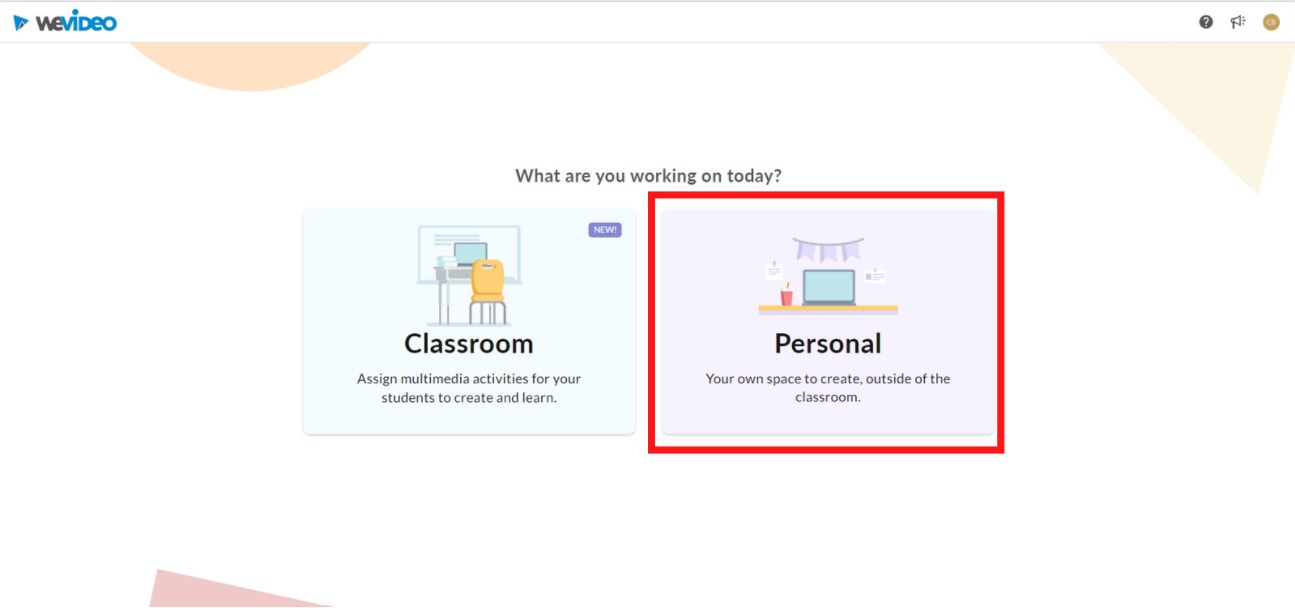
Step 2: Click on create new video in the left-hand corner of the screen.
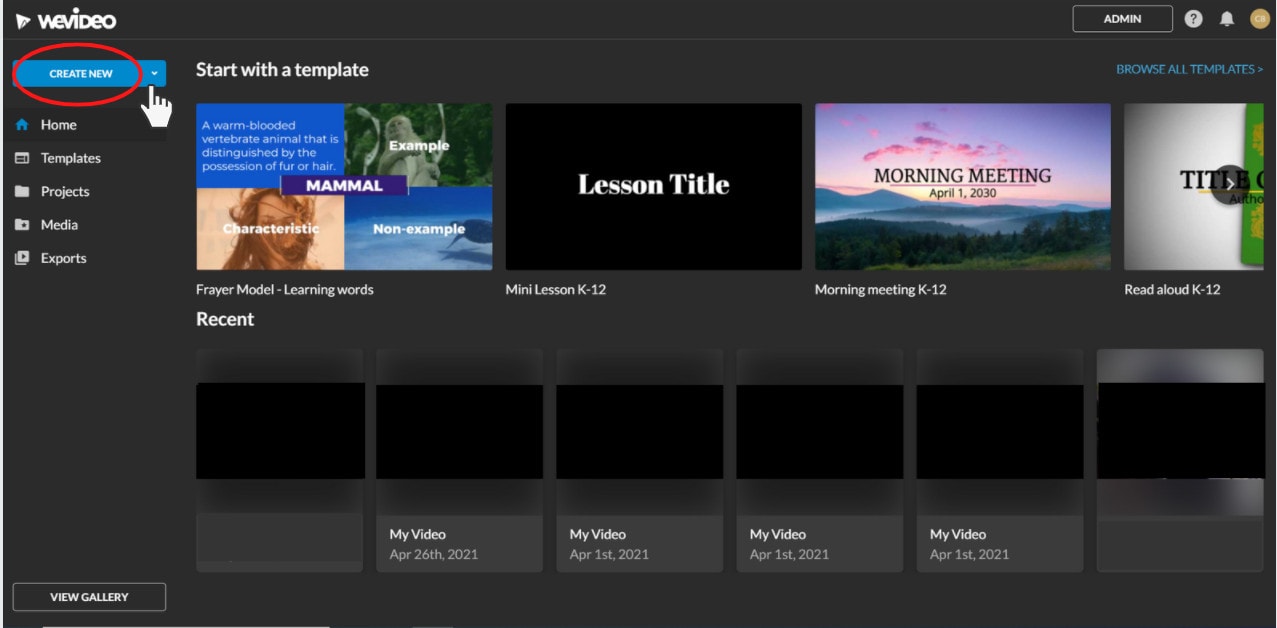
Step 3: Edit the video.
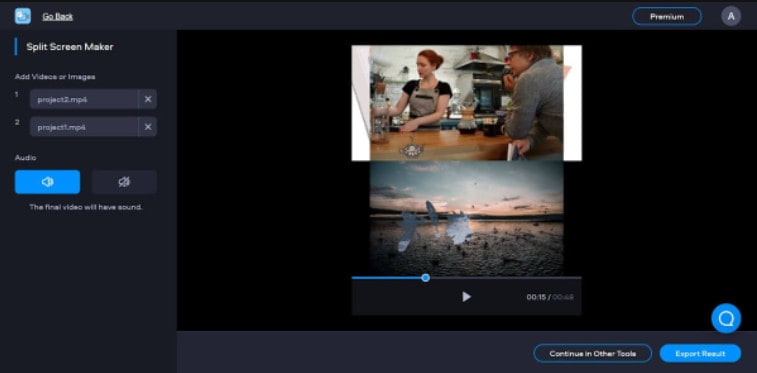
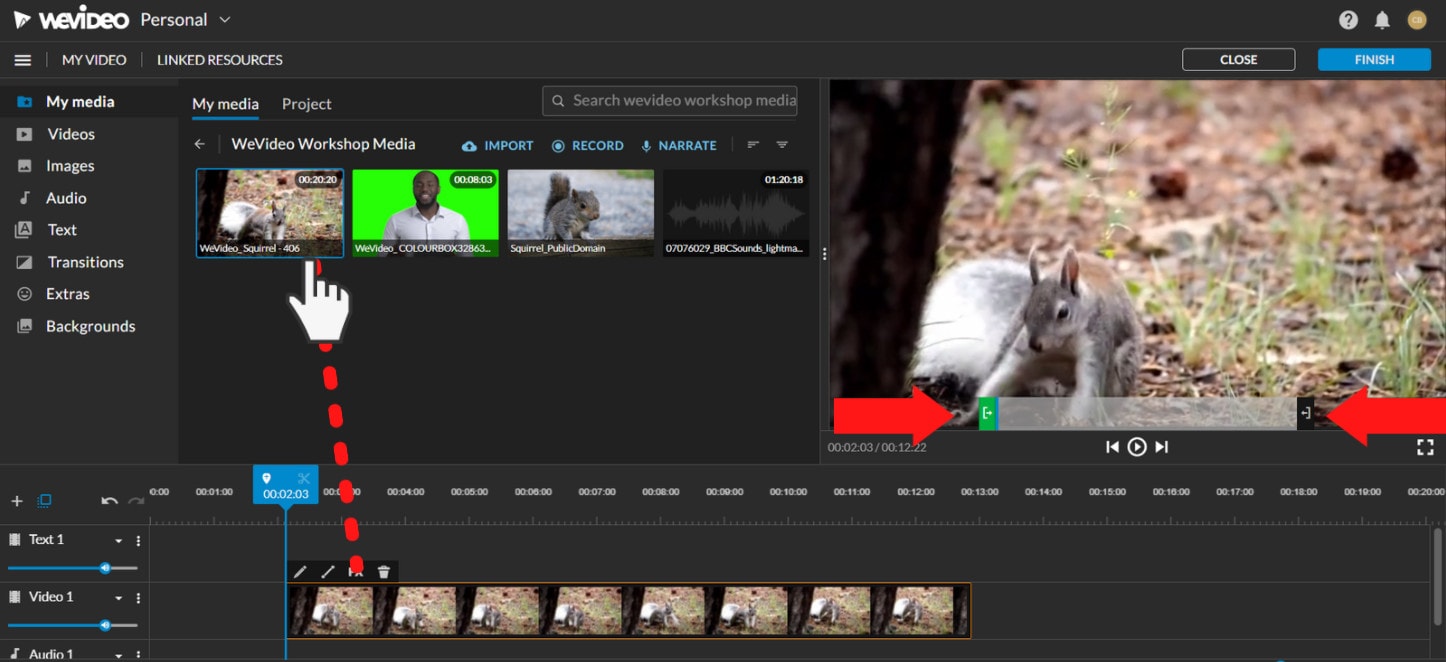
The video clip you imported will appear in the viewing window to the right once you click on it. By moving the arrows and either end, you can edit out the beginning or end of your footage.
- Drag the clip into your timeline from your media pool.
- Place the clip on your timeline by dragging and dropping it.
- Click the scissor symbol after moving the blue marker to the spot where you want to cut your clip.
- Once the material has been chopped, you can erase bits of it by selecting it with your mouse and then pressing delete on your keyboard or rearrange the clips in the timeline by dragging and dropping them to other positions.
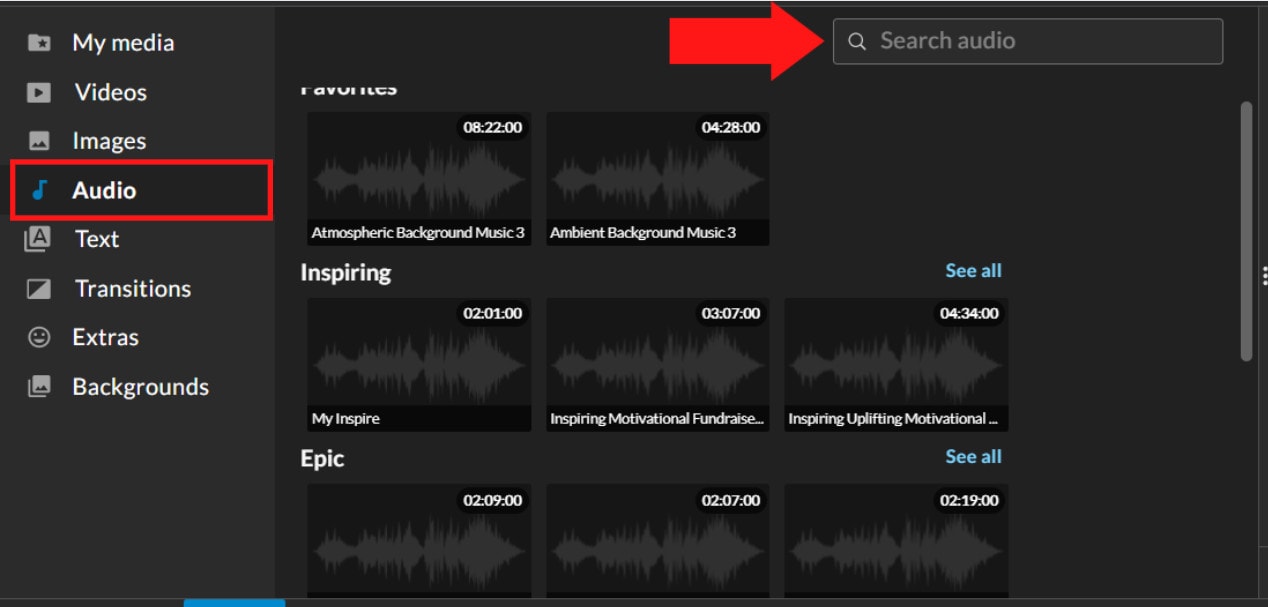
Step 4: Add effects, transitions, and music to the video.
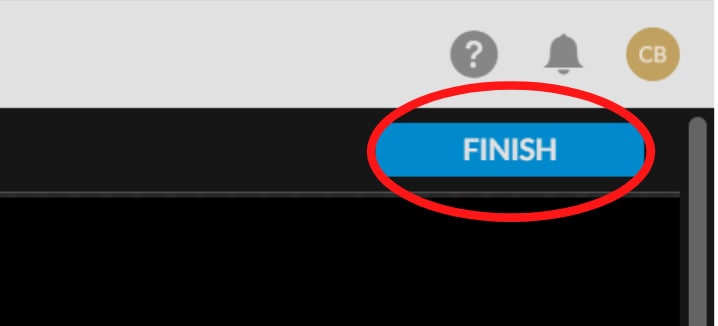
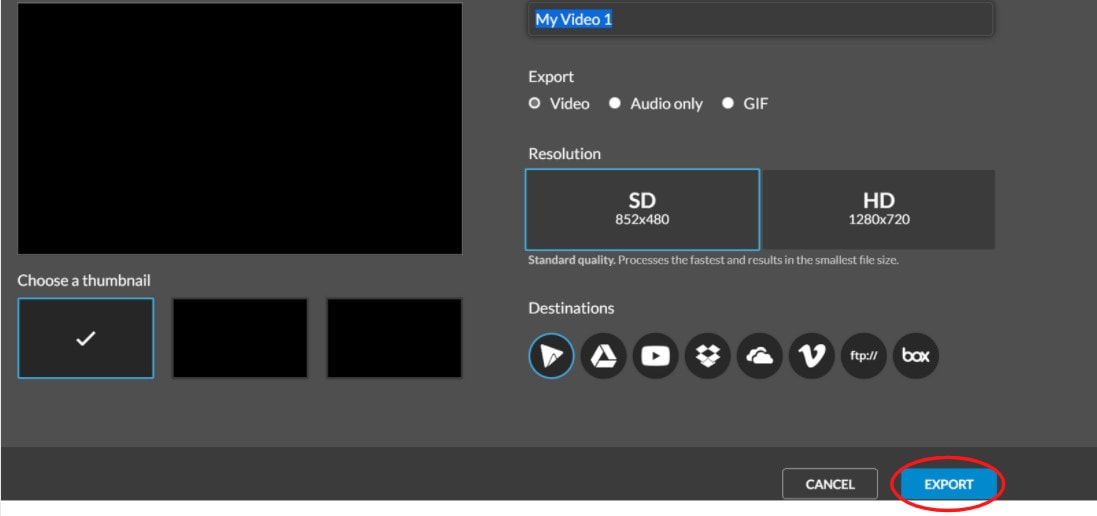
Step 5: Save and export the video by clicking on the Finish tab.
FAQs about editing FLV video
- How to open FLV files?
Any FLV player is required to view FLV files. Various players are available, including VLC, FLV Player, Sothink FLV Player for Mac, Tonec Free FLV Player, Any FLV Player, and others.
- Is Filmora compatible with Mac?
Filmora requires macOS Sierra (version 10.12) or later and the Big Sur (version 11) and Apple M1 chips. Touch Bar compatibility for MacBook Pro users and custom shortcuts to speed up editing.
- What is the best online FLV editor?
There are numerous free online editors to choose from. Fastreel, WeVideo, and FlexClip Video Maker are a few of the most popular.
- Is FLV better than MP4?
Because FLV and MP4 are the two most popular video file formats, it’s crucial to know which one is preferable. Adobe’s proprietary format is FLV. Both formats employ video and audio codecs and have equal performance levels. In their unprocessed state, MP4 files are more adaptable. You can, however, use an FLV file at the same time if you have the correct player.
- How do I choose a video editor?
When comparing video editing software, there are six crucial elements to consider.
- Budget and cost
- Ease of use/learning curve
- Multi-GPGPU acceleration and video format support
- Tools for advanced editing
- Music, special effects, and other goodies
- Customer service is second to none.
For macOS 10.14 or later
Therefore, you can use the following steps to edit FLV video on Windows and Mac:
Step 1: Import file:
Step 2: Edit the FLV file:
Acquire the perfect tool in your palm for anything you want to do, such as clipping, cropping, rotating, and more.
Furthermore, all editing capabilities in the toolbar allow drag-and-drop, making it even easier to touch up your films quickly. Consider the following scenario:
- Drag and drop a transition into the video/photo, or right-click it and select “Apply to All.”
- Please drag & drop a title template to the position where you want it to appear, then adjust it.
- To use the effects, select one from the 50+ available video effects, select it, and apply it to your photos/videos instantaneously.
Step 3: Save or Export the file:
When you’re done, export your modified MP4 files to Windows/Mac and quickly share them on YouTube, with the option of sending a message to Facebook and Twitter. When you click Create in the program window’s middle right corner, you’ll be taken to the Output window below.
Alternative Way to Edit FlV Video on Windows
1. VSDC
VSDC is a free video editor along with a lot of advanced features. Cut, combine, trim, crop, and other editing capabilities are available to help you polish your FLV films.
Although it may not look logical, learning the editing capabilities hidden within modular boxes is simple. One noteworthy aspect of VSDC is its ability to produce good visual effects using many trendy video effects, transitions, and filters.
Furthermore, strong chroma keys, color correction, object modification, and other editing tools can be utilized to edit FLV videos. It not only creates excellent FLV videos, but it also supports a wide range of media conversion, allowing you to convert FLV files to various formats and export them without a watermark.
Therefore, follow the below mentioned steps to edit FLV video using VSDC:
Step 1: Install the software on the Windows. Open the application and import the video.
Step 2: Use cutting and splitting tools to edit the video.
The first icon is a picture of a pair of scissors, which is a cutting tool. It’s very useful when you need to cut the beginning or end of a film. Place the cursor exactly where you want to cut, then select “Trim start” or “Trim finish” from the dropdown cutting menu (the small triangle next to the scissors icon).
Cropping is also simple. If you have too much additional space around the scene object recorded, just choose the file you want to trim and select the cropping icon from the “Cutting and Splitting” option. A new window will appear, allowing you to select the region of the scene that should stay.
Step 3: Apply effects and transitions.
To use one, first select the video file you wish to edit, then go to the Video effects tab and select the effect you want to use. On the timeline, a new tab will appear, containing all of the effects done to the selected object. You can alter the effect’s duration and position in time by dragging it with the mouse there. The properties pane on the right-hand side can be used to change other parameters.
Transitions follow the same rule. Place your cursor where you want the transition to begin, then choose a transition from the Video effects dropdown menu and manually adjust the duration.
Step 4: Save changes and export video.
Make sure your movie appears exactly how you want it to before exporting it. If the video appears choppy, use the red preview button and lower the preview quality. When the PC’s resources are insufficient to process the video in real time, lagging can occur. Keep in mind that it has no bearing on the outcome. When you’re finished, navigate to the Export project tab and select an export format.
2. Adobe Premiere Pro:
Professional video editors use Premiere Pro to make everything from YouTube videos to Hollywood films like Mank, a 2021 Oscar candidate. It’s also widely utilized in the workflows of designers, animators, and VFX artists, and we can see why after lengthy testing.
We found the software’s UI to be simple to use, and it increased our productivity by separating things into various workspaces, such as editing, effects, and audio. When we tested it on both Mac and PC, we discovered that each workspace helps handle a specific activity while minimizing distraction.
Edit the FLV video with Adobe Premiere Pro using the following steps:
Step 1: Import the video and create initial sequence.
Step 2: In the Timeline, trim and rearrange clips, add audio, and transitions.
Step 3: Add title and graphics.
In Premiere Pro, you may make onscreen titles, as well as stylize and animate your images.
Step 4: Export your video.
Alternative Way to Edit FlV Video on Mac
1. Blender:
Under the GNU General Public License, Blender is a free, open-source 3D content production program that runs on all major operating systems. Blender is one of the greatest video editors for both Windows and Mac, with advanced features such as modifier-based modeling tools, powerful character animation capabilities, a node-based material, etc.
Because it is developed for professionals, it is tough to use as a beginner. However, it is unrestricted in its use and distribution. In addition, color options are changeable and versatile in the UI.
In contrast, this free video editor is perfect for semi-pros or those who want to enhance their video editing skills. However, you’ll need a lot of time and effort to learn it.
Step 1: Open the application.
Step 2: Then, go into File->New->Video Editing to open the video editor.
Step 3: Import the video and start editing using the editing tools.
Step 4: Save and export the video.
2. Final Cut Pro:
When it comes to video editing software, Apple’s Final Cut Pro is one of the industry standards. As a result, it’s widely utilized in the television and film industries - at least among Mac users. However, one of the truly convincing reasons to choose it over Premiere Pro is because it is subscription-free: you only pay once.
The software’s Magnetic Timeline, grouping tools, a vast selection of effects, solid organizational capabilities, and simple ways to add and edit audio make it a favorite among professional video editors. 360° video, HDR, and powerful color correcting tools are among the other capabilities. It’s a strong software with a lot of features.
Follow the steps to edit FLV video using Final Cut Pro:
Step 1: Create Project.
To make a movie in Final Cut Pro, you must first establish a project, which keeps track of your editing selections and the media you utilize.
Step 2: Select and add clips to the timeline:
The second stage in making a movie with Final Cut Pro is to add and arrange clips in your project. In the timeline, you can move and reorder clips.
Step 3: Cut and trim video:
Final Cut Pro has a number of features for altering the start and stop points of clips in the timeline, as well as regulating the pacing of shots from one to the next.
Step 4: Edit the video by adding effects and transitions:
Final Cut Pro includes a number of advanced editing features that make it simple to create a professional film. Visual enhancements and colour correction are among the finishing touches.
Step 5: Save and export video:
2 Ways to Edit FlV Video on Android:
1. Inshot:
For Android users, Inshot is a fantastic image and video editor. This Android video editor allows you to add popular stickers and emoticons to your films, making them more fashionable and unique.
The program supports HD video output, allowing you more control over your footage. Moreover, the additional sound and video can be synchronized with the available video chronology.
You can quickly blend more than two movies into one with rich effects and sound with this Android editor app. In addition, you can generate a watermark using unique text provided in the app, and subtitles support allow you to produce one with a variety of fonts.
Following are the steps that you can follow to edit FLV video using Inshot:
Step 1: Open the app and import the video.
Tap “Video” to open your phone’s gallery folder and begin editing a video in the InShot app. Select a video to work with. Adjust the canvass after your video has been loaded into the InShot App. For your other social media accounts, there are aspect ratios and sizes that work well with the video. It also has the option of being in portrait or landscape mode.
Step 2: Trim and split videos.
Step 3: Merge videos (optional):
By combining clips, you can combine them into a single film or project. Simply choose the videos you want to import from the drop-down menu. By tapping the “+” button on the lower left of the screen, you can insert and merge more videos. Your project will then be updated using the selected video.
Step 4: Apply filters, add music, text and stickers.
Step 5: Once you are done with the editing process, save the file.
2. Videoshow:
VideoShow has a lot of video editing options. It is a simple and practical video editing program and movie scene maker for art directors and beginners. Using this video cutter, you may reverse, blur, duplicate, edit, merge and split collage clips or films.
You can also use VideoShow to adjust the audio or add subtitles to any video. It also allows you to use different filters on any video on your device. Over 50 intricate themes are included in the program, allowing you to create gorgeous music videos, slide shows, and vlogs in no time.
The annual subscription package is for $135.19, or you can also make a one-time purchase for $225.78.
However, to edit the video, you can use the following steps:
Step 1: Download and install the videoshow application and open it. Upload the video that you want to edit.
Step 2: Edit the video by applying filters or cutting and trimming the part of the video that you want to remove.
Step 3: Save changes and export the video to your preferred location.
2 Ways to Edit FlV Video on iPhone:
1. LumaFusion:
No other software program on the iPhone comes close to the feature set that LumaFusion offers for video editing. It is the only premium app on this list, and it is well worth every penny.
But, of course, YouTubers aren’t the only ones who use the program; mobile journalists and professional video producers who don’t want to lug along their bulky camera equipment and editing apparatus also use it.
LumaFusion deals with up to six video and audio tracks for photographs, movies, audio, titles, and graphics, and six audio tracks for narration, music, and sound effects. You also receive a magnetic timeline; importing clips is a breeze once they’ve been imported.
There are many transitions and effects to choose from, all of which can be layered. Finally, it includes much royalty-free music, sound effects, and other assets. So if you need a professional video editing tool for your iPhone, LumaFusion ($29.99) is the way to go.
Follow these steps to edit FLV video using LumaFusion:
Step 1: To create your first project, press + at the bottom of the screen. You can create a new project by tapping that area or by tapping the Plus button.
Step 2: Import video:
The Import section is located in the top left corner of the screen. This defaults to the Photos tab when you initially launch a new project. All of the photographs and videos can be seen here.
Step 3: Check layout and adjust volume levels
Step 4: Edit the video and add titles.
Step 5: Export the video.
2. Filmora Go:
Without a doubt, Filmora is one of the greatest free video editors for iPhone that does not contain any watermarks. In addition, it’s compatible with both iPhones and Android devices and has a simple user interface.
Filmora is the greatest iPhone video editor for beginners, with themed filters and effects that add flair to your videos without any work.
Filmora has many unique features, including themes for your videos and ‘Materials,’ which are visual effects created by the program. Unfortunately, materials are only available with Filmora Pro, so keep that in mind.
Aside from that, you’ll find all of the typical features here. You can also add titles to videos, utilize stickers and effects, and add music to the background of your movie. You may also add another clip in picture-in-picture mode, which is beneficial.
Below are the following steps to edit FLV video:
Step 1: Open the application and select ‘Create new video’. Now, import the video by choosing the video icon.
Step 2: Edit the video. Within the edit tool, you can trim and split the video. You can also improve the video quality by adding titles, transitions, and music, and voiceovers.
Step 3: After editing the video, select ‘SAVE’ and export the video or download it.
2 Ways to Edit FlV Video Online:
1. Fastreel:
If you’re seeking the finest free online video editor, Fastreel is a terrific tool to start with. This online video editing software provides a wide range of editing options. It can merge, edit, crop, and compress videos to make sharing easier.
It also includes many pre-made templates that you can change to create titles and transitions and other editing features like reverse, looping, and rotating. It’s also quite simple to use, and you can have polished videos in minutes.
There are also numerous pricing options to suit different customers, ranging from a completely free plan with watermarks to paid subscriptions with no limitations.
Use the following steps to edit FLV video:
Step 1: Open Fastreel web and import the video.
Step 2: Use templates to make it look attractive.
Step 3: Edit the video using the template.
Templates are unfinished videos with all of the effects already applied, such as backdrops, transitions, animated stickers, and titles. There are blank spots for your photos or videos, and you can arrange them in any sequence you like. You can also add music from the Fastreel library or upload your own track after entering your text.
Step 4: Once you are done with edits, save the video and export it.
2. WeVideo:
When you’re seeking the greatest video producer online, another wonderful choice to explore is WeVideo.
Google, Dropbox, Rover, and Roche are just a few of the huge names that trust our online editor. Its fast, versatile editing engine and vast stock content collection for adding stock movies, photos, and audio tracks to your productions are ideal for business users.
WeVideo also stands out since it provides unlimited cloud storage for all of your videos, which you can download and watch on any device. The only drawback is that all of this comes at a price, with WeVideo offering a variety of payment plans ranging from $4.99 to $36.99 a month.
Follow the steps to edit videos using WeVideo:
Step 1: Open WeVideo and import the video file.
Step 2: Click on create new video in the left-hand corner of the screen.
Step 3: Edit the video.
The video clip you imported will appear in the viewing window to the right once you click on it. By moving the arrows and either end, you can edit out the beginning or end of your footage.
- Drag the clip into your timeline from your media pool.
- Place the clip on your timeline by dragging and dropping it.
- Click the scissor symbol after moving the blue marker to the spot where you want to cut your clip.
- Once the material has been chopped, you can erase bits of it by selecting it with your mouse and then pressing delete on your keyboard or rearrange the clips in the timeline by dragging and dropping them to other positions.
Step 4: Add effects, transitions, and music to the video.
Step 5: Save and export the video by clicking on the Finish tab.
FAQs about editing FLV video
- How to open FLV files?
Any FLV player is required to view FLV files. Various players are available, including VLC, FLV Player, Sothink FLV Player for Mac, Tonec Free FLV Player, Any FLV Player, and others.
- Is Filmora compatible with Mac?
Filmora requires macOS Sierra (version 10.12) or later and the Big Sur (version 11) and Apple M1 chips. Touch Bar compatibility for MacBook Pro users and custom shortcuts to speed up editing.
- What is the best online FLV editor?
There are numerous free online editors to choose from. Fastreel, WeVideo, and FlexClip Video Maker are a few of the most popular.
- Is FLV better than MP4?
Because FLV and MP4 are the two most popular video file formats, it’s crucial to know which one is preferable. Adobe’s proprietary format is FLV. Both formats employ video and audio codecs and have equal performance levels. In their unprocessed state, MP4 files are more adaptable. You can, however, use an FLV file at the same time if you have the correct player.
- How do I choose a video editor?
When comparing video editing software, there are six crucial elements to consider.
- Budget and cost
- Ease of use/learning curve
- Multi-GPGPU acceleration and video format support
- Tools for advanced editing
- Music, special effects, and other goodies
- Customer service is second to none.
Tutorial | How to Make a Smooth Speed Ramping in Premiere Pro?
Versatile Video Editor - Wondershare Filmora
An easy and powerful editor
Numerous effects to choose from
Detailed tutorials are provided by the official channel
Speed ramping is a popular Premiere Pro effect for good reason: it looks fantastic! When utilized simultaneously to spice up a video clip, slow motion and quick motion may both be great aesthetic choices. This practice may save you time by enabling you to show more about what you want to see in your edit without using harsh jump cuts.

This effect may be used for a number of reasons, including clip transitions, speeding up a clip to make it shorter, and slowing down a clip to make it longer. Speed ramping may be used with a number of various effects.
According to the business, Adobe Premiere Pro is one of the most widely used video editing products on the market today. The ability to alter the speed of individual clips is one of Premiere Pro’s most important capabilities. While speed ramping is often used in sports highlights, changing the speed of video may be useful for a number of other types of material.
You’ll learn how to construct a spectacular speed ramp in Adobe Premiere Pro, beginning with capturing the proper kind of video and moving to advanced tips and methods. Following that, we’ll go through some ideas and inspiration for when to use a speed ramp in your circumstance.
What is Speed Ramping?
A speed ramp is used to gradually increase the speed of a video clip as it accelerates or decelerates. It is guaranteed that a smooth transition between two separate speeds will take place. The method is crucial in changing the tempo of the film and, as a consequence, creating a dramatic impression. The film’s required velocity is achieved by the employment of super-fast visual effects.
A speed ramp, as opposed to a rapid shift in speed, provides for a more smooth transition between two drastically differing speeds. This method is used to focus attention on certain parts of your video, which has a huge impact on your editing. It provides just the right amount of zing to keep your audience interested and excited about your presentation.
Examples of Speed Ramping
It works especially well when utilized to focus the viewer’s attention on a certain moment or action in your videos, such as a tough jump or an impending bullet. Another name for this approach speeds ramping (sometimes known as time remapping). It may also be used to create a visually pleasing transition between two clips or pictures inside a single movie.
You may also use Speed Ramping to alter the runtime of your video to fit the time limits of other social media sites, such as Instagram and Vine. If you just have 30 seconds to deliver your video, the following are the two most common places where people apply speed ramping techniques:
Assume you are shooting a person walking and want the clip to play in slow motion so that viewers can clearly see the person’s face. In this scenario, speed ramping is precisely what you need since it enables you to do precisely that.
Do you remember the famous movie “The Matrix” scene, when Neo dodges the bullets? It’s not some typical scene; it’s a pretty good example of speed ramping.
How to Create Speed Ramping/Time Remapping in Premiere Pro?
Speed Ramping premiere pro is an excellent tool for speeding up video clips. ‘ In order to speed up or slow down the speed of a video clip, this effect may be employed. In this article, you’ll learn how to make the most of this fantastic tool in Adobe Premiere Pro.

While using Premiere Pro, the ability to change a clip’s speed without altering its pitch is a very useful feature. An example of how this feature comes in helpful is when you have a clip that shows someone or something moving from left to right or vice versa.
Advanced Premiere Pro Time Remapping
The fact that this effect is so simple to use is its main benefit. By moving handles around on the clip, you may quickly choose different regions of the clip to be influenced by the adjustment when you apply it. This makes achieving the required result extremely quick and easy.

If you want to go deep into the game, Speed Ramp offers some more advanced options that give you even more control over your speed modifications. The properties section allows you to designate which portions of the timeline are affected by the ramp, as well as change factors like the curve type and bias.
Steps To Use Speed Ramping In Premiere Pro
Follow the below-mentioned steps to learn how to use speed ramping in premiere pro:
- Download and install Adobe Premiere Pro. Once installed, launch the application.
- Create a new project in Premiere by clicking the New Project button. After that, import the film that you want to speed ramp. It is the simplest and most straightforward method of importing film into Premiere to just click and drag the clip into the project window.
- Before commencing any work with speed, click and drag the video track in the timeline to make it taller by increasing the height of the track. This will guarantee that you can see the speed ramp as you go to the next stages.
- To create a sequence if you don’t already have one, drag a clip into the timeline and drop it where you want it to appear. Using the clip’s parameters, Premiere will automatically generate a sequence with the necessary settings.
- Decide when you want to apply the speed ramp and mark the spot on the screen where you will do so. The key to a pleasant speed ramp is movement, so choose a time when the environment is very active. You can specify in and out points, cut the clip with “Command+K,” or divide the clip into parts using the razor blade tool (which is accessible through the “Command+K” shortcut).
- Keyframes will be created at this point. It’s first and foremost important that the keyframes be clearly visible. Access the proper view by selecting “Show Clip Keyframes” from the context menu when you right-click on your clip.
- Another drop-down option will appear, from which you’ll choose “Time Remapping” and then press the “Enter” key.
- Select “Speed” from the drop-down menu.
- To create a keyframe, choose the pen from the toolbar (or just use the “P” key on your keyboard) and click on the white line running across the video track. If you wish to make a speed ramp, you’ll need at least two keyframes: one to indicate where the speed ramp should begin and another to indicate where it should terminate.
- If you wish to create more sophisticated speed ramps, you may do so by including more keyframes in your animation.
- Switch back to the selection tool when you’ve finished placing your keyframes. “V” is the shortcut key for this.
- Now comes the critical moment: it’s time to change the speed. This is a task that Premiere Pro makes rather simple. The only thing you have to do now is click on the white line between the keyframes you have created and drag it either up or down, depending on your preference for speed or slowness.
- It’s not finished yet; we still need to smooth it out a little more. With the selection tool selected, click and drag one of the keyframe markers to the other side of the screen. The number of frames across which the speed shift will occur will be stretched out as a result of this. The longer and more gradual the speed ramp will be, the greater the distance between the two sides of the keyframe indication is separated.
- Complete the process with the other keyframe, and your speed ramp will be complete!
Techniques to Make Speed Ramping Smooth
In this section, we will be viewing some advanced time remapping features of Adobe Premiere Pro, which are as follows.
Keyframe Interpolation
When creating a speed ramp, keyframes are used to indicate the beginning and finishing points of the speed shift. However, there are a number of methods in which Premiere may transport the clip from point A to point B.
In the video industry, filling in the data between the two locations is known as keyframe interpolation.
- Simply dragging to divide a keyframe, like in the previous example, results in an equitable speed increase between the keyframes in the animation. Linear interpolation is the term used to describe this process.
- Instead of using Bezier Interpolation, you may utilize it to produce a smoother, more natural speed ramp. With Bezier Interpolation, the pace at which the speed increases will likewise accelerate, giving the effect of a more pronounced ramp.
- To build an S-curve shape, choose a keyframe and drag the Bezier handles to the desired position. Make adjustments until you are satisfied with the outcome.
Speed Ramp Transition
Speed ramp transitions are easy to make and may be utilized to add visual interest to a wide range of video genres. This effect is achieved by boosting the clip speed at the end of a clip before transitioning into a cut.
- In the second clip, the tempo is abruptly boosted and subsequently decreased to provide a smooth transition between situations. It may symbolize the passage of time, a character’s perplexity, or simply add flair to a commercial film.
- Using Premiere Pro, create a ramp-up at the end of your first clip and a ramp-down at the start of your second clip. The speed rubber band will be curved like a bell curve across the two clips when finished.
Adding speed ramps to films in Premiere Pro may improve the usefulness and looks of a variety of movies, from narrative features to social media posts. In Premiere, you may easily create and adjust speed duration directly in the timeline to meet any needs.
Speed Ramping In Wondershare Filmora
We understood how to do speed ramping in Premiere Pro. You can also get the same results using a much easier software that is “Wondershare Filmora”.
What is Wondershare Filmora?
Filmora is a video editor that is best suited for social video editors, vloggers, home movies, and other video projects. In addition, it may be used on both Macs and PCs. To begin using Filmora, you just need to pay a one-time registration fee of $0! You’ll notice a watermark when you export from the free version. For $59.99, Filmora’s latest version is a one-time purchase that doesn’t need a subscription!
Amazing Features
Filmora is an award-winning video editing program, that allows users to create visually stunning videos without the need for complex editing techniques.
Video playback in Filmora’s latest version may be accelerated by the graphics card (GPU). It’s accelerating at an alarming rate right now. It’s also possible to lower the resolution of a 4K or higher video for quicker playing. Cuts and splits are a snap using Filmora. Make a cut by dragging your play head to the location where you want to split the footage. Then, to remove the additional clip from the clip, use the delete key.
Even those with the most basic PC hardware may use this video editing software to create high-quality movies. Moreover, the most anticipated features that Filmora’s latest version offers are as follows:
- Motion Tracking
- Keyframing Animations
- Audio Ducking
- Split Screen
- Video Transitions
- Speed Control
- Color Grading
- Filmstock Effects
- Multiple Formats Exporting
Users may utilize the color tuning option to change the white balance and dynamic range of their video clip, among other things. You may alter the audio levels of each track using the audio mixer tool. The advanced Text Editor function allows you to adjust the color, size, font, and even the motion of text. The screen recording tool enables you to capture your computer’s screen as well as your webcam in excellent quality. The video stabilization feature lowers or eliminates the effect of camera shake on video.
Speed Ramping In Filmora
The method is crucial in changing the tempo of the film and, as a consequence, creating a dramatic impression. The film’s required speed is achieved by the employment of super-fast visual effects.
When using a camera with a much higher frame rate, the speed ramping approach may provide excellent effects. It aids in the production of the most dramatic impression.
Speed ramping effects are available in six presets, which include Montage, Hero Moment, Bullet Time, Jumper, and Flash In, all of which will add a theatrical element to your movie that will leave your viewers in awe.

Creative pros can swiftly and effectively speed up a movie with Wondershare Filmora. However, in order to get the intended results, it is essential to completely understand and adhere to the approach.
Wondershare Filmora 11 has a variety of tools and features to help you create a visually stunning film in a short period of time. Its Instant Mode allows you to produce a video creation from start to finish in less than 5 minutes.
Steps
- Download and Install Filmora. Launch the application on your system.

- Navigate to the chosen video and open it in the program to speed up and lengthen it. You may also add the movie to the interface by dragging and dropping it there.

- When the video appears in the timeline, right-click it to begin playback. As a consequence, a context menu is displayed.

- Select Speed from the pop-up editing window, and then select Speed Ramping from the drop-down menu.

- Alternatively, right-click on the video or audio clip, choose Speed from the drop-down menu, and select Speed Ramping.

- In the Speed Ramping panel, you may adjust the speed or choose from a number of presets, including Montage, Hero Moment, Bullet Time, Jumper, Flash in, and Flash out, to use as templates. You have the option of using the Preset speed ramps. Alternatively, you may personalize your own innovative ones.

- Move the play head to the point where you wish to increase or decrease the speed of the video or audio. Then, to add speed keyframes, choose the Add icon from the toolbar. The video or audio clips will be marked as Speed Ramping when the speed ramp has been added by Filmora.

- If you want to delete a keyframe, you can do so by selecting that particular keyframe and selecting the delete button like in the image:

- As we go on to the video keyframe speed adjustment, just slide the keyframe dot upward or downward to alter the point speed of the movie. Aside from that, you can keep the audio pitch constant regardless of how fast or slow the video is moving.

- The settings will be saved if you are pleased with them after you make the necessary modifications. In any other case, you may use the Reset button to return to the original configuration.
- When you’ve finished your work, go to the “File” panel and choose “Save Project” from the list of options that display. Change the name of the project and then click “Save.”
- Additionally, the movie may be exported using Filmora’s “Export” feature; just choose “Export” and then specify a new name for the file. The video may be exported to a device, a system, or even YouTube. After that, choose “Export.”

Speed Ramping Tips
- High Frame Rate: The frame rate is an important consideration when it comes to speed ramping. If you wish to slow down the video after it’s been recorded, shoot it at a frame rate higher than 60 frames per second. When a video is slowed down, there should be enough frames to guarantee that the video passes the 24 frames per second threshold frame rate.
- Choose The Appropriate Frame Resolution: Another possibility is to modify your video’s frame resolution. The tip has the ability to edit the clip’s properties from the Slowing down the video is achieved by changing the frame rate in the clip’s parameters from 120 to 24 frames per second. As a consequence, the frames will be expanded to the proper frame rate. As a consequence, the video is slowed down but not jerked.
- Purposeful Time Remapping: Instead of keeping the same pace throughout the film, a deliberate speed ramp should be implemented. A video has emotional, mysterious, exciting, and slow-motion Why is this the case? The usage of the same video speed throughout the film may have a negative influence on the watching experience. As a result, it is critical that videos be separated into genres and that the tempo of the videos is modified accordingly.
Conclusion
The use of the ideal cinematic effect at the right time boosts the audience and engagement with the material. This respective article explored speed ramping in-depth and oughts to teach creative pros how to slow down a video and speed up a movie. It covers speed raming in premiere pro and then moves toward Wondershare Filmora which seems a bit easier. Wondershare Filmora is a good choice for completing the task as quickly as possible. You will have access to all of the effects and tools mentioned, as well as the ability to keep the audio pitch consistent throughout the effect, which is critical while altering the video speed.
Speed ramping is a popular Premiere Pro effect for good reason: it looks fantastic! When utilized simultaneously to spice up a video clip, slow motion and quick motion may both be great aesthetic choices. This practice may save you time by enabling you to show more about what you want to see in your edit without using harsh jump cuts.
This effect may be used for a number of reasons, including clip transitions, speeding up a clip to make it shorter, and slowing down a clip to make it longer. Speed ramping may be used with a number of various effects.
According to the business, Adobe Premiere Pro is one of the most widely used video editing products on the market today. The ability to alter the speed of individual clips is one of Premiere Pro’s most important capabilities. While speed ramping is often used in sports highlights, changing the speed of video may be useful for a number of other types of material.
You’ll learn how to construct a spectacular speed ramp in Adobe Premiere Pro, beginning with capturing the proper kind of video and moving to advanced tips and methods. Following that, we’ll go through some ideas and inspiration for when to use a speed ramp in your circumstance.
What is Speed Ramping?
A speed ramp is used to gradually increase the speed of a video clip as it accelerates or decelerates. It is guaranteed that a smooth transition between two separate speeds will take place. The method is crucial in changing the tempo of the film and, as a consequence, creating a dramatic impression. The film’s required velocity is achieved by the employment of super-fast visual effects.
A speed ramp, as opposed to a rapid shift in speed, provides for a more smooth transition between two drastically differing speeds. This method is used to focus attention on certain parts of your video, which has a huge impact on your editing. It provides just the right amount of zing to keep your audience interested and excited about your presentation.
Examples of Speed Ramping
It works especially well when utilized to focus the viewer’s attention on a certain moment or action in your videos, such as a tough jump or an impending bullet. Another name for this approach speeds ramping (sometimes known as time remapping). It may also be used to create a visually pleasing transition between two clips or pictures inside a single movie.
You may also use Speed Ramping to alter the runtime of your video to fit the time limits of other social media sites, such as Instagram and Vine. If you just have 30 seconds to deliver your video, the following are the two most common places where people apply speed ramping techniques:
Assume you are shooting a person walking and want the clip to play in slow motion so that viewers can clearly see the person’s face. In this scenario, speed ramping is precisely what you need since it enables you to do precisely that.
Do you remember the famous movie “The Matrix” scene, when Neo dodges the bullets? It’s not some typical scene; it’s a pretty good example of speed ramping.
How to Create Speed Ramping/Time Remapping in Premiere Pro?
Speed Ramping premiere pro is an excellent tool for speeding up video clips. ‘ In order to speed up or slow down the speed of a video clip, this effect may be employed. In this article, you’ll learn how to make the most of this fantastic tool in Adobe Premiere Pro.
While using Premiere Pro, the ability to change a clip’s speed without altering its pitch is a very useful feature. An example of how this feature comes in helpful is when you have a clip that shows someone or something moving from left to right or vice versa.
Advanced Premiere Pro Time Remapping
The fact that this effect is so simple to use is its main benefit. By moving handles around on the clip, you may quickly choose different regions of the clip to be influenced by the adjustment when you apply it. This makes achieving the required result extremely quick and easy.
If you want to go deep into the game, Speed Ramp offers some more advanced options that give you even more control over your speed modifications. The properties section allows you to designate which portions of the timeline are affected by the ramp, as well as change factors like the curve type and bias.
Steps To Use Speed Ramping In Premiere Pro
Follow the below-mentioned steps to learn how to use speed ramping in premiere pro:
- Download and install Adobe Premiere Pro. Once installed, launch the application.
- Create a new project in Premiere by clicking the New Project button. After that, import the film that you want to speed ramp. It is the simplest and most straightforward method of importing film into Premiere to just click and drag the clip into the project window.
- Before commencing any work with speed, click and drag the video track in the timeline to make it taller by increasing the height of the track. This will guarantee that you can see the speed ramp as you go to the next stages.
- To create a sequence if you don’t already have one, drag a clip into the timeline and drop it where you want it to appear. Using the clip’s parameters, Premiere will automatically generate a sequence with the necessary settings.
- Decide when you want to apply the speed ramp and mark the spot on the screen where you will do so. The key to a pleasant speed ramp is movement, so choose a time when the environment is very active. You can specify in and out points, cut the clip with “Command+K,” or divide the clip into parts using the razor blade tool (which is accessible through the “Command+K” shortcut).
- Keyframes will be created at this point. It’s first and foremost important that the keyframes be clearly visible. Access the proper view by selecting “Show Clip Keyframes” from the context menu when you right-click on your clip.
- Another drop-down option will appear, from which you’ll choose “Time Remapping” and then press the “Enter” key.
- Select “Speed” from the drop-down menu.
- To create a keyframe, choose the pen from the toolbar (or just use the “P” key on your keyboard) and click on the white line running across the video track. If you wish to make a speed ramp, you’ll need at least two keyframes: one to indicate where the speed ramp should begin and another to indicate where it should terminate.
- If you wish to create more sophisticated speed ramps, you may do so by including more keyframes in your animation.
- Switch back to the selection tool when you’ve finished placing your keyframes. “V” is the shortcut key for this.
- Now comes the critical moment: it’s time to change the speed. This is a task that Premiere Pro makes rather simple. The only thing you have to do now is click on the white line between the keyframes you have created and drag it either up or down, depending on your preference for speed or slowness.
- It’s not finished yet; we still need to smooth it out a little more. With the selection tool selected, click and drag one of the keyframe markers to the other side of the screen. The number of frames across which the speed shift will occur will be stretched out as a result of this. The longer and more gradual the speed ramp will be, the greater the distance between the two sides of the keyframe indication is separated.
- Complete the process with the other keyframe, and your speed ramp will be complete!
Techniques to Make Speed Ramping Smooth
In this section, we will be viewing some advanced time remapping features of Adobe Premiere Pro, which are as follows.
Keyframe Interpolation
When creating a speed ramp, keyframes are used to indicate the beginning and finishing points of the speed shift. However, there are a number of methods in which Premiere may transport the clip from point A to point B.
In the video industry, filling in the data between the two locations is known as keyframe interpolation.
- Simply dragging to divide a keyframe, like in the previous example, results in an equitable speed increase between the keyframes in the animation. Linear interpolation is the term used to describe this process.
- Instead of using Bezier Interpolation, you may utilize it to produce a smoother, more natural speed ramp. With Bezier Interpolation, the pace at which the speed increases will likewise accelerate, giving the effect of a more pronounced ramp.
- To build an S-curve shape, choose a keyframe and drag the Bezier handles to the desired position. Make adjustments until you are satisfied with the outcome.
Speed Ramp Transition
Speed ramp transitions are easy to make and may be utilized to add visual interest to a wide range of video genres. This effect is achieved by boosting the clip speed at the end of a clip before transitioning into a cut.
- In the second clip, the tempo is abruptly boosted and subsequently decreased to provide a smooth transition between situations. It may symbolize the passage of time, a character’s perplexity, or simply add flair to a commercial film.
- Using Premiere Pro, create a ramp-up at the end of your first clip and a ramp-down at the start of your second clip. The speed rubber band will be curved like a bell curve across the two clips when finished.
Adding speed ramps to films in Premiere Pro may improve the usefulness and looks of a variety of movies, from narrative features to social media posts. In Premiere, you may easily create and adjust speed duration directly in the timeline to meet any needs.
Speed Ramping In Wondershare Filmora
We understood how to do speed ramping in Premiere Pro. You can also get the same results using a much easier software that is “Wondershare Filmora”.
What is Wondershare Filmora?
Filmora is a video editor that is best suited for social video editors, vloggers, home movies, and other video projects. In addition, it may be used on both Macs and PCs. To begin using Filmora, you just need to pay a one-time registration fee of $0! You’ll notice a watermark when you export from the free version. For $59.99, Filmora’s latest version is a one-time purchase that doesn’t need a subscription!
Amazing Features
Filmora is an award-winning video editing program, that allows users to create visually stunning videos without the need for complex editing techniques.
Video playback in Filmora’s latest version may be accelerated by the graphics card (GPU). It’s accelerating at an alarming rate right now. It’s also possible to lower the resolution of a 4K or higher video for quicker playing. Cuts and splits are a snap using Filmora. Make a cut by dragging your play head to the location where you want to split the footage. Then, to remove the additional clip from the clip, use the delete key.
Even those with the most basic PC hardware may use this video editing software to create high-quality movies. Moreover, the most anticipated features that Filmora’s latest version offers are as follows:
- Motion Tracking
- Keyframing Animations
- Audio Ducking
- Split Screen
- Video Transitions
- Speed Control
- Color Grading
- Filmstock Effects
- Multiple Formats Exporting
Users may utilize the color tuning option to change the white balance and dynamic range of their video clip, among other things. You may alter the audio levels of each track using the audio mixer tool. The advanced Text Editor function allows you to adjust the color, size, font, and even the motion of text. The screen recording tool enables you to capture your computer’s screen as well as your webcam in excellent quality. The video stabilization feature lowers or eliminates the effect of camera shake on video.
Speed Ramping In Filmora
The method is crucial in changing the tempo of the film and, as a consequence, creating a dramatic impression. The film’s required speed is achieved by the employment of super-fast visual effects.
When using a camera with a much higher frame rate, the speed ramping approach may provide excellent effects. It aids in the production of the most dramatic impression.
Speed ramping effects are available in six presets, which include Montage, Hero Moment, Bullet Time, Jumper, and Flash In, all of which will add a theatrical element to your movie that will leave your viewers in awe.
Creative pros can swiftly and effectively speed up a movie with Wondershare Filmora. However, in order to get the intended results, it is essential to completely understand and adhere to the approach.
Wondershare Filmora 11 has a variety of tools and features to help you create a visually stunning film in a short period of time. Its Instant Mode allows you to produce a video creation from start to finish in less than 5 minutes.
Steps
- Download and Install Filmora. Launch the application on your system.
- Navigate to the chosen video and open it in the program to speed up and lengthen it. You may also add the movie to the interface by dragging and dropping it there.
- When the video appears in the timeline, right-click it to begin playback. As a consequence, a context menu is displayed.
- Select Speed from the pop-up editing window, and then select Speed Ramping from the drop-down menu.
- Alternatively, right-click on the video or audio clip, choose Speed from the drop-down menu, and select Speed Ramping.
- In the Speed Ramping panel, you may adjust the speed or choose from a number of presets, including Montage, Hero Moment, Bullet Time, Jumper, Flash in, and Flash out, to use as templates. You have the option of using the Preset speed ramps. Alternatively, you may personalize your own innovative ones.
- Move the play head to the point where you wish to increase or decrease the speed of the video or audio. Then, to add speed keyframes, choose the Add icon from the toolbar. The video or audio clips will be marked as Speed Ramping when the speed ramp has been added by Filmora.
- If you want to delete a keyframe, you can do so by selecting that particular keyframe and selecting the delete button like in the image:
- As we go on to the video keyframe speed adjustment, just slide the keyframe dot upward or downward to alter the point speed of the movie. Aside from that, you can keep the audio pitch constant regardless of how fast or slow the video is moving.
- The settings will be saved if you are pleased with them after you make the necessary modifications. In any other case, you may use the Reset button to return to the original configuration.
- When you’ve finished your work, go to the “File” panel and choose “Save Project” from the list of options that display. Change the name of the project and then click “Save.”
- Additionally, the movie may be exported using Filmora’s “Export” feature; just choose “Export” and then specify a new name for the file. The video may be exported to a device, a system, or even YouTube. After that, choose “Export.”
Speed Ramping Tips
- High Frame Rate: The frame rate is an important consideration when it comes to speed ramping. If you wish to slow down the video after it’s been recorded, shoot it at a frame rate higher than 60 frames per second. When a video is slowed down, there should be enough frames to guarantee that the video passes the 24 frames per second threshold frame rate.
- Choose The Appropriate Frame Resolution: Another possibility is to modify your video’s frame resolution. The tip has the ability to edit the clip’s properties from the Slowing down the video is achieved by changing the frame rate in the clip’s parameters from 120 to 24 frames per second. As a consequence, the frames will be expanded to the proper frame rate. As a consequence, the video is slowed down but not jerked.
- Purposeful Time Remapping: Instead of keeping the same pace throughout the film, a deliberate speed ramp should be implemented. A video has emotional, mysterious, exciting, and slow-motion Why is this the case? The usage of the same video speed throughout the film may have a negative influence on the watching experience. As a result, it is critical that videos be separated into genres and that the tempo of the videos is modified accordingly.
Conclusion
The use of the ideal cinematic effect at the right time boosts the audience and engagement with the material. This respective article explored speed ramping in-depth and oughts to teach creative pros how to slow down a video and speed up a movie. It covers speed raming in premiere pro and then moves toward Wondershare Filmora which seems a bit easier. Wondershare Filmora is a good choice for completing the task as quickly as possible. You will have access to all of the effects and tools mentioned, as well as the ability to keep the audio pitch consistent throughout the effect, which is critical while altering the video speed.
10 Top Suggestions for AI Video Interviews
10 Best Suggestions for AI Video Interviews
An easy yet powerful editor
Numerous effects to choose from
Detailed tutorials provided by the official channel
Artificial Intelligence is the replacement of human processes by machines and computer systems. It can replicate intelligent human behaviors, including facial expression recognition, problem-solving, and learning.
AI video interviewing, an increasingly popular assessment tool driven by artificial intelligence, is being incorporated by many large companies that receive thousands of job applications. AI electronically analyses many aspects of a video interview, including the candidate’s body language, facial expressions, word choices, and tone of voice. It can also track eye movements to determine whether candidates are looking at resources around them.
With the introduction of artificial intelligence, many tech companies and individuals have taken a likeness of it and have grown to utilize it to carry out tasks. Reconsider your position as applicants get selected by assessing their performance in the AI-based video interview against a large inventory of facial and linguistic information.
In this article
01 [How AI is Being Used in a Job Interview](#Part 1)
02 [How to Ace an AI Video Interview](#Part 2)
03 [Role of AI in a Video Interview](#Part 3)
04 [Role of AI in Video Making](#Part 4)
Part 1 How AI is being used in a job interview.
In most cases, an AI video interview is the initial stage in the hiring process, in place of or in addition to a typical cover letter and CV. It functions similarly to a face-to-face interview. Candidates get a series of job-specific interview questions, after which they have to record their responses on video with their smartphone or computer.
You’ll have a few minutes to answer each question as a candidate before going on to the next. Each exam takes about 20 minutes to complete and can be in any location convenient for you, whether in your living room, a quiet coffee shop nook, or somewhere else.
Each interview follows the same format, ensuring a similar experience for all individuals seeking that particular position.
The algorithm (also known as an assessment model) will assist the recruiter in making a more informed judgment if AI is in the process. It accomplishes this by identifying which candidates are most likely to succeed in the post based on data sets that predict job performance.
Part 2 How to Ace an AI video interview.
Planning ahead of time might make you feel less anxious and appear more confident, at ease, and relaxed. Here are some ideas for using artificial intelligence in video interviews.
It would help if you first determined whether you are going for an AI-based video interview, i.e., if you get an invite to a pre-recorded video interview via a platform. Massive firms are now using this type of interview to interview many possible employees without bias.
01Prepare for the interview differently.

When in an AI interview, you need to prepare differently. It’s not the same as a human-to-human interview. There will be no feedback from the person at the other end of the interview. Research the use of AI in interviews to know how it works. Remember to research the company in question as well.
02Go straight to the point.

Remember that you’re having an interview with a robot and not a human, so skip the small talk and hit the nail on the head. It is better to state your point clearly and straight to the end.
03Find a suitable environment for your interview.

Most artificial intelligence video interviews take place through your webcam in the comfort of your home. So, it’s essential to use an appropriate background. Your interview background should be clear of objects and distractions. It should also have enough lighting and be free from background noises since AI algorithms are designed to scan your environment and make deductions about you.
04Dress well for your interview.

There won’t be a human at the other end of the camera, so there’s no need to dress up, right? That’s wrong. You still need to dress well when attending a formal human job interview. Wear business casuals with plain colored clothes.
Another reason you want to dress professionally is that it can increase your self-confidence, making you relaxed and feel good about yourself.
05Practice before the interview.

To ace an AI interview, practice in front of a friend or mirror in advance of your interview. You can do a mock interview or record yourself to identify likely mistakes and correct them. Practice by recording yourself and then replaying the video to see where you are making mistakes and need improvement.
06Share your real-world experiences and provide proof.

Use real-world experiences to showcase your skills when responding to questions during an AI interview. To determine and ensure candidates’ suitability, AI looks for specific soft skills like communication, the ability to take the initiative, and lots more. So, talk about them, use a practical example to illustrate your skills, and generally talk about your interview experience.
07Smiling

Wear a pleasant smile as you answer. It is easy to forget to smile when focusing so hard on the questions, but remember to relax and act natural. Facial expressions such as smiling are criteria that artificial intelligence interviewers watch for. Remember to smile, nod, and Use Gestures During Your Interview to show that you are attentive.
08Maintain eye contact and a neutral voice tone.

During an AI video interview, maintain eye contact with the camera and gaze squarely into your webcam. Ensure your camera is at eye level, so you don’t have to strain to see into it. Avoid looking away all of the time; this can give the impression of being distracted and unfocused. Speak neutrally or brightly. Remember that the AI analyzes your speech tone and mannerisms. As a result, speaking in clear tones can help you succeed.
09Maintain proper body posture and even talking speed

Ensure to carry yourself the same way as you would in an in-person human interview because a human interviewer will watch your interview at some point. You emphasize more confidence when you sit up straight, Sit with an open posture, avoid crossed arms or legs, keep your chin towards your stomach, and do not hunch your shoulders or recline on the chair. Appear in control, natural, and ready to handle any question. Try to keep your talking speed at a conversational rate, and avoid talking too fast or too slow because it might come off as you being nervous or unsure of yourself.
10Make use of keywords

The use of keywords is essential in any job application process. Meanwhile, AI algorithms pick out keywords in a candidate’s response during an interview. Stand out during an AI interview by using phrases that explain what you can contribute, echoing the exact language of the job posting. Before the AI-based video interview, carefully go through the job description and note what keywords the company uses to describe the role on the company website or job posting page. Be sure to use their words specifically.
Part 3 Role of AI in a video interview

AI electronically analyzes many features of a video interview. It asks all candidates the same pre-determined questions and then explores how they answered them. Some AI models grade candidates’ responses. Many significant companies use AI video interviews or algorithm-based interviewing. Candidates are compared to previous success stories to select the best candidate for the job. The software analyzes the applicant’s performance to the last job for applicants deemed suitable for the position. It compares the inputs to the company’s ideal candidate profile and ranks you accordingly. The AI interviewer will most likely use speech analytics software to break down the candidate’s speech into parts and deduce numerous interpretations. It then uses semantic analytics to determine grammatical proficiency. It also indicates your emotional condition based on the time of your voice.
Part 4 Role of AI in video making
In video production, artificial intelligence has proven faster and more efficient than humans. It’s also more cost-effective and time-saving than hiring a video editor. It allows you to edit more films in a shorter amount of time. It streamlines your job by taking care of most of the burden, making video editing simple even for beginners. AI makes suggestions that the user may not consider, making video production more accessible and engaging. Automating color correction and scene recognition in films improves the visual experience and aids in the formulation of personalized messaging.
For Win 7 or later (64-bit)
For macOS 10.12 or later
To help simplify the artificial intelligence video interview act, you can use fantastic video editing software. This video editor employs AI in video editing and so can ensure cost-efficient video making.
Wondershare Filmora Video Editor is one of the most outstanding AI-powered video editing programs available. It can simply erase video backdrops without using a green screen or chroma key, and it also allows the insertion of borders, glitch effects, pixelated, noise, or segmentation video effects with its new AI portrait add-on.
● Ending Thoughts →
● After reading this article, you know that AI-based video interviews will gradually take over the human interview process and the video-making industry. So, gear up for AI video interviews and be prepared for your next meeting. The future is revamping.
● Besides, video making is seamless and easy when you have the right software. The Filmora tool has proven to be one of the best AI updated tools for video editing professionals and beginners.
Artificial Intelligence is the replacement of human processes by machines and computer systems. It can replicate intelligent human behaviors, including facial expression recognition, problem-solving, and learning.
AI video interviewing, an increasingly popular assessment tool driven by artificial intelligence, is being incorporated by many large companies that receive thousands of job applications. AI electronically analyses many aspects of a video interview, including the candidate’s body language, facial expressions, word choices, and tone of voice. It can also track eye movements to determine whether candidates are looking at resources around them.
With the introduction of artificial intelligence, many tech companies and individuals have taken a likeness of it and have grown to utilize it to carry out tasks. Reconsider your position as applicants get selected by assessing their performance in the AI-based video interview against a large inventory of facial and linguistic information.
In this article
01 [How AI is Being Used in a Job Interview](#Part 1)
02 [How to Ace an AI Video Interview](#Part 2)
03 [Role of AI in a Video Interview](#Part 3)
04 [Role of AI in Video Making](#Part 4)
Part 1 How AI is being used in a job interview.
In most cases, an AI video interview is the initial stage in the hiring process, in place of or in addition to a typical cover letter and CV. It functions similarly to a face-to-face interview. Candidates get a series of job-specific interview questions, after which they have to record their responses on video with their smartphone or computer.
You’ll have a few minutes to answer each question as a candidate before going on to the next. Each exam takes about 20 minutes to complete and can be in any location convenient for you, whether in your living room, a quiet coffee shop nook, or somewhere else.
Each interview follows the same format, ensuring a similar experience for all individuals seeking that particular position.
The algorithm (also known as an assessment model) will assist the recruiter in making a more informed judgment if AI is in the process. It accomplishes this by identifying which candidates are most likely to succeed in the post based on data sets that predict job performance.
Part 2 How to Ace an AI video interview.
Planning ahead of time might make you feel less anxious and appear more confident, at ease, and relaxed. Here are some ideas for using artificial intelligence in video interviews.
It would help if you first determined whether you are going for an AI-based video interview, i.e., if you get an invite to a pre-recorded video interview via a platform. Massive firms are now using this type of interview to interview many possible employees without bias.
01Prepare for the interview differently.
When in an AI interview, you need to prepare differently. It’s not the same as a human-to-human interview. There will be no feedback from the person at the other end of the interview. Research the use of AI in interviews to know how it works. Remember to research the company in question as well.
02Go straight to the point.
Remember that you’re having an interview with a robot and not a human, so skip the small talk and hit the nail on the head. It is better to state your point clearly and straight to the end.
03Find a suitable environment for your interview.
Most artificial intelligence video interviews take place through your webcam in the comfort of your home. So, it’s essential to use an appropriate background. Your interview background should be clear of objects and distractions. It should also have enough lighting and be free from background noises since AI algorithms are designed to scan your environment and make deductions about you.
04Dress well for your interview.
There won’t be a human at the other end of the camera, so there’s no need to dress up, right? That’s wrong. You still need to dress well when attending a formal human job interview. Wear business casuals with plain colored clothes.
Another reason you want to dress professionally is that it can increase your self-confidence, making you relaxed and feel good about yourself.
05Practice before the interview.
To ace an AI interview, practice in front of a friend or mirror in advance of your interview. You can do a mock interview or record yourself to identify likely mistakes and correct them. Practice by recording yourself and then replaying the video to see where you are making mistakes and need improvement.
06Share your real-world experiences and provide proof.
Use real-world experiences to showcase your skills when responding to questions during an AI interview. To determine and ensure candidates’ suitability, AI looks for specific soft skills like communication, the ability to take the initiative, and lots more. So, talk about them, use a practical example to illustrate your skills, and generally talk about your interview experience.
07Smiling
Wear a pleasant smile as you answer. It is easy to forget to smile when focusing so hard on the questions, but remember to relax and act natural. Facial expressions such as smiling are criteria that artificial intelligence interviewers watch for. Remember to smile, nod, and Use Gestures During Your Interview to show that you are attentive.
08Maintain eye contact and a neutral voice tone.
During an AI video interview, maintain eye contact with the camera and gaze squarely into your webcam. Ensure your camera is at eye level, so you don’t have to strain to see into it. Avoid looking away all of the time; this can give the impression of being distracted and unfocused. Speak neutrally or brightly. Remember that the AI analyzes your speech tone and mannerisms. As a result, speaking in clear tones can help you succeed.
09Maintain proper body posture and even talking speed
Ensure to carry yourself the same way as you would in an in-person human interview because a human interviewer will watch your interview at some point. You emphasize more confidence when you sit up straight, Sit with an open posture, avoid crossed arms or legs, keep your chin towards your stomach, and do not hunch your shoulders or recline on the chair. Appear in control, natural, and ready to handle any question. Try to keep your talking speed at a conversational rate, and avoid talking too fast or too slow because it might come off as you being nervous or unsure of yourself.
10Make use of keywords
The use of keywords is essential in any job application process. Meanwhile, AI algorithms pick out keywords in a candidate’s response during an interview. Stand out during an AI interview by using phrases that explain what you can contribute, echoing the exact language of the job posting. Before the AI-based video interview, carefully go through the job description and note what keywords the company uses to describe the role on the company website or job posting page. Be sure to use their words specifically.
Part 3 Role of AI in a video interview
AI electronically analyzes many features of a video interview. It asks all candidates the same pre-determined questions and then explores how they answered them. Some AI models grade candidates’ responses. Many significant companies use AI video interviews or algorithm-based interviewing. Candidates are compared to previous success stories to select the best candidate for the job. The software analyzes the applicant’s performance to the last job for applicants deemed suitable for the position. It compares the inputs to the company’s ideal candidate profile and ranks you accordingly. The AI interviewer will most likely use speech analytics software to break down the candidate’s speech into parts and deduce numerous interpretations. It then uses semantic analytics to determine grammatical proficiency. It also indicates your emotional condition based on the time of your voice.
Part 4 Role of AI in video making
In video production, artificial intelligence has proven faster and more efficient than humans. It’s also more cost-effective and time-saving than hiring a video editor. It allows you to edit more films in a shorter amount of time. It streamlines your job by taking care of most of the burden, making video editing simple even for beginners. AI makes suggestions that the user may not consider, making video production more accessible and engaging. Automating color correction and scene recognition in films improves the visual experience and aids in the formulation of personalized messaging.
For Win 7 or later (64-bit)
For macOS 10.12 or later
To help simplify the artificial intelligence video interview act, you can use fantastic video editing software. This video editor employs AI in video editing and so can ensure cost-efficient video making.
Wondershare Filmora Video Editor is one of the most outstanding AI-powered video editing programs available. It can simply erase video backdrops without using a green screen or chroma key, and it also allows the insertion of borders, glitch effects, pixelated, noise, or segmentation video effects with its new AI portrait add-on.
● Ending Thoughts →
● After reading this article, you know that AI-based video interviews will gradually take over the human interview process and the video-making industry. So, gear up for AI video interviews and be prepared for your next meeting. The future is revamping.
● Besides, video making is seamless and easy when you have the right software. The Filmora tool has proven to be one of the best AI updated tools for video editing professionals and beginners.
Adobe Premiere Pro Download and Use Guide
Video streaming platforms are becoming quite popular nowadays and with this, the demand for good video content is also growing. There are dozens of applications available in the market that facilitate the users with video editing tools. Adobe Premiere Pro is one such application that stands from others with its unique features as well as an easy-to-use interface.
Adobe is known to develop the best in the industry tools and Adobe Premiere Pro is no exception in showing its excellence. For content creators and filmmakers, Adobe Premiere Pro has been the first choice to edit stunning videos. And for new users, it provides pre-sets and other tools to easily produce an elegant video. In this Adobe Premiere Pro editing tutorial, we have it all covered:
1. How to Download and Install Adobe Premiere Pro
Adobe Premiere Pro is very useful to video creators by facilitating different editing tools and presets for instant effect in the video. It also has an easy-to-use interface that enables new users to use the tools available very effectively. And if you are also looking for a video editing application that can help you with creating excellent visual content, then Adobe Premiere Pro is a perfect choice. Here is how you can download and install Adobe Premiere Pro on your device:
Step-wise process
First, open your browser on your PC and then type “Adobe Premiere Pro” in the search bar. Then hit the enter button and the first results shown should be from the official website of Adobe. Click on that and you will be headed to the download page of Adobe Premiere Pro.
Here you will see an option to download the “free trial” version of the Adobe Premiere Pro which will have a limited number of tools available for video editing. And along with that, there will also be an option to “Buy” the Adobe Premiere Pro application.

Click on the free or paid version as per your preference and your download will begin shortly. After the application is downloaded to your PC, navigate to the download folder of your PC.

Here find the Adobe Premiere Pro application file and click on it to start the installation process. This will take some time and once the application is installed on your PC, you will be able to use Adobe Premiere Pro without any issue.

2. Key Features of Adobe Premiere Pro
Some of the key features of Adobe Premiere Pro are as follows:
- Multiple format support for both importing and exporting
- Video titling, graphics, transitions, and many useful tools
- Seamless cropping, adding and trimming multiple clips
- VR editing support for creating VR enabled video content
- Regional closed-captions availability for subtitles
- Motion graphics templates availability for instant access
- Simultaneously Multiple projects support in real-time
- Lumetri support along with direct publishing feature
3. How to Edit Videos with Adobe Premiere Pro
Adobe Premiere Pro features some of the best editing tools that are available in any application. These tools are arranged in an intuitive interface that can be used even by new users. These tools also can help in creating cinematic shots that can satisfy the demand for good visual content on social media platforms.
The different tools available in Adobe Premiere Pro may seem overwhelming. However, you can follow these steps on how to use adobe premiere pro to edit and share your videos very easily:
Step-wise process
First, open the Adobe Premiere pro edit video tool on your PC.
Now, click on the “Import” option and select the frame size for your project.

By default, the clips or media files you import to the Adobe Premiere Pro interface will be saved under a project file and you can create multiple projects as well as libraries simultaneously.
After the import is finished, you will need to arrange the video clips according to your desired sequence.

The clips will be displayed at the bottom of your screen on a timeline as small thumbnails. You can crop, trim or change the speed of each clip as per your requirements by dragging the intro and outro bars available on the timeline bar.
You can also add music, and voiceovers as well as video overlay on your video clips. Along with this there are options for different effects and presets that you can apply to your videos.
Transitions are another important tool that can help you make stunning cinematic videos. There are other tools such as motion graphics and VR editing tools to edit 3D videos on your PC.

After you are done with all these graphics and visual features of your video, you can navigate to the “Titles” tool to add texts to your video.
When you are done with all the necessary changes to your video and you are satisfied with all the visual effects, you can select the format and quality of the output video from the “Settings” tab.
Then click on the “export” option available on the menu bar and the video will be saved to your device in a short time.
4. Easy Alternative to Edit Videos
Though Adobe Premiere Pro is an excellent application for editing videos in any desired format, some features aren’t covered in the Adobe Premiere Pro package even if you pay a subscription fee. And if you are looking for an alternative to Adobe Premiere Pro that can satisfy all your video editing needs, then Filmora can be the best application for all your needs. You can use Filmora to edit your videos by following these steps:

For Win 7 or later (64-bit)
For macOS 10.12 or later
- First, go to your browser and search for Filmora in the search bar. Then navigate to the official website of Filmora from the search results and click on that. This will take you to the download page of Filmora.
- On the download page, click on the “free trial” or “Buy Filmora” as per your preference and then download it to your device. After the download process is completed, install it from the download folder on your PC.
- After Filmora is installed on your device, open it and select the “New Project” option available in the interface. Then this will ask you to import the media file that you want to edit. Select the video files that you want to edit and they will be imported to the Filmora interface.
- Then arrange the clips according to the required sequence by swapping the thumbnails given in the timeline bar on the bottom of your screen. You can also select and trim the videos from the same area of your screen.
- After that, you can add graphics, transitions, texts, and different effects to your video by clicking on the respective tools given in the user interface. There is also the feature of adding presets to your videos that are available by default.
- After you are done with all the visual tools in editing, you can add music or voiceover to your video by clicking the “Audio” tool available on the screen.
- When you are done with editing and merging all your video clips, click on the “Settings” tab to select the export quality. Then click on the “Export project” option and the video will be saved to your device in the desired format.
5. FAQs about Adobe Premiere Pro
1.Is Adobe Premiere Pro a good video editor?
Adobe Premiere Pro is believed to be one of the most popular video editing applications and it is used both by video content creators as well as filmmakers. It is a very effective editor for creators because of its versatile set of tools in video editing.
2.How do I edit videos using Adobe Premiere Pro?
To edit videos using Adobe Premiere Pro you will first need to import your media file to the interface. Then, you can apply the changes using different tools available in the application. The detailed process of editing video in Adobe Premiere Pro has been explained in the previous section of this article.
3.What is the price for Adobe Premiere Pro?
Currently Adobe Premiere Pro costs around $20.99 per month and if you want any other plans for buying, then the details of the listing price are available on the official website of Adobe.
Conclusion
Adobe Premiere Pro is one of the most downloaded and used video editing applications that is used by millions of users around the world. It is known for its versatility in tools and export format. This article discussed some of the best Adobe Premiere Pro editing tips to edit any video content. We also have provided the alternative of Adobe Premiere Pro that you can use for video editing. Hopefully, you will find this article helpful in creating cinematic and amazing visual content.
3. How to Edit Videos with Adobe Premiere Pro
Adobe Premiere Pro features some of the best editing tools that are available in any application. These tools are arranged in an intuitive interface that can be used even by new users. These tools also can help in creating cinematic shots that can satisfy the demand for good visual content on social media platforms.
The different tools available in Adobe Premiere Pro may seem overwhelming. However, you can follow these steps on how to use adobe premiere pro to edit and share your videos very easily:
Step-wise process
First, open the Adobe Premiere pro edit video tool on your PC.
Now, click on the “Import” option and select the frame size for your project.
By default, the clips or media files you import to the Adobe Premiere Pro interface will be saved under a project file and you can create multiple projects as well as libraries simultaneously.
After the import is finished, you will need to arrange the video clips according to your desired sequence.
The clips will be displayed at the bottom of your screen on a timeline as small thumbnails. You can crop, trim or change the speed of each clip as per your requirements by dragging the intro and outro bars available on the timeline bar.
You can also add music, and voiceovers as well as video overlay on your video clips. Along with this there are options for different effects and presets that you can apply to your videos.
Transitions are another important tool that can help you make stunning cinematic videos. There are other tools such as motion graphics and VR editing tools to edit 3D videos on your PC.
After you are done with all these graphics and visual features of your video, you can navigate to the “Titles” tool to add texts to your video.
When you are done with all the necessary changes to your video and you are satisfied with all the visual effects, you can select the format and quality of the output video from the “Settings” tab.
Then click on the “export” option available on the menu bar and the video will be saved to your device in a short time.
4. Easy Alternative to Edit Videos
Though Adobe Premiere Pro is an excellent application for editing videos in any desired format, some features aren’t covered in the Adobe Premiere Pro package even if you pay a subscription fee. And if you are looking for an alternative to Adobe Premiere Pro that can satisfy all your video editing needs, then Filmora can be the best application for all your needs. You can use Filmora to edit your videos by following these steps:
For Win 7 or later (64-bit)
For macOS 10.12 or later
- First, go to your browser and search for Filmora in the search bar. Then navigate to the official website of Filmora from the search results and click on that. This will take you to the download page of Filmora.
- On the download page, click on the “free trial” or “Buy Filmora” as per your preference and then download it to your device. After the download process is completed, install it from the download folder on your PC.
- After Filmora is installed on your device, open it and select the “New Project” option available in the interface. Then this will ask you to import the media file that you want to edit. Select the video files that you want to edit and they will be imported to the Filmora interface.
- Then arrange the clips according to the required sequence by swapping the thumbnails given in the timeline bar on the bottom of your screen. You can also select and trim the videos from the same area of your screen.
- After that, you can add graphics, transitions, texts, and different effects to your video by clicking on the respective tools given in the user interface. There is also the feature of adding presets to your videos that are available by default.
- After you are done with all the visual tools in editing, you can add music or voiceover to your video by clicking the “Audio” tool available on the screen.
- When you are done with editing and merging all your video clips, click on the “Settings” tab to select the export quality. Then click on the “Export project” option and the video will be saved to your device in the desired format.
5. FAQs about Adobe Premiere Pro
1.Is Adobe Premiere Pro a good video editor?
Adobe Premiere Pro is believed to be one of the most popular video editing applications and it is used both by video content creators as well as filmmakers. It is a very effective editor for creators because of its versatile set of tools in video editing.
2.How do I edit videos using Adobe Premiere Pro?
To edit videos using Adobe Premiere Pro you will first need to import your media file to the interface. Then, you can apply the changes using different tools available in the application. The detailed process of editing video in Adobe Premiere Pro has been explained in the previous section of this article.
3.What is the price for Adobe Premiere Pro?
Currently Adobe Premiere Pro costs around $20.99 per month and if you want any other plans for buying, then the details of the listing price are available on the official website of Adobe.
Conclusion
Adobe Premiere Pro is one of the most downloaded and used video editing applications that is used by millions of users around the world. It is known for its versatility in tools and export format. This article discussed some of the best Adobe Premiere Pro editing tips to edit any video content. We also have provided the alternative of Adobe Premiere Pro that you can use for video editing. Hopefully, you will find this article helpful in creating cinematic and amazing visual content.
Also read:
- Updated Discover How to Create Professional Foggy Text Reflection Effects in the Filmora Video Editor
- How to Use Twixtor Effect to Create Super Slow-Motion Video?
- In 2024, Want to Make a Slide Show Video? Heres How
- 2024 Approved Do You Want to Download Slow-Motion Apps that Can Edit Video Professionally? This Article Will Discuss some Slomo Makers for Both iOS and Android
- New In 2024, How to Create and Use Adjustment Layers in After Effects
- Updated 2024 Approved Do You Wish to Know How FFmpeg Can Remove Audio From a Video? If Yes, Keep Scrolling This Guide to Remove Audio From Video with FFmpeg and Other Alternative Software
- New Enhance Your Video Color Accuracy with Video Scopes
- Updated In 2024, Are You Curious About the Functionality of LUTs in LumaFusion? This Article Will Satisfy Your Queries with Ease
- Updated 2024 Approved Top GIF to MP4 Converters
- In 2024, How to Remove Background From a Video in Premier Pro
- Updated In 2024, Every Compositor Should Know The Tips of Color Match in After Effects
- Updated 2024 Approved LumaFusion – One of the Best Video Editors for iOS
- Updated 2024 Approved The Best Peter McKinnon LUTs for Perfect Video Editing
- New How to Convert Videos to Slow Motion? Complete Guide
- Updated Guide on VHS Technology and Its Influence on Video Editing for 2024
- New 2024 Approved 4 Solutions to Add White Borders on Mobile and Desktop
- Updated In 2024, How to Make a Slow Motion Video Complete Guide
- Updated In 2024, Do You Want to Remove Unnecessary Sound From Your Video? We Are Providing You the List of the Best Software to Remove Audio From Video for Mac and Apple
- New In 2024, 10 Top Suggestions for AI Video Interviews
- Techniques You Never Heard of for Learning AI Marketing YouTube for 2024
- How to Make Video Fade to Black in Movie Maker for 2024
- In 2024, Full Guide to Catch 100 IV Pokémon Using a Map On Vivo V29e | Dr.fone
- 3 Facts You Need to Know about Screen Mirroring Vivo S17t | Dr.fone
- Can Life360 Track Or See Text Messages? What Can You Do with Life360 On Lava Blaze 2? | Dr.fone
- In 2024, Switch Cards Between Apple iPhone 6s Plus and other iPhones Will Move All Phone Services? | Dr.fone
- The Best 8 VPN Hardware Devices Reviewed On Honor 90 | Dr.fone
- 8 Quick Fixes Unfortunately, Snapchat has Stopped on Oppo K11x | Dr.fone
- In 2024, Fake Android Location without Rooting For Your Samsung Galaxy A25 5G | Dr.fone
- MP4 Video Repair Tool - Repair corrupt, damaged, unplayable video files of Oppo Reno 10 5G
- How to Restore Deleted Samsung Galaxy XCover 7 Pictures An Easy Method Explained.
- In 2024, How to Remove Apple iPhone 8 SIM Lock?
- Title: In 2024, How to Edit FLV Video Files with FLV Editor Windows, Mac,Android, iPhone & Online
- Author: Morgan
- Created at : 2024-05-19 05:12:02
- Updated at : 2024-05-20 05:12:02
- Link: https://ai-video-editing.techidaily.com/in-2024-how-to-edit-flv-video-files-with-flv-editor-windows-macandroid-iphone-and-online/
- License: This work is licensed under CC BY-NC-SA 4.0.
