:max_bytes(150000):strip_icc():format(webp)/GettyImages-962954554-5c338fc146e0fb0001346aec.jpg)
In 2024, How to Make Foggy Text Reflection Effect

How to Make Foggy Text Reflection Effect
Preparation
What you need to prepare:
- A computer (Windows or macOS)
- Your video materials.
- Filmora video editor
Step 1
Download the Filmora video editor → run it → and click on “New Project”.
Step 2
Go to Titles → drag the Default Title to the Timeline below. Double-click on the clip to open its settings. Here, type in your text → change the font to Montserrat Light. Scroll down and increase Text Spacing to 5.0. Now, select only the first word in the box where you typed your text. Then, change its font to Montserrat Bold. Click OK.

Step 3
Take a Snapshot of the text you just created. Now, delete the Default Title clip from the Timeline and drag the Snapshot you took to the Timeline.

Step 4
Double-click the Snapshot clip → go to the Video tab → click the highlighted button below to flip the text. Then, take a Snapshot of this flipped version of the text and delete the clip from the Timeline.

Step 5
Visit the free stock footage site Mixkit and download any smoke or fog background video you like. Then, go to Filmora → My Media → Import Media → and select the footage you downloaded to import it into the video editor. Then, drag the Smoke clip to the Timeline and make it 6 seconds long.

Step 6
Double-click on the clip → go to Color. Now, change Contrast to “49”, Saturation to “100”, and Brightness to “18”. Below, set the 3D LUT option to “Game of Thrones”. Click OK.

Step 7
Drag the other Smoke clip to Track 2 of the Timeline. Make it 6 seconds long. Then, move the Playhead to the starting point of the video.
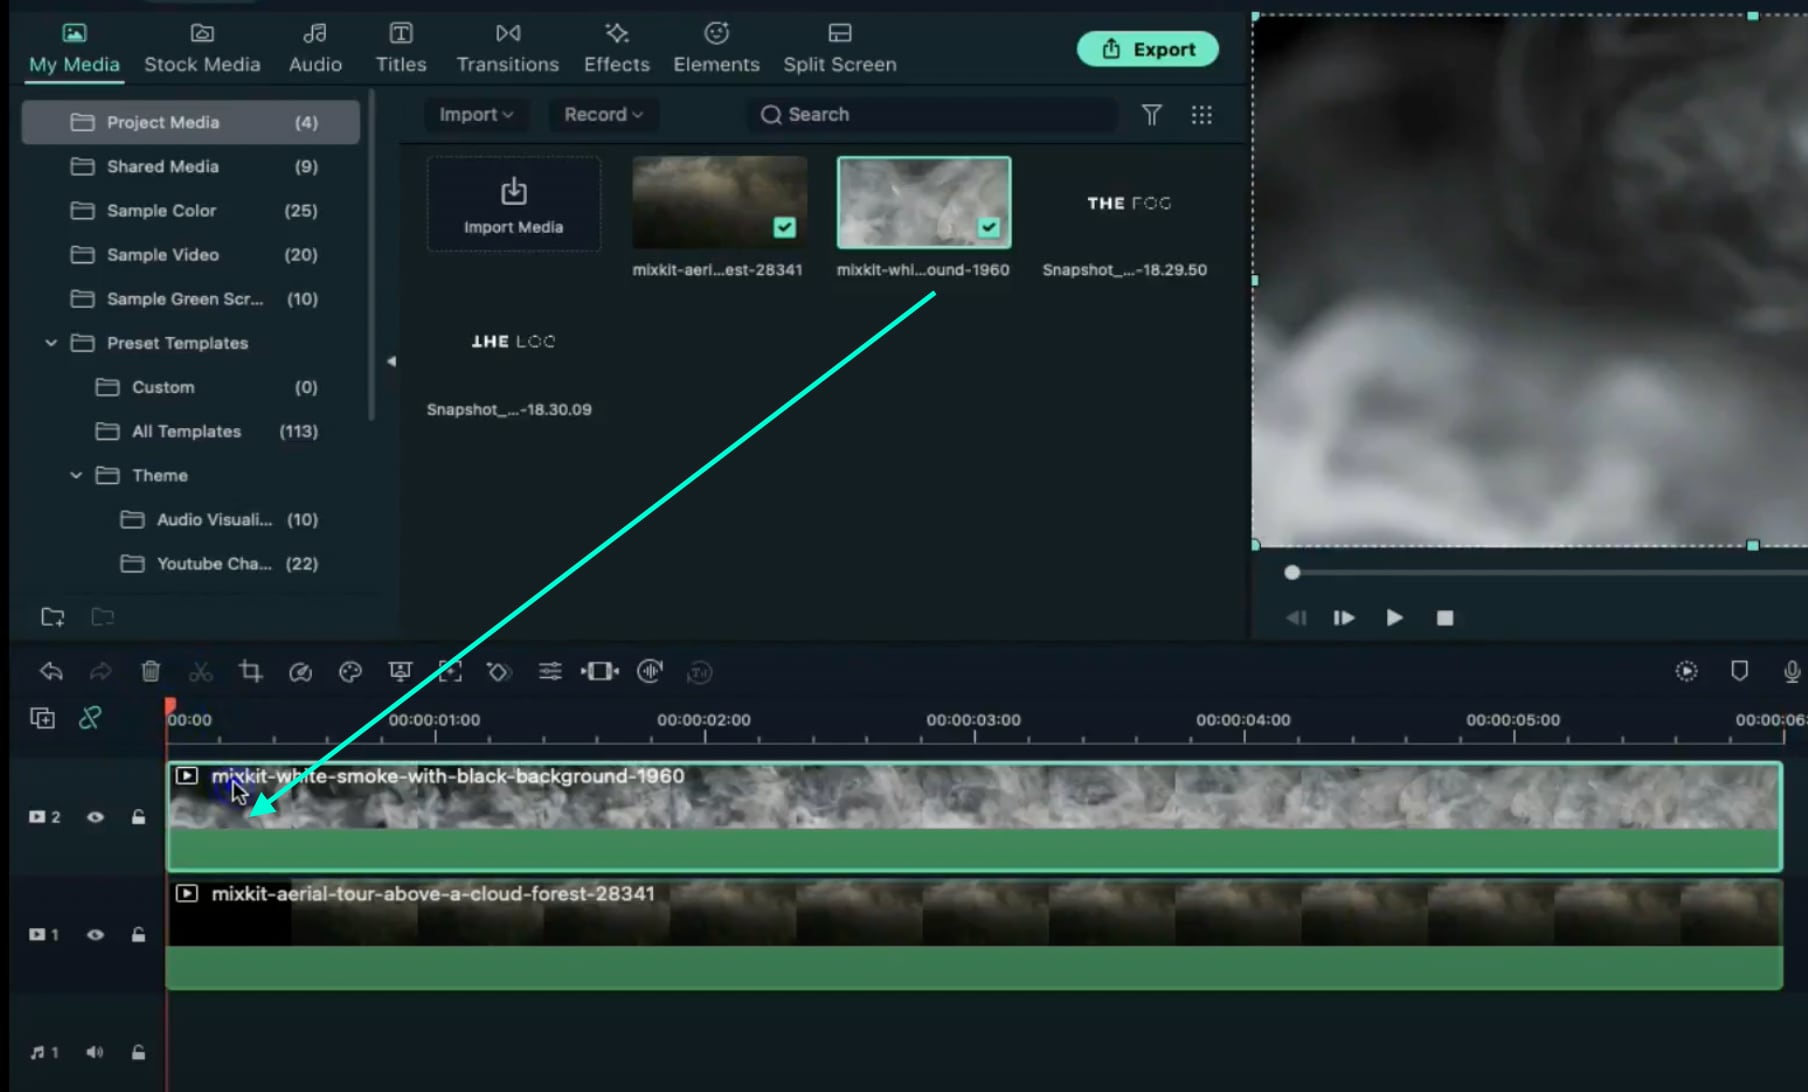
Step 8
Double-click on the new smoke clip. Go to Animation. Decrease the Opacity to 0%. Move the Playhead 10 frames forward → increase the Opacity to 6%. Don’t click OK yet.

Step 9
Move the Playhead to 5 seconds. Click on “**+Add**” to add a keyframe to the clip. Then, move the Playhead to the next-to-last frame and increase the Opacity to 100%. Click OK.

Step 10
Set the Playhead to the second frame and drop the first Snapshot we took earlier at that starting point. Drag the clip to be 6 seconds long. Then, double-click on the clip and adjust the settings exactly as you see in this image here. Don’t click on OK yet.

Step 11
Move the Playhead at the 17th frame → increase the Opacity to 6%. Move the Playhead to 5 seconds and 23rd frame → change the X-axis value to “1973”. Click OK.
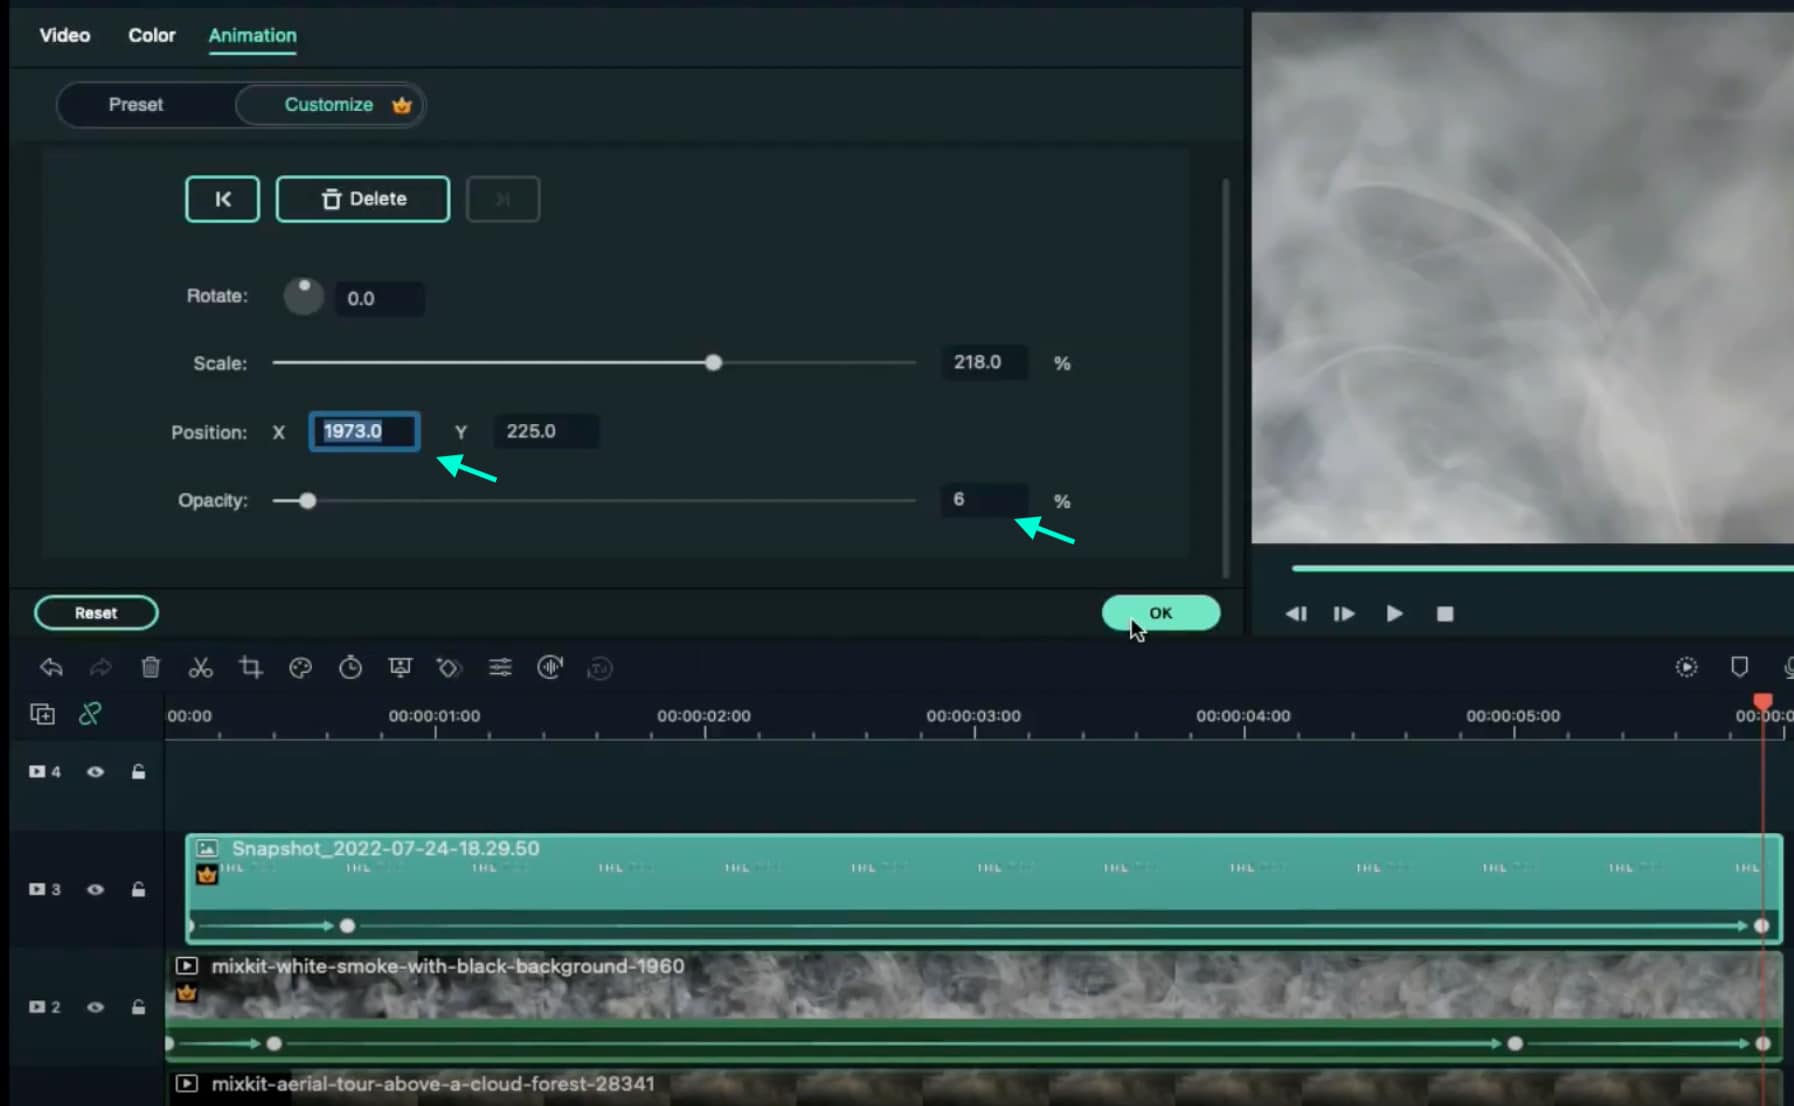
Step 12
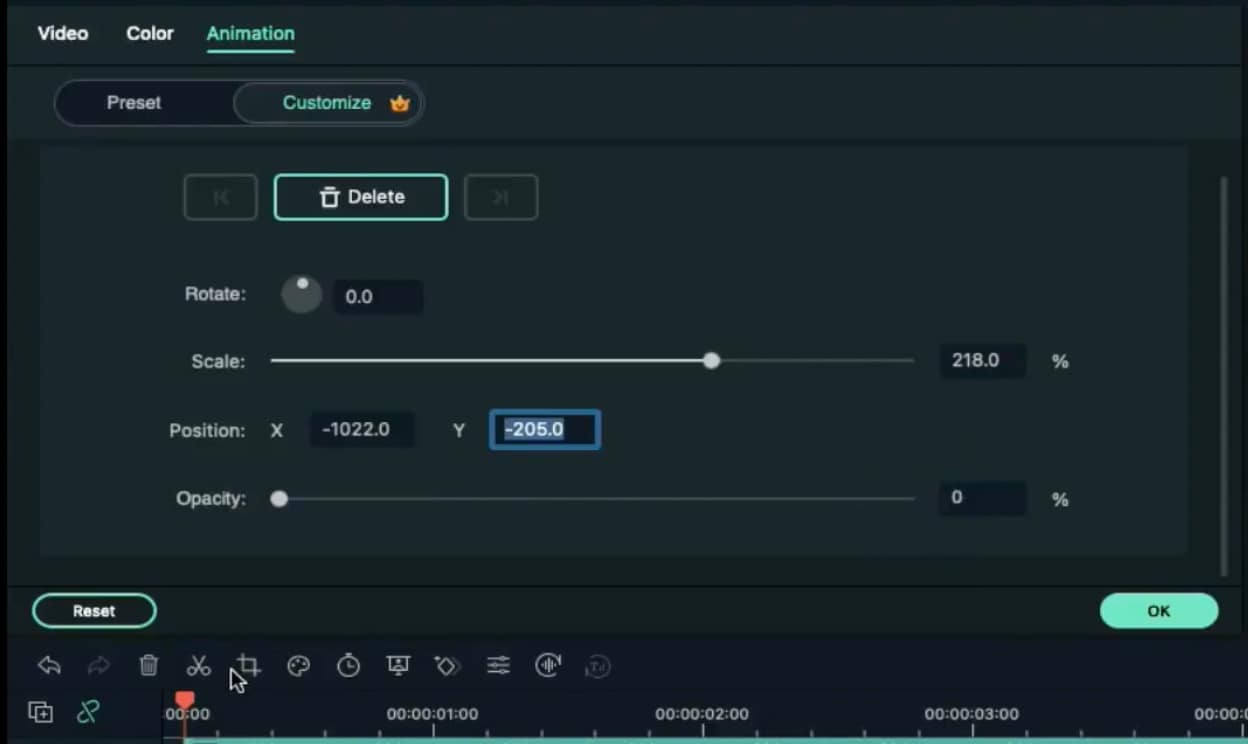
Drag the same Snapshot file to Track 4, directly on top of the clip in Track 3. Make its duration the same too. Now, double-click on this clip and apply the exact same settings as in the image here. Don’t click on OK yet.
Step 13
Move the Playhead to the 17th frame → increase the Opacity to 6%. Now, move the Playhead to 5 seconds and 23rd frame → change X-axis value to “-1944” and the Opacity to 0%. Click OK.

Step 14
Go to Sample Color and drag the White color on Track 6 in the Timeline. Place this clip at the same starting point as the snapshots below it. Set its duration the same as the clips below too. Then, move the Playhead at its starting point.

Step 15
Double-click on the Sample Color clip → go to Video → Mask → Import. Here, select the first Snapshot we created earlier in this tutorial.

Step 16
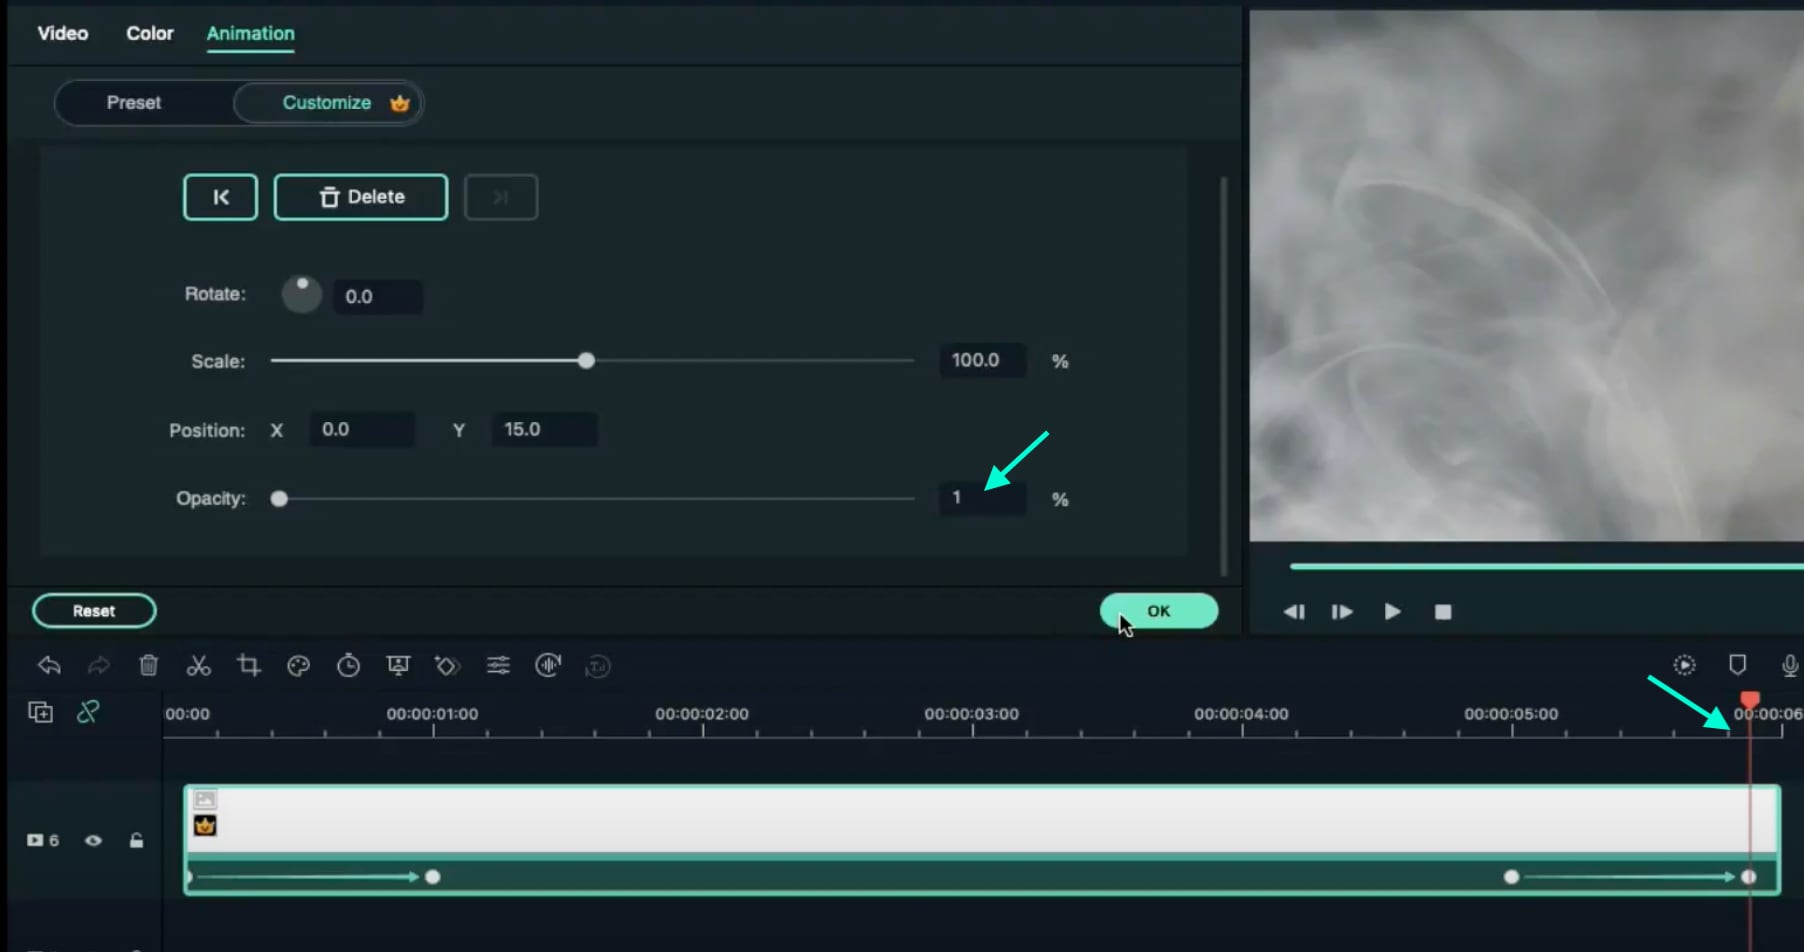
Now, go straight to the Animation tab and click the “**+Add**” button to add a keyframe. Then, compress the text in the preview screen until it’s not visible anymore on the screen.

Step 17
Add keyframes at the 1-second position and at the 5-second position. Then, move the Playhead once more to the 5-second and 22nd frame. Reduce the Opacity to 1%. Click OK.
Step 18
Drag another White Sample Color to Track 5 this time. Adjust its duration and starting point to be the same as the clip above it. Double-click on it → go to Video → Mask → Import. Here, select the flipped text Snapshot we created earlier.
Step 19
Now, go to Animation and add a keyframe at the starting point. Then, compress the text on the preview screen exactly as we did before with the other one. Then, add a keyframe at the 1-second position of the clip. Then, adjust the Y-axis position to create a reflection effect, just like this.

Step 20
Move the Playhead to the 5-second position and add a keyframe. Now, move the Playhead directly to 5-seconds and 22 frames. Here, reduce the Opacity to 0%.
Step 21
Go back to the Video tab from the upper-left corner of the panel. Now, move the Playhead to the clip’s starting point. Select the Mask tab. Add a keyframe. Move the Playhead to 1 second and set the Blur Strength to 6%.

Step 22
Move the Playhead to 3 seconds. Scroll down and set Vertical to 259%. Set Y-axis to “-157”. Then, increase Blur Strength to 25%. Click OK.

Step 23
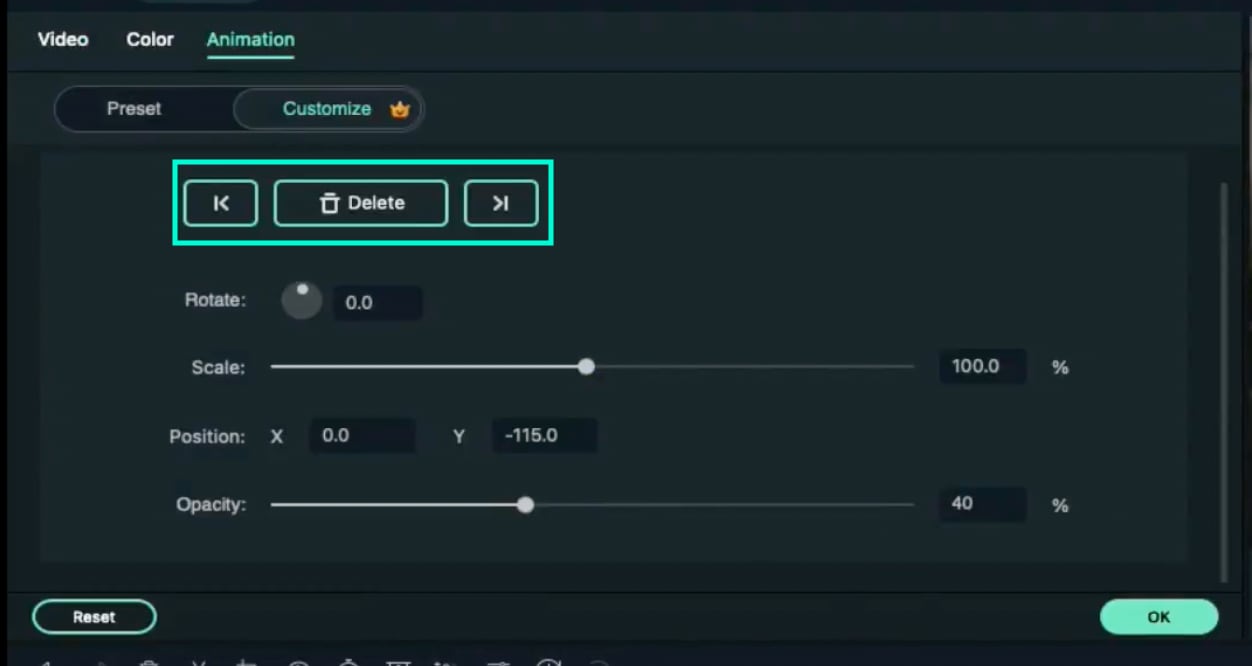
Click on the Sample Color in Track 5 and change the Opacity to 40% for the second and third keyframes. You can move between the keyframes on the arrows highlighted below. Click OK.
Step 24
Go to Sample Color and drag the “Gradient 4” color to Track 7 on the Timeline. Allow this clip to start from the very beginning and adjust its end time to be the same as all the other clips.
Step 25
Double-click on the Gradient 4 clip → go to Video → Basic. Change the Blending Mode to “Soft Light”. Reduce the Opacity to 42%. Click OK.

Step 26
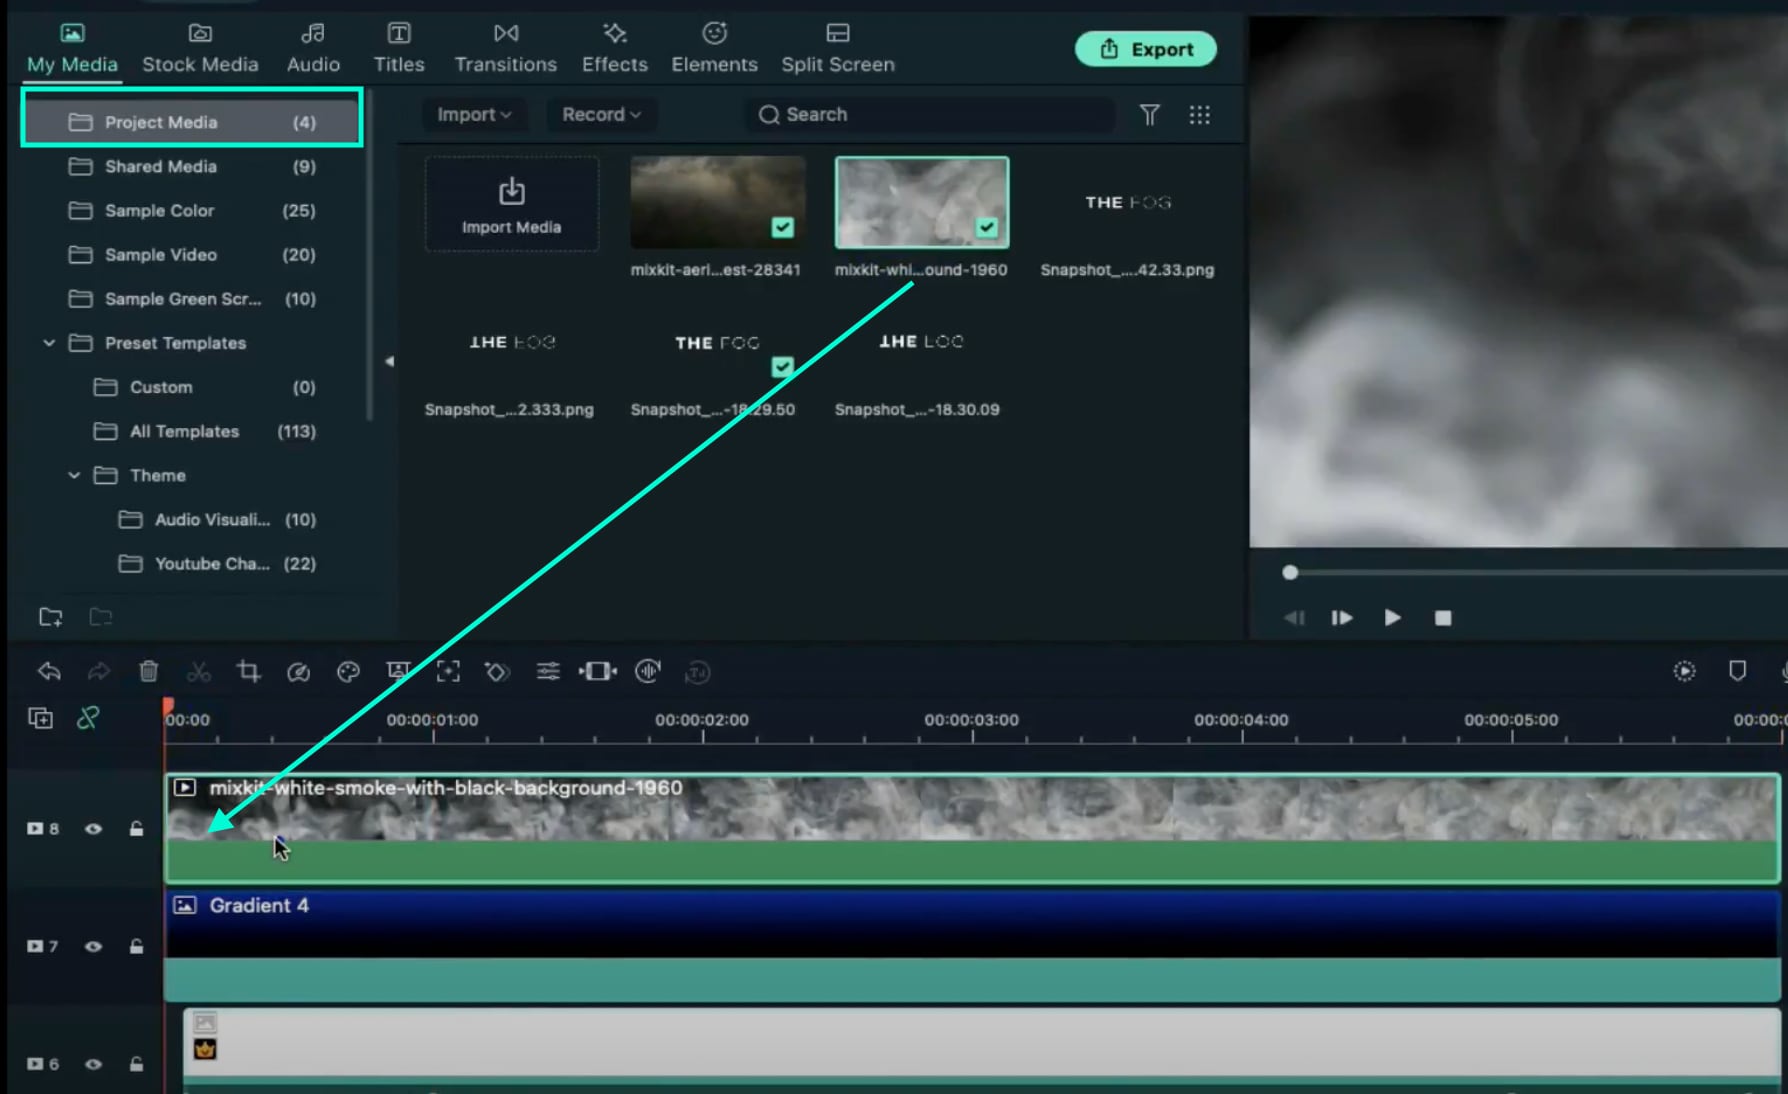
Go to Project Media and drag the white smoke clip on Track 8. Place the Playhead at the starting point and double-click on the clip.
Step 27
Change its Blending Mode to “Screen”. Go to the Animation tab and decrease the Opacity to 0%. Move the Playhead to frame 10 → increase Opacity to 12%. Move the Playhead to the 5-second position → add a keyframe. Then, move the Playhead at 5 seconds and 23rd frame → increase the Opacity back to 100%. Click OK.
Step 28
Go to Effects and drag the Cinema effect to Track 9. Adjust its duration to match all the other clips. Double-click on the clip and increase its Border Height to “0.10”. Click OK.

Step 29
Finally, Render the video and watch the final result. You’re done! Congratulations on resting a foggy text reflection effect in Filmora.

Summary
What you’ve learned:
- Create a foggy text reflection effect in the Filmora video editor
- Add and adjust keyframes to clips
- Edit and customize text
- Take and edit snapshots
What you need to prepare:
- A computer (Windows or macOS)
- Your video materials.
- Filmora video editor
Step 1
Download the Filmora video editor → run it → and click on “New Project”.
Step 2
Go to Titles → drag the Default Title to the Timeline below. Double-click on the clip to open its settings. Here, type in your text → change the font to Montserrat Light. Scroll down and increase Text Spacing to 5.0. Now, select only the first word in the box where you typed your text. Then, change its font to Montserrat Bold. Click OK.

Step 3
Take a Snapshot of the text you just created. Now, delete the Default Title clip from the Timeline and drag the Snapshot you took to the Timeline.

Step 4
Double-click the Snapshot clip → go to the Video tab → click the highlighted button below to flip the text. Then, take a Snapshot of this flipped version of the text and delete the clip from the Timeline.

Step 5
Visit the free stock footage site Mixkit and download any smoke or fog background video you like. Then, go to Filmora → My Media → Import Media → and select the footage you downloaded to import it into the video editor. Then, drag the Smoke clip to the Timeline and make it 6 seconds long.

Step 6
Double-click on the clip → go to Color. Now, change Contrast to “49”, Saturation to “100”, and Brightness to “18”. Below, set the 3D LUT option to “Game of Thrones”. Click OK.

Step 7
Drag the other Smoke clip to Track 2 of the Timeline. Make it 6 seconds long. Then, move the Playhead to the starting point of the video.

Step 8
Double-click on the new smoke clip. Go to Animation. Decrease the Opacity to 0%. Move the Playhead 10 frames forward → increase the Opacity to 6%. Don’t click OK yet.

Step 9
Move the Playhead to 5 seconds. Click on “**+Add**” to add a keyframe to the clip. Then, move the Playhead to the next-to-last frame and increase the Opacity to 100%. Click OK.

Step 10
Set the Playhead to the second frame and drop the first Snapshot we took earlier at that starting point. Drag the clip to be 6 seconds long. Then, double-click on the clip and adjust the settings exactly as you see in this image here. Don’t click on OK yet.

Step 11
Move the Playhead at the 17th frame → increase the Opacity to 6%. Move the Playhead to 5 seconds and 23rd frame → change the X-axis value to “1973”. Click OK.

Step 12
Drag the same Snapshot file to Track 4, directly on top of the clip in Track 3. Make its duration the same too. Now, double-click on this clip and apply the exact same settings as in the image here. Don’t click on OK yet.

Step 13
Move the Playhead to the 17th frame → increase the Opacity to 6%. Now, move the Playhead to 5 seconds and 23rd frame → change X-axis value to “-1944” and the Opacity to 0%. Click OK.

Step 14
Go to Sample Color and drag the White color on Track 6 in the Timeline. Place this clip at the same starting point as the snapshots below it. Set its duration the same as the clips below too. Then, move the Playhead at its starting point.

Step 15
Double-click on the Sample Color clip → go to Video → Mask → Import. Here, select the first Snapshot we created earlier in this tutorial.

Step 16
Now, go straight to the Animation tab and click the “**+Add**” button to add a keyframe. Then, compress the text in the preview screen until it’s not visible anymore on the screen.

Step 17
Add keyframes at the 1-second position and at the 5-second position. Then, move the Playhead once more to the 5-second and 22nd frame. Reduce the Opacity to 1%. Click OK.

Step 18
Drag another White Sample Color to Track 5 this time. Adjust its duration and starting point to be the same as the clip above it. Double-click on it → go to Video → Mask → Import. Here, select the flipped text Snapshot we created earlier.
Step 19
Now, go to Animation and add a keyframe at the starting point. Then, compress the text on the preview screen exactly as we did before with the other one. Then, add a keyframe at the 1-second position of the clip. Then, adjust the Y-axis position to create a reflection effect, just like this.

Step 20
Move the Playhead to the 5-second position and add a keyframe. Now, move the Playhead directly to 5-seconds and 22 frames. Here, reduce the Opacity to 0%.
Step 21
Go back to the Video tab from the upper-left corner of the panel. Now, move the Playhead to the clip’s starting point. Select the Mask tab. Add a keyframe. Move the Playhead to 1 second and set the Blur Strength to 6%.

Step 22
Move the Playhead to 3 seconds. Scroll down and set Vertical to 259%. Set Y-axis to “-157”. Then, increase Blur Strength to 25%. Click OK.

Step 23
Click on the Sample Color in Track 5 and change the Opacity to 40% for the second and third keyframes. You can move between the keyframes on the arrows highlighted below. Click OK.

Step 24
Go to Sample Color and drag the “Gradient 4” color to Track 7 on the Timeline. Allow this clip to start from the very beginning and adjust its end time to be the same as all the other clips.
Step 25
Double-click on the Gradient 4 clip → go to Video → Basic. Change the Blending Mode to “Soft Light”. Reduce the Opacity to 42%. Click OK.

Step 26
Go to Project Media and drag the white smoke clip on Track 8. Place the Playhead at the starting point and double-click on the clip.

Step 27
Change its Blending Mode to “Screen”. Go to the Animation tab and decrease the Opacity to 0%. Move the Playhead to frame 10 → increase Opacity to 12%. Move the Playhead to the 5-second position → add a keyframe. Then, move the Playhead at 5 seconds and 23rd frame → increase the Opacity back to 100%. Click OK.
Step 28
Go to Effects and drag the Cinema effect to Track 9. Adjust its duration to match all the other clips. Double-click on the clip and increase its Border Height to “0.10”. Click OK.

Step 29
Finally, Render the video and watch the final result. You’re done! Congratulations on resting a foggy text reflection effect in Filmora.

Summary
What you’ve learned:
- Create a foggy text reflection effect in the Filmora video editor
- Add and adjust keyframes to clips
- Edit and customize text
- Take and edit snapshots
What you need to prepare:
- A computer (Windows or macOS)
- Your video materials.
- Filmora video editor
Step 1
Download the Filmora video editor → run it → and click on “New Project”.
Step 2
Go to Titles → drag the Default Title to the Timeline below. Double-click on the clip to open its settings. Here, type in your text → change the font to Montserrat Light. Scroll down and increase Text Spacing to 5.0. Now, select only the first word in the box where you typed your text. Then, change its font to Montserrat Bold. Click OK.

Step 3
Take a Snapshot of the text you just created. Now, delete the Default Title clip from the Timeline and drag the Snapshot you took to the Timeline.

Step 4
Double-click the Snapshot clip → go to the Video tab → click the highlighted button below to flip the text. Then, take a Snapshot of this flipped version of the text and delete the clip from the Timeline.

Step 5
Visit the free stock footage site Mixkit and download any smoke or fog background video you like. Then, go to Filmora → My Media → Import Media → and select the footage you downloaded to import it into the video editor. Then, drag the Smoke clip to the Timeline and make it 6 seconds long.

Step 6
Double-click on the clip → go to Color. Now, change Contrast to “49”, Saturation to “100”, and Brightness to “18”. Below, set the 3D LUT option to “Game of Thrones”. Click OK.

Step 7
Drag the other Smoke clip to Track 2 of the Timeline. Make it 6 seconds long. Then, move the Playhead to the starting point of the video.

Step 8
Double-click on the new smoke clip. Go to Animation. Decrease the Opacity to 0%. Move the Playhead 10 frames forward → increase the Opacity to 6%. Don’t click OK yet.

Step 9
Move the Playhead to 5 seconds. Click on “**+Add**” to add a keyframe to the clip. Then, move the Playhead to the next-to-last frame and increase the Opacity to 100%. Click OK.

Step 10
Set the Playhead to the second frame and drop the first Snapshot we took earlier at that starting point. Drag the clip to be 6 seconds long. Then, double-click on the clip and adjust the settings exactly as you see in this image here. Don’t click on OK yet.

Step 11
Move the Playhead at the 17th frame → increase the Opacity to 6%. Move the Playhead to 5 seconds and 23rd frame → change the X-axis value to “1973”. Click OK.

Step 12
Drag the same Snapshot file to Track 4, directly on top of the clip in Track 3. Make its duration the same too. Now, double-click on this clip and apply the exact same settings as in the image here. Don’t click on OK yet.

Step 13
Move the Playhead to the 17th frame → increase the Opacity to 6%. Now, move the Playhead to 5 seconds and 23rd frame → change X-axis value to “-1944” and the Opacity to 0%. Click OK.

Step 14
Go to Sample Color and drag the White color on Track 6 in the Timeline. Place this clip at the same starting point as the snapshots below it. Set its duration the same as the clips below too. Then, move the Playhead at its starting point.

Step 15
Double-click on the Sample Color clip → go to Video → Mask → Import. Here, select the first Snapshot we created earlier in this tutorial.

Step 16
Now, go straight to the Animation tab and click the “**+Add**” button to add a keyframe. Then, compress the text in the preview screen until it’s not visible anymore on the screen.

Step 17
Add keyframes at the 1-second position and at the 5-second position. Then, move the Playhead once more to the 5-second and 22nd frame. Reduce the Opacity to 1%. Click OK.

Step 18
Drag another White Sample Color to Track 5 this time. Adjust its duration and starting point to be the same as the clip above it. Double-click on it → go to Video → Mask → Import. Here, select the flipped text Snapshot we created earlier.
Step 19
Now, go to Animation and add a keyframe at the starting point. Then, compress the text on the preview screen exactly as we did before with the other one. Then, add a keyframe at the 1-second position of the clip. Then, adjust the Y-axis position to create a reflection effect, just like this.

Step 20
Move the Playhead to the 5-second position and add a keyframe. Now, move the Playhead directly to 5-seconds and 22 frames. Here, reduce the Opacity to 0%.
Step 21
Go back to the Video tab from the upper-left corner of the panel. Now, move the Playhead to the clip’s starting point. Select the Mask tab. Add a keyframe. Move the Playhead to 1 second and set the Blur Strength to 6%.

Step 22
Move the Playhead to 3 seconds. Scroll down and set Vertical to 259%. Set Y-axis to “-157”. Then, increase Blur Strength to 25%. Click OK.

Step 23
Click on the Sample Color in Track 5 and change the Opacity to 40% for the second and third keyframes. You can move between the keyframes on the arrows highlighted below. Click OK.

Step 24
Go to Sample Color and drag the “Gradient 4” color to Track 7 on the Timeline. Allow this clip to start from the very beginning and adjust its end time to be the same as all the other clips.
Step 25
Double-click on the Gradient 4 clip → go to Video → Basic. Change the Blending Mode to “Soft Light”. Reduce the Opacity to 42%. Click OK.

Step 26
Go to Project Media and drag the white smoke clip on Track 8. Place the Playhead at the starting point and double-click on the clip.

Step 27
Change its Blending Mode to “Screen”. Go to the Animation tab and decrease the Opacity to 0%. Move the Playhead to frame 10 → increase Opacity to 12%. Move the Playhead to the 5-second position → add a keyframe. Then, move the Playhead at 5 seconds and 23rd frame → increase the Opacity back to 100%. Click OK.
Step 28
Go to Effects and drag the Cinema effect to Track 9. Adjust its duration to match all the other clips. Double-click on the clip and increase its Border Height to “0.10”. Click OK.

Step 29
Finally, Render the video and watch the final result. You’re done! Congratulations on resting a foggy text reflection effect in Filmora.

Summary
What you’ve learned:
- Create a foggy text reflection effect in the Filmora video editor
- Add and adjust keyframes to clips
- Edit and customize text
- Take and edit snapshots
What you need to prepare:
- A computer (Windows or macOS)
- Your video materials.
- Filmora video editor
Step 1
Download the Filmora video editor → run it → and click on “New Project”.
Step 2
Go to Titles → drag the Default Title to the Timeline below. Double-click on the clip to open its settings. Here, type in your text → change the font to Montserrat Light. Scroll down and increase Text Spacing to 5.0. Now, select only the first word in the box where you typed your text. Then, change its font to Montserrat Bold. Click OK.

Step 3
Take a Snapshot of the text you just created. Now, delete the Default Title clip from the Timeline and drag the Snapshot you took to the Timeline.

Step 4
Double-click the Snapshot clip → go to the Video tab → click the highlighted button below to flip the text. Then, take a Snapshot of this flipped version of the text and delete the clip from the Timeline.

Step 5
Visit the free stock footage site Mixkit and download any smoke or fog background video you like. Then, go to Filmora → My Media → Import Media → and select the footage you downloaded to import it into the video editor. Then, drag the Smoke clip to the Timeline and make it 6 seconds long.

Step 6
Double-click on the clip → go to Color. Now, change Contrast to “49”, Saturation to “100”, and Brightness to “18”. Below, set the 3D LUT option to “Game of Thrones”. Click OK.

Step 7
Drag the other Smoke clip to Track 2 of the Timeline. Make it 6 seconds long. Then, move the Playhead to the starting point of the video.

Step 8
Double-click on the new smoke clip. Go to Animation. Decrease the Opacity to 0%. Move the Playhead 10 frames forward → increase the Opacity to 6%. Don’t click OK yet.

Step 9
Move the Playhead to 5 seconds. Click on “**+Add**” to add a keyframe to the clip. Then, move the Playhead to the next-to-last frame and increase the Opacity to 100%. Click OK.

Step 10
Set the Playhead to the second frame and drop the first Snapshot we took earlier at that starting point. Drag the clip to be 6 seconds long. Then, double-click on the clip and adjust the settings exactly as you see in this image here. Don’t click on OK yet.

Step 11
Move the Playhead at the 17th frame → increase the Opacity to 6%. Move the Playhead to 5 seconds and 23rd frame → change the X-axis value to “1973”. Click OK.

Step 12
Drag the same Snapshot file to Track 4, directly on top of the clip in Track 3. Make its duration the same too. Now, double-click on this clip and apply the exact same settings as in the image here. Don’t click on OK yet.

Step 13
Move the Playhead to the 17th frame → increase the Opacity to 6%. Now, move the Playhead to 5 seconds and 23rd frame → change X-axis value to “-1944” and the Opacity to 0%. Click OK.

Step 14
Go to Sample Color and drag the White color on Track 6 in the Timeline. Place this clip at the same starting point as the snapshots below it. Set its duration the same as the clips below too. Then, move the Playhead at its starting point.

Step 15
Double-click on the Sample Color clip → go to Video → Mask → Import. Here, select the first Snapshot we created earlier in this tutorial.

Step 16
Now, go straight to the Animation tab and click the “**+Add**” button to add a keyframe. Then, compress the text in the preview screen until it’s not visible anymore on the screen.

Step 17
Add keyframes at the 1-second position and at the 5-second position. Then, move the Playhead once more to the 5-second and 22nd frame. Reduce the Opacity to 1%. Click OK.

Step 18
Drag another White Sample Color to Track 5 this time. Adjust its duration and starting point to be the same as the clip above it. Double-click on it → go to Video → Mask → Import. Here, select the flipped text Snapshot we created earlier.
Step 19
Now, go to Animation and add a keyframe at the starting point. Then, compress the text on the preview screen exactly as we did before with the other one. Then, add a keyframe at the 1-second position of the clip. Then, adjust the Y-axis position to create a reflection effect, just like this.

Step 20
Move the Playhead to the 5-second position and add a keyframe. Now, move the Playhead directly to 5-seconds and 22 frames. Here, reduce the Opacity to 0%.
Step 21
Go back to the Video tab from the upper-left corner of the panel. Now, move the Playhead to the clip’s starting point. Select the Mask tab. Add a keyframe. Move the Playhead to 1 second and set the Blur Strength to 6%.

Step 22
Move the Playhead to 3 seconds. Scroll down and set Vertical to 259%. Set Y-axis to “-157”. Then, increase Blur Strength to 25%. Click OK.

Step 23
Click on the Sample Color in Track 5 and change the Opacity to 40% for the second and third keyframes. You can move between the keyframes on the arrows highlighted below. Click OK.

Step 24
Go to Sample Color and drag the “Gradient 4” color to Track 7 on the Timeline. Allow this clip to start from the very beginning and adjust its end time to be the same as all the other clips.
Step 25
Double-click on the Gradient 4 clip → go to Video → Basic. Change the Blending Mode to “Soft Light”. Reduce the Opacity to 42%. Click OK.

Step 26
Go to Project Media and drag the white smoke clip on Track 8. Place the Playhead at the starting point and double-click on the clip.

Step 27
Change its Blending Mode to “Screen”. Go to the Animation tab and decrease the Opacity to 0%. Move the Playhead to frame 10 → increase Opacity to 12%. Move the Playhead to the 5-second position → add a keyframe. Then, move the Playhead at 5 seconds and 23rd frame → increase the Opacity back to 100%. Click OK.
Step 28
Go to Effects and drag the Cinema effect to Track 9. Adjust its duration to match all the other clips. Double-click on the clip and increase its Border Height to “0.10”. Click OK.

Step 29
Finally, Render the video and watch the final result. You’re done! Congratulations on resting a foggy text reflection effect in Filmora.

Summary
What you’ve learned:
- Create a foggy text reflection effect in the Filmora video editor
- Add and adjust keyframes to clips
- Edit and customize text
- Take and edit snapshots
Wondershare Filmora Tutorial | Using The AI Auto Reframe Feature
If you’ve struggled with adjusting the frame of your videos, there is a solution for you. The solution is to change the video aspect ratio, which is a game-changer in the world of video editing. It is a powerful feature that automatically adjusts the frame to fit different aspect ratios. With this feature, you don’t have to manually resize and reposition your video. The Auto Reframe feature will do all the work for you.
Additionally, it ensures that your videos look great on any screen by frame adjustment. It will keep your subject in focus and eliminate any unnecessary cropping. As we all know, the utility of auto reframe is undeniable. So, share your videos, knowing that they will look their best. The good part is that you can view your video at its best regardless of the device on which they are viewed.
Part 1: How Has AI Been Helping Video Editors?
With AI’s help, video editors’ jobs have become more accessible. You can change the aspect ratio of video with this feature to reduce your time and effort. Some of these ways are mentioned below, benefiting the video editors.
1. Automation in Video Editing
AI tools can help you analyze your video content and generate automated edited versions. This feature use algorithm to identify key moments in your video. Additionally, it improves your video by doing basic edits on it. These edits include basic trimming, color correction, and other options.
2. Content Analysis
This AI-based technology can help you to analyze your content in both video and image form. You can extract valuable information using AI, like facial recognition and sentiment analysis. With the help of this analysis, the editors can make precise decisions regarding editing and more.
3. Automated Captions
AI technology also recognizes speech which is very helpful for transcribing videos automatically. This feature is helping many video editors to add a professional touch to videos. Additionally, speech recognition tools add attention-grabbing subtitles with good accuracy. This saves the editors a lot of time and effort compared to manual transcription.
4. Noise Enhancement
If you have a problem with background noise and distortion, AI tools can help. AI algorithms can help you to improve your noise quality and reduce background noise. For this, you will need the original footage so that AI can work well on it. Furthermore, this will also improve the overall experience of the viewer.
5. Changing Background
With the help of AI, you can even remove unwanted elements or objects in your video. These AI tools allow you to replace objects from video frames. Also, it makes your video’s background look more appealing. In scenarios where removing logos and replacing the green screen background, this feature helps you a lot.
6. Professional Video Effects
Additionally, you can add artistic filters, effects, and appealing filters to your video with these tools. Such AI tools use deep learning algorithms to analyze the video and suggest you some corrections. This allows editors to add desired visual aesthetic effects to their content to look more attractive.
7. Content Recommendation
Using deep learning algorithms, AI can give you recommendations for your video content. These recommendations are based on user preferences and viewing patterns. This can help content creators understand their audience preferences and trends to create better video content.
Auto Reframe Video in 1-Click
Automatically resize videos in the fastest way. No editing skills are required!
Resize Video for Free Resize Video for Free Learn More >

Part 2: Understanding The Auto Reframe Feature in Wondershare Filmora
Wondershare Filmora embeds high-profile features into its video editing ecosystem. The platform integrates artificial intelligence into its video editing system to bring some of the best features. The Auto Reframe feature is one of the AI-integrated features of Wondershare Filmora. The video editing platform resizes the videos in the quickest possible ways.
Using this feature, you can easily involve a single video for all available platforms for posting videos. With a single click, you can save all the time and effort required to resize videos manually. The videos are easily adjusted across different aspect ratios using the efficient AI feature offered by Filmora.
Part 3: Other Prominent AI Features Offered by Wondershare Filmora
Wondershare Filmora offers many advanced and unique features. However, its newly incorporated AI features are some of the best. Here are the top 5 AI features Filmora offers, as discussed in the portion below.
1. AI Smart Cutout
Wondershare Filmora introduced an extraordinary feature of the smart cutout. This feature is a straightforward approach for creators who want to delete undesired items from a video. It uses AI to quickly and accurately find and separate people or objects from the background in videos. Users can easily make cool effects with a few steps, like having a green screen or changing the background effortlessly.
2. AI Copywriting
Filmora offers an AI copywriting feature that directly integrates with ChatGPT. It can generate video text and can also write titles and descriptions of YouTube Videos. The AI copywriting function saves a lot of time. It allows users to easily create professional-looking videos by incorporating AI into their platform.
3. AI Audio Stretch
Any audio track can be quickly re-timed to match the length of your video. AI Audio Stretch can be used with all kinds of music tracks. It works well for various types of videos, whether a casual vlog or a professional video. AI Audio Stretch can recognize and analyze music’s singing or vocal parts. It then remixes the audio clip to match the patterns.
4. AI Portrait
By using this feature of Filmora, users can easily remove backgrounds from images and videos. It offers over 70 different AI effects for portraits and stickers. Moreover, it can automatically detect faces and apply augmented reality (AR) stickers to them. Users don’t need any professional skills to use its portrait effects. Simply select the effect you like and click to add it to your video.
5. AI Audio Denoise
This feature automatically detects noise in any audio or video file and removes unwanted noise. It uses AI to detect background distortion in a video or audio file . Then, it further eliminates the distortion from your video project. This feature allows you to experience your video in quality and crisp sound.
Part 4: Using The Auto Reframe Feature in Wondershare Filmora
After covering an overview of Wondershare Filmora, we will work on the Auto Reframe feature. Look ahead into the steps to figure out how to auto-reframe a video using Filmora:
Convert Text-to-Speech For Win 7 or later(64-bit)
Convert Text-to-Speech For macOS 10.14 or later
Filmora Tutorial -Auto Reframe Filmora Tutorial
Step 1Start Using Auto Reframe Feature
Open Wondershare Filmora on your computer and proceed to select the “Auto Reframe” feature from the options available on the home screen.

Step 2Import The Video
This opens a new window where you can proceed with auto reframing of the video. Click the “Import” button on the top-right of the window to add the video you wish to reframe.

Step 3Change Parameters and Export
After adding the video, adjust the “Aspect Ratio” and “Motion Speed” with the available parameters. Click “Analyze” to observe the changes in reframing as provided. In this way, you can change the aspect ratio of your video using the auto reframe feature. Once completed, save your video project in the system.

Conclusion
In conclusion, auto reframe is a remarkable feature that simplifies video editing. This feature aims to ensure that your videos look great on any screen. If you seek a way to explain how to change the aspect ratio of a video, many video editing tools are now offering this feature to provide a better editing experience. Wondershare Filmora has this feature available for its users. You can easily download and install this tool to auto-reframe your video project.
Resize Video for Free Resize Video for Free Learn More >

Part 2: Understanding The Auto Reframe Feature in Wondershare Filmora
Wondershare Filmora embeds high-profile features into its video editing ecosystem. The platform integrates artificial intelligence into its video editing system to bring some of the best features. The Auto Reframe feature is one of the AI-integrated features of Wondershare Filmora. The video editing platform resizes the videos in the quickest possible ways.
Using this feature, you can easily involve a single video for all available platforms for posting videos. With a single click, you can save all the time and effort required to resize videos manually. The videos are easily adjusted across different aspect ratios using the efficient AI feature offered by Filmora.
Part 3: Other Prominent AI Features Offered by Wondershare Filmora
Wondershare Filmora offers many advanced and unique features. However, its newly incorporated AI features are some of the best. Here are the top 5 AI features Filmora offers, as discussed in the portion below.
1. AI Smart Cutout
Wondershare Filmora introduced an extraordinary feature of the smart cutout. This feature is a straightforward approach for creators who want to delete undesired items from a video. It uses AI to quickly and accurately find and separate people or objects from the background in videos. Users can easily make cool effects with a few steps, like having a green screen or changing the background effortlessly.
2. AI Copywriting
Filmora offers an AI copywriting feature that directly integrates with ChatGPT. It can generate video text and can also write titles and descriptions of YouTube Videos. The AI copywriting function saves a lot of time. It allows users to easily create professional-looking videos by incorporating AI into their platform.
3. AI Audio Stretch
Any audio track can be quickly re-timed to match the length of your video. AI Audio Stretch can be used with all kinds of music tracks. It works well for various types of videos, whether a casual vlog or a professional video. AI Audio Stretch can recognize and analyze music’s singing or vocal parts. It then remixes the audio clip to match the patterns.
4. AI Portrait
By using this feature of Filmora, users can easily remove backgrounds from images and videos. It offers over 70 different AI effects for portraits and stickers. Moreover, it can automatically detect faces and apply augmented reality (AR) stickers to them. Users don’t need any professional skills to use its portrait effects. Simply select the effect you like and click to add it to your video.
5. AI Audio Denoise
This feature automatically detects noise in any audio or video file and removes unwanted noise. It uses AI to detect background distortion in a video or audio file . Then, it further eliminates the distortion from your video project. This feature allows you to experience your video in quality and crisp sound.
Part 4: Using The Auto Reframe Feature in Wondershare Filmora
After covering an overview of Wondershare Filmora, we will work on the Auto Reframe feature. Look ahead into the steps to figure out how to auto-reframe a video using Filmora:
Convert Text-to-Speech For Win 7 or later(64-bit)
Convert Text-to-Speech For macOS 10.14 or later
Filmora Tutorial -Auto Reframe Filmora Tutorial
Step 1Start Using Auto Reframe Feature
Open Wondershare Filmora on your computer and proceed to select the “Auto Reframe” feature from the options available on the home screen.

Step 2Import The Video
This opens a new window where you can proceed with auto reframing of the video. Click the “Import” button on the top-right of the window to add the video you wish to reframe.

Step 3Change Parameters and Export
After adding the video, adjust the “Aspect Ratio” and “Motion Speed” with the available parameters. Click “Analyze” to observe the changes in reframing as provided. In this way, you can change the aspect ratio of your video using the auto reframe feature. Once completed, save your video project in the system.

Conclusion
In conclusion, auto reframe is a remarkable feature that simplifies video editing. This feature aims to ensure that your videos look great on any screen. If you seek a way to explain how to change the aspect ratio of a video, many video editing tools are now offering this feature to provide a better editing experience. Wondershare Filmora has this feature available for its users. You can easily download and install this tool to auto-reframe your video project.
Best 8 Online MPEG to GIF Converters
Powerful Video Editor - Wondershare Filmora
Provide abundant video effects - A creative video editor
Powerful color correction and grading
Detailed tutorials provided by the official channel
GIFs are known to be quite effective in displaying a video portrayal. Many people save special moments across GIFs to make sharing easy and simple. However, when you own different forms of video formats and are looking to convert them to a GIF, you may need a proper tool for its execution. In this article, we shall be working on converting MPEG to GIF without any difficulty.
To make sure that you successfully convert a MPEG to GIF, this article will introduce a set of offline and online converters for effective execution.
In this article
Part 1: Best 3 MPEG to GIF Converter Software
Part 2: Top Online 5 MPEG to GIF Converters
Part 3: How to Convert MPEG to GIF Using Wondershare Filmora?
Part 1: Best 3 MPEG to GIF Converter Software
This part will focus on the offline software that can be considered for converting MPEG to GIF. Follow through these tools to understand more details about them:
1. Wondershare Filmora
| Compatibility | Pricing |
|---|---|
| Windows/Mac | $28.98/Monthly $68.98/Annual $98.98/Perpetual |
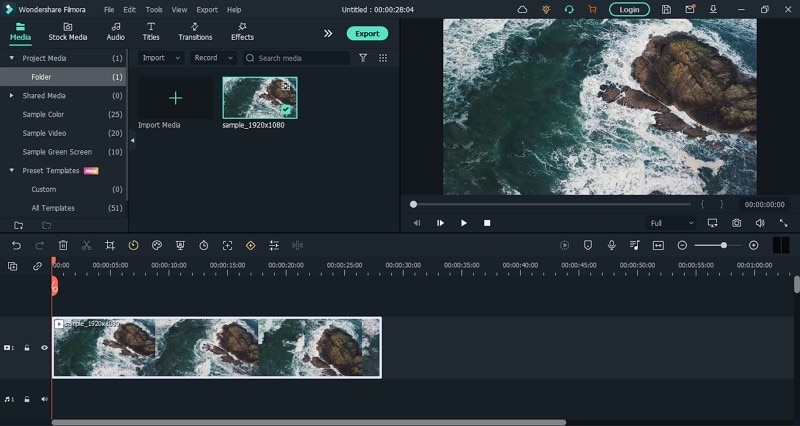
This offline software stands among the premium software of the market that provides efficient services in video management. From basic video editing to diverse features such as adding effects and transitions across it, Wondershare Filmora provides enthusiast-level features to its users. The advanced and modern features, combined with simple interfaces, bring a competitive environment for users.
As you create a video across Wondershare Filmora, multiple advanced tools can be consumed easily. You can find examples like motion tracking and overlays across the tool. However, if you consider converting a MPEG video to a GIF, Filmora is definitely a great option in the market.
Advantages
- Provides a wide variety of effects and overlays.
- Quick rendering of video while converting or editing.
- A cost-effective tool with a vast set of elements.
- Offers intuitive guidelines and custom animation tools.
Disadvantage
- Adds watermark across the exported video in the free version.
2. Adobe Premiere Pro
| Compatibility | Pricing |
|---|---|
| Windows/Mac | $20.99/Monthly |
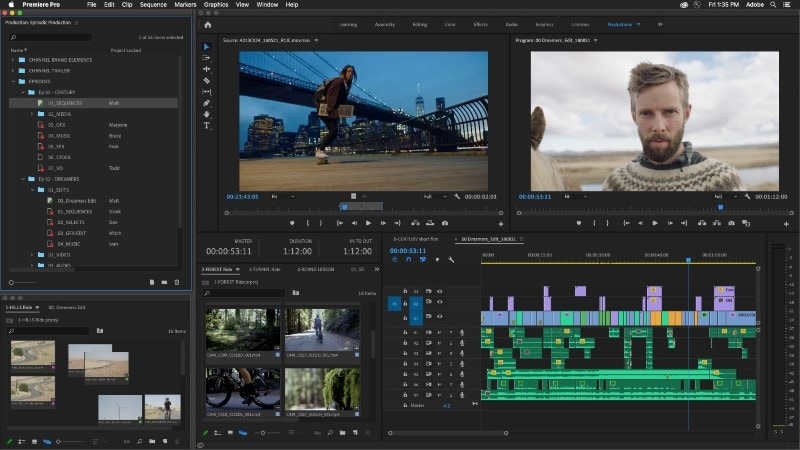
Adobe has developed industry-standard tools in this developing age of digital software. Adobe Premiere Pro is an efficient example of good video editing and management software. The ecosystem of tools offered across Premiere Pro is extensive and prolific; however, the user needs to have a basic knowledge of video editing before coming across it.
The conversion opportunities across this MPEG to GIF converter software are extensive. Its execution, alongside the wide variety of conversion options, is responsive. This makes it a great choice for your organization that is in search of a perfect tool for this purpose.
Pros
The interface is quite clear and flexible for video editors.
The stabilization tool of Filmora is commendable for users.
Collaborate with other editors on different projects through Creative Cloud.
Can perform color correction and audio tweaking on videos before having them exported.
Cons
This tool is not designed for beginners and people who do not understand video editing.
3. VLC
| Compatibility | Windows/Mac/Linux |
|---|---|
| Windows/Mac | Free |
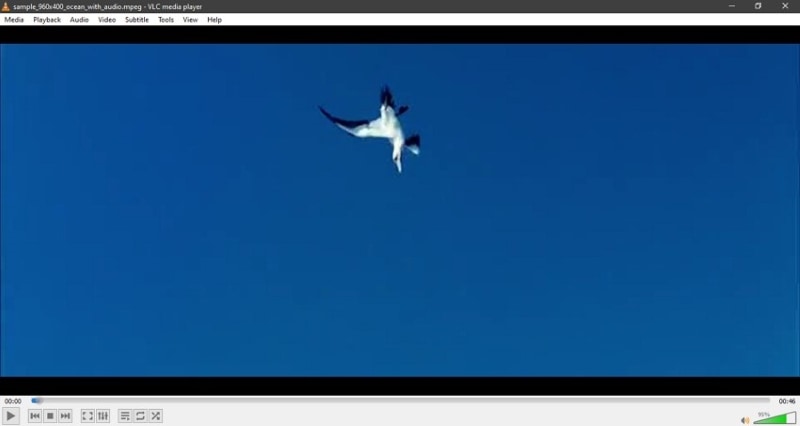
VLC is a free and open-source media player that provides an inspiring variety of tools across its platform. Unlike other free tools, VLC does not work across simple features and characteristics. It offers options for converting, streaming, video editing, and enhancing. This makes it an exceptional offer for users looking to convert their MPEG to GIF.
The tool is highly customizable and is supported with extensive file format support. Looking across the different features required in the process, you can add different plugins to expand your work across VLC.
Benefits
- Offers easy conversion of video files without loss in quality.
- Encode outbound streams without any issues.
- Works perfectly for Linux, Windows, and Mac devices. Also available across Android and iPhone devices.
- It can be expanded through plugins for better functionality.
Drawback
- You cannot edit the video using the VLC Media Player.
Part 2: Top Online 5 MPEG to GIF Converters
For this part, we shall work across a few impressive online converters that can be essentially used for converting a MPEG to GIF. Go through the functions of these tools to understand how you can convert your required video with ease.
1. Aconvert
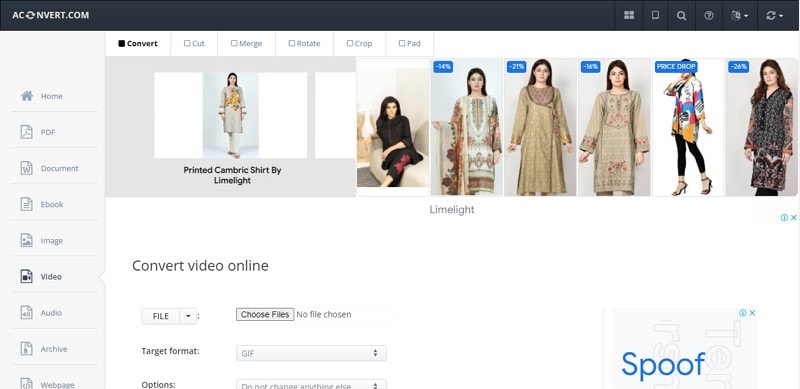
The first option among the premium online converters for MPEG to GIF is Aconvert. This tool can be quite charismatic in providing you with a proper platform to work on your video conversion. While being a simple tool, you can make changes in the video in the best possible manner. Not only does this tool provide the conversion of the specific format, but it also covers an immense amount of conversion options.
Benefits
- Set the duration of the GIF as per your desire.
- Change the video settings, such as bitrate, frame rate, and size.
- A simple and effective user interface.
- Contains a proper description of the file formats for the user’s knowledge.
Con
- Does not keep up with the quality of the video while converting.
2. EZGIF.com
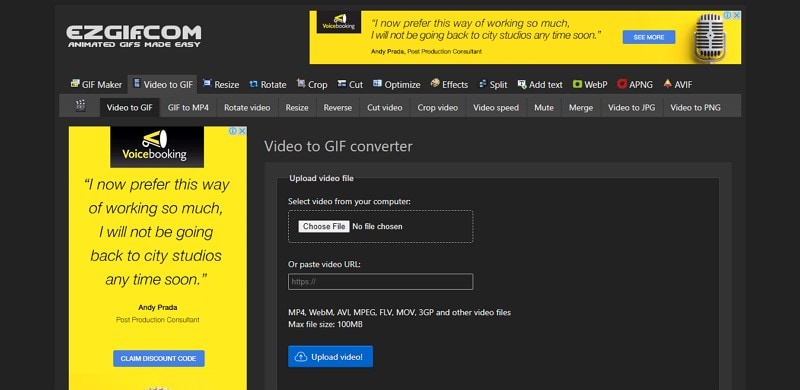
As the name suggests, this online converter is a very simple and effective tool to try. As it converts a MPEG video into a GIF with ease, you can surely look for this tool for quick results. With the option of multiple tools to work with, you can add this tool to your daily life for quick functions. EZGIF.com returns you with an animated GIF, which is quite effective compared to other online platforms.
Advantages
You can paste a URL of a video directly for conversion.
Provides a variety of file formats to its users.
Covers videos of variating frame rates, which makes it diverse.
Get an accurate start and end of the GIF with proper setting tools.
Bad
Users can only upload file sizes of 100MB.
3. CloudConvert
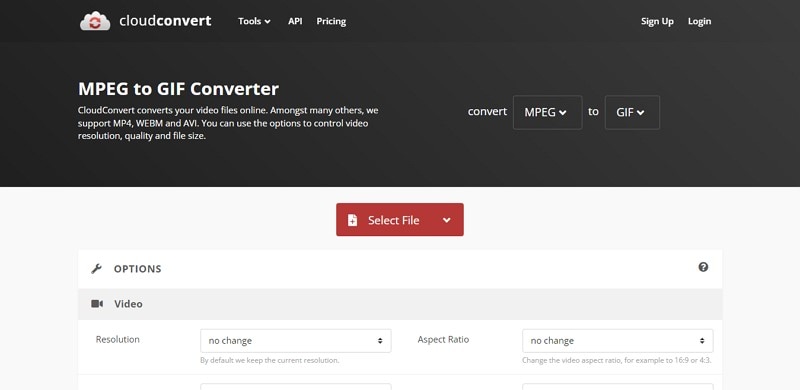
You may find this online platform to be the most effective for converting your MPEG files. While offering various options for converting videos, you can easily manage more than 200+ formats across the tool. Along with that, Cloudconvert ensures the security of all shared data across the platform. It does not allow anyone else to access your data.
Goods
You can ensure high-quality conversion with the online converter tool.
It offers you the option of setting the resolution of the video that you wish to convert.
Helps in changing the aspect ratio of the tool with ease.
You can also change the frame rate of the video that is to be converted.
Bad
Allows converting 25 videos in a day.
4. OnlineConvertFree
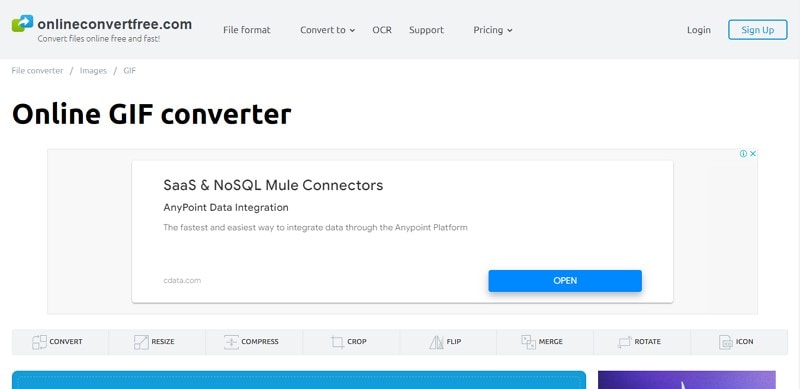
Another great website that you can consider to convert your MPEG to GIF is OnlineConvertFree. With a wide variety of conversion options available across the format, you can make quality GIFs. Along with that, the platform allows its users to upload videos through the computer and Dropbox or Google Drive. Its fast conversion makes it a premium option among users.
Pros
It is a completely free tool to use.
Provides users with support across more than 250 file formats.
Do not keep any data across the website for security reasons.
You can also save your converted data across the cloud.
Cons
The website contains a lot of ads throughout.
5. Convertio
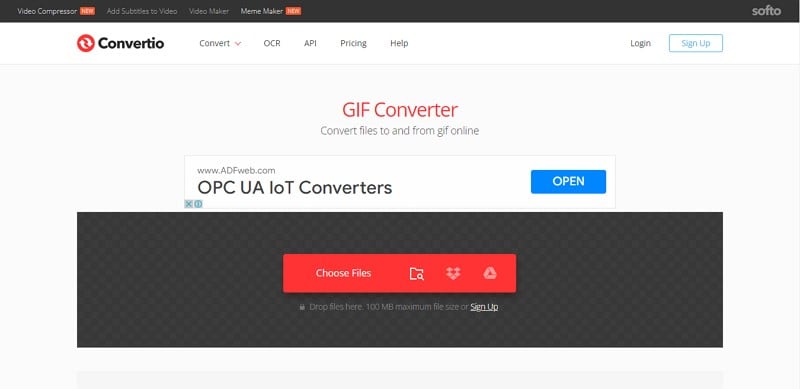
This platform is another exceptional option in file conversion that can be considered in the online software. Convertio supports more than 25600 different file conversion options, which shows that the file format support is extremely elaborate in the platform. The process of conversion is the simplest you can find in the market. Along with that, the tool ensures that the shared files are kept secure from unauthorized access.
Pros
Provides exceptional features for free.
The interface is quite straightforward.
Allows batch conversion of multiple MPEG files into GIFs.
Ensures the quality of the converted file.
Cons
Users are bound to buy a plan for Convertio to use its full features without any file size limits.
Part 3: How to Convert MPEG to GIF Using Wondershare Filmora?
Filmora can be a great option to convert MPEG to GIF without any problems. You need to go through the steps to figure out the complete procedure with ease.
Step 1: Launch Filmora and Open Project
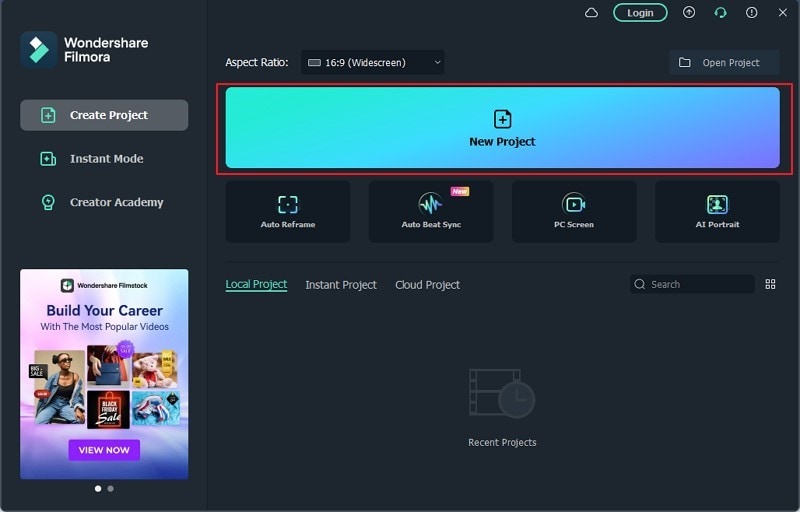
Download and install the latest version of Wondershare Filmora on your computer. Once done, launch the tool and click on “New Project” to open a new window.
Step 2: Import MPEG Video File
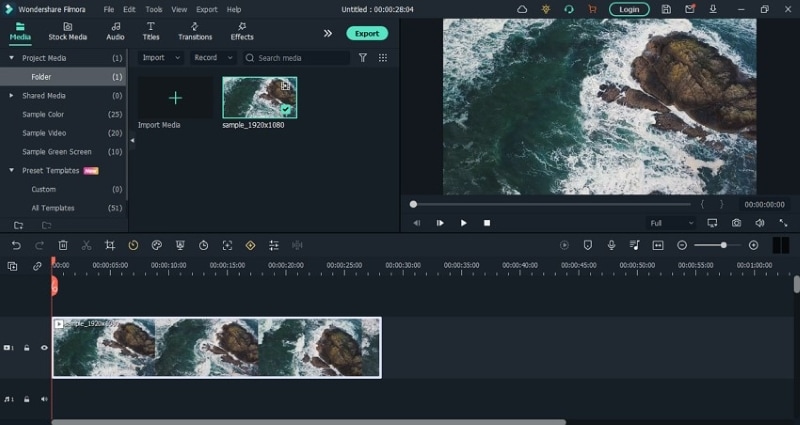
Once a new window opens up, you need to click on the “Import” icon displayed in the “Media” section. Add the MPEG video that is to be converted to a GIF. Once added, drag it across the timeline.
Step 3: Export as GIF
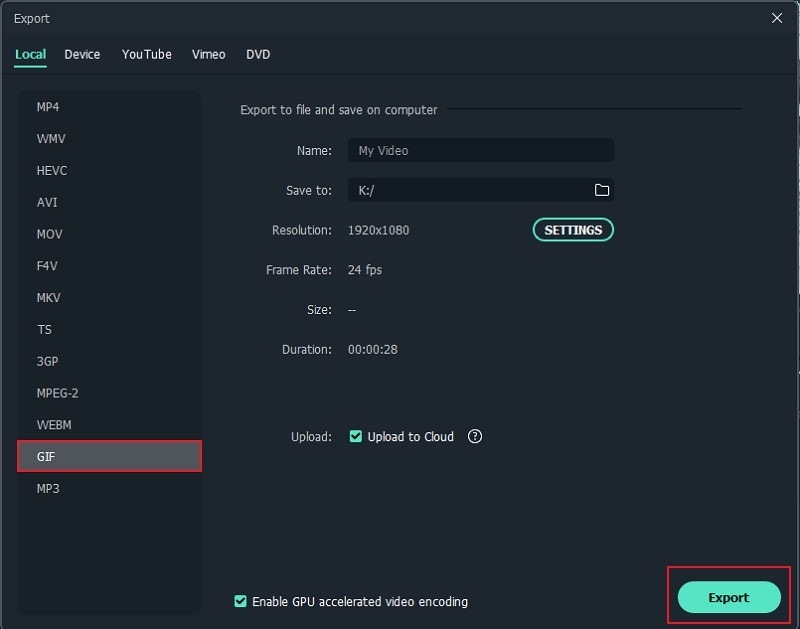
Click on the “Export” icon to open the export options. You need to select the option of “GIF” displayed on the left-hand column of the screen. Once done, set up a name and location for the video. Along with that, you can also change the resolution, frame rate, and size by clicking on “Settings.” Once done, click on the “Export” button to conclude the process.
Conclusion
Have you learned about the variety of software that is available to convert MPEG to GIF? You can consider any tools for making quick changes across your video. Along with that, for perfect execution with quality, you can definitely consider using Wondershare Filmora to convert your video files. Go through the article to make the perfect selection for your tasks.
GIFs are known to be quite effective in displaying a video portrayal. Many people save special moments across GIFs to make sharing easy and simple. However, when you own different forms of video formats and are looking to convert them to a GIF, you may need a proper tool for its execution. In this article, we shall be working on converting MPEG to GIF without any difficulty.
To make sure that you successfully convert a MPEG to GIF, this article will introduce a set of offline and online converters for effective execution.
In this article
Part 1: Best 3 MPEG to GIF Converter Software
Part 2: Top Online 5 MPEG to GIF Converters
Part 3: How to Convert MPEG to GIF Using Wondershare Filmora?
Part 1: Best 3 MPEG to GIF Converter Software
This part will focus on the offline software that can be considered for converting MPEG to GIF. Follow through these tools to understand more details about them:
1. Wondershare Filmora
| Compatibility | Pricing |
|---|---|
| Windows/Mac | $28.98/Monthly $68.98/Annual $98.98/Perpetual |
This offline software stands among the premium software of the market that provides efficient services in video management. From basic video editing to diverse features such as adding effects and transitions across it, Wondershare Filmora provides enthusiast-level features to its users. The advanced and modern features, combined with simple interfaces, bring a competitive environment for users.
As you create a video across Wondershare Filmora, multiple advanced tools can be consumed easily. You can find examples like motion tracking and overlays across the tool. However, if you consider converting a MPEG video to a GIF, Filmora is definitely a great option in the market.

Advantages
- Provides a wide variety of effects and overlays.
- Quick rendering of video while converting or editing.
- A cost-effective tool with a vast set of elements.
- Offers intuitive guidelines and custom animation tools.
Disadvantage
- Adds watermark across the exported video in the free version.
2. Adobe Premiere Pro
| Compatibility | Pricing |
|---|---|
| Windows/Mac | $20.99/Monthly |
Adobe has developed industry-standard tools in this developing age of digital software. Adobe Premiere Pro is an efficient example of good video editing and management software. The ecosystem of tools offered across Premiere Pro is extensive and prolific; however, the user needs to have a basic knowledge of video editing before coming across it.
The conversion opportunities across this MPEG to GIF converter software are extensive. Its execution, alongside the wide variety of conversion options, is responsive. This makes it a great choice for your organization that is in search of a perfect tool for this purpose.

Pros
The interface is quite clear and flexible for video editors.
The stabilization tool of Filmora is commendable for users.
Collaborate with other editors on different projects through Creative Cloud.
Can perform color correction and audio tweaking on videos before having them exported.
Cons
This tool is not designed for beginners and people who do not understand video editing.
3. VLC
| Compatibility | Windows/Mac/Linux |
|---|---|
| Windows/Mac | Free |
VLC is a free and open-source media player that provides an inspiring variety of tools across its platform. Unlike other free tools, VLC does not work across simple features and characteristics. It offers options for converting, streaming, video editing, and enhancing. This makes it an exceptional offer for users looking to convert their MPEG to GIF.
The tool is highly customizable and is supported with extensive file format support. Looking across the different features required in the process, you can add different plugins to expand your work across VLC.

Benefits
- Offers easy conversion of video files without loss in quality.
- Encode outbound streams without any issues.
- Works perfectly for Linux, Windows, and Mac devices. Also available across Android and iPhone devices.
- It can be expanded through plugins for better functionality.
Drawback
- You cannot edit the video using the VLC Media Player.
Part 2: Top Online 5 MPEG to GIF Converters
For this part, we shall work across a few impressive online converters that can be essentially used for converting a MPEG to GIF. Go through the functions of these tools to understand how you can convert your required video with ease.
1. Aconvert
The first option among the premium online converters for MPEG to GIF is Aconvert. This tool can be quite charismatic in providing you with a proper platform to work on your video conversion. While being a simple tool, you can make changes in the video in the best possible manner. Not only does this tool provide the conversion of the specific format, but it also covers an immense amount of conversion options.

Benefits
- Set the duration of the GIF as per your desire.
- Change the video settings, such as bitrate, frame rate, and size.
- A simple and effective user interface.
- Contains a proper description of the file formats for the user’s knowledge.
Con
- Does not keep up with the quality of the video while converting.
2. EZGIF.com
As the name suggests, this online converter is a very simple and effective tool to try. As it converts a MPEG video into a GIF with ease, you can surely look for this tool for quick results. With the option of multiple tools to work with, you can add this tool to your daily life for quick functions. EZGIF.com returns you with an animated GIF, which is quite effective compared to other online platforms.

Advantages
You can paste a URL of a video directly for conversion.
Provides a variety of file formats to its users.
Covers videos of variating frame rates, which makes it diverse.
Get an accurate start and end of the GIF with proper setting tools.
Bad
Users can only upload file sizes of 100MB.
3. CloudConvert
You may find this online platform to be the most effective for converting your MPEG files. While offering various options for converting videos, you can easily manage more than 200+ formats across the tool. Along with that, Cloudconvert ensures the security of all shared data across the platform. It does not allow anyone else to access your data.

Goods
You can ensure high-quality conversion with the online converter tool.
It offers you the option of setting the resolution of the video that you wish to convert.
Helps in changing the aspect ratio of the tool with ease.
You can also change the frame rate of the video that is to be converted.
Bad
Allows converting 25 videos in a day.
4. OnlineConvertFree
Another great website that you can consider to convert your MPEG to GIF is OnlineConvertFree. With a wide variety of conversion options available across the format, you can make quality GIFs. Along with that, the platform allows its users to upload videos through the computer and Dropbox or Google Drive. Its fast conversion makes it a premium option among users.

Pros
It is a completely free tool to use.
Provides users with support across more than 250 file formats.
Do not keep any data across the website for security reasons.
You can also save your converted data across the cloud.
Cons
The website contains a lot of ads throughout.
5. Convertio
This platform is another exceptional option in file conversion that can be considered in the online software. Convertio supports more than 25600 different file conversion options, which shows that the file format support is extremely elaborate in the platform. The process of conversion is the simplest you can find in the market. Along with that, the tool ensures that the shared files are kept secure from unauthorized access.

Pros
Provides exceptional features for free.
The interface is quite straightforward.
Allows batch conversion of multiple MPEG files into GIFs.
Ensures the quality of the converted file.
Cons
Users are bound to buy a plan for Convertio to use its full features without any file size limits.
Part 3: How to Convert MPEG to GIF Using Wondershare Filmora?
Filmora can be a great option to convert MPEG to GIF without any problems. You need to go through the steps to figure out the complete procedure with ease.
Step 1: Launch Filmora and Open Project
Download and install the latest version of Wondershare Filmora on your computer. Once done, launch the tool and click on “New Project” to open a new window.

Step 2: Import MPEG Video File
Once a new window opens up, you need to click on the “Import” icon displayed in the “Media” section. Add the MPEG video that is to be converted to a GIF. Once added, drag it across the timeline.

Step 3: Export as GIF
Click on the “Export” icon to open the export options. You need to select the option of “GIF” displayed on the left-hand column of the screen. Once done, set up a name and location for the video. Along with that, you can also change the resolution, frame rate, and size by clicking on “Settings.” Once done, click on the “Export” button to conclude the process.

Conclusion
Have you learned about the variety of software that is available to convert MPEG to GIF? You can consider any tools for making quick changes across your video. Along with that, for perfect execution with quality, you can definitely consider using Wondershare Filmora to convert your video files. Go through the article to make the perfect selection for your tasks.
GIFs are known to be quite effective in displaying a video portrayal. Many people save special moments across GIFs to make sharing easy and simple. However, when you own different forms of video formats and are looking to convert them to a GIF, you may need a proper tool for its execution. In this article, we shall be working on converting MPEG to GIF without any difficulty.
To make sure that you successfully convert a MPEG to GIF, this article will introduce a set of offline and online converters for effective execution.
In this article
Part 1: Best 3 MPEG to GIF Converter Software
Part 2: Top Online 5 MPEG to GIF Converters
Part 3: How to Convert MPEG to GIF Using Wondershare Filmora?
Part 1: Best 3 MPEG to GIF Converter Software
This part will focus on the offline software that can be considered for converting MPEG to GIF. Follow through these tools to understand more details about them:
1. Wondershare Filmora
| Compatibility | Pricing |
|---|---|
| Windows/Mac | $28.98/Monthly $68.98/Annual $98.98/Perpetual |
This offline software stands among the premium software of the market that provides efficient services in video management. From basic video editing to diverse features such as adding effects and transitions across it, Wondershare Filmora provides enthusiast-level features to its users. The advanced and modern features, combined with simple interfaces, bring a competitive environment for users.
As you create a video across Wondershare Filmora, multiple advanced tools can be consumed easily. You can find examples like motion tracking and overlays across the tool. However, if you consider converting a MPEG video to a GIF, Filmora is definitely a great option in the market.

Advantages
- Provides a wide variety of effects and overlays.
- Quick rendering of video while converting or editing.
- A cost-effective tool with a vast set of elements.
- Offers intuitive guidelines and custom animation tools.
Disadvantage
- Adds watermark across the exported video in the free version.
2. Adobe Premiere Pro
| Compatibility | Pricing |
|---|---|
| Windows/Mac | $20.99/Monthly |
Adobe has developed industry-standard tools in this developing age of digital software. Adobe Premiere Pro is an efficient example of good video editing and management software. The ecosystem of tools offered across Premiere Pro is extensive and prolific; however, the user needs to have a basic knowledge of video editing before coming across it.
The conversion opportunities across this MPEG to GIF converter software are extensive. Its execution, alongside the wide variety of conversion options, is responsive. This makes it a great choice for your organization that is in search of a perfect tool for this purpose.

Pros
The interface is quite clear and flexible for video editors.
The stabilization tool of Filmora is commendable for users.
Collaborate with other editors on different projects through Creative Cloud.
Can perform color correction and audio tweaking on videos before having them exported.
Cons
This tool is not designed for beginners and people who do not understand video editing.
3. VLC
| Compatibility | Windows/Mac/Linux |
|---|---|
| Windows/Mac | Free |
VLC is a free and open-source media player that provides an inspiring variety of tools across its platform. Unlike other free tools, VLC does not work across simple features and characteristics. It offers options for converting, streaming, video editing, and enhancing. This makes it an exceptional offer for users looking to convert their MPEG to GIF.
The tool is highly customizable and is supported with extensive file format support. Looking across the different features required in the process, you can add different plugins to expand your work across VLC.

Benefits
- Offers easy conversion of video files without loss in quality.
- Encode outbound streams without any issues.
- Works perfectly for Linux, Windows, and Mac devices. Also available across Android and iPhone devices.
- It can be expanded through plugins for better functionality.
Drawback
- You cannot edit the video using the VLC Media Player.
Part 2: Top Online 5 MPEG to GIF Converters
For this part, we shall work across a few impressive online converters that can be essentially used for converting a MPEG to GIF. Go through the functions of these tools to understand how you can convert your required video with ease.
1. Aconvert
The first option among the premium online converters for MPEG to GIF is Aconvert. This tool can be quite charismatic in providing you with a proper platform to work on your video conversion. While being a simple tool, you can make changes in the video in the best possible manner. Not only does this tool provide the conversion of the specific format, but it also covers an immense amount of conversion options.

Benefits
- Set the duration of the GIF as per your desire.
- Change the video settings, such as bitrate, frame rate, and size.
- A simple and effective user interface.
- Contains a proper description of the file formats for the user’s knowledge.
Con
- Does not keep up with the quality of the video while converting.
2. EZGIF.com
As the name suggests, this online converter is a very simple and effective tool to try. As it converts a MPEG video into a GIF with ease, you can surely look for this tool for quick results. With the option of multiple tools to work with, you can add this tool to your daily life for quick functions. EZGIF.com returns you with an animated GIF, which is quite effective compared to other online platforms.

Advantages
You can paste a URL of a video directly for conversion.
Provides a variety of file formats to its users.
Covers videos of variating frame rates, which makes it diverse.
Get an accurate start and end of the GIF with proper setting tools.
Bad
Users can only upload file sizes of 100MB.
3. CloudConvert
You may find this online platform to be the most effective for converting your MPEG files. While offering various options for converting videos, you can easily manage more than 200+ formats across the tool. Along with that, Cloudconvert ensures the security of all shared data across the platform. It does not allow anyone else to access your data.

Goods
You can ensure high-quality conversion with the online converter tool.
It offers you the option of setting the resolution of the video that you wish to convert.
Helps in changing the aspect ratio of the tool with ease.
You can also change the frame rate of the video that is to be converted.
Bad
Allows converting 25 videos in a day.
4. OnlineConvertFree
Another great website that you can consider to convert your MPEG to GIF is OnlineConvertFree. With a wide variety of conversion options available across the format, you can make quality GIFs. Along with that, the platform allows its users to upload videos through the computer and Dropbox or Google Drive. Its fast conversion makes it a premium option among users.

Pros
It is a completely free tool to use.
Provides users with support across more than 250 file formats.
Do not keep any data across the website for security reasons.
You can also save your converted data across the cloud.
Cons
The website contains a lot of ads throughout.
5. Convertio
This platform is another exceptional option in file conversion that can be considered in the online software. Convertio supports more than 25600 different file conversion options, which shows that the file format support is extremely elaborate in the platform. The process of conversion is the simplest you can find in the market. Along with that, the tool ensures that the shared files are kept secure from unauthorized access.

Pros
Provides exceptional features for free.
The interface is quite straightforward.
Allows batch conversion of multiple MPEG files into GIFs.
Ensures the quality of the converted file.
Cons
Users are bound to buy a plan for Convertio to use its full features without any file size limits.
Part 3: How to Convert MPEG to GIF Using Wondershare Filmora?
Filmora can be a great option to convert MPEG to GIF without any problems. You need to go through the steps to figure out the complete procedure with ease.
Step 1: Launch Filmora and Open Project
Download and install the latest version of Wondershare Filmora on your computer. Once done, launch the tool and click on “New Project” to open a new window.

Step 2: Import MPEG Video File
Once a new window opens up, you need to click on the “Import” icon displayed in the “Media” section. Add the MPEG video that is to be converted to a GIF. Once added, drag it across the timeline.

Step 3: Export as GIF
Click on the “Export” icon to open the export options. You need to select the option of “GIF” displayed on the left-hand column of the screen. Once done, set up a name and location for the video. Along with that, you can also change the resolution, frame rate, and size by clicking on “Settings.” Once done, click on the “Export” button to conclude the process.

Conclusion
Have you learned about the variety of software that is available to convert MPEG to GIF? You can consider any tools for making quick changes across your video. Along with that, for perfect execution with quality, you can definitely consider using Wondershare Filmora to convert your video files. Go through the article to make the perfect selection for your tasks.
GIFs are known to be quite effective in displaying a video portrayal. Many people save special moments across GIFs to make sharing easy and simple. However, when you own different forms of video formats and are looking to convert them to a GIF, you may need a proper tool for its execution. In this article, we shall be working on converting MPEG to GIF without any difficulty.
To make sure that you successfully convert a MPEG to GIF, this article will introduce a set of offline and online converters for effective execution.
In this article
Part 1: Best 3 MPEG to GIF Converter Software
Part 2: Top Online 5 MPEG to GIF Converters
Part 3: How to Convert MPEG to GIF Using Wondershare Filmora?
Part 1: Best 3 MPEG to GIF Converter Software
This part will focus on the offline software that can be considered for converting MPEG to GIF. Follow through these tools to understand more details about them:
1. Wondershare Filmora
| Compatibility | Pricing |
|---|---|
| Windows/Mac | $28.98/Monthly $68.98/Annual $98.98/Perpetual |
This offline software stands among the premium software of the market that provides efficient services in video management. From basic video editing to diverse features such as adding effects and transitions across it, Wondershare Filmora provides enthusiast-level features to its users. The advanced and modern features, combined with simple interfaces, bring a competitive environment for users.
As you create a video across Wondershare Filmora, multiple advanced tools can be consumed easily. You can find examples like motion tracking and overlays across the tool. However, if you consider converting a MPEG video to a GIF, Filmora is definitely a great option in the market.

Advantages
- Provides a wide variety of effects and overlays.
- Quick rendering of video while converting or editing.
- A cost-effective tool with a vast set of elements.
- Offers intuitive guidelines and custom animation tools.
Disadvantage
- Adds watermark across the exported video in the free version.
2. Adobe Premiere Pro
| Compatibility | Pricing |
|---|---|
| Windows/Mac | $20.99/Monthly |
Adobe has developed industry-standard tools in this developing age of digital software. Adobe Premiere Pro is an efficient example of good video editing and management software. The ecosystem of tools offered across Premiere Pro is extensive and prolific; however, the user needs to have a basic knowledge of video editing before coming across it.
The conversion opportunities across this MPEG to GIF converter software are extensive. Its execution, alongside the wide variety of conversion options, is responsive. This makes it a great choice for your organization that is in search of a perfect tool for this purpose.

Pros
The interface is quite clear and flexible for video editors.
The stabilization tool of Filmora is commendable for users.
Collaborate with other editors on different projects through Creative Cloud.
Can perform color correction and audio tweaking on videos before having them exported.
Cons
This tool is not designed for beginners and people who do not understand video editing.
3. VLC
| Compatibility | Windows/Mac/Linux |
|---|---|
| Windows/Mac | Free |
VLC is a free and open-source media player that provides an inspiring variety of tools across its platform. Unlike other free tools, VLC does not work across simple features and characteristics. It offers options for converting, streaming, video editing, and enhancing. This makes it an exceptional offer for users looking to convert their MPEG to GIF.
The tool is highly customizable and is supported with extensive file format support. Looking across the different features required in the process, you can add different plugins to expand your work across VLC.

Benefits
- Offers easy conversion of video files without loss in quality.
- Encode outbound streams without any issues.
- Works perfectly for Linux, Windows, and Mac devices. Also available across Android and iPhone devices.
- It can be expanded through plugins for better functionality.
Drawback
- You cannot edit the video using the VLC Media Player.
Part 2: Top Online 5 MPEG to GIF Converters
For this part, we shall work across a few impressive online converters that can be essentially used for converting a MPEG to GIF. Go through the functions of these tools to understand how you can convert your required video with ease.
1. Aconvert
The first option among the premium online converters for MPEG to GIF is Aconvert. This tool can be quite charismatic in providing you with a proper platform to work on your video conversion. While being a simple tool, you can make changes in the video in the best possible manner. Not only does this tool provide the conversion of the specific format, but it also covers an immense amount of conversion options.

Benefits
- Set the duration of the GIF as per your desire.
- Change the video settings, such as bitrate, frame rate, and size.
- A simple and effective user interface.
- Contains a proper description of the file formats for the user’s knowledge.
Con
- Does not keep up with the quality of the video while converting.
2. EZGIF.com
As the name suggests, this online converter is a very simple and effective tool to try. As it converts a MPEG video into a GIF with ease, you can surely look for this tool for quick results. With the option of multiple tools to work with, you can add this tool to your daily life for quick functions. EZGIF.com returns you with an animated GIF, which is quite effective compared to other online platforms.

Advantages
You can paste a URL of a video directly for conversion.
Provides a variety of file formats to its users.
Covers videos of variating frame rates, which makes it diverse.
Get an accurate start and end of the GIF with proper setting tools.
Bad
Users can only upload file sizes of 100MB.
3. CloudConvert
You may find this online platform to be the most effective for converting your MPEG files. While offering various options for converting videos, you can easily manage more than 200+ formats across the tool. Along with that, Cloudconvert ensures the security of all shared data across the platform. It does not allow anyone else to access your data.

Goods
You can ensure high-quality conversion with the online converter tool.
It offers you the option of setting the resolution of the video that you wish to convert.
Helps in changing the aspect ratio of the tool with ease.
You can also change the frame rate of the video that is to be converted.
Bad
Allows converting 25 videos in a day.
4. OnlineConvertFree
Another great website that you can consider to convert your MPEG to GIF is OnlineConvertFree. With a wide variety of conversion options available across the format, you can make quality GIFs. Along with that, the platform allows its users to upload videos through the computer and Dropbox or Google Drive. Its fast conversion makes it a premium option among users.

Pros
It is a completely free tool to use.
Provides users with support across more than 250 file formats.
Do not keep any data across the website for security reasons.
You can also save your converted data across the cloud.
Cons
The website contains a lot of ads throughout.
5. Convertio
This platform is another exceptional option in file conversion that can be considered in the online software. Convertio supports more than 25600 different file conversion options, which shows that the file format support is extremely elaborate in the platform. The process of conversion is the simplest you can find in the market. Along with that, the tool ensures that the shared files are kept secure from unauthorized access.

Pros
Provides exceptional features for free.
The interface is quite straightforward.
Allows batch conversion of multiple MPEG files into GIFs.
Ensures the quality of the converted file.
Cons
Users are bound to buy a plan for Convertio to use its full features without any file size limits.
Part 3: How to Convert MPEG to GIF Using Wondershare Filmora?
Filmora can be a great option to convert MPEG to GIF without any problems. You need to go through the steps to figure out the complete procedure with ease.
Step 1: Launch Filmora and Open Project
Download and install the latest version of Wondershare Filmora on your computer. Once done, launch the tool and click on “New Project” to open a new window.

Step 2: Import MPEG Video File
Once a new window opens up, you need to click on the “Import” icon displayed in the “Media” section. Add the MPEG video that is to be converted to a GIF. Once added, drag it across the timeline.

Step 3: Export as GIF
Click on the “Export” icon to open the export options. You need to select the option of “GIF” displayed on the left-hand column of the screen. Once done, set up a name and location for the video. Along with that, you can also change the resolution, frame rate, and size by clicking on “Settings.” Once done, click on the “Export” button to conclude the process.

Conclusion
Have you learned about the variety of software that is available to convert MPEG to GIF? You can consider any tools for making quick changes across your video. Along with that, for perfect execution with quality, you can definitely consider using Wondershare Filmora to convert your video files. Go through the article to make the perfect selection for your tasks.
Best CapCut Templates for Slow Motion Video Trend
In this digital realm, CapCut is a video editor, turning into another social media app. It was launched in 2020 but gained massive success by the end of 2022 with the introduction of templates. It’s an automated tool which is a sister app to TikTok. When a TikTok trend goes viral, people move to CapCut to copy that as it is. From social media influencers to users, everyone is using this video editor for good.
Recently, the CapCut template’s new trend of slow motion has been in trend. If you intend to post a video on the CapCut new trend in slow motion, this guide is for you. Without any wait, read this article to learn everything about CapCut’s new slow-motion template. Before delving into detail, you should analyze how these templates have eased our video creation.
Slow Motion Video Maker Slow your video’s speed with better control of your keyframes to create unique cinematic effects!
Make A Slow Motion Video Make A Slow Motion Video More Features

Part 1. CapCut Video Editor: How Is It Making Slow Motion Video Making Easy?
As a social media user, you must be aware of CapCut ; if not, keep reading. CapCut is a video editing platform with advanced options to help you capture key moments. With unique features , your content can go viral on TikTok, Facebook, and Instagram. After making videos, users can directly post on their social media, especially on TikTok.
This software is available to use online or download on Windows, macOS, and smartphones. Delve into its key features besides the CapCut slow motion template with neon effect:
- CapCut can trim, merge, and delete clips like every other video editor.
- You can add transitions between clips from different categories.
- From advanced features, you can add keyframe animations in video.
- Offer millions of music from the music library or extract from existing video clips.
- With its intelligent features, users can remove backgrounds and add auto-captions.
- Allows smooth editing of slow-motion and fast-speed videos with speed ramping.
Part 2. Listing Out Some Unique Templates Available on CapCut for Slow Motion Video
CapCut has a vast library of templates, as discussed earlier. They contain well-designed video layouts, transitions, effects, and texts to inspire others. For slow-motion templates, it offers extensive options that you can choose based on your preferences. If you haven’t found anything attractive, look into these CapCut new slow-motion templates.
- Camera Lenta: It’s a trending slow-motion video template on the internet. As shown, it is used by more than 23k people and requires just one clip to process. This footage shows a blurry start, which gradually turns into a clear shot with music beats.
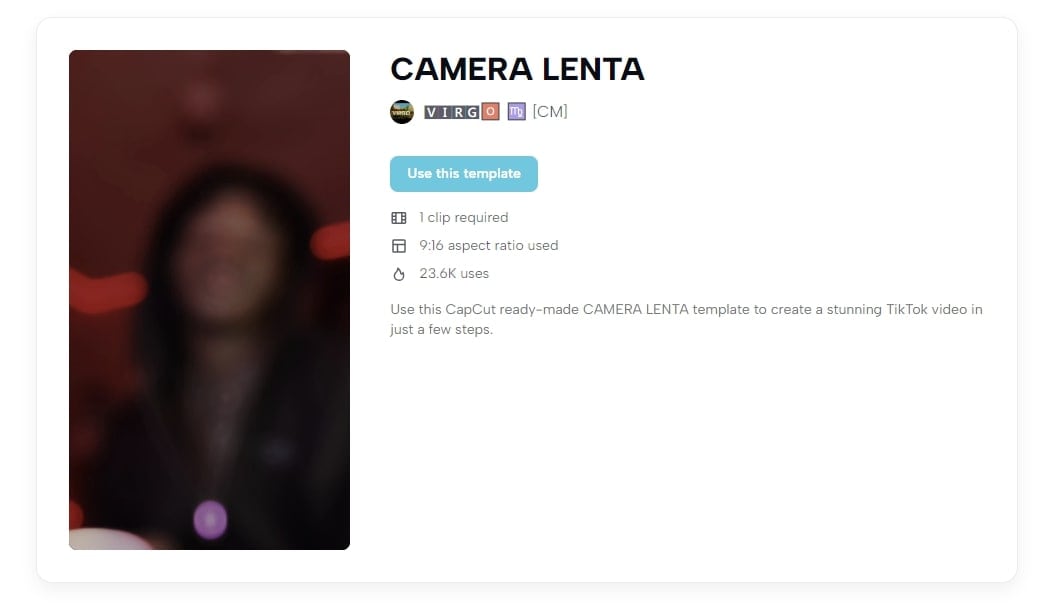
- Slow Motion: This template is popular with over 87k usages. It requires a single clip to make a video in a 9:16 aspect ratio. In this clip, a woman lip-syncs a song that reveals properly after a blurry transition into slow motion.
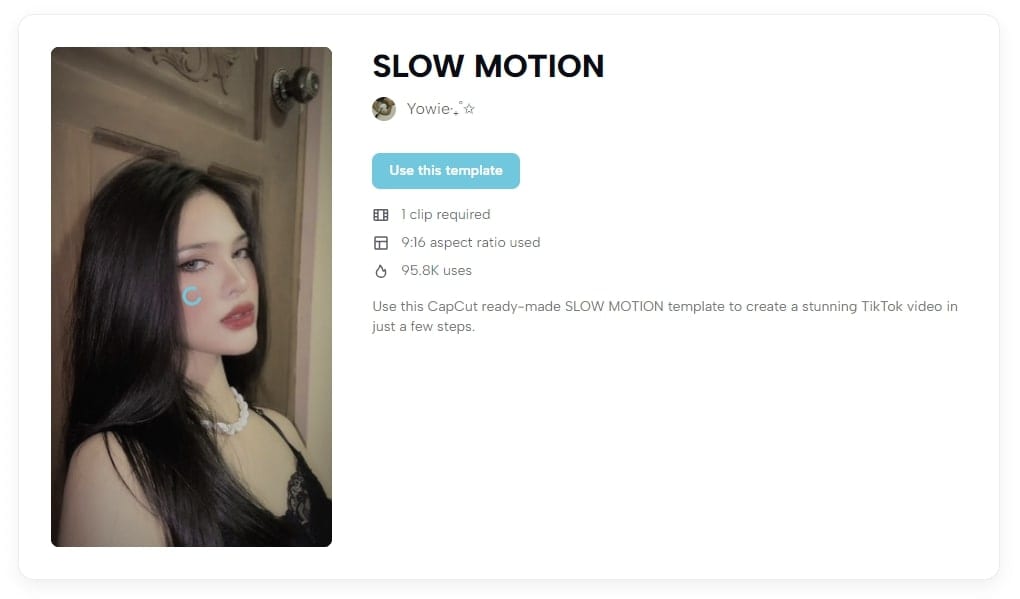
- CapCut Slow Motion: With more than 546k utilizations, this template is commonly available everywhere. You need 2 clips to use this, and an 11-second video will be generated. The massive use of this template might be due to its music, effects, and transitions.
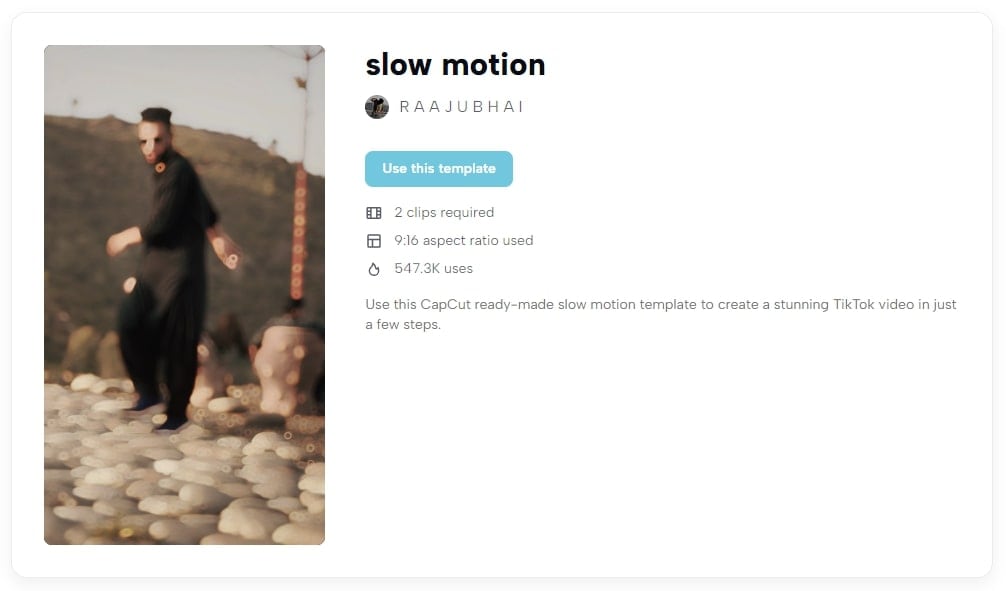
- Slow Motion Transisi: Social media influencers prefer this template to show their dance moves. It requires 4 clips to make an attractive slow-motion video. At the start of the clip, you can see a countdown timer and a music beat with dance steps.
- Slow Motion Alih: If you want to reveal your mountain travel video, this template is perfect. This 11-second template is used by over 87k people. It starts with a musical voice and progresses at normal speed. Gradually, it slows down and shifts speed abruptly with the rhythm of the music.
- Slow Motion Izacklstyle: It’s another famous template that is perfect for your travel clips. This CapCut new trend 2022 template slow motion has more than 100k uses. It asks for 4 footage to show the natural beauty of nature, mountains, waterfalls, and you.
- Slow Motion JP: With 1.3 million uses, this template is widely recognized on social media. Actually, the kid smiling in this slow-motion video makes it popular. It is an 8-second clip where the boy is standing chin-down. Suddenly, the music’s rhythm and effect change when he looks upward.
Part 3. How to Create a Simple Slow-Motion Video from a Template in CapCut?
Making a CapCut template new trend in slow motion is not very difficult. For this purpose, you have to pick one template and select the media. After choosing a template from the above section, follow the given steps for better results. Regardless of the mobile device you are using, this step-by-step guide will prove beneficial for each.
Step 1
Launch CapCut on your smartphone and sign in to your account. Access the home screen of CapCut and look for the “Template” option from the bottom. Tap on it and find the vast video template library of this platform.
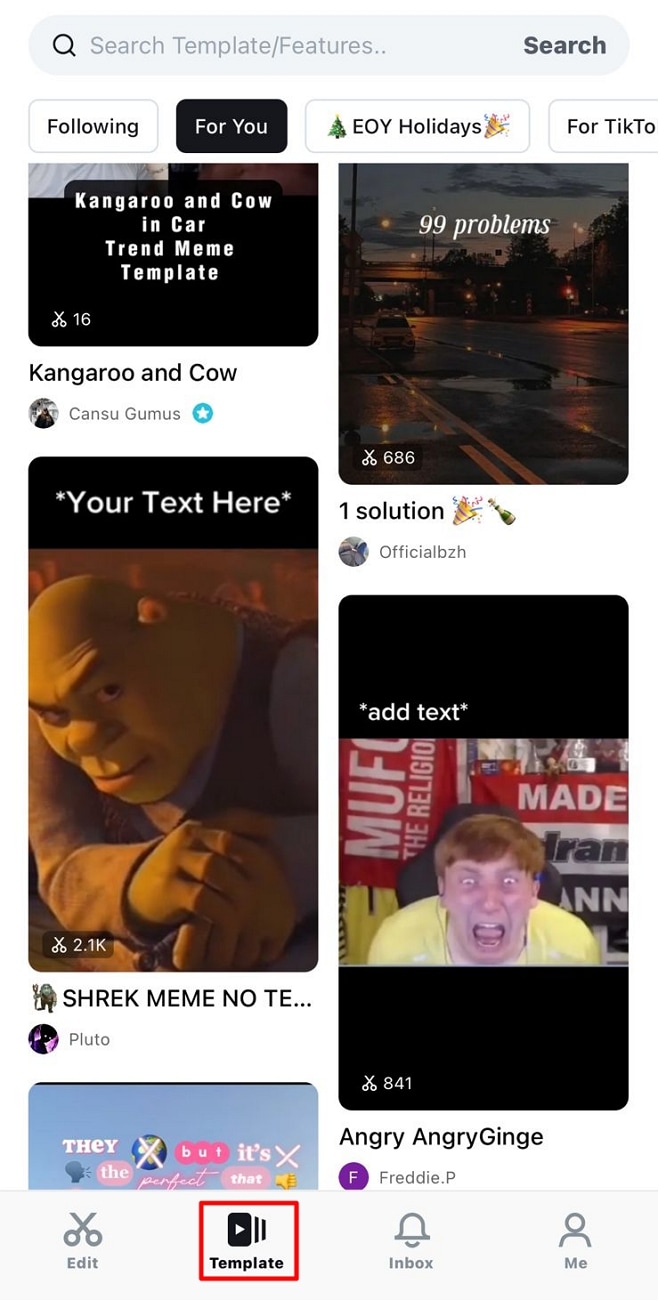
Step 2
Go to the search and prompt with “Slow Motion Video” to browse results. Pick one video template of your choice and get a preview. From its preview, hit the “Use Template” button and go directly to import media. Select the video you wish and touch the “Preview” button.

Step 3
After previewing results, go to the top right side and tap the “Export” button. You will get an extended “Export Setting” menu at the bottom. It’s up to you whether to choose “Save to Device” or Save and Share to TikTok.”
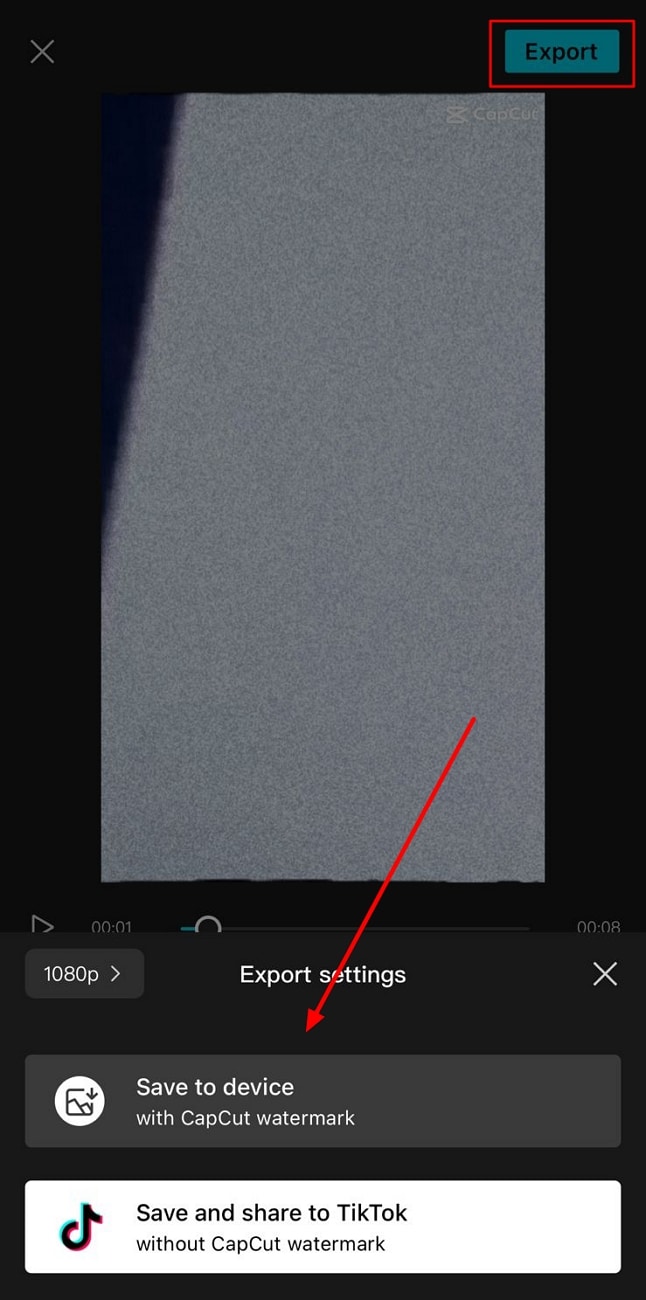
Part 4. Desktop Solution: How to Make Better Slow-Motion Videos with Wondershare Filmora?
Using CapCut’s new slow-motion templates makes videos easy but restricts certain tasks. If you want to enjoy more flexibility in creating slow-motion videos, use Wondershare Filmora . It’s a video editing platform with innovative features to uplift creativity with personalization. This all-in-all platform offers AI-integrated features to generate unique content effortlessly.
Filmora can assist you in editing tasks by providing AI Copilot Editing . Besides, it can generate engaging scripts with prompts that align with your goals. Moreover, you can get copyright-free music and images to achieve appealing virtual content. Filmora can bring limitless creativity and uniqueness to your media, so move to explore it.
Free Download For Win 7 or later(64-bit)
Free Download For macOS 10.14 or later
How to Create Personalized Slow-Motion Video with Filmora
Filmora offers Speed Ramping features to slow down video as you want. It also ensures smooth playback of slow-mo videos by providing an optical flow option. Let’s move to the real process with the given steps without further delay.
Step 1: Download Filmora and Import the Video to Slow Down
If you haven’t downloaded Filmora, visit its official site and get the latest version. Launch it on your device and access its main screen. Choose “New Project” and enter its editing screen. Press “Ctrl + I” to import your video into Filmora quickly. Drag and drop your imported media to the timeline section for further processing.
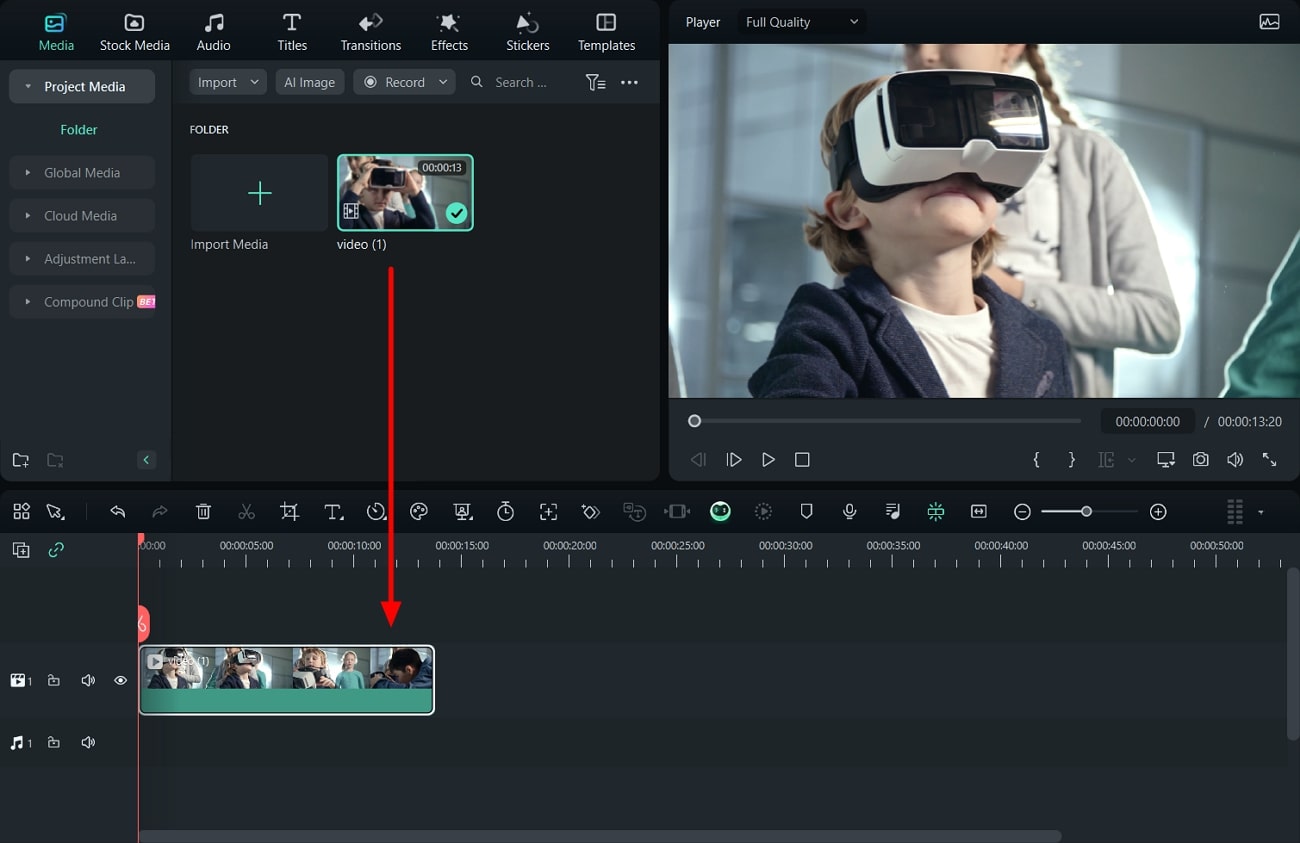
Step 2: Access Speed Ramping to Customize Video Speed
Locate your cursor on the video and right-click on it to choose “Speed Ramping” from the list. This way, you will get an editing panel on the right side. You have the flexibility to select a predesigned template for speed ramping. Otherwise, hit the “Customize” button and find the graph below. Use the graph and locate the dots upward and downward to get the desired slow-motion video.
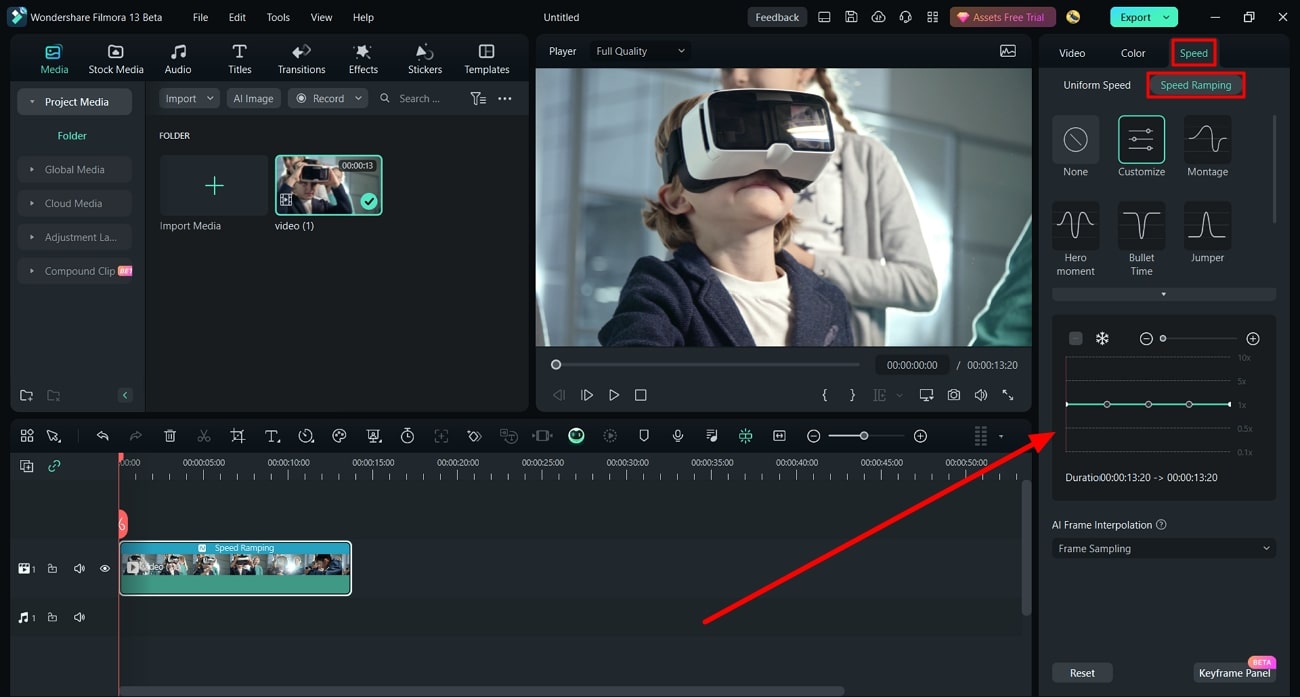
Step 3: Apply Optical Flow and Export within Personalized Settings
Later, go downward to the “AI interpolation” and extend its menu. From the menu, select “Optical Flow” for a smooth playback speed. If you are satisfied with the result, look for the “Export” button at the top right. Get the “Export” screen and adjust the parameter to save the video in your assigned settings.
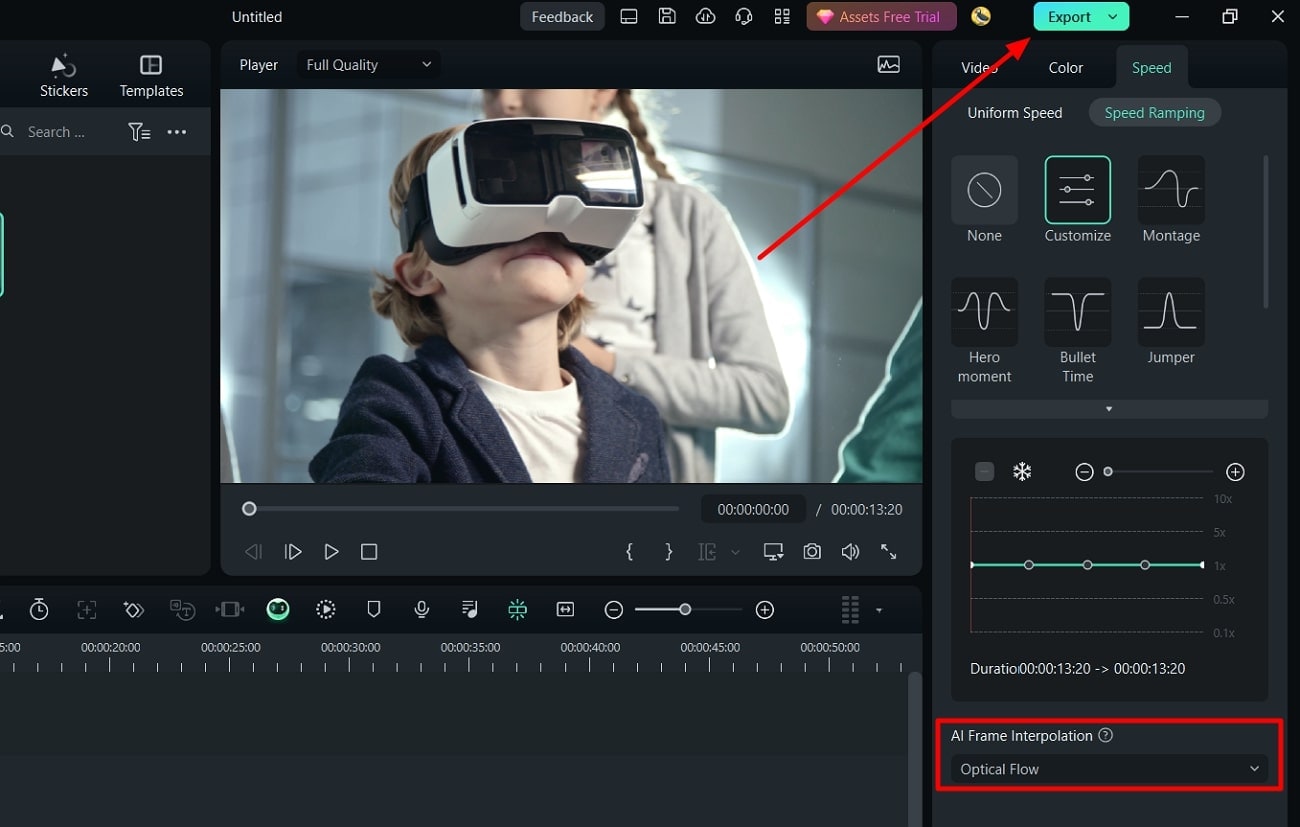
Conclusion
To conclude, social media influencers set trends using CapCut in real-time. They are getting the audience’s attention through the CapCut template’s new trend of slow motion. This article has also shed light on CapCut, its slow-motion templates, and how to use it. After reading, you must realize that using Wondershare Filmora is a far better option.
Make A Slow Motion Video Make A Slow Motion Video More Features

Part 1. CapCut Video Editor: How Is It Making Slow Motion Video Making Easy?
As a social media user, you must be aware of CapCut ; if not, keep reading. CapCut is a video editing platform with advanced options to help you capture key moments. With unique features , your content can go viral on TikTok, Facebook, and Instagram. After making videos, users can directly post on their social media, especially on TikTok.
This software is available to use online or download on Windows, macOS, and smartphones. Delve into its key features besides the CapCut slow motion template with neon effect:
- CapCut can trim, merge, and delete clips like every other video editor.
- You can add transitions between clips from different categories.
- From advanced features, you can add keyframe animations in video.
- Offer millions of music from the music library or extract from existing video clips.
- With its intelligent features, users can remove backgrounds and add auto-captions.
- Allows smooth editing of slow-motion and fast-speed videos with speed ramping.
Part 2. Listing Out Some Unique Templates Available on CapCut for Slow Motion Video
CapCut has a vast library of templates, as discussed earlier. They contain well-designed video layouts, transitions, effects, and texts to inspire others. For slow-motion templates, it offers extensive options that you can choose based on your preferences. If you haven’t found anything attractive, look into these CapCut new slow-motion templates.
- Camera Lenta: It’s a trending slow-motion video template on the internet. As shown, it is used by more than 23k people and requires just one clip to process. This footage shows a blurry start, which gradually turns into a clear shot with music beats.

- Slow Motion: This template is popular with over 87k usages. It requires a single clip to make a video in a 9:16 aspect ratio. In this clip, a woman lip-syncs a song that reveals properly after a blurry transition into slow motion.

- CapCut Slow Motion: With more than 546k utilizations, this template is commonly available everywhere. You need 2 clips to use this, and an 11-second video will be generated. The massive use of this template might be due to its music, effects, and transitions.

- Slow Motion Transisi: Social media influencers prefer this template to show their dance moves. It requires 4 clips to make an attractive slow-motion video. At the start of the clip, you can see a countdown timer and a music beat with dance steps.

- Slow Motion Alih: If you want to reveal your mountain travel video, this template is perfect. This 11-second template is used by over 87k people. It starts with a musical voice and progresses at normal speed. Gradually, it slows down and shifts speed abruptly with the rhythm of the music.

- Slow Motion Izacklstyle: It’s another famous template that is perfect for your travel clips. This CapCut new trend 2022 template slow motion has more than 100k uses. It asks for 4 footage to show the natural beauty of nature, mountains, waterfalls, and you.

- Slow Motion JP: With 1.3 million uses, this template is widely recognized on social media. Actually, the kid smiling in this slow-motion video makes it popular. It is an 8-second clip where the boy is standing chin-down. Suddenly, the music’s rhythm and effect change when he looks upward.

Part 3. How to Create a Simple Slow-Motion Video from a Template in CapCut?
Making a CapCut template new trend in slow motion is not very difficult. For this purpose, you have to pick one template and select the media. After choosing a template from the above section, follow the given steps for better results. Regardless of the mobile device you are using, this step-by-step guide will prove beneficial for each.
Step 1
Launch CapCut on your smartphone and sign in to your account. Access the home screen of CapCut and look for the “Template” option from the bottom. Tap on it and find the vast video template library of this platform.

Step 2
Go to the search and prompt with “Slow Motion Video” to browse results. Pick one video template of your choice and get a preview. From its preview, hit the “Use Template” button and go directly to import media. Select the video you wish and touch the “Preview” button.

Step 3
After previewing results, go to the top right side and tap the “Export” button. You will get an extended “Export Setting” menu at the bottom. It’s up to you whether to choose “Save to Device” or Save and Share to TikTok.”

Part 4. Desktop Solution: How to Make Better Slow-Motion Videos with Wondershare Filmora?
Using CapCut’s new slow-motion templates makes videos easy but restricts certain tasks. If you want to enjoy more flexibility in creating slow-motion videos, use Wondershare Filmora . It’s a video editing platform with innovative features to uplift creativity with personalization. This all-in-all platform offers AI-integrated features to generate unique content effortlessly.
Filmora can assist you in editing tasks by providing AI Copilot Editing . Besides, it can generate engaging scripts with prompts that align with your goals. Moreover, you can get copyright-free music and images to achieve appealing virtual content. Filmora can bring limitless creativity and uniqueness to your media, so move to explore it.
Free Download For Win 7 or later(64-bit)
Free Download For macOS 10.14 or later
How to Create Personalized Slow-Motion Video with Filmora
Filmora offers Speed Ramping features to slow down video as you want. It also ensures smooth playback of slow-mo videos by providing an optical flow option. Let’s move to the real process with the given steps without further delay.
Step 1: Download Filmora and Import the Video to Slow Down
If you haven’t downloaded Filmora, visit its official site and get the latest version. Launch it on your device and access its main screen. Choose “New Project” and enter its editing screen. Press “Ctrl + I” to import your video into Filmora quickly. Drag and drop your imported media to the timeline section for further processing.

Step 2: Access Speed Ramping to Customize Video Speed
Locate your cursor on the video and right-click on it to choose “Speed Ramping” from the list. This way, you will get an editing panel on the right side. You have the flexibility to select a predesigned template for speed ramping. Otherwise, hit the “Customize” button and find the graph below. Use the graph and locate the dots upward and downward to get the desired slow-motion video.

Step 3: Apply Optical Flow and Export within Personalized Settings
Later, go downward to the “AI interpolation” and extend its menu. From the menu, select “Optical Flow” for a smooth playback speed. If you are satisfied with the result, look for the “Export” button at the top right. Get the “Export” screen and adjust the parameter to save the video in your assigned settings.

Conclusion
To conclude, social media influencers set trends using CapCut in real-time. They are getting the audience’s attention through the CapCut template’s new trend of slow motion. This article has also shed light on CapCut, its slow-motion templates, and how to use it. After reading, you must realize that using Wondershare Filmora is a far better option.
Also read:
- Updated How to Add Filter to Video in Premiere Pro?
- New The Definite Guide to Craig Bot Discord
- New Is Augmented Reality Conferencing the Future of Workplace Collaboratio for 2024
- In 2024, General Information That You Need To Know About MKV Format
- New This Article Discusses What Is Blender Video Editor, How to Download, Install and Use It, and Its Key Features. It Further Discusses Its Alternative for Editing Your Videos and More. Check Out Now for 2024
- New Looking for a Full Guide on Removing the Background From PNG Images? Do You Want to Transform JPG to PNG Transparent? If so, Take some Time to Read This Article for 2024
- Updated Adding Shake Effects to Your Video With Alight Motion for 2024
- 2024 Approved How to Get Zoom on TV Easy Solutions
- Updated General Knowledge About MP4 Format and Best MP4 Video Editor
- New 2024 Approved Easily Sync Audio With Video With Filmora
- Updated In 2024, How to Shoot Cinematic Footage with Phone
- Updated How to Start a Video Editing Career
- Updated In 2024, If You Dont Know How to Blur a Part of a Video, Youre in the Right Place. We Have Provided All the Details You Need to Help You Blur a Still or Moving Portion of Your Video
- Have You Ever Used the Path Blur Effect in Your Photos? This Article Will Address How to Use Path Blur in Photoshop to Generate Appealing Results Accurately
- New How To Use Motion Blur On Video Star?
- New How to Color Correct in OBS
- In 2024, How To Unlink Audio and Video in DaVinci Resolve
- Updated Guide To Scaling and Setting Videos in Filmora | Tutorial
- How to Split a Clip in After Effects for 2024
- 2024 Approved How to Remove Audio From Video Without Watermark?
- 2024 Approved Ways to Make Sure Your Recording Slideshow in Powerpoint Is Not Wrong
- Updated 2024 Approved Discover the Best Game Recording Software for Your PC in This Developing Industry. Record Your Gameplay in Real Time and Enjoy the Benefits that Come with It
- Updated How to Zoom Picture in Picture Easy Solution
- Updated In 2024, Are You Facing Trouble in Playing a TS File? We Got You! Read the Article Below to Learn the Most About TS Format, Pros and Cons, and More
- In This Article, You Will Learn Easy Ways to Edit Videos Using a Mouse in Wondershare Filmora. You Can Do Video Editing without a Keyboard After Reading This Article
- Updated List of Whatsapp Video Format That You May Need to Know
- Updated 2024 Approved LUTs Can Make Ordinary-Looking Footage Look More Attractive. Read This Guide to Learn How You Can Easily Create Your Own LUTs Using Filmora
- In 2024, A Guide to Speed up a Video on Splice
- Updated Wondering How to Add Custom Transitions in OBS Studio? Here Are the Steps to Add Stinger Transitions to OBS. Get a Better OBS Alternative to Add Transitions
- Discover the Best Video Frame Rate Converters for Smooth Playback, Including Online and Offline Options. Learn How to Convert Frame Rates for Free and Elevate Your Video Quality with These Top 8 Tools for 2024
- Updated 2024 Approved Land Into the Thrill of Creating Stunning GIFs with Ezgif
- How to Denoise in Final Cut Pro – Reduce Video and Audio Noise for 2024
- Updated Top VHS Sound Effect That You Can Use in Video Making for 2024
- 2024 Approved Create an Awesome Logo Reveal with Logo Intro Templates
- Video Course and Online Learning Are Very Popular Nowadays. Here We Are Going to Recommend some of the Best Video Websites for Teachers to Use for 2024
- New Finding Best GIF Websites Is Easy as Pie — Heres What You Should Know for 2024
- New 2024 Approved Using VN Editor To Add Luts for Video Editing
- New In 2024, 3GP Video Format What Is 3GP Format And How To Open It?
- Updated Want to Immediately Know Something About Discord GIF for 2024
- How To Slow Down GIF Building an Understanding
- Do You Also Use Android to Create and Edit Videos? Read About the Efectum Video Effects Editor, Which Is Available in Your App Stores for Seamless Editing for 2024
- New 2024 Approved AVI Editors for Windows 11/10/8.1/8/7 Easily Edit AVI Files on PC
- 2024 Approved A Comprehensive Guide on Converting Slo-Mo Videos to Normal Speed Videos On iPhone
- Updated Want to Make Professional-Looking Videos? Keep Reading to Give Your Videos a Cinematic Feel with the Audio Mixer of Filmora for 2024
- New How to Make Tutorial Video with Filmora for 2024
- Updated How to Color-Correct an S-Log Footage
- Updated Want to Learn How to Crop or Trim Video in PowerPoint? We Have Got You Covered; We Have Given a Step-by-Step Guide that Will Allow You to Trim and Crop Videos Using This Presentation Program for 2024
- In 2024, Forgot Your Apple ID Password and Email From Apple iPhone 8 Plus? Heres the Best Fixes
- Honor Play 8T Camera Not Working Unexpected Error? Fix It Now | Dr.fone
- Stuck at Android System Recovery Of Oppo F25 Pro 5G ? Fix It Easily | Dr.fone
- In 2024, Bypass iCloud Activation Lock with IMEI Code On your iPhone 6s
- In 2024, How to Transfer Contacts from Oppo Reno 8T To Phone | Dr.fone
- The Most Useful Tips for Pokemon Go Ultra League On Nokia C22 | Dr.fone
- Updated Creating AI Videos With Templates for 2024
- In 2024, How To Fix Apple ID Verification Code Not Working On Apple iPhone XR
- In 2024, How to Unlock Vivo G2 Pattern Lock if Forgotten? 6 Ways
- In 2024, How to Reset your Realme Narzo 60 Pro 5G Lock Screen Password
- Top 11 Free Apps to Check IMEI on Apple iPhone 12 Pro
- How to Rescue Lost Photos from Samsung Galaxy A05s?
- In 2024, How to Unlock Xiaomi Redmi K70 Phone Pattern Lock without Factory Reset
- A Comprehensive Guide to iCloud Unlock From Apple iPhone 14 Pro Max Online
- Full Solutions to Fix Error Code 920 In Google Play on Vivo X Flip | Dr.fone
- A Perfect Guide To Remove or Disable Google Smart Lock On Lava Yuva 2 Pro
- Unlocking Made Easy The Best 10 Apps for Unlocking Your Xiaomi Device
- In 2024, How to Fix Locked Apple ID on iPhone 15 Pro
- A Perfect Guide To Remove or Disable Google Smart Lock On Asus
- Does Samsung Galaxy S23 Ultra support MKV video files?
- In 2024, Planning to Use a Pokemon Go Joystick on Samsung Galaxy M14 4G? | Dr.fone
- In 2024, Best Pokemons for PVP Matches in Pokemon Go For Oppo Reno 11 Pro 5G | Dr.fone
- Wondering the Best Alternative to Hola On Honor Magic Vs 2? Here Is the Answer | Dr.fone
- How to Unlock Oppo Reno 11F 5G Phone Pattern Lock without Factory Reset
- The Best iSpoofer Alternative to Try On Nubia Red Magic 8S Pro | Dr.fone
- Is GSM Flasher ADB Legit? Full Review To Bypass Your MeizuFRP Lock
- 6 Ways to Change Spotify Location On Your Apple iPhone SE (2020) | Dr.fone
- How to Reset a Poco C65 Phone That Is Locked | Dr.fone
- In 2024, New Multiple Ways How To Remove iCloud Activation Lock From your Apple iPhone X
- In 2024, Will Pokémon Go Ban the Account if You Use PGSharp On Huawei P60 | Dr.fone
- Recover Apple iPhone XS Data From iTunes | Dr.fone
- Guide on How To Change Your Apple ID Email Address On iPhone XR | Dr.fone
- How to Reset Realme GT Neo 5 SE without Losing Data | Dr.fone
- In 2024, Ultimate guide to get the meltan box pokemon go For Poco F5 Pro 5G | Dr.fone
- Title: In 2024, How to Make Foggy Text Reflection Effect
- Author: Morgan
- Created at : 2024-05-19 05:12:18
- Updated at : 2024-05-20 05:12:18
- Link: https://ai-video-editing.techidaily.com/in-2024-how-to-make-foggy-text-reflection-effect/
- License: This work is licensed under CC BY-NC-SA 4.0.


