
:max_bytes(150000):strip_icc():format(webp)/GettyImages-1088144728-3a9f1bd54e994bfaa4cabea82414202e.jpg)
In 2024, How To Slow Down GIF Building an Understanding
How To Slow Down GIF: Building an Understanding
Graphic interchange format, mostly known as GIF, is extensively used to convey information. GIF is a communication tool in bitmap image format that clearly conveys your online content. When sharing GIF images, playback speed is the most important thing to count. If the playback speed of the GIF is faster than usual, viewers may skip their focus essential data.
As a solution, you must learn how to adjust slow motion GIF’s speed. This article will teach you the stepwise methods to achieve a slow-motion GIF. Before heading towards the methods, learn about some GIF video platforms. By the end, you will be able to make a matchless slow-mo GIF through a desktop solution.
Slow Motion Video Maker Slow your video’s speed with better control of your keyframes to create unique cinematic effects!
Make A Slow Motion Video Make A Slow Motion Video More Features

Part 1: Where Can I Get Impressive Slow-Motion GIFs for Myself?
Slowing down GIFs brings viewers’ attention to specific actions in video content. It exaggerates facial expressions or movements in the videos, leading to humorous results. Creators choose to slow down GIFs to convey particular moods and styles. Different contexts require different slow-mo GIF videos; below are some platforms to cater to all of them.
1. Giphy
One of the famous platforms for GIFs is Giphy, which offers an extensive collection of GIFs. If you want a GIF that can add humor to your content, pick the entertainment category from Giphy. It provides different domains of GIFs for your ease of selection. Some of its categories include sports, gaming, animals, and cartoons.

Key Features
- Using this platform, you can not only get a GIF but also upload one. Graphics designers or GIF creators can use this place to publish their work globally.
- After selecting one GIF, you can share it on any platform. It allows you to embed the GIF directly on websites or share it through links.
- Every GIF on Giphy provides in-depth details like size, frame, and source. This way, you can instantly choose one that matches your project’s requirements.
2. Tenor
Another popular platform to get high-quality GIFs is Tenor. It supports multiple languages in its interface so international users can better comprehend it. Apart from that, there are many categories in the trending searches of GIFs. It shows which domain of GIFs is ranking the most. Some trending tenors include cars, snow, happy holidays, good nights, and GIFs.

Key Features
- When you pick one GIF, you can change its format before downloading. In this regard, you can choose HD, MP4, and SD quality options.
- This platform detects your selection and suggests relevant GIFs afterward. For instance, if you pick a cat GIF, then you will find a cat GIF when scrolling down.
- Tenor provides GIF specification details under each. Besides, you can share the selected GIF image through the URL and embedded link.
Part 2: What to Do If You Want to Slow Down GIFs: The Best Tools
Knowing platforms, as mentioned above, makes it easier for you to avail the desired GIF. After grabbing one of your choices, you can make it a slow-motion GIF, if required. To do so, there are several tools in the market. Some of them are explained below, along with step-by-step instructions on how to use them.
List of Best Tools to Slow Down GIFs
1. Ezgif.com
This tool is primarily responsible for online GIF making and image editing. Besides, it can convert your video into GIF, resize, cut, crop, and optimize them. Moreover, you can add effects and text to your videos or GIFs to make them appealing. GIF animation speed changers are the real game changers among online solutions:
Step 1
Browse the official site of Ezgif.com and tap on the “Effects” section. Afterward, choose the “Adjust GIF Speed” section to proceed to further options. There, click the “Choose File” white button and look for the file you want to slow down. Optionally, paste the URL link in the given section and tap “Upload” to continue.

Step 2
Scroll down the window and insert the digits on which percentage you want to slow down the speed. Afterward, click the “Change Speed” button and find a slow-motion GIF in the output image.

2. VEED.io
VEED.io is a preferred choice by many creators for professional or high-quality videos. It offers screen recording, video editing, and subtitle translation services. Apart from that, it can fix GIF speed with the GIF speed changer feature. After changing speed, you can add transitions and animation effects in Veed.io. For now, let’s just stick to the slow-mo GIF in the following steps:
Step 1
Access the “GIF Speed Changer” in VEED.io, start by tapping “Choose GIF File” and enter the editing screen.

Step 2
From the next screen, you will get a pop-up menu first. You have to hit the “Upload a File” option and select a GIF file to import into VEED.io. Under the video preview, click on the “Speed” icon next to the “Sound” symbol. Then, choose “0.5x” and get a slow-down GIF preview in front of you.

3. Canva
Students must be aware of this platform as a presentation template provider. Canva is a tool that provides stunning templates to customize with its cloud storage system. Gradually, it’s turning more into a video editing platform. Regarding slow-motion GIFs, it can change the GIF speed online. After slowing down the GIF, you can convert it into MP4 or enhance it by adding graphics.
Step 1
Reach out to the GIF Speed Changer feature of Canva’s video editing. Then, tap the “Change GIF Speed” button to access the editing screen.

Step 2
Navigate towards the left-side panel and hit the “Upload Files.” Now, search and select your GIF to import in Canva’s editing window. Afterward, go to the “Playback” option at the top left and then direct to the left panel. Move the “Video Speed” slider to the left for a Slow-mo GIF. Click on the video for a preview, or look for any other playback adjustments.

Part 3: Make Impressive Slow Mo GIFs Using Desktop Solution
Are you getting customized speed adjustment options using any of the above tools? The answer is quite clear: no online tools do not offer personalization for slow-motion GIFs. That’s where you need Wondershare Filmora as a better alternative. It is currently the best video editor that transforms your videos into art pieces.
With more than 10 billion stock media, you don’t have to browse different sites. Filmora is an all-in-all platform that can not only edit your video but also aims to polish it to the next level. Besides, editors can use Filmora anywhere with just a password.
Free Download For Win 7 or later(64-bit)
Free Download For macOS 10.14 or later
How to Make Slow-motion GIF with Filmora
After discovering the top-notch features of Filmora, it’s time to use it. Although it’s very simple to operate, this step-by-step guide will help you process faster:
Step 1Launch Filmora and Import GIF to the Timeline
Download Wondershare Filmora from its official site. After a successful launch, you will enter its main screen. Look for the “New Project” option from the main interface. Tapping on the New Project, you will find the editing screen. Import your GIF in the media panel and drag it into the timeline section to begin the process.

Step 2Slow Down the GIF with Optical Flow
Right-click on the video and pick the “Uniform Speed” option from the list. This way, you will find an editing panel on the right side. Now, you can move the “Speed” slider towards the left. You can press the space bar and get the slow-motion GIF preview. Direct downward and choose the “Optical Flow” option from the extended menu of “AI Interpolation.”

Step 3Continue to Edit or Head to Export the Media
Finally, you will get a slow but high-quality GIF. Now, it’s up to you to continue exploring other features of Filmora or head to save the file. To save the file, go to the top right corner and press the “Export” button.

Key Features Marking Filmora’s Greatness
Filmora is proven to be the easiest software with the most powerful editing features. As proof, you can read the main features of Filmora to comprehend its functionalities better.
1. Speed Ramping
Create a unique cinematic effect in your video by adjusting keyframes. Filmora offers speed ramping features to bring a smooth transition in slow-motion or fast motions. In speed ramping, you get 6 templates, such as bullet time, montage, and jumper. Using those templates, you don’t need to manually adjust keyframes for speed ramping. Also, you can retain the original pitch of the audio after changing the speed.
2. AI Copilot Editing
To boost productivity, Filmora provides an AI Copilot editor option. It saves time that could be wasted searching for some feature or making the editing perfect. Users can ask anything to copilot in natural language. They can take help from an already existing question in the copilot editors. This feature will guide you toward practical actions through navigation buttons.
3. AI Music Generator
Who else is fed up with finding the perfect music for Vlog? Commonly, you didn’t find a video of exact length and mood. Thus, Filmora enables you to generate a soundtrack according to your mood and video length. Using it, you just have to prompt with the number of tracks, mood, and length. The AI-generated music will not require copyrights, so you can use it freely anywhere.
4. AI Image
Have you ever heard that any video editor can convert your text prompts into images? Filmora is offering this option, especially for people who are struggling to get their desired image. For this purpose, they need to describe images in simple language. Afterward, they are required to pick one style for accurate results.
5. AI Copywriting
Do you have a deadline for script submission, but it is not ready yet? Leave this headache to Filmora’s AI copywriting feature, which aims to produce engaging scripts. With ChatGPT integration, it can generate YouTube titles and descriptions. Furthermore, you can ask AI to convert your script into an appealing video.
Conclusion
To summarize, slowing down is the ultimate solution to retain the viewer’s attention. In this article, you have seen the top-notch platforms for slow-motion GIFs. They are not enough for remarkable videos because of the limited speed adjustment options. So, using Filmora remains the best option in providing easier ways to customize the speed of GIFs.
Make A Slow Motion Video Make A Slow Motion Video More Features
Part 1: Where Can I Get Impressive Slow-Motion GIFs for Myself?
Slowing down GIFs brings viewers’ attention to specific actions in video content. It exaggerates facial expressions or movements in the videos, leading to humorous results. Creators choose to slow down GIFs to convey particular moods and styles. Different contexts require different slow-mo GIF videos; below are some platforms to cater to all of them.
1. Giphy
One of the famous platforms for GIFs is Giphy, which offers an extensive collection of GIFs. If you want a GIF that can add humor to your content, pick the entertainment category from Giphy. It provides different domains of GIFs for your ease of selection. Some of its categories include sports, gaming, animals, and cartoons.
Key Features
- Using this platform, you can not only get a GIF but also upload one. Graphics designers or GIF creators can use this place to publish their work globally.
- After selecting one GIF, you can share it on any platform. It allows you to embed the GIF directly on websites or share it through links.
- Every GIF on Giphy provides in-depth details like size, frame, and source. This way, you can instantly choose one that matches your project’s requirements.
2. Tenor
Another popular platform to get high-quality GIFs is Tenor. It supports multiple languages in its interface so international users can better comprehend it. Apart from that, there are many categories in the trending searches of GIFs. It shows which domain of GIFs is ranking the most. Some trending tenors include cars, snow, happy holidays, good nights, and GIFs.
Key Features
- When you pick one GIF, you can change its format before downloading. In this regard, you can choose HD, MP4, and SD quality options.
- This platform detects your selection and suggests relevant GIFs afterward. For instance, if you pick a cat GIF, then you will find a cat GIF when scrolling down.
- Tenor provides GIF specification details under each. Besides, you can share the selected GIF image through the URL and embedded link.
Part 2: What to Do If You Want to Slow Down GIFs: The Best Tools
Knowing platforms, as mentioned above, makes it easier for you to avail the desired GIF. After grabbing one of your choices, you can make it a slow-motion GIF, if required. To do so, there are several tools in the market. Some of them are explained below, along with step-by-step instructions on how to use them.
List of Best Tools to Slow Down GIFs
1. Ezgif.com
This tool is primarily responsible for online GIF making and image editing. Besides, it can convert your video into GIF, resize, cut, crop, and optimize them. Moreover, you can add effects and text to your videos or GIFs to make them appealing. GIF animation speed changers are the real game changers among online solutions:
Step 1
Browse the official site of Ezgif.com and tap on the “Effects” section. Afterward, choose the “Adjust GIF Speed” section to proceed to further options. There, click the “Choose File” white button and look for the file you want to slow down. Optionally, paste the URL link in the given section and tap “Upload” to continue.
Step 2
Scroll down the window and insert the digits on which percentage you want to slow down the speed. Afterward, click the “Change Speed” button and find a slow-motion GIF in the output image.
2. VEED.io
VEED.io is a preferred choice by many creators for professional or high-quality videos. It offers screen recording, video editing, and subtitle translation services. Apart from that, it can fix GIF speed with the GIF speed changer feature. After changing speed, you can add transitions and animation effects in Veed.io. For now, let’s just stick to the slow-mo GIF in the following steps:
Step 1
Access the “GIF Speed Changer” in VEED.io, start by tapping “Choose GIF File” and enter the editing screen.
Step 2
From the next screen, you will get a pop-up menu first. You have to hit the “Upload a File” option and select a GIF file to import into VEED.io. Under the video preview, click on the “Speed” icon next to the “Sound” symbol. Then, choose “0.5x” and get a slow-down GIF preview in front of you.
3. Canva
Students must be aware of this platform as a presentation template provider. Canva is a tool that provides stunning templates to customize with its cloud storage system. Gradually, it’s turning more into a video editing platform. Regarding slow-motion GIFs, it can change the GIF speed online. After slowing down the GIF, you can convert it into MP4 or enhance it by adding graphics.
Step 1
Reach out to the GIF Speed Changer feature of Canva’s video editing. Then, tap the “Change GIF Speed” button to access the editing screen.
Step 2
Navigate towards the left-side panel and hit the “Upload Files.” Now, search and select your GIF to import in Canva’s editing window. Afterward, go to the “Playback” option at the top left and then direct to the left panel. Move the “Video Speed” slider to the left for a Slow-mo GIF. Click on the video for a preview, or look for any other playback adjustments.
Part 3: Make Impressive Slow Mo GIFs Using Desktop Solution
Are you getting customized speed adjustment options using any of the above tools? The answer is quite clear: no online tools do not offer personalization for slow-motion GIFs. That’s where you need Wondershare Filmora as a better alternative. It is currently the best video editor that transforms your videos into art pieces.
With more than 10 billion stock media, you don’t have to browse different sites. Filmora is an all-in-all platform that can not only edit your video but also aims to polish it to the next level. Besides, editors can use Filmora anywhere with just a password.
Free Download For Win 7 or later(64-bit)
Free Download For macOS 10.14 or later
How to Make Slow-motion GIF with Filmora
After discovering the top-notch features of Filmora, it’s time to use it. Although it’s very simple to operate, this step-by-step guide will help you process faster:
Step 1Launch Filmora and Import GIF to the Timeline
Download Wondershare Filmora from its official site. After a successful launch, you will enter its main screen. Look for the “New Project” option from the main interface. Tapping on the New Project, you will find the editing screen. Import your GIF in the media panel and drag it into the timeline section to begin the process.
Step 2Slow Down the GIF with Optical Flow
Right-click on the video and pick the “Uniform Speed” option from the list. This way, you will find an editing panel on the right side. Now, you can move the “Speed” slider towards the left. You can press the space bar and get the slow-motion GIF preview. Direct downward and choose the “Optical Flow” option from the extended menu of “AI Interpolation.”
Step 3Continue to Edit or Head to Export the Media
Finally, you will get a slow but high-quality GIF. Now, it’s up to you to continue exploring other features of Filmora or head to save the file. To save the file, go to the top right corner and press the “Export” button.
Key Features Marking Filmora’s Greatness
Filmora is proven to be the easiest software with the most powerful editing features. As proof, you can read the main features of Filmora to comprehend its functionalities better.
1. Speed Ramping
Create a unique cinematic effect in your video by adjusting keyframes. Filmora offers speed ramping features to bring a smooth transition in slow-motion or fast motions. In speed ramping, you get 6 templates, such as bullet time, montage, and jumper. Using those templates, you don’t need to manually adjust keyframes for speed ramping. Also, you can retain the original pitch of the audio after changing the speed.
2. AI Copilot Editing
To boost productivity, Filmora provides an AI Copilot editor option. It saves time that could be wasted searching for some feature or making the editing perfect. Users can ask anything to copilot in natural language. They can take help from an already existing question in the copilot editors. This feature will guide you toward practical actions through navigation buttons.
3. AI Music Generator
Who else is fed up with finding the perfect music for Vlog? Commonly, you didn’t find a video of exact length and mood. Thus, Filmora enables you to generate a soundtrack according to your mood and video length. Using it, you just have to prompt with the number of tracks, mood, and length. The AI-generated music will not require copyrights, so you can use it freely anywhere.
4. AI Image
Have you ever heard that any video editor can convert your text prompts into images? Filmora is offering this option, especially for people who are struggling to get their desired image. For this purpose, they need to describe images in simple language. Afterward, they are required to pick one style for accurate results.
5. AI Copywriting
Do you have a deadline for script submission, but it is not ready yet? Leave this headache to Filmora’s AI copywriting feature, which aims to produce engaging scripts. With ChatGPT integration, it can generate YouTube titles and descriptions. Furthermore, you can ask AI to convert your script into an appealing video.
Conclusion
To summarize, slowing down is the ultimate solution to retain the viewer’s attention. In this article, you have seen the top-notch platforms for slow-motion GIFs. They are not enough for remarkable videos because of the limited speed adjustment options. So, using Filmora remains the best option in providing easier ways to customize the speed of GIFs.
Best 10 Fun Discord Bots You Need
Top 10 Fun Discord Bots You Need in 2024
An easy yet powerful editor
Numerous effects to choose from
Detailed tutorials provided by the official channel
Consumers enjoy discord because it serves as a hub for their social groups and communities. It’s a haven where users can be themselves while socializing with others who share their interests and hobbies. There is no algorithm selecting what they should see, no continuous scrolling, and no news feed. Common interests fuel conversations and you can use some fun discord bots to pep up the conversation.

Fun bots to add discord with artificial intelligence (AI) technologies are among the most helpful tools available on the discord platform. Funny emojis for discord may be beneficial to greet new members and have funny light conversations! This aids in the creation and maintenance of a vibrant online community. You can add music, games, and fun memes to your server using these bots if you wish to.
In this article
01 [10 Fun Discord Bots You Need in 2024](#Part 1)
02 [Fun Discord Bots FAQs](#Part 2)
Part 1 Fun Discord Bots You Need in 2024
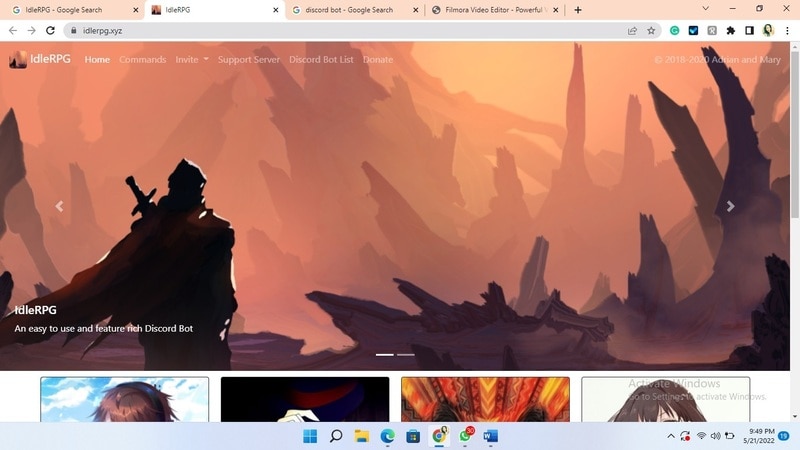
01IdleRPG
The IdleRPG is another enjoyable and engaging fun discord bot in the RPG gaming experience. It rewards server members for participating in the game while gaining XP and having fun. It offers character advancement and is comparable to other RPG games.
You may travel on a quest, trade various things, fight other players, and even find love. There’s also a scoreboard for the top ten loves, top ten PvP players, top ten wealthiest, and top ten XP players. IdleRPG also allows you to wager in various ways to help you boost your gaming money.
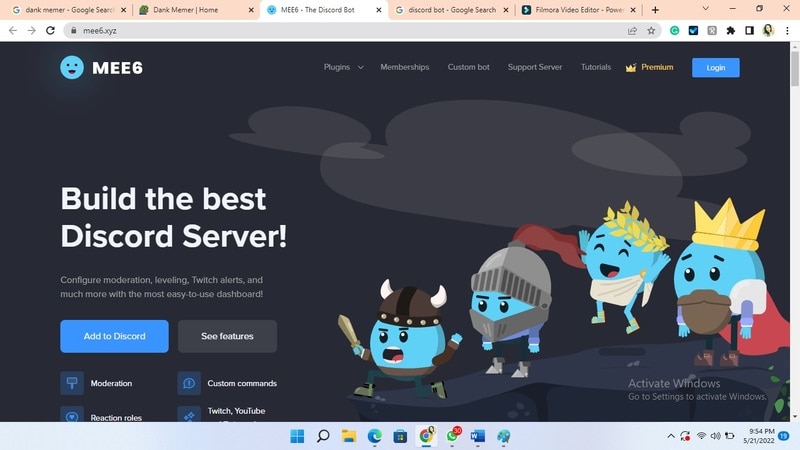
02MEE6
MEE6 is a widespread moderation and one of the greatest fun bots for discord. It takes care of many tasks that a mod team would typically do. This includes greeting new members, informing your server when you or your favorite content producers go live on Twitch or YouTube, and allowing users to assign roles depending on their reactions.
A command tool that allows you to generate custom commands and an XP leveling system that users may grind to earn access to various channels and permissions depending on activity are two of MEE6’s more complicated features. MEE6 also includes plugins for music and developing your fun discord bot.
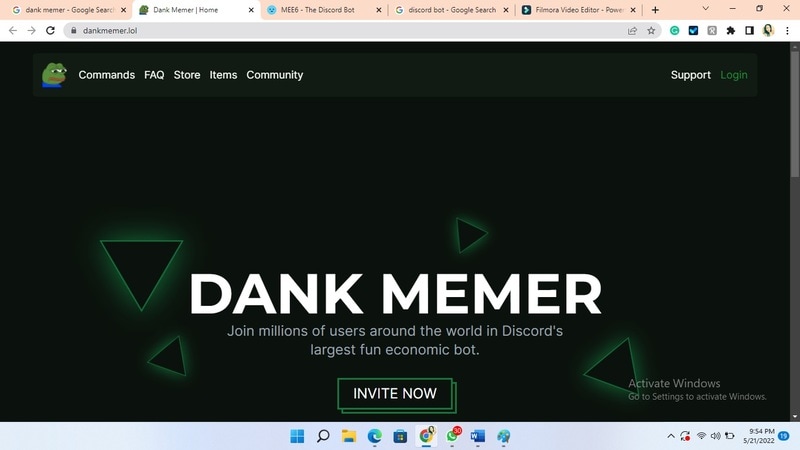
03Dank Memer
Dank Memer is another fun bot to add to discord with a lighthearted tone. It offers one of the most extensive built-in economies, allowing participants to engage in text-based thievery, bank robbery, and gambling experiences.
As its name implies, it also offers a slew of meme-related commands. You can use simple chat instructions to create memes. Other memes automatically publish.
Even more impressive is that awesome memes are collected daily from Reddit’s top meme collections.
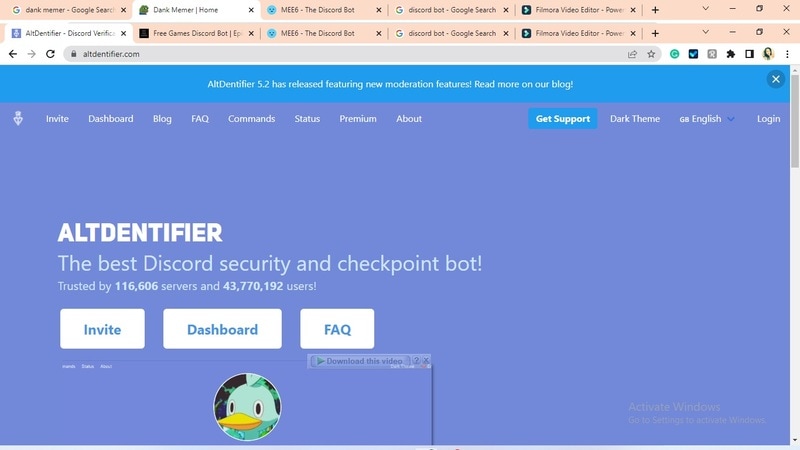
04AltDentifier
Another unique funny discord emoji bot is AltDentifier, which maintains your server clean and spam-free. It’s simple to set up and takes only a few minutes to get up and run. It now has over 35 million users spread across 100,000 servers. It also includes several more moderation commands to make administration easier.
The AltDentifier bot contains:
● An automated anti-raid system.
● A robust verification mechanism.
● Multilingual support.
● A review record.
It will also notify you if a user attempts to circumvent any limitations by utilizing a VPN.
05EpicFreeGames
Over the last two years, Epic Free Games has given away thousands of free games. GTA V, Dead By Daylight, and NBA 2K21 are among the given-away titles. It even-handed away Discord Nitro lately. Have any of these free games ever escaped your notice? Fear not, for the EpicFreeGames bot has your back.
The EpicFreeGames bot delivers a message to a channel, reminding everyone of Epic’s free game(s). It only has one task, yet it can provide you with hundreds of dollars worth of games. Never miss another fantastic free Epic Games game again.
06**Rythm **
Rythm is a great fun discord bot for playing music in the voice stream of your server. This one features a beautiful user interface that includes a music player that you can interact with. This makes controlling the channel’s queue a breeze.
The options are changeable. You can designate DJ duties, prohibit the same songs from appearing in queues again, and block particular channels from playing music. Rhythm is less platform-agnostic than Groovy. Spotify, YouTube, SoundCloud, and Bandcamp are among the options. Apple Music is not currently supported.
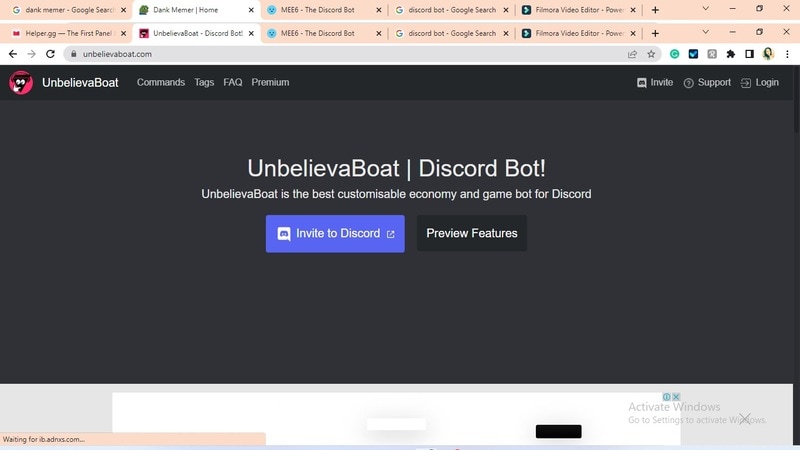
07Unbelievaboat
UnbelievaBoat is a versatile, fun bot to add to discord that uses exciting activities to keep server members engaged. These capabilities, fortunately, include a moderation mechanism that you may utilize to issue warnings and enforce bans. Your moderators may keep track of each action by assigning it a case number.
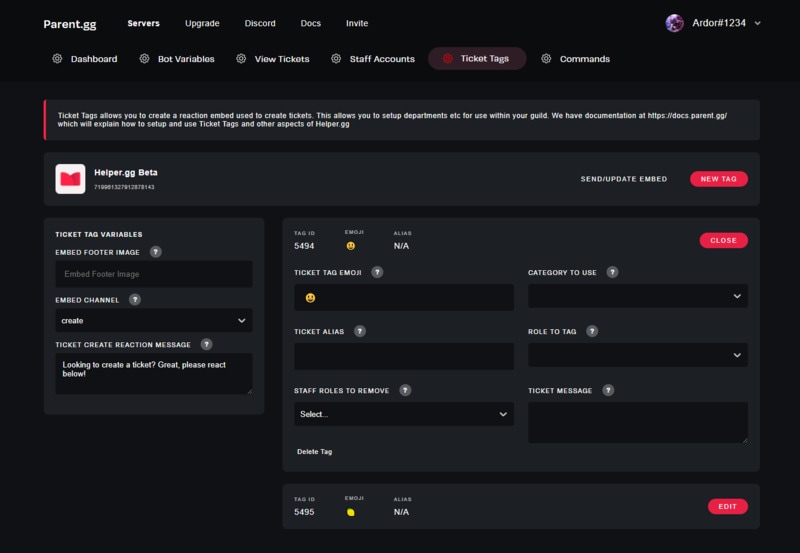
08Helper.gg
Helper.gg enables you to transform your discord server into a support ticket system. It’s a board ticket bot with a stunning UI that makes managing and responding to client tickets simple.
Create staff accounts for your company’s customer support representatives and manage their access. Ticket logging with the flexibility to rename and relocate tickets, add and delete users, and the contentment of having tickets close automatically based on the amount of time that has passed since the previous reply are all accessible.
09GameStats
Next, GameStats has one-of-a-kind funny emojis for the discord bot. We all enjoy looking at our in-game statistics and comparing them. The GameStats Discord bot makes sharing and displaying your impressive numbers simple.
Connect to your game or platform, make a personalized profile card, and begin sharing your tryhard statistics.
10Dyno
Dyno is another well-crafted fun discord bot. It’s an utterly customizable server moderation bot that assists with server automation. You also receive a basic online dashboard with Dyno that you can use to monitor and control your server.
It has functions such as creating positions, making announcements, banning members, and even requesting puppy or cat images. Dyno is a fun bot that allows you to automate your server management effortlessly. Premium subscriptions, which start at $4.99 per month and unlock more exclusive features, are also available.
However, if you are a creative video editor who likes sharing their experience on discord, Filmora is for you. With Filmora, you can bring your recorded experiences with funny discord emojis to life!
But Wait, What is Wondershare Filmora Video Editor ?
Filmora is a famous video editing program for those who wish to focus on editing and producing high-quality videos with the support of 4K video editing. It’s a reasonably priced software featuring tools like split, trim, add text, color, etc. When it comes to designing, adding effects, and modifying movies, it provides users with many possibilities. Users can add overlays, create animations and objects, add music, and more with Wondershare’s Filmora. It’s an excellent tool for individuals who wish to include dedications, tributes, fun emojis and anecdotes in their films. Any video can also benefit from voiceovers.
For Win 7 or later (64-bit)
For macOS 10.12 or later
Part 2 Fun Discord Bots FAQs
Q. What does MEE6 stand for?
A. MEE6 is a discord role bot that lets users assign roles to themselves via discord replies. This discord role generator will change user rights in discord automatically.
Q. Are these fun bots free?
A. Yes and no. Most fun bots for discord are free to use, although you must pay for some features.
Q. What is the top level I can reach on the MEE6 bot?
A. The maximum level accessible is 1,768,802, which would take 935 billion years if messages sent every minute.
Q. Help! My discord got hacked; how did that even happen?
A. Users may edit discord javascript files. A cybercriminal can install harmful malware to discord client files if they get user authorization. When people open the file, the code also gets executed. After then, the hacker has access to the user’s discord data.
Q. What can discord bots do?
A. On your server, the bots can conduct a variety of helpful automated chores and bot commands, like welcoming new users, monitoring content, and banning rule violators. Using fun discord bots’ instructions, you can add music, humor, games, and other emojis to your server.
● Ending Thoughts →
● In short, moderators and administrators can use funny discord emojis to administer their servers better, make them attractive, and get more users. There are many vanilla discord commands to choose from, and when you put fun bots to add to discord, the possibilities become unlimited.
● Besides, there are several funny emojis for discord to improve your discord skills and establish your discord server. Finally, Filmora can assist you in beautifying your recorded videos make funny emojis for discord.
Consumers enjoy discord because it serves as a hub for their social groups and communities. It’s a haven where users can be themselves while socializing with others who share their interests and hobbies. There is no algorithm selecting what they should see, no continuous scrolling, and no news feed. Common interests fuel conversations and you can use some fun discord bots to pep up the conversation.
Fun bots to add discord with artificial intelligence (AI) technologies are among the most helpful tools available on the discord platform. Funny emojis for discord may be beneficial to greet new members and have funny light conversations! This aids in the creation and maintenance of a vibrant online community. You can add music, games, and fun memes to your server using these bots if you wish to.
In this article
01 [10 Fun Discord Bots You Need in 2024](#Part 1)
02 [Fun Discord Bots FAQs](#Part 2)
Part 1 Fun Discord Bots You Need in 2024
01IdleRPG
The IdleRPG is another enjoyable and engaging fun discord bot in the RPG gaming experience. It rewards server members for participating in the game while gaining XP and having fun. It offers character advancement and is comparable to other RPG games.
You may travel on a quest, trade various things, fight other players, and even find love. There’s also a scoreboard for the top ten loves, top ten PvP players, top ten wealthiest, and top ten XP players. IdleRPG also allows you to wager in various ways to help you boost your gaming money.
02MEE6
MEE6 is a widespread moderation and one of the greatest fun bots for discord. It takes care of many tasks that a mod team would typically do. This includes greeting new members, informing your server when you or your favorite content producers go live on Twitch or YouTube, and allowing users to assign roles depending on their reactions.
A command tool that allows you to generate custom commands and an XP leveling system that users may grind to earn access to various channels and permissions depending on activity are two of MEE6’s more complicated features. MEE6 also includes plugins for music and developing your fun discord bot.
03Dank Memer
Dank Memer is another fun bot to add to discord with a lighthearted tone. It offers one of the most extensive built-in economies, allowing participants to engage in text-based thievery, bank robbery, and gambling experiences.
As its name implies, it also offers a slew of meme-related commands. You can use simple chat instructions to create memes. Other memes automatically publish.
Even more impressive is that awesome memes are collected daily from Reddit’s top meme collections.
04AltDentifier
Another unique funny discord emoji bot is AltDentifier, which maintains your server clean and spam-free. It’s simple to set up and takes only a few minutes to get up and run. It now has over 35 million users spread across 100,000 servers. It also includes several more moderation commands to make administration easier.
The AltDentifier bot contains:
● An automated anti-raid system.
● A robust verification mechanism.
● Multilingual support.
● A review record.
It will also notify you if a user attempts to circumvent any limitations by utilizing a VPN.
05EpicFreeGames
Over the last two years, Epic Free Games has given away thousands of free games. GTA V, Dead By Daylight, and NBA 2K21 are among the given-away titles. It even-handed away Discord Nitro lately. Have any of these free games ever escaped your notice? Fear not, for the EpicFreeGames bot has your back.
The EpicFreeGames bot delivers a message to a channel, reminding everyone of Epic’s free game(s). It only has one task, yet it can provide you with hundreds of dollars worth of games. Never miss another fantastic free Epic Games game again.
06**Rythm **
Rythm is a great fun discord bot for playing music in the voice stream of your server. This one features a beautiful user interface that includes a music player that you can interact with. This makes controlling the channel’s queue a breeze.
The options are changeable. You can designate DJ duties, prohibit the same songs from appearing in queues again, and block particular channels from playing music. Rhythm is less platform-agnostic than Groovy. Spotify, YouTube, SoundCloud, and Bandcamp are among the options. Apple Music is not currently supported.
07Unbelievaboat
UnbelievaBoat is a versatile, fun bot to add to discord that uses exciting activities to keep server members engaged. These capabilities, fortunately, include a moderation mechanism that you may utilize to issue warnings and enforce bans. Your moderators may keep track of each action by assigning it a case number.
08Helper.gg
Helper.gg enables you to transform your discord server into a support ticket system. It’s a board ticket bot with a stunning UI that makes managing and responding to client tickets simple.
Create staff accounts for your company’s customer support representatives and manage their access. Ticket logging with the flexibility to rename and relocate tickets, add and delete users, and the contentment of having tickets close automatically based on the amount of time that has passed since the previous reply are all accessible.
09GameStats
Next, GameStats has one-of-a-kind funny emojis for the discord bot. We all enjoy looking at our in-game statistics and comparing them. The GameStats Discord bot makes sharing and displaying your impressive numbers simple.
Connect to your game or platform, make a personalized profile card, and begin sharing your tryhard statistics.
10Dyno
Dyno is another well-crafted fun discord bot. It’s an utterly customizable server moderation bot that assists with server automation. You also receive a basic online dashboard with Dyno that you can use to monitor and control your server.
It has functions such as creating positions, making announcements, banning members, and even requesting puppy or cat images. Dyno is a fun bot that allows you to automate your server management effortlessly. Premium subscriptions, which start at $4.99 per month and unlock more exclusive features, are also available.
However, if you are a creative video editor who likes sharing their experience on discord, Filmora is for you. With Filmora, you can bring your recorded experiences with funny discord emojis to life!
But Wait, What is Wondershare Filmora Video Editor ?
Filmora is a famous video editing program for those who wish to focus on editing and producing high-quality videos with the support of 4K video editing. It’s a reasonably priced software featuring tools like split, trim, add text, color, etc. When it comes to designing, adding effects, and modifying movies, it provides users with many possibilities. Users can add overlays, create animations and objects, add music, and more with Wondershare’s Filmora. It’s an excellent tool for individuals who wish to include dedications, tributes, fun emojis and anecdotes in their films. Any video can also benefit from voiceovers.
For Win 7 or later (64-bit)
For macOS 10.12 or later
Part 2 Fun Discord Bots FAQs
Q. What does MEE6 stand for?
A. MEE6 is a discord role bot that lets users assign roles to themselves via discord replies. This discord role generator will change user rights in discord automatically.
Q. Are these fun bots free?
A. Yes and no. Most fun bots for discord are free to use, although you must pay for some features.
Q. What is the top level I can reach on the MEE6 bot?
A. The maximum level accessible is 1,768,802, which would take 935 billion years if messages sent every minute.
Q. Help! My discord got hacked; how did that even happen?
A. Users may edit discord javascript files. A cybercriminal can install harmful malware to discord client files if they get user authorization. When people open the file, the code also gets executed. After then, the hacker has access to the user’s discord data.
Q. What can discord bots do?
A. On your server, the bots can conduct a variety of helpful automated chores and bot commands, like welcoming new users, monitoring content, and banning rule violators. Using fun discord bots’ instructions, you can add music, humor, games, and other emojis to your server.
● Ending Thoughts →
● In short, moderators and administrators can use funny discord emojis to administer their servers better, make them attractive, and get more users. There are many vanilla discord commands to choose from, and when you put fun bots to add to discord, the possibilities become unlimited.
● Besides, there are several funny emojis for discord to improve your discord skills and establish your discord server. Finally, Filmora can assist you in beautifying your recorded videos make funny emojis for discord.
15 Best LUTS to Buy
The LUTs application improves the quality factors of the media files. It works on the color gradients and performs corrections with the existing images to bring out the best in the captures. Some details become visible only after making innovative corrections using the best LUTs program.
Using this tool, you can create filters and apply them to the photos in no time. Choose reliable applications to obtain the desired outcomes. Select the programs that carry in-built elements and a user-friendly interface for optimal tool usage. In this article, you will explore the top 15 best LUTs you can buy in 2024 to increase the overall view of the photos and videos.

Here, quickly surf the wide range of the LUTs app and its related details. Connect with the right ones that match your needs.
1. Urban Dark LUTs
The Urban dark LUTs are exclusively designed to display the city environment. You can use these LUTs to enhance your shot with urban effects. The relevant color gradients are applied to this file.
Price: $37.

Urban Dark LUTs
2. Osiris Cinematic LUT
The Osiris Cinematic LUT hails from a reputed developer Vision Color. This pack contains 3 different LUT effects with processed films to provide cinematic looks to the media content. Many filmmakers use this LUT effect frequently to reveal the realistic shots in their movies.
Price: $57

Osiris Cinematic LUT
3. Black Magic LUT
The Black magic LUT corrects the color shifts and brings out the natural flavors in the shots. This LUT effect includes the skin tone and displays the realistic colors on the captured content.
Price: $22.

Black Magic LUT
4. Filmic Tone LUT
In this LUT, you can rectify the color gradients and match the skin tone perfectly. It contains dark vibes and it is enough if you import this LUT to the editing interface without any complex installation process. The Filmic Tone LUT seems to be compatible with different video editing platforms.
Price: $28.

Filmic Tone LUT
5. Moody Bundles
Here, you can find seven types of LUT effects available in this pack. It displays the atmospheric vibes and specializes in the moods related to the landscapes, weather, fashion, and sports. Choose the LUTs as per the genre of the video clippings.
Price: $91

Moody Bundles
6. Filippo Cinotti
The film lovers use these LUT effects to adjust the shadows and highlights on the captured content. There are options to customize this LUT using the in-built color panel available with the video editing environment like Adobe Premiere, Photoshop and many more adds to the list.
Price: $29

Filippo Cinotti
7. Winter Lifestyle LUT pack
This LUTs pack is specially built to apply winter effects to the media content. It helps to include the snow, and white environment in the background to add flavor to the capture. There are more than 30 winter lifestyle LUTs effects available to include in the videos and photos effortlessly.
Price: $55

Winter Lifestyle LUT pack
8. Autumn LUTs pack
There are 20 autumn LUTs packs available in this product to edit the videos and photos with unique effects. Instead of applying similar filters to the media content, try this autumn collection LUTs to view different looks of your photos and videos.
Price: $35

Autumn LUTs pack
9. Sports LUTs
It is a pack of 20 unique sports LUTs exclusively available to insert into your videos and images. Customize the LUTs by adjusting the brightness, contrast, color grading and intensity values to add value to the captured content.
Price: $36

Sports LUTs
10. Christmas LUTs
Use these LUTs during the festival season and create an impact on the viewers. You can impress the audience by playing the videos edited using the Christmas LUTs at the time of family and friend get together. Here the effects are highly professional and no compromises with the quality factors.
Price: $36

Christmas LUTs
11. Beach LUTs
When you shoot the memorable moments on the beach, edit the content using 20 different types of beach LUTs. They are highly professional and work on the blue color with intense gradients to provide natural looks overall.
Price: $36

Beach LUTs
12. Black and White LUTs
To add the black and white color gradients to the imported videos or photos, this LUT gives you great effects. Brush the media file with black and white shades to obtain a new look at the existing content.
Price: $17

Black and White LUTs
13. Creamy LUTs
In these LUTs, you can add the skin tone effects realistically on the characters in the video content. The skin color is quickly matched by adjusting the color gradients. The creamy nature of the skin tone is retained using these LUTs.
Price: $36

Creamy LUTs
14. Retro LUTs
The retro effects are assured when you apply these LUTs in your video. Convert your latest images and videos into a retro mood by using the Retro LUTs while editing the media content on any platform. There are 20 different retro LUTs to add flavors to the videos.
Price: $36

Retro LUTs
15. Epic LUTs
When you narrate a story with the photos and videos, then insert the epic LUTs in the content to convey the tracks as a history. Resemble any epic events in your shots and use these LUTs to maintain the realistic looks overall.
Price: $36

Epic LUTs
Bonus! Use your LUTs in Filmora
Now, it is high time to study the usage of LUTs effects in Filmora and build a media file outstanding. The Filmora is a video editor tool that edits the video content beyond imagination. It allows you to perform limitless edits in your content hassle-free. You can easily upload the content from any storage space and quickly add desired effects to the videos. Apart from effects, you can insert transitions, animations, and icons to create an impact on the audience who watches the final edited video content. The Filmora video editor satisfies both the professionals and newbies giving satisfactory results.
Follow the below steps to insert the LUT effects on the imported video or photos using the Filmora editor application.
Step 1Install the LUTs app
Go to the official webpage of Filmora and download the tool according to the system OS. Install it and launch the application. Then, upload the desired video or photo that requires further edits.
Step 2Choose Effects
Now, tap the Effects option in the menu and select the LUTs option in the left panel of the screen. Next, select your favorite LUT effect displayed on the right side of the screen. Here, you can find a wide range of LUTs to include in the loaded videos or photos.

Choose Effects
Step 3Apply Now
Finally, hit the Apply button to insert the chosen LUT effect into the imported video or photo. There are options to expand the Effects library by loading LUTs from external sources. Click the Custom LUT tab and tap the drop-down menu nearby the 3D LUT label. Then, choose the Load New LUTs option to include extra LUTs in the list. You can include them in further video edits on the Filmora interface.

Load New LUTs
You can also customize the available LUT effects in the Filmora library according to the video or photo content. Use the Filmora video editor program optimally to bring the best in the content and entertain the audience for better reach. Every edit reveals the expected displays of the media content. Choose the editing features in the Filmora Video Editor app precisely for satisfactory results.
Wondershare Filmora11 Express Better
Achieve More
Grow Together
Free Download Free Download Learn More

![]()
Summarize:
Thus, you are the last lines in the discussion of the best LUTs you can purchase in 2024. Quickly rush up to the stores before the above discussed LUTs becomes out of stock. You can wait for a few days if your favorite LUTs go unavailable. Choose the LUTs professionally and use the Filmora Video Editor to insert the LUTs optimally in the video content. Connect with this article to gather exciting facts about LUTs.
Free Download Free Download Learn More
![]()
Summarize:
Thus, you are the last lines in the discussion of the best LUTs you can purchase in 2024. Quickly rush up to the stores before the above discussed LUTs becomes out of stock. You can wait for a few days if your favorite LUTs go unavailable. Choose the LUTs professionally and use the Filmora Video Editor to insert the LUTs optimally in the video content. Connect with this article to gather exciting facts about LUTs.
7 Best GoPro Video Editors for Mac
Have you ever used or seen small box-type cameras for recording videos? Well, those are called action cameras. Action cameras are compact go. They were basically made to shoot sports or any other activities videos. They are mountable on many surfaces so you can record freely during any activity. Many of them provide 4K videos at 60 fps or higher to provide crisp video quality or low resolution at 120 or 240 fps to record smooth slow-mo videos. Most of them are waterproof and have good video stabilization so you can record any sports hassle-free.
There are many action camera companies out there in the market but the one ruling the market at the moment is GoPro. It has some best action camera models with dozens of amazing features. It can also record in RAW format and GoPro max can also shoot 360 videos.
GoPro gives amazing results but sometimes videos aren’t up to your expectations and need a little bit of refinement. From sharpening to speed ramping there are many ways to enhance your GoPro videos. And for this purpose, you need a good video editing software which has all these features plus it also supports RAW and 360 video files. Here we have mentioned some noteworthy video editing softwares for you.
Wondershare - Filmora :
It is available for both Windows and Mac.
If you are looking for professional and easy-to-use software to edit your GoPro videos then Filmora Video Editor can be the right choice for you. It has many cool features to enhance your action cam footage. From stabilization to color grading to fish eye effect all can be done in this software. It has a simple and attractive UI.
It has hundreds of effects and cool transitions. It is a paid video editor which also provides a free version to check and practice your skills on. But the main disadvantage of the free version is that it leaves a watermark on export. If you don’t want to invest money in the beginning, till then you can practice on the free version and once you are satisfied with your skills then you can upgrade to a pro version.
Pricing: Wondershare Filmora offers three different plans. Monthly one at $9.99/a month, Yearly one at $69.99, and perpetual license for $79.99 where you can own the software’s specific version for perpetual. It also provides an educational plan for students and teachers.
For Win 7 or later (64-bit)
For macOS 10.14 or later
~ Features:
- It supports 4K files and a wide range of file formats.
- It has a simple UI that is suitable for beginners.
- It Supports 360 video files (in equirectangular format).
- Supports industry-standard plugins like Boris fx.
- Have features like standard motion tracking, masking, chroma key, e.t.c.
- The paid version has more features like Speed ramping, Auto-sync, keyframing, and animation.
- Have vast stock library.
~ Cons:
- The free version leaves a watermark on export.
- Have playback issues with 4k videos.
- Lacks some standard editing features.
~ Steps:
Import: Open “Filmora” then select the desired aspect ratio and click “New Project’ to start editing. Click on the “Import panel” to import media files.

Edit: Drag and drop the clips to add them to the timeline. Drop the clips above or below to add them in layers. Click the top-left icon of the timeline to add layers. Select a clip and you will see a bunch of tools appear on the top bar of the timeline, use them to perform basic editing tasks like split, crop, speed ramping, keyframing, e.t.c.
Double-click on a clip to open its properties. . Click the blue “Ok” button to move back to the previous window.
Select the “Video” icon to transform the clip or to do motion tracking, stabilization, chroma-key, Masking, e.t.c.
Select the “Audio” icon to apply effects and enhance your audio.
Select the “Color” icon to do color correction and grading.
Select the “3D LUT” option to import a new customized lut.
Select the “Animation” icon to add preset animations or make custom animations by using keyframes.
Select the “Speed” icon to adjust the speed of the clip or to do speed ramping.

Click the blue “OK” button below to go back to the previous window.
Effects: On the horizontal bar at the top-left corner of the screen, all the effects, transitions, title present, and stock library are located. Drag and drop to apply them.

Export: Click the blue “Export” button to open export window, choose the desired settings than click “Export”. and don’t forget to save the project if you want to edit it again.
Free GoPro Video Editors for Mac:
If you are tight on budget but still want a professional video editor to edit your GoPro videos then here I have mentioned some free but powerful video editors. Whether you are a beginner or a professional content creator, these free softwares can get your job done.
Blackmagic - Davinchi Resolve:
It is available for both Windows and Mac.
Whether you are a freelance video editor or an industry-level filmmaker, if you want to step up your game and stand out from your competition then you need a powerful video editor to help you out and Davinchi Resolve can be the right choice for you. From sports vlogging using action cams to Hollywood filmmaking using Red cinema cameras, Davinchi Resolve can handle and edit all this footage easily and smoothly. It is even used in the making of several Hollywood projects including Marvels’s feature films.
It is one of the best color grading software available in the market. It has advanced color grading tools that can help color grade your GoPro raw videos easily as raw videos look dull but provide greater flexibility. It is a timeline-based editor but its Fusion and Color grading panel provides a Node-based editing system which is hard to use but provides great flexibility once mastered.
Resolve has 6 different pages to deal with different editing parts:
“Edit” and “Cut” pages to deal with simple editing tasks. Its “Fusion” page allows users to do VFX and 3D compositing. The “Color Grading” page has all the professional grading tools. While the “Fairlight” page is designed to edit and enhance audio. And the “Deliver” page to export your files.
All these features are available for free without even giving a watermark. Although it has a studio version that provides some additional features to get more out of this amazing software.

- Davinchi Resolve Studio:
The free version has almost everything a professional video editor needs. but you can purchase the Studio version to get some really juicy features to enhance your video editing experience. It includes the Davinci neural engine, stereoscopic 3D tools, Dolby atmos audio mastering,e.t.c.
Pricing: Studio version is available at $ 295 for a lifetime license and with free updates.
~ Features:
- It supports a 4K resolution at 60fps. (while the Studio version supports up to 32K resolution at 120 fps.)
- It is a multi-feature software that provides editing, color grading, VFX, 3D compositing, and audio editing all in one place.
- It has the most advanced and powerful Node-based color grading system, which is also used by Hollywood film studios.
- Supports Raw and 360 videos from GoPro or other action cameras.
- Supports multi-cam editing up to 16 camera angles.
- Can make Compound clips and add adjustment layers.
- Fairlight panel has professional audio production tools like waveform editing, audio ducking, and Channel mapping. (Dolby Vision mastering and 3D spatial Panning [audio editing in 3D space] are available in the Studio version.)
- Supports third-party plugins.
- Has a 3D workspace and provides a virtual set extension for 3D modeling and compositing.
~ Cons:
- Its node-based editing style is quite difficult for beginners.
- Requires a high-end workstation to run smoothly otherwise will often crash during editing.
- Its node-based editing system is hard to learn.
~ Steps:
Import: Open “Davinci Resolve’. Select a previously saved project or press “New project” to start a new one. Click “File” >> “Import” >> “Media” to import files or press “CTRL + I”.
Edit: Drag and drop files to add them to the timeline Use the tools present above the timeline to trim, cut or move your clips. Click the “Inspector” icon on the top-right corner of the window to open the Inspector tab. Here you will find the properties of all the clips, audio, transitions, effects, e.t.c. There are different editing tabs at the bottom of the window.
In the “Fusion” window, click “Nodes” to open the Node screen. Import a clip or use it from the editor timeline. Usually, a clip will have two nodes connected through a line. Above the nodes panel, different types of nodes are available. Drag any node in the panel and connect it through lines. or add a “merge” node to connect nodes.
Its color grading panel also has Node based editing system.

Effects: Click “Effects Library” then select any effect and drop it in the timeline to apply it. You can change its properties in the “Inspector” panel.
Click the diamond icon on the right side of the property to start keyframing then change the value of that property to add keyframes at desired time period.

Export: Open the “Deliver” window, choose the desired settings then click “Add to Render Queue” to start exporting.

FXhome - Hitfilm Express:
It is available on Windows, Mac and Linux also.
If you are looking for a free but powerful video editor to edit your GoPro clips then Hitfilm Express can be the right choice for you. It is a free timeline-based editing software with professional-grade VFX tools. It is a timeline-based editor where you can add dozens of audio, videos, and text layers.
It has a composite shot sequence where you can do complex editing like editing 3D videos and elements, lights e.t.c. It has physic-base behaviors and effects also to enhance 3D compositing. For professional-level editing almost most of the effects and properties have keyframing options. It has different workspace modes to suit your editing needs.
It can also edit 360 videos recorded from your GoPro max. It has a “GoPro Lens Reframe” effect to adjust your 360 clips, but some 360 toolkits can only be available when you purchase Hitfilm pro or buy a 360 toolkit add-on. Similarly, you can purchase more add-ons according to your editing needs or you can purchase Hitfilm Pro to gain access to all add-ons and features. But can use these pro features for free but without exporting as exporting with a paid effect can give a watermark.
Hitfilm Pro:
Although Hitfilm express doesn’t give a watermark on export, but to use more features like 3D composition, LUTs, e.t.c you need to purchase add-ons, there are over 30+ add-ons available to purchase which you can purchase depending on your needs, but if you want to get all the features than its better to get your hands on Hitfilm Pro.
Pricing: Available for purchase at £ 309 or $ 388 for a lifetime license. With 12 months of free updates. It has 3 seat license which means It can run on 3 PCs simultaneously.
~ Features:
- It is a free editing software with no watermark.
- It can edit 3D videos and it can also import and edit 3D models and tracking data.
- It can edit 360 videos also.
- You can add effects and color grades as layers in the timeline also.
- Can add adjustment layers and create nested clips within nested clips to make complex editing easier.
- It has a motion track and locked-on stabilization features.
- Can do smooth keyframing and animation with the help of value graphs.
- It supports multi-cam editing also.
- Keyboard shortcuts make workflow quite easy and quick.
~ Cons:
- It has some playback issues while using 4K videos.
- It crashes sometimes, so it’s better to save the project frequently during editing.
- Hitfilm express doesn’t have a dark mode.
- Some common features are only available on the Pro version or add-ons.
~ Steps:
Import: Open “Hitfilm”, Select “New Project” to open a blank project then click “open” to open an existing file or click “new” to create a new project. Then set project settings on pop-up then and click “ok”.
Then click the “Media” tab on the top-left corner of the screen. Then select the “Import” button to import videos, images, audio, or 3d models. You can also import previously made composite shots.
Edit: Drag and drop media files from the media tab to the timeline. or click the “New” tab to create a “Composite shot” or a solid plane layer. Right-click on the left side of the timeline to insert or delete layers. On the left side of the timeline, you will find some basic tools located on the vertical bar to do simple tasks.
In the “Viewer” tab, on the left side of the playback screen, you can find tools for masking and adding text.
In the “Controls” tab, you can adjust the properties of clips and other features related to the clip like masking, track, blend, transform, e.t.c.
Create a “Composite shot” to do complex editing like 3D compositing. Or select multiple layers then right-click and select “make Composite shot” to combine them for easy editing. Double-click the composite shot to open its contents.

Effects: From the “Effects” tab drag and drop effects on the clip to add them. Some effects can be added as layers which can affect all the layers beneath it. Properties of these effects can be adjusted in the “Control” tab.
To do keyframing, Click the circle icon on the left side of the property to start keyframing then change the values of that property to add keyframes at desired time period.
Export: Click the “Export” icon then “Export now” located at the top right side of the timeline to open the export window. The export will start automatically.
Shotcut:
It is available on Windows, Mac and Linux.
If you are making videos from your GoPro or mobile phone just for fun that doesn’t require much editing then you can look for a free and simple video editor and “Shotcut” can be the right choice for this purpose.
It is a free and open-source video editor with many cool features to get your hands on. It doesn’t have any pro version. It is simple and easy to use but takes some time to understand. It supports multi-track timeline editing. It has a basic timeline design but you can customize your timeline to meet your editing needs. It has some good color grading options, you can also import your color luts. It has many cool features and effects. It supports 360 video editing and also has a few 360 video filters. It has audio effects also.
~ Features:
- All its features are for free and it doesn’t leave any watermark.
- It supports 4K resolution and a wide range of file formats.
- It also supports 360 video files.
- Has keyframing and chroma kry features.
- It has advanced color grading features.
- It provides standard animation and keyframing features.
~ Cons:
- It is a basic video editor and lacks some professional editing features.
- Have playback issues with 4K videos.
- It does have proper text editing tools.
- It is difficult to understand as its UI is different from other familiar video editors.
~ Steps:
Import: Open “Shot Cut” then click the “Open Files” button on the top-left corner of the window to import files.
Edit: Drag and drop clips on an empty timeline panel to add tracks and drag the clip from corners to trim them. Right-click on the left side of the timeline to add a video or an audio track. You will find a bunch of tools above the timeline to do some basic tasks.
You can choose from 6 different workspace designs (available in the top-right corner of the window) to suit your editing styles.

On top of the window, you will see a bunch of icons like Timeline, filter, project, and properties. e.t.c. In the properties tab, you can change the aspect ratio and speed of the clip.
Effects: Click the “Filters” icon on top of the window to open the filters menu, Click “+” above it to add filters. Double click a filter to add it to the selected clip, then click the filter to open its properties menu. You can also add text from here.
Click the “Keyframes” icon on top of the window to open the Keyframes window. Select the “clock” icon on the filters to start keyframing then change the values at a specific time to add keyframes. Click the “Timeline” icon to go back to the previous window.

Export: Click the “Export” button on the top of the screen. Select a preset or click the “Advanced” button to change export settings then click “Export File”.

Paid GoPro Video Editor for Mac:
If you are a professional athlete or a vlogger using GoPro for all of your contents and want to invest some money on paid video editors to improve your content. Then here we have mentioned some paid video editors worthy of your investment.
Apple - Final Cut Pro:
It is available for Mac only.
If you are an Apple enthusiastic person and want everything Apple, then why look for any other video editor when you can have a powerful video editor “Final cut pro” made by Apple. It is a paid but professional software that can raise your GoPro videos to the next level. Whether it’s a 360 video or a RAW file recorded from your GoPro or from the RED cinema camera, all can be edited smoothly inside Final Cut Pro. It has dozens of useful features that a professional video editor looks for like 3D tracking, Motion Graphics, Color Grading, Audio Mixing, Multi-cam editing e.t.c.
Pricing: It is a one-time purchase software available at $ 299.9 for a lifetime license and all its future updates can be downloaded free of cost.
~ Features:
- It supports up to 8K resolution.
- Support 360 and RAW video files.
- Edit videos in complete 360 and 3D spaces.
- Supports third-party video and audio plugins.
- Supports Multi-cam editing.
- Have professional color grading tools with HDR support.
- Its UI is easy to use.
~ Cons:
- It is designed for Apple devices only.
- Requires a powerful PC.
- Its UI is a bit different from other common video editors in the market.
- ~ Steps:
Import: Open “Final Cut Pro” then click the “Files” button on the top-left corner of the screen, then select “Project” to create a new project. In the “Files” menu, click “import” then “media” to import your media files. Here most of the work is done with Keyboard commands.
Edit: Drag and Drop clips on the timeline. In the viewer panel, press “I” and “O” to add input and output points then drag the clip to add only a specific part of the clip. Press “Cmd + B” to split the clip at the desired location. Or add the clips above to add the layer.
Click the “Text” icon on the top-left corner of the screen to open the text page. Choose from presets or import your own Text presets and drag them to the timeline. Click the text to open “Text Editor” on the left side of the screen.
Select multiple clips then Right-click and select “New Compound Clip” to combine them. Double-click the compound clip to edit its components.
Effects: Click 2 icons on the top-right side of the timeline to open the effects and transition panel. Drag and drop on the clip to use them. You can change their properties in the “Effects editor” tab located in the same place as “Text Editor”.
In the editor tab, click the diamond icon beside any property to start keyframing, then change its property to add keyframes at the desired time.
Press “Cmd + 6” to open the Color Grading tab, here you can color grade your clips.
Export: To export the edited video. Click “File” >> “Share” >> “Master file” to open export window. Choose the desired settings then click “Next” then “Save” to export the video.
Adobe - Premiere Pro:
It is available for both Windows and Mac.
Whether you are a content creator or not, if you use a DSLR or an action camera for the first time, then maybe the output wouldn’t meet your expectations. In order to make it good, you need a video editor. And if you will ask your gathering about a good video editor, most of them will recommend you Adobe Premiere Pro, because it is such a versatile and well-known software available in the market. It is a subscription-based video editor.
It is an industry-level software with many professional and advanced features. From beginner video editing to film compositing, all can be done in this software. Whether you have a 360 video or a 4K video in Raw format recorded from your GoPro, just import it into premiere pro and start editing. It has a downloadable “GoPro FX Reframe” plugin to edit your 360 videos. It has different panels designed to deal with specific parts of post-production such as the Effects panel, Graphics panel, Sound panel, Colour Grading panel, e.t.c.
~ Features:
- It supports up to 8K resolution.
- Have different panels to enhance different segments of post-production.
- Have an essential Effects panel to create motion effects and animations using keyframes.
- Supports hundreds of third-party extensions.
- Have useful features like warp stabilizer and denoiser.
- You can import or create your color LUTs.
- Have a creative cloud with 100 Gb of storage.
- The bundle also includes a mobile video editor and a stock library.
~ Cons:
- Real-time rendering. It will take some time to render before exporting if you work on a mid-range PC.
- Freezes or crashes sometimes.
- Cache data fill-up quickly and eats a lot of storage. (It’s better to clear it after every project)
Pricing: It is cloud-based software, therefore it can’t be purchased one time. It has a monthly subscription starting at $ 20.99/month. It includes “premiere rush” mobile video editor and 100 GB of cloud storage within the plan. It also has a “Creative cloud All apps” plan that includes all 30+ Softwares + 100Gb cloud storage along with premiere pro for $ 54.99 only. All plans also include Behance (adobe creative community), Adobe Fonts, and Adobe stock assets for free. Adobe also provides educational access at a much discounted price.
~ Steps:
Import: Open “Premiere Pro”. Click “New Project” to start with then Click the “Files” button on the top-left corner of the window then select the “Import files” button to import files. Or press “CTRL + I” to import files or drag your files from their location to premiere pro.

Edit: Drag and Drop the files to add them to the timeline. Drop a file above a clip to add as a layer. or drop over a clip to overwrite it. On the right side of the timeline, you can find a bunch of tools to do basic edits like trimming, splitting, speed ramping, masking, or adding text.
In the “Effects Control” tab you can transform the selected clip or change its properties.
Select multiple clips then right-click and select “make Nested clip” to combine them into a single clip for easy editing.

Slide between 8 different workspace styles designed for specific post-production tasks by clicking the buttons available on the top of the window.
Effects: Go to the “Effects” panel on the bottom-left window to apply an effect or transitions. Here you can find all audio, video, 2D, and 3D effects. Drag and Drop on a clip to apply it. Change the properties of these effects in the “Effects Control” panel.
To color grade, your clips move to the “Color” workspace. Here you will find all the color grading features: correction, curves, color wheels, creative tab, e.t.c. To import a LUT click the “creative tab” then click “Browse” to import a LUT.
Export: To Export go to the “Files” tab on top of the screen then select the “Export” button to open the export tab. Select the desired settings then click “Export”.
Power Director 365 :
It is available for both Windows and Mac.
If you are looking for a budget-friendly video editor that is powerful enough to edit your GoPro videos like a content creator then Power director can be the right choice for you. It has many unique and useful features. It has different plugins and design centers to do specific post-production tasks like Ad designer, Multicam editor, AI style plugins, e.t.c.
It also has a separate action cam center to fix or enhance action cam videos. IT also has chapter and subtitle rooms to add subtitles and chapters for your Youtube videos or films. It also has a vast stock and preset library to speed up your project.
Pricing: It has a subscription plan which is available at $69/year. It is now available at 30% off till 22nd May,2022.
~ Features:
- It supports 4K videos and a wide range of import formats.
- Have many built-in plugins and design centers.
- Supports Multi-cam editing.
- Have an action cam center to deal with action cam footage.
- Have separate aspect ratio mode for 360 videos.
- Also, have a chapter and subtitle room. many recording aspects of the video.
- Have a content-aware editing feature that detects the recording aspects.
- Can import presets and color LUTs.
- Have a vast stock library.
~ Cons:
- Have some playback issues with 4K videos. (create shadow files to overcome this issue to an extent).
- Its UI is a little bit complicated for beginners.
- Not ideal for fast pace editing.
~ Steps:
Import: Open Power director and a pop-up will appear, select desired aspect ratio then click “Full mode” to open the software. Or select 360 aspect ratio if you want to edit 360 videos.

Click the “Import Media” icon below the Files tab in the top-left corner of the window to import files or press “CTRL + Q” to import files.
Edit: Drag and drop files to add them to any desired layer in the timeline. Click the icon on the top left corner of the timeline to add layers. When you select a clip in the timeline, some tools appear on the top timeline. Select any specific tool to edit your selected clip. Or click the “Plugins” button on the top-left of the window to open a specific designer tab.
Double-click on the clip to open ‘PIP designer”. Here you will find all the editing tools to edit or animate your clip.

After selecting a clip, in the “Plugins” menu click the “Action Camera Center” button to open an edit tab, Here you can fix your GoPro videos.

Effects: On the top-left corner of the window in a vertical bar you will find all the effects material lile Project library, titles, effects, transitions, overlays, e.t.c. Simply just drag and drop them on the timeline to use them. Here you can also do audio mixing and add subtitles and chapters.
Double click a clip or an overlay element to open the designer window. Here you can customize the clips and overlays to enhance your project.
Export: Click the blue “Produce” button on top of the screen to export your edited file. Select the desired mode and file format and add an export destination, then click “Start” to start exporting.
Which One Should I Choose Free or Paid GoPro Video Editor?
You can choose free or paid softwares depending on your requirements and budget. If a free software meets your requirements then stay on it otherwise move towards a paid alternative. If you have a GoPro and you make videos just for fun then use a free and simple video editor. Even if you are an experienced video editor, I would recommend you to go for free video editors which I have mentioned above as they are quite powerful and professional software but if you are harvesting a good amount of money from this field then you can upgrade to pro versions of these free softwares or get a paid software from start. As almost all of these softwares are professional and can get your job done, so it’s better to choose one, which is comfortable for you to work on.
FAQs about GoPro Video Editing:
- Q) Does GoPro has its own video editor?
Yes, GoPro has its own video editor “Quik”. It is available on mobile phones and desktops both. It is simple and easy to use. It provides basic features to edit your video. But the main disadvantage of this desktop software is that it supports only GoPro videos, you can’t import files from other devices. Although this isn’t the issue with Quik mobile app, here you can import videos from other devices also.
- Q) Can I make videos for social media with a GoPro?
It was basically made for recording sports and action videos. But as the market is revolutionized and new models are released it has covered a wide range of the video industry like vlogging, travel and cooking videos e.t.c. As new models of GoPros are waterproof, you can get some amazing underwater shots for your Instagram.
- Q) What is GoPro media format?
GoPro export files in popular file format MP4. MP4 is the most common file format and is supported by almost all the video editors. While it is efficient and takes less storage but isn’t supported in many devices.
- Q) How do I transfer files from my GoPro to Mac?
You can transfer your GoPro files through 3 methods:
- Eject the SD card from your GoPro and connect it to your Mac using a SD card adapter to transfer files.
- Connect your GoPro to Mac through USB connector and use “iphoto” or any other photo importer to import files.
For macOS 10.14 or later
~ Features:
- It supports 4K files and a wide range of file formats.
- It has a simple UI that is suitable for beginners.
- It Supports 360 video files (in equirectangular format).
- Supports industry-standard plugins like Boris fx.
- Have features like standard motion tracking, masking, chroma key, e.t.c.
- The paid version has more features like Speed ramping, Auto-sync, keyframing, and animation.
- Have vast stock library.
~ Cons:
- The free version leaves a watermark on export.
- Have playback issues with 4k videos.
- Lacks some standard editing features.
~ Steps:
Import: Open “Filmora” then select the desired aspect ratio and click “New Project’ to start editing. Click on the “Import panel” to import media files.
Edit: Drag and drop the clips to add them to the timeline. Drop the clips above or below to add them in layers. Click the top-left icon of the timeline to add layers. Select a clip and you will see a bunch of tools appear on the top bar of the timeline, use them to perform basic editing tasks like split, crop, speed ramping, keyframing, e.t.c.
Double-click on a clip to open its properties. . Click the blue “Ok” button to move back to the previous window.
Select the “Video” icon to transform the clip or to do motion tracking, stabilization, chroma-key, Masking, e.t.c.
Select the “Audio” icon to apply effects and enhance your audio.
Select the “Color” icon to do color correction and grading.
Select the “3D LUT” option to import a new customized lut.
Select the “Animation” icon to add preset animations or make custom animations by using keyframes.
Select the “Speed” icon to adjust the speed of the clip or to do speed ramping.
Click the blue “OK” button below to go back to the previous window.
Effects: On the horizontal bar at the top-left corner of the screen, all the effects, transitions, title present, and stock library are located. Drag and drop to apply them.
Export: Click the blue “Export” button to open export window, choose the desired settings than click “Export”. and don’t forget to save the project if you want to edit it again.
Free GoPro Video Editors for Mac:
If you are tight on budget but still want a professional video editor to edit your GoPro videos then here I have mentioned some free but powerful video editors. Whether you are a beginner or a professional content creator, these free softwares can get your job done.
Blackmagic - Davinchi Resolve:
It is available for both Windows and Mac.
Whether you are a freelance video editor or an industry-level filmmaker, if you want to step up your game and stand out from your competition then you need a powerful video editor to help you out and Davinchi Resolve can be the right choice for you. From sports vlogging using action cams to Hollywood filmmaking using Red cinema cameras, Davinchi Resolve can handle and edit all this footage easily and smoothly. It is even used in the making of several Hollywood projects including Marvels’s feature films.
It is one of the best color grading software available in the market. It has advanced color grading tools that can help color grade your GoPro raw videos easily as raw videos look dull but provide greater flexibility. It is a timeline-based editor but its Fusion and Color grading panel provides a Node-based editing system which is hard to use but provides great flexibility once mastered.
Resolve has 6 different pages to deal with different editing parts:
“Edit” and “Cut” pages to deal with simple editing tasks. Its “Fusion” page allows users to do VFX and 3D compositing. The “Color Grading” page has all the professional grading tools. While the “Fairlight” page is designed to edit and enhance audio. And the “Deliver” page to export your files.
All these features are available for free without even giving a watermark. Although it has a studio version that provides some additional features to get more out of this amazing software.
- Davinchi Resolve Studio:
The free version has almost everything a professional video editor needs. but you can purchase the Studio version to get some really juicy features to enhance your video editing experience. It includes the Davinci neural engine, stereoscopic 3D tools, Dolby atmos audio mastering,e.t.c.
Pricing: Studio version is available at $ 295 for a lifetime license and with free updates.
~ Features:
- It supports a 4K resolution at 60fps. (while the Studio version supports up to 32K resolution at 120 fps.)
- It is a multi-feature software that provides editing, color grading, VFX, 3D compositing, and audio editing all in one place.
- It has the most advanced and powerful Node-based color grading system, which is also used by Hollywood film studios.
- Supports Raw and 360 videos from GoPro or other action cameras.
- Supports multi-cam editing up to 16 camera angles.
- Can make Compound clips and add adjustment layers.
- Fairlight panel has professional audio production tools like waveform editing, audio ducking, and Channel mapping. (Dolby Vision mastering and 3D spatial Panning [audio editing in 3D space] are available in the Studio version.)
- Supports third-party plugins.
- Has a 3D workspace and provides a virtual set extension for 3D modeling and compositing.
~ Cons:
- Its node-based editing style is quite difficult for beginners.
- Requires a high-end workstation to run smoothly otherwise will often crash during editing.
- Its node-based editing system is hard to learn.
~ Steps:
Import: Open “Davinci Resolve’. Select a previously saved project or press “New project” to start a new one. Click “File” >> “Import” >> “Media” to import files or press “CTRL + I”.
Edit: Drag and drop files to add them to the timeline Use the tools present above the timeline to trim, cut or move your clips. Click the “Inspector” icon on the top-right corner of the window to open the Inspector tab. Here you will find the properties of all the clips, audio, transitions, effects, e.t.c. There are different editing tabs at the bottom of the window.
In the “Fusion” window, click “Nodes” to open the Node screen. Import a clip or use it from the editor timeline. Usually, a clip will have two nodes connected through a line. Above the nodes panel, different types of nodes are available. Drag any node in the panel and connect it through lines. or add a “merge” node to connect nodes.
Its color grading panel also has Node based editing system.
Effects: Click “Effects Library” then select any effect and drop it in the timeline to apply it. You can change its properties in the “Inspector” panel.
Click the diamond icon on the right side of the property to start keyframing then change the value of that property to add keyframes at desired time period.
Export: Open the “Deliver” window, choose the desired settings then click “Add to Render Queue” to start exporting.
FXhome - Hitfilm Express:
It is available on Windows, Mac and Linux also.
If you are looking for a free but powerful video editor to edit your GoPro clips then Hitfilm Express can be the right choice for you. It is a free timeline-based editing software with professional-grade VFX tools. It is a timeline-based editor where you can add dozens of audio, videos, and text layers.
It has a composite shot sequence where you can do complex editing like editing 3D videos and elements, lights e.t.c. It has physic-base behaviors and effects also to enhance 3D compositing. For professional-level editing almost most of the effects and properties have keyframing options. It has different workspace modes to suit your editing needs.
It can also edit 360 videos recorded from your GoPro max. It has a “GoPro Lens Reframe” effect to adjust your 360 clips, but some 360 toolkits can only be available when you purchase Hitfilm pro or buy a 360 toolkit add-on. Similarly, you can purchase more add-ons according to your editing needs or you can purchase Hitfilm Pro to gain access to all add-ons and features. But can use these pro features for free but without exporting as exporting with a paid effect can give a watermark.
Hitfilm Pro:
Although Hitfilm express doesn’t give a watermark on export, but to use more features like 3D composition, LUTs, e.t.c you need to purchase add-ons, there are over 30+ add-ons available to purchase which you can purchase depending on your needs, but if you want to get all the features than its better to get your hands on Hitfilm Pro.
Pricing: Available for purchase at £ 309 or $ 388 for a lifetime license. With 12 months of free updates. It has 3 seat license which means It can run on 3 PCs simultaneously.
~ Features:
- It is a free editing software with no watermark.
- It can edit 3D videos and it can also import and edit 3D models and tracking data.
- It can edit 360 videos also.
- You can add effects and color grades as layers in the timeline also.
- Can add adjustment layers and create nested clips within nested clips to make complex editing easier.
- It has a motion track and locked-on stabilization features.
- Can do smooth keyframing and animation with the help of value graphs.
- It supports multi-cam editing also.
- Keyboard shortcuts make workflow quite easy and quick.
~ Cons:
- It has some playback issues while using 4K videos.
- It crashes sometimes, so it’s better to save the project frequently during editing.
- Hitfilm express doesn’t have a dark mode.
- Some common features are only available on the Pro version or add-ons.
~ Steps:
Import: Open “Hitfilm”, Select “New Project” to open a blank project then click “open” to open an existing file or click “new” to create a new project. Then set project settings on pop-up then and click “ok”.
Then click the “Media” tab on the top-left corner of the screen. Then select the “Import” button to import videos, images, audio, or 3d models. You can also import previously made composite shots.
Edit: Drag and drop media files from the media tab to the timeline. or click the “New” tab to create a “Composite shot” or a solid plane layer. Right-click on the left side of the timeline to insert or delete layers. On the left side of the timeline, you will find some basic tools located on the vertical bar to do simple tasks.
In the “Viewer” tab, on the left side of the playback screen, you can find tools for masking and adding text.
In the “Controls” tab, you can adjust the properties of clips and other features related to the clip like masking, track, blend, transform, e.t.c.
Create a “Composite shot” to do complex editing like 3D compositing. Or select multiple layers then right-click and select “make Composite shot” to combine them for easy editing. Double-click the composite shot to open its contents.
Effects: From the “Effects” tab drag and drop effects on the clip to add them. Some effects can be added as layers which can affect all the layers beneath it. Properties of these effects can be adjusted in the “Control” tab.
To do keyframing, Click the circle icon on the left side of the property to start keyframing then change the values of that property to add keyframes at desired time period.
Export: Click the “Export” icon then “Export now” located at the top right side of the timeline to open the export window. The export will start automatically.
Shotcut:
It is available on Windows, Mac and Linux.
If you are making videos from your GoPro or mobile phone just for fun that doesn’t require much editing then you can look for a free and simple video editor and “Shotcut” can be the right choice for this purpose.
It is a free and open-source video editor with many cool features to get your hands on. It doesn’t have any pro version. It is simple and easy to use but takes some time to understand. It supports multi-track timeline editing. It has a basic timeline design but you can customize your timeline to meet your editing needs. It has some good color grading options, you can also import your color luts. It has many cool features and effects. It supports 360 video editing and also has a few 360 video filters. It has audio effects also.
~ Features:
- All its features are for free and it doesn’t leave any watermark.
- It supports 4K resolution and a wide range of file formats.
- It also supports 360 video files.
- Has keyframing and chroma kry features.
- It has advanced color grading features.
- It provides standard animation and keyframing features.
~ Cons:
- It is a basic video editor and lacks some professional editing features.
- Have playback issues with 4K videos.
- It does have proper text editing tools.
- It is difficult to understand as its UI is different from other familiar video editors.
~ Steps:
Import: Open “Shot Cut” then click the “Open Files” button on the top-left corner of the window to import files.
Edit: Drag and drop clips on an empty timeline panel to add tracks and drag the clip from corners to trim them. Right-click on the left side of the timeline to add a video or an audio track. You will find a bunch of tools above the timeline to do some basic tasks.
You can choose from 6 different workspace designs (available in the top-right corner of the window) to suit your editing styles.
On top of the window, you will see a bunch of icons like Timeline, filter, project, and properties. e.t.c. In the properties tab, you can change the aspect ratio and speed of the clip.
Effects: Click the “Filters” icon on top of the window to open the filters menu, Click “+” above it to add filters. Double click a filter to add it to the selected clip, then click the filter to open its properties menu. You can also add text from here.
Click the “Keyframes” icon on top of the window to open the Keyframes window. Select the “clock” icon on the filters to start keyframing then change the values at a specific time to add keyframes. Click the “Timeline” icon to go back to the previous window.
Export: Click the “Export” button on the top of the screen. Select a preset or click the “Advanced” button to change export settings then click “Export File”.
Paid GoPro Video Editor for Mac:
If you are a professional athlete or a vlogger using GoPro for all of your contents and want to invest some money on paid video editors to improve your content. Then here we have mentioned some paid video editors worthy of your investment.
Apple - Final Cut Pro:
It is available for Mac only.
If you are an Apple enthusiastic person and want everything Apple, then why look for any other video editor when you can have a powerful video editor “Final cut pro” made by Apple. It is a paid but professional software that can raise your GoPro videos to the next level. Whether it’s a 360 video or a RAW file recorded from your GoPro or from the RED cinema camera, all can be edited smoothly inside Final Cut Pro. It has dozens of useful features that a professional video editor looks for like 3D tracking, Motion Graphics, Color Grading, Audio Mixing, Multi-cam editing e.t.c.
Pricing: It is a one-time purchase software available at $ 299.9 for a lifetime license and all its future updates can be downloaded free of cost.
~ Features:
- It supports up to 8K resolution.
- Support 360 and RAW video files.
- Edit videos in complete 360 and 3D spaces.
- Supports third-party video and audio plugins.
- Supports Multi-cam editing.
- Have professional color grading tools with HDR support.
- Its UI is easy to use.
~ Cons:
- It is designed for Apple devices only.
- Requires a powerful PC.
- Its UI is a bit different from other common video editors in the market.
- ~ Steps:
Import: Open “Final Cut Pro” then click the “Files” button on the top-left corner of the screen, then select “Project” to create a new project. In the “Files” menu, click “import” then “media” to import your media files. Here most of the work is done with Keyboard commands.
Edit: Drag and Drop clips on the timeline. In the viewer panel, press “I” and “O” to add input and output points then drag the clip to add only a specific part of the clip. Press “Cmd + B” to split the clip at the desired location. Or add the clips above to add the layer.
Click the “Text” icon on the top-left corner of the screen to open the text page. Choose from presets or import your own Text presets and drag them to the timeline. Click the text to open “Text Editor” on the left side of the screen.
Select multiple clips then Right-click and select “New Compound Clip” to combine them. Double-click the compound clip to edit its components.
Effects: Click 2 icons on the top-right side of the timeline to open the effects and transition panel. Drag and drop on the clip to use them. You can change their properties in the “Effects editor” tab located in the same place as “Text Editor”.
In the editor tab, click the diamond icon beside any property to start keyframing, then change its property to add keyframes at the desired time.
Press “Cmd + 6” to open the Color Grading tab, here you can color grade your clips.
Export: To export the edited video. Click “File” >> “Share” >> “Master file” to open export window. Choose the desired settings then click “Next” then “Save” to export the video.
Adobe - Premiere Pro:
It is available for both Windows and Mac.
Whether you are a content creator or not, if you use a DSLR or an action camera for the first time, then maybe the output wouldn’t meet your expectations. In order to make it good, you need a video editor. And if you will ask your gathering about a good video editor, most of them will recommend you Adobe Premiere Pro, because it is such a versatile and well-known software available in the market. It is a subscription-based video editor.
It is an industry-level software with many professional and advanced features. From beginner video editing to film compositing, all can be done in this software. Whether you have a 360 video or a 4K video in Raw format recorded from your GoPro, just import it into premiere pro and start editing. It has a downloadable “GoPro FX Reframe” plugin to edit your 360 videos. It has different panels designed to deal with specific parts of post-production such as the Effects panel, Graphics panel, Sound panel, Colour Grading panel, e.t.c.
~ Features:
- It supports up to 8K resolution.
- Have different panels to enhance different segments of post-production.
- Have an essential Effects panel to create motion effects and animations using keyframes.
- Supports hundreds of third-party extensions.
- Have useful features like warp stabilizer and denoiser.
- You can import or create your color LUTs.
- Have a creative cloud with 100 Gb of storage.
- The bundle also includes a mobile video editor and a stock library.
~ Cons:
- Real-time rendering. It will take some time to render before exporting if you work on a mid-range PC.
- Freezes or crashes sometimes.
- Cache data fill-up quickly and eats a lot of storage. (It’s better to clear it after every project)
Pricing: It is cloud-based software, therefore it can’t be purchased one time. It has a monthly subscription starting at $ 20.99/month. It includes “premiere rush” mobile video editor and 100 GB of cloud storage within the plan. It also has a “Creative cloud All apps” plan that includes all 30+ Softwares + 100Gb cloud storage along with premiere pro for $ 54.99 only. All plans also include Behance (adobe creative community), Adobe Fonts, and Adobe stock assets for free. Adobe also provides educational access at a much discounted price.
~ Steps:
Import: Open “Premiere Pro”. Click “New Project” to start with then Click the “Files” button on the top-left corner of the window then select the “Import files” button to import files. Or press “CTRL + I” to import files or drag your files from their location to premiere pro.
Edit: Drag and Drop the files to add them to the timeline. Drop a file above a clip to add as a layer. or drop over a clip to overwrite it. On the right side of the timeline, you can find a bunch of tools to do basic edits like trimming, splitting, speed ramping, masking, or adding text.
In the “Effects Control” tab you can transform the selected clip or change its properties.
Select multiple clips then right-click and select “make Nested clip” to combine them into a single clip for easy editing.
Slide between 8 different workspace styles designed for specific post-production tasks by clicking the buttons available on the top of the window.
Effects: Go to the “Effects” panel on the bottom-left window to apply an effect or transitions. Here you can find all audio, video, 2D, and 3D effects. Drag and Drop on a clip to apply it. Change the properties of these effects in the “Effects Control” panel.
To color grade, your clips move to the “Color” workspace. Here you will find all the color grading features: correction, curves, color wheels, creative tab, e.t.c. To import a LUT click the “creative tab” then click “Browse” to import a LUT.
Export: To Export go to the “Files” tab on top of the screen then select the “Export” button to open the export tab. Select the desired settings then click “Export”.
Power Director 365 :
It is available for both Windows and Mac.
If you are looking for a budget-friendly video editor that is powerful enough to edit your GoPro videos like a content creator then Power director can be the right choice for you. It has many unique and useful features. It has different plugins and design centers to do specific post-production tasks like Ad designer, Multicam editor, AI style plugins, e.t.c.
It also has a separate action cam center to fix or enhance action cam videos. IT also has chapter and subtitle rooms to add subtitles and chapters for your Youtube videos or films. It also has a vast stock and preset library to speed up your project.
Pricing: It has a subscription plan which is available at $69/year. It is now available at 30% off till 22nd May,2022.
~ Features:
- It supports 4K videos and a wide range of import formats.
- Have many built-in plugins and design centers.
- Supports Multi-cam editing.
- Have an action cam center to deal with action cam footage.
- Have separate aspect ratio mode for 360 videos.
- Also, have a chapter and subtitle room. many recording aspects of the video.
- Have a content-aware editing feature that detects the recording aspects.
- Can import presets and color LUTs.
- Have a vast stock library.
~ Cons:
- Have some playback issues with 4K videos. (create shadow files to overcome this issue to an extent).
- Its UI is a little bit complicated for beginners.
- Not ideal for fast pace editing.
~ Steps:
Import: Open Power director and a pop-up will appear, select desired aspect ratio then click “Full mode” to open the software. Or select 360 aspect ratio if you want to edit 360 videos.
Click the “Import Media” icon below the Files tab in the top-left corner of the window to import files or press “CTRL + Q” to import files.
Edit: Drag and drop files to add them to any desired layer in the timeline. Click the icon on the top left corner of the timeline to add layers. When you select a clip in the timeline, some tools appear on the top timeline. Select any specific tool to edit your selected clip. Or click the “Plugins” button on the top-left of the window to open a specific designer tab.
Double-click on the clip to open ‘PIP designer”. Here you will find all the editing tools to edit or animate your clip.
After selecting a clip, in the “Plugins” menu click the “Action Camera Center” button to open an edit tab, Here you can fix your GoPro videos.
Effects: On the top-left corner of the window in a vertical bar you will find all the effects material lile Project library, titles, effects, transitions, overlays, e.t.c. Simply just drag and drop them on the timeline to use them. Here you can also do audio mixing and add subtitles and chapters.
Double click a clip or an overlay element to open the designer window. Here you can customize the clips and overlays to enhance your project.
Export: Click the blue “Produce” button on top of the screen to export your edited file. Select the desired mode and file format and add an export destination, then click “Start” to start exporting.
Which One Should I Choose Free or Paid GoPro Video Editor?
You can choose free or paid softwares depending on your requirements and budget. If a free software meets your requirements then stay on it otherwise move towards a paid alternative. If you have a GoPro and you make videos just for fun then use a free and simple video editor. Even if you are an experienced video editor, I would recommend you to go for free video editors which I have mentioned above as they are quite powerful and professional software but if you are harvesting a good amount of money from this field then you can upgrade to pro versions of these free softwares or get a paid software from start. As almost all of these softwares are professional and can get your job done, so it’s better to choose one, which is comfortable for you to work on.
FAQs about GoPro Video Editing:
- Q) Does GoPro has its own video editor?
Yes, GoPro has its own video editor “Quik”. It is available on mobile phones and desktops both. It is simple and easy to use. It provides basic features to edit your video. But the main disadvantage of this desktop software is that it supports only GoPro videos, you can’t import files from other devices. Although this isn’t the issue with Quik mobile app, here you can import videos from other devices also.
- Q) Can I make videos for social media with a GoPro?
It was basically made for recording sports and action videos. But as the market is revolutionized and new models are released it has covered a wide range of the video industry like vlogging, travel and cooking videos e.t.c. As new models of GoPros are waterproof, you can get some amazing underwater shots for your Instagram.
- Q) What is GoPro media format?
GoPro export files in popular file format MP4. MP4 is the most common file format and is supported by almost all the video editors. While it is efficient and takes less storage but isn’t supported in many devices.
- Q) How do I transfer files from my GoPro to Mac?
You can transfer your GoPro files through 3 methods:
- Eject the SD card from your GoPro and connect it to your Mac using a SD card adapter to transfer files.
- Connect your GoPro to Mac through USB connector and use “iphoto” or any other photo importer to import files.
Also read:
- New FLV Editors for Windows 11/10/8.1/8/7 Easily Edit FLV Videos on PC
- New Do You Wish to Make Your Discord PFP an Attention-Seeker? If Yes, Try the Animated Discord PFP. Lets Go over Essential Facts on the Topic, Including How to Get an Animated Discord PFP for 2024
- Updated How to Get Motion Blur in Roblox?
- Updated In 2024, Learn How to Merge Audio and Video Like a Pro with This Step-by-Step Guide to Using FFmpeg. Create Seamless Videos and Improve Your Video Production Skills
- Updated Best MOV to GIF Converters for 2024
- New Do You Want to Add a Motion Blur Effect in Valorant? Read This Guide to Find Out How to Create a Motion Blur Effect in Valorant without Any Hassle for 2024
- How To Change Speed of Video in Final Cut Pro for 2024
- New 2024 Approved A Guide to Create Your Own LOL Montage Video
- Fast and Easy Method to Match Color in Photoshop for 2024
- New How To Make A Political Video
- New Are You Eager to Discover the Top-Rated and Reliable LUTs that Can Be Used in Shotcut? This Article Will Help You a Lot with This Matter for 2024
- Updated In 2024, How to Change Frame Rate in Premiere Pro
- 2024 Approved We Can Say that the Horror Movies of the 90S Laid the Foundation for Current Horror Movies. So, without Wasting Time, Lets Create a 1990S Horror Movie Similar to The Blair Witch Project
- Updated Do You Know You Can Trim and Cut Your Video Into the Desired Portions Using a Reliable Video Splitter? Get an Easy Video Splitter Now to Simplify Your Work. Here Are 33 Carefully Chosen Apps to Help You in This
- New Full Guide to Funcall Voice Changer and Its Alternatives for 2024
- Top 5 Free Online Video Filter Editors
- 2024 Approved How to Create Video Contents That Convert Sales
- Updated In 2024, If You Want to Add an Effect Like a VHS Overlay Free Effect to Enhance Your Videos, You Can Do It on After Effects. Read More to Learn How
- 2024 Approved How I Got Free After Effects Templates Slideshow with Simple Trick
- 2024 Approved 10 Creative AR Teaching Examples to Tell You What Is AR in Teaching
- New Looking Forward to Making up Your Career in Video Editing? Land in Here to Learn About the Credibility of some Popular Video Editing Courses
- Updated Do You Know Anything About the Video Format Supported by WhatsApp? If Not, Then This Is the Right Time to Learn About WhatsApp-Supported Video Formats
- New Create an Awesome Logo Reveal with Logo Intro Templates for 2024
- Updated 5 Tried-And-True Ways to GIF Making for 2024
- Featuring The Use of Camera Shake in Creating the Best Videos for 2024
- New Looking for a Video Editor Where You Can Edit Your Tutorial and Training Videos? Camtasia Is a Great Choice. But Is It the Best Video Editor Available? Find Out From Our Camtasia Review for 2024
- Updated How to Make Tutorial Video with Filmora for 2024
- In 2024, Using Slow Motion in Adobe After Effects A Step-by-Step Procession
- Updated Step by Step to Resize Video in Davinci Resolve
- Updated 2024 Approved How to Create Video in Text Intro?
- How To Remove or Bypass Knox Enrollment Service On Nokia C12
- 4 Ways to Unlock Apple iPhone 12 Pro to Use USB Accessories Without Passcode | Dr.fone
- In 2024, Hassle-Free Ways to Remove FRP Lock on Vivo S18ewith/without a PC
- In 2024, Best Ways on How to Unlock/Bypass/Swipe/Remove Vivo S18 Fingerprint Lock
- Top 6 Apps/Services to Trace Any Apple iPhone 14 Pro Location By Mobile Number | Dr.fone
- In 2024, Top 15 Apps To Hack WiFi Password On Itel S23
- The Top 5 Android Apps That Use Fingerprint Sensor to Lock Your Apps On Vivo V27
- Ultimate Guide to Catch the Regional-Located Pokemon For Apple iPhone XR | Dr.fone
- In 2024, How Can You Transfer Files From Realme C51 To iPhone 15/14/13? | Dr.fone
- In 2024, 15 Best Strongest Pokémon To Use in Pokémon GO PvP Leagues For Motorola Moto G84 5G | Dr.fone
- In 2024, Rootjunky APK To Bypass Google FRP Lock For Vivo Y100
- Update 6 Best Voice Changers You Cant Miss
- Poco F5 Pro 5G Music Recovery - Recover Deleted Music from Poco F5 Pro 5G
- In 2024, How To Bypass iCloud Activation Lock on Mac For iPhone 12?
- 5 Ways to Reset Oppo A78 5G Without Volume Buttons | Dr.fone
- In 2024, For People Wanting to Mock GPS on Honor Play 7T Devices | Dr.fone
- In 2024, For People Wanting to Mock GPS on Motorola Moto G84 5G Devices | Dr.fone
- In 2024, Why is iPogo not working On Vivo T2 5G? Fixed | Dr.fone
- In 2024, Easy Guide How To Bypass Infinix Hot 30 5G FRP Android 10/11/12/13
- Fixing Persistent Pandora Crashes on Vivo X Fold 2 | Dr.fone
- Unova Stone Pokémon Go Evolution List and How Catch Them For Honor 90 Lite | Dr.fone
- In 2024, Unlock Your Device iCloud DNS Bypass Explained and Tested, Plus Easy Alternatives From iPhone 15
- Forgot Apple iPhone 11 Pro Max Backup Password? Heres What to Do
- In 2024, Forgot Locked iPhone 13 Password? Learn the Best Methods To Unlock | Dr.fone
- How do i sign a .xls files document electronically
- Guide to Promoting Music Videos on YouTube
- Title: In 2024, How To Slow Down GIF Building an Understanding
- Author: Morgan
- Created at : 2024-05-19 05:12:04
- Updated at : 2024-05-20 05:12:04
- Link: https://ai-video-editing.techidaily.com/in-2024-how-to-slow-down-gif-building-an-understanding/
- License: This work is licensed under CC BY-NC-SA 4.0.
