
:max_bytes(150000):strip_icc():format(webp)/samsungappstore-c0194a478ba54e90a798b3bb5ff4f6d5.jpg)
In 2024, Top Animated Title Makers
Top Animated Title Makers
You know that your video needs a title, but rather than just type in some bland text to introduce the video, you can create an animated title page that is far more attractive. Animated titles make a video more attractive and when done correctly, they can even guarantee that your target audience will stick around long enough to watch the entire video. They can also be very useful for introducing the content of the video.
But to make an effective animated title, you need a tool that is designed to do just that. In this article, we look at some of the top animated title makers that you can use to create the perfect animated title for your video.
Part 1. Animated Title Maker Online
If you don’t want to install software on your computer to create the animated title, the following are the top online tools to choose from;
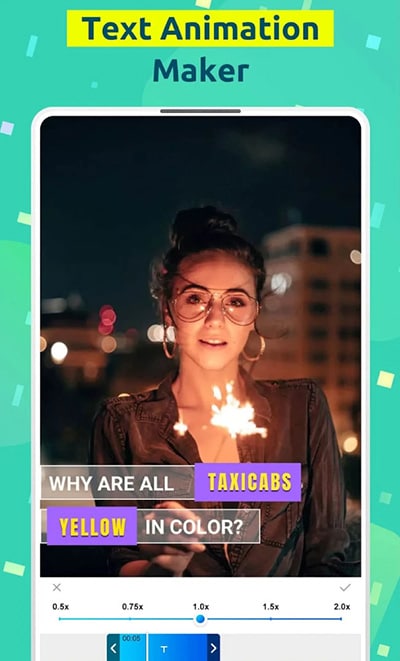
Animaker
Link: https://www.animaker.com/text-animation-maker
Rating: 4.5/5
Animaker is an online tool that is specifically designed to help you create text animations that you can then add to your video project. Available online on all browsers, Animaker has a simple user interface that makes it easy to create text animations in a matter of minutes. It is so easy to use that even the average beginner can create stunning text animations.
If you don’t want to create the animations from scratch, Animaker has numerous pre-designed templates for you to choose from that you can then just edit to fit your design. It also has a lot of customizable infographics that you can repurpose.

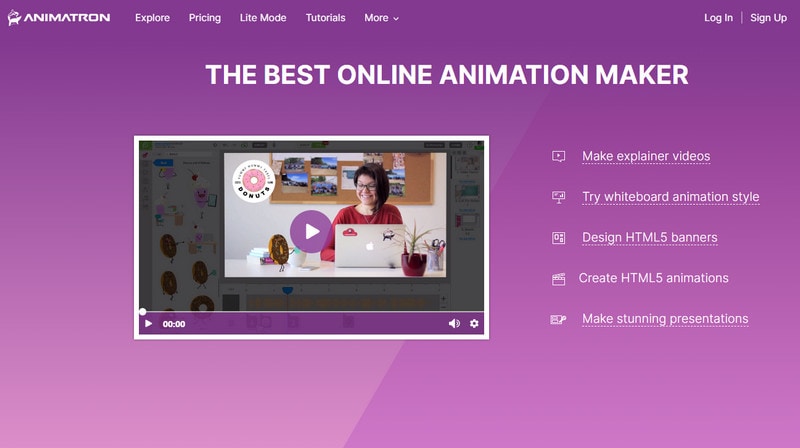
Animatron Studio
Link: https://www.animatron.com/studio
Rating: 4.5/5
The Animatron Studio is a one-stop solution for generating all types of animated texts. You can use it to create the perfect animated title for your video, but its numerous features also mean that it is one of the best ways to create attention-grabbing animated banner ads that can be posted on various ad sites,
It has a wealth of resources that you can use to create the title including more than 500,000 royalty-free images, videos, and audio to include in your project. If you don’t want to build the animated content from the ground up, you can select from the 200 pre-animated sets that Animatron Studio provides.
Kapwing Title Maker
Link: https://www.kapwing.com/animated-text-video-maker
Rating: 4.5/5
If your goal is to do more than just create an animated title for your video, Kapwing is a good solution. It is a complete online video editor that can also be used to create animated titles. As such, you can expect Kapwing to have more advanced features that allow you to customize the animated title in various ways.
For instance, it has a huge selection of animations that you can apply to the text. But you also get the option to upload your own animations, colors, and fonts. But please note that the free version of Kapwing will add a watermark to the video.

Biteable Animated Text Maker
Link: https://biteable.com/animated/text/
Rating: 4.5/5
Biteable is one of the most popular solutions that you can use to create all kinds of animated texts. It is simple enough to use that it is useful to both professionals and amateur video creators. It has numerous useful features including custom scenes, foundations, backgrounds, and characters all of which can work together to create the perfect animated title.
One of the main benefits of choosing Biteable is that you can share the videos you edit directly on social media without having to download the video.

Flexclip Video Maker
Link: https://www.flexclip.com/editor/
Rating: 4.5/5
Flexclip is another very easy-to-use and easily accessible solution to create animated texts for videos. Rather than create the texts from scratch, Flexclip allows you to create stunning animated texts just by selecting several parameters.
There are also a lot of pre-made designer text templates that are fully customizable. All you have to do is select one of the templates, and change the text, font, and any images to make it unique to you and your video.

Part 2. Animated Title Maker for Computer
Online tools can be useful, especially since they are more easily accessible. But if you want additional features and more ways to customize your animated title, the following desktop solutions may be more applicable to you;
Filmora
Rating: 4.5/5
Wondershare Filmora is a complete suite of video editing tools that can also come in handy when creating animated titles for videos. It is a very simple video editor with a simple user interface, making it an ideal solution even for beginner users. Adding a title to your video is easy and you get to choose from more than 200 different animations that you can apply to bring the text to life.
Filmora is also very useful because it comes with advanced editing features for the professional editor. You can use it to edit all aspects of the video including the clips and even any audio that may be on the project.

Adobe Animate
Rating: 4.5/5
Adobe Animate is a great option to create various animations for your video project, including animated texts. Used by animators to create 2D animated content, Adobe Animate has a lot of features designed to facilitate this kind of animation and is, therefore, one of the go-to solutions for designers looking to create illustrations like logos and infographics.
But like other Adobe programs, Adobe Animate is not very easy to use and the beginner may find that it takes quite a long time to figure out how it works. But once you figure it out, the 800+ web fonts can make it very easy for you to customize your animated title in various ways.

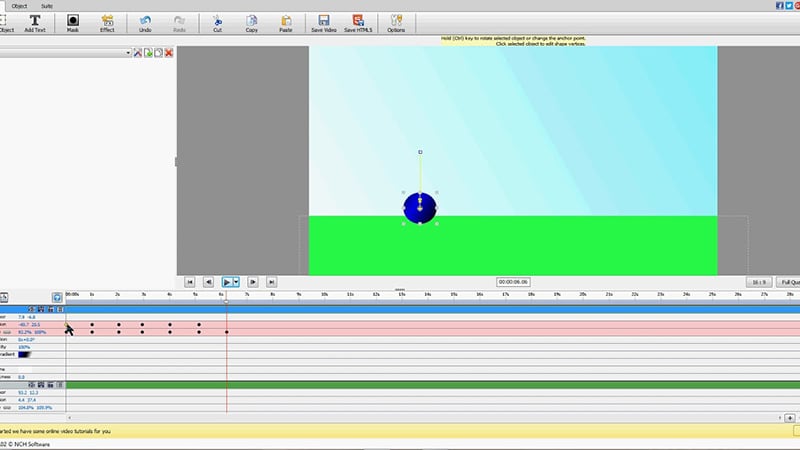
Express Animate
Rating: 4.5/5
Express Animate is a completely free program that you can download on your computer. It is a complete video editor which means that you can use it to animate text and characters, but it is also a great way to edit other aspects of the video including the audio tracks and adding digital effects.
With a simple user interface, Express Animate allows users to create 2D animations that can be used to create unique videos. It is also a good way to create GIFs and memes.
Movavi Video Editor
Rating: 4.5/5
Movavi Video Editor is another complete suite of editing tools that can also come in handy when you want to create an animated title for your video. Designed for both professionals and beginners, this video has all the advanced features you will need to edit all aspects of your video, including a built-in audio editor.
When it comes to animation, Movavi has a lot of effects and transitions as well as pre-made title templates to choose from. Once you have selected the title, you can easily customize the font and color to fit into your project.

Windows Movie Maker
Rating: 4.5/5
For PC users Windows Movie Maker is a simple to use and free way to edit videos. Included with the Windows OS, you likely don’t need to install any software to use and even though it is a free solution, Windows Movie Maker does have the necessary features to create and add animated titles to any video.
It comes with numerous effects, transitions, and templates to choose from when animating text. And it can also be used to edit videos in other ways including trimming and merging clips.

Part 3. Animated Title Maker Apps
If you are editing your videos on your mobile device, the following are the top animated title-making apps to choose from;
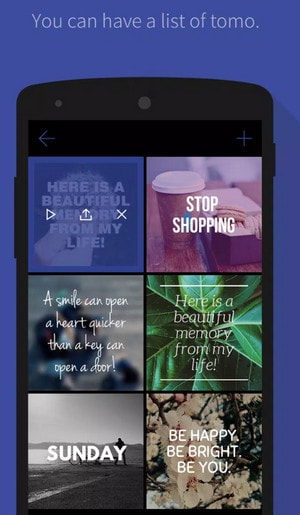
Tomo
Rating: 4.5/5
Link: https://m.apkpure.com/tomo-animate-text-in-video/com.entzeners.app.tomo
Tomo is one of the best apps that you can use to animate text in a video. It has robust features that allow you to easily add text to the video and then animate the text using various transitions and effects. Once the edits are complete, Tomo allows you to share the completed video directly on social media apps like Instagram and Twitter.
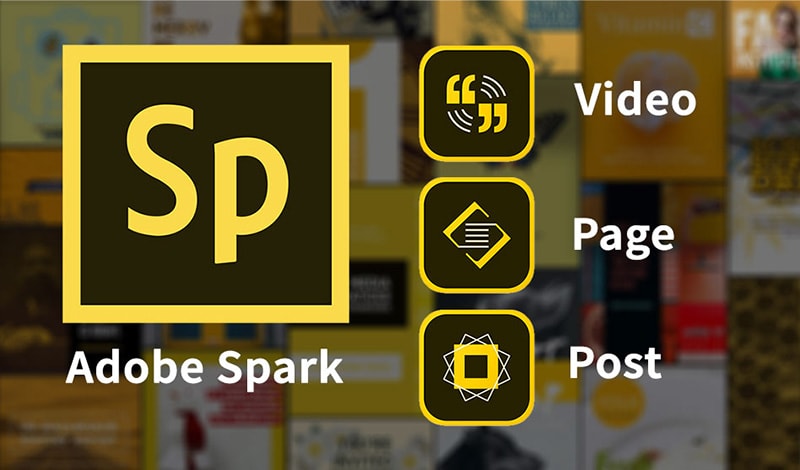
Adobe Spark
Rating: 4.5/5
Link:https://apps.apple.com/us/app/adobe-spark-post-design-maker/id1051937863
Available for both Android and iOS devices, Adobe Spark is a video editing tool that has numerous tools to add and edit texts on videos. You can use the professionally designed templates that you have access to when using Adobe Spark to create stunning animation titles. And since it easily integrates with other apps on the device, sharing the videos is very easy.
Quik
Rating: 4.5/5
Link: https://play.google.com/store/apps/details?id=com.gopro.smarty&hl=en&gl=US
Quik is an app that is dedicated to text animations and therefore one of the best solutions when you want to add and edit texts on videos. It is available for both iOS and Android and although the free version of the app is slightly limited, its basic editing features are still better than what you find on other more expensive solutions.
Hyper-type Animated Text Videos
Rating: 4.5/5
Link: https://itunes.apple.com/us/app/hype-type-animated-text-videos
This app gives you two options when it comes to animating the text on your video; auto-motion and typography. It focuses on just adding and editing text on a video and as such may not have any of the other video editing features you will find on some of the other apps. But if your goal is to create an interactive animated video title, Hyper-type Animated Text Videos is a great solution.
Vimeo
Rating: 4.5/5
Link: https://play.google.com/store/apps/details?id=com.vimeo.android.videoapp&hl=en&gl=US
Also available for both iOS and Android devices, Vimeo can also be a handy solution for the creation and editing of animated titles for videos. It has a lot of features to edit not just the text in videos, but also all other elements including audio. You even get a wide selection of royalty-free music that you can add to the video and motion stickers to make your title stand out even more. But the free version of Vimeo will add a watermark to the video.

Free Download For Win 7 or later(64-bit)
Free Download For macOS 10.14 or later
Best Ways to Convert Video Frame Rate to 60FPS [Software and Online Choices]
One of the primary things that differentiate a good video from a low-quality one is its frame rate or burst rate. This refers to the frequency of a series of images or frames consecutively appearing during display. A low frame rate per second or FPS causes issues in most display screens, so you will need a 60 FPS video converter to update it.
You need to convert or make video 60FPS online through tools and software to improve the sharpness of frame speed and make it suitable for streaming sites like YouTube that play 60FPS only or create UHD/4K videos. Plus, most high-definition screens for gaming, computers, tablets, and smartphones require high FPS.
This article will teach you the best solutions to make the conversion possible. Choose your option after a full evaluation.

Part I. What does 60 FPS mean?
Before discussing the best tools available for frame rate conversion, you should know what frame rate is. Also known as update rate, this signifies the frequency of the display of consecutive series of frames or images. The speed of how they appear determines the fluid play of the video with no interruption or lag.
In the context of video and film cameras, motion capture systems, and computer graphics, you should try to convert video to 60FPS. There are multiple types available, like the low 24FPS or 30FPS or the higher 60FPS or 120FPS. 60FPS is the most accepted option for diverse operating systems, screens, and graphics.
Differences between 24FPS, 30FPS, and 60FPS
Here are the differences you will note between the three common frame rates per second in videos. For a simple overview, these differences are expressed in tabular form.
| 24FPS | 30FPS | 60FPS | |
|---|---|---|---|
| Description | This universally acceptable frame rate choice is used for transferring video signals to film. | 30FPS is a slightly higher frame rate choice for animations and show videos that are suitable for television viewing and online platforms. | Videos at 60FPS have better fluency and smoother definition, with sharp videos that work during gaming, high-definition streaming, and UHD/4K video editing. |
| Types of videos | Older videos and films. | Online videos, TV shows, and news. | HD-quality movies, online videos, and games. |
| Users | Movie suppliers | Entertainment and Media professionals. | Movie producers, video editors, gaming software developers, etc. |
Why Should You Convert Videos into 60FPS?
In the context of video FPS, the three variations- 30FPS, 60FPS, and 24FPS are the most common. However, there are specific reasons why 60FPS is the best option you should use, and take the time to convert your files with this frame rate.
- Playing 24FPS or 30FPS videos on LCD screens have more prominent motion blur, the sharpness of transition is low and rough, etc.
- Well-known streaming sites like YouTube set their standard for videos at 60FPS. If you use a file with a higher FPS, it will compress to 60FPS automatically. Anything lower than that is unacceptable since it creates a laggy video transition.
- Creating high-quality movies in UHD or 4K resolution requires a high FPS like 60FPS. Movies shot with 24FPS do not assure the best display in the native frame rate and need pulldown conversion. This causes judder, which affects video quality. Converting the video to 60fps ai online is a better choice.
- Modern devices like computers, smartphones, and tablets have a high refresh rate. So, these, including some gaming monitors and television varieties, accept videos with 60FPS best.
- In animation, most creators run 3-4 images per drawing, which means 6 or 8 drawings per second. For the best transition between shorts and images, converting the animation videos to 60FPS is useful.
If you want to know more about these FPS options and which one to select for long-term usage, read through the comprehensive review .
Part II. How to convert A Video to 60fps?
If you plan to use a 60fps video converter, luckily, multiple capable choices are available in the market. Here, we present the top options you can use with an accurate conversion that occurs quickly and with limited errors.
1. Best Software Converters
The following are the best software-based platforms that you can try out.
One notable ai 60fps converter that users find extremely useful all around for optimized video editing is Wondershare UniConverter. The tool comes with varying AI-powered tools you can try to change.
With this software, you can easily make changes to the file during the conversion, like upgrading the FPS and bitrate of various video codecs, adjusting the contrast, contrast, etc., for output. Plus, it is possible to change the speed of the videos you are editing through the Editing timeline, between 0.25X - 3X speed options.

- User Base: Professional video editors, social media vloggers, businesses, students, beginner-level users, etc.
Watch this video to get a visual representation of how the tool works for FPS conversion and other editing functions.
How to use Wondershare UniConverter for converting FPS?
Step1 Download and launch the Wondershare UniConverter software on your device after completing all installation steps.
Step2 Click or drag and drop the video file of which you will change the frame rate.

Step3 To make changes to the video, click the Edit button and do them- like speed change, cutting sections, etc.
Step4 Then press the Settings button. Choose the Video option and then select the format like MP4.
Step5 Tap the setting icon beside the format choice and set the frame rate option as 60FPS. Then, press the Create button.

Step6 To convert the file further, click the Convert button and choose the destination file format. Press Convert.

Features:
- Convert between different file formats.
- Edit or split the files.
- Change the speed of the video between various speed modes.
- Download files at high resolution as per customization.
Pros
- Easy to use for non-technical users.
- The free software includes most of the conversion functions.
- Zero quality loss or lagging FPS playthrough in the converted file.
Cons
- GPU acceleration and High-Speed Conversion are available for Pro users only.
- You can resize the file for social media platforms like YouTube once using the Free Trial version.
Another FPS video maker and converter tool that you must try is Format Factory. This professional-quality video and audio converter tool are useful for various levels of video editing, including specifications like the frame rate per second.
You can clip and join your video section and do audio mixing steps. Easily adjust your video frame speed to ensure top-grade video playback with limited to no resolution loss. You can easily set the frame rate to 60FPS after downloading YouTube videos and making adjustments.

Pros
- Compress file size with settings changes for frame rate.
- Supports different video formats.
- Compatible with HEIC and WEBP formats for conversion.
Cons
- Only suitable for Windows users.
- Slightly complex to try for beginner-level users.
One of the best 60fps video editor options available in the market is MiniTool Video Converter. This Windows-based native software can make multiple advanced changes to your video file during conversion. Not to mention, it supports quick batch processing, with zero drop in quality after the process.
You can easily change the frame rate speed to 60FPS or other speed options during the exporting process. Adding effects will maintain a strong frame rate frequency that you can also preview.

Pros
- Supports a variety of video formats for conversion.
- Batch conversion is supported here.
- No loss of quality when you change the frame rate or bitrate.
Cons
- The process will lag if there is not at least 1 GB of free storage space in your device.
- Only works on Windows devices.
2. Best Online Converters
If you want to use a 60fps video converter online, there are tools available for that as well. These converters come with limited advanced mechanisms or features. However, in terms of changing the FPS of videos, web-based tools are easier to operate and do straightforward tasks.
Plus, you will not need to register or download third-party software here- the tools are accessible through any browser or device.
1) AI Video Frame Rate Converter
One of the best tools for online video frame rate conversion is the AI Video Frame Rate Converter. With this online tool, you can easily insert your file into the tool you access on any browser of your choice.
Then, choose the conversion FPS like 60FPS for your video and get high-resolution video quality in the final file. The software does not keep the file on the server, which assures good privacy protection for users with their files and data.

Pros
- No need to install the software.
- Easily choose the FPS option to convert the file.
- The quick conversion process.
Cons
- The free version only allows 5 credits for users to try.
- No tools to enhance video quality with the free tool.
2) Video2Edit
Another top 60fps converter online that users should give a chance is Video2Edit. This tool is accessible through any web browser and allows one to change various aspects of the video they are converting, including the frame rate.
You can choose 60FPS as the target frame rate choice for the video that you add to your device’s tool. It also supports 120FPS and other options lower than 60FPS- the final converter file is still a high definition.

Pros
- Choose the frame rate per second for your video.
- Make settings changes for your video audio additionally.
- The tool is easily accessible and free to use.
Cons
- You have to take more steps for customization instead of directly getting the FPS changing option.
- Cannot convert multiple files simultaneously.
3) Aconvert
Users can try out this online video to 60fps converter to change elements of videos quickly during conversion. You can insert your file from a cloud account, device, or URL and choose the video format to convert.
Plus, it is much easier to directly set the frame rate you want to change in the video. This tool supports up to 60FPS for the change, and you can choose a custom FPS if necessary.

Pros
- Can convert video codec settings like bitrate, etc., for different file formats.
- Easily add a file from the device, URL, or cloud.
- Quick processing speed for the conversion.
Cons
- No batch conversion for multiple files.
- Big files can get slow to convert.
Bonus Tip. Use Wondershare Filmora to Create High-Quality Videos with 60FPS Support
If you plan to make further edits to your video clips and directly create a project with 60FPS support, using a capable 60fps maker software is necessary. Wondershare Filmora is suitable software for video editing professionals and regular users to try to make videos easily.
Free Download For Win 7 or later(64-bit)
Free Download For macOS 10.14 or later
You can use the different features available for quick and customized video projects. Here, you can try the Instant Mode feature for instantaneous video edits or directly try out the editor timeline with diverse features like Edit icon or Speed Ramping to make changes. As for adjusting the frame rate, you can make those changes during export.
Watch this video to know how to use Filmora for further video editing.
How to Change Frame Rate to 60FPS in Filmora?
Step1 After you have completed all of the edits, click on the Export button in the editor timeline of Filmora.
Step2 Choose the output format you will download the video file, e.g., MP4, from the Local tab.

Step3 Click on the Settings button. Adjust the specification of the video, like frame rate, and change to 60FPS. Make other changes if needed, and press OK.

Step4 Click on Export to download the file or directly upload it via Vimeo or YouTube through those tabs.
Conclusion
Indeed, adjusting the frame rate of your video will help you create high-quality videos with a fluid and lag-less transition. You should convert your file to 60FPS if it is a lower version at the time to improve sharpness and make it compatible with most screen types, 4K movie playing, and streaming.
Use the available online and native software options to make these changes quickly and efficiently. Additionally, if you want to create a file directly at 60FPS, you can do so using Filmora.
Give these tools a try first to get a better experience with the features and process.
Why Should You Convert Videos into 60FPS?
In the context of video FPS, the three variations- 30FPS, 60FPS, and 24FPS are the most common. However, there are specific reasons why 60FPS is the best option you should use, and take the time to convert your files with this frame rate.
- Playing 24FPS or 30FPS videos on LCD screens have more prominent motion blur, the sharpness of transition is low and rough, etc.
- Well-known streaming sites like YouTube set their standard for videos at 60FPS. If you use a file with a higher FPS, it will compress to 60FPS automatically. Anything lower than that is unacceptable since it creates a laggy video transition.
- Creating high-quality movies in UHD or 4K resolution requires a high FPS like 60FPS. Movies shot with 24FPS do not assure the best display in the native frame rate and need pulldown conversion. This causes judder, which affects video quality. Converting the video to 60fps ai online is a better choice.
- Modern devices like computers, smartphones, and tablets have a high refresh rate. So, these, including some gaming monitors and television varieties, accept videos with 60FPS best.
- In animation, most creators run 3-4 images per drawing, which means 6 or 8 drawings per second. For the best transition between shorts and images, converting the animation videos to 60FPS is useful.
If you want to know more about these FPS options and which one to select for long-term usage, read through the comprehensive review .
Part II. How to convert A Video to 60fps?
If you plan to use a 60fps video converter, luckily, multiple capable choices are available in the market. Here, we present the top options you can use with an accurate conversion that occurs quickly and with limited errors.
1. Best Software Converters
The following are the best software-based platforms that you can try out.
One notable ai 60fps converter that users find extremely useful all around for optimized video editing is Wondershare UniConverter. The tool comes with varying AI-powered tools you can try to change.
With this software, you can easily make changes to the file during the conversion, like upgrading the FPS and bitrate of various video codecs, adjusting the contrast, contrast, etc., for output. Plus, it is possible to change the speed of the videos you are editing through the Editing timeline, between 0.25X - 3X speed options.
- User Base: Professional video editors, social media vloggers, businesses, students, beginner-level users, etc.
Watch this video to get a visual representation of how the tool works for FPS conversion and other editing functions.
How to use Wondershare UniConverter for converting FPS?
Step1 Download and launch the Wondershare UniConverter software on your device after completing all installation steps.
Step2 Click or drag and drop the video file of which you will change the frame rate.
Step3 To make changes to the video, click the Edit button and do them- like speed change, cutting sections, etc.
Step4 Then press the Settings button. Choose the Video option and then select the format like MP4.
Step5 Tap the setting icon beside the format choice and set the frame rate option as 60FPS. Then, press the Create button.
Step6 To convert the file further, click the Convert button and choose the destination file format. Press Convert.
Features:
- Convert between different file formats.
- Edit or split the files.
- Change the speed of the video between various speed modes.
- Download files at high resolution as per customization.
Pros
- Easy to use for non-technical users.
- The free software includes most of the conversion functions.
- Zero quality loss or lagging FPS playthrough in the converted file.
Cons
- GPU acceleration and High-Speed Conversion are available for Pro users only.
- You can resize the file for social media platforms like YouTube once using the Free Trial version.
Another FPS video maker and converter tool that you must try is Format Factory. This professional-quality video and audio converter tool are useful for various levels of video editing, including specifications like the frame rate per second.
You can clip and join your video section and do audio mixing steps. Easily adjust your video frame speed to ensure top-grade video playback with limited to no resolution loss. You can easily set the frame rate to 60FPS after downloading YouTube videos and making adjustments.
Pros
- Compress file size with settings changes for frame rate.
- Supports different video formats.
- Compatible with HEIC and WEBP formats for conversion.
Cons
- Only suitable for Windows users.
- Slightly complex to try for beginner-level users.
One of the best 60fps video editor options available in the market is MiniTool Video Converter. This Windows-based native software can make multiple advanced changes to your video file during conversion. Not to mention, it supports quick batch processing, with zero drop in quality after the process.
You can easily change the frame rate speed to 60FPS or other speed options during the exporting process. Adding effects will maintain a strong frame rate frequency that you can also preview.
Pros
- Supports a variety of video formats for conversion.
- Batch conversion is supported here.
- No loss of quality when you change the frame rate or bitrate.
Cons
- The process will lag if there is not at least 1 GB of free storage space in your device.
- Only works on Windows devices.
2. Best Online Converters
If you want to use a 60fps video converter online, there are tools available for that as well. These converters come with limited advanced mechanisms or features. However, in terms of changing the FPS of videos, web-based tools are easier to operate and do straightforward tasks.
Plus, you will not need to register or download third-party software here- the tools are accessible through any browser or device.
1) AI Video Frame Rate Converter
One of the best tools for online video frame rate conversion is the AI Video Frame Rate Converter. With this online tool, you can easily insert your file into the tool you access on any browser of your choice.
Then, choose the conversion FPS like 60FPS for your video and get high-resolution video quality in the final file. The software does not keep the file on the server, which assures good privacy protection for users with their files and data.
Pros
- No need to install the software.
- Easily choose the FPS option to convert the file.
- The quick conversion process.
Cons
- The free version only allows 5 credits for users to try.
- No tools to enhance video quality with the free tool.
2) Video2Edit
Another top 60fps converter online that users should give a chance is Video2Edit. This tool is accessible through any web browser and allows one to change various aspects of the video they are converting, including the frame rate.
You can choose 60FPS as the target frame rate choice for the video that you add to your device’s tool. It also supports 120FPS and other options lower than 60FPS- the final converter file is still a high definition.
Pros
- Choose the frame rate per second for your video.
- Make settings changes for your video audio additionally.
- The tool is easily accessible and free to use.
Cons
- You have to take more steps for customization instead of directly getting the FPS changing option.
- Cannot convert multiple files simultaneously.
3) Aconvert
Users can try out this online video to 60fps converter to change elements of videos quickly during conversion. You can insert your file from a cloud account, device, or URL and choose the video format to convert.
Plus, it is much easier to directly set the frame rate you want to change in the video. This tool supports up to 60FPS for the change, and you can choose a custom FPS if necessary.
Pros
- Can convert video codec settings like bitrate, etc., for different file formats.
- Easily add a file from the device, URL, or cloud.
- Quick processing speed for the conversion.
Cons
- No batch conversion for multiple files.
- Big files can get slow to convert.
Bonus Tip. Use Wondershare Filmora to Create High-Quality Videos with 60FPS Support
If you plan to make further edits to your video clips and directly create a project with 60FPS support, using a capable 60fps maker software is necessary. Wondershare Filmora is suitable software for video editing professionals and regular users to try to make videos easily.
Free Download For Win 7 or later(64-bit)
Free Download For macOS 10.14 or later
You can use the different features available for quick and customized video projects. Here, you can try the Instant Mode feature for instantaneous video edits or directly try out the editor timeline with diverse features like Edit icon or Speed Ramping to make changes. As for adjusting the frame rate, you can make those changes during export.
Watch this video to know how to use Filmora for further video editing.
How to Change Frame Rate to 60FPS in Filmora?
Step1 After you have completed all of the edits, click on the Export button in the editor timeline of Filmora.
Step2 Choose the output format you will download the video file, e.g., MP4, from the Local tab.
Step3 Click on the Settings button. Adjust the specification of the video, like frame rate, and change to 60FPS. Make other changes if needed, and press OK.
Step4 Click on Export to download the file or directly upload it via Vimeo or YouTube through those tabs.
Conclusion
Indeed, adjusting the frame rate of your video will help you create high-quality videos with a fluid and lag-less transition. You should convert your file to 60FPS if it is a lower version at the time to improve sharpness and make it compatible with most screen types, 4K movie playing, and streaming.
Use the available online and native software options to make these changes quickly and efficiently. Additionally, if you want to create a file directly at 60FPS, you can do so using Filmora.
Give these tools a try first to get a better experience with the features and process.
Top 11 Best Video Editing Apps for iPhone
Videography is an art, whether done professionally or just for fun. It includes many phases from pre-production to post-production and video editing is one of its important aspects. It is a gamechanger, as most of the mistakes done during production can be fixed in editing.
Video editing is done on large scale for film industries which require expensive and powerful computers but we won’t about them now. As video editing doesn’t only depend on powerful softwares and expensive computers, Skills play a vital role in video editing. A skilled artist on a mobile phone can create better content than a beginner with an expensive PC.
Therefore, here we will talk about small-scale editing which can be done on mobile phones and especially iPhones. Considering iPhones as they are one of the most common devices used by vloggers and small filmmakers. As a mobile video editor, you can edit your clips anywhere you want. Therefore editing videos on a go is quite important. So we have selected some top iPhone video editors for you which are as following:
- Filmora Go
- Free iPhone Video Editors
- Adobe Premiere Rush
- CapCut
- iMovie
- GoPro-Quik
- VN Video Editor
- Paid iPhone Video Editors
- Kinemaster
- Power Director
- LumaFusion
- InShot
- VivaCut
Filmora Go:
It is available on IOS and Android both.
Apart from having a professional video editor for PC, Wondershare has also introduced a video editor for mobile phones. Filmora Go is an amazing video editor, with many cool features such as chroma key, mask, keyframing, blending, e.t.c. It is fast and easy to use with built-in effects, transitions, and presets to speed up the editing process. It is a paid video editor but you can try it for free, free trial includes most of the features but it leaves a watermark on export.
~Features:
- Has speed curves for smooth speed ramping.
- Supports multiple images and video layers.
- Have many presets and filters for fast pace editing.
- Have cool features like chroma key, masking, keyframing, e.t.c.
- Supports “Pixabay’s” stock library.
~Cons:
- Its UI doesn’t support editing in landscape orientation.
- It doesn’t support 4k video resolution.


~Steps:
Import: Open Filmora Go, Click “New project” to start a new project, or Choose the previous one from the “Draft” portion. Select videos or images to import to your timeline. Hold and drag the clip to change its arrangement.
Edit: You can add text, effects, stickers, layers, e.t.c. by clicking their icon, present on the bar at the bottom.
Click the “PiP” icon to add image or video layers, you also can add multiple layers.
Select a clip to edit it. Different editing tools appear on the bottom bar. Here you can change its opacity, its speed, or add animations.
Effects: Click the “Effects” icon to open the effects menu. Select an effect to apply to your clip.
Click the white box between two clips to add transitions.
Export: Click the “Export” button to export your file. Select your desired resolution and frame rate to export your clip.


Some Free iPhone Video Editors:
If you do video editing rarely or do just basic video editing then it is useless to purchase paid video editors. Even if you are a content creator but tight on budget or new to this field, you can use free video editing softwares and save your cash for other pieces of equipment.
So, here we have mentioned some free video editors for you. Some of these are quite powerful and can do advanced editing while others are simple but easy to use.
Adobe Premiere Rush:
It is available on IOS and Android both.
Whether you are a beginner or a content creator using mobile phones or PCs for editing, you may have heard of Adobe softwares. It is a computer software company which makes powerful softwares for different purposes. Like premiere pro, they have designed a compact version for phones named “Premiere Rush”. It is a free video editor that has all the tools needed for video editing, from video effects to color grading and audio editing. Its UI is a bit similar to PC video editors. It is a free video editor with no watermarks. Although it takes some time to understand it. But once mastered, you can do editing quickly.
~Features:
- It is a free video editor with no watermark.
- It supports up to 4K resolution at 60fps.
- You can extract audio and can do voiceover directly from the software.
- It has hundreds of filters, overlays, and title designs.
- It has basic color grading tools.
- It also has a motion tracking feature. (in Paid version)
- It supports multiple audio, video, and text layers.


~Cons:
- It only runs on high-end devices. ( It is not supported in most mid-range phones)
- Not suitable for beginners. Its UI is quite hard to understand.
- Doesn’t have common features like the chroma key, masking, e.t.c.

~Price:
Its Premium version is available for 9.99/month. It includes some premium features. Or you can purchase the “All Apps Bundle” at $54.99/month for the annual plan.
CapCut:
It is available on IOS and Android both.
If you are looking for a free but good video editor to help you edit videos on the go, then you should get your hands on CapCut. It is a free mobile video editing software with many interesting features like keyframing, chroma-key, masking e.t.c. It also supports video and image layers. It has one of the best speed ramping features among other mobile video editors. It provides curves to smoothly speed ramp your clips. It can edit landscape, portrait, and even square video formats. It has many amazing effects and filters, it also has some stock clips.


~Features:
- It is completely free and has no watermarks.
- It supports up to 4K video resolution.
- Has curves for speed ramping.
- Has keyframes for animation.
- It has hundreds of effects, overlays, and titles.


~Cons:
- Its UI doesn’t support editing in landscape orientation.
- Lacks some common editing tools.
iMovie:
It is available on IOS and Mac.
iMovie is a free video editing software designed by apple for their flagship products. It is simple and easy to use. It has all the basic editing tools to enhance your video like crop, trim, transitions, effects, e.t.c. It also has a speed ramping feature which let you change the speed at different points of a clip. It’s AI mode “Magic Movie” lets you select clips and a style and software will make the final product for you.
Its “Storyboards” mode is a creative way of learning production and post-production skills. It lets you choose a theme from many famous Genres available, then it will guide you through the production process like capturing footage, arranging your shots, and creating cinematic titles to enhance your story.


~Features:
- It is free and easy to use.
- Let you do speed ramping.
- Supports Raw files.
- It’s AI mode creates videos for you on its own.
- The “Storyboarding” feature helps you through the production process.


~Cons:
- It only works on ios and Mac.
- Not suitable for professional projects.
GoPro - Quik:
It is available on IOS and Android and windows also.
It is a free and easy-to-use software designed by GoPro. It can edit clips of your GoPro or any other device. It is a quick and easy way to enhance your clips before posting them on any social platform. It can do basic edits like trim, rotate, color correction, e.t.c. It can also make amazing speed ramps by changing the speed of different parts of the clip (available in the premium version only). It doesn’t produce any watermarks. Although its premium version unlocks more features like speed ramping, more themes, and unlimited backup space.


~Features:
- Its free version doesn’t leave a watermark.
- It is simple and easy to use.
- Can do basic color correction.
- Have pre-made themes for faster editing.
- Change the speed at different parts of the video to create smooth speed ramps. (Available in the premium version.)
- Has a free version with limited tools for basic editing.

~Cons:
- It lacks advanced tools therefore not suitable for large projects.
- Its free version has many limitations.
~Price: Its subscription is available at $1.99/month or at discount for an annual subscription having $9.99/year.
VN Video editor:
It is available on IOS and Android, Windows, and Mac.
If you are looking for a video editor, which let you do fast but quality edits, then “VN video editor” is the right choice for you. It is free and easy-to-use software with many useful features like transitions, effects, speed ramps, PiP, chroma-key, keyframing, e.t.c. It supports different aspect ratios for all your social platforms.
It also has pre-made templates to speed up your editing process. Its Story mode let you manage your production and post-production work easily. It also has overlay mode, which can make awesome slide shows for you.


~Features:
- It is free software with no watermark.
- It supports up to 4K resolution at 60fps.
- Supports multi-layer editing.
- Have keyframing curves to create smooth animations.
- Have speed curves for smooth speed ramping.
- Its Story mode let you manage your production work easily.
- Can extract audio from a video file.


~Cons:
- Its UI doesn’t support editing landscape orientation.
- Its free version has limitations of creating max 100 projects.
~Price:
Its Premium version is available for $3.9/month or $20.9/year.
Some Paid iPhone Video Editors:
If you want to move forward and get your hands on these paid softwares to try new features then you should buy these paid softwares. As most of these softwares are quite affordable but they pack the punch. And some of them can give you more in return than your investment. Then what are you waiting for? go and try them yourself.
Kinemaster:
It is available on IOS and Android both.
If you want to do more than just trimming and cropping to your videos then you should try Kinemaster. For editors, who want to do some advanced-level video editing on their phone, then you must have Kinemaster on your phone. It is a paid software, which is packed with many useful features. It has many video and audio effects. It also has an amazing audio editor. It also has many title designs and basic color correction tools. It has hundreds of effects and transitions + more can be downloaded from its asset store. Its UI is suitable for beginners and content creators both. It is a paid software, but all its features are completely free to use, but the free version leaves a watermark on export.


~Features:
- It supports up to 4K resolution at 60fps. (depending on mobile configuration)
- Have amazing features like chroma key, keyframing, blend e.t.c
- Has built-in audio and video recorder.
- Supports multiple texts and video layers with different resolutions depending on the capability of the mobile phone.
- Has UI like a PC video editor and supports landscape orientation for editing.
- Have an asset store with 100s of free effects, transitions, and stock material.


~Cons:
- Can’t export 4K videos on most devices.
- Can’t apply keyframes and chroma key to the main video. (can be done on layers only)
~Price:
Its Premium version is available for $4.9/month or $39.9/year. It also includes all the premium assets.
Power Director:
It is available on IOS and Android both.
It is a paid but quite advanced video editor available for androids and IOS both. Like its PC version mobile version is also packed with many great features. It is compact and easy to use. It supports multiple video and audio layers. Have many cool filters and transitions. Can also do basic color corrections. To complete post-production work it also has audio editing tools and effects. It also has hundreds of title designs. Its UI is easy to use and supports both portrait and landscape orientation for editing. Most of its features can be used for free with a watermark on export. To remove the watermark you need to purchase the premium version.


~Features:
- It supports up to 4K resolution at 60fps. (compatible on most devices)
- Supports both Portrait and Landscape orientation for editing.
- Supports Key framing and video stabilization also.
- Supports multiple audio and video layers.
- Can edit videos in different aspect ratios.
- Have a vast stock library.


~Cons:
- Can’t export 4K videos on many devices.
- Can apply keyframing and chroma key to layers only.
- Software lags sometimes.
~Price:
Its Premium version is available for $4.9/month or $29.9/year.
LumaFusion:
It is available on IOS and Mac (with an m1 processor).
If you are a content creator and want to do professional-level video editing on your phone then you should get your hands on “LumaFusion”. It is of the most powerful and advanced video editors designed for a mobile phone. But it only works on iPhones and iPads. It is a multi-track video editor with many useful features like the Chroma key, keyframing, color grading, and color LUTs. Have powerful color grading tools and an audio editor. It also has a lock and load stabilizer. You have to purchase the software before using it. It doesn’t have any free version to try.

Credits: Pic by Luma touch website.
~Features:
- It supports up to 4K video resolution at a max of 240 fps.
- Can also edit and export 360 videos.
- Have powerful color correction tools. You can also import your own color LUTs.
- Supports Keyframing on almost all the editing tools within the software.
- You can add some third-party audio plugins.
- Supports up to 6 audio and video layers.
- Have “Storyblock” stock library. (Many of its contents are free to use)
- Supports external monitor for display.

Credits: Pic by Luma touch website.
~Cons:
- Not available for Android devices.
- Being an advanced software, it doesn’t have masking and speed ramping features.
- Doesn’t have a free version to try on.
~Price:
It is available for purchase at $29.99.
InShot:
It is available on IOS and Android both.
If you are new to video editing and want to do simple editing tasks then this software can be the right choice for you. It is simple and easy to use. Apart from just trimming and arranging your clips, it also has some cool features like speed ramping, chroma-key, mask e.t.c. It also has an HSL color grading tool. You can add multiple layers as PiP. It is a paid software but you can try it for free with the watermark on export.


~Features:
- It supports up to 4K resolution at 60fps.
- Its UI is beginner-friendly.
- Have some advanced color correction and grading tools.
- Supports multiple images and video layers as PiP.
- Have features like a mask, chroma key, and blend for layers.
- Can edit videos in different aspect ratios.
- Have speed curves for smooth speed ramping.


~Cons:
- Doesn’t have advanced tools.
- Its UI doesn’t support editing landscape orientation.
~Price:
It has 3 diff purchase plans. you can get its subscription for $3.9/month or $14.99/year. or you can purchase the software for lifetime at $34.99.
VivaCut:
It is available on IOS and Android both.
Almost every mobile video editor wished for doing PC-like video editing on their phone, but that was not possible due to software limitations and device compatibility. But now you can create PC-like videos on your phone through “VivaCut”. It is a paid software that is packed with many advanced features. Like 3D transform, overlay, Effects, Masking, e.t.c. It has one of the best color correction and grading tools among other mobile video editors. It has advanced keyframing and curve paths that can make splendid animations. It also supports multi-layer video editing. It also has a Grouping tool that let you combine several clips and texts into a single clip for easy editing. It also lets you import your presets. It is a paid software but you can try it for free with the watermark on export.


~Features:
- It supports multi-layer editing.
- Supports keyframing curves and 3D transform.
- Have advanced color correction and grading tools.
- Can Group multiple clips for easy editing.
- Let you import your presets.
- Can edit videos in different aspect ratios.
- Have an “FX plugin” library with many special effects that can be customized also.


~Cons:
- It doesn’t support 4K resolution.
- Its UI doesn’t support editing landscape orientation.
- It lags and crashes sometimes.
~Price:
Its premium version is available at $4.99/month or $19.99/year.
Which Should I Choose Free or Paid Video Editing Apps for iPhone:
If you do video editing once in a while or you don’t do more than just trimming and cropping then you shouldn’t purchase a paid video editing software. Because there are free video editors that can get your job done and even more than that. But if you are a content creator who doesn’t want to do editing on PCs or laptops, then you can get these paid video editors for your iPhone. These softwares are quite affordable and worthy of your investment. Some are cheaper than others. You can purchase the one, which meets your budget or fulfills your needs.
And if you are a beginner but want to move forward in this field then you should try free versions of these paid softwares. Select the one, which you are comfortable working on and once you are satisfied with the software then you can purchase its premium version.
- Free iPhone Video Editors
- Adobe Premiere Rush
- CapCut
- iMovie
- GoPro-Quik
- VN Video Editor
- Paid iPhone Video Editors
- Kinemaster
- Power Director
- LumaFusion
- InShot
- VivaCut
Filmora Go:
It is available on IOS and Android both.
Apart from having a professional video editor for PC, Wondershare has also introduced a video editor for mobile phones. Filmora Go is an amazing video editor, with many cool features such as chroma key, mask, keyframing, blending, e.t.c. It is fast and easy to use with built-in effects, transitions, and presets to speed up the editing process. It is a paid video editor but you can try it for free, free trial includes most of the features but it leaves a watermark on export.
~Features:
- Has speed curves for smooth speed ramping.
- Supports multiple images and video layers.
- Have many presets and filters for fast pace editing.
- Have cool features like chroma key, masking, keyframing, e.t.c.
- Supports “Pixabay’s” stock library.
~Cons:
- Its UI doesn’t support editing in landscape orientation.
- It doesn’t support 4k video resolution.
~Steps:
Import: Open Filmora Go, Click “New project” to start a new project, or Choose the previous one from the “Draft” portion. Select videos or images to import to your timeline. Hold and drag the clip to change its arrangement.
Edit: You can add text, effects, stickers, layers, e.t.c. by clicking their icon, present on the bar at the bottom.
Click the “PiP” icon to add image or video layers, you also can add multiple layers.
Select a clip to edit it. Different editing tools appear on the bottom bar. Here you can change its opacity, its speed, or add animations.
Effects: Click the “Effects” icon to open the effects menu. Select an effect to apply to your clip.
Click the white box between two clips to add transitions.
Export: Click the “Export” button to export your file. Select your desired resolution and frame rate to export your clip.
Some Free iPhone Video Editors:
If you do video editing rarely or do just basic video editing then it is useless to purchase paid video editors. Even if you are a content creator but tight on budget or new to this field, you can use free video editing softwares and save your cash for other pieces of equipment.
So, here we have mentioned some free video editors for you. Some of these are quite powerful and can do advanced editing while others are simple but easy to use.
Adobe Premiere Rush:
It is available on IOS and Android both.
Whether you are a beginner or a content creator using mobile phones or PCs for editing, you may have heard of Adobe softwares. It is a computer software company which makes powerful softwares for different purposes. Like premiere pro, they have designed a compact version for phones named “Premiere Rush”. It is a free video editor that has all the tools needed for video editing, from video effects to color grading and audio editing. Its UI is a bit similar to PC video editors. It is a free video editor with no watermarks. Although it takes some time to understand it. But once mastered, you can do editing quickly.
~Features:
- It is a free video editor with no watermark.
- It supports up to 4K resolution at 60fps.
- You can extract audio and can do voiceover directly from the software.
- It has hundreds of filters, overlays, and title designs.
- It has basic color grading tools.
- It also has a motion tracking feature. (in Paid version)
- It supports multiple audio, video, and text layers.
~Cons:
- It only runs on high-end devices. ( It is not supported in most mid-range phones)
- Not suitable for beginners. Its UI is quite hard to understand.
- Doesn’t have common features like the chroma key, masking, e.t.c.
~Price:
Its Premium version is available for 9.99/month. It includes some premium features. Or you can purchase the “All Apps Bundle” at $54.99/month for the annual plan.
CapCut:
It is available on IOS and Android both.
If you are looking for a free but good video editor to help you edit videos on the go, then you should get your hands on CapCut. It is a free mobile video editing software with many interesting features like keyframing, chroma-key, masking e.t.c. It also supports video and image layers. It has one of the best speed ramping features among other mobile video editors. It provides curves to smoothly speed ramp your clips. It can edit landscape, portrait, and even square video formats. It has many amazing effects and filters, it also has some stock clips.
~Features:
- It is completely free and has no watermarks.
- It supports up to 4K video resolution.
- Has curves for speed ramping.
- Has keyframes for animation.
- It has hundreds of effects, overlays, and titles.
~Cons:
- Its UI doesn’t support editing in landscape orientation.
- Lacks some common editing tools.
iMovie:
It is available on IOS and Mac.
iMovie is a free video editing software designed by apple for their flagship products. It is simple and easy to use. It has all the basic editing tools to enhance your video like crop, trim, transitions, effects, e.t.c. It also has a speed ramping feature which let you change the speed at different points of a clip. It’s AI mode “Magic Movie” lets you select clips and a style and software will make the final product for you.
Its “Storyboards” mode is a creative way of learning production and post-production skills. It lets you choose a theme from many famous Genres available, then it will guide you through the production process like capturing footage, arranging your shots, and creating cinematic titles to enhance your story.
~Features:
- It is free and easy to use.
- Let you do speed ramping.
- Supports Raw files.
- It’s AI mode creates videos for you on its own.
- The “Storyboarding” feature helps you through the production process.
~Cons:
- It only works on ios and Mac.
- Not suitable for professional projects.
GoPro - Quik:
It is available on IOS and Android and windows also.
It is a free and easy-to-use software designed by GoPro. It can edit clips of your GoPro or any other device. It is a quick and easy way to enhance your clips before posting them on any social platform. It can do basic edits like trim, rotate, color correction, e.t.c. It can also make amazing speed ramps by changing the speed of different parts of the clip (available in the premium version only). It doesn’t produce any watermarks. Although its premium version unlocks more features like speed ramping, more themes, and unlimited backup space.
~Features:
- Its free version doesn’t leave a watermark.
- It is simple and easy to use.
- Can do basic color correction.
- Have pre-made themes for faster editing.
- Change the speed at different parts of the video to create smooth speed ramps. (Available in the premium version.)
- Has a free version with limited tools for basic editing.
~Cons:
- It lacks advanced tools therefore not suitable for large projects.
- Its free version has many limitations.
~Price: Its subscription is available at $1.99/month or at discount for an annual subscription having $9.99/year.
VN Video editor:
It is available on IOS and Android, Windows, and Mac.
If you are looking for a video editor, which let you do fast but quality edits, then “VN video editor” is the right choice for you. It is free and easy-to-use software with many useful features like transitions, effects, speed ramps, PiP, chroma-key, keyframing, e.t.c. It supports different aspect ratios for all your social platforms.
It also has pre-made templates to speed up your editing process. Its Story mode let you manage your production and post-production work easily. It also has overlay mode, which can make awesome slide shows for you.
~Features:
- It is free software with no watermark.
- It supports up to 4K resolution at 60fps.
- Supports multi-layer editing.
- Have keyframing curves to create smooth animations.
- Have speed curves for smooth speed ramping.
- Its Story mode let you manage your production work easily.
- Can extract audio from a video file.
~Cons:
- Its UI doesn’t support editing landscape orientation.
- Its free version has limitations of creating max 100 projects.
~Price:
Its Premium version is available for $3.9/month or $20.9/year.
Some Paid iPhone Video Editors:
If you want to move forward and get your hands on these paid softwares to try new features then you should buy these paid softwares. As most of these softwares are quite affordable but they pack the punch. And some of them can give you more in return than your investment. Then what are you waiting for? go and try them yourself.
Kinemaster:
It is available on IOS and Android both.
If you want to do more than just trimming and cropping to your videos then you should try Kinemaster. For editors, who want to do some advanced-level video editing on their phone, then you must have Kinemaster on your phone. It is a paid software, which is packed with many useful features. It has many video and audio effects. It also has an amazing audio editor. It also has many title designs and basic color correction tools. It has hundreds of effects and transitions + more can be downloaded from its asset store. Its UI is suitable for beginners and content creators both. It is a paid software, but all its features are completely free to use, but the free version leaves a watermark on export.
~Features:
- It supports up to 4K resolution at 60fps. (depending on mobile configuration)
- Have amazing features like chroma key, keyframing, blend e.t.c
- Has built-in audio and video recorder.
- Supports multiple texts and video layers with different resolutions depending on the capability of the mobile phone.
- Has UI like a PC video editor and supports landscape orientation for editing.
- Have an asset store with 100s of free effects, transitions, and stock material.
~Cons:
- Can’t export 4K videos on most devices.
- Can’t apply keyframes and chroma key to the main video. (can be done on layers only)
~Price:
Its Premium version is available for $4.9/month or $39.9/year. It also includes all the premium assets.
Power Director:
It is available on IOS and Android both.
It is a paid but quite advanced video editor available for androids and IOS both. Like its PC version mobile version is also packed with many great features. It is compact and easy to use. It supports multiple video and audio layers. Have many cool filters and transitions. Can also do basic color corrections. To complete post-production work it also has audio editing tools and effects. It also has hundreds of title designs. Its UI is easy to use and supports both portrait and landscape orientation for editing. Most of its features can be used for free with a watermark on export. To remove the watermark you need to purchase the premium version.
~Features:
- It supports up to 4K resolution at 60fps. (compatible on most devices)
- Supports both Portrait and Landscape orientation for editing.
- Supports Key framing and video stabilization also.
- Supports multiple audio and video layers.
- Can edit videos in different aspect ratios.
- Have a vast stock library.
~Cons:
- Can’t export 4K videos on many devices.
- Can apply keyframing and chroma key to layers only.
- Software lags sometimes.
~Price:
Its Premium version is available for $4.9/month or $29.9/year.
LumaFusion:
It is available on IOS and Mac (with an m1 processor).
If you are a content creator and want to do professional-level video editing on your phone then you should get your hands on “LumaFusion”. It is of the most powerful and advanced video editors designed for a mobile phone. But it only works on iPhones and iPads. It is a multi-track video editor with many useful features like the Chroma key, keyframing, color grading, and color LUTs. Have powerful color grading tools and an audio editor. It also has a lock and load stabilizer. You have to purchase the software before using it. It doesn’t have any free version to try.
Credits: Pic by Luma touch website.
~Features:
- It supports up to 4K video resolution at a max of 240 fps.
- Can also edit and export 360 videos.
- Have powerful color correction tools. You can also import your own color LUTs.
- Supports Keyframing on almost all the editing tools within the software.
- You can add some third-party audio plugins.
- Supports up to 6 audio and video layers.
- Have “Storyblock” stock library. (Many of its contents are free to use)
- Supports external monitor for display.
Credits: Pic by Luma touch website.
~Cons:
- Not available for Android devices.
- Being an advanced software, it doesn’t have masking and speed ramping features.
- Doesn’t have a free version to try on.
~Price:
It is available for purchase at $29.99.
InShot:
It is available on IOS and Android both.
If you are new to video editing and want to do simple editing tasks then this software can be the right choice for you. It is simple and easy to use. Apart from just trimming and arranging your clips, it also has some cool features like speed ramping, chroma-key, mask e.t.c. It also has an HSL color grading tool. You can add multiple layers as PiP. It is a paid software but you can try it for free with the watermark on export.
~Features:
- It supports up to 4K resolution at 60fps.
- Its UI is beginner-friendly.
- Have some advanced color correction and grading tools.
- Supports multiple images and video layers as PiP.
- Have features like a mask, chroma key, and blend for layers.
- Can edit videos in different aspect ratios.
- Have speed curves for smooth speed ramping.
~Cons:
- Doesn’t have advanced tools.
- Its UI doesn’t support editing landscape orientation.
~Price:
It has 3 diff purchase plans. you can get its subscription for $3.9/month or $14.99/year. or you can purchase the software for lifetime at $34.99.
VivaCut:
It is available on IOS and Android both.
Almost every mobile video editor wished for doing PC-like video editing on their phone, but that was not possible due to software limitations and device compatibility. But now you can create PC-like videos on your phone through “VivaCut”. It is a paid software that is packed with many advanced features. Like 3D transform, overlay, Effects, Masking, e.t.c. It has one of the best color correction and grading tools among other mobile video editors. It has advanced keyframing and curve paths that can make splendid animations. It also supports multi-layer video editing. It also has a Grouping tool that let you combine several clips and texts into a single clip for easy editing. It also lets you import your presets. It is a paid software but you can try it for free with the watermark on export.
~Features:
- It supports multi-layer editing.
- Supports keyframing curves and 3D transform.
- Have advanced color correction and grading tools.
- Can Group multiple clips for easy editing.
- Let you import your presets.
- Can edit videos in different aspect ratios.
- Have an “FX plugin” library with many special effects that can be customized also.
~Cons:
- It doesn’t support 4K resolution.
- Its UI doesn’t support editing landscape orientation.
- It lags and crashes sometimes.
~Price:
Its premium version is available at $4.99/month or $19.99/year.
Which Should I Choose Free or Paid Video Editing Apps for iPhone:
If you do video editing once in a while or you don’t do more than just trimming and cropping then you shouldn’t purchase a paid video editing software. Because there are free video editors that can get your job done and even more than that. But if you are a content creator who doesn’t want to do editing on PCs or laptops, then you can get these paid video editors for your iPhone. These softwares are quite affordable and worthy of your investment. Some are cheaper than others. You can purchase the one, which meets your budget or fulfills your needs.
And if you are a beginner but want to move forward in this field then you should try free versions of these paid softwares. Select the one, which you are comfortable working on and once you are satisfied with the software then you can purchase its premium version.
Do You Know How to Create Video Loops on PowerPoint? If Not Then Read This Article to Learn More Details
Loop videos are a great way to showcase your content. They’re easy to make, and they’re also easy to edit. You can have a loop video where the slides keep repeating in the same order, or you can change it up by putting different images on each slide.
You’re probably already familiar with the concept of looping video in PowerPoint. However, there are some instances where looping videos can be a real-time saver. To do this, you need to make sure that your visuals are engaging and unique. You can achieve this by using video loops in PowerPoint presentations.
You can use it if you want to demonstrate an idea or concept by showing several parts of the same thing at once. Or you can use PowerPoint if you have a very long video that you want to show in one go. You can also use it for suggesting different angles for your audience and making their eyes move from one point to another without making them bored.
Part 1: How to Make a Slideshow Loop in PowerPoint
A power-point loop video is the most efficient way to create a slideshow for your presentation. This easy-to-use software utility provides a simple and intuitive interface that lets you add slideshows to your presentations.
This is ideal for creating multi-streaming PowerPoint presentations that can be repeatedly viewed in the same or a different sequence. Create multimedia presentations with an animated slide show, including videos, and music with just a few clicks of the mouse.
The creation of the Slideshow loop in Microsoft PowerPoint is quite easy and simple. To make a looping slideshow, you’ll first need a PowerPoint. A PowerPoint is a set of instructions that allows you to display a series of images and text in the same sequence. This gives your audience the ability to explore the information on the slides in more depth and engage with the content on a more personal level.
If you want to create a looping slideshow in PowerPoint, you can use the following steps.
Step 1: Open Microsoft PowerPoint and select Slide show from Toolbar
The first step is to open Microsoft PowerPoint. To create a looping slideshow in PowerPoint, click on the Slide show feature on the top of the toolbar. Then different features will appear after clicking on it.

Step 2: Set up the Slide show manually
When you open the Slideshow, click on the Set Up Show from the toolbar. Some options will be shown in the drop-down (Manual, Auto, and Set Up Show). Select the option Set Up Show. A dialogue box will appear to select the following check boxes that are shown in the below picture:

Step 3: Select the slides and click on Transition
Select overall slides and click on the Transitions tab. You can see an option of Auto, interval. Uncheck the box of Auto, interval, and choose the time according to your requirements. Adding transitions can help to make your PowerPoint presentation more engaging and visually appealing. When you are adding transitions, make sure to think about how they can help to improve your overall presentation.

PowerPoint has the technology to create an endless loop slideshow that keeps playing without your finger. Loop slideshows are best used with information that is short, repeated, and not too repetitious. For example, if you want to play something on a loop it is better to create a looping slideshow than an extended presentation that repeats itself endlessly.
The power of loop slides is in their ability to engage users. You can have a slideshow that plays automatically or you can have it play when the user enters a specific panel. Slideshow Loops on PowerPoint allow you to play one or more slides over and over again by pressing the Play button. You can also create a time-lapse, which pauses the slideshow at a specific point.
Benefits of making a slideshow in PowerPoint
There are many benefits of using a looping slideshow in PowerPoint. There are many benefits of using loop video in PowerPoint presentations. Loop slideshow gives your audience a sense of continuity and connection, which can help them follow the story and understand the information more easily. It also helps to keep people engaged and interested in your presentation. They can be used to promote a product or service, commemorate a special event, or entertain and inform your audience.
- Slides can be played in a continuous loop, allowing the audience to stay engaged with the presentation from beginning to end.
- The looping feature makes it easy to create a presentation that is tailored to the specific needs of your audience. You can choose to have the slides repeat automatically, or you can control when each slide appears.
- It can help to save time. By using loop video, you can avoid having to constantly start and stop your presentation to show different parts of it. This can save you a lot of time and energy, which can be put into more important things.
- They can be used to commemorate a special event.
- They can be used to entertain and inform your audience.
Part 2: Alternative Way to Create Loop Slideshow Video
If you have been searching for the perfect way to create a loop slideshow video, Filmora video editor might be what you need. It is one of the most popular loop slideshow makers on the market and there is an app for all devices, including PCs and Macs to android phones and tablets. Filmora is a slideshow loop maker that allows you to produce video files quickly and easily with simple drag and drop.
Filmora provides you with seamless loop video for your website, youtube, and other channels, You can create content in various formats and image resolution to any social media like Facebook, Twitter, Instagram, and others with the help of our unique features. Filmora is a professional video editor for Windows. It’s an ideal tool for everyone, from beginners to professionals, as well as a great help for students, researchers, and teachers.
In this article, we’ll show you how to make a looping slideshow in PowerPoint. First, you’ll need to download Filmora. This software is used to create professional-looking videos that can be made at any length.
Step 1: Download Filmora and Import images and videos
Free Download For Win 7 or later(64-bit)
Free Download For macOS 10.14 or later
So first off, we need to create a new project. On the left-hand side, you’ll see your media library and on the right-hand side, there’s a green button that says “create new project”. You’ll notice there are three sections: video, audio, and images. These play a key role in creating your final video so let’s talk about each one individually.

Step 2: Add Title and background to your Slideshow video
This step is totally up to you in which you can add some titles the starting your slideshow. It is not very necessary but gives your slide show a perfect look. It also allows you to select any plain background of any color. You can use multiple transitions, music, and effects to tell your story in exactly the way you want!

Step 3: Make copies of the Slideshow and add transitions
Lastly, make copies of your media or pictures you want to add to your slideshow. Filmora allows you to set the duration of your slideshow. After copying the pictures paste them where the video ends. Then continue pasting according to your requirements. Add a transition “Dissolve” from the Transitions Tab. When you complete your editing export your video to your desktop or where you want to store it.

Benefits of looping Slideshare video in Filmora
There are many benefits of using a loop slideshow video in Filmora. First and foremost, a looping slideshow is a great way to create a presentation or video that is both engaging and professional. Additionally, looping a video makes it easy to keep audiences engaged and on foot, which is especially important for long videos or presentations.
Plus, looping can help to save on file size and memory usage, making it a great option for videos that will be shared online. Finally, looping can add an element of excitement and anticipation to a video, which can help to keep viewers engaged and coming back for more. You could also add animations between the slides that move differently than they would normally do.
Loop Slideshow Video in Filmora is a great option for you. It’s easy to use, and it has a wide range of options that allow you to customize your video output. You can even add music and sound effects to your videos! If you’re looking to make a loop slideshow video, this is the best software for it.
The Bottom Line
Slideshows are very popular, but they can sometimes seem a little boring. If you want to add something new, looping your slideshow will make all the difference. Adding music is easy in PowerPoint. A slideshow loop can be an effective way to keep viewers’ attention, making it an effective tool for presentation. You can renovate your outdated slideshows video with Filmora.
With its loop function, Filmora enables you to incorporate interesting dynamic effects into your videos. So what does it take to set up a PowerPoint loop video? You don’t need a lot of special programs or plugins to make your videos get looped on your presentations. Follow the above simple steps and you’ll have your videos getting looped in no time.
Free Download For macOS 10.14 or later
So first off, we need to create a new project. On the left-hand side, you’ll see your media library and on the right-hand side, there’s a green button that says “create new project”. You’ll notice there are three sections: video, audio, and images. These play a key role in creating your final video so let’s talk about each one individually.
Step 2: Add Title and background to your Slideshow video
This step is totally up to you in which you can add some titles the starting your slideshow. It is not very necessary but gives your slide show a perfect look. It also allows you to select any plain background of any color. You can use multiple transitions, music, and effects to tell your story in exactly the way you want!
Step 3: Make copies of the Slideshow and add transitions
Lastly, make copies of your media or pictures you want to add to your slideshow. Filmora allows you to set the duration of your slideshow. After copying the pictures paste them where the video ends. Then continue pasting according to your requirements. Add a transition “Dissolve” from the Transitions Tab. When you complete your editing export your video to your desktop or where you want to store it.
Benefits of looping Slideshare video in Filmora
There are many benefits of using a loop slideshow video in Filmora. First and foremost, a looping slideshow is a great way to create a presentation or video that is both engaging and professional. Additionally, looping a video makes it easy to keep audiences engaged and on foot, which is especially important for long videos or presentations.
Plus, looping can help to save on file size and memory usage, making it a great option for videos that will be shared online. Finally, looping can add an element of excitement and anticipation to a video, which can help to keep viewers engaged and coming back for more. You could also add animations between the slides that move differently than they would normally do.
Loop Slideshow Video in Filmora is a great option for you. It’s easy to use, and it has a wide range of options that allow you to customize your video output. You can even add music and sound effects to your videos! If you’re looking to make a loop slideshow video, this is the best software for it.
The Bottom Line
Slideshows are very popular, but they can sometimes seem a little boring. If you want to add something new, looping your slideshow will make all the difference. Adding music is easy in PowerPoint. A slideshow loop can be an effective way to keep viewers’ attention, making it an effective tool for presentation. You can renovate your outdated slideshows video with Filmora.
With its loop function, Filmora enables you to incorporate interesting dynamic effects into your videos. So what does it take to set up a PowerPoint loop video? You don’t need a lot of special programs or plugins to make your videos get looped on your presentations. Follow the above simple steps and you’ll have your videos getting looped in no time.
Also read:
- Updated Mask Tracking Is Believed to Be a Helpful Procedure for Marking Proper Areas in Videos. Learn How to Perform Premiere Pro Mask Tracking in This Guide for 2024
- 2024 Approved 6 Best Methods to Make a Video Longer
- New Easy Ways to Make Procreate GIFs
- New Do You Want to Slow Down Your TikTok Video and Zoom on a Specific Part? This Is No Longer a Difficult Task as This Video Comes up with the Right Set of Methods that Can Be Used to Implement the Slow Zoom Effect TikTok
- 3D LUT Mobile App Review - A Composite Application for Editing Media for 2024
- Updated If You Have a Low Budget but Want to Create a Filmy Appearance of the Video, Then Read 6 Ways to Get Professional Filming Equipment by Using Household Objects
- New In 2024, Wondering How to Edit a Video to Slow Motion on iPhone and Android Devices? Find Out How to Use Wondershare Filmora to Create and Edit Slo Mo Videos in a Few Clicks
- New 2024 Approved Are You Ready to Learn About Something Free yet Amazing? We Are Talking About All Format Video Players for PC that You Should Know , Lets Begin
- Updated Top 12 AI Video Generators to Pick
- Updated In 2024, The Complete Guide to GIF for Discord Profile
- New In 2024, Top 10 Online And PC Cartoon Video Maker 2022 For Beginner
- Updated 2024 Approved How to Create a Special Animated Transition in Filmora in Just 2 Minutes. This Simple Step-by-Step Guide Will Show You the Easy Way
- New In 2024, Video Editing Tips to Know Before Editing First Draft
- Updated 2024 Approved 10 Recommended Websites to Discover Awesome Premiere Pro Video Templates
- New In 2024, Using Track Matte and Tracking in Adobe After Effects Reviewing All Possibilities
- New How To Blur The Video Background in After Effects
- In 2024, Best MOV to GIF Converters
- New VLC Media Player How to Merge Audio and Video Like a Pro for 2024
- New Finding The Best Filmic Pro LUTs For Video Editing
- Updated Best Tips on How to Design Travel Slideshow
- In 2024, Knowing All Ways To Slow Down Video With Adobe Premiere Pro
- New If You Are Looking for Reliable Solutions to Export Your Musical Slideshow Through a DVD Burning Process, Take a Breath, You Have Landed at the Right Place for 2024
- Updated 2024 Approved 8 Ways To Live Stream Pre-Recorded Video
- 2024 Approved Do You Also Use Android to Create and Edit Videos? Read About the Efectum Video Effects Editor, Which Is Available in Your App Stores for Seamless Editing
- In 2024, How to Use Zoom in Google
- Split Videos in the Lightworks Step by Step
- 2024 Approved This Post Will Make You Learn Anything and Everything About Animated GIFs, the Ways to Use Cool Gifs in My Marketing, and How to Create Unique Custom Animated Gifs
- New 2024 Approved Deleting White Background in Photoshop Is Hard? No
- New 2024 Approved How Can You DIY VHS Overlay in After Effects?
- New In 2024, How to Make a Super Easy Rotating Video Effect
- If You Want to Know What to Prepare and How to Make the Wedding Video Perfect for Videographers, Check Out This Menu Here
- Step by Step to Add Border to Video Using Premiere Pro for 2024
- In 2024, How to Speed Up Video with Canva Online Tool?
- Updated In 2024, Top 10 Free WhatsApp Video Converter 2023
- Updated Complete Tutorial on After Effects Countdown Timer Adding
- Updated The Ultimate Wedding Videography Checklist
- How to Rescue Lost Contacts from Nubia Red Magic 9 Pro?
- In 2024, How to Track Oppo A59 5G Location without Installing Software? | Dr.fone
- Latest way to get Shiny Meltan Box in Pokémon Go Mystery Box On Vivo Y100 5G | Dr.fone
- 9 Solutions to Fix Honor Magic 5 System Crash Issue | Dr.fone
- How To Change Your Apple ID Password On your iPhone 14 Pro
- In 2024, How to Transfer Contacts from OnePlus Nord 3 5G to Outlook | Dr.fone
- New Best 10 Chinese Video to English Translator for 2024
- In 2024, A Step-by-Step Guide to Finding Your Apple ID From Your iPhone 12 Pro Max
- How to use Pokemon Go Joystick on Apple iPhone XR? | Dr.fone
- 4 Solutions to Fix Unfortunately Your App Has Stopped Error on Nubia Z50S Pro | Dr.fone
- Easy Guide to Infinix Note 30i FRP Bypass With Best Methods
- New In 2024, A Beginners Guide to Tell You What 3D Animation Is
- How To Free Up iPhone 6s Plus Space | Dr.fone
- Double Location Dongle All to Know About Apple iPhone X/iPad GPS Spoofing | Dr.fone
- Top 11 Free Apps to Check IMEI on Vivo V29e Phones
- Prank Your Friends! Easy Ways to Fake and Share Google Maps Location On Itel P55 | Dr.fone
- In 2024, Does find my friends work on Poco C51 | Dr.fone
- How to Repair Broken video files of Magic Vs 2?
- How to Find iSpoofer Pro Activation Key On Vivo Y100t? | Dr.fone
- How to Fix Honor 100 Pro Find My Friends No Location Found? | Dr.fone
- In 2024, The Most Useful Tips for Pokemon Go Ultra League On Realme C51 | Dr.fone
- In 2024, Detailed guide of ispoofer for pogo installation On Tecno Phantom V Fold | Dr.fone
- Title: In 2024, Top Animated Title Makers
- Author: Morgan
- Created at : 2024-05-19 05:12:26
- Updated at : 2024-05-20 05:12:26
- Link: https://ai-video-editing.techidaily.com/in-2024-top-animated-title-makers/
- License: This work is licensed under CC BY-NC-SA 4.0.
