
In 2024, Track Mattes The Ultimate Guide For After Effects

Track Mattes: The Ultimate Guide For After Effects
Are you wondering what Track Mattes is? In After Effects, this tool adds an invisible layer that is used to mask or reveal parts of a layer, including video, graphics, text, shapes, and images. This feature is in the arsenal of any visual effects artist or motion graphic designer.
For After Effects editors, Track Mattes can be an incredibly helpful tool for managing multiple layers and creating complex animations.
In this article, we’ll explore everything you need to know about Track Mattes. We’ll cover topics like the difference between a mask and Track Matte, finding this tool in After Effects, and its four options: Alpha Matter, Alpha Inverted Matte, Luma Matte, and Luma Inverted Matte.
- Alpha Matte
- Alpha Inverted Matte
- Luma Matte
- Luma Inverted Matte
- Differences Between Alpha Channel and Luma Channel
Part 1. What Are Track Mattes In After Effects?
A Track Matte is an element used in video editing to control the opacity of a layer. Essentially, it lets you create a “hole” in a layer so that underlying layers can show through. This tool can be used with video and audio layers, which is essential for creating complex composites in After Effects.
You can use Track Mattes to generate shapes, reveal part of a layer, or keying outs. Interestingly, it remains independent of all layers in your projects, which means you can get visual effects and animations more efficiently than with the masks tool.
Moreover, Track Mattes uses Alpha or Luma channels as a layer mask to determine what parts of the layer to reveal. For instance, you can make a top layer that provides an Alpha or Luminous effect and a bottom layer consisting of the image that will be revealed or shown.
Thus, if you want to use an image to hide your video until you want to unveil it or add a picture in your text, Track Mattes will help you to shape the appearance of a layer above it.
Part 2. Differences Between A Mask And A Track Matte
In Adobe After Effects, there are two types of masking tools: Masks and Track Mattes. Both are used to hide or reveal a portion of a layer.
Here’re some key differences between a Mask and a Track Matte:
- A mask is dependent on a specific layer, while the Track Matter is independent of any layer.
- A mask is applied directly to a layer having an image or a video and transforms with the layers. On the other hand, Track Matte is a stationary mask applied to the composition rather than a layer.
Part 3. Finding The Track Matte Tool In After Effects
Track Matte is located by default in the Timeline Window of the After Effects interface, but if it is unavailable there for some reason, toggle the Transfer Control Pane button on the bottom-left of the timeline.
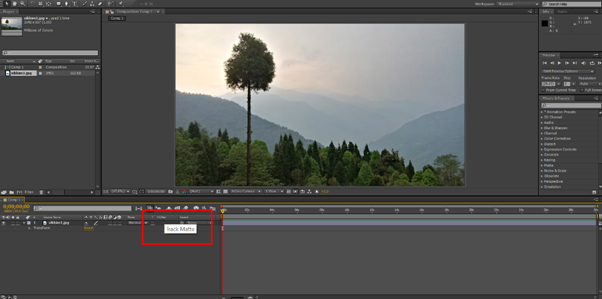
If you are still unable to find the Track Matte option, press the F1 key or do the following steps in sequence:
- Right-click on the area above your layers and select “Columns.”
- Scroll down and click the “Modes” option to enable it.
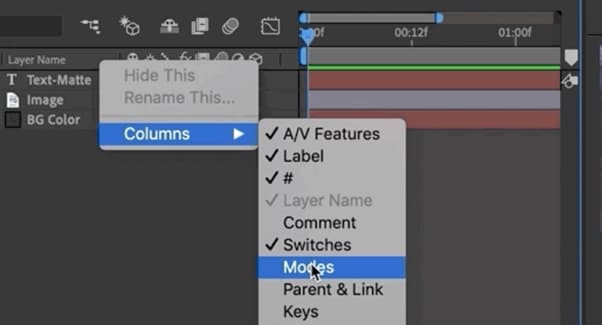
- Track Matte mode, Preserve Underlying Transparency, and Blending Modes will be available now.
Under Track Matte’s drop-down menu, you can find four further options, two with Alpha and two with Luma. We’ll discuss these options in detail in the next section.
Part 4. All Four Track Matte Options In After Effects
After Effects provides four types of Track Matte options: Alpha Matte, Alpha Inverted Matte, Luma Matte, and Luma Inverted Matte, each has its own specific use case. But first, you need to understand what Alpha and Luma are:
Alpha: This Track Matte type uses the layer’s Alpha channel to determine the layer’s opacity.
Luma: This Track Matte type uses the top layer’s brightness to mask the bottom layer.
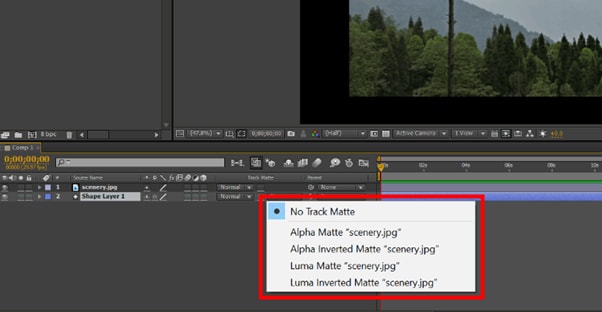
Let’s find out the functions of each option one by one:
Alpha Matte
Alpha Matte is an important option under the Track Matte menu, as it allows you to create a mask based on the transparency of the layer you are using it on. Like the mask, it will use any pixel above 0% opacity and can be useful for various purposes, such as creating a vignette or isolating a certain area of the frame.
Alpha Inverted Matte
The Alpha Inverted Matte option is quite the opposite of the Alpha Matte, and around the Alpha channel, it uses negative space from the above layer and will therefore use pixels with 0% opacity as it had 100% opacity.
Luma Matte
Instead of using the Alpha channel, Luma Mattes uses the brightness level or Luma channel of the upper layer to create a mask for the bottom layer.
Luma Inverted Matte
Opposite of the Luma Matte, the Luma Inverted Matte uses dark or low luminance areas of the upper layer to create a mask for the lower layer.
Differences Between Alpha Channel and Luma Channel
When altering the opacity of a layer, it may look like the brightness settings are changed. This might confuse some users, as both Alpha and Luma channels carry the same information. However, they differ in how they are used.
Alpha channel is a type of Track Matte that stores transparency information. This information determines how opaque or transparent a layer will be when superimposed over another layer.

On the other hand, a Luma channel is a video track that stores brightness information. This information is used to determine how bright or dark an image will be and is further divided into three channels, i.e., Red, Green, and Blue (RGB). Their value ranges from 0 to 255, where 0 represents the darkest value while 255 represents the brightest value.

Video – How to use Track Mattes in Adobe After Effects - Tutorial
Conclusion
In this article, we’ve discussed what Track Matte is in After Effects and how it differs from the mask tool. We also explored where to find the Track Matter option and its four options, i.e., Alpha Matte, Alpha Inverted Matte, Luma Matte, and Luma Inverted Matte. In the end, we discussed the difference between the Alpha and Luma channels to provide a clear view of the two.
Hopefully, this guide resolves your queries, and you now have a better understanding of the Track Matte tool in After Effects.
Free Download For Win 7 or later(64-bit)
Free Download For macOS 10.14 or later
Part 1. What Are Track Mattes In After Effects?
A Track Matte is an element used in video editing to control the opacity of a layer. Essentially, it lets you create a “hole” in a layer so that underlying layers can show through. This tool can be used with video and audio layers, which is essential for creating complex composites in After Effects.
You can use Track Mattes to generate shapes, reveal part of a layer, or keying outs. Interestingly, it remains independent of all layers in your projects, which means you can get visual effects and animations more efficiently than with the masks tool.
Moreover, Track Mattes uses Alpha or Luma channels as a layer mask to determine what parts of the layer to reveal. For instance, you can make a top layer that provides an Alpha or Luminous effect and a bottom layer consisting of the image that will be revealed or shown.
Thus, if you want to use an image to hide your video until you want to unveil it or add a picture in your text, Track Mattes will help you to shape the appearance of a layer above it.
Part 2. Differences Between A Mask And A Track Matte
In Adobe After Effects, there are two types of masking tools: Masks and Track Mattes. Both are used to hide or reveal a portion of a layer.
Here’re some key differences between a Mask and a Track Matte:
- A mask is dependent on a specific layer, while the Track Matter is independent of any layer.
- A mask is applied directly to a layer having an image or a video and transforms with the layers. On the other hand, Track Matte is a stationary mask applied to the composition rather than a layer.
Part 3. Finding The Track Matte Tool In After Effects
Track Matte is located by default in the Timeline Window of the After Effects interface, but if it is unavailable there for some reason, toggle the Transfer Control Pane button on the bottom-left of the timeline.

If you are still unable to find the Track Matte option, press the F1 key or do the following steps in sequence:
- Right-click on the area above your layers and select “Columns.”
- Scroll down and click the “Modes” option to enable it.

- Track Matte mode, Preserve Underlying Transparency, and Blending Modes will be available now.
Under Track Matte’s drop-down menu, you can find four further options, two with Alpha and two with Luma. We’ll discuss these options in detail in the next section.
Part 4. All Four Track Matte Options In After Effects
After Effects provides four types of Track Matte options: Alpha Matte, Alpha Inverted Matte, Luma Matte, and Luma Inverted Matte, each has its own specific use case. But first, you need to understand what Alpha and Luma are:
Alpha: This Track Matte type uses the layer’s Alpha channel to determine the layer’s opacity.
Luma: This Track Matte type uses the top layer’s brightness to mask the bottom layer.

Let’s find out the functions of each option one by one:
Alpha Matte
Alpha Matte is an important option under the Track Matte menu, as it allows you to create a mask based on the transparency of the layer you are using it on. Like the mask, it will use any pixel above 0% opacity and can be useful for various purposes, such as creating a vignette or isolating a certain area of the frame.
Alpha Inverted Matte
The Alpha Inverted Matte option is quite the opposite of the Alpha Matte, and around the Alpha channel, it uses negative space from the above layer and will therefore use pixels with 0% opacity as it had 100% opacity.
Luma Matte
Instead of using the Alpha channel, Luma Mattes uses the brightness level or Luma channel of the upper layer to create a mask for the bottom layer.
Luma Inverted Matte
Opposite of the Luma Matte, the Luma Inverted Matte uses dark or low luminance areas of the upper layer to create a mask for the lower layer.
Differences Between Alpha Channel and Luma Channel
When altering the opacity of a layer, it may look like the brightness settings are changed. This might confuse some users, as both Alpha and Luma channels carry the same information. However, they differ in how they are used.
Alpha channel is a type of Track Matte that stores transparency information. This information determines how opaque or transparent a layer will be when superimposed over another layer.

On the other hand, a Luma channel is a video track that stores brightness information. This information is used to determine how bright or dark an image will be and is further divided into three channels, i.e., Red, Green, and Blue (RGB). Their value ranges from 0 to 255, where 0 represents the darkest value while 255 represents the brightest value.

Video – How to use Track Mattes in Adobe After Effects - Tutorial
Conclusion
In this article, we’ve discussed what Track Matte is in After Effects and how it differs from the mask tool. We also explored where to find the Track Matter option and its four options, i.e., Alpha Matte, Alpha Inverted Matte, Luma Matte, and Luma Inverted Matte. In the end, we discussed the difference between the Alpha and Luma channels to provide a clear view of the two.
Hopefully, this guide resolves your queries, and you now have a better understanding of the Track Matte tool in After Effects.
Free Download For Win 7 or later(64-bit)
Free Download For macOS 10.14 or later
Best 12 Best Freeze Frame Video Editing Examples
Top 12 Best Freeze Frame Video Editing Examples
An easy yet powerful editor
Numerous effects to choose from
Detailed tutorials provided by the official channel
Freeze frame effect in video editing is a skill that requires more practice to master. It adds drama and impact to movies. If you want to see more energy and acting in the videos you watch, then you should see more freeze-frame examples.
Sometimes we notice that a particular action stays on longer than necessary in a movie or video. The filmmakers use this skill to emphasize some intense moments further to sustain or pique your interest.
The freeze-frame video editing feature is a valuable skill that helps filmmakers make excellent movies. We have a list of the top 12 examples of freeze-frame effects in movies for you.
In this article
01 [What is freeze-frame video editing?](#Part 1)
02 [Ways to use freeze-frame video editing](#Part 2)
03 [What are the best freeze-frame video editing examples?](#Part 3)
Part 1 What Is Freeze Frame Video Editing?
Freeze frame video editing is a video editing technique that halts movement in a video for a given period. It converts moving pictures into still photography for some time. These video editor effects help filmmakers gear attention to the video editing or filmmaking process. In other words, they are self-reflexive.
Part 2 Ways to Use Freeze Frame in Video editing
Freeze frames can be helpful in 3 significant ways in video editing;
● At the beginning of a movie/video: Freeze-frame at the beginning helps you pique the audience’s interest and give them a sneak peek of what to expect in the movie. This freeze-frame technique was used in the film ‘Good Fellas’ to pique the audience’s interests.
● At the end: Using a freeze-frame allows the audience to choose or decide how the movie ends, whether it is obvious. The ‘breakfast club’ filmmakers use a freeze-frame at the end to emphasize the young boy.
● In the middle, subtly capturing intense moments like in the movie ‘The Departed.’
Part 3 What are the Best Freeze-Frame Video Editing Examples?
It takes a great deal of skill to employ freeze frame with the best results correctly. It might bore the audience or give another impression other than the intended when not done effectively.
But several movie directors have effectively used the freeze-frame video editing technique that wowed the audience.
Here is a list of the best freeze frame examples you would love;
01The Departed
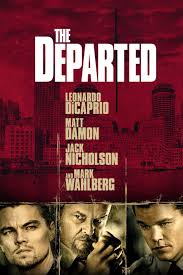
In this 2006 movie, an undercover cop and a mole try to identify each other. Scorsese shows his editing prowess once again as he uses freeze-frame more subtly.
He changes the frame speed instead of stopping on one frame for a considerably longer time. This emphasizes some memorable moments that you may overlook on a first watch.
02Rocky III
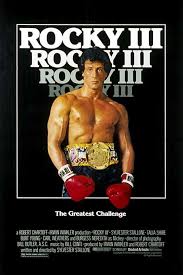
The freeze-frame came in during the final match between Apollo and Balboa in this movie.
During the first 3 Rocky movies, Apollo and Balboa had an intriguing rivalry. At the end of Rocky III, the duo decides to engage in a friendly battle to determine who was the Lord in boxing.
The movie ends in a freeze-frame with Rocky swinging a right hook after Apollo imitates the bell, saying, “Ding Dong.”
The freeze-frame allows the audience to guess who the winner will be, thus a longer time to think of the movie after watching.
03400 Blows
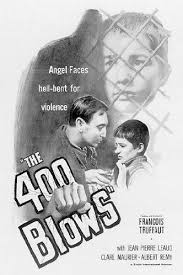
In 400 Blows, the main character Antoine, a young Parisian, was hardly out of trouble.
In an attempt to end his troubles, he arrives at the beach after running away from a soccer match.
He is faced with either jumping right in or going back. The movie ends in a freeze-frame as no one finds out. The decision was left to the audience.
04Thelma and Louise
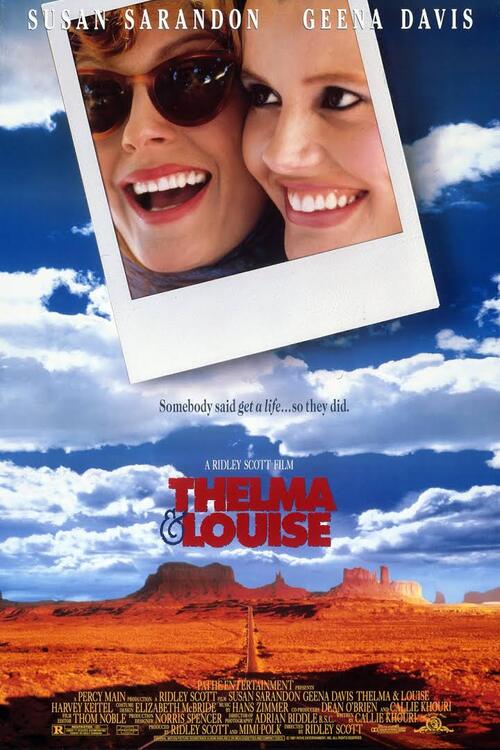
Thelma and Louise is about two (2) friends, Thelma Dickinson and Louise Sawyer. They both rise to defend themselves in a male-dominated world. In the film, Thelma and Louise are both running from the authorities. Louise killed a man who almost raped her friend, Thelma, thus the run. Things get out of control as they try to escape to Mexico, away from the authorities.
While on the run, they get ambushed by the police towards the grand canyon. The audience, at this point, is in suspense as to whether the ladies will survive or not.
Instead of surrendering, they drive right into the grand canyon, and the movie ends in a freeze-frame as they get caught hanging in the air while plunging into the canyon.
Regular movies might decide to give us all the details of the car plunging and exploding.
05The Wolf of Wall Street
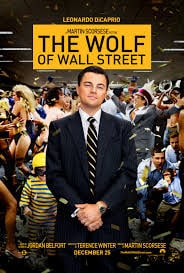
Scorsese uses freeze-frame at the beginning of this movie, just as he did in Good Fellas. The freeze-frame effect here helps introduce the character and shows us the plot of the movie hence piquing the audience’s interests immediately.
06Out of Sight
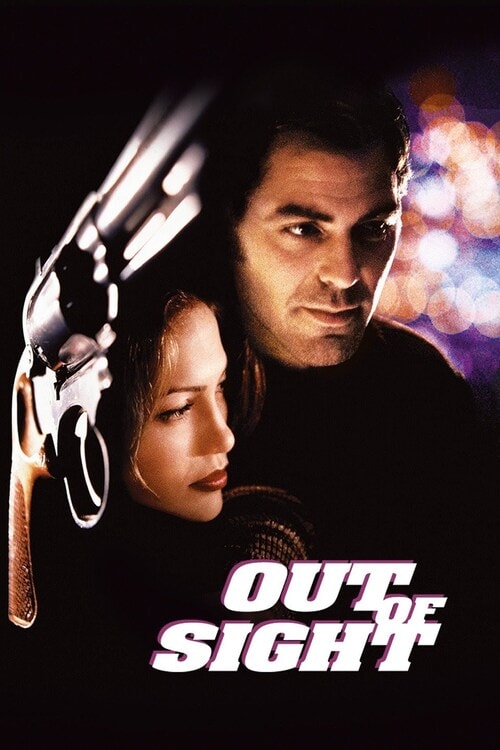
This movie is another excellent example of freeze-frame video editing. What other way to pique the audience’s interest significantly and emphasize them than capture them in a freeze-frame.
07Death Proof
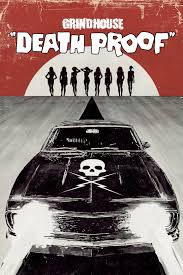
In this movie, the freeze-frame stays till the very end. It captures three women as they raise their hands-on celebration after successfully beating to death a psychopath who has been killing young women.
08Butch Cassidy and the Sundance Kid
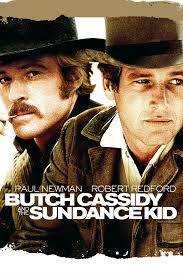
This movie follows two train robbers, Butch Cassidy and Harry Longabaugh, known as the ‘Sundance Kid.’ After conducting several robberies, they go on the run as the authorities pursue them. After a gun battle with the authorities, they take cover inside a building, but they get surrounded with no other escape route.
Thus they decide to engage in the last fight instead of surrendering, and you see them in a gun battle with the authorities. The movie ends with them caught in a freeze-frame brandishing their guns at the officers instead of actual bloodshed. Though we all know they will get killed.
09Good Fellas
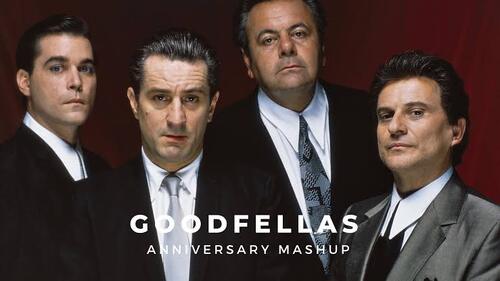
Initially, we mentioned that a freeze-frame could be of use at the beginning of a movie. Scorsese used this effectively in ‘Good Fellas’ to emphasize the movie plot.
In the opening scene, the characters Henry, Jimmy, and Tonny, played by Ray Liotta, Robert De Niro, and Joe Pesci, respectively, stop their car in the middle of the road.
They open their truck and see a man badly wounded and beaten, Tonny stabs him, and Jimmy shoots him. Henry then closes the truck and looks on in a freeze-frame before uttering the lines, “As far back as I can remember, I have always wanted to be a gangster.”
This lets us know right away what will happen in the movie. That person will get killed, and this is the mob territory.
10Harry Potter and the Prisoner of Azkaban
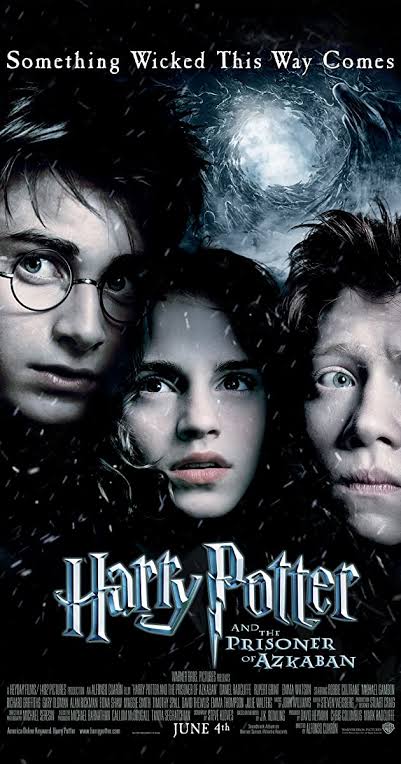
During a bad and weird year at Hogwarts, Harry potter experiences an extremely joyous moment when he goes anti-gravity on his new Firebolt broom.
He becomes overjoyed and his expression gets captured in a freeze-frame.
11The Breakfast Club
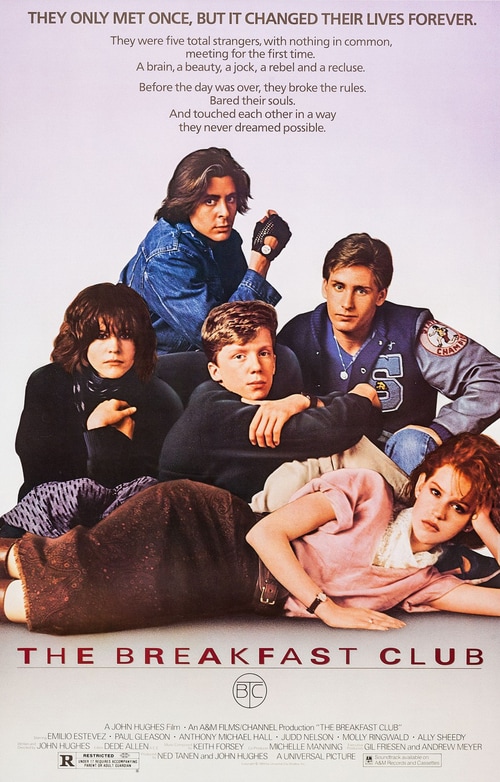
The Breakfast Club is an 80s movie showing teenagers trying to find their identity in life and overcoming the challenges of these years.
This is another freeze frame example where the filmmakers showed great expertise. The character John Bender is caught in a freeze-frame, punching the air to celebrate his victory.
He has just shared a kiss with the class sweetheart Claire. He and his classmates have also just won over the authoritative principal, Mr. Vernon.
12Pulp Fiction: Pumpkin and Honey Bunny.
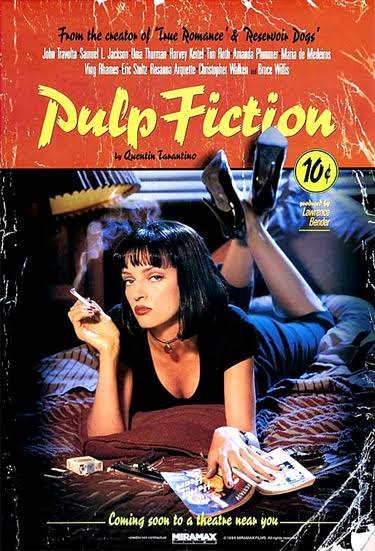
Pulp Fiction is another movie such as ‘Good Fellas’ with its freeze-frame edition done at the movie’s beginning.
Pumpkin and Honey Bunny are shown at the movie’s beginning, sitting together in a diner. They argue whether it will be safer to rub a bank or a restaurant. In the end, they settle for a diner — the same one they are sitting in.
They kiss and pull out their guns, and the images freeze before the credits roll out.
The freeze-frame gives us a sneak peek of the violence to experience in the movie, and indeed, we were not disappointed.
For Win 7 or later (64-bit)
For macOS 10.12 or later
With Wondershare Filmora Video Editor ‘s speed ramping feature, you can adjust your video speed while controlling the keyframes to create fascinating cinematic videos.
Filmora is a video editing tool developed by wondershare and has exciting features. Filmora makes video editing easy and seamless yet produces professional results.
Filmora’s freeze-frame feature helps bring dynamism and energy to your videos using its keyframe feature.
● Ending Thoughts →
● It is an inexplicable feeling that we get every time we remember a movie we watched a long time ago, the ones whereas kept debating with our friends as to what would have happened.
● That is the purpose of adding freeze-frame effects at the end of videos. So you keep thinking about them.
● Now that you know this effect, you can figure out which freeze-frame video examples you still find very interesting. Also, do not hesitate to try out the new features of Filmora. It would bring out the best of your video to the audience.
Freeze frame effect in video editing is a skill that requires more practice to master. It adds drama and impact to movies. If you want to see more energy and acting in the videos you watch, then you should see more freeze-frame examples.
Sometimes we notice that a particular action stays on longer than necessary in a movie or video. The filmmakers use this skill to emphasize some intense moments further to sustain or pique your interest.
The freeze-frame video editing feature is a valuable skill that helps filmmakers make excellent movies. We have a list of the top 12 examples of freeze-frame effects in movies for you.
In this article
01 [What is freeze-frame video editing?](#Part 1)
02 [Ways to use freeze-frame video editing](#Part 2)
03 [What are the best freeze-frame video editing examples?](#Part 3)
Part 1 What Is Freeze Frame Video Editing?
Freeze frame video editing is a video editing technique that halts movement in a video for a given period. It converts moving pictures into still photography for some time. These video editor effects help filmmakers gear attention to the video editing or filmmaking process. In other words, they are self-reflexive.
Part 2 Ways to Use Freeze Frame in Video editing
Freeze frames can be helpful in 3 significant ways in video editing;
● At the beginning of a movie/video: Freeze-frame at the beginning helps you pique the audience’s interest and give them a sneak peek of what to expect in the movie. This freeze-frame technique was used in the film ‘Good Fellas’ to pique the audience’s interests.
● At the end: Using a freeze-frame allows the audience to choose or decide how the movie ends, whether it is obvious. The ‘breakfast club’ filmmakers use a freeze-frame at the end to emphasize the young boy.
● In the middle, subtly capturing intense moments like in the movie ‘The Departed.’
Part 3 What are the Best Freeze-Frame Video Editing Examples?
It takes a great deal of skill to employ freeze frame with the best results correctly. It might bore the audience or give another impression other than the intended when not done effectively.
But several movie directors have effectively used the freeze-frame video editing technique that wowed the audience.
Here is a list of the best freeze frame examples you would love;
01The Departed

In this 2006 movie, an undercover cop and a mole try to identify each other. Scorsese shows his editing prowess once again as he uses freeze-frame more subtly.
He changes the frame speed instead of stopping on one frame for a considerably longer time. This emphasizes some memorable moments that you may overlook on a first watch.
02Rocky III

The freeze-frame came in during the final match between Apollo and Balboa in this movie.
During the first 3 Rocky movies, Apollo and Balboa had an intriguing rivalry. At the end of Rocky III, the duo decides to engage in a friendly battle to determine who was the Lord in boxing.
The movie ends in a freeze-frame with Rocky swinging a right hook after Apollo imitates the bell, saying, “Ding Dong.”
The freeze-frame allows the audience to guess who the winner will be, thus a longer time to think of the movie after watching.
03400 Blows

In 400 Blows, the main character Antoine, a young Parisian, was hardly out of trouble.
In an attempt to end his troubles, he arrives at the beach after running away from a soccer match.
He is faced with either jumping right in or going back. The movie ends in a freeze-frame as no one finds out. The decision was left to the audience.
04Thelma and Louise

Thelma and Louise is about two (2) friends, Thelma Dickinson and Louise Sawyer. They both rise to defend themselves in a male-dominated world. In the film, Thelma and Louise are both running from the authorities. Louise killed a man who almost raped her friend, Thelma, thus the run. Things get out of control as they try to escape to Mexico, away from the authorities.
While on the run, they get ambushed by the police towards the grand canyon. The audience, at this point, is in suspense as to whether the ladies will survive or not.
Instead of surrendering, they drive right into the grand canyon, and the movie ends in a freeze-frame as they get caught hanging in the air while plunging into the canyon.
Regular movies might decide to give us all the details of the car plunging and exploding.
05The Wolf of Wall Street

Scorsese uses freeze-frame at the beginning of this movie, just as he did in Good Fellas. The freeze-frame effect here helps introduce the character and shows us the plot of the movie hence piquing the audience’s interests immediately.
06Out of Sight

This movie is another excellent example of freeze-frame video editing. What other way to pique the audience’s interest significantly and emphasize them than capture them in a freeze-frame.
07Death Proof

In this movie, the freeze-frame stays till the very end. It captures three women as they raise their hands-on celebration after successfully beating to death a psychopath who has been killing young women.
08Butch Cassidy and the Sundance Kid

This movie follows two train robbers, Butch Cassidy and Harry Longabaugh, known as the ‘Sundance Kid.’ After conducting several robberies, they go on the run as the authorities pursue them. After a gun battle with the authorities, they take cover inside a building, but they get surrounded with no other escape route.
Thus they decide to engage in the last fight instead of surrendering, and you see them in a gun battle with the authorities. The movie ends with them caught in a freeze-frame brandishing their guns at the officers instead of actual bloodshed. Though we all know they will get killed.
09Good Fellas

Initially, we mentioned that a freeze-frame could be of use at the beginning of a movie. Scorsese used this effectively in ‘Good Fellas’ to emphasize the movie plot.
In the opening scene, the characters Henry, Jimmy, and Tonny, played by Ray Liotta, Robert De Niro, and Joe Pesci, respectively, stop their car in the middle of the road.
They open their truck and see a man badly wounded and beaten, Tonny stabs him, and Jimmy shoots him. Henry then closes the truck and looks on in a freeze-frame before uttering the lines, “As far back as I can remember, I have always wanted to be a gangster.”
This lets us know right away what will happen in the movie. That person will get killed, and this is the mob territory.
10Harry Potter and the Prisoner of Azkaban

During a bad and weird year at Hogwarts, Harry potter experiences an extremely joyous moment when he goes anti-gravity on his new Firebolt broom.
He becomes overjoyed and his expression gets captured in a freeze-frame.
11The Breakfast Club

The Breakfast Club is an 80s movie showing teenagers trying to find their identity in life and overcoming the challenges of these years.
This is another freeze frame example where the filmmakers showed great expertise. The character John Bender is caught in a freeze-frame, punching the air to celebrate his victory.
He has just shared a kiss with the class sweetheart Claire. He and his classmates have also just won over the authoritative principal, Mr. Vernon.
12Pulp Fiction: Pumpkin and Honey Bunny.

Pulp Fiction is another movie such as ‘Good Fellas’ with its freeze-frame edition done at the movie’s beginning.
Pumpkin and Honey Bunny are shown at the movie’s beginning, sitting together in a diner. They argue whether it will be safer to rub a bank or a restaurant. In the end, they settle for a diner — the same one they are sitting in.
They kiss and pull out their guns, and the images freeze before the credits roll out.
The freeze-frame gives us a sneak peek of the violence to experience in the movie, and indeed, we were not disappointed.
For Win 7 or later (64-bit)
For macOS 10.12 or later
With Wondershare Filmora Video Editor ‘s speed ramping feature, you can adjust your video speed while controlling the keyframes to create fascinating cinematic videos.
Filmora is a video editing tool developed by wondershare and has exciting features. Filmora makes video editing easy and seamless yet produces professional results.
Filmora’s freeze-frame feature helps bring dynamism and energy to your videos using its keyframe feature.
● Ending Thoughts →
● It is an inexplicable feeling that we get every time we remember a movie we watched a long time ago, the ones whereas kept debating with our friends as to what would have happened.
● That is the purpose of adding freeze-frame effects at the end of videos. So you keep thinking about them.
● Now that you know this effect, you can figure out which freeze-frame video examples you still find very interesting. Also, do not hesitate to try out the new features of Filmora. It would bring out the best of your video to the audience.
Freeze frame effect in video editing is a skill that requires more practice to master. It adds drama and impact to movies. If you want to see more energy and acting in the videos you watch, then you should see more freeze-frame examples.
Sometimes we notice that a particular action stays on longer than necessary in a movie or video. The filmmakers use this skill to emphasize some intense moments further to sustain or pique your interest.
The freeze-frame video editing feature is a valuable skill that helps filmmakers make excellent movies. We have a list of the top 12 examples of freeze-frame effects in movies for you.
In this article
01 [What is freeze-frame video editing?](#Part 1)
02 [Ways to use freeze-frame video editing](#Part 2)
03 [What are the best freeze-frame video editing examples?](#Part 3)
Part 1 What Is Freeze Frame Video Editing?
Freeze frame video editing is a video editing technique that halts movement in a video for a given period. It converts moving pictures into still photography for some time. These video editor effects help filmmakers gear attention to the video editing or filmmaking process. In other words, they are self-reflexive.
Part 2 Ways to Use Freeze Frame in Video editing
Freeze frames can be helpful in 3 significant ways in video editing;
● At the beginning of a movie/video: Freeze-frame at the beginning helps you pique the audience’s interest and give them a sneak peek of what to expect in the movie. This freeze-frame technique was used in the film ‘Good Fellas’ to pique the audience’s interests.
● At the end: Using a freeze-frame allows the audience to choose or decide how the movie ends, whether it is obvious. The ‘breakfast club’ filmmakers use a freeze-frame at the end to emphasize the young boy.
● In the middle, subtly capturing intense moments like in the movie ‘The Departed.’
Part 3 What are the Best Freeze-Frame Video Editing Examples?
It takes a great deal of skill to employ freeze frame with the best results correctly. It might bore the audience or give another impression other than the intended when not done effectively.
But several movie directors have effectively used the freeze-frame video editing technique that wowed the audience.
Here is a list of the best freeze frame examples you would love;
01The Departed

In this 2006 movie, an undercover cop and a mole try to identify each other. Scorsese shows his editing prowess once again as he uses freeze-frame more subtly.
He changes the frame speed instead of stopping on one frame for a considerably longer time. This emphasizes some memorable moments that you may overlook on a first watch.
02Rocky III

The freeze-frame came in during the final match between Apollo and Balboa in this movie.
During the first 3 Rocky movies, Apollo and Balboa had an intriguing rivalry. At the end of Rocky III, the duo decides to engage in a friendly battle to determine who was the Lord in boxing.
The movie ends in a freeze-frame with Rocky swinging a right hook after Apollo imitates the bell, saying, “Ding Dong.”
The freeze-frame allows the audience to guess who the winner will be, thus a longer time to think of the movie after watching.
03400 Blows

In 400 Blows, the main character Antoine, a young Parisian, was hardly out of trouble.
In an attempt to end his troubles, he arrives at the beach after running away from a soccer match.
He is faced with either jumping right in or going back. The movie ends in a freeze-frame as no one finds out. The decision was left to the audience.
04Thelma and Louise

Thelma and Louise is about two (2) friends, Thelma Dickinson and Louise Sawyer. They both rise to defend themselves in a male-dominated world. In the film, Thelma and Louise are both running from the authorities. Louise killed a man who almost raped her friend, Thelma, thus the run. Things get out of control as they try to escape to Mexico, away from the authorities.
While on the run, they get ambushed by the police towards the grand canyon. The audience, at this point, is in suspense as to whether the ladies will survive or not.
Instead of surrendering, they drive right into the grand canyon, and the movie ends in a freeze-frame as they get caught hanging in the air while plunging into the canyon.
Regular movies might decide to give us all the details of the car plunging and exploding.
05The Wolf of Wall Street

Scorsese uses freeze-frame at the beginning of this movie, just as he did in Good Fellas. The freeze-frame effect here helps introduce the character and shows us the plot of the movie hence piquing the audience’s interests immediately.
06Out of Sight

This movie is another excellent example of freeze-frame video editing. What other way to pique the audience’s interest significantly and emphasize them than capture them in a freeze-frame.
07Death Proof

In this movie, the freeze-frame stays till the very end. It captures three women as they raise their hands-on celebration after successfully beating to death a psychopath who has been killing young women.
08Butch Cassidy and the Sundance Kid

This movie follows two train robbers, Butch Cassidy and Harry Longabaugh, known as the ‘Sundance Kid.’ After conducting several robberies, they go on the run as the authorities pursue them. After a gun battle with the authorities, they take cover inside a building, but they get surrounded with no other escape route.
Thus they decide to engage in the last fight instead of surrendering, and you see them in a gun battle with the authorities. The movie ends with them caught in a freeze-frame brandishing their guns at the officers instead of actual bloodshed. Though we all know they will get killed.
09Good Fellas

Initially, we mentioned that a freeze-frame could be of use at the beginning of a movie. Scorsese used this effectively in ‘Good Fellas’ to emphasize the movie plot.
In the opening scene, the characters Henry, Jimmy, and Tonny, played by Ray Liotta, Robert De Niro, and Joe Pesci, respectively, stop their car in the middle of the road.
They open their truck and see a man badly wounded and beaten, Tonny stabs him, and Jimmy shoots him. Henry then closes the truck and looks on in a freeze-frame before uttering the lines, “As far back as I can remember, I have always wanted to be a gangster.”
This lets us know right away what will happen in the movie. That person will get killed, and this is the mob territory.
10Harry Potter and the Prisoner of Azkaban

During a bad and weird year at Hogwarts, Harry potter experiences an extremely joyous moment when he goes anti-gravity on his new Firebolt broom.
He becomes overjoyed and his expression gets captured in a freeze-frame.
11The Breakfast Club

The Breakfast Club is an 80s movie showing teenagers trying to find their identity in life and overcoming the challenges of these years.
This is another freeze frame example where the filmmakers showed great expertise. The character John Bender is caught in a freeze-frame, punching the air to celebrate his victory.
He has just shared a kiss with the class sweetheart Claire. He and his classmates have also just won over the authoritative principal, Mr. Vernon.
12Pulp Fiction: Pumpkin and Honey Bunny.

Pulp Fiction is another movie such as ‘Good Fellas’ with its freeze-frame edition done at the movie’s beginning.
Pumpkin and Honey Bunny are shown at the movie’s beginning, sitting together in a diner. They argue whether it will be safer to rub a bank or a restaurant. In the end, they settle for a diner — the same one they are sitting in.
They kiss and pull out their guns, and the images freeze before the credits roll out.
The freeze-frame gives us a sneak peek of the violence to experience in the movie, and indeed, we were not disappointed.
For Win 7 or later (64-bit)
For macOS 10.12 or later
With Wondershare Filmora Video Editor ‘s speed ramping feature, you can adjust your video speed while controlling the keyframes to create fascinating cinematic videos.
Filmora is a video editing tool developed by wondershare and has exciting features. Filmora makes video editing easy and seamless yet produces professional results.
Filmora’s freeze-frame feature helps bring dynamism and energy to your videos using its keyframe feature.
● Ending Thoughts →
● It is an inexplicable feeling that we get every time we remember a movie we watched a long time ago, the ones whereas kept debating with our friends as to what would have happened.
● That is the purpose of adding freeze-frame effects at the end of videos. So you keep thinking about them.
● Now that you know this effect, you can figure out which freeze-frame video examples you still find very interesting. Also, do not hesitate to try out the new features of Filmora. It would bring out the best of your video to the audience.
Freeze frame effect in video editing is a skill that requires more practice to master. It adds drama and impact to movies. If you want to see more energy and acting in the videos you watch, then you should see more freeze-frame examples.
Sometimes we notice that a particular action stays on longer than necessary in a movie or video. The filmmakers use this skill to emphasize some intense moments further to sustain or pique your interest.
The freeze-frame video editing feature is a valuable skill that helps filmmakers make excellent movies. We have a list of the top 12 examples of freeze-frame effects in movies for you.
In this article
01 [What is freeze-frame video editing?](#Part 1)
02 [Ways to use freeze-frame video editing](#Part 2)
03 [What are the best freeze-frame video editing examples?](#Part 3)
Part 1 What Is Freeze Frame Video Editing?
Freeze frame video editing is a video editing technique that halts movement in a video for a given period. It converts moving pictures into still photography for some time. These video editor effects help filmmakers gear attention to the video editing or filmmaking process. In other words, they are self-reflexive.
Part 2 Ways to Use Freeze Frame in Video editing
Freeze frames can be helpful in 3 significant ways in video editing;
● At the beginning of a movie/video: Freeze-frame at the beginning helps you pique the audience’s interest and give them a sneak peek of what to expect in the movie. This freeze-frame technique was used in the film ‘Good Fellas’ to pique the audience’s interests.
● At the end: Using a freeze-frame allows the audience to choose or decide how the movie ends, whether it is obvious. The ‘breakfast club’ filmmakers use a freeze-frame at the end to emphasize the young boy.
● In the middle, subtly capturing intense moments like in the movie ‘The Departed.’
Part 3 What are the Best Freeze-Frame Video Editing Examples?
It takes a great deal of skill to employ freeze frame with the best results correctly. It might bore the audience or give another impression other than the intended when not done effectively.
But several movie directors have effectively used the freeze-frame video editing technique that wowed the audience.
Here is a list of the best freeze frame examples you would love;
01The Departed

In this 2006 movie, an undercover cop and a mole try to identify each other. Scorsese shows his editing prowess once again as he uses freeze-frame more subtly.
He changes the frame speed instead of stopping on one frame for a considerably longer time. This emphasizes some memorable moments that you may overlook on a first watch.
02Rocky III

The freeze-frame came in during the final match between Apollo and Balboa in this movie.
During the first 3 Rocky movies, Apollo and Balboa had an intriguing rivalry. At the end of Rocky III, the duo decides to engage in a friendly battle to determine who was the Lord in boxing.
The movie ends in a freeze-frame with Rocky swinging a right hook after Apollo imitates the bell, saying, “Ding Dong.”
The freeze-frame allows the audience to guess who the winner will be, thus a longer time to think of the movie after watching.
03400 Blows

In 400 Blows, the main character Antoine, a young Parisian, was hardly out of trouble.
In an attempt to end his troubles, he arrives at the beach after running away from a soccer match.
He is faced with either jumping right in or going back. The movie ends in a freeze-frame as no one finds out. The decision was left to the audience.
04Thelma and Louise

Thelma and Louise is about two (2) friends, Thelma Dickinson and Louise Sawyer. They both rise to defend themselves in a male-dominated world. In the film, Thelma and Louise are both running from the authorities. Louise killed a man who almost raped her friend, Thelma, thus the run. Things get out of control as they try to escape to Mexico, away from the authorities.
While on the run, they get ambushed by the police towards the grand canyon. The audience, at this point, is in suspense as to whether the ladies will survive or not.
Instead of surrendering, they drive right into the grand canyon, and the movie ends in a freeze-frame as they get caught hanging in the air while plunging into the canyon.
Regular movies might decide to give us all the details of the car plunging and exploding.
05The Wolf of Wall Street

Scorsese uses freeze-frame at the beginning of this movie, just as he did in Good Fellas. The freeze-frame effect here helps introduce the character and shows us the plot of the movie hence piquing the audience’s interests immediately.
06Out of Sight

This movie is another excellent example of freeze-frame video editing. What other way to pique the audience’s interest significantly and emphasize them than capture them in a freeze-frame.
07Death Proof

In this movie, the freeze-frame stays till the very end. It captures three women as they raise their hands-on celebration after successfully beating to death a psychopath who has been killing young women.
08Butch Cassidy and the Sundance Kid

This movie follows two train robbers, Butch Cassidy and Harry Longabaugh, known as the ‘Sundance Kid.’ After conducting several robberies, they go on the run as the authorities pursue them. After a gun battle with the authorities, they take cover inside a building, but they get surrounded with no other escape route.
Thus they decide to engage in the last fight instead of surrendering, and you see them in a gun battle with the authorities. The movie ends with them caught in a freeze-frame brandishing their guns at the officers instead of actual bloodshed. Though we all know they will get killed.
09Good Fellas

Initially, we mentioned that a freeze-frame could be of use at the beginning of a movie. Scorsese used this effectively in ‘Good Fellas’ to emphasize the movie plot.
In the opening scene, the characters Henry, Jimmy, and Tonny, played by Ray Liotta, Robert De Niro, and Joe Pesci, respectively, stop their car in the middle of the road.
They open their truck and see a man badly wounded and beaten, Tonny stabs him, and Jimmy shoots him. Henry then closes the truck and looks on in a freeze-frame before uttering the lines, “As far back as I can remember, I have always wanted to be a gangster.”
This lets us know right away what will happen in the movie. That person will get killed, and this is the mob territory.
10Harry Potter and the Prisoner of Azkaban

During a bad and weird year at Hogwarts, Harry potter experiences an extremely joyous moment when he goes anti-gravity on his new Firebolt broom.
He becomes overjoyed and his expression gets captured in a freeze-frame.
11The Breakfast Club

The Breakfast Club is an 80s movie showing teenagers trying to find their identity in life and overcoming the challenges of these years.
This is another freeze frame example where the filmmakers showed great expertise. The character John Bender is caught in a freeze-frame, punching the air to celebrate his victory.
He has just shared a kiss with the class sweetheart Claire. He and his classmates have also just won over the authoritative principal, Mr. Vernon.
12Pulp Fiction: Pumpkin and Honey Bunny.

Pulp Fiction is another movie such as ‘Good Fellas’ with its freeze-frame edition done at the movie’s beginning.
Pumpkin and Honey Bunny are shown at the movie’s beginning, sitting together in a diner. They argue whether it will be safer to rub a bank or a restaurant. In the end, they settle for a diner — the same one they are sitting in.
They kiss and pull out their guns, and the images freeze before the credits roll out.
The freeze-frame gives us a sneak peek of the violence to experience in the movie, and indeed, we were not disappointed.
For Win 7 or later (64-bit)
For macOS 10.12 or later
With Wondershare Filmora Video Editor ‘s speed ramping feature, you can adjust your video speed while controlling the keyframes to create fascinating cinematic videos.
Filmora is a video editing tool developed by wondershare and has exciting features. Filmora makes video editing easy and seamless yet produces professional results.
Filmora’s freeze-frame feature helps bring dynamism and energy to your videos using its keyframe feature.
● Ending Thoughts →
● It is an inexplicable feeling that we get every time we remember a movie we watched a long time ago, the ones whereas kept debating with our friends as to what would have happened.
● That is the purpose of adding freeze-frame effects at the end of videos. So you keep thinking about them.
● Now that you know this effect, you can figure out which freeze-frame video examples you still find very interesting. Also, do not hesitate to try out the new features of Filmora. It would bring out the best of your video to the audience.
Different Ways To Trim Video In Premiere Pro
Create High-Quality Video - Wondershare Filmora
An easy and powerful YouTube video editor
Numerous video and audio effects to choose from
Detailed tutorials provided by the official channel
Trimming your video is one of the most effective ways to get the viewer’s attention. As such, you should always trim the end and beginning of your videos to a length that will not repel viewers. Premiere Pro can help you trim videos, leaving you with tight and compelling content that engages your audience. Developed by Adobe Inc., this timeline-based video editing software application is ideal for those who want to produce the best video. We’ll explain how to trim videos in Premiere Pro.
In this article
01 What Is the Difference Between Cutting and Trimming a Video?
02 How to Trim videos in Premiere Pro in Different Ways
03 Extra Tips About Trimming Videos in Premiere Pro
What Is the Difference Between Cutting and Trimming a Video?
If you are new to video editing, you might find that cutting and trimming video files sound the same to you. At first sight, you’ll see that these two operations are similar because they involve the cutting of videos. Let’s look at the differences between these two operations.
Trimming
Trimming is the process of cutting off a portion of the end or beginning of your video to reduce its length, leaving the desired content only. Trimming is vital when you want to ensure your video starts swiftly and your viewers will not get bored while waiting for something captivating to occur.
The first seconds of a video are what draw viewers’ attention and convince them to continue watching the entire video. When you apply it intelligently, video trimming allows you to remove unnecessary frames from the beginning and end of your video and leave content that your audience will like.
Cutting
Cutting is also a fundamental video editing skill, and it involves removing a portion of a video clip by cutting in two places. You’ll then lift out the middle area and combine the leftover video back together.
This operation is helpful when you want to polish your video and cut off meaningless snippets. What’s more? You can apply cutting if you intend to insert a section of your video clip into another one.
You might want to consider cutting when you want to share your video on social networks and need to cut it into pieces due to the video length limits.
People often confuse trimming with cutting because they are all about deleting sections of the video. However, trimming involves deleting the beginning and end of a video, while cutting refers to cutting a part of a video file from somewhere else. Understanding this crucial difference will allow you to edit your videos like a professional.
How to Trim videos in Premiere Pro in Different Ways
You can trim video Premiere Pro on the timeline or program. Let’s look at these two methods.
Method 1:Trim Clips on Timeline
If you are wondering: What is a timeline? It’s the area Premiere Pro where you arrange your videos and map out the edits you want to apply. You will see all your video clips, transitions, effects, and more laid out in chronological order while you are working on your project. You can Premiere Pro trim video clips on the timeline, and at any point, play your project to check how your edits will look.
Remember that edits on the Premiere Pro timeline don’t alter your source files, and they are previews of how your edits will appear. That means you can untrim a video clip to extend it to its original length without consequence.
To learn how to trim video in Premiere Pro on the timeline, follow the steps below.
- Double click on the video file you want to trim in Premiere Pro.
- Adjust the timings of your edits. Drag the ends of your video clip as if you are resizing a window to shorten or extend by trimming. As your cursor gets closer at the edge of the video clip, you’ll see a red arrow.

- The Ripple Edit tool lets you trim video clips without leaving a white gap. You can also use it to push adjacent video clips later in the sequence.

- The Rolling Edit tool allows you to adjust the timing of the edit you make between two video clips and extends a clip by the same size you shorten the other.
- Click the padlock icon located on the tracker header to lock the entire track and prevent unwanted changes.

- You can also use the Q and W keys on your keyboard to Premiere Pro trim video. The Q key removes unwanted content at the beginning of the clip, while the W key trims the end of the clip.
- Choose the Selection tool once you’ve finished using the trimming tools.
Method 2:Trim Clips in the Program
You can also trim videos in the Program Monitor. Follow the guide below to learn how to trim a video in Premiere Pro program monitor.
- Double-click the end of your video clip to enter the Trim Mode in the program.
- To trim, drag on the images of your video in the program monitor. You can also use the buttons on the panel.

- To exit Trim mode, click an empty section in the Timeline panel.
You can change how trimming works by Command-clicking (macOS) or Control-clicking (Windows) on the images of the video in the program while you are in the Timeline panel or Trim Mode. The yellow cursor means ripple trimming, while the red pointer means regular trimming.
The benefit of trimming videos in the Program Monitor is that the precision adjustment buttons under the footage allow you to trim 1 or 5 frames at a time.
Extra Tips About Trimming Videos in Premiere Pro
We have provided some tips that you should keep in mind when using Adobe Premiere trim video.
How to Trim a Video without Re-Rendering?
When adding a video to Premiere Pro, it will be rendered by this software application to ensure high-quality playback and speed. Rendering takes time afterward, leading to loss of quality; however, it makes sure you have gotten the best video quality as much as possible by removing skipped frames and lag from the video playback.
If you are wondering how to trim videos in Premiere Pro without re-render follow the steps below:
- Import your video to Premiere Pro by launching the application and choosing ‘Import Media to Start’. Browse and select the video you want to trim.
- The video will appear in the media library area at the bottom of the screen.
- Drag and drop the video from the media library to the timeline. You’ll see the complete video clip duration in the timeline.
- You can crop the video by dragging the blue time marker to the duration where you would like to start the video.
- Hold the ‘Ctrl’ key on your keyboard, then drag the starting end of the video clip to the time marker position. You’ll remove unnecessary video content from the beginning of your video.
- You can trim the video from its other end by following the same steps but from the opposite direction. You can only use this method to trim from one of the ends of your video clip.
- Choose the ‘Laser Tool’ located at the side menu of the timeline to trim from the center of the video clip. Now, click on the clip at the position you want to trim, and the application will cut the video from this position.
- Follow steps 2 to 4 to trim from cuts you’ve just made.

- Go to ‘File’ and choose the ‘Export’ option. Tap ‘Media’ from the list, and you will be directed to the export setting. Here, you can adjust specific settings, such as quality, name, and format. Click ‘Export’ after entering the appropriate information.

Unlink Audio and Video for Trimming
When you upload a video file to Adobe Premiere Pro and take it into the timeline, the audio tracks and video will be synced and locked. Essentially, this ensures there is no misalignment when the program converts the video to another format. For example, importing it into another video editor can cause a mis-sync between audio and video if the two tracks are not locked or linked.
Video editing professionals avoid this by locking the two tracks together. As such, you might want to unlink or unlock the two before doing anything. To do this, you need to import the video into the application and take it to the timeline with the associated tracks. Then, select the video track alone.

Next, right-click the video track and select the Unlink option. The software will separate the audio from the video track. You can now trim either of these.
How to Trim and Re-Encode Videos without Re-Rendering
Follow the method below to trim video Premiere Pro and encode it without rendering it.
- Launch Premiere Pro and navigate to File, then choose import. Find the video that you want to trim and double click on it.
- Drag and drop the video into the timeline.
- Choose the ‘Ripple Edit Tool’ and then Press ‘Sequence’. Head to ‘Sequence Settings’ and set or modify the codec, bitrate, name, format, and much more.
- Adjust the Ripple so that it defines the end time and start time that you want for your video.
- Now, finalize the trim by choosing ‘File’ and tap ‘Export’. To ‘Export Settings,’ elect ‘Media’.
Conclusion
● Now that you know how to trim videos in Premiere Pro, you can remove unnecessary portions at the beginning or end of your videos. In turn, your videos will attract more viewers.
Trimming your video is one of the most effective ways to get the viewer’s attention. As such, you should always trim the end and beginning of your videos to a length that will not repel viewers. Premiere Pro can help you trim videos, leaving you with tight and compelling content that engages your audience. Developed by Adobe Inc., this timeline-based video editing software application is ideal for those who want to produce the best video. We’ll explain how to trim videos in Premiere Pro.
In this article
01 What Is the Difference Between Cutting and Trimming a Video?
02 How to Trim videos in Premiere Pro in Different Ways
03 Extra Tips About Trimming Videos in Premiere Pro
What Is the Difference Between Cutting and Trimming a Video?
If you are new to video editing, you might find that cutting and trimming video files sound the same to you. At first sight, you’ll see that these two operations are similar because they involve the cutting of videos. Let’s look at the differences between these two operations.
Trimming
Trimming is the process of cutting off a portion of the end or beginning of your video to reduce its length, leaving the desired content only. Trimming is vital when you want to ensure your video starts swiftly and your viewers will not get bored while waiting for something captivating to occur.
The first seconds of a video are what draw viewers’ attention and convince them to continue watching the entire video. When you apply it intelligently, video trimming allows you to remove unnecessary frames from the beginning and end of your video and leave content that your audience will like.
Cutting
Cutting is also a fundamental video editing skill, and it involves removing a portion of a video clip by cutting in two places. You’ll then lift out the middle area and combine the leftover video back together.
This operation is helpful when you want to polish your video and cut off meaningless snippets. What’s more? You can apply cutting if you intend to insert a section of your video clip into another one.
You might want to consider cutting when you want to share your video on social networks and need to cut it into pieces due to the video length limits.
People often confuse trimming with cutting because they are all about deleting sections of the video. However, trimming involves deleting the beginning and end of a video, while cutting refers to cutting a part of a video file from somewhere else. Understanding this crucial difference will allow you to edit your videos like a professional.
How to Trim videos in Premiere Pro in Different Ways
You can trim video Premiere Pro on the timeline or program. Let’s look at these two methods.
Method 1:Trim Clips on Timeline
If you are wondering: What is a timeline? It’s the area Premiere Pro where you arrange your videos and map out the edits you want to apply. You will see all your video clips, transitions, effects, and more laid out in chronological order while you are working on your project. You can Premiere Pro trim video clips on the timeline, and at any point, play your project to check how your edits will look.
Remember that edits on the Premiere Pro timeline don’t alter your source files, and they are previews of how your edits will appear. That means you can untrim a video clip to extend it to its original length without consequence.
To learn how to trim video in Premiere Pro on the timeline, follow the steps below.
- Double click on the video file you want to trim in Premiere Pro.
- Adjust the timings of your edits. Drag the ends of your video clip as if you are resizing a window to shorten or extend by trimming. As your cursor gets closer at the edge of the video clip, you’ll see a red arrow.

- The Ripple Edit tool lets you trim video clips without leaving a white gap. You can also use it to push adjacent video clips later in the sequence.

- The Rolling Edit tool allows you to adjust the timing of the edit you make between two video clips and extends a clip by the same size you shorten the other.
- Click the padlock icon located on the tracker header to lock the entire track and prevent unwanted changes.

- You can also use the Q and W keys on your keyboard to Premiere Pro trim video. The Q key removes unwanted content at the beginning of the clip, while the W key trims the end of the clip.
- Choose the Selection tool once you’ve finished using the trimming tools.
Method 2:Trim Clips in the Program
You can also trim videos in the Program Monitor. Follow the guide below to learn how to trim a video in Premiere Pro program monitor.
- Double-click the end of your video clip to enter the Trim Mode in the program.
- To trim, drag on the images of your video in the program monitor. You can also use the buttons on the panel.

- To exit Trim mode, click an empty section in the Timeline panel.
You can change how trimming works by Command-clicking (macOS) or Control-clicking (Windows) on the images of the video in the program while you are in the Timeline panel or Trim Mode. The yellow cursor means ripple trimming, while the red pointer means regular trimming.
The benefit of trimming videos in the Program Monitor is that the precision adjustment buttons under the footage allow you to trim 1 or 5 frames at a time.
Extra Tips About Trimming Videos in Premiere Pro
We have provided some tips that you should keep in mind when using Adobe Premiere trim video.
How to Trim a Video without Re-Rendering?
When adding a video to Premiere Pro, it will be rendered by this software application to ensure high-quality playback and speed. Rendering takes time afterward, leading to loss of quality; however, it makes sure you have gotten the best video quality as much as possible by removing skipped frames and lag from the video playback.
If you are wondering how to trim videos in Premiere Pro without re-render follow the steps below:
- Import your video to Premiere Pro by launching the application and choosing ‘Import Media to Start’. Browse and select the video you want to trim.
- The video will appear in the media library area at the bottom of the screen.
- Drag and drop the video from the media library to the timeline. You’ll see the complete video clip duration in the timeline.
- You can crop the video by dragging the blue time marker to the duration where you would like to start the video.
- Hold the ‘Ctrl’ key on your keyboard, then drag the starting end of the video clip to the time marker position. You’ll remove unnecessary video content from the beginning of your video.
- You can trim the video from its other end by following the same steps but from the opposite direction. You can only use this method to trim from one of the ends of your video clip.
- Choose the ‘Laser Tool’ located at the side menu of the timeline to trim from the center of the video clip. Now, click on the clip at the position you want to trim, and the application will cut the video from this position.
- Follow steps 2 to 4 to trim from cuts you’ve just made.

- Go to ‘File’ and choose the ‘Export’ option. Tap ‘Media’ from the list, and you will be directed to the export setting. Here, you can adjust specific settings, such as quality, name, and format. Click ‘Export’ after entering the appropriate information.

Unlink Audio and Video for Trimming
When you upload a video file to Adobe Premiere Pro and take it into the timeline, the audio tracks and video will be synced and locked. Essentially, this ensures there is no misalignment when the program converts the video to another format. For example, importing it into another video editor can cause a mis-sync between audio and video if the two tracks are not locked or linked.
Video editing professionals avoid this by locking the two tracks together. As such, you might want to unlink or unlock the two before doing anything. To do this, you need to import the video into the application and take it to the timeline with the associated tracks. Then, select the video track alone.

Next, right-click the video track and select the Unlink option. The software will separate the audio from the video track. You can now trim either of these.
How to Trim and Re-Encode Videos without Re-Rendering
Follow the method below to trim video Premiere Pro and encode it without rendering it.
- Launch Premiere Pro and navigate to File, then choose import. Find the video that you want to trim and double click on it.
- Drag and drop the video into the timeline.
- Choose the ‘Ripple Edit Tool’ and then Press ‘Sequence’. Head to ‘Sequence Settings’ and set or modify the codec, bitrate, name, format, and much more.
- Adjust the Ripple so that it defines the end time and start time that you want for your video.
- Now, finalize the trim by choosing ‘File’ and tap ‘Export’. To ‘Export Settings,’ elect ‘Media’.
Conclusion
● Now that you know how to trim videos in Premiere Pro, you can remove unnecessary portions at the beginning or end of your videos. In turn, your videos will attract more viewers.
Trimming your video is one of the most effective ways to get the viewer’s attention. As such, you should always trim the end and beginning of your videos to a length that will not repel viewers. Premiere Pro can help you trim videos, leaving you with tight and compelling content that engages your audience. Developed by Adobe Inc., this timeline-based video editing software application is ideal for those who want to produce the best video. We’ll explain how to trim videos in Premiere Pro.
In this article
01 What Is the Difference Between Cutting and Trimming a Video?
02 How to Trim videos in Premiere Pro in Different Ways
03 Extra Tips About Trimming Videos in Premiere Pro
What Is the Difference Between Cutting and Trimming a Video?
If you are new to video editing, you might find that cutting and trimming video files sound the same to you. At first sight, you’ll see that these two operations are similar because they involve the cutting of videos. Let’s look at the differences between these two operations.
Trimming
Trimming is the process of cutting off a portion of the end or beginning of your video to reduce its length, leaving the desired content only. Trimming is vital when you want to ensure your video starts swiftly and your viewers will not get bored while waiting for something captivating to occur.
The first seconds of a video are what draw viewers’ attention and convince them to continue watching the entire video. When you apply it intelligently, video trimming allows you to remove unnecessary frames from the beginning and end of your video and leave content that your audience will like.
Cutting
Cutting is also a fundamental video editing skill, and it involves removing a portion of a video clip by cutting in two places. You’ll then lift out the middle area and combine the leftover video back together.
This operation is helpful when you want to polish your video and cut off meaningless snippets. What’s more? You can apply cutting if you intend to insert a section of your video clip into another one.
You might want to consider cutting when you want to share your video on social networks and need to cut it into pieces due to the video length limits.
People often confuse trimming with cutting because they are all about deleting sections of the video. However, trimming involves deleting the beginning and end of a video, while cutting refers to cutting a part of a video file from somewhere else. Understanding this crucial difference will allow you to edit your videos like a professional.
How to Trim videos in Premiere Pro in Different Ways
You can trim video Premiere Pro on the timeline or program. Let’s look at these two methods.
Method 1:Trim Clips on Timeline
If you are wondering: What is a timeline? It’s the area Premiere Pro where you arrange your videos and map out the edits you want to apply. You will see all your video clips, transitions, effects, and more laid out in chronological order while you are working on your project. You can Premiere Pro trim video clips on the timeline, and at any point, play your project to check how your edits will look.
Remember that edits on the Premiere Pro timeline don’t alter your source files, and they are previews of how your edits will appear. That means you can untrim a video clip to extend it to its original length without consequence.
To learn how to trim video in Premiere Pro on the timeline, follow the steps below.
- Double click on the video file you want to trim in Premiere Pro.
- Adjust the timings of your edits. Drag the ends of your video clip as if you are resizing a window to shorten or extend by trimming. As your cursor gets closer at the edge of the video clip, you’ll see a red arrow.

- The Ripple Edit tool lets you trim video clips without leaving a white gap. You can also use it to push adjacent video clips later in the sequence.

- The Rolling Edit tool allows you to adjust the timing of the edit you make between two video clips and extends a clip by the same size you shorten the other.
- Click the padlock icon located on the tracker header to lock the entire track and prevent unwanted changes.

- You can also use the Q and W keys on your keyboard to Premiere Pro trim video. The Q key removes unwanted content at the beginning of the clip, while the W key trims the end of the clip.
- Choose the Selection tool once you’ve finished using the trimming tools.
Method 2:Trim Clips in the Program
You can also trim videos in the Program Monitor. Follow the guide below to learn how to trim a video in Premiere Pro program monitor.
- Double-click the end of your video clip to enter the Trim Mode in the program.
- To trim, drag on the images of your video in the program monitor. You can also use the buttons on the panel.

- To exit Trim mode, click an empty section in the Timeline panel.
You can change how trimming works by Command-clicking (macOS) or Control-clicking (Windows) on the images of the video in the program while you are in the Timeline panel or Trim Mode. The yellow cursor means ripple trimming, while the red pointer means regular trimming.
The benefit of trimming videos in the Program Monitor is that the precision adjustment buttons under the footage allow you to trim 1 or 5 frames at a time.
Extra Tips About Trimming Videos in Premiere Pro
We have provided some tips that you should keep in mind when using Adobe Premiere trim video.
How to Trim a Video without Re-Rendering?
When adding a video to Premiere Pro, it will be rendered by this software application to ensure high-quality playback and speed. Rendering takes time afterward, leading to loss of quality; however, it makes sure you have gotten the best video quality as much as possible by removing skipped frames and lag from the video playback.
If you are wondering how to trim videos in Premiere Pro without re-render follow the steps below:
- Import your video to Premiere Pro by launching the application and choosing ‘Import Media to Start’. Browse and select the video you want to trim.
- The video will appear in the media library area at the bottom of the screen.
- Drag and drop the video from the media library to the timeline. You’ll see the complete video clip duration in the timeline.
- You can crop the video by dragging the blue time marker to the duration where you would like to start the video.
- Hold the ‘Ctrl’ key on your keyboard, then drag the starting end of the video clip to the time marker position. You’ll remove unnecessary video content from the beginning of your video.
- You can trim the video from its other end by following the same steps but from the opposite direction. You can only use this method to trim from one of the ends of your video clip.
- Choose the ‘Laser Tool’ located at the side menu of the timeline to trim from the center of the video clip. Now, click on the clip at the position you want to trim, and the application will cut the video from this position.
- Follow steps 2 to 4 to trim from cuts you’ve just made.

- Go to ‘File’ and choose the ‘Export’ option. Tap ‘Media’ from the list, and you will be directed to the export setting. Here, you can adjust specific settings, such as quality, name, and format. Click ‘Export’ after entering the appropriate information.

Unlink Audio and Video for Trimming
When you upload a video file to Adobe Premiere Pro and take it into the timeline, the audio tracks and video will be synced and locked. Essentially, this ensures there is no misalignment when the program converts the video to another format. For example, importing it into another video editor can cause a mis-sync between audio and video if the two tracks are not locked or linked.
Video editing professionals avoid this by locking the two tracks together. As such, you might want to unlink or unlock the two before doing anything. To do this, you need to import the video into the application and take it to the timeline with the associated tracks. Then, select the video track alone.

Next, right-click the video track and select the Unlink option. The software will separate the audio from the video track. You can now trim either of these.
How to Trim and Re-Encode Videos without Re-Rendering
Follow the method below to trim video Premiere Pro and encode it without rendering it.
- Launch Premiere Pro and navigate to File, then choose import. Find the video that you want to trim and double click on it.
- Drag and drop the video into the timeline.
- Choose the ‘Ripple Edit Tool’ and then Press ‘Sequence’. Head to ‘Sequence Settings’ and set or modify the codec, bitrate, name, format, and much more.
- Adjust the Ripple so that it defines the end time and start time that you want for your video.
- Now, finalize the trim by choosing ‘File’ and tap ‘Export’. To ‘Export Settings,’ elect ‘Media’.
Conclusion
● Now that you know how to trim videos in Premiere Pro, you can remove unnecessary portions at the beginning or end of your videos. In turn, your videos will attract more viewers.
Trimming your video is one of the most effective ways to get the viewer’s attention. As such, you should always trim the end and beginning of your videos to a length that will not repel viewers. Premiere Pro can help you trim videos, leaving you with tight and compelling content that engages your audience. Developed by Adobe Inc., this timeline-based video editing software application is ideal for those who want to produce the best video. We’ll explain how to trim videos in Premiere Pro.
In this article
01 What Is the Difference Between Cutting and Trimming a Video?
02 How to Trim videos in Premiere Pro in Different Ways
03 Extra Tips About Trimming Videos in Premiere Pro
What Is the Difference Between Cutting and Trimming a Video?
If you are new to video editing, you might find that cutting and trimming video files sound the same to you. At first sight, you’ll see that these two operations are similar because they involve the cutting of videos. Let’s look at the differences between these two operations.
Trimming
Trimming is the process of cutting off a portion of the end or beginning of your video to reduce its length, leaving the desired content only. Trimming is vital when you want to ensure your video starts swiftly and your viewers will not get bored while waiting for something captivating to occur.
The first seconds of a video are what draw viewers’ attention and convince them to continue watching the entire video. When you apply it intelligently, video trimming allows you to remove unnecessary frames from the beginning and end of your video and leave content that your audience will like.
Cutting
Cutting is also a fundamental video editing skill, and it involves removing a portion of a video clip by cutting in two places. You’ll then lift out the middle area and combine the leftover video back together.
This operation is helpful when you want to polish your video and cut off meaningless snippets. What’s more? You can apply cutting if you intend to insert a section of your video clip into another one.
You might want to consider cutting when you want to share your video on social networks and need to cut it into pieces due to the video length limits.
People often confuse trimming with cutting because they are all about deleting sections of the video. However, trimming involves deleting the beginning and end of a video, while cutting refers to cutting a part of a video file from somewhere else. Understanding this crucial difference will allow you to edit your videos like a professional.
How to Trim videos in Premiere Pro in Different Ways
You can trim video Premiere Pro on the timeline or program. Let’s look at these two methods.
Method 1:Trim Clips on Timeline
If you are wondering: What is a timeline? It’s the area Premiere Pro where you arrange your videos and map out the edits you want to apply. You will see all your video clips, transitions, effects, and more laid out in chronological order while you are working on your project. You can Premiere Pro trim video clips on the timeline, and at any point, play your project to check how your edits will look.
Remember that edits on the Premiere Pro timeline don’t alter your source files, and they are previews of how your edits will appear. That means you can untrim a video clip to extend it to its original length without consequence.
To learn how to trim video in Premiere Pro on the timeline, follow the steps below.
- Double click on the video file you want to trim in Premiere Pro.
- Adjust the timings of your edits. Drag the ends of your video clip as if you are resizing a window to shorten or extend by trimming. As your cursor gets closer at the edge of the video clip, you’ll see a red arrow.

- The Ripple Edit tool lets you trim video clips without leaving a white gap. You can also use it to push adjacent video clips later in the sequence.

- The Rolling Edit tool allows you to adjust the timing of the edit you make between two video clips and extends a clip by the same size you shorten the other.
- Click the padlock icon located on the tracker header to lock the entire track and prevent unwanted changes.

- You can also use the Q and W keys on your keyboard to Premiere Pro trim video. The Q key removes unwanted content at the beginning of the clip, while the W key trims the end of the clip.
- Choose the Selection tool once you’ve finished using the trimming tools.
Method 2:Trim Clips in the Program
You can also trim videos in the Program Monitor. Follow the guide below to learn how to trim a video in Premiere Pro program monitor.
- Double-click the end of your video clip to enter the Trim Mode in the program.
- To trim, drag on the images of your video in the program monitor. You can also use the buttons on the panel.

- To exit Trim mode, click an empty section in the Timeline panel.
You can change how trimming works by Command-clicking (macOS) or Control-clicking (Windows) on the images of the video in the program while you are in the Timeline panel or Trim Mode. The yellow cursor means ripple trimming, while the red pointer means regular trimming.
The benefit of trimming videos in the Program Monitor is that the precision adjustment buttons under the footage allow you to trim 1 or 5 frames at a time.
Extra Tips About Trimming Videos in Premiere Pro
We have provided some tips that you should keep in mind when using Adobe Premiere trim video.
How to Trim a Video without Re-Rendering?
When adding a video to Premiere Pro, it will be rendered by this software application to ensure high-quality playback and speed. Rendering takes time afterward, leading to loss of quality; however, it makes sure you have gotten the best video quality as much as possible by removing skipped frames and lag from the video playback.
If you are wondering how to trim videos in Premiere Pro without re-render follow the steps below:
- Import your video to Premiere Pro by launching the application and choosing ‘Import Media to Start’. Browse and select the video you want to trim.
- The video will appear in the media library area at the bottom of the screen.
- Drag and drop the video from the media library to the timeline. You’ll see the complete video clip duration in the timeline.
- You can crop the video by dragging the blue time marker to the duration where you would like to start the video.
- Hold the ‘Ctrl’ key on your keyboard, then drag the starting end of the video clip to the time marker position. You’ll remove unnecessary video content from the beginning of your video.
- You can trim the video from its other end by following the same steps but from the opposite direction. You can only use this method to trim from one of the ends of your video clip.
- Choose the ‘Laser Tool’ located at the side menu of the timeline to trim from the center of the video clip. Now, click on the clip at the position you want to trim, and the application will cut the video from this position.
- Follow steps 2 to 4 to trim from cuts you’ve just made.

- Go to ‘File’ and choose the ‘Export’ option. Tap ‘Media’ from the list, and you will be directed to the export setting. Here, you can adjust specific settings, such as quality, name, and format. Click ‘Export’ after entering the appropriate information.

Unlink Audio and Video for Trimming
When you upload a video file to Adobe Premiere Pro and take it into the timeline, the audio tracks and video will be synced and locked. Essentially, this ensures there is no misalignment when the program converts the video to another format. For example, importing it into another video editor can cause a mis-sync between audio and video if the two tracks are not locked or linked.
Video editing professionals avoid this by locking the two tracks together. As such, you might want to unlink or unlock the two before doing anything. To do this, you need to import the video into the application and take it to the timeline with the associated tracks. Then, select the video track alone.

Next, right-click the video track and select the Unlink option. The software will separate the audio from the video track. You can now trim either of these.
How to Trim and Re-Encode Videos without Re-Rendering
Follow the method below to trim video Premiere Pro and encode it without rendering it.
- Launch Premiere Pro and navigate to File, then choose import. Find the video that you want to trim and double click on it.
- Drag and drop the video into the timeline.
- Choose the ‘Ripple Edit Tool’ and then Press ‘Sequence’. Head to ‘Sequence Settings’ and set or modify the codec, bitrate, name, format, and much more.
- Adjust the Ripple so that it defines the end time and start time that you want for your video.
- Now, finalize the trim by choosing ‘File’ and tap ‘Export’. To ‘Export Settings,’ elect ‘Media’.
Conclusion
● Now that you know how to trim videos in Premiere Pro, you can remove unnecessary portions at the beginning or end of your videos. In turn, your videos will attract more viewers.
Also read:
- New 2024 Approved Every Compositor Should Know The Trick of Color Match in After Effects
- Splitting Video in VSDC Step by Step for 2024
- New In 2024, An Overview of the Best Free LUTs to Use
- Unleash the Power of Video Slow Motion with Wondershare Filmora. Find Out How to Create Slow Motion Video with the Effective Speed Ramping Feature on Filmora for 2024
- Do You Know There Are Websites to Download Free Glitch Transition Effects for Premiere Pro? You Can Easily Download Them and Make Awesome Videos
- Updated Overview of Best LUTs for Vlog for 2024
- Updated In 2024, How to Make Foggy Text Reflection Effect
- Color Match Game Tips for You for 2024
- Updated Have You Ever Wanted to Stop Your Video and Hold on to a Single Frame to Draw Attention to a Point or for Dramatic Flair? Good News! VEGAS Pro Makes It Easy to Do Just That. In This Tutorial, Well Look at How to Make Sony Vegas Freeze Frame
- Whatever the Reason You Want to Convert an Mp4 to GIF Online, There Are a Number of Ways to Do It. Use This Guide to Learn the Best Methods. Read More Here for 2024
- New AI Features of Filmora - Silence Detection in Videos
- Updated How to Edit A Time Lapse Video on iPhone, In 2024
- How to Vlog? A Beginners Guide to Start Vlogging
- Updated 2024 Approved 10 Recommended Websites to Discover Awesome Premiere Pro Video Templates
- Create Intro Video with Flixpress for 2024
- Updated 2024 Approved Why Vimeo Slideshow Maker Become Popular
- Overview About Supported iPhone Video Formats and Best iPhone Video Editor & Converter for 2024
- Updated In 2024, How to Create an Alternate Reality Effect
- Updated In 2024, Some Leading AI Tools to Replace Sky Backgrounds
- Updated 2024 Approved How Can You Import and Adjust the Video Clips on Wondershare Filmora?
- iPhone Transfer Transfer Contact from Apple iPhone 15 Pro Max to iPhone without iCloud | Dr.fone
- In 2024, Top 10 Password Cracking Tools For Vivo V29
- In 2024, Can I use iTools gpx file to catch the rare Pokemon On Meizu 21 | Dr.fone
- How to Unlock Apple ID Activation Lock From Apple iPhone 12 Pro?
- In 2024, Is pgsharp legal when you are playing pokemon On Vivo Y36i? | Dr.fone
- In 2024, 3 Ways to Unlock Your Apple iPhone 14 Pro for Free
- In 2024, Hassle-Free Ways to Remove FRP Lock on Motorola Edge 40 Phones with/without a PC
- What To Do if Your Tecno Phantom V Fold Auto Does Not Work | Dr.fone
- How to Track a Lost Vivo Y27 5G for Free? | Dr.fone
- Lock Your Itel A60 Phone in Style The Top 5 Gesture Lock Screen Apps
- In 2024, How to Make the Most of Your iPhone 12 Pro Max Lock Screen with Notifications? | Dr.fone
- In 2024, Top 6 Apps/Services to Trace Any Apple iPhone XS Location By Mobile Number | Dr.fone
- In 2024, How to Get and Use Pokemon Go Promo Codes On Honor X7b | Dr.fone
- In 2024, Hassle-Free Ways to Remove FRP Lock on OnePlus Ace 3with/without a PC
- Title: In 2024, Track Mattes The Ultimate Guide For After Effects
- Author: Morgan
- Created at : 2024-06-24 01:30:16
- Updated at : 2024-06-25 01:30:16
- Link: https://ai-video-editing.techidaily.com/in-2024-track-mattes-the-ultimate-guide-for-after-effects/
- License: This work is licensed under CC BY-NC-SA 4.0.

