
:max_bytes(150000):strip_icc():format(webp)/is-audible-worth-it-00616437e29b4d108264ba36057bbdde.jpg)
Learn Everything About Leeming LUT Pro for 2024
Learn Everything About Leeming LUT Pro
Create High-Quality Video - Wondershare Filmora
An easy and powerful YouTube video editor
Numerous video and audio effects to choose from
Detailed tutorials are provided by the official channel
Color grading can be a tedious process, especially if you don’t have the technical skills required to achieve the desired result. That’s where a LUT can come in handy. So, what is a LUT?
LUT stands for “look up table.” Simply put, a LUT is a color preset that you can apply to your video footage to speed up the color grading process. While LUTs are commonly used to speed up the color grading process, they can also be used for other tasks, such as color transfer between software, monitor calibration, and more.
In this article, we’ll explore a particular LUT – Leeming LUT Pro™ and how you can use it in various video editors.

In this article
02 Supported Cameras of Leeming LUT Pro™
03 How to Import and Use Leeming LUT Pro™ in Different Video Editors
What is Leeming LUT Pro™?
Leeming LUT Pro™ is the world’s first unified, corrective Look Up Table (LUT) system for supported cameras. It’s designed to maximize dynamic range, fix skin tones, remove unwanted color casts and provide an accurate Rec709 starting point for further creative color grading.
The Pro LUTs are designed for perfect Rec709 colorimetry and have a linear luma curve, with an average measured dE(2000) of less than 1. As a result, they are visually indistinguishable from reality to the human eye.
Athena LUTs are a brighter version of Pro. They are designed around how the eye sees while retaining the same perfect colorimetry as Pro.
Supported Cameras of Leeming LUT Pro™
- Panasonic G Series: All G series cameras with Cine-D, V-LogL, and HLG for Rec709
- Panasonic S Series: All S series cameras with V-Log, V-Log BRAW, V-Log ProRes RAW, Cine-D, Cine-D2, and HLG for Rec709
- Fujifilm X Series: All X Series cameras with F-Log, Eterna Cinema, Pro Neg Std, and HLG for Rec709
- Canon R Series: All R series cameras with the Faithful Picture Style, C-Log, C-Log3, and CanonRAW
- Canon C Series: All C series cameras with BT.709, C-Log2, C-Log3, HDR-PQ for Rec709, and HLG for Rec709
- Blackmagic Pocket 4K/6K/6K Pro: All cameras with Gen 4 or Gen5 Film
- Blackmagic Pocket/Micro: Older cameras with Gen1 Film
- Nikon Z Series: All cameras with N-Log, Flat
- Sony A Series: All cameras with Picture profile menus, like the A7, with Cine2, S-Log2, S-Log3, HLG/3 for Rec709, and S-Cinetone
- JVC: GY-LS300 with J-Log1
- RunCam: 5 Orange Normal, Flat
- GoPro: 6,7 8, 9 & 10 ProTune, 4 & 5 ProTune, Session ProTune
- DJI: Mavic3, Phantom 4 Pro, Air 2S, Mavic 2 Pro, Mavic Air 2, Mini Series, Mavic Air, Mavic Pro, Pocket 2, Osmo Pocket, Osmo Action, X5 Series
How to Import and Use Leeming LUT Pro™ in Different Video Editors
Leeming LUT Pro™ is supported by various video editors, coloring software, and motion graphics programs, such as:
- Final Cut Pro X
- Avid Media Composer
- DaVinci Resolve
- Adobe Premiere Pro
- Adobe After Effects
- Magix Vegas
- Grass Valley Edius
- Lightworks
- Cyberlink PowerDirector
- LumaFusion
Next, we’ll explore how you can use Leeming LUT in some popular video editors.
1. How to Use Leeming LUT in FCPX
Follow these steps to use Leeming LUT in Final Cut Pro:
Step 1. Import Footage
Launch Final Cut Pro and import your footage. To import your footage, navigate to the top left corner and click on the import icon (the arrow pointing downwards).
In the window that opens, your camera or device name should appear in the left column under devices.
Click on your camera or device to display the media you want to import. Then select the media you want to import and click on the import selected button in the bottom right corner to import your footage.

Step 2. Highlight the Footage
Highlight all the footage by clicking and dragging your pointer over the footage or press Command + A to select all the footage.

Step 3. Open the Inspector
After highlighting all the footage, open the Inspector menu and click the little i icon. Then go down to the bottom of the Inspector and switch from Basic to General.
Step 4. Select the Camera LUT Option
Select Camera LUT from the options under General and click on the Add Custom Camera LUT option.
Step 5. Import Leeming LUTs into FCPX
Find the folder where your Leeming LUTs are stored and import them into Final Cut Pro by clicking on Open.
Step 6. Select the LUT
Once imported, go back to the Camera LUT option under General and click on it. Then scroll down the available options and select your Leeming LUT under the Custom Camera options.
Finally, click the profile you used to apply it to your footage.
2. How to Use Leeming LUT in PowerDirector
Follow these steps to use a LUT in PowerDirector:
Step 1. Launch PowerDirector
Open PowerDirector and select Full Mode.
Step 2. Import Media
Click the import button and then select Import Media Folder to import the video footage you want to apply the Leeming LUT to.
Step 3. Add Footage to Timeline
Drag and drop the imported video footage into your project’s timeline.
Step 4. Select the Fix/Enhance Option
Click on the video clip on the timeline and choose the Fix/Enhance option.
Step 5. Select the Color Presets & CLUTs Option
In the top left window that opens above the timeline, select the Color Presets & CLUTs option under Enhance.
Step 6. Apply the Leeming LUT to the Footage
Click on the import button in the panel to import the Leeming LUT file. Once imported, apply it to give your video a more vibrant look.
Part 5: Bonus! Use Filmora – Easy to Use Video Editor for Color LUTs
Besides Final Cut Pro and PowerDirector, Filmora is another excellent video editing software that you can use to apply LUTs to your video.
Designed for beginners and intermediate users, Filmora is an intuitive yet powerful video editing software.
For instance, you can apply 3D LUTs to your video using Filmora. Unlike 1D LUTs, which can only control one value setting, 3D LUTs can allow you to control various value settings. As a result, 3D LUTs can give you more control over specific color values in your video.
Here’s how you can apply LUTs using Filmora:
Step 1. Import the Footage
Launch Filmora and choose New Project. In the New Project window that opens, import the video you want to apply the LUT to by clicking on Import and selecting one of the drop-down options.
Step 2. Add the Video to the Timeline
Drag and drop the video into your project’s timeline.
Step 3. Open the Color Tab
Double click the video on the timeline to select it. Once it’s selected, go to the top left panel and click on the color tab.

Step 4. Apply a LUT to the Video
Under the color tab, navigate to the 3D LUT option and select one of the available options in the 3D LUT drop-down menu to apply a LUT.
Many LUTs are named after popular TV shows and series whose visual styles they mimic, such as Batman, House of Cards, Game of Thrones, Mission Impossible, Harry Potter, Star Wars, and more.
Once you apply a LUT, you can see your changes in the Preview Window. Besides using the preset LUTs, Filmora also allows you to use custom LUTs. Instead of choosing one of the presets, click on the Load New LUT option to import your custom LUT into Filmora.
Step 5. Make Fine Adjustments
Once you apply a LUT, Filmora can allow you to make further modifications to the video. Click on the Advanced button at the bottom of the color tab to view advanced color correction options.
In the new window that opens, you can adjust several things, such as color, light, HSL, and more. You can also choose from a variety of other available presets.

Step 6. Save the Changes
Once you’re satisfied with the changes you’ve applied, click on the OK button in the lower right corner to save the changes.
For Win 7 or later (64-bit)
For macOS 10.12 or later
Conclusion
LUTs are a fast way to color grade your footage after color correction. However, to ensure your LUTs work effectively, here are some important guidelines you should observe when using LUTs:
- Ensure your footage matches from shot to shot, especially if you’re applying LUTs to multiple clips.
- Ensure your exposure is correct before using LUTs. You can use a histogram to help you set the exposure.
- Ensure you apply LUTs to a video that’s been properly color corrected.
- Make small adjustments to things, such as brightness, saturation, contrast, exposure, color temperature, and tint for best results.
- Test out various LUTs before settling for one because shooting conditions can drastically affect how different LUTs look.
Ultimately, LUTs are an excellent way to make your video more cinematic. If you don’t have advanced video editing skills or prior experience working with LUTs, don’t worry. Filmora is a user-friendly video editing software that allows you to quickly apply LUTs with no video editing experience. Just download Filmora for free to get started.
Color grading can be a tedious process, especially if you don’t have the technical skills required to achieve the desired result. That’s where a LUT can come in handy. So, what is a LUT?
LUT stands for “look up table.” Simply put, a LUT is a color preset that you can apply to your video footage to speed up the color grading process. While LUTs are commonly used to speed up the color grading process, they can also be used for other tasks, such as color transfer between software, monitor calibration, and more.
In this article, we’ll explore a particular LUT – Leeming LUT Pro™ and how you can use it in various video editors.
In this article
02 Supported Cameras of Leeming LUT Pro™
03 How to Import and Use Leeming LUT Pro™ in Different Video Editors
What is Leeming LUT Pro™?
Leeming LUT Pro™ is the world’s first unified, corrective Look Up Table (LUT) system for supported cameras. It’s designed to maximize dynamic range, fix skin tones, remove unwanted color casts and provide an accurate Rec709 starting point for further creative color grading.
The Pro LUTs are designed for perfect Rec709 colorimetry and have a linear luma curve, with an average measured dE(2000) of less than 1. As a result, they are visually indistinguishable from reality to the human eye.
Athena LUTs are a brighter version of Pro. They are designed around how the eye sees while retaining the same perfect colorimetry as Pro.
Supported Cameras of Leeming LUT Pro™
- Panasonic G Series: All G series cameras with Cine-D, V-LogL, and HLG for Rec709
- Panasonic S Series: All S series cameras with V-Log, V-Log BRAW, V-Log ProRes RAW, Cine-D, Cine-D2, and HLG for Rec709
- Fujifilm X Series: All X Series cameras with F-Log, Eterna Cinema, Pro Neg Std, and HLG for Rec709
- Canon R Series: All R series cameras with the Faithful Picture Style, C-Log, C-Log3, and CanonRAW
- Canon C Series: All C series cameras with BT.709, C-Log2, C-Log3, HDR-PQ for Rec709, and HLG for Rec709
- Blackmagic Pocket 4K/6K/6K Pro: All cameras with Gen 4 or Gen5 Film
- Blackmagic Pocket/Micro: Older cameras with Gen1 Film
- Nikon Z Series: All cameras with N-Log, Flat
- Sony A Series: All cameras with Picture profile menus, like the A7, with Cine2, S-Log2, S-Log3, HLG/3 for Rec709, and S-Cinetone
- JVC: GY-LS300 with J-Log1
- RunCam: 5 Orange Normal, Flat
- GoPro: 6,7 8, 9 & 10 ProTune, 4 & 5 ProTune, Session ProTune
- DJI: Mavic3, Phantom 4 Pro, Air 2S, Mavic 2 Pro, Mavic Air 2, Mini Series, Mavic Air, Mavic Pro, Pocket 2, Osmo Pocket, Osmo Action, X5 Series
How to Import and Use Leeming LUT Pro™ in Different Video Editors
Leeming LUT Pro™ is supported by various video editors, coloring software, and motion graphics programs, such as:
- Final Cut Pro X
- Avid Media Composer
- DaVinci Resolve
- Adobe Premiere Pro
- Adobe After Effects
- Magix Vegas
- Grass Valley Edius
- Lightworks
- Cyberlink PowerDirector
- LumaFusion
Next, we’ll explore how you can use Leeming LUT in some popular video editors.
1. How to Use Leeming LUT in FCPX
Follow these steps to use Leeming LUT in Final Cut Pro:
Step 1. Import Footage
Launch Final Cut Pro and import your footage. To import your footage, navigate to the top left corner and click on the import icon (the arrow pointing downwards).
In the window that opens, your camera or device name should appear in the left column under devices.
Click on your camera or device to display the media you want to import. Then select the media you want to import and click on the import selected button in the bottom right corner to import your footage.
Step 2. Highlight the Footage
Highlight all the footage by clicking and dragging your pointer over the footage or press Command + A to select all the footage.
Step 3. Open the Inspector
After highlighting all the footage, open the Inspector menu and click the little i icon. Then go down to the bottom of the Inspector and switch from Basic to General.
Step 4. Select the Camera LUT Option
Select Camera LUT from the options under General and click on the Add Custom Camera LUT option.
Step 5. Import Leeming LUTs into FCPX
Find the folder where your Leeming LUTs are stored and import them into Final Cut Pro by clicking on Open.
Step 6. Select the LUT
Once imported, go back to the Camera LUT option under General and click on it. Then scroll down the available options and select your Leeming LUT under the Custom Camera options.
Finally, click the profile you used to apply it to your footage.
2. How to Use Leeming LUT in PowerDirector
Follow these steps to use a LUT in PowerDirector:
Step 1. Launch PowerDirector
Open PowerDirector and select Full Mode.
Step 2. Import Media
Click the import button and then select Import Media Folder to import the video footage you want to apply the Leeming LUT to.
Step 3. Add Footage to Timeline
Drag and drop the imported video footage into your project’s timeline.
Step 4. Select the Fix/Enhance Option
Click on the video clip on the timeline and choose the Fix/Enhance option.
Step 5. Select the Color Presets & CLUTs Option
In the top left window that opens above the timeline, select the Color Presets & CLUTs option under Enhance.
Step 6. Apply the Leeming LUT to the Footage
Click on the import button in the panel to import the Leeming LUT file. Once imported, apply it to give your video a more vibrant look.
Part 5: Bonus! Use Filmora – Easy to Use Video Editor for Color LUTs
Besides Final Cut Pro and PowerDirector, Filmora is another excellent video editing software that you can use to apply LUTs to your video.
Designed for beginners and intermediate users, Filmora is an intuitive yet powerful video editing software.
For instance, you can apply 3D LUTs to your video using Filmora. Unlike 1D LUTs, which can only control one value setting, 3D LUTs can allow you to control various value settings. As a result, 3D LUTs can give you more control over specific color values in your video.
Here’s how you can apply LUTs using Filmora:
Step 1. Import the Footage
Launch Filmora and choose New Project. In the New Project window that opens, import the video you want to apply the LUT to by clicking on Import and selecting one of the drop-down options.
Step 2. Add the Video to the Timeline
Drag and drop the video into your project’s timeline.
Step 3. Open the Color Tab
Double click the video on the timeline to select it. Once it’s selected, go to the top left panel and click on the color tab.
Step 4. Apply a LUT to the Video
Under the color tab, navigate to the 3D LUT option and select one of the available options in the 3D LUT drop-down menu to apply a LUT.
Many LUTs are named after popular TV shows and series whose visual styles they mimic, such as Batman, House of Cards, Game of Thrones, Mission Impossible, Harry Potter, Star Wars, and more.
Once you apply a LUT, you can see your changes in the Preview Window. Besides using the preset LUTs, Filmora also allows you to use custom LUTs. Instead of choosing one of the presets, click on the Load New LUT option to import your custom LUT into Filmora.
Step 5. Make Fine Adjustments
Once you apply a LUT, Filmora can allow you to make further modifications to the video. Click on the Advanced button at the bottom of the color tab to view advanced color correction options.
In the new window that opens, you can adjust several things, such as color, light, HSL, and more. You can also choose from a variety of other available presets.
Step 6. Save the Changes
Once you’re satisfied with the changes you’ve applied, click on the OK button in the lower right corner to save the changes.
For Win 7 or later (64-bit)
For macOS 10.12 or later
Conclusion
LUTs are a fast way to color grade your footage after color correction. However, to ensure your LUTs work effectively, here are some important guidelines you should observe when using LUTs:
- Ensure your footage matches from shot to shot, especially if you’re applying LUTs to multiple clips.
- Ensure your exposure is correct before using LUTs. You can use a histogram to help you set the exposure.
- Ensure you apply LUTs to a video that’s been properly color corrected.
- Make small adjustments to things, such as brightness, saturation, contrast, exposure, color temperature, and tint for best results.
- Test out various LUTs before settling for one because shooting conditions can drastically affect how different LUTs look.
Ultimately, LUTs are an excellent way to make your video more cinematic. If you don’t have advanced video editing skills or prior experience working with LUTs, don’t worry. Filmora is a user-friendly video editing software that allows you to quickly apply LUTs with no video editing experience. Just download Filmora for free to get started.
The Best Tools for Converting Slides to Digital - 2024 Review
The Best Tools for Converting Slides to Digital - Review
An easy yet powerful editor
Numerous effects to choose from
Detailed tutorials provided by the official channel
Are you looking to convert your slides into digital form at home? Are you in search of the best tools for converting old slides to digital? Here, you will get every single detail for it. These conversion tools can help you to convert your old slides into digital images just by sitting at home. In this blog, we will discuss the need, how to achieve it, and the best 8 tools for the conversion. The list of these top tools will be based on the user reviews and ratings of 2024.
In this article
01 [Why We Need to Turn Old Slides into Digital Images](#Part 1)
02 [How to Convert Slides to Digital - Step-by-Step Guide](#Part 2)
03 [Best 8 Slide to Digital Image Converters 2024](#Part 3)
04 [FAQ of Converting Slides to Digital](#Part 4)
Part 1 Why We Need to Turn Old Slides into Digital Images
In this digital era, people rather have access to projectors to view old slides. Therefore, it is beneficial to convert those slides into digital form. There are also many benefits of this conversion such as:
● Preserving the photos for future generations without the fear of getting them lost or damaged.
● Old slides might fade up and you can give them a brand new look by using new tools and technologies.
● The organization becomes much easier than the physical ones.
● It will create less clutter.
● You can share the pictures with just one click with your friends, family members, etc to flourish the memories.
● It lets you enjoy your old memories in a better and more enhanced way.
So, you might have understood why there is a need for converting slides to pictures. Now, let’s dig down more on the topic.
Part 2 How to Convert Slides to Digital - Step-by-Step Guide
Here, we will discuss step-by-step ways to turn the old slides into digital images. So, let’s begin:
Step 1: Resolution
The very first step for converting slides to digital photos is measuring and fixing the resolution of the slides. The technical measurement of image resolution is DPI (dot per inch). It helps you to predict the sharpness or clarity of the final image. The overall measurement depends on the size of the slide and the type of converter or scanner you are using. For example,
A 35 mm slide scanned at 10 MP will give you the images of size 13”*9”.
Step 2: Dust and Scratch Removal
If you have slides that have been wrapped in a box and remained untouched for so long, they might require cleaning. Such slides may develop mold buildup, age-related blemishes, or scratches. They need a cleaning process before using them to convert into slides. A lint-free cloth and an anti-static film cleaner are the best combinations to gently clean the slides and make them fresh.
Step 3: Color Correction and Restoration
Color correction and restoration is another important step when you are dealing with converting old slides into digital images. In order to correct the fading and color shift, you can use the built-in scanning software. You can also use other software for such purposes.
Wondershare Filmora is the best tool which can be used for the color correction of old slides. It is a handy tool with a variety of features. Filmora offers a number of options when it comes to color correction and grading. These options include color histogram, white balance, 3D LUT (3D Lookup table), color and light, HSL, vignette, etc.
Step 4: Using the Best Scanner cum Digital Converter
The next step is choosing the best quality scanner according to the requirement. 35 mm is the most common size of the slides. But, it does come with other uncommon formats too such as 110, 126, 120, 127, etc. You will come to know about the actual size when the image is mounted on the cardboard. Therefore, it is essential to select a quality and versatile scanner which can convert slides of any size effectively.
Part 3 Best 8 Slide to Digital Image Converters 2024
Here, you can run down the list of the best tools to convert the photo slides into digital images on the basis of user reviews and ratings.
01Wolverine Titan 8-in-1

Wolverine Titan 8-in-1 is one of the top choices when it comes to converting photo slides to digital. It is easy to use the device with a fast conversion process. It provides a variety of features such as:
● High output resolution
● Large built-in display
● Wide-format compatibility
● Standalone performance
● Small, compact, and lightweight design
● Pretty fast processing
● Fast uploading slide-adapters
● 4.3-inch color display
● Contains HDMI-to-out jack
● Comes in 3 colors
● Highest quality sensors
● Available at a reasonable price
02Digitnow Film Scanner

A digitnow film scanner is a great option for converting physical photo prints or slides into digital images. The easy to use standalone device comes with a small display which can be attached to the TV screen, PC, or MacBook. It provides a lot of additional tools including
● Adapter tray frames to hold photo prints and slides.
● Slots to insert slides into the scanner.
● GB memory card to hold approximately 1000 photos.
● A disc of image retouching software for Windows users.
● A soft brush to clean dust and other debris from slides and film.
● User manual.
● TV cable.
● Standard buttons.
03Plustek ePhoto Z300

Plustek ePhoto Z300 is not just a slide converter but also a photo scanner. It has the capability to convert a photo or slide of size 6*4 in just 2 to 3 seconds. This simple and compact photo scanner can be attached to a PC or Mac. The device also has a built-in editor which provides photo editing options along with the crop and resizes. The major advantage of this tool is its fastest scanning capacity. This is a good option if you own a large collection of old photos and wish to digitize them quickly. You can use this device by combining it with others too.
04Sharper Image Slide and Negative Converter

It is a lightweight slide to digital converter weighing just 0.6 pounds. The tool provides on-screen interfaces in 7 languages. Despite its small size, the tool has as many features as compared to other slide converters. Sharper image slide and negative converter are easy to use with a basic interface and clearly labeled buttons. The additional tools that come with this device are:
● Cleaning brush
● User manual
● Well designed plastic frame trays
The converter does not come with an in-built SD card and you are required to buy one.
05Kodak Scanza Digital Film and Slide Scanner

Kodak scanza digital film and slide scanner is the best tool if you have a large heap of images. It provides the largest storage option and due to which it is a little expensive. Scanza can convert images and reels into JPEG files within seconds of time. The device is an all-rounder and contains all the latest features and specifications. One can easily use this plastic design and lightweight device because of its small and sleek design. The additional features of Scanza include:
● Adjustable brightness option
● Removable SD card slot
● Powerful photo editing option
● USB power cable
● HDMI cable
● AC adapter
● Video cable
● Six adapter trays
● Film cleaning brush
● 3.5 inch TFT LCD screen
06Zonoz FS-3 22MP All-in-1

Zonoz FS-3 22 MP All-in-1 is a wonderful option if you are looking for a digital converter in an affordable range. It can convert up to 35, 110, 126 slides and negatives along with Super 8 film. One benefit of using this converter is the output images look sharper when compared to other converters. The additional features that the tool avail to its users are:
● Photo editing capabilities
● Brightness adjustment
● Mirroring or flipping
● Small built-in color display
● Adapter tray frames
● Cleaning brush
● USB and TV cables
● User manual
07Kodak Mini Digital Films and Slide Scanners

This miniature scanner model is the best selling slide scanner on the internet. Anyone can use it easily without any requirement for external extensions. With a rating of 4.2 upon 5, it is on the list of best slide scanners of 2024. It weighs around 1.4 pounds and measures 3.6*3.4*3.9 inches.
08Magnasonic
Magnasonic is named as the fastest slide scanner. The device is capable of quickly scanning the slides which saves both your time and efforts. It comes with fast scanning speed, 2.4 inch LCD screen, and 22 MP quality. The tool allows you to store upto 100 images. It also comes with some additional tools such as featured film trays etc.
Part 4 FAQ of Converting Slides to Digital
01What to do with the old slides?
Converting slides to digital images can help you to experiment a lot with them. The old slides might be faded and you can use some tools with the option color correction to make them look new and more appealing. Videos are in trend these days. You can create a video out of those slides after converting them into digital. It will help you to enjoy the old memories in the new version with new effects, songs, etc.
Wondershare Filmora Video Editor is the most powerful tool to prepare an effective video in a hassle-free manner. It has many useful features to make your video more enhanced. Also, it has the option of color correction and grading to make the faded old pics colorful and better. There is no need for professionalism to use this tool, but any beginner can also use it effectively with ease. So, make your memories everlasting with Wondershare Filmora.
For Win 7 or later (64-bit)
For macOS 10.12 or later
02Can you clean negatives with alcohol?
Yes, it is possible to clean negatives with alcohol. But make sure to use 98% isopropyl alcohol for this purpose. For cleaning, use a cotton ball and dab it on the alcohol. Then, lightly wipe the negatives and keep them to dry for some time.
● Ending Thoughts →
● So, hope you get all the required knowledge to convert the slides into digital images.
● We have shared the list of top tools for the purpose. Now, it is up to you to choose any according to your suitability and requirement.
● Just use these devices and accomplish your conversion purpose at home without the need for any professional and worrying about the cost of converting slides to digital.
● At last, with the help of Filmora create an effective video to make your memories everlasting and enhanced.
Are you looking to convert your slides into digital form at home? Are you in search of the best tools for converting old slides to digital? Here, you will get every single detail for it. These conversion tools can help you to convert your old slides into digital images just by sitting at home. In this blog, we will discuss the need, how to achieve it, and the best 8 tools for the conversion. The list of these top tools will be based on the user reviews and ratings of 2024.
In this article
01 [Why We Need to Turn Old Slides into Digital Images](#Part 1)
02 [How to Convert Slides to Digital - Step-by-Step Guide](#Part 2)
03 [Best 8 Slide to Digital Image Converters 2024](#Part 3)
04 [FAQ of Converting Slides to Digital](#Part 4)
Part 1 Why We Need to Turn Old Slides into Digital Images
In this digital era, people rather have access to projectors to view old slides. Therefore, it is beneficial to convert those slides into digital form. There are also many benefits of this conversion such as:
● Preserving the photos for future generations without the fear of getting them lost or damaged.
● Old slides might fade up and you can give them a brand new look by using new tools and technologies.
● The organization becomes much easier than the physical ones.
● It will create less clutter.
● You can share the pictures with just one click with your friends, family members, etc to flourish the memories.
● It lets you enjoy your old memories in a better and more enhanced way.
So, you might have understood why there is a need for converting slides to pictures. Now, let’s dig down more on the topic.
Part 2 How to Convert Slides to Digital - Step-by-Step Guide
Here, we will discuss step-by-step ways to turn the old slides into digital images. So, let’s begin:
Step 1: Resolution
The very first step for converting slides to digital photos is measuring and fixing the resolution of the slides. The technical measurement of image resolution is DPI (dot per inch). It helps you to predict the sharpness or clarity of the final image. The overall measurement depends on the size of the slide and the type of converter or scanner you are using. For example,
A 35 mm slide scanned at 10 MP will give you the images of size 13”*9”.
Step 2: Dust and Scratch Removal
If you have slides that have been wrapped in a box and remained untouched for so long, they might require cleaning. Such slides may develop mold buildup, age-related blemishes, or scratches. They need a cleaning process before using them to convert into slides. A lint-free cloth and an anti-static film cleaner are the best combinations to gently clean the slides and make them fresh.
Step 3: Color Correction and Restoration
Color correction and restoration is another important step when you are dealing with converting old slides into digital images. In order to correct the fading and color shift, you can use the built-in scanning software. You can also use other software for such purposes.
Wondershare Filmora is the best tool which can be used for the color correction of old slides. It is a handy tool with a variety of features. Filmora offers a number of options when it comes to color correction and grading. These options include color histogram, white balance, 3D LUT (3D Lookup table), color and light, HSL, vignette, etc.
Step 4: Using the Best Scanner cum Digital Converter
The next step is choosing the best quality scanner according to the requirement. 35 mm is the most common size of the slides. But, it does come with other uncommon formats too such as 110, 126, 120, 127, etc. You will come to know about the actual size when the image is mounted on the cardboard. Therefore, it is essential to select a quality and versatile scanner which can convert slides of any size effectively.
Part 3 Best 8 Slide to Digital Image Converters 2024
Here, you can run down the list of the best tools to convert the photo slides into digital images on the basis of user reviews and ratings.
01Wolverine Titan 8-in-1
Wolverine Titan 8-in-1 is one of the top choices when it comes to converting photo slides to digital. It is easy to use the device with a fast conversion process. It provides a variety of features such as:
● High output resolution
● Large built-in display
● Wide-format compatibility
● Standalone performance
● Small, compact, and lightweight design
● Pretty fast processing
● Fast uploading slide-adapters
● 4.3-inch color display
● Contains HDMI-to-out jack
● Comes in 3 colors
● Highest quality sensors
● Available at a reasonable price
02Digitnow Film Scanner
A digitnow film scanner is a great option for converting physical photo prints or slides into digital images. The easy to use standalone device comes with a small display which can be attached to the TV screen, PC, or MacBook. It provides a lot of additional tools including
● Adapter tray frames to hold photo prints and slides.
● Slots to insert slides into the scanner.
● GB memory card to hold approximately 1000 photos.
● A disc of image retouching software for Windows users.
● A soft brush to clean dust and other debris from slides and film.
● User manual.
● TV cable.
● Standard buttons.
03Plustek ePhoto Z300
Plustek ePhoto Z300 is not just a slide converter but also a photo scanner. It has the capability to convert a photo or slide of size 6*4 in just 2 to 3 seconds. This simple and compact photo scanner can be attached to a PC or Mac. The device also has a built-in editor which provides photo editing options along with the crop and resizes. The major advantage of this tool is its fastest scanning capacity. This is a good option if you own a large collection of old photos and wish to digitize them quickly. You can use this device by combining it with others too.
04Sharper Image Slide and Negative Converter
It is a lightweight slide to digital converter weighing just 0.6 pounds. The tool provides on-screen interfaces in 7 languages. Despite its small size, the tool has as many features as compared to other slide converters. Sharper image slide and negative converter are easy to use with a basic interface and clearly labeled buttons. The additional tools that come with this device are:
● Cleaning brush
● User manual
● Well designed plastic frame trays
The converter does not come with an in-built SD card and you are required to buy one.
05Kodak Scanza Digital Film and Slide Scanner
Kodak scanza digital film and slide scanner is the best tool if you have a large heap of images. It provides the largest storage option and due to which it is a little expensive. Scanza can convert images and reels into JPEG files within seconds of time. The device is an all-rounder and contains all the latest features and specifications. One can easily use this plastic design and lightweight device because of its small and sleek design. The additional features of Scanza include:
● Adjustable brightness option
● Removable SD card slot
● Powerful photo editing option
● USB power cable
● HDMI cable
● AC adapter
● Video cable
● Six adapter trays
● Film cleaning brush
● 3.5 inch TFT LCD screen
06Zonoz FS-3 22MP All-in-1
Zonoz FS-3 22 MP All-in-1 is a wonderful option if you are looking for a digital converter in an affordable range. It can convert up to 35, 110, 126 slides and negatives along with Super 8 film. One benefit of using this converter is the output images look sharper when compared to other converters. The additional features that the tool avail to its users are:
● Photo editing capabilities
● Brightness adjustment
● Mirroring or flipping
● Small built-in color display
● Adapter tray frames
● Cleaning brush
● USB and TV cables
● User manual
07Kodak Mini Digital Films and Slide Scanners
This miniature scanner model is the best selling slide scanner on the internet. Anyone can use it easily without any requirement for external extensions. With a rating of 4.2 upon 5, it is on the list of best slide scanners of 2024. It weighs around 1.4 pounds and measures 3.6*3.4*3.9 inches.
08Magnasonic
Magnasonic is named as the fastest slide scanner. The device is capable of quickly scanning the slides which saves both your time and efforts. It comes with fast scanning speed, 2.4 inch LCD screen, and 22 MP quality. The tool allows you to store upto 100 images. It also comes with some additional tools such as featured film trays etc.
Part 4 FAQ of Converting Slides to Digital
01What to do with the old slides?
Converting slides to digital images can help you to experiment a lot with them. The old slides might be faded and you can use some tools with the option color correction to make them look new and more appealing. Videos are in trend these days. You can create a video out of those slides after converting them into digital. It will help you to enjoy the old memories in the new version with new effects, songs, etc.
Wondershare Filmora Video Editor is the most powerful tool to prepare an effective video in a hassle-free manner. It has many useful features to make your video more enhanced. Also, it has the option of color correction and grading to make the faded old pics colorful and better. There is no need for professionalism to use this tool, but any beginner can also use it effectively with ease. So, make your memories everlasting with Wondershare Filmora.
For Win 7 or later (64-bit)
For macOS 10.12 or later
02Can you clean negatives with alcohol?
Yes, it is possible to clean negatives with alcohol. But make sure to use 98% isopropyl alcohol for this purpose. For cleaning, use a cotton ball and dab it on the alcohol. Then, lightly wipe the negatives and keep them to dry for some time.
● Ending Thoughts →
● So, hope you get all the required knowledge to convert the slides into digital images.
● We have shared the list of top tools for the purpose. Now, it is up to you to choose any according to your suitability and requirement.
● Just use these devices and accomplish your conversion purpose at home without the need for any professional and worrying about the cost of converting slides to digital.
● At last, with the help of Filmora create an effective video to make your memories everlasting and enhanced.
Zoom In and Out on Discord (Desktop + App + Browser Solutions)
Abundant Video Effects - Wondershare Filmora
Provide abundant video effects - A creative video editor
Powerful color correction and grading
Detailed tutorials are provided by the official channel
Discord has gained much popularity in recent years owing to its versatility and wide range of customization options available. It is an innovative program that allows users to communicate via text messages, voice and video calls, media files, and more.
One of the main reasons for Discord’s growing popularity is its multipurpose resources that allow people to stay in touch with their communities. As Discord features are customizable, you can alter the zoom settings on the servers and chat screens to increase visibility and ease.
Not sure how to do that? You can head over to the article below to find easy step-by-step guides on how to zoom in Discord desktop and mobile applications and the official website.
In this article
Part 1: Zoom In and Out on Discord Software
Part 2: Zoom In and Out in Discord Mobile App
Part 3: Zoom In and Out on Discord Website
Part 4: Frequently Asked Questions (FAQs)
Part 1: Zoom In and Out on Discord Software
The Discord desktop software is available for Windows 7 and above, Linux, and Mac computers. If you want to know how to zoom in on Discord desktop software, you have landed on the right page. The following steps indicate how to zoom in or out on Discord’s desktop version by accessing the software’s settings.
Step 1: To begin with, launch the Discord desktop application on your computer. Sign in to your Discord profile if asked.
Step 2: On Discord’s homepage, in the left corner at the bottom, you will see your profile name along with the headphones and microphone icons. Next to these, a cog-shaped icon for Settings will be visible. Tap on it to launch user settings.

Step 3: Under “User Settings,” locate the “App Settings” category from the sidebar at the left. Find and click on the “Appearance” option from here.

Step 4: When you scroll down under the “Appearance” settings, you will find the sliders to change the “Chant Font Scaling,” “Space between Message Groups,” and the “Zoom Level” settings at the bottom.

Step 5: The sliders are set on a highlighted percentage visible in green by default. If you wish to increase the chat font size, drag that particular slider to the right and check the preview until you arrive at the size you want. To decrease the font size, you have to drag the slider to the left and look for the desired result in the preview section.

Step 6: If you wish to change the zoom levels of all the elements in a chat screen, you can change the “Zoom Level” slider’s position until you reach your desired result. Now exit the Settings window to apply your changes.

Part 2: Zoom In and Out in Discord Mobile App
Discord offers its mobile applications for Android and iOS devices. You can easily change the Discord app’s built-in settings to change the zoom level. To know how to zoom in on the Discord mobile app, take a look at the comprehensive step-by-step guide below:
Step 1: Firstly, install and launch the Discord app on your mobile and sign in to your profile.
Step 2: Go to the app’s homepage and search for your profile icon at the bottom-right corner of the screen. Click on it to access “User Settings.”

Step 3: Now, look for the “Appearance” settings by scrolling down and tapping on it. You will see the “Chat Font Scaling” option and a slider under it. You can drag the slider to adjust the font size on the Discord application.

Step 4: You can drag the slider to the right to increase the font scale across the app and check for your desired preview. To decrease the font size, you will need to drag the slider to the left. Now exit your Settings and restart the app to make your changes effective.

Step 5: If you want to restore the zoom settings to default, you can click the “Reset” button at the bottom left corner of the screen.

Part 3: Zoom In and Out on Discord Website
If you are using the web version of Discord, there are multiple ways to zoom in. On your native web browser, you can access the ellipses icon at the right and find the “Zoom” option. From here, you can simply click on the “+” icon to zoom in and the “-” icon to zoom out on the page you have opened at the moment.
If you prefer to change the Zoom settings using Discord’s native settings, you can easily do so in the web version using keyboard shortcuts. Here is an in-depth guide indicating how to zoom out in Discord for the online version.
Step 1: Launch the web browser on your computer and open the online version of the Discord software. You might be asked to sign in to your profile at this point.

Step 2: Once you are at the homepage of your Discord profile, you can access the keyboard shortcuts to zoom in or out. To zoom in on Discord, simply hold the “CTRL” key on your keyboard and click the “+” icon key. Each click of the key will result in a 10% increase in the zoom level of the screen.

Step 3: If you want to zoom out on Discord’s screen, you can use your keyboard. Similar to the step mentioned above, tap the “-” key on your keyboard while holding down the “Ctrl” key to make your screen and chat appear smaller.

Step 4: You can reset the zoom settings to default by holding down the “Ctrl” key and hitting “0” on the keyboard. This will restore the settings back to the default 100%.
Part 4: Frequently Asked Questions (FAQs)
Are Discord zoom and text size settings different?
Yes, there is a difference between the zoom levels and the text size settings on Discord. By changing the zoom levels of the software, you alter the zoom level of all the elements, including icons, images, windows, and more, across the Discord application. Changing the text size settings will simply alter the chat font scale in a specific chat window.
Does changing the Discord zoom on my PC affect the settings on my mobile app?
No, all the changes made on the zoom level or text size of Discord remain limited to the version of the software you are currently using. If you change the zoom settings on your PC, the change will not be reflected on your mobile application.
Conclusion
Digital chatting applications such as Discord have made it exceedingly easy to stay in touch with friends and family over long distances. From sending and receiving messages to voice and video calls, you can do a lot with Discord.
If you are a Discord user, knowing how to alter the zoom level on the app can prove to be incredibly beneficial. By changing the zoom settings on Discord, you can make the text, images, and other items present on the screen appear bigger or smaller. With the guide mentioned above, you now know how to zoom in on Discord across the mobile, desktop, and web.
Discord has gained much popularity in recent years owing to its versatility and wide range of customization options available. It is an innovative program that allows users to communicate via text messages, voice and video calls, media files, and more.
One of the main reasons for Discord’s growing popularity is its multipurpose resources that allow people to stay in touch with their communities. As Discord features are customizable, you can alter the zoom settings on the servers and chat screens to increase visibility and ease.
Not sure how to do that? You can head over to the article below to find easy step-by-step guides on how to zoom in Discord desktop and mobile applications and the official website.
In this article
Part 1: Zoom In and Out on Discord Software
Part 2: Zoom In and Out in Discord Mobile App
Part 3: Zoom In and Out on Discord Website
Part 4: Frequently Asked Questions (FAQs)
Part 1: Zoom In and Out on Discord Software
The Discord desktop software is available for Windows 7 and above, Linux, and Mac computers. If you want to know how to zoom in on Discord desktop software, you have landed on the right page. The following steps indicate how to zoom in or out on Discord’s desktop version by accessing the software’s settings.
Step 1: To begin with, launch the Discord desktop application on your computer. Sign in to your Discord profile if asked.
Step 2: On Discord’s homepage, in the left corner at the bottom, you will see your profile name along with the headphones and microphone icons. Next to these, a cog-shaped icon for Settings will be visible. Tap on it to launch user settings.
Step 3: Under “User Settings,” locate the “App Settings” category from the sidebar at the left. Find and click on the “Appearance” option from here.
Step 4: When you scroll down under the “Appearance” settings, you will find the sliders to change the “Chant Font Scaling,” “Space between Message Groups,” and the “Zoom Level” settings at the bottom.
Step 5: The sliders are set on a highlighted percentage visible in green by default. If you wish to increase the chat font size, drag that particular slider to the right and check the preview until you arrive at the size you want. To decrease the font size, you have to drag the slider to the left and look for the desired result in the preview section.
Step 6: If you wish to change the zoom levels of all the elements in a chat screen, you can change the “Zoom Level” slider’s position until you reach your desired result. Now exit the Settings window to apply your changes.
Part 2: Zoom In and Out in Discord Mobile App
Discord offers its mobile applications for Android and iOS devices. You can easily change the Discord app’s built-in settings to change the zoom level. To know how to zoom in on the Discord mobile app, take a look at the comprehensive step-by-step guide below:
Step 1: Firstly, install and launch the Discord app on your mobile and sign in to your profile.
Step 2: Go to the app’s homepage and search for your profile icon at the bottom-right corner of the screen. Click on it to access “User Settings.”
Step 3: Now, look for the “Appearance” settings by scrolling down and tapping on it. You will see the “Chat Font Scaling” option and a slider under it. You can drag the slider to adjust the font size on the Discord application.
Step 4: You can drag the slider to the right to increase the font scale across the app and check for your desired preview. To decrease the font size, you will need to drag the slider to the left. Now exit your Settings and restart the app to make your changes effective.
Step 5: If you want to restore the zoom settings to default, you can click the “Reset” button at the bottom left corner of the screen.
Part 3: Zoom In and Out on Discord Website
If you are using the web version of Discord, there are multiple ways to zoom in. On your native web browser, you can access the ellipses icon at the right and find the “Zoom” option. From here, you can simply click on the “+” icon to zoom in and the “-” icon to zoom out on the page you have opened at the moment.
If you prefer to change the Zoom settings using Discord’s native settings, you can easily do so in the web version using keyboard shortcuts. Here is an in-depth guide indicating how to zoom out in Discord for the online version.
Step 1: Launch the web browser on your computer and open the online version of the Discord software. You might be asked to sign in to your profile at this point.
Step 2: Once you are at the homepage of your Discord profile, you can access the keyboard shortcuts to zoom in or out. To zoom in on Discord, simply hold the “CTRL” key on your keyboard and click the “+” icon key. Each click of the key will result in a 10% increase in the zoom level of the screen.
Step 3: If you want to zoom out on Discord’s screen, you can use your keyboard. Similar to the step mentioned above, tap the “-” key on your keyboard while holding down the “Ctrl” key to make your screen and chat appear smaller.
Step 4: You can reset the zoom settings to default by holding down the “Ctrl” key and hitting “0” on the keyboard. This will restore the settings back to the default 100%.
Part 4: Frequently Asked Questions (FAQs)
Are Discord zoom and text size settings different?
Yes, there is a difference between the zoom levels and the text size settings on Discord. By changing the zoom levels of the software, you alter the zoom level of all the elements, including icons, images, windows, and more, across the Discord application. Changing the text size settings will simply alter the chat font scale in a specific chat window.
Does changing the Discord zoom on my PC affect the settings on my mobile app?
No, all the changes made on the zoom level or text size of Discord remain limited to the version of the software you are currently using. If you change the zoom settings on your PC, the change will not be reflected on your mobile application.
Conclusion
Digital chatting applications such as Discord have made it exceedingly easy to stay in touch with friends and family over long distances. From sending and receiving messages to voice and video calls, you can do a lot with Discord.
If you are a Discord user, knowing how to alter the zoom level on the app can prove to be incredibly beneficial. By changing the zoom settings on Discord, you can make the text, images, and other items present on the screen appear bigger or smaller. With the guide mentioned above, you now know how to zoom in on Discord across the mobile, desktop, and web.
What Are the Best 10 GIF Creator?
What are the 10 Best GIF Creator?
An easy yet powerful editor
Numerous effects to choose from
Detailed tutorials provided by the official channel
Stay tuned to find the most affordable GIF creator solutions.
In this article
01 [Why Gifs Are Essential for Every Marketer?](#Part 1)
02 [How to Make Your Own GIF?](#Part 2)
03 [What Are 10 Best GIF Creator to Find Brilliant Pre-made Gifs?](#Part 3)
Part 1 Why Gifs Are Essential for Every Marketer?
Everyone around you today is accustomed with the fact that GIFs are an interesting and impactful means of content sharing. These 3-5 second snippets are highly preferred and convenient ways to deliver information that is precise, clear and to the point. When it comes to time frames, short and quick GIFs are obvious choices over lengthy videos. Additionally, GIFs are eye-catchy and keep you captivated to see though the entire content within seconds, contradictory to those monotonous and often dull videos that sound more like a long, boring lecture.
These are an effective media tool that is not limited to sharing information that is chiefly entertainment based or fun centered. You can use them to deliver important content that addresses a specific purpose or audience. Owing to this, GIFs have become an essential marketing utility, here’s why:
● Improve Product Branding:
GIFs can serve as impressive branding tools for your products in the market. Markets today are considerably impacted by the ‘What You See is What You Buy’ concept, which puts forward the need to lay added stress on effective branding.
GIFs are ready to sort this out with their exciting range of features. From video editing choices to sound and color customization, GIFs are loaded with everything you need to improvise your product branding. All you have to do is explore your creativity to make the most of the GIF branding choices.
● Explain it Better
On a preference poll, most of us would shift to ‘watch’ over ‘read’ for a comprehensive understanding. An attractive motion visual is an even better treat. GIFs are pivotal in making viewers relate to the concept and message behind your product in a more enhanced manner.
Additionally, these are a continent means to introduce emotional mobility among your target audience with depictive emojis. You can use GIFs to develop effective content approaches to make the audience connect with your product viability, both practically band emotionally.
● Increase Visitor Attraction
Today’s changing times have brought about a rapid outlook towards everything. All of us are bounded by time constraints and when browsing the web, the prime need is to look for quick and accurate solutions to everything concerned.
Short and exact information delivery of GIFs is something that would keep visitors glued to your site because they will be assured of getting exactly what they search for and that too in an interesting and entertaining way.
Part 2 How to Make Your Own GIF?
Now that you are familiar with the creative marketing credibility of GIFs, you might naturally feel motivated towards creating a GIF of your own. In case you are, see through the following section of this article to find out interesting ways of creating interesting and catchy GIFs, either for impressive product marketing or just to make your social media posts leave your community peers in awe!
Looking for the best GIF creator solutions on the web, you can rely on GIPHY, one of the most preferred and convenient databases to create GIFs quickly. This is a smartphone compatible tool and works well with almost any device. Follow the steps given below to make GIFs with this tool:
Step 1:
Download and install the GIPHY app in your device.
Step 2:
Click on ‘Create’ in the app’s welcome screen. This will change (+) icon at the top-right corner to the ‘Camera’ symbol. You can also navigate to the ‘Profile’ at the bottom-right and tap the (+) or ‘Camera’ icon in the app’s account page.
Step 3:
Click on ‘Allow Camera Access’. You will receive two successive prompt messages from the app. Click on ‘Allow’ to grant access permissions to your device media. When you are done, click on ‘I Agree’.
Step 4:
GIFHY uses your device’s front camera for GIF creation. However, if you need to go for a camera switch, click on the ‘Camera’ sign at the bottom-right.
Step 5:
Choose a desired filter and effect for your GIF with a left or right swipe on the live feed toolbar. The app has 11 amazing and realistic effects, including VHS Static, 3D Glasses, etc.
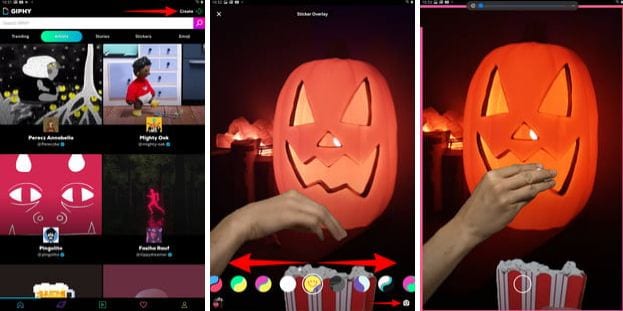
Step 6:
You can take up either of the following:
Press either of the ‘Filter’ or ‘Effect’ buttons to take static shots to create GIF from images, or press and hold the same to create animated GIF. For simply using effects, tap the white button.
In case you choose to create a motion GIF, the app forms a ‘visual timer’ around the editor screen. The motion recording stops once the line is in sync with the screen edges.
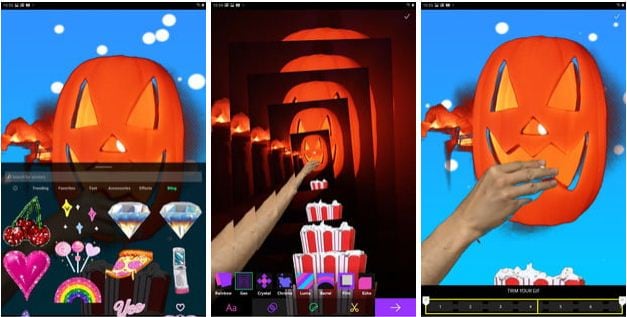
Step 7:
Having captured your perfect shot, you have the liberty to merge it with an image or video. However, do consider the following options to add some more elements to your capture: You can add relatable text in 9 color choices.
● Enhance your graphic presentation with 8 amazing effects like, ‘rainbow overlays’, BW film grains, etc.
● Choose from a never ending list of suitable stickers to add the feel through connect to your GIFs.
● Trim your animated GIFs to the ‘just perfect’ portion by adjusting the editing markers.
Relax; that’s no rocket science. Just tap on the respective buttons and there you go!
Step 8:
Set your GIF in a desired size frame by choosing the ‘Crop’ tool from the top-right corner of the editing screen. You are given a size flexibility of 1:1, 3:2, 16:9, 4:5 and 9:16.

Step 9:
Once you are satisfied with your creation, tap the ‘Right Arrow’ icon. In the interface that follows, add suitable share tags to the GIF.
Step 10:
Tap ‘Share GIF’ to post your creation on social media platforms or share it through popular IM apps. To save your initially captured clip, click on ‘Save Video’ or tap ‘Save GIF’ to save your creation in your smartphone’s memory.
Part 1 What Are 10 Best GIF Creator to Find Brilliant Pre-made Gifs?
Having talked about GIF creation on the go, let’s take a dive into the best GIF creator solutions that are a storehouse of exciting pre-made GIFs. When browsing the web for an affordable GIF maker tool, you land across a pool of choices. Read through the further sections of this article to find out what’s best for you.
Described below are 10 best alternatives to get amazing pre-made GIFs:
● Wondershare Filmora Video Editor
This one is a popular, preferred and top rated application where you get to choose from an exciting range of pre-made GIFs under a variety of specific categories. All you need to do is, visit the app’s official site, browse to your favorite GIF category and select a desired GIF. Follow a few app instructions to save your selection and that’s it! Your selected GIF reaches your device memory within seconds.

Wondershare Filmora - Best Video Editor for Mac/Windows
5,481,435 people have downloaded it.
Build unique custom animations without breaking a sweat.
Focus on creating epic stories and leave the details to Filmora’s auto features.
Start a creative adventure with drag & drop effects and endless possibilities.
Filmora simplifies advanced features to save you time and effort.
Filmora cuts out repetition so you can move on to your next creative breakthrough.
Key Features
● This app is available to you absolutely free of cost.
● Has an intelligent and user cohesive interface.
● Loaded with tons of brilliant GIFs to choose from.
● The app supports GIF customization.
● GIFHY
Launched in 2013, this one is probably the best GIF maker and downloader tool available on the web today. It is a free tool, packed with enormous varieties of GIFs to choose from. What’s more interesting about the app is that you are free to play with your editing creativity to enhance your downloaded GIFs in the GIPHY editor.
Key Features
● It comes with an easy to use, convenient interface.
● You can edit downloaded GIFs with hundreds of effects and filters.
● The app provides you a direct sharing platform, allowing you to post GIFs to various social media platforms and also go for sharing via Instant Messaging applications.
● This is a fast processing tool that allows you to escape the notch of annoying and delayed download processes.
● Tenor
You can conveniently regard this one as the closest competitor to the GIPHY GIF creator and downloader tool. Needless to say, both are quite similar to each other in interface and usage respects. However, focusing on search results for a common keyword, you find diverse variations to your obvious surprise.
Key Features
● This is a free to use, interactive interface tool.
● It introduces a GIF Keyboard that allows you to search the most specific and relatable GIFs.
● It ensures a speedy and high quality GIF download.
● You can explore your editing skills to your heart’s content to improvise the downloaded GIFs with this tool.
● This tool gives you the liberty to directly share GIFs across different platforms.
If you like to spend ample time on choosing what’s perfect for you, refer this online tool for your GIF download solutions. It caters to your love of diversity with the most deep rooted and broad GIF range. However, this one comes with a little messy interface, demanding some patience from you to get to the right thing.
Key Features
● This tool provides you with almost all possible choices for a GIF category.
● It is available to you free of cost
● The tool site is loaded with rich and quality GIF content.
● This one is a direct save and export tool for your downloaded GIFs.
● Gfycat
You can prefer this one as a GIF hosting tool. Developed with a view to launch a common medium for GIF and HTML contents, this app ensures in-time and hassle free downloads and delivery. Though lacking a refined search bar, this tool promises you of excellence in content quality.
Key Features
● This comes to you as one of the most reliable GIF hosting tools.
● It is a free and quick content delivery tool.
● You are allowed to select the most suitable one from a variety of playback choices.
● This tool also gives you the flexibility of direct media sharing.
● GIFbin
If you are hung-over decade old nostalgia and the fever doesn’t seem to go away, you can check this site for some really satisfying retro and other similar content. This would definitely make you take a toll back to the times when MSN and Limewire were unparalleled market leaders in content sharing.
Key Features
● GIFbin is a storehouse of the best animated GIFs, that is on a continuous update to facilitate fresh and quality based content, every time you visit the site.
● It has an advanced, API enabled search mechanism.
● It boasts of having the handiest and convenient user interface.
● If you prefer GIFs of the comic genre, this tool is heaven for you.
● Imgflip
This is another GIF download site, commonly preferred for comedy and fun oriented content. Using this site, you can download and create a variety of GIF based memes that have the potential to flood your social media posts with likes and comments. This one is a complete GIF basket, suited to vast content varieties and user preferences. You will find the site’s official watermark on all its contents.
Key Features
● The site stands among the most preferred GIF-meme creation and sharing platforms.
● The tool is packed with loads of quality content under specific categories
● You can improvise the dimensions of your editing skills to modify downloaded GIFs.
● This site has a default media export feature that you can use to share your GIFs on social media.
● Imgur
Launched in 2009, this is among the most visited GIF sites, originally created for sharing meme based contents on social media. Its extensive search filters are dedicated to fetch the exact GIFs and memes you are looking for. If you are tired of browsing sites for particular content requirements, your search spree will definitely end here.
Key Features
● The site is known for its extensive and diversified content quality.
● It is a free, convenient and dependable GIF download tool.
● Imgur is highly preferred for content export across various media platforms.
● It is equipped with an advanced and updated search filter that assures you of getting fresh and top quality GIFs on almost every possible keyword.
● Tumblr
Claiming a launch date of 13 years back, this is quite a good GIF download option. You can find excellent quality GIF content on the site, particularly in the comic genre. Though not as popular as its online counterparts today, the site definitely enjoyed commendable visitor preferences at the time of its launch. You can certainly visit this site for a filling entertainment dose.
Key Features
● Tumblr is a free download site with a user friendly interface.
● The site is loaded with notable content varieties.
● You can go for direct media sharing through this site.
● Its comic GIFs are quite hilarious.
● Know Your Meme
This site uses the Wiki software to stock an inventory of classic GIFs and memes. Using this database for GIF downloads means that you don’t need to compromise on content and image quality. The site contents are periodically updated to ensure that visitors are not exposed to stale and outdated content.
Key Features
● The site offers fresh content having catchy and latest GIFs.
● This is a complete storehouse of GIFs and memes that can definitely keep you rolling.
● The site comes as a free tool and gas a user cohesive interface
● It hast the most efficient search filters that are regularly improvised to ensure quality content delivery.
● Key Takeaways from This Episode →
● GIFs are an effective and captivating means of quality content sharing and message delivery. Take them as a hilarious entertainment source or use them to enhance your marketing policies, GIFs can do it all.
● Influenced by the user credibility of GIFs, there are loads of GIF creator and download tools available online; among which Filmora by Wondershare is the current market leader. You can use this app to explore your GIF editing skills or download and share latest GIFs across media sharing platforms.
Stay tuned to find the most affordable GIF creator solutions.
In this article
01 [Why Gifs Are Essential for Every Marketer?](#Part 1)
02 [How to Make Your Own GIF?](#Part 2)
03 [What Are 10 Best GIF Creator to Find Brilliant Pre-made Gifs?](#Part 3)
Part 1 Why Gifs Are Essential for Every Marketer?
Everyone around you today is accustomed with the fact that GIFs are an interesting and impactful means of content sharing. These 3-5 second snippets are highly preferred and convenient ways to deliver information that is precise, clear and to the point. When it comes to time frames, short and quick GIFs are obvious choices over lengthy videos. Additionally, GIFs are eye-catchy and keep you captivated to see though the entire content within seconds, contradictory to those monotonous and often dull videos that sound more like a long, boring lecture.
These are an effective media tool that is not limited to sharing information that is chiefly entertainment based or fun centered. You can use them to deliver important content that addresses a specific purpose or audience. Owing to this, GIFs have become an essential marketing utility, here’s why:
● Improve Product Branding:
GIFs can serve as impressive branding tools for your products in the market. Markets today are considerably impacted by the ‘What You See is What You Buy’ concept, which puts forward the need to lay added stress on effective branding.
GIFs are ready to sort this out with their exciting range of features. From video editing choices to sound and color customization, GIFs are loaded with everything you need to improvise your product branding. All you have to do is explore your creativity to make the most of the GIF branding choices.
● Explain it Better
On a preference poll, most of us would shift to ‘watch’ over ‘read’ for a comprehensive understanding. An attractive motion visual is an even better treat. GIFs are pivotal in making viewers relate to the concept and message behind your product in a more enhanced manner.
Additionally, these are a continent means to introduce emotional mobility among your target audience with depictive emojis. You can use GIFs to develop effective content approaches to make the audience connect with your product viability, both practically band emotionally.
● Increase Visitor Attraction
Today’s changing times have brought about a rapid outlook towards everything. All of us are bounded by time constraints and when browsing the web, the prime need is to look for quick and accurate solutions to everything concerned.
Short and exact information delivery of GIFs is something that would keep visitors glued to your site because they will be assured of getting exactly what they search for and that too in an interesting and entertaining way.
Part 2 How to Make Your Own GIF?
Now that you are familiar with the creative marketing credibility of GIFs, you might naturally feel motivated towards creating a GIF of your own. In case you are, see through the following section of this article to find out interesting ways of creating interesting and catchy GIFs, either for impressive product marketing or just to make your social media posts leave your community peers in awe!
Looking for the best GIF creator solutions on the web, you can rely on GIPHY, one of the most preferred and convenient databases to create GIFs quickly. This is a smartphone compatible tool and works well with almost any device. Follow the steps given below to make GIFs with this tool:
Step 1:
Download and install the GIPHY app in your device.
Step 2:
Click on ‘Create’ in the app’s welcome screen. This will change (+) icon at the top-right corner to the ‘Camera’ symbol. You can also navigate to the ‘Profile’ at the bottom-right and tap the (+) or ‘Camera’ icon in the app’s account page.
Step 3:
Click on ‘Allow Camera Access’. You will receive two successive prompt messages from the app. Click on ‘Allow’ to grant access permissions to your device media. When you are done, click on ‘I Agree’.
Step 4:
GIFHY uses your device’s front camera for GIF creation. However, if you need to go for a camera switch, click on the ‘Camera’ sign at the bottom-right.
Step 5:
Choose a desired filter and effect for your GIF with a left or right swipe on the live feed toolbar. The app has 11 amazing and realistic effects, including VHS Static, 3D Glasses, etc.
Step 6:
You can take up either of the following:
Press either of the ‘Filter’ or ‘Effect’ buttons to take static shots to create GIF from images, or press and hold the same to create animated GIF. For simply using effects, tap the white button.
In case you choose to create a motion GIF, the app forms a ‘visual timer’ around the editor screen. The motion recording stops once the line is in sync with the screen edges.
Step 7:
Having captured your perfect shot, you have the liberty to merge it with an image or video. However, do consider the following options to add some more elements to your capture: You can add relatable text in 9 color choices.
● Enhance your graphic presentation with 8 amazing effects like, ‘rainbow overlays’, BW film grains, etc.
● Choose from a never ending list of suitable stickers to add the feel through connect to your GIFs.
● Trim your animated GIFs to the ‘just perfect’ portion by adjusting the editing markers.
Relax; that’s no rocket science. Just tap on the respective buttons and there you go!
Step 8:
Set your GIF in a desired size frame by choosing the ‘Crop’ tool from the top-right corner of the editing screen. You are given a size flexibility of 1:1, 3:2, 16:9, 4:5 and 9:16.
Step 9:
Once you are satisfied with your creation, tap the ‘Right Arrow’ icon. In the interface that follows, add suitable share tags to the GIF.
Step 10:
Tap ‘Share GIF’ to post your creation on social media platforms or share it through popular IM apps. To save your initially captured clip, click on ‘Save Video’ or tap ‘Save GIF’ to save your creation in your smartphone’s memory.
Part 1 What Are 10 Best GIF Creator to Find Brilliant Pre-made Gifs?
Having talked about GIF creation on the go, let’s take a dive into the best GIF creator solutions that are a storehouse of exciting pre-made GIFs. When browsing the web for an affordable GIF maker tool, you land across a pool of choices. Read through the further sections of this article to find out what’s best for you.
Described below are 10 best alternatives to get amazing pre-made GIFs:
● Wondershare Filmora Video Editor
This one is a popular, preferred and top rated application where you get to choose from an exciting range of pre-made GIFs under a variety of specific categories. All you need to do is, visit the app’s official site, browse to your favorite GIF category and select a desired GIF. Follow a few app instructions to save your selection and that’s it! Your selected GIF reaches your device memory within seconds.
Wondershare Filmora - Best Video Editor for Mac/Windows
5,481,435 people have downloaded it.
Build unique custom animations without breaking a sweat.
Focus on creating epic stories and leave the details to Filmora’s auto features.
Start a creative adventure with drag & drop effects and endless possibilities.
Filmora simplifies advanced features to save you time and effort.
Filmora cuts out repetition so you can move on to your next creative breakthrough.
Key Features
● This app is available to you absolutely free of cost.
● Has an intelligent and user cohesive interface.
● Loaded with tons of brilliant GIFs to choose from.
● The app supports GIF customization.
● GIFHY
Launched in 2013, this one is probably the best GIF maker and downloader tool available on the web today. It is a free tool, packed with enormous varieties of GIFs to choose from. What’s more interesting about the app is that you are free to play with your editing creativity to enhance your downloaded GIFs in the GIPHY editor.
Key Features
● It comes with an easy to use, convenient interface.
● You can edit downloaded GIFs with hundreds of effects and filters.
● The app provides you a direct sharing platform, allowing you to post GIFs to various social media platforms and also go for sharing via Instant Messaging applications.
● This is a fast processing tool that allows you to escape the notch of annoying and delayed download processes.
● Tenor
You can conveniently regard this one as the closest competitor to the GIPHY GIF creator and downloader tool. Needless to say, both are quite similar to each other in interface and usage respects. However, focusing on search results for a common keyword, you find diverse variations to your obvious surprise.
Key Features
● This is a free to use, interactive interface tool.
● It introduces a GIF Keyboard that allows you to search the most specific and relatable GIFs.
● It ensures a speedy and high quality GIF download.
● You can explore your editing skills to your heart’s content to improvise the downloaded GIFs with this tool.
● This tool gives you the liberty to directly share GIFs across different platforms.
If you like to spend ample time on choosing what’s perfect for you, refer this online tool for your GIF download solutions. It caters to your love of diversity with the most deep rooted and broad GIF range. However, this one comes with a little messy interface, demanding some patience from you to get to the right thing.
Key Features
● This tool provides you with almost all possible choices for a GIF category.
● It is available to you free of cost
● The tool site is loaded with rich and quality GIF content.
● This one is a direct save and export tool for your downloaded GIFs.
● Gfycat
You can prefer this one as a GIF hosting tool. Developed with a view to launch a common medium for GIF and HTML contents, this app ensures in-time and hassle free downloads and delivery. Though lacking a refined search bar, this tool promises you of excellence in content quality.
Key Features
● This comes to you as one of the most reliable GIF hosting tools.
● It is a free and quick content delivery tool.
● You are allowed to select the most suitable one from a variety of playback choices.
● This tool also gives you the flexibility of direct media sharing.
● GIFbin
If you are hung-over decade old nostalgia and the fever doesn’t seem to go away, you can check this site for some really satisfying retro and other similar content. This would definitely make you take a toll back to the times when MSN and Limewire were unparalleled market leaders in content sharing.
Key Features
● GIFbin is a storehouse of the best animated GIFs, that is on a continuous update to facilitate fresh and quality based content, every time you visit the site.
● It has an advanced, API enabled search mechanism.
● It boasts of having the handiest and convenient user interface.
● If you prefer GIFs of the comic genre, this tool is heaven for you.
● Imgflip
This is another GIF download site, commonly preferred for comedy and fun oriented content. Using this site, you can download and create a variety of GIF based memes that have the potential to flood your social media posts with likes and comments. This one is a complete GIF basket, suited to vast content varieties and user preferences. You will find the site’s official watermark on all its contents.
Key Features
● The site stands among the most preferred GIF-meme creation and sharing platforms.
● The tool is packed with loads of quality content under specific categories
● You can improvise the dimensions of your editing skills to modify downloaded GIFs.
● This site has a default media export feature that you can use to share your GIFs on social media.
● Imgur
Launched in 2009, this is among the most visited GIF sites, originally created for sharing meme based contents on social media. Its extensive search filters are dedicated to fetch the exact GIFs and memes you are looking for. If you are tired of browsing sites for particular content requirements, your search spree will definitely end here.
Key Features
● The site is known for its extensive and diversified content quality.
● It is a free, convenient and dependable GIF download tool.
● Imgur is highly preferred for content export across various media platforms.
● It is equipped with an advanced and updated search filter that assures you of getting fresh and top quality GIFs on almost every possible keyword.
● Tumblr
Claiming a launch date of 13 years back, this is quite a good GIF download option. You can find excellent quality GIF content on the site, particularly in the comic genre. Though not as popular as its online counterparts today, the site definitely enjoyed commendable visitor preferences at the time of its launch. You can certainly visit this site for a filling entertainment dose.
Key Features
● Tumblr is a free download site with a user friendly interface.
● The site is loaded with notable content varieties.
● You can go for direct media sharing through this site.
● Its comic GIFs are quite hilarious.
● Know Your Meme
This site uses the Wiki software to stock an inventory of classic GIFs and memes. Using this database for GIF downloads means that you don’t need to compromise on content and image quality. The site contents are periodically updated to ensure that visitors are not exposed to stale and outdated content.
Key Features
● The site offers fresh content having catchy and latest GIFs.
● This is a complete storehouse of GIFs and memes that can definitely keep you rolling.
● The site comes as a free tool and gas a user cohesive interface
● It hast the most efficient search filters that are regularly improvised to ensure quality content delivery.
● Key Takeaways from This Episode →
● GIFs are an effective and captivating means of quality content sharing and message delivery. Take them as a hilarious entertainment source or use them to enhance your marketing policies, GIFs can do it all.
● Influenced by the user credibility of GIFs, there are loads of GIF creator and download tools available online; among which Filmora by Wondershare is the current market leader. You can use this app to explore your GIF editing skills or download and share latest GIFs across media sharing platforms.
Also read:
- Updated 2024 Approved 4 Solutions to Crop a Video on Android Easily
- What Are the Best 10 GIF Creator for 2024
- Things About Transparent PNG Remove and Convert for 2024
- Updated Best 10 Anime Movies for All Time
- How to Denoise in After Effects – Audio and Video Noise Removal for 2024
- Updated Ideas That Will Help You Out in Converting AVI to GIF for 2024
- Top iOS Solutions Finding Premium Slow Motion Apps For Video Creation
- Updated Explore a Variety of Inexpensive Camera Models Suitable for Making Slow-Motion Footage without Compromising Quality for 2024
- New In 2024, How to Use Frame Blending in Adobe Premiere Pro
- New 2024 Approved Want to Add Motion Effects to Your Texts in Your Video? Learn the Simple Steps to Create Motion Text Effects in Popular Video Editors
- New In 2024, Best iPhone LUTs App to Use
- New How to Merge Audio and Video Using FFmpeg
- Updated In 2024, 4 Methods to Resize a WebM File
- 2024 Approved Easy Way to Create a DIY Green Screen Video Effect
- Looking for the Ways by Which Subtitles Can Be Extracted From Your MKV Files without Affecting the File Quality? Look No Further as We Are Here to Help You Know the Best Tools that Can Easily Extract SRT From MKV for 2024
- 2024 Approved How to Fade in Text in Adobe Premiere Pro
- In 2024, Best GIF to AVI Converters (Online + Software Solutions)
- Updated 2024 Approved A Countdown Effect Is Widely Used in Gaming and Report Videos. So How to Create Your Own Countdown Video? This Article Will Tell You some Ideas About Contdown Video Editing
- Best Cinematic LUTs For Premiere Pro You Can Come Across for 2024
- New In 2024, Mix and Match The Ultimate List of 8 Video and Photo Merging Tools
- Updated In 2024, Explore the Potential of Slow-Motion Video for Different Industries. Read This Guide and Choose the Best Slow-Motion Camera App to Create Stunning Videos
- Updated In 2024, Windows Movie Maker Review
- New 2024 Approved How to Create an Alternate Reality Effect
- 2024 Approved Vintage Film Effect 1920S - How to Make
- 2024 Approved Learn Top Best Free LUTs For Premiere Pro
- In 2024, How to Make Audio Visualizer in Filmora Easy
- Create Kinetice Typography Text Effect in Filmora
- New How to Use LUTs in VN Editor – Complete Guide and Best LUTs Download for 2024
- New What You Should Know About Speech-to-Text Technology for 2024
- In 2024, Want to Create an Impressive Video Collage but Clueless About the Best Tools? No Worries as We Are Here and Will Help You to Learn About the Best Video Collage Maker PC Tools
- 2 Effective Ways to Easily Convert VTT to SRT
- In 2024, Do You Want to Use a Professional Tool to Add Subtitles? Read This Article to Discover the Best Reliable Tool to Create Subtitles in Your Desired Manner
- New 2024 Approved How to Create a Custom Slide Show in PowerPoint
- Updated Looking for the Simple Steps to Add a Filter to Your Video in Premiere Pro? Here Are the Complete Steps Along with the List of Free Premiere Filter Presets to Use for 2024
- Transparent Logo and Images Look Cool when You Are Planning to Create a Brand Identity. An Image with Unique Features Catches the Attention of Viewers and Leaves Impression
- Updated If You Are Experiencing a Color Distortion in Your Video, You Are in the Right Place. We Have Provided a Detailed Guide with Three Methods that Will Help You Correct This Issue
- New 8 Frame Rate Video Converters You Must Try
- Do You Know About some Efficient Slow-Motion Video Editors? Read This Article to Find Out the Best Slow-Motion Video Editing Tools that You Can Try for 2024
- How to Zoom in Discord
- Creating Testimonial Videos For Health And Wellness Business Industry for 2024
- New 2024 Approved Top Tools To Create Blend Image Collage
- Updated 2024 Approved Guide Cropping and Combining Content in Wondershare Filmora Latest
- Top Apps and Online Tools To Track Vivo X Flip Phone With/Without IMEI Number
- In 2024, A Step-by-Step Guide on Using ADB and Fastboot to Remove FRP Lock from your Honor X9a
- Thinking About Changing Your Netflix Region Without a VPN On Tecno Camon 20 Pro 5G? | Dr.fone
- In 2024, How to Mirror PC Screen to Vivo V29 Pro Phones? | Dr.fone
- In 2024, Top Apps and Online Tools To Track Vivo V30 Phone With/Without IMEI Number
- In 2024, How to Transfer Data After Switching From Vivo T2 Pro 5G to Latest Samsung | Dr.fone
- How to Successfully Bypass iCloud Activation Lock from iPhone 13
- In 2024, Still Using Pattern Locks with Nubia Z50 Ultra? Tips, Tricks and Helpful Advice
- In 2024, Apple ID is Greyed Out On Apple iPhone SE How to Bypass?
- Why Is My Tecno Pop 8 Offline? Troubleshooting Guide | Dr.fone
- In 2024, How To Change Your SIM PIN Code on Your OnePlus Nord CE 3 Lite 5G Phone
- How to Rescue Lost Music from Xiaomi
- What Legendaries Are In Pokemon Platinum On Samsung Galaxy A05? | Dr.fone
- 3 Ways to Fake GPS Without Root On Oppo Find X6 | Dr.fone
- Title: Learn Everything About Leeming LUT Pro for 2024
- Author: Morgan
- Created at : 2024-05-19 05:12:21
- Updated at : 2024-05-20 05:12:21
- Link: https://ai-video-editing.techidaily.com/learn-everything-about-leeming-lut-pro-for-2024/
- License: This work is licensed under CC BY-NC-SA 4.0.
