
:max_bytes(150000):strip_icc():format(webp)/GettyImages-185223738-56a691fd5f9b58b7d0e3a1d9.jpg)
New 2 Effective Ways to Add Text Behind Objects for 2024
2 Effective Ways to Add Text Behind Objects
Adding text behind objects in your videos can be a great way to start your videos. For example, you can do so to create an attractive intro or startup a video. So, if you hope to make a video like a pro, let’s learn how to add text behind objects in your videos by Filmora.

Part 1. What Are The Benefits of Adding Text Behind Objects in Videos?
Your videos must maintain quality to create content worthy of a huge audience. You may have a YouTube channel or be starting down the road. Then you must give this a try because
Give a cool look
Adding text behind an object in a video looks cool! Now, your object could be a silhouette of a person or a huge skyscraper. You can add a text tile behind the object, creating the illusion. Due to this, the text will be flying in real-time.
Show creativity
Blasting your channel with innovative and creative content is the key to building a big audience. But, of course, you can always opt for many ways to create a video showing your creativity. One of those ways is to add text behind your object.
You can create an attractive intro by adding text behind objects that captivate the viewer. It ensures that your subscribers stay tuned to your channel and your content.
Build up a solid audience
Every day can be a real struggle if you are a daily content creator on YouTube. The audience demands good content. But your daily videos can get boring if you do not use new methods to edit your videos.
You can add text behind videos to spice up your intros and hook your daily audience even more. That will show the audience that you are genuinely putting in the effort.
Part 2. What Will You Need To Add Text Behind Videos?
Now there are a few things that you will need to add text behind videos. First, take a look at the basic priorities to perform this feature.
1. A Static Object Video
Adding text behind an object can be tricky if the object isn’t static. For example, the effect will be ruined if an object moves around a lot in a video.
Our goal is to create a smooth text behind the video effect. And this can only be achieved if the target object remains static in the video and does not move about its position.
2. A Video Editing Software - Wondershare Filmora
Once you select a video source, you aim to add it to a video editor. For this purpose, Wondershare Filmora would be your best choice. Wondershare Filmora allows you to create innovative and attractive videos.
Free Download For Win 7 or later(64-bit)
Free Download For macOS 10.14 or later
It has a very engaging system UI, allowing even beginner users to get their hands on it instantly. You will learn how to add text behind your videos with a few simple steps.

Now that you know the requirements for the video, let’s move on to the step-by-step guide to add text to your video.
Part 3. Step-by-Step Guide To Add Text Behind Videos
We look at two examples of how to add text behind videos in Wondershare Filmora.
- A static video with an object that can be easily masked out.
- A video with high contrast and a clean background.
Add Text behind a Static Video
First, we will go with adding text behind a static object. For this, scroll more to get the step-by-step process.
Step1 Download Wondershare Filmora
If you are a beginner just starting in the video editing business, Wondershare Filmora is the best choice. Follow the steps below to download the free version of Wondershare Filmora:
- First, download the Wondershare Filmora on your PC or Mac.
- Open the setup and install the Wondershare Filmora.
After downloading the Wondershare Filmora software, let’s edit the video. Scroll below to learn how to start the editing process!
Step2 Add the Video to the Timeline
We will first look at the static video example. For this, follow the below instructions:
- You have to start by importing your video in the import library.
- From the import library, you can click on the video and drag it down below to the timeline.

![]()
Note: Adding video to the timelines will allow you to create a workspace to edit your video.
Now let’s move on to how we will add the text tile to our video.
Step3 Add the Text Tile
It is time to add the text tile you will animate behind the object. To do that, follow the steps mentioned as such.:
- Go to the Titles icon on the bar above the import library.
- A drop-down option will be available on the left side.
- Scroll down to the Plain text.
- Here, you can see many text tiles to add to your video.
- You can choose anyone you like.
- The most commonly used tile is the Basic 6.
- When you add the text tile to the timeline, you must ensure that the text is of equal length to the video.
- To do that, drag the right corner of the text tile and drag it to the right to match the length of the video.

Step4 Edit the Text Tile
After you have added the text tile you desire, you need to type in the text. For this article, we will keep it simple. We will be typing a simple statement such as “Hello, World.“
- Double-click the Text tile to open the settings menu.
- After the settings menu is opened, type in the text box on the import window.
You will notice changes on the main window that your text has changed.

- After the text appears, you can make the font look as desired.
- Look above the text window, and you will see the type of text font selected.
- Click on the drop-down option and choose whatever you like.
Let’s move on to animate the text tile.
Step5 Animate the text tile
After adding text, it is time to animate it. This animation will decide how your text will appear behind the target object.
- First, you must open the text settings by double-clicking on the text tile in the timeline.
- In the settings opened in the import window, you will have to click on the animation tab in the upper left corner, aside from the Preset
- Now scroll down to where you will see the Right Roll
- Click on Right Roll and then click on the OK in the bottom right corner of the import window.

![]()
Note: You may notice now that the text appears in front of our object. Don’t worry now! We are getting there. With a few simple steps, we will see the results.
Now let us move on to the more significant part of the editing, masking the object. Again, look ahead to see how you can mask the object!
Step6 Mask the Object
To mask our object, we will need to be technical. We will begin by adding the same footage of the static object on our timeline. Follow the steps mentioned below:
- Drag and drop the static object footage above the timeline text. Make sure the text stays in the middle of the sandwich.

- We will hide the video in the first track to simplify things. In addition, this will make our editing easier.
- We will have to look in the effects library to insert the masking effect.
- You can see the Effects icon on the bar at the top.
- Click on the Effects.
- You will see the search bar at the top of the import window.
- In the search bar, type in Image mask.
- Drag the Image mask effect on the video above the text tile.
Now the masking effect has been added. But we would have to adjust so that it stays upon our object.
- Double-click on the video and the settings option will open up.
- Go into the Effects
![]()
Note: You must select your target object’s mask shape exactly as its shape.
- We have to mask out a building, so that we will need a vertical rectangle.

- After you have selected the shape of your object, we will need to convert it to the object’s size so that it only masks the building.
- To do that, scroll down below the import window to the settings.
- Here you can see the X, Y, and width settings.
- First, move the width bar so that it matches the width of the building.

- Now drag the X bar until the mask is confined to the building. You would have created the mask only limited to the building.

- Once you complete this step, click OK in the bottom right corner.
- Now un-hide the original video that you imported in the beginning.
Finally, play the video in the main play window from the beginning.

You have successfully created a text behind the object effect. Now that you know how to add text behind static objects let us move to learn how to add text to a video that has high contrast and a clean background.
Add text behind a high contrast and clean background
Besides the text can be added behind a static object, it can also be added to a clean background with high contrast. But how is it? Let’s dive into it.
Step1 Import the video into the timeline
- Import the video from the location in your PC media.
- When imported, drag and drop it onto the timeline.

Step2 Add the text tile
To add the text to your video, follow the steps mentioned below.
- Click on the titles icon on the bar above the import window.
- On the left drop-down option, scroll down to the titles.
- Select the Plain text option.
- You will notice that multiple options will pop up in the import window.
- Select the text title that suits you best.
- After you have selected the text style, drag and drop it down above your video in the timeline.

- Our next step would be to add the text.
- Double-click on the text tile. Doing so will open the settings menu in the import window.
- Type in the text that you want. For reference, we will keep it simple such as, “Hello world.”
- You can also adjust the font of your text.
- Above the type box, a drop-down option will show you the range of fonts available.
- Select the font you desire.

Now that you have added the text, it is time to animate it.
Step3 Take a snapshot
After typing in the text, you will notice in the main play window that your text still appears in front of your object. Therefore, we want to take it behind the object. To do so, first, you will need to take a snapshot.
Follow the steps mentioned to take a snapshot:
- Hide the main video. You can see the Eye icon aside from your main video in the edit column on the left side of the timeline.
- Click on the Eye icon to hide the main video.
- In the main play window, you will notice that the screen turns black, which leaves only the text on the screen.

- In the main play screen, you can notice a small camera icon.
- This camera icon is used to take snapshots of your screen.
- Click on the camera icon to take a snapshot of your screen.
- Your snapshot will now be saved in the main import window.

Now that we have taken a snapshot, we will need to import it into the timeline. Scroll below for more.
Step4 Add the snapshot
After taking it, your goal is to import it into the timeline. To perform this action, perform the following steps:
- Before adding the snapshot to the timeline, we must delete the main text tile.
- Then drag and drop the snapshot from the import library into the timeline above the video.
- Make sure that the snapshot is aligned well with the length of the video.
- If it is longer than the video, drag it from the right to match the length of the video.
- If its length is smaller than the video, drag it to the right to increase its length.

After adding the snapshot, we will have to change its blending mode.
Step5 Change the blending of the snapshot
To create the effect of your text behind the video, you must alter the main text’s blending mode. In this case, it will be the snapshot we took.
![]()
Note: Changing the blending mode of the snapshot will allow it to blend with the transparent background and will create the effect of the text behind the object in the video.
Follow the steps mentioned below to change the blending of the snapshot:
- Double-click the snapshot.
- If you select the compositing tab, the blending options will pop up.
- From default, it would be set to Normal. Click on the Normal
- It will show a drop-down option.
- Scroll down below until you can see an option labeled Then click on Overlay.

- And press OK in the bottom right corner to confirm your changes.
The text can be blended with the background.
- Click on the Eye icon to un-hide the video from the timeline.
- Now play the video from the start from the main play screen to see the final changes.

Congratulations! The above steps allow you to add text behind objects in your videos.
Conclusion
Modern media is full of creative content. And if you are a content creator that wants to make it through the world of YouTube and video creating, you need to be the best. You can only be the best at what you do if you keep pushing the boundaries of your creativity.
Adding text behind objects could be the first step in making your intros shine with creativity and innovation. It allows you to maintain and build your viewing audience. The more the audience, the more your content gets watched!
Free Download For macOS 10.14 or later
It has a very engaging system UI, allowing even beginner users to get their hands on it instantly. You will learn how to add text behind your videos with a few simple steps.
Now that you know the requirements for the video, let’s move on to the step-by-step guide to add text to your video.
Part 3. Step-by-Step Guide To Add Text Behind Videos
We look at two examples of how to add text behind videos in Wondershare Filmora.
- A static video with an object that can be easily masked out.
- A video with high contrast and a clean background.
Add Text behind a Static Video
First, we will go with adding text behind a static object. For this, scroll more to get the step-by-step process.
Step1 Download Wondershare Filmora
If you are a beginner just starting in the video editing business, Wondershare Filmora is the best choice. Follow the steps below to download the free version of Wondershare Filmora:
- First, download the Wondershare Filmora on your PC or Mac.
- Open the setup and install the Wondershare Filmora.
After downloading the Wondershare Filmora software, let’s edit the video. Scroll below to learn how to start the editing process!
Step2 Add the Video to the Timeline
We will first look at the static video example. For this, follow the below instructions:
- You have to start by importing your video in the import library.
- From the import library, you can click on the video and drag it down below to the timeline.
![]()
Note: Adding video to the timelines will allow you to create a workspace to edit your video.
Now let’s move on to how we will add the text tile to our video.
Step3 Add the Text Tile
It is time to add the text tile you will animate behind the object. To do that, follow the steps mentioned as such.:
- Go to the Titles icon on the bar above the import library.
- A drop-down option will be available on the left side.
- Scroll down to the Plain text.
- Here, you can see many text tiles to add to your video.
- You can choose anyone you like.
- The most commonly used tile is the Basic 6.
- When you add the text tile to the timeline, you must ensure that the text is of equal length to the video.
- To do that, drag the right corner of the text tile and drag it to the right to match the length of the video.
Step4 Edit the Text Tile
After you have added the text tile you desire, you need to type in the text. For this article, we will keep it simple. We will be typing a simple statement such as “Hello, World.“
- Double-click the Text tile to open the settings menu.
- After the settings menu is opened, type in the text box on the import window.
You will notice changes on the main window that your text has changed.
- After the text appears, you can make the font look as desired.
- Look above the text window, and you will see the type of text font selected.
- Click on the drop-down option and choose whatever you like.
Let’s move on to animate the text tile.
Step5 Animate the text tile
After adding text, it is time to animate it. This animation will decide how your text will appear behind the target object.
- First, you must open the text settings by double-clicking on the text tile in the timeline.
- In the settings opened in the import window, you will have to click on the animation tab in the upper left corner, aside from the Preset
- Now scroll down to where you will see the Right Roll
- Click on Right Roll and then click on the OK in the bottom right corner of the import window.
![]()
Note: You may notice now that the text appears in front of our object. Don’t worry now! We are getting there. With a few simple steps, we will see the results.
Now let us move on to the more significant part of the editing, masking the object. Again, look ahead to see how you can mask the object!
Step6 Mask the Object
To mask our object, we will need to be technical. We will begin by adding the same footage of the static object on our timeline. Follow the steps mentioned below:
- Drag and drop the static object footage above the timeline text. Make sure the text stays in the middle of the sandwich.
- We will hide the video in the first track to simplify things. In addition, this will make our editing easier.
- We will have to look in the effects library to insert the masking effect.
- You can see the Effects icon on the bar at the top.
- Click on the Effects.
- You will see the search bar at the top of the import window.
- In the search bar, type in Image mask.
- Drag the Image mask effect on the video above the text tile.
Now the masking effect has been added. But we would have to adjust so that it stays upon our object.
- Double-click on the video and the settings option will open up.
- Go into the Effects
![]()
Note: You must select your target object’s mask shape exactly as its shape.
- We have to mask out a building, so that we will need a vertical rectangle.
- After you have selected the shape of your object, we will need to convert it to the object’s size so that it only masks the building.
- To do that, scroll down below the import window to the settings.
- Here you can see the X, Y, and width settings.
- First, move the width bar so that it matches the width of the building.
- Now drag the X bar until the mask is confined to the building. You would have created the mask only limited to the building.
- Once you complete this step, click OK in the bottom right corner.
- Now un-hide the original video that you imported in the beginning.
Finally, play the video in the main play window from the beginning.
You have successfully created a text behind the object effect. Now that you know how to add text behind static objects let us move to learn how to add text to a video that has high contrast and a clean background.
Add text behind a high contrast and clean background
Besides the text can be added behind a static object, it can also be added to a clean background with high contrast. But how is it? Let’s dive into it.
Step1 Import the video into the timeline
- Import the video from the location in your PC media.
- When imported, drag and drop it onto the timeline.
Step2 Add the text tile
To add the text to your video, follow the steps mentioned below.
- Click on the titles icon on the bar above the import window.
- On the left drop-down option, scroll down to the titles.
- Select the Plain text option.
- You will notice that multiple options will pop up in the import window.
- Select the text title that suits you best.
- After you have selected the text style, drag and drop it down above your video in the timeline.
- Our next step would be to add the text.
- Double-click on the text tile. Doing so will open the settings menu in the import window.
- Type in the text that you want. For reference, we will keep it simple such as, “Hello world.”
- You can also adjust the font of your text.
- Above the type box, a drop-down option will show you the range of fonts available.
- Select the font you desire.
Now that you have added the text, it is time to animate it.
Step3 Take a snapshot
After typing in the text, you will notice in the main play window that your text still appears in front of your object. Therefore, we want to take it behind the object. To do so, first, you will need to take a snapshot.
Follow the steps mentioned to take a snapshot:
- Hide the main video. You can see the Eye icon aside from your main video in the edit column on the left side of the timeline.
- Click on the Eye icon to hide the main video.
- In the main play window, you will notice that the screen turns black, which leaves only the text on the screen.
- In the main play screen, you can notice a small camera icon.
- This camera icon is used to take snapshots of your screen.
- Click on the camera icon to take a snapshot of your screen.
- Your snapshot will now be saved in the main import window.
Now that we have taken a snapshot, we will need to import it into the timeline. Scroll below for more.
Step4 Add the snapshot
After taking it, your goal is to import it into the timeline. To perform this action, perform the following steps:
- Before adding the snapshot to the timeline, we must delete the main text tile.
- Then drag and drop the snapshot from the import library into the timeline above the video.
- Make sure that the snapshot is aligned well with the length of the video.
- If it is longer than the video, drag it from the right to match the length of the video.
- If its length is smaller than the video, drag it to the right to increase its length.
After adding the snapshot, we will have to change its blending mode.
Step5 Change the blending of the snapshot
To create the effect of your text behind the video, you must alter the main text’s blending mode. In this case, it will be the snapshot we took.
![]()
Note: Changing the blending mode of the snapshot will allow it to blend with the transparent background and will create the effect of the text behind the object in the video.
Follow the steps mentioned below to change the blending of the snapshot:
- Double-click the snapshot.
- If you select the compositing tab, the blending options will pop up.
- From default, it would be set to Normal. Click on the Normal
- It will show a drop-down option.
- Scroll down below until you can see an option labeled Then click on Overlay.
- And press OK in the bottom right corner to confirm your changes.
The text can be blended with the background.
- Click on the Eye icon to un-hide the video from the timeline.
- Now play the video from the start from the main play screen to see the final changes.
Congratulations! The above steps allow you to add text behind objects in your videos.
Conclusion
Modern media is full of creative content. And if you are a content creator that wants to make it through the world of YouTube and video creating, you need to be the best. You can only be the best at what you do if you keep pushing the boundaries of your creativity.
Adding text behind objects could be the first step in making your intros shine with creativity and innovation. It allows you to maintain and build your viewing audience. The more the audience, the more your content gets watched!
How to Make Coin Magic With Filmora
Do you want to become a magician in your videos? Now, everyone can look like a magician with the magic of editing. This article will show you how to do a cool coin trick in Filmora 11 .
Part 1: What is the filmmaking technique “Cutting on action”
Cutting on action is a technique the editors use to cut in the middle of an action to another shot that matches the first shot’s action. Typically, the subject starts an action in one shot and continues the action in another, creating a smooth transition. For example, when you make the coin trick video, you need to cut on the tapping so it can trick the eyes, and the cut won’t be noticeable.

Part 2: Things You Need to Prepare for The Coin Magic Trick
- Glass and two coins

- Set the phone on a tripod. Because utilizing a tripod can significantly improve the recording’s stability.

Part 3: Start Filming
Step1 Firstly, you must show the coin and the bottom of the glass.

Step2 After that, you need to hold the coin with the fingers part of one hand and tap down on the coin. Make sure it looks like the coin is going through straight to the glass.

Step3 You need someone else to drop the other coin from the top. Meanwhile, you are pretending to tap a coin on the glass. You don’t need to worry about someone else hand in the frame. Since you can remove it easily with the masking feature in Filmora.

Step4 It would help if you had a second shot for a clean plate of the background. You can record background for 20 seconds.

Part 4: Bring the clips into Filmora 11
Step1 If you have not downloaded Filmora, you can visit filmora.wondershare.com to download Filmora’s new version.

Step2 Drag and drop the clip onto the first track of the timeline.Afterward, move the playhead to the right and find the spot where you tapped the coin last time before your friend drops the other coin. Additionally, make sure it is in the middle of the tapping action and cut.

Step3 Then move the playhead to the right and find the spot where your friend drops the coin while you tap without the coin in your hand. Make sure it is in the middle of the tapping action, and the position of your hand roughly matches that in the last cut and make a cut.

Step4 Now you need to delete the middle part and play it back. Indeed, cutting on action is the key to creating the illusion that the action is continued without editing.

Step5 Next, you must remove your friend’s hand in the frame with the Filmora masking feature. Afterwards. drag and drop the clean plate video onto the second track of the timeline.

Step6 Next, double-click the clip to open the setting video. Find the Mask Section and select the single line.

Step7 Here you can see the mask is applied.First, adjust the angle and position of the mask to only show the top part of the frame. Then you have to change the Blur Strength to add more blur to the edge of the mask.

Step8 With the mask finalized, unhide the first video track and adjust the length of the clip on the timeline. Finally, playback the video and see how it looks.

Summary
That’s how to make a coin move through a glass-like MAGIC with the cutting on action editing technique. You can pay close attention to the steps above and follow each step for perfect results.
Free Download For Win 7 or later(64-bit)
Free Download For macOS 10.14 or later
Free Download For macOS 10.14 or later
Stunning Glitch Effect and Its Creation Guideline for Premiere Pro
Glitch means errors and malfunction in the footage in software, games, videos, images, and audio. Presently, creative professionals are intentionally adding the glitch effect to their work to give a unique vibe to it. The effect appears as the pixels glitch organically, appearing to melt or duplicate onto the next scene.
The article takes Adobe Premiere Pro under consideration. First, glitch effect Premiere templates and then the step-by-step guide to add glitch transition Premiere Pro would be discussed. Time to begin!
In this article
01 Part 1: 8 Amazing Glitch Effect for Premiere Pro
02 Part 2: How Do You Do the Glitch Effect in Premiere Pro?
Part 1: 8 Amazing Glitch Effect for Premiere Pro
There are extensive websites in business that offer amazing templates to add glitch effects to your video. The subsection of this article shall come up with eight workable VHS effect Premiere, which would be perfectly compatible with Premiere Pro. These VHS effect Premiere Pro are HD quality, which means you do not have to worry about the output. So, let us start! Shall we?
The first VHS overlay Premiere is Digital Glitch Transitions. Envato Elements offers 20 glitch transitions that can be used in different video themes. The HD resolution of this distortion effect Premiere Pro is 1920x1080. There are noise effects as well.

Glitch Slideshow is another amazing glitch effect Premiere Pro free introduced by Envato Elements. If you are a photographer or a film director, this glitch transition Premiere gives you what you need. The HD resolution is offered, and no plugins are required.

3. Venus
Venus is the perfect choice to add an Adobe Premiere VHS effect by offering an adjustable duration of the video with effortless customization. The template is highly famous among YouTubers and content creators to leave a long-lasting impact on the audience via glitchy titles and effects.

Presenting another Premiere Pro template, Fast Glitch Transitions is a ready-to-use template. It offers ten fast-tracked transitions that add value to the project. Moreover, it brings versatile colors to the video with the glitches. This Premiere VHS effect is perfect for intros and travel videos.

Allow me to introduce you to another new and stylish static effect Premiere Pro known as Glitch Multiframe Opener. It is a dynamic template that needs no plugins. Be free to use the template for commercials, Facebook video openers, and teasers. Moreover, photos and videos can be added to make the glitch workable.

Glitch Urban Opener is an impeccable glitch effect for Premiere Pro, presenting trendy and creative designs. It brings smooth transitions to the video with 17 editable layers, 11 media holders, and one logo placeholder. All of these options make this VHS filter Premiereeasily customizable and operatable.

Another retro effect Premiere Pro from Motion Elements is 30 Glitch Transitions. The media industry uses this template to insert different glitch effects into the video and make it eye-catching for everyone. The effects are styled with interference, bad TV, distortions, VHS noise, and other fatal errors.

Last but not the least, Glitch Transitions can be counted upon to act as the best Adobe Premiere glitch effect. There are three transitions for different themes. The color controls help manage the video editing more effectively. Moreover, the templates offer horizontal and vertical directions to work better.

Part 2: How Do You Do the Glitch Effect in Premiere Pro?
Are you a Premiere Pro user? Do you need to add the Premiere glitch transition to the video? Worry no more! Follow this subsection vividly. Would you?
Adobe Premiere Pro is a video editing software that has got you covered. You can enhance the speed of the video to tell your story better and share the vision. With Premiere Pro in the frame, you can shift the colors, insert graphics and titles, and give a unique music effect to the video. All in one platform, a dream come true, don’t you agree?
If you want to perform a Premiere Pro VHS effect, allow us to walk you through the process. It is highly recommended that you follow the guide carefully to have desirable results. So, what are we waiting for? Time to start, right?
Step 1: Importing the Targeted Video
To begin the process, open Adobe Premiere Pro on your system. Import the targeted footage and drag it to the timeline. After the video is added, head to the “Effects” panel on the left side of the interface.

Step 2: Launching the VR Digital Glitch
Type away glitch in the search bar. The user will find VR Digital Glitch in the results. Drag the effect to the clip on the timeline. Now, it is time to navigate to the “Effect Controls.”

Step 3: Changing the Distortion Control
Scroll down to find “Distortion” in the controls and expand it. The user is suggested to increase the color distortion to give an RGB effect to the footage. After that, you should reduce the distortion rate to 0 so that different artifacts can be eliminated effortlessly.

Step 4: Changing the Noise Strength
Moving on, expand the “Noise” control section and increase the noise strength. It will give the footage a significant level of graininess.

Step 5: Animating the Glitch Effect
To animate the glitch, use the playhead on the top and drag it to the first position where the effect should start from. Hit the stopwatch located on the left of “Master Amplitude.” It will create a keyframe. Alter the “Master Amplitude” to 0 as we do not want the clip to begin with a glitch.

Step 6: Playing with the Playhead
Now, use your keyboard’s right arrow to move the playhead three frames forward. After that, set the “Master Amplitude” to 100. Again, move the playhead three frames forward and set the “Master Amplitude” to 0. The animation is produced on the RGB color distortion.

Step 7: Positioning the Video
Move back to the first keyframe and head to the top that shows “Scale” settings. Enhance the scale value so that the video position can be leveled. Click on the stopwatch next to “Position” to create a keyframe. Move the playhead one frame forward and adjust the position of the frame.

Step 8: Final Process
Again, move the playhead to the next frame and click on the “Reset” shaped icon to reset the position of the video. Move another frame forward and reposition the video. You can do this multiple times to give a glitchy effect to the clip. There you go! It is all done.

Conclusion
A raw video doesn’t send the message as the user wants. For this, creative professionals need to give some effects to the video, such as glitch effect Premiere. The article highlighted some famous glitch effects which were perfectly compatible with Adobe Premiere Pro. The whole procedure to add the Adobe Premiere glitch effect was also the crux of this write-up.
02 Part 2: How Do You Do the Glitch Effect in Premiere Pro?
Part 1: 8 Amazing Glitch Effect for Premiere Pro
There are extensive websites in business that offer amazing templates to add glitch effects to your video. The subsection of this article shall come up with eight workable VHS effect Premiere, which would be perfectly compatible with Premiere Pro. These VHS effect Premiere Pro are HD quality, which means you do not have to worry about the output. So, let us start! Shall we?
The first VHS overlay Premiere is Digital Glitch Transitions. Envato Elements offers 20 glitch transitions that can be used in different video themes. The HD resolution of this distortion effect Premiere Pro is 1920x1080. There are noise effects as well.
Glitch Slideshow is another amazing glitch effect Premiere Pro free introduced by Envato Elements. If you are a photographer or a film director, this glitch transition Premiere gives you what you need. The HD resolution is offered, and no plugins are required.
3. Venus
Venus is the perfect choice to add an Adobe Premiere VHS effect by offering an adjustable duration of the video with effortless customization. The template is highly famous among YouTubers and content creators to leave a long-lasting impact on the audience via glitchy titles and effects.
Presenting another Premiere Pro template, Fast Glitch Transitions is a ready-to-use template. It offers ten fast-tracked transitions that add value to the project. Moreover, it brings versatile colors to the video with the glitches. This Premiere VHS effect is perfect for intros and travel videos.
Allow me to introduce you to another new and stylish static effect Premiere Pro known as Glitch Multiframe Opener. It is a dynamic template that needs no plugins. Be free to use the template for commercials, Facebook video openers, and teasers. Moreover, photos and videos can be added to make the glitch workable.
Glitch Urban Opener is an impeccable glitch effect for Premiere Pro, presenting trendy and creative designs. It brings smooth transitions to the video with 17 editable layers, 11 media holders, and one logo placeholder. All of these options make this VHS filter Premiereeasily customizable and operatable.
Another retro effect Premiere Pro from Motion Elements is 30 Glitch Transitions. The media industry uses this template to insert different glitch effects into the video and make it eye-catching for everyone. The effects are styled with interference, bad TV, distortions, VHS noise, and other fatal errors.
Last but not the least, Glitch Transitions can be counted upon to act as the best Adobe Premiere glitch effect. There are three transitions for different themes. The color controls help manage the video editing more effectively. Moreover, the templates offer horizontal and vertical directions to work better.
Part 2: How Do You Do the Glitch Effect in Premiere Pro?
Are you a Premiere Pro user? Do you need to add the Premiere glitch transition to the video? Worry no more! Follow this subsection vividly. Would you?
Adobe Premiere Pro is a video editing software that has got you covered. You can enhance the speed of the video to tell your story better and share the vision. With Premiere Pro in the frame, you can shift the colors, insert graphics and titles, and give a unique music effect to the video. All in one platform, a dream come true, don’t you agree?
If you want to perform a Premiere Pro VHS effect, allow us to walk you through the process. It is highly recommended that you follow the guide carefully to have desirable results. So, what are we waiting for? Time to start, right?
Step 1: Importing the Targeted Video
To begin the process, open Adobe Premiere Pro on your system. Import the targeted footage and drag it to the timeline. After the video is added, head to the “Effects” panel on the left side of the interface.
Step 2: Launching the VR Digital Glitch
Type away glitch in the search bar. The user will find VR Digital Glitch in the results. Drag the effect to the clip on the timeline. Now, it is time to navigate to the “Effect Controls.”
Step 3: Changing the Distortion Control
Scroll down to find “Distortion” in the controls and expand it. The user is suggested to increase the color distortion to give an RGB effect to the footage. After that, you should reduce the distortion rate to 0 so that different artifacts can be eliminated effortlessly.
Step 4: Changing the Noise Strength
Moving on, expand the “Noise” control section and increase the noise strength. It will give the footage a significant level of graininess.
Step 5: Animating the Glitch Effect
To animate the glitch, use the playhead on the top and drag it to the first position where the effect should start from. Hit the stopwatch located on the left of “Master Amplitude.” It will create a keyframe. Alter the “Master Amplitude” to 0 as we do not want the clip to begin with a glitch.
Step 6: Playing with the Playhead
Now, use your keyboard’s right arrow to move the playhead three frames forward. After that, set the “Master Amplitude” to 100. Again, move the playhead three frames forward and set the “Master Amplitude” to 0. The animation is produced on the RGB color distortion.
Step 7: Positioning the Video
Move back to the first keyframe and head to the top that shows “Scale” settings. Enhance the scale value so that the video position can be leveled. Click on the stopwatch next to “Position” to create a keyframe. Move the playhead one frame forward and adjust the position of the frame.
Step 8: Final Process
Again, move the playhead to the next frame and click on the “Reset” shaped icon to reset the position of the video. Move another frame forward and reposition the video. You can do this multiple times to give a glitchy effect to the clip. There you go! It is all done.
Conclusion
A raw video doesn’t send the message as the user wants. For this, creative professionals need to give some effects to the video, such as glitch effect Premiere. The article highlighted some famous glitch effects which were perfectly compatible with Adobe Premiere Pro. The whole procedure to add the Adobe Premiere glitch effect was also the crux of this write-up.
How To Fade Audio In Kinemaster
If you have been looking for video and audio editing tools then you have probably heard of Kinemaster. It is a great video editing app that allows users to edit all aspects of the video including any audio or music that may accompany the video. It has a lot of very useful features and the user interface is fairly easy to use.
One of the things that you can do with Kinemaster is to fade out audio, a useful feature that can help the ending of any video appear more authentic. In this article, we will be looking at how you can use Kinemaster to fade audio.
Kinemaster Fade Audio Steps
The following steps show you how you can easily fade audio in Kinemaster;
Step1If you don’t have Kinemaster already, start by downloading and installing the video editor on your computer.
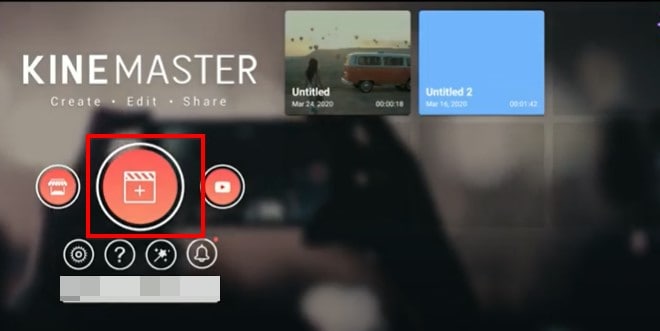
Step2Open Kinemaster on your computer and then click on the “New Project” icon to start. Select the aspect ratio that you would like to use. If you are not sure, we recommend choosing the “16:9” aspect ratio.
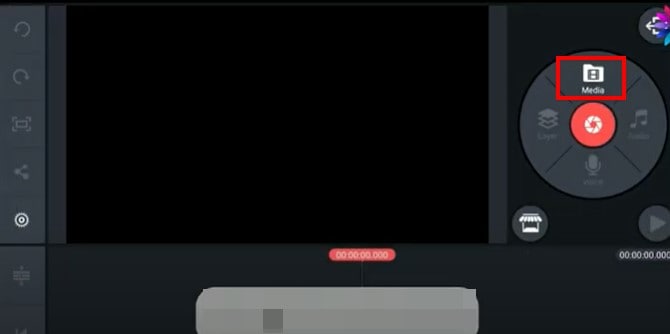
Step3In the next window, click on “Media” to select the clip you would like to add to the Kinemaster project that you have just created.
Step4To fade in and fade out the audio in the project, click on the gear icon from the options to the left of the screen.
![]()
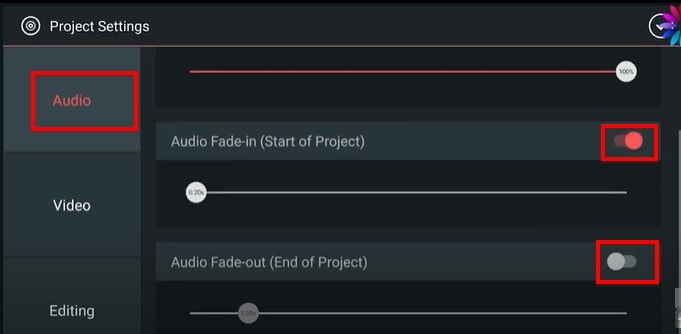
Step5Select the “Audio” tab on the next screen and then turn on the switch next to “Audio Fade-in (Start of Project)” and “Audio Fade-out (End of Project).” This will add a fade-in and fade-out effect at the beginning of the audio and at the end of it.
Step6You can then easily set the duration of the “Audio fade-in” and “Audio fade-out” by dragging the slider below each option. We recommend setting the duration to just a few seconds.
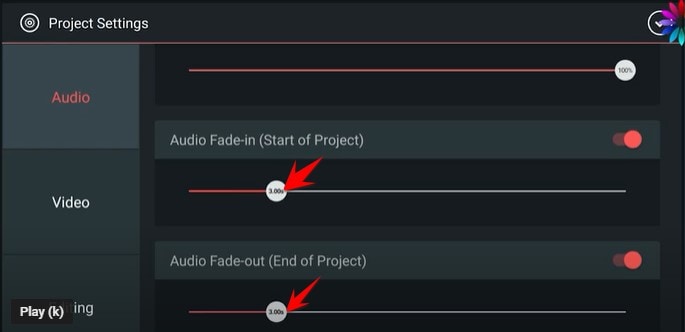
Don’t forget to save the project when you’re done.
Kinemaster Alternative to Edit Audio
Kinemaster is a good way to edit both audio and video on your computer, but the following options are just as good;
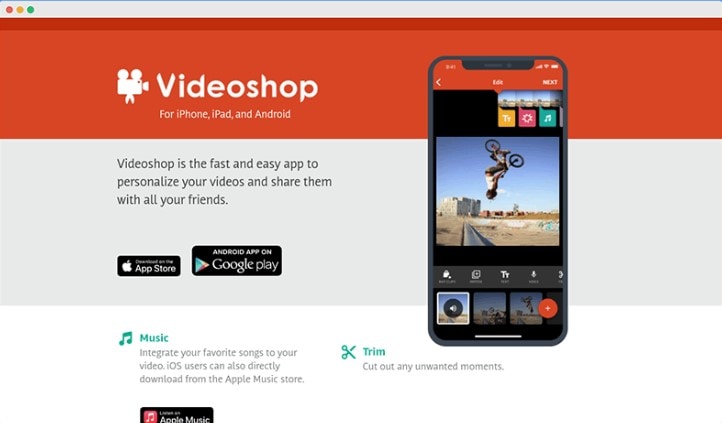
1. VideoShop
VideoShop is a simple to use and highly effective program that you can use to create and edit videos on your computer. The interface makes it easy to import any video project that you have into the program and the wealth of very useful features can help you edit the video in various ways.
For example, you can change the speed of the video, add transitions at various points in the video, add and remove text, add and remove music and so much more. Although there is a free trial version, you will only be able to access some of the more useful features when you purchase the premium version.
The Pro version of VideoShop goes for $3.99 a month, but you can get lifetime access to the program for only $39.99. One thing that VideoShop has over Kinemaster is that it is very easy to use, even beginner users find video editing a breeze with this tool.
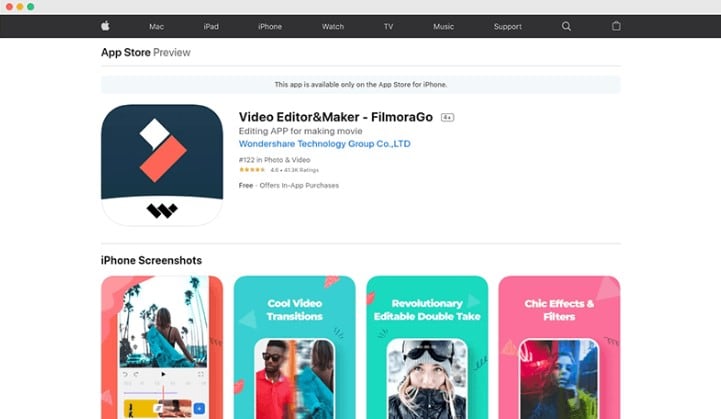
2. Filmora
If you are looking for a simple way to edit videos on Android or iOS devices, Filmora is one of the best options in the market. This mobile version of the very popular Filmora video editor is just as easy to use as its parent program. You can use it to create video projects from scratch or upload a video and make changes to it.
It offers you a lot of choices when it comes to editing features including trimming sections of the video, adding filters, adding music, adding or removing text, and even changing the canvas or the background of the video. Advanced options such as changing the speed of the video are also available.
One of the things that we love about Filmora is that you don’t even have to create an account to use it or remove the watermark added to the completed video project, watching a video ad can be enough. But this option is only available once every 24 hours, meaning that you can only remove a watermark on the free version once a day. Filmora is available for both iOS and Android and the yearly premium plan will cost you just $19.90.
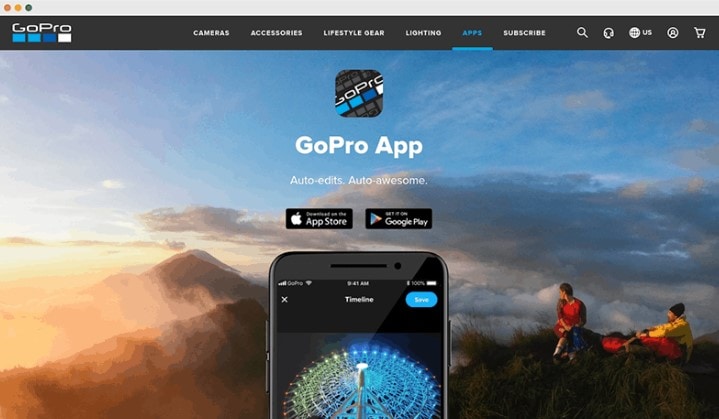
3. Quik
Quik is a video editing program created by GoPro for the purpose of editing GoPro videos, but that doesn’t mean that you will not be able to use it to edit other types of videos. You can use Quik to create a new project or edit an existing video and gives users a lot of different options when it comes to video editing.
One of the main benefits of using Quik is that you can easily add music, audio, and special effects to a video as well as change the length of the video, fade audio in and out and even change when the music starts. It is also one of the best ways to use images to create collages and slideshows very easily. There are a lot of slideshow and collage templates to choose from, and you can edit them easily by adding your music and images. Quik is completely free to use and you can upload your creation to the cloud ad share the link with others.
Conclusion
Kinemaster is one of the most popular video editing tools, especially since it simplifies the video editing process to make it very easy. All the alternative tools we have outlined here in this article are selected because they can make video editing quite simple.
Free Download For Win 7 or later(64-bit)
Free Download For macOS 10.14 or later
Also read:
- New How to Convert a GIF to a Video for Instagram
- New Camtasia Review – Is It The Best Video Editor for 2024
- New General Knowledge About MP4 Format and Best MP4 Video Editor
- New Vintage Film Effect 1980S - How to Create for 2024
- Full Guide to Discord Boost
- You May Want to Create Your Video Tutorial and Share Your Knowledge with Others. Fortunately, You Can Easily Create a Professionally Edited Tutorial Video with Filmora. Keep Reading This Article Since We Will Show You How to Do It for 2024
- New Add some Sci-Fi Touch to Your Next Video Content Using Wondershare Filmora Editing Tools to Create an Alternate Reality Effect for 2024
- Updated How to Fade to Black Premiere Pro
- New How to Add a Lower Third to Your Video
- How To Make a Photo Collage in Microsoft Word
- New 2024 Approved 7 Solutions to Edit GoPro Video on Mac
- Updated In 2024, Do You Want to Rotate Your TikTok Video to Stylize It More? This Article Will Provide Simple Methods of Rotating TikTok Videos to Improve the Audience Viewing Experience
- New 2024 Approved Have You Recently Experienced Motion Blur in Games? Do You Wish to Learn More About It? This Article Provides an Overview and the Need for Motion Blur Gaming
- New 2024 Approved Easy Guide to Overlay Videos in Premiere Pro
- Updated Create a Stunning Light Sweep Effect in Filmora. Use Simple and Easy Steps to Export a High-Quality Video that Will Impress Even Pro Video Editors
- Read on to Learn About Multi Object Tracking, Its Types, and Requirements. Youll Also Learn About the Different Approaches Toward Object Tracking for 2024
- Green Screen YouTube Videos
- 2024 Approved Are You Aware that AV1 Has the Potential to Change the Way We Watch Videos Online? Read on to Learn More About AV1 and How It Could Impact Your Life
- In 2024, How To Slow Down GIF Building an Understanding
- Ways to Find Free Online Slideshow Maker with No Watermark
- New 2024 Approved Do You Want to Watch Videos in QuickTime with Subtitles in Your Desired Language? Here Are Different Ways to Add Subtitles in QuickTime Player
- There Are Many Vlogging Cameras You Can Find in the Market. However, to Get a Good Start in Vlogging, some Sony Vlogging Cameras and Canon Vlog Cameras Are to Consider. This Article Introduces You to the Respective List
- Updated 2024 Approved How to Become a Youtuber
- New Read Through This Post to Know What Frame Rate Is, the Different Variations, and Why 60FPS Is Superior. Also, Know the Tools Available to Make the Conversion for 2024
- Updated Learn the Step-by-Step Process of Slowing Down Time-Lapse Videos on Your iPhone for 2024
- Updated Learn How to Create a Unique Repeated Text Animation in the Filmora Video Editor. Follow the Simple Step-by-Step Instructions for 2024
- Tactics to Make Transparent Image in Minimal Steps for 2024
- Step by Step Guide on Make Gimp Transparent Background PNG
- Updated Wondering How to Create a Stunning Intro Video with KineMaster? Here Are the Simple Steps to Use KineMaster to Design Your Intro Video in Simple Steps
- New 2024 Approved Are You Trying to Make Slow-Mo Videos on Instagram? In This Article, We Will Discuss Top-Rated Ways to Produce Perfect Slow-Motion Videos for Instagram
- Updated 2024 Approved How to Stabilize Videos for Free with Google Photos App
- Updated 2024 Approved How to Add Transitions in Adobe Premiere Pro
- Updated Detailed Tutorial to Rotate Videos in Cyberlink PowerDirector
- Updated 2024 Approved Tips for Choosing Location & Scheduling Music Video
- Full Guide on Mirroring Your Honor Play 40C to Your PC/Mac | Dr.fone
- Pokemon Go Error 12 Failed to Detect Location On Nokia C02? | Dr.fone
- Unlock Apple iPhone XR With Forgotten Passcode Different Methods You Can Try
- How Can I Unlock My Apple iPhone 8 After Forgetting my PIN Code? | Dr.fone
- Fix Unfortunately Settings Has Stopped on Tecno Spark 20C Quickly | Dr.fone
- Full Guide How To Fix Connection Is Not Private on OnePlus Nord N30 5G | Dr.fone
- How to Transfer Photos from Vivo X90S to Laptop Without USB | Dr.fone
- In 2024, Fake the Location to Get Around the MLB Blackouts on Vivo X Flip | Dr.fone
- Updated 2024 Approved Tips for GIF to Animated PNG
- How To Fix Unresponsive Phone Touchscreen Of Motorola Moto G73 5G | Dr.fone
- Best 3 Vivo X90S Emulator for Mac to Run Your Wanted Android Apps | Dr.fone
- In 2024, How to Unlock Vivo V27e Phone Password Without Factory Reset?
- Top 11 Free Apps to Check IMEI on Oppo Find X7 Phones
- In 2024, Additional Tips About Sinnoh Stone For Oppo F23 5G | Dr.fone
- Top 10 Oppo Reno 9A Android SIM Unlock APK
- 3uTools Virtual Location Not Working On Asus ROG Phone 8? Fix Now | Dr.fone
- In 2024, How to Unlock Apple iPhone XR without Passcode or Face ID
- How to rescue lost call logs from Nubia Red Magic 8S Pro+
- Ultimate Guide from Honor Magic 5 FRP Bypass
- 9 Best Phone Monitoring Apps for Itel P55+ | Dr.fone
- How To Upgrade or Downgrade iPhone 14 Pro Without Data Loss? | Dr.fone
- In 2024, What Pokémon Evolve with A Dawn Stone For Vivo X100 Pro? | Dr.fone
- How does the stardust trade cost In pokemon go On Vivo V27 Pro? | Dr.fone
- 4 Feasible Ways to Fake Location on Facebook For your Samsung Galaxy S23+ | Dr.fone
- Gmail Not Working on Realme Narzo N53 7 Common Problems & Fixes | Dr.fone
- How to Fix My Tecno Camon 20 Location Is Wrong | Dr.fone
- Title: New 2 Effective Ways to Add Text Behind Objects for 2024
- Author: Morgan
- Created at : 2024-05-19 05:12:49
- Updated at : 2024-05-20 05:12:49
- Link: https://ai-video-editing.techidaily.com/new-2-effective-ways-to-add-text-behind-objects-for-2024/
- License: This work is licensed under CC BY-NC-SA 4.0.
