:max_bytes(150000):strip_icc():format(webp)/GettyImages-919006240-ee5ef631cb6f4e4997bce403b8bafa77.jpg)
New 2 Methods to Crop a Video in VLC

2 Methods to Crop a Video in VLC
Want to crop your videos but don’t know how to start?
A video editor needs to know how he can crop his videos. There is a way to do this using the VLC that is installed in your computer. This guide will teach you a simple way to get what you want. This might appear as complicated at first sight but it will be shown to you in a digestible way. An alternative way would be to use Wondershare Filmora. You will also be guided on how to use this software to crop your videos. Don’t worry and just take it one step at a time.
Method 1: Cropping a Video using VLC
Have you ever heard of the VLC media player? If not, you can browse through it online and install it on your computer. Aside from watching content, you can also crop videos with it. Cropping is a way to remove spaces that you would not want to be included on your video.
Find the software on your computer and don’t be overwhelmed by the interface.

Then click the Media and select Open File to choose the video that you want to crop. You should prepare the videos that you want to be cropped and rename them to avoid confusion.

Click the Tools on the menu and select the Effects and Filters.

After that, click on the Video Effects and under that select Crop. Doing this, will open the cropping editor.

You need to enter specific pixels on the left, right, top and bottom. This will depend on your preferences. If it is your first time and you don’t know the exact pixels then just input what you think would be enough.

After entering your preferred pixels, you can preview it. If you would like to adjust then just simply repeat entering the specific pixels.

You decided to save the cropped video. Find the Tools menu and select Preferences.

Find the Show settings and click All. In the search bar type Croppadd then save your previous preferred pixel settings. Lastly, click Save.

In the Media menu select the Convert/Save. You can drag and drop the cropped video to the File box.

You can select your file format and codecs by clicking Convert/Save.

Find the Edit Selected Profile and click the Video Codec. Then under the Filters tab, select the Video cropping filter. Finally, click Save.

In the Destination file select where you want it to be saved.

Then click Start.

Congratulations on getting here! You finally cropped your video using the VLC media player.
Although there are disadvantages to using this as your cropping tool. Like for example you want the real-time preview of what you’ve changed in your video. This would be a turn off for some that want their outputs to be shown to them immediately. Aside from this, there is a chance that you will forget one step to make and thus, the whole process would need to start over from scratch. Lastly, is the freedom to batch crop multiple videos. This is especially important for those that need to have many clips in one video. A user might lose the continuity of the story within his video.
While one of its strong suits is the affordability of the software. It is completely free and has no additional charges that may surprise you in the future. Finally, your output won’t have watermarks that could destroy the aesthetics of your video.
What are your experiences with using it as a cropping tool? What would you recommend to improve it? It is up to you the user if you want to continue using this as your partner in removing the excess in your videos.
Method 2: Cropping a Video using Wondershare Filmora
Have you heard of an editing tool called Wondershare Filmora Video Editor ? What are your first impressions of this software? You can download this for free by going to the official site.
For Win 7 or later (64-bit)
For macOS 10.14 or later
Wondershare Filmora is a useful editor that can help you produce the content that you want. It is packed with beneficial tools that you can learn to apply. If it is already installed on your computer then proceed to opening it.

Prepare your videos that you need to crop. You can drag and drop your video or click the Import.

Select the video clip that you want to crop. Then, click the Crop tool and choose if you want the Crop or Pan & Zoom.

You can also right click the video clip .Under the Video tab you can select the Crop and Zoom or Crop to Fit then adjust to your preferred ratio.

One of the advantages of Filmora is you can preview what you have cropped immediately. This will greatly help you if you’re not sure what kind of crop that you want. If you’ve thought that you made a mistake then a simple Undo button could fix it. In short, you’re not going through the gruesome process of starting all over again. You can also do the batch cropping of multiple videos helping you ensure the smoothness of flow in the final output.
Although the Filmora is not free, there is a trial that you can use to test it to check if this video editor would meet your needs. It has tools that a beginner to expert video editor could use to produce high quality videos that would make the audience think that it was life from the movies.
The Bottom Line
The journey of exploring different options would help you make the decision. Both VLC media player and Wondershare Filmora have their great features which would aid the user to crop his videos in an efficient way. What are your thoughts on each of them? As an individual you have varied needs that a video tool should meet.
After reading this, you’ve had a clearer view of what these video softwares offers. Did this guide help you decide which would fit your needs as a video editor? What are your suggestions for improvement?
You could share with us the tips and tricks you know on cropping videos using these applications.
Then click the Media and select Open File to choose the video that you want to crop. You should prepare the videos that you want to be cropped and rename them to avoid confusion.

Click the Tools on the menu and select the Effects and Filters.

After that, click on the Video Effects and under that select Crop. Doing this, will open the cropping editor.

You need to enter specific pixels on the left, right, top and bottom. This will depend on your preferences. If it is your first time and you don’t know the exact pixels then just input what you think would be enough.

After entering your preferred pixels, you can preview it. If you would like to adjust then just simply repeat entering the specific pixels.

You decided to save the cropped video. Find the Tools menu and select Preferences.

Find the Show settings and click All. In the search bar type Croppadd then save your previous preferred pixel settings. Lastly, click Save.

In the Media menu select the Convert/Save. You can drag and drop the cropped video to the File box.

You can select your file format and codecs by clicking Convert/Save.

Find the Edit Selected Profile and click the Video Codec. Then under the Filters tab, select the Video cropping filter. Finally, click Save.

In the Destination file select where you want it to be saved.

Then click Start.

Congratulations on getting here! You finally cropped your video using the VLC media player.
Although there are disadvantages to using this as your cropping tool. Like for example you want the real-time preview of what you’ve changed in your video. This would be a turn off for some that want their outputs to be shown to them immediately. Aside from this, there is a chance that you will forget one step to make and thus, the whole process would need to start over from scratch. Lastly, is the freedom to batch crop multiple videos. This is especially important for those that need to have many clips in one video. A user might lose the continuity of the story within his video.
While one of its strong suits is the affordability of the software. It is completely free and has no additional charges that may surprise you in the future. Finally, your output won’t have watermarks that could destroy the aesthetics of your video.
What are your experiences with using it as a cropping tool? What would you recommend to improve it? It is up to you the user if you want to continue using this as your partner in removing the excess in your videos.
Method 2: Cropping a Video using Wondershare Filmora
Have you heard of an editing tool called Wondershare Filmora Video Editor ? What are your first impressions of this software? You can download this for free by going to the official site.
For Win 7 or later (64-bit)
For macOS 10.14 or later
Wondershare Filmora is a useful editor that can help you produce the content that you want. It is packed with beneficial tools that you can learn to apply. If it is already installed on your computer then proceed to opening it.

Prepare your videos that you need to crop. You can drag and drop your video or click the Import.

Select the video clip that you want to crop. Then, click the Crop tool and choose if you want the Crop or Pan & Zoom.

You can also right click the video clip .Under the Video tab you can select the Crop and Zoom or Crop to Fit then adjust to your preferred ratio.

One of the advantages of Filmora is you can preview what you have cropped immediately. This will greatly help you if you’re not sure what kind of crop that you want. If you’ve thought that you made a mistake then a simple Undo button could fix it. In short, you’re not going through the gruesome process of starting all over again. You can also do the batch cropping of multiple videos helping you ensure the smoothness of flow in the final output.
Although the Filmora is not free, there is a trial that you can use to test it to check if this video editor would meet your needs. It has tools that a beginner to expert video editor could use to produce high quality videos that would make the audience think that it was life from the movies.
The Bottom Line
The journey of exploring different options would help you make the decision. Both VLC media player and Wondershare Filmora have their great features which would aid the user to crop his videos in an efficient way. What are your thoughts on each of them? As an individual you have varied needs that a video tool should meet.
After reading this, you’ve had a clearer view of what these video softwares offers. Did this guide help you decide which would fit your needs as a video editor? What are your suggestions for improvement?
You could share with us the tips and tricks you know on cropping videos using these applications.
Then click the Media and select Open File to choose the video that you want to crop. You should prepare the videos that you want to be cropped and rename them to avoid confusion.

Click the Tools on the menu and select the Effects and Filters.

After that, click on the Video Effects and under that select Crop. Doing this, will open the cropping editor.

You need to enter specific pixels on the left, right, top and bottom. This will depend on your preferences. If it is your first time and you don’t know the exact pixels then just input what you think would be enough.

After entering your preferred pixels, you can preview it. If you would like to adjust then just simply repeat entering the specific pixels.

You decided to save the cropped video. Find the Tools menu and select Preferences.

Find the Show settings and click All. In the search bar type Croppadd then save your previous preferred pixel settings. Lastly, click Save.

In the Media menu select the Convert/Save. You can drag and drop the cropped video to the File box.

You can select your file format and codecs by clicking Convert/Save.

Find the Edit Selected Profile and click the Video Codec. Then under the Filters tab, select the Video cropping filter. Finally, click Save.

In the Destination file select where you want it to be saved.

Then click Start.

Congratulations on getting here! You finally cropped your video using the VLC media player.
Although there are disadvantages to using this as your cropping tool. Like for example you want the real-time preview of what you’ve changed in your video. This would be a turn off for some that want their outputs to be shown to them immediately. Aside from this, there is a chance that you will forget one step to make and thus, the whole process would need to start over from scratch. Lastly, is the freedom to batch crop multiple videos. This is especially important for those that need to have many clips in one video. A user might lose the continuity of the story within his video.
While one of its strong suits is the affordability of the software. It is completely free and has no additional charges that may surprise you in the future. Finally, your output won’t have watermarks that could destroy the aesthetics of your video.
What are your experiences with using it as a cropping tool? What would you recommend to improve it? It is up to you the user if you want to continue using this as your partner in removing the excess in your videos.
Method 2: Cropping a Video using Wondershare Filmora
Have you heard of an editing tool called Wondershare Filmora Video Editor ? What are your first impressions of this software? You can download this for free by going to the official site.
For Win 7 or later (64-bit)
For macOS 10.14 or later
Wondershare Filmora is a useful editor that can help you produce the content that you want. It is packed with beneficial tools that you can learn to apply. If it is already installed on your computer then proceed to opening it.

Prepare your videos that you need to crop. You can drag and drop your video or click the Import.

Select the video clip that you want to crop. Then, click the Crop tool and choose if you want the Crop or Pan & Zoom.

You can also right click the video clip .Under the Video tab you can select the Crop and Zoom or Crop to Fit then adjust to your preferred ratio.

One of the advantages of Filmora is you can preview what you have cropped immediately. This will greatly help you if you’re not sure what kind of crop that you want. If you’ve thought that you made a mistake then a simple Undo button could fix it. In short, you’re not going through the gruesome process of starting all over again. You can also do the batch cropping of multiple videos helping you ensure the smoothness of flow in the final output.
Although the Filmora is not free, there is a trial that you can use to test it to check if this video editor would meet your needs. It has tools that a beginner to expert video editor could use to produce high quality videos that would make the audience think that it was life from the movies.
The Bottom Line
The journey of exploring different options would help you make the decision. Both VLC media player and Wondershare Filmora have their great features which would aid the user to crop his videos in an efficient way. What are your thoughts on each of them? As an individual you have varied needs that a video tool should meet.
After reading this, you’ve had a clearer view of what these video softwares offers. Did this guide help you decide which would fit your needs as a video editor? What are your suggestions for improvement?
You could share with us the tips and tricks you know on cropping videos using these applications.
Then click the Media and select Open File to choose the video that you want to crop. You should prepare the videos that you want to be cropped and rename them to avoid confusion.

Click the Tools on the menu and select the Effects and Filters.

After that, click on the Video Effects and under that select Crop. Doing this, will open the cropping editor.

You need to enter specific pixels on the left, right, top and bottom. This will depend on your preferences. If it is your first time and you don’t know the exact pixels then just input what you think would be enough.

After entering your preferred pixels, you can preview it. If you would like to adjust then just simply repeat entering the specific pixels.

You decided to save the cropped video. Find the Tools menu and select Preferences.

Find the Show settings and click All. In the search bar type Croppadd then save your previous preferred pixel settings. Lastly, click Save.

In the Media menu select the Convert/Save. You can drag and drop the cropped video to the File box.

You can select your file format and codecs by clicking Convert/Save.

Find the Edit Selected Profile and click the Video Codec. Then under the Filters tab, select the Video cropping filter. Finally, click Save.

In the Destination file select where you want it to be saved.

Then click Start.

Congratulations on getting here! You finally cropped your video using the VLC media player.
Although there are disadvantages to using this as your cropping tool. Like for example you want the real-time preview of what you’ve changed in your video. This would be a turn off for some that want their outputs to be shown to them immediately. Aside from this, there is a chance that you will forget one step to make and thus, the whole process would need to start over from scratch. Lastly, is the freedom to batch crop multiple videos. This is especially important for those that need to have many clips in one video. A user might lose the continuity of the story within his video.
While one of its strong suits is the affordability of the software. It is completely free and has no additional charges that may surprise you in the future. Finally, your output won’t have watermarks that could destroy the aesthetics of your video.
What are your experiences with using it as a cropping tool? What would you recommend to improve it? It is up to you the user if you want to continue using this as your partner in removing the excess in your videos.
Method 2: Cropping a Video using Wondershare Filmora
Have you heard of an editing tool called Wondershare Filmora Video Editor ? What are your first impressions of this software? You can download this for free by going to the official site.
For Win 7 or later (64-bit)
For macOS 10.14 or later
Wondershare Filmora is a useful editor that can help you produce the content that you want. It is packed with beneficial tools that you can learn to apply. If it is already installed on your computer then proceed to opening it.

Prepare your videos that you need to crop. You can drag and drop your video or click the Import.

Select the video clip that you want to crop. Then, click the Crop tool and choose if you want the Crop or Pan & Zoom.

You can also right click the video clip .Under the Video tab you can select the Crop and Zoom or Crop to Fit then adjust to your preferred ratio.

One of the advantages of Filmora is you can preview what you have cropped immediately. This will greatly help you if you’re not sure what kind of crop that you want. If you’ve thought that you made a mistake then a simple Undo button could fix it. In short, you’re not going through the gruesome process of starting all over again. You can also do the batch cropping of multiple videos helping you ensure the smoothness of flow in the final output.
Although the Filmora is not free, there is a trial that you can use to test it to check if this video editor would meet your needs. It has tools that a beginner to expert video editor could use to produce high quality videos that would make the audience think that it was life from the movies.
The Bottom Line
The journey of exploring different options would help you make the decision. Both VLC media player and Wondershare Filmora have their great features which would aid the user to crop his videos in an efficient way. What are your thoughts on each of them? As an individual you have varied needs that a video tool should meet.
After reading this, you’ve had a clearer view of what these video softwares offers. Did this guide help you decide which would fit your needs as a video editor? What are your suggestions for improvement?
You could share with us the tips and tricks you know on cropping videos using these applications.
Convert Slow Motion Videos to Regular Videos in Your iOS Device |A How
Thanks to the eccentric and offbeat elements, slow-motion videos have become the super-fun, state-of-the-art trend. Whether you’re in the bar trying to click the aesthetic, cinematic video or capture cool, unique, and enticing birthday moments, you can always rely on the slow-mo feature.

But do you ever feel like converting the slow-motion video in your iOS device to a normal video? Perhaps you thought the slow-mo video would be more attractive, but it’s not, or maybe you want to determine how to remove slow-motion from a video iPhone.
No matter the reason, there are numerous ways to remove slow motion from iPhone video. In this article, you’ll learn the various methods to convert slow-motion video into a regular video on your iPhone or iPad. Also, learn the steps involved in achieving it.
So, let’s start.
How To Convert Slow Motion Video to Normal on iPhone and iPad
Due to the slow-motion and Time-lapse modes that are built into the iPhone, people may quickly record slo-mo and time-lapse clips using their iOS smartphone cameras.
Access the iPhone camera, select Slo-mo, press the Record icon once to begin filming, and then press it once more to stop. This will create a slo-mo video.
Do you ever wish to get your video’s slow motion removed? How to convert slow-motion video to normal on an iPhone? Well, here’s your answer.
Method 1. Using the Photos App
The Photos app is an in-built app for iPhone and iPad that features editing capabilities like rotation, resizing, and auto-enhancement, in addition to helping you manage videos and images.
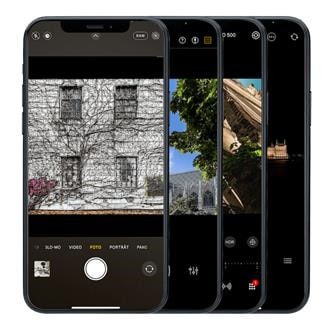
You may quickly and effortlessly turn a slow-mo video into a regular-speed one with the Photos app’s tucked-away slow-motion converter feature. Additionally, there won’t be any quality loss in your video.
And here are the steps on how to remove slow-mo from iPhone video using the Photos app on an iPad or iPhone to turn it to normal speed.
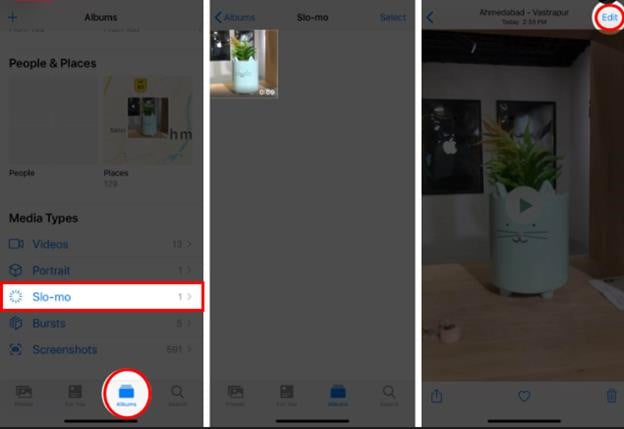
Step1: Take your iPad or iPhone, navigate to the Photos app, open it, and then go to the bottom to hit the Albums tab.
Step2: Choose the Slo-mo option, and subsequently select the video you wish to turn into a regular speed video. Go to the top right corner of the screen and hit the Edit button.
Step3: If you look under the timeline, you’ll find vertical lines. Here, the area with apart spaces signifies slow motion.
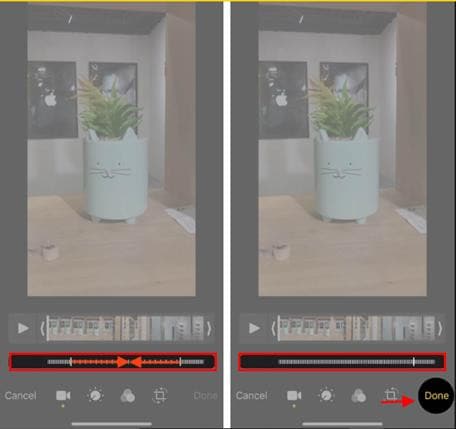
Step4: To learn how to remove slow mo from iPhone video is to learn how to turn it into regular speed. To do so, select the slow-motion bar and drag it towards the other one to position the lines at a close distance.
Step5: When finished, hit the Done button and save this video. However, if you think this change was unnecessary or incorrect, you can discard it by clicking on Edit → Revert → Revert To Original.

Editing Tip
- The Photos app on iPhone doesn’t allow you to convert any video shot at 24fps or 30fps to slow motion.
- You cannot reduce or decrease the overall size of the video after conversion.
Pros & Cons
Pros
- It is a built-in app on every iOS device.
- Saves the hassle of downloading any third-party app.
- No charges are applicable for using this app.
- Excellent slow-mo video convertor.
Cons
- Limited speed adjustment for the conversion of slow-mo videos into regular videos.
Method 2: Using Other Converter Apps
You may think that converting slow-mo video to a regular speed video on your iPad or iPhone is convenient, but there’s a drawback too. The method mentioned above can only help you with minimalistic speed changes, which may not give you the desired result.
However, other converter apps also help you change slow-mo video to regular iPhone video. These apps work seamlessly on your PC or Mac to turn your slow-mo videos on the iPhone or Mac to normal-speed video using customized and high-resolution settings.
Overview of The Apps
| Particulars | iMovie | Slow-Fast Motion Video Editor |
|---|---|---|
| Type (versatile or specialized) | Versatile | Specialized |
| Supported OS | iOS, Mac | iOS, Mac |
| Average Rating | 3.9/5 | 4.7/5 |
| Price | Free | Free |
| Best for | Video editing with cinematic effects | Slo-mo video conversion |
1) iMovie
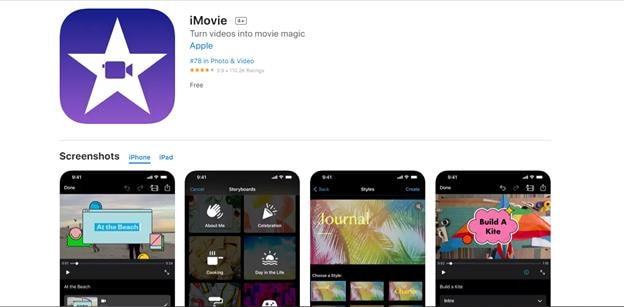
iMovie is an excellent option if you’re looking for an application to modify a video with additional tools and convert the slow-mo to a regular pace. Among the top video converters for the iPhone is iMovie.
It offers a wide range of tools and capabilities that allow you to change the video transition, audio, and speed, add music, animated text, video overlay effects, normal video effects, and more. Additionally, it aids users in producing stunning films and commercials in a Cinematic manner.
iMovie could convert slow-mo footage to normal speed, in case you didn’t know. Did you ever attempt to change slow mot to regular speed in iMovie? With the use of iMovie, how can slow-motion video be made normally on an iPhone?
Here are the instructions.
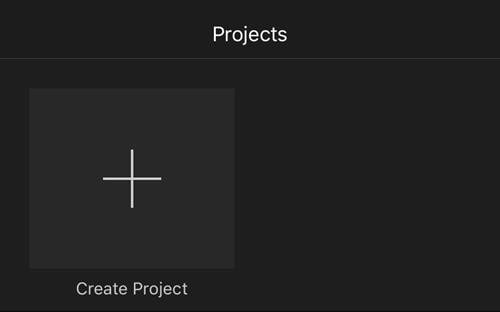
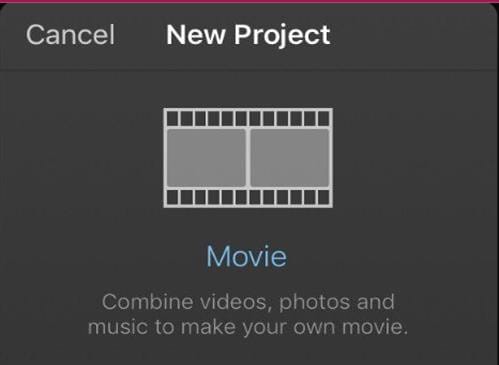
Step1: Open the iMovie app, click on the ‘Create Project’ option, → tap on ‘Movie → Media → Video.
Step2: Tap on the slow-mo option, select the slow-motion video you want to convert and hit the ‘Create Movie’ option.
Step3: Get to know the editing options by clicking on the timeline. Then, click on the clock (speed) icon. At the beginning of the lines, you’ll find a turtle. It demonstrates slow motion. Plus, the number right behind the rabbit at the end signifies the speed.

Step4: To turn this slow-motion video into a regular speed video, drag and slide the speed control slider until the number turns 1x.
Step5: To save the changes, tap on the Done option. Subsequently, edit the video as per your preference.
2) Slow-Fast Motion Video Editor
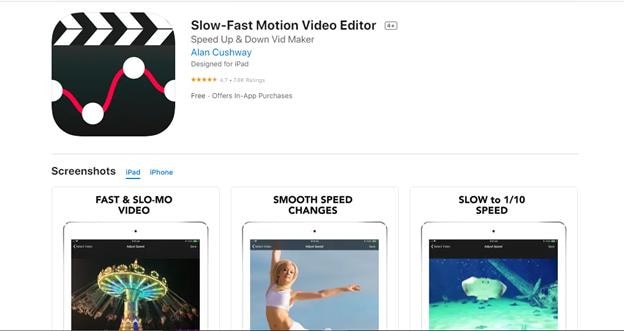
This slow-mo video converter app helps you slow down or speed up any slow-motion video without any watermark and charges. This free app supports both landscape or portrait operation, unlimited video length, and corrected audio pitch.
The application is convenient to use and seamless to speed up or slow down any parts or clips of your videos. Without charging a penny, this app meets the users’ expectations. If you’re wondering how to use this converter app, here’s a step-by-step guide:
Method 3. Using Third-Party Online Tools
The smartphone sector’s most cutting-edge functionalities can be found on iPhones. Users may capture slow-motion videos, for instance. However, you may consider accelerating the slo-mo movie to regular video speed once it has been recorded.
Using your smartphone, how would you go about doing that? Well, we have seen that using the built-in Photos app and converter apps like iMovie can help, but can they really provide the level of customization and outcomes you need?
When things get professional and the expectations are too high, it’s best to use third-party online tools. So, here are a few practical choices:
Overview of the Online Tools
| Particulars | KAPWING | Clideo | EZGIF |
|---|---|---|---|
| Supported File Format | .AVI, .FLV, 3GP, and other edge file types. | MP4, MOV, WMV, AVI, WEBM, FLV, MKV, MPG, MPEG, MTS. | MNG files |
| Watermark | Not Available | Only in Free version | Not Available |
| Available Speed Option | As fast as 4x for an accelerated video | 0.25 times to 2 times | 0.25 times to 2 times |
| Time Consuming | No | Moderate | No |
1) KAPWING
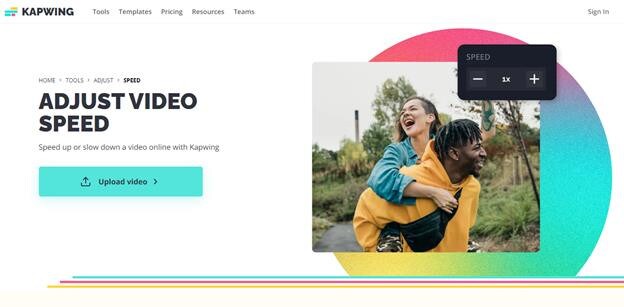
Kapwing is a tool for group film editing that enables people to collaborate to produce original videos. For individuals to create the ideal video, Kapwing offers a collection of pre-built themes, stock footage, and materials.
Kapwing acts as a digital office solution that enables individuals to organize all of their resources in one location and work together on projects utilizing sharing features. Amid its vast range of features, its slow-mo converter is the most famous and widely used one.
- Rating: 4.1/5
- Price: Plan starts at $20 per month
Step-By-Step Guide To Convert Slow-Mo on Iphone Using Kapwing App
Step1: First, download and install the Kapwing app from the App Store.
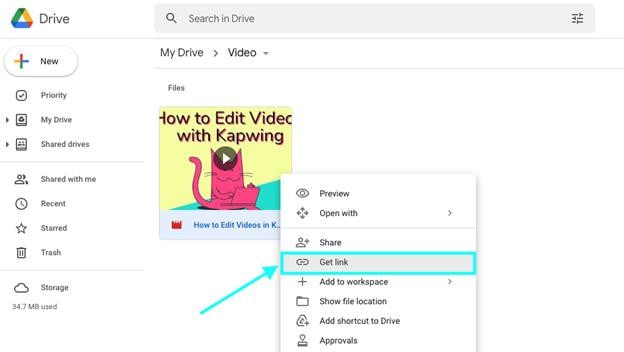
Step2: Upload the slow-mo video that you want to speed up.
![]()
Note: Kapwing also lets you speed up any slow-mo video present on TikTok, Twitter, or YouTube.
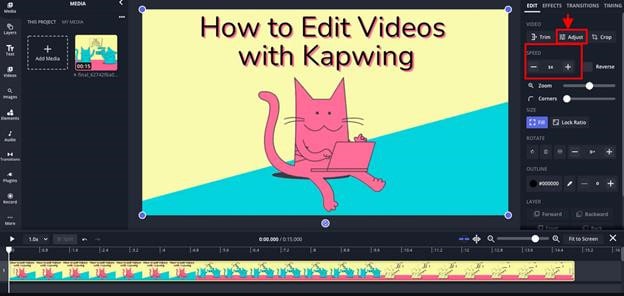
Step3: Perform the video clip speed adjustment by utilizing the Kapwing sidebar. You can accelerate the video clip speed up to four times the original speed. If not, you can play in every level in between.
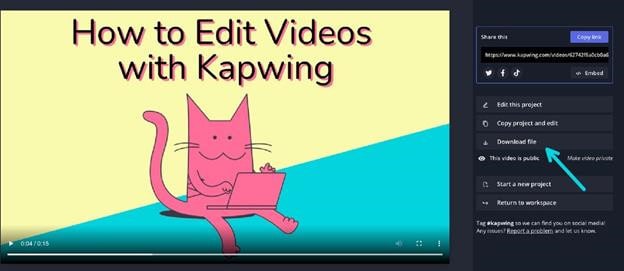
Step4: Finally, click on the Export option, and the final video clip with all speed adjustments will be generated within a few seconds.
2) Clideo
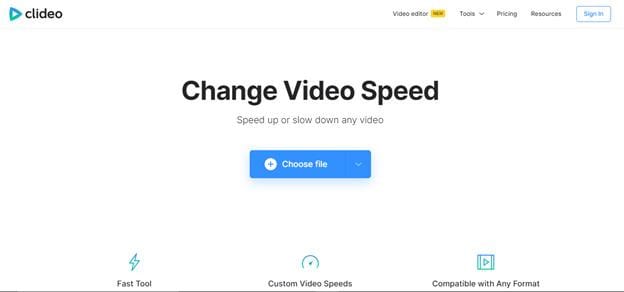
Among the finest free tools for rapid photo or video editing is Clideo. You can start upgrading your material by uploading files in a wide range of formats to their site.
Limitless customization is possible with the paid version for just $9 a month. The capabilities, though, aren’t as varied as those offered by rivals, and there aren’t any mobile apps for people who want to generate material while on the go.
- Ratings: 4.3/5
- Price: Starts at $9 per month
Step-By-Step Guide To Convert Slow-Mo on Iphone Using Clideo App:
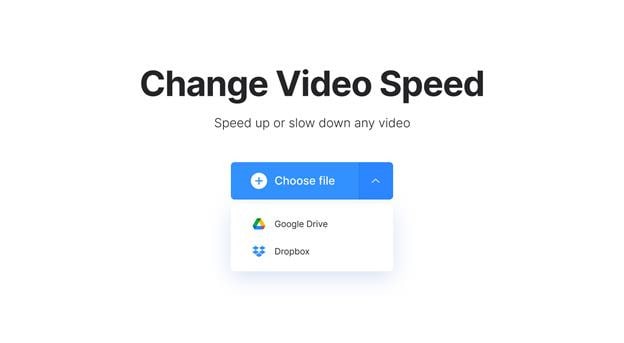
Step1: From your computer (Mac) or mobile device (iPhone), upload a video. You can also add from a Dropbox or Google Drive account.
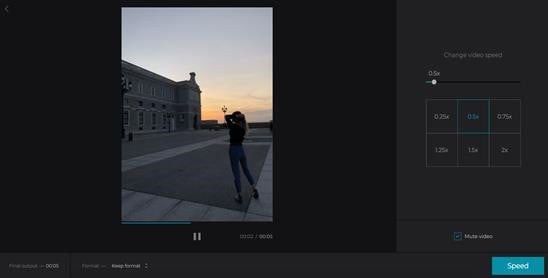
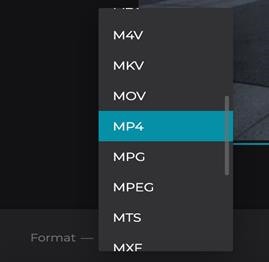
Step2: Select to speed up the video after it has been recorded. Then, if required, muffle its sound and alter the file type.
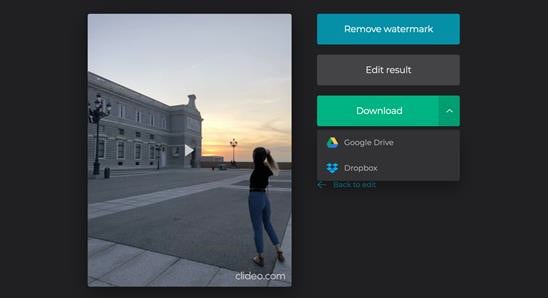
Step3: The video can be seen directly in your browser. Click “Download” after you are finished and delighted with your creation.
3) EZGIF
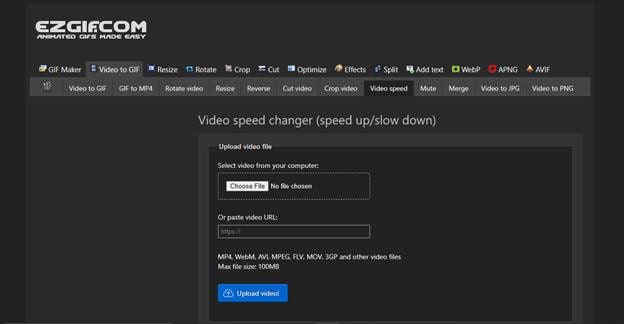
EZGIF is a free online editing tool that enables individuals to change the playback speed of any video. Not only does it effectively convert your slow-mo video on an iOS device to a normal speed video, but it also comes with many other features (later on that). The website has a simple, outdated interface, but except for that, it’s a fine app for beginners.
Step-By-Step Guide To Convert Slow-Mo on Iphone Using Clideo App:
Step1: Upload the video clip and choose a speed multiplier to start using this program.
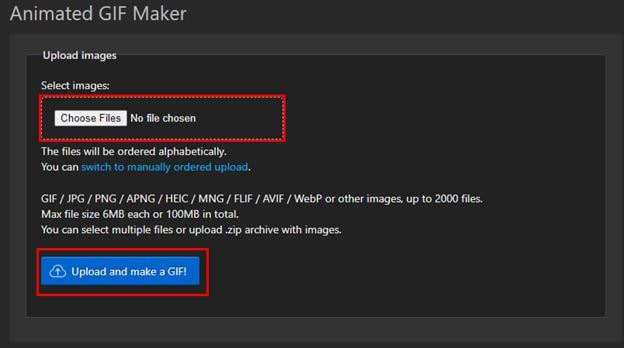
Step2: A number less than one will slow down playback; a number greater than one will quicken it.
Step3: Thus, input 0.5 to run the program at 1/2 its normal speed, and so forth.
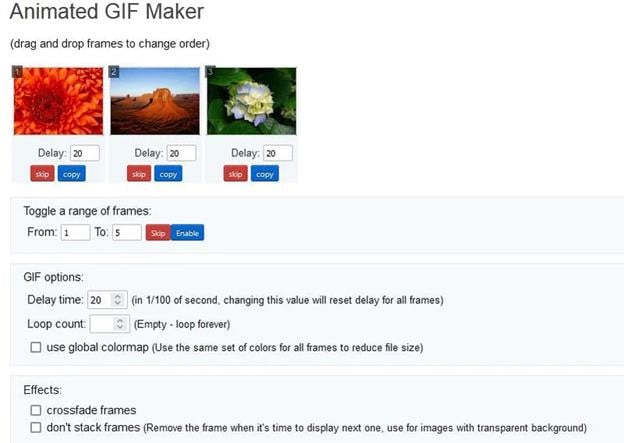
Step4: You can preserve the audio track’s original tempo, vary the speed along with the video, or silence the audio entirely.
Convert Your Slo-Mo Videos Into Regular Ones In a Few Simple Steps With Filmora
Filmora is a leading online video editing software that has become the preferred choice of all professionals and amateurs. From everyday needs to something formal, it helps you edit videos for every occasion.
You can change pace swiftly or consistently in Filmora and vary the pace of the audio or video recordings. Use the Speed Ramping tool in Filmora. If you want to remove slow-mo or add it, you can use Filmora’s speed ramping feature anytime.
Free Download For Win 7 or later(64-bit)
Free Download For macOS 10.14 or later
We will share some details on how to use this feature here, but for a comprehensive, detailed guide, read to the end.
Step-By-Step Guide to Speed Changing
Step1Launch the Video
Activate Wondershare Filmora on your computer. To increase the speed and runtime of the movie, explore the desired video and enter it into the software. You can drag and drop the movie onto the interface as well.
Step2Speed Adjustment

Press the left mouse button as soon as the video shows on the screen. And click the speed tab in the toolbar. There is then a contextual menu displayed. To double the rate, select 2x from the “Fast” menu. The participant may use any fundamental that has more than one.
Step3Save & Export
When finished, select “Save Project” from the list of available options in the “File” panel. Press “Save” after renaming the project.
Using Filmora’s “Export” feature, selecting “Export,” and then modifying the file name is the alternative way to export the video. A device, a system, or even YouTube can receive the exported video. Next, click “Export.”
Bonus Tips. 2 More Methods to Normalize Your Video Speed
Filmora offers you 2 more advanced methods to increase or decrease the speed of the video, one is uniform speed and the other, is speed ramping . Want to learn more about changing speed in Filmora, watch this video tutorial to get a quick start on using them.
Conclusion
That’s basically it! So that’s how you turn any slow-motion video into a regular one.
This article covers all major techniques to convert videos to slow motion on iOS and Mac. You can pick one of them to convert video to slow motion or to slow down slow motion.
So, are you now prepared to convert slow-motion videos on your iPad or iPhone device to ordinary speed? Try the Filmora video editor if you’re looking for something really professional.
It makes it much easier to convert slow-motion videos from your smartphone or tablet to regular speed. It has powerful video editing features and is more comfortable to use. So, get started today!
Method 2: Using Other Converter Apps
You may think that converting slow-mo video to a regular speed video on your iPad or iPhone is convenient, but there’s a drawback too. The method mentioned above can only help you with minimalistic speed changes, which may not give you the desired result.
However, other converter apps also help you change slow-mo video to regular iPhone video. These apps work seamlessly on your PC or Mac to turn your slow-mo videos on the iPhone or Mac to normal-speed video using customized and high-resolution settings.
Overview of The Apps
| Particulars | iMovie | Slow-Fast Motion Video Editor |
|---|---|---|
| Type (versatile or specialized) | Versatile | Specialized |
| Supported OS | iOS, Mac | iOS, Mac |
| Average Rating | 3.9/5 | 4.7/5 |
| Price | Free | Free |
| Best for | Video editing with cinematic effects | Slo-mo video conversion |
1) iMovie

iMovie is an excellent option if you’re looking for an application to modify a video with additional tools and convert the slow-mo to a regular pace. Among the top video converters for the iPhone is iMovie.
It offers a wide range of tools and capabilities that allow you to change the video transition, audio, and speed, add music, animated text, video overlay effects, normal video effects, and more. Additionally, it aids users in producing stunning films and commercials in a Cinematic manner.
iMovie could convert slow-mo footage to normal speed, in case you didn’t know. Did you ever attempt to change slow mot to regular speed in iMovie? With the use of iMovie, how can slow-motion video be made normally on an iPhone?
Here are the instructions.
Step1: Open the iMovie app, click on the ‘Create Project’ option, → tap on ‘Movie → Media → Video.

Step2: Tap on the slow-mo option, select the slow-motion video you want to convert and hit the ‘Create Movie’ option.

Step3: Get to know the editing options by clicking on the timeline. Then, click on the clock (speed) icon. At the beginning of the lines, you’ll find a turtle. It demonstrates slow motion. Plus, the number right behind the rabbit at the end signifies the speed.

Step4: To turn this slow-motion video into a regular speed video, drag and slide the speed control slider until the number turns 1x.
Step5: To save the changes, tap on the Done option. Subsequently, edit the video as per your preference.
2) Slow-Fast Motion Video Editor

This slow-mo video converter app helps you slow down or speed up any slow-motion video without any watermark and charges. This free app supports both landscape or portrait operation, unlimited video length, and corrected audio pitch.
The application is convenient to use and seamless to speed up or slow down any parts or clips of your videos. Without charging a penny, this app meets the users’ expectations. If you’re wondering how to use this converter app, here’s a step-by-step guide:
Method 3. Using Third-Party Online Tools
The smartphone sector’s most cutting-edge functionalities can be found on iPhones. Users may capture slow-motion videos, for instance. However, you may consider accelerating the slo-mo movie to regular video speed once it has been recorded.
Using your smartphone, how would you go about doing that? Well, we have seen that using the built-in Photos app and converter apps like iMovie can help, but can they really provide the level of customization and outcomes you need?
When things get professional and the expectations are too high, it’s best to use third-party online tools. So, here are a few practical choices:
Overview of the Online Tools
| Particulars | KAPWING | Clideo | EZGIF |
|---|---|---|---|
| Supported File Format | .AVI, .FLV, 3GP, and other edge file types. | MP4, MOV, WMV, AVI, WEBM, FLV, MKV, MPG, MPEG, MTS. | MNG files |
| Watermark | Not Available | Only in Free version | Not Available |
| Available Speed Option | As fast as 4x for an accelerated video | 0.25 times to 2 times | 0.25 times to 2 times |
| Time Consuming | No | Moderate | No |
1) KAPWING

Kapwing is a tool for group film editing that enables people to collaborate to produce original videos. For individuals to create the ideal video, Kapwing offers a collection of pre-built themes, stock footage, and materials.
Kapwing acts as a digital office solution that enables individuals to organize all of their resources in one location and work together on projects utilizing sharing features. Amid its vast range of features, its slow-mo converter is the most famous and widely used one.
- Rating: 4.1/5
- Price: Plan starts at $20 per month
Step-By-Step Guide To Convert Slow-Mo on Iphone Using Kapwing App
Step1: First, download and install the Kapwing app from the App Store.
Step2: Upload the slow-mo video that you want to speed up.
![]()
Note: Kapwing also lets you speed up any slow-mo video present on TikTok, Twitter, or YouTube.

Step3: Perform the video clip speed adjustment by utilizing the Kapwing sidebar. You can accelerate the video clip speed up to four times the original speed. If not, you can play in every level in between.

Step4: Finally, click on the Export option, and the final video clip with all speed adjustments will be generated within a few seconds.

2) Clideo

Among the finest free tools for rapid photo or video editing is Clideo. You can start upgrading your material by uploading files in a wide range of formats to their site.
Limitless customization is possible with the paid version for just $9 a month. The capabilities, though, aren’t as varied as those offered by rivals, and there aren’t any mobile apps for people who want to generate material while on the go.
- Ratings: 4.3/5
- Price: Starts at $9 per month
Step-By-Step Guide To Convert Slow-Mo on Iphone Using Clideo App:
Step1: From your computer (Mac) or mobile device (iPhone), upload a video. You can also add from a Dropbox or Google Drive account.

Step2: Select to speed up the video after it has been recorded. Then, if required, muffle its sound and alter the file type.


Step3: The video can be seen directly in your browser. Click “Download” after you are finished and delighted with your creation.

3) EZGIF

EZGIF is a free online editing tool that enables individuals to change the playback speed of any video. Not only does it effectively convert your slow-mo video on an iOS device to a normal speed video, but it also comes with many other features (later on that). The website has a simple, outdated interface, but except for that, it’s a fine app for beginners.
Step-By-Step Guide To Convert Slow-Mo on Iphone Using Clideo App:
Step1: Upload the video clip and choose a speed multiplier to start using this program.

Step2: A number less than one will slow down playback; a number greater than one will quicken it.
Step3: Thus, input 0.5 to run the program at 1/2 its normal speed, and so forth.

Step4: You can preserve the audio track’s original tempo, vary the speed along with the video, or silence the audio entirely.
Convert Your Slo-Mo Videos Into Regular Ones In a Few Simple Steps With Filmora
Filmora is a leading online video editing software that has become the preferred choice of all professionals and amateurs. From everyday needs to something formal, it helps you edit videos for every occasion.
You can change pace swiftly or consistently in Filmora and vary the pace of the audio or video recordings. Use the Speed Ramping tool in Filmora. If you want to remove slow-mo or add it, you can use Filmora’s speed ramping feature anytime.
Free Download For Win 7 or later(64-bit)
Free Download For macOS 10.14 or later
We will share some details on how to use this feature here, but for a comprehensive, detailed guide, read to the end.
Step-By-Step Guide to Speed Changing
Step1Launch the Video
Activate Wondershare Filmora on your computer. To increase the speed and runtime of the movie, explore the desired video and enter it into the software. You can drag and drop the movie onto the interface as well.
Step2Speed Adjustment

Press the left mouse button as soon as the video shows on the screen. And click the speed tab in the toolbar. There is then a contextual menu displayed. To double the rate, select 2x from the “Fast” menu. The participant may use any fundamental that has more than one.
Step3Save & Export
When finished, select “Save Project” from the list of available options in the “File” panel. Press “Save” after renaming the project.
Using Filmora’s “Export” feature, selecting “Export,” and then modifying the file name is the alternative way to export the video. A device, a system, or even YouTube can receive the exported video. Next, click “Export.”
Bonus Tips. 2 More Methods to Normalize Your Video Speed
Filmora offers you 2 more advanced methods to increase or decrease the speed of the video, one is uniform speed and the other, is speed ramping . Want to learn more about changing speed in Filmora, watch this video tutorial to get a quick start on using them.
Conclusion
That’s basically it! So that’s how you turn any slow-motion video into a regular one.
This article covers all major techniques to convert videos to slow motion on iOS and Mac. You can pick one of them to convert video to slow motion or to slow down slow motion.
So, are you now prepared to convert slow-motion videos on your iPad or iPhone device to ordinary speed? Try the Filmora video editor if you’re looking for something really professional.
It makes it much easier to convert slow-motion videos from your smartphone or tablet to regular speed. It has powerful video editing features and is more comfortable to use. So, get started today!
Make Videos with Pictures and Music-10 Apps
Versatile Video Editor - Wondershare Filmora
Almost all modern social media platforms allow you to upload videos on your profile, on your story, and even send them as a message. And if you want to create more personalized videos, then you might be looking for apps to put music over video, apps to make videos with pictures and music, and other types of video editor apps. But since everyone wants to edit videos right on their Android and iOS devices, many apps are available. And to help you pick the perfect app for music on video clips and make other edits, we are here with the 10 best apps to make videos with music and pictures. All of these video editor apps also have their important details below. You can easily pick the best app for making videos with pictures and music by going through the following options.
In this article
01 [Best 10 Apps for Making Videos on Android & iOS](#Part 1)
02 [Video Editor Software for Windows & Mac](#Part 2)
Part 1 Best 10 Apps for Making Videos on Android & iOS
#1) Kinemaster
Kinemaster is considered one of the most influential and feature-rich options when you talk about the best app for making videos with music right on your mobile device. While its user interface can be a little imitating initially, it offers almost all the features you will need in a picture video app with music support. You can easily edit 4K videos, apply video effects, work with multiple layers, use its inbuilt media library, and do much more for quickly editing videos with any music of your choice.

#2) Filmr
Filmr can be a great video-creating app with music support for all those who want something easy to use thanks to its user interface. Even though this app may not have all the high-end and versatile video editing features, it certainly offers all the basics making it a great app to make music videos with pictures. Despite being completely free to use, you still get various filters for both video and audio. You can also apply these effects on pictures for making videos with music. And the best part is that you get all of this in a completely free-to-use the app.
#3) Filmora
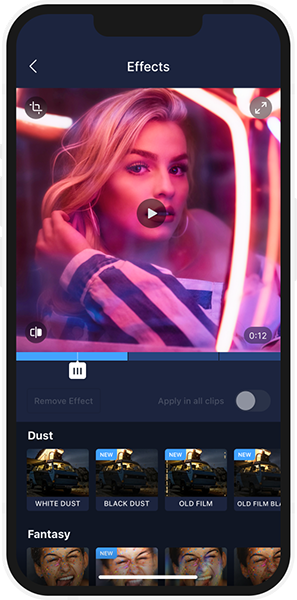
Filmora is most likely the best app to make a video with music and pictures on your smartphone. This is thanks to the wide range of features and effects that it includes while being one of the easiest to use apps out there. If you want to create videos with pictures and music, you will be glad to know that this is a video editor app with Spotify music support and offline music support so that you can apply any music of your choice. Filmora also allows you to use a wide range of video effects, apply text, add face filters, etc. And if you like Filmora, you can even try the Filmora video editor, which is its desktop version, as you will see below.

#4) Inshot
Inshot is one of the more basic and simpler video editor apps out there. It was primarily made to create square images and videos for posting on social media platforms like Instagram. But now, this app can also be used for trimming, applying effects, changing color filters, adding stickers, adding text, and much more. And most importantly, Inshot can also be used to create slideshows and videos using pictures and music. Unlike some other free video editors, this one does not even have any watermarks.
#5) CapCut
CapCut has been quite a popular option for creating music videos for social media platforms like Instagram Reels, YouTube Shorts, TikTok, and more. Thus, it is the perfect sync video to music beat app that you install on your smartphone. But most importantly, it comes with all the latest video effects, transitions, and much more for creating all the latest video trends on your phone. You can add music to both videos and photos using CapCut as you like.
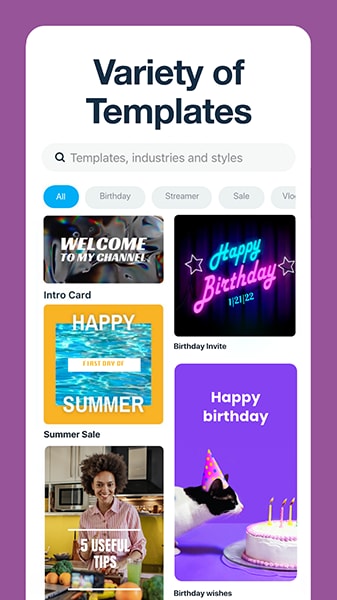
#6) Vimeo Create
Vimeo is a fairly popular video streaming platform which is almost similar to YouTube. Since a lot of users upload a large number of videos on Vimeo, Vimeo also offers its own editor. While it also has an online editor, you can also download Vimeo Create on your mobile device since it is available for both Android and iOS devices. It is the perfect option for beginners thanks to the large number of templates it offers for creating videos using pictures and music.
#7) Power Director
Power Director is quite a popular video editing app which is available on almost all platforms out there including mobile devices like Android & iOS. And even with the mobile version, you get almost all the functions of the desktop version making it perfect for creating videos using pictures and music. Even with the free version of Power Director, you also get a decent amount of video effects and support for editing 4K videos with ease. However, the free version does have a watermark on all the videos that you create.
#8) Adobe Premiere Rush
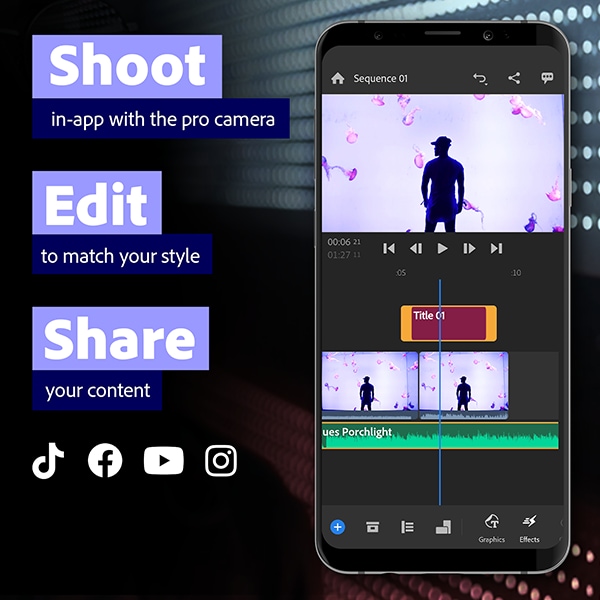
If you are familiar with industry standards when you are talking about video editors, then you must know about Adobe Premiere Pro. And if you want a familiar experience on your mobile device, then you can go with the Adobe Premiere Rush. Even on your mobile device, it offers a very similar experience thanks to the wide range of features, effects, controls, and much more it offers. Unlike other video editor apps, it even allows you to record videos if you want more than just creating videos using pictures and music.
#9) GoPro Quik
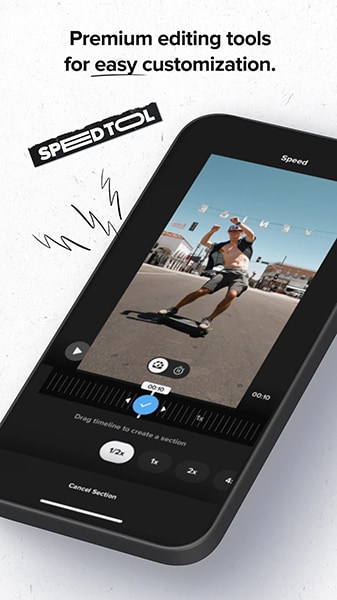
As you can guess by the name, GoPro Quik is a video editing app primarily made for GoPro cameras. But with newer updates for this app, it can be used with any kind of video or picture files. And the best thing about the GoPro Quik app is that it supports automated music beat sync editing. You can simply add any music track in the app and it will automatically sync photos and videos with it. If you want, you can also use video effects like speed control, crop and trim, color filters, text, stickers, and much more.
#10) Picsart
Even though Picsart was primarily a photo editing app, it also supports video editing in newer versions. And since Picsart is great for editing photos and pictures, creating videos using pictures and music is also quite easy. All of the features and effects supported by Picsart for photos, will also work for editing videos using Picsart. It includes color filters, face filters, makeup options, video effects, cropping, trimming, etc.

Part 2 Video Editor Software for Windows & Mac
With all the various apps given above, you can easily pick the right app to put videos together with music right on your smartphone. And while all of these apps work great for basic usage, any large projects are better to be done on a computer. Thankfully, even if you want an app to put videos and pictures together with music on your computer, you can still find multiple free to use options. Out of all such options,
is considered the best free app to make videos with music for Windows and Mac. Just per the name, Filmora is the desktop version of the previously mentioned Filmora.
Since this is the desktop version of Filmora, it offers even more features making it a great option for those who want the best app to make videos with music on Windows and Mac. Both the Windows and Mac versions of the Filmora video editing app are quite easy to use with easy-to-access options. As for its options, you get a wide range of video effects, color grading, audio settings, keyboard shortcuts, keyframing, motion tracking, and much more. And unlike other options, Filmora is the best perfect picture video app with music support for those who want an easy-to-run video editor since it can run even on entry-level computers with ease.
Wondershare Filmora
Get started quickly with Filmora’s powerful performance, intuitive interface, and countless effects!
Try It Free Try It Free Try It Free Learn More >

Conclusion
While there are music video creator app options available out there, not all of them offer the right features and options. Hence, to help you in picking the best app for music video made on your mobile device, we have already given the 10 best apps to make videos with music and pictures. Since all of these apps are quite different, you can certainly find the right option whether you want music over video app or a video collage with music app for your mobile device. You can also leave your thoughts and questions regarding the best app for making videos with pictures and music in the comments section below.
Almost all modern social media platforms allow you to upload videos on your profile, on your story, and even send them as a message. And if you want to create more personalized videos, then you might be looking for apps to put music over video, apps to make videos with pictures and music, and other types of video editor apps. But since everyone wants to edit videos right on their Android and iOS devices, many apps are available. And to help you pick the perfect app for music on video clips and make other edits, we are here with the 10 best apps to make videos with music and pictures. All of these video editor apps also have their important details below. You can easily pick the best app for making videos with pictures and music by going through the following options.
In this article
01 [Best 10 Apps for Making Videos on Android & iOS](#Part 1)
02 [Video Editor Software for Windows & Mac](#Part 2)
Part 1 Best 10 Apps for Making Videos on Android & iOS
#1) Kinemaster
Kinemaster is considered one of the most influential and feature-rich options when you talk about the best app for making videos with music right on your mobile device. While its user interface can be a little imitating initially, it offers almost all the features you will need in a picture video app with music support. You can easily edit 4K videos, apply video effects, work with multiple layers, use its inbuilt media library, and do much more for quickly editing videos with any music of your choice.

#2) Filmr
Filmr can be a great video-creating app with music support for all those who want something easy to use thanks to its user interface. Even though this app may not have all the high-end and versatile video editing features, it certainly offers all the basics making it a great app to make music videos with pictures. Despite being completely free to use, you still get various filters for both video and audio. You can also apply these effects on pictures for making videos with music. And the best part is that you get all of this in a completely free-to-use the app.

#3) Filmora
Filmora is most likely the best app to make a video with music and pictures on your smartphone. This is thanks to the wide range of features and effects that it includes while being one of the easiest to use apps out there. If you want to create videos with pictures and music, you will be glad to know that this is a video editor app with Spotify music support and offline music support so that you can apply any music of your choice. Filmora also allows you to use a wide range of video effects, apply text, add face filters, etc. And if you like Filmora, you can even try the Filmora video editor, which is its desktop version, as you will see below.

#4) Inshot
Inshot is one of the more basic and simpler video editor apps out there. It was primarily made to create square images and videos for posting on social media platforms like Instagram. But now, this app can also be used for trimming, applying effects, changing color filters, adding stickers, adding text, and much more. And most importantly, Inshot can also be used to create slideshows and videos using pictures and music. Unlike some other free video editors, this one does not even have any watermarks.

#5) CapCut
CapCut has been quite a popular option for creating music videos for social media platforms like Instagram Reels, YouTube Shorts, TikTok, and more. Thus, it is the perfect sync video to music beat app that you install on your smartphone. But most importantly, it comes with all the latest video effects, transitions, and much more for creating all the latest video trends on your phone. You can add music to both videos and photos using CapCut as you like.

#6) Vimeo Create
Vimeo is a fairly popular video streaming platform which is almost similar to YouTube. Since a lot of users upload a large number of videos on Vimeo, Vimeo also offers its own editor. While it also has an online editor, you can also download Vimeo Create on your mobile device since it is available for both Android and iOS devices. It is the perfect option for beginners thanks to the large number of templates it offers for creating videos using pictures and music.

#7) Power Director
Power Director is quite a popular video editing app which is available on almost all platforms out there including mobile devices like Android & iOS. And even with the mobile version, you get almost all the functions of the desktop version making it perfect for creating videos using pictures and music. Even with the free version of Power Director, you also get a decent amount of video effects and support for editing 4K videos with ease. However, the free version does have a watermark on all the videos that you create.

#8) Adobe Premiere Rush
If you are familiar with industry standards when you are talking about video editors, then you must know about Adobe Premiere Pro. And if you want a familiar experience on your mobile device, then you can go with the Adobe Premiere Rush. Even on your mobile device, it offers a very similar experience thanks to the wide range of features, effects, controls, and much more it offers. Unlike other video editor apps, it even allows you to record videos if you want more than just creating videos using pictures and music.

#9) GoPro Quik
As you can guess by the name, GoPro Quik is a video editing app primarily made for GoPro cameras. But with newer updates for this app, it can be used with any kind of video or picture files. And the best thing about the GoPro Quik app is that it supports automated music beat sync editing. You can simply add any music track in the app and it will automatically sync photos and videos with it. If you want, you can also use video effects like speed control, crop and trim, color filters, text, stickers, and much more.

#10) Picsart
Even though Picsart was primarily a photo editing app, it also supports video editing in newer versions. And since Picsart is great for editing photos and pictures, creating videos using pictures and music is also quite easy. All of the features and effects supported by Picsart for photos, will also work for editing videos using Picsart. It includes color filters, face filters, makeup options, video effects, cropping, trimming, etc.

Part 2 Video Editor Software for Windows & Mac
With all the various apps given above, you can easily pick the right app to put videos together with music right on your smartphone. And while all of these apps work great for basic usage, any large projects are better to be done on a computer. Thankfully, even if you want an app to put videos and pictures together with music on your computer, you can still find multiple free to use options. Out of all such options,
is considered the best free app to make videos with music for Windows and Mac. Just per the name, Filmora is the desktop version of the previously mentioned Filmora.
Since this is the desktop version of Filmora, it offers even more features making it a great option for those who want the best app to make videos with music on Windows and Mac. Both the Windows and Mac versions of the Filmora video editing app are quite easy to use with easy-to-access options. As for its options, you get a wide range of video effects, color grading, audio settings, keyboard shortcuts, keyframing, motion tracking, and much more. And unlike other options, Filmora is the best perfect picture video app with music support for those who want an easy-to-run video editor since it can run even on entry-level computers with ease.
Wondershare Filmora
Get started quickly with Filmora’s powerful performance, intuitive interface, and countless effects!
Try It Free Try It Free Try It Free Learn More >

Conclusion
While there are music video creator app options available out there, not all of them offer the right features and options. Hence, to help you in picking the best app for music video made on your mobile device, we have already given the 10 best apps to make videos with music and pictures. Since all of these apps are quite different, you can certainly find the right option whether you want music over video app or a video collage with music app for your mobile device. You can also leave your thoughts and questions regarding the best app for making videos with pictures and music in the comments section below.
Almost all modern social media platforms allow you to upload videos on your profile, on your story, and even send them as a message. And if you want to create more personalized videos, then you might be looking for apps to put music over video, apps to make videos with pictures and music, and other types of video editor apps. But since everyone wants to edit videos right on their Android and iOS devices, many apps are available. And to help you pick the perfect app for music on video clips and make other edits, we are here with the 10 best apps to make videos with music and pictures. All of these video editor apps also have their important details below. You can easily pick the best app for making videos with pictures and music by going through the following options.
In this article
01 [Best 10 Apps for Making Videos on Android & iOS](#Part 1)
02 [Video Editor Software for Windows & Mac](#Part 2)
Part 1 Best 10 Apps for Making Videos on Android & iOS
#1) Kinemaster
Kinemaster is considered one of the most influential and feature-rich options when you talk about the best app for making videos with music right on your mobile device. While its user interface can be a little imitating initially, it offers almost all the features you will need in a picture video app with music support. You can easily edit 4K videos, apply video effects, work with multiple layers, use its inbuilt media library, and do much more for quickly editing videos with any music of your choice.

#2) Filmr
Filmr can be a great video-creating app with music support for all those who want something easy to use thanks to its user interface. Even though this app may not have all the high-end and versatile video editing features, it certainly offers all the basics making it a great app to make music videos with pictures. Despite being completely free to use, you still get various filters for both video and audio. You can also apply these effects on pictures for making videos with music. And the best part is that you get all of this in a completely free-to-use the app.

#3) Filmora
Filmora is most likely the best app to make a video with music and pictures on your smartphone. This is thanks to the wide range of features and effects that it includes while being one of the easiest to use apps out there. If you want to create videos with pictures and music, you will be glad to know that this is a video editor app with Spotify music support and offline music support so that you can apply any music of your choice. Filmora also allows you to use a wide range of video effects, apply text, add face filters, etc. And if you like Filmora, you can even try the Filmora video editor, which is its desktop version, as you will see below.

#4) Inshot
Inshot is one of the more basic and simpler video editor apps out there. It was primarily made to create square images and videos for posting on social media platforms like Instagram. But now, this app can also be used for trimming, applying effects, changing color filters, adding stickers, adding text, and much more. And most importantly, Inshot can also be used to create slideshows and videos using pictures and music. Unlike some other free video editors, this one does not even have any watermarks.

#5) CapCut
CapCut has been quite a popular option for creating music videos for social media platforms like Instagram Reels, YouTube Shorts, TikTok, and more. Thus, it is the perfect sync video to music beat app that you install on your smartphone. But most importantly, it comes with all the latest video effects, transitions, and much more for creating all the latest video trends on your phone. You can add music to both videos and photos using CapCut as you like.

#6) Vimeo Create
Vimeo is a fairly popular video streaming platform which is almost similar to YouTube. Since a lot of users upload a large number of videos on Vimeo, Vimeo also offers its own editor. While it also has an online editor, you can also download Vimeo Create on your mobile device since it is available for both Android and iOS devices. It is the perfect option for beginners thanks to the large number of templates it offers for creating videos using pictures and music.

#7) Power Director
Power Director is quite a popular video editing app which is available on almost all platforms out there including mobile devices like Android & iOS. And even with the mobile version, you get almost all the functions of the desktop version making it perfect for creating videos using pictures and music. Even with the free version of Power Director, you also get a decent amount of video effects and support for editing 4K videos with ease. However, the free version does have a watermark on all the videos that you create.

#8) Adobe Premiere Rush
If you are familiar with industry standards when you are talking about video editors, then you must know about Adobe Premiere Pro. And if you want a familiar experience on your mobile device, then you can go with the Adobe Premiere Rush. Even on your mobile device, it offers a very similar experience thanks to the wide range of features, effects, controls, and much more it offers. Unlike other video editor apps, it even allows you to record videos if you want more than just creating videos using pictures and music.

#9) GoPro Quik
As you can guess by the name, GoPro Quik is a video editing app primarily made for GoPro cameras. But with newer updates for this app, it can be used with any kind of video or picture files. And the best thing about the GoPro Quik app is that it supports automated music beat sync editing. You can simply add any music track in the app and it will automatically sync photos and videos with it. If you want, you can also use video effects like speed control, crop and trim, color filters, text, stickers, and much more.

#10) Picsart
Even though Picsart was primarily a photo editing app, it also supports video editing in newer versions. And since Picsart is great for editing photos and pictures, creating videos using pictures and music is also quite easy. All of the features and effects supported by Picsart for photos, will also work for editing videos using Picsart. It includes color filters, face filters, makeup options, video effects, cropping, trimming, etc.

Part 2 Video Editor Software for Windows & Mac
With all the various apps given above, you can easily pick the right app to put videos together with music right on your smartphone. And while all of these apps work great for basic usage, any large projects are better to be done on a computer. Thankfully, even if you want an app to put videos and pictures together with music on your computer, you can still find multiple free to use options. Out of all such options,
is considered the best free app to make videos with music for Windows and Mac. Just per the name, Filmora is the desktop version of the previously mentioned Filmora.
Since this is the desktop version of Filmora, it offers even more features making it a great option for those who want the best app to make videos with music on Windows and Mac. Both the Windows and Mac versions of the Filmora video editing app are quite easy to use with easy-to-access options. As for its options, you get a wide range of video effects, color grading, audio settings, keyboard shortcuts, keyframing, motion tracking, and much more. And unlike other options, Filmora is the best perfect picture video app with music support for those who want an easy-to-run video editor since it can run even on entry-level computers with ease.
Wondershare Filmora
Get started quickly with Filmora’s powerful performance, intuitive interface, and countless effects!
Try It Free Try It Free Try It Free Learn More >

Conclusion
While there are music video creator app options available out there, not all of them offer the right features and options. Hence, to help you in picking the best app for music video made on your mobile device, we have already given the 10 best apps to make videos with music and pictures. Since all of these apps are quite different, you can certainly find the right option whether you want music over video app or a video collage with music app for your mobile device. You can also leave your thoughts and questions regarding the best app for making videos with pictures and music in the comments section below.
Almost all modern social media platforms allow you to upload videos on your profile, on your story, and even send them as a message. And if you want to create more personalized videos, then you might be looking for apps to put music over video, apps to make videos with pictures and music, and other types of video editor apps. But since everyone wants to edit videos right on their Android and iOS devices, many apps are available. And to help you pick the perfect app for music on video clips and make other edits, we are here with the 10 best apps to make videos with music and pictures. All of these video editor apps also have their important details below. You can easily pick the best app for making videos with pictures and music by going through the following options.
In this article
01 [Best 10 Apps for Making Videos on Android & iOS](#Part 1)
02 [Video Editor Software for Windows & Mac](#Part 2)
Part 1 Best 10 Apps for Making Videos on Android & iOS
#1) Kinemaster
Kinemaster is considered one of the most influential and feature-rich options when you talk about the best app for making videos with music right on your mobile device. While its user interface can be a little imitating initially, it offers almost all the features you will need in a picture video app with music support. You can easily edit 4K videos, apply video effects, work with multiple layers, use its inbuilt media library, and do much more for quickly editing videos with any music of your choice.

#2) Filmr
Filmr can be a great video-creating app with music support for all those who want something easy to use thanks to its user interface. Even though this app may not have all the high-end and versatile video editing features, it certainly offers all the basics making it a great app to make music videos with pictures. Despite being completely free to use, you still get various filters for both video and audio. You can also apply these effects on pictures for making videos with music. And the best part is that you get all of this in a completely free-to-use the app.

#3) Filmora
Filmora is most likely the best app to make a video with music and pictures on your smartphone. This is thanks to the wide range of features and effects that it includes while being one of the easiest to use apps out there. If you want to create videos with pictures and music, you will be glad to know that this is a video editor app with Spotify music support and offline music support so that you can apply any music of your choice. Filmora also allows you to use a wide range of video effects, apply text, add face filters, etc. And if you like Filmora, you can even try the Filmora video editor, which is its desktop version, as you will see below.

#4) Inshot
Inshot is one of the more basic and simpler video editor apps out there. It was primarily made to create square images and videos for posting on social media platforms like Instagram. But now, this app can also be used for trimming, applying effects, changing color filters, adding stickers, adding text, and much more. And most importantly, Inshot can also be used to create slideshows and videos using pictures and music. Unlike some other free video editors, this one does not even have any watermarks.

#5) CapCut
CapCut has been quite a popular option for creating music videos for social media platforms like Instagram Reels, YouTube Shorts, TikTok, and more. Thus, it is the perfect sync video to music beat app that you install on your smartphone. But most importantly, it comes with all the latest video effects, transitions, and much more for creating all the latest video trends on your phone. You can add music to both videos and photos using CapCut as you like.

#6) Vimeo Create
Vimeo is a fairly popular video streaming platform which is almost similar to YouTube. Since a lot of users upload a large number of videos on Vimeo, Vimeo also offers its own editor. While it also has an online editor, you can also download Vimeo Create on your mobile device since it is available for both Android and iOS devices. It is the perfect option for beginners thanks to the large number of templates it offers for creating videos using pictures and music.

#7) Power Director
Power Director is quite a popular video editing app which is available on almost all platforms out there including mobile devices like Android & iOS. And even with the mobile version, you get almost all the functions of the desktop version making it perfect for creating videos using pictures and music. Even with the free version of Power Director, you also get a decent amount of video effects and support for editing 4K videos with ease. However, the free version does have a watermark on all the videos that you create.

#8) Adobe Premiere Rush
If you are familiar with industry standards when you are talking about video editors, then you must know about Adobe Premiere Pro. And if you want a familiar experience on your mobile device, then you can go with the Adobe Premiere Rush. Even on your mobile device, it offers a very similar experience thanks to the wide range of features, effects, controls, and much more it offers. Unlike other video editor apps, it even allows you to record videos if you want more than just creating videos using pictures and music.

#9) GoPro Quik
As you can guess by the name, GoPro Quik is a video editing app primarily made for GoPro cameras. But with newer updates for this app, it can be used with any kind of video or picture files. And the best thing about the GoPro Quik app is that it supports automated music beat sync editing. You can simply add any music track in the app and it will automatically sync photos and videos with it. If you want, you can also use video effects like speed control, crop and trim, color filters, text, stickers, and much more.

#10) Picsart
Even though Picsart was primarily a photo editing app, it also supports video editing in newer versions. And since Picsart is great for editing photos and pictures, creating videos using pictures and music is also quite easy. All of the features and effects supported by Picsart for photos, will also work for editing videos using Picsart. It includes color filters, face filters, makeup options, video effects, cropping, trimming, etc.

Part 2 Video Editor Software for Windows & Mac
With all the various apps given above, you can easily pick the right app to put videos together with music right on your smartphone. And while all of these apps work great for basic usage, any large projects are better to be done on a computer. Thankfully, even if you want an app to put videos and pictures together with music on your computer, you can still find multiple free to use options. Out of all such options,
is considered the best free app to make videos with music for Windows and Mac. Just per the name, Filmora is the desktop version of the previously mentioned Filmora.
Since this is the desktop version of Filmora, it offers even more features making it a great option for those who want the best app to make videos with music on Windows and Mac. Both the Windows and Mac versions of the Filmora video editing app are quite easy to use with easy-to-access options. As for its options, you get a wide range of video effects, color grading, audio settings, keyboard shortcuts, keyframing, motion tracking, and much more. And unlike other options, Filmora is the best perfect picture video app with music support for those who want an easy-to-run video editor since it can run even on entry-level computers with ease.
Wondershare Filmora
Get started quickly with Filmora’s powerful performance, intuitive interface, and countless effects!
Try It Free Try It Free Try It Free Learn More >

Conclusion
While there are music video creator app options available out there, not all of them offer the right features and options. Hence, to help you in picking the best app for music video made on your mobile device, we have already given the 10 best apps to make videos with music and pictures. Since all of these apps are quite different, you can certainly find the right option whether you want music over video app or a video collage with music app for your mobile device. You can also leave your thoughts and questions regarding the best app for making videos with pictures and music in the comments section below.
Camtasia Vs Captivate - Which to Choose?
Being a video editor, it’s critical to keep ahead of the curve in our fast-changing global world. From small enterprises to major corporations, eLearning applications have shown to be a significant tool for cutting expenses and increasing profits. Software like Camtasia and Captivate are in high demand as e-learning becomes a more vital aspect of our life. When it comes to creating a course or video instruction, these two applications are quite quick and useful. Whether you should choose a Camtasia or a Captivate relies entirely on your industry and what you want to accomplish with this application.
Often times between Camtasia vs Captivate, the question arises: “Which software is superior?” As a result, we’ve compared Camtasia and Captivate based on the software packages themselves, as well as some important features, similarities, and differences. Software stimulation, production, demonstration screencasts, and translation of PowerPoint presentations into various formats are all possible using TechSmith Camtasia and Adobe Captivate. Camtasia offers fewer online learning alternatives, but it boasts incredible screen and video capture, as well as video editing facilities. This application allows you to alter the sound and visual characteristics manually. Video artists may improve video quality by using auxiliary microphones and cameras. The editing of the video is Camtasia’s most impressive function. It allows you to cut and paste films, add transitions and subtitles to them, as well as do color grading and color correction.
Part 1. Overall Comparison
Each piece of software may be used to create eLearning and lesson material. Despite the fact that Adobe Captivate offers amazing transitional features and visual effect tools, it does not include video editing, which is, in my view, the backbone of developing eLearning material that adheres to the learning management system. As a result, Adobe Captivate needs the use of Adobe Premiere to edit and correct any problems in your films. Adobe Captivate, on the other hand, is the greatest alternative for developing quality eLearning and lesson software material. It’s an excellent tool for developing online courses and tutorials. However, as previously said, Adobe Captivate is not simple to use and is not recommended for novices. Camtasia, on the other hand, seems to be the most economical and practical alternative for you based on your abilities if you are an entry-level editor and want to master the fundamentals of video editing and lesson production on your own.
Attributes360-degree Learning Experience
| | Camtasia | Adobe Captivate | |
| ——————- | ———————————————————————- | ———————————————————————- |
| Ease of Use | Easy and simple User Interface | User-friendly and simple gestures for adding and creating |
| Requirement | Camtasia supports a dual-core processor with a clock speed of 2.0GHz. | A 1.0GHz CPU can run Captivate. |
| Special Feature | Annotations for Multi-Track Timelines Learning in all directions | |
| Support system | Camtasia is only compatible with 64-bit operating systems. | Captivate is compatible with both 32-bit and 64-bit operating systems. |
| Price | Camtasia costs $249 | Captivate comes for $34/month. |
| Best for | Best for professional video editing and production | It’s great for transferring and watching videos. |
| Value For Money | Value for Money is a bit high | It provides both monthly and one-time subscription options. |
| Recording | Camtasia features a function that allows you to record screens. | Captivate has a clever function that enables you to capture videos. |
| Overall Rating | Less than Adobe Captivate in terms of overall rating and user reviews. | Higher Rating and user feedbacks. |
Part 2. Camtasia Software Review
Camtasia by TechSmith is a straightforward video editing and screen recording application. Camtasia was created with novices in mind, allowing designers to quickly and easily make excellent instructional films. Both Windows and MacOS are supported. Camtasia is one of the most popular video editing applications on the market. Camtasia is available for both Windows and iOS. Camtasia is simple to use and supports a wide range of media formats. This software package has several features and controls. On the same platform, you can capture screens and edit movies with Camtasia. The benefits don’t stop there; you can also share your work with others through YouTube and Google Drive.

Pros:
- Camtasia is designed for video-editing novices, with a simple setup and user interface.
- The screen capture capability is fantastic. Not only is the resolution excellent, but it is also simple to operate.
- Camtasia’s built-in effects are, on the whole, minimal. Their cursor effects, on the other hand, are spectacular.
- You may use Camtasia to add interactive quizzes to your videos.
- Camtasia provides many of the fundamentals you’ll need if you’re short on time and need to search assets straight immediately.
- TechSmith is a free app for iOS and Android that allows you to make screen recordings from your smartphone or tablet.
- TechSmith offers an excellent customer service department.
Cons:
- Crashing and bugs very often
- Many instructions are missing, despite the fact that they have restricted keyboard controls.
- Camtasia is designed for novices; therefore, it does not allow for much modification.
- Camtasia makes it tough to move and animate things.
- Camtasia video encoding and exporting difficulties have been reported by certain users.
Part 3. Adobe Captivate Review
Captivate is an Adobe tool designed to make online learning more engaging and interactive. Students save time since they can take their classes with them. Captivate has no built-in video editing tools. To do so, you’ll need to use additional Adobe applications. Captivate allows students to study at any time and from any location. However, if you’re the one creating the course, Adobe Captivate could be a little frightening since it requires Adobe experience to utilize.

Pros:
- It’s quite simple to use! Each frame may be easily shortened or lengthened.
- It’s simple to record motions onscreen, and it comes with a range of choices for recording various things (the application smooths down mouse movements).
- When the user is through shooting, the video is divided into multiple frames to make editing easy.
- A built-in editor enables users to manipulate audio by cutting, pasting, altering levels, and adding silences.
- Captivate can capture what’s occurring onscreen and provide step-by-step subtitles for popular menu actions automatically.
- Captivate has some fantastic interactive elements. Tutorials may be created so that users can follow along with pre-recorded comments on the screen.
- Adding audio or importing from another source is simple.
Cons:
- The sound’s bit rate was automatically reduced, making it seem more robotic and muffled.
- It might take a long time to preview and save works-in-progress.
- The finished flash flicks are fairly big.
Part 4. Alternative Way to Edit Videos [The Best Method]
Wondershare Filmora is a robust screen capture tool that allows you to manually alter all video and audio parameters, as well as edit your recordings in the software’s video editor. By tweaking a few basic parameters and exporting your eLearning material in MP4, MOV, or GIF file formats, you may make PIP movies. Filmora is a less expensive alternative to Camtasia 9 or Adobe Captivate for creating high-quality screen recordings. Filmora has the resources to make it possible. It’s both sound and video editing software that comes with a lot of instructions and activities to help you handle the fundamentals and create excellent recordings.
For Win 7 or later (64-bit)
For macOS 10.12 or later
This video editorial manager for PC and Mac comes with a natural point of connection that makes it simple to use for both new and experienced users. Because it is a freemium instrument, the free version will allow you to examine all of the components, albeit the final video will include a watermark. Change over, chop, change the examining rate, add effects, and that’s only the beginning of what you can do with your digital recording on the app’s schedule. Wondershare Filmora is simple to use and maintains the best sound and video toolkit. It’s best suited for novice and intermediate users since it allows you to create professional recordings in seconds and supports all of the popular designs.
Steps to Edit Video using Filmora
Step 1: Download and install Filmora Toolkit.
To begin using Filmora for editing, go to the official website and download the most current version of Wondershare Filmora. Launch the software when the download is complete and click the New Project button to see the product’s underlying window interface.

Step 2: Remove Any Unnecessary Background Sounds
Filmora Audio Editor, in addition to the video editor, allowing you to enhance the sound of your video. If your voice-over has any background noise, you may simply eliminate it from the whole clip or a segment of the video where the sound is inappropriate. In Filmora, you may also add your favourite ones to the videos by importing the files and adding them to the timeline. You may also isolate the audio from your video clips and chop or sync it with the video using the timeline of this video editor.
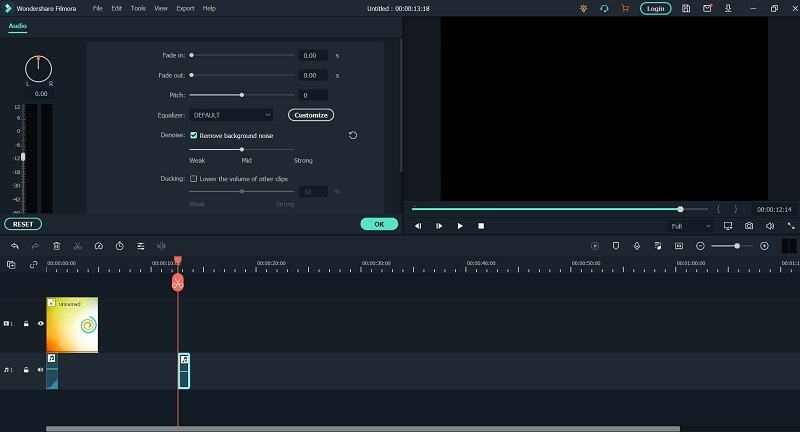
Step 3: Perform Professional Video Editing
Right-click the video and choose edit from the menu. Then, by hitting the proper effects buttons, you may rotate the movie. You may also swivel 90 degrees anticlockwise/clockwise, flip level, or go vertical, depending on your requirements. Then, in that instance. You can also add a variety of video effects, and the greatest part is that you can use others from the standard library as well, allowing you to put it with greater adjustment. The Editor in Filmora allows you to add Animated Titles, amazing effects, Audio Enhancements, and more to your recorded video.

Step 4: Enhance Audio Quality
The Wondershare Filmora Audio Editor allows you to change the volume, add fade-in and fade-out effects, and silence audio in certain parts of the video. All of the options are easily accessible on the right side of the software interface when you click on the audio component of the movie in Wondershare Filmora’s timeline. You may check the audio sound within the application to see whether it’s in sync with your recorded video clip once you’ve made any necessary edits to your audio.

Step 5: Download/Share the video
Click “Export” in the Toolbar to export the video to the specified format and also, you may share it on-spot. Finally, when you’ve done the video editing, you may completely utilize the Filmora editor as above. And, to publish your work of art immediately to YouTube or another well-known site, select the Export option and pick the platform where you want to share your video clip. You may even alter the movie before sharing it if you desire.

Conclusion
Camtasia’s technique of making a presentation using an individual movie works well for developers who are knowledgeable with video applications. Developers inexperienced with the method may have significant trouble with the editing operation in Camtasia since screen grabs occur in real time. Editing material using slides in Captivate 2 is often less onerous than the video format utilized in Camtasia. The biggest issue is that long presentations might result in a large number of slides that can be time consuming to look through and result in a greater file size for the Flash file that user’s access. Hence, we like to advocate Filmora as a reasonable method between these two.
Part 2. Camtasia Software Review
Camtasia by TechSmith is a straightforward video editing and screen recording application. Camtasia was created with novices in mind, allowing designers to quickly and easily make excellent instructional films. Both Windows and MacOS are supported. Camtasia is one of the most popular video editing applications on the market. Camtasia is available for both Windows and iOS. Camtasia is simple to use and supports a wide range of media formats. This software package has several features and controls. On the same platform, you can capture screens and edit movies with Camtasia. The benefits don’t stop there; you can also share your work with others through YouTube and Google Drive.

Pros:
- Camtasia is designed for video-editing novices, with a simple setup and user interface.
- The screen capture capability is fantastic. Not only is the resolution excellent, but it is also simple to operate.
- Camtasia’s built-in effects are, on the whole, minimal. Their cursor effects, on the other hand, are spectacular.
- You may use Camtasia to add interactive quizzes to your videos.
- Camtasia provides many of the fundamentals you’ll need if you’re short on time and need to search assets straight immediately.
- TechSmith is a free app for iOS and Android that allows you to make screen recordings from your smartphone or tablet.
- TechSmith offers an excellent customer service department.
Cons:
- Crashing and bugs very often
- Many instructions are missing, despite the fact that they have restricted keyboard controls.
- Camtasia is designed for novices; therefore, it does not allow for much modification.
- Camtasia makes it tough to move and animate things.
- Camtasia video encoding and exporting difficulties have been reported by certain users.
Part 3. Adobe Captivate Review
Captivate is an Adobe tool designed to make online learning more engaging and interactive. Students save time since they can take their classes with them. Captivate has no built-in video editing tools. To do so, you’ll need to use additional Adobe applications. Captivate allows students to study at any time and from any location. However, if you’re the one creating the course, Adobe Captivate could be a little frightening since it requires Adobe experience to utilize.

Pros:
- It’s quite simple to use! Each frame may be easily shortened or lengthened.
- It’s simple to record motions onscreen, and it comes with a range of choices for recording various things (the application smooths down mouse movements).
- When the user is through shooting, the video is divided into multiple frames to make editing easy.
- A built-in editor enables users to manipulate audio by cutting, pasting, altering levels, and adding silences.
- Captivate can capture what’s occurring onscreen and provide step-by-step subtitles for popular menu actions automatically.
- Captivate has some fantastic interactive elements. Tutorials may be created so that users can follow along with pre-recorded comments on the screen.
- Adding audio or importing from another source is simple.
Cons:
- The sound’s bit rate was automatically reduced, making it seem more robotic and muffled.
- It might take a long time to preview and save works-in-progress.
- The finished flash flicks are fairly big.
Part 4. Alternative Way to Edit Videos [The Best Method]
Wondershare Filmora is a robust screen capture tool that allows you to manually alter all video and audio parameters, as well as edit your recordings in the software’s video editor. By tweaking a few basic parameters and exporting your eLearning material in MP4, MOV, or GIF file formats, you may make PIP movies. Filmora is a less expensive alternative to Camtasia 9 or Adobe Captivate for creating high-quality screen recordings. Filmora has the resources to make it possible. It’s both sound and video editing software that comes with a lot of instructions and activities to help you handle the fundamentals and create excellent recordings.
For Win 7 or later (64-bit)
For macOS 10.12 or later
This video editorial manager for PC and Mac comes with a natural point of connection that makes it simple to use for both new and experienced users. Because it is a freemium instrument, the free version will allow you to examine all of the components, albeit the final video will include a watermark. Change over, chop, change the examining rate, add effects, and that’s only the beginning of what you can do with your digital recording on the app’s schedule. Wondershare Filmora is simple to use and maintains the best sound and video toolkit. It’s best suited for novice and intermediate users since it allows you to create professional recordings in seconds and supports all of the popular designs.
Steps to Edit Video using Filmora
Step 1: Download and install Filmora Toolkit.
To begin using Filmora for editing, go to the official website and download the most current version of Wondershare Filmora. Launch the software when the download is complete and click the New Project button to see the product’s underlying window interface.

Step 2: Remove Any Unnecessary Background Sounds
Filmora Audio Editor, in addition to the video editor, allowing you to enhance the sound of your video. If your voice-over has any background noise, you may simply eliminate it from the whole clip or a segment of the video where the sound is inappropriate. In Filmora, you may also add your favourite ones to the videos by importing the files and adding them to the timeline. You may also isolate the audio from your video clips and chop or sync it with the video using the timeline of this video editor.

Step 3: Perform Professional Video Editing
Right-click the video and choose edit from the menu. Then, by hitting the proper effects buttons, you may rotate the movie. You may also swivel 90 degrees anticlockwise/clockwise, flip level, or go vertical, depending on your requirements. Then, in that instance. You can also add a variety of video effects, and the greatest part is that you can use others from the standard library as well, allowing you to put it with greater adjustment. The Editor in Filmora allows you to add Animated Titles, amazing effects, Audio Enhancements, and more to your recorded video.

Step 4: Enhance Audio Quality
The Wondershare Filmora Audio Editor allows you to change the volume, add fade-in and fade-out effects, and silence audio in certain parts of the video. All of the options are easily accessible on the right side of the software interface when you click on the audio component of the movie in Wondershare Filmora’s timeline. You may check the audio sound within the application to see whether it’s in sync with your recorded video clip once you’ve made any necessary edits to your audio.

Step 5: Download/Share the video
Click “Export” in the Toolbar to export the video to the specified format and also, you may share it on-spot. Finally, when you’ve done the video editing, you may completely utilize the Filmora editor as above. And, to publish your work of art immediately to YouTube or another well-known site, select the Export option and pick the platform where you want to share your video clip. You may even alter the movie before sharing it if you desire.

Conclusion
Camtasia’s technique of making a presentation using an individual movie works well for developers who are knowledgeable with video applications. Developers inexperienced with the method may have significant trouble with the editing operation in Camtasia since screen grabs occur in real time. Editing material using slides in Captivate 2 is often less onerous than the video format utilized in Camtasia. The biggest issue is that long presentations might result in a large number of slides that can be time consuming to look through and result in a greater file size for the Flash file that user’s access. Hence, we like to advocate Filmora as a reasonable method between these two.
Part 2. Camtasia Software Review
Camtasia by TechSmith is a straightforward video editing and screen recording application. Camtasia was created with novices in mind, allowing designers to quickly and easily make excellent instructional films. Both Windows and MacOS are supported. Camtasia is one of the most popular video editing applications on the market. Camtasia is available for both Windows and iOS. Camtasia is simple to use and supports a wide range of media formats. This software package has several features and controls. On the same platform, you can capture screens and edit movies with Camtasia. The benefits don’t stop there; you can also share your work with others through YouTube and Google Drive.

Pros:
- Camtasia is designed for video-editing novices, with a simple setup and user interface.
- The screen capture capability is fantastic. Not only is the resolution excellent, but it is also simple to operate.
- Camtasia’s built-in effects are, on the whole, minimal. Their cursor effects, on the other hand, are spectacular.
- You may use Camtasia to add interactive quizzes to your videos.
- Camtasia provides many of the fundamentals you’ll need if you’re short on time and need to search assets straight immediately.
- TechSmith is a free app for iOS and Android that allows you to make screen recordings from your smartphone or tablet.
- TechSmith offers an excellent customer service department.
Cons:
- Crashing and bugs very often
- Many instructions are missing, despite the fact that they have restricted keyboard controls.
- Camtasia is designed for novices; therefore, it does not allow for much modification.
- Camtasia makes it tough to move and animate things.
- Camtasia video encoding and exporting difficulties have been reported by certain users.
Part 3. Adobe Captivate Review
Captivate is an Adobe tool designed to make online learning more engaging and interactive. Students save time since they can take their classes with them. Captivate has no built-in video editing tools. To do so, you’ll need to use additional Adobe applications. Captivate allows students to study at any time and from any location. However, if you’re the one creating the course, Adobe Captivate could be a little frightening since it requires Adobe experience to utilize.

Pros:
- It’s quite simple to use! Each frame may be easily shortened or lengthened.
- It’s simple to record motions onscreen, and it comes with a range of choices for recording various things (the application smooths down mouse movements).
- When the user is through shooting, the video is divided into multiple frames to make editing easy.
- A built-in editor enables users to manipulate audio by cutting, pasting, altering levels, and adding silences.
- Captivate can capture what’s occurring onscreen and provide step-by-step subtitles for popular menu actions automatically.
- Captivate has some fantastic interactive elements. Tutorials may be created so that users can follow along with pre-recorded comments on the screen.
- Adding audio or importing from another source is simple.
Cons:
- The sound’s bit rate was automatically reduced, making it seem more robotic and muffled.
- It might take a long time to preview and save works-in-progress.
- The finished flash flicks are fairly big.
Part 4. Alternative Way to Edit Videos [The Best Method]
Wondershare Filmora is a robust screen capture tool that allows you to manually alter all video and audio parameters, as well as edit your recordings in the software’s video editor. By tweaking a few basic parameters and exporting your eLearning material in MP4, MOV, or GIF file formats, you may make PIP movies. Filmora is a less expensive alternative to Camtasia 9 or Adobe Captivate for creating high-quality screen recordings. Filmora has the resources to make it possible. It’s both sound and video editing software that comes with a lot of instructions and activities to help you handle the fundamentals and create excellent recordings.
For Win 7 or later (64-bit)
For macOS 10.12 or later
This video editorial manager for PC and Mac comes with a natural point of connection that makes it simple to use for both new and experienced users. Because it is a freemium instrument, the free version will allow you to examine all of the components, albeit the final video will include a watermark. Change over, chop, change the examining rate, add effects, and that’s only the beginning of what you can do with your digital recording on the app’s schedule. Wondershare Filmora is simple to use and maintains the best sound and video toolkit. It’s best suited for novice and intermediate users since it allows you to create professional recordings in seconds and supports all of the popular designs.
Steps to Edit Video using Filmora
Step 1: Download and install Filmora Toolkit.
To begin using Filmora for editing, go to the official website and download the most current version of Wondershare Filmora. Launch the software when the download is complete and click the New Project button to see the product’s underlying window interface.

Step 2: Remove Any Unnecessary Background Sounds
Filmora Audio Editor, in addition to the video editor, allowing you to enhance the sound of your video. If your voice-over has any background noise, you may simply eliminate it from the whole clip or a segment of the video where the sound is inappropriate. In Filmora, you may also add your favourite ones to the videos by importing the files and adding them to the timeline. You may also isolate the audio from your video clips and chop or sync it with the video using the timeline of this video editor.

Step 3: Perform Professional Video Editing
Right-click the video and choose edit from the menu. Then, by hitting the proper effects buttons, you may rotate the movie. You may also swivel 90 degrees anticlockwise/clockwise, flip level, or go vertical, depending on your requirements. Then, in that instance. You can also add a variety of video effects, and the greatest part is that you can use others from the standard library as well, allowing you to put it with greater adjustment. The Editor in Filmora allows you to add Animated Titles, amazing effects, Audio Enhancements, and more to your recorded video.

Step 4: Enhance Audio Quality
The Wondershare Filmora Audio Editor allows you to change the volume, add fade-in and fade-out effects, and silence audio in certain parts of the video. All of the options are easily accessible on the right side of the software interface when you click on the audio component of the movie in Wondershare Filmora’s timeline. You may check the audio sound within the application to see whether it’s in sync with your recorded video clip once you’ve made any necessary edits to your audio.

Step 5: Download/Share the video
Click “Export” in the Toolbar to export the video to the specified format and also, you may share it on-spot. Finally, when you’ve done the video editing, you may completely utilize the Filmora editor as above. And, to publish your work of art immediately to YouTube or another well-known site, select the Export option and pick the platform where you want to share your video clip. You may even alter the movie before sharing it if you desire.

Conclusion
Camtasia’s technique of making a presentation using an individual movie works well for developers who are knowledgeable with video applications. Developers inexperienced with the method may have significant trouble with the editing operation in Camtasia since screen grabs occur in real time. Editing material using slides in Captivate 2 is often less onerous than the video format utilized in Camtasia. The biggest issue is that long presentations might result in a large number of slides that can be time consuming to look through and result in a greater file size for the Flash file that user’s access. Hence, we like to advocate Filmora as a reasonable method between these two.
Part 2. Camtasia Software Review
Camtasia by TechSmith is a straightforward video editing and screen recording application. Camtasia was created with novices in mind, allowing designers to quickly and easily make excellent instructional films. Both Windows and MacOS are supported. Camtasia is one of the most popular video editing applications on the market. Camtasia is available for both Windows and iOS. Camtasia is simple to use and supports a wide range of media formats. This software package has several features and controls. On the same platform, you can capture screens and edit movies with Camtasia. The benefits don’t stop there; you can also share your work with others through YouTube and Google Drive.

Pros:
- Camtasia is designed for video-editing novices, with a simple setup and user interface.
- The screen capture capability is fantastic. Not only is the resolution excellent, but it is also simple to operate.
- Camtasia’s built-in effects are, on the whole, minimal. Their cursor effects, on the other hand, are spectacular.
- You may use Camtasia to add interactive quizzes to your videos.
- Camtasia provides many of the fundamentals you’ll need if you’re short on time and need to search assets straight immediately.
- TechSmith is a free app for iOS and Android that allows you to make screen recordings from your smartphone or tablet.
- TechSmith offers an excellent customer service department.
Cons:
- Crashing and bugs very often
- Many instructions are missing, despite the fact that they have restricted keyboard controls.
- Camtasia is designed for novices; therefore, it does not allow for much modification.
- Camtasia makes it tough to move and animate things.
- Camtasia video encoding and exporting difficulties have been reported by certain users.
Part 3. Adobe Captivate Review
Captivate is an Adobe tool designed to make online learning more engaging and interactive. Students save time since they can take their classes with them. Captivate has no built-in video editing tools. To do so, you’ll need to use additional Adobe applications. Captivate allows students to study at any time and from any location. However, if you’re the one creating the course, Adobe Captivate could be a little frightening since it requires Adobe experience to utilize.

Pros:
- It’s quite simple to use! Each frame may be easily shortened or lengthened.
- It’s simple to record motions onscreen, and it comes with a range of choices for recording various things (the application smooths down mouse movements).
- When the user is through shooting, the video is divided into multiple frames to make editing easy.
- A built-in editor enables users to manipulate audio by cutting, pasting, altering levels, and adding silences.
- Captivate can capture what’s occurring onscreen and provide step-by-step subtitles for popular menu actions automatically.
- Captivate has some fantastic interactive elements. Tutorials may be created so that users can follow along with pre-recorded comments on the screen.
- Adding audio or importing from another source is simple.
Cons:
- The sound’s bit rate was automatically reduced, making it seem more robotic and muffled.
- It might take a long time to preview and save works-in-progress.
- The finished flash flicks are fairly big.
Part 4. Alternative Way to Edit Videos [The Best Method]
Wondershare Filmora is a robust screen capture tool that allows you to manually alter all video and audio parameters, as well as edit your recordings in the software’s video editor. By tweaking a few basic parameters and exporting your eLearning material in MP4, MOV, or GIF file formats, you may make PIP movies. Filmora is a less expensive alternative to Camtasia 9 or Adobe Captivate for creating high-quality screen recordings. Filmora has the resources to make it possible. It’s both sound and video editing software that comes with a lot of instructions and activities to help you handle the fundamentals and create excellent recordings.
For Win 7 or later (64-bit)
For macOS 10.12 or later
This video editorial manager for PC and Mac comes with a natural point of connection that makes it simple to use for both new and experienced users. Because it is a freemium instrument, the free version will allow you to examine all of the components, albeit the final video will include a watermark. Change over, chop, change the examining rate, add effects, and that’s only the beginning of what you can do with your digital recording on the app’s schedule. Wondershare Filmora is simple to use and maintains the best sound and video toolkit. It’s best suited for novice and intermediate users since it allows you to create professional recordings in seconds and supports all of the popular designs.
Steps to Edit Video using Filmora
Step 1: Download and install Filmora Toolkit.
To begin using Filmora for editing, go to the official website and download the most current version of Wondershare Filmora. Launch the software when the download is complete and click the New Project button to see the product’s underlying window interface.

Step 2: Remove Any Unnecessary Background Sounds
Filmora Audio Editor, in addition to the video editor, allowing you to enhance the sound of your video. If your voice-over has any background noise, you may simply eliminate it from the whole clip or a segment of the video where the sound is inappropriate. In Filmora, you may also add your favourite ones to the videos by importing the files and adding them to the timeline. You may also isolate the audio from your video clips and chop or sync it with the video using the timeline of this video editor.

Step 3: Perform Professional Video Editing
Right-click the video and choose edit from the menu. Then, by hitting the proper effects buttons, you may rotate the movie. You may also swivel 90 degrees anticlockwise/clockwise, flip level, or go vertical, depending on your requirements. Then, in that instance. You can also add a variety of video effects, and the greatest part is that you can use others from the standard library as well, allowing you to put it with greater adjustment. The Editor in Filmora allows you to add Animated Titles, amazing effects, Audio Enhancements, and more to your recorded video.

Step 4: Enhance Audio Quality
The Wondershare Filmora Audio Editor allows you to change the volume, add fade-in and fade-out effects, and silence audio in certain parts of the video. All of the options are easily accessible on the right side of the software interface when you click on the audio component of the movie in Wondershare Filmora’s timeline. You may check the audio sound within the application to see whether it’s in sync with your recorded video clip once you’ve made any necessary edits to your audio.

Step 5: Download/Share the video
Click “Export” in the Toolbar to export the video to the specified format and also, you may share it on-spot. Finally, when you’ve done the video editing, you may completely utilize the Filmora editor as above. And, to publish your work of art immediately to YouTube or another well-known site, select the Export option and pick the platform where you want to share your video clip. You may even alter the movie before sharing it if you desire.

Conclusion
Camtasia’s technique of making a presentation using an individual movie works well for developers who are knowledgeable with video applications. Developers inexperienced with the method may have significant trouble with the editing operation in Camtasia since screen grabs occur in real time. Editing material using slides in Captivate 2 is often less onerous than the video format utilized in Camtasia. The biggest issue is that long presentations might result in a large number of slides that can be time consuming to look through and result in a greater file size for the Flash file that user’s access. Hence, we like to advocate Filmora as a reasonable method between these two.
Also read:
- Updated In 2024, Confused About Deciding the Next Destination for Your Trip? This Article Features some of the Best Vloggers You Can Find for Gaining Inspiration for Traveling
- Updated 2024 Approved Speed Control Is Frequently Used in Video Editing. By Speed up or Slow Down the Video Speed, You Can Achieve Different Visual Results. This Article Will Show You How to Control the Speed of a Video
- Updated How to Start a Video Editing Career
- How Did AI Video Games Act More Human Than Human?
- Updated 2024 Approved Camtasia Vs. Final Cut Pro
- In 2024, Record Slow Motion Videos With Phantom Slow-Mo Camera
- New Why You Should Master Slideshows In Lightroom, In 2024
- The Ultimate Wedding Videography Checklist
- New Discover How to Create Professional Foggy Text Reflection Effects in the Filmora Video Editor
- Updated 2024 Approved How to Make Discord Emoji GIF
- Find Out the Best Animated Text Video Tools and Learn How to Animate Text in a Video in Simple Steps. Discover the Best Fonts to Animate Text Along with the Text Animation Templates for 2024
- In 2024, How to Share YouTube Video on Zoom?
- Updated 2024 Approved Leveraging the Vectorscope for Better Color Correction in Premiere Pro
- Updated Want to Learn How to Crop or Trim Video in PowerPoint? We Have Got You Covered; We Have Given a Step-by-Step Guide that Will Allow You to Trim and Crop Videos Using This Presentation Program for 2024
- Updated In 2024, Do You Wish to Learn About some Tools to Slow Down a Video? Discover How to Slow Down Time Lapse on iPhone Throughout This Article
- Updated Merge MP4 Online? Its Easy With These 5 Tools
- Updated In 2024, A Comprehensive Guide to Slow Motion YouTube Videos and How to Manage Them
- Updated Why Vimeo Slideshow Maker Become More and More Popular for 2024
- Updated In 2024, Step by Step to Cut Videos in Lightworks
- Updated Exploring the Top Professional Tools to Perform Mask Tracking
- Discover the Best Video Frame Rate Converters for Smooth Playback, Including Online and Offline Options. Learn How to Convert Frame Rates for Free and Elevate Your Video Quality with These Top 8 Tools for 2024
- New Top 12 Sony Vegas Slideshow Templates for Free Download
- Best Ideas for Time Lapse Video for 2024
- New In 2024, List of Whatsapp Video Format That You May Need to Know
- 2024 Approved HOW to Add Fade to Black on Premiere Pro
- New 2024 Approved Guaranteed 10 Storyboard Creators To Make Animation Easier For You
- New “Create. Edit. Share. Transform Your Videos with KineMaster! Powerful Tools, Easy to Use.” – a Few Words We Read when We Come up with the Official Web-Site of KineMaster, a Mobile Video Editing Application for 2024
- Updated 2024 Approved Quick Answer What Is a GIF File
- New How to Make Stunning Glitch Effect in Photoshop? Ultimate Guide
- Some Facts About GIF Background You Didnt Know
- New In 2024, How to Use Visual Effect for Zoom
- New 2024 Approved Top 8 Augmented Reality Video Games
- How to Zoom Video in VLC Media Player
- Updated In 2024, How to Vlog? A Beginners Guide to Start Vlogging
- Split a Video in the Lightworks Step by Step
- Updated Google Meet Green Screen
- In 2024, How to Record Clips Using Your Camera and Edit Them Using Wondershare Filmora to Make a Loop Video? A Complete Guide for Beginners
- New 2024 Approved How to Add Text to Video
- Updated How to Create Your Own LUTs for Your Video with Filmora for 2024
- In This Article, We Will Discuss What Lens Distortion Is, How It May Be Fixed, and the Factors You Need to Pay Attention to Avoid Lens Distortion when Taking or Recording Videos
- New Color Lut in Video -How to Color Grade Your Video
- Updated 2024 Approved 10+ Best Unlimited FCPX Slideshow Templates
- Updated 2024 Approved 5 Tips for Faster Editing in Filmora
- In 2024, Do You Wish to Make Your Discord PFP an Attention-Seeker? If Yes, Try the Animated Discord PFP. Lets Go over Essential Facts on the Topic, Including How to Get an Animated Discord PFP
- Updated 2024 Approved Splitting a Video Into Frames with the FFmpeg Step by Step
- 2024 Approved Best 5 GIF to Video Converters You Cant-Miss
- In 2024, If You Are a Teacher or People Who Want to Share Their Ideas via Vides, You Can Always Make It on Your Own. This Article Will Share You 7 Tips to Create an Educational Video Easily
- Updated In This Article, We Will Show You How to Rotate Videos Using Obs
- New How To Add Motion Blur Effect To Photos in GIMP
- New In 2024, Things You Need to Know About Color Grading in Photography
- Can I Remove the Apple Watch Activation Lock By iPhone XS without the Previous Owner?
- In 2024, How to Reset Apple ID and Apple Password From iPhone 12 Pro Max
- Full Guide to Unlock Apple iPhone 11 Pro Max with iTunes | Dr.fone
- In 2024, How to Transfer Contacts from OnePlus Ace 2V to iPhone XS/11 | Dr.fone
- New How To Perform a Successful Streaming on Twitch for 2024
- How To Restore Missing Call Logs from Samsung Galaxy S23+
- Life360 Learn How Everything Works On Samsung Galaxy A05 | Dr.fone
- What To Do When Motorola Moto G24 Has Black Screen of Death? | Dr.fone
- In 2024, About Vivo X100 Pro FRP Bypass
- In 2024, A Guide OnePlus Nord 3 5G Wireless and Wired Screen Mirroring | Dr.fone
- How to sign a PDF v1.1 document with digital signature software
- Troubleshooting Guide How to Fix an Unresponsive Oppo A18 Screen | Dr.fone
- Best Ways on How to Unlock/Bypass/Swipe/Remove Honor 100 Fingerprint Lock
- Title: New 2 Methods to Crop a Video in VLC
- Author: Morgan
- Created at : 2024-05-19 05:11:46
- Updated at : 2024-05-20 05:11:46
- Link: https://ai-video-editing.techidaily.com/new-2-methods-to-crop-a-video-in-vlc/
- License: This work is licensed under CC BY-NC-SA 4.0.

